• stem+node ceramics
  • HOME
  • Food Recipes
  • About
  • Contact
Menu

The Lovely Crazy

Street Address
City, State, Zip
Phone Number

Your Custom Text Here

The Lovely Crazy

  • stem+node ceramics
  • HOME
  • Food Recipes
  • About
  • Contact

Butternut Squash Noodles with Caramelized Onions and Sage

November 4, 2015 Colleen Stem
IMG_2782.jpg
IMG_2746.jpg

You know how I have been saying that I have so so many winter squashes that they are taking over my house? (the other night the mr and I counted while eating dinner.. there were 29 at the time) Well, not that I think I cannot eat them all myself, but I want to share and I think I found a way to share them that people (especially the mr) will really like… Squash noodles of course!

Honestly, I am always more then happy to just eat a squash pretty much as untouched as possible. All I do is stick one (any variety) in the oven on a rack and bake it till its soft then eat it. And it's like crack.. I can't get enough. If I was not a stronger person, I would probably eat an entire squash in once sitting, then still want more. (It's happened) But that's me. Most of the peps that I make food for are not as squash happy as I am and are not into just squash mush. 

So last night I noodled some butternut for the mr. And win.. he really liked them,  even with a shit ton of caramelized onions. (I loved the onions, he has never been a huge onion fan but still really like them)  Ever since zucchini season has been over, I have been trying to find that new meal that I can whip up in a short amount of time, that the mr really likes, and can be made with the abundance of the season. I don't know why I didn't do this sooner. And sure, this particular dish takes a little time to make cause of the onions, which are so worth it, but on a regular old night, I can just toss some garlic, olive oil and a handful of fresh herbs into a pot and it will take like 15 minutes. to make.I am a genius (I am sure that noodling is not an original idea, but whatever, original to me)

Anyway.. squash noodles are now a thing for us, and I am sure will be a thing everywhere soon so you should jump in the band wagon now and get to making some too! .


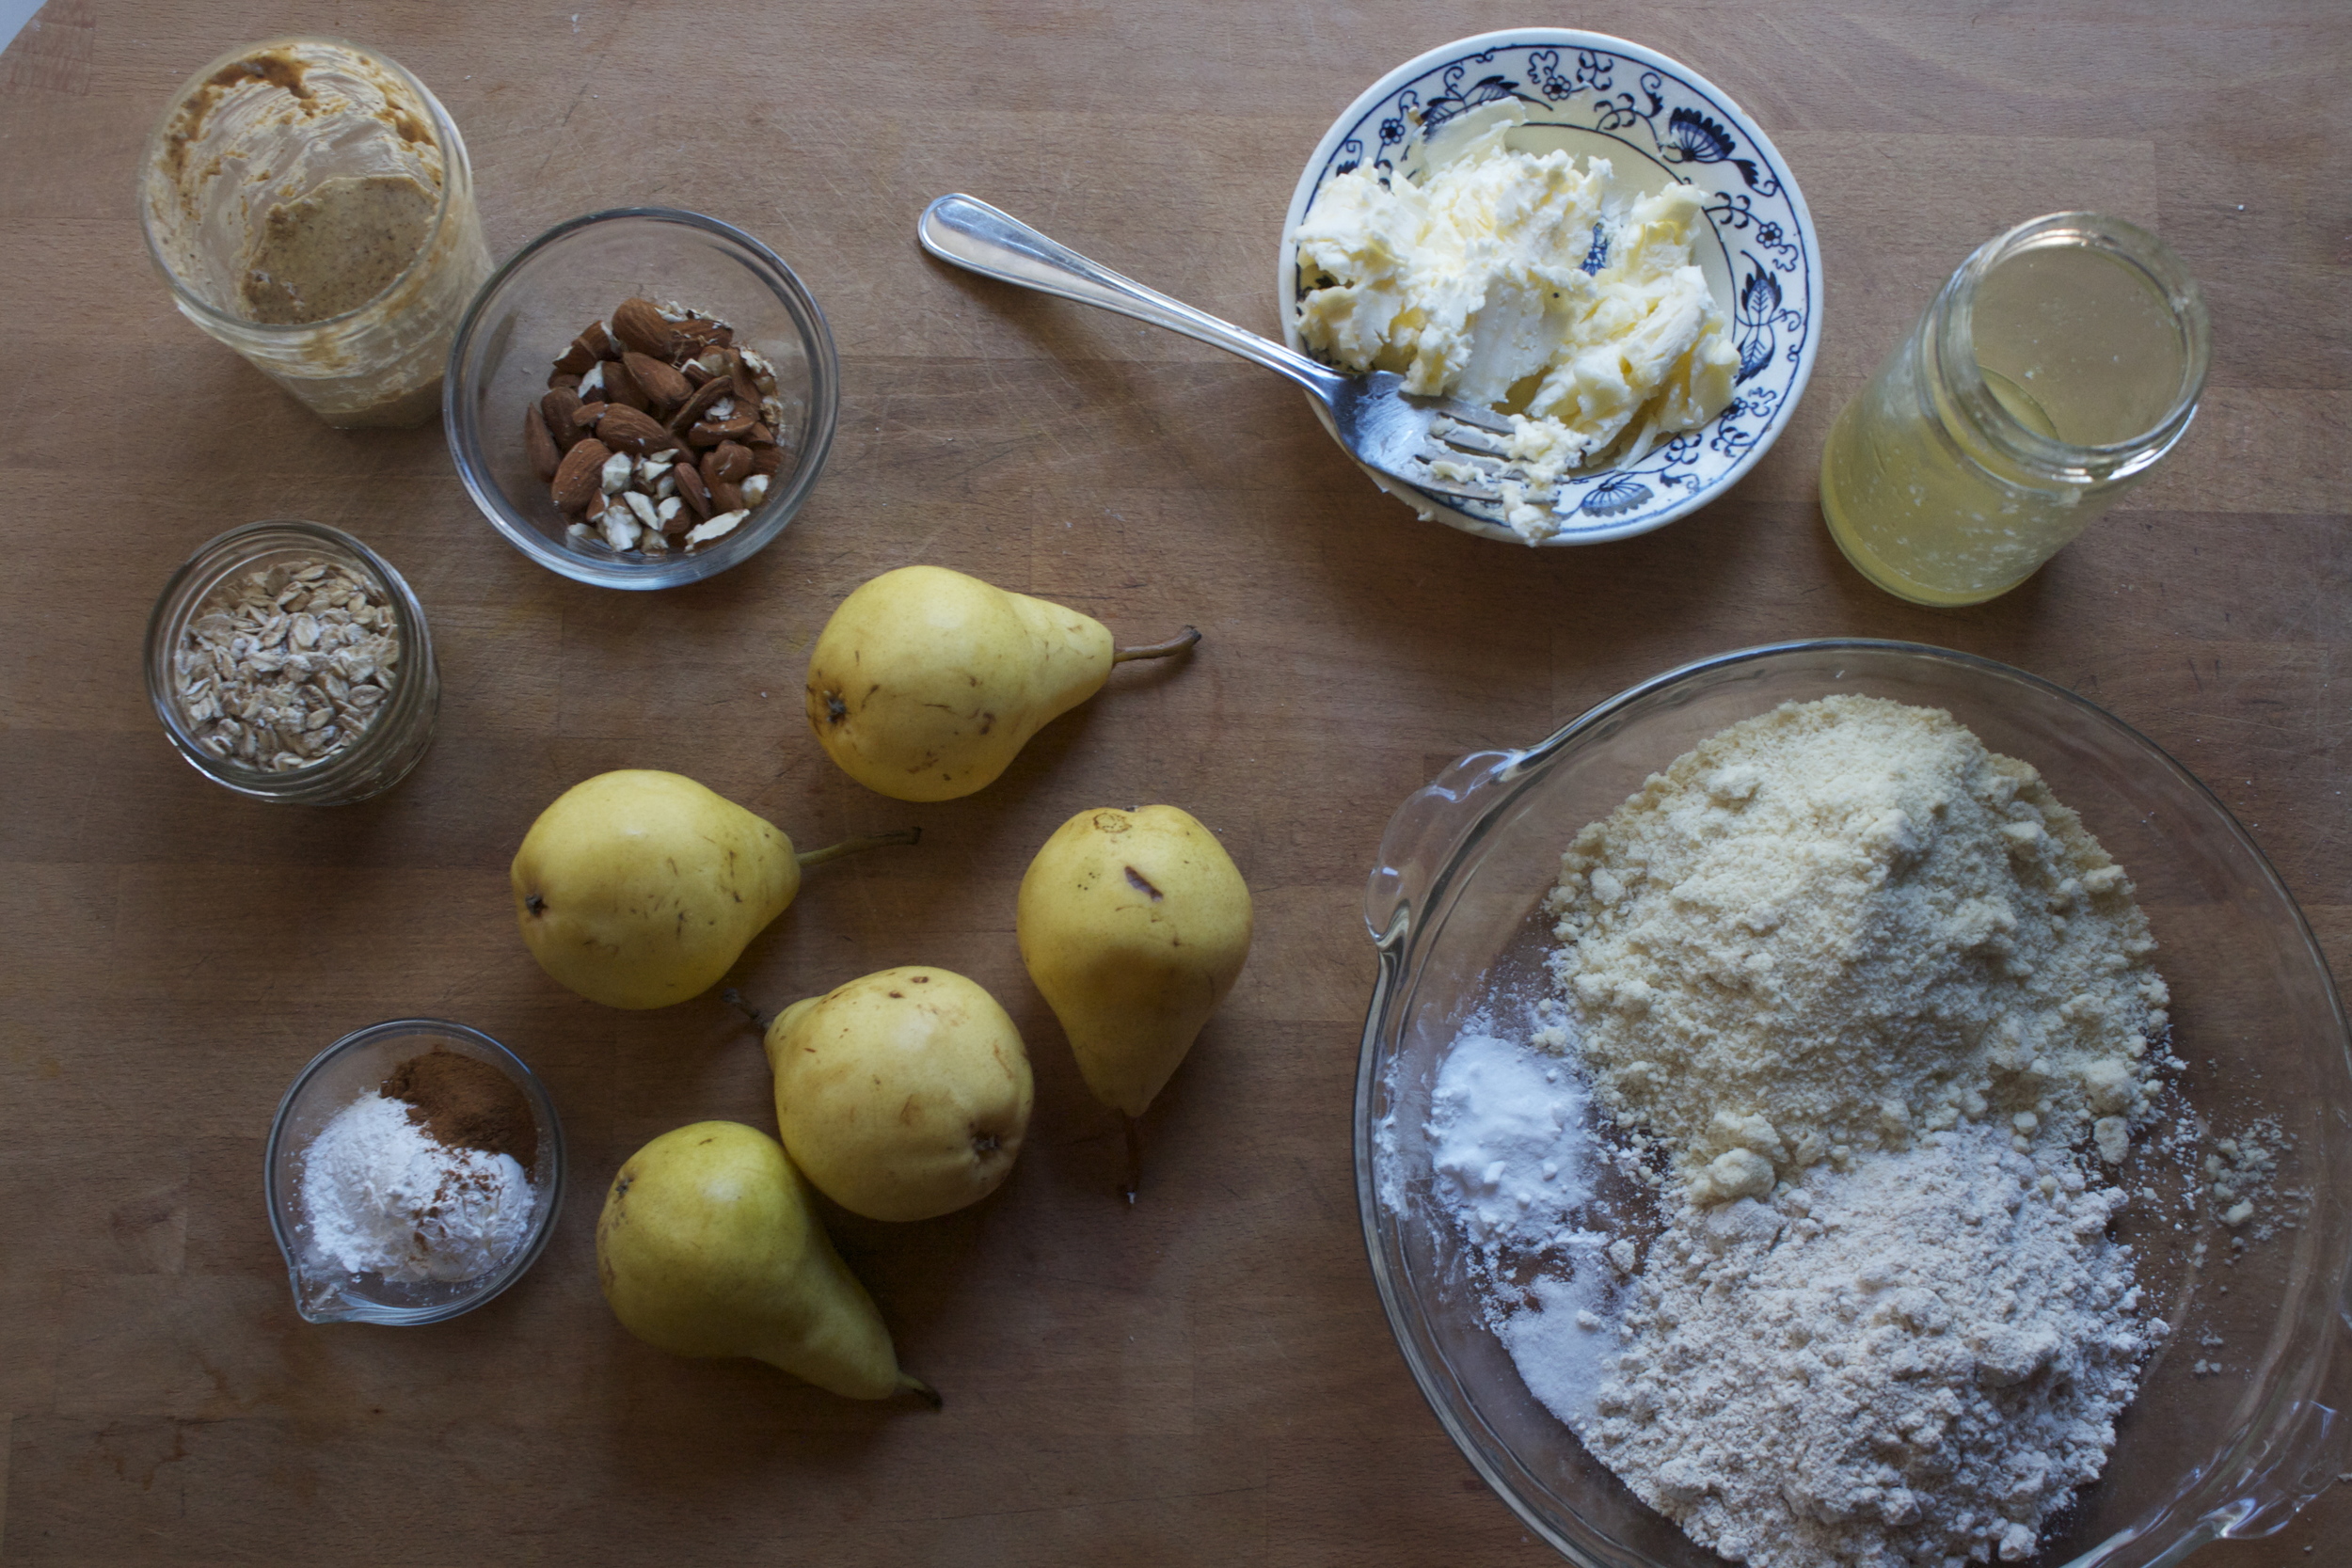
The stuff. A butternut squash, a few onions, and a handful of fresh sage. . Also need some garlic, wine vinegar, olive oil, salt and pepper and some water (water not in picture)

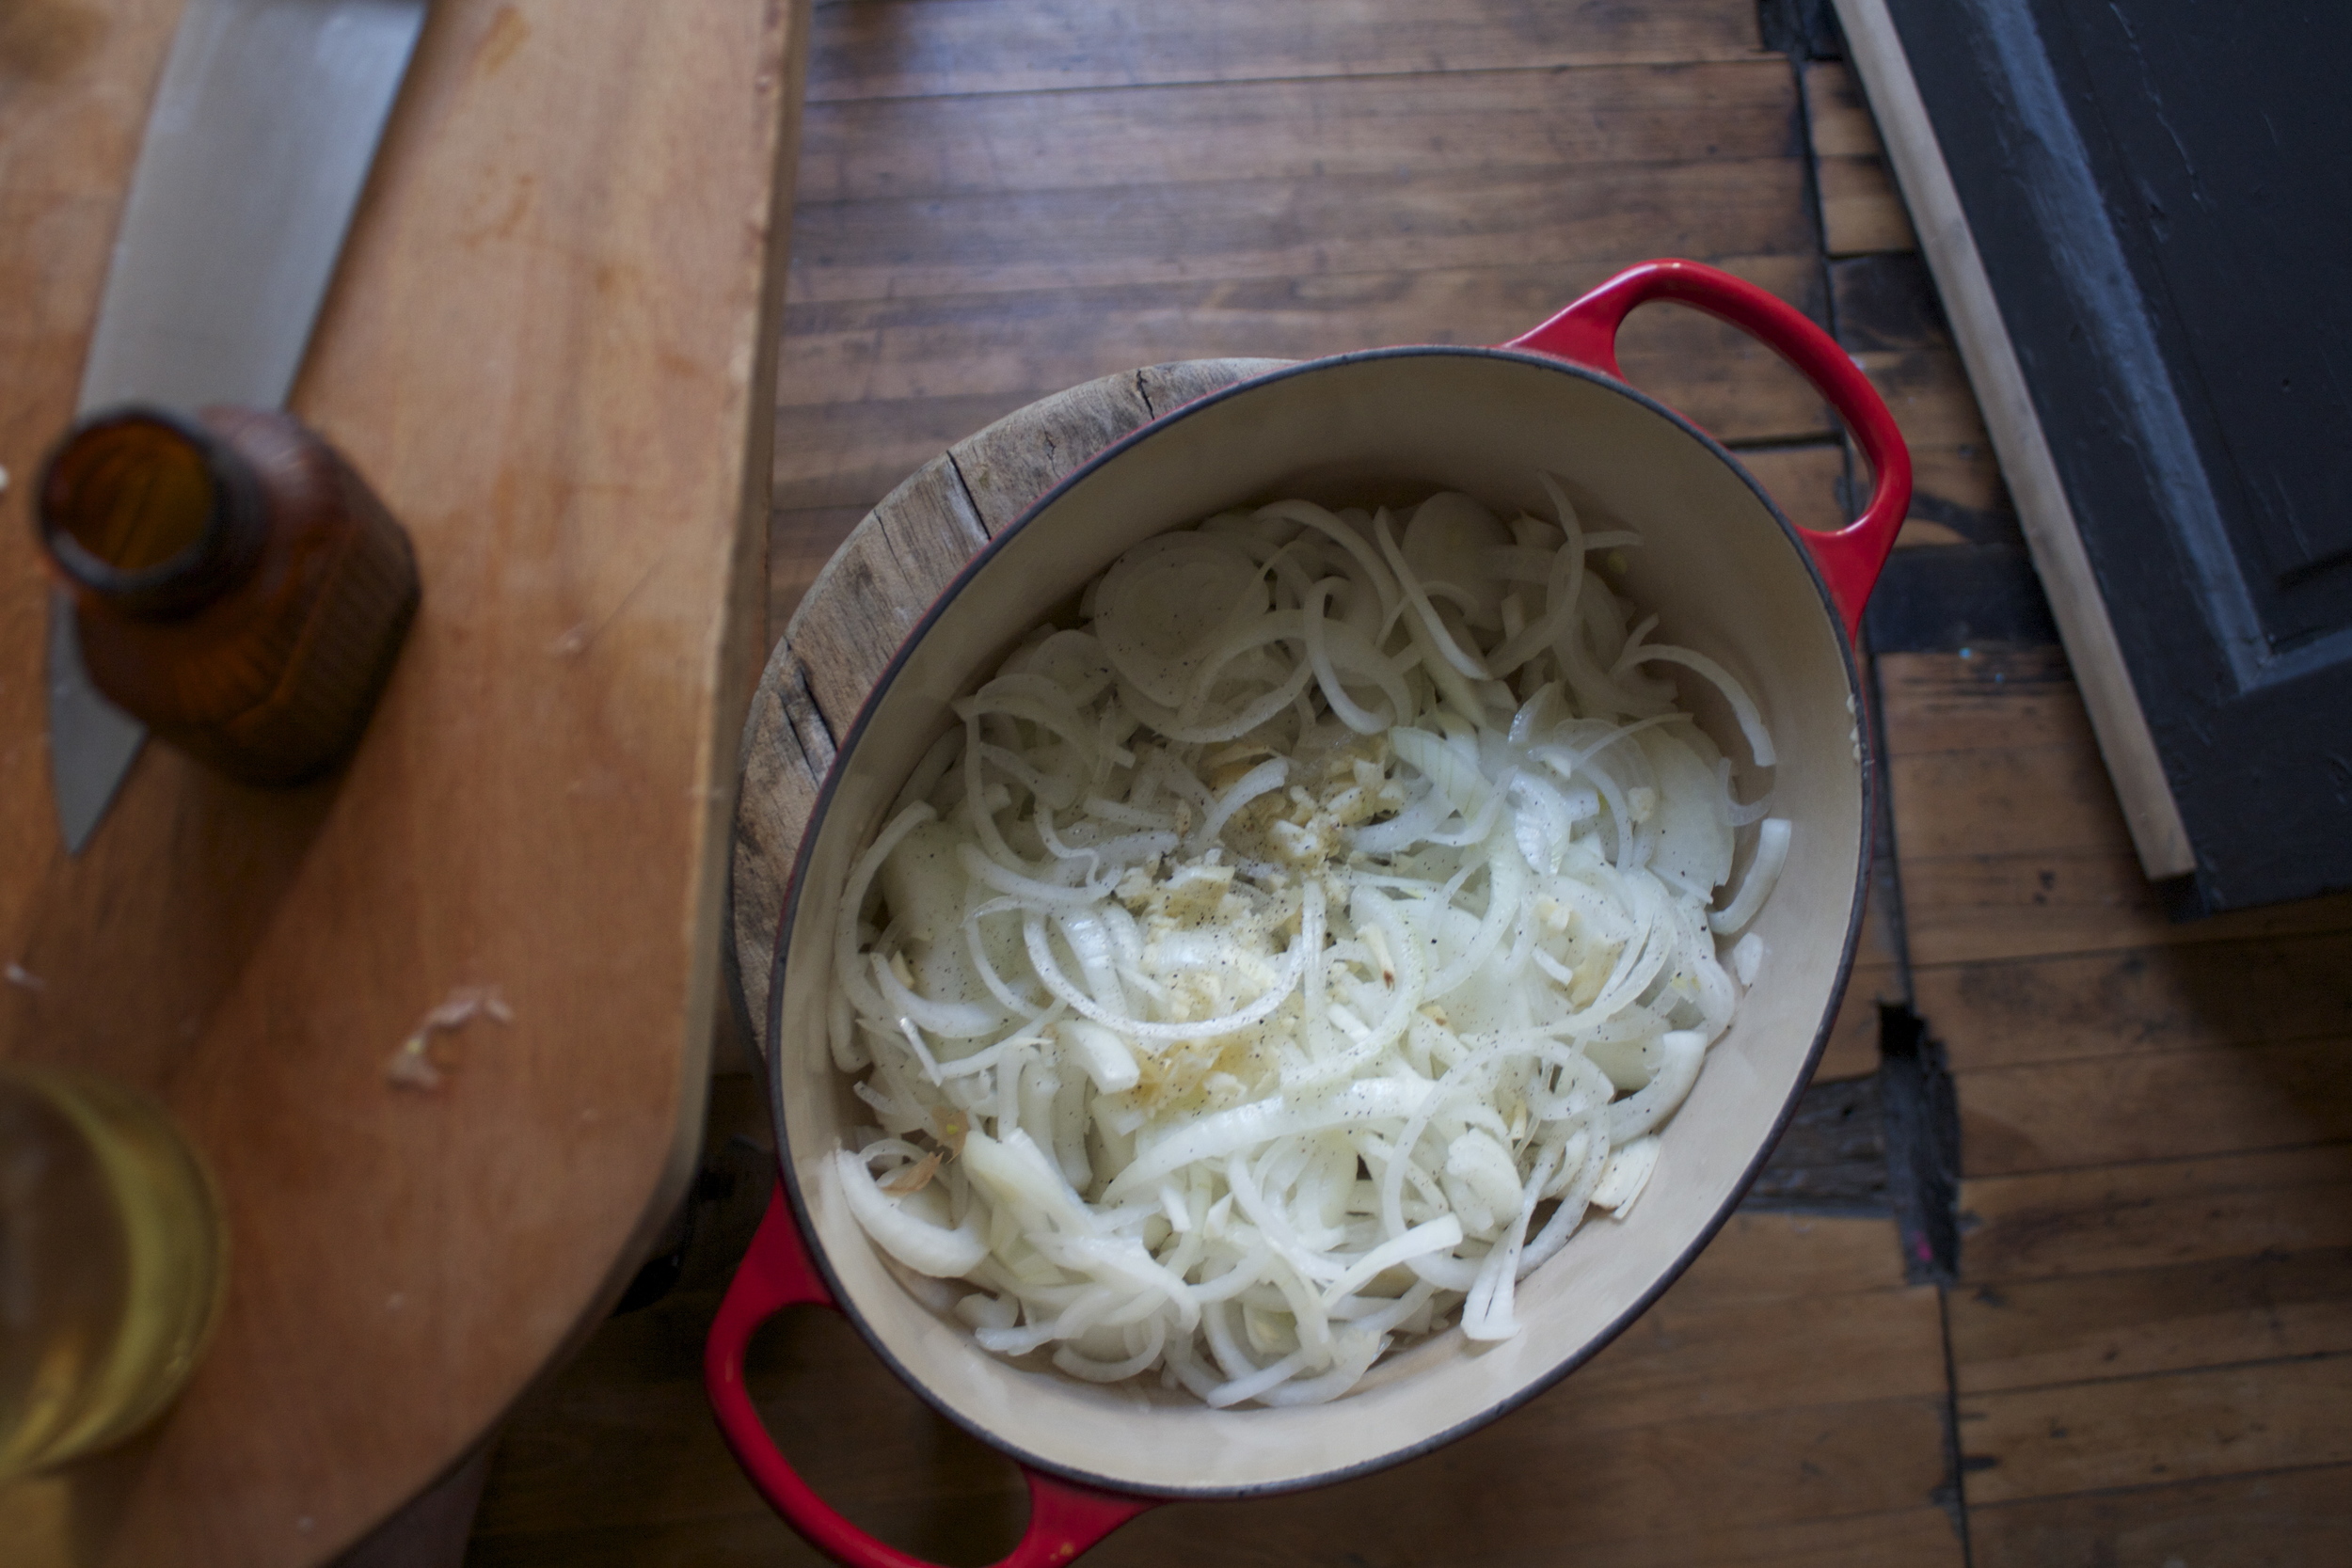
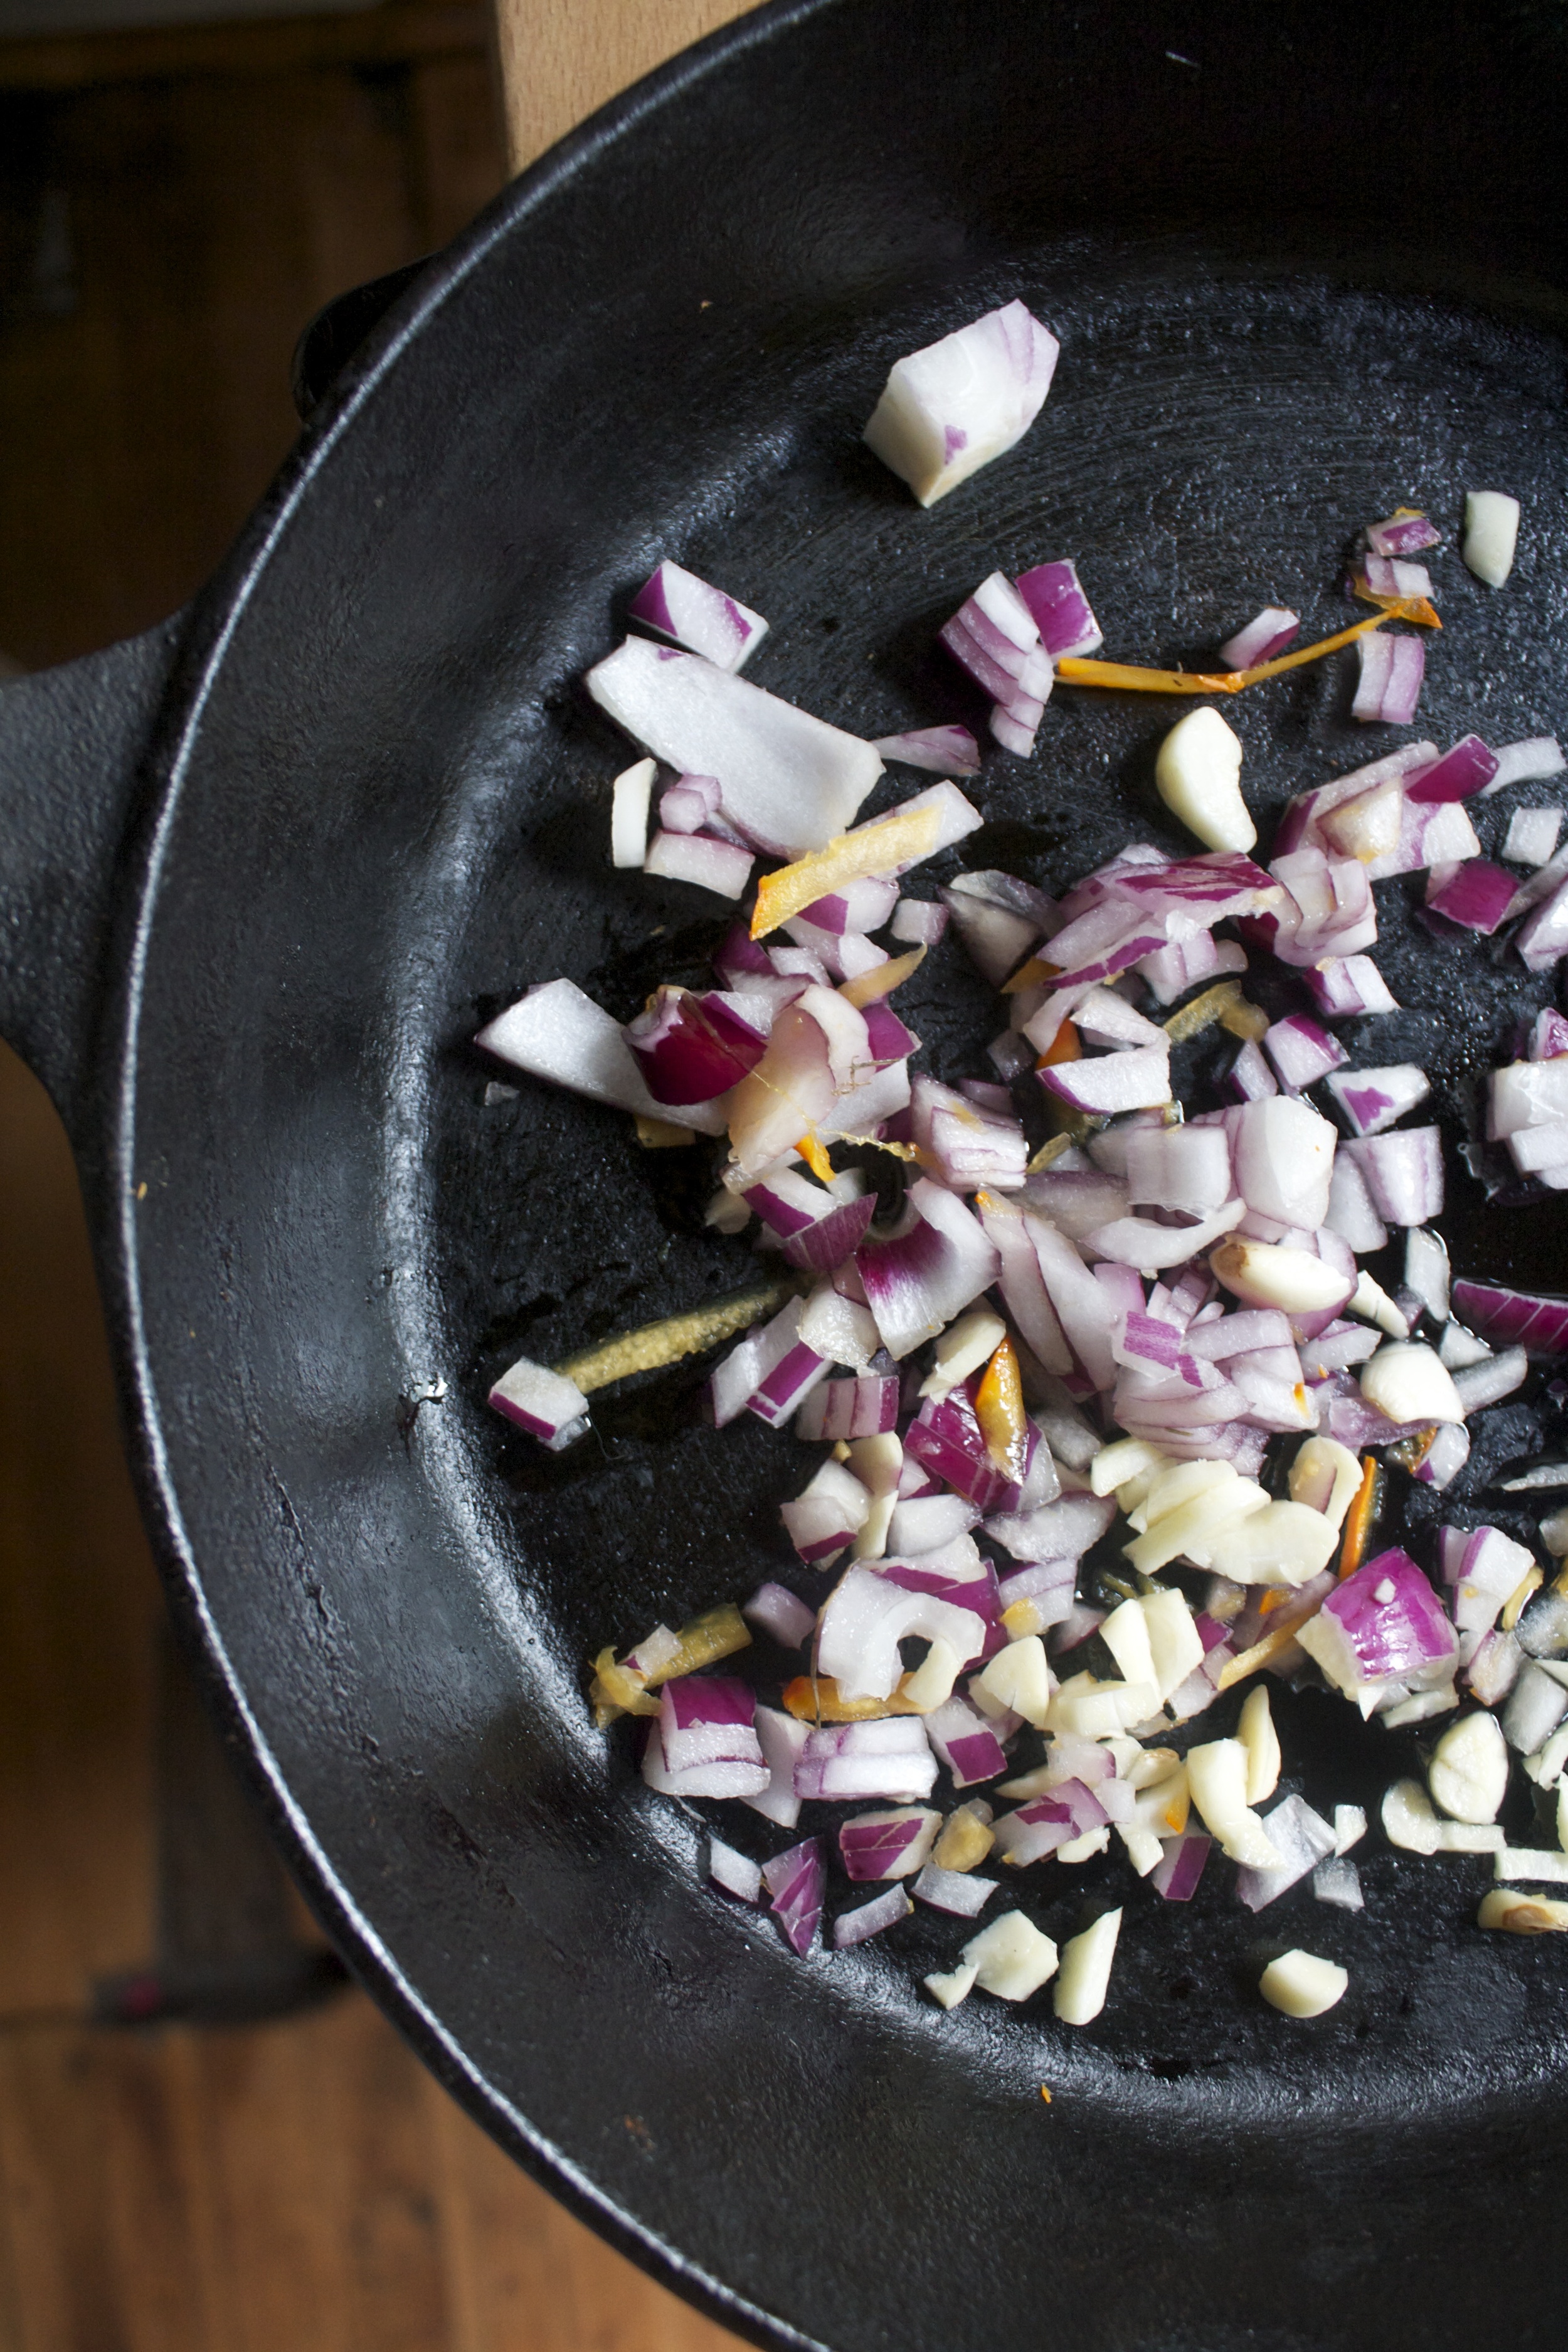
Slice up all the onions as thin as you can, mince up the garlic, and stick it all into a big pot with a drizzle of olive oil, a sprinkle of salt and pepper and a small splash of water. Stick the pot on the stove on medium heat until the onions start to cook and smell all yummy oniony and maybe a few are sticking to the bottom of the pot. Grab the vinegar and give the onions a good splash, stirring  around, making sure no onions are stuck on the bottom. Now turn heat to low and cover the pot. Let the onions cook for a while (about a 1/2 hour) giving them a stir ever now and then.

And once the onions are all super soft and starting to caramelize, add in the sage (but mince it first). Keep the pot on low heat without the lid.

IMG_2712.jpg
IMG_2714.jpg

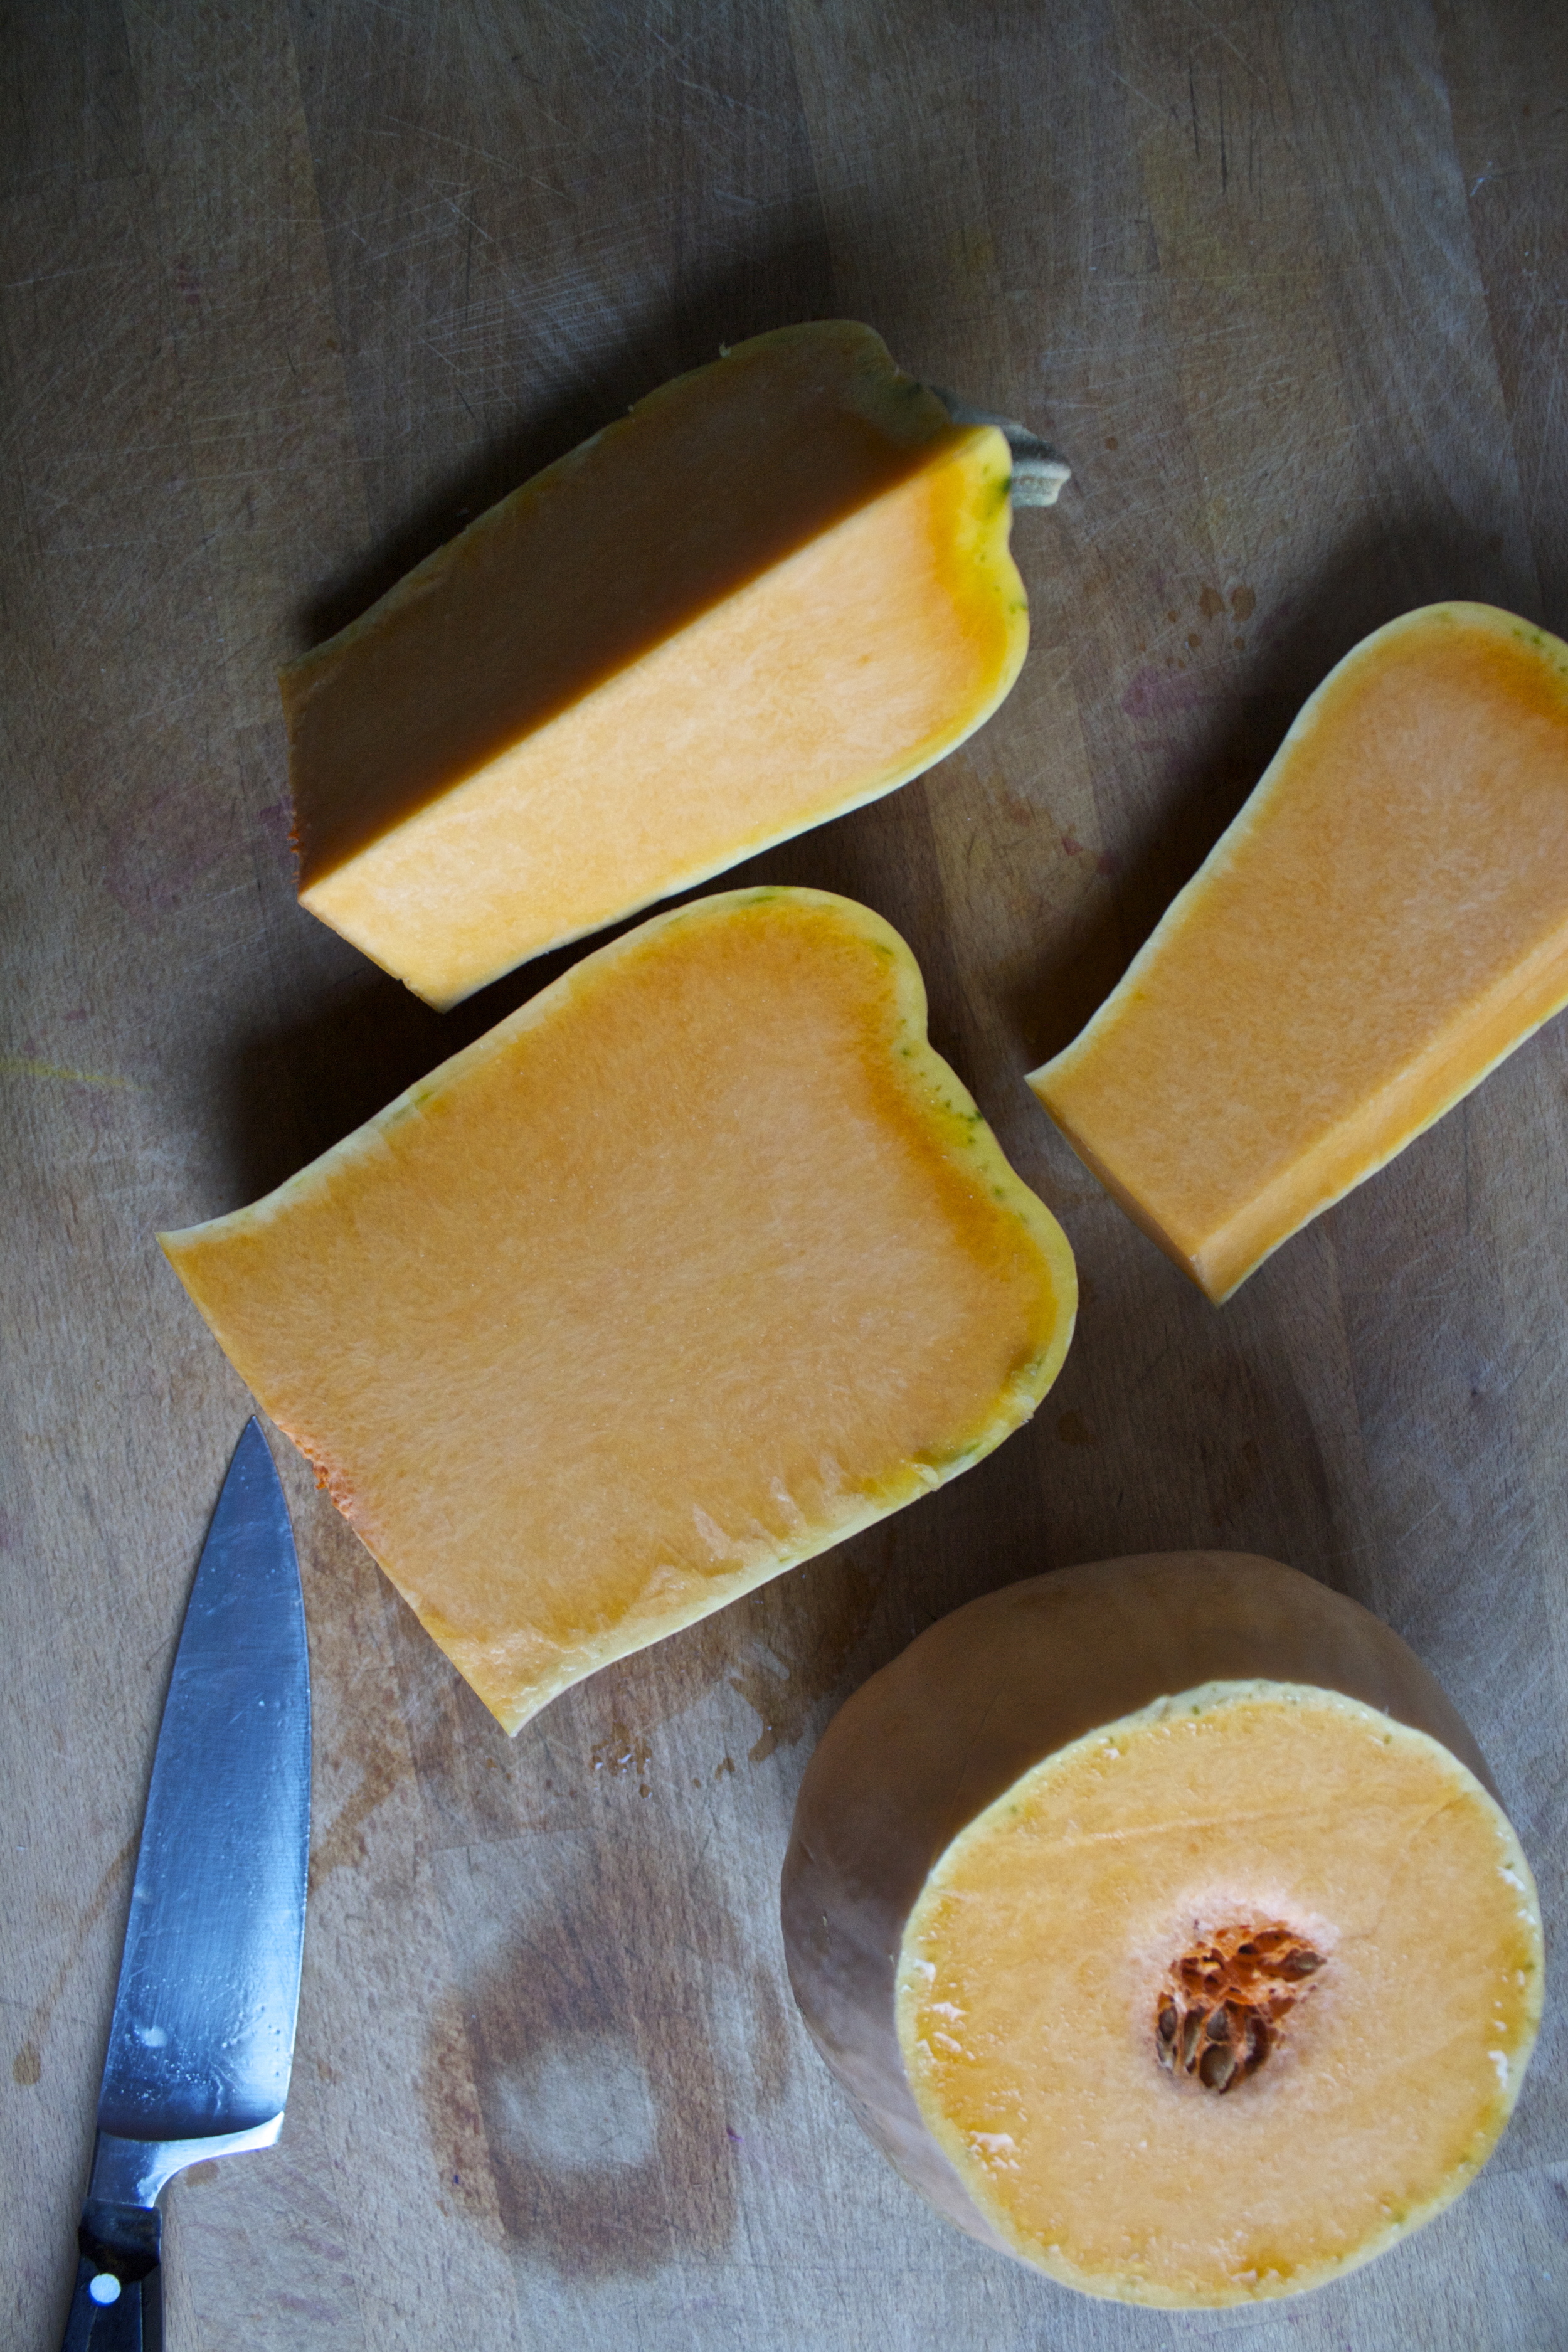
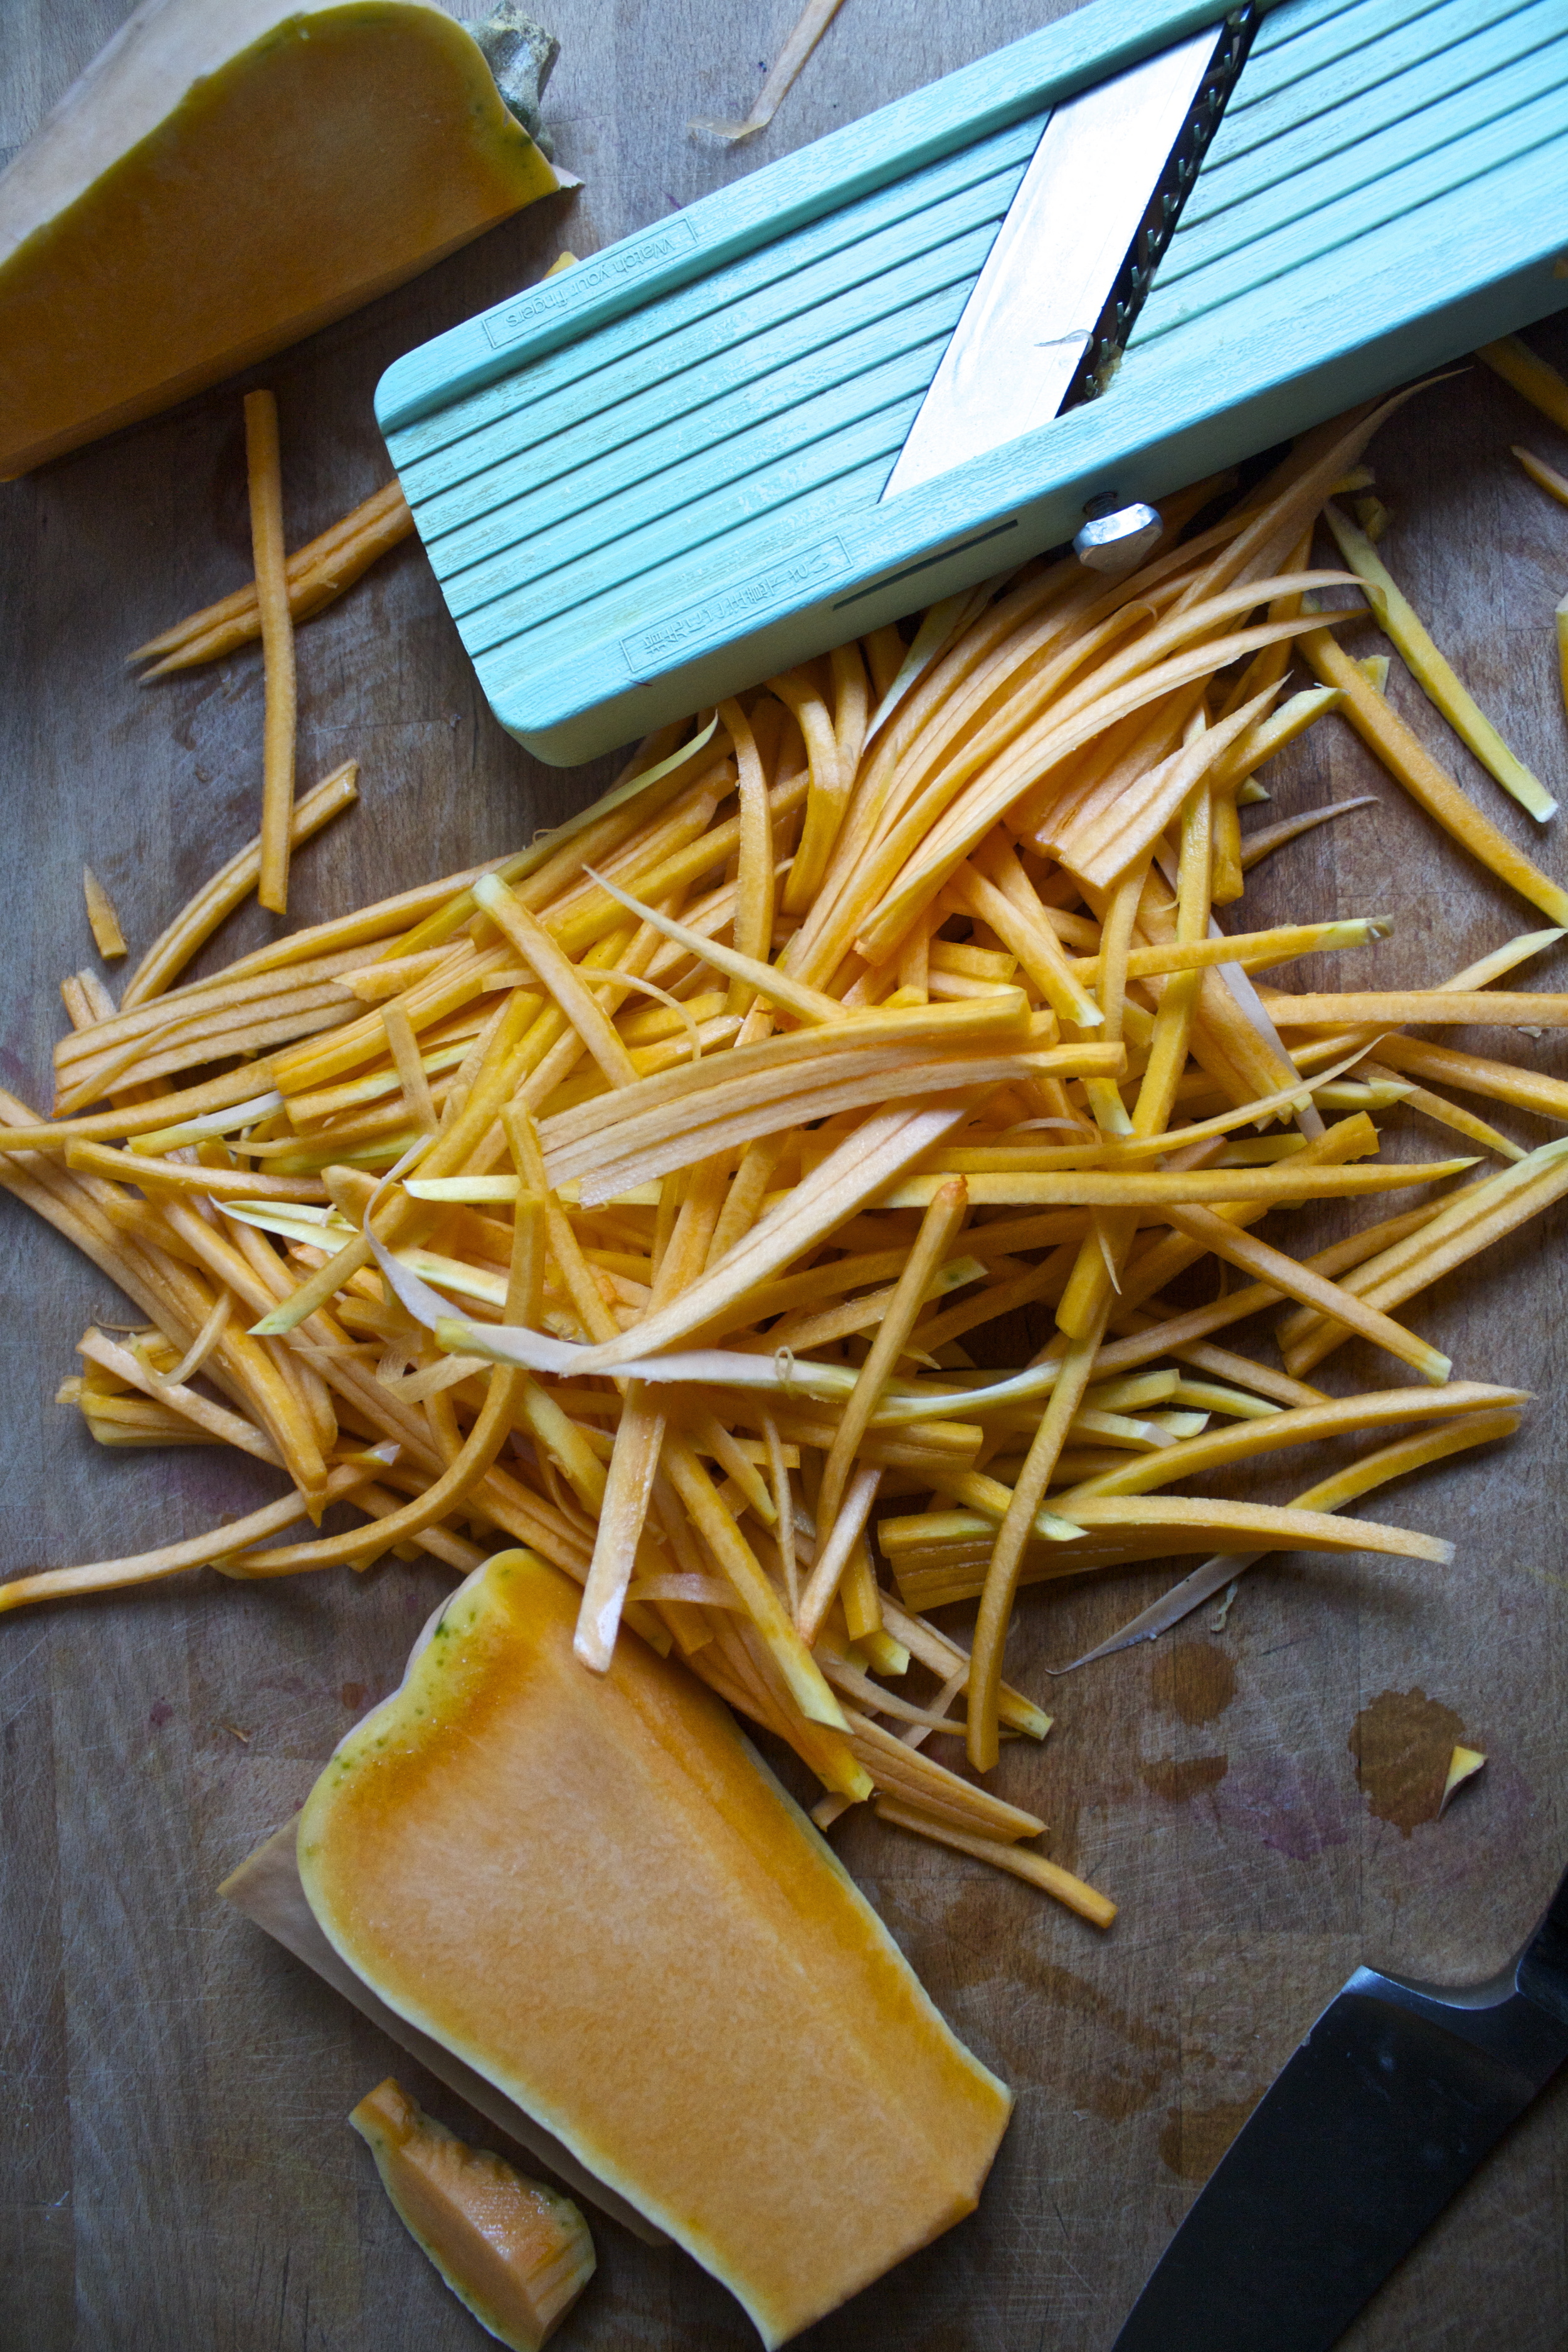
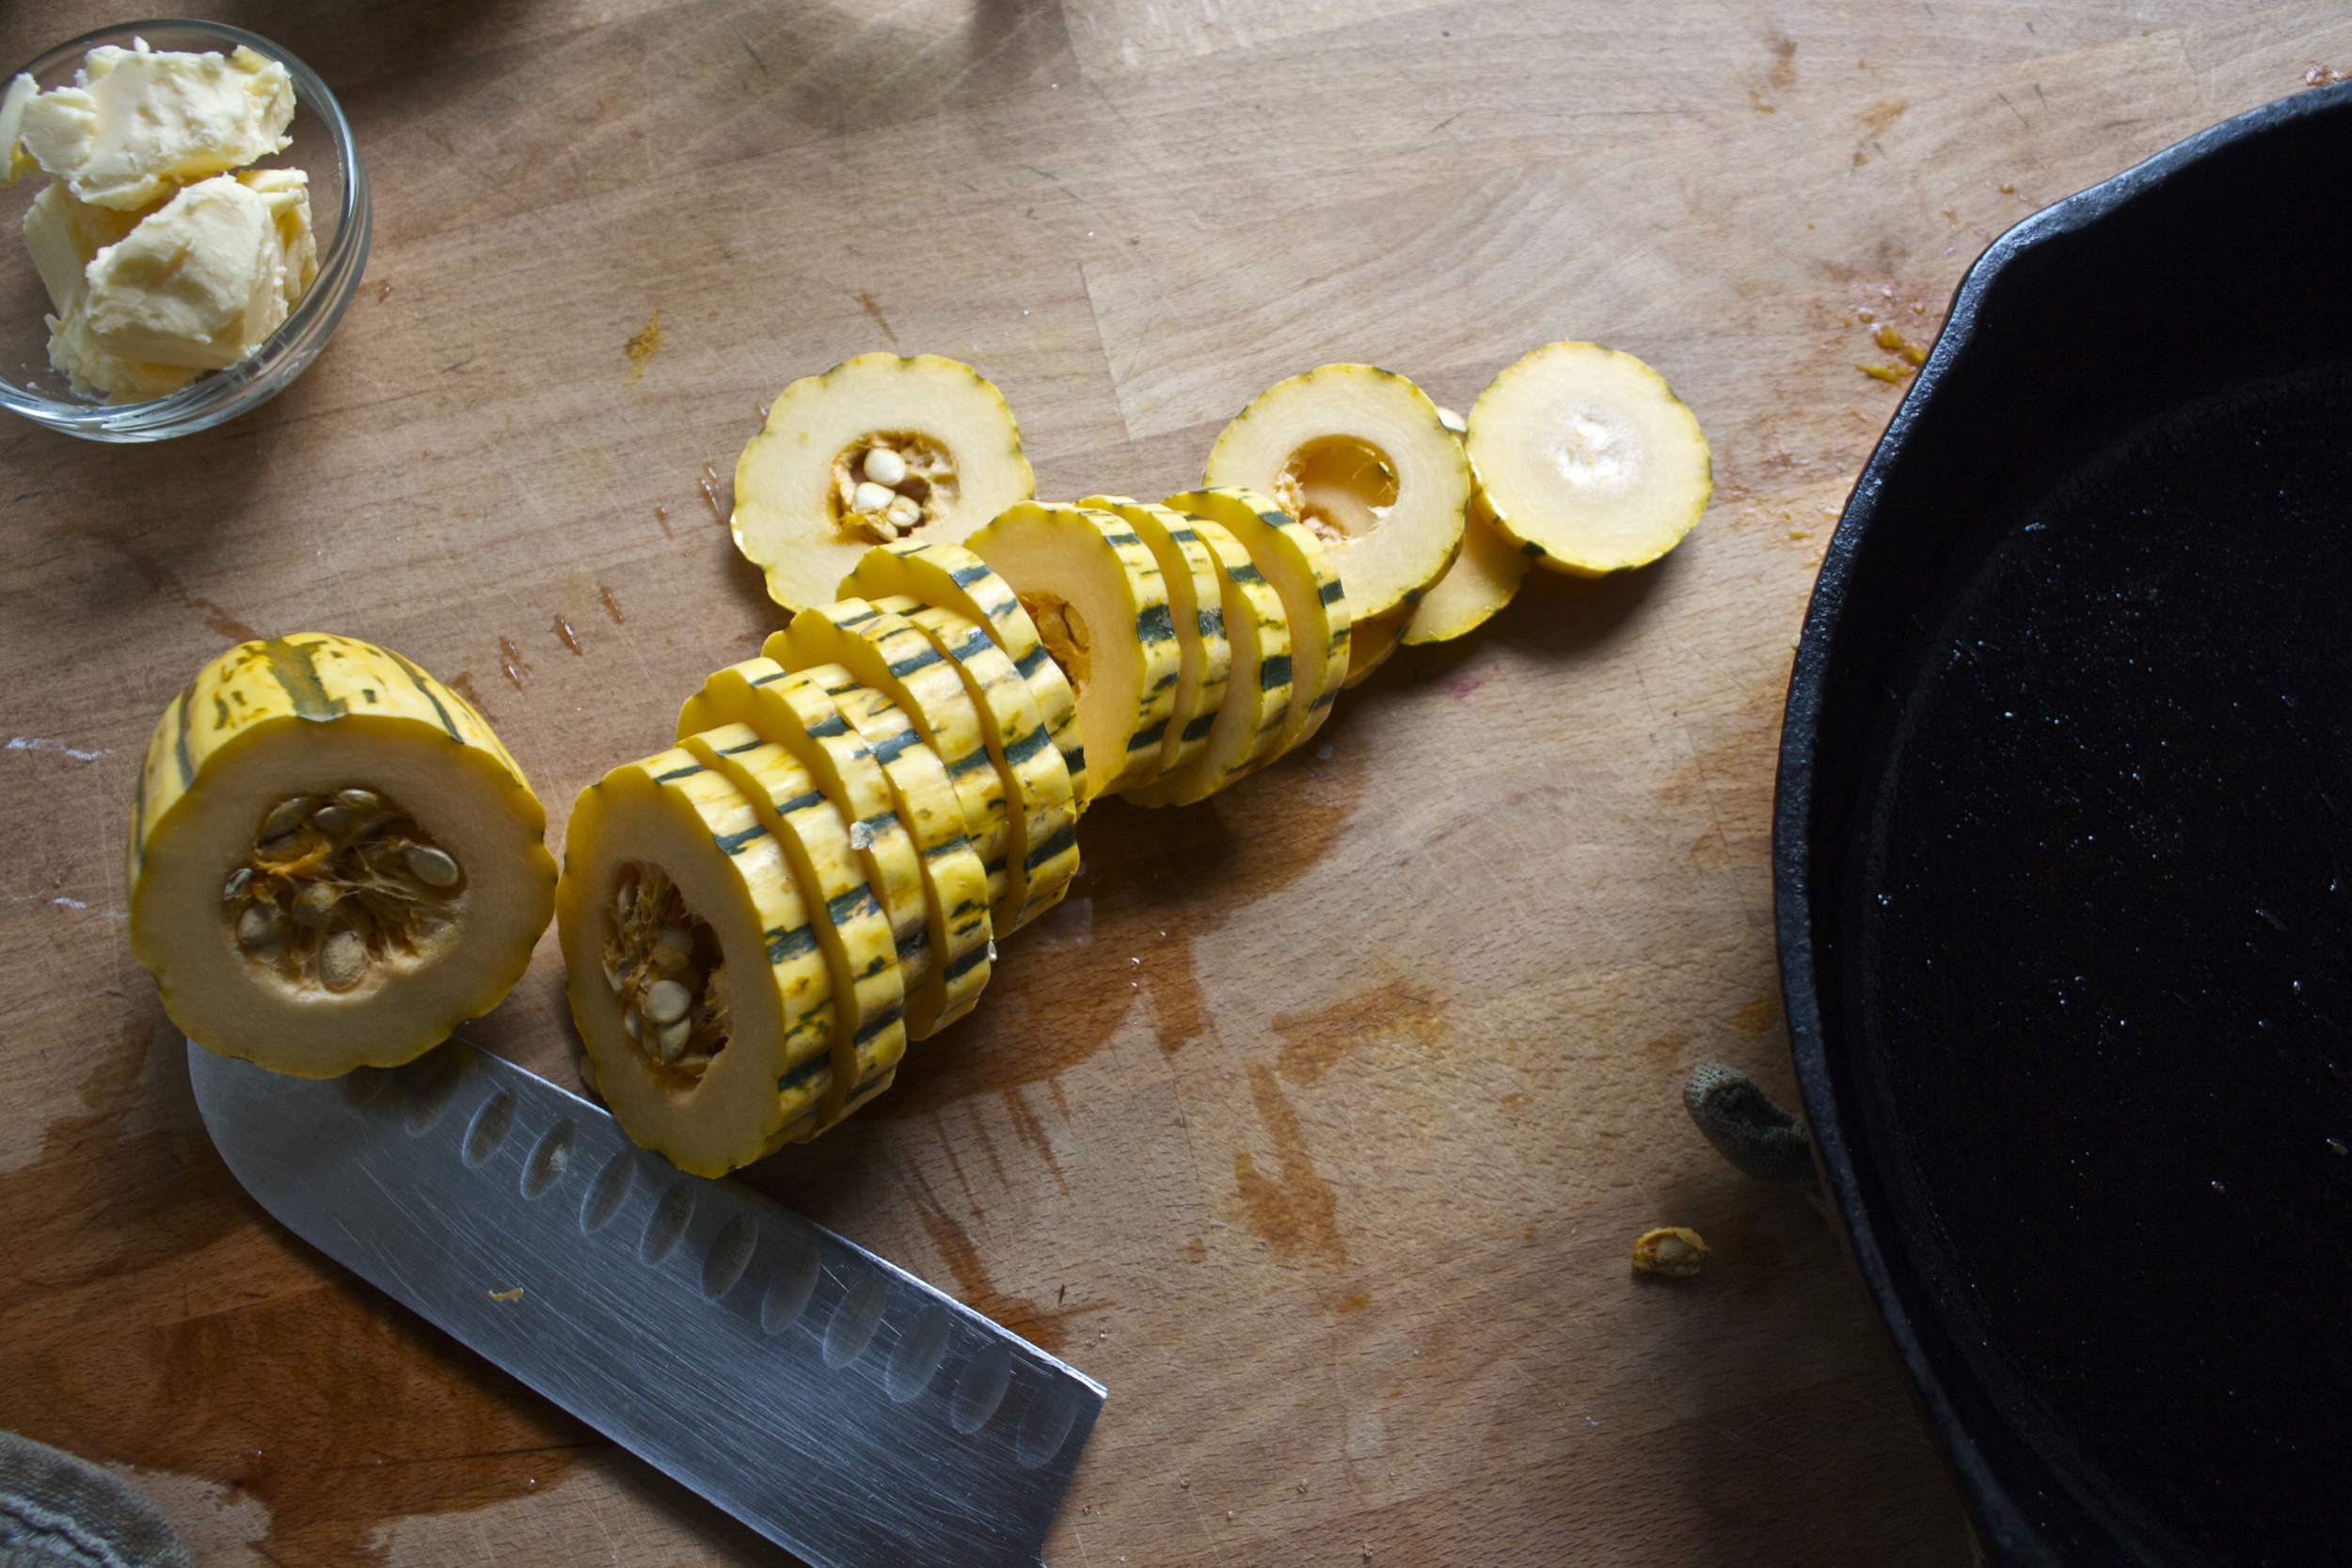
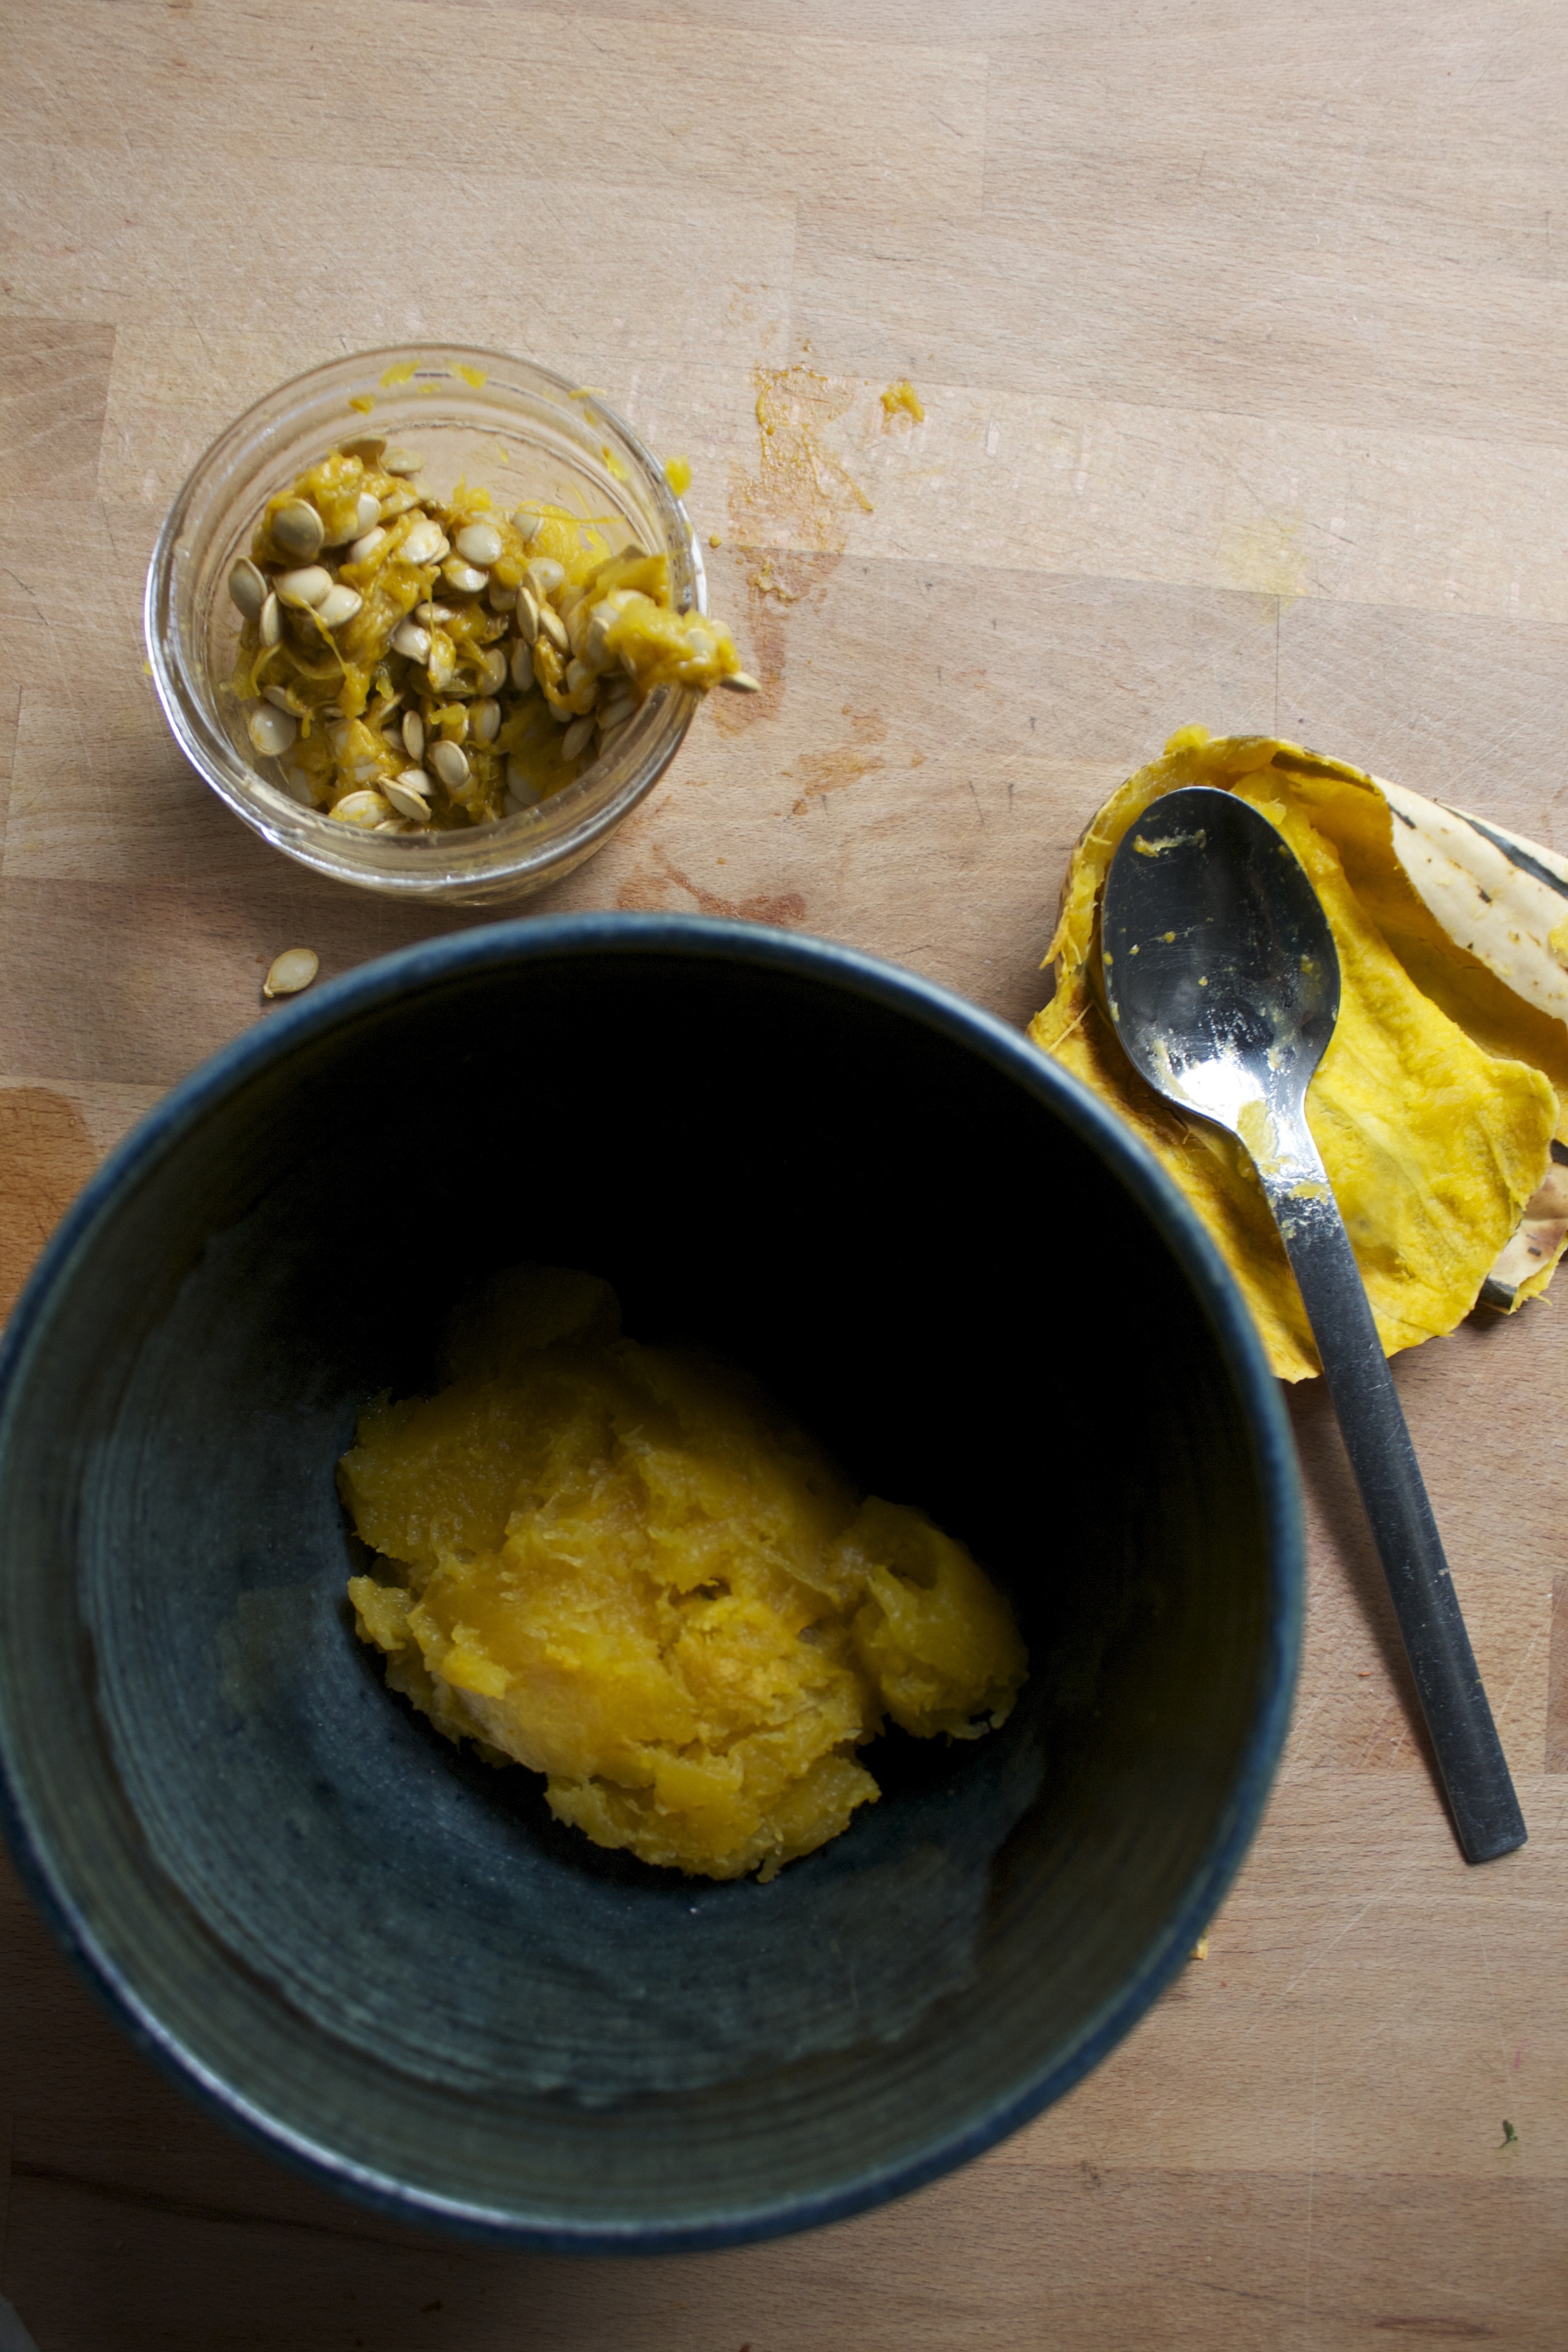
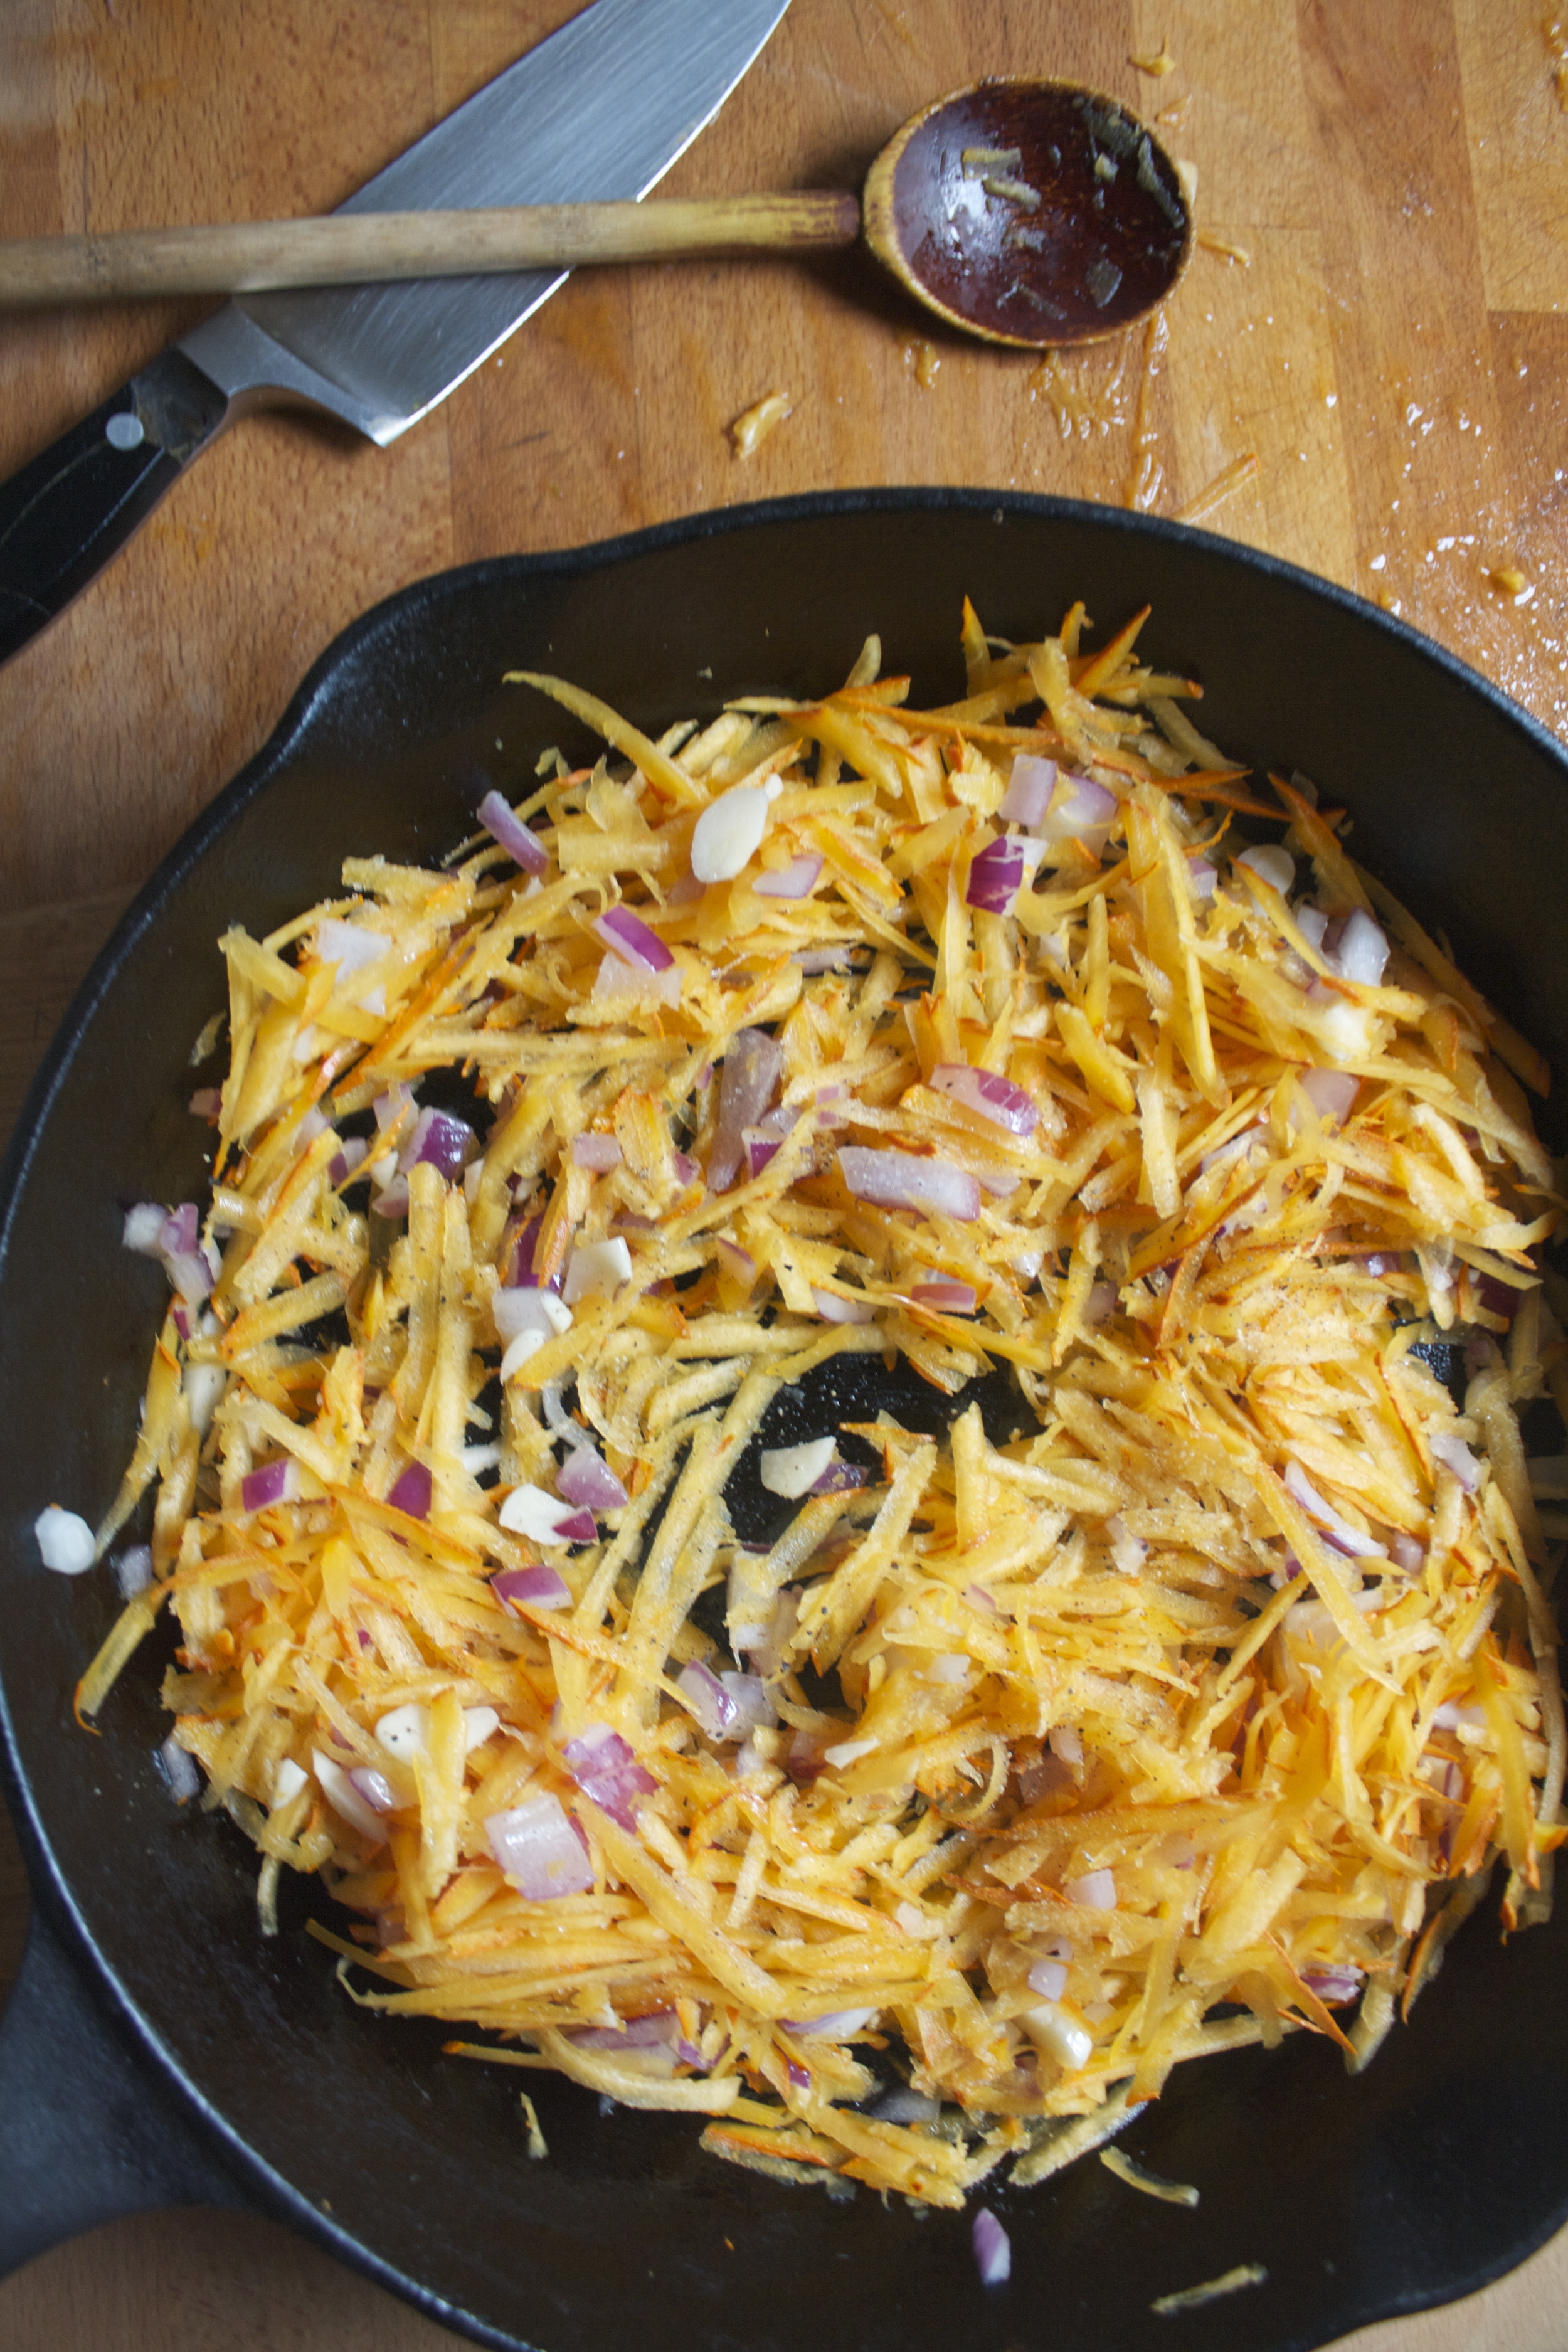
While the sage and onions are melding together, turn the squash into some noodles. Do it by the means that you use. I have a mandolin that does the trick, but use your spiralizer, noodler maker, or even a knife and a little bit of patience. Just make sure all you noodles, however made, are all the same thickness to it all cooks at the same time.  So yeah, cut the bottom part of the squash off and use the neck… and save the rest for soup tomorrow.

Note… I did not peel the squash cause I like to eat the skin. If you want, peel it, but really, even if you don't like the skin, you will not notice it in the noodles. 

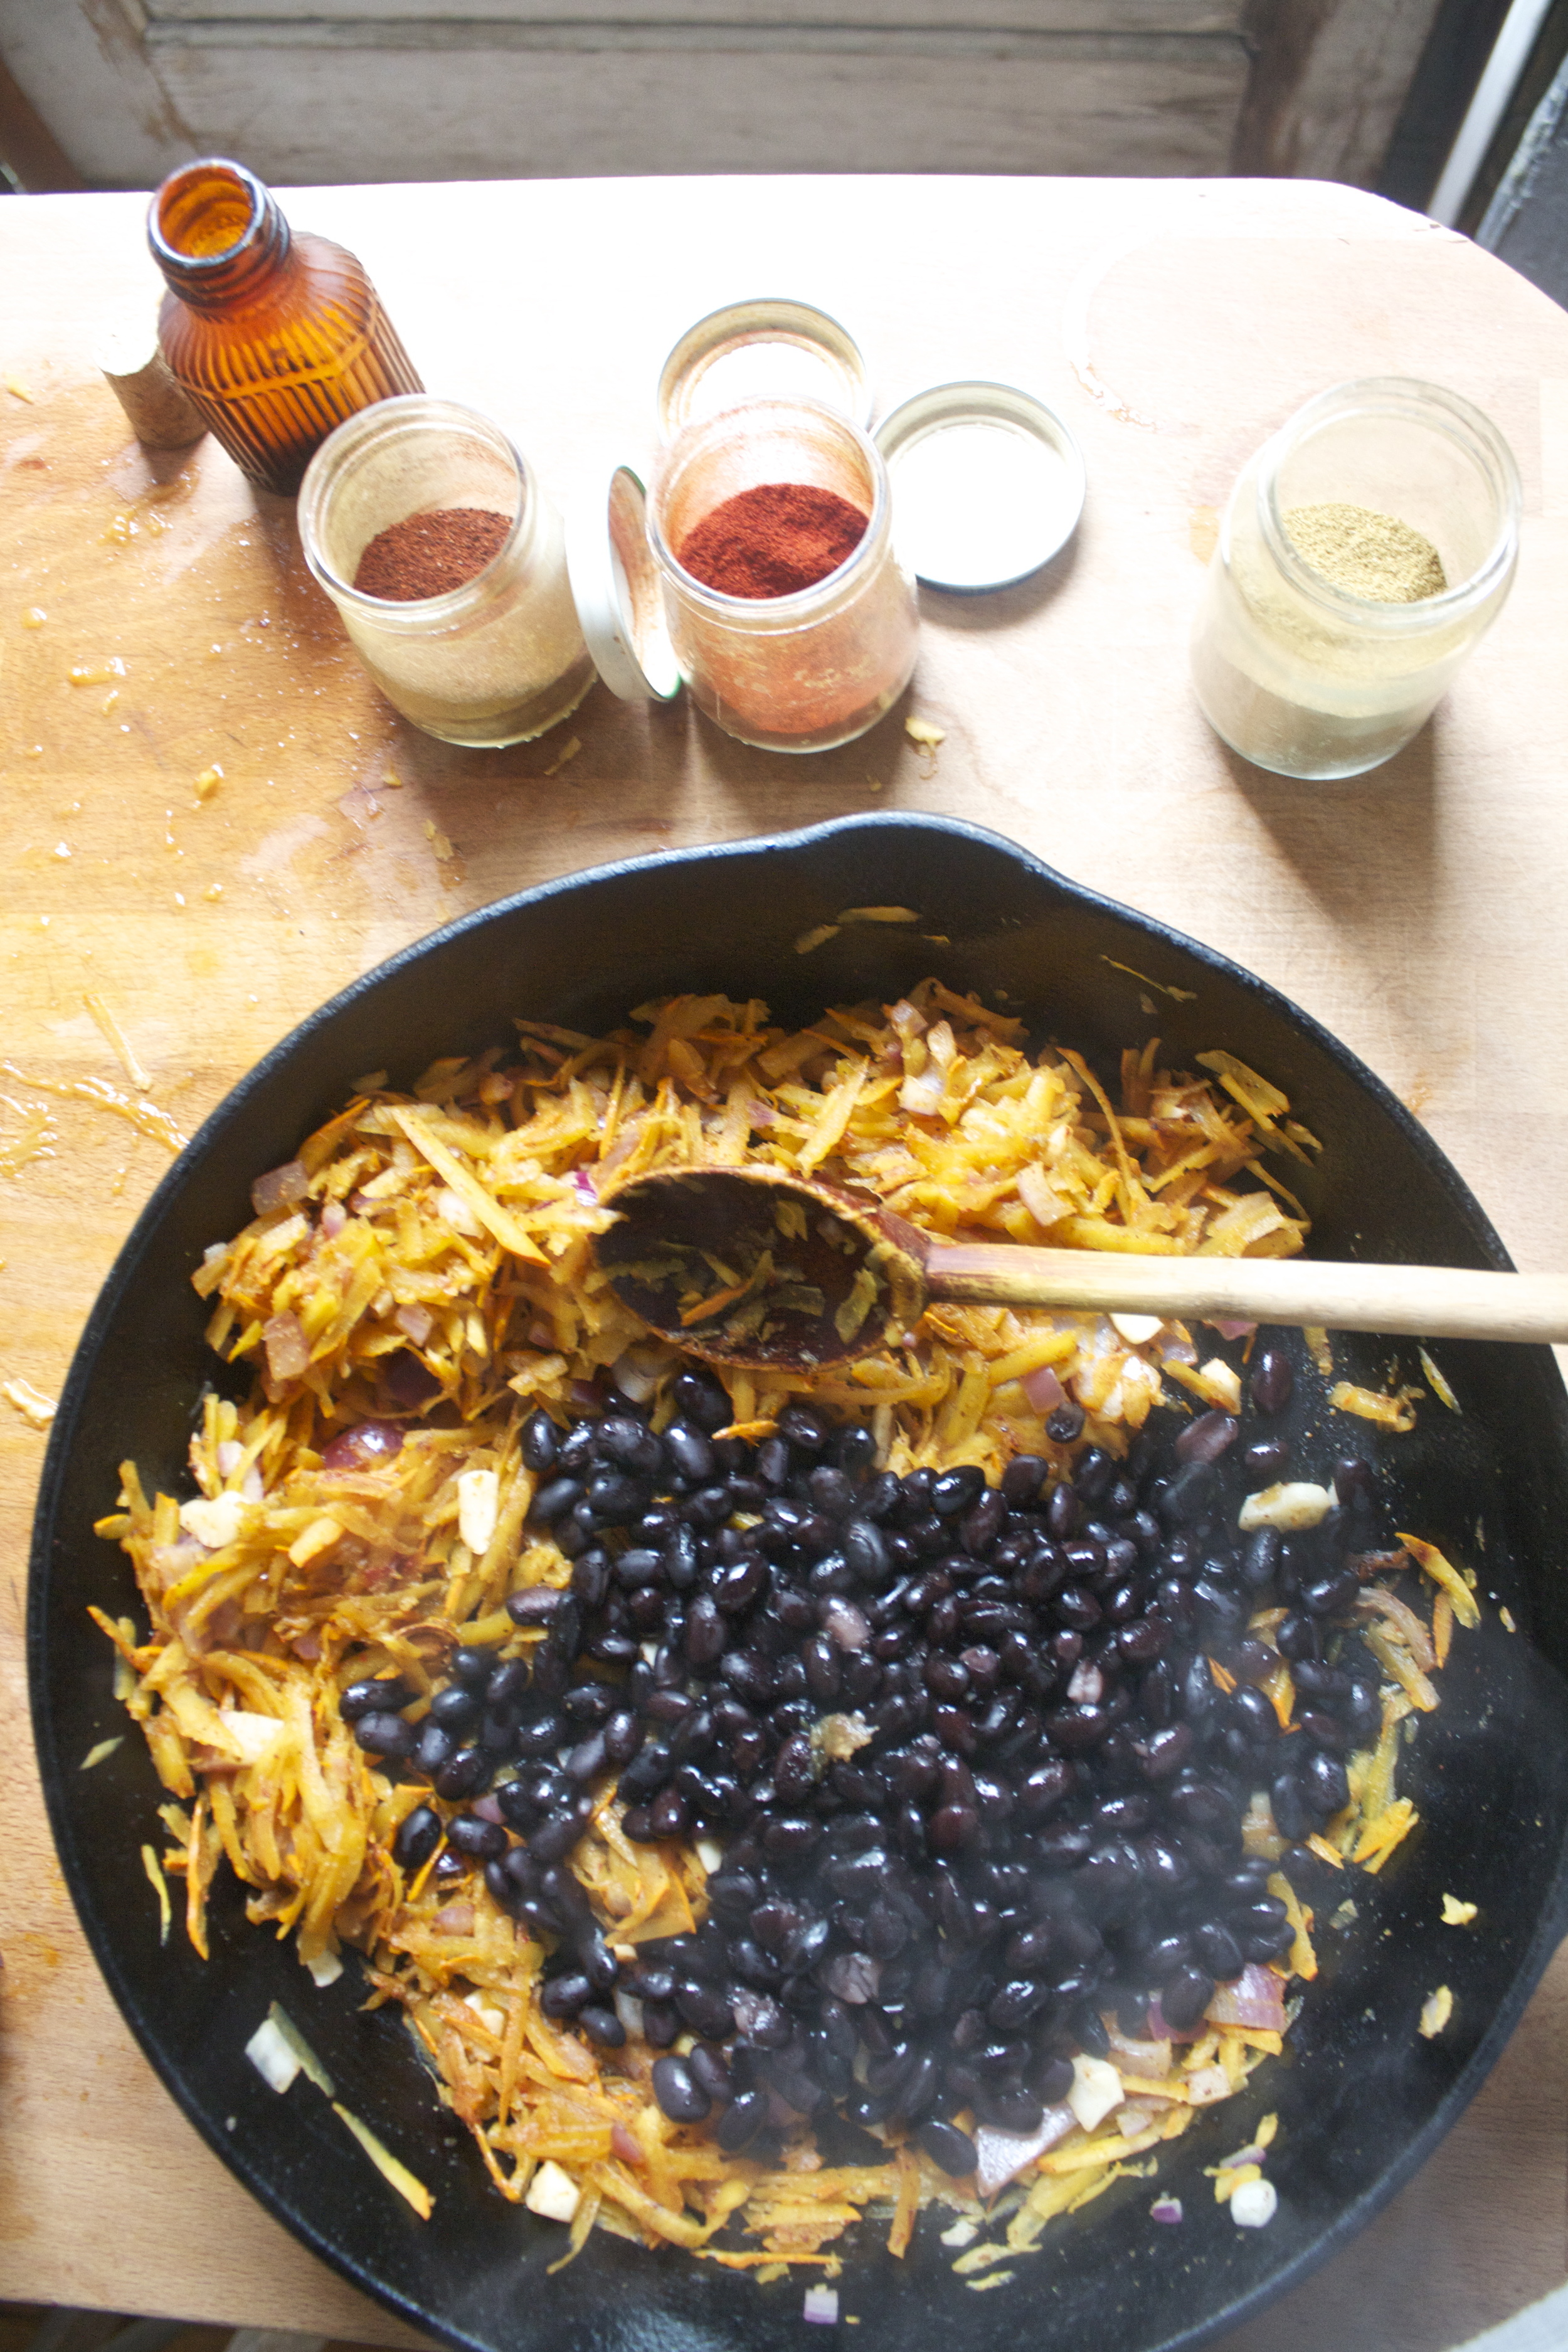
After the sage has had a few  minutes with the onions, and now that the noodles are made, it's time to add in a few splashes of vinegar and about a cup of water to the pot. So do that and give it all a good stir.

Now dump in the noodles, stir once more, and turn  the pot to medium heat and stick the lid back on it. Let cook down on medium heat for about 15 minutes, or unlit the noodles are tender and cooked, but not mushy. 
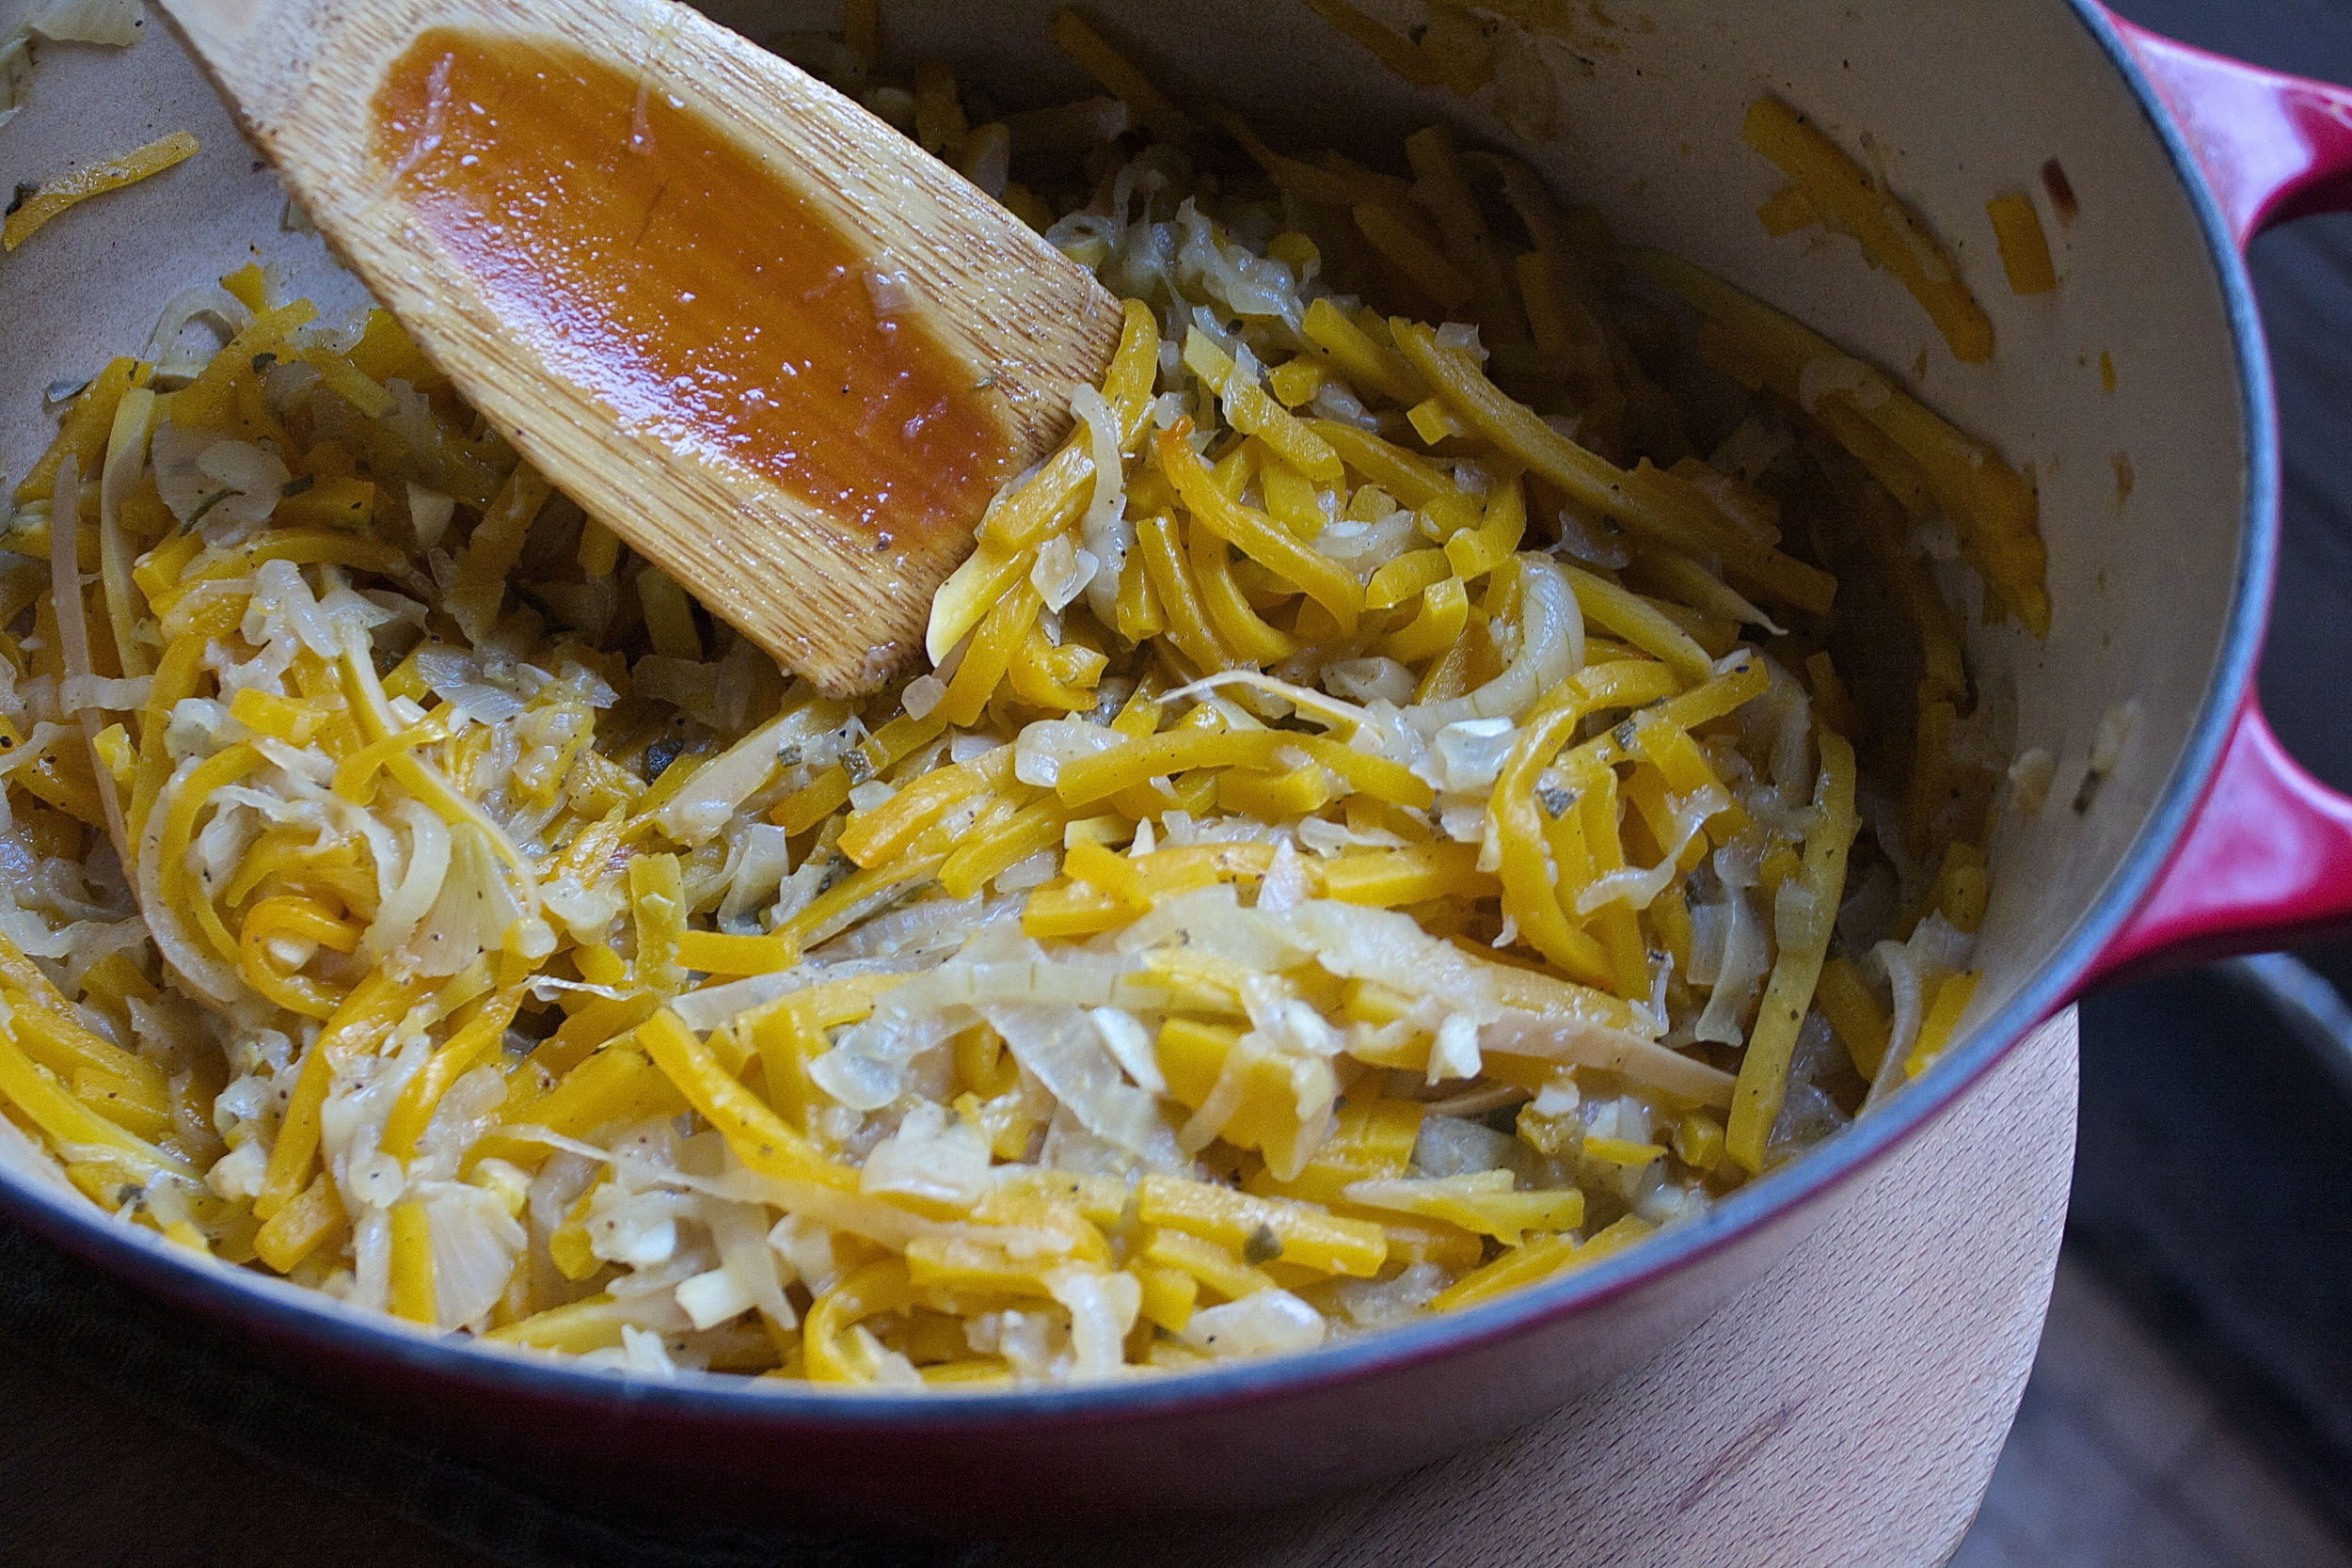
Like so. 

Now all you have to do is eat it.

Place a big pile into a pretty bowl, a fresh tiny little sage leave as garnish, and serve with a clean cloth napkin and a clean fork to eat with.. Or better yet, just eat it out of the pot with the wooden spoon  that may or may not have fallen on the floor. (my preferred method of eating)

Have a fantastic Day!

-C


Butternut Squash Noodles with Caramelized Onions and Sage 

Make 2 Servings 

  • 1 butternut squash (or the solid, neck part of a squab)
  • 4 medium sized sweet onion
  • 4-5 cloves of garlic
  • handful of fresh sage leaves
  • 1- 1 1/2 cups water
  • 2-3 splashes of red or white wine vinegar
  • olive oil
  • salt and pepper to taste 

Take onions and slice them as thinly as you can and mince up the garlic. Place into o big pot with a drizzle of olive oil, a splash of water and a sprinkle of salt. Stick on stove on medium high heat and stir onions until they start to give off a sweet onion smell and are starting to stick to the pot. Add in a splash of vinegar to deglaze pot, give it all a stir, and turn heat to low. Cover with a lid and continue to cook, string now and again, until onions reduce in volume by about half, are all tender, almost falling apart and are starting to brown a bit. (takes about 30- 40 minutes ) When onions are at this point, tiny chop the fresh sage and mix into the onion. 

Now grab you squash and turn in into noodles.( I cut the bottom part off (for soup tomorrow) and use the neck of the squash). You can do this by using a mandolin, a noodler, or even a knife. Any way works, just make sure the noodles are all the same thickness (mine were about 1/4 inch thick) so they cook at the same time.  Noodle about 5- 6 handfuls or cups of noodles. 

Now right before you add the noodles to the pot, add in a few more splashes of vinegar. another pitch or two of salt and pepper, and a cup of water, Mix that all  around then add in the noodles. Give those a mix then turn heat to medium and place the lid back on the pot, checking and string every few minutes until the noodles are tender(but not falling apart) and the water has pretty much evaporated. (about 15 minutes)  If you notice the water is gone and the noodles still need more cooking, add in another 1/2 cup of water.

And when you are happy with the tenderness of the noodles. remove pot from heat, taste and season with more salt and pepper if needed,  and get to eating!!!!!

In Vegetables, Vegan, Savory, recipes, Paleo, Gluten Free, Dairy Free, grain free Tags Butternut Squash Noodles with Caramelized Onion and Sage, VEgan, gluten free, healthy, clean eating, plant based, grain free, noodles, vegetarian, winter squash, butternut squash, fresh, sage, local, organic
Comment

Delicata Upside down Cake

October 23, 2015 Colleen Stem
IMG_1942.jpg
IMG_1980.jpg

I have so so so many winter squash. It's getting kind of out of hand. The mr is even making me a couple of wall shelves specifically for the squash so we can get our table back (it is currently covered in squash and tomatoes). I hoard them and I can't exactly tell you why. I think there is a part of me that is afraid that sometime durning the winter I am going to ran out of squash and am going to be forced to eat, I don't know, other food. And there also the part of me that knows that I will eat it all and why the hell not hoard them.. they are so pretty and lovely and…..well because I can! When I sit here and think about it,  there is no real logical reason for me to have so many, especially sense I will be doing a winter farm share and we get squash at each pick up all winter long. 

Hum….Things to think about..Oh well. I'll just call it a little werido quork of mine… squash hoarder, which is much better then a trash hoarder or a "stupid shit I found on the side of the road"  hoarder (that would be the mr.. but I don't judge).

So yeah,  I might need a squash intervention, or I can just make everyone around me happy by baking them sweet ass squash treats. I have shared and I always like to share my squash loot (see, another resin to have so many) but I found that most of the people in my life do not have the same kind of hunger for savory cooked squash.(weirdos) But you know what they do like? Cake Everyone will eat cake.

And for this cake I used delicata. It is really sweet,(I think all on its own it taste like a sweet dessert) so tasty, and easy to cook, The perfect squash for a cake. Add in the warm fall spices and you got yourself a winner. And bonus.. if you have heard that there is a canned pumpkin shortage this year and are are worried about you pumpkin fix. Stop. You don't need canned pumpkin. Just make your own puree and make it with all the squashes, especially delicata. 

Now go bake a cake.. I will probably make another one this weekend while I start on eating/baking with the sweet dumplings and buttercups that are piled on the fridge (seriously.. I have squash EVERYWHERE!)

The stuff. In the big white bowl there is white whole wheat pastry flour, baking soda and powder, salt, cinnamon and nutmeg. Then we have some brown sugar, oil, water with some vinegar and a already baked delicata squash. Also going to need another uncooked squash, earth balance and a little more brown sugar for the upside down part.

First off, grab yourself 10-12 inch skillet, preferably one that you have not just cooked garlic in. 

Slice up the uncooked delicata into 1/2 inch slices and remove the seeds (to roast later)

Stick the earth balance and the lesser amount of brown sugar into the skillet and place it on low heat, just to melt the butter and sugar down to form a sauce.

Now layer the squash rounds in the sauce. Fill in the skillet as much as you can. ( any left over can be for  cooked for lunch)

IMG_1869.jpg
IMG_1873.jpg
IMG_1878.jpg

The already baked delicata squash (minus the seed and skin.. save the seeds to roast, skin you eat right away) goes into a bowl with the brown sugar and oil. Mix it all together until combined. 

Note.. My squash was still warm when I mixed it with the sugar and oil. which really helped the sugar resolve and for the mixture to be smooth. If you squash is cold, warm it up a bit..

Whisk together all the dry and dump in the squash mixture and mix.

And slowly pour in the water/ vinegar mixture and mix until just incorporated.

Now slowly pour batter over the delicata in the skillet.

And into the oven it goes!

After 45-50 minutes, the cake should be browned and beautiful and a tester should come out clean when stuck in the middle. Remove the cake and place on cooling rack for about 8-10 minutes to cool. Don't get to excited and do it to soon or else the caramelization on the bottom will still be too liquid and completely soak into cake. Giving it a few minutes will let it cool enough to set up and stick to the top….so just wait!

And for the best and scary part…flip the skillet onto a plate or cutting board and be amazed. oh, but right before you do, run a spatula or knife around the edge to make sure the cake is loose.

It really should have no problem coming out of the skillet, but if any of the squash sticks (one piece of mine did) just scrap it out and place it back on the cake… no one will notice)

Now time for a slice… or maybe two!

And for reals, go get yourself lots of squash, even if it's just to make cakes with!

Have a fantastic weekend!

-C


Delicata Upside-down Cake 

Makes a 12 inch skillet cake (can be made in a can pan)

For the cake

  • 1 3/4 cup white whole wheat pastry flour (can use white pastry, wheat pastry, or all purpose)
  • 3/4 cup brown sugar
  • 1 cup warm delicata squash puree*
  • 1 teaspoon baking soda
  • 1 teaspoon baking powder
  • 1/3 cup mild flavored oil (canola or veggie)
  • 1 cup water 
  • 1 tablespoon apple cider vineagr
  • 1 teaspoon salt
  • 2 teaspoons cinnamon
  • 1/2 teaspoon nutmeg 

For the upside down part

  • 1/4 cup of brown sugar
  • 3 tablespoons earth balance]
  • 1 small uncooked delicata squash 

*Note.. To make delicata puree, simply stick the whole squash into the oven and roast until fork tender. Remove and let cool enough to handle. Cut in half, scoop to the seeds and scoop the flesh into a bowl….thats it. Oh, save seeds to roast and eat the skin as a snack (skin is my favorite part and the seeds are almost better then pumpkin!)

Preheat oven to 350 degrees. 

Grab yourself a 10-12 inch clean cast iron skillet (maybe don't cook garlic in it before you make this cake). Stick the earth balance and the brown sugar in it and place on low heat until the butter and sugar melt together and form a sauce. Remove pan from heat. Take the raw delicata squash and slice it into 1/2 inch rounds. Remove the seeds(save for roasting) and place the rounds into the bottom of the skillet, fitting in as many as you can, without overlapping. Set aside and make cake batter.

In a large bowl, whisk together the flour, salt, baking soda and powder and the cinnamon and nutmeg. In a separate bowl, combine the cooked warm squashwith the oil and the brown sugar. (if you squash puree is cold, warm it up. It mixes better warm) Mix until completely combined. Dump wet into dry and whack together then slowly pour in water/ vinegar mixture and whack until everything is full incorporated. 

Pour cake batter over the stuff in the skillet and place into the oven. Bake for 45-50 minutes , until a nice golden brown and tester in middle comes out clean. Remove and place on a cooling rack or ontop of the oven to cool for 8-10 minutes. Once  cooled, take a plate, cooling rack, or cutting board that is a least a little bigger therm the skillet, place it ontop pif the killet, and flip. The cake should drop right out…. if anything sticks in the skillet, trust scrap it off and stick it back on the cake.

Now the cake is ready to eat.. so grab a knife, cut a slice and do it.

In Vegan, Sweets, recipes, holiday, Dairy Free, breakfast Tags Upside down delicata cake, delicata squash, cake, winter squash, sweet, pumpkin, pumpkin shortage, local, organic, vegan, vegan cake, plant based
Comment

Pumpkin Black bean Enchiladas with Roasted Tomatillo Sauce

October 13, 2015 Colleen Stem

For a quite a while now (like at least a year)  the mr and I have had a standing Tuesday night dinner date with my sister Shannon. It's been great. We don't get to see each other as much as we would like so having a day where we can catch up and hang out is really nice. Plus, I get to make her dinner and I love to make her food cause she really likes the stuff I make.

 Well over the course of the past month we have not had our Tuesday dinners (always her fault… sick kids or some shit)

But last week, I was determined. I miss my sister and was real pumped to make her some food. So I sent her a text a few days before, saying dinner for sure no excuses! Then texted her again that Tuesday morning… just to make absolutely sure…. And she said yes Hooray! Sister time, I was excited.

But then sometime around lunch she sent me this  "I know I am really lame, but going to have to cancel tonight.".

Thoughts that ran through my head.. "That BITCH!.. and What the FU*K!.. and can she be anymore of a butt hole?"

But it ok, I get it. She is constantly working and taking care of monsters (the kids) and things happen.  I am really not mad, I just really miss my sister, So whatever, she canceled, but I still wanted to make what I planned on making and that's  what I did. These enchiladas, so freaking good, ! And it's really to bad that she ditched us cause I know that she would have been all up in these.

So it's Tueday again. I talked to her last night. She says we are on for dinner tonight… My hopes are high, but I think I am going to have a back up dinner plan. And if she cancels tonight, I am going to spray paint boobs on her front door.

I'll let you know how it goes.

Now to the enchiladas!

The stuff. Pumpkin of course!.plus the seeds in that pumpkin. We also need black beans, red onion, garlic and kale. Paprika, cumin, chili powder, salt pepper and olive oil  Thats for the filling. Now for the sauce we need tomatillos, another onion, jalaepnos, lemon, parsley (I wanted to use cilantro, but couldn't find any so you can use either) We are going to use salt, pepper and oil in this too. And some tortillas to wrap it all in!

IMG_0028.jpg
IMG_0037.jpg

First off, turn the oven on to 400.

Now grab the tomatillos and remove the outer skins. Chop up the white onion and the jalapeños and toss everything into a lightly oiled skillet. Sprinkle l with a bit of salt and stick it into the oven to roast.

Now we need the seeds from the pumpkin so slice the pumpkin in half and remove all the seed and guts. 

Gather the seeds, rinse and dry them and toss them into a lightly oiled skillet (or baking sheet) and stick those into the oven too.

While the stuff is in the oven roasting, grab a chunk of pumpkin (with skin on, or if you want you can peel it, but it really is pointless) and shred.. and shred until you have about 2 1/2- 3 cups worth or pumpkin. Also , small dice the red onion and mince up the garlic while you are at it.

IMG_0079.jpg
IMG_0086.jpg
IMG_0105.jpg

Place the onion and garlic in lightly oiled skillet and cook for a few minutes, then toss in the pumpkin with a few splashed  of water. Cook a bit longer until the pumpkin is starting to become tender. Now toss in the spices and the beans and mix it all around.

And lastely, chop up the kale and mix that into the skillet as well. 

After the filling is made, the stuff in the oven is most likely done. When the tomatillos and onions are all soft and roasted and the seed are golden brown and crunchy remove them from the oven.

IMG_0140.jpg
IMG_0155.jpg

Pour the roasted tomatillos noon and peppers, the juice of the lemon, a handful of roasted seeds, and the fresh herbs into a blender with a drizzle of olive oil and blend until smooth.

Now all the stuff is ready to go.

IMG_0172.jpg
IMG_0175.jpg
IMG_0178.jpg

A big scoop of pumpkin bean mixute in a tortilla. Wrap it up and stick into pan seam down (I used the same skillet that I roast the tomatillos in) . Repeat until stuff is gone (make sure the enchiladas are all nice and snug) then pour sauce all over.(you can use all the sauce or save a little for to serve with)

And into the oven goes!

After about 20 minute, the sauce is thick, the edges of the wraps are a little crispy, and it is all ready for eating

Garnish with more roasted seeds and some chopped up green stuff!

 And eat you heart out!

And this is why you don not want to cancel dinner plans with me!

Happy Tuesday People!

-C


Pumpkin Blak Bean Enchiladas with Roasted Tomatillo Sauce  

  • 1 small sugar pie pumpkin (only going to use about 3 cups shredded so you are going to have some left over,Maybe Pie?)
  • 2 cups cooked black beans
  • 1 small red onion
  • 3-4 cloves garlic
  • few kale leaves
  • 1-2 teaspoons Paprika*
  • 1-2 teaspoons chili powder*
  • 1-2 teaspoons cumin*
  • salt and pepper to taste
  • 5-6 medium sized flour torilttas (or any kind you like)

For the Tomatillo Sauce

  • 1 pint tomatillos  
  • 1 medium yellow onion
  • 1-2 jalapeños  (or none if you don't want them)
  • 1 lemon
  • handful of toasted pumpkin seeds 
  • A bunch of fresh cilantro or parsley 
  • salt and pepper to taste
  • olive oil 

*Use a teaspoon of each, taste, then add more if you want… I like a lot of spice so I used a lot. 

Preheat oven to 400

Chop your pumpkin in half and coop out the seeds. Rinse them, dry them and toss them onto a lightly oiled skillet or baking pan and stick into the oven to roast until golden brown and crispy, giving them a little stir after about 15 minutes   Should take about 20-30 minutes. 

For the sauce ...

Grab the tomatillos, the yellow onion, and the jalapeños. Remove papery skins from the tomatillos and toss into a lightly oiled skillet. Cut the jalapeños in half (remove seeds and ribs) and chop up the onion into a few chunks. Toss that into the skillet too. Sprinkle with salt and stick that into the oven . Cook until tomatillos are soft, (stab them with a fork, if they kind of pop, they are done) and the onion iand pepper is tender.. about 25-30 minutes.   When done, remove form oven, let cool for a few minutes, then transfer to a blender. Add in a handful of toasted pumpkin seeds, the juice of the lemon,, and the pare sly or cilantro. Blend until smooth. 

For the filling... (I do this while the stuff is in the oven)

 Grab the red onion dice it small, and grab the garlic and mince it and toss into a skillet.  Drizzle with a tiny oil. and a pinch of salt and place on the stove on medium low heat to soften a bit.  Take a chunk of pumpkin and shred it until you get about 2 1/2- 3 cups of pumpkin. Toss the shredded pumpkin into the skillet with the cooking onion and mix in the spices and a splash or two on water. Let cook on stove for about 8-10 minutes, or until pumpkin is slightly tender. Now mix in the beans and chop up the kale leaves into little pieces and toss that in too. Mix it all around and remove from heat. .

To assemble. 

Take a big scoop of the filling and place in a flour tortilla. Roll up and place,seem down, into a skillet or roasting pan (I used the skillet I roasted the tomatillos in) Repeat until you have used up all the filling. The enchiladas should be snug.

Now pour the sauce all over eht op, spreading it over the sides. You can use all the sauce you made, or save little for serving)

Place into oven and bake for about 20 minutes or until the sauce is starting to become a lithe golden brown. Remove, let cool for a few minutes, and finsih with a handful of toasted pumpkin seeds and some pretty green stuff.

And eat. A fork an knife are handy.

In Vegan, Savory, sauce, recipes, Gluten Free, Dairy Free Tags Pumpkin Black Bean Enchiladas, Tomatillo Sauce, MExican, local, organic, seasonal, vegan, gluten free adaptable, clean eating, plant based
Comment

Arugula Pesto-Delicata Squash-and Cashew Cheese Pizza

October 2, 2015 Colleen Stem

Hey there people.. It's FRIDAY!!! and I gots another pizza here that will knock your socks off (I am back to wearing socks, are you?)

So the mr is trying to not eat quite as much cheese lately (he really likes to eat cheese). But he also can not live (happily) without eating pizza and I usually make his pizzas with cheese. So me being the best girl friend ever went out of my lovely way to make him a pizza without dairy cheese. And who said that pizza need real cheese? I bet there is somebody, but I don't care, and neither did the mr. He was all into this, no dairy cheese in sight. Plus bonus for me, I didn't have to grate cheese (worst activity ever!) 

Anyway, let's talk about this pizza. The toppings alone are HELL YEAH! Arugula pesto , which is bitter, and spicy. Delicata squash that is smooth, sweet and creamy, and  cashew cheese brings it all together with a cheesy, creamy, sweet, tanginess….. I mean, are you drooling yet? And let's just look at how pretty it is.. So pretty, which makes the whole thing that much better. 

A pizza tha will make just about anyone happy, full of so much fantastic flavor and not covered in a bunch of grease and gross. One could eat the entire thing and really not feel so bad about it. It's kind of the perfect pizza. 

So onwards! Go make pizza!

The stuff. A pizza dough (homemade or store bought.. whatever works for you). Some cashew cheese (slightly watered down so it pourable) and a delicata squash.  For the pesto… arugula, garlic, nutritional yeast, lemon juice, olive oil and a little salt.

IMG_9422.jpg
IMG_9435.jpg

To make the pesto toss the arugaula, lemon juice, garlic,a pitch of salt,  and the nutritional yeast into a food processor. Start the thing and slowly drizzle a little olive oil in as its going until it all comes together and looks all creamy pesto nice like.

Grab the squash and slice it up into 1/4 inch think pieces. Once it's sliced, the seeds come out  really easily with a spoon or you fingers, so remove those but don't toss them! Roast them, either now or save for later

IMG_9451.jpg
IMG_9453.jpg
IMG_9456.jpg

Roll , stretch, toss your dough and place on a lightly oiled baking sheet, or in a skillet however you like to bake you pizza) and start  adding the toppings. Arugula pesto..delicata squash and lastly, cashew cheese spattered all over.

Looking good and ready for the hot oven.

And after some time… Crispy. golden brown crust. The Delicatia is nice and soft and the cashew cheese is starting to brown(just a bit)

Cut into slices and serves with extra arugula (if you want). 

Have the best weekend. Go do something fall-ish.  (I am going PUMPKIN PICKING!)

Happy Friday!

-C


Arugula Pesto-Delicata Squash-Cashew Cheese Pizza


  • pizza dough for a 12 inch pizza * (use any dough, this recipe or store bought)
  • 1 cup cashew cheese (recipe here), slightly thinned out with water to like melted ice cream consistency 
  • 1 delicata squash

For the pesto

  • 3-4 large handfuls of arugula
  • 4 cloves of garlic
  • juice of 1 lemon
  • 2 tablespoons nutrional yeast
  • olive oil (1-2 tablespoons
  • salt and pepper

*Note. Make sure to set you pizza dough out for at least 15-20 minutes to let it rest and come to room temperature

Preheat oven to 450

Roll out pizza dough to about a 12 inch circle or square (whatever shape you want) and place in or on a lightly oiled baking sheet or skillet (or whatever you like to bake you pizzas on)  Drizzle with a tiny bit of olive oil and set aside.

Take arugula, garlic, nutritional yeat and lemon juice and stick into a food processor. Turn on and blend, drizzling in a little olive oil until all the stuff comes together and is all pesto like. Season with salt. Now take your squash and slice it into 1/4 ish rounds. Remove the seeds (scrap out with a spoon or just push them out of the whole with your fingers) 

Grab the dough, smear on a good amount of pesto (you don't need to use it all) layer the delicata rounds on top of that, and then drip, splatter,our pour the cashew cheese on top of that.

Stick into hot oven and bake for about 15-20 minutes, or until crust and cashew cheese is golden brown.

Remove from oven, let cool for a minute, cut into slices and serve with extra fresh arugula and a bit more nutritional yeast.

Eat and eat.    


In Gluten Free, Dairy Free, recipes, Vegan Tags Pizza, Vegan, Dairy free, healthy, protein, clean eating, plant based, organic, local, cashew cheese, arugula pesto, delicata squah, dinner, friday
Comment

Pear Almond Oat Crumble Bars

September 30, 2015 Colleen Stem
IMG_9302.jpg
IMG_9305.jpg
IMG_9334.jpg

This treat is a long time coming, like almost a years time…Let me explain. 

One of the littles had requested a dessert of some type of almond pear situation for his birthday…..last year. Of course I said yes, no problem, for your birthday, you got it. But I never got it. I actually completely forgot. Then a few months later, I remebemered, felt like a big D-bag and told  myself I still had to make something for the guy… and I forgot again. Next time I remembered, I had just bought a bunch of pears and that was it. Make the kid something you bitch (is what I told myself) but heres the thing, I figured he forgot too and those pears were mighty tasty.(I know I am horrible) 

So just last week I was at the store, meandering through the produce, and noticed that local pears were on sale. This was it. I knew it had to be done. I bought a large quantity (enough to bake with and eat) and got to making that little his birthday treat request. I went with bars.. nothing to sweet, nothing to crazy, lot and lots of almond and pear flavors. Perfect for breakfast or an afternoon snack, and made even better by the fact that they were made for him, and it isn't even his birthday.

So I made them, and brought them to his house, waited for him to get off the bus from school, and handed him his long awaited pear almond treat. He was so happy, it made me feel like shit.(I so should have made him something a year ago)  But oh well,  he got them right? And this way is much more a surprise then if I had actually made them when I said that I would. An unexpected, not your birthday, birthday treat!

Right here guys…Still the Best Aunt EVER!

The stuff. Alond flour, oat flour, baking soda ,salt, earth balance and a little honey. We also need some rolled oaths almond butter and almonds. And of course we need pears, with a little corn starch and a smidge of cinnamon.

Nice ripe pears get thinly sliced, seeds and stems removed.

Tossed into a bowl with the starch and cinnamon and set aside. 

IMG_9236.jpg
IMG_9243.jpg

The oat and almond flour gets mixed together with the salt and the baking soda, then mix together with the earth balance and honey until it turns into a dough.( I used my hands to mix it together…it worked better then a fork)

Break off about a 1/4 of the dough and stick back in bowl. Take the rest and evenly press into the bottom of a 9x9 baking pan.

Take the remaing dough and mix in the almonds, oats, and almond butter to form the crumble.

Dump the pears on the crust, making sure the are level and pretty evenly layered.

And crumble the crumble on top.

Give it a little press to compact the crumble and into the oven it goes!

When all browned and crispy and nice, remove from oven and let cool. Cut into squares and go for it.

Look at that, so much goodness.Go ME! 

Happy Wednesday people!

-C


Pear Almond Oat Crumble Squares

For the crust and crumble

  • 1 1/2 cup oat flour
  • 1 1/2 cup almond  flour
  • 1 teaspoon baking soda
  • 1 teaspoon salt
  • 1/4 cup honey
  • 1/2 cup earth balance (can use butter)
  • 1/4 cup almond butter
  • 1/2 cup oats
  • 1/4 cup almonds

For the pear filling

  • 4-5 ripe pears
  • 2 tablespoons corn or arrowroot starch
  • 1 teaspoon cinnamon

Preheat oven to 350

In a large bowl, mix together the almond and oat flour, baking soda, and salt. Add in the earth balance and honey and mix together until a dough forms (I find using my hands to work swell). Roll dough into a blob and tear about 1/4 of the dough away and set back into bowl. Press the remaining dough into he bottom of a 9X9 inch baking pan. With the remaining dough, mix the rolled oats, the almond butter and the chopped almonds and set aside again.

Now slice up your pears  into 1/4 inch thick slices (remove seeds and stems) and toss into a bowl with the cinnamon and starch. Take pears and layer ontop of the crust, trying to keep the pears evenly distributed. And dump and distribute the crumble topping all over the pears. Gie the whole thing a few pats to compress the crumble a bit.

Stick into the oven and bake for about 45 minutes, or until the crumble topping is all nice and brown and crispy. 

Remove from the oven, let cool and cut into squares. 

Great as breakfast lunch snack or dinner. Eat with you hands and lick crumbs off plate. 


In Gluten Free, Dairy Free, breakfast, recipes, Sweets, Vegan Tags vegan, gluten free, sweets, pears, Pear Almond Oat Crumble Bars, sugar free, healthy treats, fall, heathy dessert, breakfast, plant based, local, clean eating
Comment
← Newer Posts Older Posts →
 

https://thelovelycrazy.squarespace.com/config#/|/about/

Me. Food Maker.Food eater. Woo HOO!

STEM+NODE  SMALL BATCH AND ONE OF A KIND POTTERY

stem+node ceramics


____________________

Subscribe

GET NEW POSTS IN YO EMAIL

You are AWESOME!!!


@thelovelycrazy 2014-2021