• stem+node ceramics
  • HOME
  • Food Recipes
  • About
  • Contact
Menu

The Lovely Crazy

Street Address
City, State, Zip
Phone Number

Your Custom Text Here

The Lovely Crazy

  • stem+node ceramics
  • HOME
  • Food Recipes
  • About
  • Contact

Do Some Apple Printing

October 14, 2015 Colleen Stem

A simple little artsy craft project to get down with… apple printing. ALmost the same as potato print, except smells better and your apple comes with an interior fun shape to print with. And you have to use apple this time of year cause its apple season and there are apples everywhere!

I usually do things like this with a little or two, but at the time, I had no littles in my possession, so I went it did it all by my lonesome. (which was actually a lot of fun) I made myself big cup of hot coffee, put on some tunes, and zoned out and did a bunch of prints. It was a great little afternoon project that anyone, little or not so much, can do. And the best part about printing is… you can't screw it up

And I know that this is going to be a cold dreary weekend… so this might just be the perfect indoor project to do! 

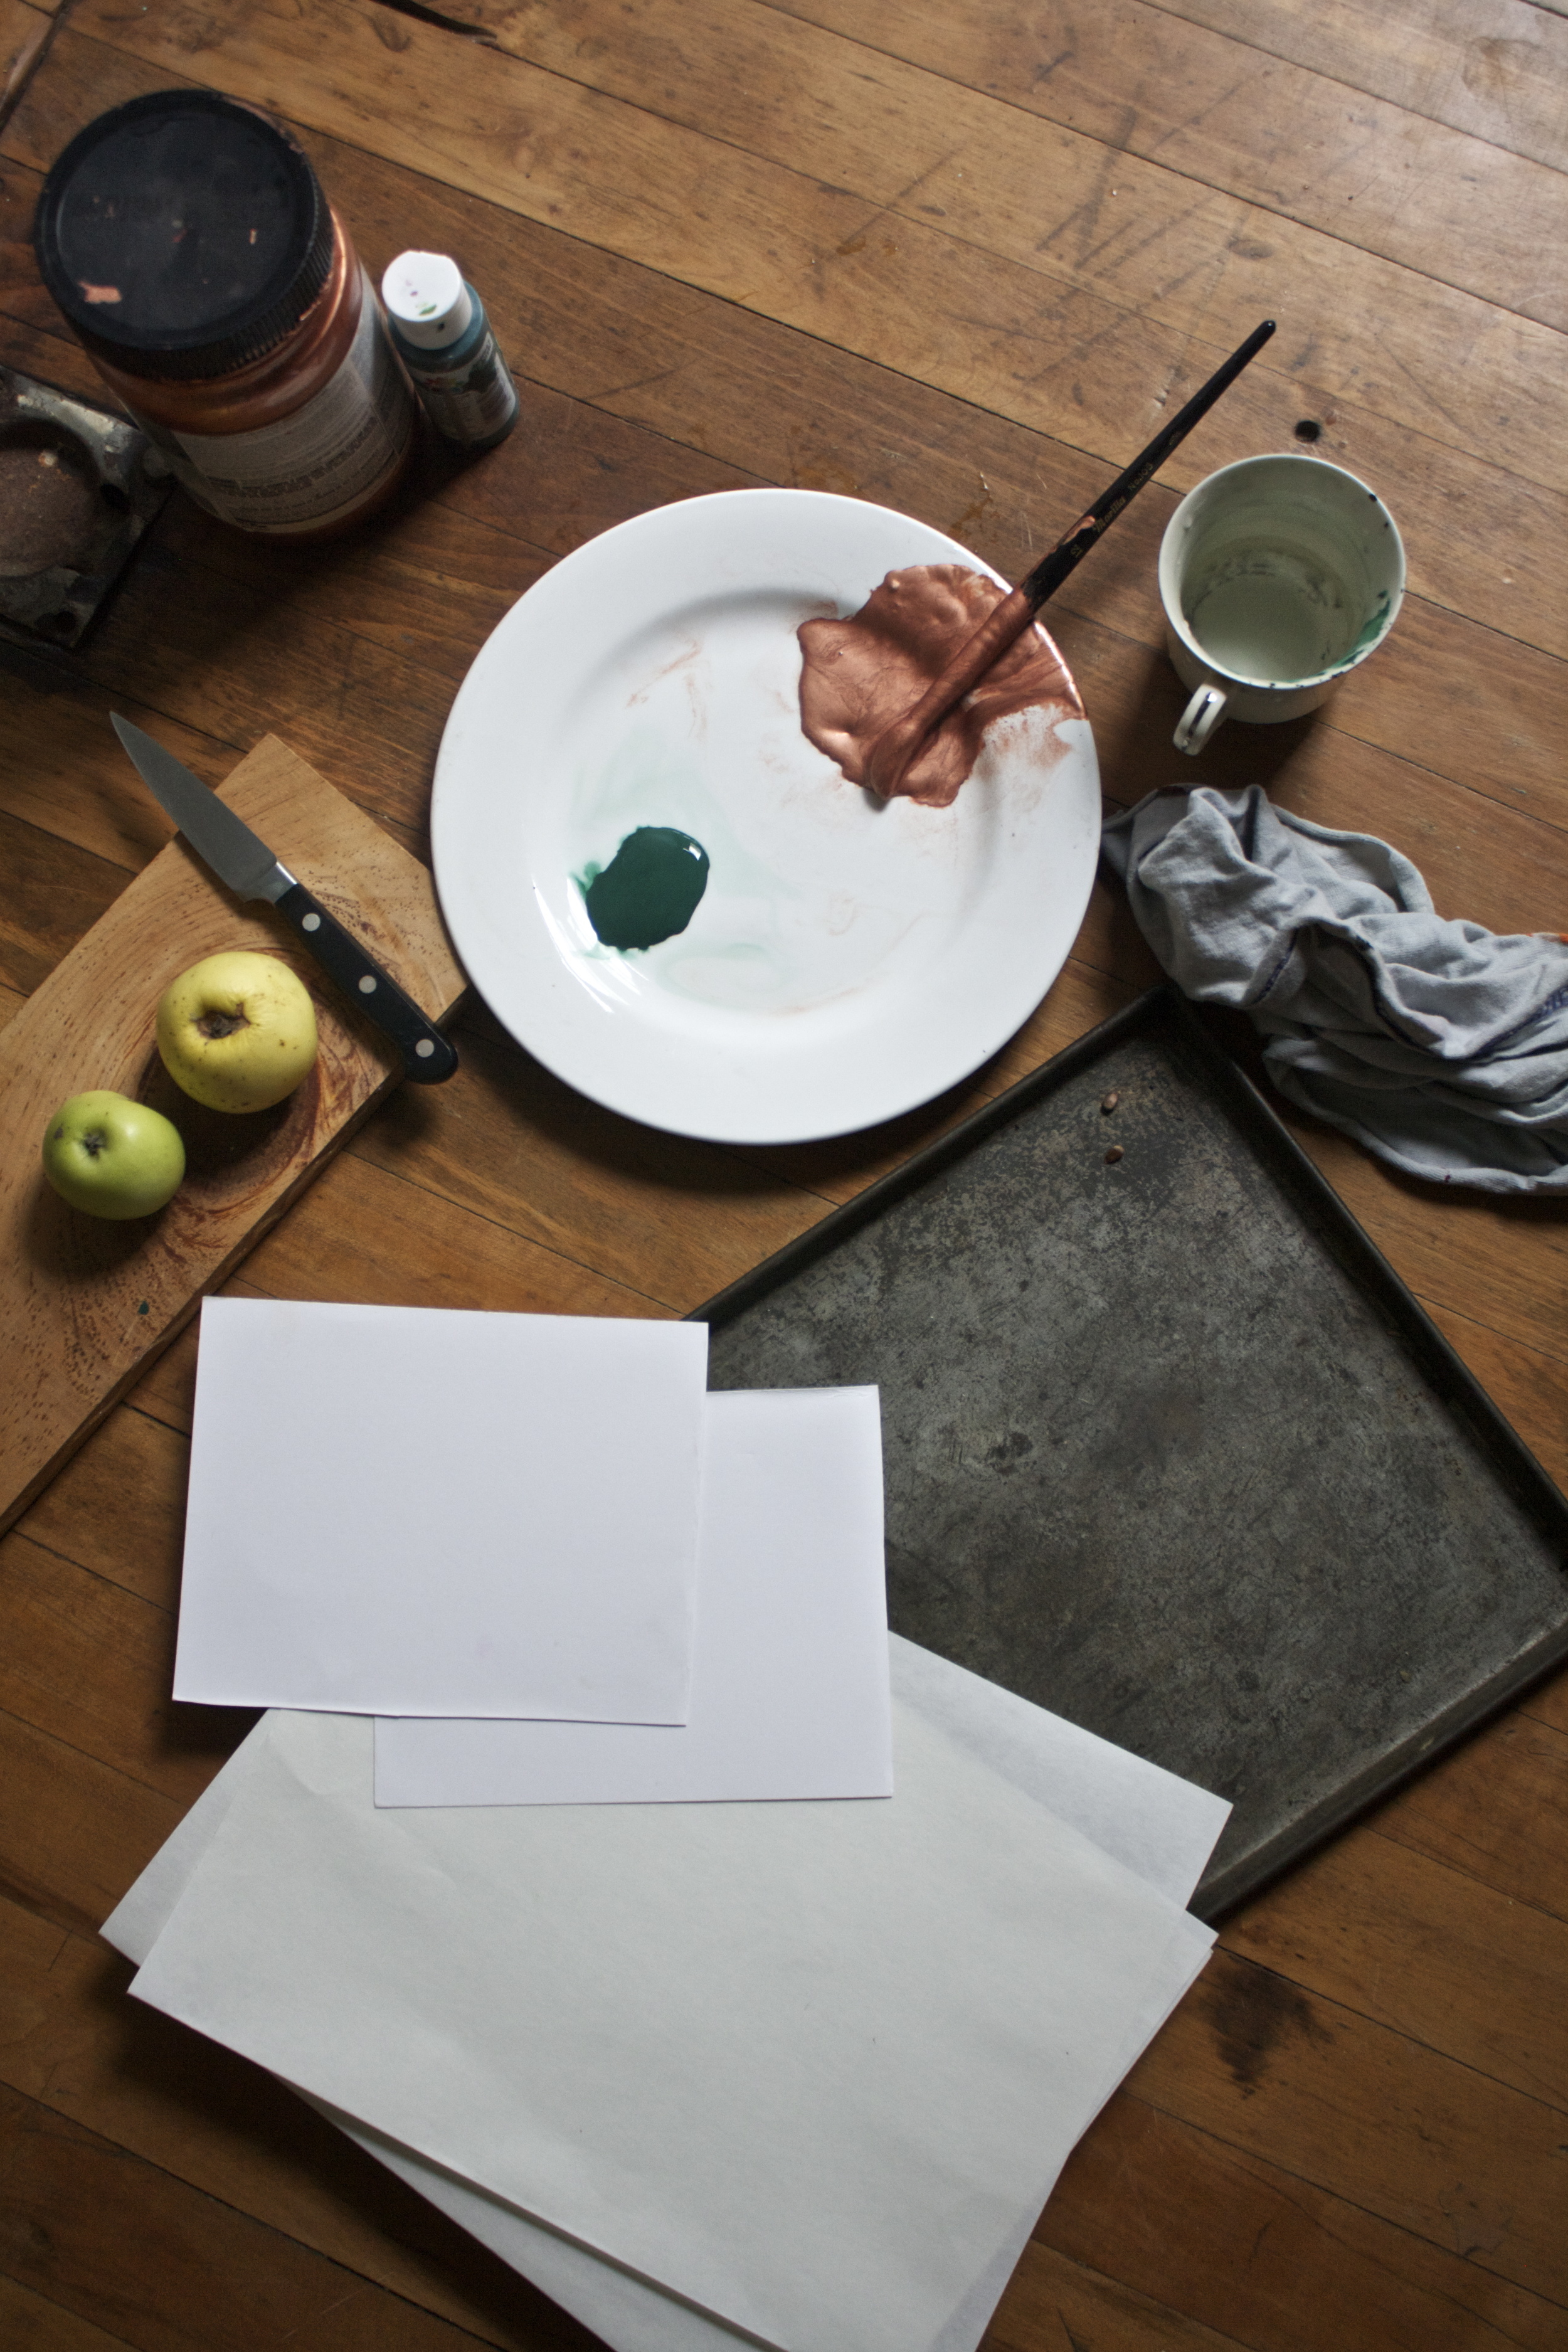
Things you are going to need..

  • apple(s).. And the apple that I use are fallen apples.. so I don't feel bad about using them.
  • paper
  • a knife (or something sharp enough to cut the apple)
  • paint ( I used cheap-o acrylic paint, but any paint would work)
  • paint-brush
  • Cup of water (to rinse brush)
  • rag (to wipe hands)


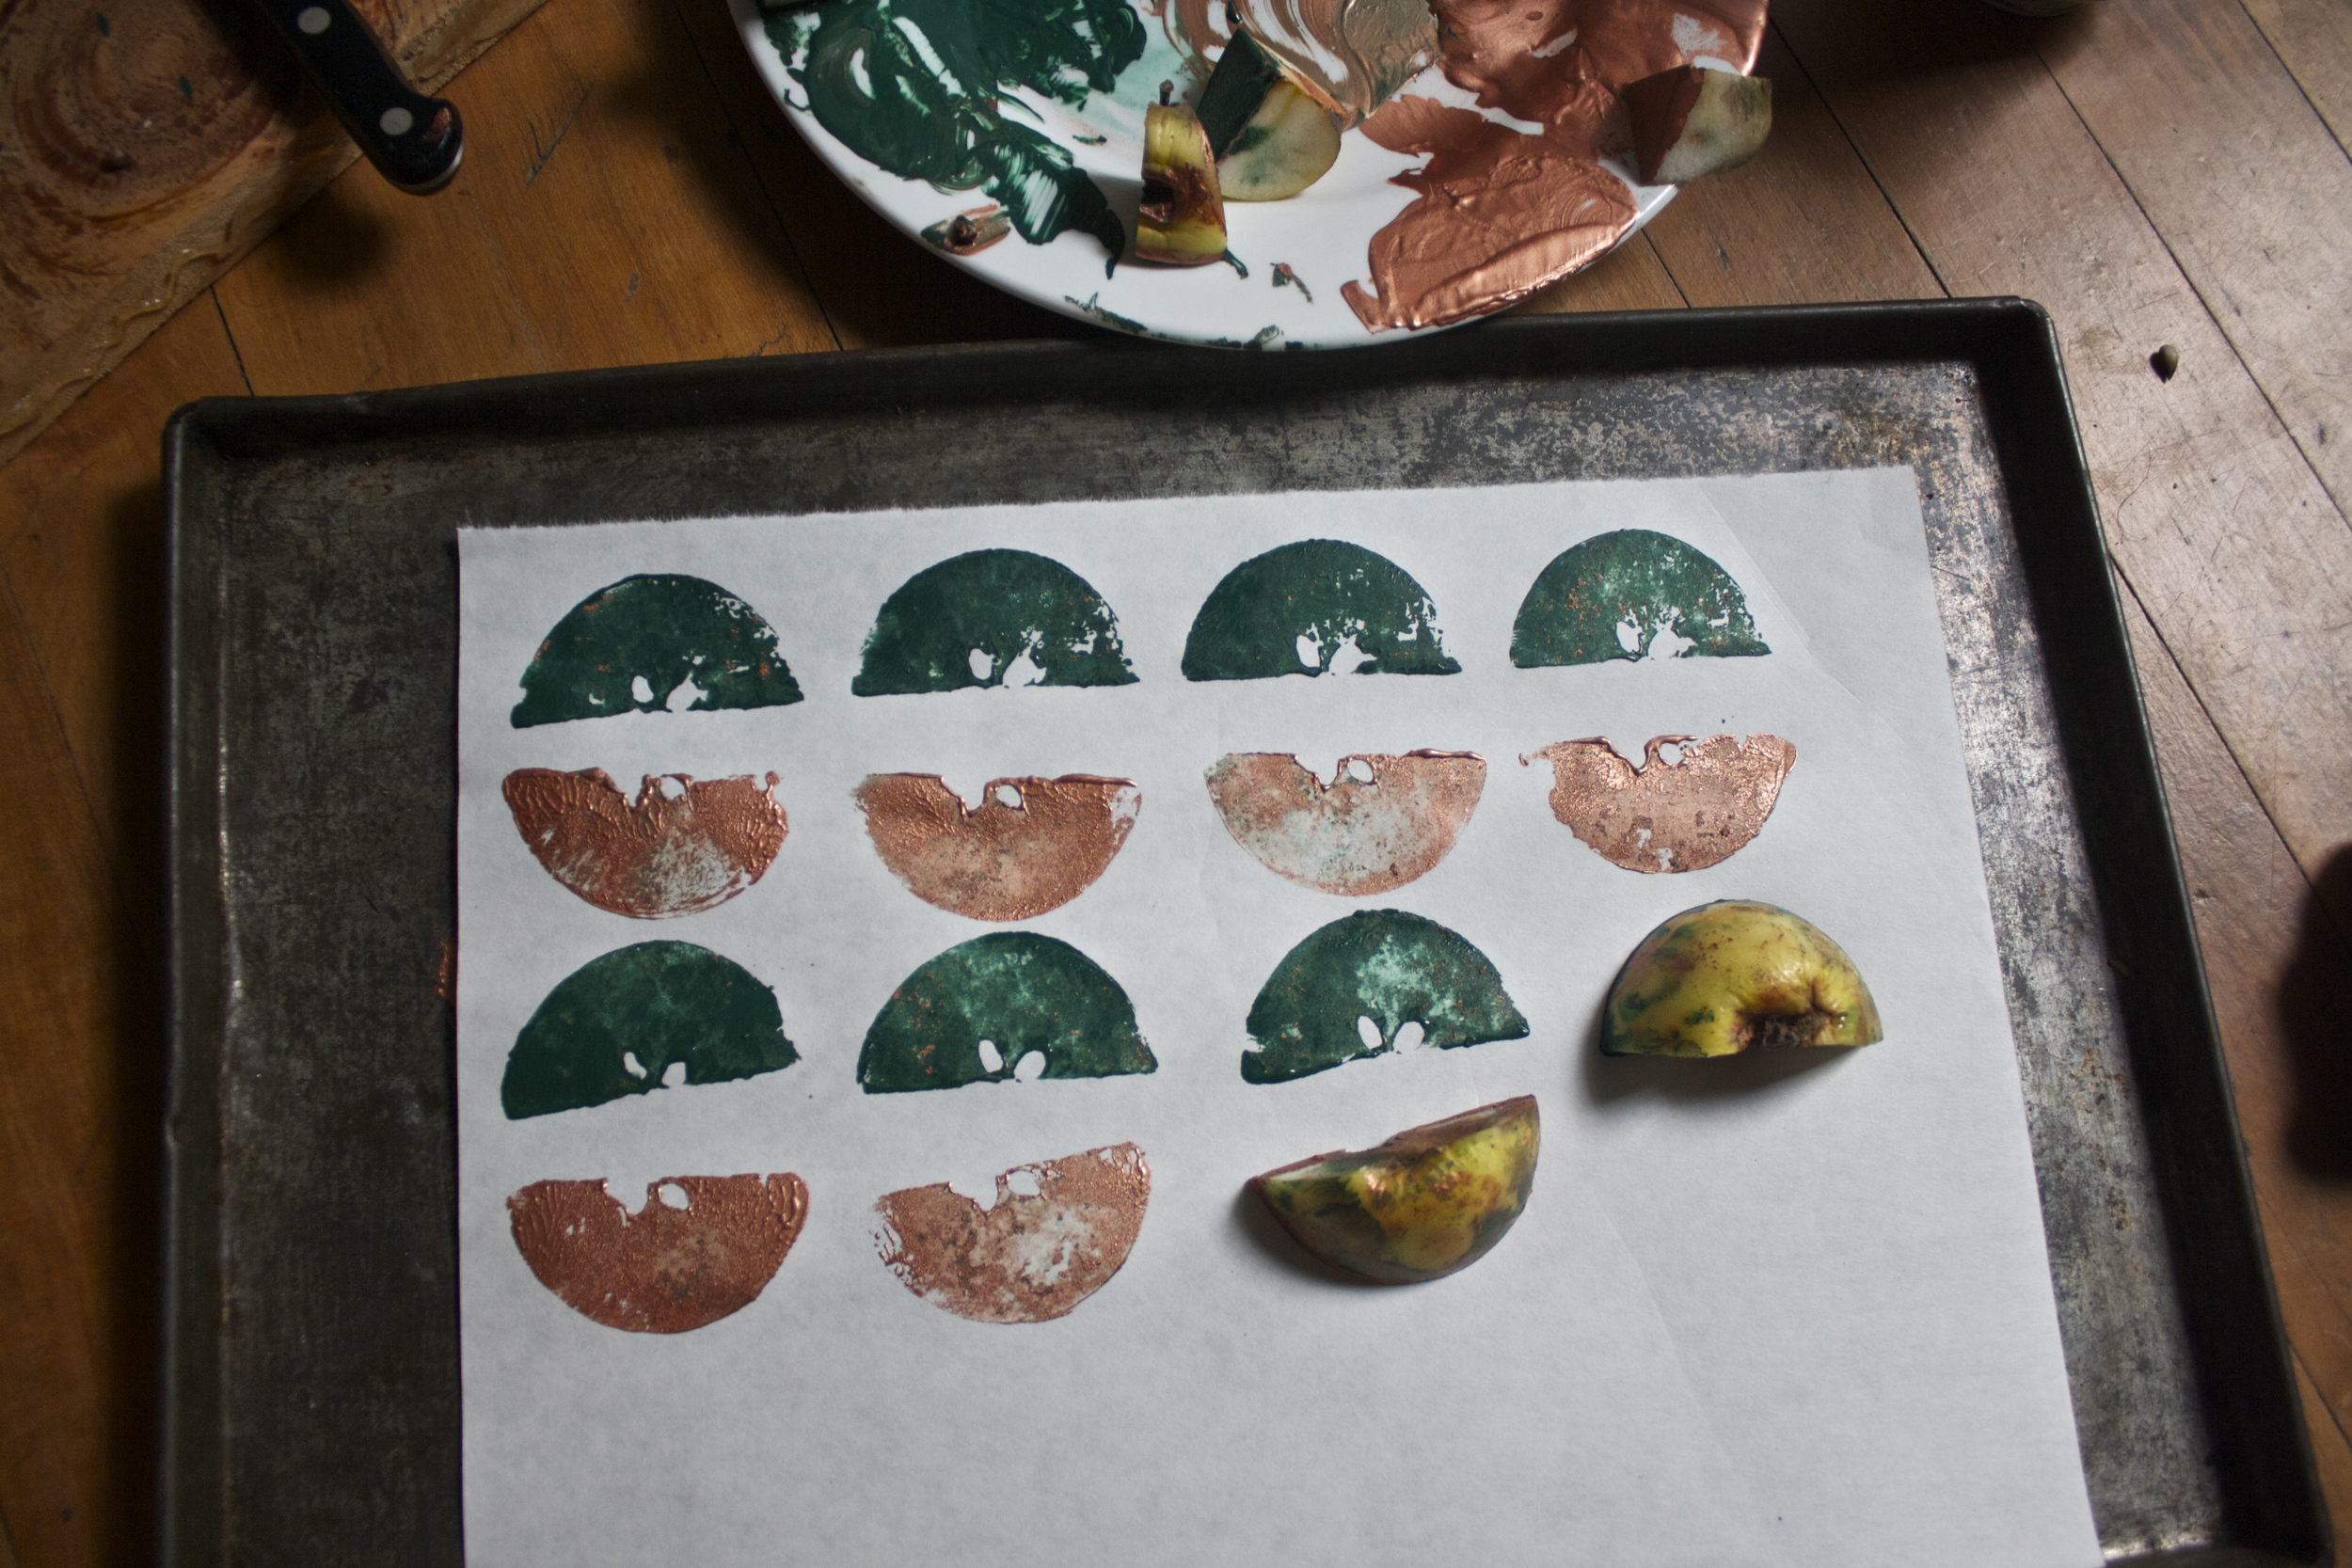
Start by slicing your apple. If you cut in in half, you get the cool star shape in the middle, or just chop it into cool shaped pieces. 

Apply paint to the apple. I found that if I dipped the apple, then remove to much excess paint with a paint brush to work the best for me.. My suggestion is to play around with what works best for you.

Apple goes paint side down on paper… and that's how it goes. Now repeat, either with the same shape, or use a new one. OR change up the color.. it's all how you want to do it. 

If 

. I got a little excited with my fist print turned out a little chaotic(note print above) but then I rained myself in. 

And did a few more simpler designs.   

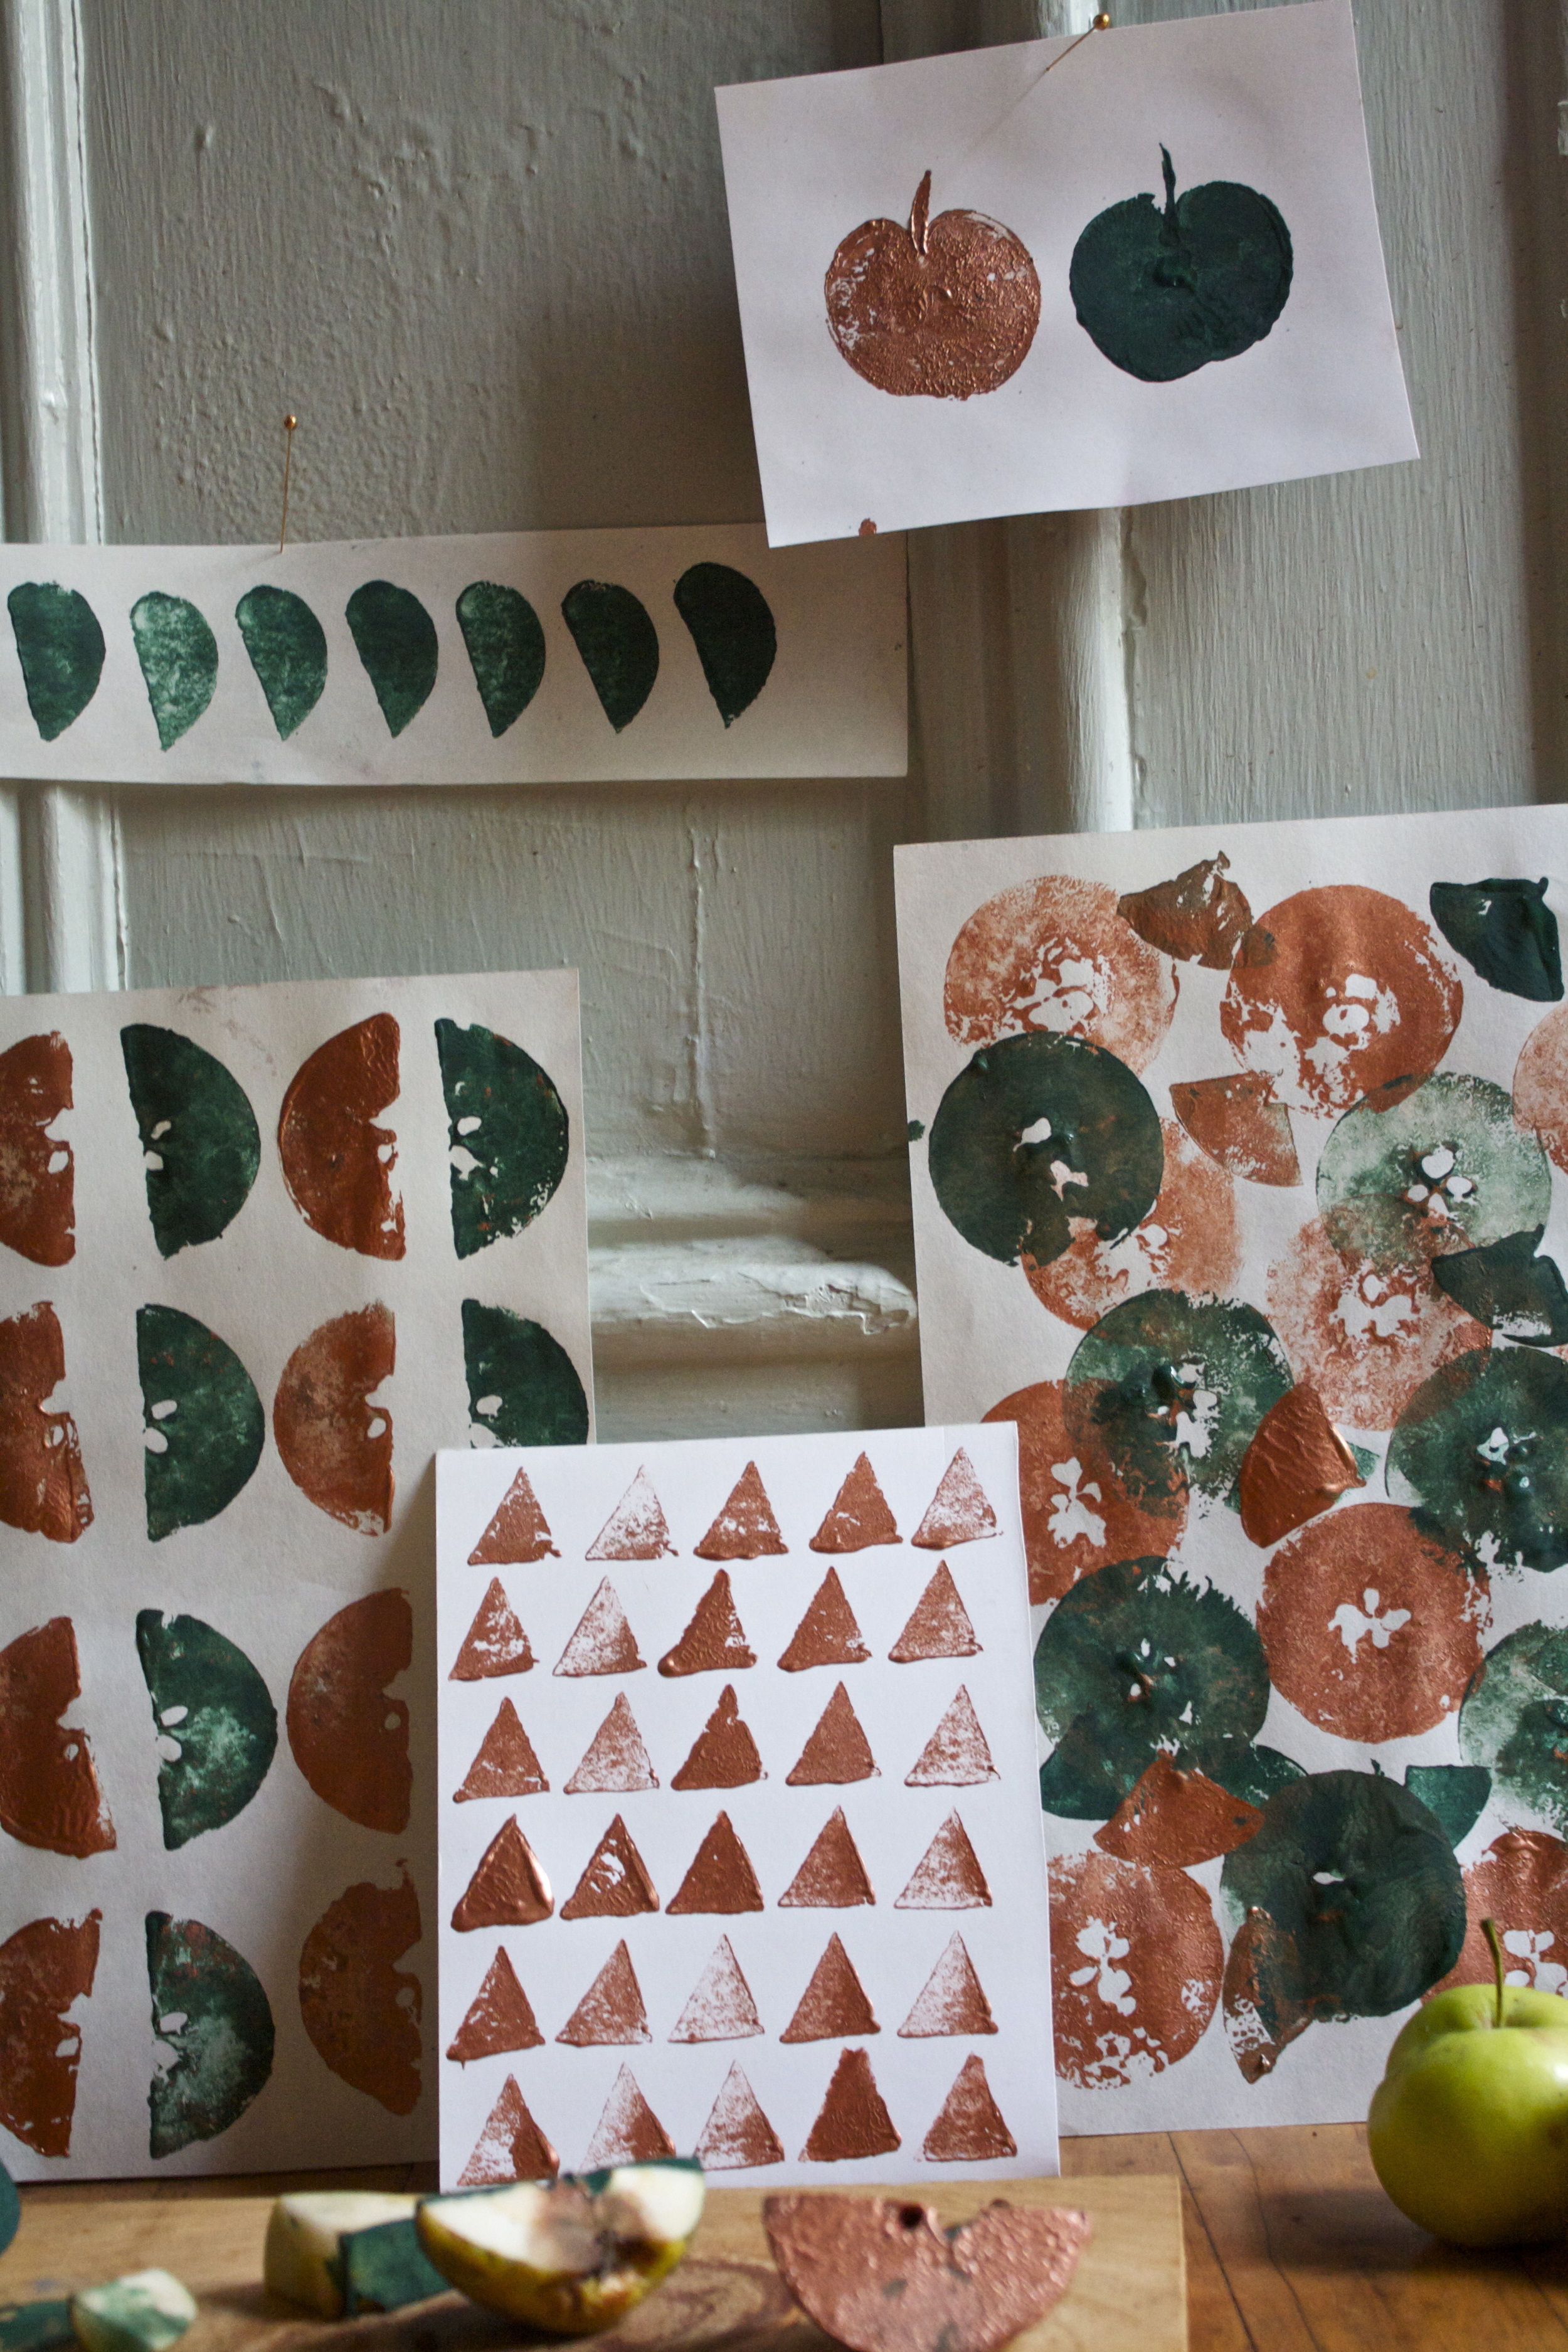
But do it anyway you want cause it's going to look cool no matter what.

Have fun!

-C

In crafts, arts, DIY Tags apple, printing, art project, kid friendly, family, art, craft, paint, easy
Comment

Butternut Apple and Onion Galette

October 7, 2015 Colleen Stem
IMG_9680.jpg
IMG_9657.jpg

Fall is all up in here!. The air is so nice and crisp and the leaves are changing to the prettiest colors. I gots my pumpkins, an abundance of apples and squashes (our table is forverver overflowing with some type of squash) and am wearing all of my favorite sweaters. 

I am a happy lady here!

And this happy lady just wants to sit on her butt and knit.

But first, dinner. And my thought are. "What to do that doesn't include doing much of anything (especially dishes) and maybe even has the oven on for a little extra warmth?" See here, I am a thinker. I knew I  had a single pie dough in the freezer (you should always have a pie dough in the freezer), a table full of the loveliest produce. So this happened. And the mr ate it, and he was all like "Whoa".  And I was like,"yeah dude, I know."

A Ssuper fall galette.. and I still had time for my knitting and my butt. 

Like Whoa!

The stuff. A single crust pie dough, a butternut squash, an onion, and a honey crisp apple.(there are 2 shown, but I only needed on1)  Also going to need a tiny bit if olive oil and a pinch of salt

Preheat oven to 375.

Roll your chilled dough out  on a lightly floured surface and place onto a large baking sheet. Stick it in the fridge to rest for a few minutes.

Grab your pretty things

And slice them up into 1/4 inch-ish thick srounds.

IMG_9610.jpg
IMG_9614 2.jpg
IMG_9621.jpg

Time to compile… A layer of overlapping squash. (Make sure to leave inch-ish boarder)  Then a layer of the apples, and lastly the onion, which I think looks so pretty as ringlets, but you could keep in rounds if you wanted. 

Fold the sides and pinching dough to keep it secure. Drizzle the top, and the crust, with a tiny bit of olive oil and sprinkle with a picnh of salt.

Now into the oven it goes!

And  after about 45 minutes when the dust is perfectly golden and the stuff inside is nice and tender. Remove (turn off the oven) and let cool

And there you have it.. A ode to fall in flavors and colors..

Have a great day… Eat lots of fall food!

-C


Butternut Apple and Onion Galette

  • 1 single pie dough (recipe here)
  • 1 small butternut squash
  • 1 medium sweet onion
  • 1 large honey crisp apple
  • olive oil
  • salt

Preheat oven to 375.

Roll out chilled pie dough  on a lightly floured surface to about a 12-14 inch round (ish) and place on a large baking sheet and stick in the fridge.

Grab the squash and cut the neck off the bottom. Save the bottom for later (maybe soup?) and slice up the neck into 1/4 inch thick rounds.  Now take the onion and apple and slice those into 1/4 inch thick rounds too. (the seeds and the stem will just fall our.. but if they don't, just poke them out with a knife)

Grab the dough from fridge and start to layer. First a layer of squash, leaving around an 1.5 inch boarder. You want the pieces to overlap,but don't double layer. Next the apples go on top of the squash, again overlapping. Finally the onion. I liked the look of the individual ringlets… but you can do thick rounds if you want. Fold over the sides of the dough, pinching it in wherever it needs to be pinch until all the stuff is snug. Drizzle with a tiny bit of olive oil  and rub a little oil on the outside crust as well. Sprinkle with a pinch of salt and stick into oven.

Bake for about 45 minutes or until crust is a nice light golden brown and the stuff inside is tender.

Remove, let cool for a few minutes and eat your heart out.

In Dairy Free, breakfast, recipes, Savory, Vegan, Sweets Tags galette, butternut, apple, onion, tart, rustic, vegan, fall, Butternut Apple and onion Galette
Comment

Apple Muffins with Peanut Butter Streusel

September 25, 2015 Colleen Stem
IMG_9218.jpg
IMG_9206.jpg

I am a firm believe in the healing power of food. Whenever anyone (that I like) gets some sort of medical percedure, I like to bring them something home cooked, weather it be dinner or a baked good,  you know, so they don't have to worry about starving to death. ( no one I have ever visited was ever starving) Food helps you heal and food makes you happy so bringing a healing person some food only makes sense to me. So when the mr's aunt recently had part of her knee drilled out, cleaned out and stuffed with human cadaver bone marrow ( pretty cool))  I baked her, her husband, and her kiddos some muffins.

Why muffins? Well I was thinking soup or a casserole, but the mr suggests I do a baked good instead. I was going to go with a cake, but then that can get kind of annoying and troublesome with a couple of kids. Cupcakes are to cheesy and don't send the right message of get well, (cupcakes say, run around.. sugar high!), a pie would have been nice, but I am not sure if the kids like pie. Then there are muffins.. muffins are perfect. Not terribly packed full of sugars and crap. A little more hearty, can be eaten as a snack, a dessert, or a quick breakfast, and keep for a good while.  I made them apple cause I gots a shit ton of apple and peanut butter cause protein is good and it just makes sense. 

Apple+peanut butter are BFF's and really, what human doesn't like peanut butter? 

So his aunt and family got the muffins, and the mr only got 1. I think he was really disappointed that I didn't save him another one or make more.  

Oh well. I guess I can make them again, if he is lucky. 

And I feel like I should say get we'll soon Sarrh, but this last is a badass and is already doing great,so I will just say, Hi Sarah, looking good!

Now to the muffins!

The stuff. Dry ingredients are flour, baking packing soda cinnamon and salt. Then we have applesauce, breon sugar, oil, vanilla extract and vinegar. For the streusel.... peanut butter, brown sugar, flour, salt and earth balance. (you could use butter if you want)

IMG_9113.jpg
IMG_9110.jpg

The streusel stuff goes into a bowl and gets mixed until it turns into a crumbly, soft dough and set aside.

Whisk together the flour, baking soda, cinnamon and salt in one bowl, then in another bowl, mix together he applesauce, oil, vanilla,  sugar and lastly, the vinegar. 

IMG_9113.jpg

Fold the wet into the dry, mixing just enough until incorporated. And remember….DON"T OVERMIX!

Now scoop batter into muffin pans. Use liners, or not… I usually don't but figured that lined muffins travel and keep a little better… plus I just found a bunch when I was cleaning out a kitchen drawer.

Streusel top those muffins!

A view from the side… Use it all, don't be shy, the crumble is there to be eaten… Oh, and lesson learned by me. Next time I make these I will give the streusel a little pat into each muffin, to really secure it to the tops. So yeah, you should do that.

Now into the ove they go!

Pull out to cool when the streusel is browned, the muffins are poofed, and a tester poked comes out clean.

The smell alone will make your mouth water and you tummy growl. 

A muffin win!

Happy Friday!  Do lots of fun fall stuff this weekend!

-C


Apple Muffin with Peanut Butter Streusel

Makes 12 muffins


 Muffin Stuff

  • 2 1/4 cups all-purpose flour
  • 2 teaspoons baking soda
  • 1 teaspoon salt
  • 1 teaspoons ground cinnamon
  • 2 cups applesauce* (recipe here)
  • 2/3 cups brown sugar
  • 1/2 cup oil
  • 2 tablespoons apple-cider vinegar
  • 1 teaspoon pure vanilla extract


Peanut Butter Streusel Stuff

  • 1/2 cup flour
  • 1/3 cup peanut butter
  • 3 tablespoon  brown sugar
  • 2 tablespoons  earth balance

* IF you are using homemade applesauce (you should!) A little chunky is good. Just make sure that there are no huge chunks. Also, if you applesauce is really thick, just add a bit of water to think it would. It doesn't have to be pourable, but it should have a bit of water content to it. 

Turn oven on to 350 and either grease or line a 12 hole muffin pan

In a bowl, combine all of the streusel stuff unit it becomes a kind of crumbly dough and set aside.

In a large bowl, whisk together the flour, baking soda, salt, and cinnamon. In a separate bowl, mix together the applesauce,, brown sugar, oil, vanilla,, and vinegar. Pour the wet into the dry and fold in until  just fully incorporated, br careful to not over mix the batter.

Scoop equal amounts of batter into you muffin tin. Grab the streusel l topping and evenly distipute that all over the muffins, giving the topping a soft pat to make sure it stays put while baking. 

Place muffins in oven and bake for about 30 ish minutes, or unlit the streusel is browning, the muffins are poofy and a test comes out clean.

Remove from oven, pop muffins from tin, and let cool on a rack.

Serve as soon as you want. A glass of milk (plan, nut or cow) or a big old cup of joe goes really well with this muffin situation. 


In Dairy Free, breakfast, recipes, Sweets, Vegan Tags vegan, apple, applesauce, peanut butter, streusel, peanut butter streusel, breakfast, desserts
Comment
← Newer Posts
 

https://thelovelycrazy.squarespace.com/config#/|/about/

Me. Food Maker.Food eater. Woo HOO!

STEM+NODE  SMALL BATCH AND ONE OF A KIND POTTERY

stem+node ceramics


____________________

Subscribe

GET NEW POSTS IN YO EMAIL

You are AWESOME!!!


@thelovelycrazy 2014-2021