• stem+node ceramics
  • HOME
  • Food Recipes
  • About
  • Contact
Menu

The Lovely Crazy

Street Address
City, State, Zip
Phone Number

Your Custom Text Here

The Lovely Crazy

  • stem+node ceramics
  • HOME
  • Food Recipes
  • About
  • Contact

Tahini Chocolate Chip Granola Bars

February 9, 2016 Colleen Stem
IMG_8923.jpg
IMG_8917.jpg
IMG_8917.jpg

I wanted to be in the kitchen so I asked the mr what he wanted me to make him. Anything he wanted, like a cake, or cookies, or donuts.

He asked for granola bars. (so cute)

I think the reason that he requested granola bars was that he knew I wanted to test out the golden syrup that I brought back from Ireland and I had mentioned that I was going to make myself some granola.  (not him, me) but I went with it. And really, I was excited to bust out the golden syrup.

Now what kind of granola bars was the question, but I didn't even ask him I just went with tahini chocolate chip. Tahini cause its amazing, chocolate chips because, just because. And the golden syrup. The bit of research that I have done on golden syrup had told me that this stuff is like glue (it really is) and that it can be used in lu of other binders that I would normally add to granola bars (like dates) It is pure can sugar that has been turned into a thick, golden syrup (hence the name) and has a more nutty, earthy flavor then just sugar, which went together quite nicely with the oats ans tahini in these bars. (next thing to try it with.. rice crispy treats!)

 So I got some kitchen time, the bars where made, the syrup was used, the mr was happy.

Win win win. WIN!

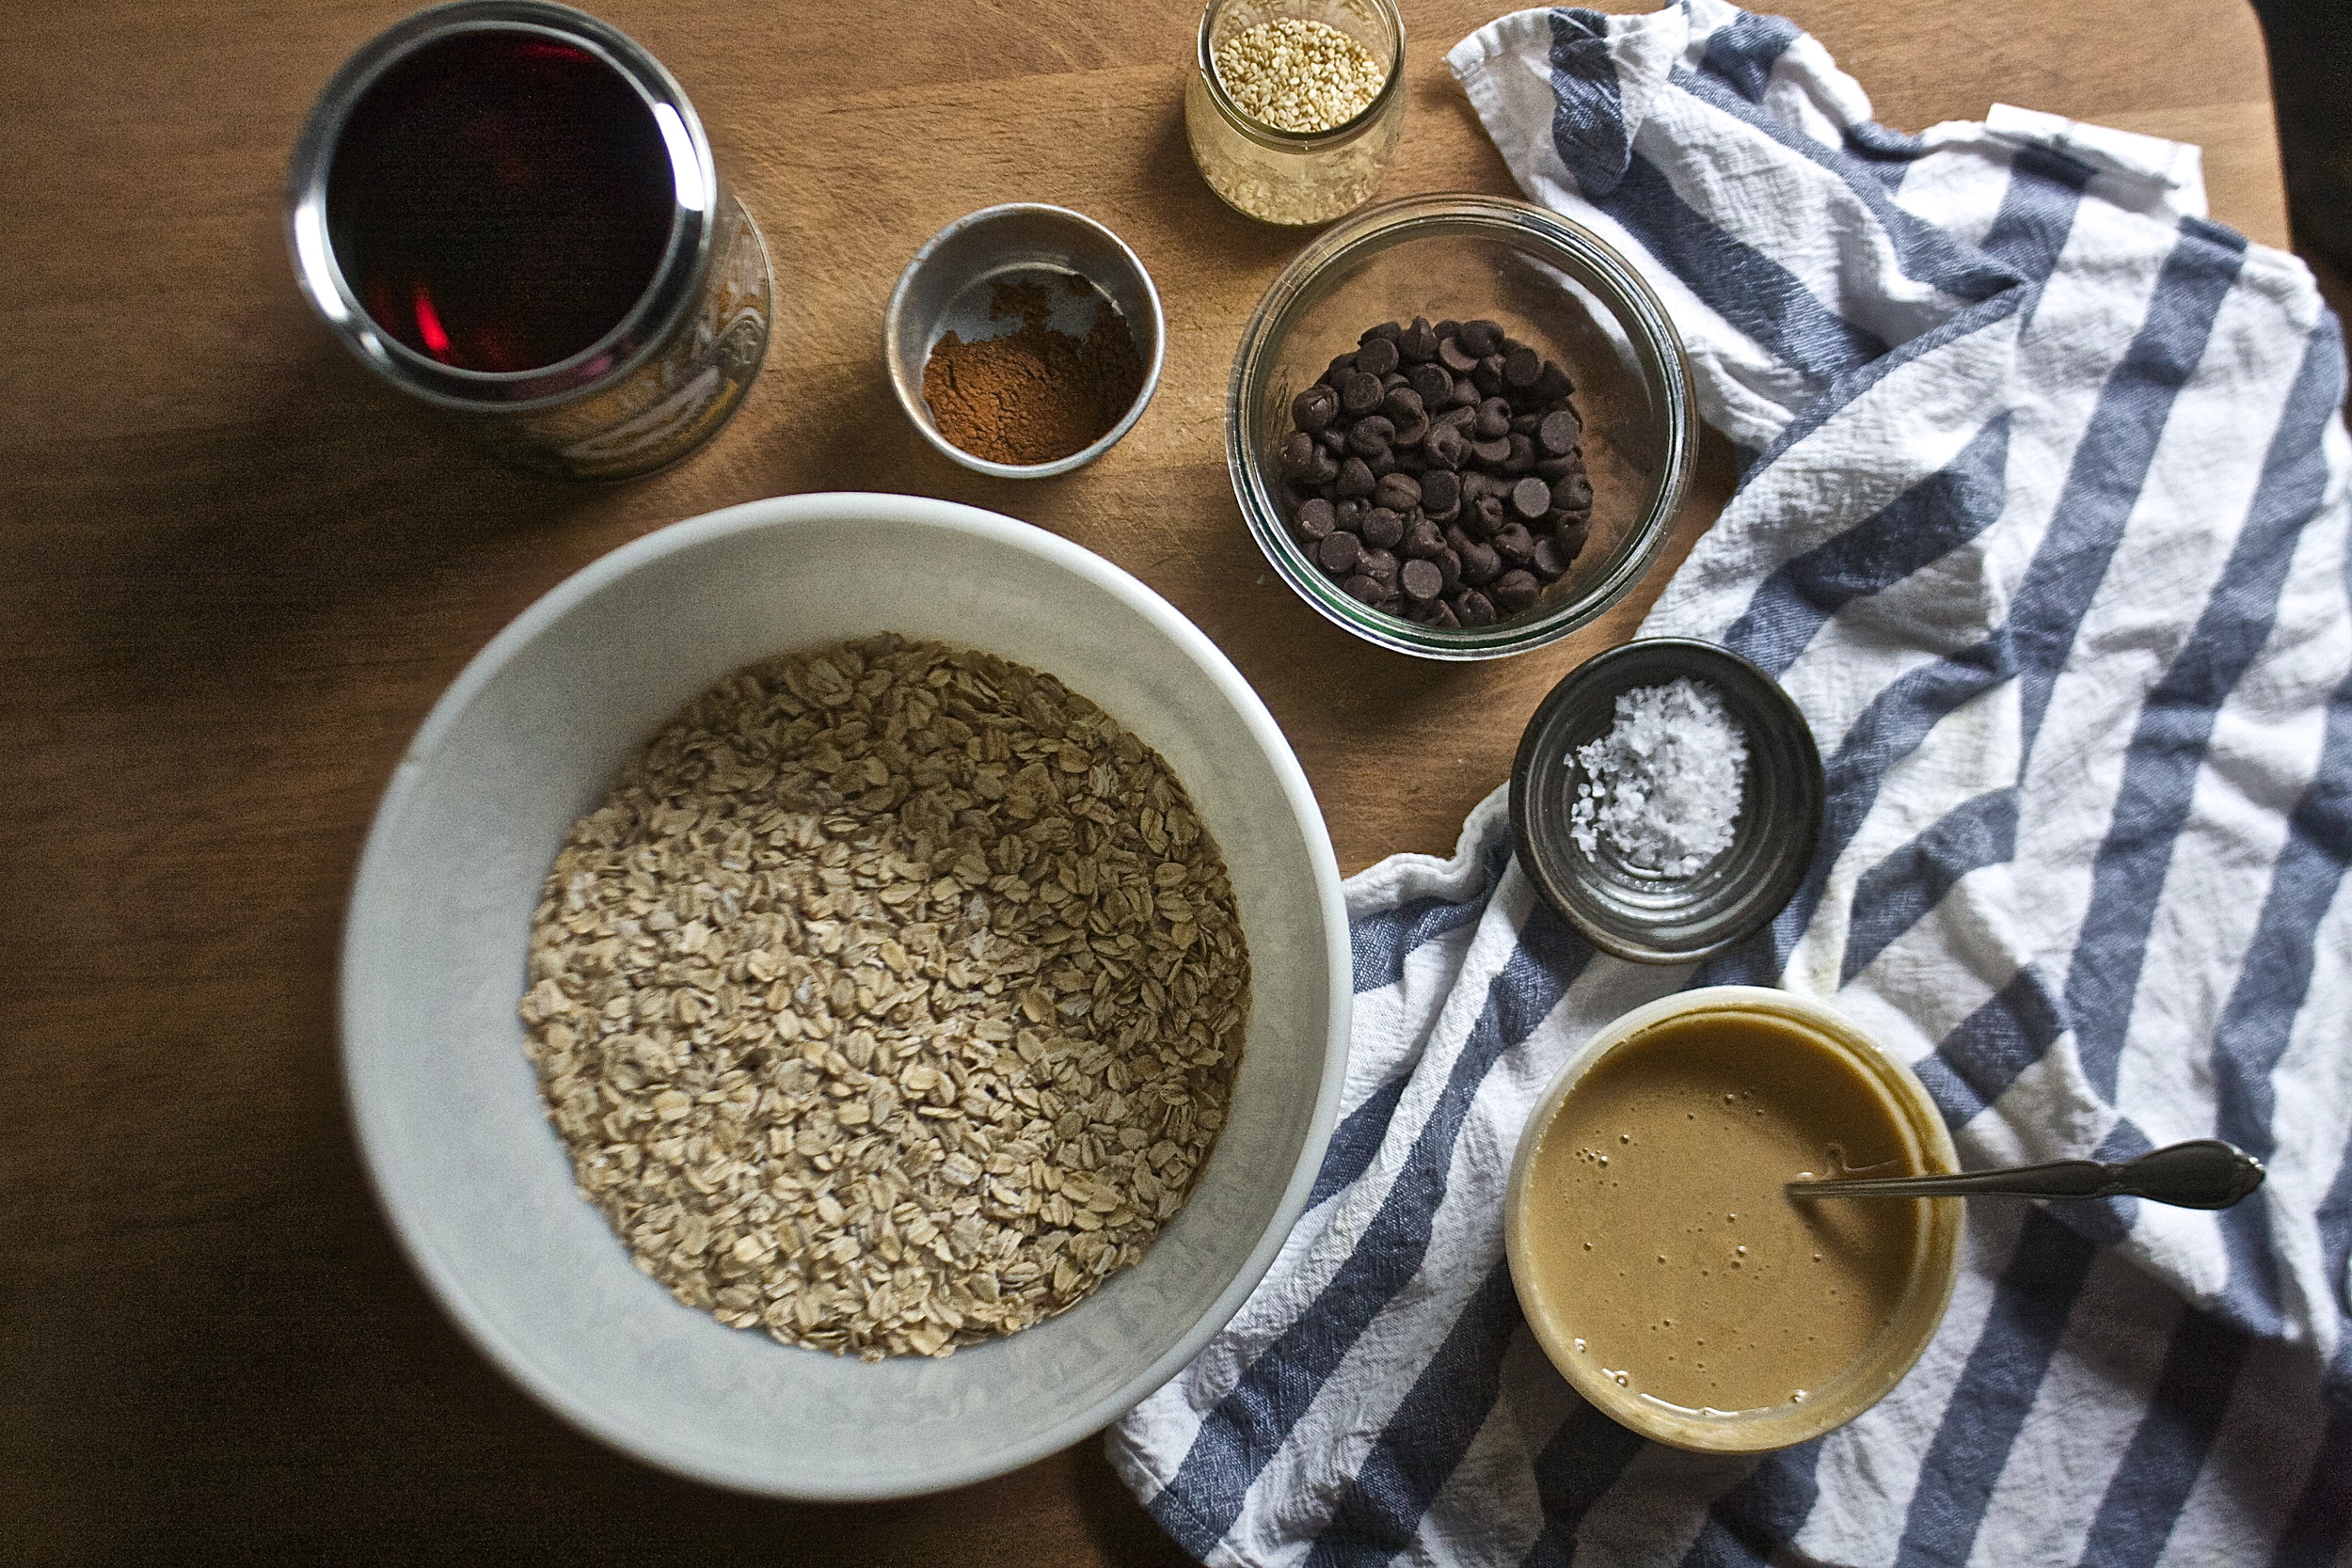
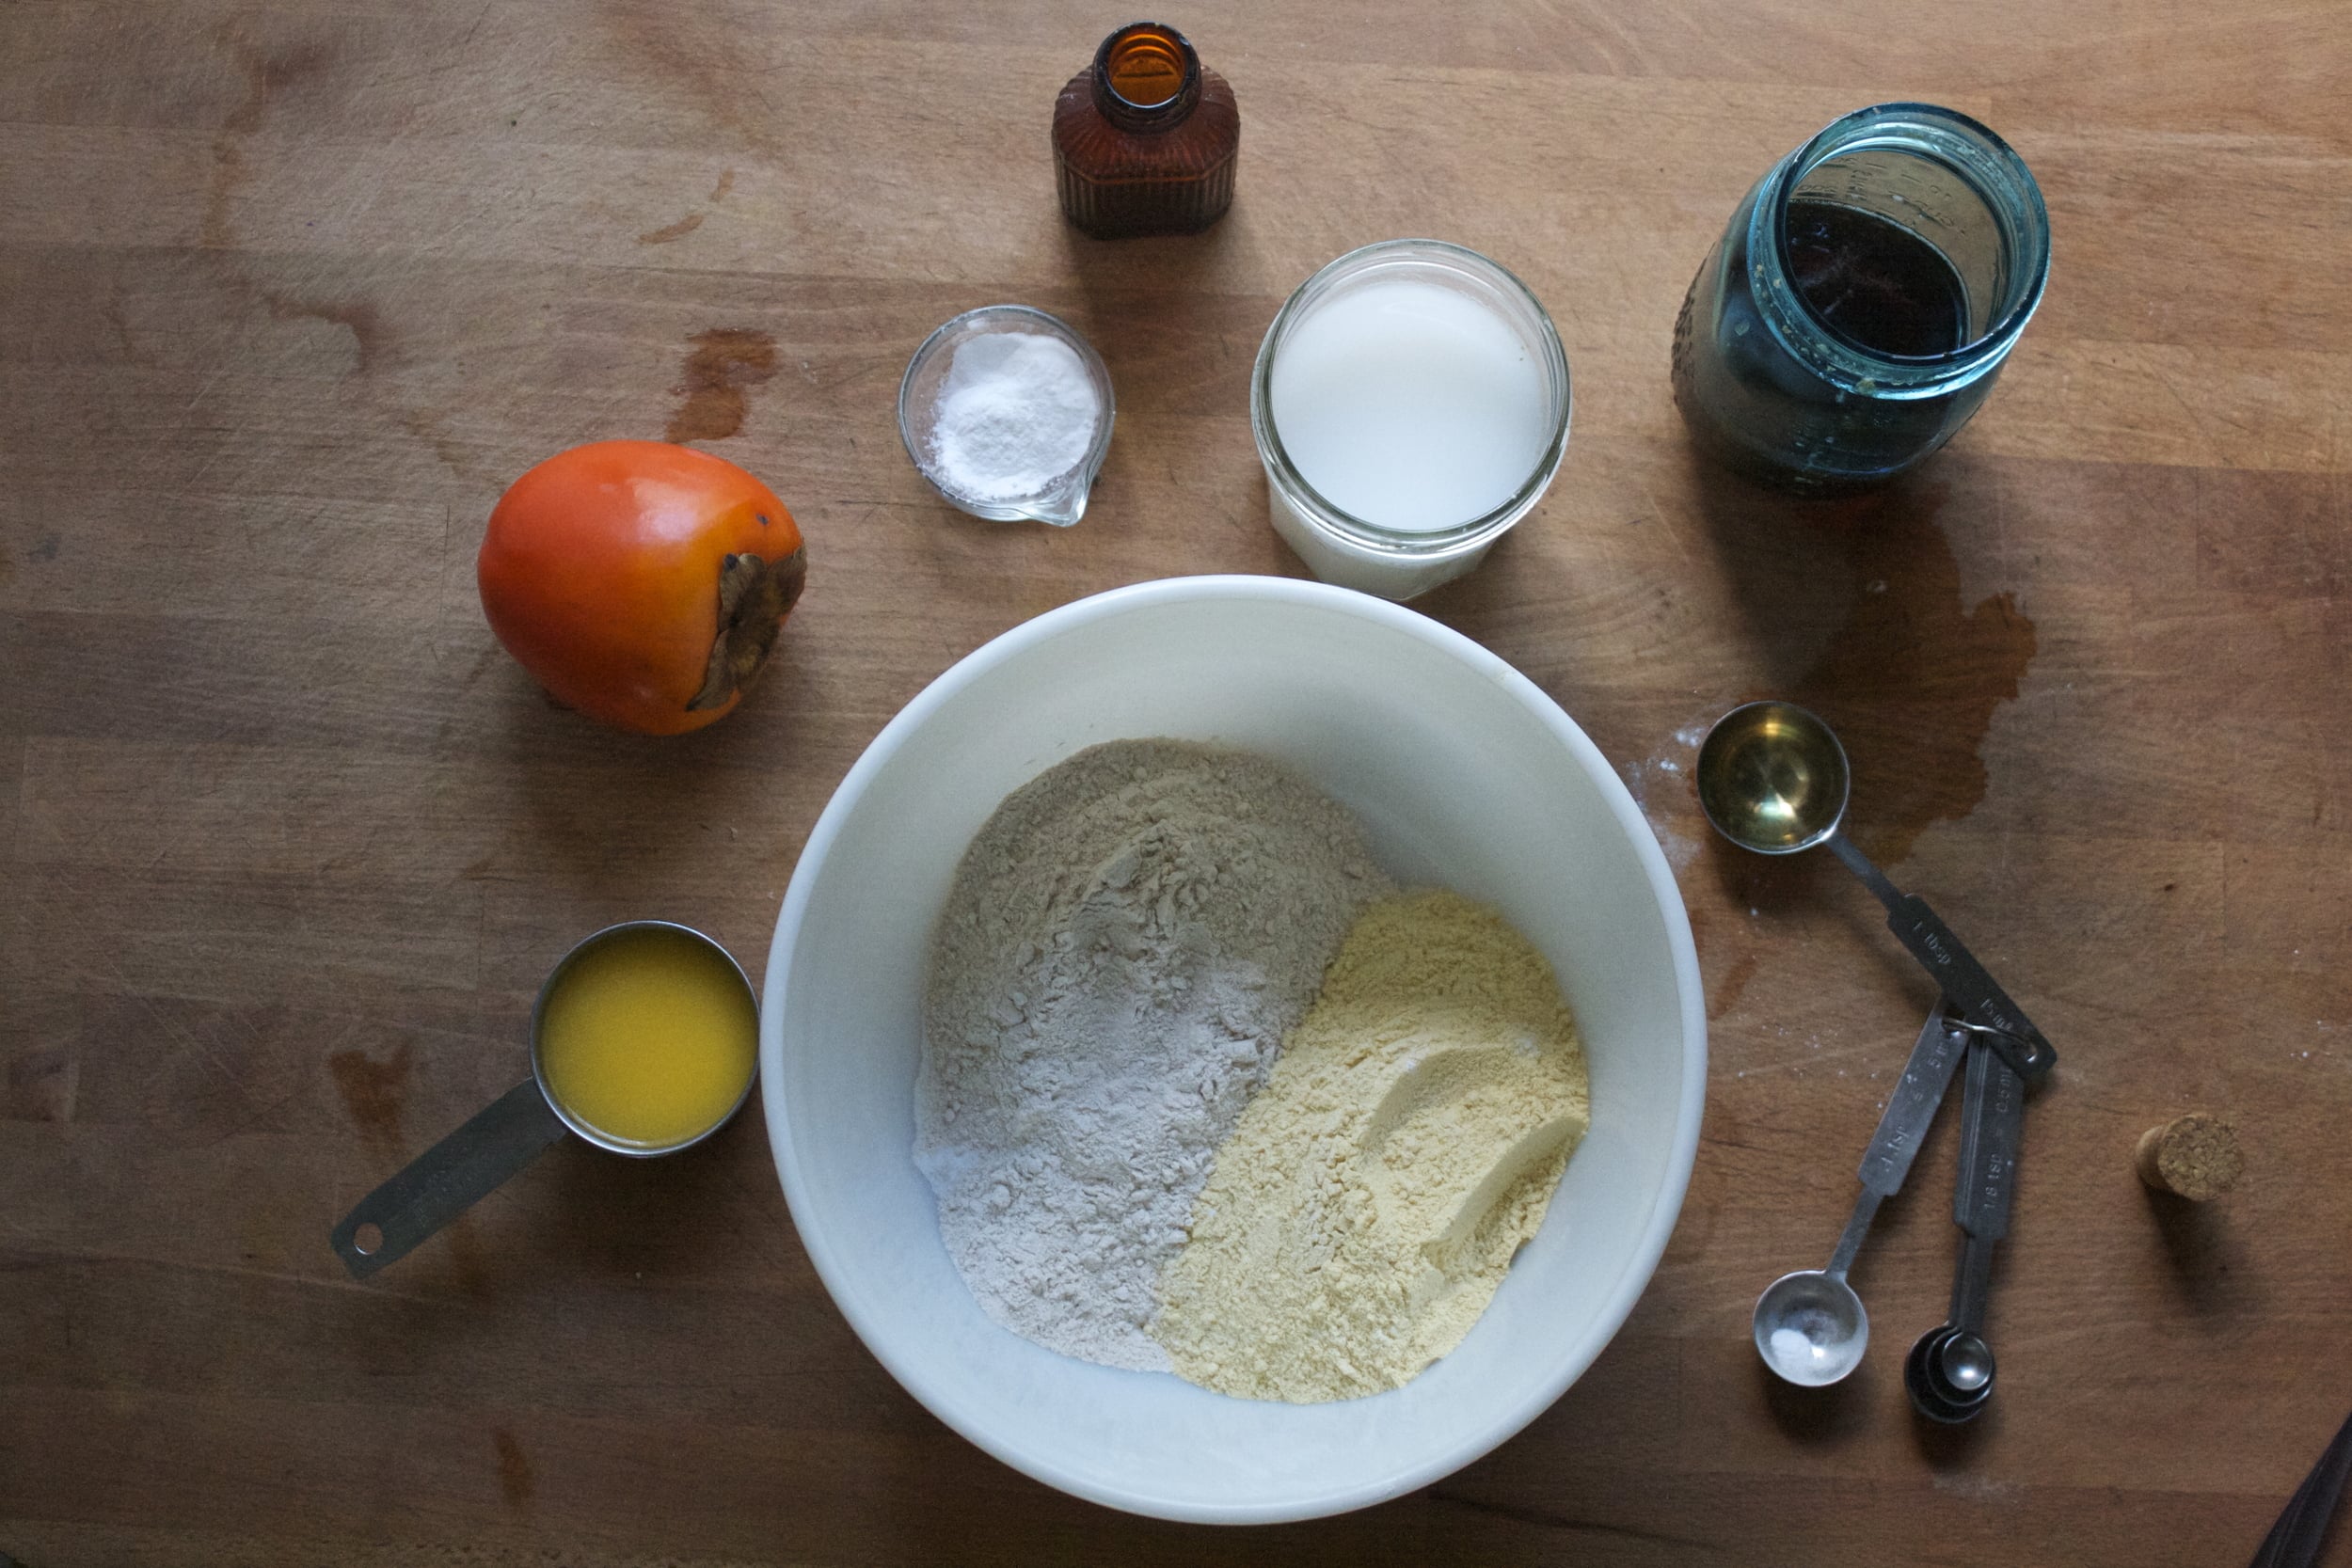
The stuff. Oats, tahini, golden syrup, cinnamon, sesame seeds, chocolate chips, and sea salt. Not a whole lot of stuff and nothing else is needed. But if you are feeling it, add some more. (cranberries, chopped dates, coconut, some nuts)

In a big bowl, combine the oats, cinnamon, sesame seed and chocolate chips.

In a separate (microwave safe) bowl or jar mix together the golden syrup and the tahini. Stick it in the microwave for 15 seconds, take it out, stir it, then another stick it in for another 15 seconds. You just want the mixture to be runny. Another way you could do this is on the stove top or, Like me, place jar in the oven and stir until loose. (I don't have a microwave and I didn't want to dirty a pot)

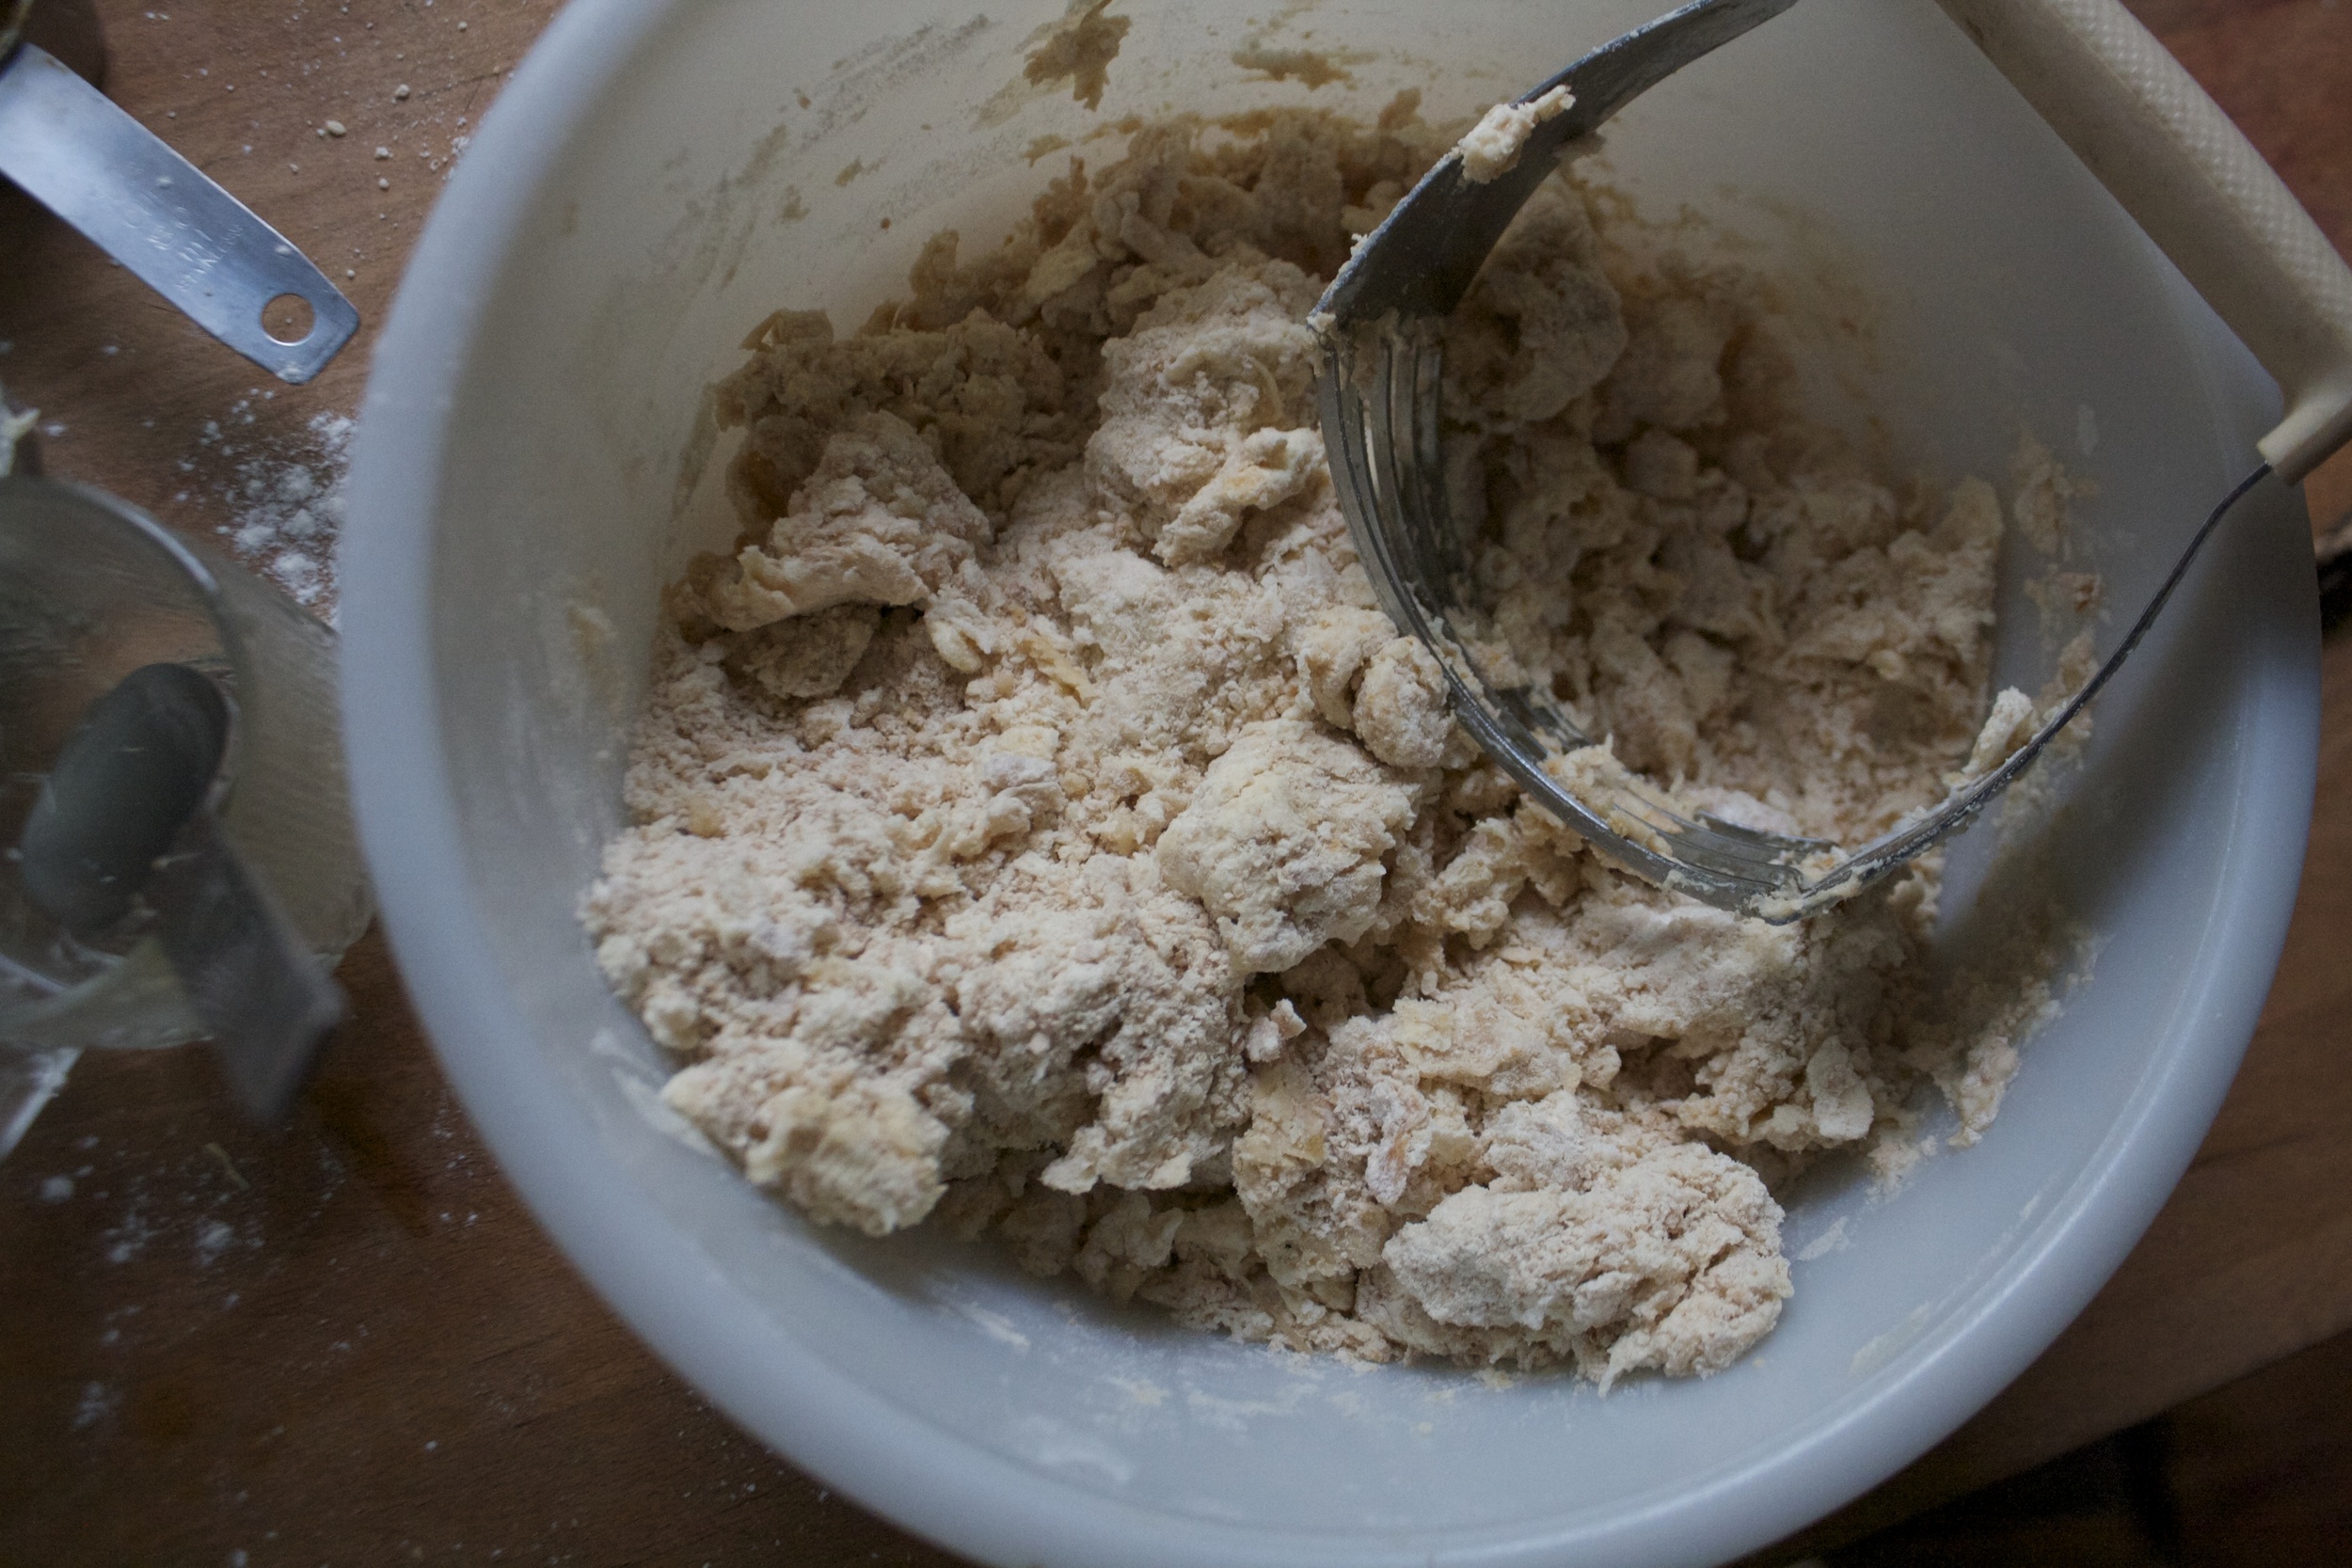
Pour the warm mixture into the oat mixture and stir until all the oats and stuff are all coated.

IMG_8874.jpg
IMG_8881.jpg

Dump the mixture into a parchment lined pan and press it down as hard as you can with your hands or a bottom of a glass

And optional, but really good, sprinkle the top with sea salt. (do not use table salt)

Now here is the deal. You can do one of two things. If you want a chewer granola bar, place these bars in the fridge for at least an hour until they set up and call them done. For a cruncher bar,  stick the granola into the oven for a little bit to give them a slightly crunchier texture

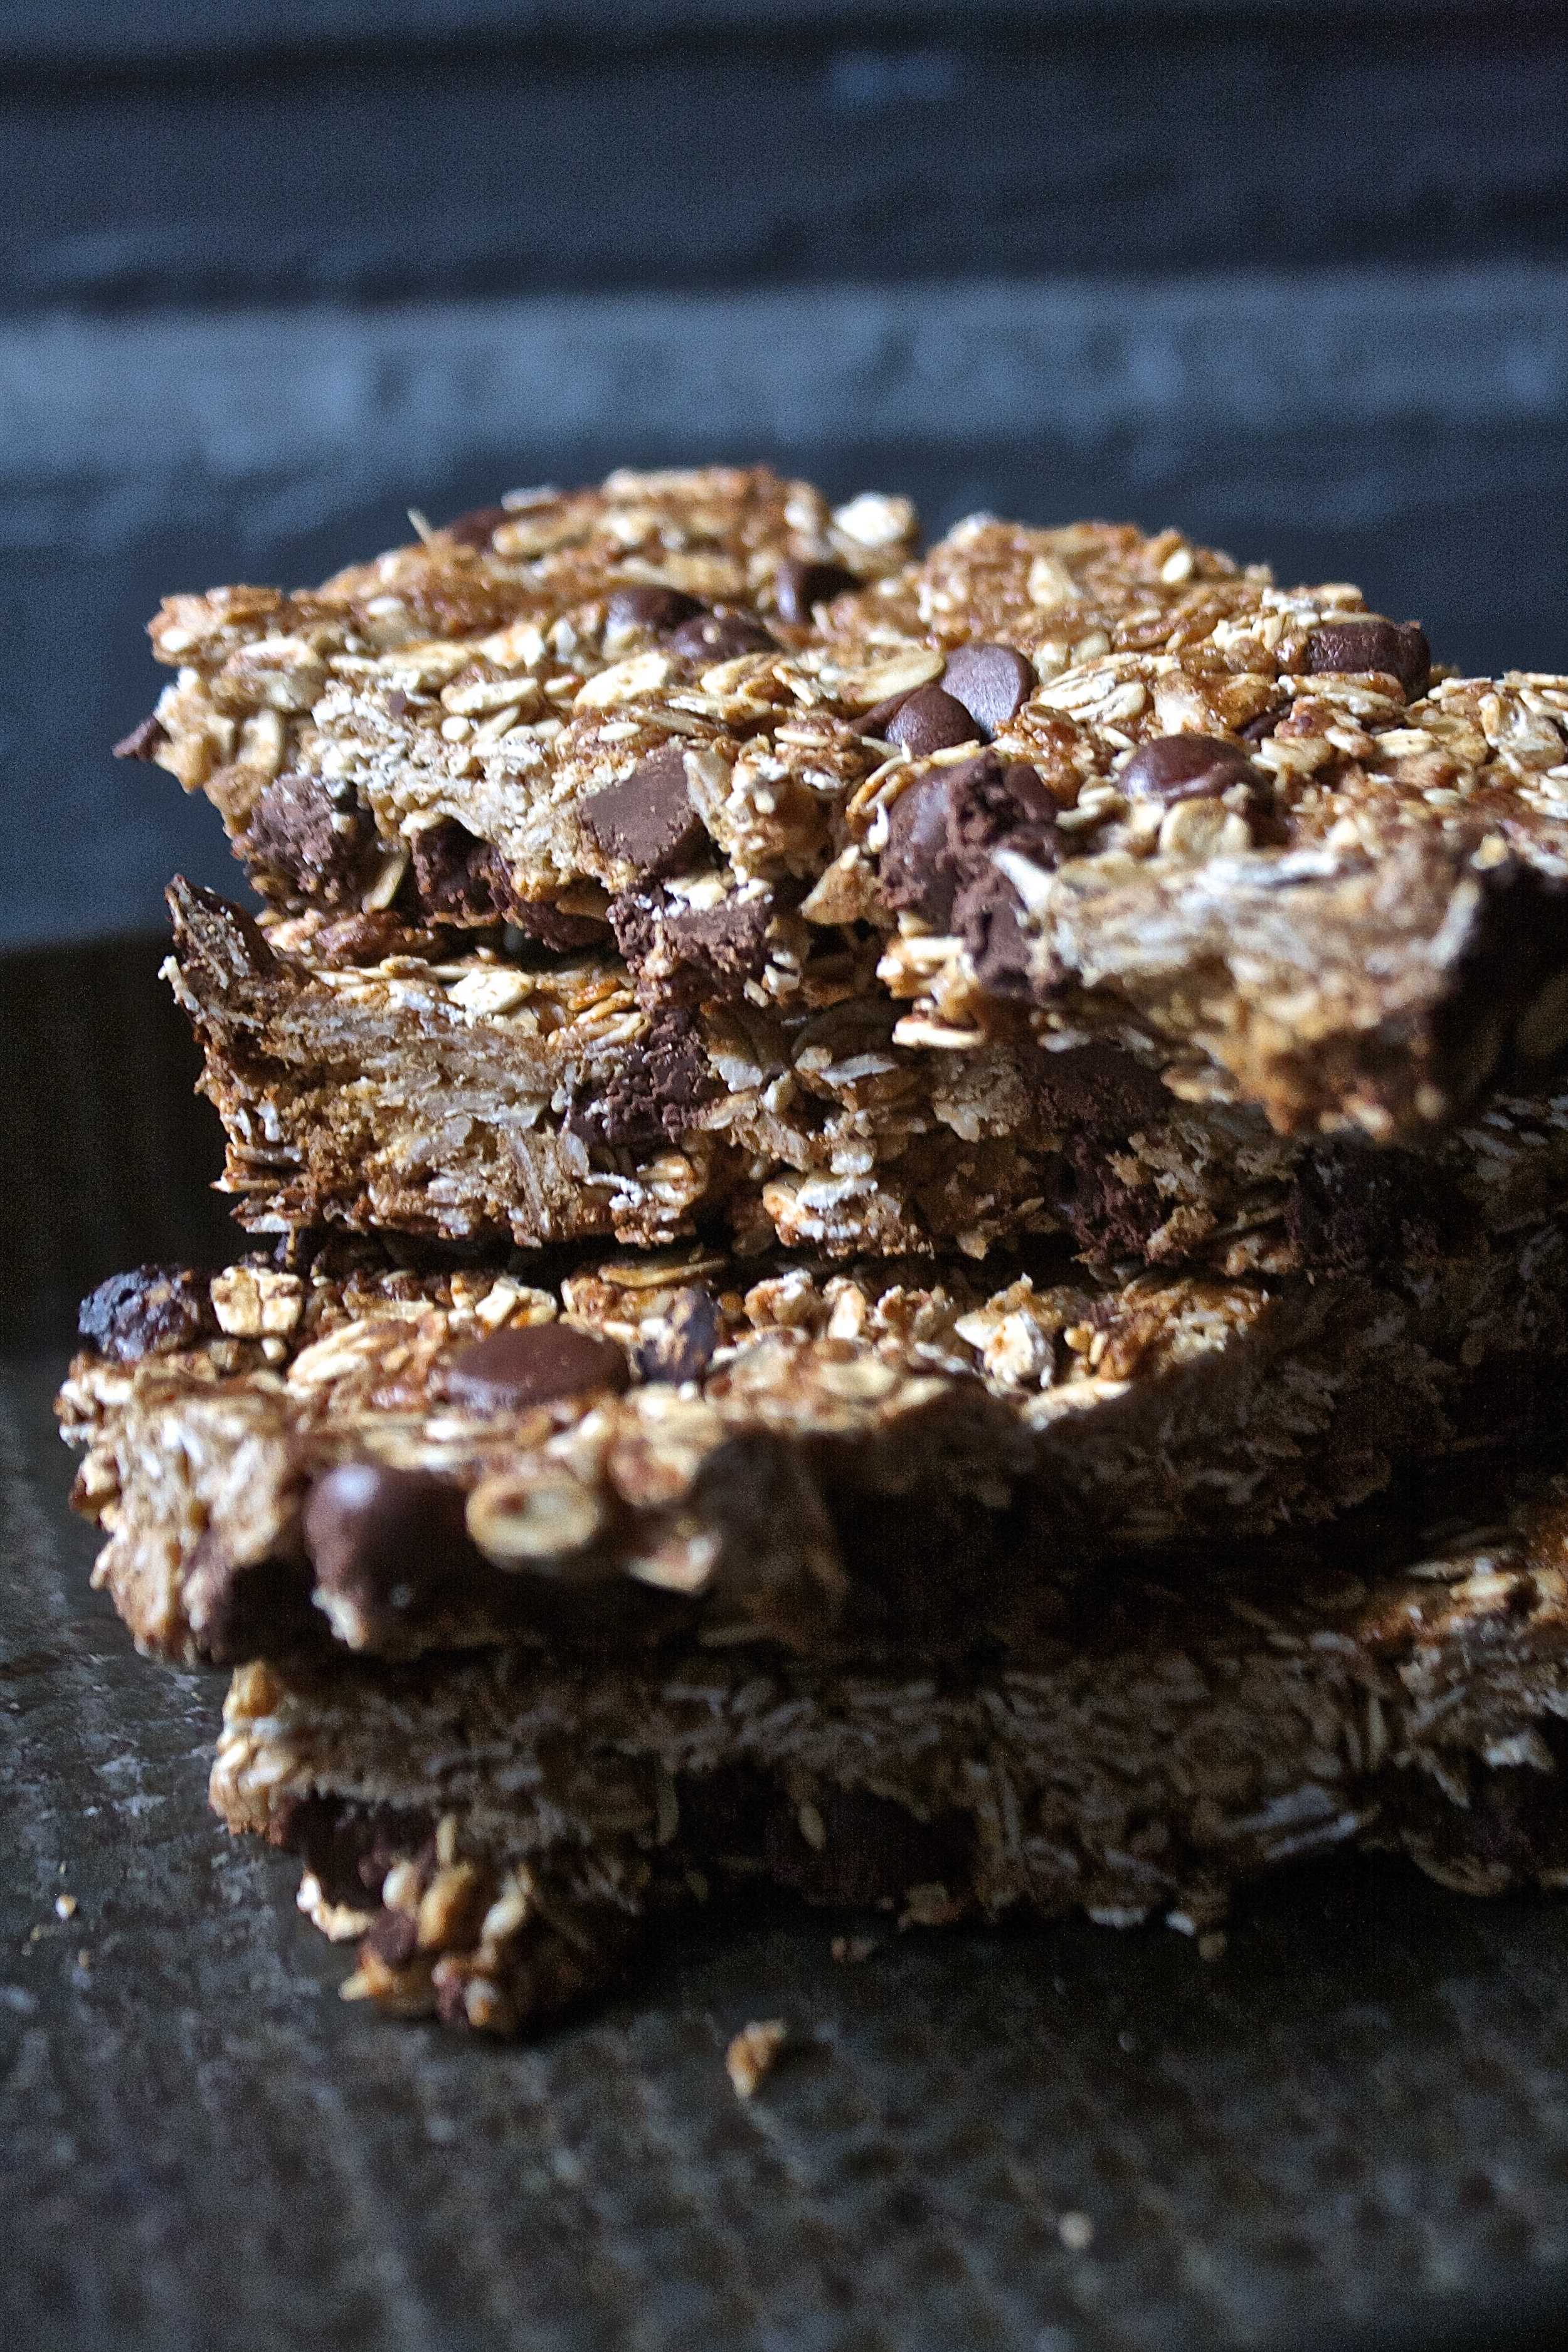
I tossed my into the oven, just for like 12 minutes, just to give them a little color and a bit of crunch. (the longer you leave them in there, the harder and crunchier they become)

Pulled from the oven, chillin out and waiting to be cut.

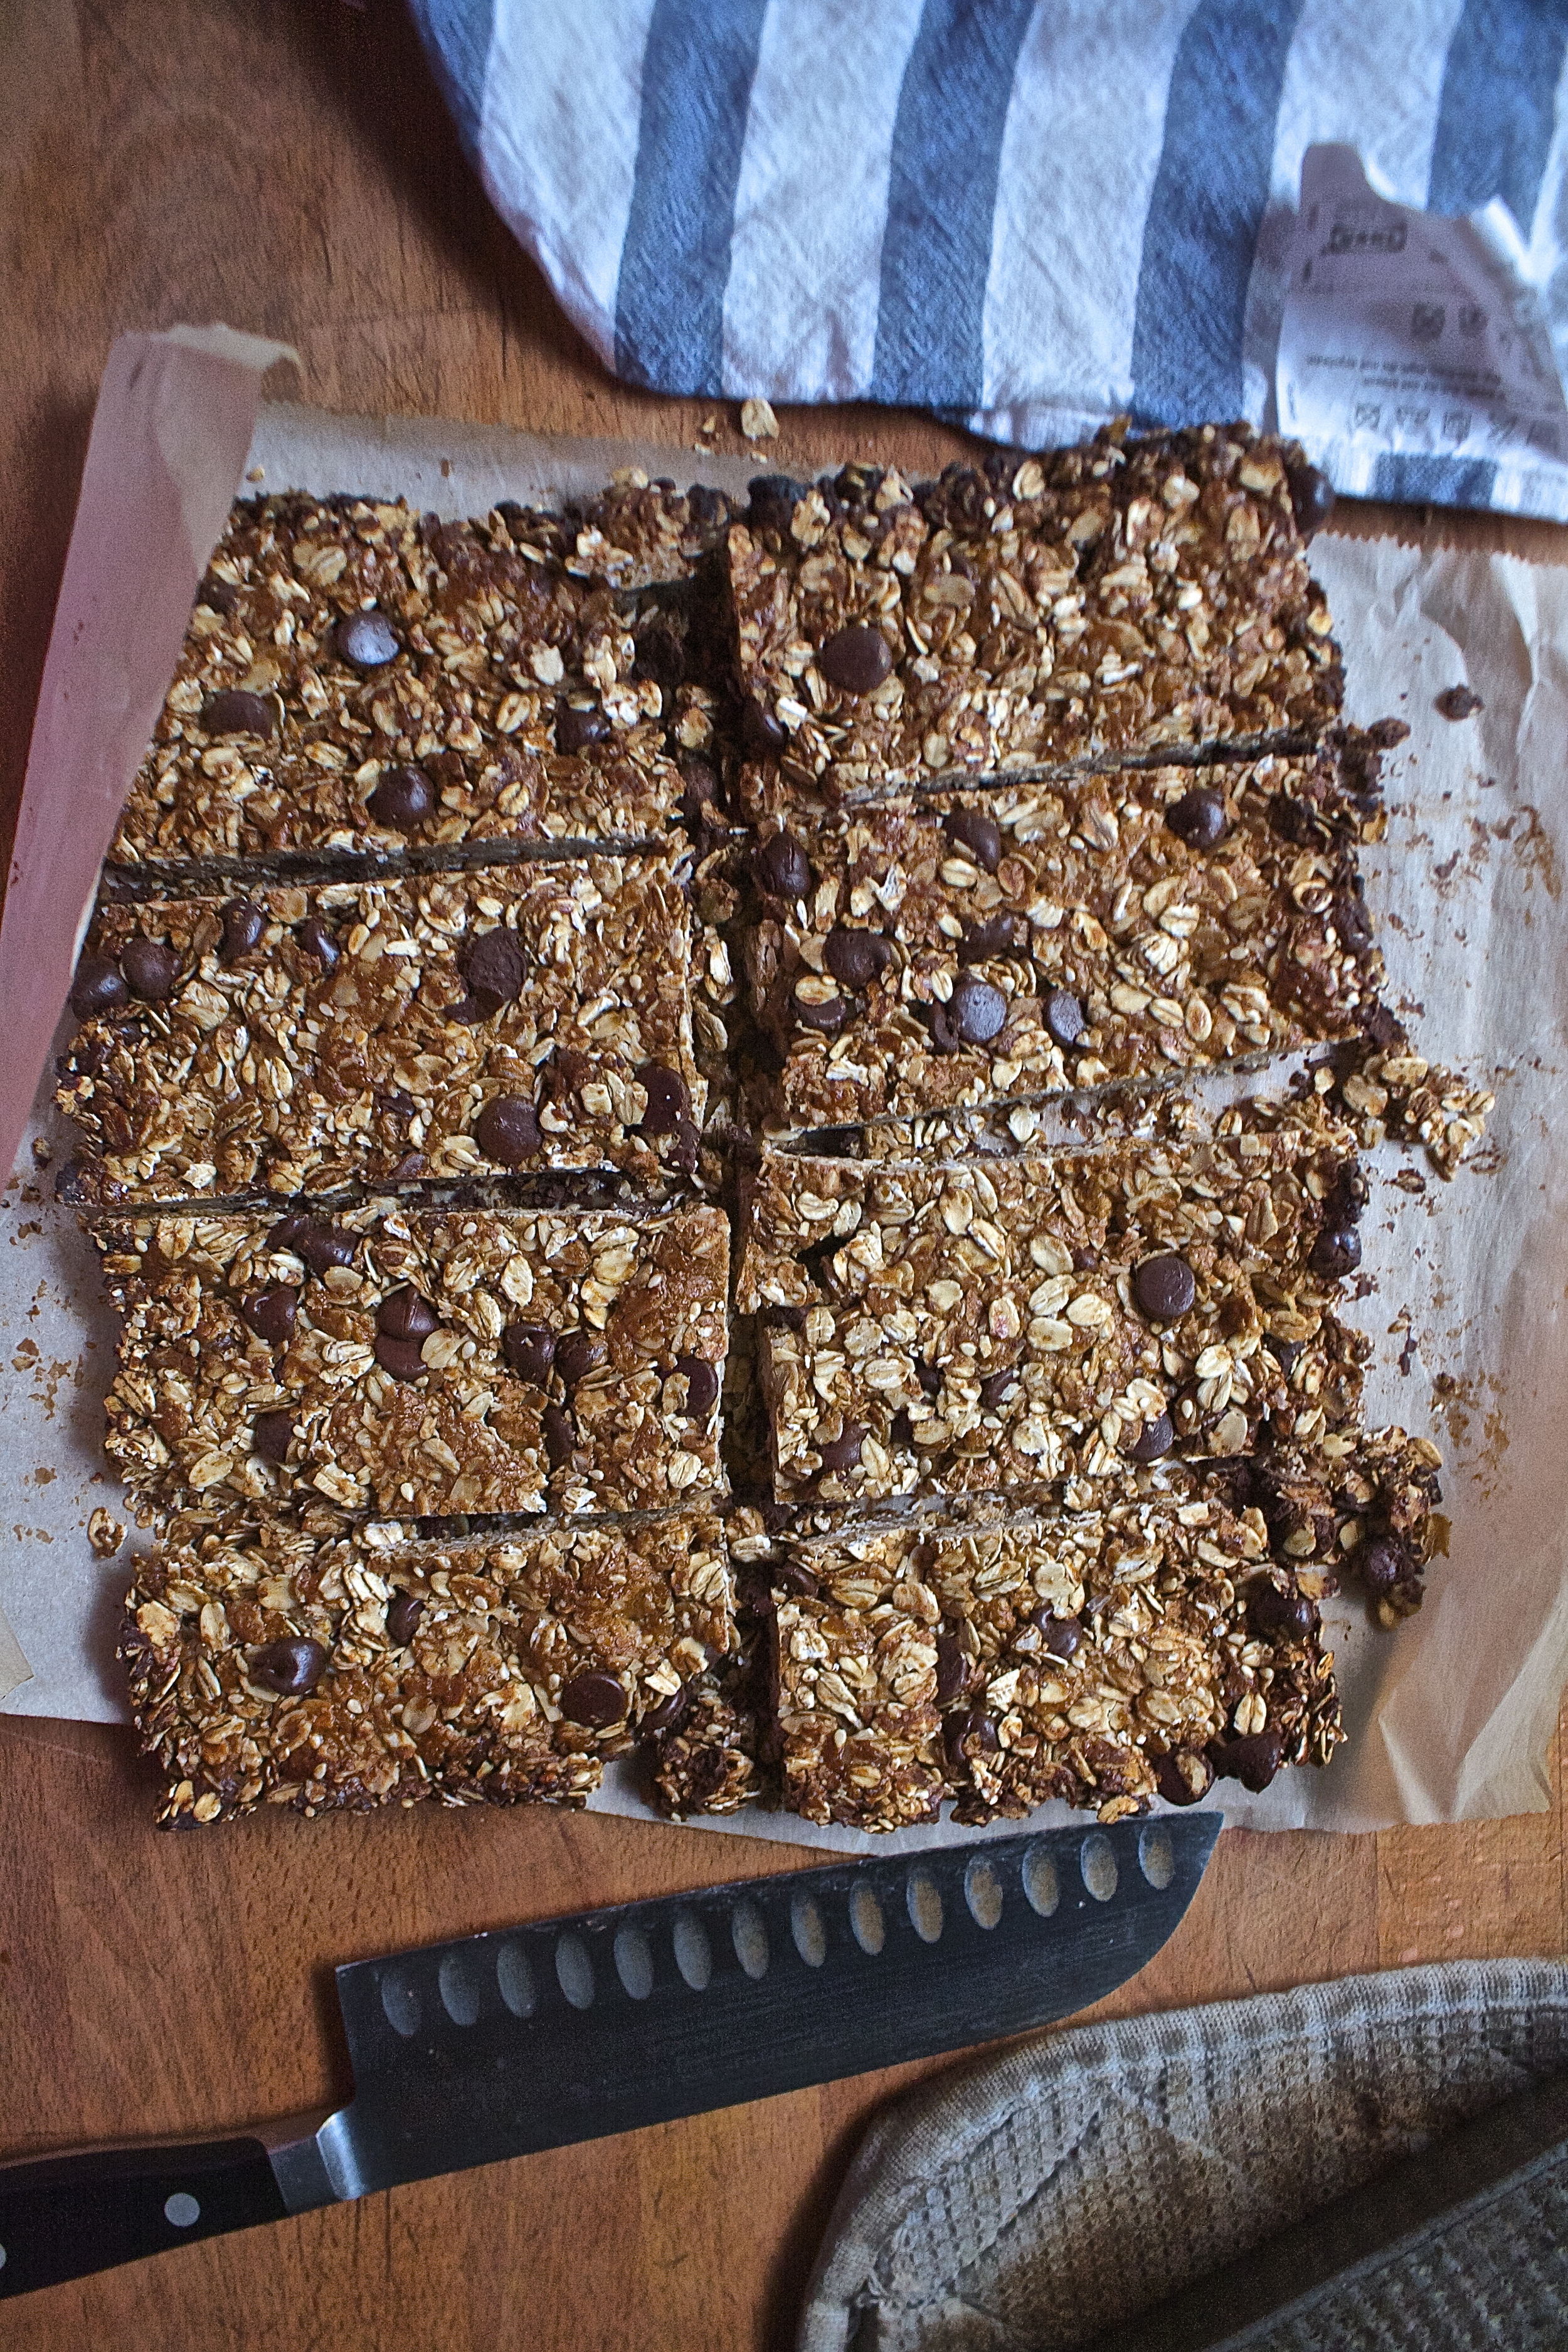
And piled high. a stack of bars, awaiting a mouth to eat them.

What a bar. The mr is a lucky guy.

Happy day to you!

-C


Tahini Chocolate Chip Granola Bars

makes 8 Bars

  • 3 cups oats (gluten free if needed)
  • 1/3 heaping cup golden syrup (can be bought at some grocery stores but can be found online as well)
  • 1/3 heaping cup tahini
  • teaspoon of cinnamon
  • 1/2-1 cup of chocolate chips
  • a few pinches of sea salt(optional)

Note. Feel free to add more mix ins if you want (nuts, coconut, dried fruit) just don't add more then another 1/2 cup of stuff.

In a large bowl toss together the oats, cinnamon, sesame seeds and chocolate chips. In a separate microwave safe bowl (or a pot), combine the golden syrup and the tahini. Place in microwave for 15 second increments,  stirring in between until the mixture is loose and pourable. (or heat on stove on low heat until pourable)

Add tahini mixture into oat mixture and mix until all the oats are evenly coated.  Dump into a parchment lined, 9x9 inch baking pan and evenly press the granola down as hard as you can with either your hands or a bottom of a glass (or whatever) Sprinkle the top with sea salt.

And now you have two decide if you want a more chewy granola bar or or a slightly crunchier bar. For a chewier one,  stick the pan into the fridge for at least an hour until they firm up. For a but more crunch,. place bars in the oven for 10-15 minutes at 350, just until they get a slight golden brown and a little bit of crunch on top.  Remove from oven and let cool.

Once bars are ready, remove from pan, grab a knife, cut into bars (or whatever shape you want) and eat them. Store extra in an airtight container (raw ones in the fridge, baked ones are ok on the counter)


In 5 ingerdients or less, breakfast, brunch, Dairy Free, desserts, Gluten Free, Raw, recipes, snack, Sweets, Vegan Tags Tahini Chocolate chip granola bars, granola bars, raw, vegan, gluten free, chocolate chips, plant based, oats, sesame, breakfast, snack, protein
Comment

Peanut Butter Banana Pop Tarts

February 4, 2016 Colleen Stem
IMG_7662.jpg
IMG_7694.jpg

We are back.. Woo hoo!! Did you miss me? cause I missed you guys.

The past two weeks we nutters. We traveled so hard, did and saw so much stuff. We had such a blast. I will tell you all about it with lots of pictures, but give me a few days cause I am still on crazy, sleep deprived, jet lagged brain and am still having a hard time comprehending normal world activity.. I think I am going to need the rest of the week to recover and get my head back into the real world. ( I don't mind living in a fog for a little while, it suits me) And if my writing is a little wonky or maybe doesn't make sense.. again, jet lag brain.

So anyways, lets talk about food. Right before we left we had a sleep over with the littles. I figured I would make them something kind of special for breakfast because I am awesome ans because we weren't going to see them for a while. Pop tarts. Who doesn't like a pop tart?  These littles, they love them a pop tart. Not that long ago they went through a phase where all they wanted to eat were pop tarts (I did not support that habit). So that is what I made (a bit more healthy then the store bough ones) and yup, they were amazing (so I was told) and devoured with every sprinkle eaten and fingers licked clean. I mean, peanut butter anything is good, and banana with that is even better. Stick a little chocolate and sprinkles into with that...Everyone can get down with these

The stuff. For the crust we need some flour, a little brown sugar, salt, cold earth balance, some peanut butter, and some ice cold water. For the filling, just some more peanut butter and a couple of ripe bananas. And completely optional( kinda) chocolate spread and sprinkles to top with afterword.

Start with the crust. A big bowl with the flour, salt and brown sugar that all gets whisked together. Then cold peanut butter and earth balance go in.

Just like a normal pie crust, use a a pastry cutter or fork to cut in the fat until a crumbly mixture forms.

Then, a few tablespoons at a time, add in he ice water until the mixture starts to come together into a dough.

Dump it onto a piece of wax paper or plastic wrap and gather it together into a ball. Wrap it really tight and stick the dough in the fridge (for a least an hour, but a few hours or over night would be good)

When the dough has chilled and you are ready to proceed, grab the dough and roll it out onto a lightly floured surface. You want to try and keep it a kind of a rectangular shape and rolled about 1/2 an inch thick.

Trim the edges (bake off scraps for a little extra treat) and cut the dough in half length wise then in 6 equal sizes width wise.(you should wind up with 12 pieces)

Take one side of each pair and place on a a baking sheet. Smear each piece with a good glob of peanut butter but leaving a little boarder.

Then slice up the bananas and layer those on of of the peanut butter.

Place the tops onto the bottoms (gently) and with a fork, crimp the edges of the tarts closed. Then take the fork and poke a few holes into the tops.

Now into the oven they go.

After about 25 minutes or so, you end up with the most magical smelling, golden brown pop tart.

And because it's a pop tart, you must drizzle on a little some thing something (nutella or chocolate spread of any kind) and sprinkles. Do not forget the sprinkles.

Ready for eating.. Peanut Butter banana greatness. Best served a little warm and with some type of cold milk (plant, nut, or cow) and eaten in front of tv watching cartoons.

These will ruin store bough pop tarts for you. Sorry (not sorry)

Have a great day guys.. Really am happy to be back!

-C


Peanut Butter Banana Pop tarts

The Crust

  • 2 cups all purpose flour
  • 1/2 cup earth balance
  • 1/3 cup smooth peanut butter
  • 1 teaspoon salt
  • 2 tablespoons brown sugar
  • 7-8 tablespoons cold water

The filling

  • 2 ripe bananas thinly sliced
  • 6-8 tablespoon peanut butter

Optional toppings

  • chocolate spread or Nutella
  • sprinkles

Start by making the crust. Grab a big bowl, add in the flour, salt, and brown sugar ans whisk together. Then add in cold earth balance and if you think of it, cold peanut butter. Cut that into the flour with a pastry cutter or a fork and when the mixture is kinda crumbly start adding in tablespoons of ice water until the mixture starts to come together then dump the dough onto a piece of wax paper or plastic wrap, press together, wrap it all up, and stick it into the fridge. Let chill for at least ans hour or up to over night.

When you are ready for pop tarts, preheat oven to 375 and grab dough from fridge and roll it out on a lightly floured surface,  into a large, 1/2 inch thick rectangle. Trim the sides of the rectangle and cut in half length wise. Then cut that into 6 even pieces width wise, giving you 12 pieces.

Place the 6 bottom pieces of the dough onto a baking sheet. Smear each piece with about a tablespoon of peanut butter and then top with a few pieces if thinly sliced banana. Place the top pieces on each bottom and using a fork, press the edges of the dough together. Then take fork and pop a few holes into the top to let the steam escape.

Place into the oven and bake for about 20-25 minutes or until the tarts are nice and golden brown. Remove from oven, drizzle with nutella or chocolate and cover with sprinkles.

Eat right away with a tall glass of some kind of milk

Any left over (if that happens) can be stored in the fridge for a day or two or frozen to be enjoyed whenever the craving hits you.

In breakfast, Vegan, Sweets, snack, recipes, photography, desserts, Dairy Free, brunch, cookies Tags Peanut Butter Banana Pop Tarts, Pop tarts, peanut butter, banana, vegan, pie, dessert, breakfast, chocolate
Comment

Persimmon Maple cornbread

January 14, 2016 Colleen Stem
IMG_7412.jpg
IMG_7433.jpg

This time next week the mr and I will be on our jolly (the word jolly is way underused) journey through the hill of the Irish countryside.  I am getting a bit nervous. First off, we have yet to book a single b and b (we are air bnb-ing it the whole time.) We still haven't reserved a car, have just starting looking at baggage requirements and have no clue how we are getting home from the airport. But we did print out the plane tickets last night, so that's something!!  I make it sound like we have been slacking, but it really isn't our fault (most of it). We have most of the stuff we need to book ready to pay for, but our credit card we ordered for this trip was lost in the mail and we can't book anything without it. Aagh!  But hopefully the new one will be in the mailbox today and we can get on our way to planning the best trip ever

With the trip getting so close, my mind is doing this weird thing where it doesn't want to research things anymore. It is sick of looking up attractions or prices of this, or how to translate that. I have done all the research that I can handle and am mentally tired. I just want to chill on the internet stuff and spend the rest of this week cleaning the house and baking things until we leave. You know, smash in as much domestic things as I can.

So clean I do and bake things I am. The other day I bought 4 beautiful vanilla persimmons (yeah persimmons!)  and instead of hoarding them all to my face, I baked a little persimmon cornbread concoction for the mr(he doesn't get excited about fresh persimmon like I do) This way he gets in on some of the persimmon action and I don't feel as guilty about buying 4 persimmons.

Dense, moist on the inside, crispy on the outside. A nice sweet maple glazed layer of soft persimmon nicely layered on top to take it to the next level .This bread, it's and all sorts of good. It hugs the boarder of a bread and cake. but still makes a great side to a big bowl of squash soup, black bean chili, or whatever.  The mr, he ate a piece for a snack after I made it, then a chunk with his dinner, a little slice for late night snacking and then a piece for breakfast. I might just make him a lunch situation with the rest of it for him today. And then it will be gone.. whoa.  I guess that means it perfect for anytime and it's just that good.

I am that good. But we can talk about me later, for now, the cornbread.

The stuff. A persimmon, some white whole wheat flour, yellow cornmeal, baking soda and powder and salt. Maple syrup, melted earth balance, and some soy milk are going in too.

Start by preheating the oven and then thinly slicing the persimmon into the prettiest little rounds

And now whisk together all the dry stuff in a big bowl then dump in all the wet stuff.

IMG_7346.jpg

Mix it all together until full just incorporated. (don't over mix.)

Grease a 9 inch pan (can use a 9 inch square) and coat the grease with cornmeal.

IMG_7358.jpg
IMG_7359.jpg

Spread the mixture in the pan then layer the top with the sliced persimmon.

Lovely right.

Now stick it into the oven.

After about 25 minutes, the cake is just about done. Remove it from the oven and quickly brush the top with maple syrup then stick it back into the oven to finish baking.

And when the bread is completely baked, the persimmons nice and soft and glimmering,  remove from the oven and sit on a rack to let cool.

And when you can't wait any longer..... cut yourself a big piece

Along with a cup of coffee.....

Nothing to worry about here.

Have a great day.. Wish me luck!

-C


Persimmon Maple Cornbread

make a 9 inch round bread cake

  • 1 cup white wheat flour
  • 1 cup yellow or white corn meal
  • 1/3 cup melted earth balance
  • 1/4 cup maple syrup plus about 2 tablespoons more for brushing the top of bread
  • 1 1/2 cups soy milk
  • 2 teaspoons baking soda
  • 1 teaspoon baking powder
  • 2 tablespoon apple cider vinegar
  • pinch of salt
  • 1 large ripe but firm vanilla or fuyu persimmon (If you have smaller ones, you might need 2)

Preheat oven to 375

First off, slice the persimmon into really thin slices.

Next, combine the flour, the cornmeal, baking soda powder, ans the salt into a large bowl and whisk together. Add in the maple syrup, the soy milk, the melted earth balance and the apple cider vinegar. Mix together until just combined.  Dumb the batter into to a greased and cornflour coated 9 inch cake pan and layer persimmon slices on top, starting with the outer edge and layering inward (or whatever way you want to)

Place bread into oven and bake for about 25 minutes or until the cornbread has risen and is starting to brown, but could use a few more minutes. Take cake out and brush the persimmons with maple syrup. Place back into over to bake for another 8-10 minutes or until the cornbread is completely cooked.(tester comes out clean)

Remove from oven and let cool in pan on a wire rack

Slice, serve, and eat.


In bread, breakfast, brunch, Dairy Free, desserts, photography, recipes, snack, Vegan Tags Persimmon Maple Cornbread, cornbread, persimmon, vegan cornbread, vegan, persimmon bread, corn bread, dessert, corn cake, plant based, refined suger free, fruit
Comment

Lemon Strawberry Jam Cookies

January 9, 2016 Colleen Stem
IMG_7188.jpg
IMG_7197.jpg

My little twin brothers birthday was yesterday, and when I say little, I mean younger, cause these dudes are not small and 18 isn't little. But really, all I can think is "What the F**K. When did that happen?"  It seems like just yesterday that I was baby sitting these kids, watching Rugrats and Toy Story on loop. Playing with mr. lemon head, blowing bubbles and drawing with sidewalk chalk. All the boxes of mac ans cheese, cups of chocolate with a little milk and the fruitthat needed to be cut up in order for them to eat it. They were so cute and sweet and they loved their big sister (me) so much Now when I see them, if they decided to come out of their rooms,  they talk about which colleges they want to go to, their jobs, girls (if I pry) and things that I have no need to listen to (sports, video games, stuff boys walk about). And because they are bigger then me, I usually get roughed up a little when ever I see them.(I kind of deserve it cause when they were babied I dropped them each at least once) They are pretty much all grown up, although they still drink too much chocolate milk, still like their fruit pre-cut, and I think that they still secretly watch Toy Story on loop.

Never to old for Toy Story.

The cookies were made for their birthday. I was going to make a cake, but my mom was on that with 2 ice cream cakes and another regular one(just in case two was not enough) and I was not about to do a cake to compete with boxed ice cream cakes from the grocery store. I know my family, they liked their carnival ice cream cakes.  But one of the twins asked me to make him a special dessert, something with lemon. So I made him these here lemon cookies and I added strawberry jam because I wanted to and it felt right. Look at me being the best sister.

But just because it's not your birthday you can still have these cookies. It's citrus season so everything should be citrusy and bright and it's just the right amount of time between Christmas cookies and now so you can make these cookies no problem. Just don't eat them all at once.

The stuff. Flour, baking powder and soda, and a little salt. Then earth balance, a chia egg, vanilla, turbinado sugar, a lemon and some strawberry jam.

Sugar, earth balance, vanilla, and the chia egg go into the bowl.

And cream it all together.

Then the dry ingredients get mix together into a bowl with the zest of the lemon then dumped into the wet with the juice of the lemon.

Mix together until a stiff, but soft dough forms.

Roll dough into little balls and with an object of your choosing (I used a chop stick) squish the cookies down a bit in a starburst like pattern then push the center of each cookie in a bit to create a little well for the jam to go.

Place the cookies on a baking sheet and fill the centers with jam and into the oven they go!

And after a good few minutes in the oven, remove from baking sheet and set to cool for a least a minute (never eat super hot jam.. you will be sorry)

And there you have it, Happy Birthday Cookies! Or just cookies, but happy cookies non the less!

Have a great weekend!

-C


Lemon Strawberry Jam Cookies

Makes about 24 cookies

  • 2 cups all purpose flour

  • 1/2 teaspoon baking powder

  • 1/2 teaspoon baking soda

  • 1/2 teaspoon salt

  • 1 cup turbinado sugar

  • 1/2 cup room temperature vegan butter

  • 1 large lemon (zest and about 3 tablespoons of juice)

  • 1 chia egg (1 tablespoon ground chia seeds and 3 tablespoons water)

  • 1 teaspoon vanilla

  • about a 1/3 cup of strawberry jam (or any flavor you want)

In a large bowl, cream together the earth balance, sugar, vanilla and chia egg. In another bowl whisk together the flour, baking soda and powder, salt and the zest of the lemon. Dump the dry into wet and mix together along with about 3 tablespoons of lemon juice until a dough forms.

preheat oven to 350

Roll dough into little palm sized balls then give them a little squish to slightly flatten them. With a chop stick or fork, press lines around the center of the cookie then take your finger and push in the center a little to create a small well.  Place cookies on a baking sheet and fill each well with about 1/2 teaspoon jam. Place in oven and bake for about 10until the cookies have puffed up a little and the jam has spread. Remove one from sheet ans if the bottom is golden brown, then they are done. (The tops do not brown much) They may seem a little under baked, but once they cool, they will be perfect.  Remove the rest from baking sheet and let cool on a wire rack.

Eat cookies.

In Vegan, Sweets, snack, recipes, desserts, Dairy Free, breakfast, cookies Tags cookies, lemon cookies, thumbprint cookies, strawberry jam cookies, vegan, vegan cookies, chia egg, lemon, citrus, happy birthday cookies
Comment

Cumin Lime Waffle Iron Tofu with Squash and Avocado on Toast

January 7, 2016 Colleen Stem
IMG_7014.jpg
IMG_6983.jpg

I have been meaning to share the magic of crispy waffle iron tofu for a while, but somehow kind of forgot. Yesterday when talking to my (not quite) mother in law she mentioned the bean waffles I made a while ago and suddenly I had a very real need to go home and bust out the waffle iron and make some tofu. And some of you may be thinking that this sounds weird, but its not. Waffle irons are not just for waffles, you can cook just about anything in them. I compare then to a George Foreman grill (remember those) or even a griddler. . Works the same way, just makes everything waffles shaped.

As for the rest of this open face toast situation, it just makes so much sense.  Crispy cumin lime tofu, avocado, mashed up squash.... A heap of things that are so freaking good.  I actually made the sandwich for the mr and was a little bit worried he was not going to like it, but worry I need not. He got down with it too. You could even ditch the bread and eat waffled tofu slathered in the squash and tofu alone, or maybe swap out bread for greens (that's what I did) Whatever you do, it will be good and your tofu will be so nice and crispy (without having to deep fry) that you may never cook tofu anther way again.

The stuff. Tofu, some roasted squash (any squash or sweet potato works), and half an avocado. Going to need a lime, some cumin and a pinch of chili powder, salt and pepper and little olive oil. And some type of bread that is good for toasting.

The cumin and chili powder go into a bowl with lime juice, a little oil ans a pinch of salt ans pepper. Give it a good whisk and set aside.

And now tend to the tofu. You want to get as much water removed from the tofu as you can.  I do this by pressing the sliced pieces between a clean tea towel a bunch of times until the tofu is as dry I can get it without falling apart.

While you are doing this, preheat your waffle iron.

Once the tofu is a dried as you can get it, dredge each piece of tofu, front and back, through the cumin lime mixture.

And place it on your preheated, lightly oiled waffle iron.

Close iron and let the tofu iron itself cripsy.

And in about 7-10 minutes, you got yourself some super fantastic crispy, oh so tasty tofu.

Now to put it all together.  Bread is toasted and topped with mashed up squash.

Next goes the tofu then top that with the avocado. Finish with a squeeze of lime and a pinch of salt.

And sriracha if you like it..

Not deep fried, but super crispy tofu! And squash! and avocado! and toast!

It's amazing.

-C


Cumin Lime Waffle Iron Tofu with Squash and Avocado on toast

Make 2 pieces of toast

For the tofu

  • 1/2 a block of extra firm tofu cut about an inch thick slices
  • Juice of half a lime
  • 1 heaping teaspoon cumin
  • pinch of chili powder
  • salt and pepper
  • 3 teaspoons oil plus more to brush onto iron

And for the rest of the sandwich

  • a piece 4-5 inch piece of baguette or 2 slices of thick bread (use gluten free bread if you want)
  • About a 1/3 cup of cooked or roasted squash or sweet potato
  • sriracha (if you are into it)
  • 1/2 an avocado
  • the other half of lime

In a shallow bowl, mix together the juice of 1/2 the lime,the cumin and chill powder, a pinch of salt and pepper and 3 teaspoons of oil. Set aside

Preheat waffle iron to either the on setting or if it has variable setting, high.

Take your tofu and remove as much of the liquid as you can by pressing it between two clean kitchen towels. When you get as much of the liquid out as you can, take the tofu and place into the cumin mixture and coat both sides.  Ready the iron by brushing each side with a little more oil just to make sure it doesn't stick and place the tofu on the iron, close it up, and let it do it's thing for about 8-10 minutes. (check after 6-7 to see whats what and if is as crispy crunchy as you like, remove. If you think it could use another minute or two, well close it back up and keep ironing it.

And when the tofu is done, it's time tot make compile it all together.

Toast you bread you are going to use. Once toasted mash a good amount of squash onto toast. Place tofu on top of that and thinly sliced avocado on top of that. Finish with a sprinkle of salt, a squeeze of lime juice and if you are feeling a bit more spicy, a few drizzle drops of sriracha.

Eat right away. Do not share...they can make their own.


In Vegetables, Vegan, snack, Savory, recipes, Gluten Free, Dairy Free, brunch, breakfast Tags Cumin Lime Waffle Iron Tofu with squash and Avocado on Toast, toast, squash toast, avocado toast, avocado, squash, vegan, gluten free, healthy, plant based, clean eating, dinner, sandwich, veggies, waffle iron tofu, tofu waffle
Comment
← Newer Posts Older Posts →
 

https://thelovelycrazy.squarespace.com/config#/|/about/

Me. Food Maker.Food eater. Woo HOO!

STEM+NODE  SMALL BATCH AND ONE OF A KIND POTTERY

stem+node ceramics


____________________

Subscribe

GET NEW POSTS IN YO EMAIL

You are AWESOME!!!


@thelovelycrazy 2014-2021