• stem+node ceramics
  • HOME
  • Food Recipes
  • About
  • Contact
Menu

The Lovely Crazy

Street Address
City, State, Zip
Phone Number

Your Custom Text Here

The Lovely Crazy

  • stem+node ceramics
  • HOME
  • Food Recipes
  • About
  • Contact

Polenta Veggie Bean Pot Pie

September 22, 2015 Colleen Stem
IMG_8674.jpg
IMG_8653.jpg

Whenever I think of pot pies, I think of those little frozen, boxed pot pies that you get in the freezer section of the grocery store. Those frozen disks filled with all sorts of nasty shit made many appearances in my childhood. Hungry after school? Go home,grab pot pie from the freezer, give it a few stabs with a fork and toss it into the oven.. 

Well one day I did exactly that. Came home from school, grabbed a pot pie out of the freezer, grabbed  a sharp knife (wait a knife?) and stabbed the pie. One hole. Stabbed it again. Two holes. One more time for good measure. three holes, and. knife goes through pie and into my hand. I can remember it like it was yesterday. I was so shocked that I just stood there for a few minutes just staring at the whole situation. Imagine that, a little girl holding a knife with a frozen pot pie stuck on it covered in blood, screaming. Ugh.

Needless to say, after that, I never touched one of those frozen pot pies again.

But this is not one of those nasty frozen pot pies. This is a one pot,(skillet) full of warm and hearty goodness. Seasoned tender veggies and beans covered in a creamy polenta crust that has no need for any sort of stabbing.   And bonus.. only one pot to clean up! And it's all cool and autumn-y out so we don't want to die when to oven is on!!! 

Pot Pie WInner!

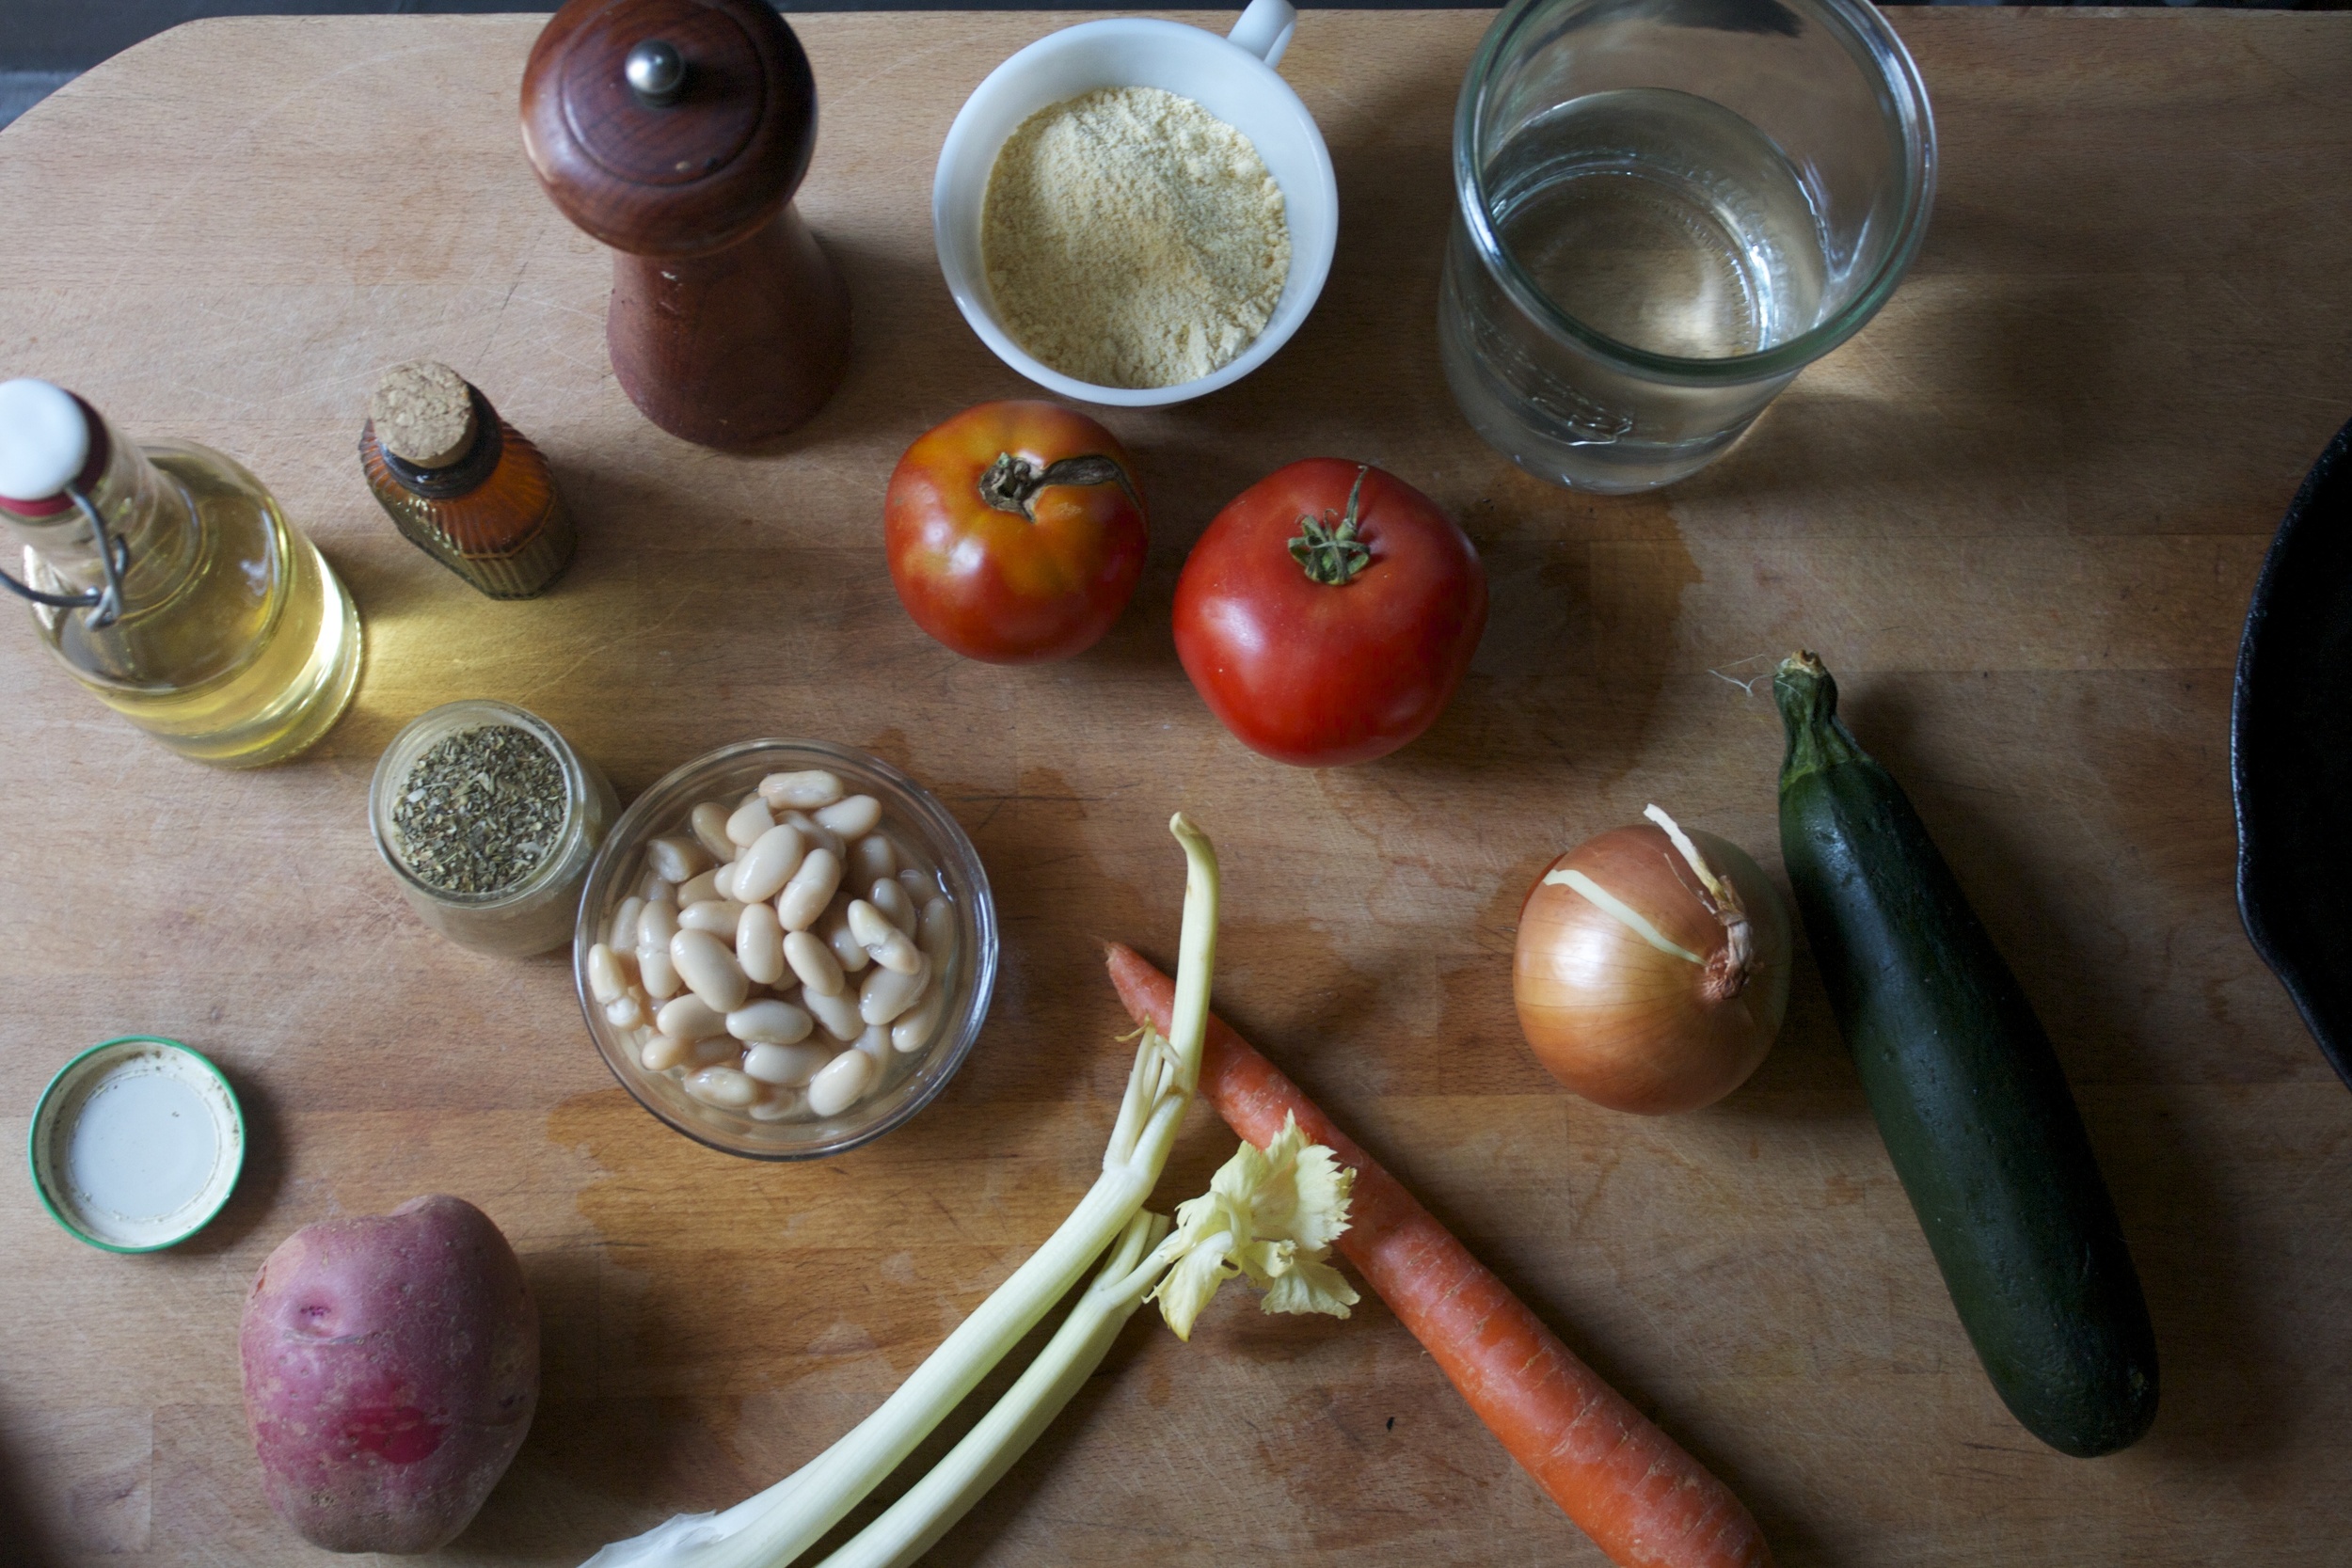
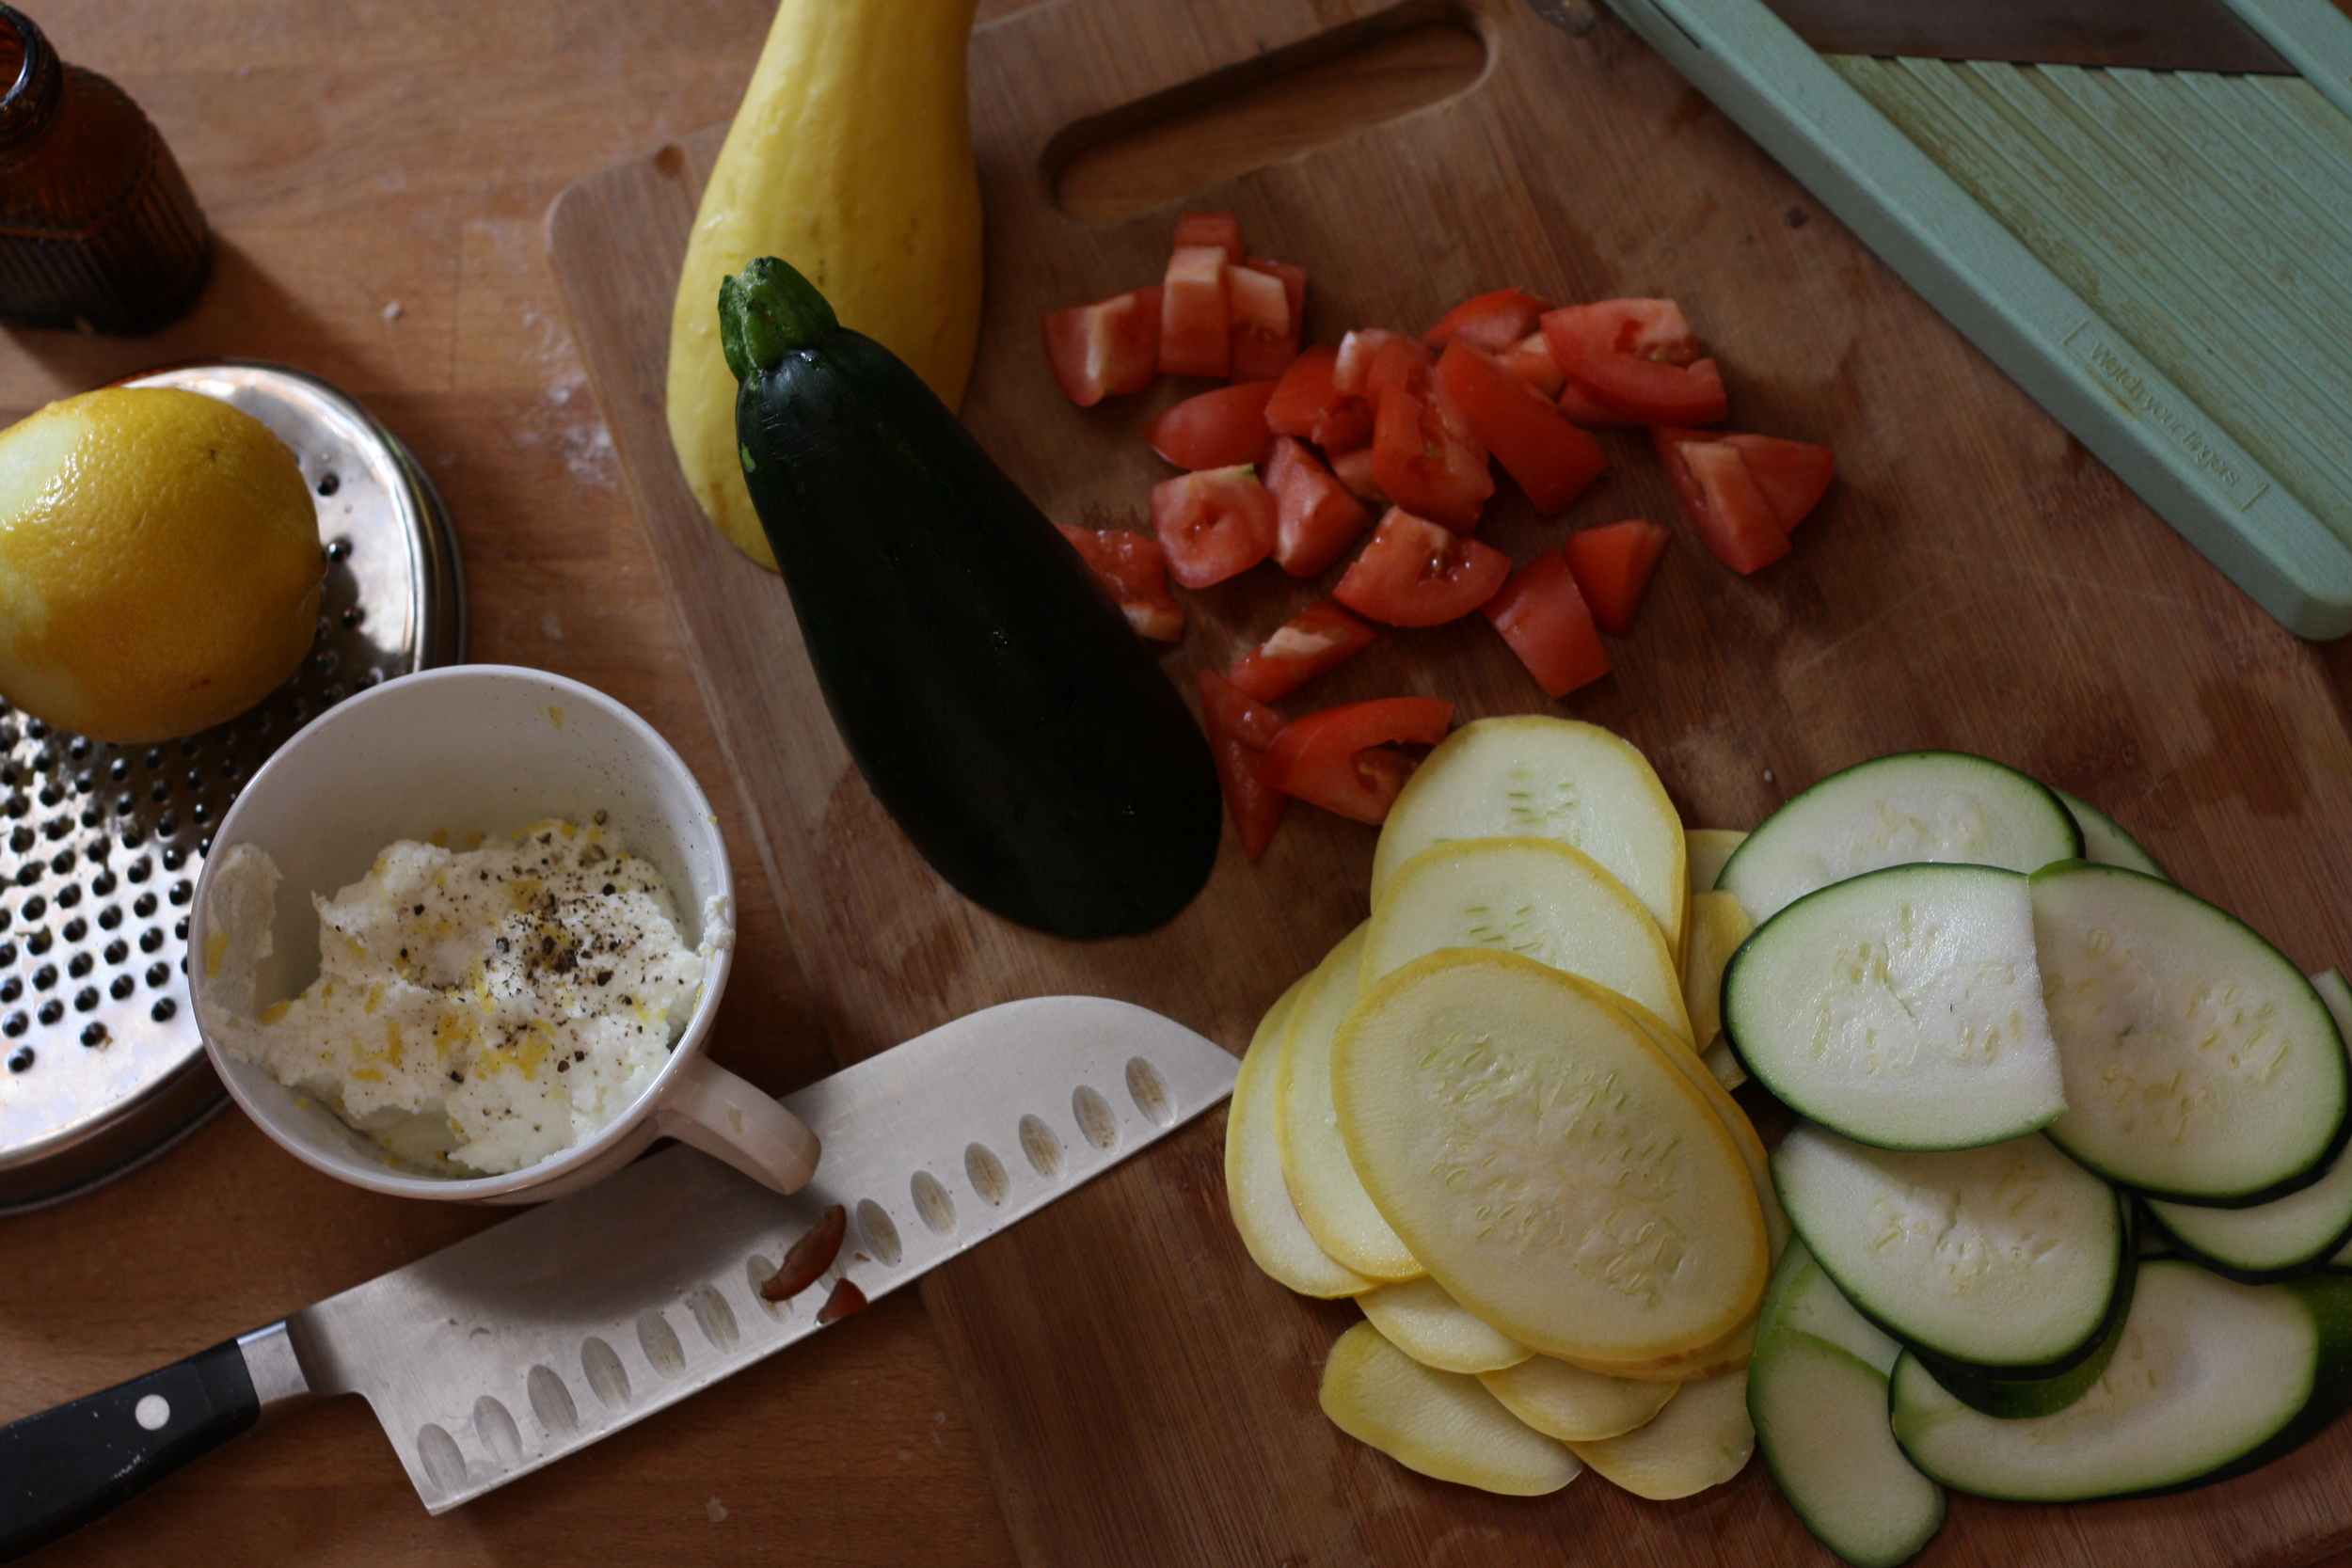
The stuff. Onion, zucchini. potato, carrot, tomato, canaille beans, corn meal, boiling water, Italian seasoning, salt and pepper, and a little olive oil.  

So If you are missing, or not wanting to use any of the above veggies, don't. Just sub in more of another or ad something different. Same with the bean. If you had chick peas or navy beans… its' all going to taste good. 

Chop up all the veggies, except the tomato and toss into a oiled skillet. Sprinkle with salt and pepper and the italian seasoing and stick on medium heat. We want to give the veggies a little cooking head start, but the majority of the cooking will happen in the oven. With that said, turn your oven on. 

 Veggies looking good.

Once the veggies have become slightly tender, add in the beans and the tomatoes.  Keep cooking for a little while longer, just to soften up the tomatoes.

While thats going on, get the polenta ready. Add a little salt to the cornmeal and grab yourself a whisk. Slowly poor boiling water over cornmeal while constantly mixing with whisk to prevent big lumps. (it's ok if there rare a few small lumps)

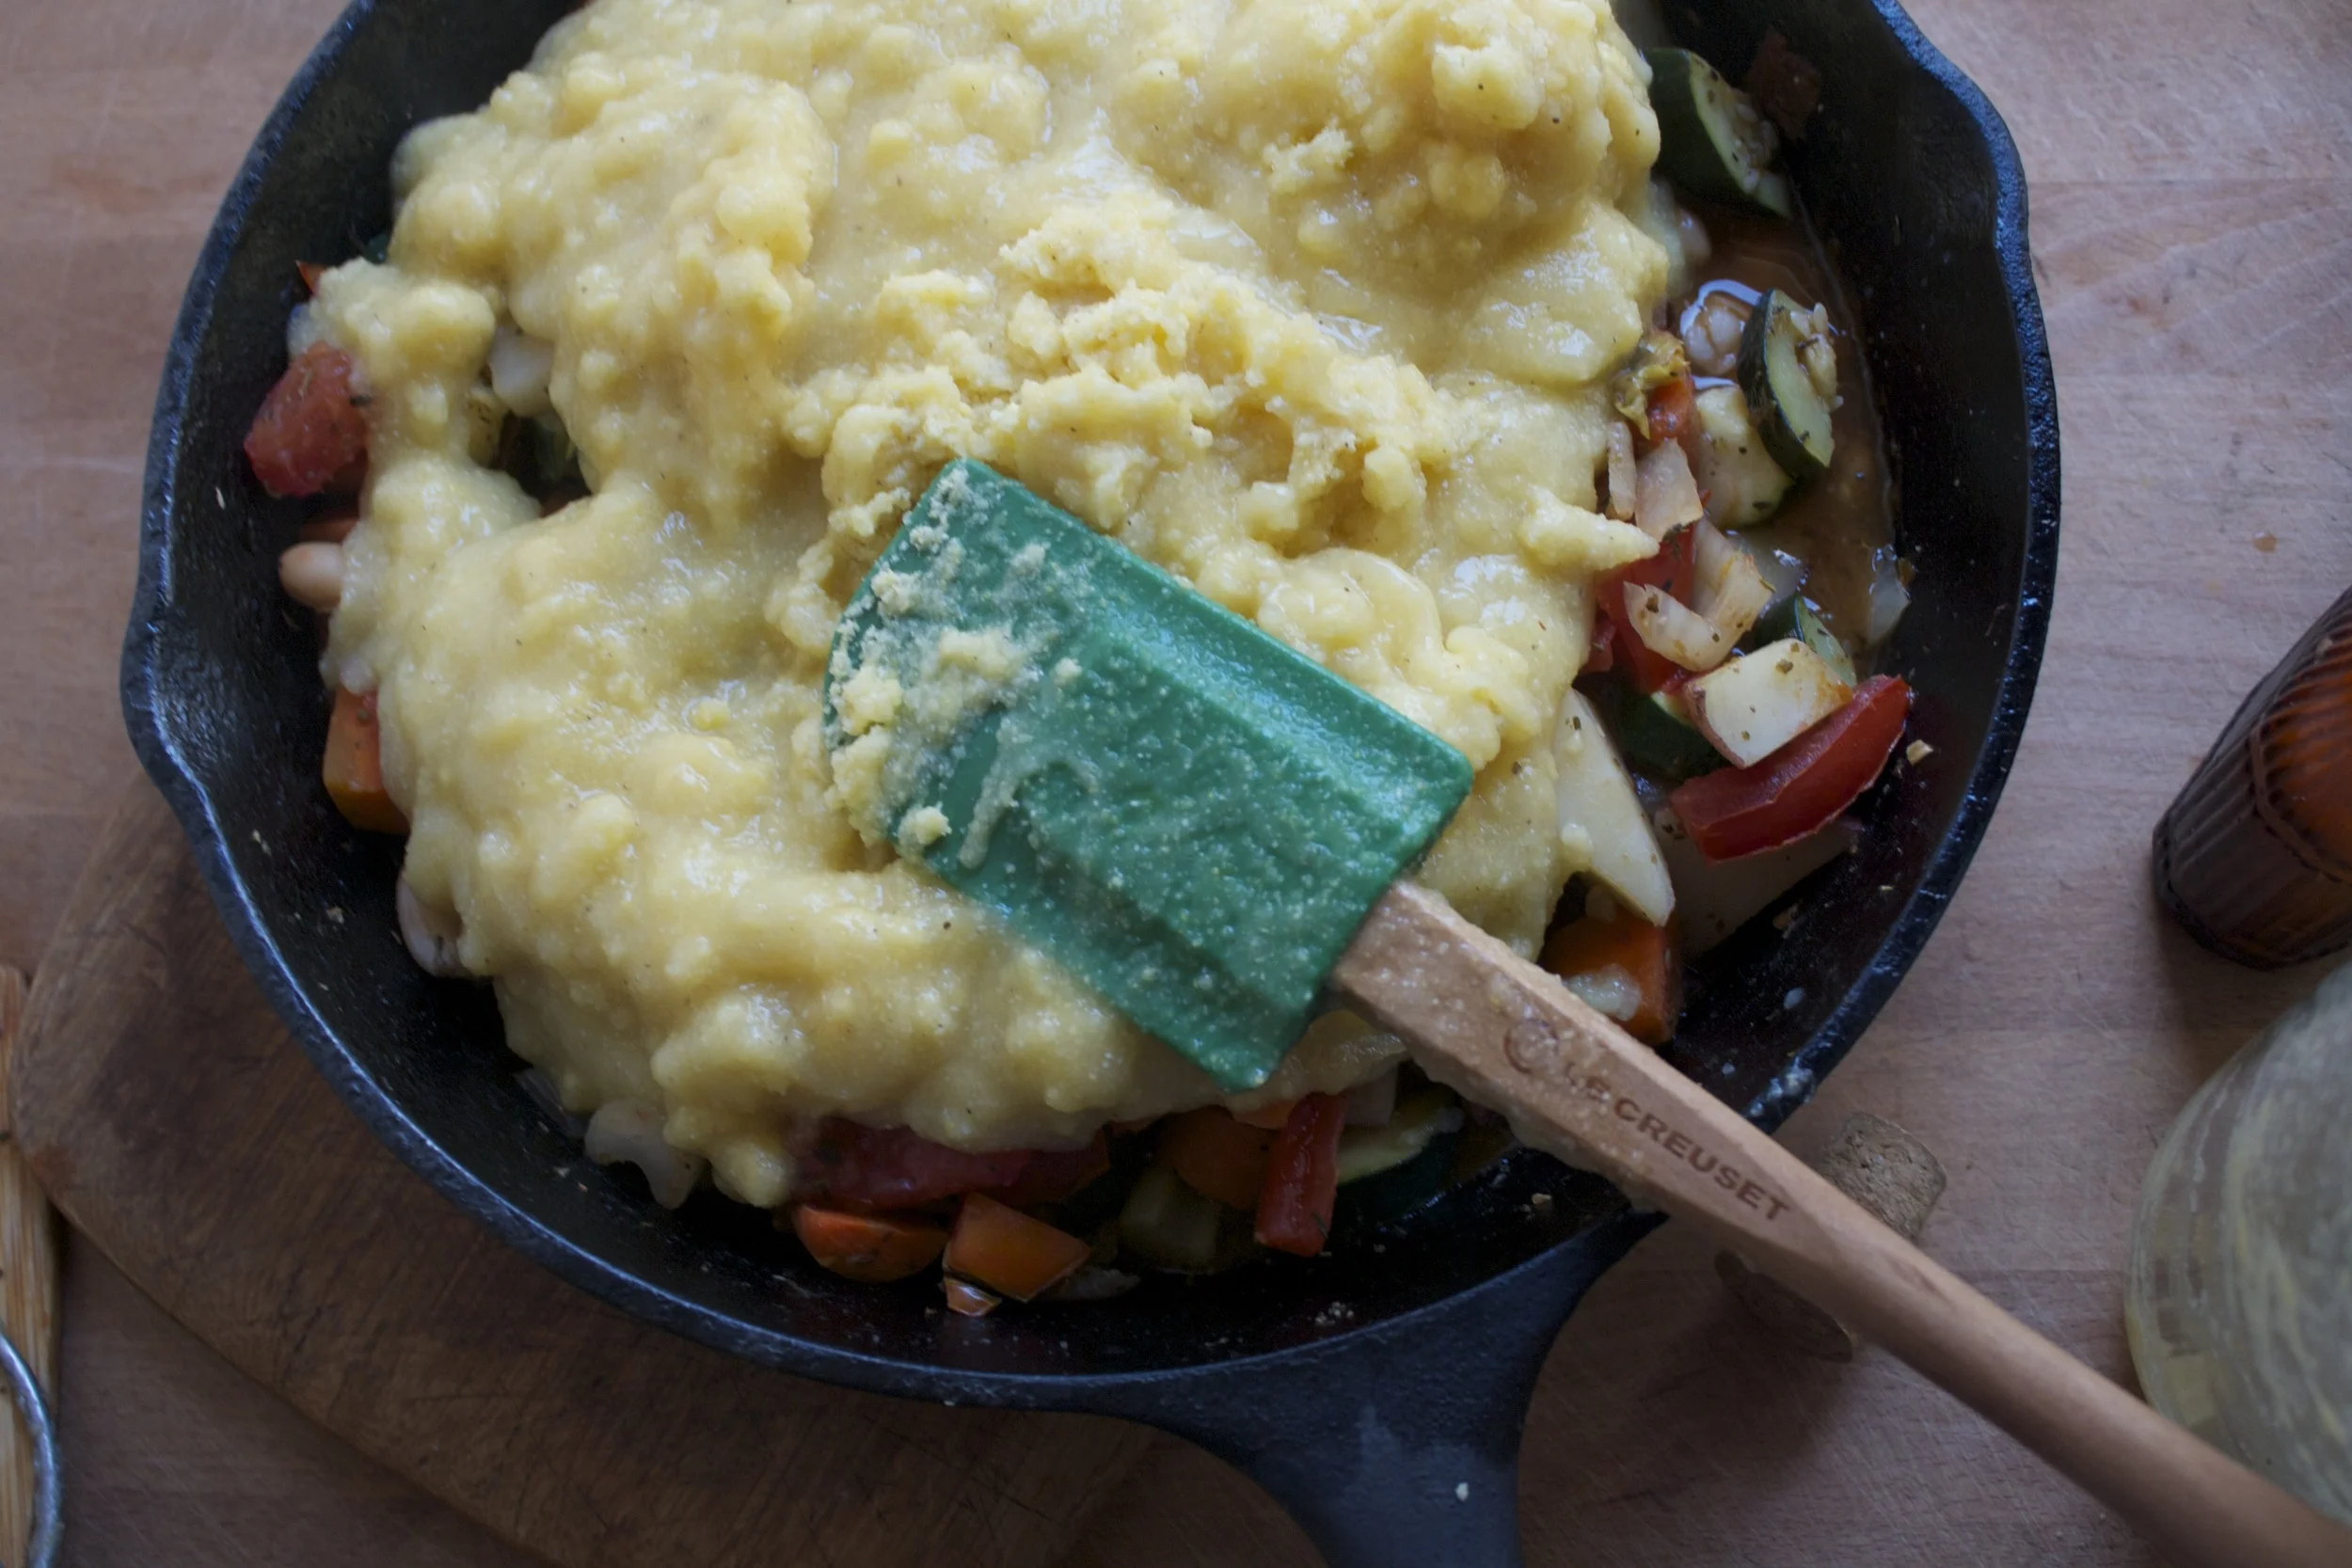
Dump the polenta onto veggies

And smooth over the top. Sprinkle with lots of pepper and stick it into hot oven to bake.

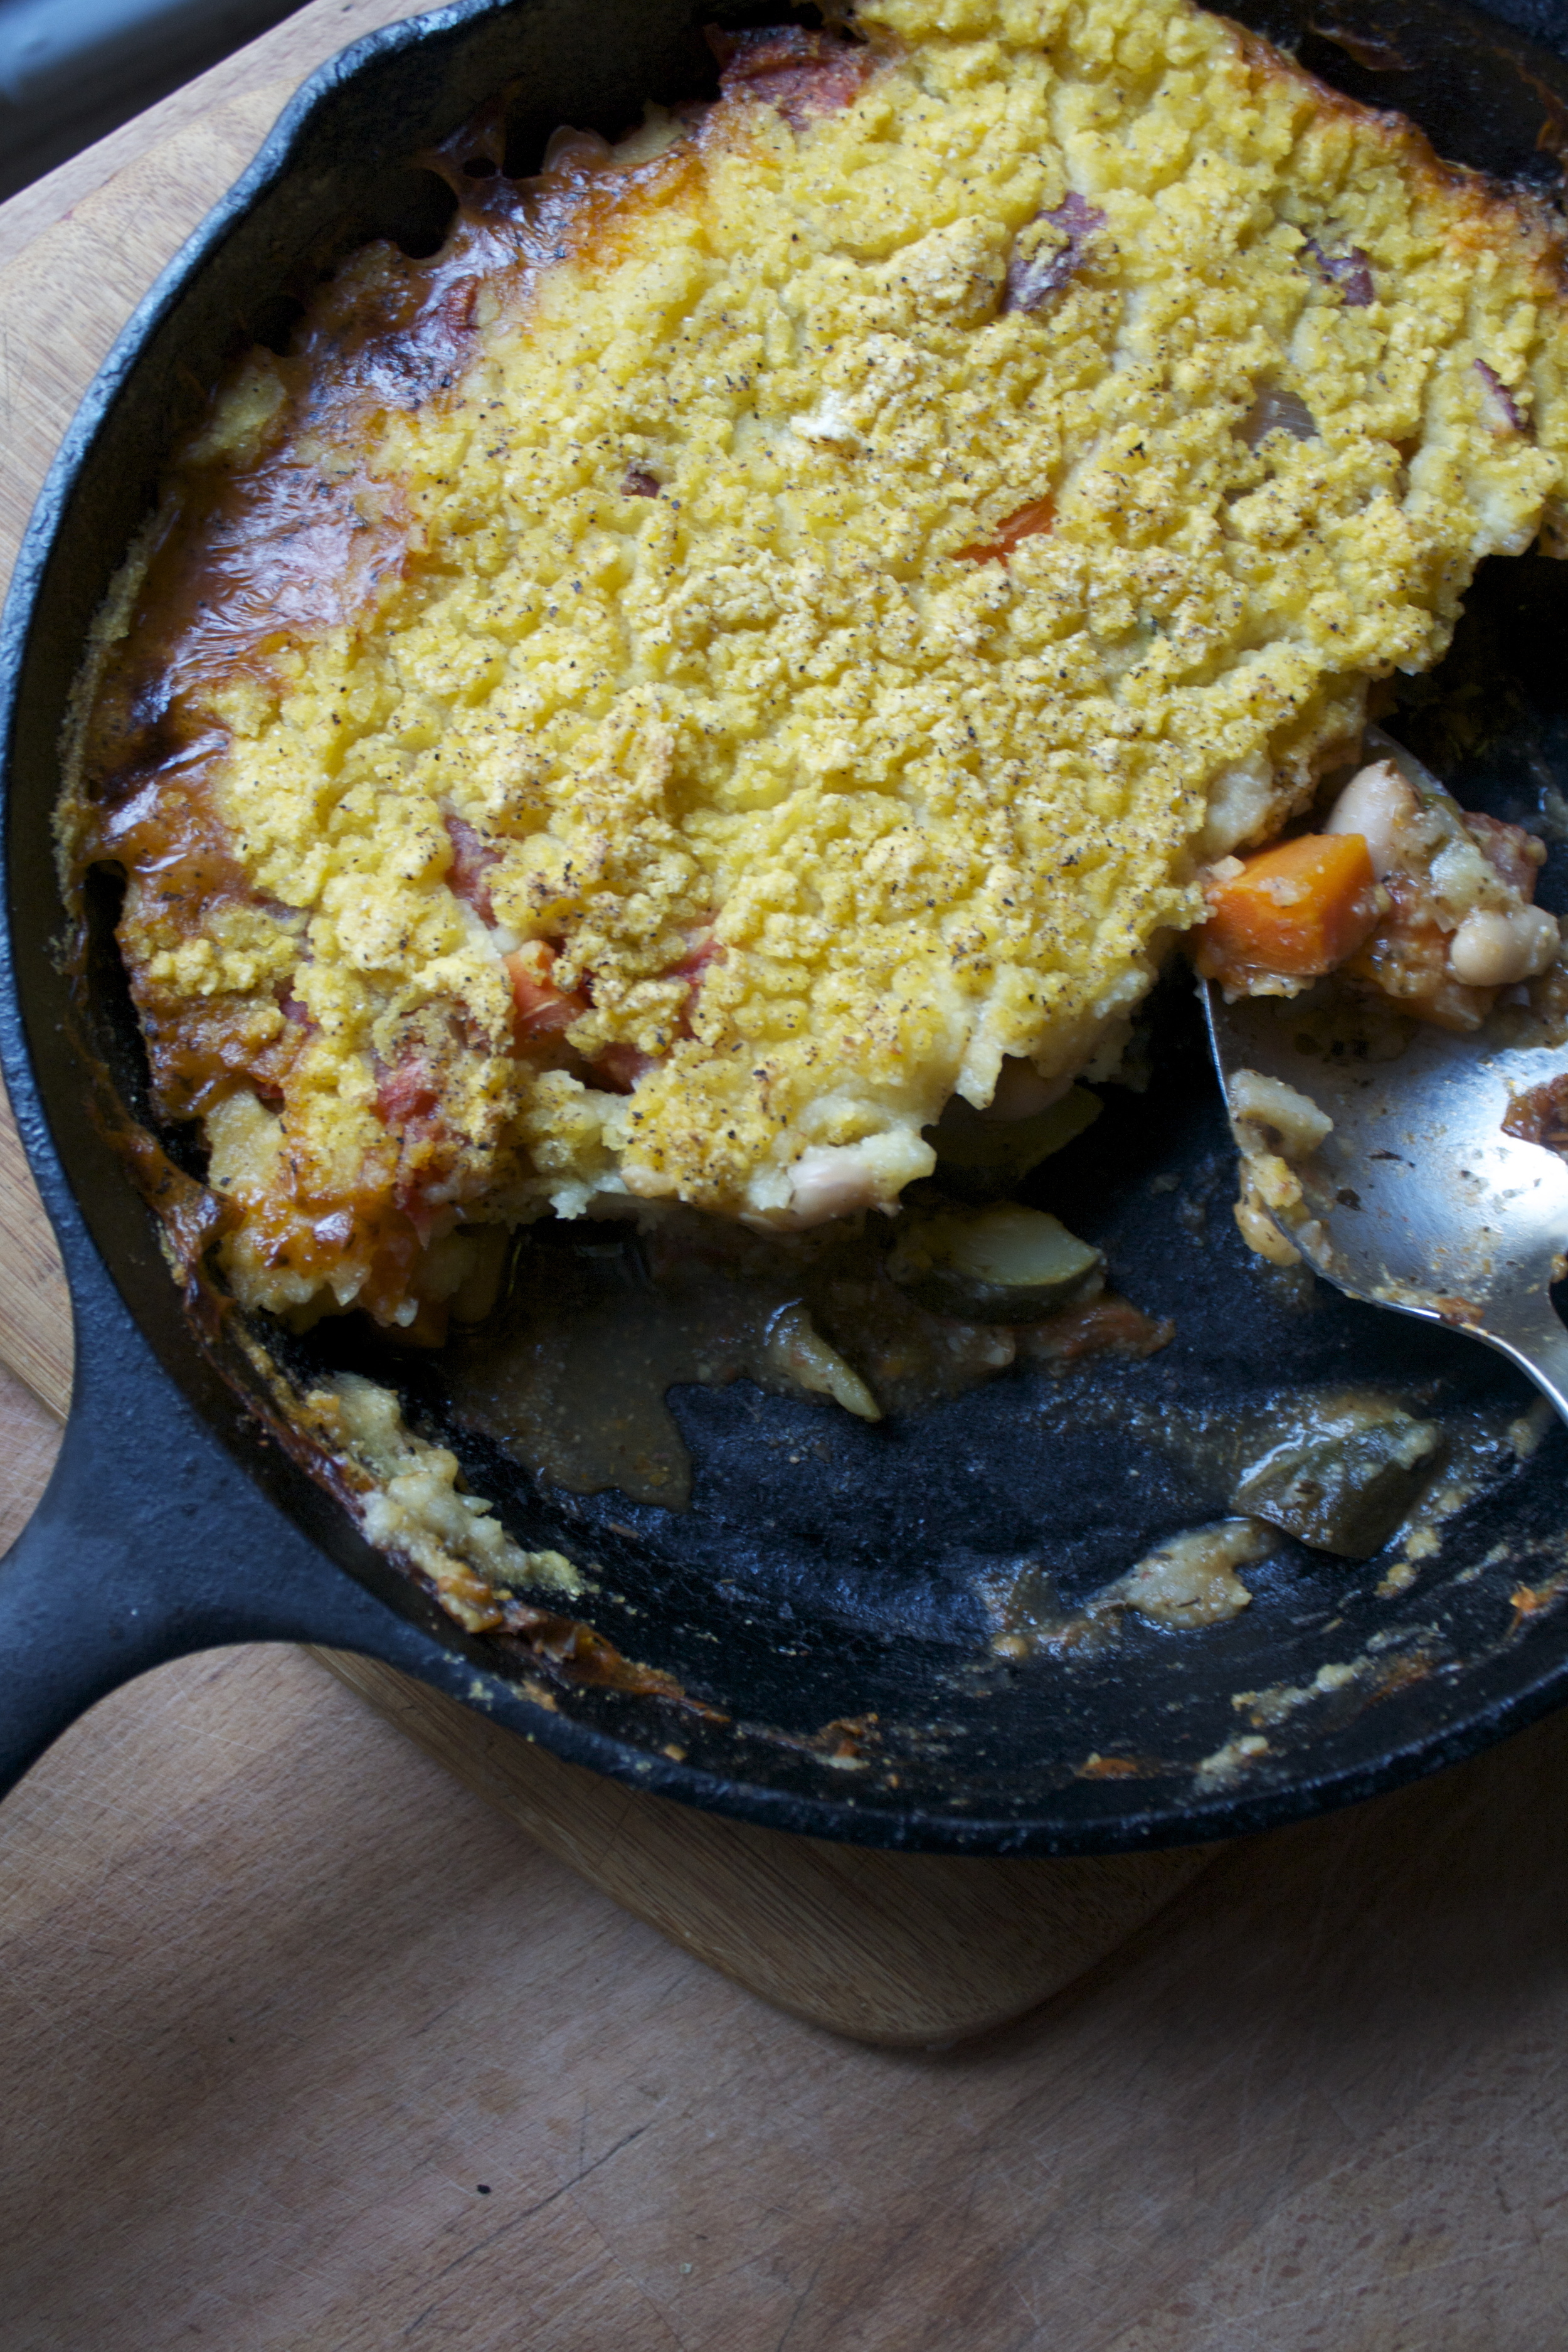
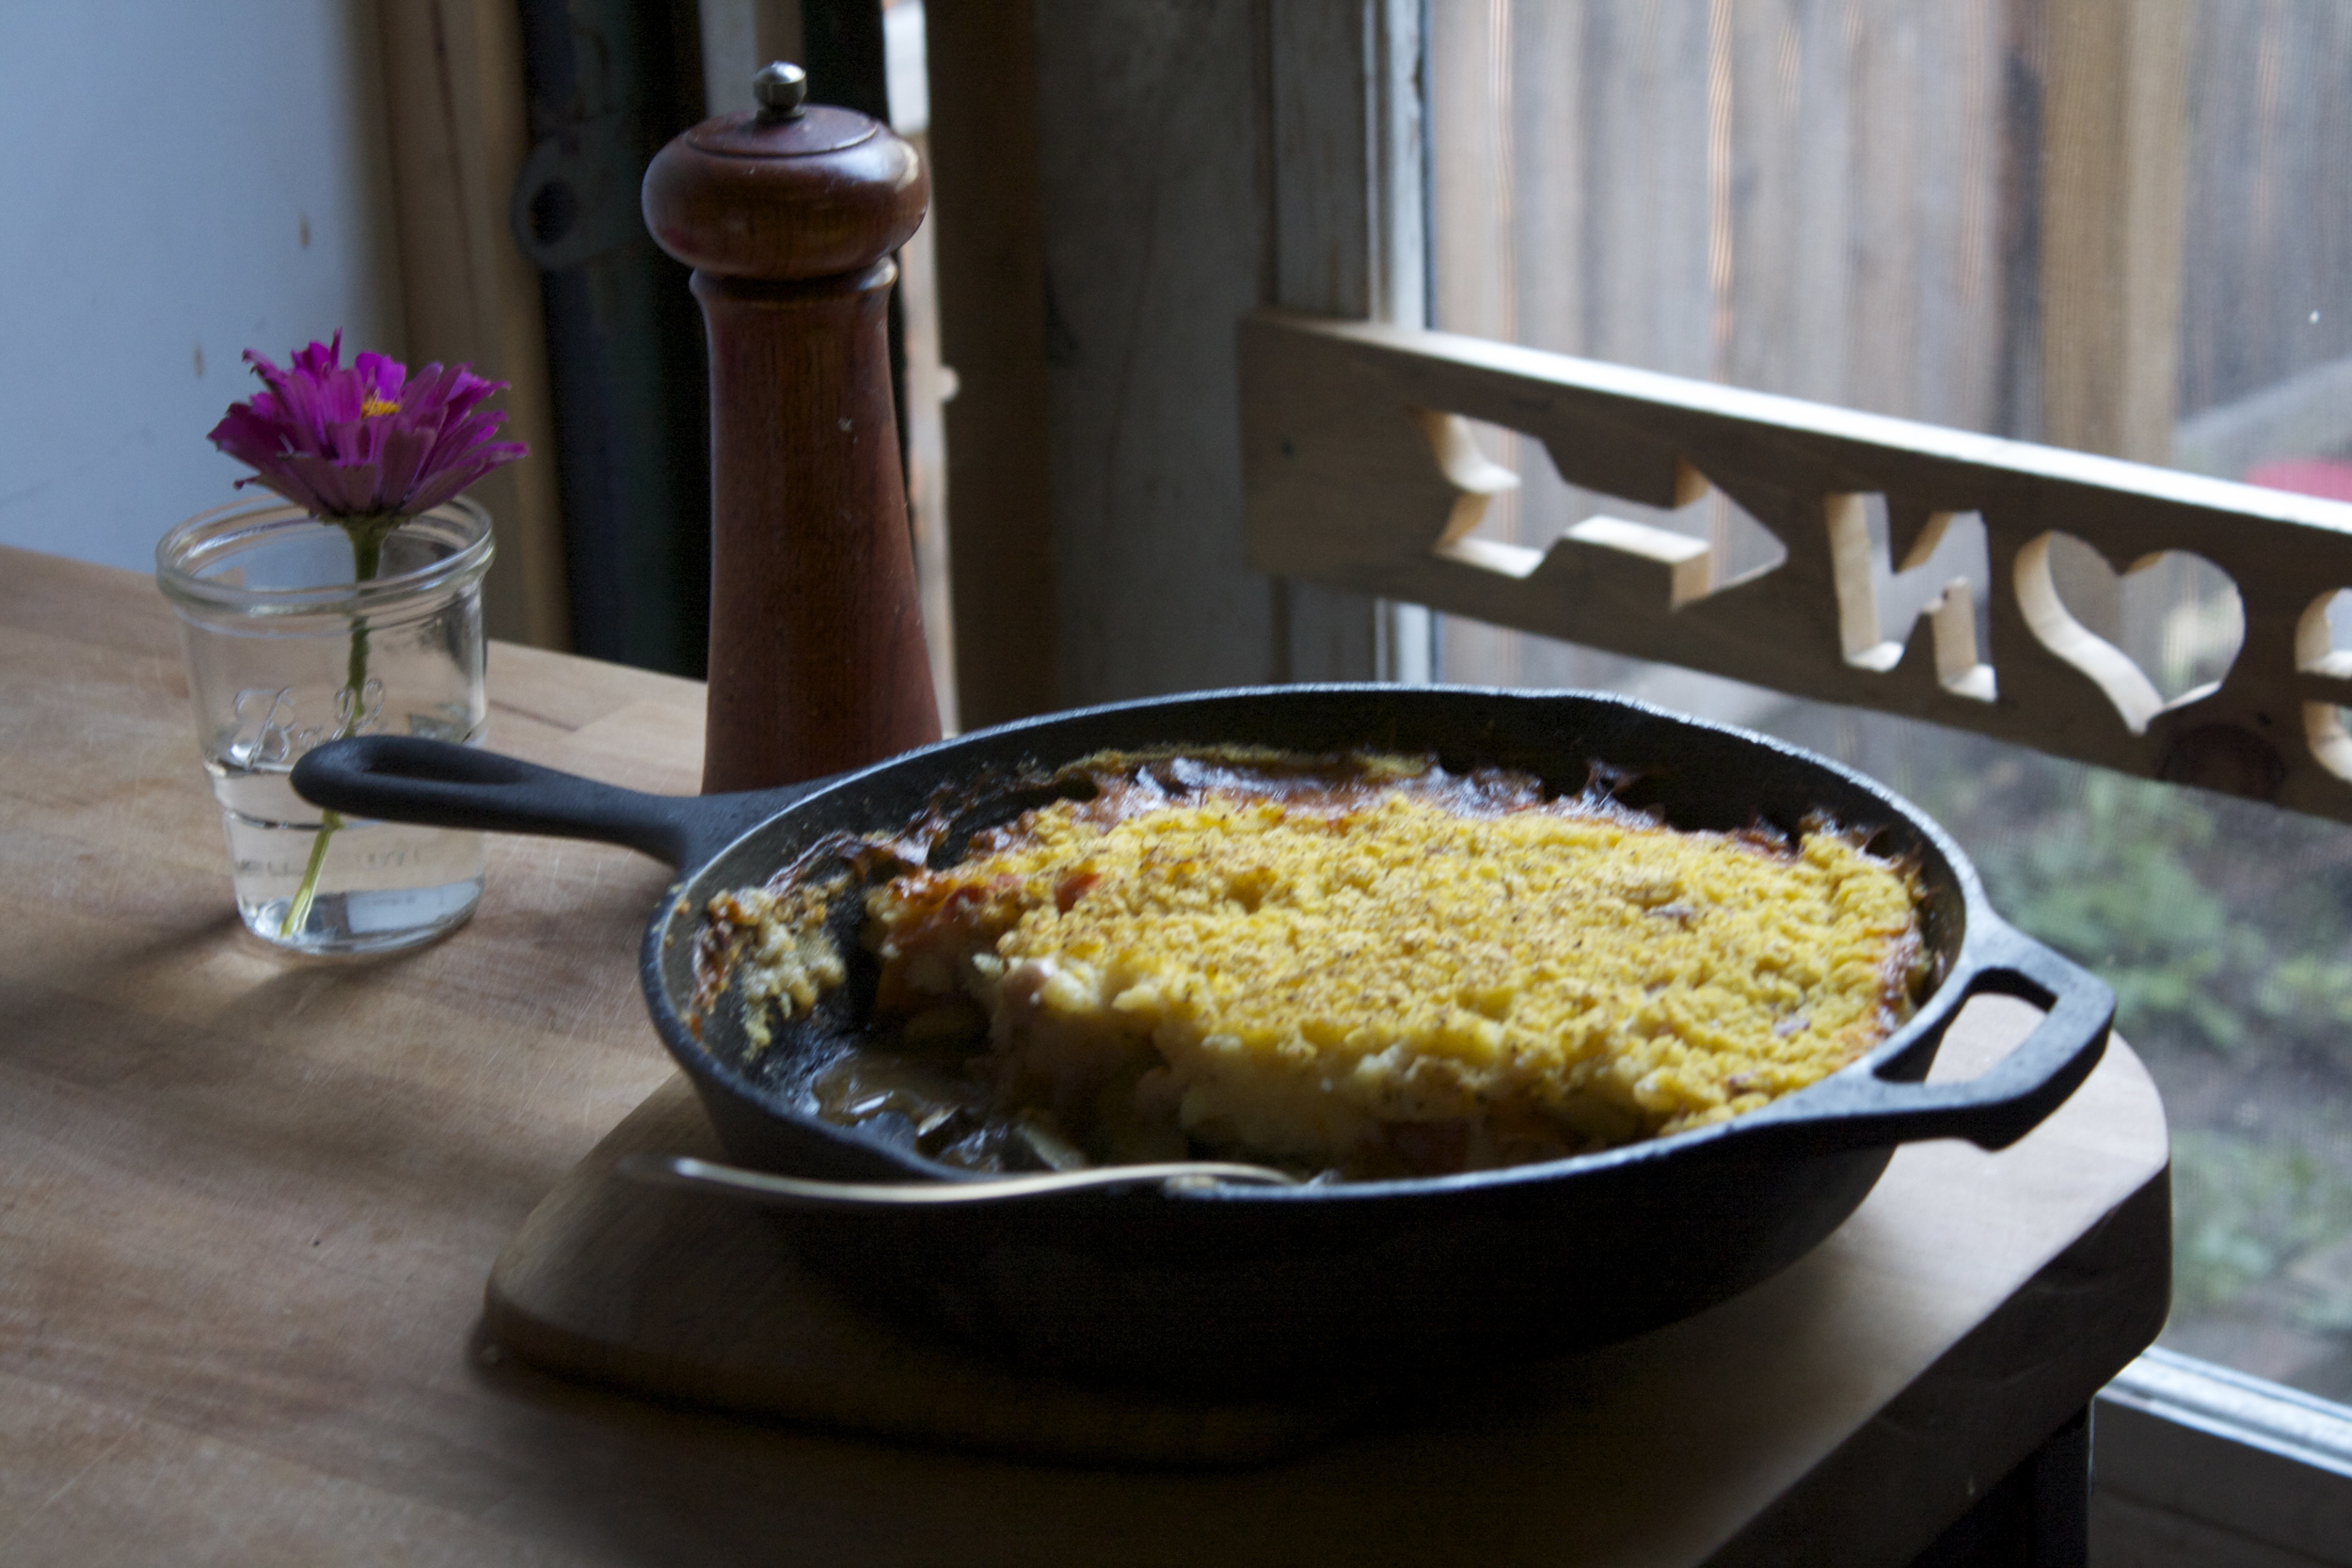
Some time later(about 45 minute) the polenta is all cooked and crispy, the veggies underneath  are all  creamy and soft, and the whole thing is ready for consumption.

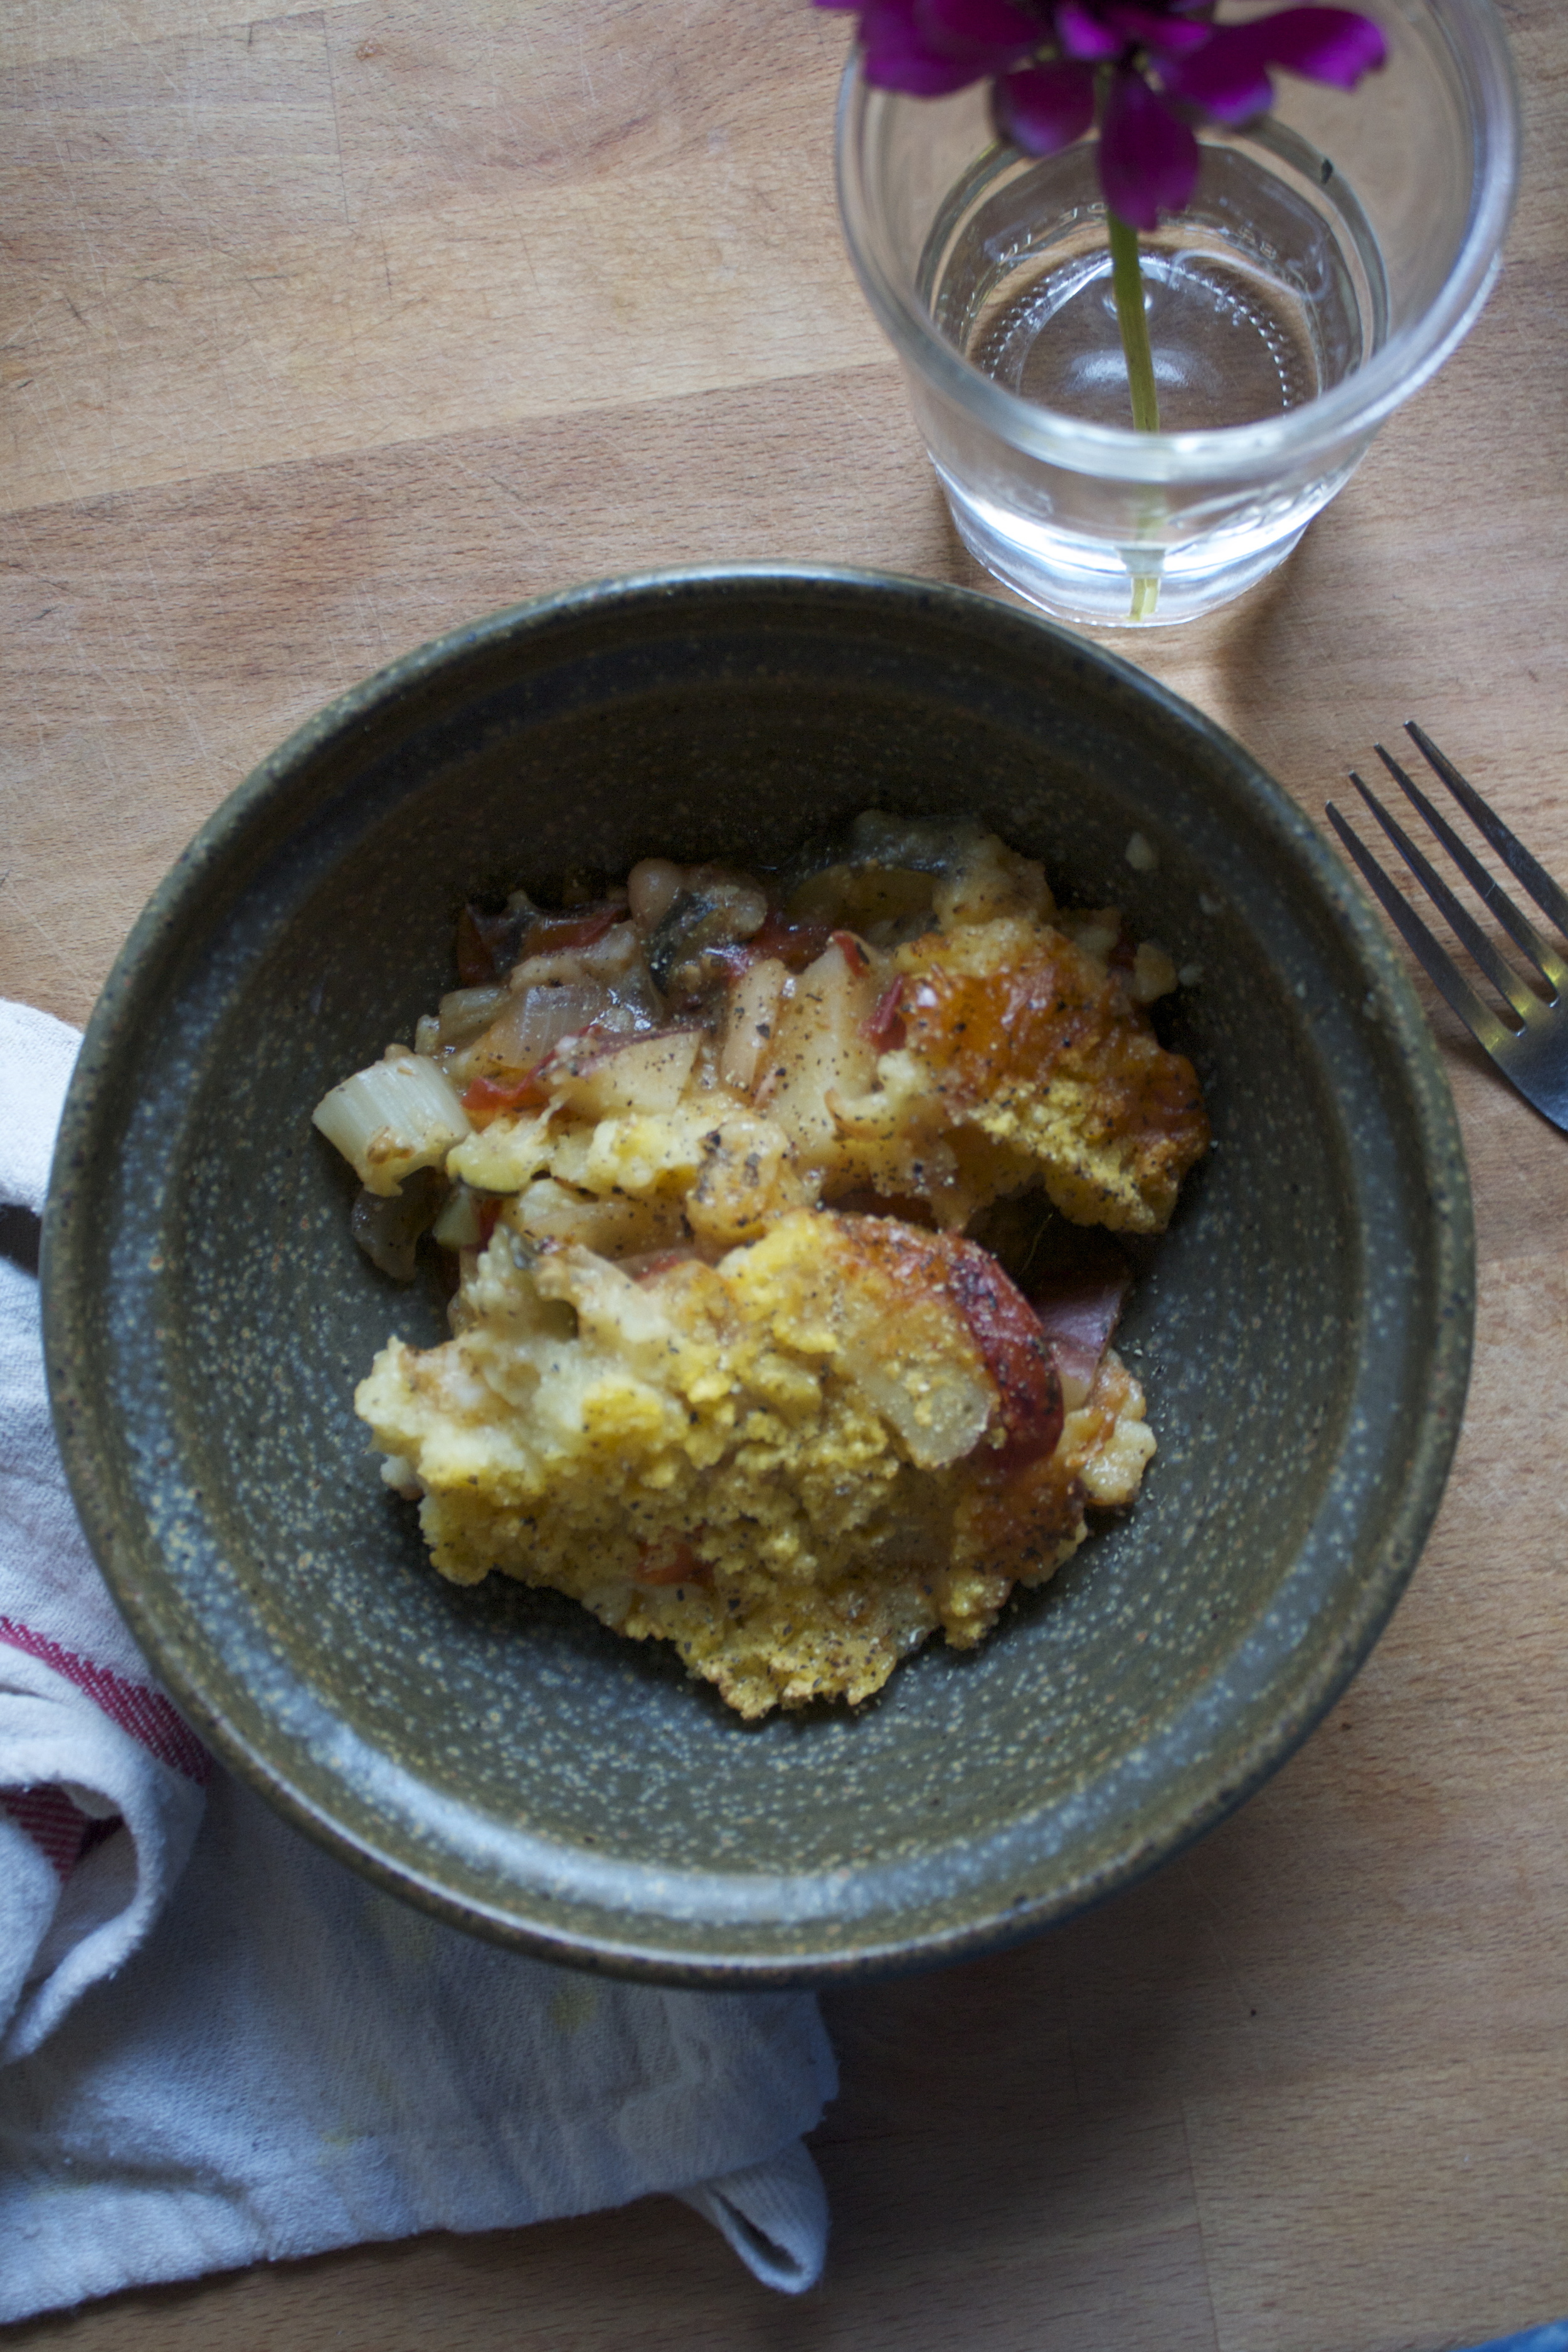
Grab you bowls, grab you forks… Big scoops right into bowl

And happy eating it is.

-C


Polenta Veggie Bean Pot Pie

serve 3-4

  • 1 carrot
  • 1 small onion
  • 2 stalks celery
  • 1 medium red potato
  • 2 tomatoes
  • 1 small zucchini
  • 1 cup canaille beans
  • 3 tablesoons italinan spice blend*
  • 3/4 cup corn meal
  • 3 cups boiling water
  • salt and pepper
  • olive oil  

*I make my own italian spice blend, which consists of basil, oregano, thyme, marjoram,, rosemary, and garlic powder. I think most blends are the same, minus the garlic so make your own use a pre blended mixture, just look to see there is garlic in it. If not, add a teaspoon or two of garlic powder to the veggies.

Preheat oven to 425.

Oil a large (I used a 12 inch) cast iron skillet or such oven. Chop up all the veggies, except the tomatoes, into smallish, mouth sized chunks and toss into skillet. Add in seasoning and a good few pinches of salt and pepper. Place on medium heat and cook for about 8 minutes, or until the veggies start to release there juices and are slightly tender.  Now chop up the tomatoes and toss those into the pot along with the beans, in with the veggies. Cook for another 5  minutes or until all the veggies are slightly tender. 

In a large jar or bowl, whisk together a pitch or two of salt and pepper to the cornmeal. While continuously whacking, pour the boiling water over the cornmeal. Pour/ spread cornmeal mixture over veggies, then smooth it out to form the crust. Season with salt and lots of pepper and place into oven. Bake for 45-50 minutes or until the polenta is cooked and has turned a nice golden brown. Remove from oven, let cool for a few minute, then serve.

Some folks might enjoy some type of cheese so if you want to,  give it to them.

In Gluten Free, Dairy Free, recipes, Savory Tags Polenta Veggie Bean Pot Pie, pot pie, veggies, vegan, gluten free, dinner, easy, 1 pot, fast easy meals, healthy, fall, autumn, hearty, comfort food
Comment

Lentil Tacos with Garden Veggie Salsa

September 1, 2015 Colleen Stem
IMG_6284.jpg
IMG_6169.jpg

HEY Hey Hey… It's Taco TUESDAY, which means that you are obligated as consumer of food to eat some tacos today!

So ok, I am not going to lie, these tacos were not actually made on a Tuesday (GASP) but were made in lu of pizza Friday (another GASP!!) 

But guess what? No one died. People were happy. Food was fantastic, and there was no mention of the pizza that was not.  So sure, taco tuesday is totally a thing around here, but  you know how "Nobady puts baby in a corner"..  well nobody buts tacos in a corner. We don't let the day of the week depict when tacos are eaten cause we think tacos are for everyday!

And these tacos, well, I got down with these. Made with lentils, cause lentils are the best, and topped with a hearty scoop of super fresh, chunky veggie salsa…. Not much is better then that. Easy and fast with lots of pretty in every bite, these tacos are a great addition to any taco dinner rotation!

Now lets get taco-ing!!!

The stuff. First off, you are going to need some type of taco shell.. soft or hard or both , that is entirely up to you.( I made taco shells a little early in the day, but store bought is totally cool.) Also need lentils, water to cook the lentils, a jalapeño (optional), taco seasoning (pre blended or your own blend) and onion. Also needed is a gigantic tomato, some red cabbage, a few kale leaves, a lime, and salt and pepper.

To get this party started, chop up half the onion, the tomato, cabbage ,and kale and toss into a big bowl. Oh, and chop up the cilantro and toss that in as well.

Sprinkle with salt and add the juice of the lime. Mix oh mix and set aside to let all the flavors meld.

Now that the salsa is doing it's thing, chop up the jalapeño and the other half of onion and toss into a big skillet and place on medium heat.

And when the bits start to brown like so...

Dump the lentils in to the pan with water.Bring it all  to a boil then turn heat down to low.. Add in the taco seasoning and sprinkle of salt and pepper and place some type of lid on ithe pan.

And simmered until cooked.

Note. Check the lentils every few minutes while they are cooking. If you think they seems to dry, add in another 1/2 cup of water.

Now it's ssembly time! Lentils in shell, topped with a generous amount of  salsa. That's it! Maybe some guacamole would be nice (I had an avocado saved for guac, but it was rotten on the inside.. I was super pissed) But with or without, these are some freak yeah yummy tacos! I served my next to a bed of some jasmine rice which was nice, but do what you want my friends. 

Happy Taco Tuesday! (or any taco day!)

-C


Lentils Tacos with Garden Veggie Salsa

Makes about 8 -10 tacos

For the Lentil Filling

  • 1 cup dried lentils
  • 2 1/2 -3 cups water
  • 2 tablespoons taco seasoning*
  • 1/2 of an onion
  • 1 jalapeño 

Fot the Garden Veggie Salsa

  • 2 big tomatoes (or one gigantic tomato)
  • 1/4 head of red(or green) cabbage (about 2 cups shredded)
  • 1/2  of an onion
  • 4-5 kale leaves
  • 1 juicy lime (2 if they are not very juicy)
  • a bunch of cilantro 
  • salt and pepper

And don't forget the taco shells!

*Note. You can use any type of taco seasoning that you like, store bought or home made. I make my own with cumin, chili powder, onion powder, garlic powder, and a little coriander. 

Dice the tomato and 1/2 the onion into small chunks and toss into a big bowl. Finely chop the cabbage an the kale into small shreds and toss that into the bowl. And chop up as much cilantro as you would like and that goes into the bowl as well. Spinkle with some salt and add in the juice of the lime.  Mix everything all around and set aside.

Once the salsa is made and sitting, chop the jalapeño and other half of onion and toss into a large skillet. Place on medium heat for a few minutes until the pepper and onion start to brown. Now dump in dried lentils and 2 1/2 cups of water. Turn heat to high and bring to a boil, them back down to low. Seaosn with salt, add in the taco seasoning, and stick a lid (or cover with something), and let simmer for about 20- 25 minutes or until the lentils have absorbed  all the water and are nice and soft. If you find the lentils are still hard and there is no liquid, , add in another 1/2 cup of water. 

Once the lentils are cooked to your liking, remove from heat and get assemble tacos. 

Scoops some lentil mixture into shells. Add on a big scoop of the fresh veggie salsa and eat with you face.

Guacamole, cheese, sour cream, or whatever are optional topping that you may consider adding but are definitely not necessary.  . 


In recipes, Gluten Free, Savory, Vegan Tags Lentil, tacos, Lentil Tacos, Garden Veggie Salsa, Vegan, Gluten free, healthy, protein, dairy free, summer, veggies, mexican, clean eating, whole food, Taco Tuesday
Comment

A Roasted Head of Cauliflower with Roasted Red Pepper Sauce

August 25, 2015 Colleen Stem
IMG_5573.jpg
IMG_5562.jpg

Finally, it's safe to turn the oven back on. No more heatwave (PLEASE NO MORE!!!) Last week was such a bust of life, I still feel like I am recovering. But let's not talk about anymore. Lets talk about this cauliflower situation that was a highlight of my week.

I have been meaning to do this for a while now. And I have attempted, I'll have the intention, get the cauliflower and peppers,  then somehow forget that I was going to cook it and just feed it to the mr raw, or he will just start eating at it and then the head is not intact anymore (He loves raw cauliflower). And sure, you don't need to have a whole head of cauliflower to roast it and enjoy it, but come on, doesn't it look super badass and pretty whole? And you can slices of it like you would a cake, a really yummy veggie cake. So yeah, it should be a whole head. Anyways, besides being pretty, this thing was freaking amazing. I love cauliflower, roasted cauliflower even more. Add to it some slightly sweet and cheesy pepper sauce, holy ho…I almost ate the entire thing myself. It was everything and more how I wanted it to turn out and am now forever going eat my cauliflower exactly like this (but probably not always). And the sauce…. I am going to make giant jars of it and stick it on everything. So good.

Now lets get to it.

The stuff. A whole head of cauliflower, a couple colorful peppers, nutritional yeast, garlic, lemon, salt and pepper, and a little bit of olive oil. 

Start with the cauliflower, Trim away any big leaves from the bottom and stick the whole head into a oven safe pot big enough to hold it.. Add in a little water and stick on the stove top on medium heat to cook for a few minutes, just to give it a little head start.

And preheat the oven

IMG_5501.jpg
IMG_5527.jpg

Pre roasted, slightly streamed cauliflower goes into the oven until a nice golden brown and all pretty like.

IMG_5470.jpg
IMG_5482.jpg

While the cauliflower is roasting, roasted the peppers too.I place mine whole onto a lightly oiled cast iron pan* and stick into the oven.

Once the peppers are starting to char and have become soft and tender, remove from the oven and let cool for a few minutes or long enough for you to handle them. When cooled enough, remove the stem, seeds and any of the skin that is coming off.

*Last year I used the same cast iron pan over and over to rasot peppes and never cleaned it, or bothered to oil it. By the end of the summer, there was a 1/2 inch thick layer of hard as rock caramelized pepper juice that I had to chip it away with a chisel… so yeah. be careful of pepper juice.

Toss the roasted peppers into a food processor along with the garlic, lemon juice, nutritional yeast, a splsh of oil and s little salt and pepper.  

And taste.. and try not to eat it all right now (It is so f ing good) 

And take that sweet, so delocouis sauce and smother all over the roasted cauliflower.

If you want, stick it back into the oven for a few minutes to crust up a little bit, but not a necessary.You can call it here and go to town.

I stuck in back in the oven for a few minutes… But again, not necessary.

And now you have this giant, amazing, head of delicious cauliflower, waiting to be eaten. I recommend removing the head and sticking it on a cutting board, you know, for easier cutting, and also it looks pretty badass. 

Cut into chunks and serve right away.  

Goodness gracious was this thing so freaking good!

Have a fantastic day!

-C


A Roasted Head of Cauliflower with Roasted Red Pepper Sauce

  • 1 fresh head of cauliflower
  • 2 red(yellow or orange work too) peppers
  • 2 -3 tablespoons nutritional yeast (the more the cheesier)
  • 4-5 cloves of garlic
  • juice of a lemon
  • salt and pepper
  • olive oil

Take whole head of cauliflower and trim any big leaves or stem off bottom. Stick into a big oven safe pot with about 1/2 inch of water. Place a lid on pot and stick on medium heat for about 8-10 minutes, or until water has evaporated. and cauliflower is slightly tender.

Preheat oven to 425.

After the brief cook on the stove top, remove lid, drizzle cauliflower with a tiny bit of oil and sprinkle with a little salt and pepper. Stick into oven without the lid.

Now that the oven is on, toss peppers into oven, either on a baking sheet, pan, or on the rack if you have the space and cook until all roasted and soft (should take about 15 minutes). Remove when cooked and let cool off for a few minutes. Once cool enough to handle, remove seeds and stem and any of the skin that want to come off and stick into a food processor. Add in the garlic, nutritional yeast, lemon juice and a tiny drizzle of olive oil. Blend until smooth. Add salt and pepper to taste.

Once the head of cauliflower is cooked and browned, remove from oven and dump/ smear with the red pepper sauce. If you want, place back into oven for a few more minutes, or not. Good both ways.

Remove from pot and cut into big ass chunks. Garnish with something green and eat until you can't eat anymore.

If by chance you have any left overs (which I highly doubt) try blending it up as soup. It is freaking fantastic!

In recipes, Gluten Free, Vegan Tags vegan, gluten free, vegan cheese, veggies, cauliflower, Roasted head of cauliflower, red pepper sauce, dinner, side dish
Comment

Chocolate Zucchini Cake

July 31, 2015 Colleen Stem
IMG_3644.jpg
IMG_3739.jpg

What are your weekend plans?

Me well, I need to can, pickle and eat as much zucchini as I can. And it's not just zucchini anymore… we are getting into cucumbers too…AAAHHH  I know I have said this a few times in the past weeks, but man, I have so manning freaking zucchinis.. and the more I eat, the more I end up with… It's getting pretty crazy here!

So anyway, yesterday my dad came back to VT, WOO HOO! and I was his first stop on his rotating dinner schedule. (cause I am his favorite child. I think..maybe) I made zucchini noodles for dinner (I have made them every night for the past week) and I wanted to make him dessert,  I have all sorts of pretty fruit that I wanted to make and prepare,  but I also had little time and honestly, little desire to move all that much (it was so f ing hot!)  I already had out the shredder and a bowl, and the zucchini was just sitting there, in the basket  taunting me with it's gigantic green whaleness.  So I figured I'd just make a zucchini cake, or better yet, cause my dad really likes chocolate, a chocolate zucchini cake. 

This cake is tender and moist, almost like a cakey brownie, so it does not require any frosting  which is nice when your dead tired and it's so hot that any frosting would probably just melt off anyway. (although you could totally frost it up) It makes a great dessert, but I would not hesitate to serve this for breakfast either because,  1. It has a lot of zucchini in it which automatically justifies eating it whenever,  2.  also made with whole wheat, and 3. it's totally ok to eat chocolate cake for breakfast. I mean people eat donuts for breakfast and that shit is usually fried. 

Yeah, this is for sure a dessert/breakfast cake.

The stuff for cake…. Regular all purpose flour, white whole wheat flour, and cocoa powder. Some sugar, salt, baking soda and oil. A little vanilla extract and a bit of coffee. And of course, shredded zucchini

IMG_3614.jpg
IMG_3625.jpg

Dump the sugar, salt and baking soda into flour, whisk together, then mix in the oil, vanilla and the coffee. Now add in the shredded zucchini, but right before adding it in,  give it a squeeze to remove a little bit of the liquid. 

Mix until combined.

And pour batter into a well oiled pan

IMG_3639.jpg

Feeling fancy? I was so I peeled the green skin from a zucchini and make a little starburst on top

And into the oven to bake...

And it comes out looking so fancy.  Let cake cool for a few minutes and carefully flip from pan.

Note. It might not be the best idea to test your cake with a blunt chop stick.. I did and it made the middle sink in a little. No big deal, but next time I will use a fork.

Cooled and removed from pan. Now all you need to do now is eat cake.. I think that's something you can handle.

Happy Friday!!!! 

-C


 Chocolate Zucchini Cake 

  • 1 cup white whole wheat (can use regular whole wheat or alll purpose)
  • 1 cup all purpose flour
  • 1 cup white sugar
  • 1/2 cup cocoa powder
  • 2 teaspoons vanilla extract
  • 1/2 cup oil (veggie, canola, sufflower)
  • 1 teaspoons baking soda
  • 1 teaspoon salt
  •  2 cups of shredded zucchini 
  • 1/2 cup of coffee

Preheat oven to 350

In a large bowl, whisk together the flours, salt, baking soda, cocoa powder, salt and sugar. Then add in the oil, vanilla and coffee. Add in the zucchini. Mix until incorporated. 

Oil a 9 inch cake pan and pour in the batter. If you want, use  zucchini skin to make a pretty design on top (completely optional), and place into preheated oven.

Bake for about 45-50 minutes, or until a tester stabbed in the middle comes out clean. 

Remove from oven and let cool in pan for at least 5 minutes the gently invert pan to remove cake and place on a rack to cool.

Serve as soon as you want..

Place in mouth, chew, and swallow…..Smile!!!


Tags Chocolate Zucchini Cake, Chocolate Cake, Zucchini, vegan cake, whole wheat, vegetarian, veggies, dessert, snack, chocolate
Comment

Sweet and Savory Ricotta Galettes

June 30, 2015 Colleen Stem

I made a pie dough a little while ago with the intention of making a cherry pie…but I ate all the cherries . (I do that a lot… eat all of something that I was intending to use for something else)

And then I think about that saying.. The road to hell is paved in good intentions.

.Well I guess I am going to hell.

So no cherries, but I have a crap load of summer squash (and it's only the beginning) and a few peaches that are in need of some eating. And what's that, a container of ricotta in the fridge from lasagna a couple weeks back…. Meant to be and not in hell yet!

Sure, I could have made one single crust galette, sweet or savory, and thrown it to the masses for consumption, but I figured that I might as well just hit two birds with one stone. A dinner and a dessert, all at once, and call it a victory in time management and putting a dent in the pile of squash on the table. (don't be fooled, I love excess amounts of squash.. It's like the printer paper of the veggie world.. can be used for everything!) And bonus, only one set of dishes! I mean come on, this is so good, easy and just really pretty. I know, I know….. so smart.

Anyway, here, take a look, get inspired and make some pretty dinsert (dinner and dessert) galettes. 

The stuff. For the base, we need one single crust pie dough (that's going to be for two smaller galettes) and some ricotta cheese.  The savory galette has summer squash, salt, pepper, lemon ( the zest) and a couple tomatoes.  The sweet needs honey, a peach, and a few strawberries. 

And if you want, change up your toppings. Pretty much any fruit or veggie combo would work. And spice up the ricotta if you wan. Garlic, fresh thyme, cinnamon… whatever will make you happy.

First things first. Roll ourt dough. You could cut the dough in half and roll two separate disks, but I just rolled out one big rectangle shape.

And onto the baking sheet and into the fridge to rest.

While the dough is chillin, take half of the ricotta and whip it up  with some honey and thinly slice up your fruit.

Take the other half of the ricotta and add a bit os lemon zest, a sprinkle of salt and pepper, and mix that up. And thinly slice up the squashes and dice up the tomatoes.

Two crusts(or one cut in half. Smear the honey ricotta on one side, savory on the other, leaving a boarder so you can fold the dough over.

Now pile the fruits on the honey ricotta, veggies on the savory,  and fold the uncheesed part of the crust over. just enough to keep everything from falling out. Sprinkle salt and pepper on the veggies.

Stick into  a preheated oven and bake until the crust is cooked all nice and golden brown and crispy. 

While the galettes are baking, toss the chunks of tomatoes into a skillet with a splash of oil, salt and pepper and stick it into the oven too. Just bake until the tomatoes are nice and soft. You can stick in the oven right away and let the tomatoes cool, or towards the end of the bake time so that you can eat them warm… these tomatoes are good hot or cold.

all baked up, removed from the oven, looking oh so pretty.

Pile the roasted tomatoes onto the savory tart. And if you got it, a bit of chopped freshy fresh basil

And drizzle a little bit more honey on the sweet.

IMG_1602.JPG

And serve… Is it savory first or do you go sweet?

How about a pice of both. Dnner and dessert.. all on one plate!

Happy Tuesday!

Ba Bye!

-C


Sweet and Savory Ricotta Galette's

-Makes 2 small or one large galettes 

  • a single pie crust (recipe here.. or use whatever dough you like)
  • 1 cup of ricotta cheese

For the savory

  • 2 cups thinly sliced green and yellow summer squash*
  • 2 roma tomatoes
  • salt and pepper
  • teaspoon lemon zest
  • a few fresh basil leaves
  • olive oil

For the Sweet

  • 2-3 tablesppons honey
  • 1 peach thinly sliced*
  • 3-4 strawberries thibky sliced*

*Note. Feeling like blueberry apricot or maybe potatoes and peas? Swap out any fruit and veggie (and spice) combination you want. The possibilities are endless! And if you want to do just one big galette, go for it. 

Roll out pie dough in either 2 separate disks or one large rectange cut in half and.place on baking sheet and stick in fridge. While dough is resting, divide the ricotta into separate bowls. Add the salt, pepper and lemon zest to one, and the honey to the other. Using a fork, whip them up.

Preheat oven to 400 degrees

When the oven is preheated, grab the crust from fridge and smear the ricotta fillings evenly on the middle of each crust, leaving about an inch and a half boarder. Layer on the toppings, (sweet on honey, savory on lemon pepper.. or whatever floats your boat) and fold  border over the edges of the filling. Place in oven and bake for about 35-40 minutes or until the crusts are nice and crispy and golden brown.

While those are baking, dice up the tomatoes and toss into a oven safe skillet with a little drizzle of oil and sprinkle of salt. Stick that into the oven for about 10 minutes or until the tomatoes are nice and soft. You can do this right away, or towards the end of the bake time of the galettes… roasted tomatoes are great warm or cold.

When the galettes are done baking, remove from oven and let sit for at least 5 minutes before serving. Top the savory galette with the roasted tomatoes and chopped fresh basil. Drizzle a little more honey on the one with the fruit .

Serve one, then the other, or both at the same time!

Eats good hot, warm, or cold. Utensils not required


Tags galette, rustic tart, pie, ricotta, healthy, fruit, veggies, dinner, dessert
Comment
← Newer Posts Older Posts →
 

https://thelovelycrazy.squarespace.com/config#/|/about/

Me. Food Maker.Food eater. Woo HOO!

STEM+NODE  SMALL BATCH AND ONE OF A KIND POTTERY

stem+node ceramics


____________________

Subscribe

GET NEW POSTS IN YO EMAIL

You are AWESOME!!!


@thelovelycrazy 2014-2021