• stem+node ceramics
  • HOME
  • Food Recipes
  • About
  • Contact
Menu

The Lovely Crazy

Street Address
City, State, Zip
Phone Number

Your Custom Text Here

The Lovely Crazy

  • stem+node ceramics
  • HOME
  • Food Recipes
  • About
  • Contact

Apple Cranberry Butternut Squash Soup with Apple Cranberry Relish

November 24, 2018 Colleen Stem
IMG_2608 2.jpg
IMG_2498 2.jpg

Soup is all about comfort and I needed comfort this week. What with being all sad and slightly stressed with a little touch of the holiday blues. And I needed something to warm me up because is has been freaking chilly cold. I needed soup. But I wanted something slightly special, not the everyday, but also not anything fussy or finicky. A soup that I could make really fast or let sit on the stove all day. A soup that would bring a little brightness without being overly rich. A soup to take away the chill and make me happy.

Is that asking to much of a soup? I think not.

This soup, it did it all. But also take into account, this soup is not for the people that do not like squash. Or for the people that do not like apples or cranberries. Or for people that do not like thick creamy soups. But if you are not one of this people (you are a person that likes squash, apples and cranberries, and creamy soup) then this soup is for you. It is for us. Creamy, flavorful, slightly sweet and spicy with a little tang and just so dang delicious. It is like a warm blanket of soup. Comfortable and lovely. I have basically eaten an entire pot all to myself in the past two days.

It has been just what I needed.

Join me.

IMG_2453.jpg

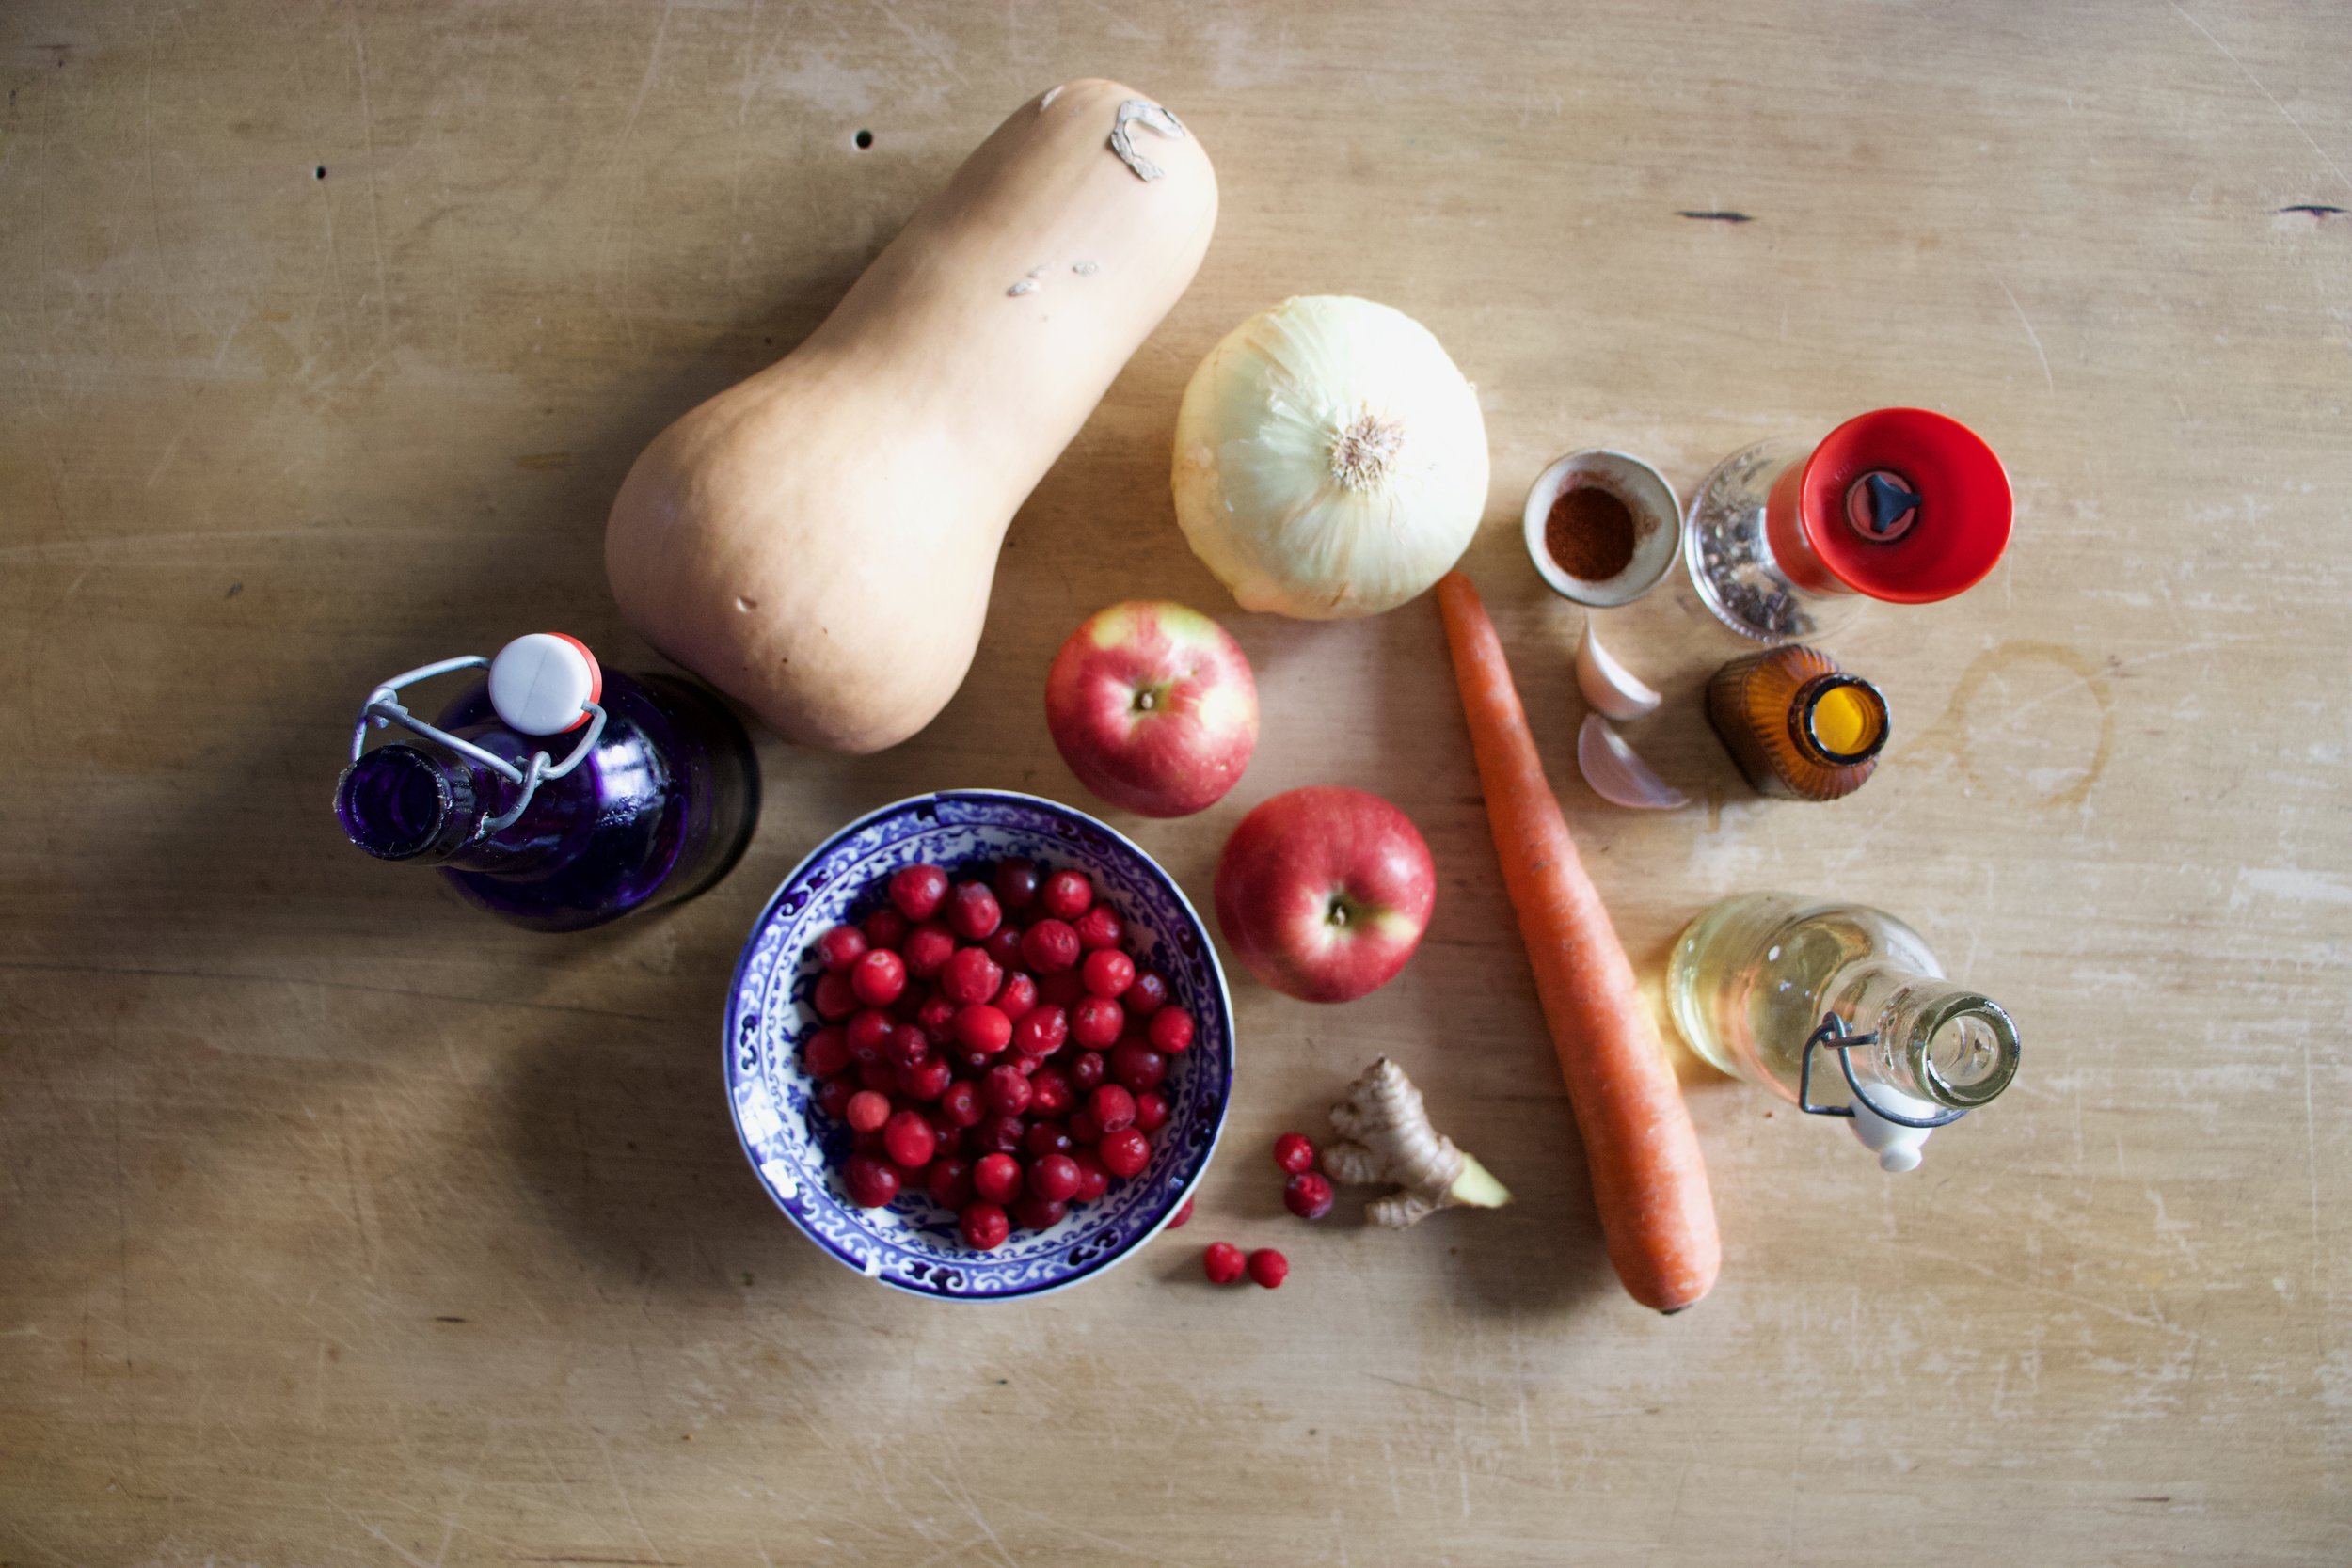
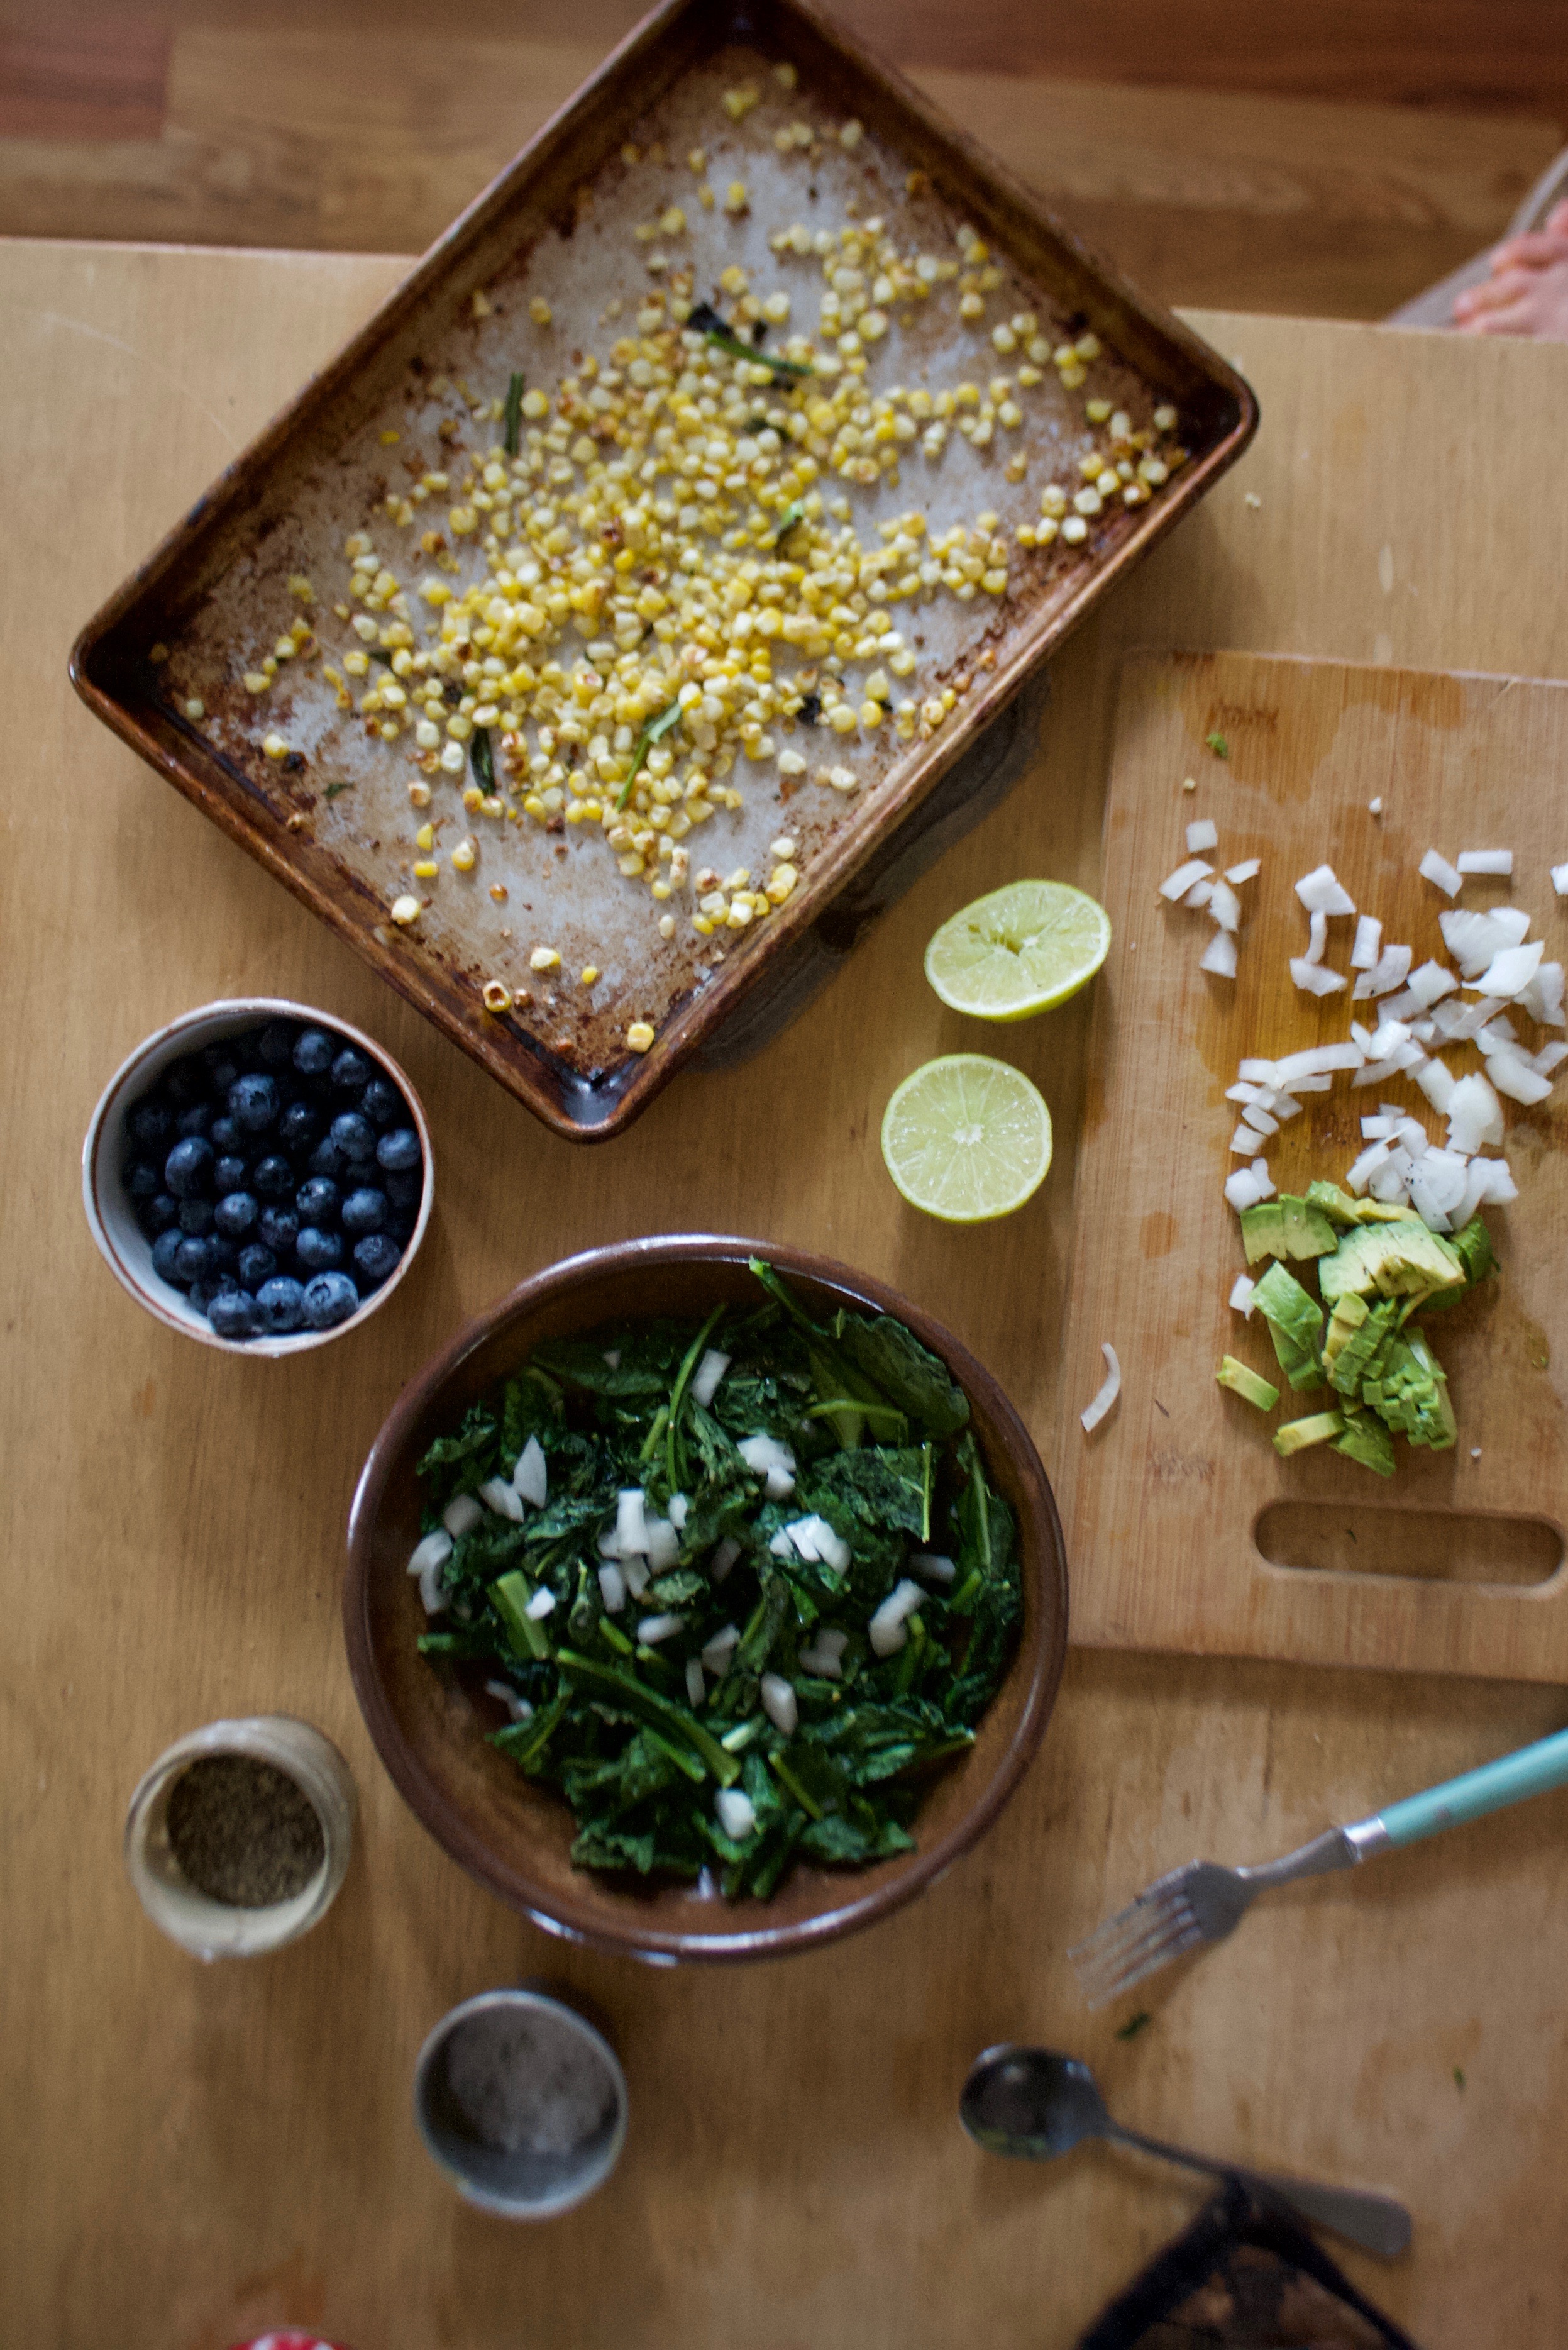
The stuff. A butternut squash, a couple apples, and some cranberries. Also a carrot, an onion, some fresh ginger, a few cloves garlic, cumin and chili powder, salt and pepper, apple cider vinegar, and a little olive oil.

IMG_2473.jpg

Start by chopping up the carrot and the onion. Small pieces just because they cook a little faster.

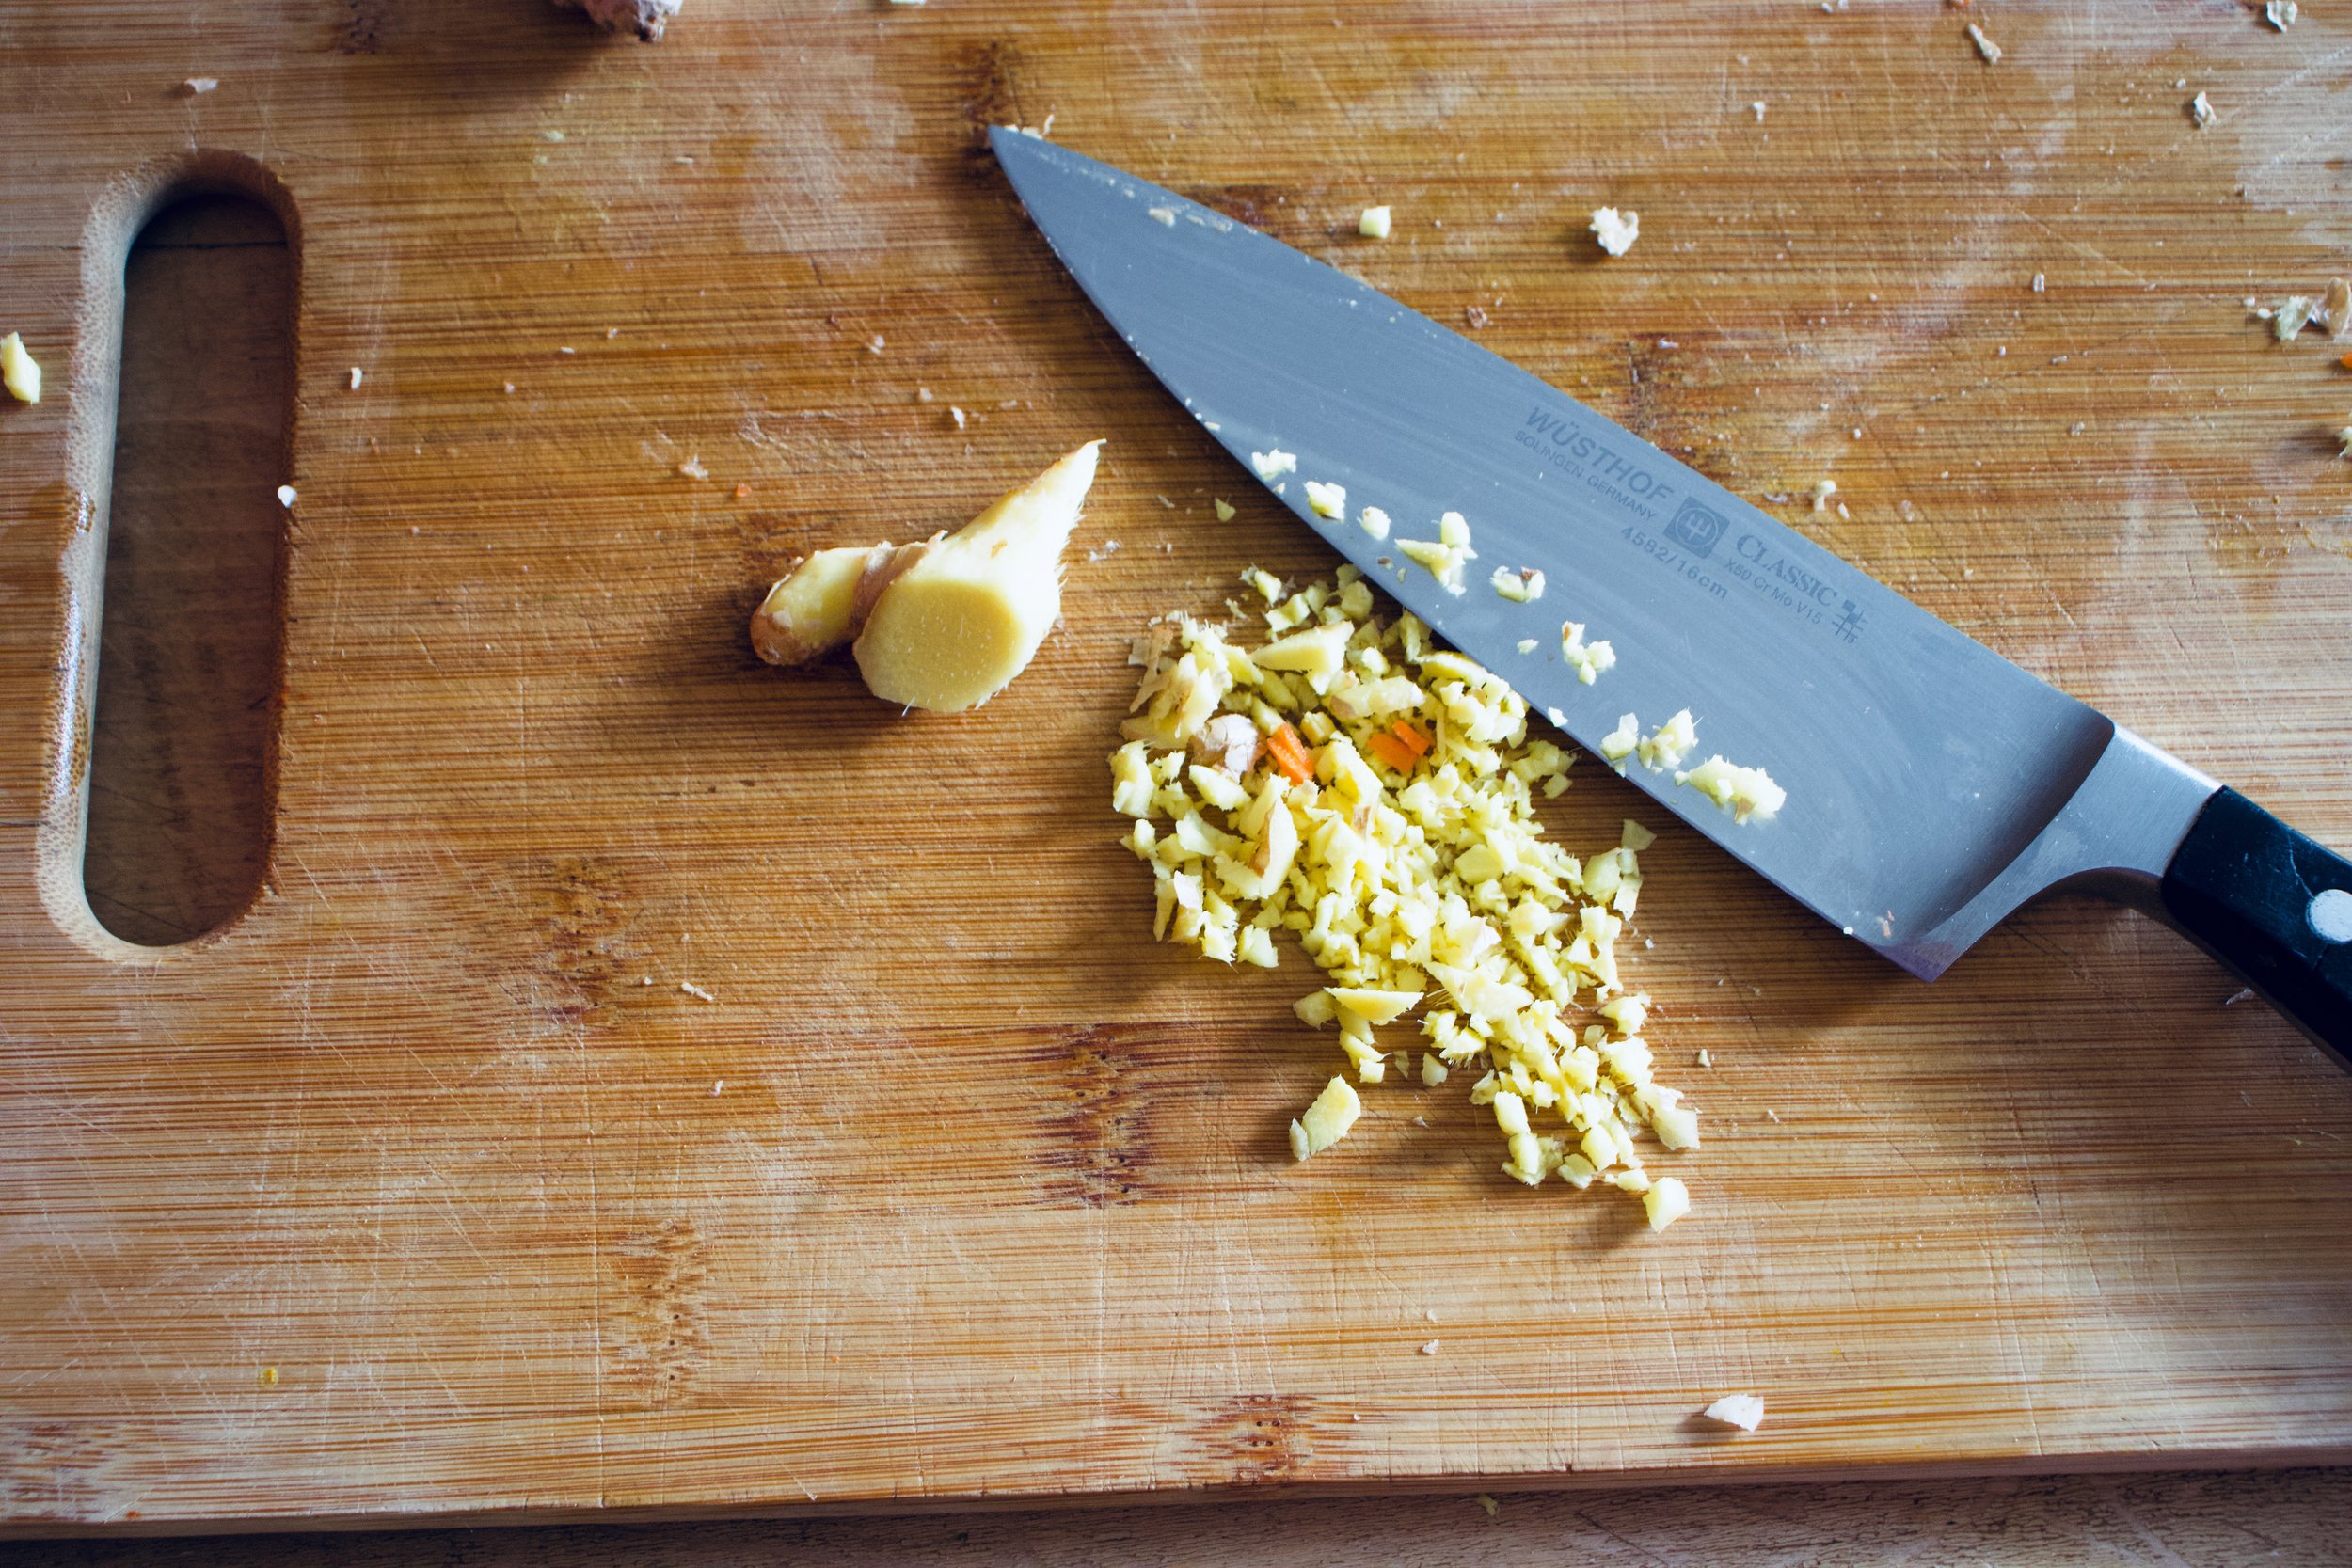
Peel and grate or mince some fresh ginger too.

IMG_2479.jpg
IMG_2485.jpg

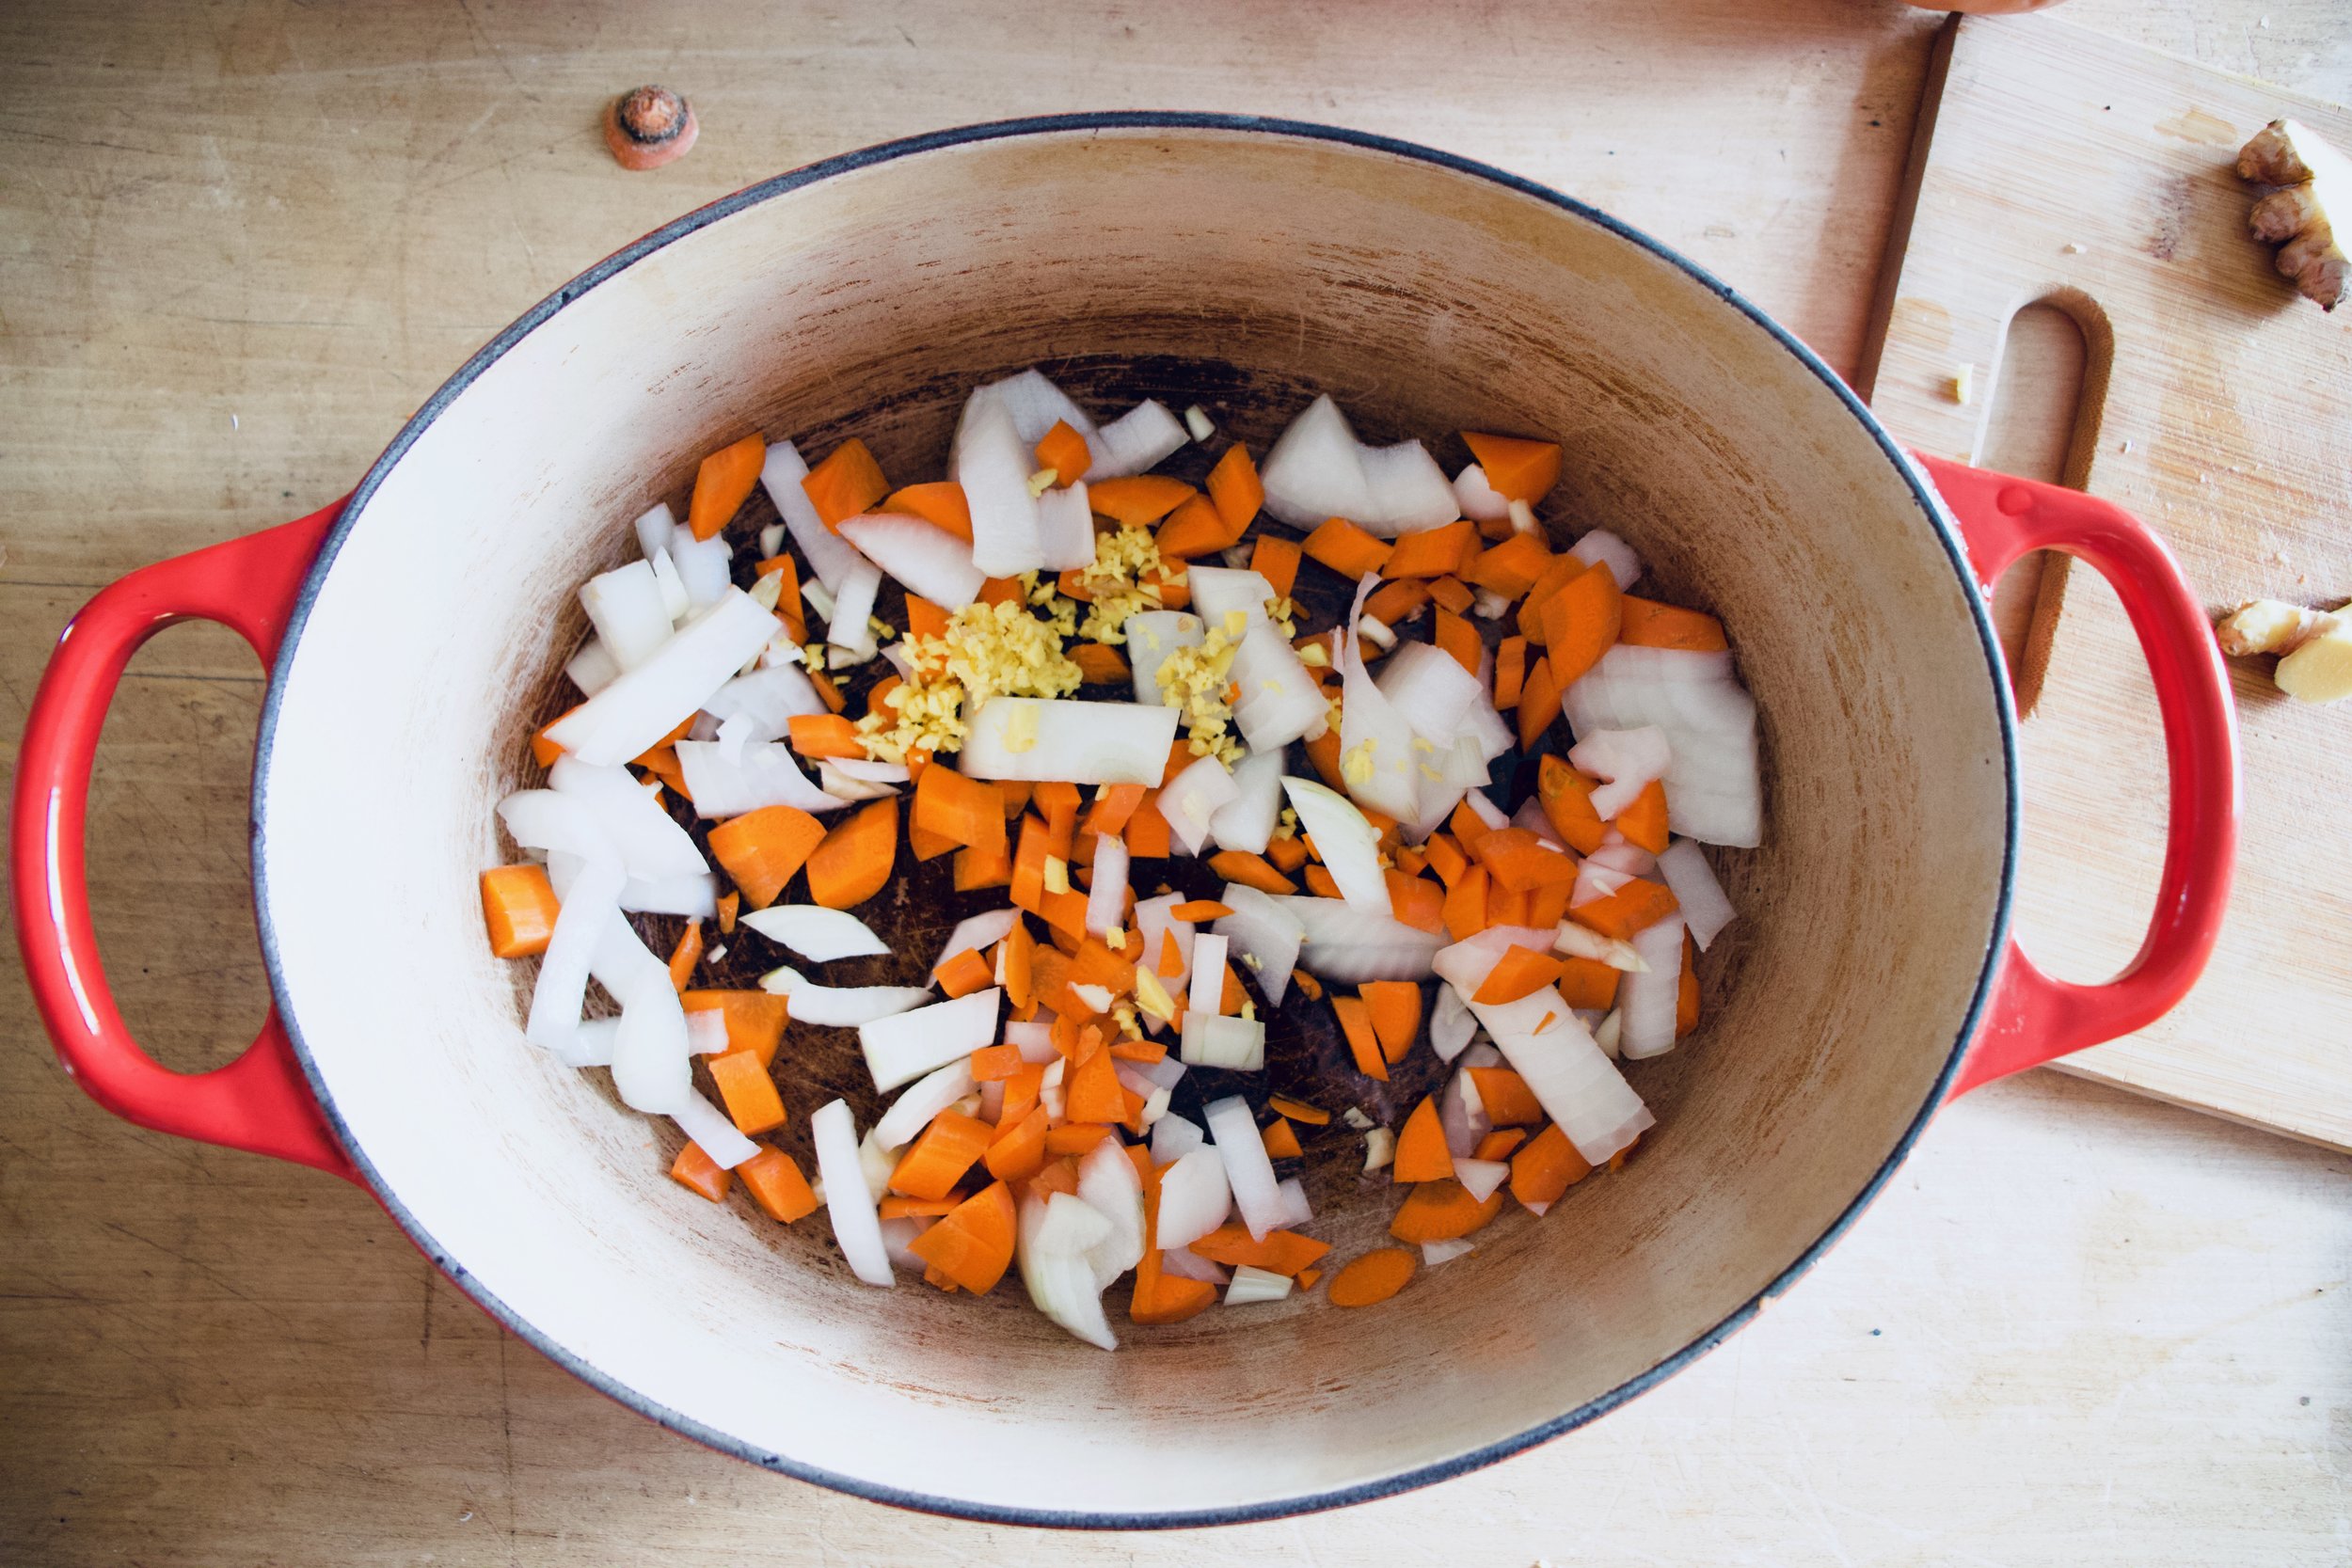
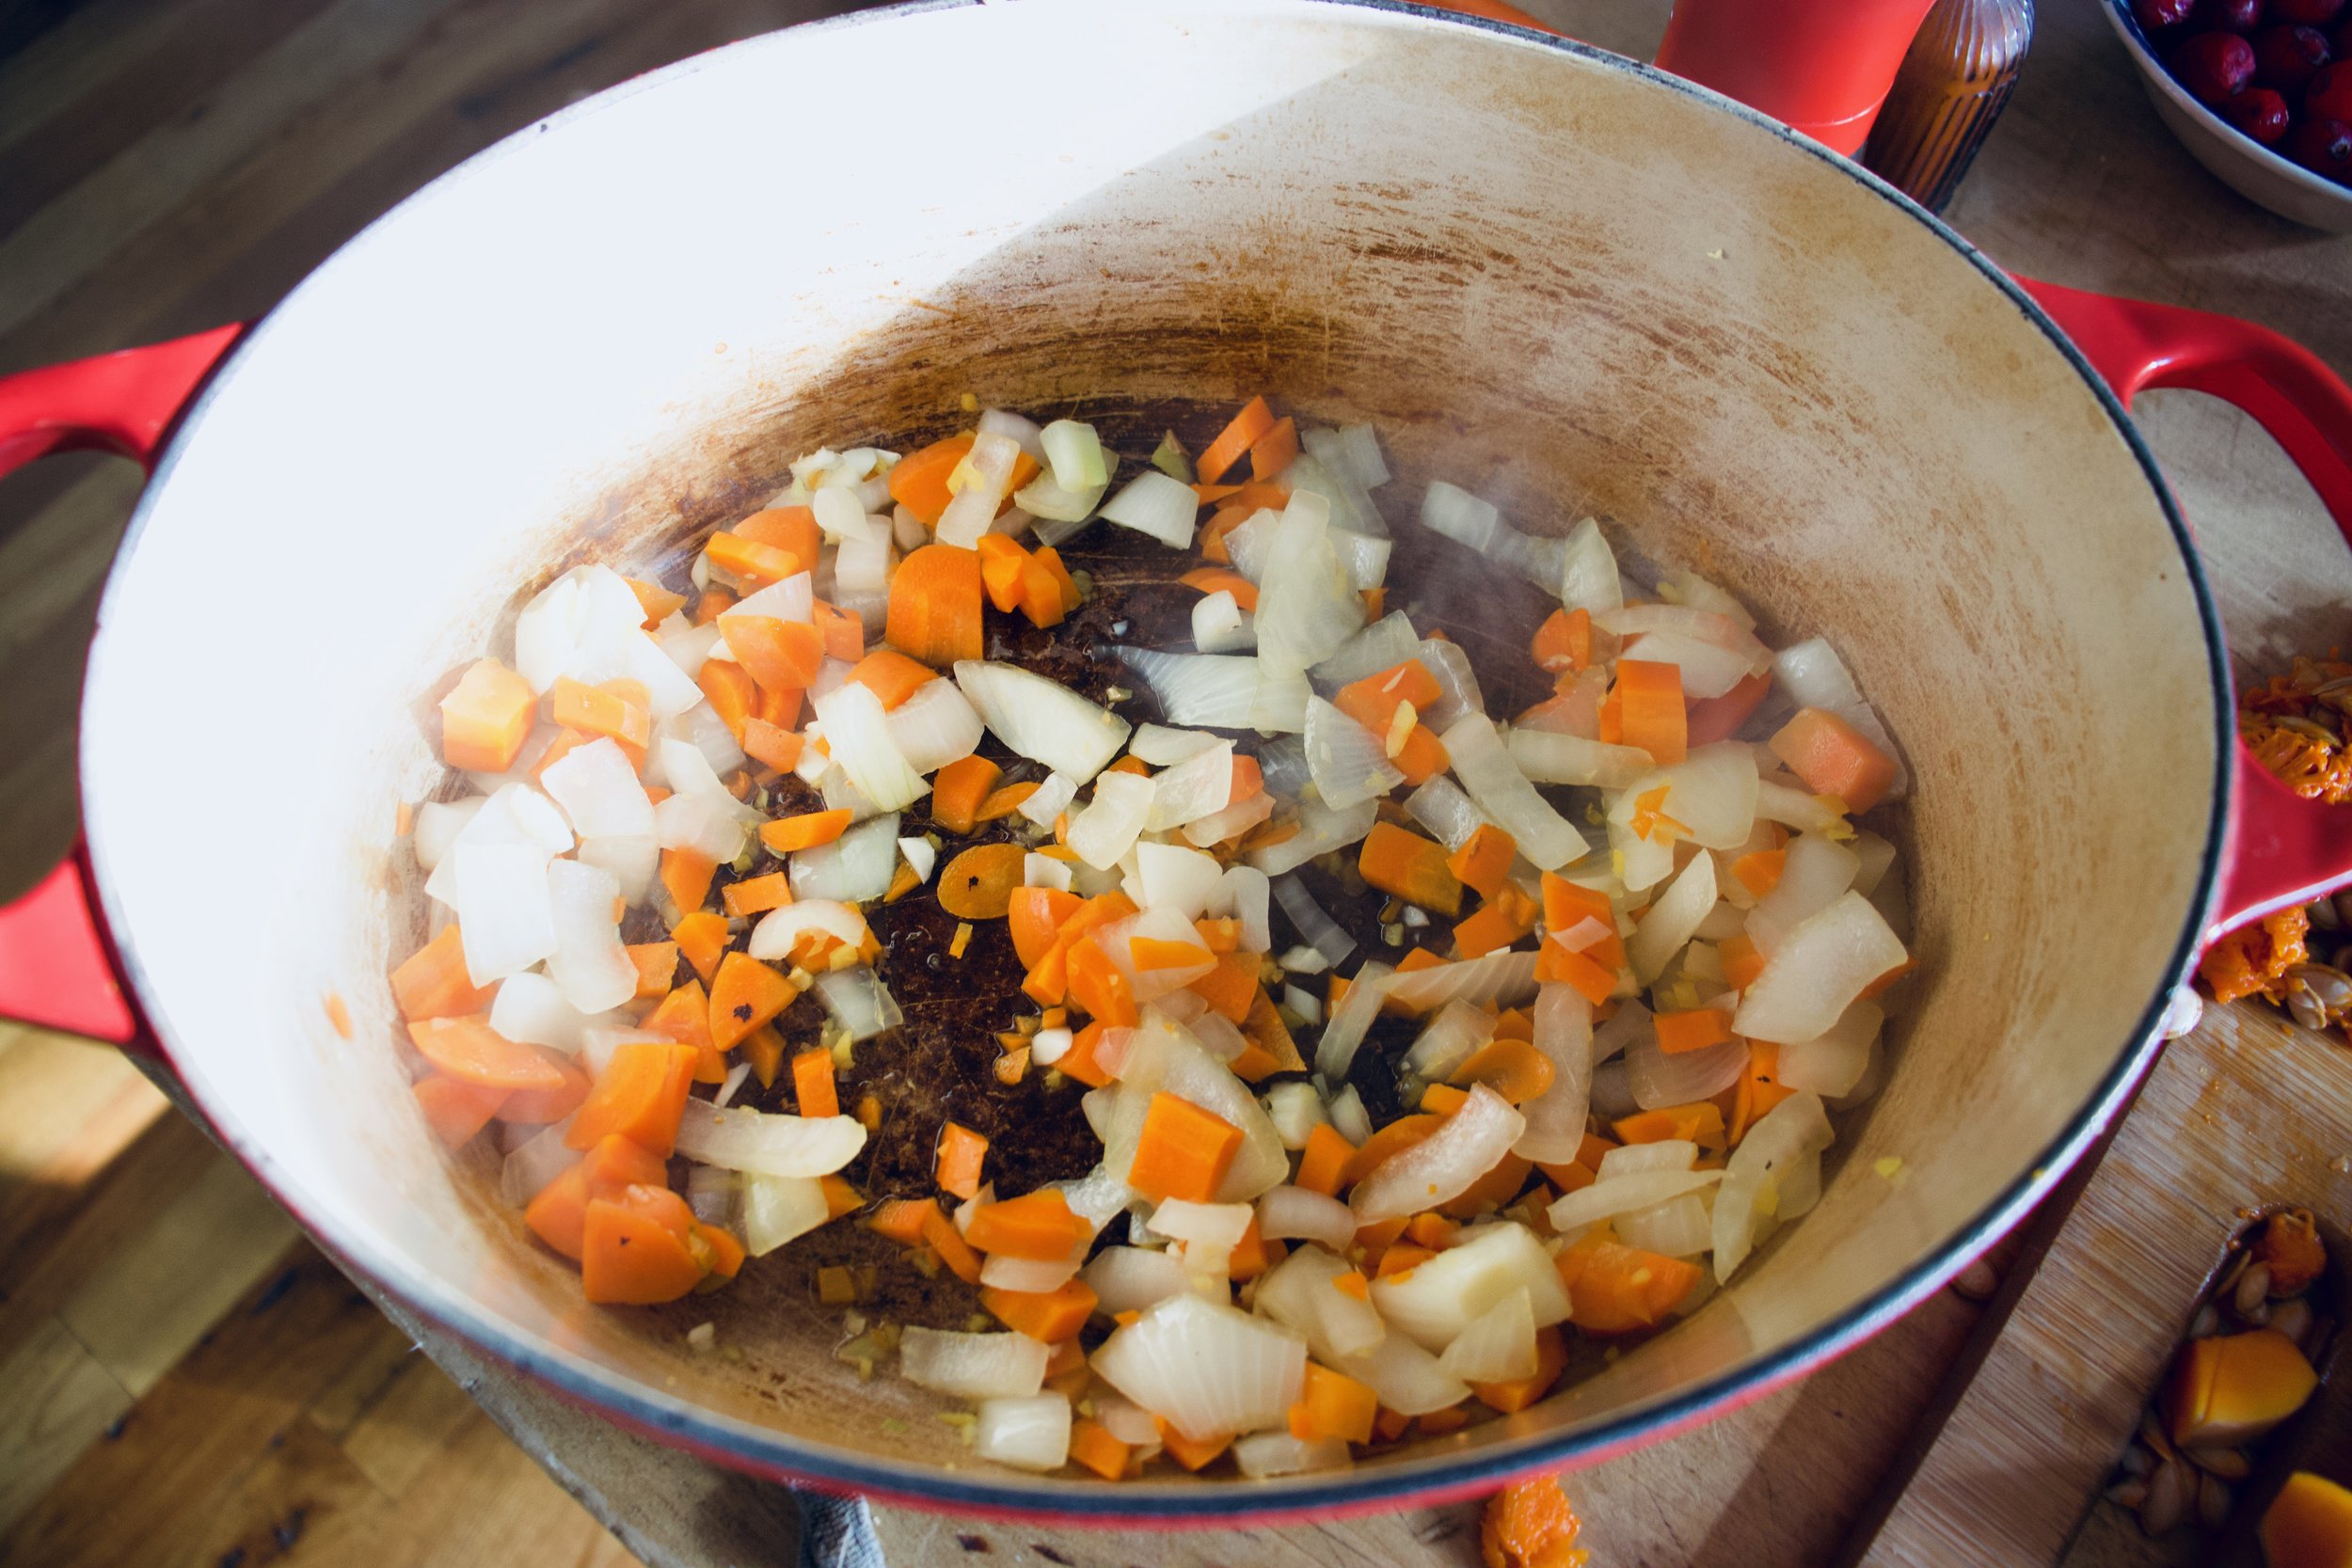
Toss that all into a big pot with a splash of olive oil and a splash of water and cook on a medium heat until tender and fragrant.

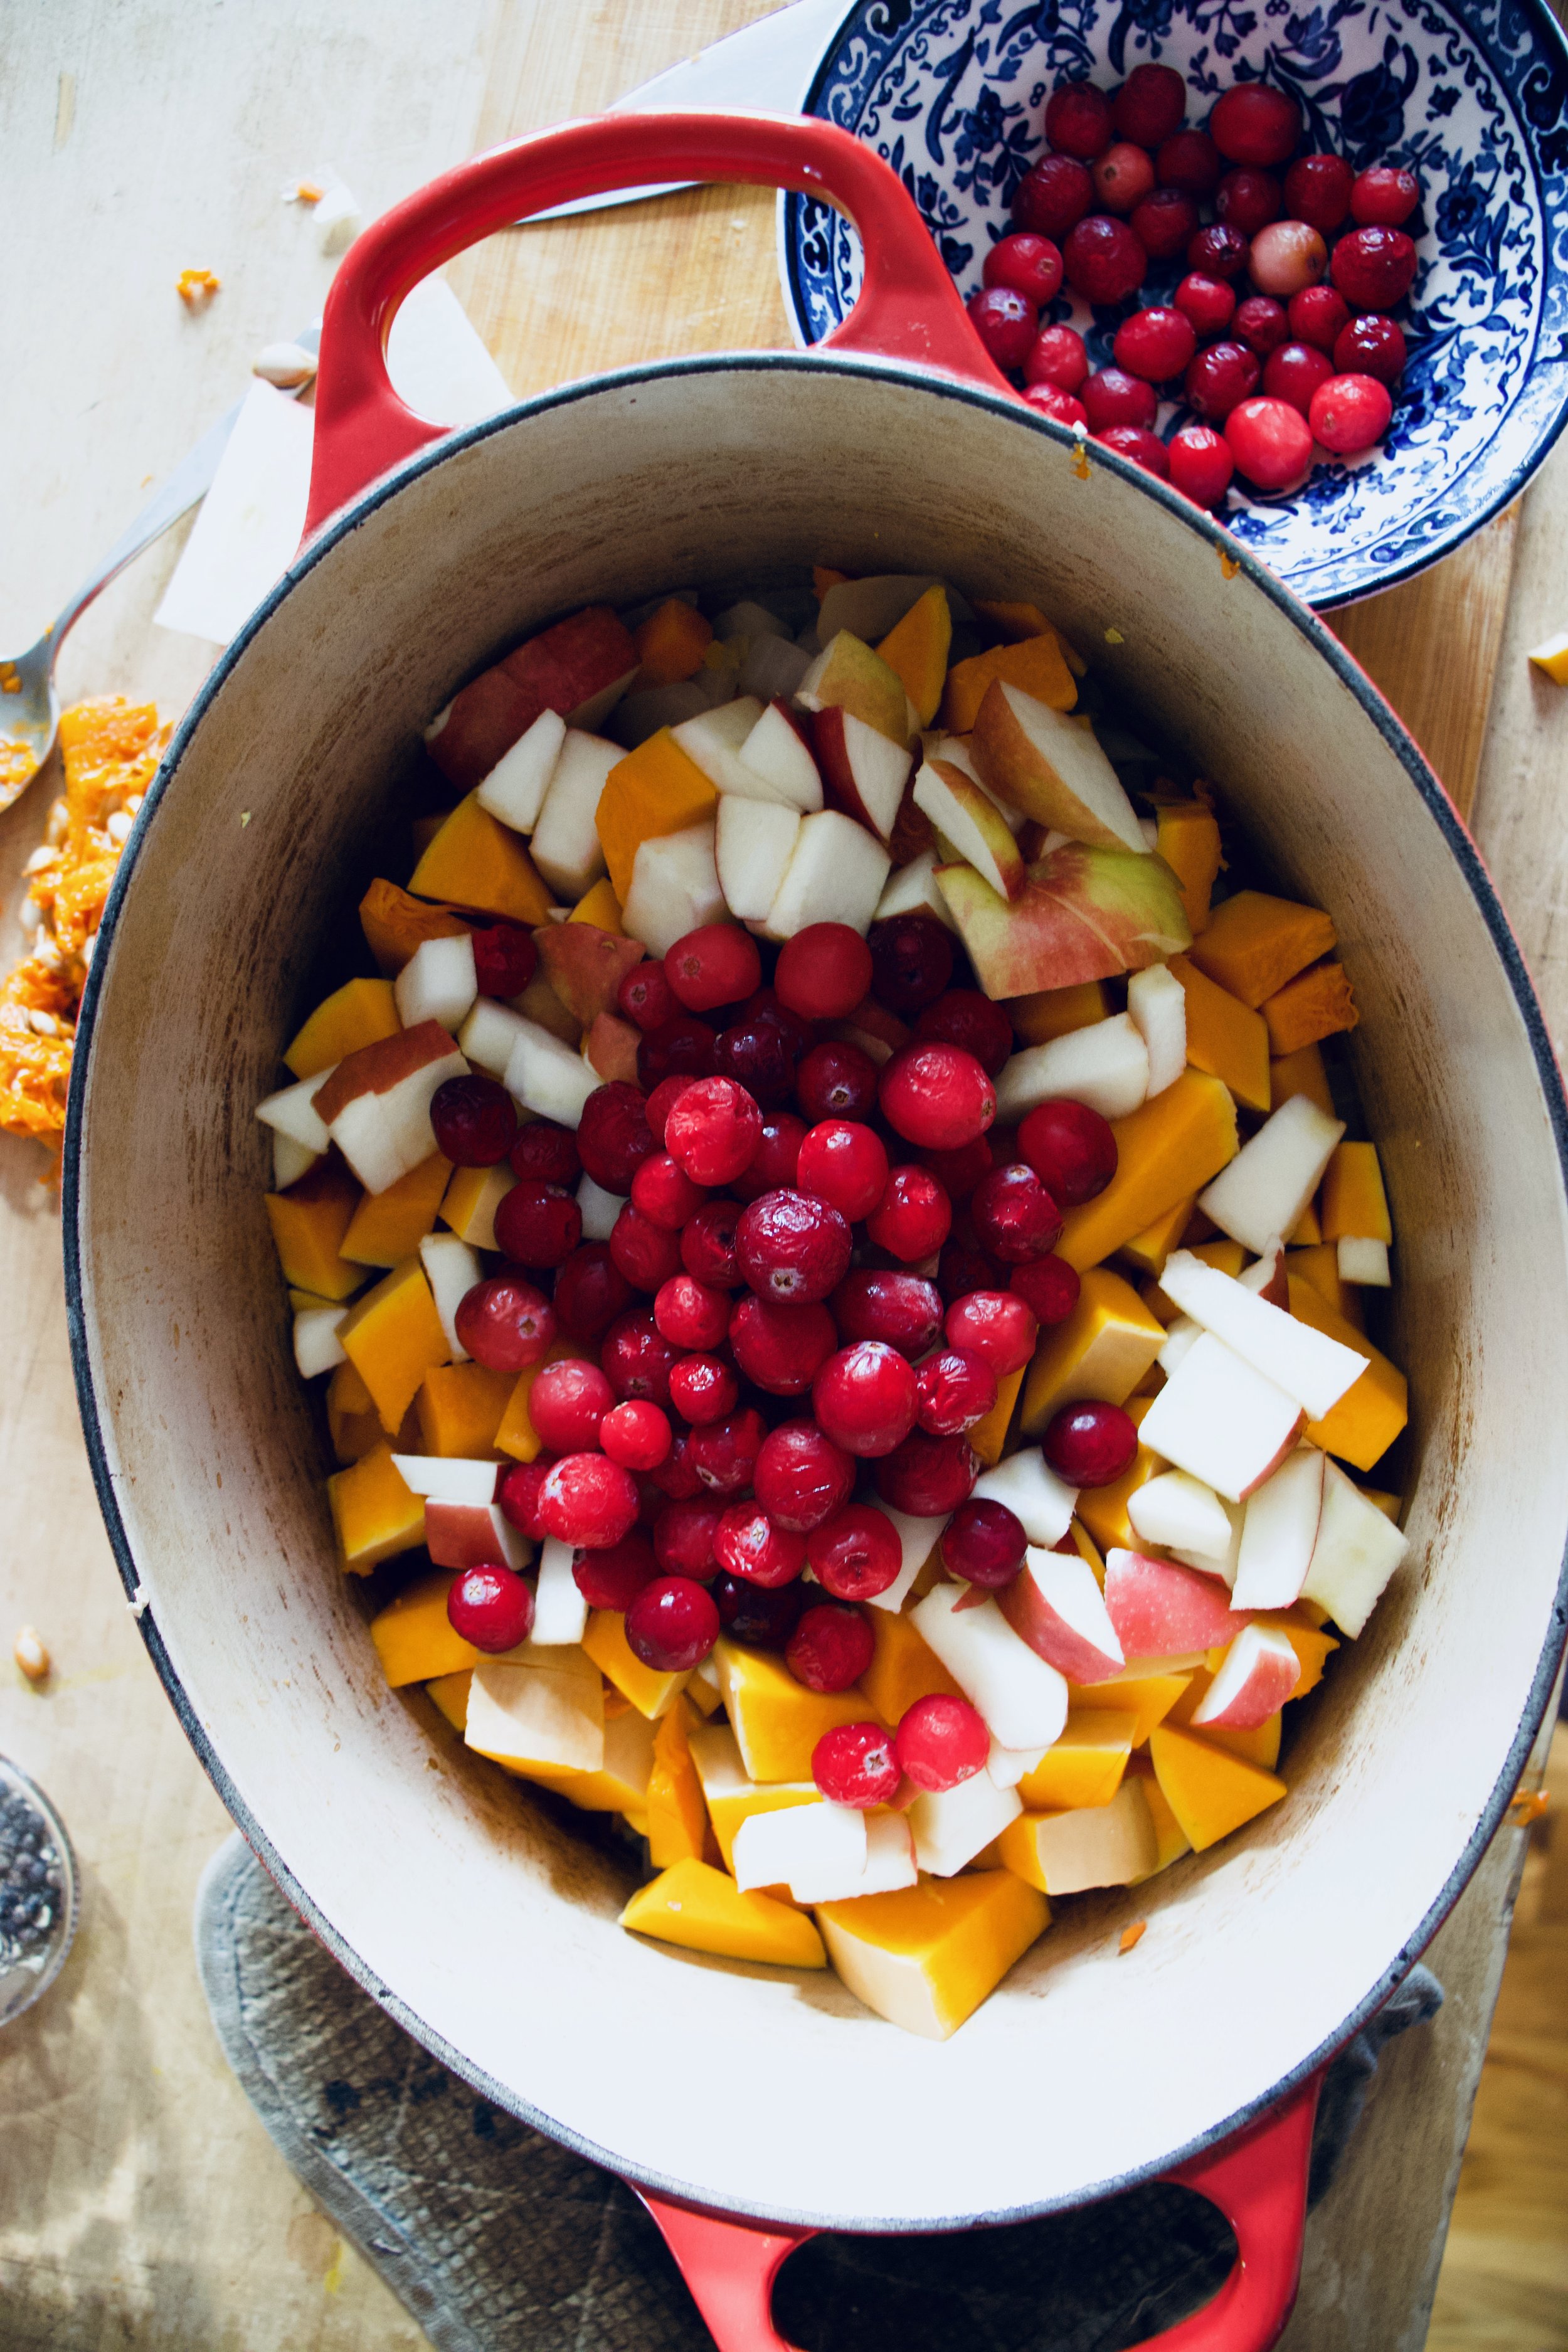
While the veggies cook, chop the squash into small cubes. Remove the seeds, but no need to peel.

IMG_2490.jpg

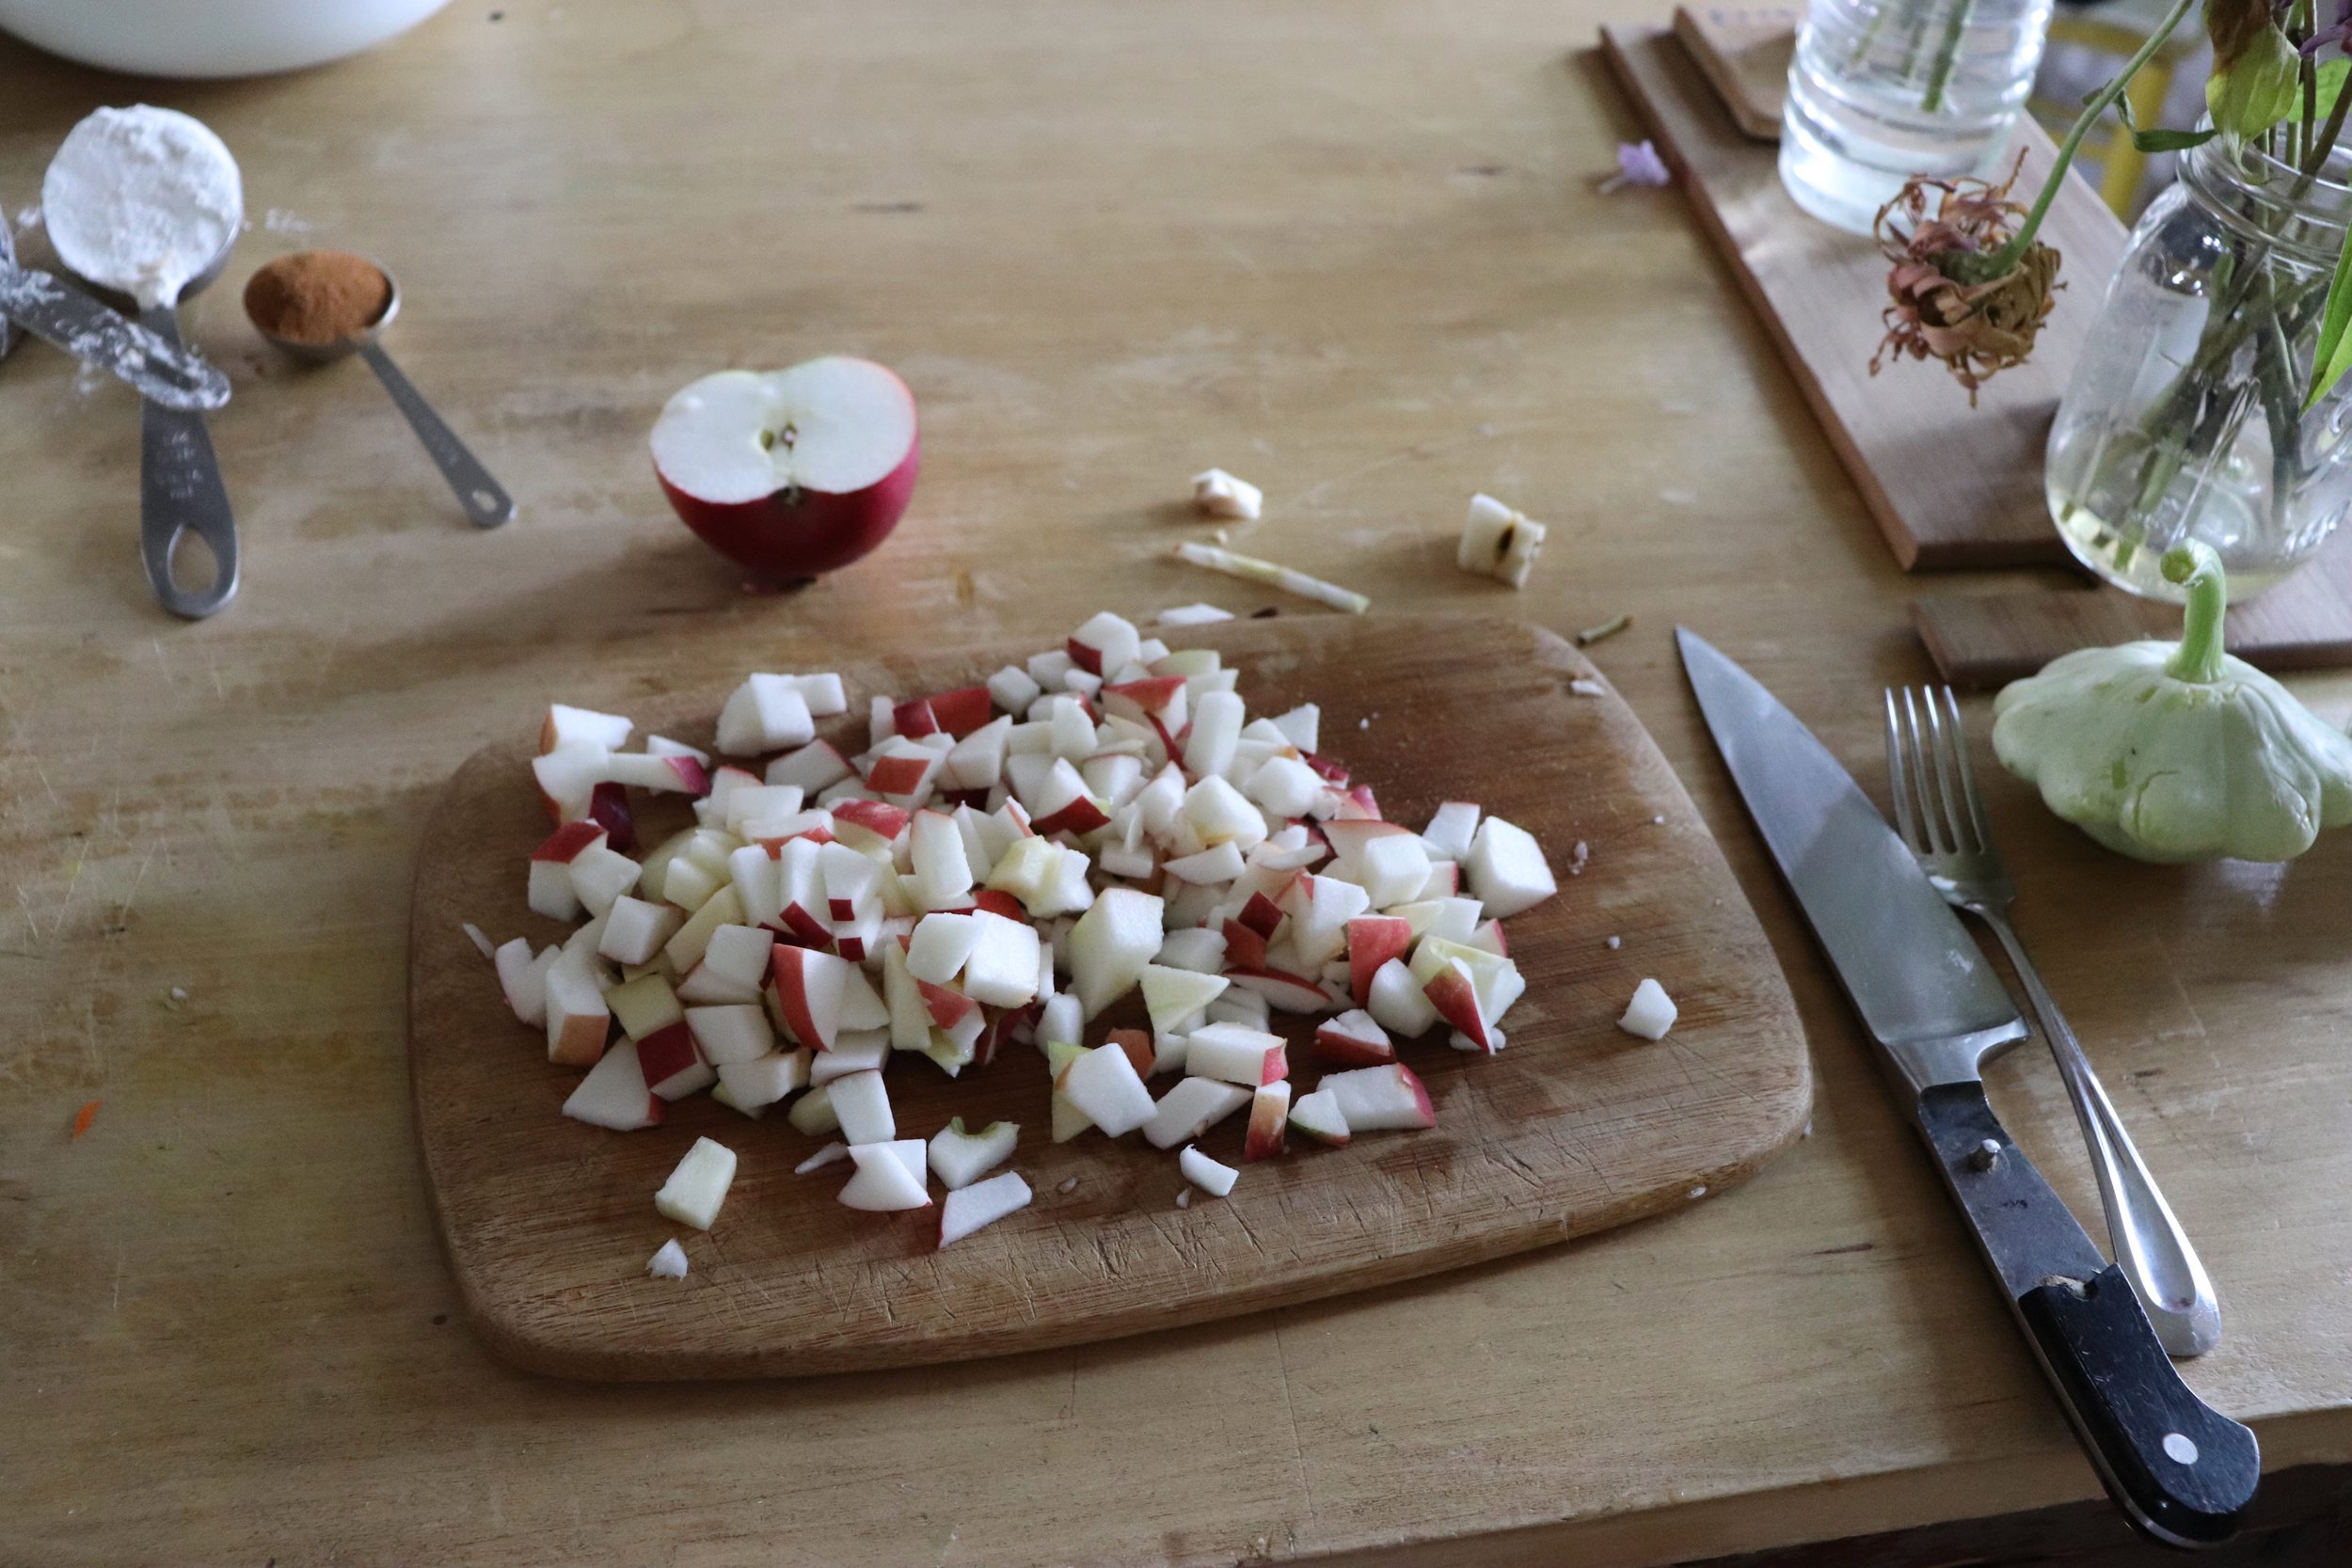
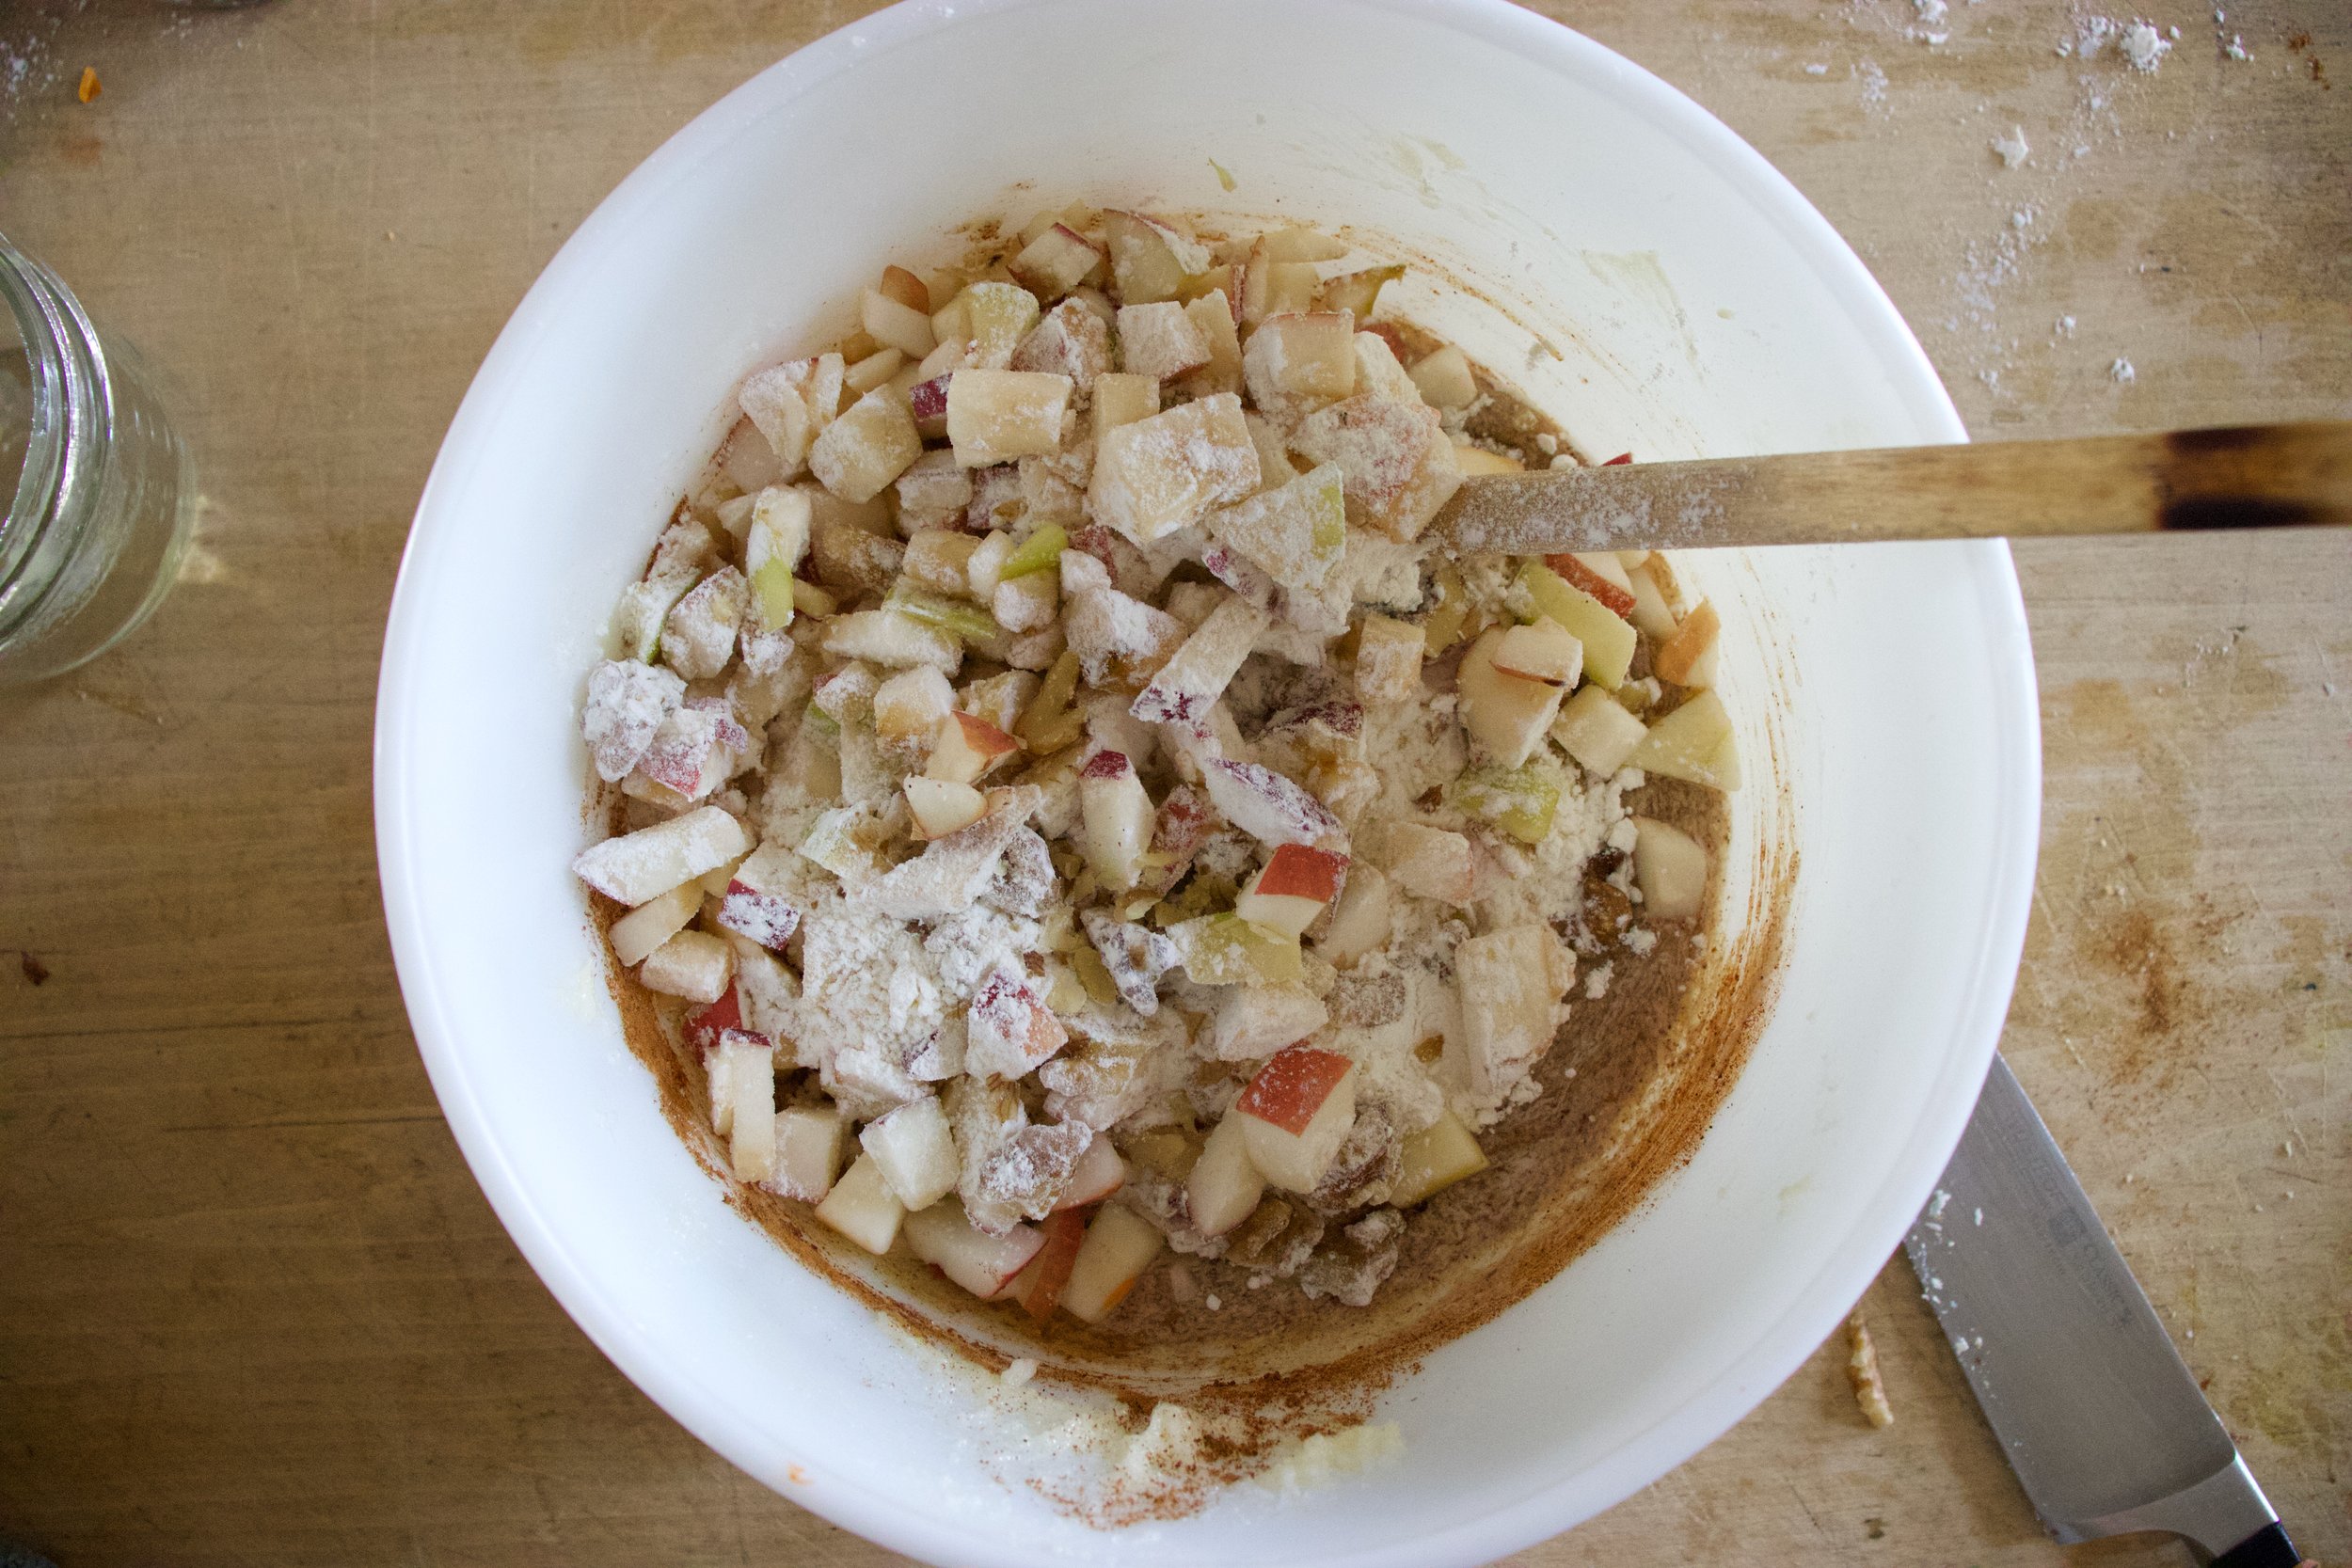
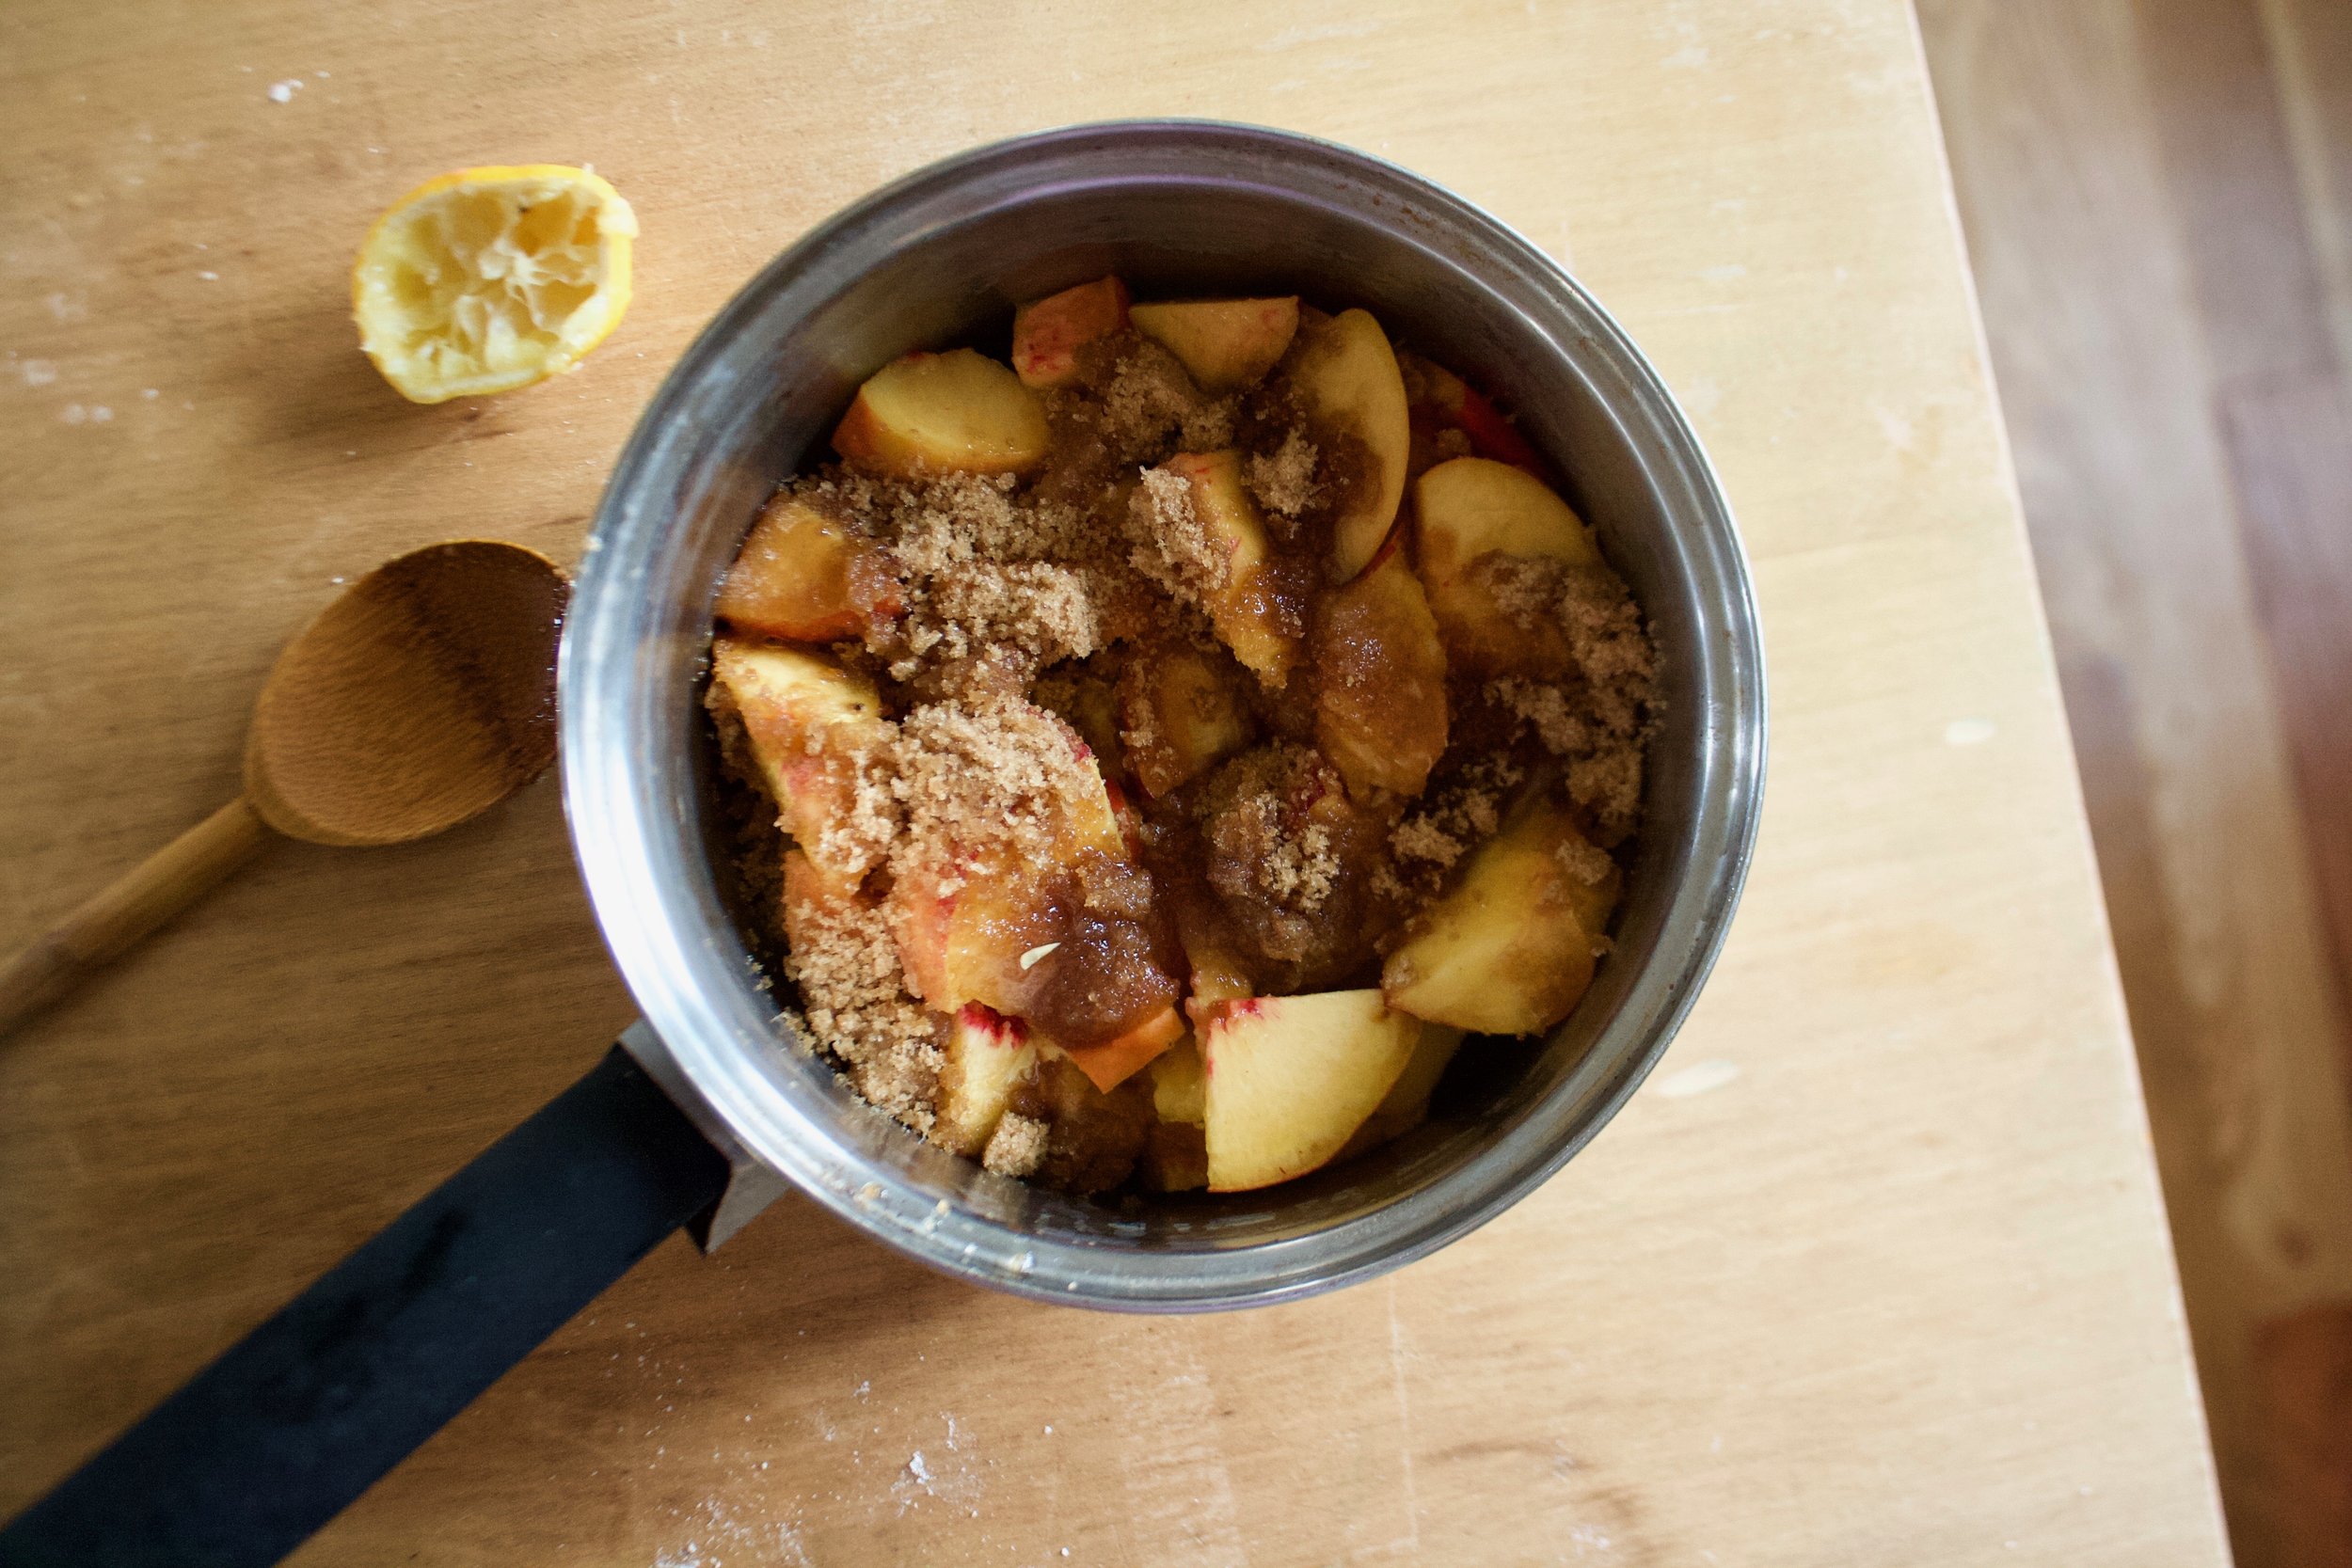
And chop up the apple too, but set aside a half of one for the apple cranberry relish.

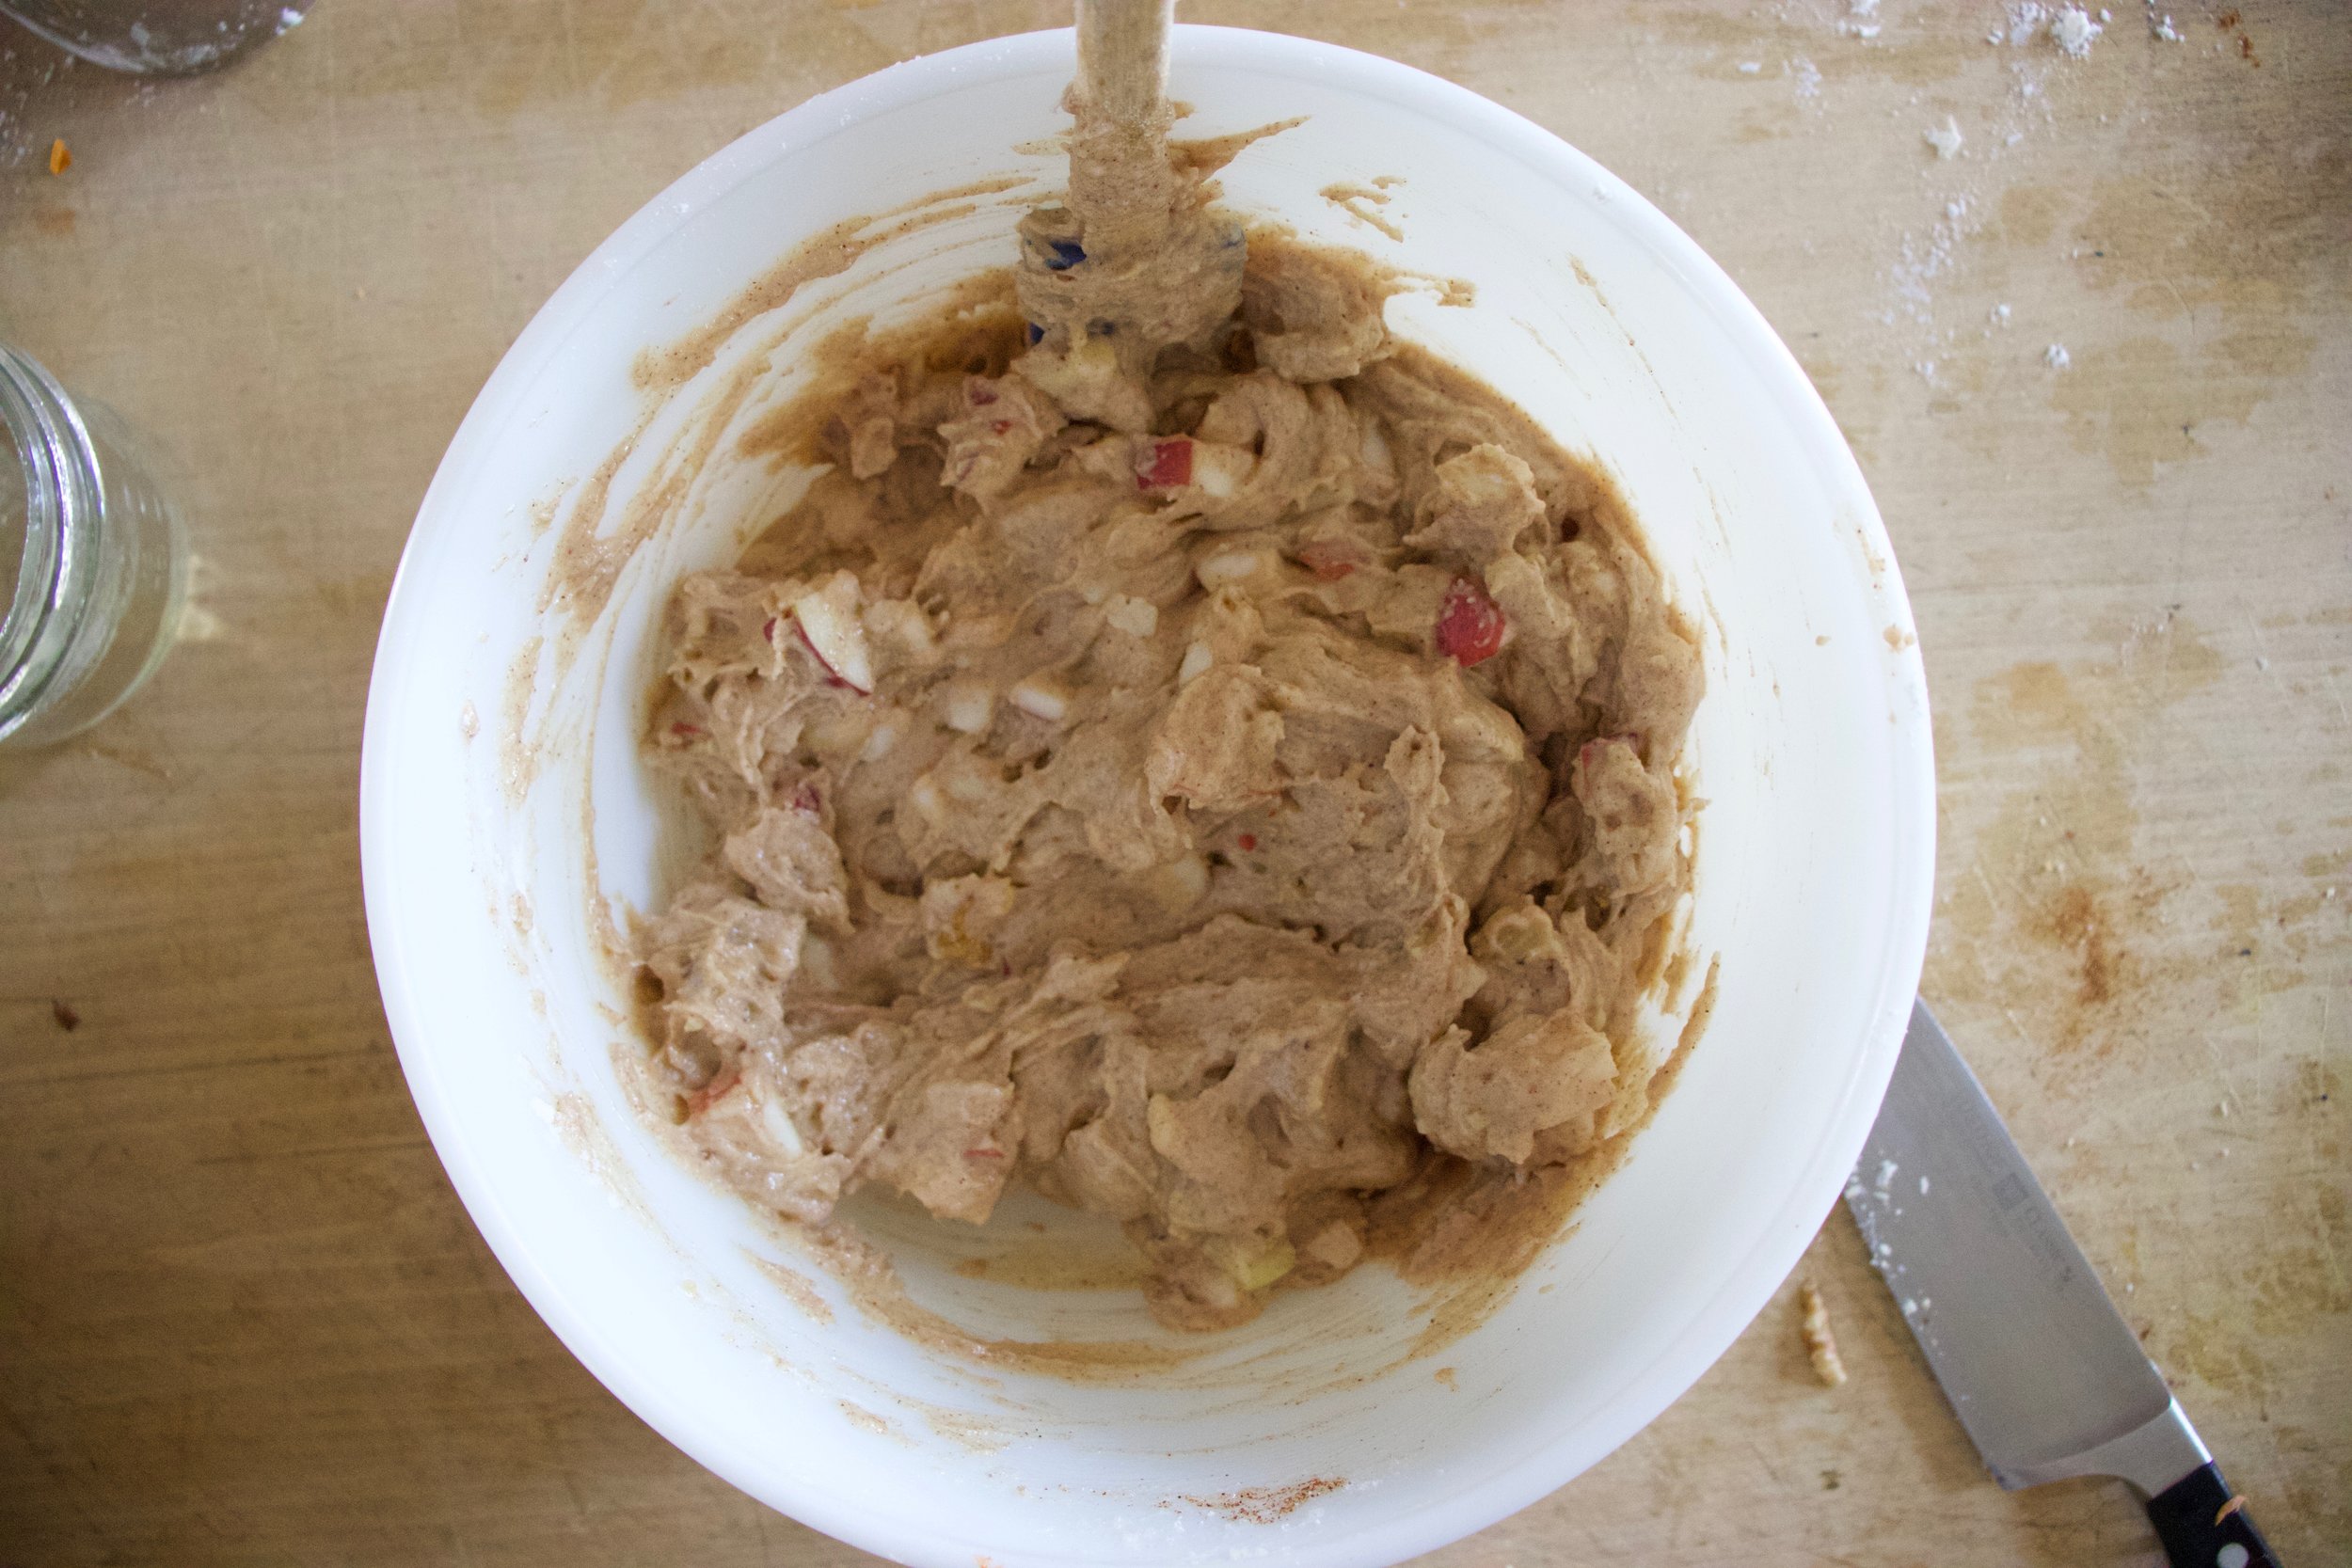
Now toss all that into the pot along with the cranberries.

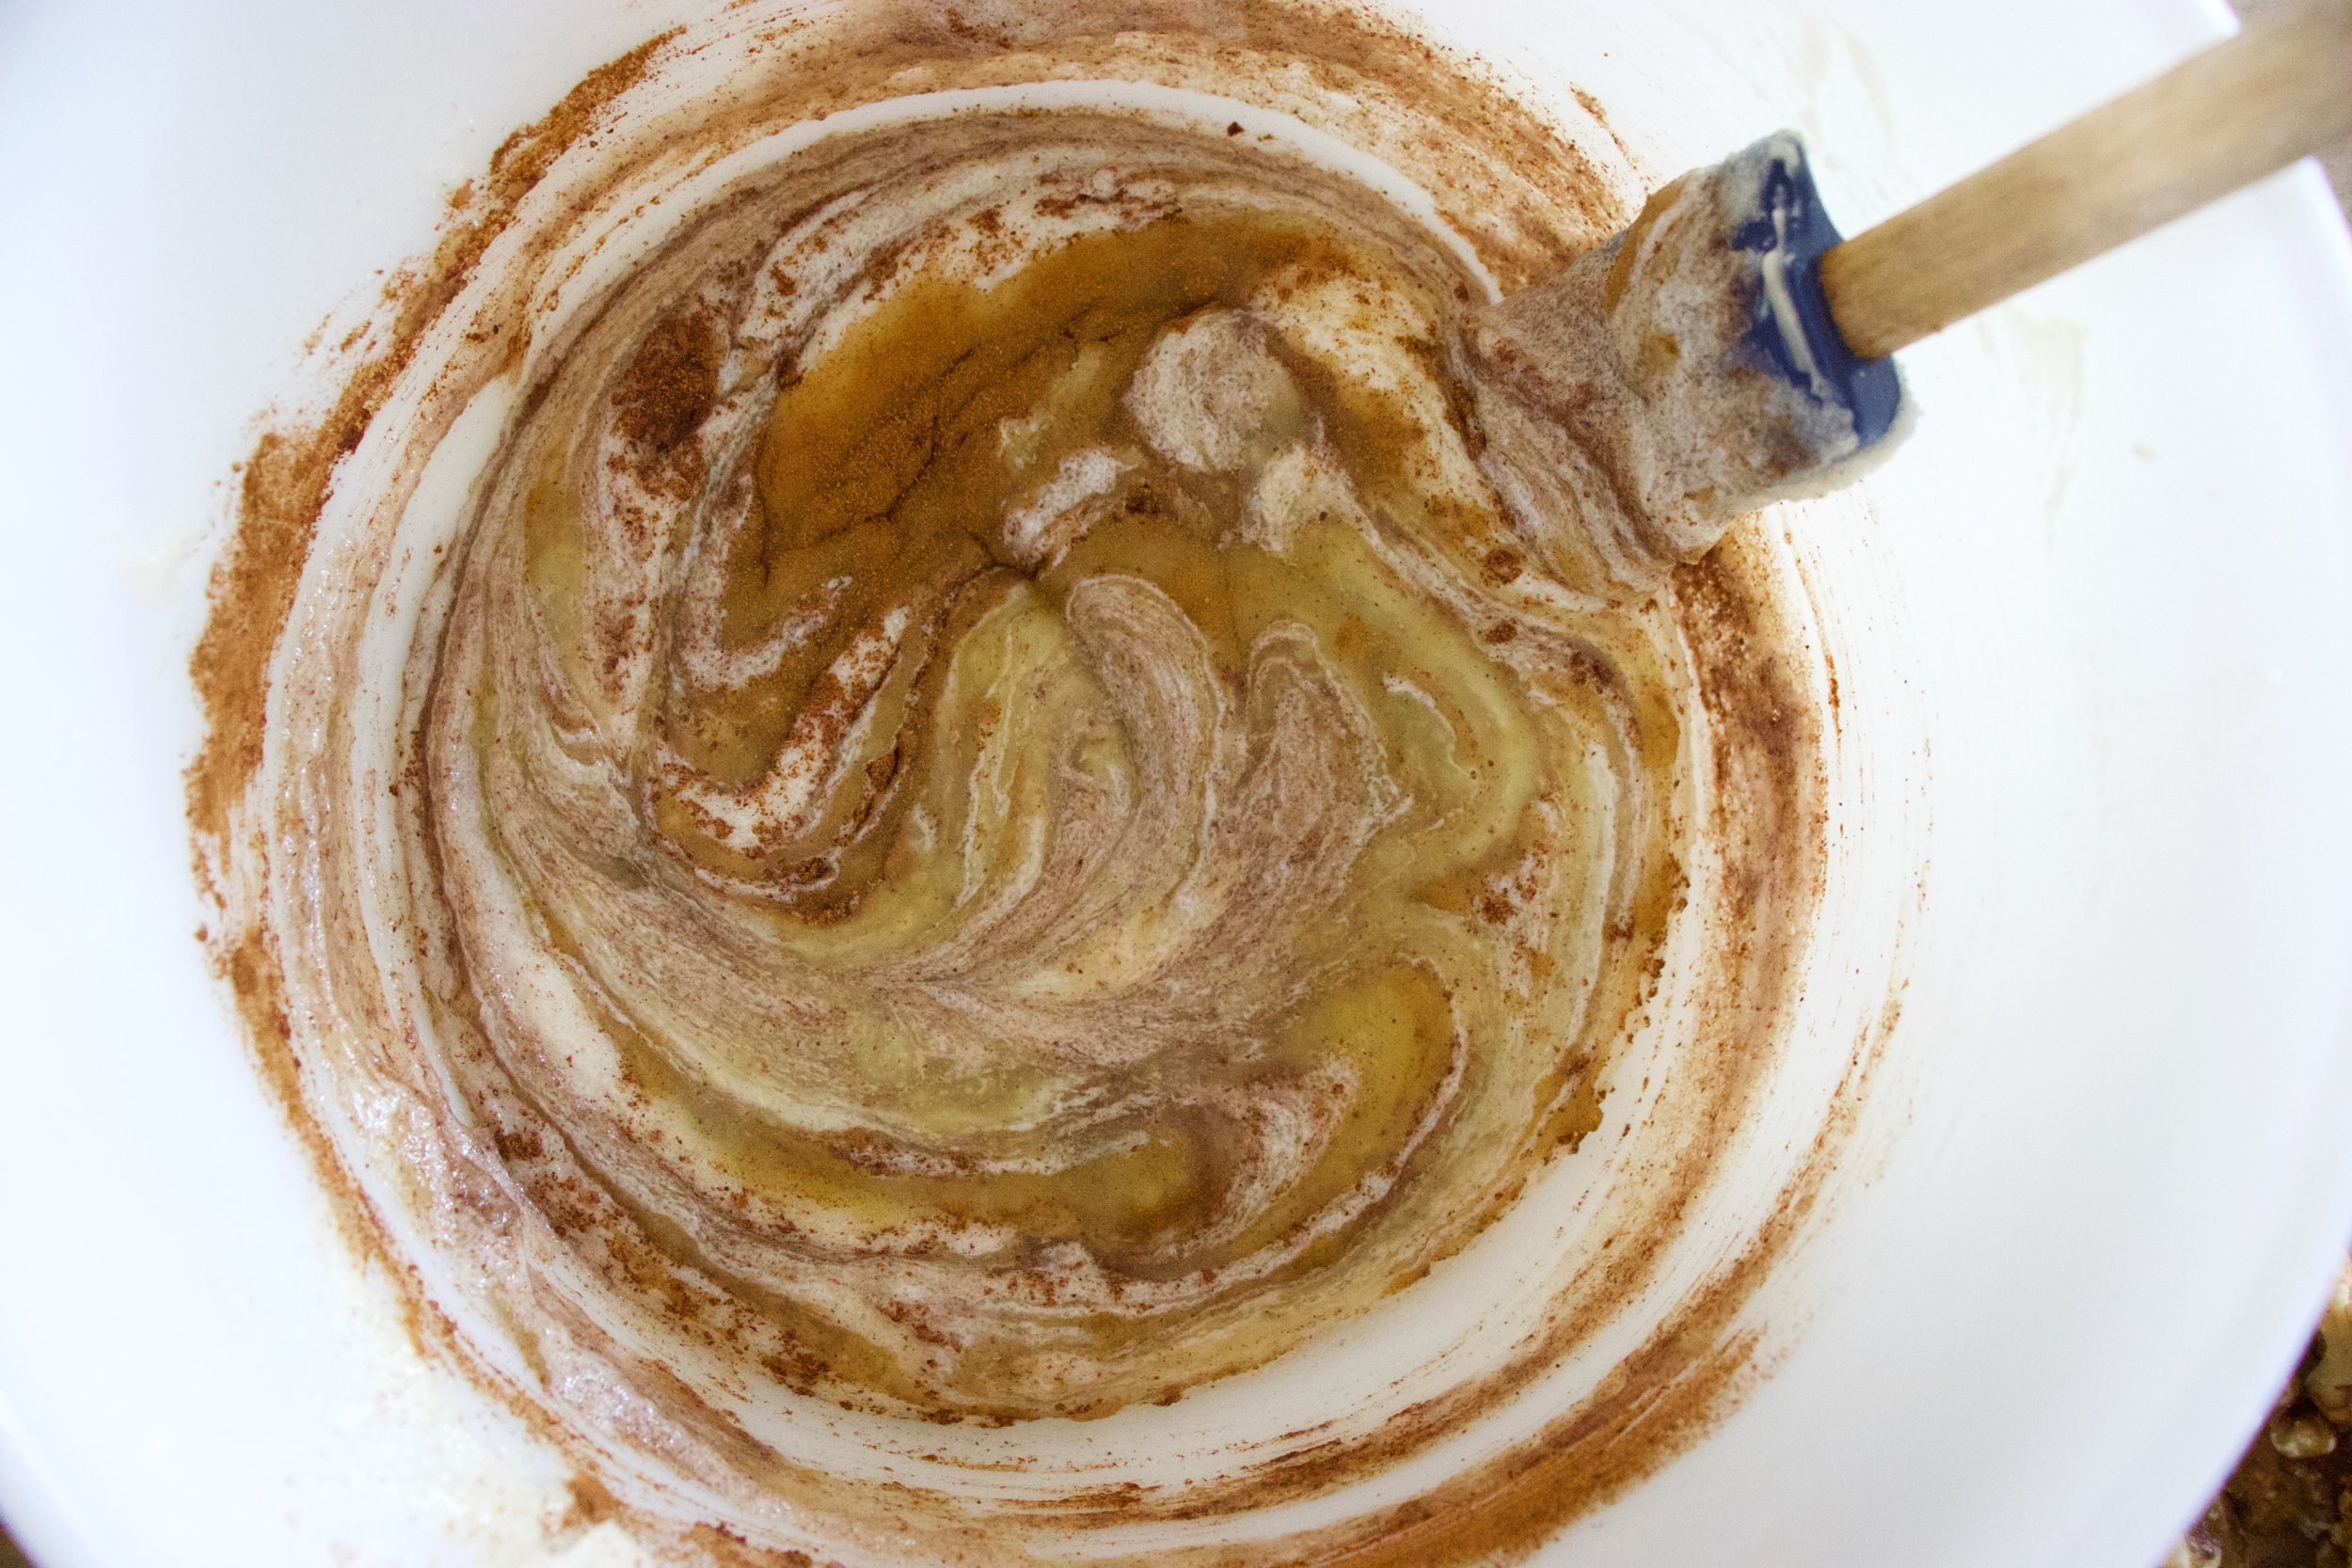
Add the spices, salt and pepper, a few splashed of apple cider vinegar, and water to cover it all. Then place it on stove, bring to a boil, then turn heat to medium and let cook.

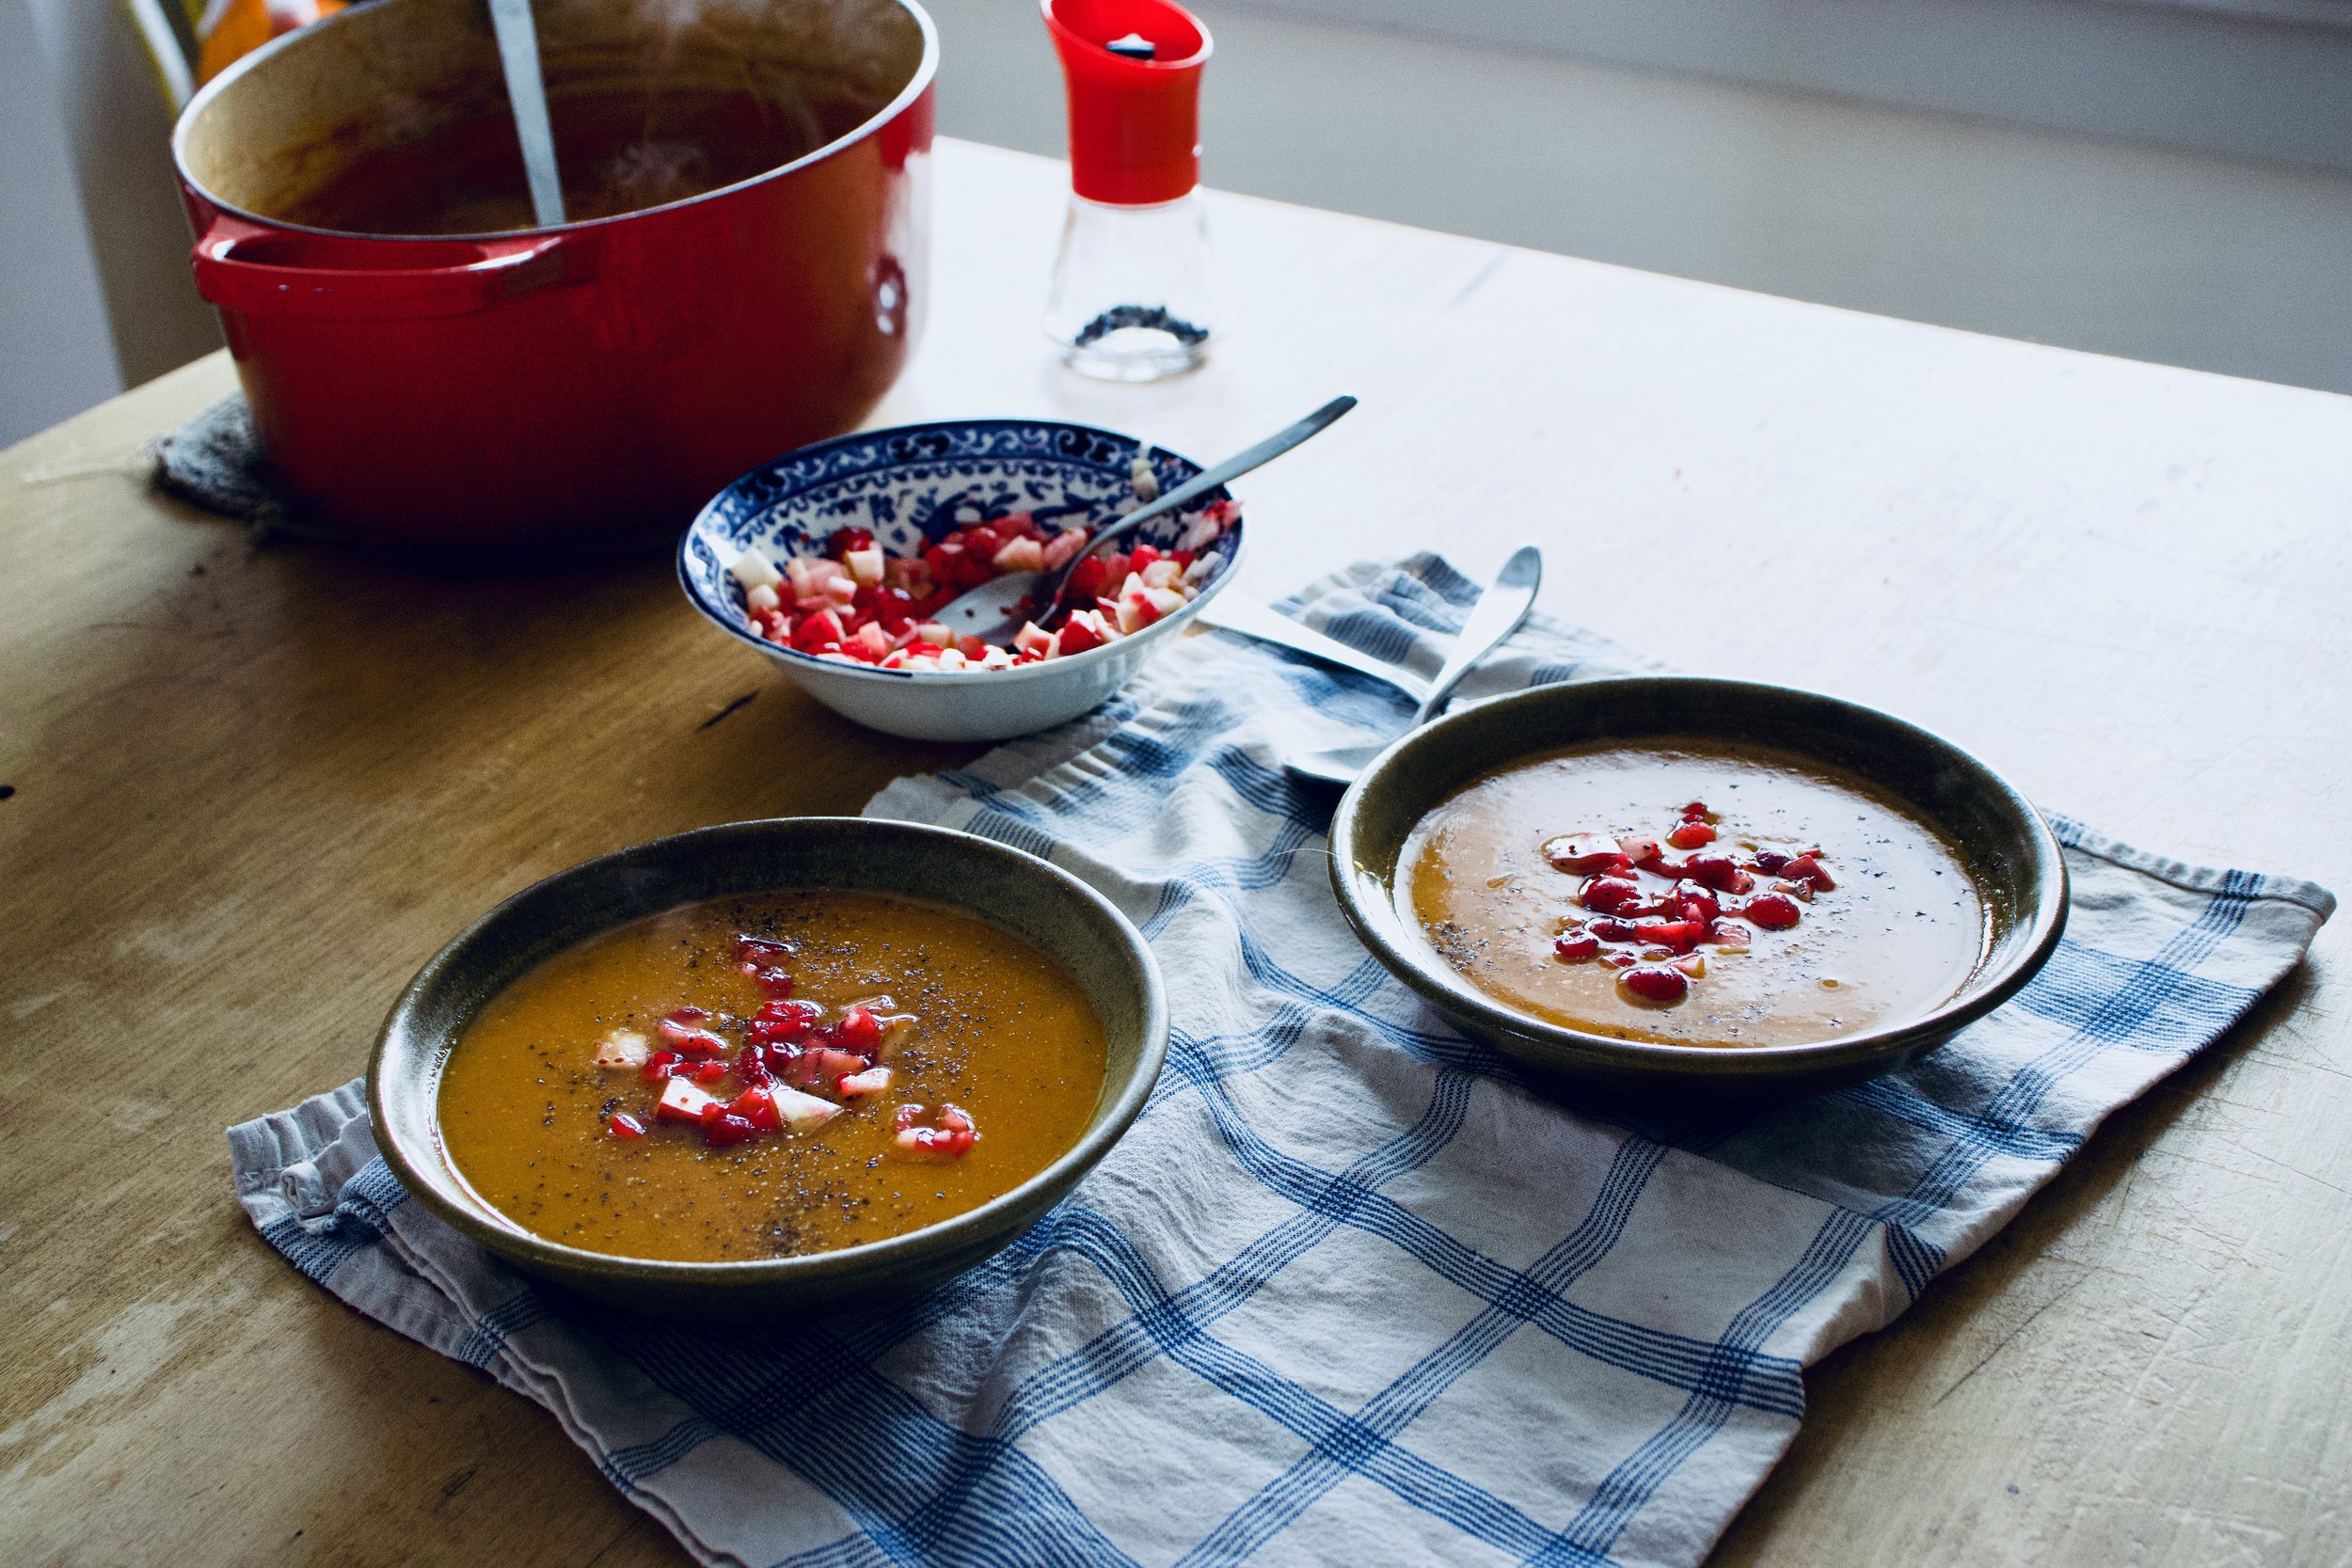
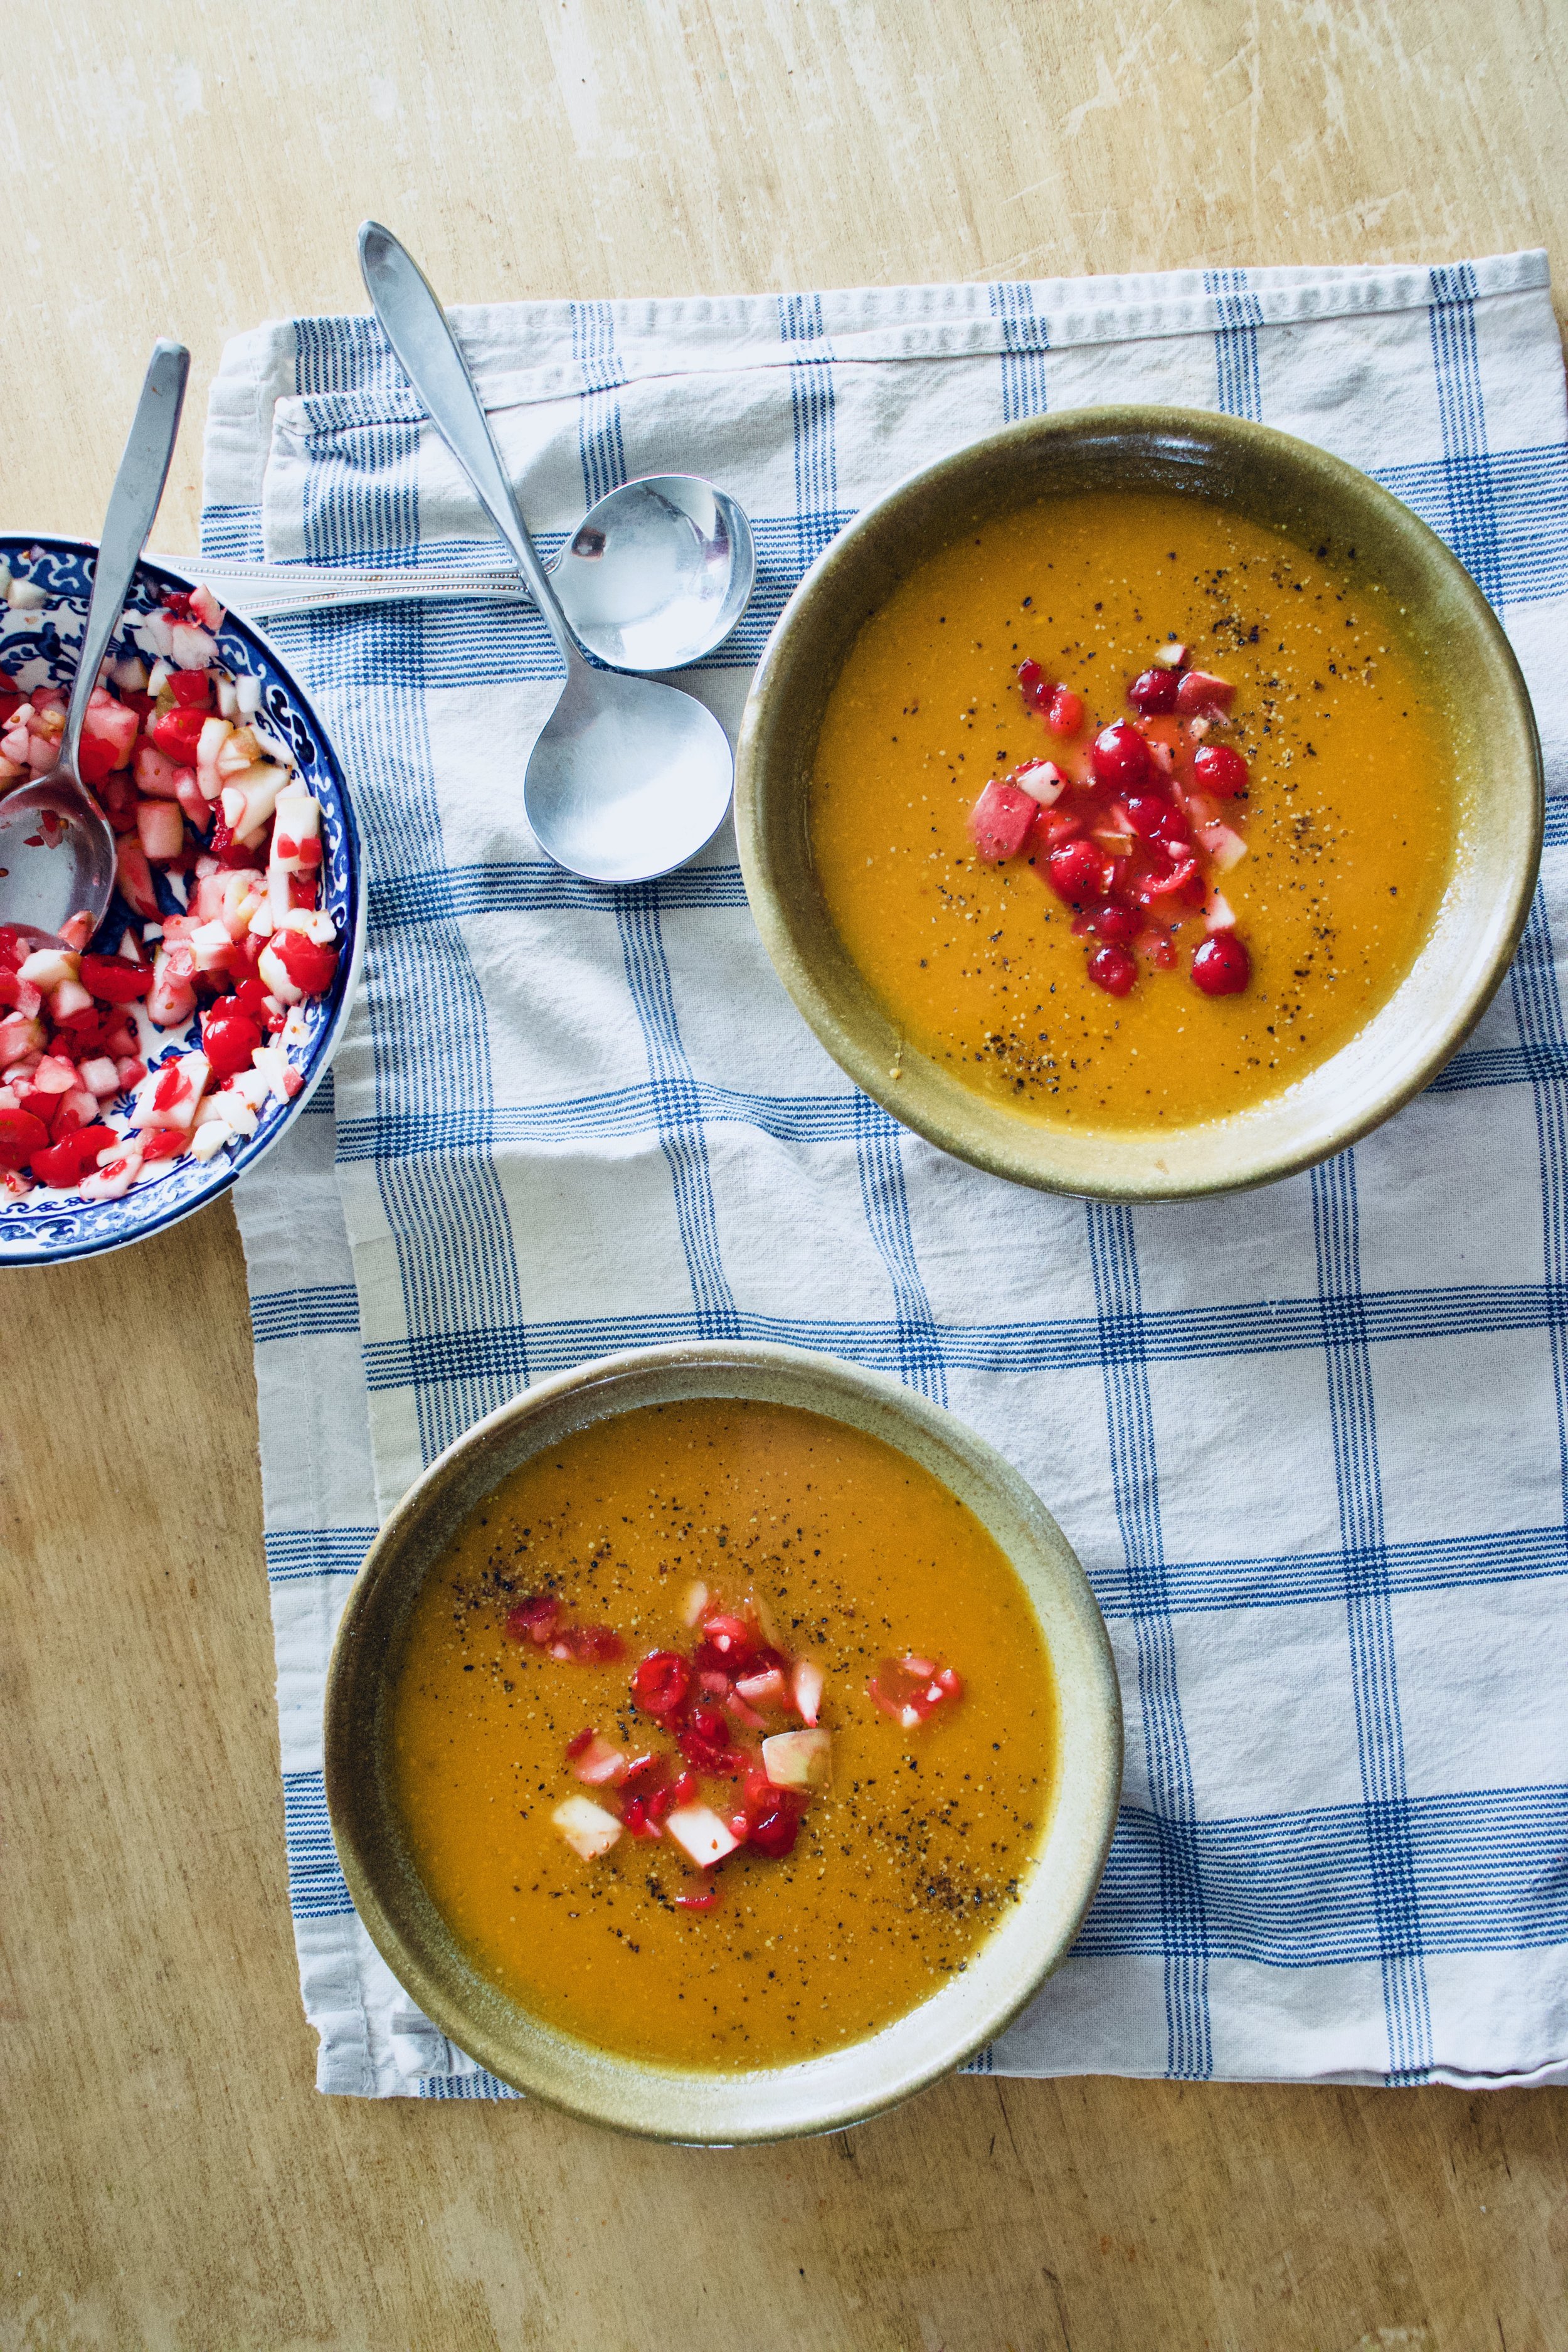
While the soup is cooking, make the relish. Mince the half apple along with about 1/2 cup of cranberries.

IMG_2523 2.jpg

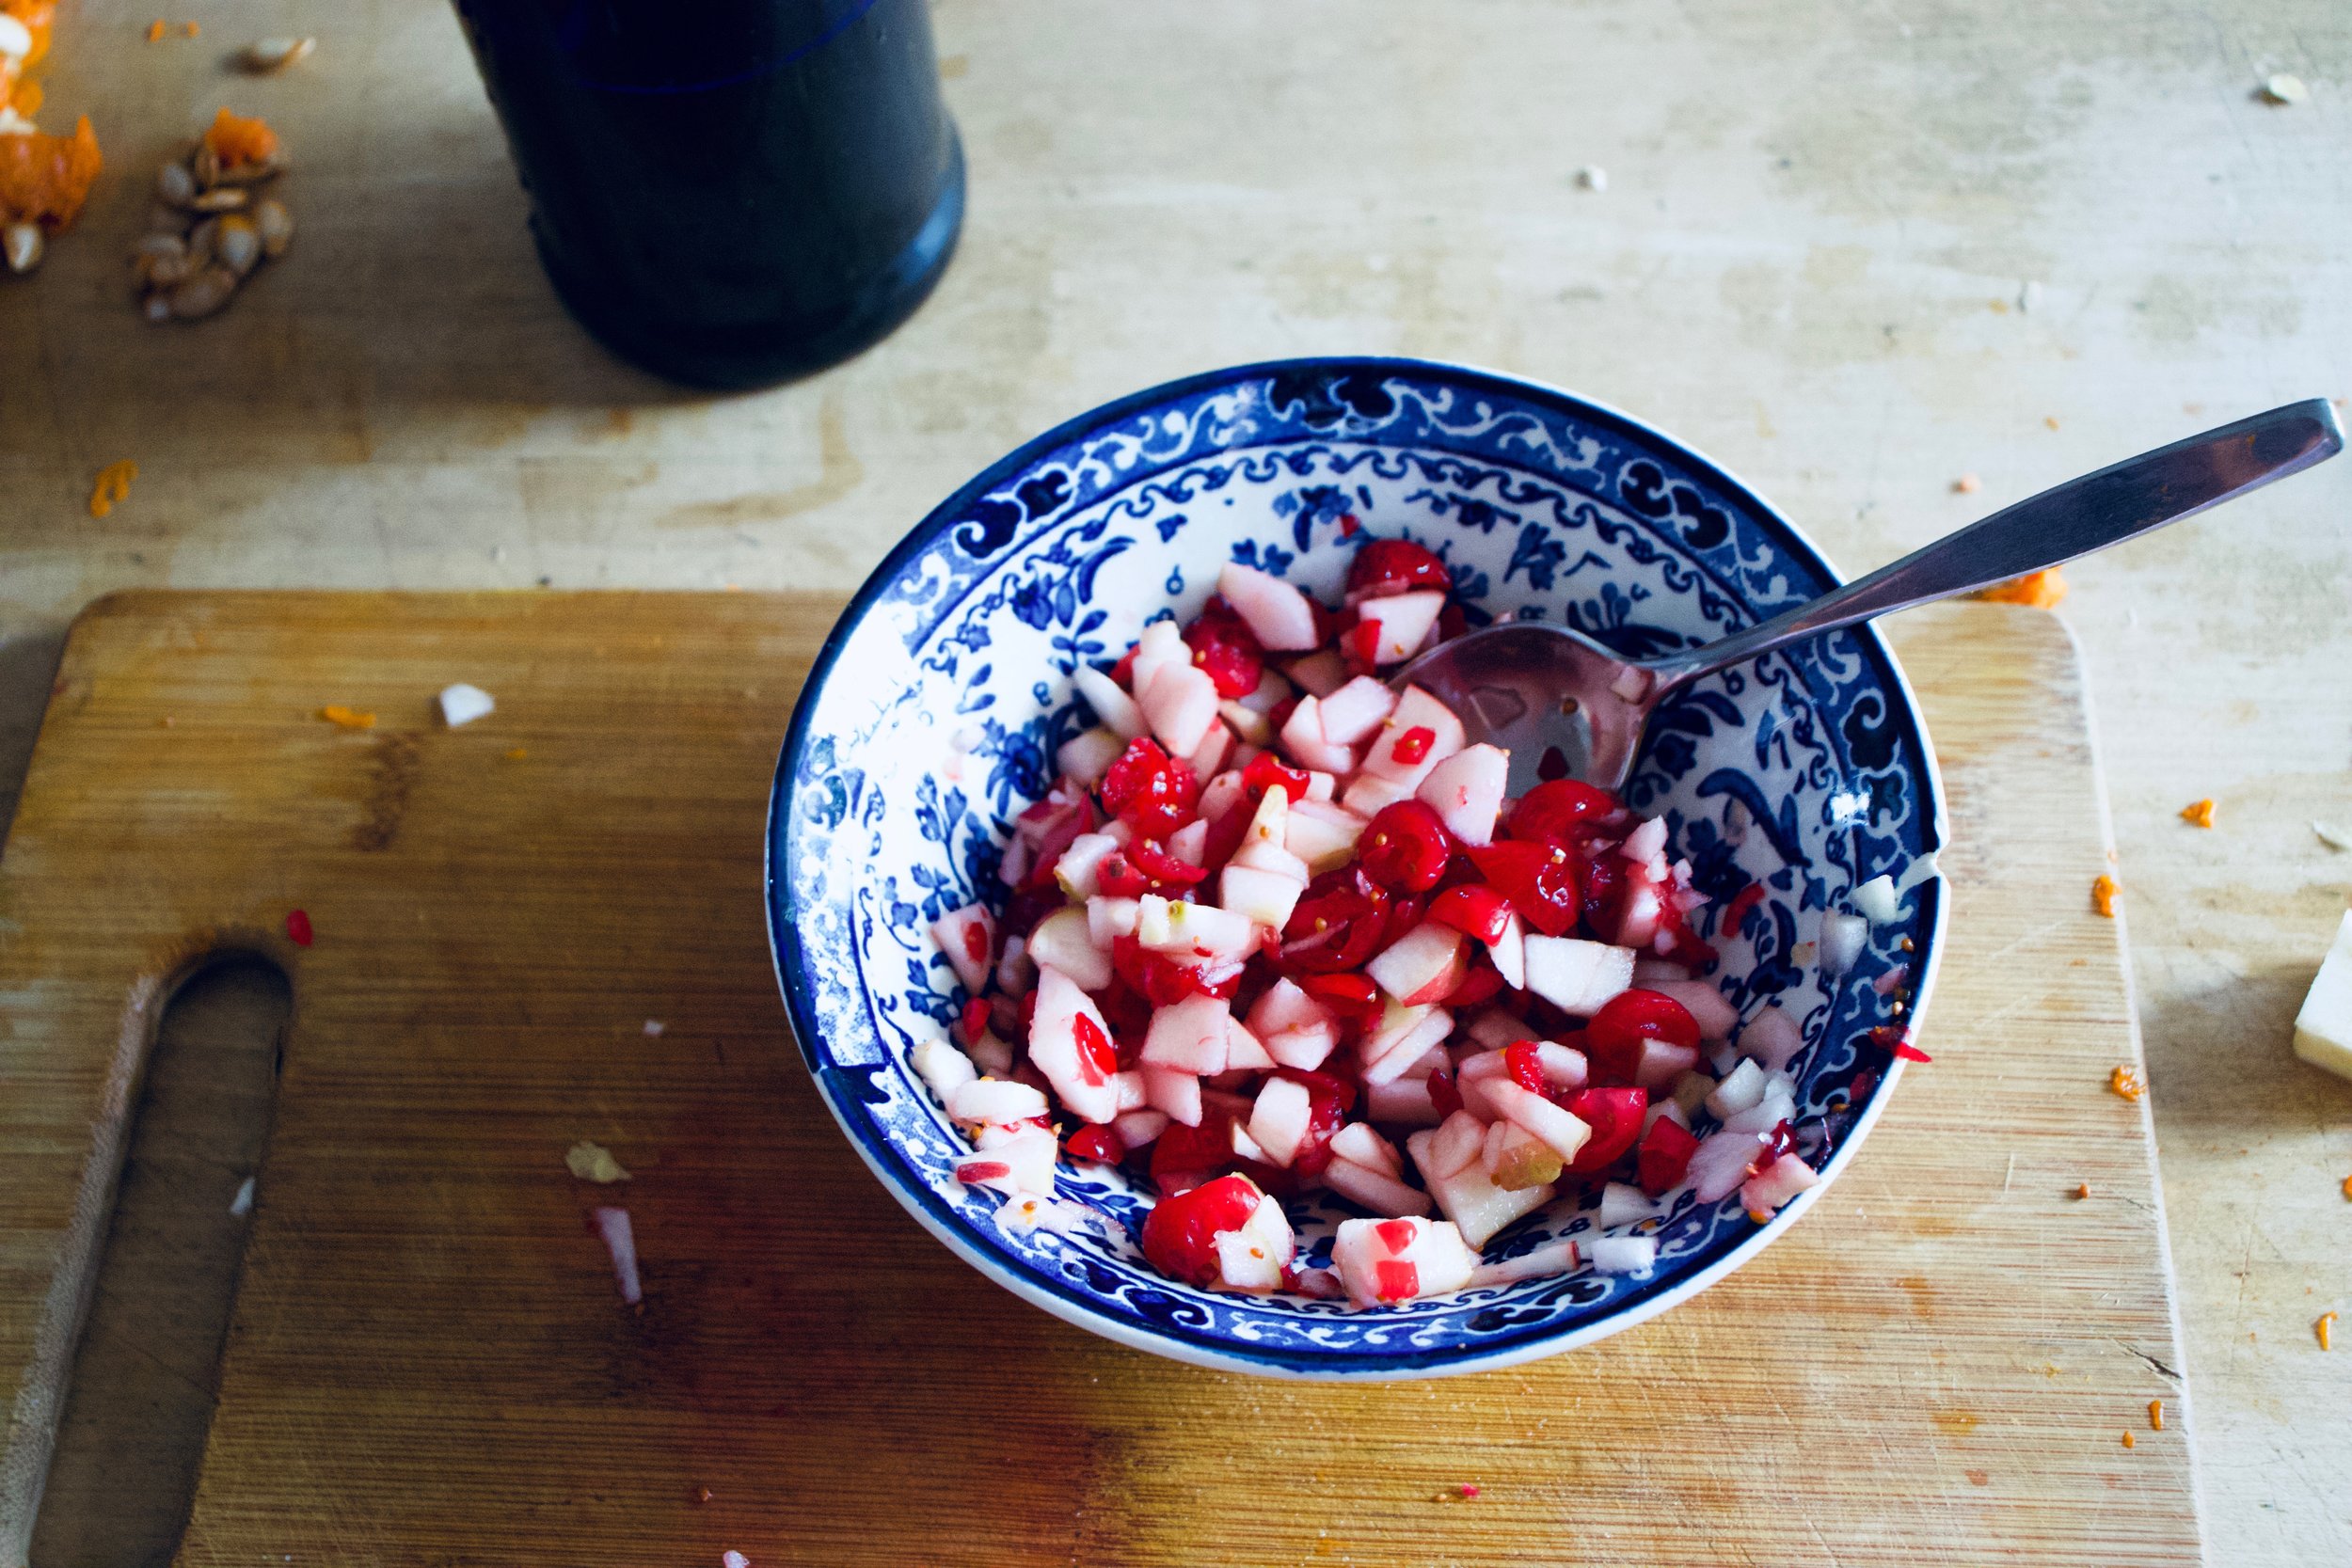
Place in a bowl with a pinch of salt and a few splashed of apple cider vinegar. Then just let it sit and meld.

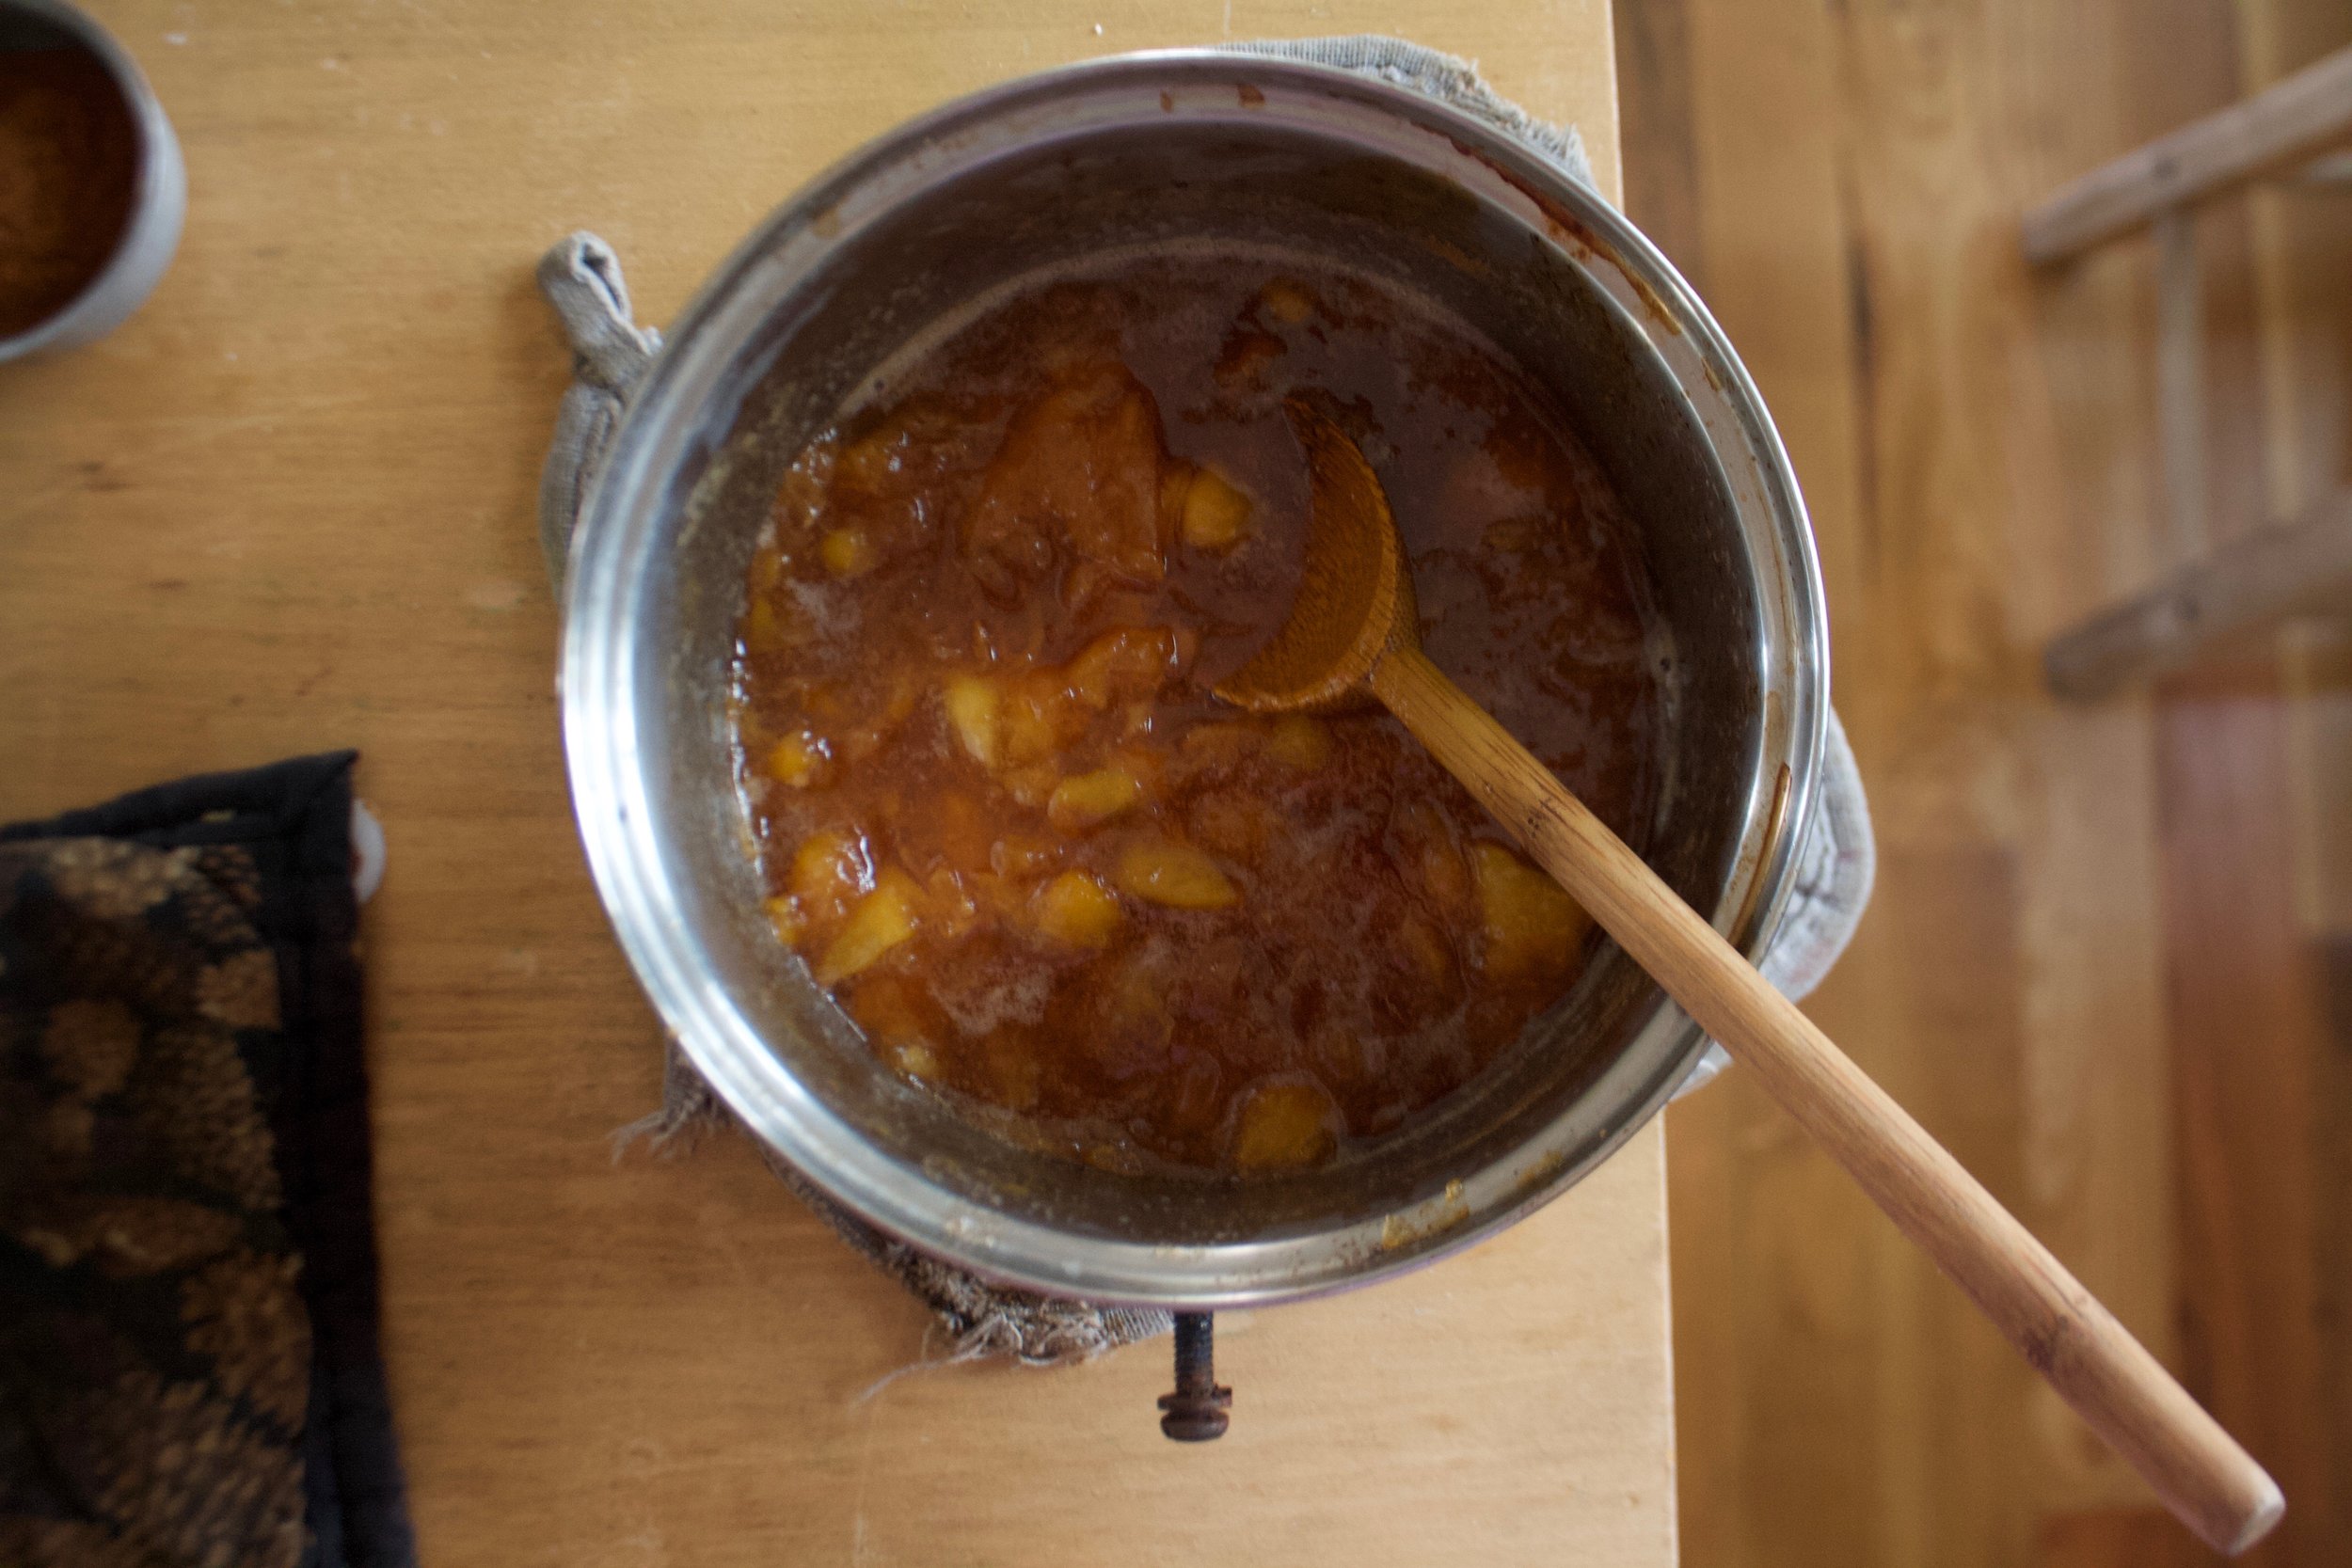
Soup is looking good. Everything is soft and falling apart and ready to go.

IMG_2538.jpg

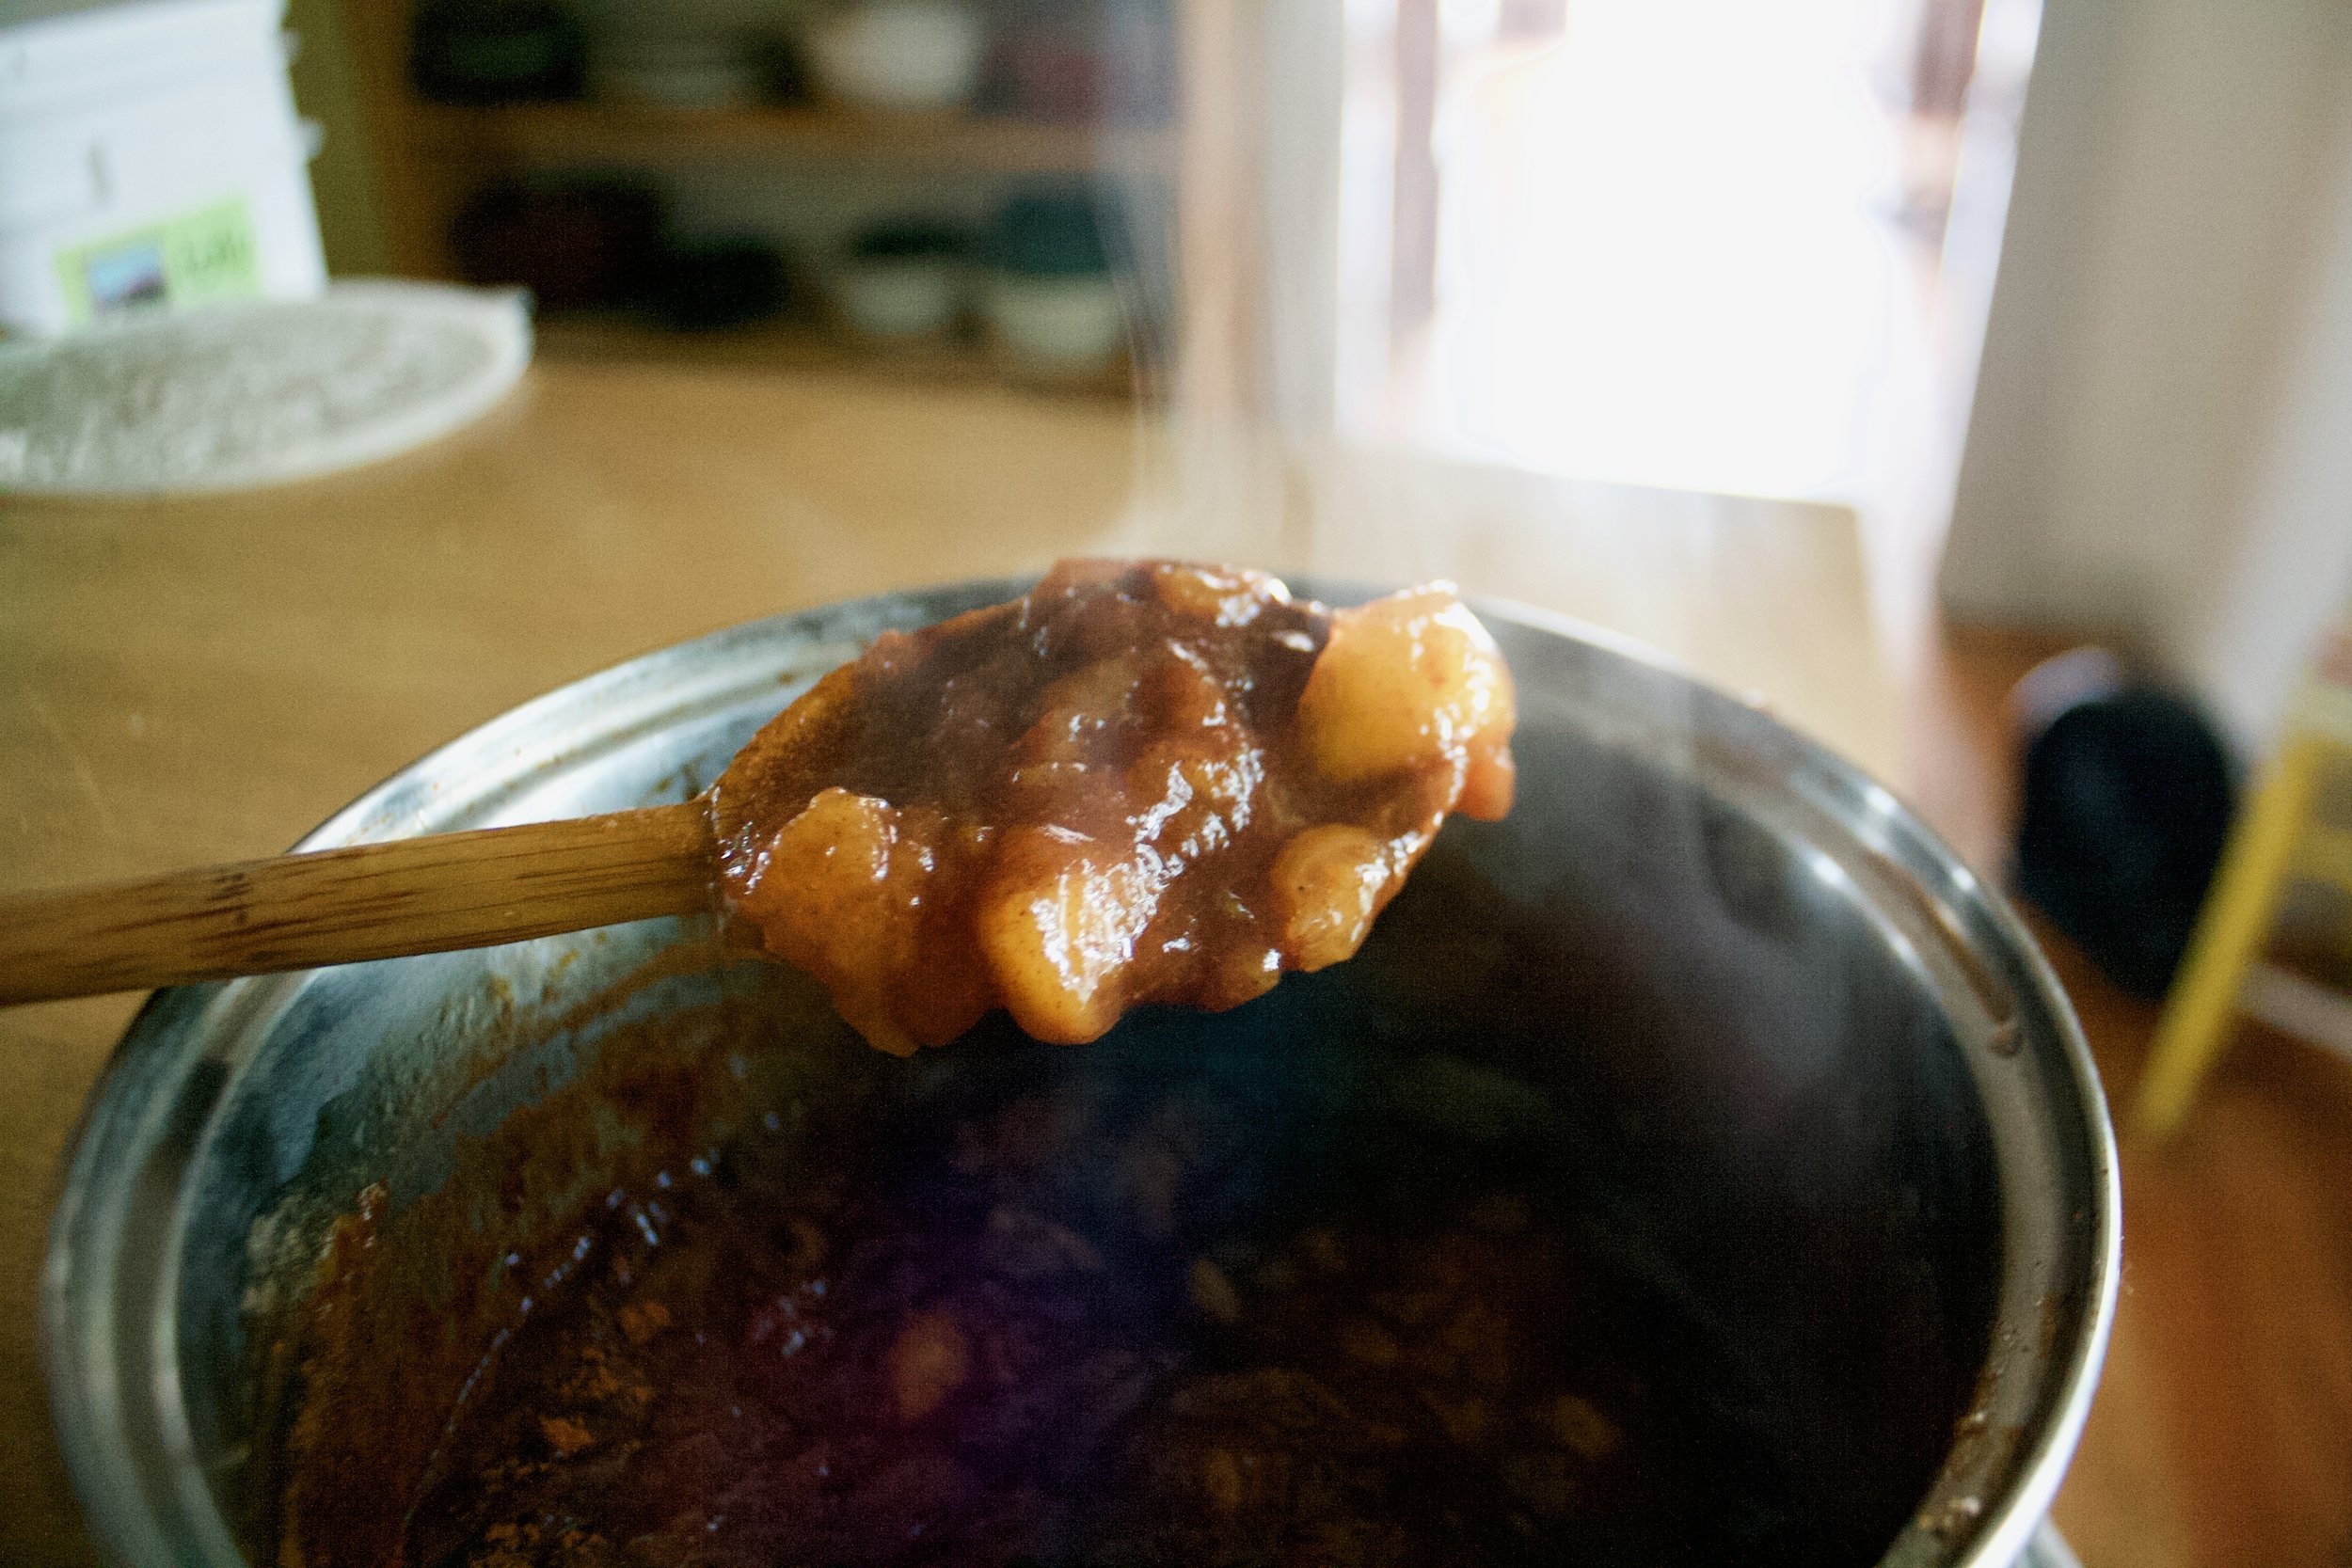
Blend it all until smooth.

IMG_2554.jpg

Thick and creamy goodness right here. If it is to thick, add more water, too thin, cook it down a little longer. The consistency is up to you.

Now all you need to do is ladle soup into bowls and top with a couple spoonfuls of the relish.

IMG_2569 2.jpg

This is comfort. This is good.

Have a great, comfy weekend.

-C


Apple Cranberry Butternut Squash Soup with Apple Cranberry Relish

makes 6-8 servings

  • 1 small butternut squash (about 5 cups cubed)

  • 1 large onion

  • 1 carrot

  • 2 macon or mac apples

  • 2 cups fresh cranberries (you can use frozen too)

  • 2 tablespoon cumin

  • 2 tablespoons chili power

  • 2-3 cloves garlic

  • 2 tablespoon fresh minced or grated ginger

  • 4-5 tablespoon apple cider vinegar

  • olive oil

  • salt and pepper

  • 6 cups water

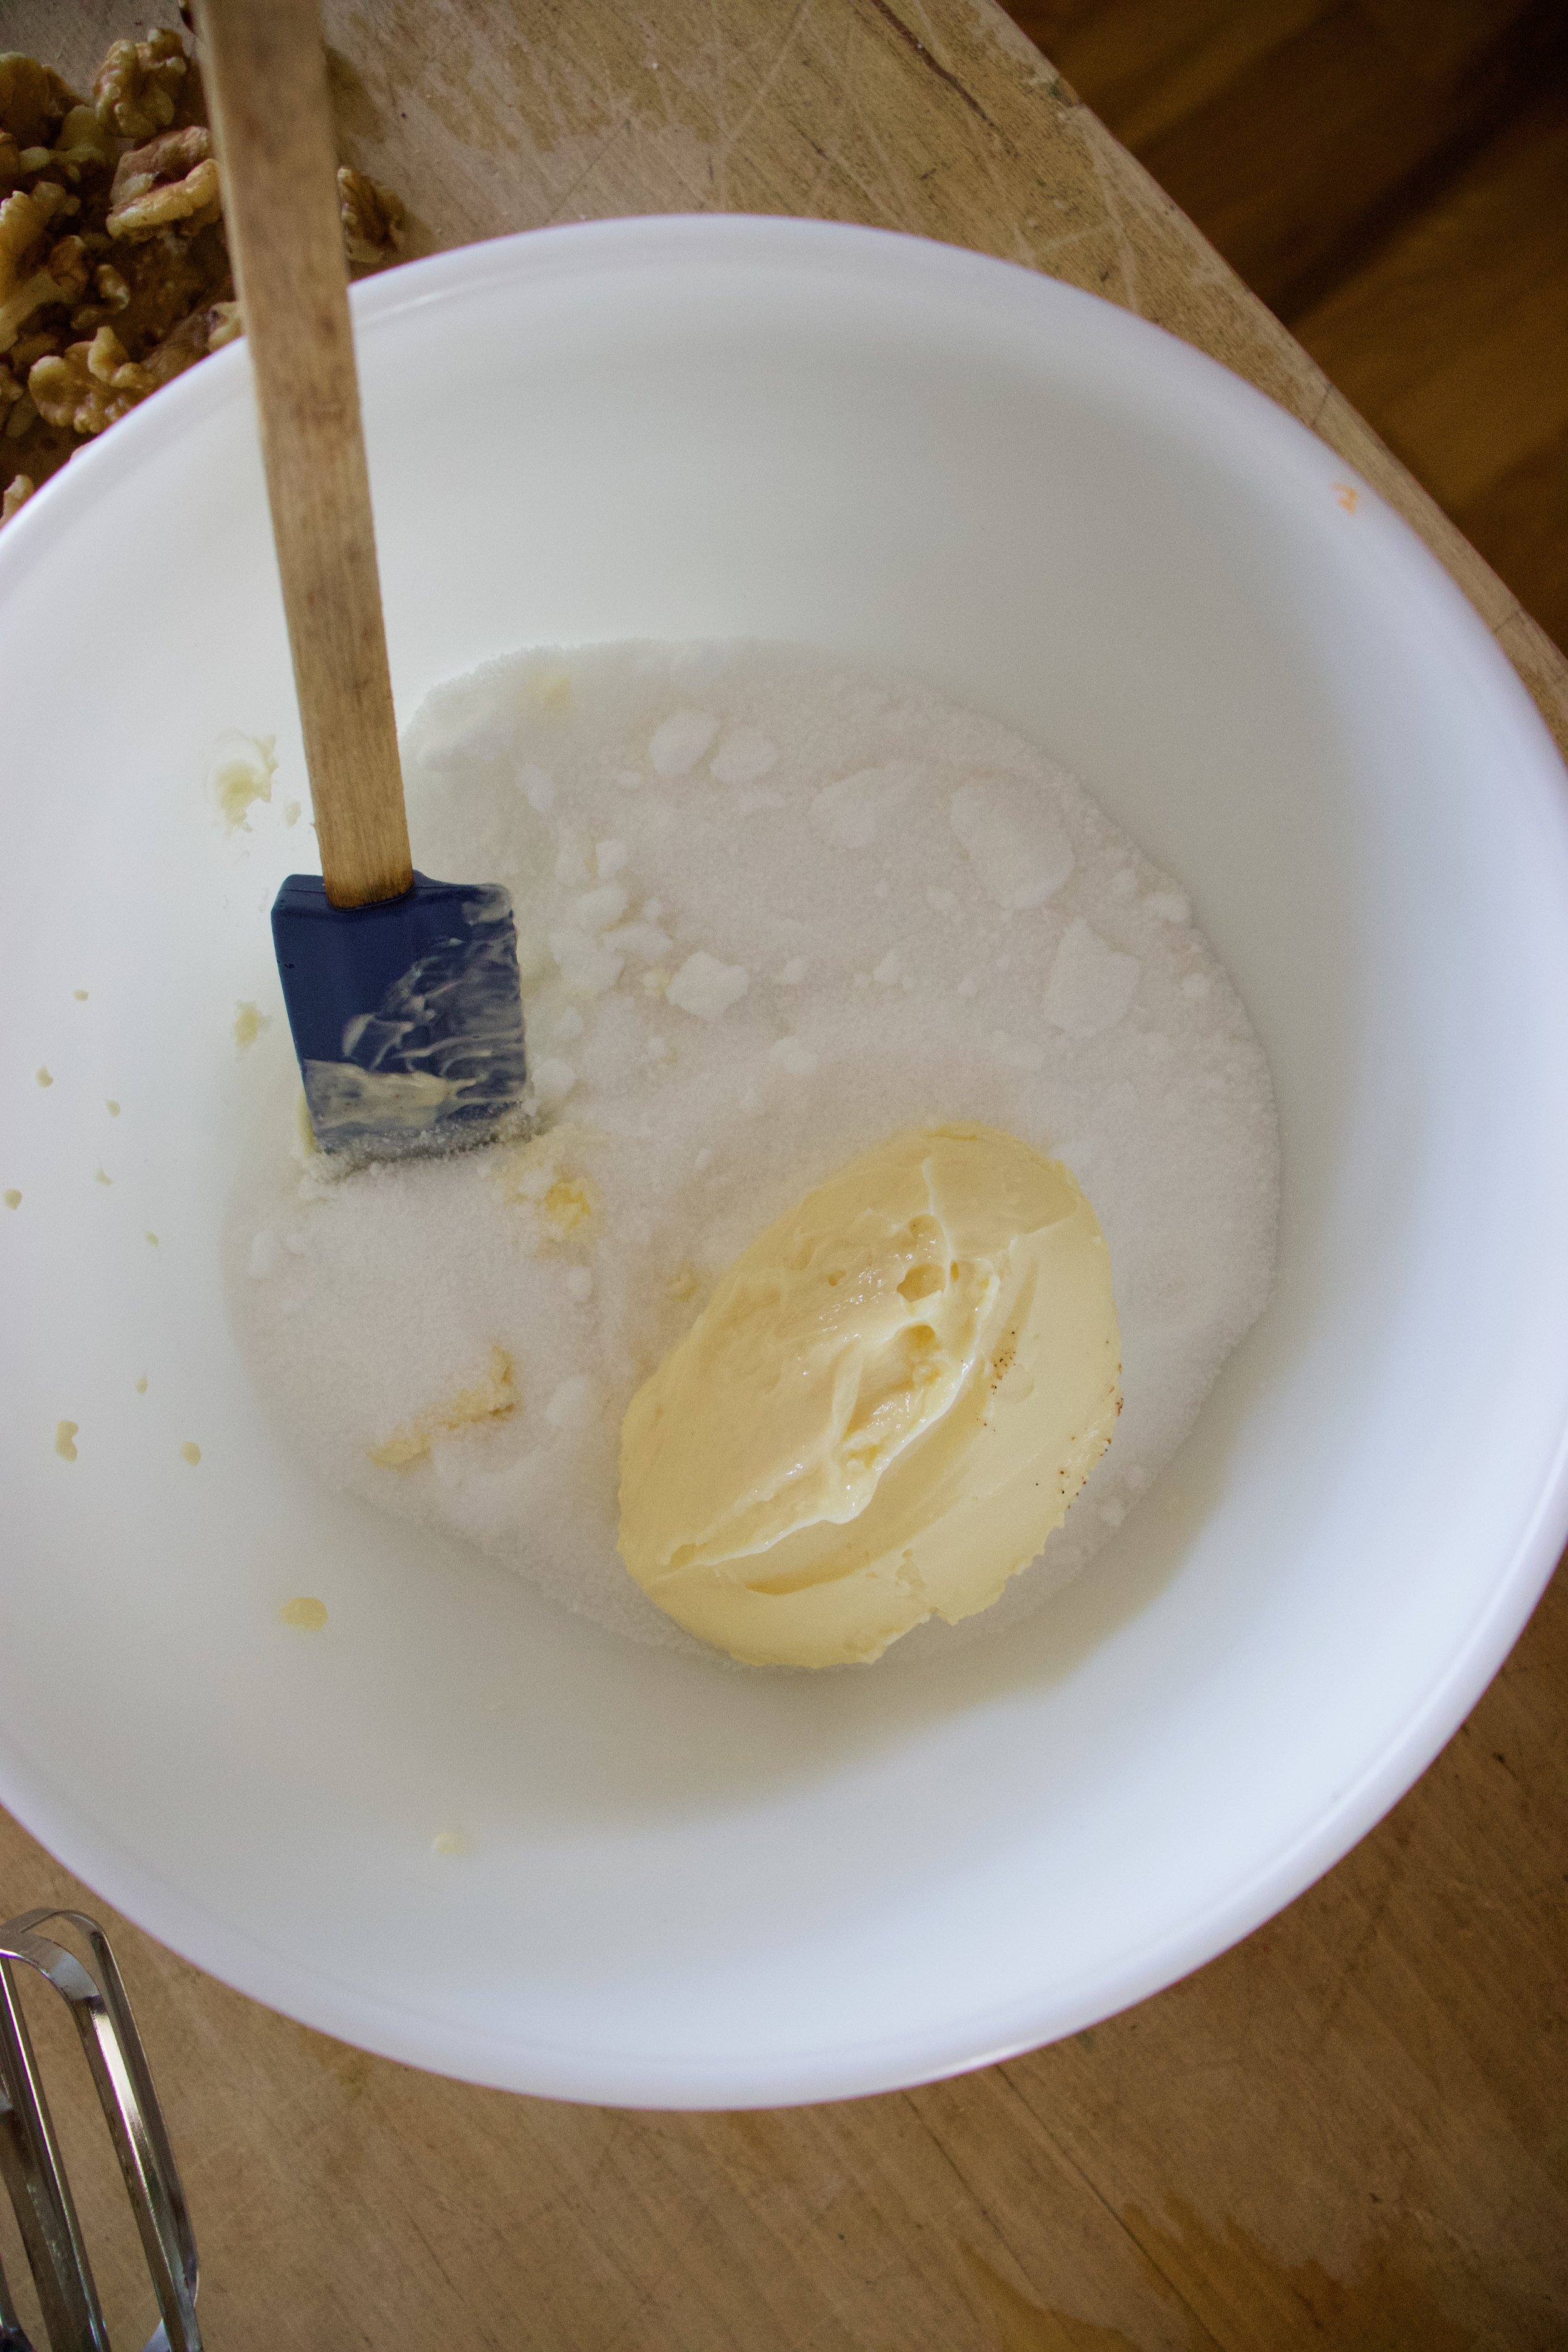
Start by chopping the onion and carrot into small pieces. Place into large heavy bottom pot with a splash of water and a tiny splash of olive oil. Mince the garlic and peel and mince ginger. Toss into the pot as well and place it on a medium heat to cook until the veggies are tender and fragrant.

While the veggies are cooking, dice up the butternut squash. Remove any seeds but there is no need to peel. Also dice up the apples, reserving 1/2 of one for the relish. Place the chopped squash and apples into the pot with the cooking veggies along with 1 1/2 cups of cranberries , the chili powder and cumin, 2-3 tablespoons apple cider vinegar, and the water. Place the pot back on the stove, bring it to a boil, then reduce heat to medium and let cook.

Once soup is on the stove, take reserved half apple and the other 1/2 cup of cranberries and dice into very small pieces. Place into a bowl with a little pinch of salt and 2 tablespoons apple cider vinegar. Toss around and set aside.

And back to soup. Once the squash is tender and starting to fall apart, it is time. Remove from heat and either with a immersion blender, or a regular blender, blend the soup until smooth. After its blended and creamy smooth, check for thickness. If you think it is too thick, add more water. Too thin, place back on stove and cook down until it thickens up a bit more.

When you are ready to serve and eat, ladle soup into a bowl and top with more pepper and a spoonful or two of the apple cranberry relish.

Then eat and feel cozy.

In Dairy Free, Gluten Free, grain free, holiday, soup, Vegan, Vegetables, fruit Tags Apple Cranberry Butternut Squash Soup with Apple Cranberry Relish, Vegan, vegan soup, dairy free soup, gluten free, plant based, dinner, comfort
2 Comments

Apple Walnut Brownies

September 22, 2018 Colleen Stem
IMG_0522.jpg
IMG_0581.jpg
IMG_0558.jpg

Well happy first day of fall to you! Are you as excited as I am? I am very very excited because well, cooler weather, shorter days, pretty trees, pumpkins, sweaters, and of course apples. All the apples!!

I am not going to lie, I was going to wait to do a big apple pick to start with my apple baking but this week the grocery store was selling apples form the orchard I am going to go picking from for a 77cents a pound!! I mean, I couldn’t not buy 20 lbs right? Sure I felt a little guilty that they were not hand picked by me, but in a way they were because I did hand pick them form the store so that kind of counts? Plus I am still going apple picking, today in fact so not harm in having a shit ton of apples.

Anyway, so apple brownies. Why, because why not. Slightly chewy but soft, dense, full of all the cinnamon and apple walnut flavor one could want or need to feel all the feels of the apple season. Made them and fed them to the people and they were gone within a minute. Huge success in flavor and texture. and best part, it was slightly chilly out when I made them so the oven on was extra nice, and my house smelled amazing. Oh gosh, I am just so excited that it’s fall, it’s the best time of year!

And now I am for real going apple picking! I’ll probably make these brownies again, just because you know, apples and I'll probably come home with another 100 lbs or more so you know, I’ll have the apples to do it.

IMG_0447.jpg

The stuff. Apples. sugar, applesauce, cinnamon, and walnuts. Also some vegan butter, flour, baking powder, and baking soda.

IMG_0451.jpg

FIrst, chop up the apples. And no, don’t peel them, just chop, into little 1/2 inch cubes.

IMG_0458.jpg
IMG_0459.jpg

Butter and sugar get a good beat until light and fluffy (I read somewhere that when you beat the sugar with butter in brownies, it helps make that crisp, crackly top)

Fold in the apple sauce and cinnamon .

IMG_0472.jpg

Like a galaxy of cinnamon goodness.

IMG_0482.jpg
IMG_0487.jpg

Then all the rest of the stuff: flour, baking soda and powder, salt, apples, walnuts, get folded in too until just incorporated.

Batter gets spread evenly in a greased and parchment lined pan. (There is parchment there, I was running low so it only covers the bottom of the pan. Better if it goes up the sides though.)

Then into the hot oven they go.

Popped out at just the right moment. See the top? A bit crisped crinkly, kind of like a brownie! Now pop them out of the pan and let cool completely. Or cool enough to cut. Or, cool enough to handle and eat…..

There you go, apple walnut brownies.

And now you can officially enjoy the first day of fall because there is a lot of apple goodness in these brownies and what is fall without apples?!!

Have the best day.

-C


Apple Walnut Brownies

makes a 9x9 pan of apple goodness

  • 1 1/4 cup all purpose flour

  • 1 cup white sugar

  • 1/2 cup vegan butter

  • 1/2 cup applesauce

  • 1/2 teaspoon baking soda

  • 1/2 teaspoon baking powder

  • 1/2 teaspoon salt

  • 1 tablespoon cinnamon

  • 1/2 cup chopped walnuts

  • 2 large Macintosh apples (about 2 cups chopped)

Preheat oven to 350

Core and dice apples into about 1/2 inch cubes . Measure out 2 cups ans eat any left over apple chunks. In a large bowl, beat together vegan butter and sugar until light and fluffy. Fold in the applesauce and cinnamon. In a smaller bowl whisk together the flour, salt, baking soda, and baking powder. Dump into wet mixture, along with the apples and walnuts and fold together until just evenly incorporated. Grease and parchment line a 9x9 baking sheet. Dump the batter into the pan and spread evenly then pop into oven and bake for 40- 45 minutes or until browned and a tester stuck in the middle comes out clean. Check after 35 minutes… you don’t want to over bake! Once cooked all the way through, remove from oven and let cool for a few minutes. Once cool enough to handle, remove the brownies from the pan (you really need to line the pan with parchment to do this) and let cool completely on a wire rack. When they are cool (if you can wait that long because really, these are great eaten warm too.), cut and eat.

Store left overs in a airtight container for a day or two or freeze any extra. Great warmed and serves with a scoop of some ice cream or a yogurt situation.

In brownies and bars, desserts, fall, fruit, Vegan, Nuts Tags Apple Walnut Brownies, vegan, vegan apple walnut brownies, apples, fall, vegan sweets, easy dessert, walnuts, fall food
Comment

Crispy Kale and Corn with Blueberries and Avocado Salad

August 18, 2018 Colleen Stem
IMG_1479.jpg
IMG_1448.jpg
IMG_1500.jpg

I think that my favorite thing abut summer is probably the food. Yeah, no, definitely all the food. If it weren't for all the delicious amazing things that grow during these summer months, I would probably hate summer.  Well, I mean, not hate it because summer is nice when it it nice, but lately it has not been so nice and so I am trying to make myself feel better by finding all the good things that I like about summer. Summer trees, summer flowers, the smell of fresh cut grass, river rocks, summer sandals, summer... well that's what I got right now. But summer produce, that is the best and what keeps me happy when I am extremely over heated and over sunned and just want a blast of cold air accompanied by some dark clouds, a sweater and the smell of decomposing leaves. Obviously I am being a little crank butt, and I actually do usually like me some summertime, I am just over this summer. To hot, to humid, to dry. I am ready to move on. 

But back to the good parts of summer that I am not over. The food. The corn is flowing steadily (I am getting on average 10 pieces of corn a week from the farm. That is a lot of corn for 2 people, one of which says he doesn't like corn), the kale is growing in super abundance in the garden, and it's is for sure blueberry season. When we  have those three things and we toss in a avocado, as little onion, and lots of lime juice , BAM, another super fantastic summertime eating time, reason that summer can be a ok. Makes  all the heat a little worth it. 

I am telling you, this is my new favorite food combination. Blueberries are magical (I think so anyway) and really add the perfect little sweetness, tartness, and texture to this salad. Crisping up the kale and corn elevates the deliciousness, and avocado always is welcome is any salad situation. This is one of those salads that you will make for yourself and then immediately want to make for someone you like because it is so good you want to share. OR you just want to make it for yourself again because you could share or you could just eat more of it yourself. It's ok either way, you do you. 

IMG_1375.jpg

The stuff. A cob of fresh corn. some fresh blueberries, a bunch of dinosaur kale, a lime, an avocado, a piece of a sweet onion, sea salt, pepper, and a little oil. 

First off preheat the oven then cut the corn off the cob.

Then deal with the kale. Each leaf needs just the slightest bit of oil. The easiest way to do this is to dump a little oil into your hands and grab each piece of kale and rub your oily hands all over the kale.

IMG_1414.jpg
IMG_1436.jpg

After the kale is oiled, chop it into chunks. First place the corn on a baking sheet then add the kale on top. Placet it into the oven to get all crispy... The kale will might get crispy before the corn, which is fine because you can remove the kale then pop the corn back into the oven for a few more minutes to keep cooking if you want. Or you might just want to call it cooked, it's your call. 

IMG_1454.jpg

I popped the corn back into the oven to get a little more color. I like a real crispy corn. 

Cut up some onion and avocado into chunks. 

And time to compile. Kale, onions, corn, avocado, blueberries, and lime juice. And don't or get a sprinkle of sea salt and pepper. 

Toss it all around and be delighted. 

Just look at that salad. Who wouldn't want to eat that? 

Heres to summer salads....The reason I can barely stand the heat!

-C


Crispy Kale And Corn With Blueberries And Avocado Salad 

makes one salad

  • 10 or so large Lacinato (Dinosaur) Kale leaves
  • 1 fresh cob of corn
  •  1/2 of an avocado
  • 1/2 cup fresh blueberries
  • 1/4 of a sweet onion (about 1/4 cup diced)
  • 1 lime
  • teaspoon olive oil
  • sea salt and pepper  

Preheat oven to 350

Cut the corn off the con and place on a lightly oiled baking sheet. Take a little oil and rub into hands then grab the kale leaves ans rub oil all over them. Once oiled, rough chop into medium sized pieces (don't chop small, it will shrink a lot in the oven). Place chopped kale on top of corn and stick into hot oven. Bake until the kale is crispy, about 12-15 minutes.. What closely after 10 minutes to prevent burning.

Remove the kale from the baking sheet and place in a large bowl. The corn will be cooked, but if you want to make it a little crispier , just toss it back into the oven for a few minutes.  Once corn is to your liking, remove from pan and toss into two with the kale.

Small dice up some onion and dice up half of the avocado. Toss into the bowl with the kale and corn. And the blueberries, add those in. Sprinkle the whole shebang with a little sea salt and pepper and squeeze the juice of at least half of a lime all over (use the whole lie if you want) Give it all one last toss and that is it. 

Eat your new favorite salad. Think about making it for all your favorite friends and family and how impressed they will be because this is one of those impressive salads. T

In Vegetables, Vegan, summer, side dish, salad, fruit, grain free Tags Crispy Kale And Corn With Blueberries And Avocado Salad, Blueberries, corn, kale, dinosaur kale, lacinato kale, vegan, gluten free, plant based, healthy, heathy fats, summer, salad, fresh, farm food, crispy corn, crispy kale
Comment

Waterloupe (Watermelon and Cantaloupe) Slushies

August 11, 2018 Colleen Stem
IMG_1260.jpg
IMG_1145.jpg
IMG_1310.jpg

It's melon season! The past few farm shares have included at least 2,, if not 4, watermelons and cantaloupes... Can you imagine. eating 4 watermelons a week? That's a tall order, even for someone like me who could probably eat a whole watermelon in one sitting, it's just doing it 4 times a week might be a problem.  It's a whole lot of melon and not enough stomach, you know what I mean? 

So what do I do with so much melon? Well first off, whenever anyone comes over I try to get them to  eat as much of it as they can, which helps a great deal. Secondly, I cut it up and freeze some. But here is the thing, I love eating chunks of frozen cantaloupe, but frozen watermelon, never been my favorite so I usually just pass on sticking in the freezer, until now.

There is something magical that happens when you stick the frozen watermelon and cantaloupe together into a blender and making it into a slushy. It's like eating a ray of sunshine or maybe even a rainbow, just really satisfying and juicy, and sweet but not overly sweet, and just really freaking good. Especially with all the stupid hot and humid weather we have had lately, these slushies have really been hitting the spot.  Even the mr who says he dislikes watermelon was all into these melon slushies. (he likes things that he says he doesn't like all the time. I am pretty sure he is taste confused) Like  he was really into them. Usually I have to prompt him to tell me how something tastes, but not the slushy, he told me right away how good it was. I was like, I know dude, I just drank 2 of them myself. And I could have drank 2 more but I was trying to not get tot far ahead of myself. Moderation is key, plus I didn't;t have any more of the melons frozen. Time to restock the freezer. 

Go make yourself a slushy, it's juicy deliciousness will make you happy. 

IMG_1165.jpg

The stuff. Watermelon and cantaloupe. There should be a lime in there too but it must have rolled away.... 

Chop some of each of the melon up, remove the rinds, and place on a big baking sheet and stick into the freezer until frozen. You can do as little as 2 cups  of each or as much as a whole melon, it's up to you. (I suggest freezing extra)

IMG_1216.jpg

Frozen melon. And now you can slushy.

IMG_1222.jpg
IMG_1237.jpg

Equal parts watermelon and cantaloupe go into blender, along with the juice of half (or more to taste) a lime and you are probably going to need to add about 1/2 a cup of water, to help the blender blend it all together.  And that's it. You blend until it's all slushy.

IMG_1309 4.jpg

Pour into cups, garnish with a lime and/or little chunks of melon and you are good as golden. 

IMG_1309 4.jpg

From now on, or until summer is over and I run out of melon, I will be keeping the freezer stocked, especially because I know that the next few weeks are suppose to be stupid hot again. 

Waterloupe slushies. Summertime goodness. 

-C


Waterloupe (Watermelon And Cantaloupe) Slushies


  • about 2 cups  of a watermelon
  • about 2 cups of a cantaloupe 
  • 1 lime
  • 1/2- 1 cup water 

Note. The amounts above are for two  2 cup slushies. You can, and should, freeze a crap load more melon for future slushies.  Also, no one would fault you for maybe adding a little nip of some clear alcohol to this slushy situation to make it more of an adult drink......

Cut up a watermelon and a cantalopjue. Eat some and reserve at least 2 cups of each. Remove the rinds from the melons and cut into cubes. Place melon on a baking sheet and stick into the freezer until frozen. 

Once frozen, place equal parts frozen watermelon and cantaloupe into the blender with the juice of a lime. Turn blender on. Slowly add in water until the blender can handle blending the frozen fruit. Blend until smooth. Pour into cups, garnish if you want with more melon and lime, then get to drinking. 


In 5 ingerdients or less, drinks, frozen, fruit, quick and easy, Raw, summer, Vegan Tags Waterloupe (Watermelon And Cantaloupe) Slushies, watermelon, slushies, slushy, cantaloupe, fruit, vegan, easy, cold treat, gluten free, no added sugar, fresh, raw, dairy free, drinks, cocktail
Comment

Peachy Sweet Buns

July 28, 2018 Colleen Stem
IMG_0581 3.jpg
IMG_0718.jpg
IMG_0652.jpg

Who doesn't like a good bun, right?  And just because this is where my mind wonders, peachy sweet buns. Doesn't that sound like a pick up line or something you say to your significant other. Like, "Oh hey peachy sweet buns, you are looking good. Woo hoo"........ Anyway, this is not about anyones peachy sweet buns, it it about actually sweet buns so u-hum, yeah. 

I am not trying to float my own boat here, but I am really really good at making buns, and you know what, I bet that you are too. They may seem a little intimidating, but really, it's quite easy. I think what throws some people off is the yeasted dough and having to knead and waiting for the dough to rise, but don't let that stop you from sweet sweet buns. They are no harder to make then a boxed cake (maybe a little harder) and the results are by far more amazing and delightful (we don't use the word delightful enough around here) then any old box or pre-made thing will ever be. Ever. Freshly made buns are what is right in this world.

If you are awesome and decide to make buns like any good person with a baking itch or a need for some sweet bun goodness does, make them peachy because its peach season and how can a peach bun not be that much more amazing?  Just think. Soft sweet dough, jammy cinnamon peaches, covered in a sweet lemony glaze......

Go on now, go and get yourself some peachy sweet buns.

IMG_0369.jpg

The stuff. Flour and salt in the bowl, melted earth balance, brown sugar, yeast, warm soy milk, cane sugar, cinnamon, powdered sugar, a couple of lemons, and af course, peaches.

IMG_0374.jpg
IMG_0396.jpg

Warm (not hot) soy milk, yeast, cane sugar, an melted (but again, not hot) earth balance go into a big bowl and get whisked around. Then add in the flour and salt ans mix around until you just can't.

IMG_0402.jpg

Time to knead. Dump the dough ad all the little bits onto a flour surface. Gather it all together and knead away, for about 5-8 minutes, or until the dough looks like....

This. Nice and soft and glossy.  Lightly grease the bowl ans stick the dough back into it, covered with a towel, and set for about 1 hour to rise and double in size. 

IMG_0415.jpg

As soon as the dough is set ti rise, start on your peach filling. Chop up enough peaches that you have about 2 1/2 cups of chunks.

IMG_0435.jpg
IMG_0459.jpg

Brown sugar and peach chunks go into a pot and stuck on a medium heat until they start to bubble then set to a low simmer for about 20 minutes or until the peaches all break apart and reduce by half.

IMG_0490.jpg

Add in the cinnamon and stir.. Peachy goodness. Now quick and stick that shit in the fridge or freezer to cool down.

BOOM. Dough did what it's job and doubled. Time o make the buns. 

IMG_0504.jpg
IMG_0509.jpg

Place the dough on a lightly floured surface and roll our into a rectangle of sorts that is about 1/2 an inch thick 

IMG_0513.jpg

Cover the surface with all the peachy jammy goodness, and sprinkle on the remaining finely chopped peaches.

IMG_0519 2.jpg
IMG_0522 3.jpg

And roll, as tightly as you can, without squeezing all the filling out. I roll towards me, but roll away from you if it is easier.  It might get a little sloppy... it's ok, just lick your fingers and keep going. 

Rolled and cut into 12 pieces.

Place the rolls carefully onto a grease and parchment lined baking 9x13 baking dish. In my picture I used a baking pan, which was not what I wanted to do, but I wasn't thinking properly and so that's what I did. Something with sides is preferable, but the baking pan did the job so really, your call. 

When you place the buns in the dish, place them toughen a bit, it helps then bake up high instead of out.  And any remaining go on jam that spilled out can get scraped right on top of the buns, if you didn't already eat it.

Now into the preheated oven these  babies go.

Look at those beauts. And they smell. A-MAZ-ING!! 

IMG_0566.jpg

Right away get that glaze made. Powdered sugar, lemon zest, ans lemon juice. Super easy, just add the zest and juice to sugar and mix until smooth and glaze. 

Pour glaze over warm buns. Make sure to hit them all or someone is going to be pissed they didn't get enough glaze..... 

Then it's really just up to you whether you wait for coffee or tea or not, but really, just eat right away. There should be very little time between newly glazed buns and a bun in your face.

Enjoy the peaches!

-C


Peachy Sweet Buns

Makes 12 Buns

  • For the Dough 
    • 3 1/2 cups all purposes flour
    • 1/4  cup cane sugar
    • 1 cup warm soy milk
    • 2 teaspoon or 1 packet yeast
    • 4 tablespoons melted vegan butter 
    • 1 teaspoon salt
  • For the Filling 
    • 3-4 good sized ripe peaches (about 3 cups chopped peaches)
    • 3/4 cup brown sugar
    • 1 tablespoon cinnamon
    • Juice of half a lemon
  • For the Glaze
    • 1 lemons
    • 1 1/2 cup powered sugar

In a large bowl mix together the yeast, warm (not hot) soy milk, sugar, and melted but cooled butter. Now add in  the salt and the flour. Mix until it's too hard to mix then dump it all onto a lightly floured surface and knead for 7-10 minutes until the dough is  soft, elastic-y, and smooth. Place dough back into a clean lightly greased bowl and drape with a damp towel. Let dough rise for about 1 to 1.5 hours or until it has doubled in size.

While the dough is rising, chop the peaches up until you have about 3 cups. Place 2 1/2 cups of the  peaches into a medium sized pot with the brown sugar and lemon juice and stick on medium heat. Set the rest aside. Cook for about 20 minutes, stirring and mashing with a wooden spoon every few minutes, until mixture has become thick and reduced by about 1/2. Remove from heat, stir in cinnamon,  and place in fridge to cool. 

Once thee dough has doubled, dump onto a flour surface and roll our into a retacnge that is about 1/2 inch thick  Grab your peach mixture and spread the mixture evenly over the dough. Evenly distribute  the remaining chopped peaches over jam.  And then it's the to roll.

Start from the long side and start to roll toward the other end, keeping it as tight as possible without squeezing out all the filling.  Once rolled, slice into 12 even sized buns.

Place on a lightly greased and parchment lined 9x13 inch baking sheet or pan and let rest and rest for another20 minutes or so. OR if you want to wait to bake them off, cover them with plastic and set into the fridge for up to 24 hours. When you are ready to bake, remove from fridge and let the buns set on counter to come to room temperature before baking. 

Preheat oven to 350.

Place rolls into oven. Bake for 30-35 minutes or until all the buns have gotten a nice golden brown on top, and if you want to take the internal temp, that the temp has reached 190. 

Once the buns are done  baking, mix together the zest and juice of the lemon and powdered sugar. If the glaze seems to thick, add more juice or water, to think, add more sugar. Pour glaze all over warm (but not hot) buns.

And now all you need to do is serve up those buns right away, nice and warned.

Any left overs should be stored in the fridge for 3-4 days but should definitely be warmed up in the microwave for a minute or two before serving. They also freeze well too. 

In Vegan, Sweets, sweet breads and muffins, fruit, desserts, Dairy Free, brunch, breakfast, bread Tags Sweet buns, Sweet rolls, peachy sweet buns, peach cinnamon rolls, vegan, vegan sweet rolls, plant based, breakfast, brunch, dessert, dairy free, egg free
Comment
← Newer Posts Older Posts →
 

https://thelovelycrazy.squarespace.com/config#/|/about/

Me. Food Maker.Food eater. Woo HOO!

STEM+NODE  SMALL BATCH AND ONE OF A KIND POTTERY

stem+node ceramics


____________________

Subscribe

GET NEW POSTS IN YO EMAIL

You are AWESOME!!!


@thelovelycrazy 2014-2021