• stem+node ceramics
  • HOME
  • Food Recipes
  • About
  • Contact
Menu

The Lovely Crazy

Street Address
City, State, Zip
Phone Number

Your Custom Text Here

The Lovely Crazy

  • stem+node ceramics
  • HOME
  • Food Recipes
  • About
  • Contact

Chickpea Carrot Ginger Fried Rice

October 24, 2020 Colleen Stem
IMG_1309.jpg
IMG_1282.jpg

Rice is a hit or miss in this house. Whenever I make it fresh, I either make too much or not enough so I like to air on the side of too much because when there is too much, you just save for a later day and make fried rice, which to some, might be even better then fresh rice. So there you go.

Fried rice. Not really a complicated dish. Basically it is just reheating rice up in a skillet with some stuff. This version is carrot ginger with chickpeas because those flavors are on point and also I had just made a huge batch of chikepeas and always have carrots and ginger on hand. The rice was just waiting to be reheated and I was glad for it because fried rice take a quarter of the time to make then fresh rice (I use brown rice) and I was trying to get dinner done without having to make much of an effort. And because there is veggies and chickpeas in this rice, it is a complete meal and did not need to make anything else. One pot dinner and done. Good things.

Now to the fried rice!

The stuff. Cooked rice, chick peas, carrots, fresh ginger, garlic, soy, red wine vinegar, olive oil, scallions, cabbage, and cilantro (optional). Also going to need a little water. And black pepper.

IMG_1129.jpg
IMG_1121.jpg
IMG_1122 2.jpg
IMG_1138.jpg

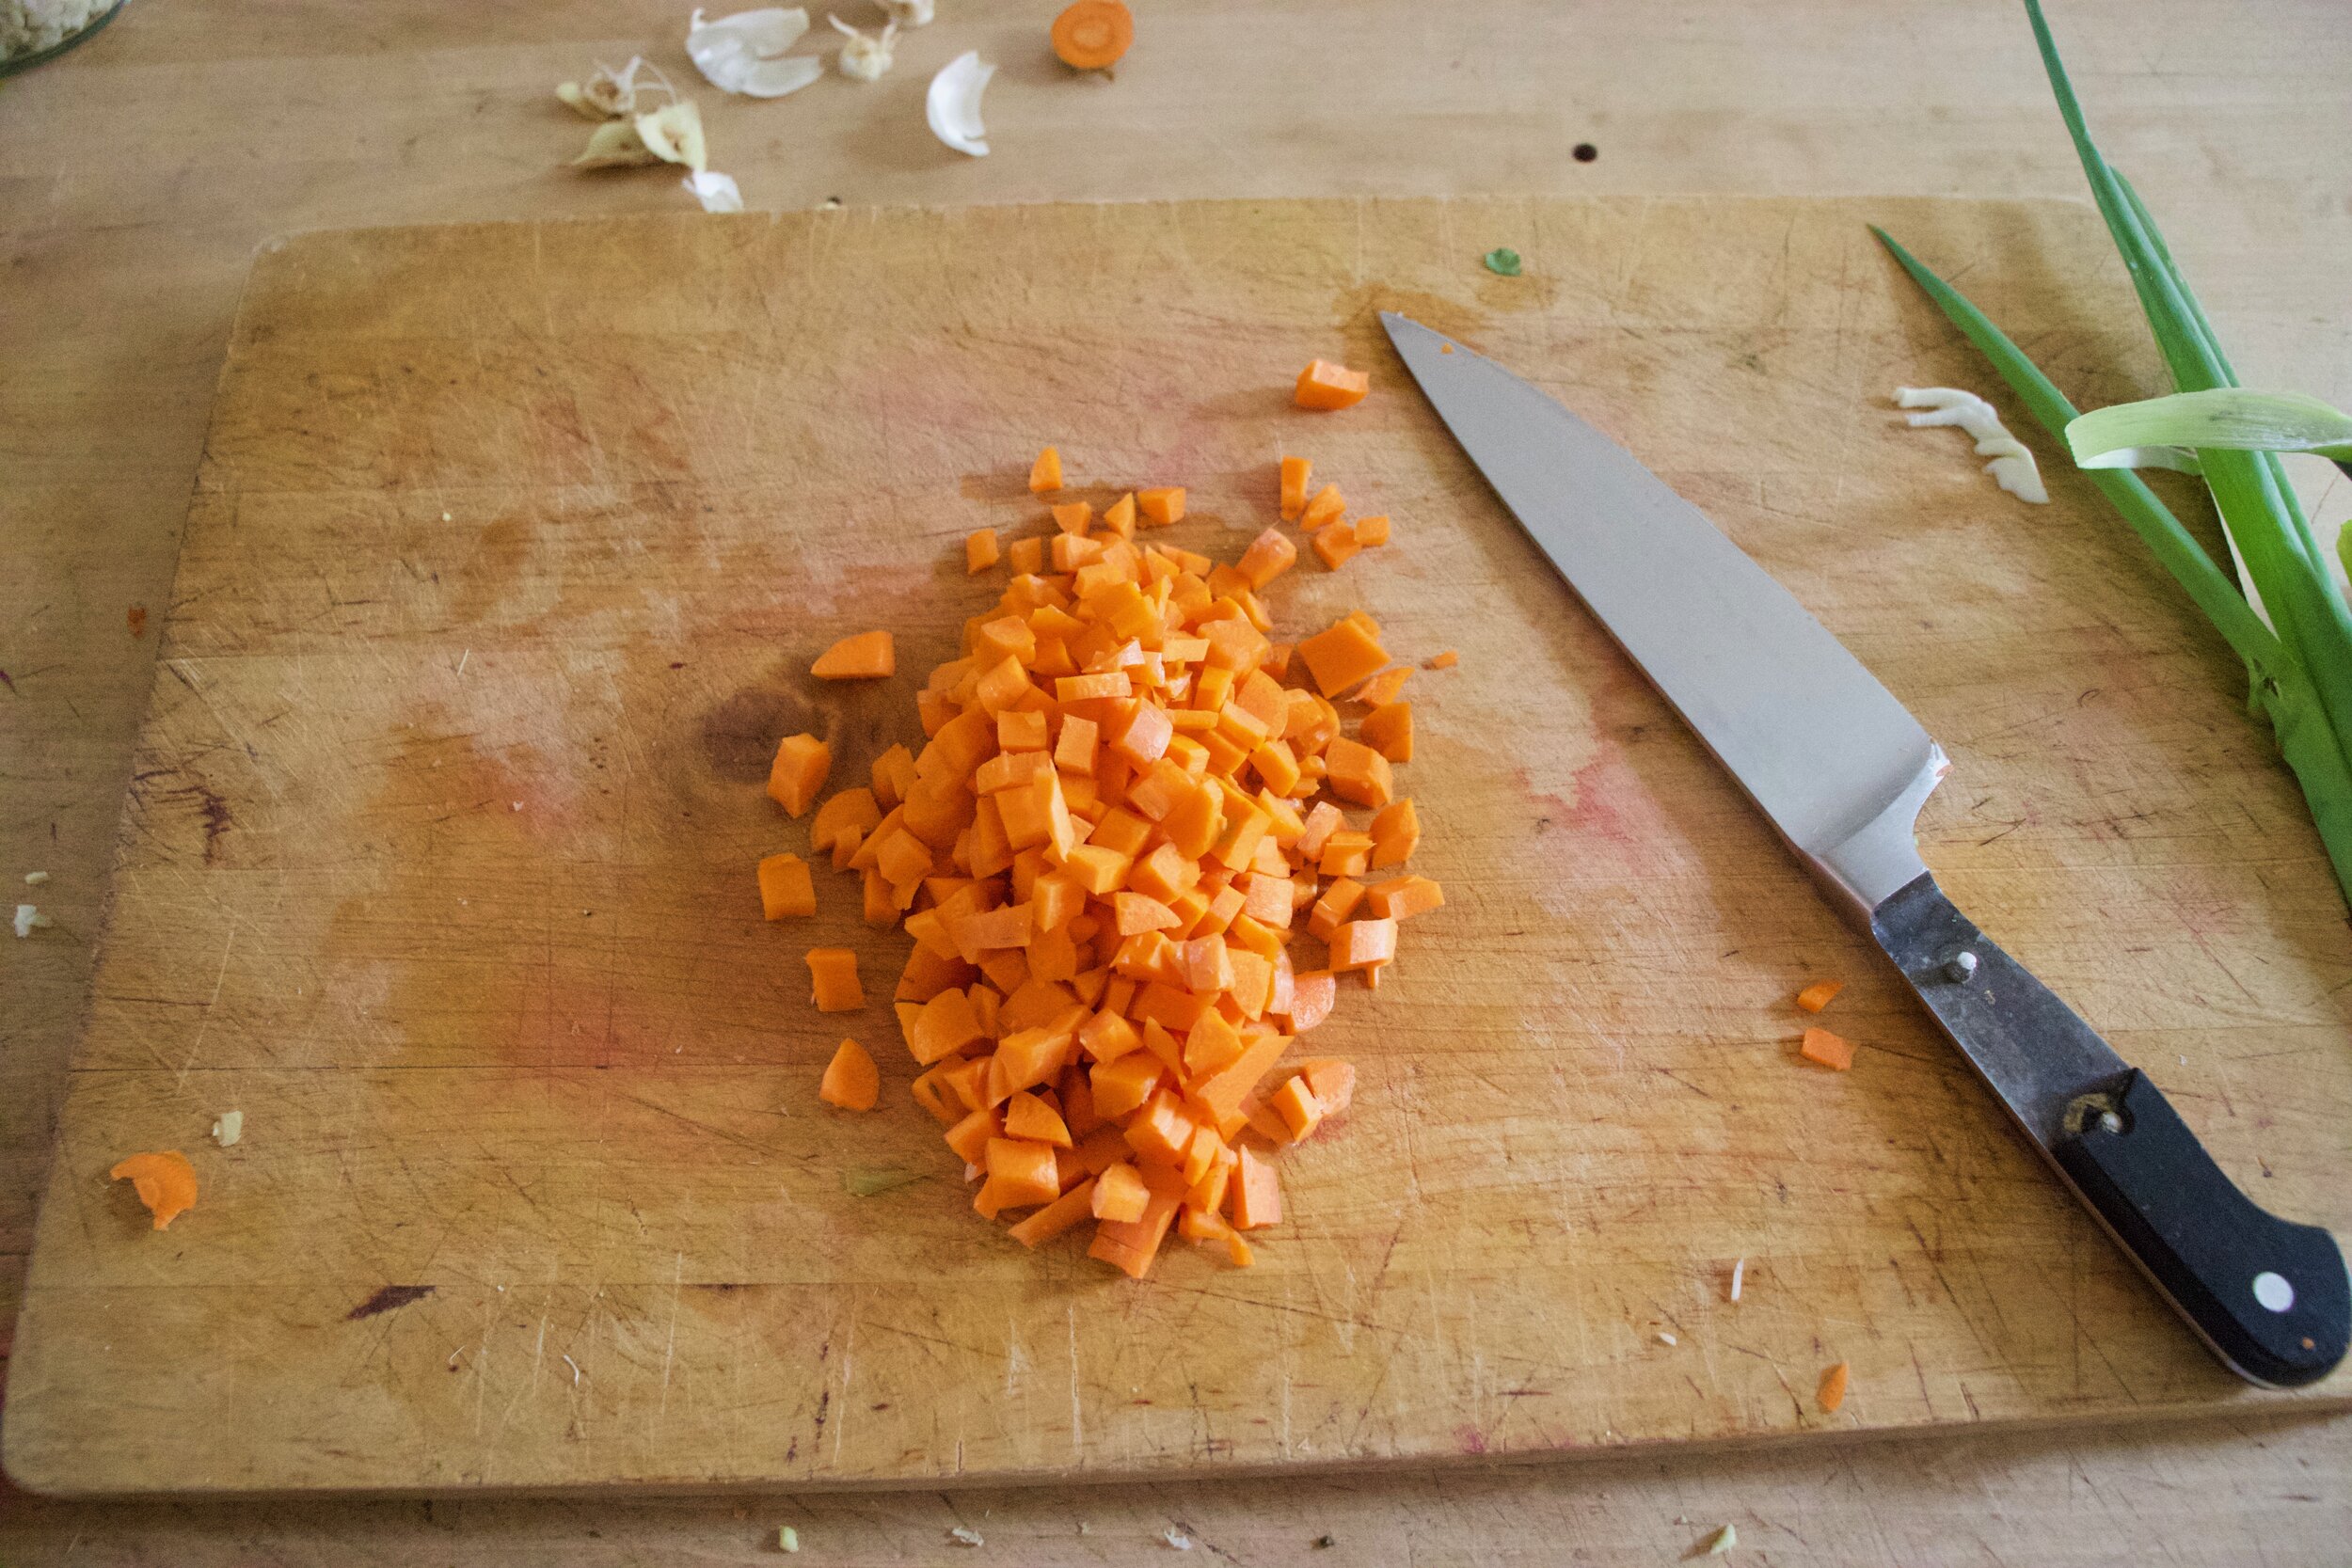
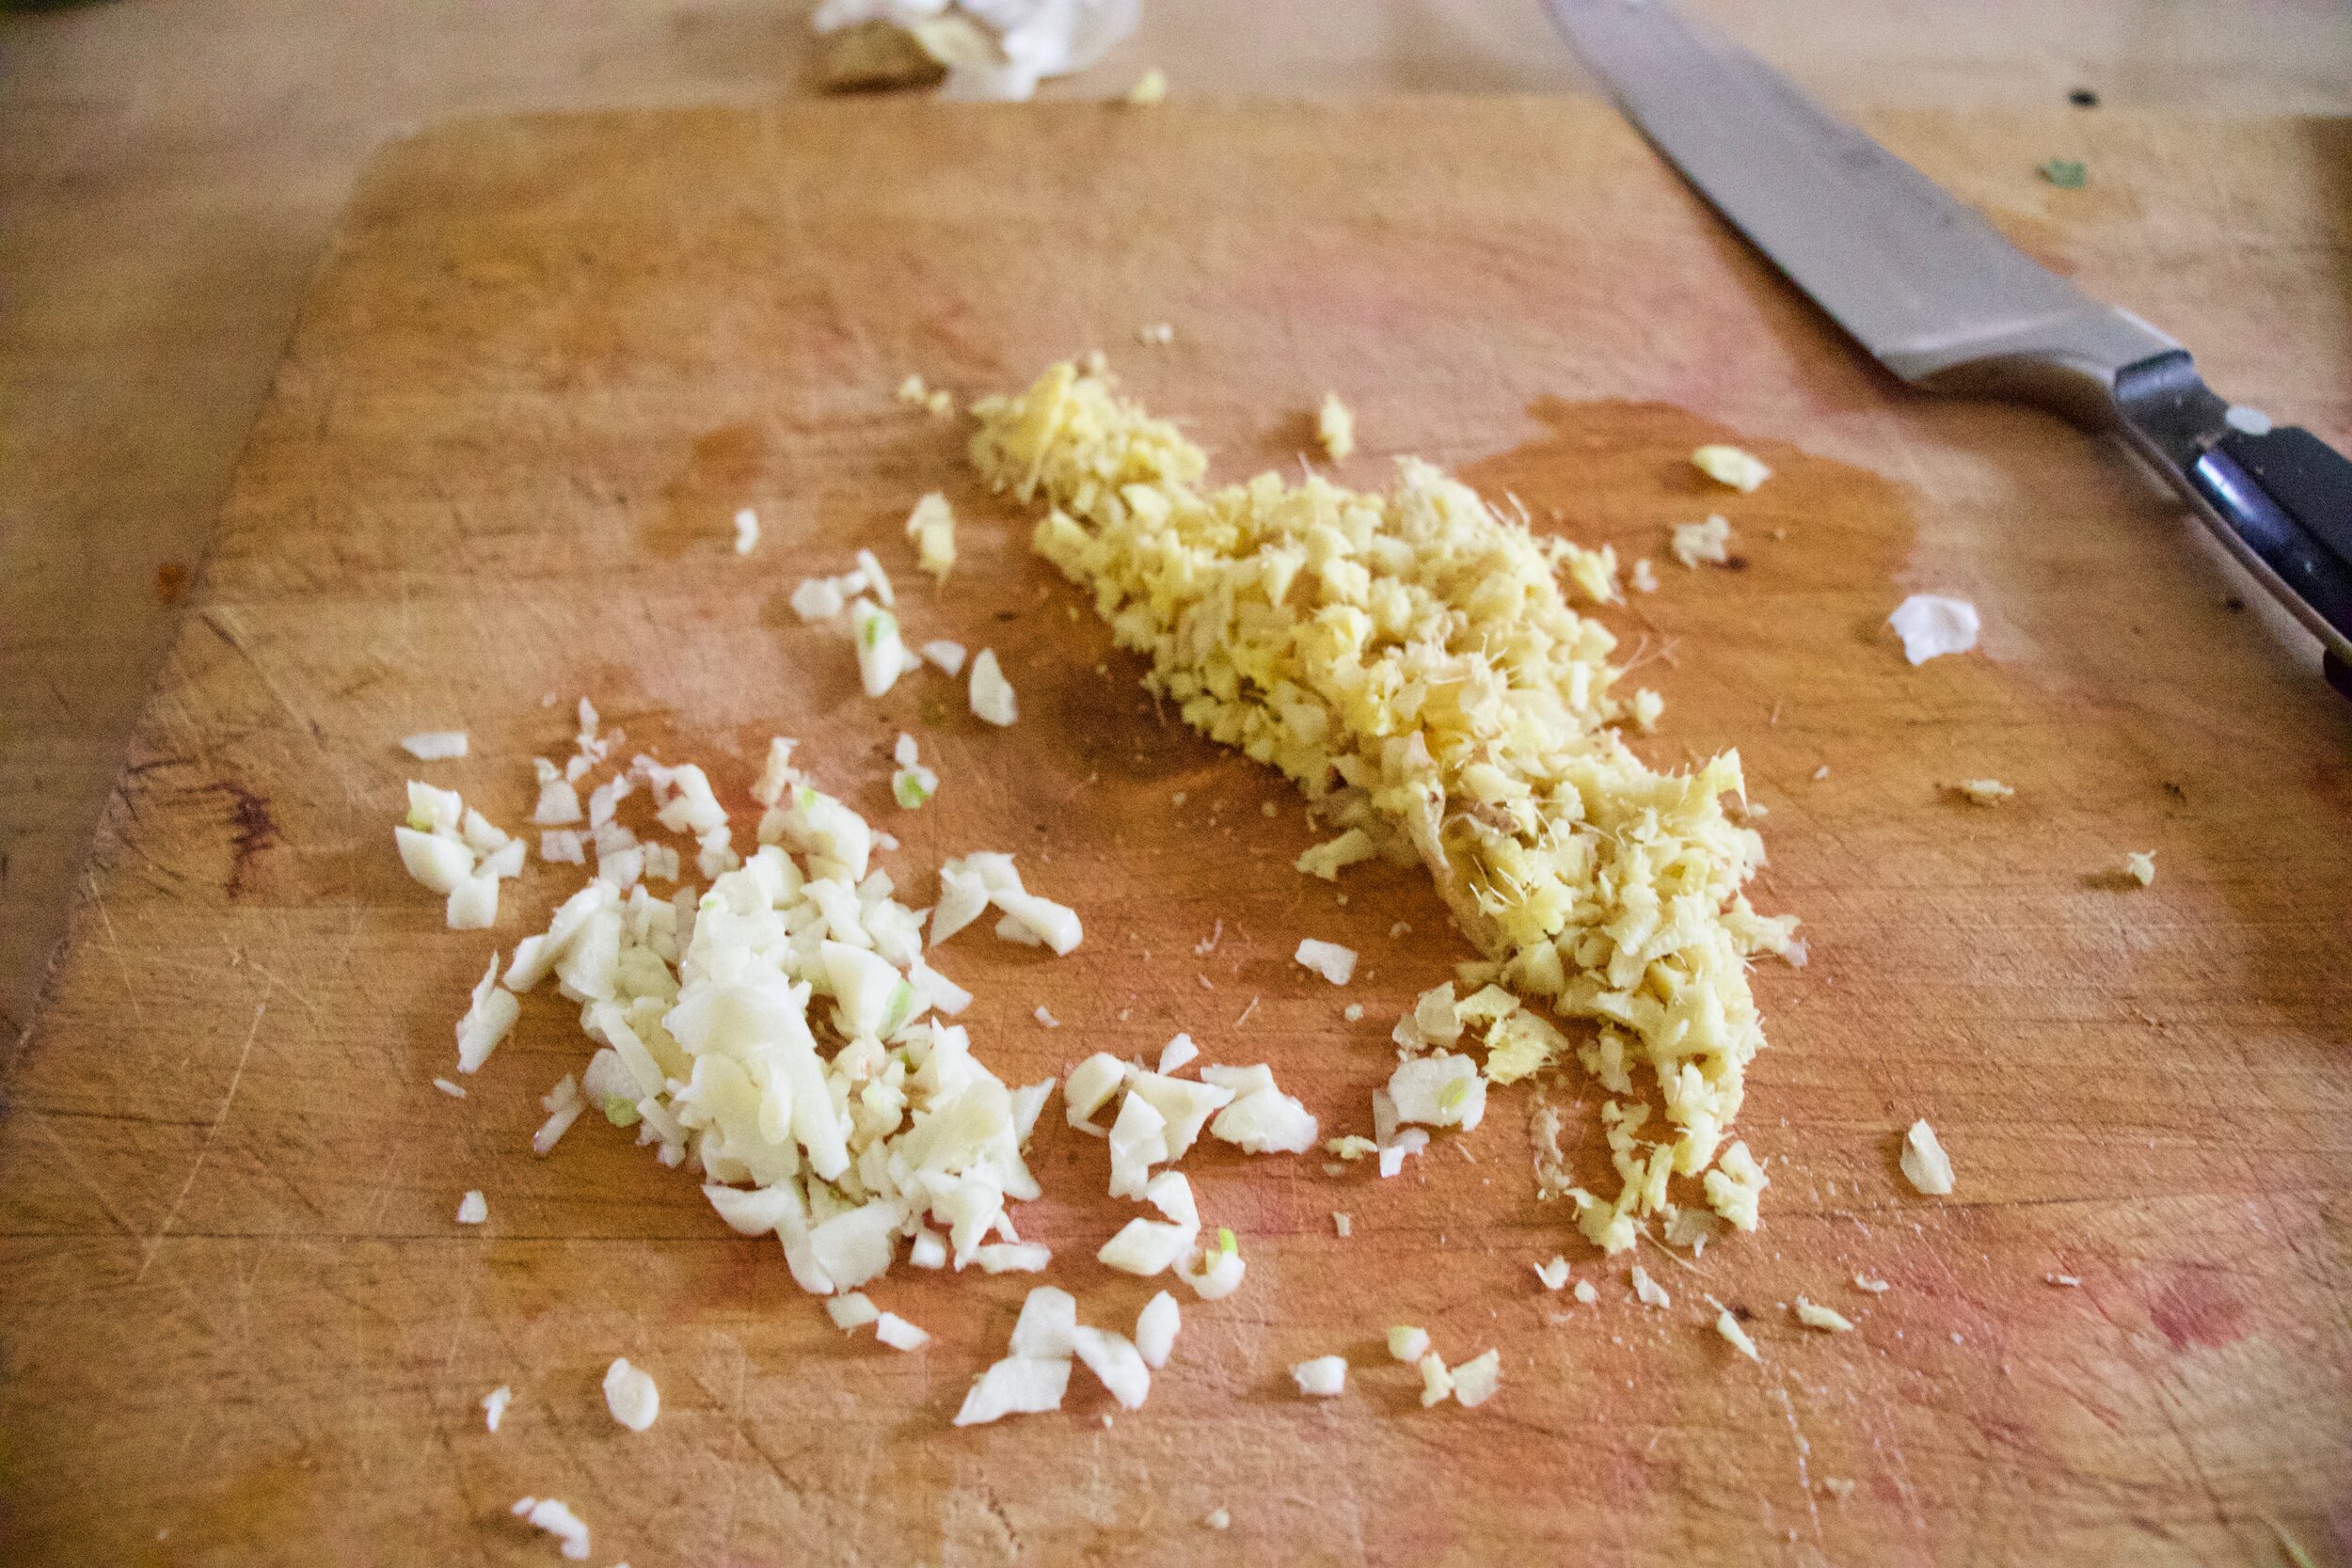
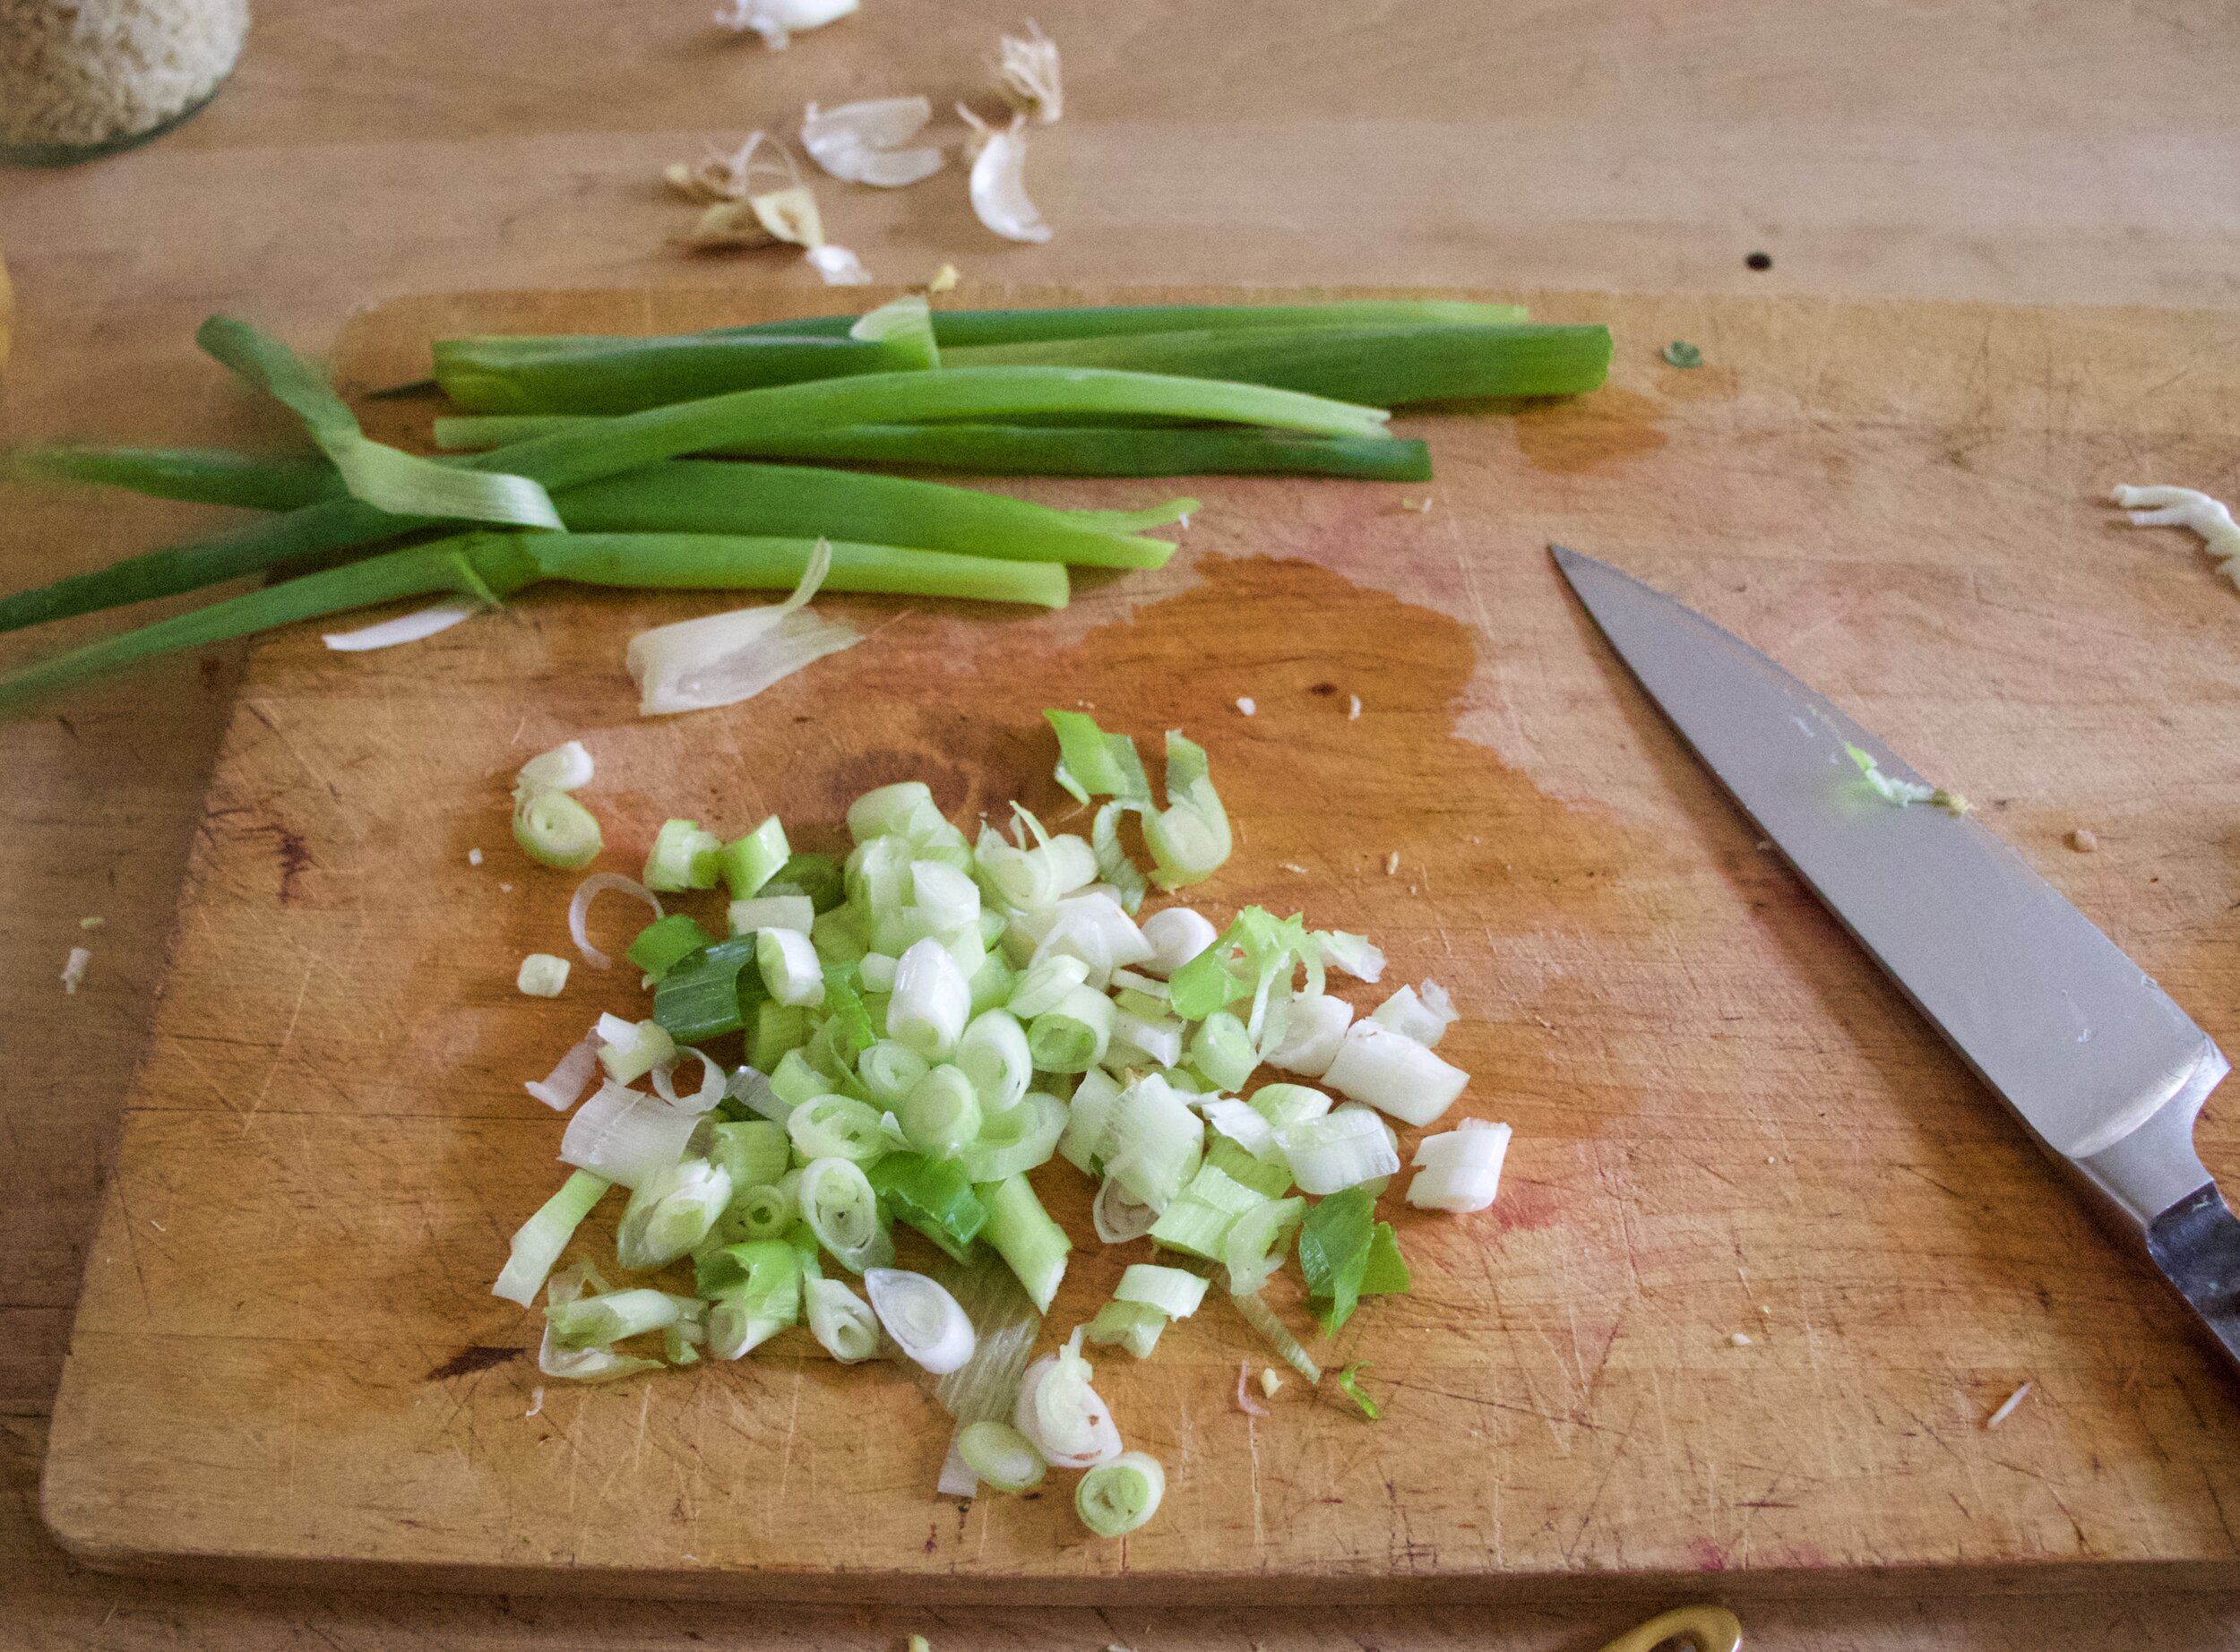
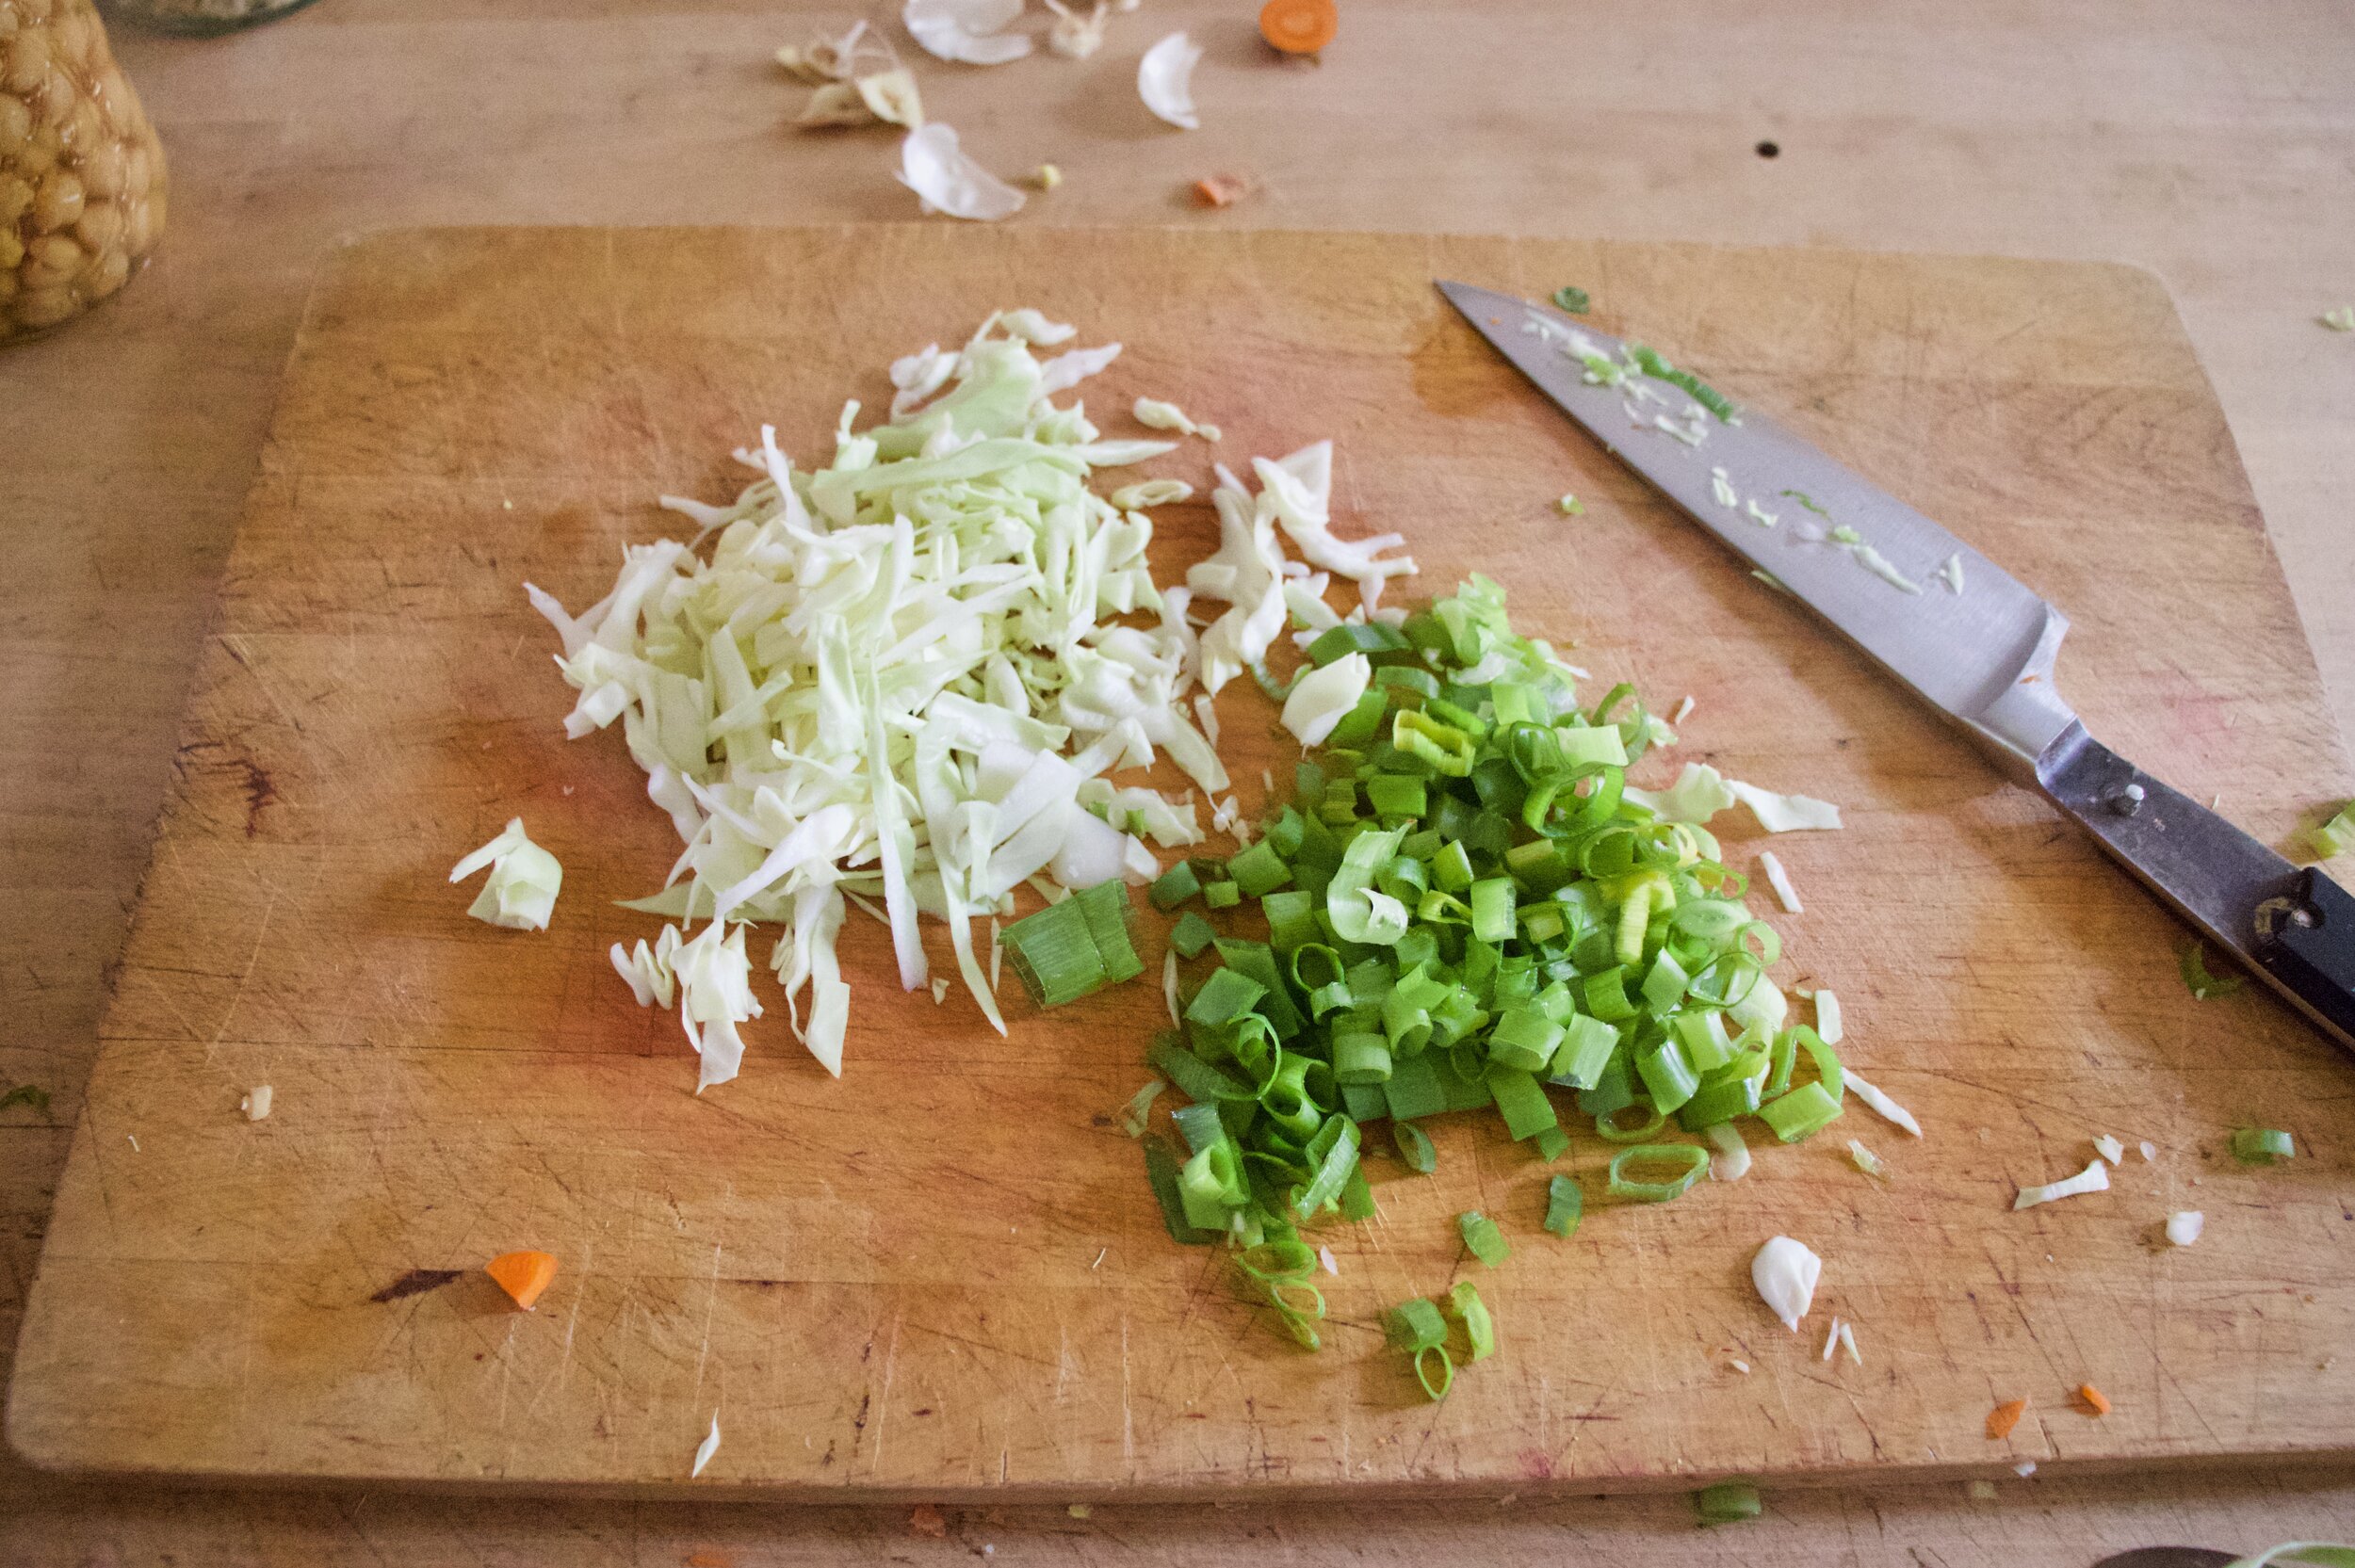
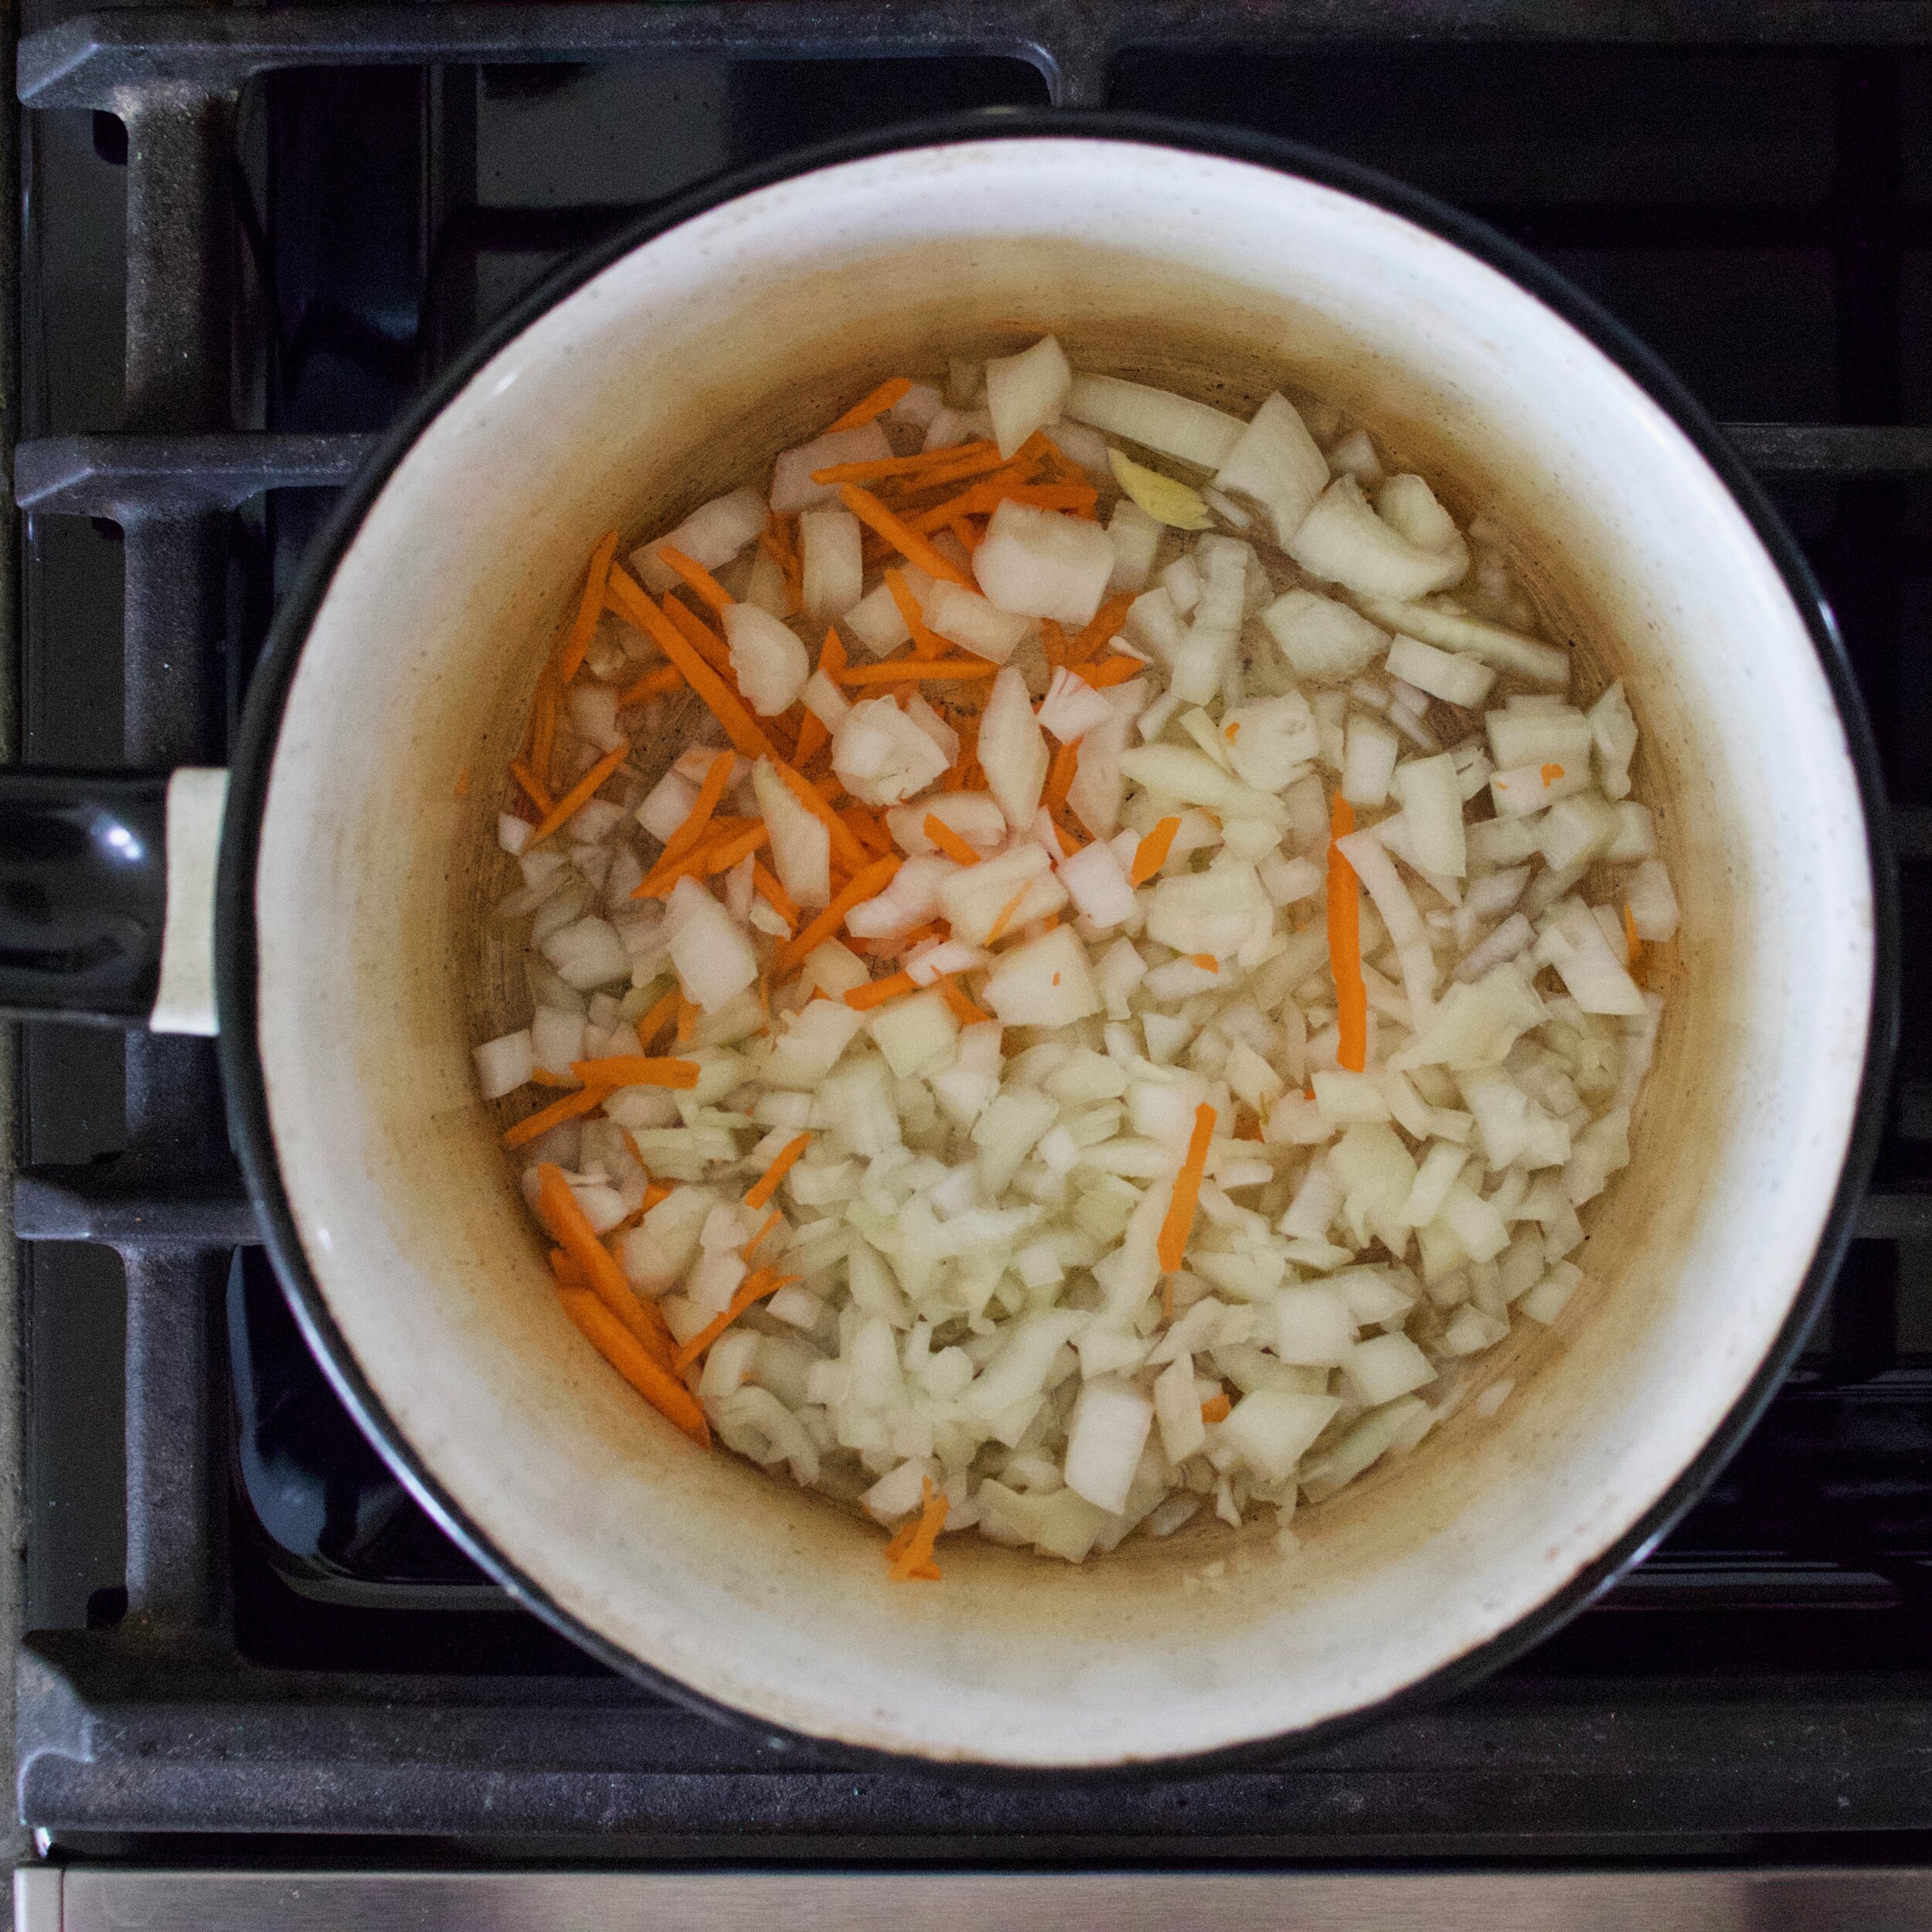
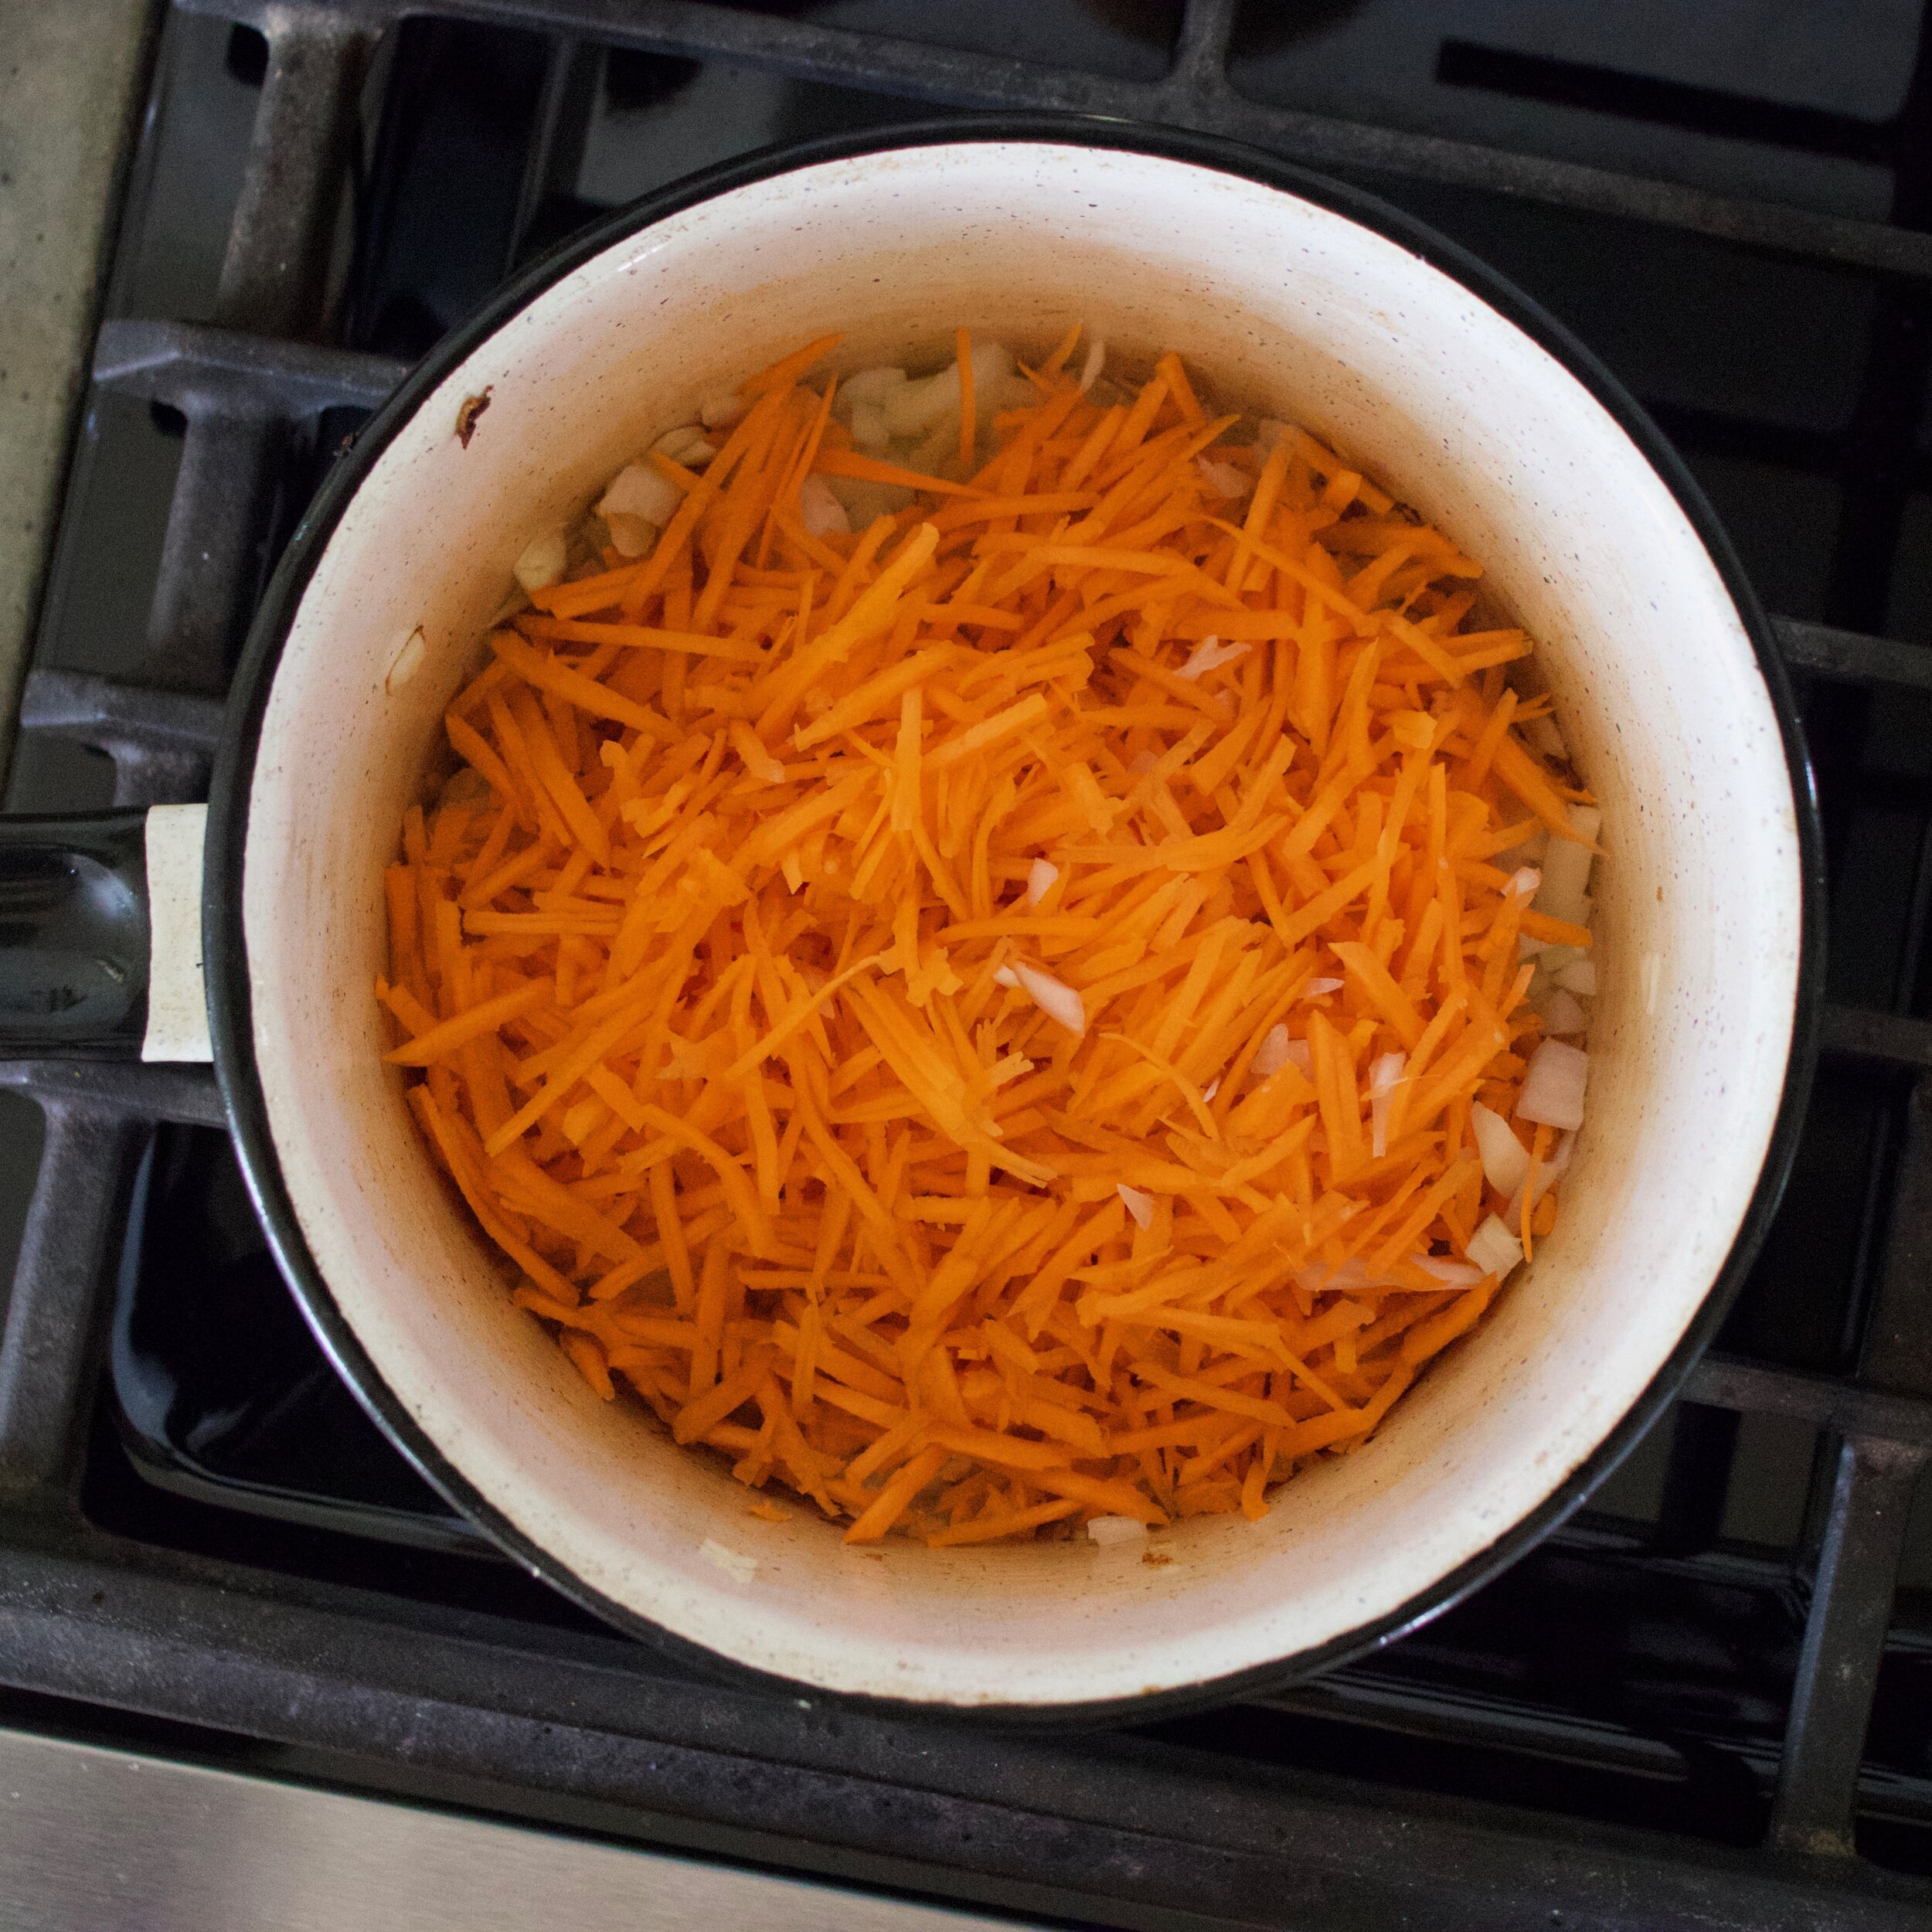
Start with veggies. Dice the carrots into very small little pieces. Toss into lightly oiled skillet with a splash of water and set on low heat. Then start mincing garlic and the fresh ginger. Toss that into skillet with carrots. Grab scallions and cut the thick white parts from he green and slice thinly and toss into skillet. And lastly shredded cabbage and thinly slice the greens of the scallions and set that aside.

IMG_1152.jpg

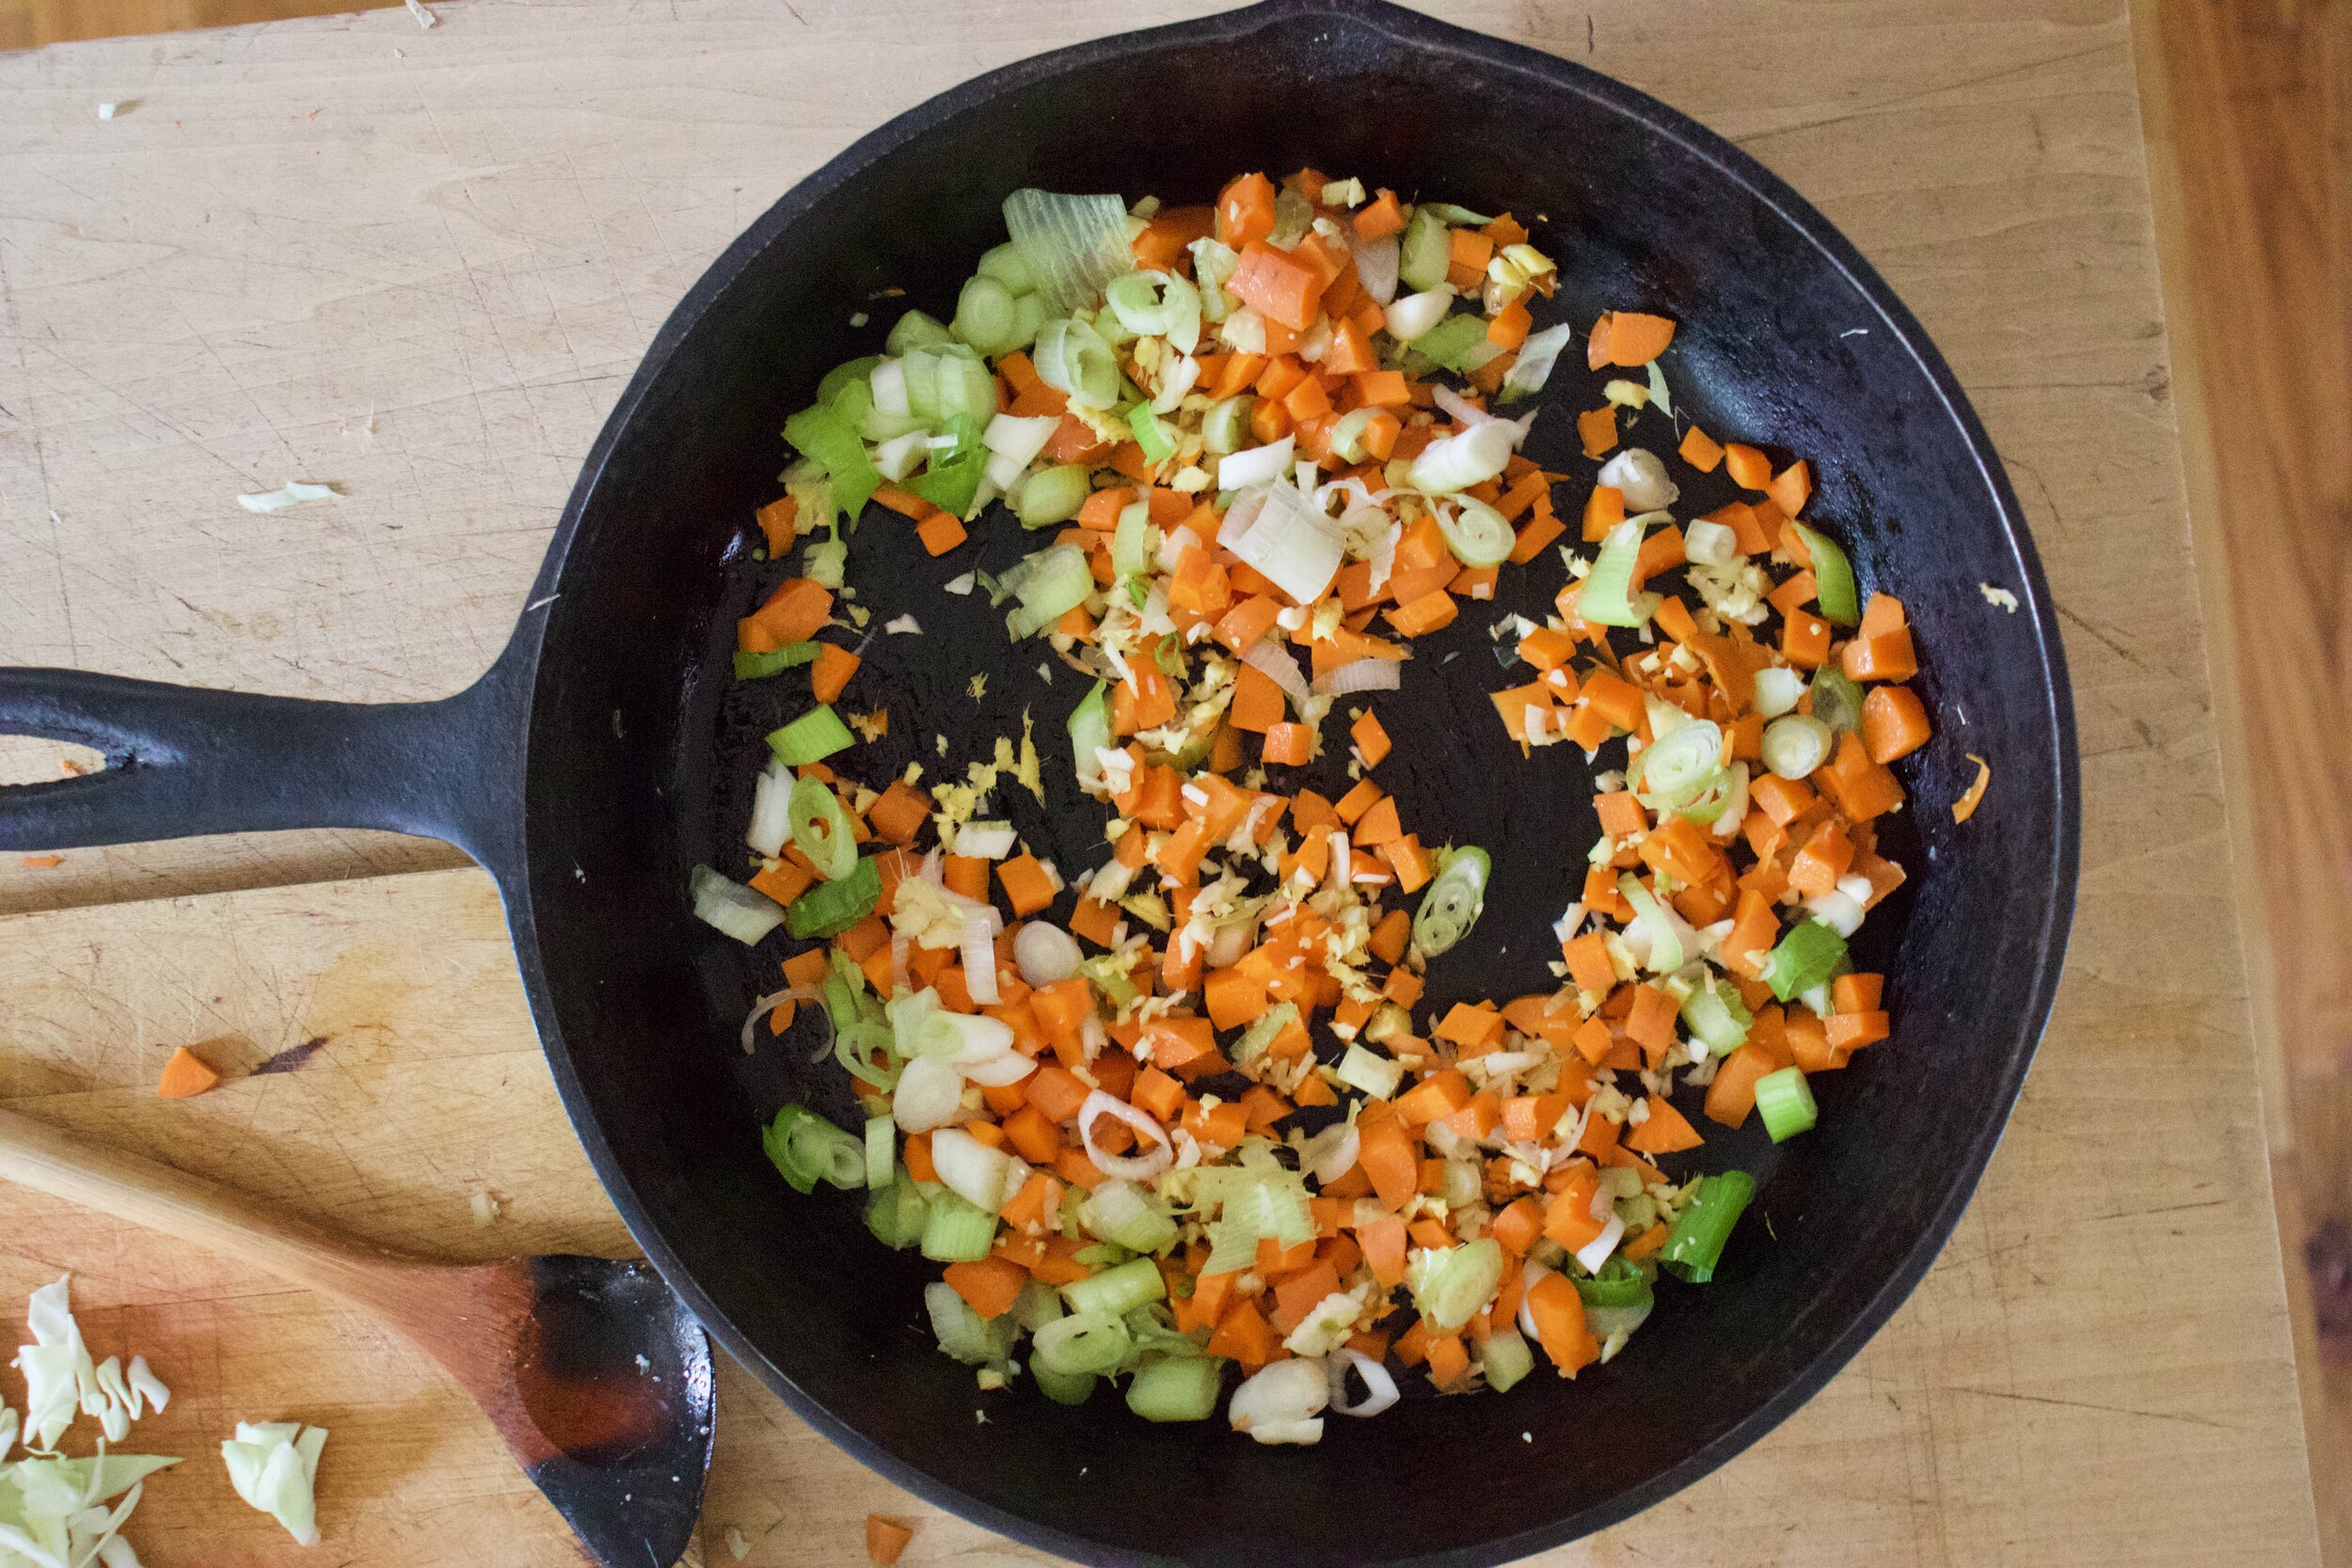
Carrot, ginger, garlic, and scallions are in skillet getting a little heat. Turn heat up to medium, add a splash or two of water, and cook until the carrots are just starting to get a little soft and the ginger and garlic are fragrant. If the

Add in the chick peas, the soy, and the vinegar and cook away.

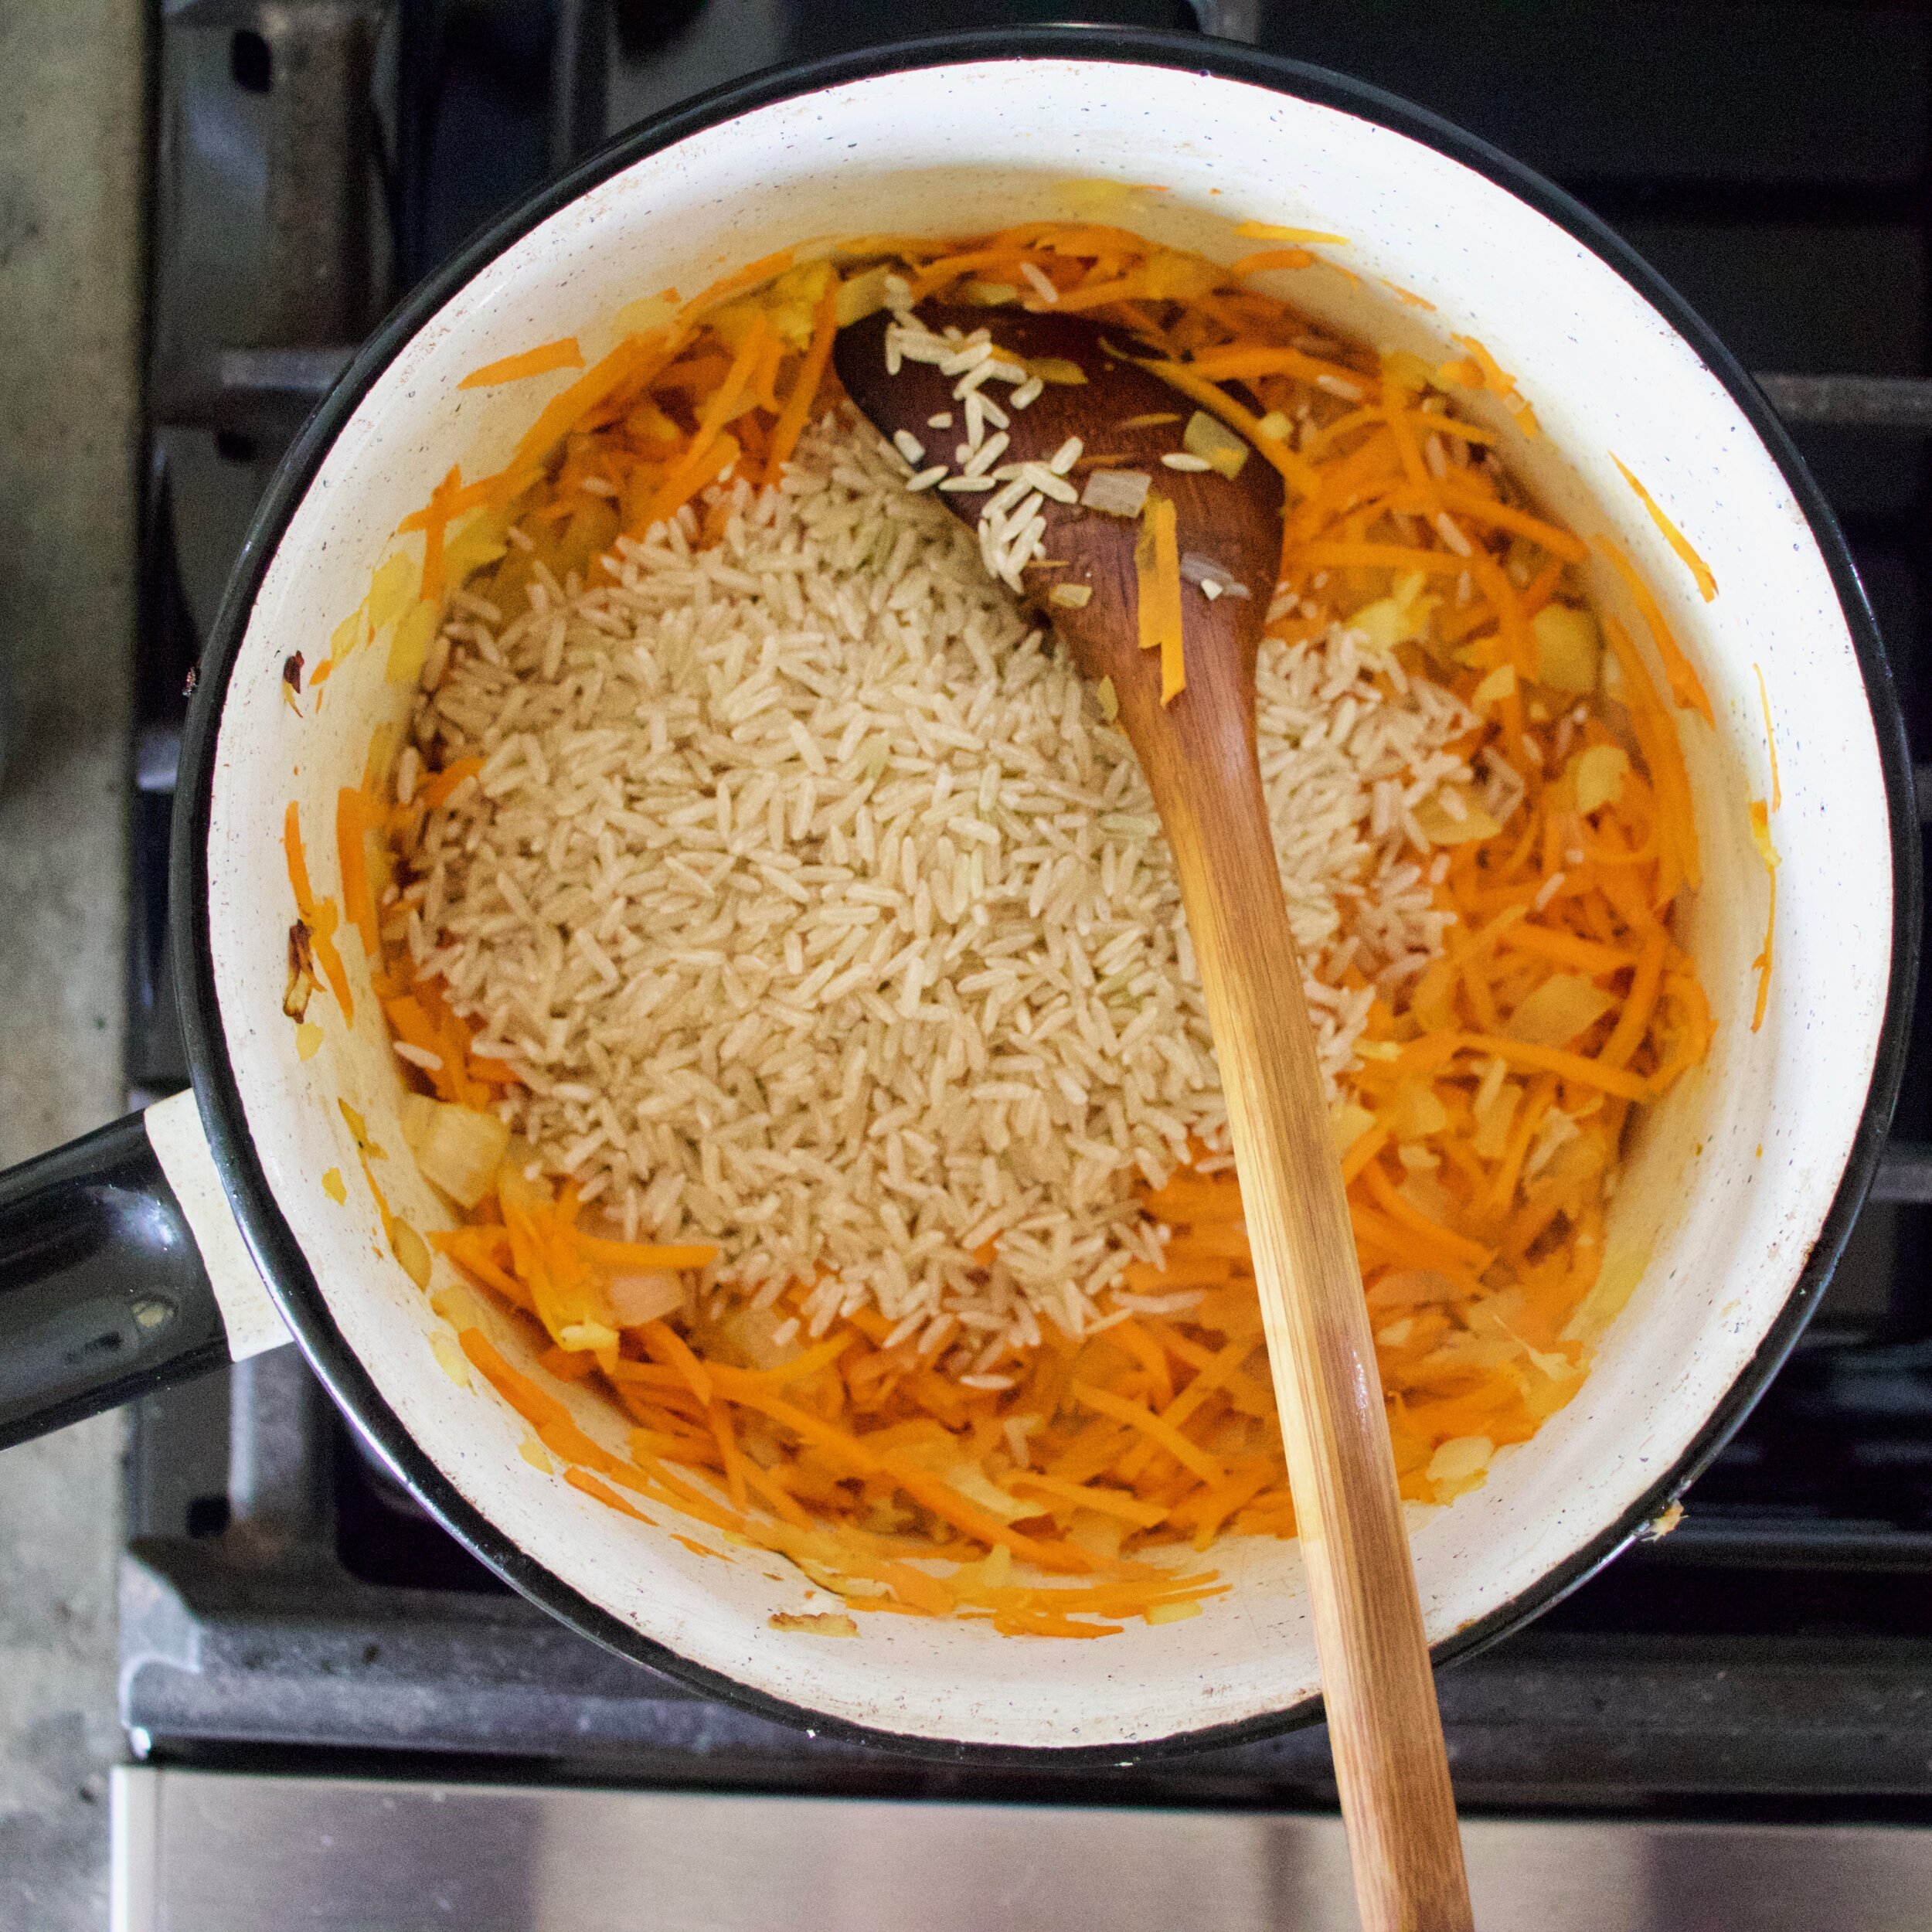
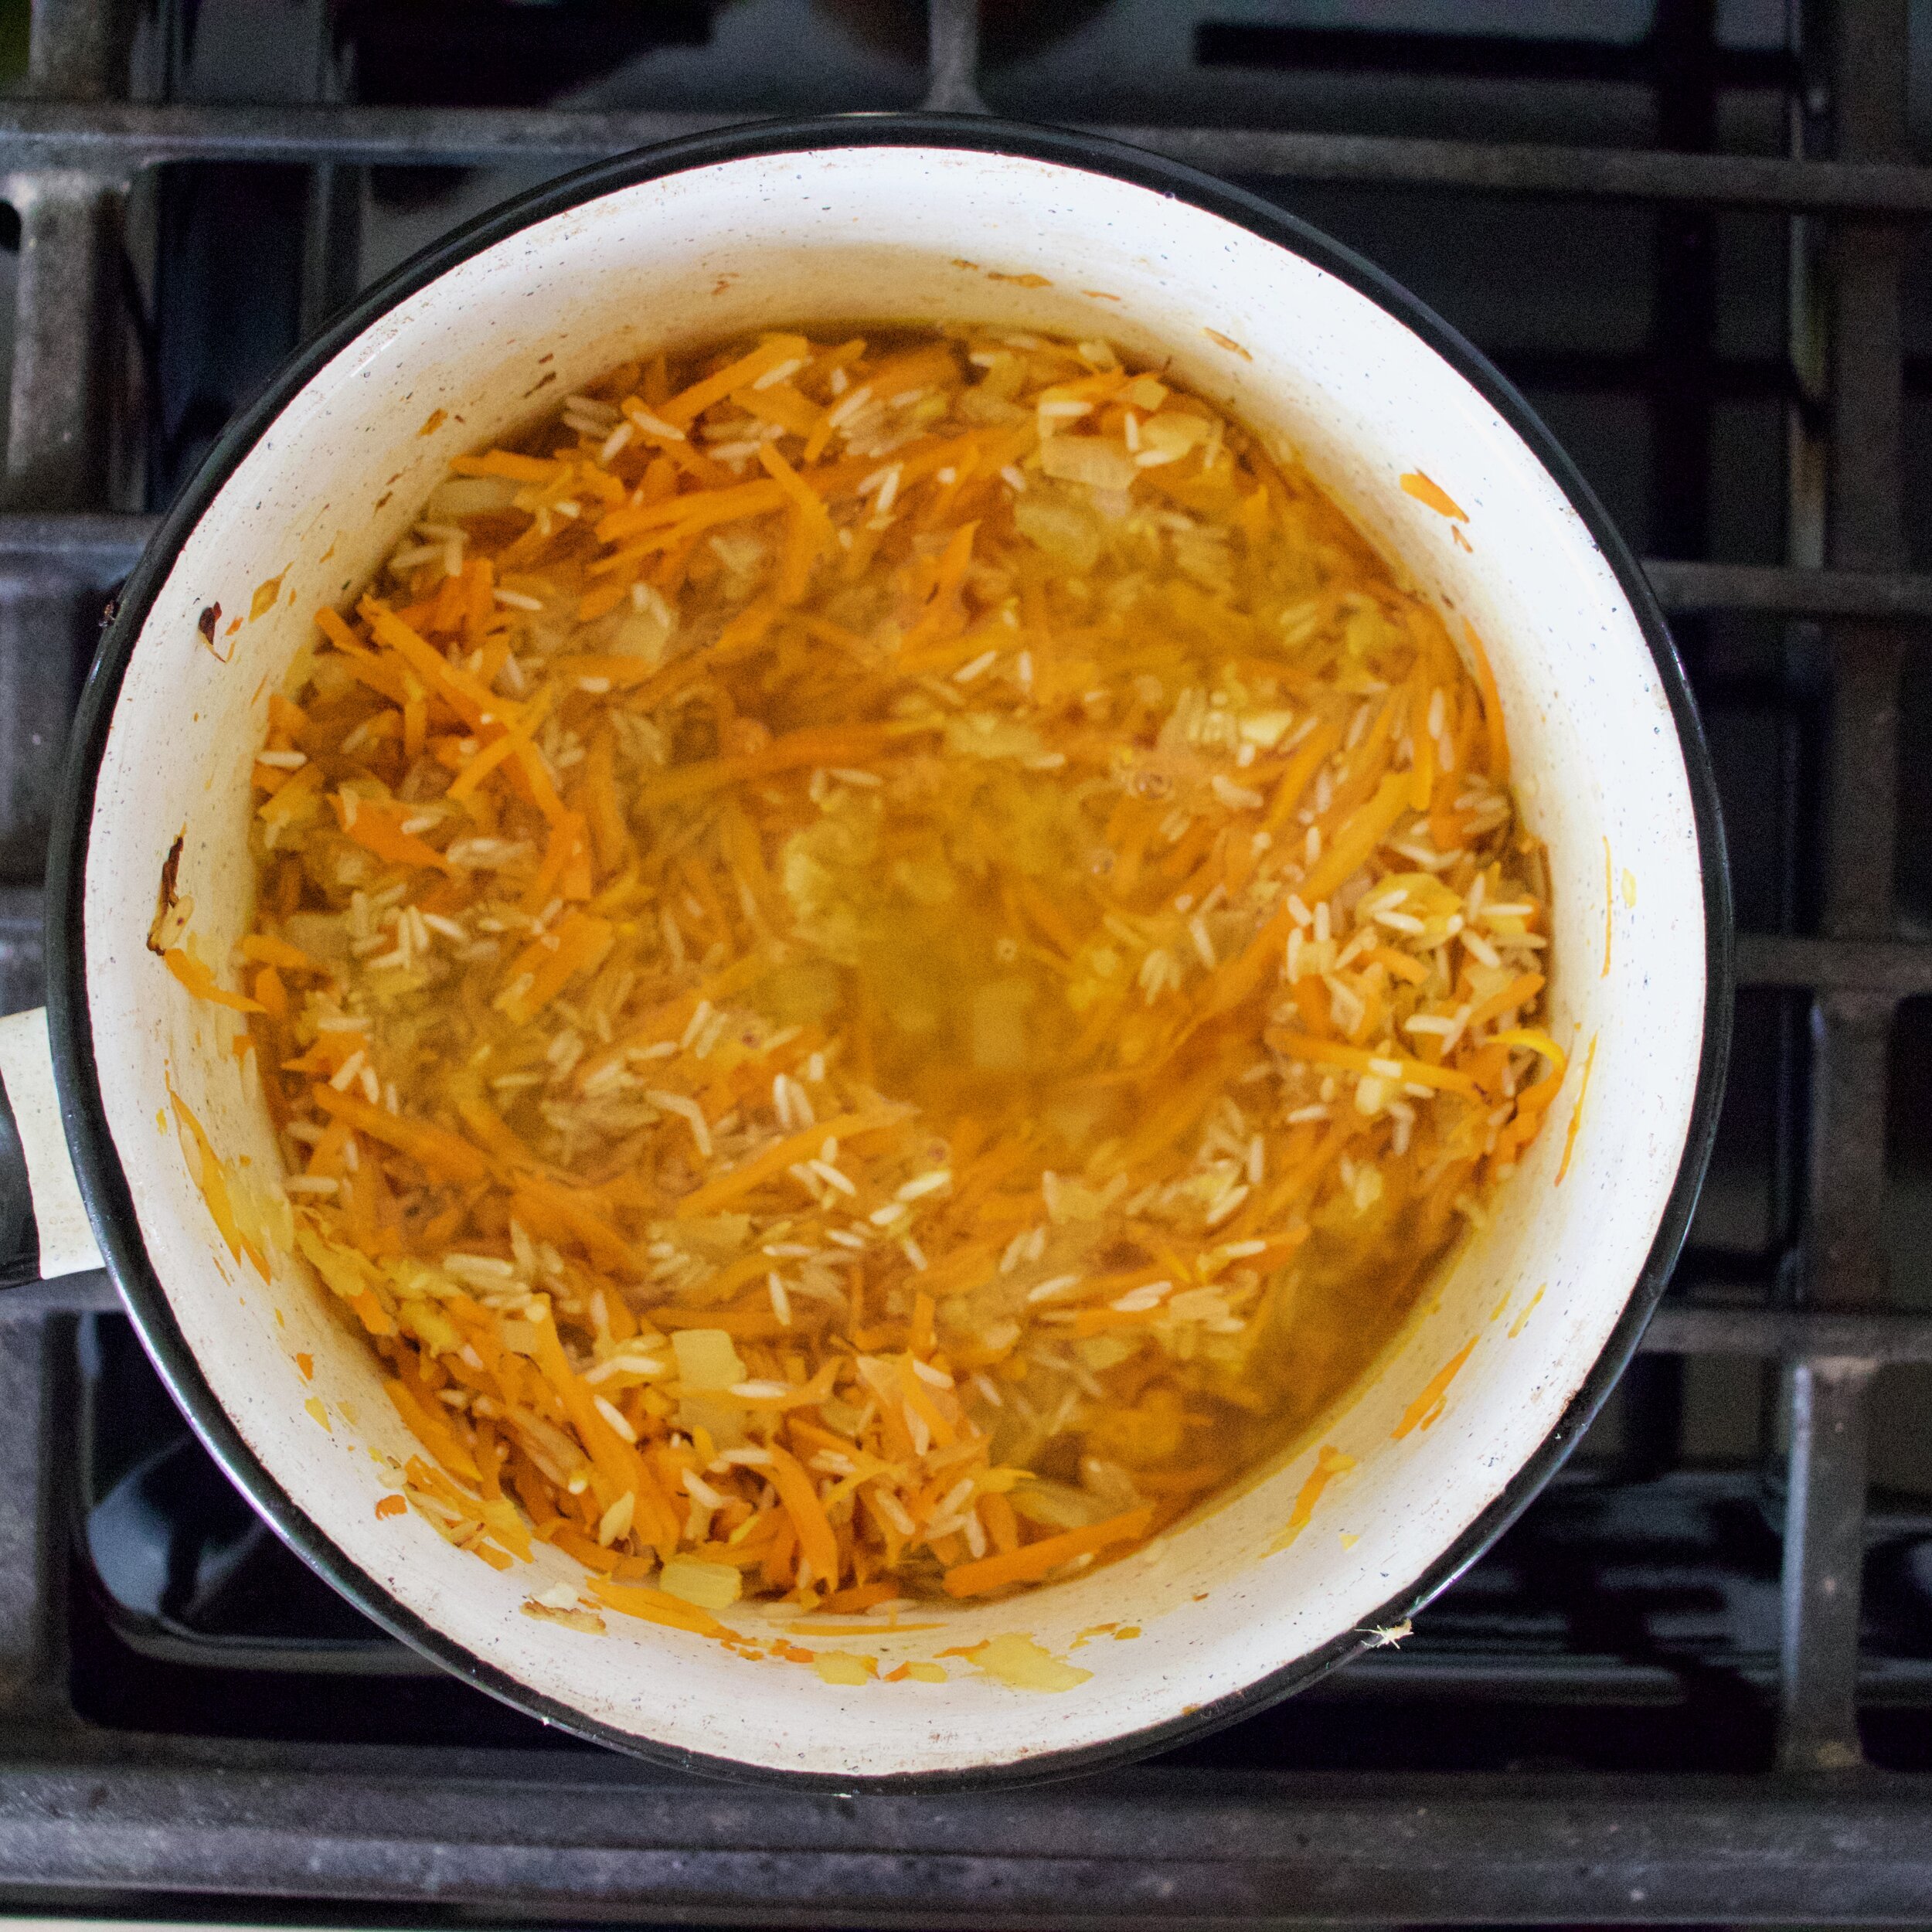
Once chick peas are warm through, add in the rice and another splash of water and mix around.

And when the rice is warm, add in he cabbage and greens of the scallion and mix until incorporated.
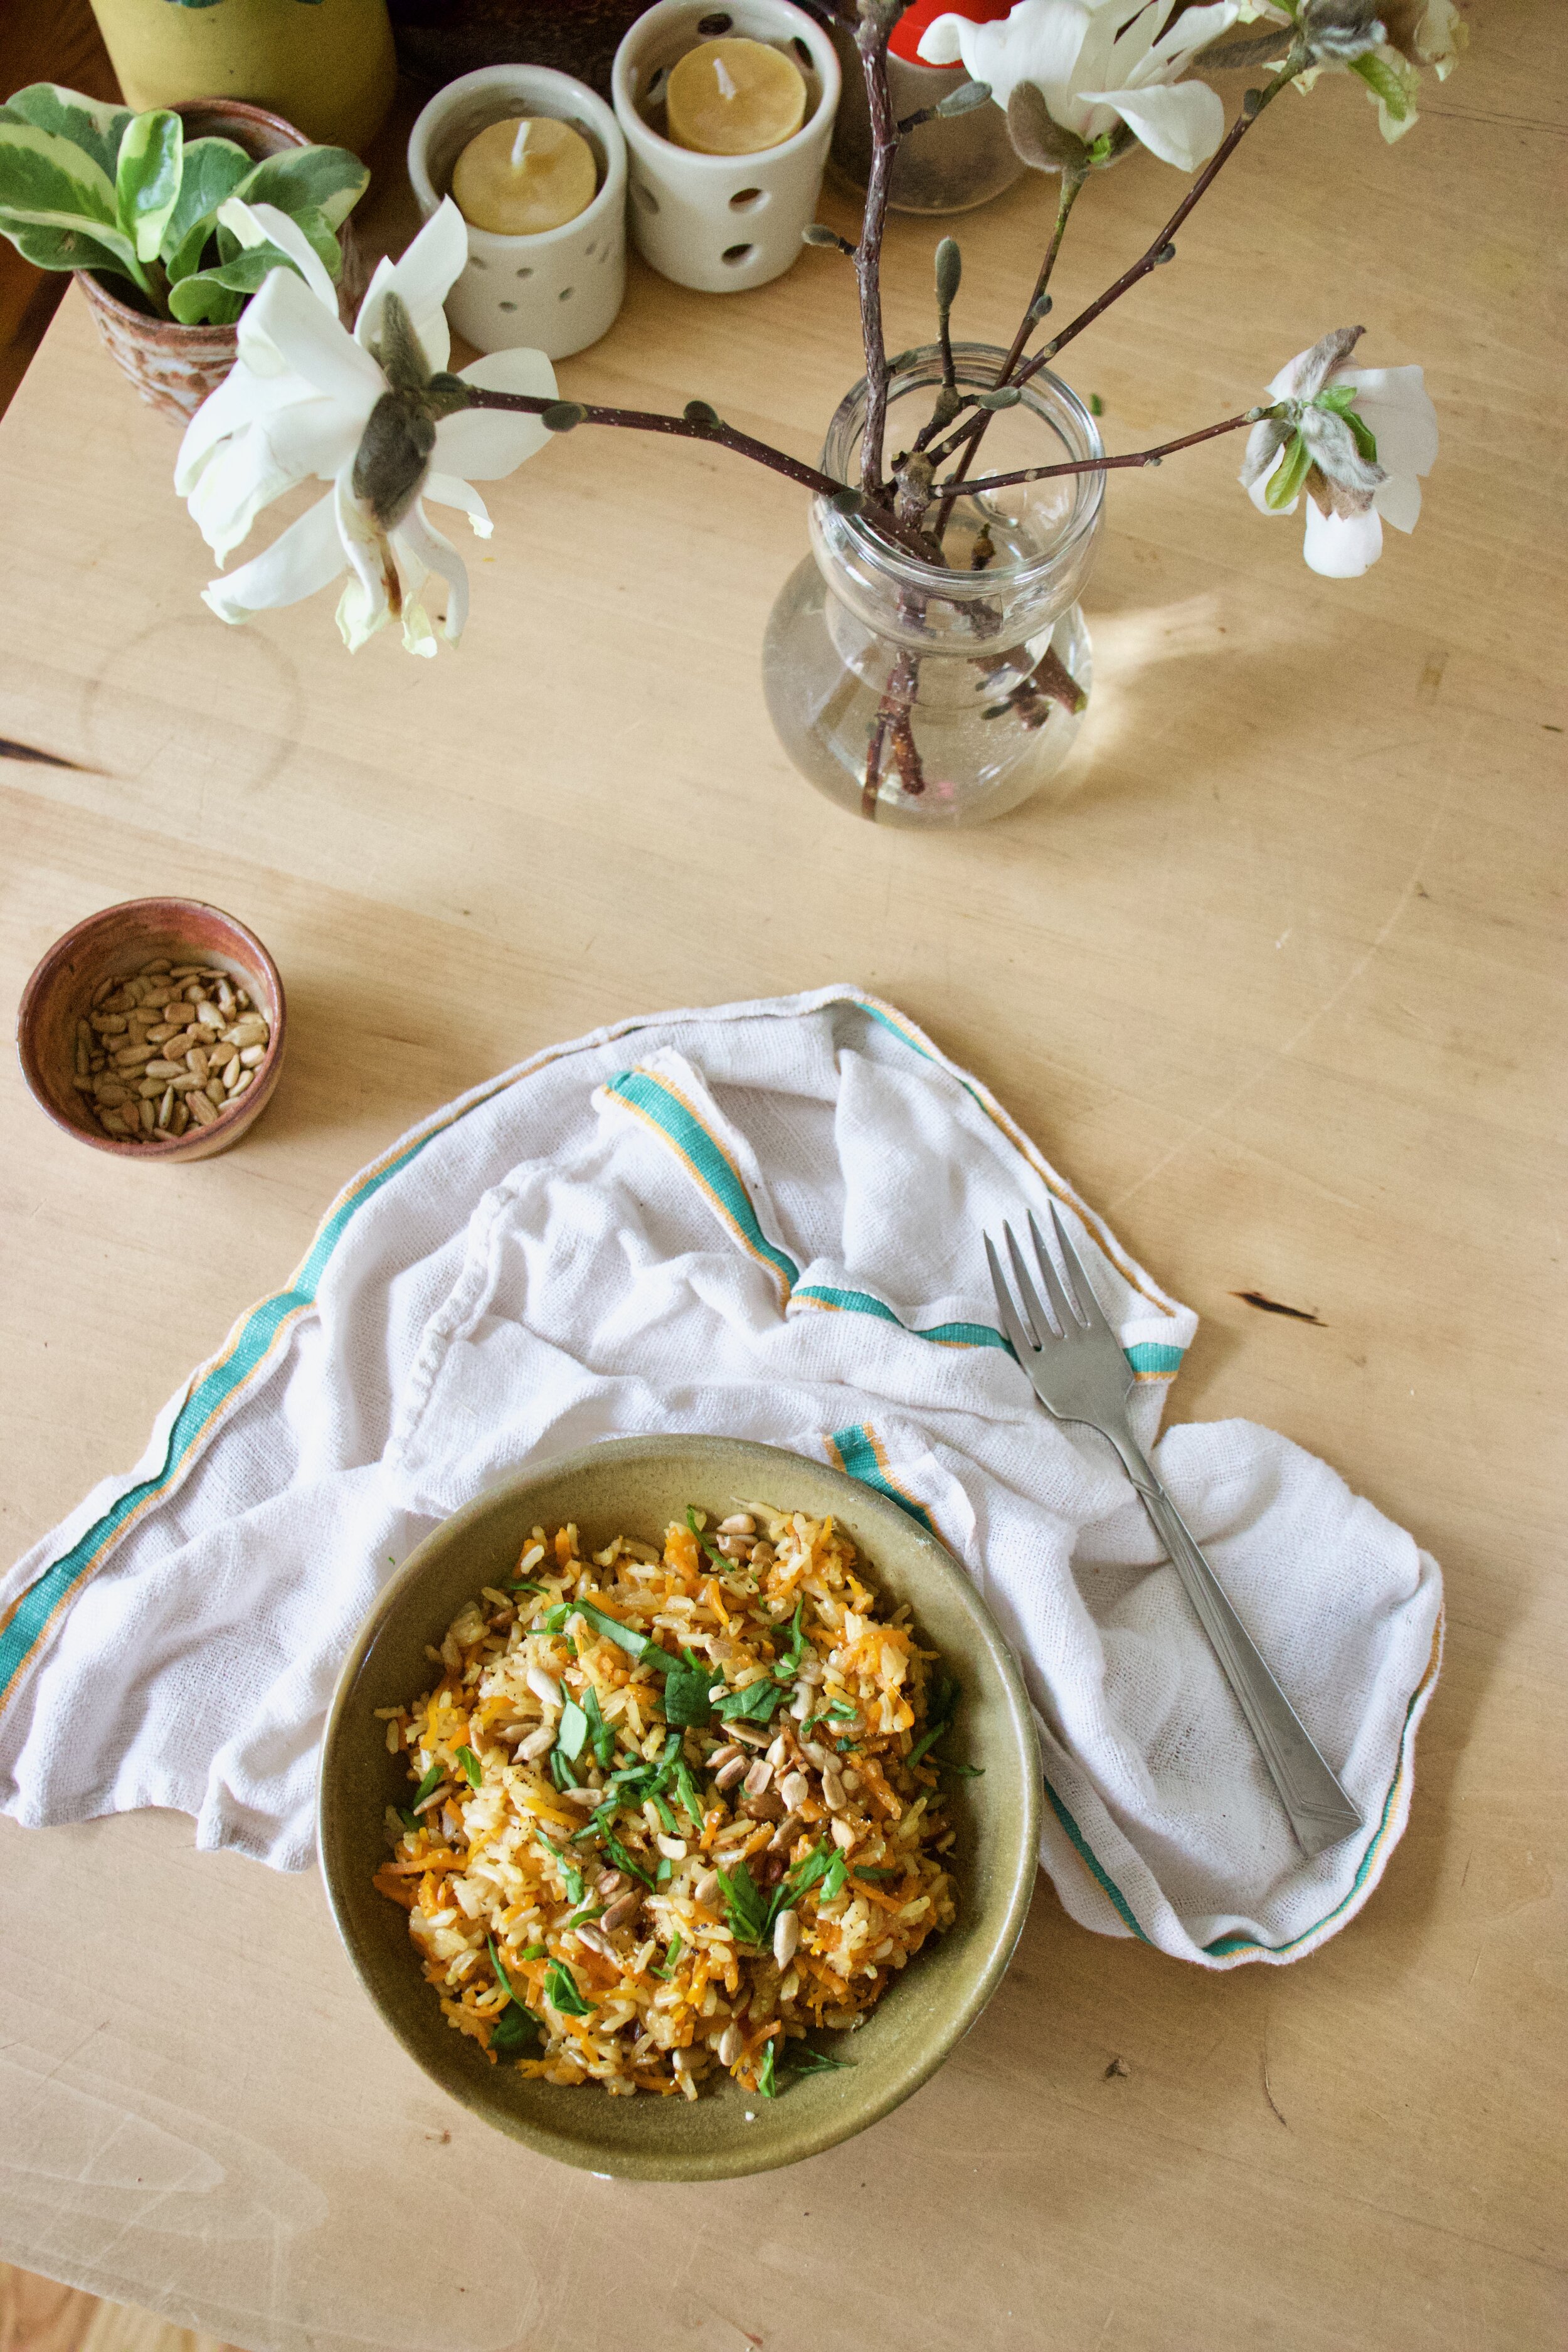
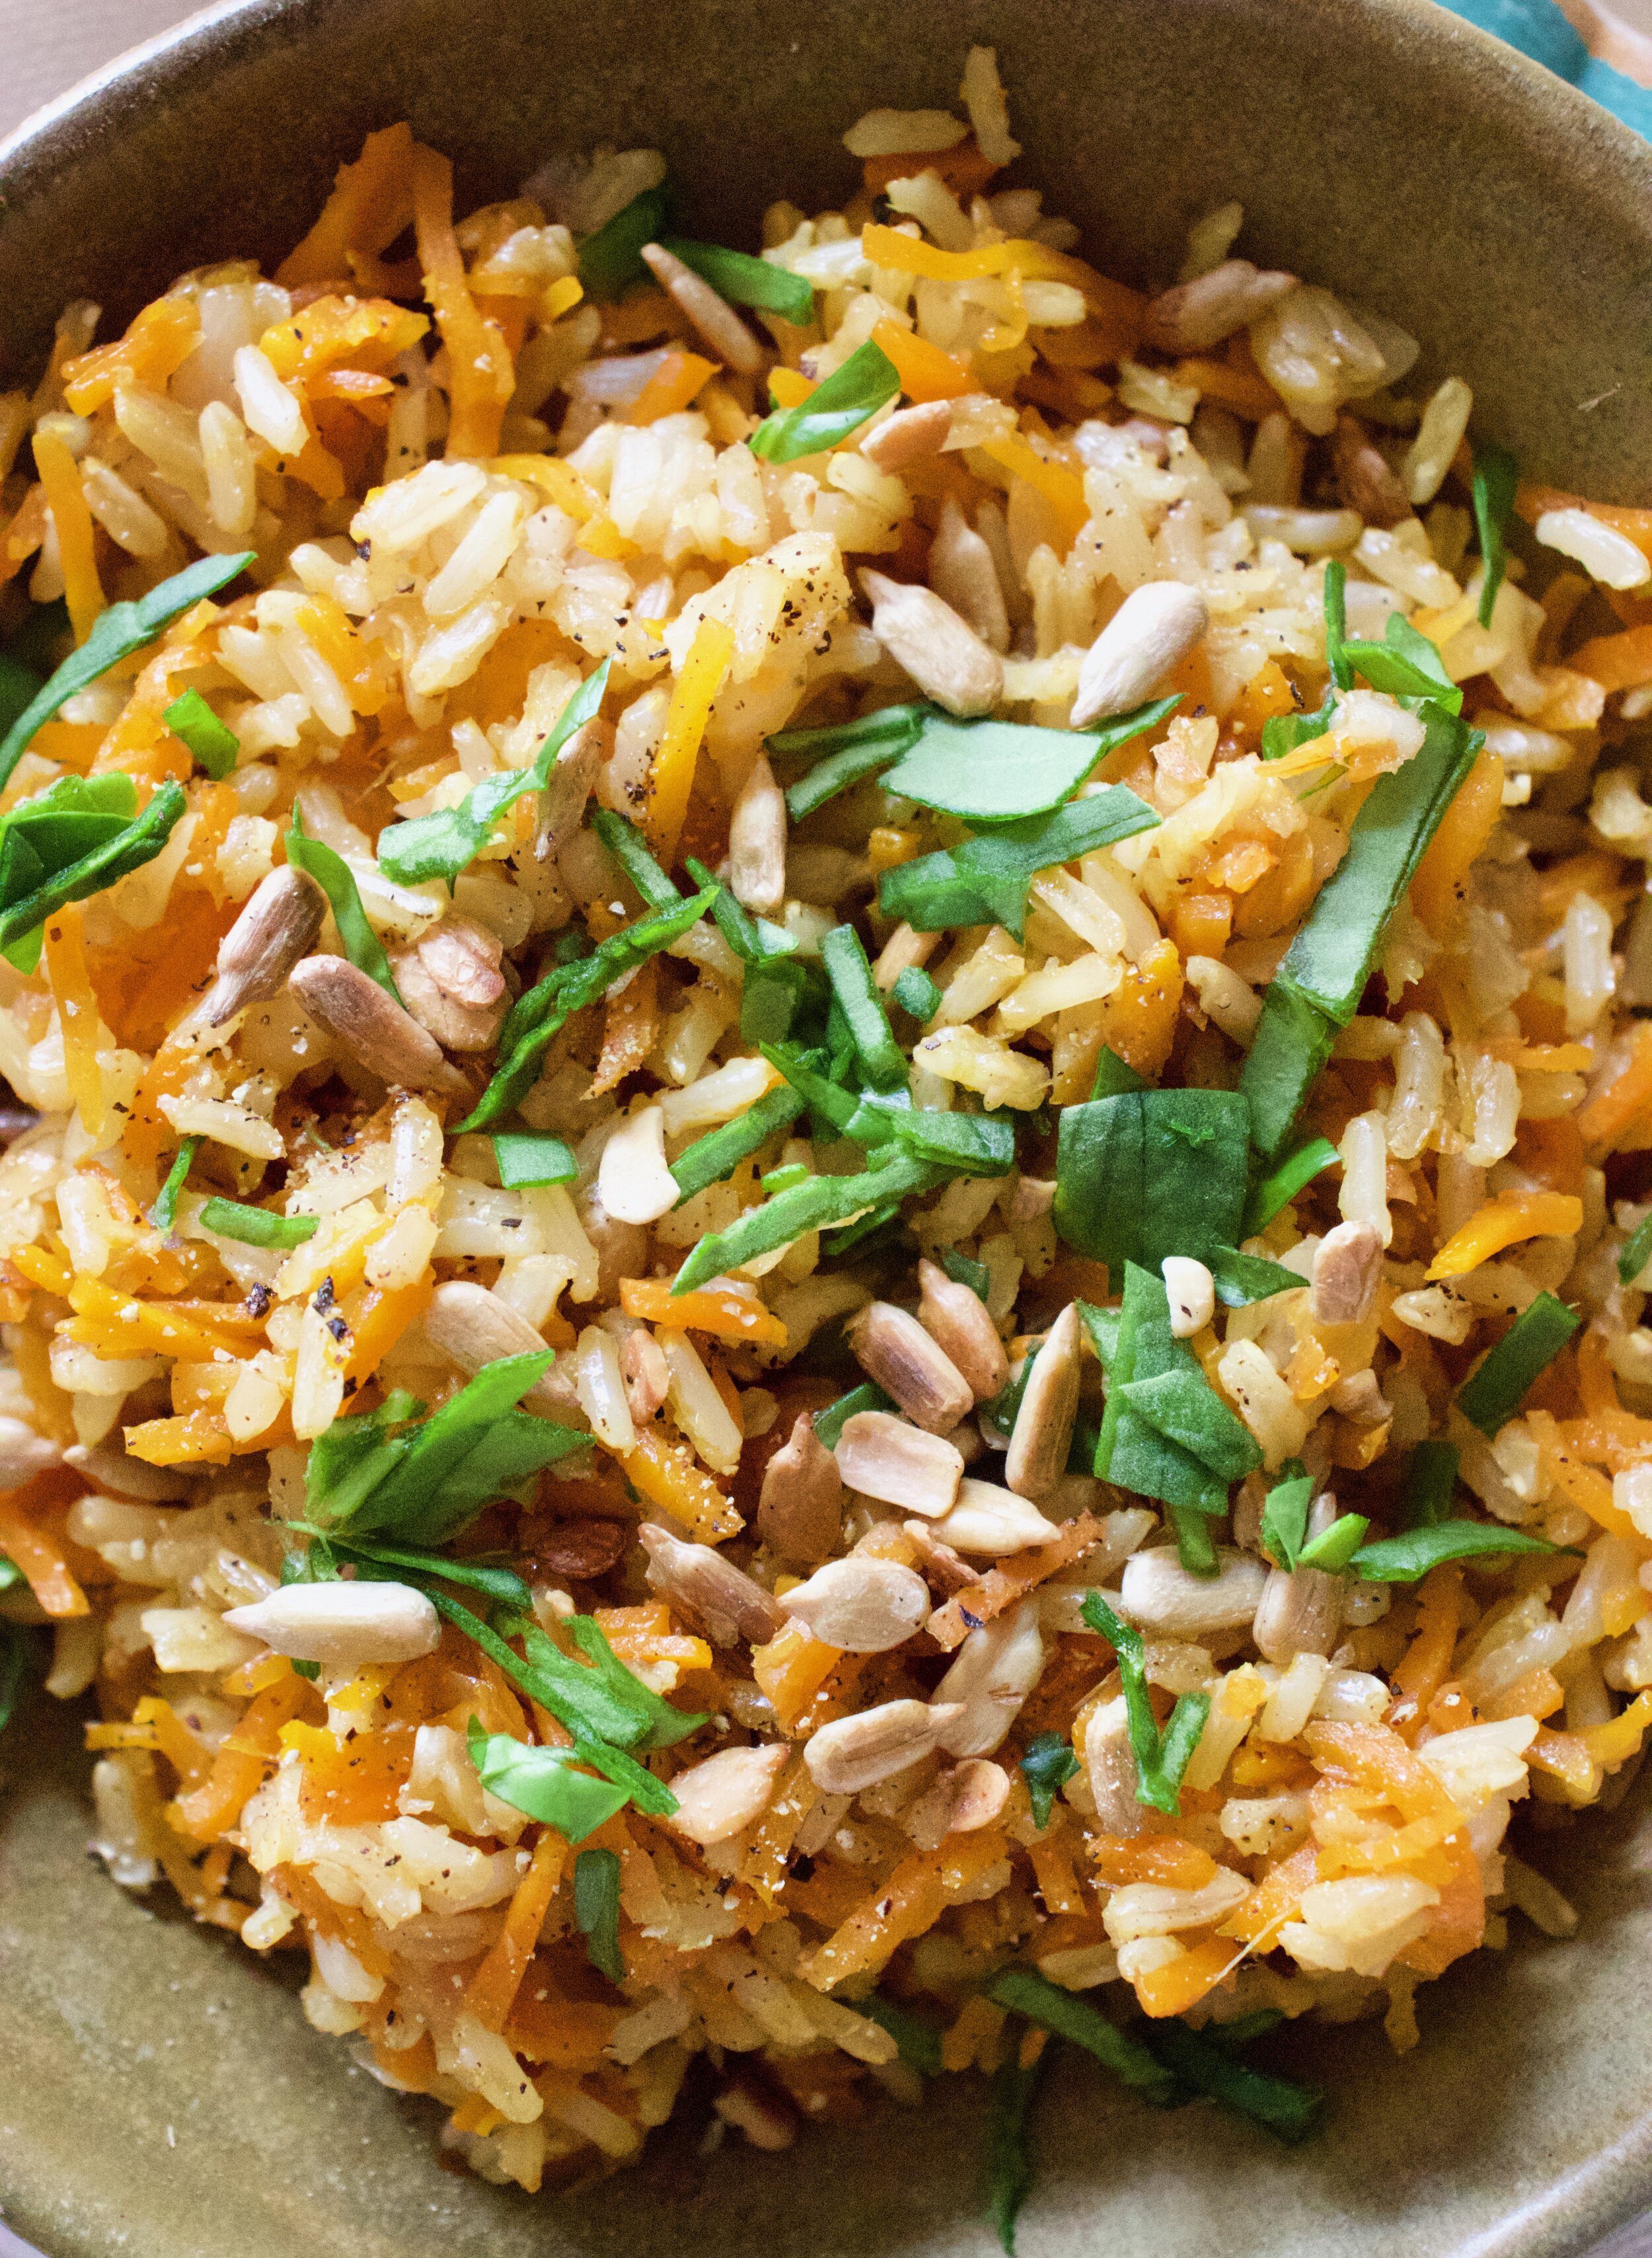
Done and ready.

IMG_1304.jpg

Now scoop into bowls, toss some cilantro and black pepper on for good measure then grab a eating utensil.

And eat.

-C


Chickpea Carrot Ginger Fried Rice

serves 2-3 as a meals or 5-6 as a side

  • 3 cups already cooked rice (white or brown, I used brown)

  • 2 cups cooked chick peas

  • 2 carrots

  • 2 inches fresh ginger root

  • 2 gloves garlic

  • 3-4 teaspoon soy or liquid aminos

  • 1 tablespoon red or white wine vinegar

  • 1-2 teaspoons olive oil

  • 2-3 large scallions

  • small hunk of cabbage

  • black pepper

  • Few tablespoons water

  • fresh cilantro (optional)

Start by prepping the veggies. Cut the carrots into very small little pieces and toss into a large, lightly oiled skillet Place on stove on low heat with a splash of water. Now mince the garlic and ginger and toss it into the skillet was well. Shredded the hunk of cabbage and set aside Grab the scallion, cut the green parts from the white, then thinly slice the the white, thicker part and toss into the skillet and thinly slice the green and add to the pile with the shredded cabbage. Mix all the veggies around, add another tablespoon or two of water, turn heat up to medium, and cook until carrots are slightly soft and the garlic and ginger are fragrant.

Once it is all starting to cook, toss in the drained chickpeas and add in the vinegar and 2-3 teaspoons of soy. Mix and cook until chickpeas are warm all the way through.

Now for the rice. Toss that in and mix around. Once rice is warm, toss in the greens of the scallions and the shredded cabbage. Cook until the rice is hot. Taste, and if you need more soy, add in in another teaspoon.

Once its all hot, it ready to eat and that is what you do. So scoop into bowls, add some chopped cilantro and black pepper and eat.

In beans, dinner, entree, Gluten Free, grains, side dish, Vegetables, Vegan Tags fried rice, vegan, vegan fried rice, carrot ginger fried rice, carrot ginger, chick peas, beans, pulses, plant based, gluten free, dairy free, healthy, complete protein, meal, dinner, easy, rice
Comment

Cauliflower, Kale, and Lentil Bowl with Peanut Sauce

June 20, 2020 Colleen Stem
IMG_8622.jpg
IMG_8615.jpg

I am freaking hot. We are currently in a heat wave right this very minute and I am not happy about it. This is my problem with summer, the heat. Or better yet, the heat with humidity. It turns me sour and I can’t deal with anything, including myself. It is not a good look on me.

But a redeeming quality summer does have is all the fresh produce. The farm share is really starting to pick up and we are getting a good amount of fresh goody goods and that is something I can’t not be happy about. But it is still to hot and when it’s to hot, no one (I think) wants to cook. So don’t cook, just compile. A big ass bowl of veggies, some lentil (or use beans if you want) , and creamy peanut sauce. Thrown together within minutes, hardy and satisfying without being heavy and hot, and tasted really freaking good. A meal on it’s own or a fantastic side dish or snack dish or you know, anytime eating time food dish.

It is just a good dish to make and even better to eat. Heatwave or not.

Now to the cauliflower, kale, and lentil bowl with all the peanut sauce!

The stuff. Half a head of cauliflower, a few big kale leaves, half an onion, cooked lentils, peanut butter, apple cider vinegar, hot water, soy sauce, ginger, garlic powder, red pepper flakes, and black pepper.

IMG_8527.jpg
IMG_8536.jpg

Cut up cauliflower. Just go at it with a knife until it is a pile of small little pieces. Then dice up the onion into small pieces and cut up kale into small pieces as well.

Toss all of that into a bowl and top with the lentils.

IMG_8552.jpg
IMG_8564.jpg

Peanut sauce. Mix together the peanut butter, vinegar, soy, ginger, garlic, and red pepper flakes. Stir and add in enough hot water to make it creamy, smooth, and pourable.

IMG_8568.jpg

Dump the peanut sauce into the bowl with everything else.

Toss until everything is evenly coated. And don’t forget to add a good amount of black pepper.

And that is it. Now grab a bowl and a fork and eat. It is really really good.

-C


Cauliflower, Kale, and Lentil Bowl with Peanut Sauce 

Serves 1-2 as a big salad or 3-4 as a side

  • 1/2 head of cauliflower

  • 1 1/2 cup cooked lentils

  • 2-3 large kale leaves

  • 1/2 a small onion

Peanut Sauce

  • 1/4 heaping cup of peanut butter

  • 2 tablespoons soy or liquid aminos

  • 2 tablespoons apple cider vinegar

  • 1 teaspoon garlic powder

  • 1/2 teaspoon ground ginger

  • 1/2 teaspoon chili flakes

  • 4-5 tablespoons hot water

  • black pepper

Start by chopping up cauliflower into little pieces. Some pieces will be like crumble and that is good. Also dice up onion into small pieces and chop kale into small pieces. Place it all into a bowl and top with the cooked lentils.

Make peanut sauce. Place peanut butter, soy ,vinegar, the ginger, garlic and red pepper flakes, and 4 tablespoons hot water into a jar or bowl and mix until incorporated. It should be smooth and thick, but pourable. If to thick, add in another tablespoon or two of hot water.

Once sauce is made, dump into bowl with the rest of the stuff and toss until everything is coated and combined. Top with lots of black pepper and then, well, eat. Or set aside until meal time. Then eat.

In Vegetables, Vegan, side dish, salad, Raw, pulses, quick and easy, grain free, Gluten Free, dinner, Dairy Free Tags Cauliflower, Kale, and Lentil Bowl with Peanut Sauce, cauliflower, lentils, pulses, vegan, grain free, gluten free, peanut sauce, healthy, plant based, dinner, quick and easy, summer, no cooking, saald, salad, BBQ, Summer, fresh, raw, dairy free
Comment

Creamy Cannellini Bean Potato Salad

June 13, 2020 Colleen Stem
IMG_8519.jpg
IMG_8478.jpg

Do you ever make cold potato salad when it is not summer? I can’t remember a time when I have. Is that strange? Maybe a little, but it probably has more to do with never wanting to turn the oven on in the summer to cook anything or eating anything that is hot. And fall and winter is not time for anytime cold, I just want my potatoes hot.

I just reasoned myself my own question.

Anyway, cold potato salad. A classic summertime staple just in time for all the BBQ’s, picnics, lazy days spent at home doing nothing , and basically eating anywhere, anytime. Yes,a great side dish but I have been known to have myself a little bowl here or there for a nice snack. Heck, it would make for a nice filling breakfast treat as well. It’s your potato salad ad you can it it whenever you dang well please.

This potato salad is pretty classic in the since that is is boiled potatoes covered with creaminess except the creaminess comes form beans and not mayo. And let me tell you, the mayo is not missed in the slightest here. The bean cream is made from cannellini beans which when blended, are nice and smooth and not overly beany. Added to the cream is pickle juice and mustard for a slight tang. And it all gets mixed together with onions to complete the dish. Simple yes, but so good. And because it is mayo free, everyone can eat it, making it a perfect side dish to bring along or share at any eating event with people that might have a different style of eating. Because we all deserve some so good potato salad, don’t ya think?

Now to the potato salad!

IMG_8339.jpg

The stuff. Potatoes, caneillini beans, an onion, a few cloves garlic, brown mustard, ground flax seeds, pickle juice, and salt and pepper

Start by dicing up potatoes into inch-ish sized chunks.

Rinse then place the potatoes into a pot completely submerged in cold water. Sprinkle in a good pinch of salt and set on stove to boil.

IMG_8355.jpg

In the mean time, dice up onions into small pieces. Also chop garlic into smaller pieces.

Place onions into a big bowl along with a pinch of salt and1/4 cup of pickle juice (or vinegar if you prefer)

IMG_8362.jpg
IMG_8371.jpg
IMG_8379.jpg

Now make bean cream. Strain all the liquid from the beans then place 1/4 cup back in. Add the rest of the pickle juice, the mustard, the chipped garlic, and the ground flax seed. Blend until smooth.

IMG_8411.jpg

Once the potatoes are nice and from tender, remove from heat and strain away the liquid.

Toss the warm potatoes into the bowl with the pickling onion. Let sit for about 10-15 minutes so potatoes have time to cool and absorb picking liquid.

When potatoes have slightly cooled, dump the bean puree an and toss until combined.

IMG_8473.jpg

And there you have it, super delicious creamy cannellini bean potato salad. If you want to be a little fancy, dice up something green (I used broccoli) to sprinkle on top. It never hurts!

Happy Summertime eating!

-C


Creamy Cannellini Bean Potato Salad

  • About 2 1/2 pounds potatoes ( I used Yukon gold)

  • a large onion

  • 2 heaping tablespoons spicy brown mustard

  • 1 heaping tablespoon ground flax seed

  • 2 cups cooked cannellini beans with 1/4 cup bean liquid

  • 2-3 cloves garlic

  • 1/2 cup pickle juice (or any type of vinegar)

  • salt and pepper

Start by dicing up potatoes into cubes about and inch big. Place potatoes in a large pot, rinse in water, strain, then refill pot with cold water until all potatoes are submerged. Add a large pinch of salt to pot and then stick pot on high heat on stove until it starts to boil. Once water is boiling, lower heat but keep at a soft boil. Cook potatoes until fork tender which should take about 15 minutes.

While potatoes are cooking, dice up the onion into small pieces. Place in a large bowl along with a pinch of salt and 1/4 cup of pickle juice. Toss around and set aside.

The cannellini bean cream. Strain the beans but reserve 1/4 cup of liquid. Add liquid back to beans along with the other 1/4 cup pickle juice, the garlic, the mustard and flax seeds, and a small pinch of salt and lots of pepper. With either a hand blender or regular blender, blend until smooth. Taste and add more salt if needed. Also if the puree seems really thick, add in another splash of pickle juice. To thin, add in another tablespoon ground flax seeds.

Once potatoes are fully cooked, strain from water and toss the potatoes, still warm, into the bowl with the onions. Gently toss around and let sit for a few minutes to cool and absorb any pickle liquid. Once the potatoes cooled off a bit, dump the bean cream into the bowl and toss around until potatoes are all evenly coated.

And that is it. You can be fancy and spindle something green like some chopped dill or parsley or broccol on top for a little color and flavor…If you want.

And then eat right away still slightly warm or stick in the fridge to completely chill and eat cold. Last for 3-4 day in the fridge covered.

In Vegan, summer, side dish, salad, pulses, beans, BBQ Tags Creamy Cannellini Bean Potato Salad, Side dish, potato salad, vegan, dairy free, grain free, gluten free, mayo free, beans, plant based, healthy, potato, salad, BBQ, summertime, picnic, simple
Comment

Chickpea Flour Onion Rings

May 16, 2020 Colleen Stem
IMG_8021.jpg
IMG_8005.jpg

I love me some onions, I mean I eat one everyday so I asked myself why the heck haven’t I made onion rings before? Probably because when I usually think onion rings, I think greasy and fried and that is not really my jam. But early in the week the lightbulb went off in my brain. I have been making a lot of stuff with bean flours lately and thought that chickpea flour would make an excellent batter for onions. And low and behold, I was right. Very very right.

These onion rings are so f-ing amazing. Sure they might not be the most traditional of onion ring but they are for sure just as good. A spicy crispy crunchy outer layer with a soft and creamy onion inside. Baked, not fried, and just really delightful. Easy to throw together and yeah, you got onion rings. I have made them twice this week already. Probably going to make them again tonight because why the hell not? They are simply a vegetable covered in bean. I should be eating them every day and you probably should be eating them everyday too.

Now to the onion rings!

IMG_7970.jpg

The stuff. Onions (I used valida but any sweet variety will work) chickpea flour, spices (garlic, ginger, cumin, chili powder, paprika, and a pick or red pepper flakes), warm water, oil, and salt and pepper.

IMG_7971 2.jpg
IMG_7973 2.jpg
IMG_7976 2.jpg
IMG_7980 3.jpg

Mix up the batter. All the spices get mix together with the chickpea flour. Add in the water and then mix unit completely combined and all batter like.

IMG_7983.jpg

Cut onions into rings.

IMG_7990.jpg

Dip the onions into the batter and place on a oiled baking sheet. Try not to overlap too much and use the insides of large rings to place the small ones!

IMG_7999.jpg
IMG_8006.jpg

Into the oven and out of the oven. Crispy, dark, and delicious!

Get those rings onto a plate while they are hot, grab some dipping sauce of choice (tahini for me) and eat.

Get into this.

-C


Chickpea Flour Onion Rings

  • 3/4 cup checkpea flour

  • 1 teaspoon each cumin and chili powder

  • 1/2 teaspoon each garlic, paprika and ground ginger

  • pinch of red pepper flakes

  • 2 medium sized valida onions (or whatever onions you have)

  • 3/4 cup warm water

  • 1/2 teaspoon salt

  • cracked pepper

  • tablespoon or so of oil to oil baking sheet

Preheat oven to 425.

In a wide bottomed bowl mix together the chickpea flour. salt. and all the spices. Add in the warm water and mix until completely incorporated and smooth. You want the batter to coat the onions when dipped but not be overly thick. If you think it needs to thicken up a bit, add a tablespoon more chickpea flour. To thin it, just add a splash more water.

Grab onions and peel off papery skin then slice into 1/4-1/2 inch rounds. Take onion rings and dip them into the batter then place rings on a large oiled baking sheet. Try not to overlap to much and definitely place smaller rings inside bigger rings. Also use a second baking sheet if you need to.

Once rings are all battered, place in preheated oven and bake for 40 minutes, giving them a flip atfter about 25-30 minutes.

Once dark brown and crispy, remove from the oven. Place rings on a plate and eat. Dipping sauce recommendation is tahini but anything or nothing at all is also right.

In appetizers, Gluten Free, grain free, pulses, quick and easy, side dish, Vegan, Vegetables Tags baked onion rings, chickpea flour, gluten free, onion rings, dairy free, baked, plant based, easy, simple, healthy, protein, side dish, onion, savory, spicy, food, homemade, fresh, yummy, eater, delicious, vegan, grain free, pulses, beans, besem flour
Comment

Carrot Ginger Brown Rice Pilaf

April 25, 2020 Colleen Stem
IMG_7607.jpg
IMG_7559 2.jpg

Do you have a shit ton of rice? I know of at least a few people that might have gone overboard with their rice stock so I think it might be safe to assume that many more did too. And that’s cool, just as long as you eat it. No one like a food waster.

But are you bored with plan rice? Well I got you. Rice is so easy to jazz up. Add a little this, add a little that, and you’ve got yourself a rice dish among the greats. Even better, toast the rice a little before cooking it and you end up with a even better, flavorful rice. That is fact.

Carrot ginger is a classic flavor combination and can pair with just about any other flavors so you don’t have to think too hard about what else to serve with it. And really, you could just eat a big bowl of the rice. There is no need for anything else. It has it all. Grain, veggies, and seeds or nuts… All you need is a fork (or spoon if you are like that) and an open mouth and you are golden.

Now to the rice pilaf!

IMG_7466.jpg

The stuff. Long grain brown rice, a couple carrots, some fresh ginger, garlic, an onion, soy sauce, olive oil, water, and pepper.

Grab onion and dice it up really small. Shredded or julienne the carrots.

IMG_7475.jpg
IMG_7476.jpg
IMG_7482.jpg

Add a couple of tablespoons of olive oil to a pot. Add in the onions and start on medium heat and let them cook for a few minutes. Then add in the carrots and keep cooking for a few more minutes until they become slightly tender.

Mince the garlic and the ginger.

IMG_7497.jpg
IMG_7499.jpg
IMG_7520.jpg

Add that freshly minced garlic and ginger to the pot and give it a good stir. Add in the rice now as well and cook for another few minutes , stirring it once or twice until you can smell the toasty-ness of the rice. Then add in the water and soy.

IMG_7532.jpg

Bring the pot to a boil then turn heat down to the lowest simmer. Pop a top on the pot and let cook, undisturbed, for about 30ish minutes, or until all the liquid has absorbed into the rice.

Once rice is cooked, grab a fork and fluff then pop the lid back on and let it rest for 5-ish minutes. Trust, this makes the rice so just do it.

And then the rice is done, all fluffy and flavorful. Add some green something for a little pretty and yum. Also added a handful of toasted sunflower seeds because why the heck not.

-C


Carrot Ginger Brown Rice Pilaf

makes 3-4 servings

  • 3/4 cup long grain brown jasmine rice

  • 1 1/2 cups water

  • 1 small onion

  • 2 carrots (about 2 cups shredded)

  • 2 tablespoons minced fresh ginger

  • 2 tablespoons soy sauce

  • 2-3 cloves garlic

  • 2 tablespoon olive oil

  • pepper

  • 1/2 cup toasted sunflower or any other seeds or nuts you have on hand (optional)

Start by dicing up the onion and shredding or julienning the carrot into small pieces. Place into medium pot along with olive oil and set on medium heat. Cook for a few minutes until the slightly tender.

Mince garlic and fresh ginger and add it to the pot with carrots and onions. Add in dried rice too and keep cooking on medium heat until the rice smells toasty. Add in the soy and the water. Bring pot to a boil then reduce to lowest simmer you got. Place a lid on top and cook for 30ish minutes or until the rice has absorbed all the liquid.

Once the rice has the liquid, remove the pot from the heat and fluff it with a fork. Place lid back on pot and let the rice rest for 5ish more minutes.

Then eat. I think adding a handful of some crunchy seeds or nut and maybe something green only adds to the rice so go for it if you have it around.

In grains, side dish, Vegan, Vegetables, dinner Tags Carrot Ginger Brown Rice Pilaf, grains, whole grains, rice, vegan, food, pilaf, healthy, plant based, dairy free, dinner, easy, homemade, fresh, yummy, simple
Comment
← Newer Posts Older Posts →
 

https://thelovelycrazy.squarespace.com/config#/|/about/

Me. Food Maker.Food eater. Woo HOO!

STEM+NODE  SMALL BATCH AND ONE OF A KIND POTTERY

stem+node ceramics


____________________

Subscribe

GET NEW POSTS IN YO EMAIL

You are AWESOME!!!


@thelovelycrazy 2014-2021