• stem+node ceramics
  • HOME
  • Food Recipes
  • About
  • Contact
Menu

The Lovely Crazy

Street Address
City, State, Zip
Phone Number

Your Custom Text Here

The Lovely Crazy

  • stem+node ceramics
  • HOME
  • Food Recipes
  • About
  • Contact

Countertop Cucumber Onion Pickles

August 4, 2015 Colleen Stem
IMG_3971.jpg
IMG_3964.jpg

And now the cucumbers are growing shit crazy.

Every time I open the fridge, at least one (if not a few) come falling out from all the places that I have managed to squeeze them in. (the egg tray in the door is not a safe place for cucumbers) This is a slight problem, but a problem that I kind of like having.

This past weekend I had planned on doing a bunch of pickling and canning. Like a whole day of music blasting, dancing around the kitchen in a cute little apron with wooden spoon in hand, (pretending its a microphone) canning all sorts of fruits and veggies that a piling up in massive amounts for the winter months. 

That didn't happen, and I still have a million cucumbers and not a whole heck of a lot of time this week to inact my canning day day dream.

My simple solution. Cut um up, stick in a bowl with a some fresh dill, a lithe vinegar and leave them on the counter…..  And watch as they disappear. It's crazy. I find if you leave a bowl of cut up anything on the counter, anyone that walks by will stop and eat a few pieces (if not the whole bowl) It's a scientific fact (no not really, but maybe)

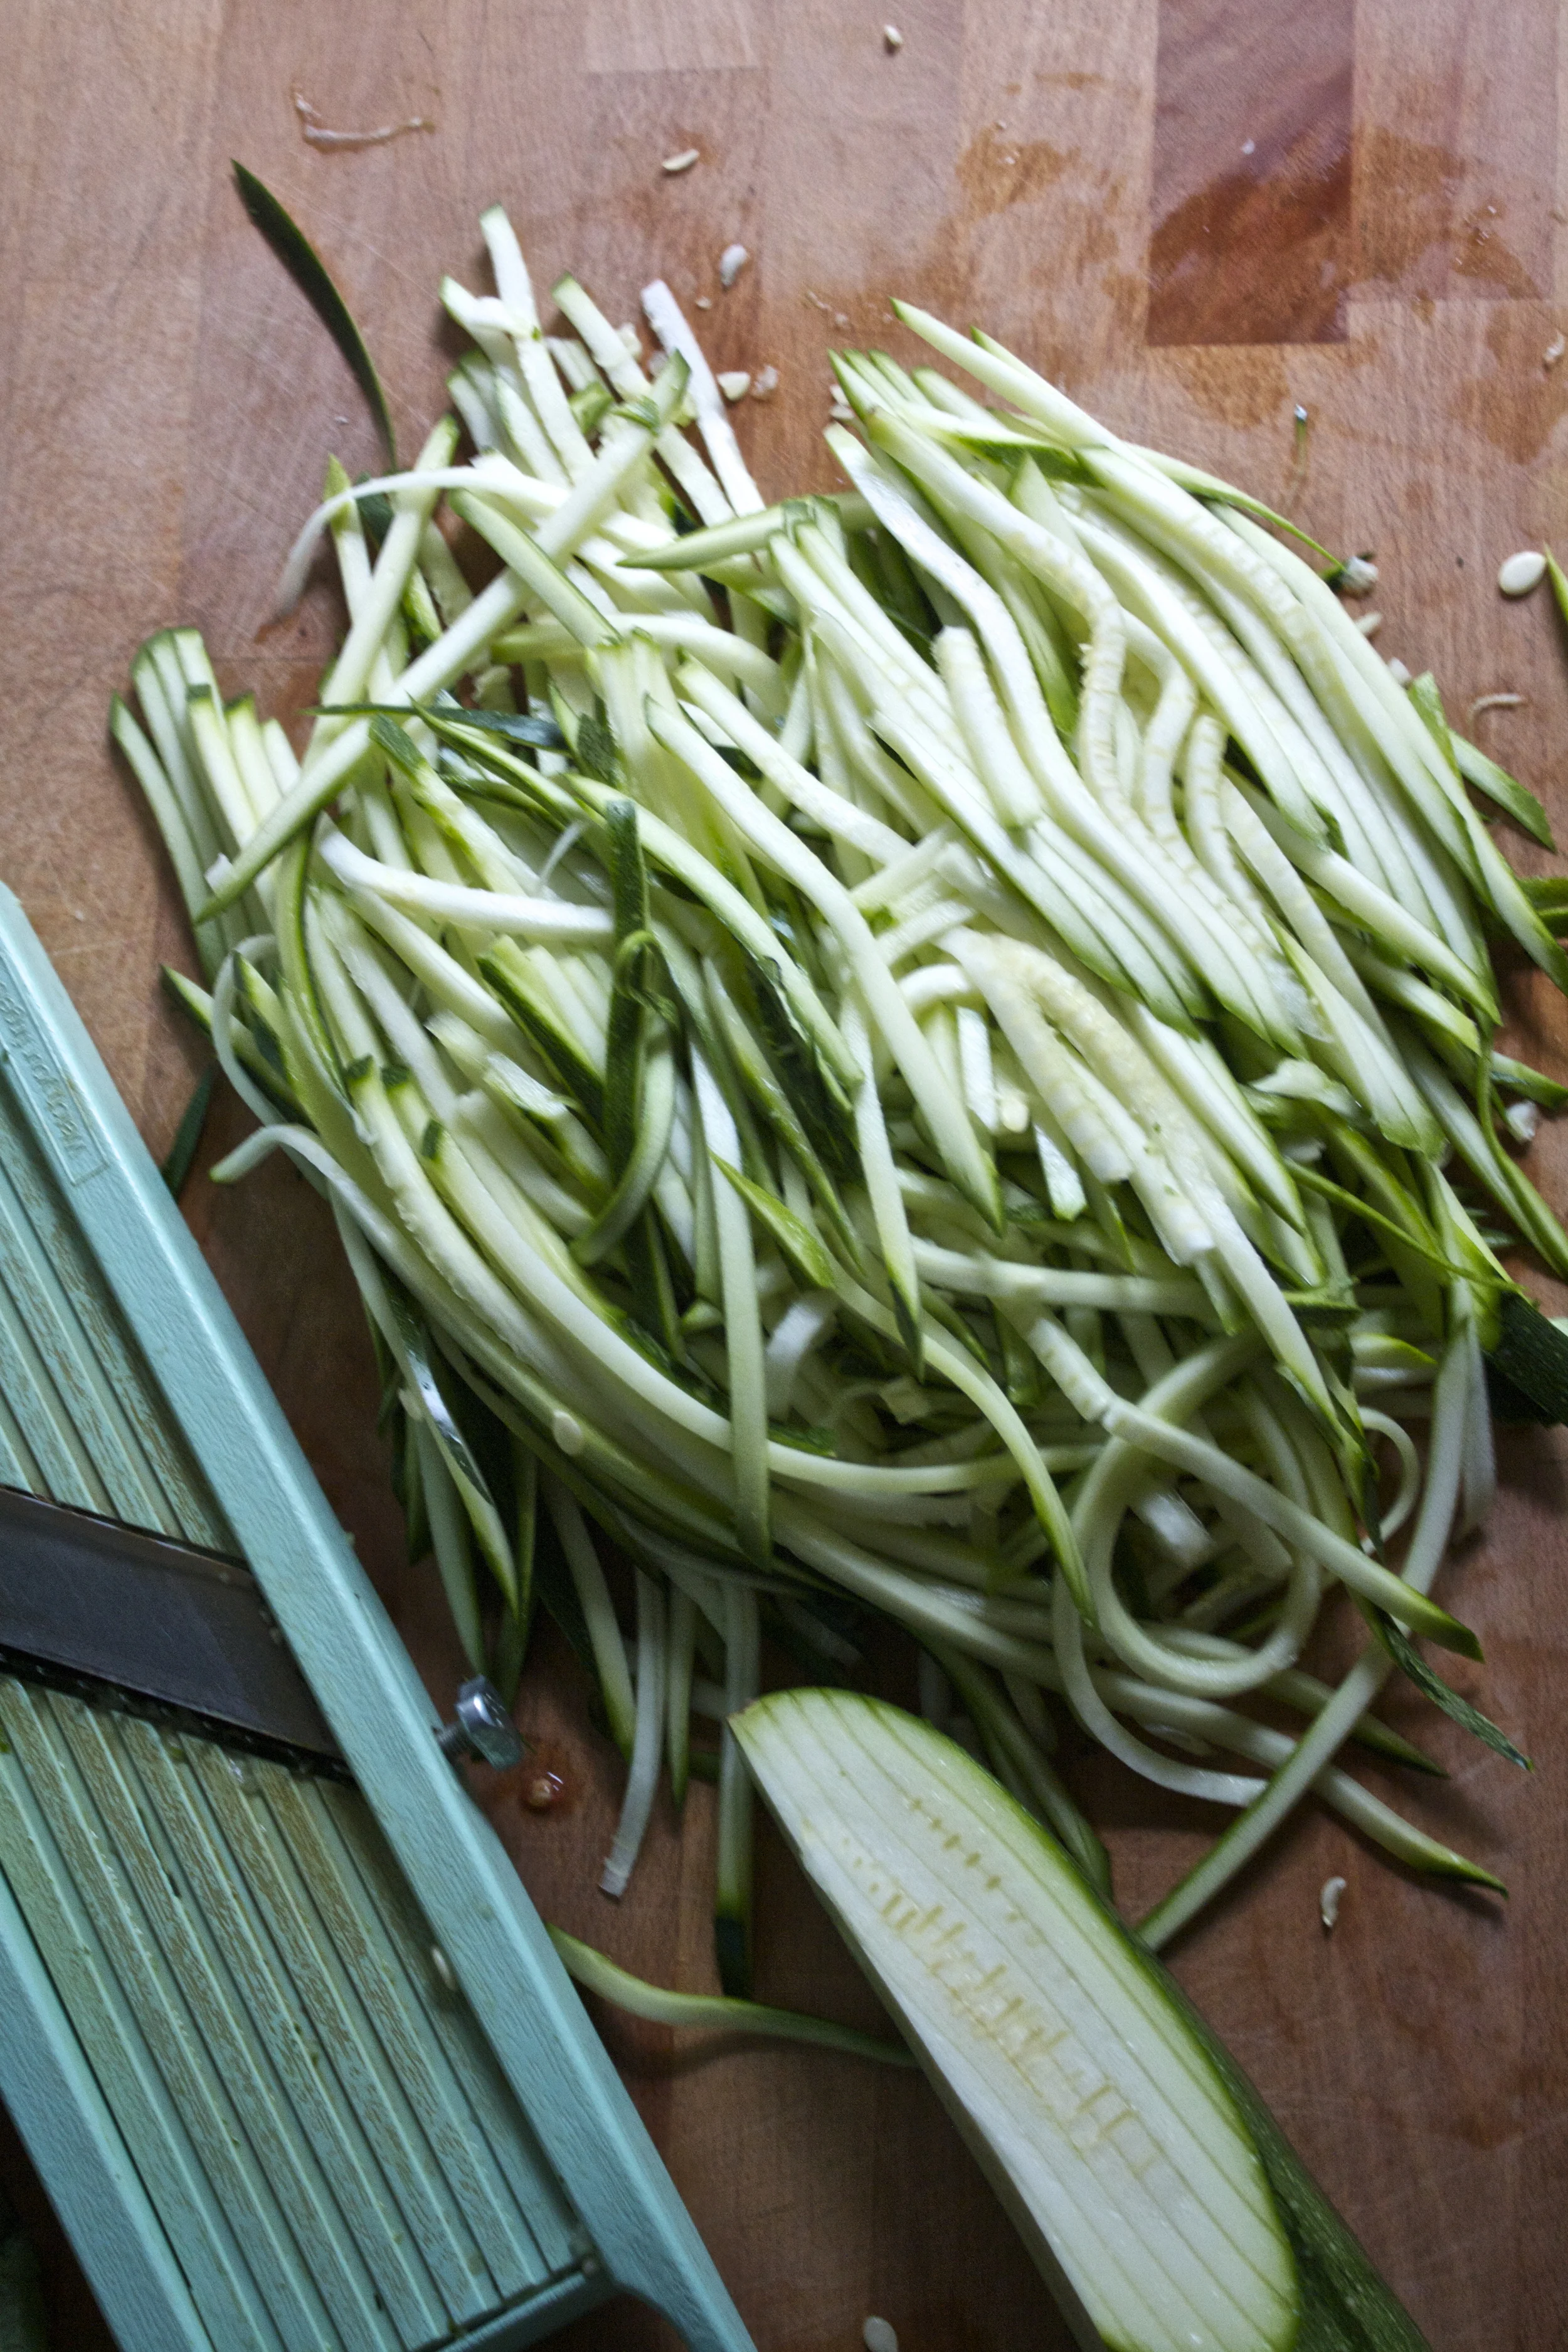
As for my blissful canning day. It will be happening soon. But until then, this is the way to go with those all those cucks. (this works fantastic will zucchinis too!)

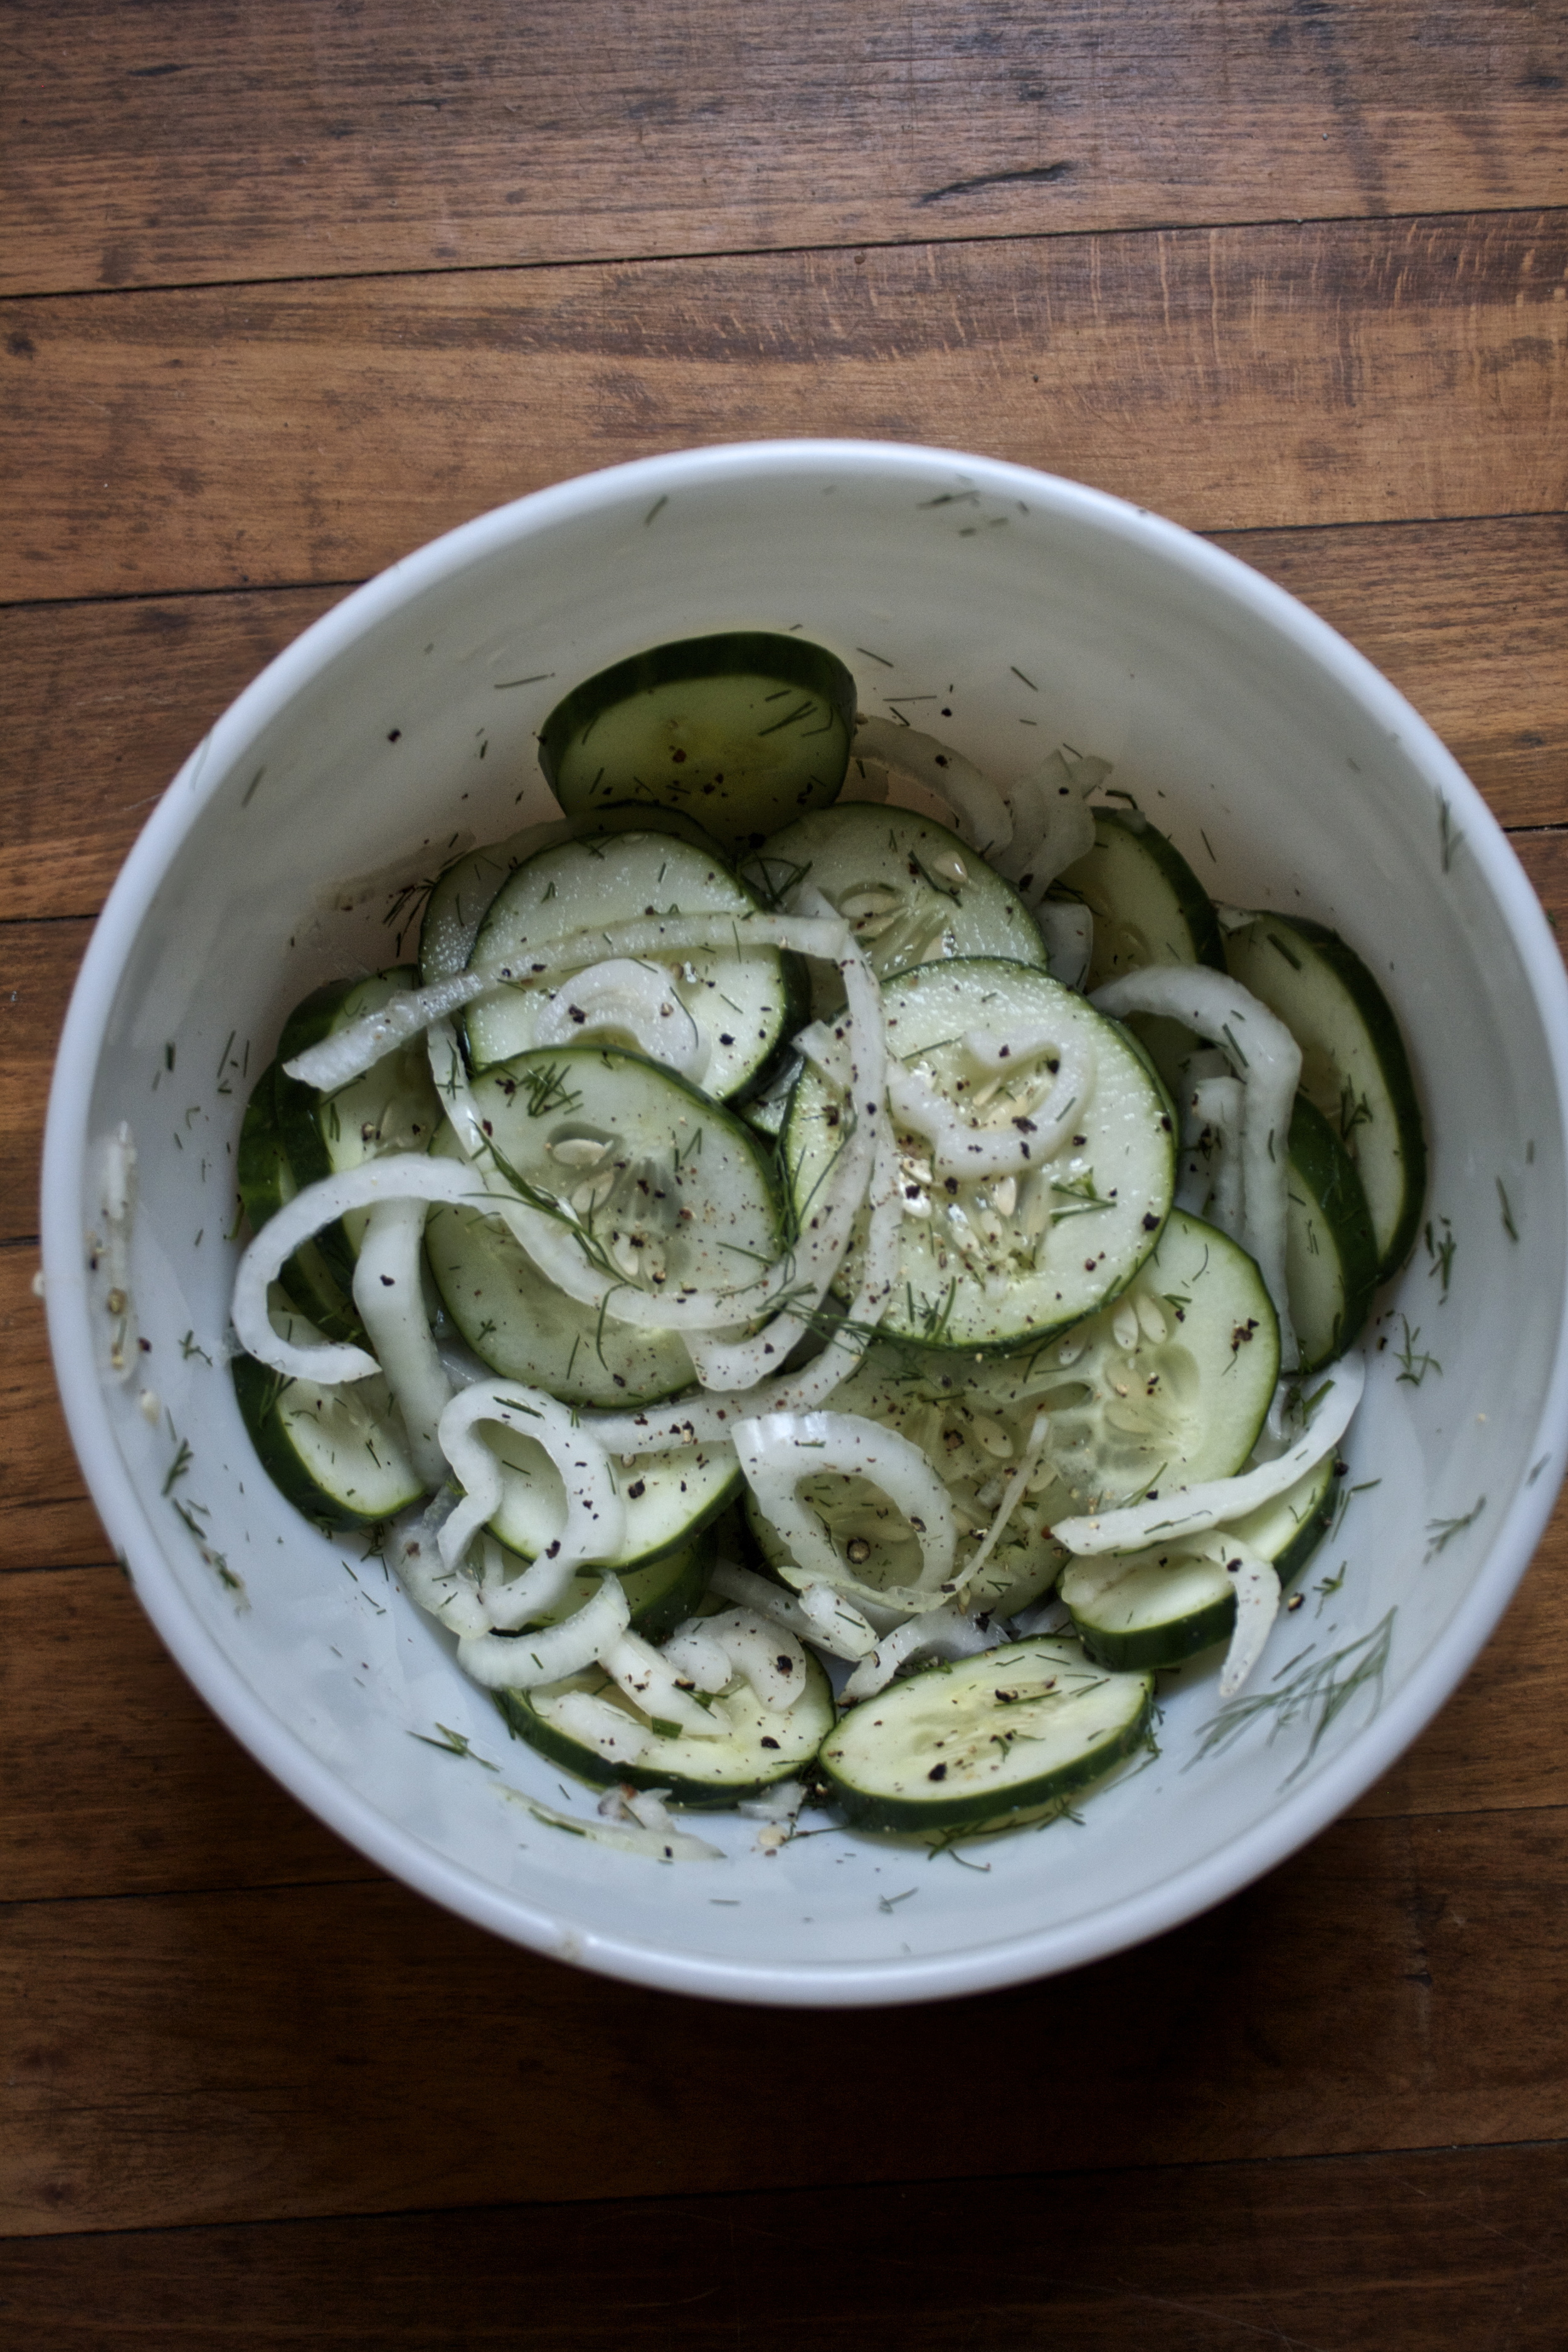
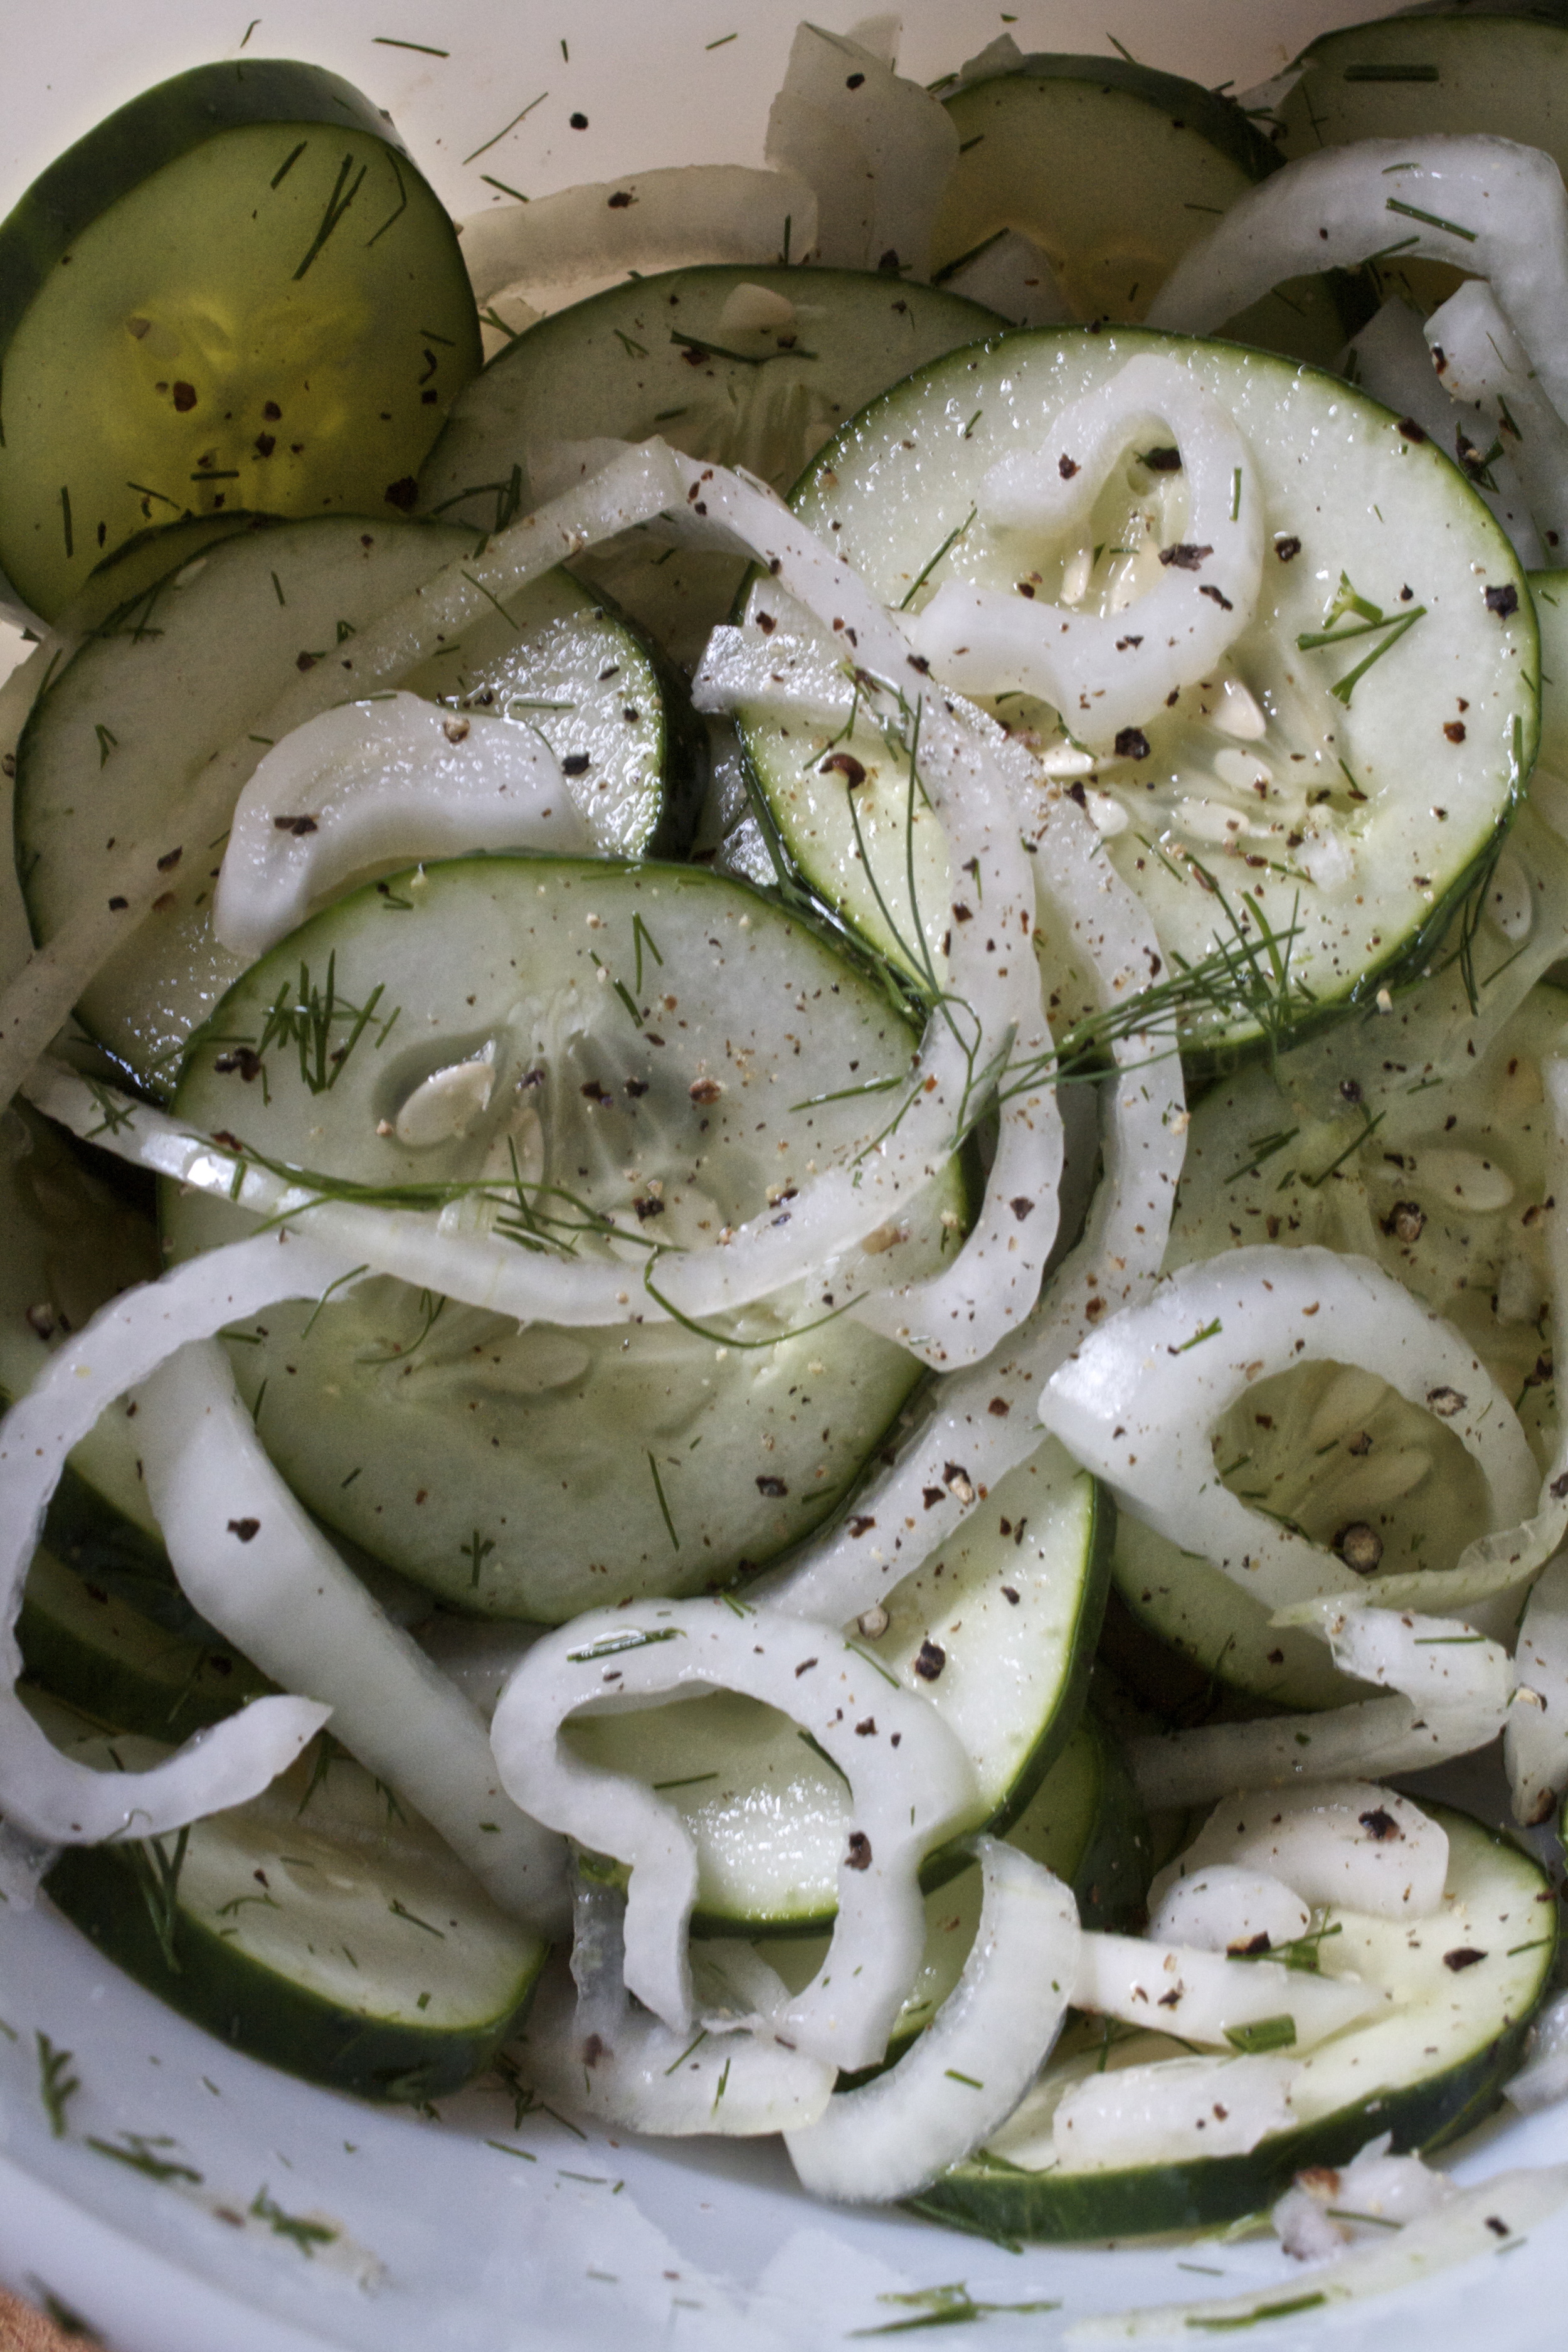
The stuff. Cucumbers, onion, fresh dill, salt, pepper, and red wine vinegar.

Slice up the cucumber and onion and toss into a bowl. Spinkle with salt, pepper, and lots of fresh chopped up dill. Splash in the vinegar and toss it all around.

Let it sit on the counter for at least 2 minutes, but the longer they sit, the more pickley they taste.

And eat.  Leave on the counter until they are all gone..which won't take too long.

Enjoy the Tuesday!

-C


Countertop Cucumber Onion Pickles

  • 2-3 medium to large cucumbers
  • 1 medium  sweet onion
  • a bunch of fresh dill
  • salt and pepper (fresh cracked is best)
  • red wine vinegar

Slice cucumber and onion into thin slices. and stick in a big bowl. Sprinkle with salt. pepper, chopped up dill. Pour on a few glugs of vinegar. Toss around, taste and adjust seasoning if needed and let sit on the counter for a few minute… or as long as you want*.

Eat all day long or until they are gone.

IF there are still cucumbers left over after 2 hours and you are worried about leaving food out all day  (I don't worry, but that's me), stick in the fridge until you ar ready to eat them.

In recipes, Vegan, Raw, Gluten Free, Savory Tags cucumber, dill, onion, quick pickle, pickle, fresh, vegan, gluten free, paleo, raw, clean eating, healthy, organic, local, csa, farmshare, summer
Comment

Fresh or Seared Watermelon with Basil Pesto

July 29, 2015 Colleen Stem

Are you sizzling? Is that pool of water next to you , in fact, your own sweat?

Yeah, I feel you.....stupid heat wave. 

During these long extended periods of heat and humidity, my body starts to revolt. I get bitchy, by skin get itchy, my head goes foggy, my stomach starts to refuse food. and I generally just feel like crap. I love the summer, but I am not,  by any means,  a hot, high humidity person.

So during this nasty bout of heat, I do what I can to find comfort. And one of my comforts is watermelon. I am pretty sure that watermelon is a magical fruit. A giant green oblong ball that when cracked open is the brightest, sweetest bright pink fruit.. I mean, thats pretty f ing magical. It can make anything better, and is one of the few things that I want to eat when its a million degrees outside without barfing.

Watermelon is my official heatwave food. Watermelon all day long (Is it bad that I could literally eat an entire watermelon all to my face, in one sitting? ) And because I am me, I like to spice it up a bit and slather a big glob of basil pesto to the melon…. and that makes me happy. Plus it makes the fact that I am eating nothing but melon seem a little more substantial.

   Do you have a heatwave food? If not, try this….It will be your food.

The stuff. A big hunk of watermelon, basil, a lemon, olive oil and salt.

IMG_3519.jpg
IMG_3526.jpg

Stick the basil, the juice of the lemon, and a pinch of salt into a blender. Turn on and blend, adding just a tad bit of olive oil until a nice green pesto is made. 

Prepare your melon. Remove rinds if you want and save for later.. (seriously, we can make gazpacho with it) and cut into inch thick chunks.

And now if your feeling it, stick a skillet on the stove and preheat on medium high. Once heated, place watermelon chunks on hot skillet and sear each side for about 3-5 minutes per side.

If you want to go fresh, just skip searing it. Me, I do a bowl of both. 

And now slather the melon with the pesto 

And go to town

Stay cool my friends!

-C


Seared (or not) Watermelon with Basil Pesto

  • Watermelon
  • a bunch of basil
  • a lemon
  • salt
  • olive oil

Place basil, a pinch of salt and the juice of the lemon into a blender. Turn on and blend, adding in a drizzle of olive oil until pesto forms. 

Preheat a lightly oiled skillet (or a grill) on medium high heat. Take your watermelon and remove rinds (save for later) and cut into inch chunks.* When heated, add the watermelon. LEt each side sear for 3-5 minutes, or until caramelized. Tarnsfrer to a bowl.

*Note. The seared melon is fantastic cooked then cooled. Also, I know some people blot out the juice before grilling, but I think that is a waste and I find unnecessary, but if you don't want a juicy piece of cooke melon, by all means, blot out the juice.. 

Or if you don't want to cook it, don't

And lastly,  toss in a big giant scoop of pesto 

Now eat… eat eat eat. 


In recipes Tags Watermelon pesto, watermelon, seared watermelon, pesto, fruit, salad, vegan, gluten free, paleo, fresh', summer, healthy, happy
Comment

Easy Peasy Zucchini Noodles with Tomato, Garlic and Fresh Basil

July 23, 2015 Colleen Stem

 The mr. calls them the beached whales of the garden. One day you have these nice little green gems growing in the garden. You see them from a distance and think, "Oh look at those squash, those are  oh so lovely" and then you look away. Maybe you leave and let them grow for a day or two. Then when you come back to look, they have turned into  humongous squash that, in fact, look like giant green beached whales.

We have been eating a lot of those beached whale these past few weeks..

Take yesterday for example. I  made zucchini bread, zucchini relish, zucchini pickles and these here zucchini noodles. And that was before I went to the garden and picked 4 more. And today is farm share pick up which means I'll be receiving at least another 8-12 squash. And did I mention that there are currently 6 large zucchini sitting on my table.

My new life motto as of lately is ….When life gives you zucchini.. just eat the shit out of them.

These noodles are by far, one of the easiest, and most delicious ways to use up a butt load of zucchini. And you can do it every day. I know people that eat pasta like 5 time a week so I don't think it's that weird to be eating zucchini noodles every night. The mr. well he is eating them like a champ. For a guy that really likes his pasta, he really likes when I make these noodle. And as he said last night, "who wouldn't like a bowl of carb free noodles that taste amazing and you can eat as much as you want and not feel like car?". My responses was," maybe some asshole? I don't know"

So yeah, zucchini noodles is where its at. 

The stuff. 2 big zucchinis, a large tomato, a few cloves of garlic, a lemon (or just some lemon juice) and a handful of fresh basil. Also grab a little olive oil and the and salt and pepper. 

Firstly, turn you squash into noodles. Do it anyway you like.. I used my mandolin slicer to cut "spaghetti" but you can use a julienne slicer, a noodle maker, or even a box grater. Once made, set noodles aside.

Now chop tomato into chunks and  mince garlic. Add to a large skillet with a drizzle of olive oil. Place on medium heat, mix around and cook for a few minutes unit  garlic becomes fragrant and the tomatoes are soften. 

Now add in the noodles.  Just toss right into the pan with the galic and tomatoes. Add a splash  of water, the juice of the lemon and salt and pepper. Keep heat on medium and mix noodles around until slightly soft (or cooked to you liking)

Once your happy with the doneness, remove from heat.

 Roughly chop or tear the basil into smallish pieces and toss into noodles.

And noodles be done. Now to eating.. and be sure to eat as much as you can, its only zucchini.

Have a good today!

-C


Easy Peasy Zucchini Noodles with Basil Garlic and Tomatoes.

  • 2 medium to large medium zucchinis 
  • a handful of fresh basil
  • 1 large tomato or 2 handfuls of cherry tomatoes 
  • 3-4 cloves of garlic
  • 1 lemon
  • salt and pepper
  • olive oil

Take zucchini and either with a veggie noodle maker, a juillene peeler, or madoline,  a box grater, or just some sweets knife skills, make the noodles and set aside. Mince garlic and chop the tomatoes into chunks add to a large skillet with a drizzle of olive oil and place on medium heat and cook until  the tomatoes are soft and the garlic is fragrant.Once that's cooked, place the noodles into the skillet with about 1/4 cup water and the nice of the lemon. Season to taste  with salt and pepper. Mix noodles around and cook until slightly tender (cook longer for a more well done noodle) Remove from heat. Chop or rip up your basil and toss into the noodles and mix around.

And now it's time.

Place in bowls and fill you mouth hole.


Tags basil zucchini noodlea, Vegan, gluten free, paleo, clean eating, meal prep, summer, squash, easy, quick meal, healthy
Comment

Rhubarb Popsicles and Some Rhubarb Butter

July 21, 2015 Colleen Stem
IMG_3161.jpg
IMG_3173.jpg

This time of year, there are so many reasons for popsicles, but I think that main reason is that I don't want to willingly turn on the oven for any amount of time. It's just to f-ing hot.

Lately, it's been hot. And humid. And gross. Just way too hot to make anything in the oven. So when I grabbed the rhubarb out of the fridge, knowing that if I didn't use it soon it would go bad, I immediately thought to make pie. Then I was like," hell no, not going to happen. I need to freeze this shit". And freeze it I did..into the greatest, slightly sweet, slightly tart, bright pink popsicles of happiness. They are really the perfect little frozen treat. Not overly sweet and sticky, have a lot a fresh clean flavor, and takes the edge off of the super summer heat and humidity, even if only for a few minutes. 

I love popsicles. 

But sadly this is probably the last rhubarb for the season (Or maybe the second to last..I think I saw some for sale at the coop a few days ago)

So get it while you can and make these popsicles! 

The stuff. Rhubarb, a lime and a little bit of honey (or any sweetener you like). Plus you are going to need some water, but I bet you have some of that on hand.

IMG_3071.jpg
IMG_3074.jpg

Chop the rhubarb into inch chunks and toss into a big pot with the water. Stick on the stove and bring to a boil then turn heat to low and let simmer. 

Once the rhubarb is so soft that it falls apart, remove from heat and let cool for a few minutes.

With a fine mesh stainer, strain juice into a large jar or bowl. 

Now you have the juice for the popsicles and the left over rhubarb stuff is the rhubarb butter.

Place the rhubarb butter into a jar, adding a little honey(or whatever) if you want and eat with anything and everything  ( I've been adding  it to the mr's yogurt and just eating it with a spoon)

And now add the juice of the lime to the rhubarb juice and add a little honey or whatever sweetness to taste.

And add the rhubarb juice to your popsicle molds and stick in the freezer with sticks tops or wait two hours and add wooden sticks.

IMG_3143.jpg

When frozen, run the mold under a little hot water and pop those suckers out.

A two for one deal here. And timed perfectly. You  have the rhubarb butter to eat while you wait for the popsicles to freeze. So smart

Happy Tuesday.. Keep it cool!

-C


Rhubarb Popsicles and Some Rhubarb Butter

makes 6 4oz popsicles and about a cup of jam

  • 3 cups chopped rhubarb
  • 2 1/2 cups water
  • 1 lime
  • Anywhere from 4 tablespoons honey (2 for popsicles and 2 for jam)

Chop the rhubarb into inch ish chunks and stick into a big pot with water. Turn on high heat and bring to a boil. Once boiling, turn heat to low and simmer until the rhubarb is so soft its falling apart. Remove from heat and let cool for a few minutes. Take a big jug or bowl with a fine mesh strainer,strain the liquid from the solids. You can use a wooden spoon to stir around to help get the juice flowing. Place remaining solids into a jar and add as little or as much or as little honey (any sweetener you like) and give it a stir. Thats your jam

Now for the popsicles. Add the juice of the lime and a tablespoon or two of honey (or whatever sweeteners you like) and mix around. Pour into popsicle molds and stick into freezer.Know your mold.. if you need to insert a stick, do so after about 2 hours. 

When pops are frozen, remove from mold and eat your heart out.


Tags Rhubarb popsicles, rhubarb butter, frozen, frozen dessert, snack, vegan, gluten free, paleo, sugar free dessert, healthy, clean eating, meal prep
Comment

Roasted Strawberries

July 6, 2015 Colleen Stem
IMG_2395.jpg
IMG_2393.jpg

Maybe you, like me, went a did a little strawberry picking this past weekend. And maybe you, like me, pick so so many that now you have an overload of the most perfect, if not slightly too ripe strawberries staring at you, waiting to be eaten or, at the very least, cooked into some magical cake, pie, cookie, or whatever. But lets face it, its Monday and maybe we do not exactly feel the need (or have the time) to make a cake, pie, cookie or whatever tonight. So that leaves us with a crap load of strawberries that need to be dealt with. 

And sure, we can freeze them, but maybe you, like me, already have a freezer full of other stuff. And just because we don't want to bake a cake, pie, cookies, or whatever tonight, doesn't mean we don't want something amazingly tasty and fantastic.

So that brings us to this super easy, oh so pretty, and ever so tasty way to move those strawberries….. Stick them in the oven and roast them. So simple and really truly amazing. When strawberries are roasted, they turn so tender and fall apart and release all of their juices that turn into a sweet syrup. They become almost jam like, but the flavors are way better, more complex. And there is no need for added sugar or any other stuff because the flavors and natural sweetness of the roasted strawberries stand on their own.  

A few ways to which you might want to use roasted strawberries that will make your life better: Dump onto ice cream, yogurt, or make a strawberry shortcake or a strawberry fool. Scoop onto a green salad, mix into a bowl of quinoa, marinate some tofu, or add to roasted veggies.  You can mix into muffin batter, into oatmeal, or add to a layer cake. They make a fantastic PB and J and the syrup in seltzer is a tasty drink. You can pretty much use them for anything. But MY favorite way to consume these…a bowl, a little spoon, and my mouth. Nothing else needed.

And if you didn't happen to go strawberry picking this weekend. It's cool, just pick some up from the closest farm stand near you. You can tell all your anyone thats asks that you picked them yourself.  (not a lie, just a stretch cause you did, in fact, pick them up yourself)

 Yea for Monday and for roasted strawberries! (Or at least yea for strawberries.) 

All you need…A big (or small) bowl of strawberries. 

Rinse those pretties and place them on a parchment lines baking sheet. (don't skip parchment… these suckers get super thick and juicy.)

Here is the thing. These strawberries are picked from the lovely farm I get my CSA from.(How badass is it that we have a PYO part of the share). They are not like super market berries that are extra firm with dirty unappealing green tops. These little organic lovelys have tender little green tops…. I eat them. If you do not wish to eat the greens, just top the berry off before roasting. 

So the berries, stick them in the oven at 450 degrees and roast them for about 35-45 minutes (depending on the size of your berries)

Pull them out when they start to get dark and slightly charred and the juice is thick and bubbly.

And scrap the berries, juice and all, right into a jar.

Eat with anything, everything and with nothing at all.

Happy Monday

-C


Roasted Strawberries

  •  strawberries of any quantity

Place strawberries, with or without tops (your preference) on a parchment lined baking sheet. Place in a 450 degree oven and roasted  foe about 45 minutes or until the berries are soft, mushy, starting to charr and have lots of bubbly juice, . When done, remove from oven and let cooll for for about 5 minutes. Transfer berries, juice and all, into jar. 

Eat right away or stick in fridge. Juices thicken up when cooled.

Keeps  about a week in fridge, but I highly doubt it will last the night.


Tags roasted strawberries, vegan, gluten free, paleo, healthy, sugar free, dessert, condiment, strawberries
Comment
← Newer Posts Older Posts →
 

https://thelovelycrazy.squarespace.com/config#/|/about/

Me. Food Maker.Food eater. Woo HOO!

STEM+NODE  SMALL BATCH AND ONE OF A KIND POTTERY

stem+node ceramics


____________________

Subscribe

GET NEW POSTS IN YO EMAIL

You are AWESOME!!!


@thelovelycrazy 2014-2021