• stem+node ceramics
  • HOME
  • Food Recipes
  • About
  • Contact
Menu

The Lovely Crazy

Street Address
City, State, Zip
Phone Number

Your Custom Text Here

The Lovely Crazy

  • stem+node ceramics
  • HOME
  • Food Recipes
  • About
  • Contact

Freezer Soup Bags

September 5, 2020 Colleen Stem

Has your garden exploded yet? Mine has, as has my farm share. So much goodness all at once. It is amazing and wonderful and I am constantly eating just to keep up with it. But no matter how much I eat (I eat A LOT) I still have an abundance of fresh amazing produce, which is exactly what I planned because I freeze a lot of stuff for winter.

Which brings me to soup bags. To know me is to know that I am a soup person, like I eat soup everyday all day, kind of person. And so having veggies on hand at all times for soup is a necessity. Sure I sometimes use fresh ingredients but more often then not, especially in the winter months (which will be here before you know it), I just grab whatever bag of frozen veggies I have in the freezer and that is that.

A few years ago I started being a little more strategic about how I freeze my veggies and started making bags that are specifically for soup. Hence soup bags.

What’s in a soup bag you ask? Well anything you want. Mine are usually filled with things like lots of tomatoes, zucchinis, onions, eggplants, pepper, and so forth. Basically whatever I hav an abundance of. Like right now. I am bagging a shit load of zucchinis and tomatoes. In the next coming weeks, I will do another soup bag day and there will be more sweet potatoes and roots in the mix. I tend to not add greens because well, honestly, I never have too many fresh greens, I alway just eat them all. But you can if you want. Thats the beauty of making them yourself. You choose what you stick in them.

Either food from your garden, farm share, or grocery store, doing this now will give you a good jump on some meal prepping for the future months. It’s a no brainer. You will thank yourself, and me, but mostly yourself.

To the soup bags!

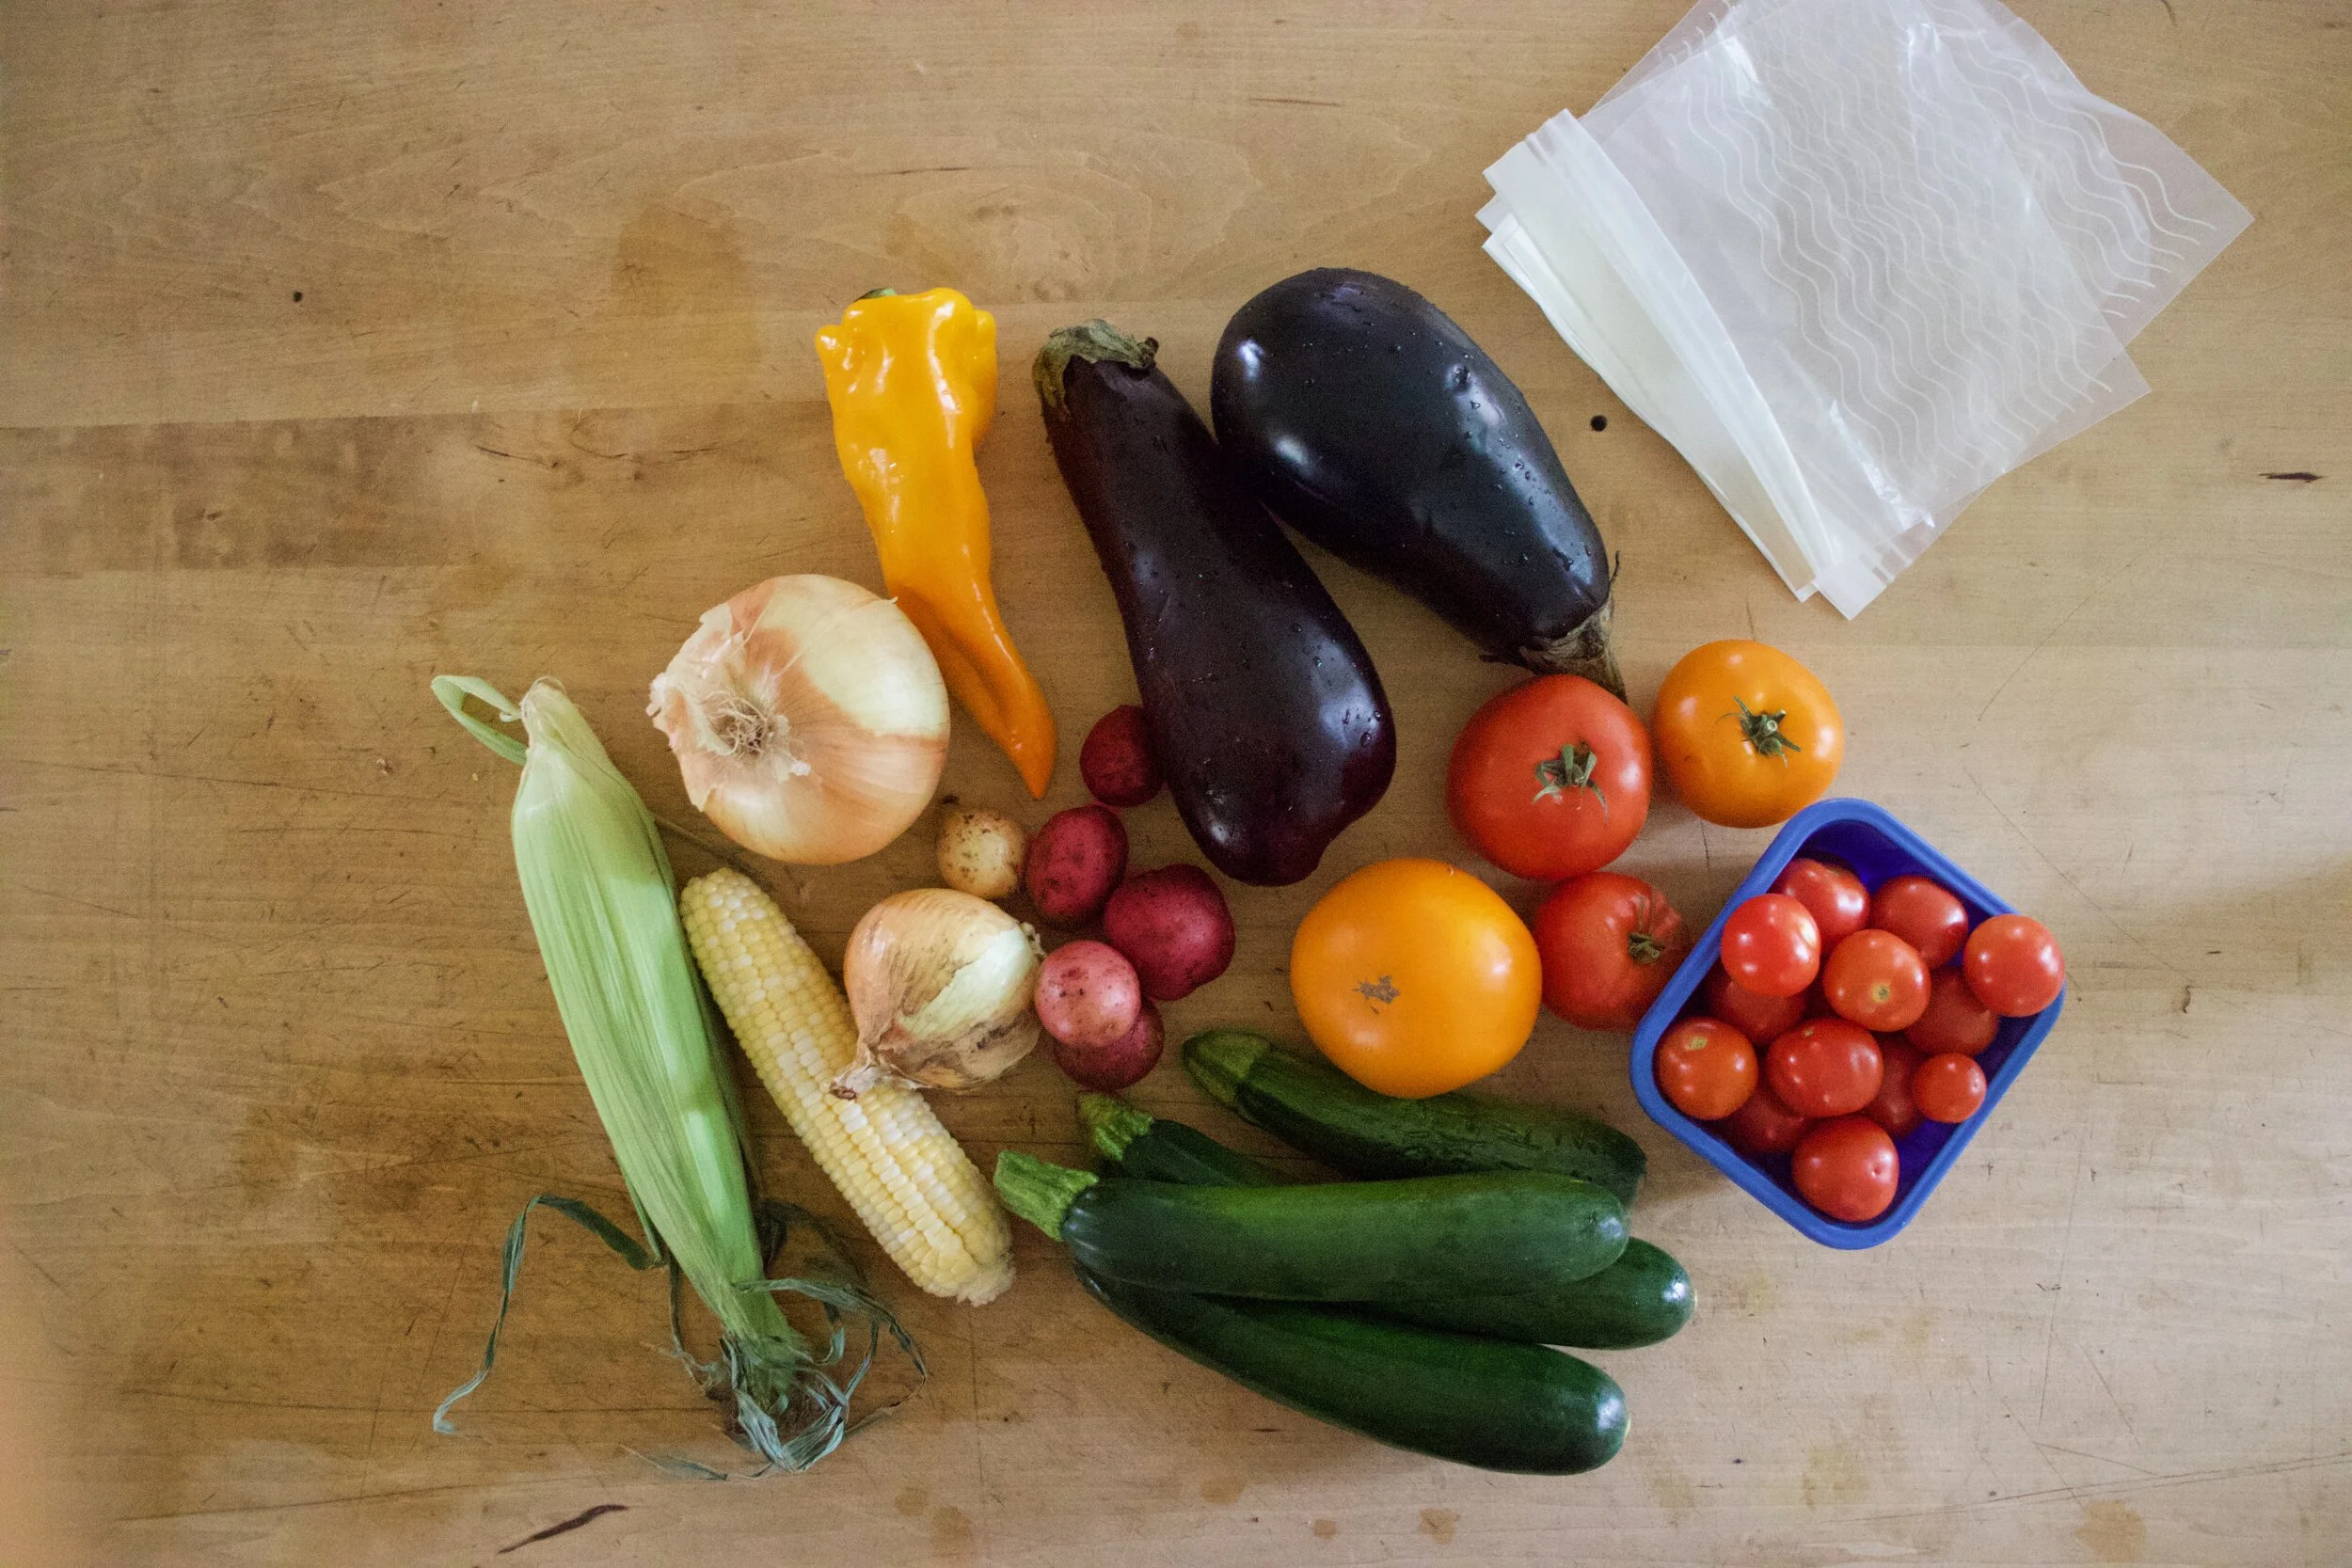
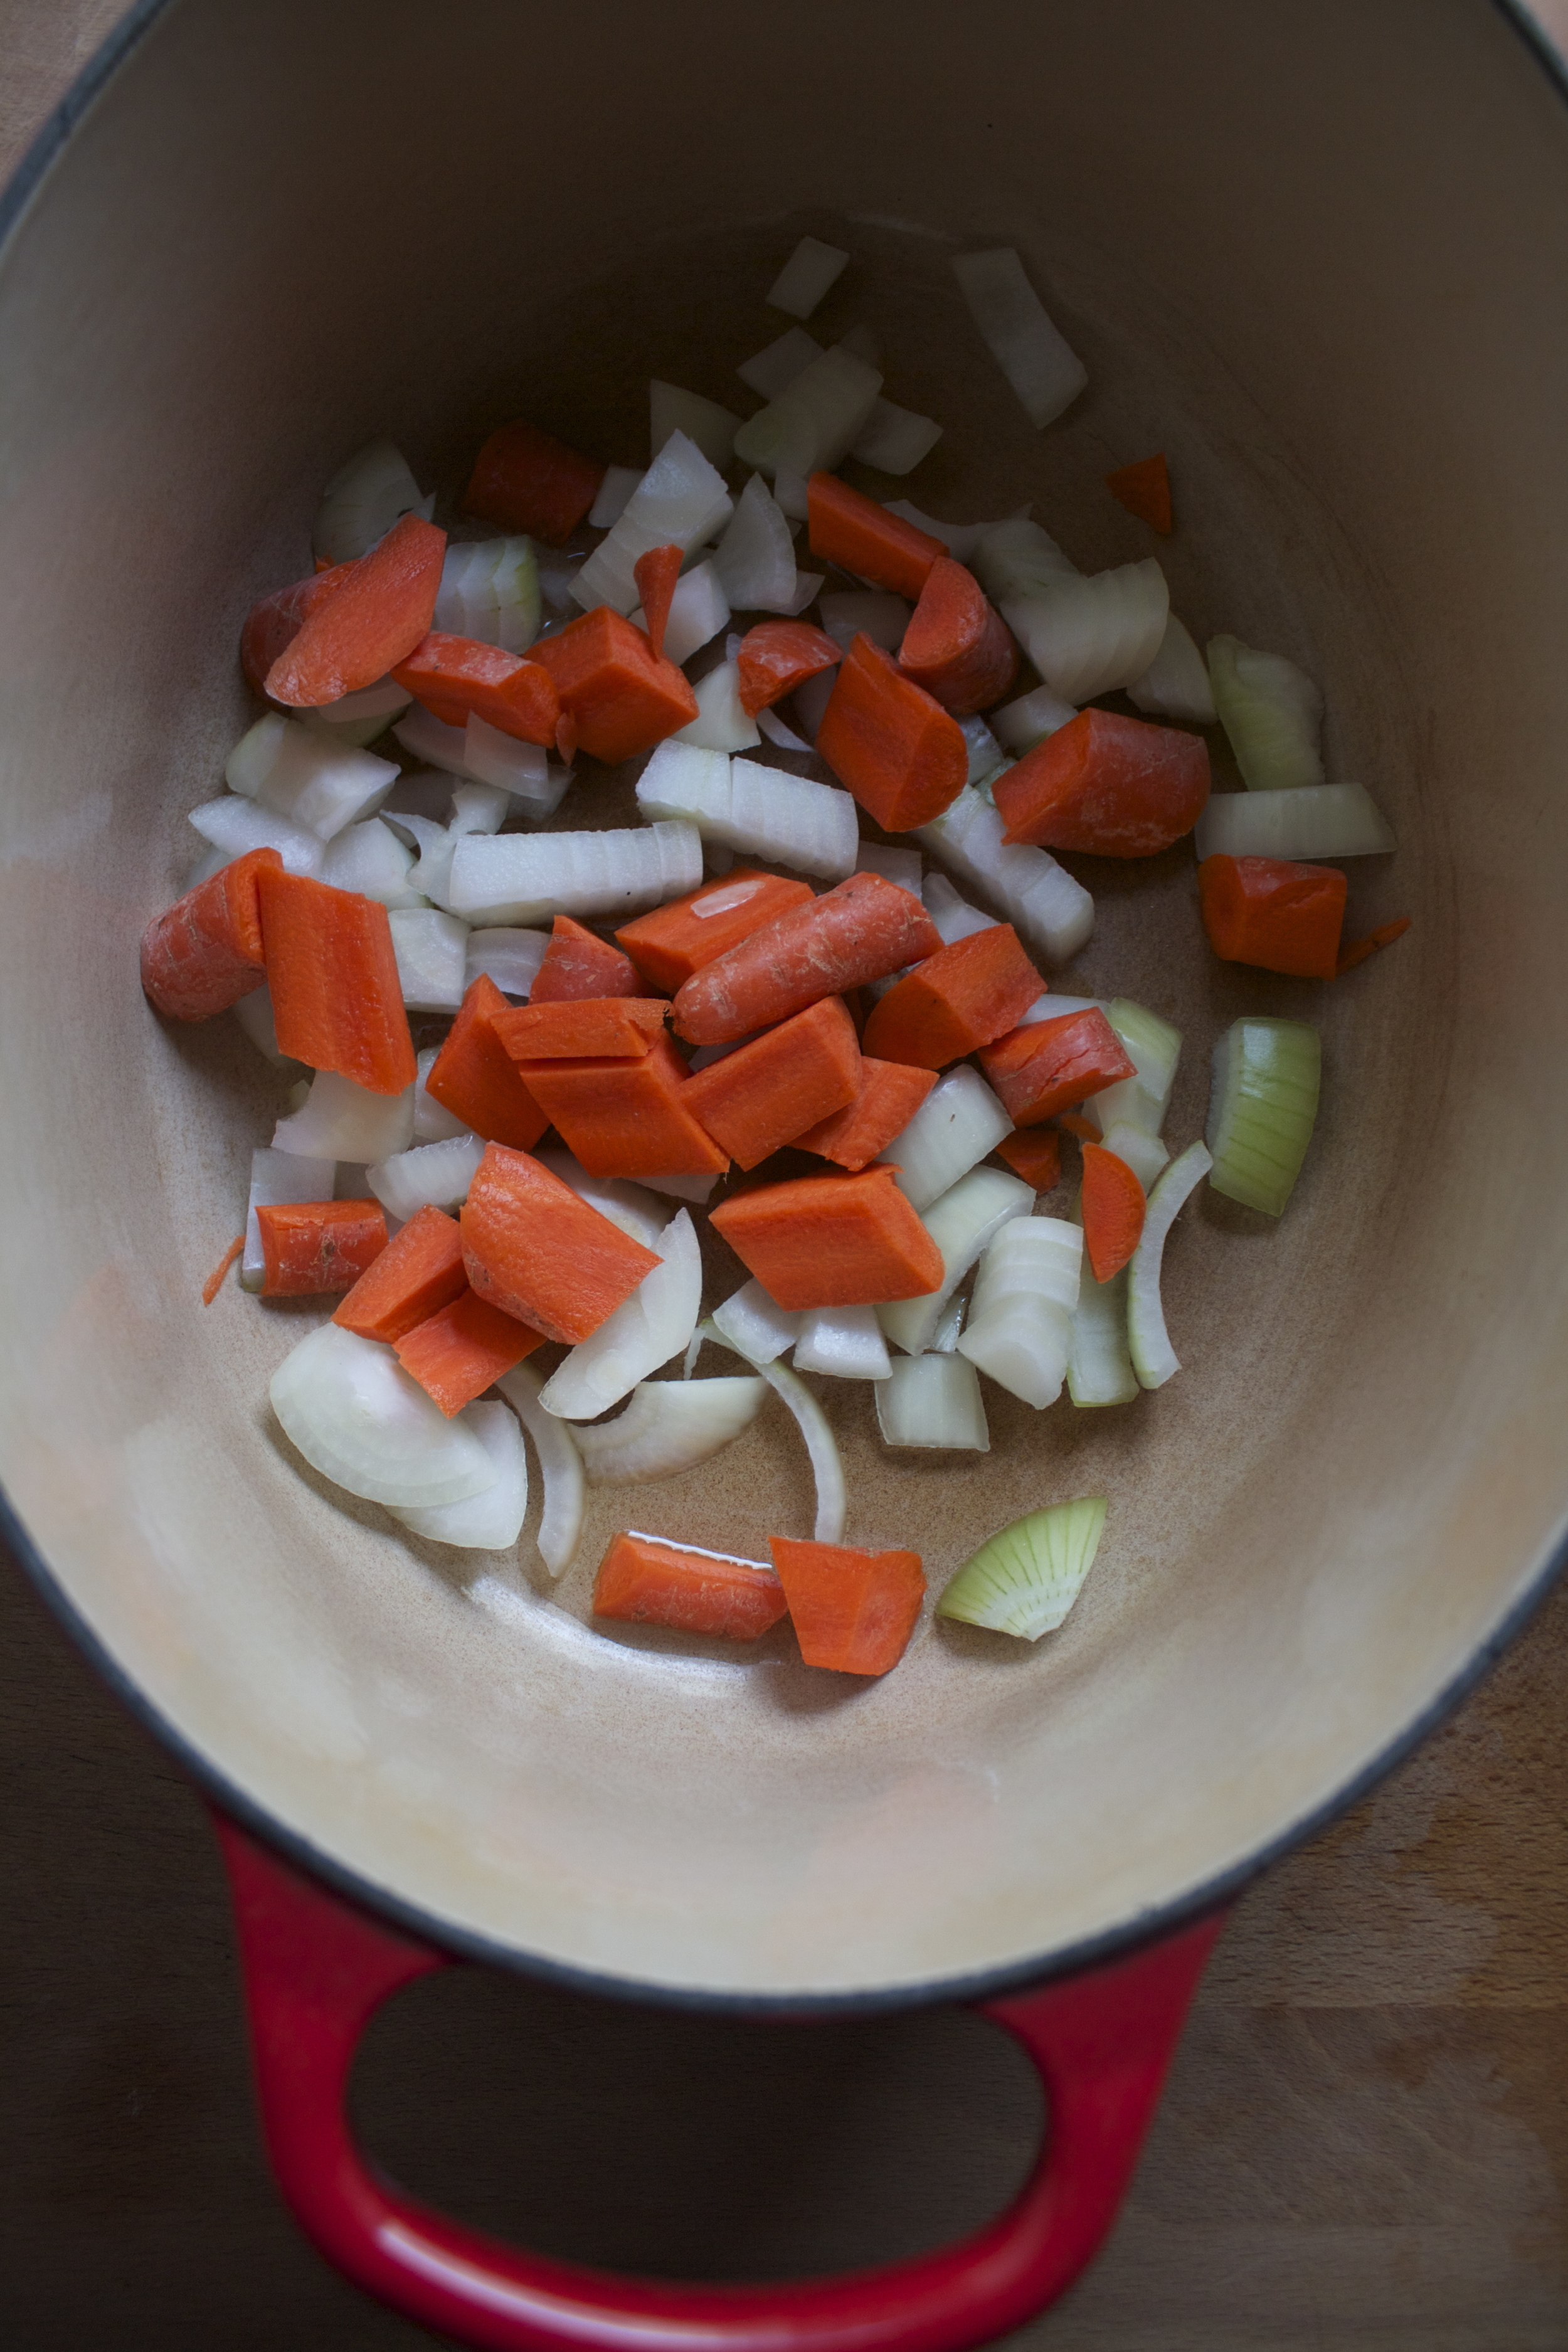
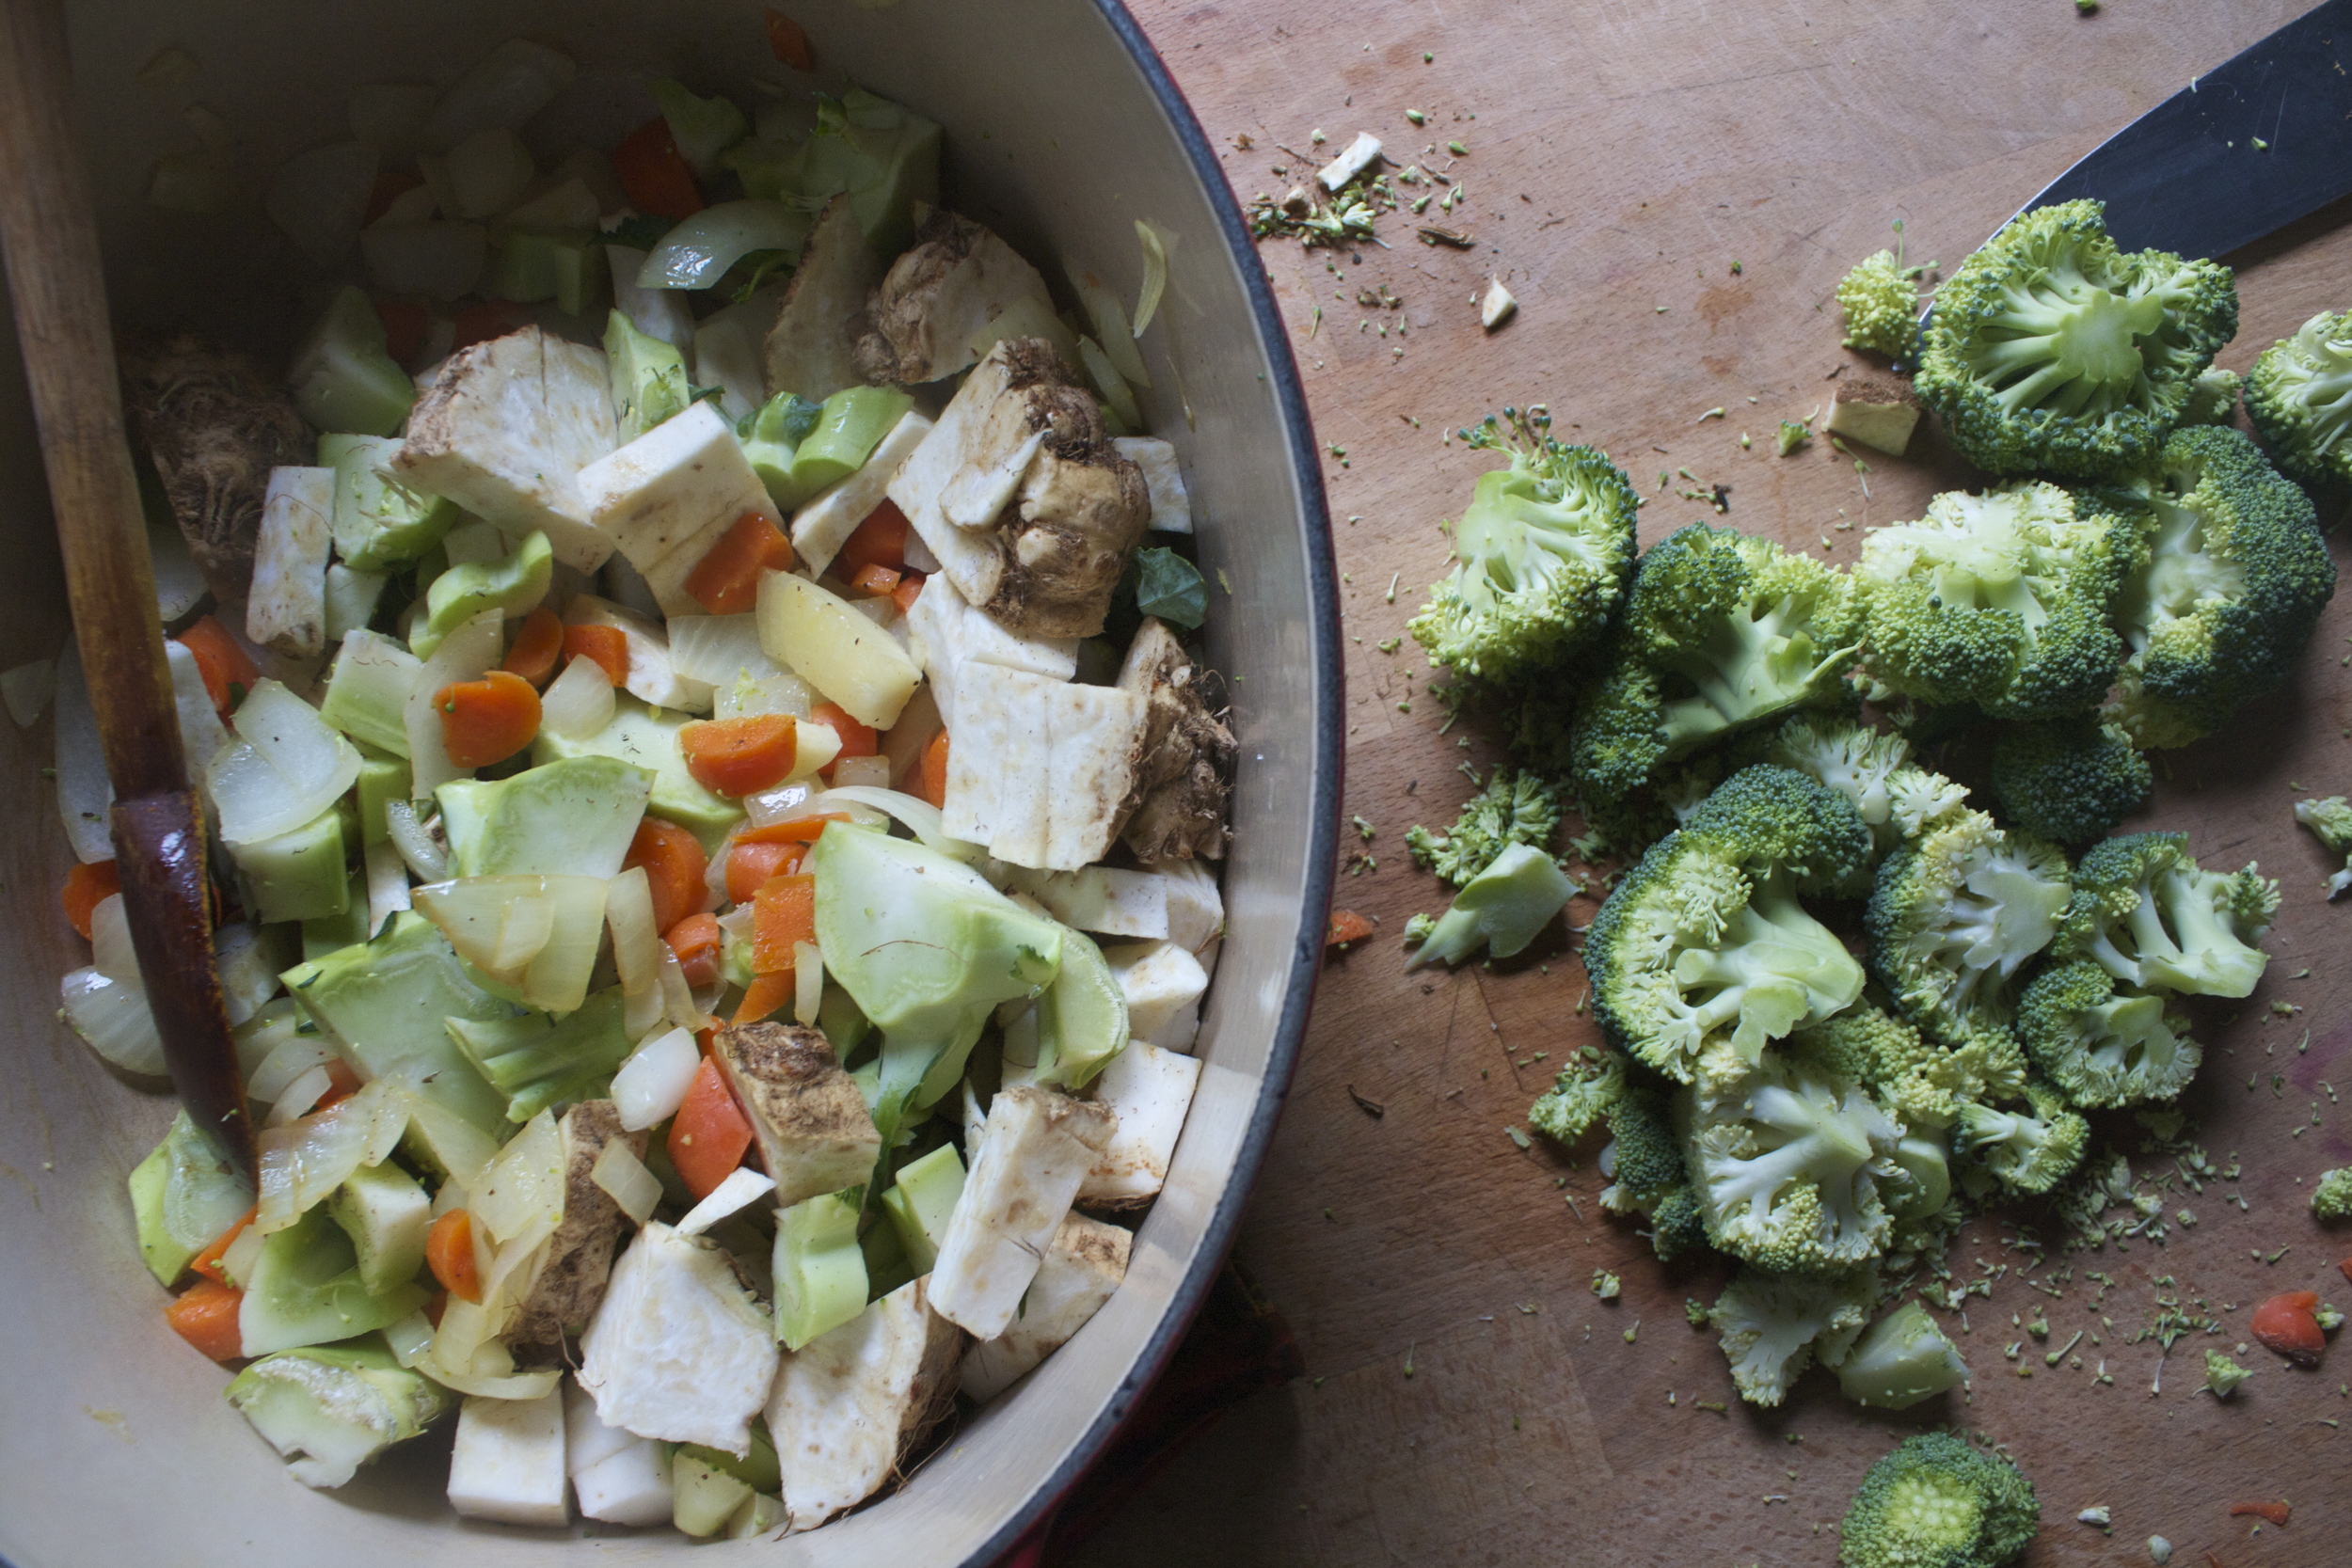
The stuff can be whatever stuff you have plenty of or whoever stuff you usually put in your soups. Me, I just grabbed an armful of stuff that was overflowing from the fridge and counter. Eggplants, zucchinis, tomatoes, corn. onion, peppers, potatoes. Whatever you have and whatever you want.

Simple as can be. Just chop everything up. And sure, you could blanch things if you want but really, I have never seen the difference when it comes to soup and that is just one more step that you don’t need to take.

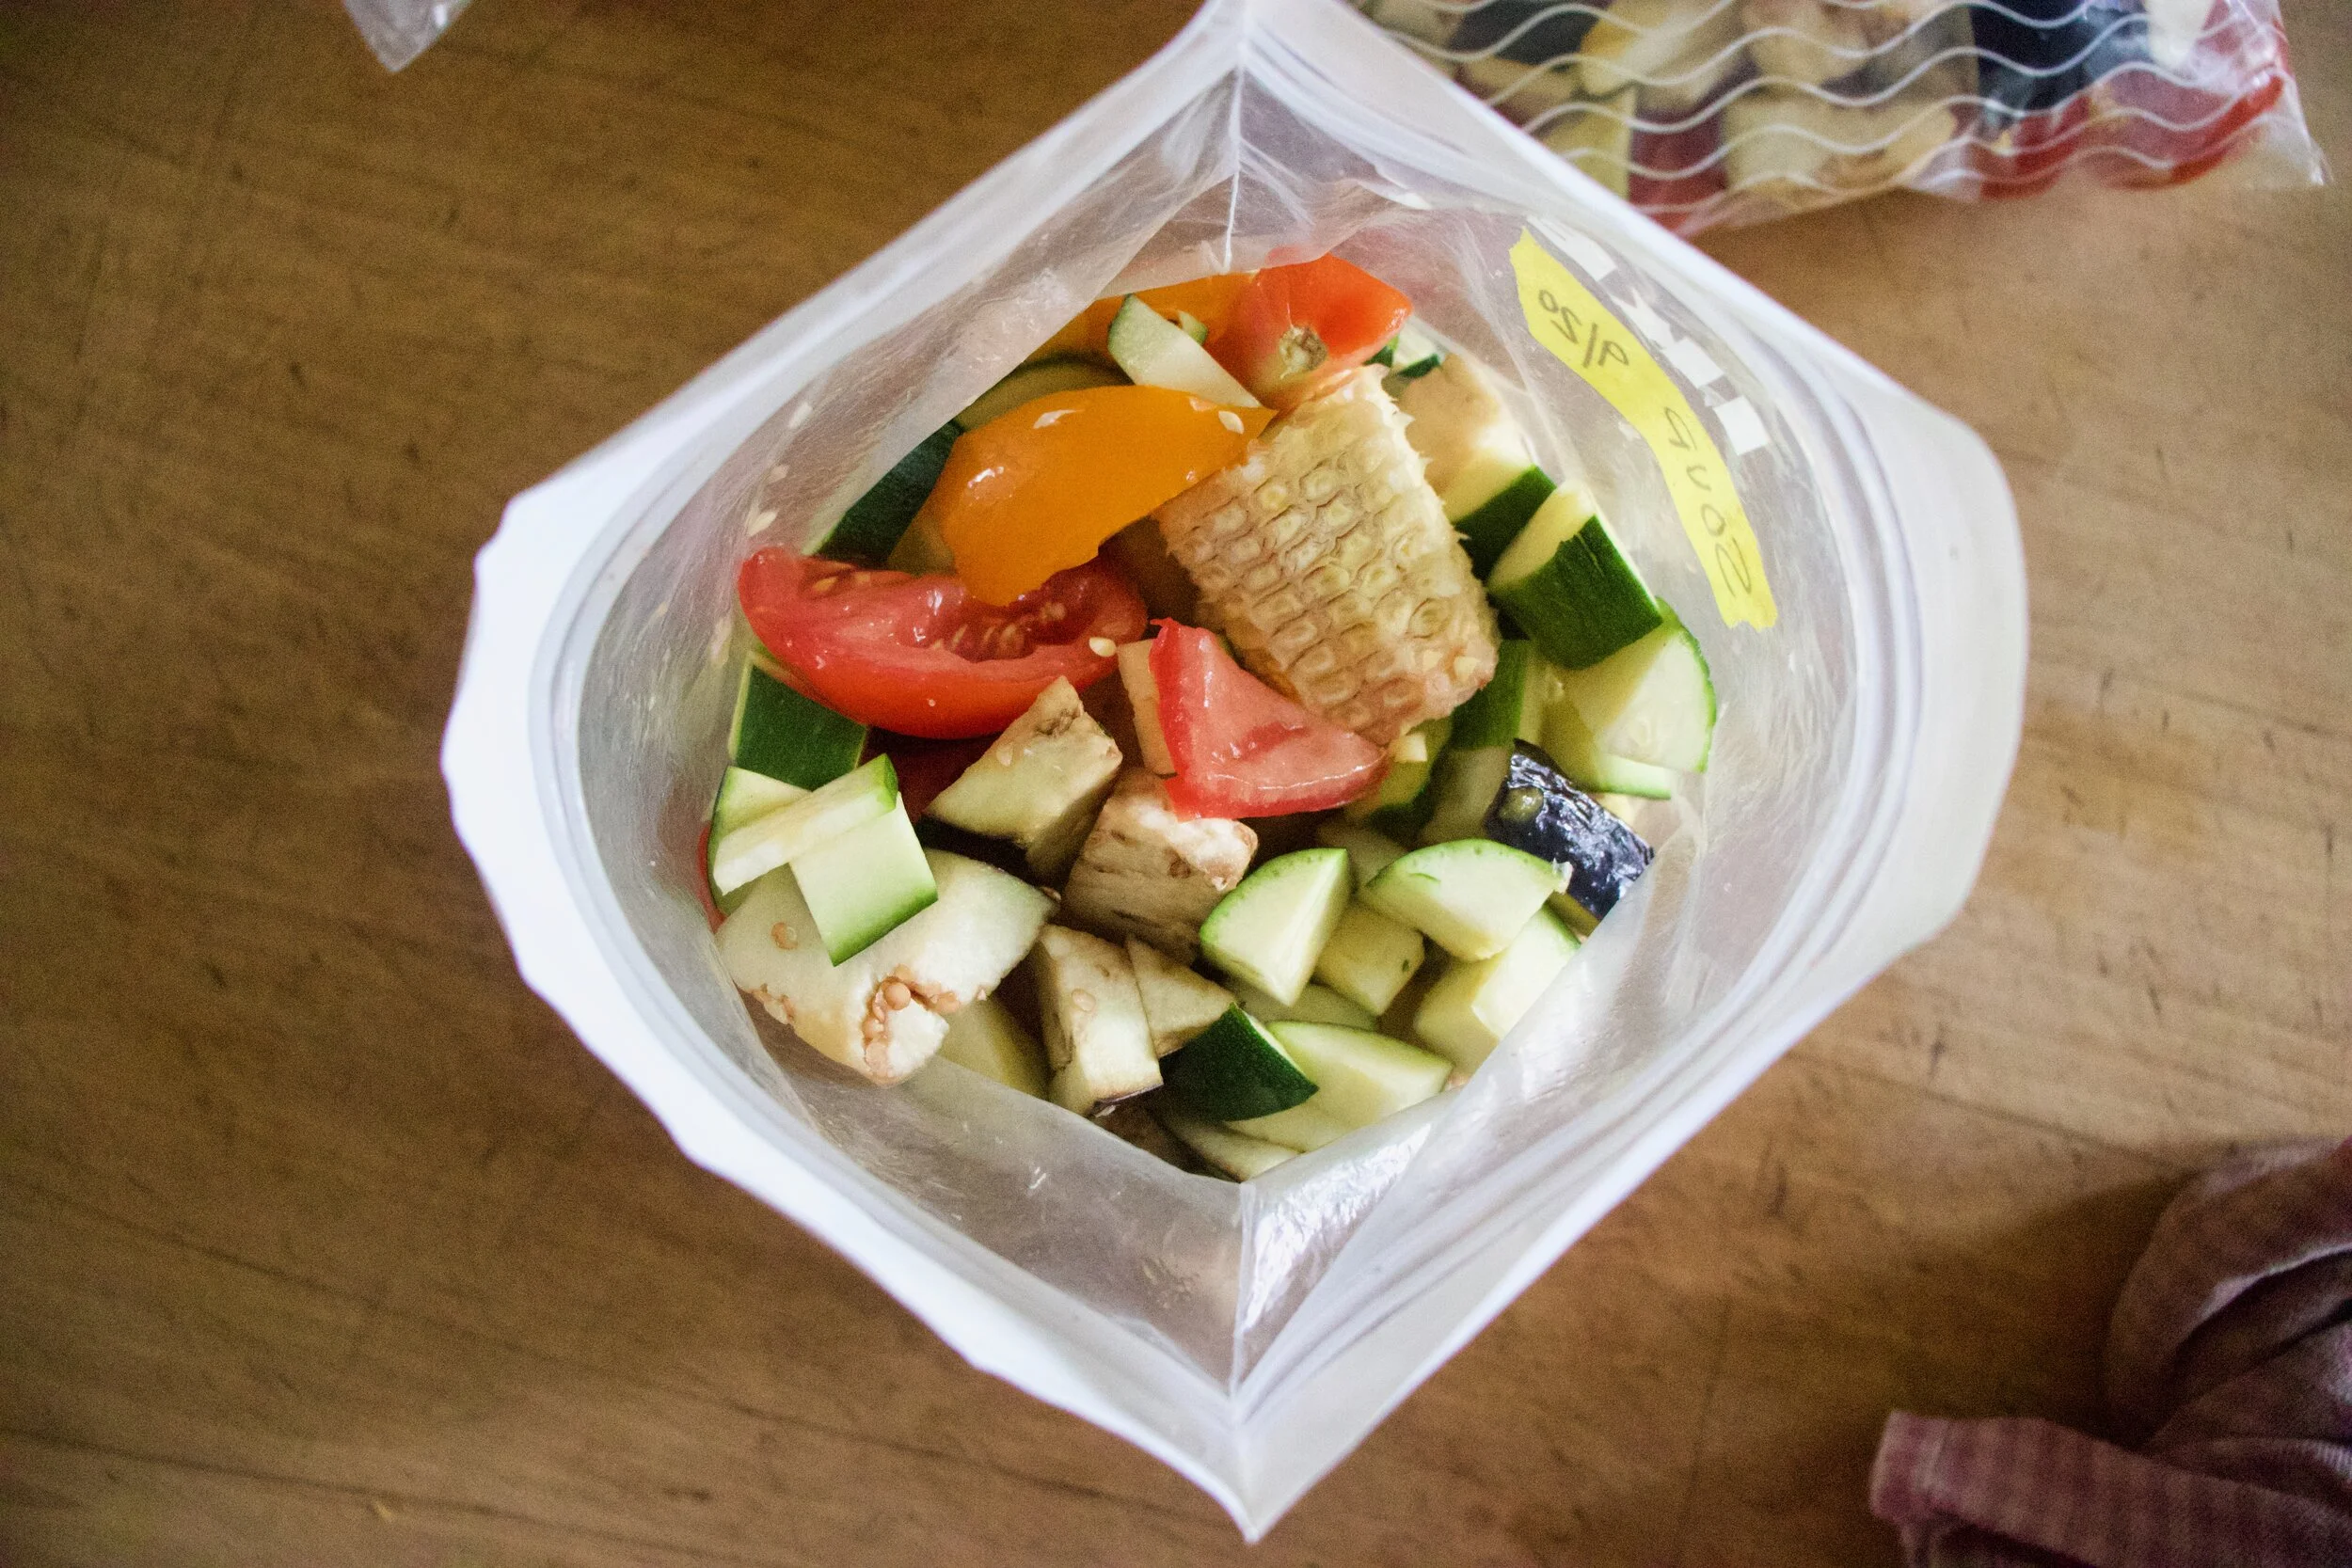
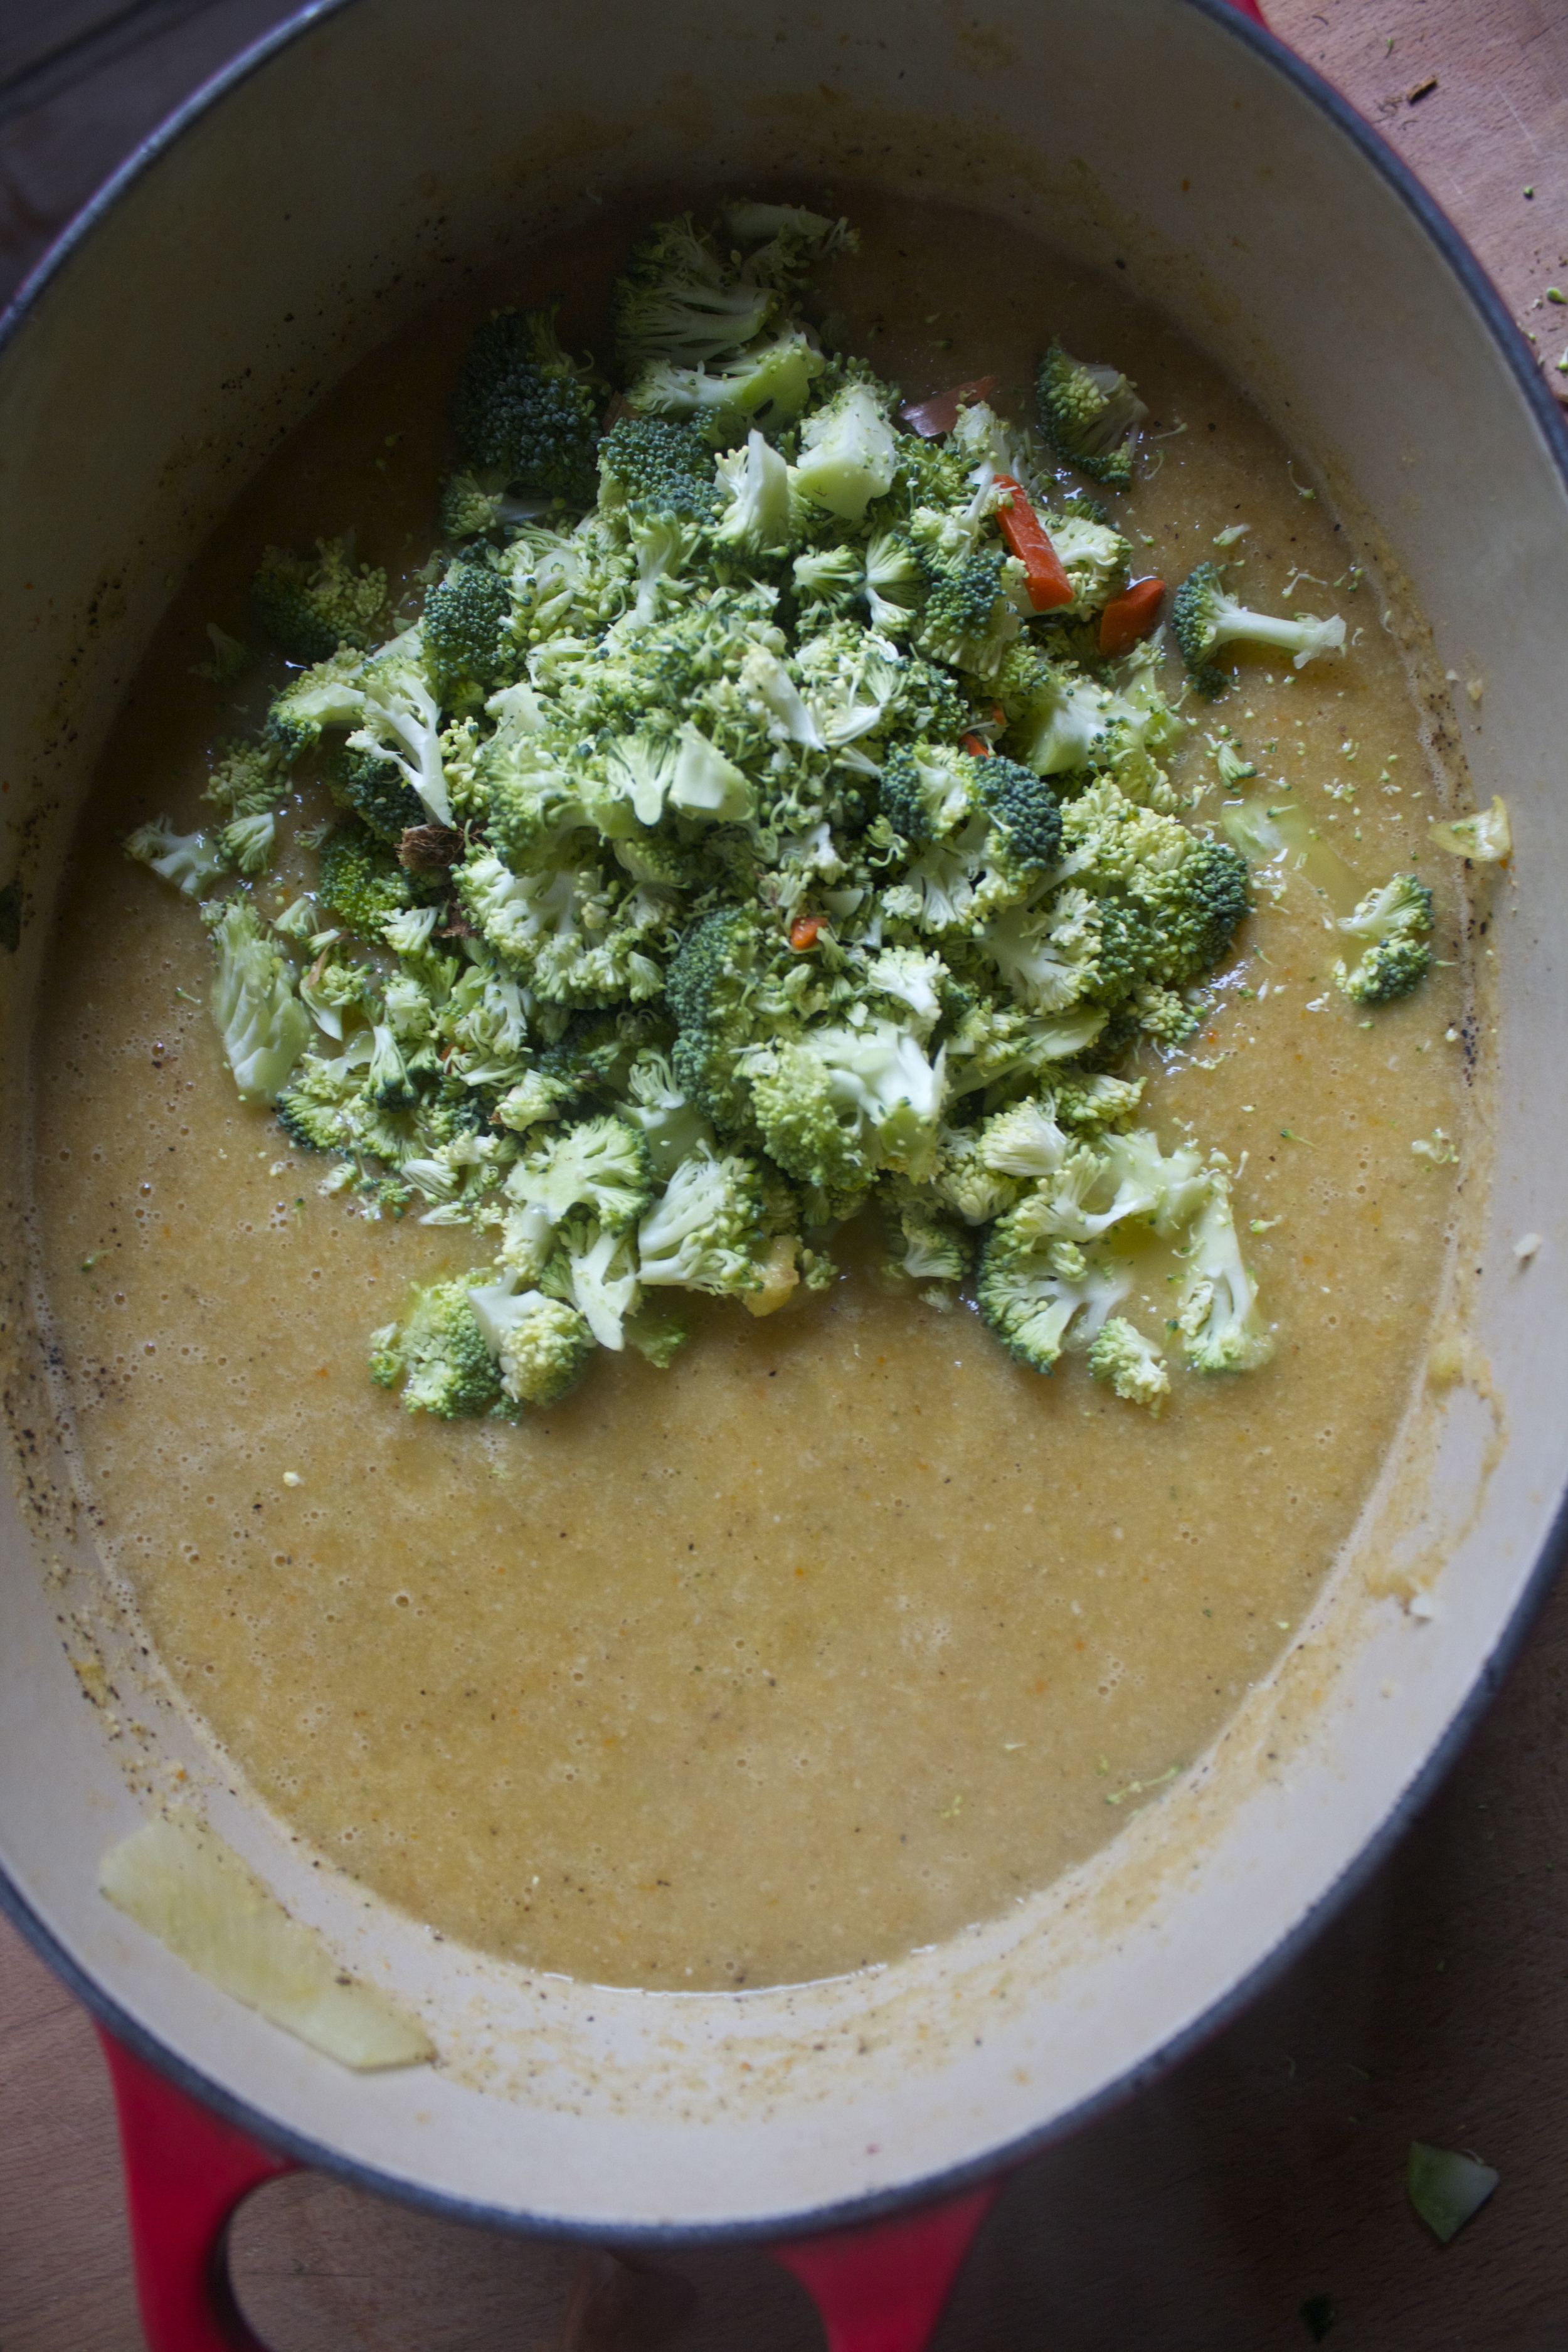
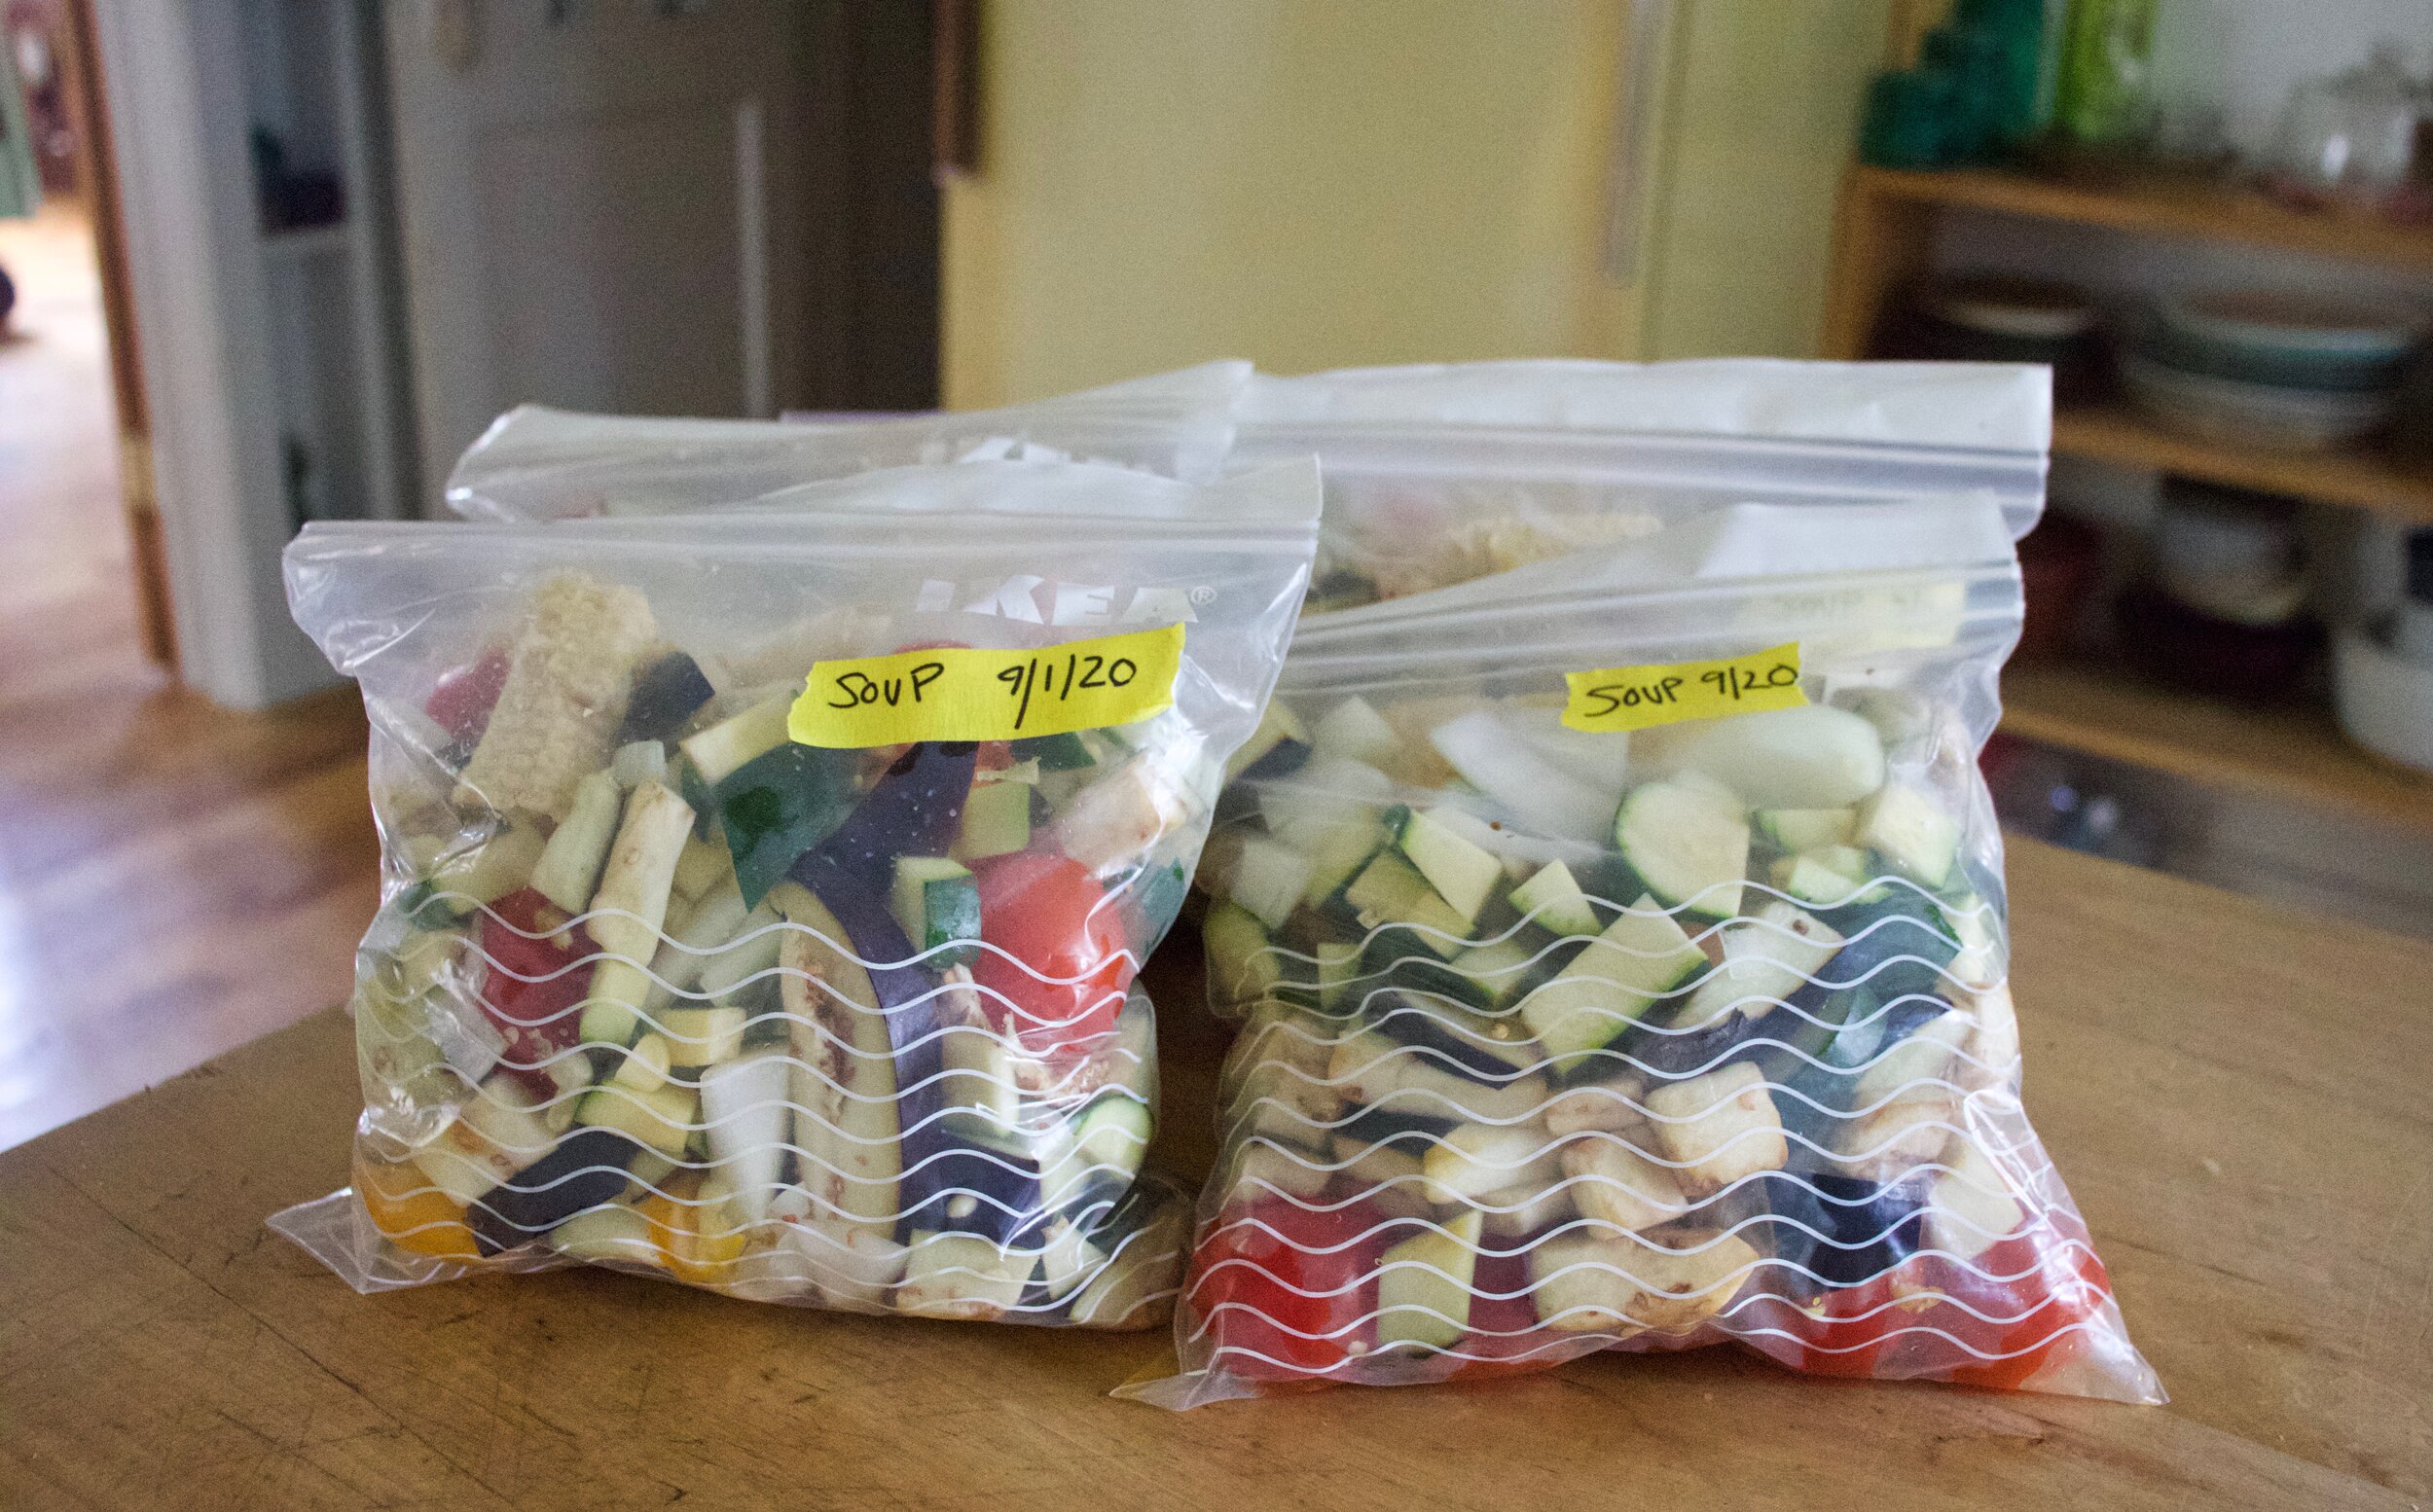
Once everything is chopped, bag it, adding whatever feels right. I just start tossing handfuls of whatever into the bags until they are full. Sometimes I will fill bags with more specific veggies and label them for specific soups, but most of the time, its just a mixture of whatever. And I am never disappointed when I dump a bag out and see the medley.

Oh, and corn. I always toss the cob into the pot when I am making soup, extra flavor, so they go into the bags too.

Then you just label and date them and pop those bad boys into the freezer.

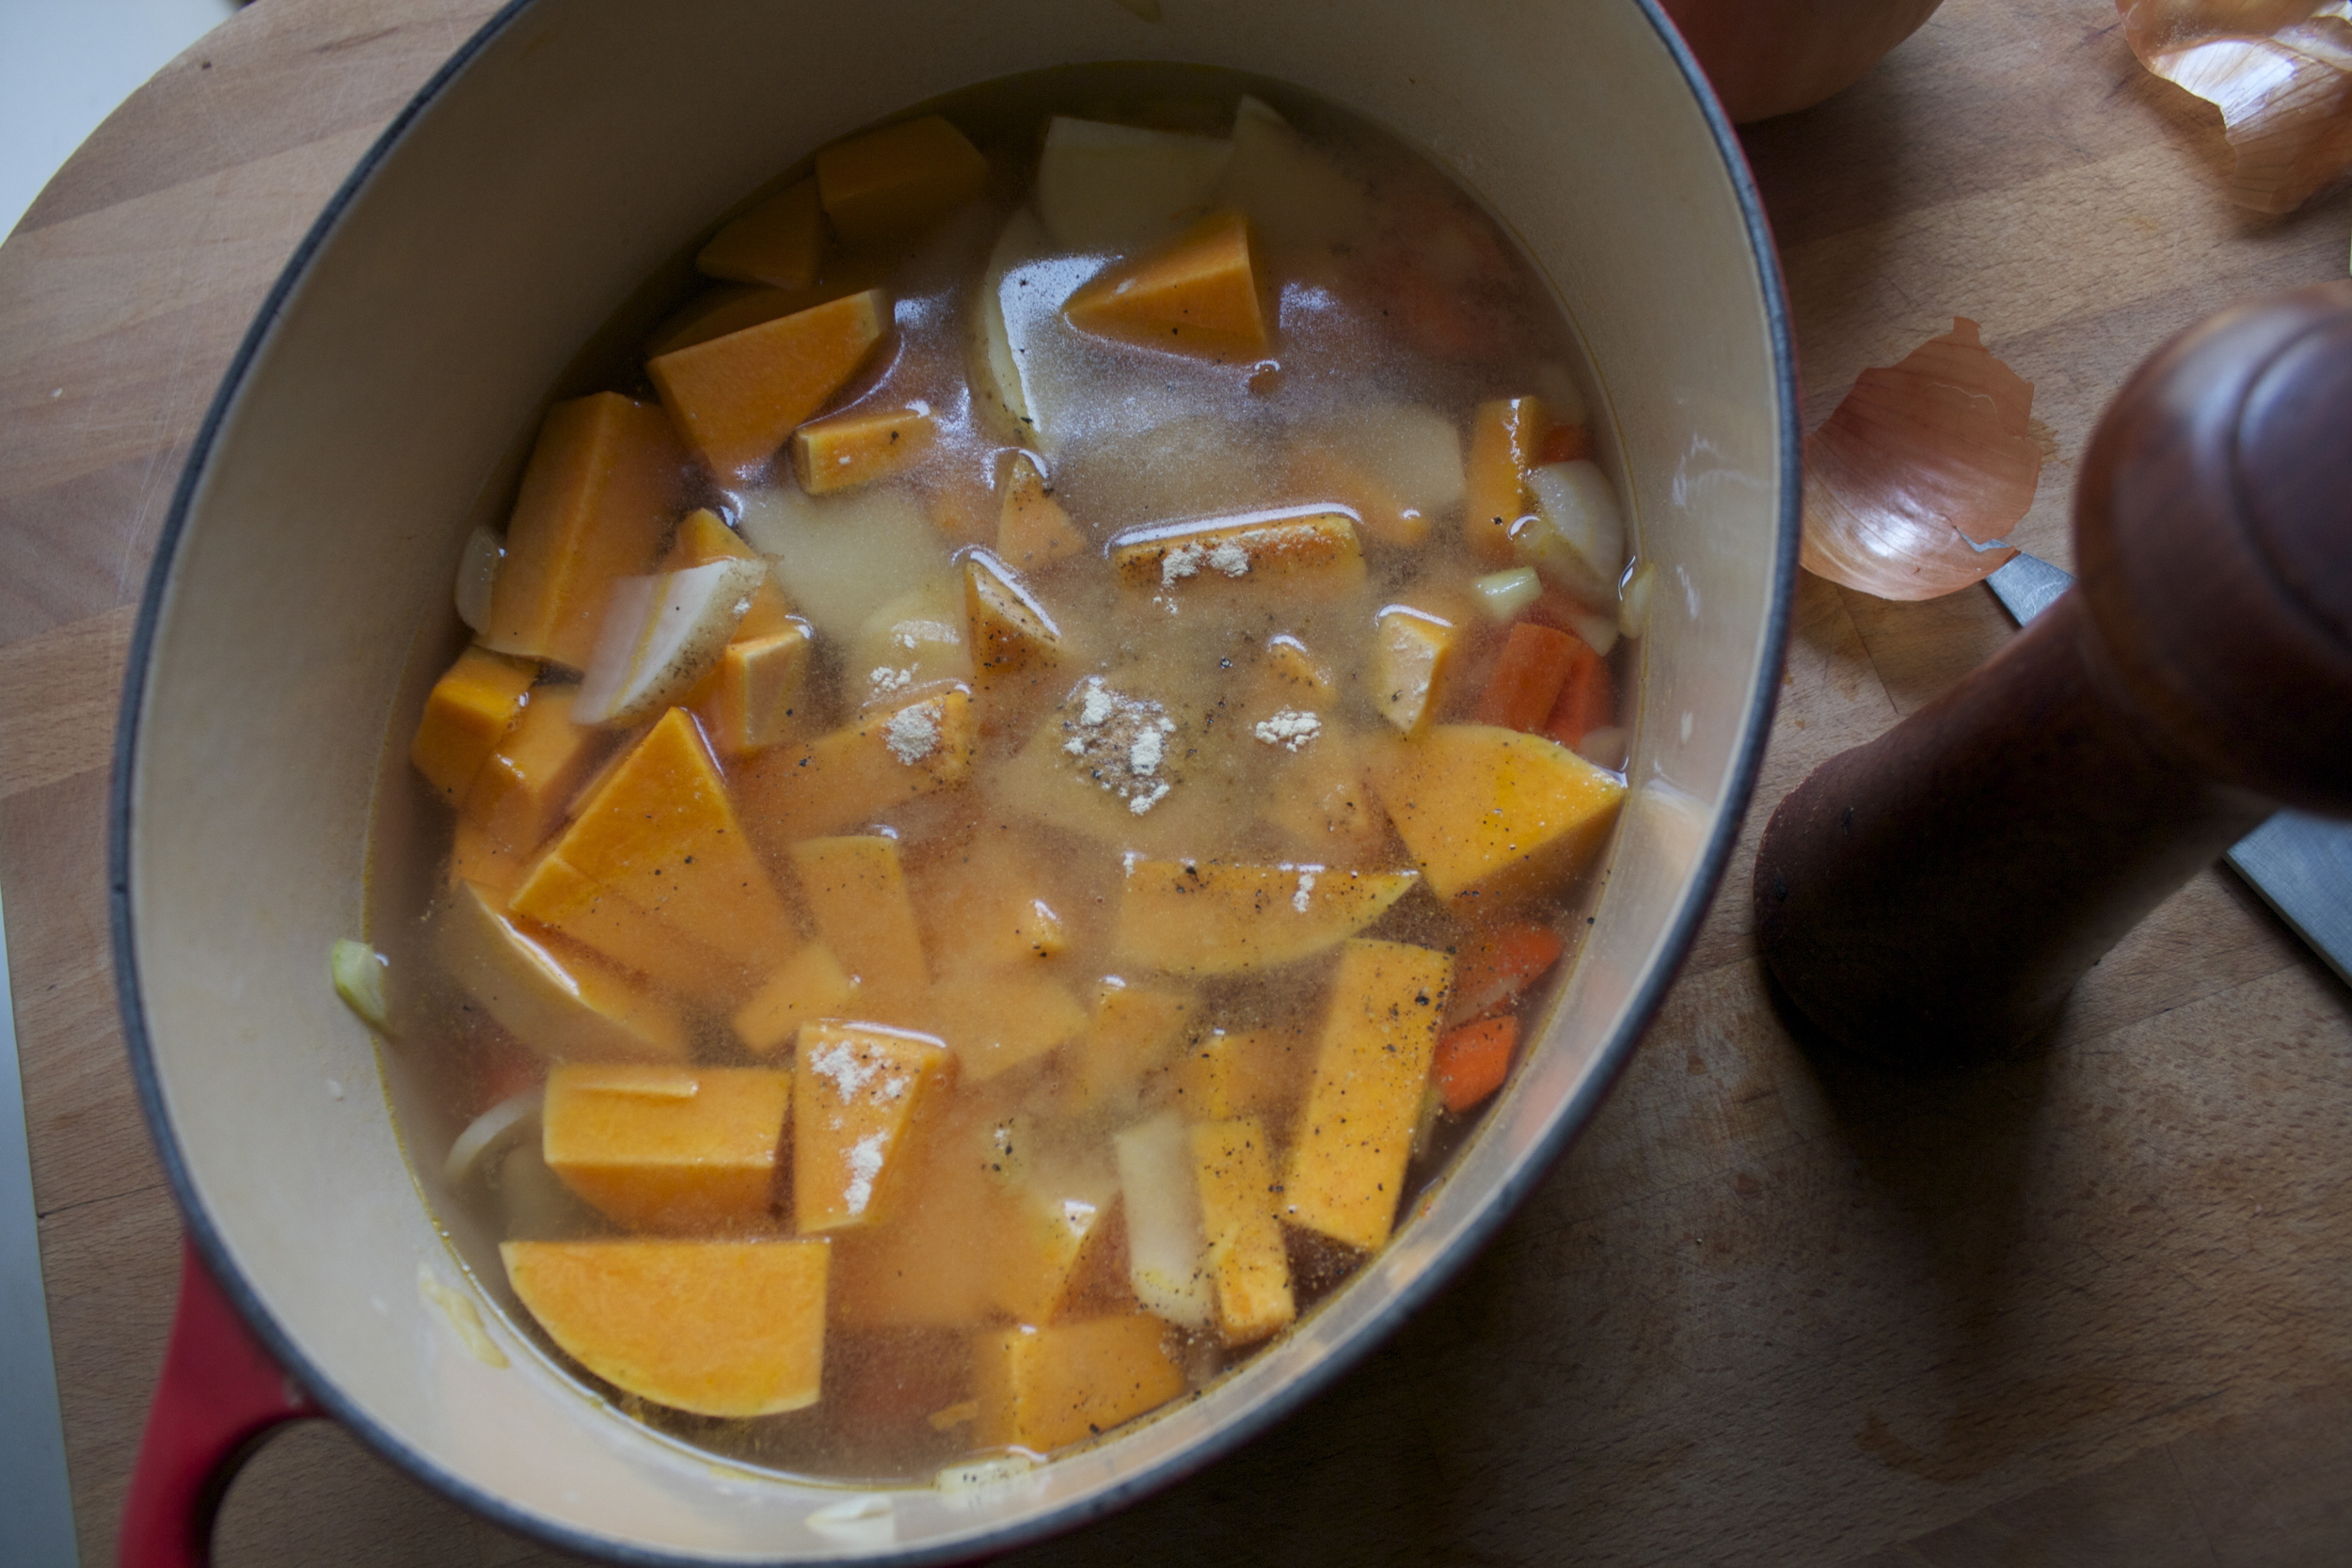
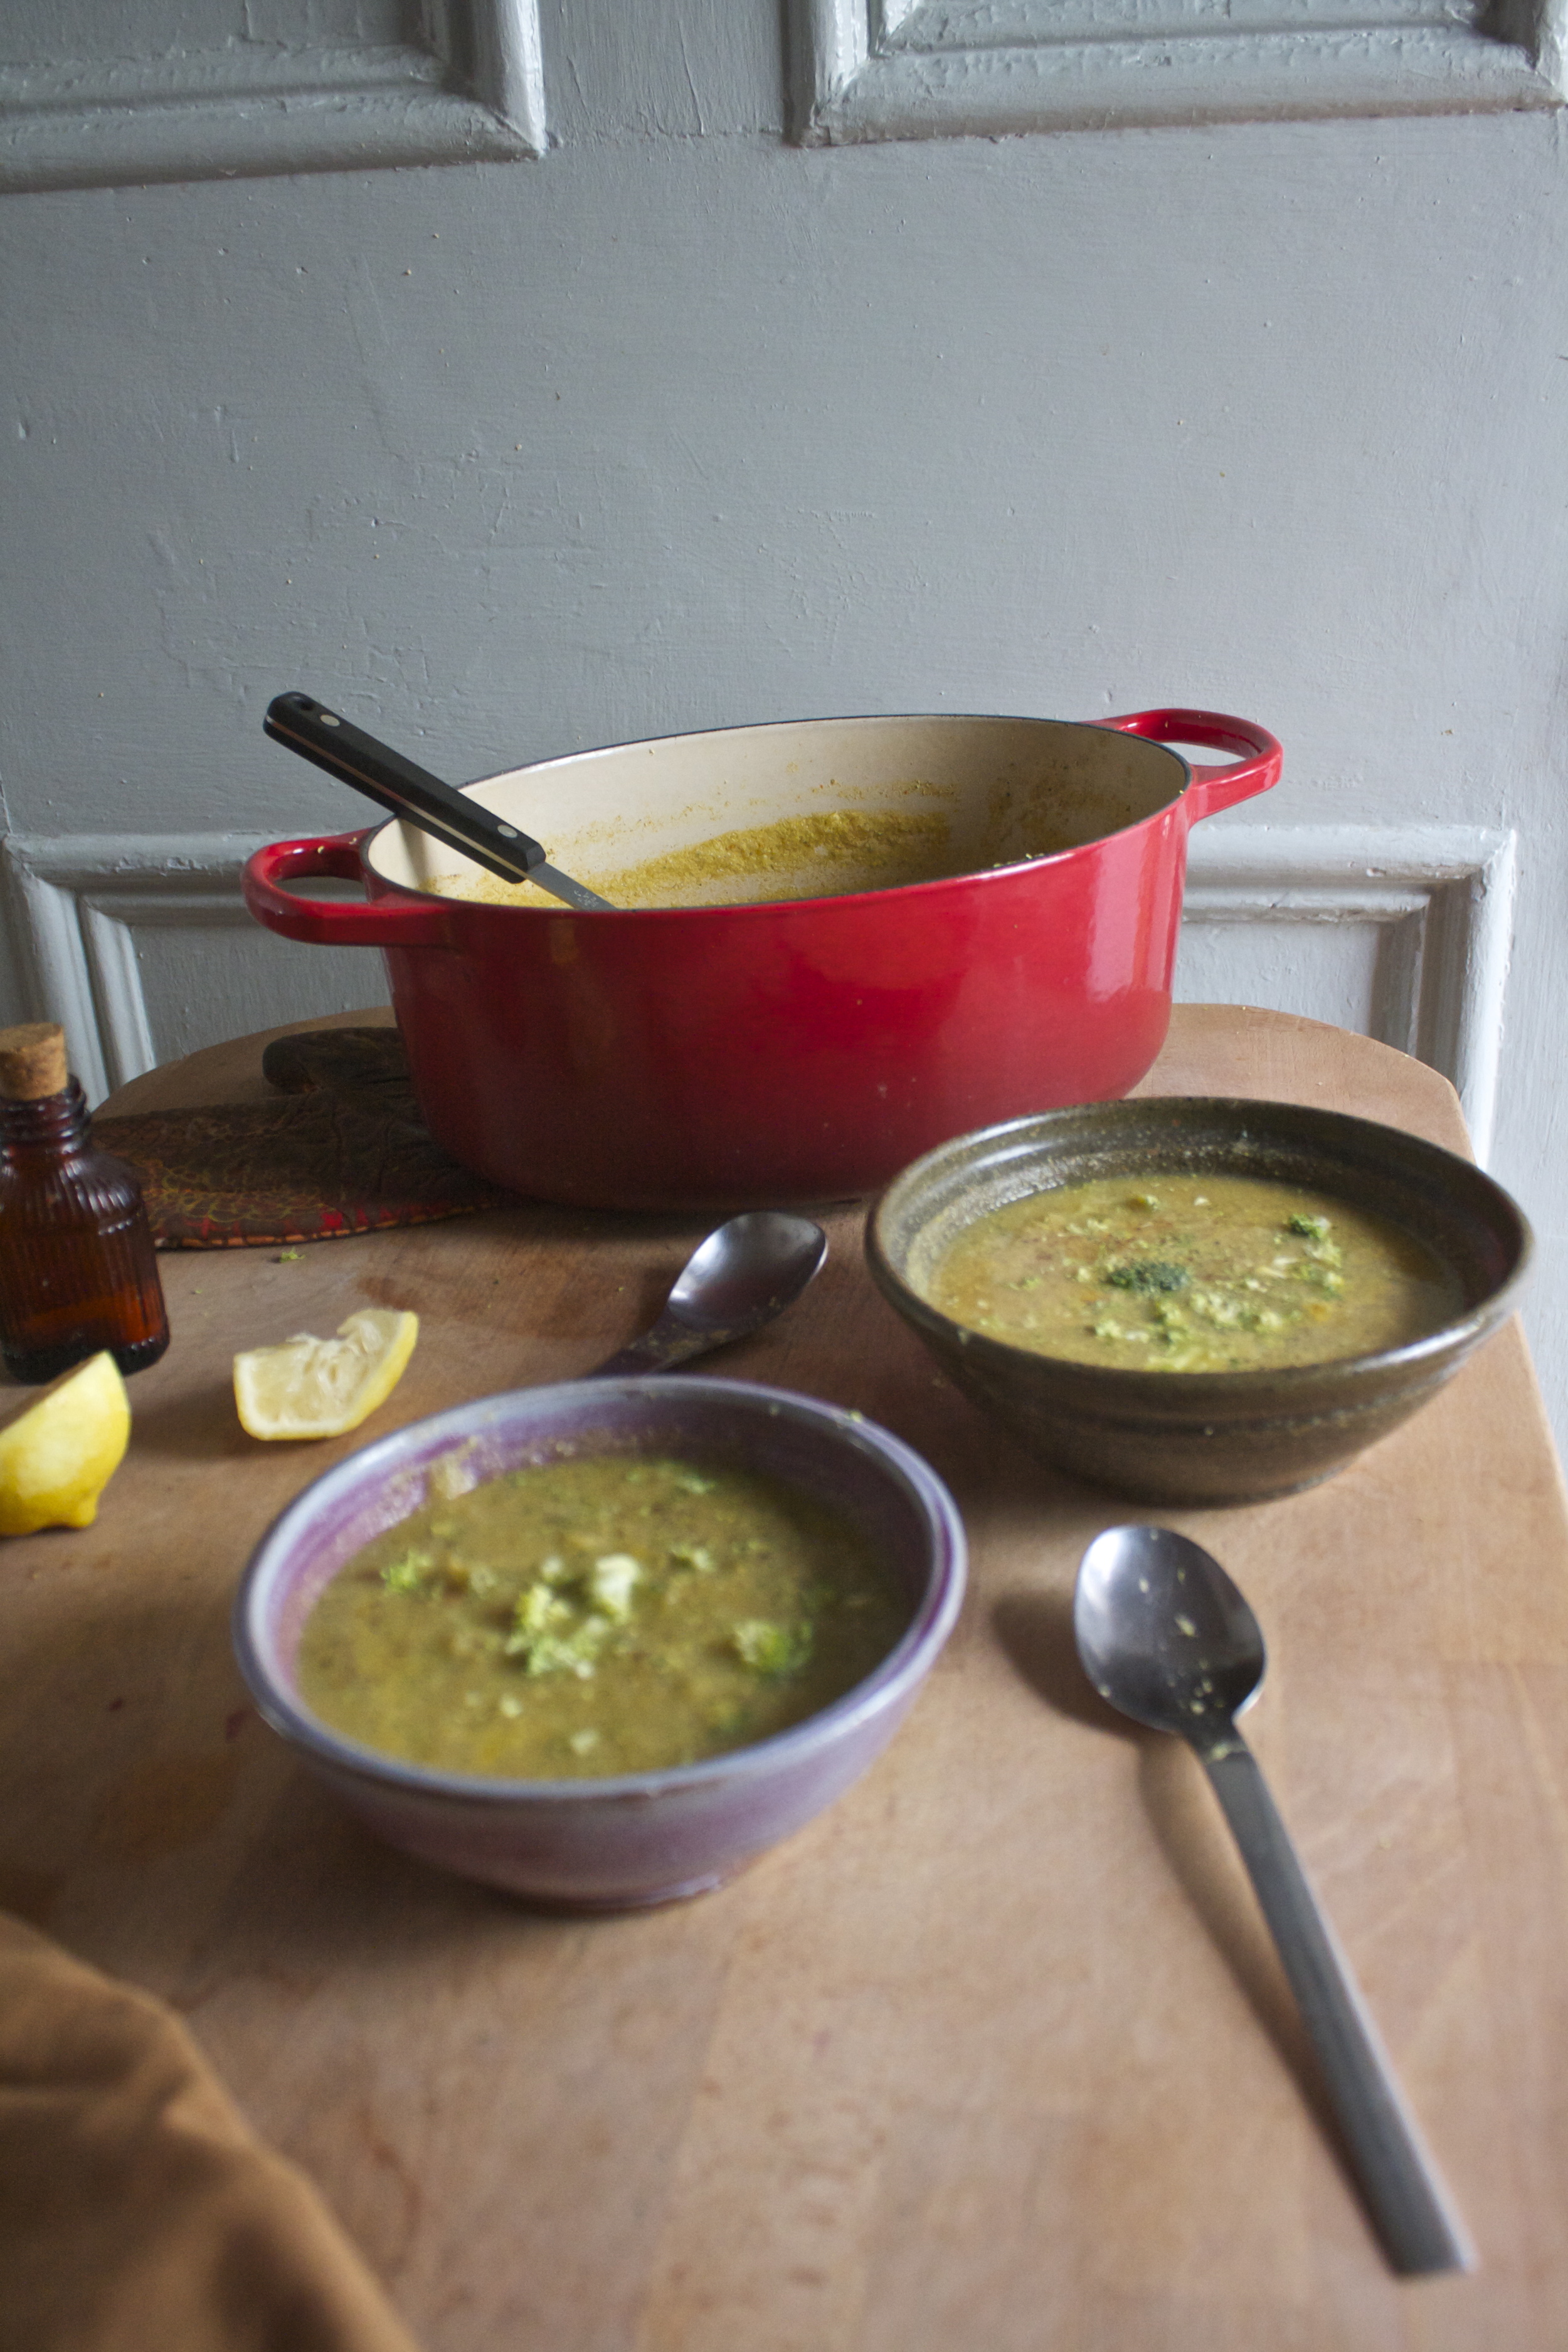
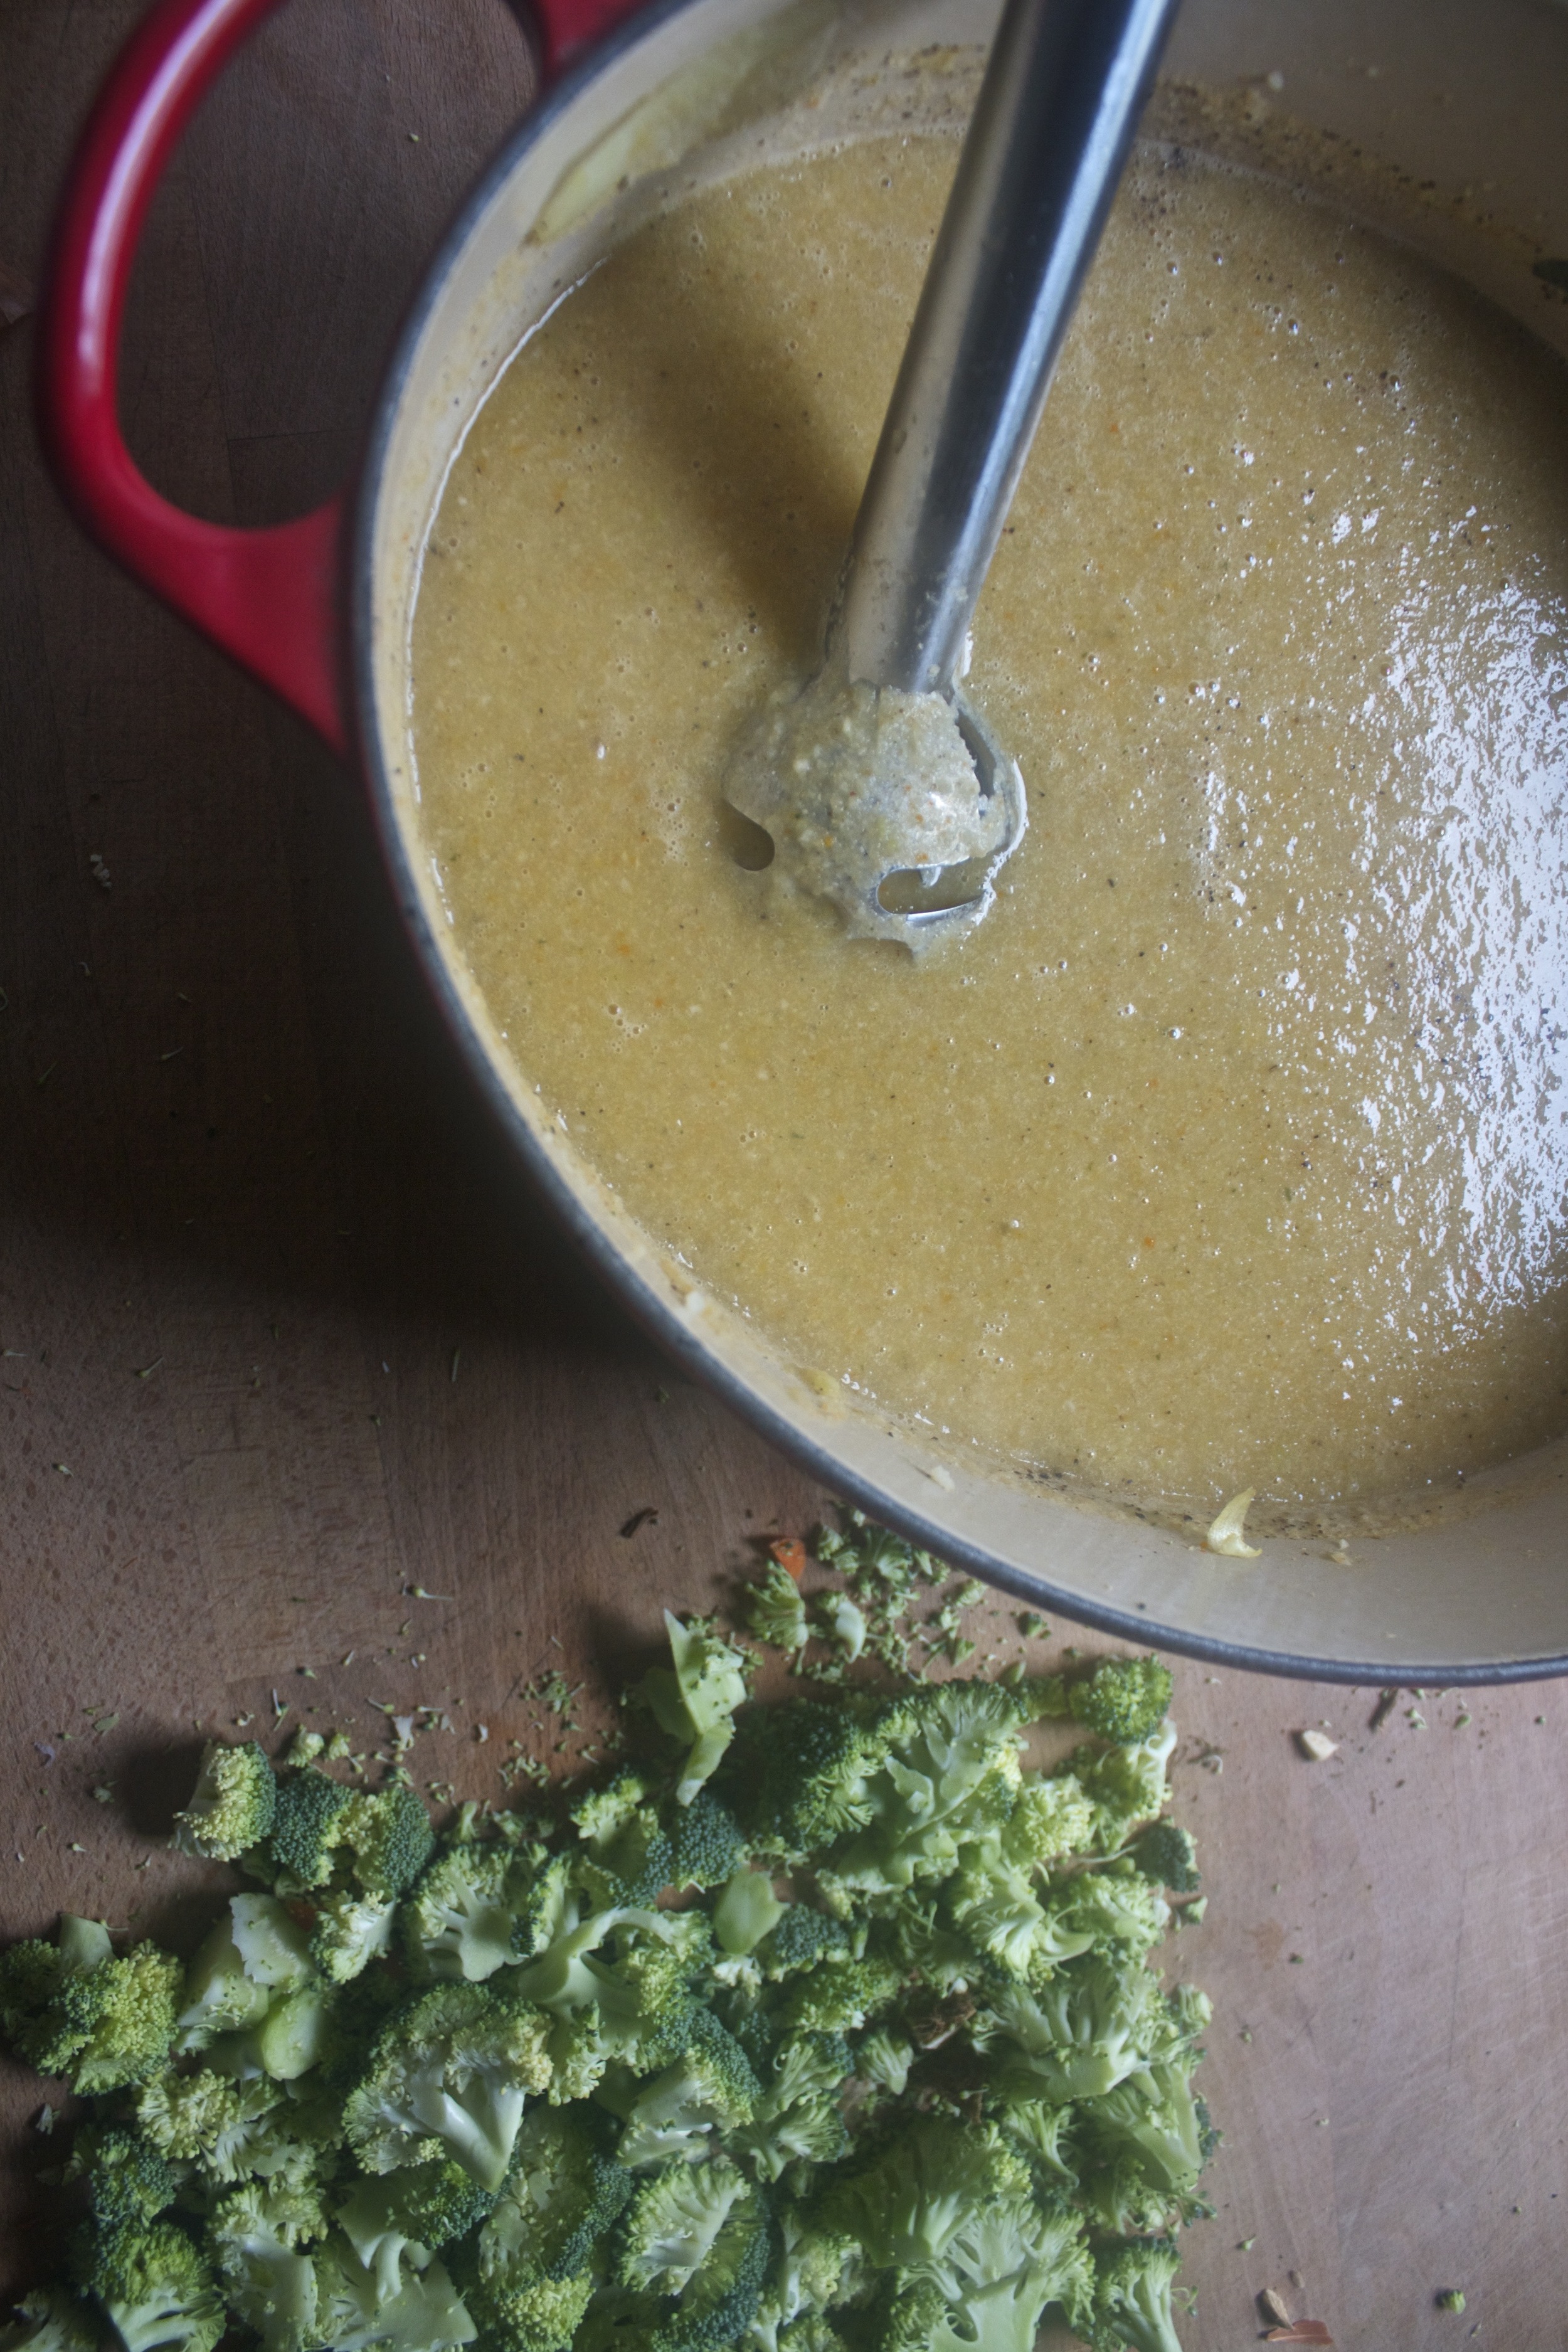
And now you are more then half way to soup at any given time. Just pop a bag out, dump it into a pot or your slow or pressure cooker with a liquid of your choice (water, stock, crashed tomatoes), toss in whatever spices you are feeling, maybe add some lentils or beans, and voila. You are souping.

Is souping a word? Well it is now.

Souping. verb The act of making and or eating soup.

-C

In soup Tags Freezer Soup Bags, summer, freezer, produce, soup, easy, meal prep, dinner
Comment

Cashew Creamed Kale with Pomegranate

November 17, 2015 Colleen Stem
IMG_3668.jpg
IMG_3772.jpg

  I use to suck the juice out of the seeds (they are actually called arils) of the pomegranate and spit out the actual seeds... I thought that the seeds were poisonous. (I blame my sister for this .She is the one that told me that).  And it turns out that it is an actual thing. That other people think that the seeds are not edible, so I guess don’t feel so duped. But I leaned. The seeds, they are very much edible, and very much tasty. I love biting into a pomegranate seed, letting the juice flood my mouth, followed by a nice little crunch from the seed inside, just like little crunchy red jewels. And the method of removing the seeds just makes them that much better. When you have to whack a fruit for it's edible parts, it got to be good. And to make this clear…. to all the people out there that thick the seeds are poison… the seeds are NOT POISION. In fact, they are quite good for you.

Now that that has been established, we can get to eating these little pearls the right way.  And being all holiday and jolly lala, I was thinking of some classic side dishes that are typical around this time.  Creamed spinach came to mind, but that just seemed a little boring. That’s where the pomegranate comes in.  You add pomegranate to anything and it’s not boring anymore. Also I switched out the creamed part and replaced it with cashew cream, and spinach with kale… cause that’s what I do. And the results are fantastic! Sweet, creamy, crunchy, earthy... All the best flavors. And even though I ate most of it hot, it’s definitely a side that moves from hot to cold and still taste super great. Would even make a nice sandwich or maybe add a little bed of grains and you got yourself a nice little lunch.

But the again, you probably wont have any left overs

The stuff. A bunch of kale, some cashews that have been soaking for a little while,  and a pomegrante  (I only used half of one). We also need us some more fresh water, a lemon, a few cloves of garlic and salt and pepper.

Remove the arils (thats what the juicy seeds ae called) by placing half the pomegranate into a bowl and whacking  it with a big wooden spoon. (martha stewart taught me this)

IMG_3684.jpg
IMG_3701.jpg

Strain the soaking cashews and dump them into a blender with the juice of the lemon, the garlic, some fresh water and some salt and pepper.

Turn blender on and blend until a nice smooth consistency

Chop up the kale and place into a really big skillet with a few splashes of water.

IMG_3726.jpg
IMG_3732.jpg

Once the kale has wilted, pour the cashew cream all over it. 

Add in the pomegranate  seeds

And get yourself a fork (bowl is optional( and eat. 

Creamed food never tasted this good!

-C


Cashew Creamed Kale with Pomegranate

makes 3-4 servings 

  • 1 bunch (abut a pound) Kale
  • 1/2 cup cashews that have been soaking in water for a little while
  • 3/4 cup water
  • 1 lemon
  • 2-3 loves garlic
  • 1/2 cup pomegranate seeds (about 1/2 a pomegranate)
  • salt and pepper to taste 

Take your pomegranate , slice in half, and place half seed sside down into a bowl. Take a big wooden spoon or something like it, and whack the outside of the fruit. The seeds will all fall out.. but check for any stuck seeds

Strain cashews from soaking waterand dump into a blender with the juice of the lemon, the garlic, ¾ cups of water, and a pinch or two of salt. Blend until a smooth a creamy cream. If you think the cream is to thick, add in another splash of water

After washing kale, chop it up into smallish pieces. (remove stems if you want.. I don't, I like the stems) Stick the kale into a large skillet with a few splashes of water and a sprinkle of salt and place on the oven on medium high heat. Stir around until kale is wilted and the water has evapotated. Pour on the cashew cream, mix around and top with the pomegranate seeds.

and eat..hot or cold. Its all good.

In Vegetables, Vegan, Savory, sauce, Paleo, holiday, grain free, Gluten Free, Dairy Free Tags thanksgiving, side dishes, vegan, gluten free, paleo, Cashew creamed kale and pomegranate, pomegrante, fresh, clean eating, plant based, meal prep, salad, nuts, simple sides, heathy, protein
Comment

Butternut Mac N' Cheeze

October 29, 2015 Colleen Stem
IMG_2242.jpg
IMG_2207.jpg

Had some littles over for dinner halloween dinner the other night  and I made them some mac n' cheese.

Kinda, cause it wasn't really cheese. Let me explain. 

These particular littles are tough. Getting them to eat things that are not pizza, hot dogs, or some other crap is not always easy.(although they will always eat carrots) So whenever they come over, I try to feed them a healthier version of something that I know that they like,  like tofu dogs or homemade whole wheat pizzas. So this night, I though I would give my vegan mac and cheese and try.  I mean,what kid doesn't like it? But what kind is the question. If you ask them, its got to be boxed Kraft mac and cheese. I knew when I was making it that there was a great chance that I might have to make peanut butter banana sandwiches as well, but whatever These little littles need to stop being such picky crappy eaters and yeah. Even if that means I make them eat what why don't like or that on the ride home I tell them that any pizza that is not home made will probably end up killing them) So I try, and sometimes it works. 

So I made it, no cheese in sight and served it up. The verdict.... The mr, he loved it. My sister (she came too) she was into it as well. One little ate almost an entire bowl, and the other, well he spit it out, but he is more a hot dog guy then a mac and cheese guy so his opinion doesn't count. So to conclude, yes, this is a fantasic mac and cheese that just happened to be cheese less,  full of veggies, and damn tasty!

And serving suggestion DON"T LET THE LITTLE KNOW IT"S NOT REAL CHEESE!!! They don't need to know

To the mac!

The stuff. A small butternut squash, a potato, an onion, and a carrot. Also needed is nutritional yeast (the cheeze), garlic powder, olive oil, salt and pepper, and some water. And pasta.. don't forget the pasta. 

IMG_2139.jpg
IMG_2143.jpg

Start with the onion and carrot in a big pot with some oil. Stick that on the stove and turn on the heat, and when that's going, chop up the butternut sqauh and the potato and toss that into the pot too. Let the stuff cook for just a few minutes.

Pour in water (enough o submerge all the veggies)  and add in the garlic powder and some salt and pepper. Bring the water to a boil then turn heat down to medium and stick a lid on the pot.

IMG_2190.jpg
IMG_2196.jpg

Now is a good time to boil up your pasta situation (cook it the way the package says too)

When it's done, strain it. And if it happens that it is done a little before the sauce, it's cool, just drizzle it with a little oil so that the noodles don't all stick together and set aside.

Back to the sauce. Once the pot of veggies is all tender and falling apart, take it off the stove.

And blend the crap out of it with your blending method of choice (a hand o a regular blender)

Oh, and mix in the nutrioanl yeast (can add it in at the blending stage… I just forgot too) and season with any more salt and pepper if needed.

Grap the cooked noodles, dump them into the sauce and give a good mix.

golden deliciousness!

Scoop into food eating vessels,(handled coffee mugs are great for the littles.. and cute) Maybe sprinkle on some chopped green stuff(my people enjoyed the addition of chopped up kale) and serve right away!

Now you can eat all the mac n cheeze. 

Happy Thursday!

-C


Butternut Mac N' Cheeze

Serve 6 or so people

  • 1 lb macaroni noodles (any kind you like. vegan, gluten free, whole wheat) 
  • half a small butternut squash (about 2 1/2 ish cups chopped)
  • 1 medium white potato
  • 1 medium yellow onion
  • 1 large carrot
  • 1/3 cup nutritional yeast
  • 1 tablespoon garlic powder
  • salt and pepper to taste
  • olive oil
  • water

Chop up the onion and the carrot and stick into a large heavy bottom pot with a splash or two of olive oil and stick on the stove on medium heat. While that's  going on, chop up the butternut and potato into reasonable small chunks and toss that into the pot with the other stuff. Add in the garlic powder, season well with salt and pepper, and add enough water to full submerge the contents of the pot. Bring the water to a boil then reduce heat to medium and stick a cover on the pot.

While the veggies are boiling, boil the pasta up, slightly al denta (follow what the pasta people on the package tells you to do)

Once all the veggies in the pot are super tender, even falling apart (about 20 minutes) remove pot from heat and using your blending method of choice (hand or normal blender)  blend everything together until smooth and creamy and then add in the nutritional yeast. Taste and if you think it needs it, add more salt and  pepper. If you find that the sauce seems to thick, add in a splash or two of water.. to thin, stick back on stove and cook long to reduce. 

So you got you cooked pasta and you sauce. Mix it all together. And wa la… Mac N' Cheeze

serve right away and eat it all. But any left overs can be refrigerated. Tastes great  the next day warmed in a skillet with a little oil. 

In Vegetables, Vegan, Savory, sauce, recipes, Gluten Free, Dairy Free Tags Butternut Mac n' cheeze, mac and cheese, macaroni, pasta, vegan dinner, dinner, fake cheese, healthy, clean eating, meal prep, plant based, kid friendly, fast and easy, vegetarian, healthy comfort food, comfort food, butternut, winter squash
Comment

Creamy Broccoli and Celeriac Soup

October 22, 2015 Colleen Stem
IMG_1822.jpg
IMG_1798.jpg

Two days ago,  I was doing my least favoritie thing on my computer (bills) when the computer started to act a little funny and throwing me off the internet and just vein stupid. So what did I do? Well, like every other electronic that I have ever had issues with, I just turned it off and restarted the thing. When I turned it back on, already in a bad mood (stupid bills), I was greeted to a blank blue background where one lived a really cute picture of the mr and the pup. "Weird" was the thought that passed through my mind but didn't think to much about it, just that I needed a new photo. So I went to my iPhoto library to pick out a new picture and what did I find? NOTHING! Not a single f*king picture. My entire photo library from the past 5 months...GONE!! Yup. I totally freaked out. I have no clue what happened. I searched and looked up all sorts of things, but found no help. I even brought the computer to my sisters, who told me that I should have no problem getting the stuff back, I just need to  time machine you computer. But guess what, that little nifty function was turned off on my commuter. WHAT THE F!(I have sense turned it on) Long story shot.. the picture, they be gone.. and I am not willing to fork over hundreds of dollars to see if someone in a fancy blue shirt  might be able to get them back. 

Just going to take it as a lesson learned to BACK UP YOUR COMPUTER!!!!!!  

Agh. So that happened, but so did this soup. These pictures are  the last pictures that I had on my camera sim card that I accidentally  didn't remove the last time I loaded up my pictures. After the afternoon and evening of franticly trying to restore my pictures, it was nice little surprise to find one thing left.  I think it was meant to be, to have to share this soup with the world cause this soup be banging!  Made all creamy and nice with one of my favorite veggies,  celeriac and broccoli , and a touch of cheeeniess from a little nutritional yeast. A spin on the classic cream of broccoli. A soup so good I ate 3 bowls in one sitting (ok, so they were small bowls, but still) And the last of the photos from before that day that I will recur to now as "Stupid Fucking Computer Day, or SFCD" 

Anyway, a fantastic soup, a shitty day. But you know what? It could have been a lot worse. I could have totally destroyed everything on my computer or even broke the thing. Sure, I lost a bunch of pictures, but I am ok with it now. I am just taking it like I have a clean slate.  And now I am going to be way better about backing shit up.  I will think about it everytime I make soup. Maybe it will be my new thing, back computer up  while I make soup.

The stuff. A big head of broccoli, with a big stalk, some super knobby celeriac, an onion and a couple carrots. Also gonna need a lemon, some garlic and garlic powder, nutritional yeast, salt and pepper and a little olive oil. 

Start by dicing up the carrot, onion, and the garlic and toss it into a large heavy bottom bot with a drizzle of olive oil. Stick that pot on the stove on medium heat and let those veggies get a kick start in cooking. And now is a good time to dice up the celeriac (I do not peel it, but you can if you want)  and cut the broccoli florets off of the stalk and dice up the stalk.

Dump the stalk and celeratic into the pot as week, giving it a sprinkle of salt and a splash of water. LEt everything cook for a fe wore minutes, or until the stuff starts to brown and the water is evaporated.

Now pouter in water.. enough to full submerge the veggie goodness. SPrinlle the whole pot with a bit more salt and pepper and add in the garlic pepper. Bring the pot to a boil, then turn heat down to low, stick a litd on it, and list simmer for about 20-25 minutes.

And the veggies are all super nice and tender 

IMG_1729.jpg
IMG_1734.jpg

Now grab your hand blender… and do what needs to be done. Turn the burner off and  blend until smooth and creamy. If you need to, add in more water, as much as you like. The more water, the thinner your soup.( IF you add to much, just simmer soup longer and let it cook out) Now chop chop chop the broccoli florets into little pieces and dump them into the creamy goodess. Turn the burner back on to medium heat.

Add in the nutritional yeast and the zest of the lemon and and any more salt sand pepper that you like, give it a good stir, and let cook for a few more minutes or unit the little pieces of broccoli are nice and tender. 

And right when you are ready to serve, add in the juice of the lemon.. or just serve each bowl with a wedge. Garnish with pretty green chopped up broccoli if you like.. some cracked pepper or whatever. 

And don't forget a spoon !

Souping.. that what I do.

Now go back up your computer!

Have a great day!

-C


Creamy Broccoli and Celeriac Soup 

Makes enough for 4-5 people

  • 2 celeriac bulbs (softball-ish sized)
  • 1 large head of broccoli with a big stalk
  • 1 large yellow onion
  • 2 carrots
  • 4-5 cloves of garlic
  • 2 teaspoons garlic powder (optional..I like a lot of garlic)
  • 1/4 cup nutritional yeast
  • 1 lemon… zest and juice
  • olive oil
  • salt and pepper to taste
  • 4-5 cups water

Grab yourself a big heavy bottom pot and drizzle it with a little olive oil. Chop up the carrot, onion and garlic and toss that stuff  into the pot.  Give it a stir and let cook for a few minutes on medium heat.. Meanwhile, chop up the celeriac into small chiunks and  chop the florets from the broccoli, set floteets aside ,and dice up the remaining parts and stalk of the broccoli.  Toss the chopped broccoli stalk and the chop celeriac into the pot with the onions and carrots , give the pot a big splash of water, a sprinkle of salt and give it a good stir. Let the veggies cook for a few more minutes or until the water has completely evaporated. 

Now add in  water.. enough to fully submerge all the veggies. Add in a little more salt, pepper and the garlic powder, give it all a good stir, bring to a boil, then reduce heart to medium low and cover the pot with a lid. Let veggies simmer for about 20- 25 minutes or until the veggie are nice and tender. 

Turn heat off and grab the emulsifying blender and blend until smooth (can use a normal blender) Once smooth, chop  the broccoli florets into little pieces and add to the pot , along with the nutritional yeast, the zest of the lemon,  and any more salt and pepper that you would like.  Turn heat back on to medium low and continue to cook until the little piece of broccoli are tender.Once ready to serve, add in the juice of the lemon.

Serve in bowls, sprinkle with broccoli bits, pepper or whatever, and eat you heart out. (I ate 3 bowls in one sitting)


In Dairy Free, Vegetables, Vegan, soup, Savory, recipes, Gluten Free Tags creamy broccoli and celeriac soup, souo, vegan, gluten free, dairy free, healthy, clean eating, plant based, meal prep
Comment

Raw Oatmeal Coconut Chocolate Nut Cookies

August 7, 2015 Colleen Stem
IMG_4397.jpg
IMG_4402.jpg

FRIDAY YEAH YEAH!!!!

And for your Friday, I made these awesome little raw/ vegan/ gluten free cookies. 

Now wait a minute. Don't let all the labels of what is not in these cookies scare you away. Just focus on all the stuff that these cookies are made of. Almonds, Cashews, Coconut, Cocoa, Oatmeal. They are cookies made with lots of good yummy stuff that just happened to be enjoyed by those with specific food diets as well as those who eat anything. A cookie for all!  See, don't they sound excellent? Yes, yes they do. And they are good. So, so, good. Even the mr. is into them. And he is far from being raw/vegan/ gluten free. 

And because these cookies are made with all sorts of good for you stuff (lots of proteins, good healthy fats, and complex carbs) you can pretty much feel zero percent guilt eating them. They a are a no joke, healthy, energy packed cookies of goodness. A fantastic way to start the morning, eat with lunch, as dessert, post work out, or eat as a late night snack. (Just don't eat them all at once) 

Now go for it!

The raw stuff. A cup of old fashion rolled oat that have been soaking in water for about an hour.  Almonds(which I spent 20 minutes deshelling) cashews, dehydrated coconut flakes, some cocoa powder and a few medjool date. If your nuts are unsalted, add a pinch of salt too. 

Dump everything into  a food processor. BUT WAIT! Make sure to remove the pits from the dates)I have broken a blade in the past form a date pit)

Blend unit combined and a kind of rough dough is formed. It will be a little sticky. If it;s to sticky to handle, place into the fridge for a few minutes to set up.

Now take blobs of mixture and roll into balls

And you could totally leave them as balls… you can even play with your balls….

But I think they look nicer squished flat and topped with pieces of nuts and coconut. They look almost fancy, if I do say so myself.

Now have yourself a cookie, and place the rest in the fridge (they get harder and, if you can imagine, taste even better after a few hours of cold)

Freak Yeah FRIDAY! Do fu stuff!

-C


Raw Oatmeal Chocolate Nut Cookies

Makes 15 normal sized cookies (you can make more or less, depending on the ball size)

  • 1 cups oat fashion oats soaked in 1 cup water for at least an hour (use gluten free oats if needed)
  • 1/2 cup raw almonds
  • 1/2 cup raw cashews
  • 5-6 medjool dates
  • 1/2 cup dehydrated flaked coconut
  • 1/4 cup cocoa powder
  • a pinch of salt (if your nuts are unsalted)

Add all the ingredients into a food processer and blend until the mixer forms a  cohesive dough. It;s going to be a tad sticky, but if it seems to sticky to handle, refrigerate for a little bit so it's easier to handle. (I have no problem handling right away)

Scoop  and roll into balls and either leave them as is or squish them flat. Sprinkle with chopped nuts and coconut

Eat one or two right away, then stick the rest in fridge.

A ok to eat as breakfast, with lunch, at dinner, as as snack, a post workout protein, or when sitting on the couch and watching TV.

Tags Raw, vegan, gluten free, healthy, sugar free, chocolate nut cookie, cookie, protein, breakfast cookie, clean eating, fast, no bake, simple, meal prep, dessert, coconut
Comment
Older Posts →
 

https://thelovelycrazy.squarespace.com/config#/|/about/

Me. Food Maker.Food eater. Woo HOO!

STEM+NODE  SMALL BATCH AND ONE OF A KIND POTTERY

stem+node ceramics


____________________

Subscribe

GET NEW POSTS IN YO EMAIL

You are AWESOME!!!


@thelovelycrazy 2014-2021