Made from necessity, a seat near the door to sit and remove shoes, store winter stuff and doesn't look like I threw a bunch of milk crates together..I threw them together and added a nice blanket, I'm classy like that. I do love a good milk crate…there has always been something so satisfying to me about a free plastic receptacle that has a world of uses. These three crates and some scrap wood have changed my entire living situation. The entryway of our 200 sq ft loft is now super functional, looks fantastic, and makes me happy. .All from a the scrape pile.
 It's not what you think…we have a barn that is pretty much dedicated to scrap wood and some other building material that has come from buildings we have worked on. This picture does not do our scrap wood(and junk) pile any justice. It is pretty crazy, and drives me nuts. I don't know how many times I have threatened a 30 yard dumpster, but you know what? When Nick or I are in need of some wood, we always find ourselves rummaging through the pile and can almost always find a piece of what we are looking for. The pile somehow always redeems itself, for that reason it still lives on(for now). Being that you as a sane person, you probably don't have a barn full of scrap wood(and junk), so what you will need for this project is..
Materials
- Two 39.5 X13 inches pieces of 3/4 inch ply wood(top and bottom)
- Two pieces 13X13 of 3/4 inch plywood(sides)
- Four 10 inch 2x4 (Legs)
- about twenty-five 2 inch finishing screws
- 3 milk crates(you can do 2 or 4…just have to measure out for wood)
Tools
- Drill
- circular saw
- measuring tape
- t square or a long straight edge.
- pencil
Note: If you are not comfortable buying a full sheet of ply wood and cutting it down or you don't own necessary tools, go to Home Depot or Lowes and have them cut the pieces to size for you.. Also, I have never really gone through a project step by step so if you are making this and somethings seems off or you have any questions, totally email or comment to me… but I will try my best to make each step clear…..
 Three milk crates..What I found was that there are some milk crates that are not the same size so make sure that you have three that are the same. These crates are 13x13x11.
 Measure and cut ply wood. The top and a bottom are the same measurements…Here comes some math…. three milk crates that are 13 inches long = 39 inches. One crate deep is 13 inches. . Cut two pieces 39.5 inches by 13 inches. (The extra 1/2 inch is so the crates can move in and out easier)
 Now measure and cut sides. Two pieces at 13x13.The crates are 11 inches high, but you need to add the extra 1.5 inches because of the thickness of the plywood. If your milk crates are a different height, use that measurement plus 1.5 inches.
If you haven't heard this saying before, it will change your life…Measure TWICE!! cut once. Dont get overly cocky, cause even the seasoned wood worker screws up measurements.. I screw up sometimes so the saying is not lost on me.


Once you have all four pieces cut, its time to assemble. Having an extra hand will help a lot, but you can do this on your own.
Screw the side pieces into the top and bottom. We stood the top and bottom vertically and place and lined up the side. Now sink four screws into both sides to secure to the other pieces. When sinking the screws, make sure you are drilling straight down so your drew doesn't come out of the side of the wood. If that happens, just remove and start again, no biggy. Once you have done one size, flip and screw in the other.
 I caught that piece of wood he is throwing at me. Ok, not really, but I could have. Here Nick is cutting four 10 inch pieces of 2x4 for the legs. We decided on 10 inch legs because we wanted a bench that was a little taller than the average chair, which is about 18 inches floor to seat. If you wanted to make the legs shorter or taller, by all means, I just wouldn't go to much taller or you might not be able to sit conformably on it.
 After you have all your legs cut, mark out where you want to place them. We did a one inch recessed from the front and the side…but do whatever looks best to you. Mark where the legs go and place two screws into inch leg, screwing from the inside of the bench.
  And thats it… ..now you have the frame. Take a minute here to admire your handy wood working skills. If you are not into the raw wood look, this would be the time to paint it.
 With the crates inserted…Doesn't it look magnificent! I choose these 3 crates for the colors and the patterns..I wish I has a grey crate that fit. That would have looked awesome.
 Test one……….the crate slides out perfectly and my mittens fit!!
 Now for the big test……....and it works!! My butt safely seated. My feet touch the ground and I can bend over and tie my shows… can't get any better…
 But it did. The addition of a folded blanket as a cushion. I was going to make a cushion but found a really pretty blanket at the second-hand store that was perfect. It was 2 bucks and is actually way more practical than a cushion. I can wash this blanket, a hand-made cushion, I probably wouldn't want to mess with that, plus a piece of foam alone cost like 25 bucks. The blanket was meant to be.
A great success.. This bench is really great, I definitely recommend it to anyone and everyone.. It's the perfect place to sit and remove wet shoes, store all of our hats, mittens and canvas shopping bags and it just looks cool. It was really simple to make, cheap, and took very little time. You could even make two, one for you and one for a friend(think holiday gift)
A perfect weekend project!! DO IT!!!! and if you make one, please, send a pic on over, I would love to see it!
Have Fun!!!!!


 Here is the list of what you will need to make the exact shelf with the same measurements that we used…but feel free to use and adjust the measurements to your want or need.
 Take one of the 17 1/2" pieces and with a straight edge, draw two lines form opposite corners to find dead center. Measure 8" from center on each line, that is where the legs are going to be placed. Working with one leg at a time, add a smear of wood glue to each leg as you are about to screw it down. Place leg on mark and sink a screw about an inch up from the inside of the leg, screwing at a slight angle (see photo)..
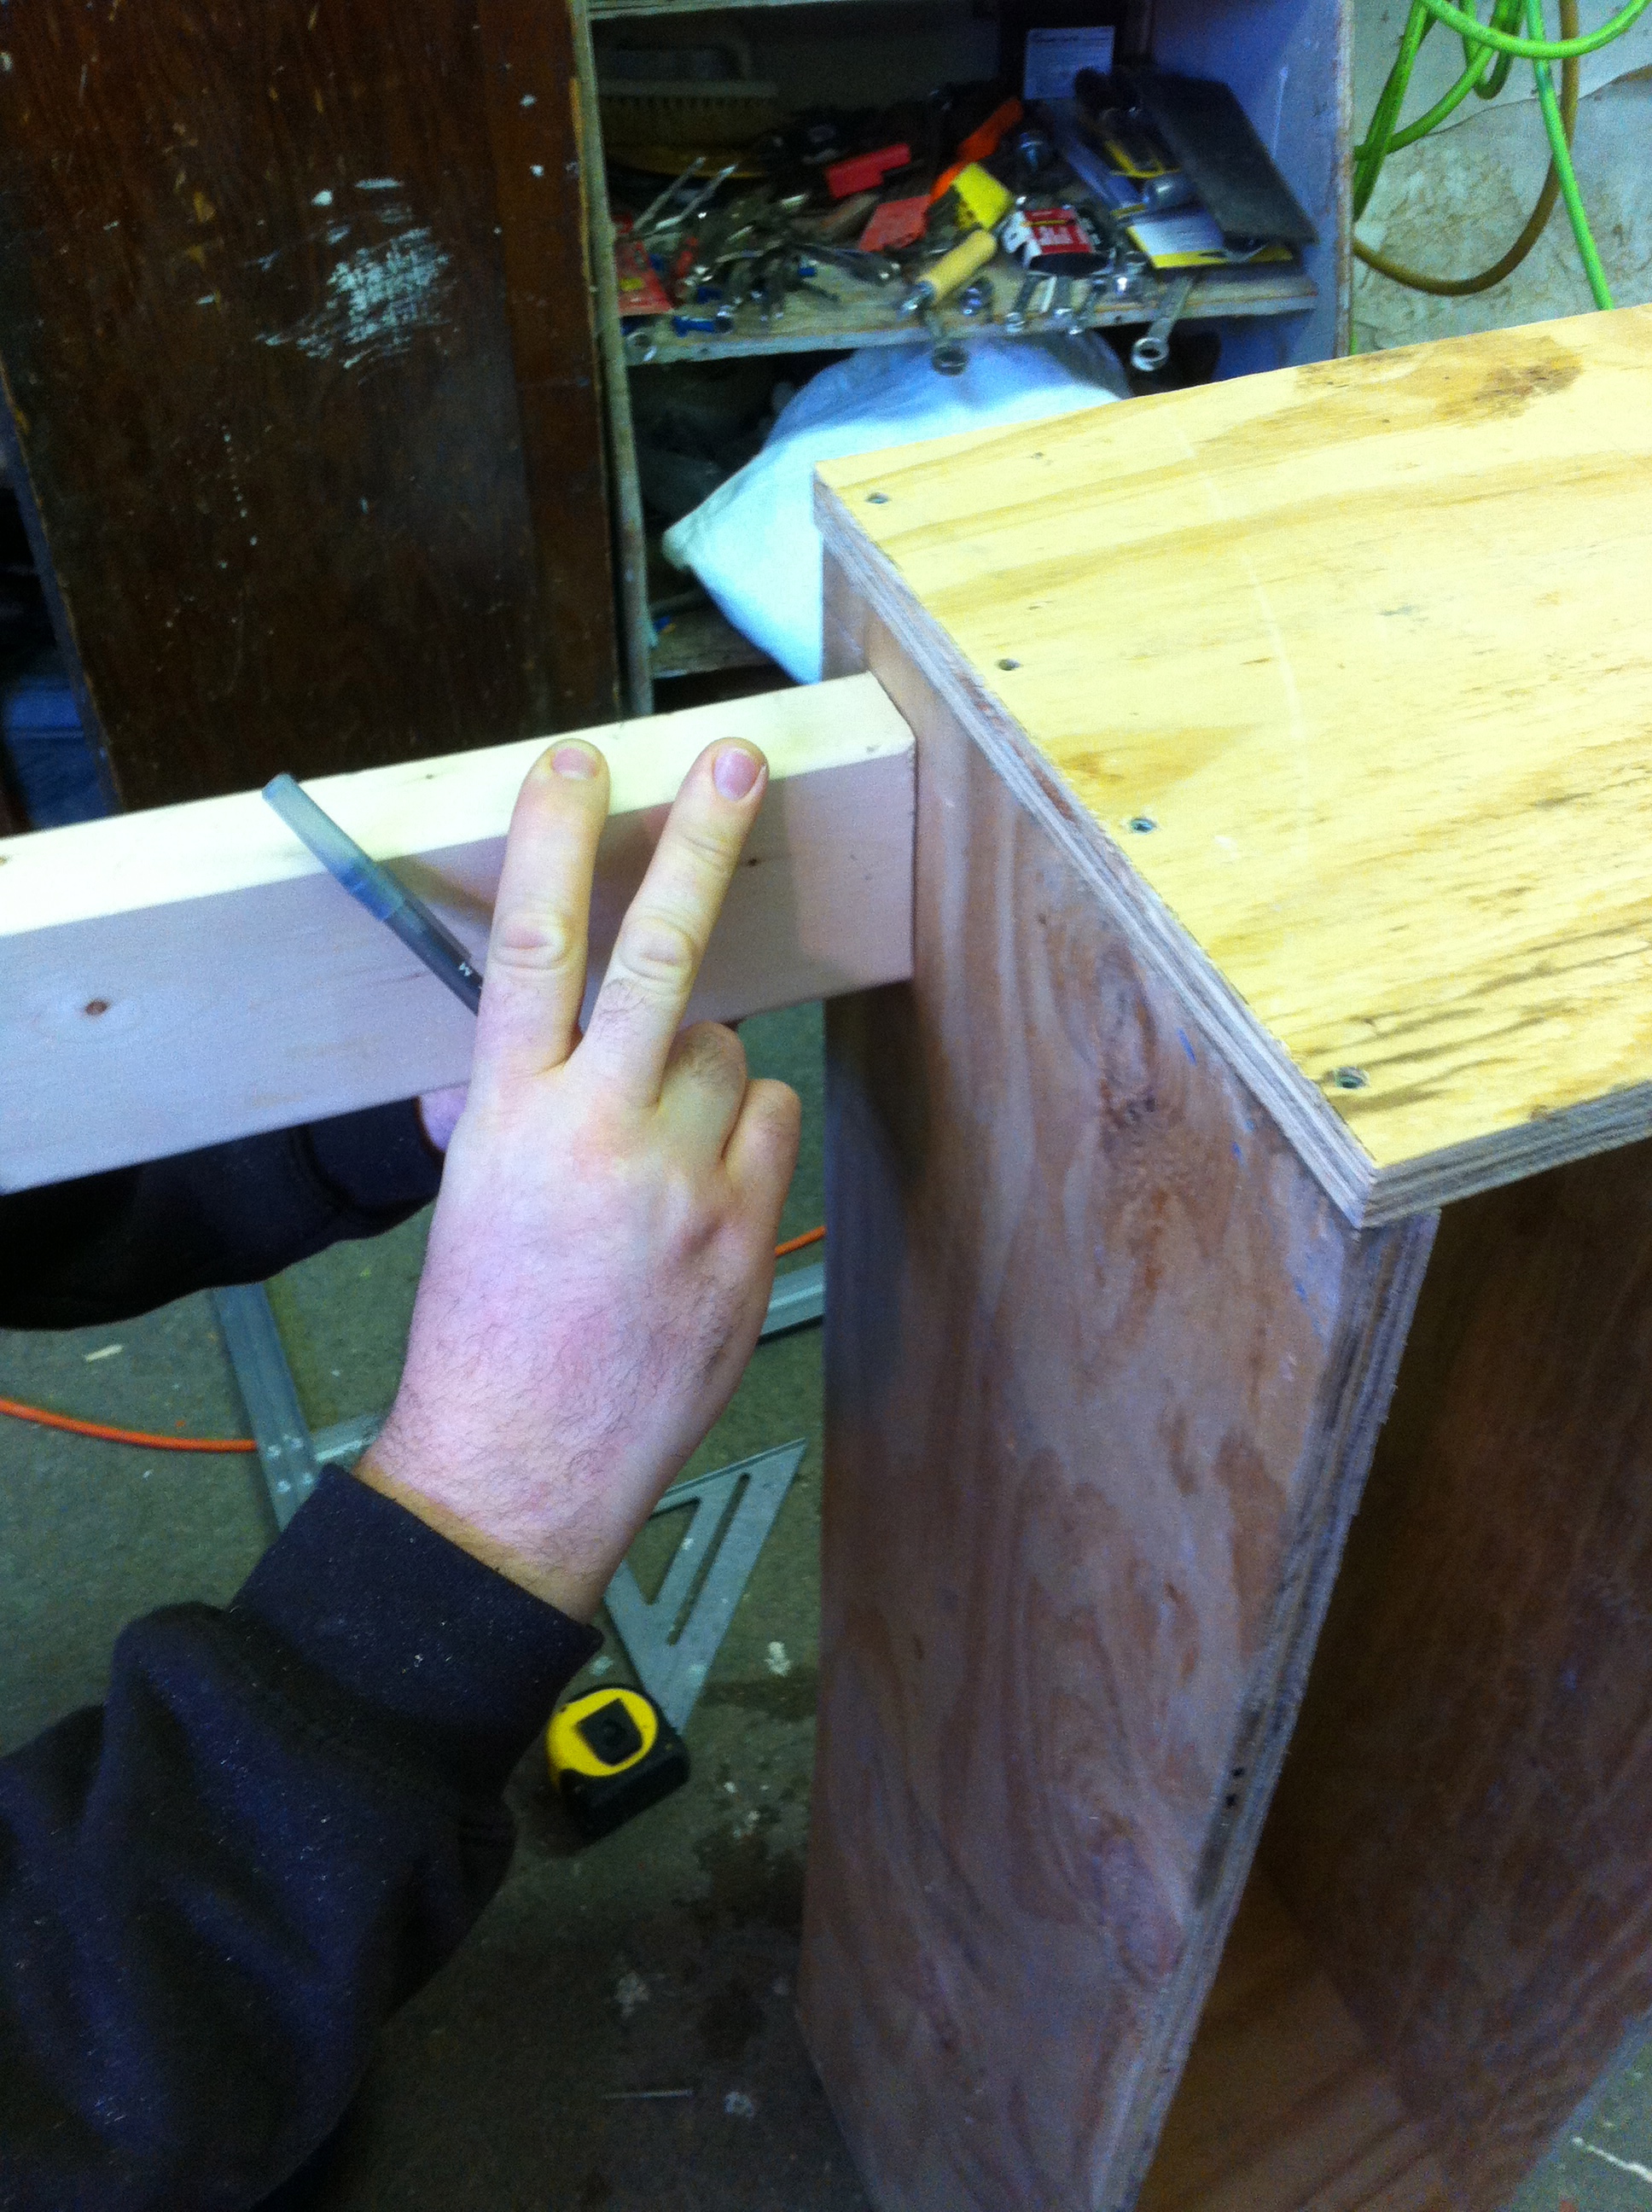
 Now grab the top piece (17 1/2 ") piece and the two sides pieces (25 1/2"). Add a bit of wood glue to the side ends and line up top piece with the sides. Sink 2 screws into each side. If you have another person helping, have them hold the pieces for you while you screw the top into the sides.. if not, use the bottom to rest a side against (like in picture).
  Now flip over and screw the bottom piece into the sides……
 Place shelf on the lines (The wood should fit in tight, you might even have to bang it a bit to get it into place….but you want it to fit nice and snug.) Now screw the shelf…two screws on each side.