• stem+node ceramics
  • HOME
  • Food Recipes
  • About
  • Contact
Menu

The Lovely Crazy

Street Address
City, State, Zip
Phone Number

Your Custom Text Here

The Lovely Crazy

  • stem+node ceramics
  • HOME
  • Food Recipes
  • About
  • Contact

Lemon Sugar Cookies

December 16, 2017 Colleen Stem
IMG_8860.jpg
IMG_8896 2.jpg

Right now it is all about the holiday cookies. There are the chocolate ones, the filled ones, the nutty ones and all at the other ones, but really, what is the holiday without a good basic sugar cookie covered in way to much icing and sprinkles? Not right it what it is.

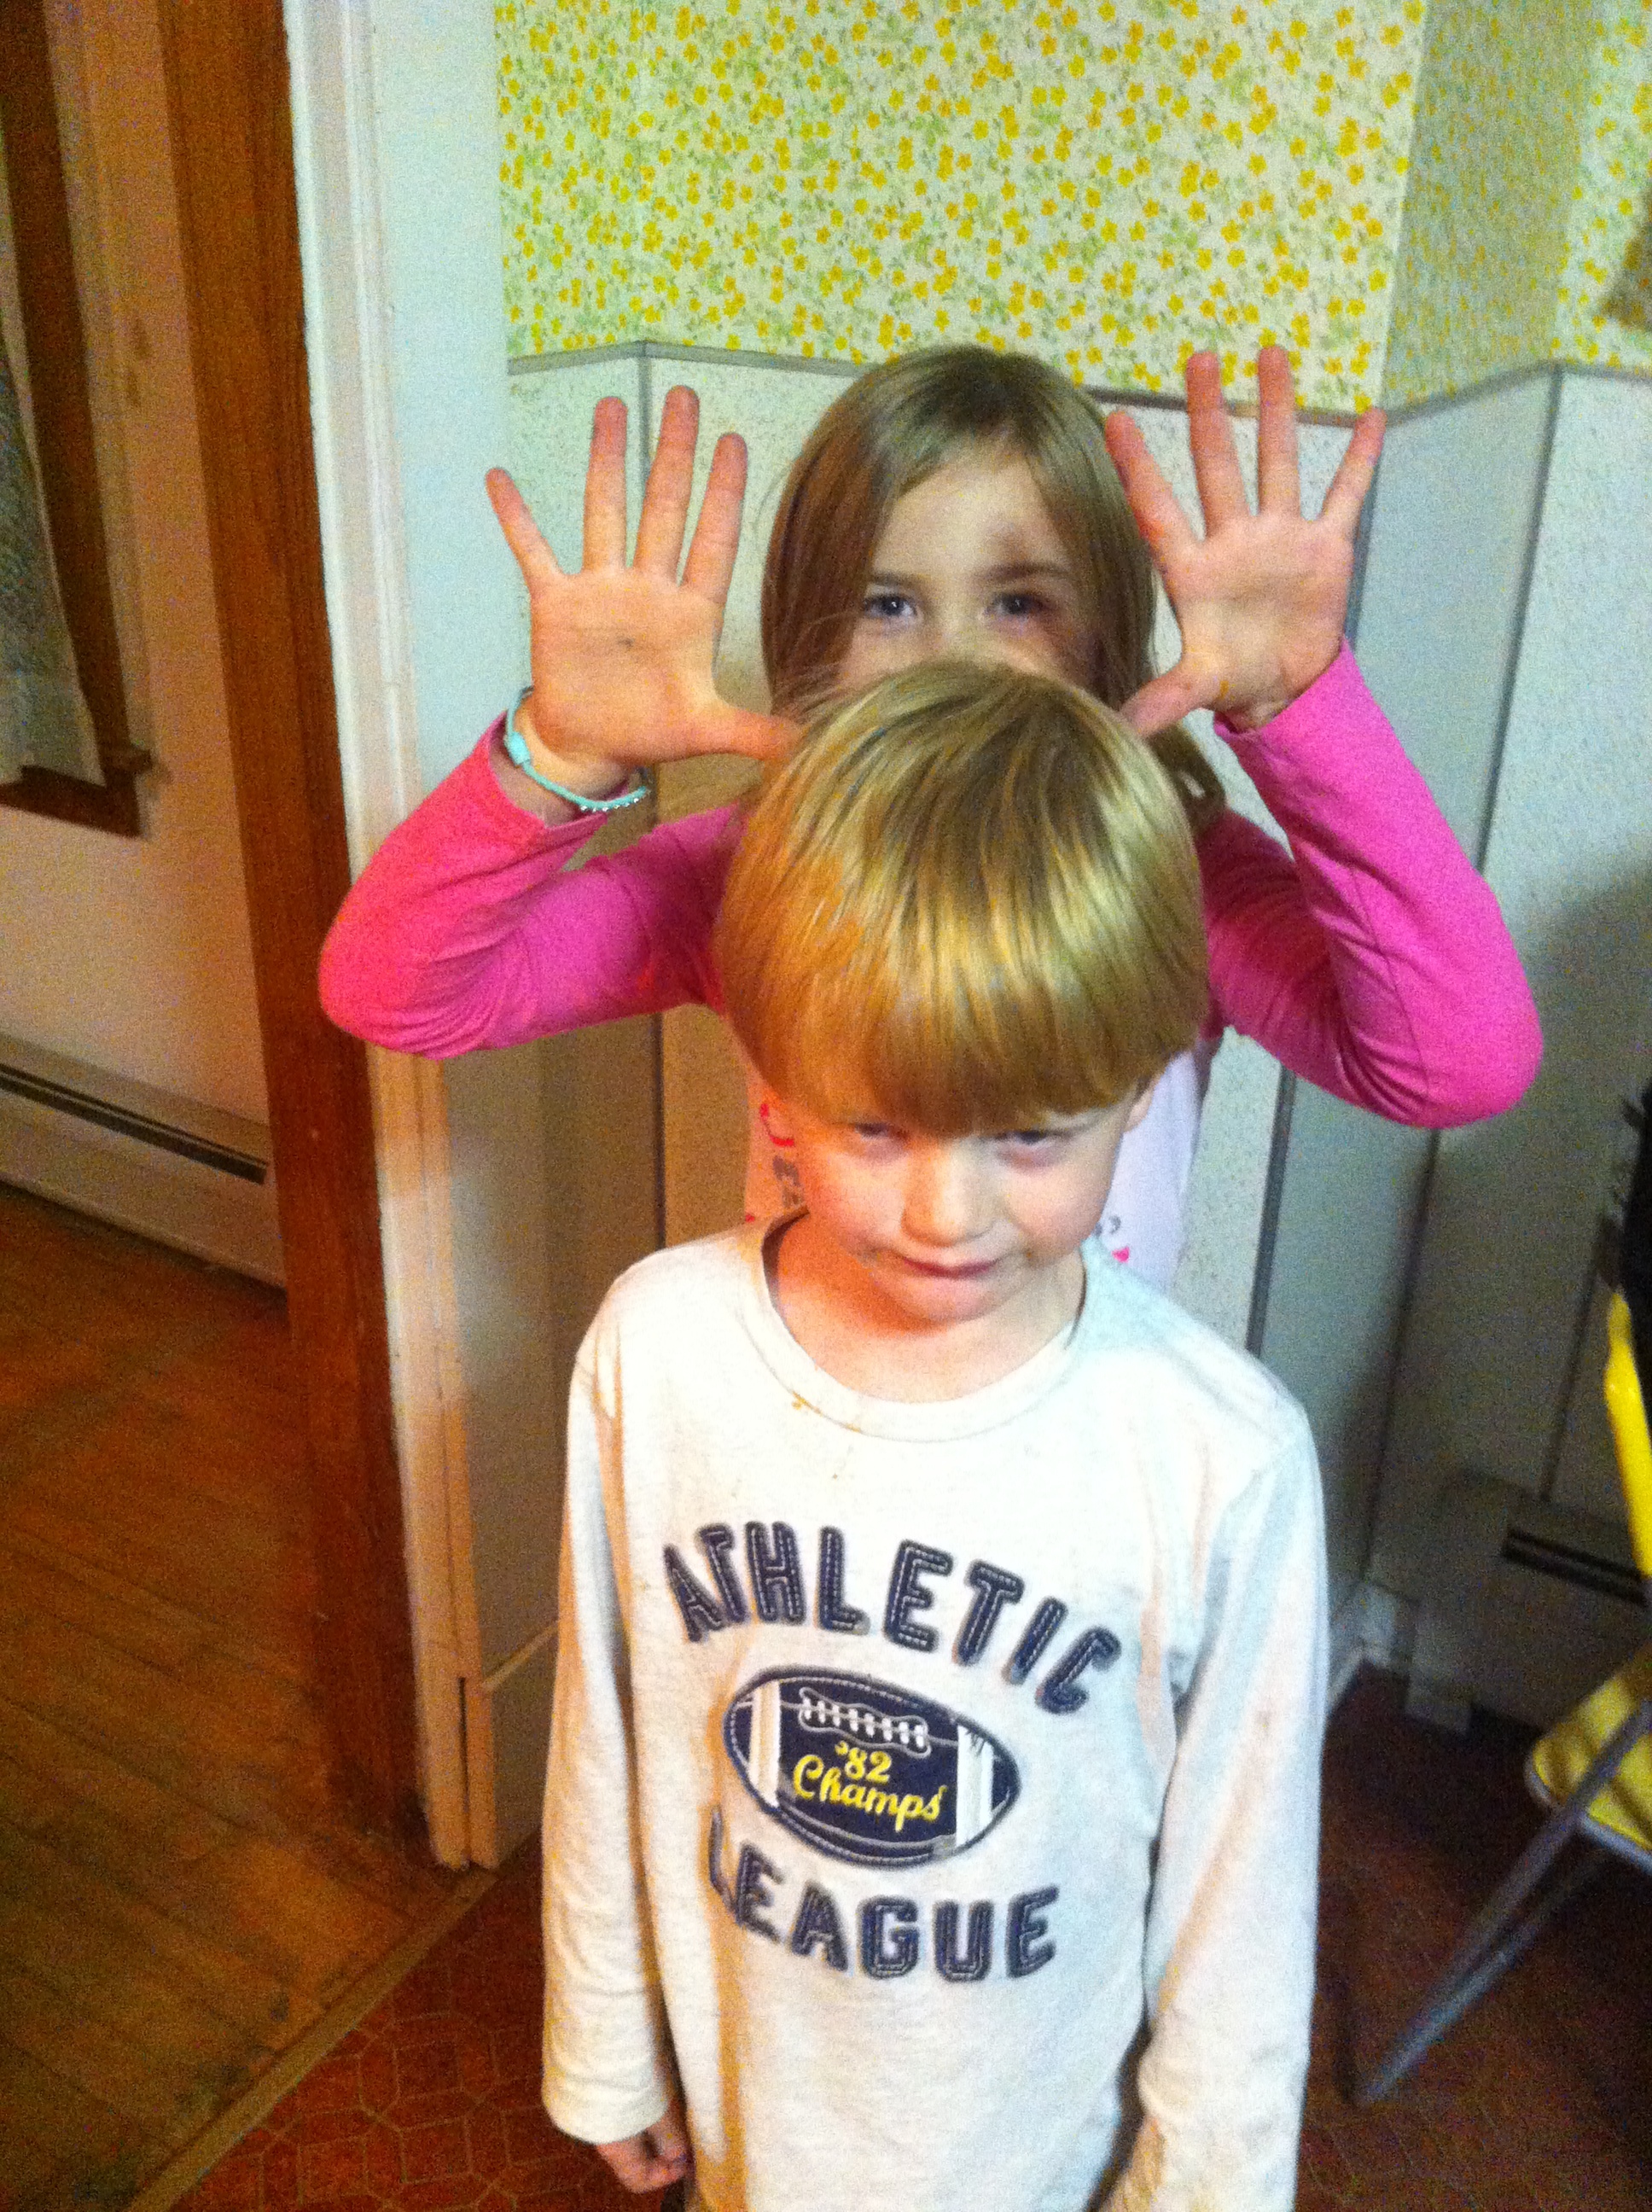
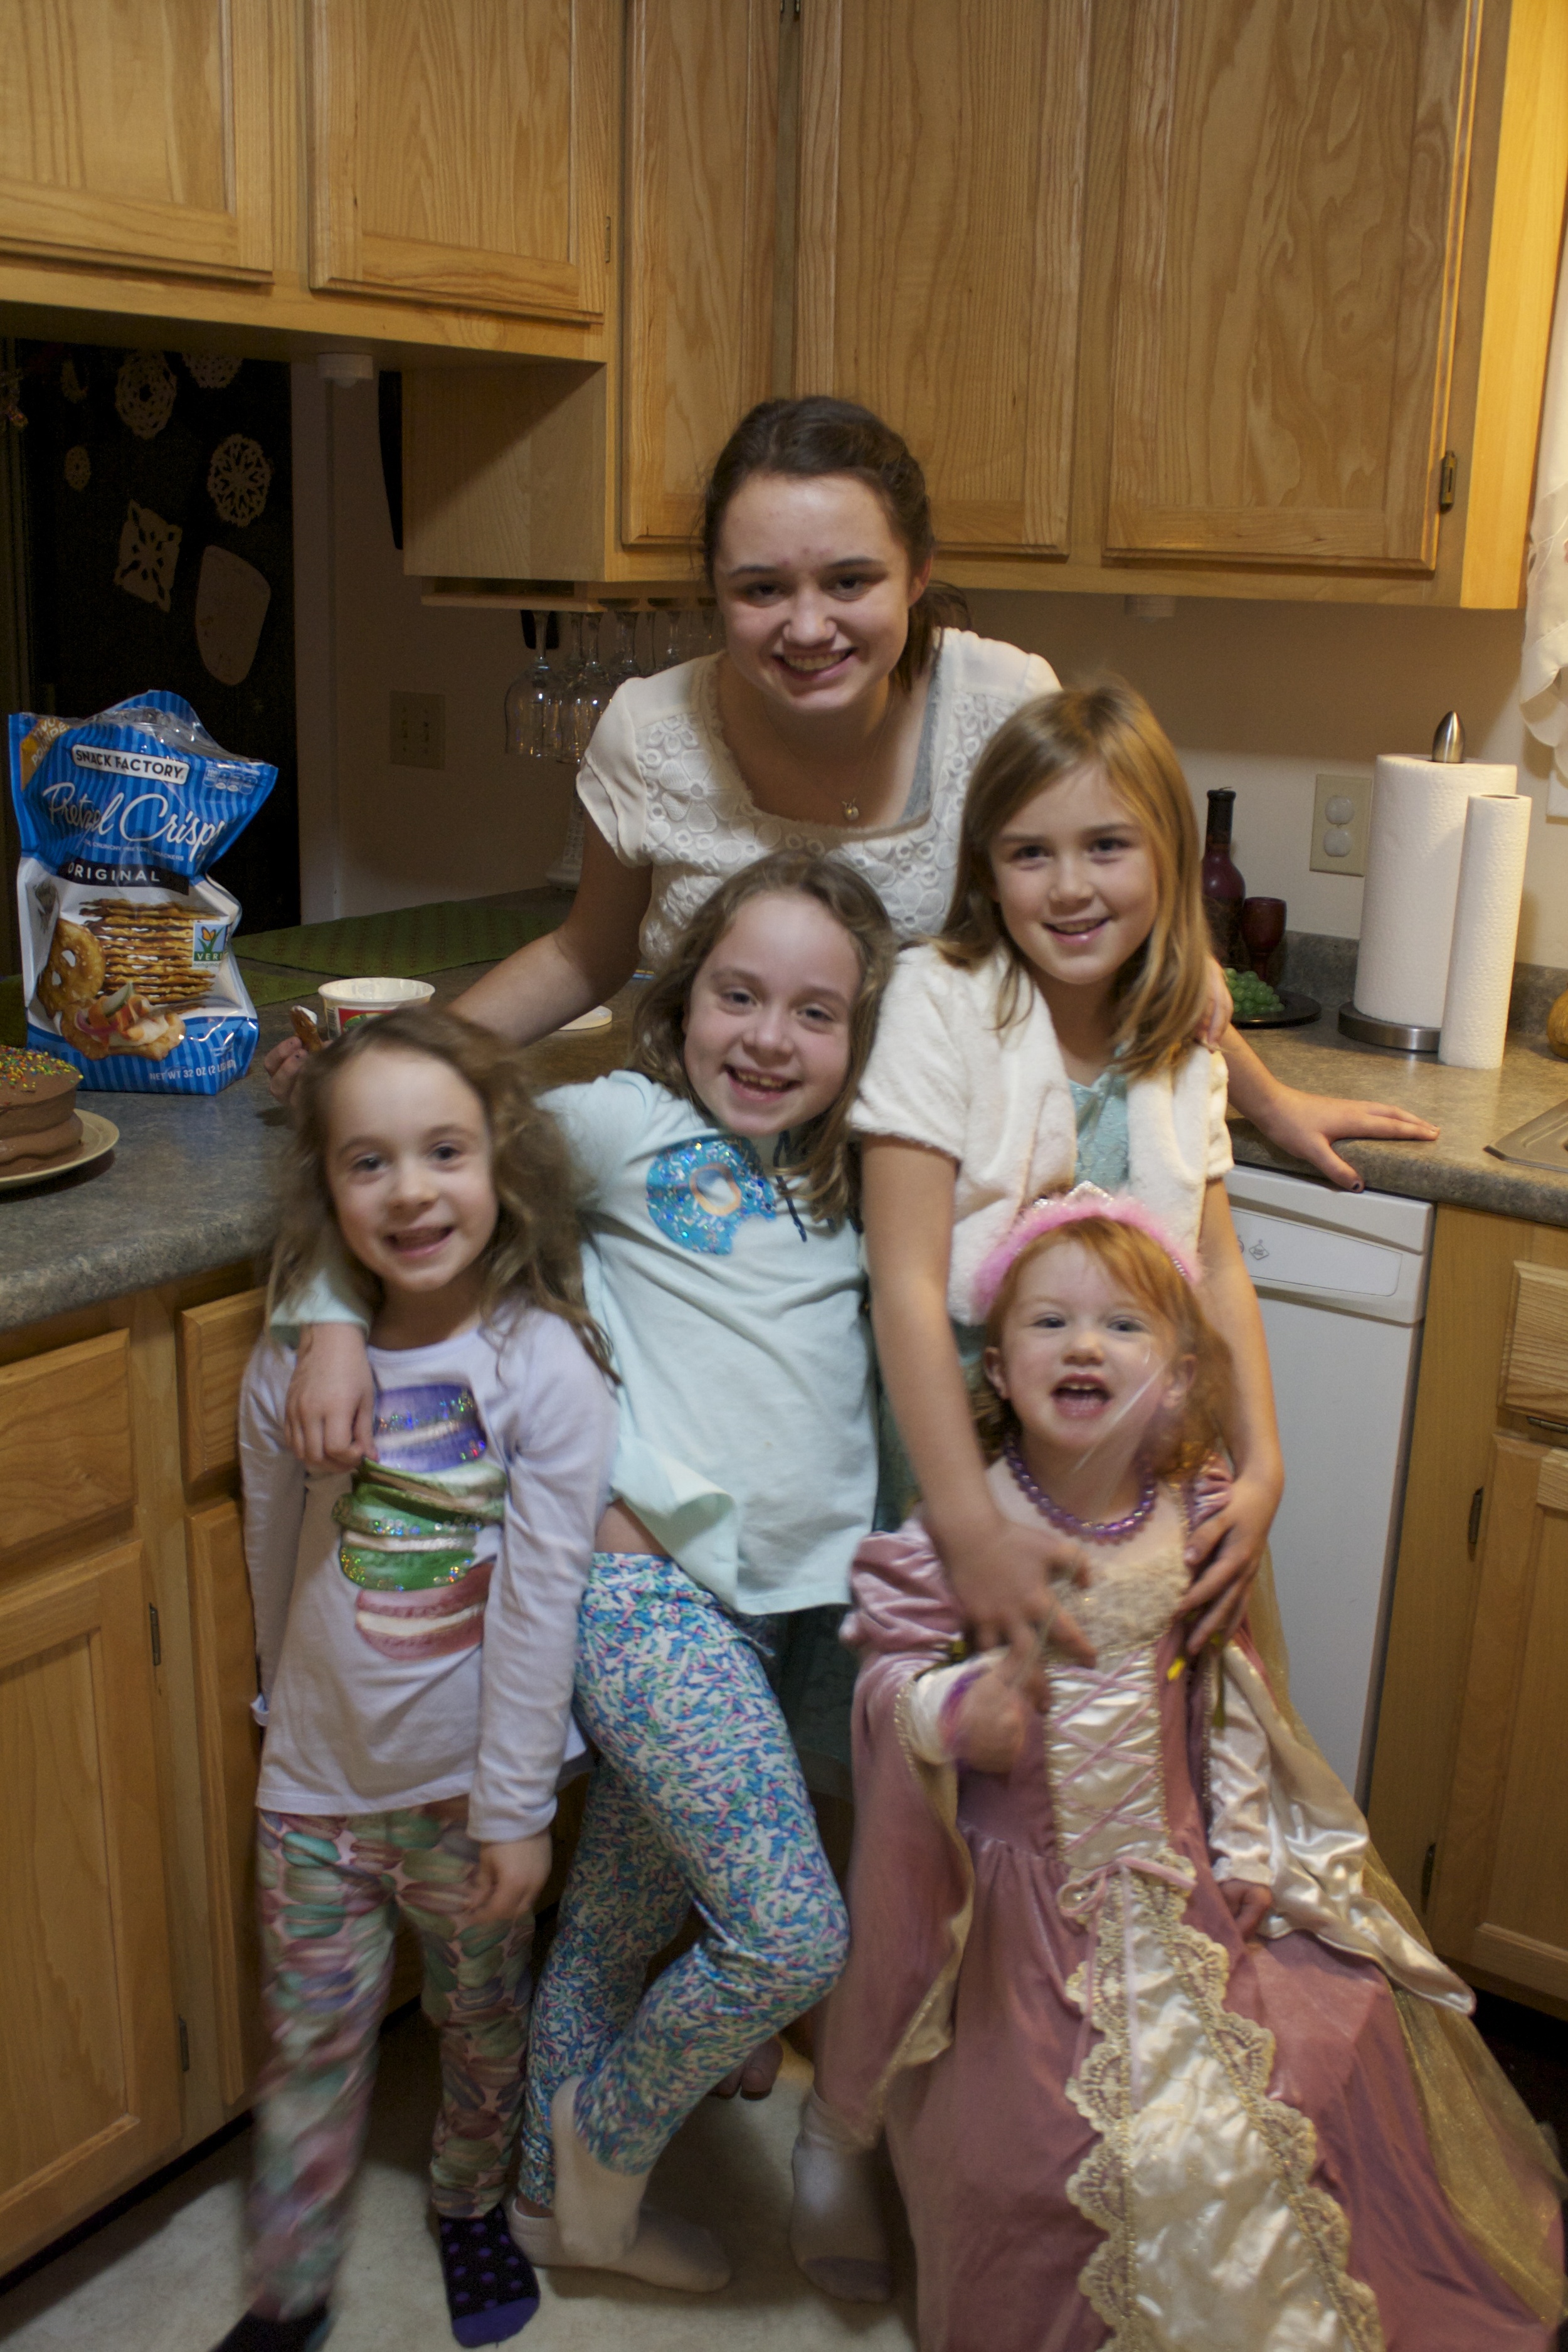
So to kick off holiday cookie baking I had a cookie decorating and pizza  party with the littles and big littles. Cookies, icing and frosting, and so many sprinkles. I went the smart route with preparation and precut all the cookies before the party. I was thinking that I would have everyone cut there own cookies out but then I was thinking  a bunch of little and hot pans and more likely then not burnt cookies. I just didn't want to deal with it and it was a good choice on my part. I am so smart. 

These cookies are kind of your basic sugar cookies with a little lemon twist. The lemon adds that extra something, a little zip behind the sweetness, especially after all the glaze. And they can be baked to be slightly soft or to have a nice crisp edge. A good, tasty,  all around cookie, perfect for any holiday cookie party. 

And just a warning about cookie parties. There will be madness and states of being that only an emense amount of sugar can produce.

The stuff. Flour, baking powder sugar, and salt. Squash puree, earth balance, vanilla, and some lemons. 

IMG_8813.jpg

Sugar, butter, puree, lemon zest, lemon juice and the vanilla get cozy into big bowl and then mixed together.

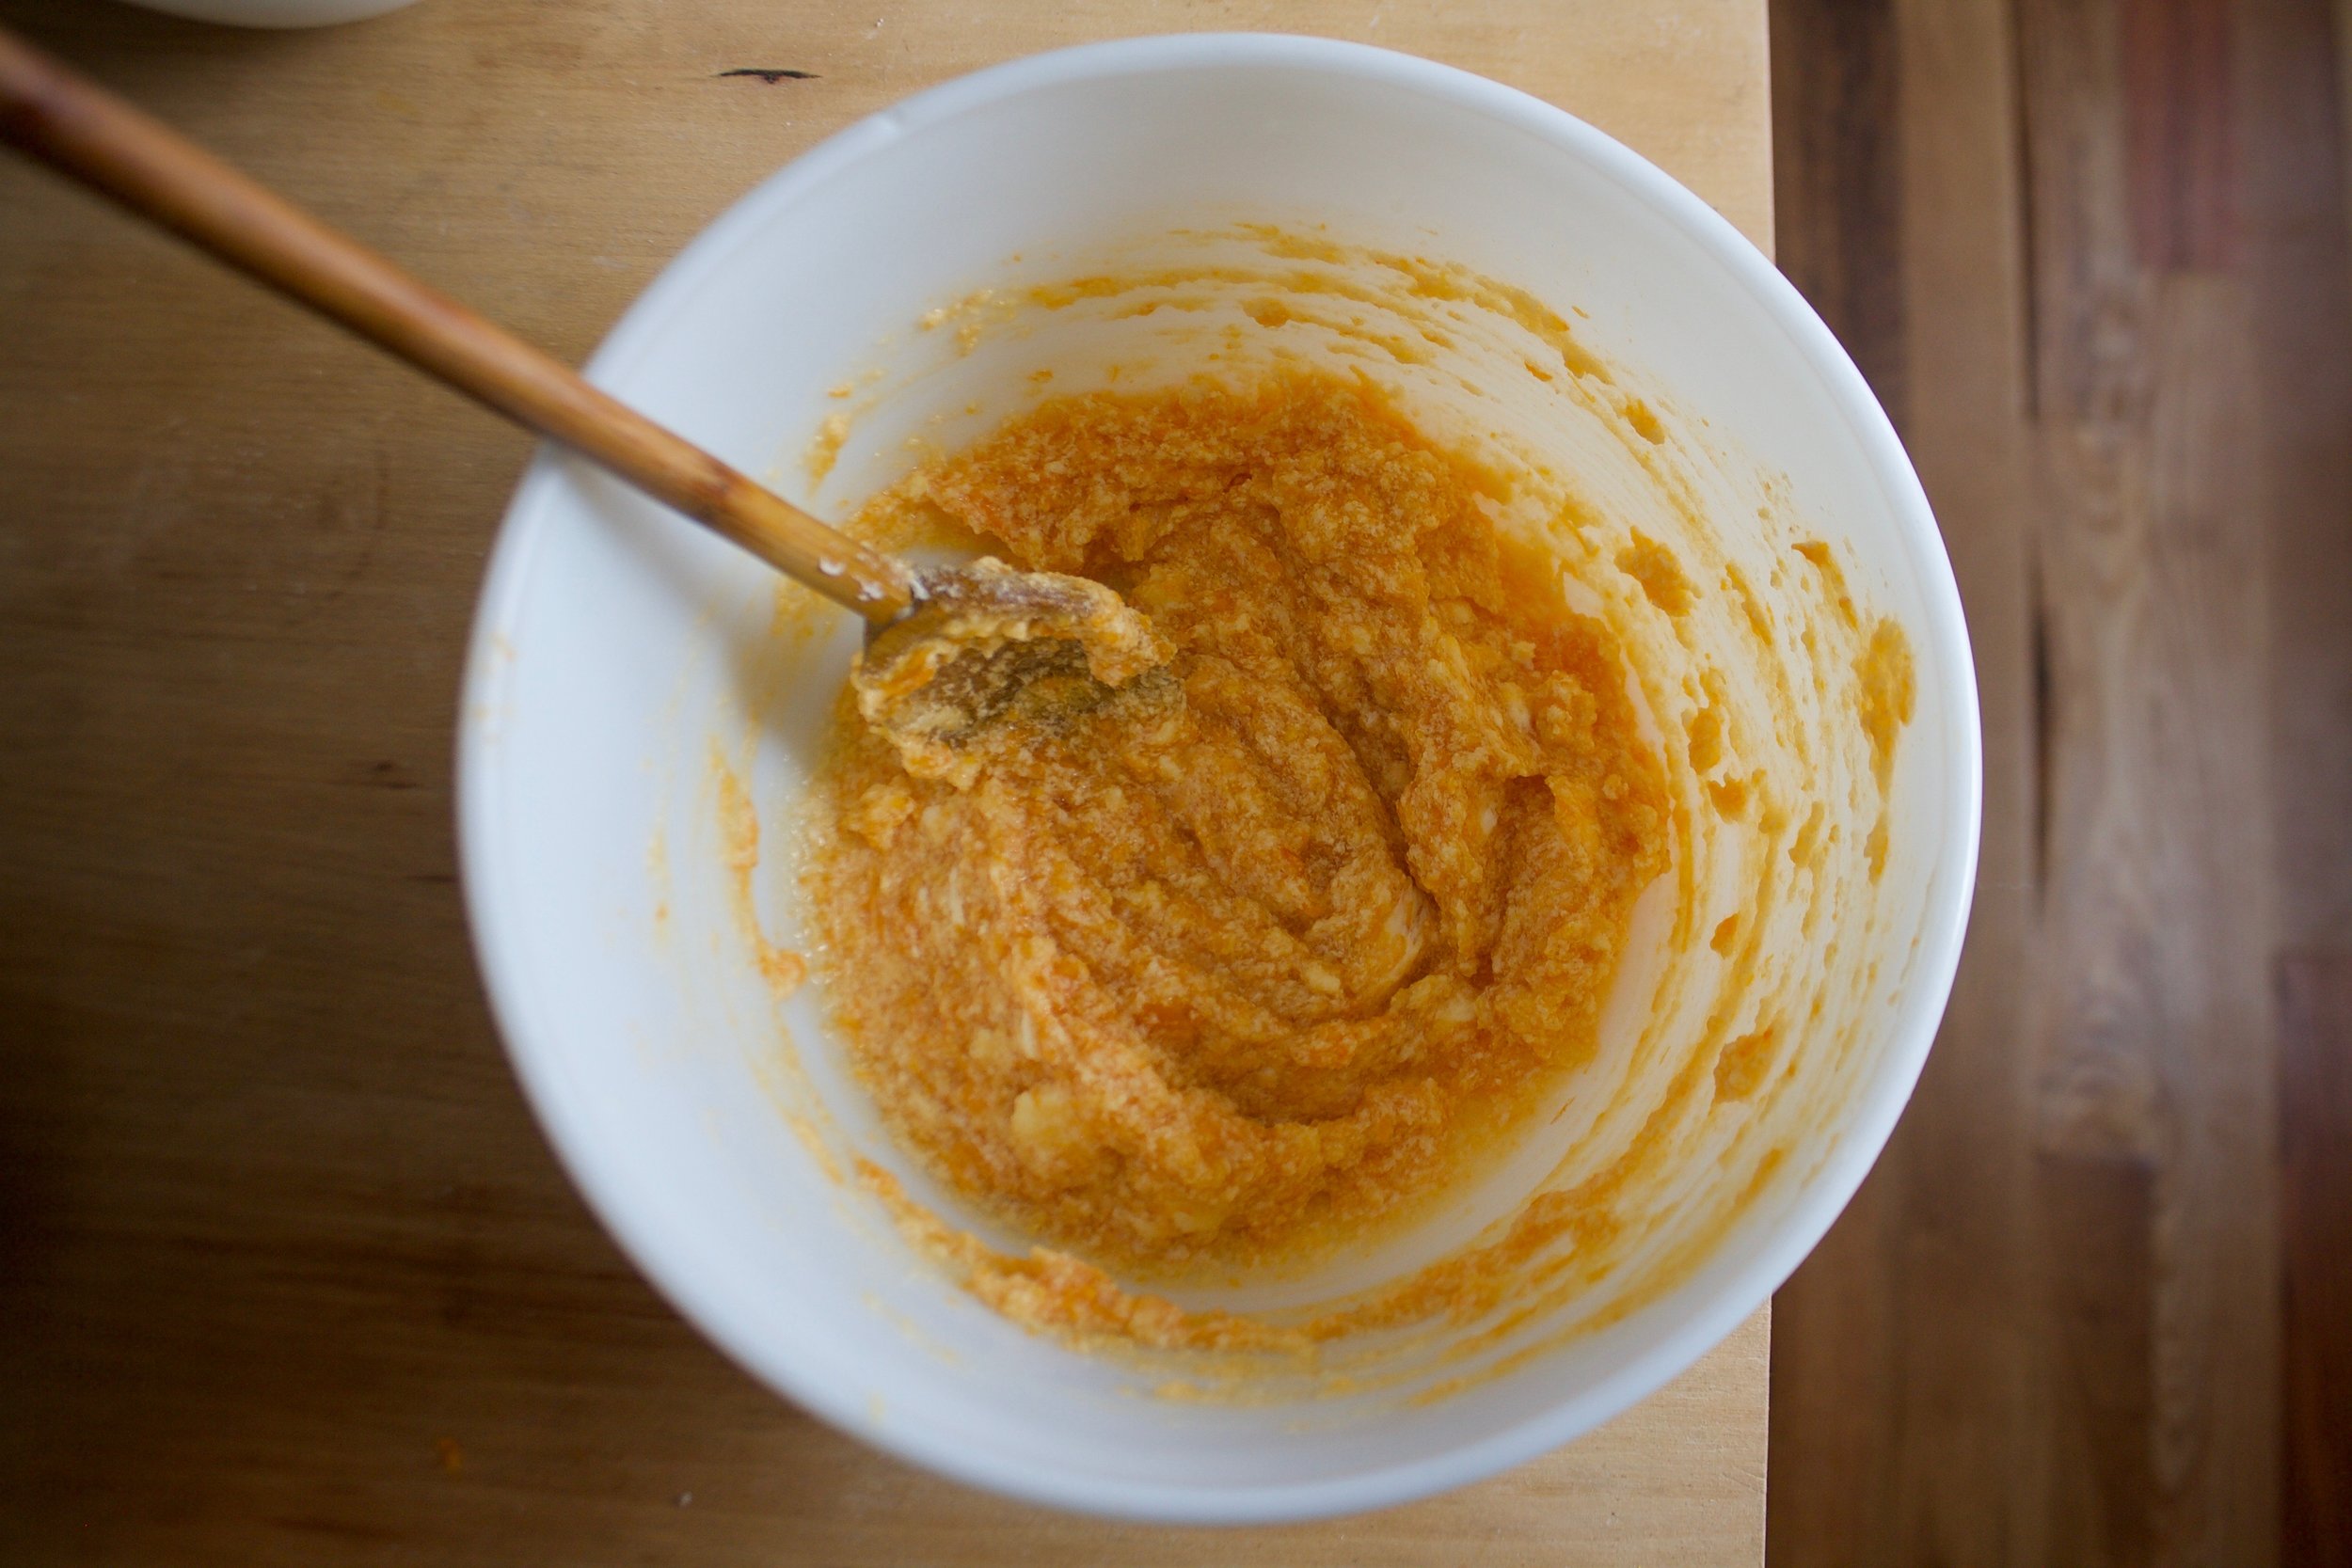
Some people prefer to do this step with an electric beater but I like to use a wooden spoon because arm powder. Either way, make sure the mixtures is completely mixed and that there are no huge chunks of butter. 

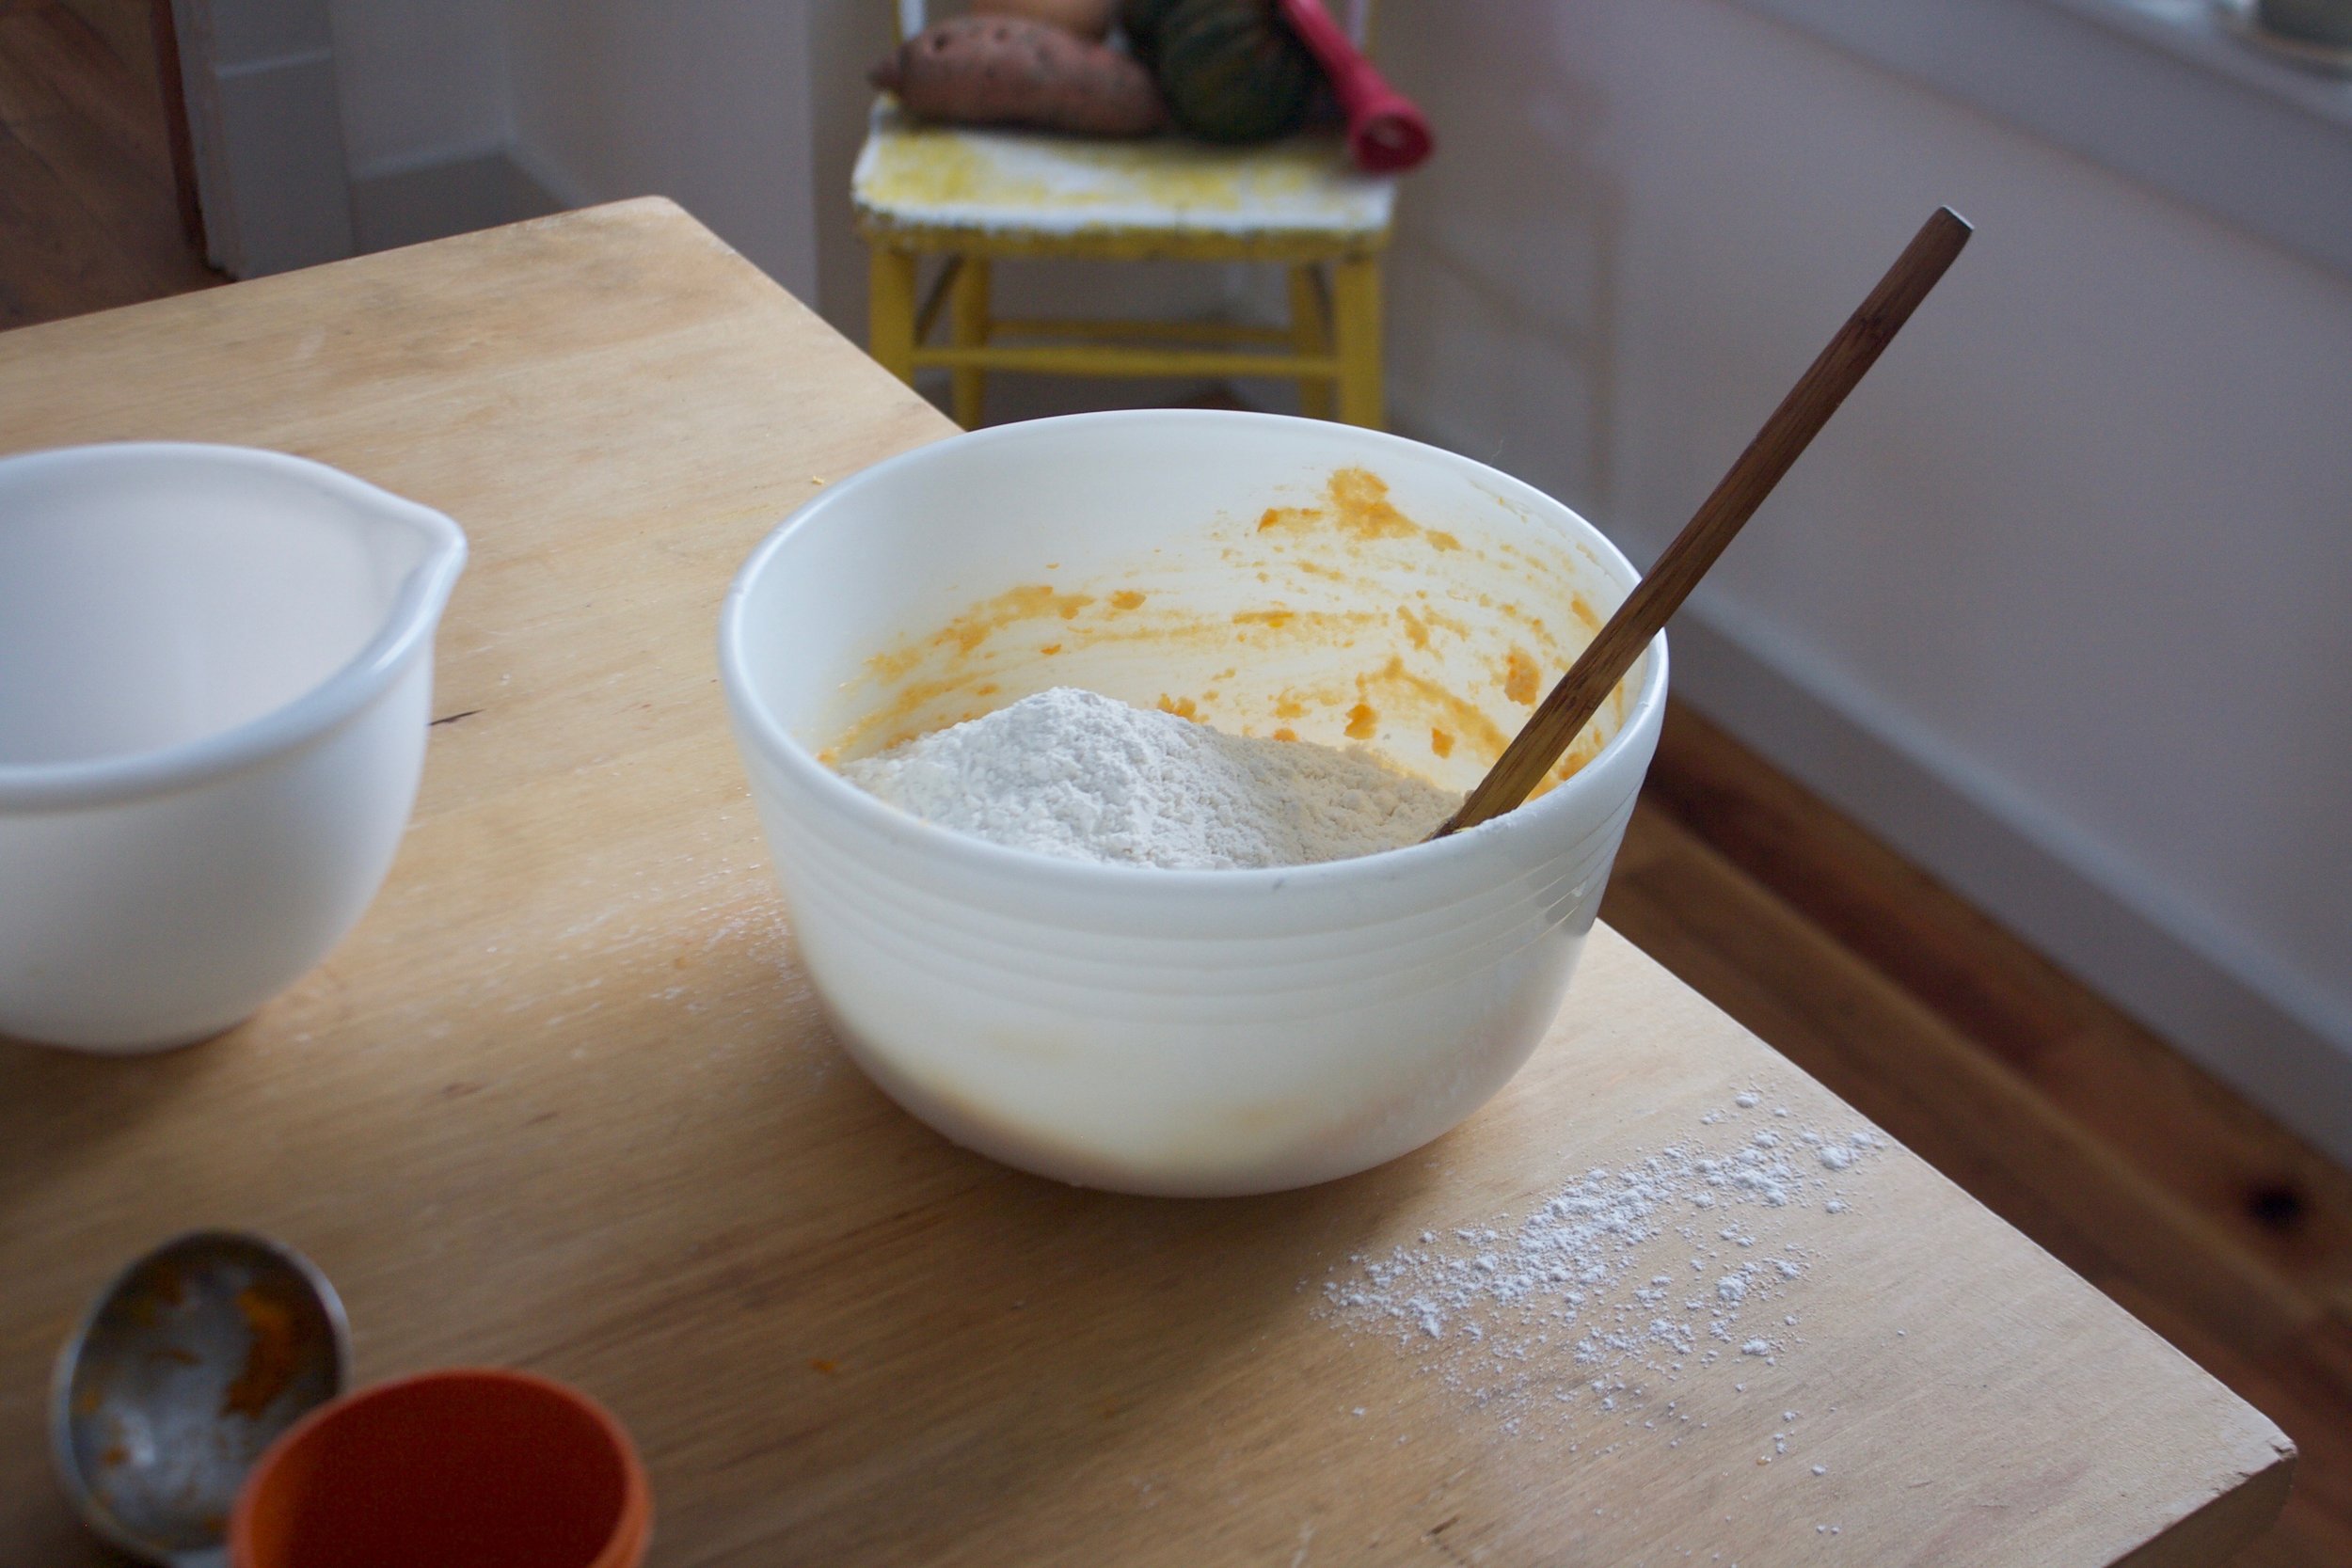
Now add in the dry and mix mix mix until if forms a dough.

 Don't be afraid to use your hands here.. I started out with the spoon and finish with my hands. It is much easier.

The dough needs a little time in the fridge so wrap it in plastic (or a large plastic bag) and stick in the fridge for a least and hour or up to a day. 

IMG_8841.jpg

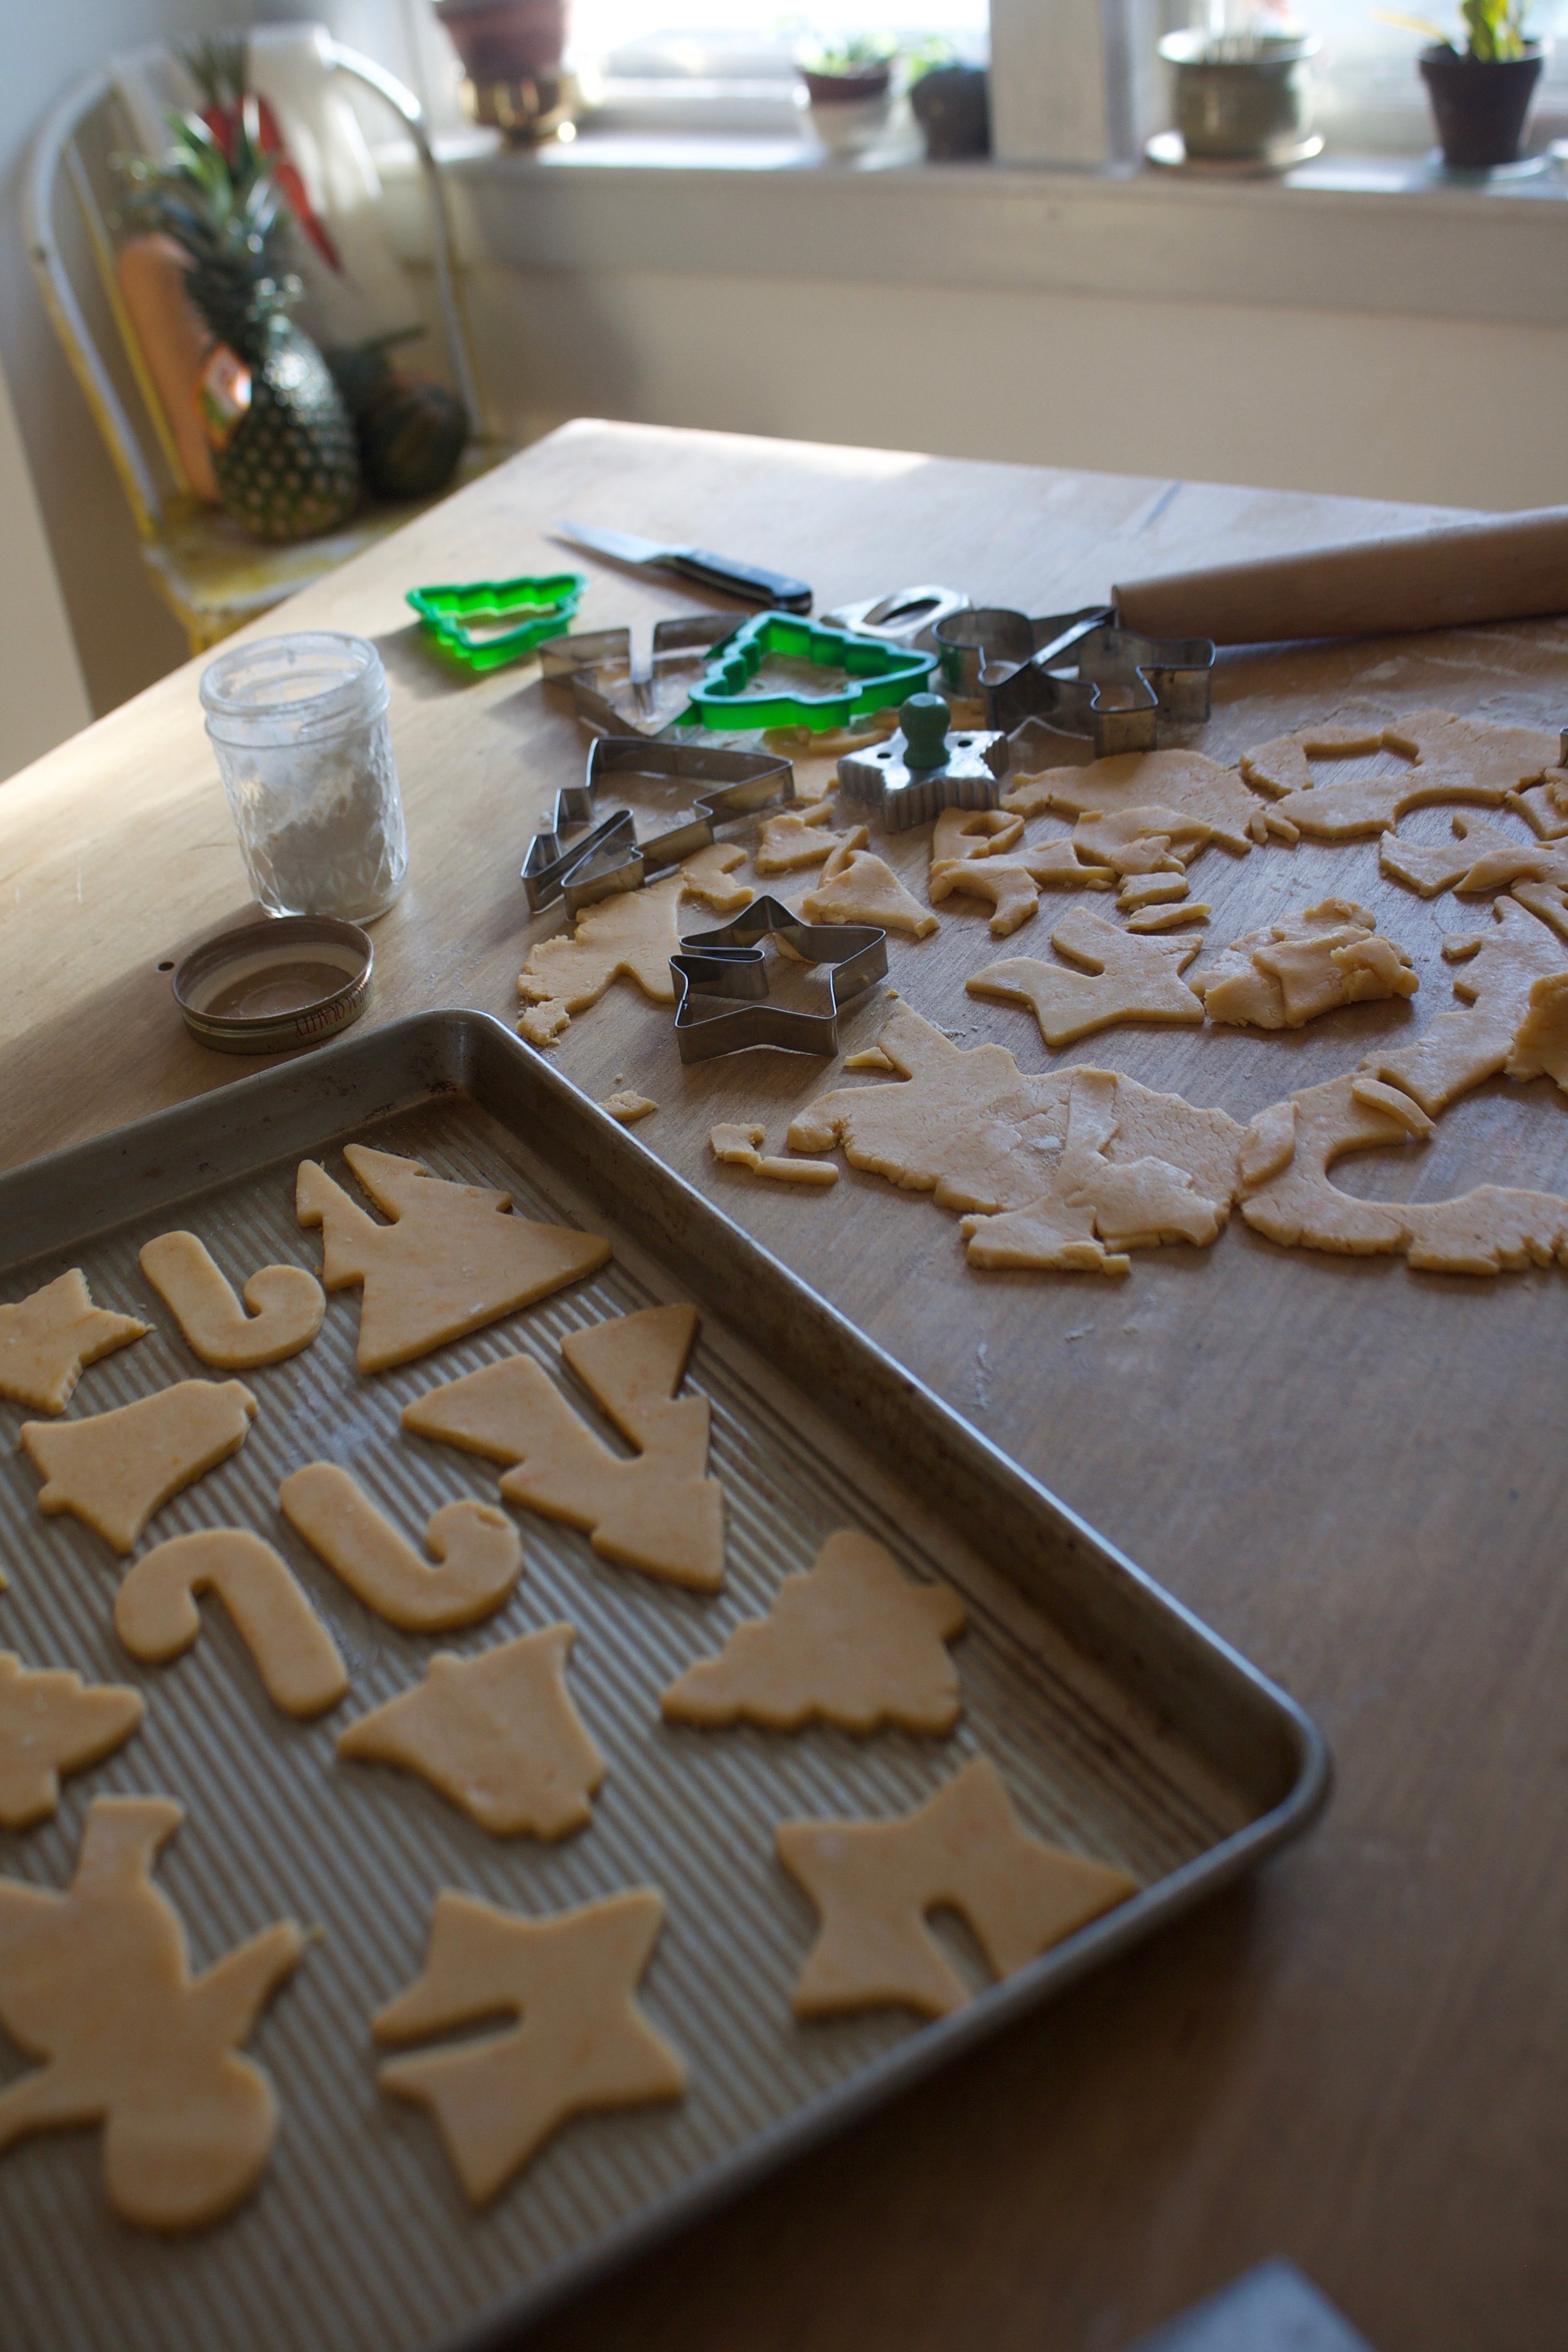
When your ready for cookie cutting time, remove dough and let sit on counter for a few minutes to warm up. Then place on a lightly floured surface and roll out about 1/4 inch thick (you can go a little thinner if you like)

Cut your cookies.

IMG_8859.jpg

And keep gathering and rolling ou the dough until all the dough is a cookie.

Bake the cookies for anywhere between 10-13 minutes. This is dependent on if you like a softer cookie or one with more of a crunch. 

IMG_8869 2.jpg

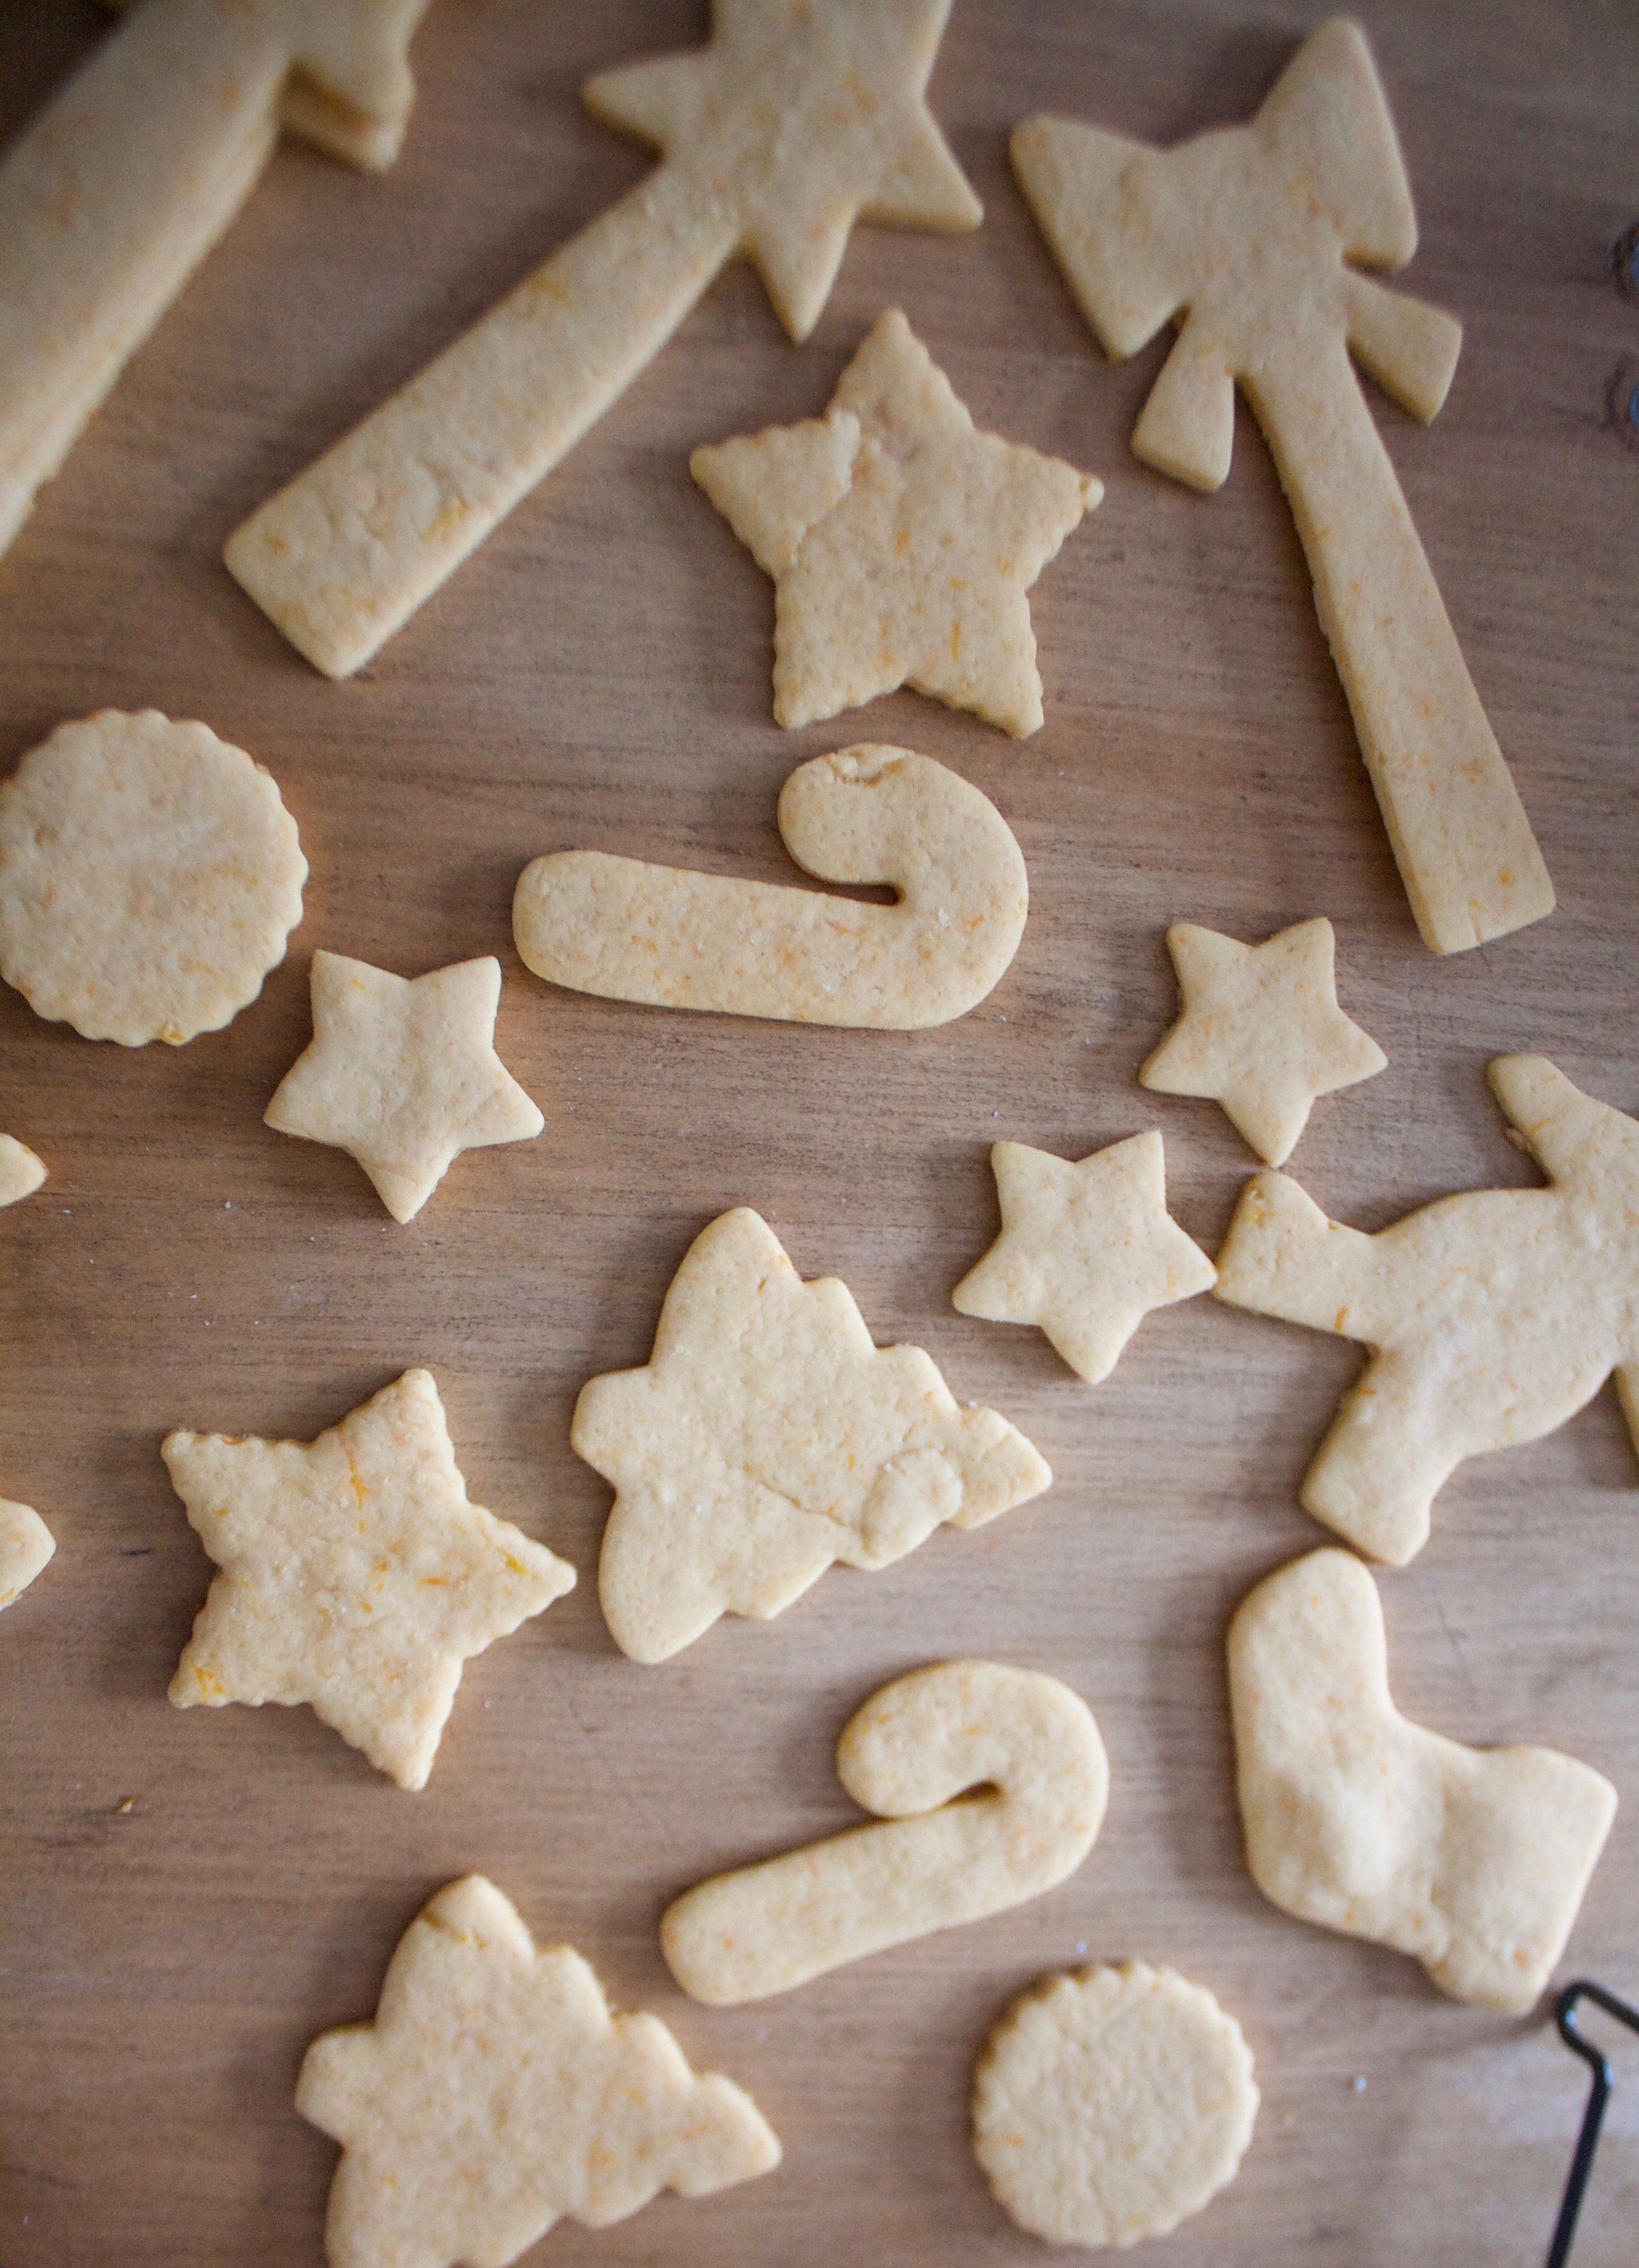
All the naked cookies.

IMG_8873.jpg

And you are probably going to want to make some glaze, which is super simple. Powedred sugar, water, corn syrup, and vanilla extract. 

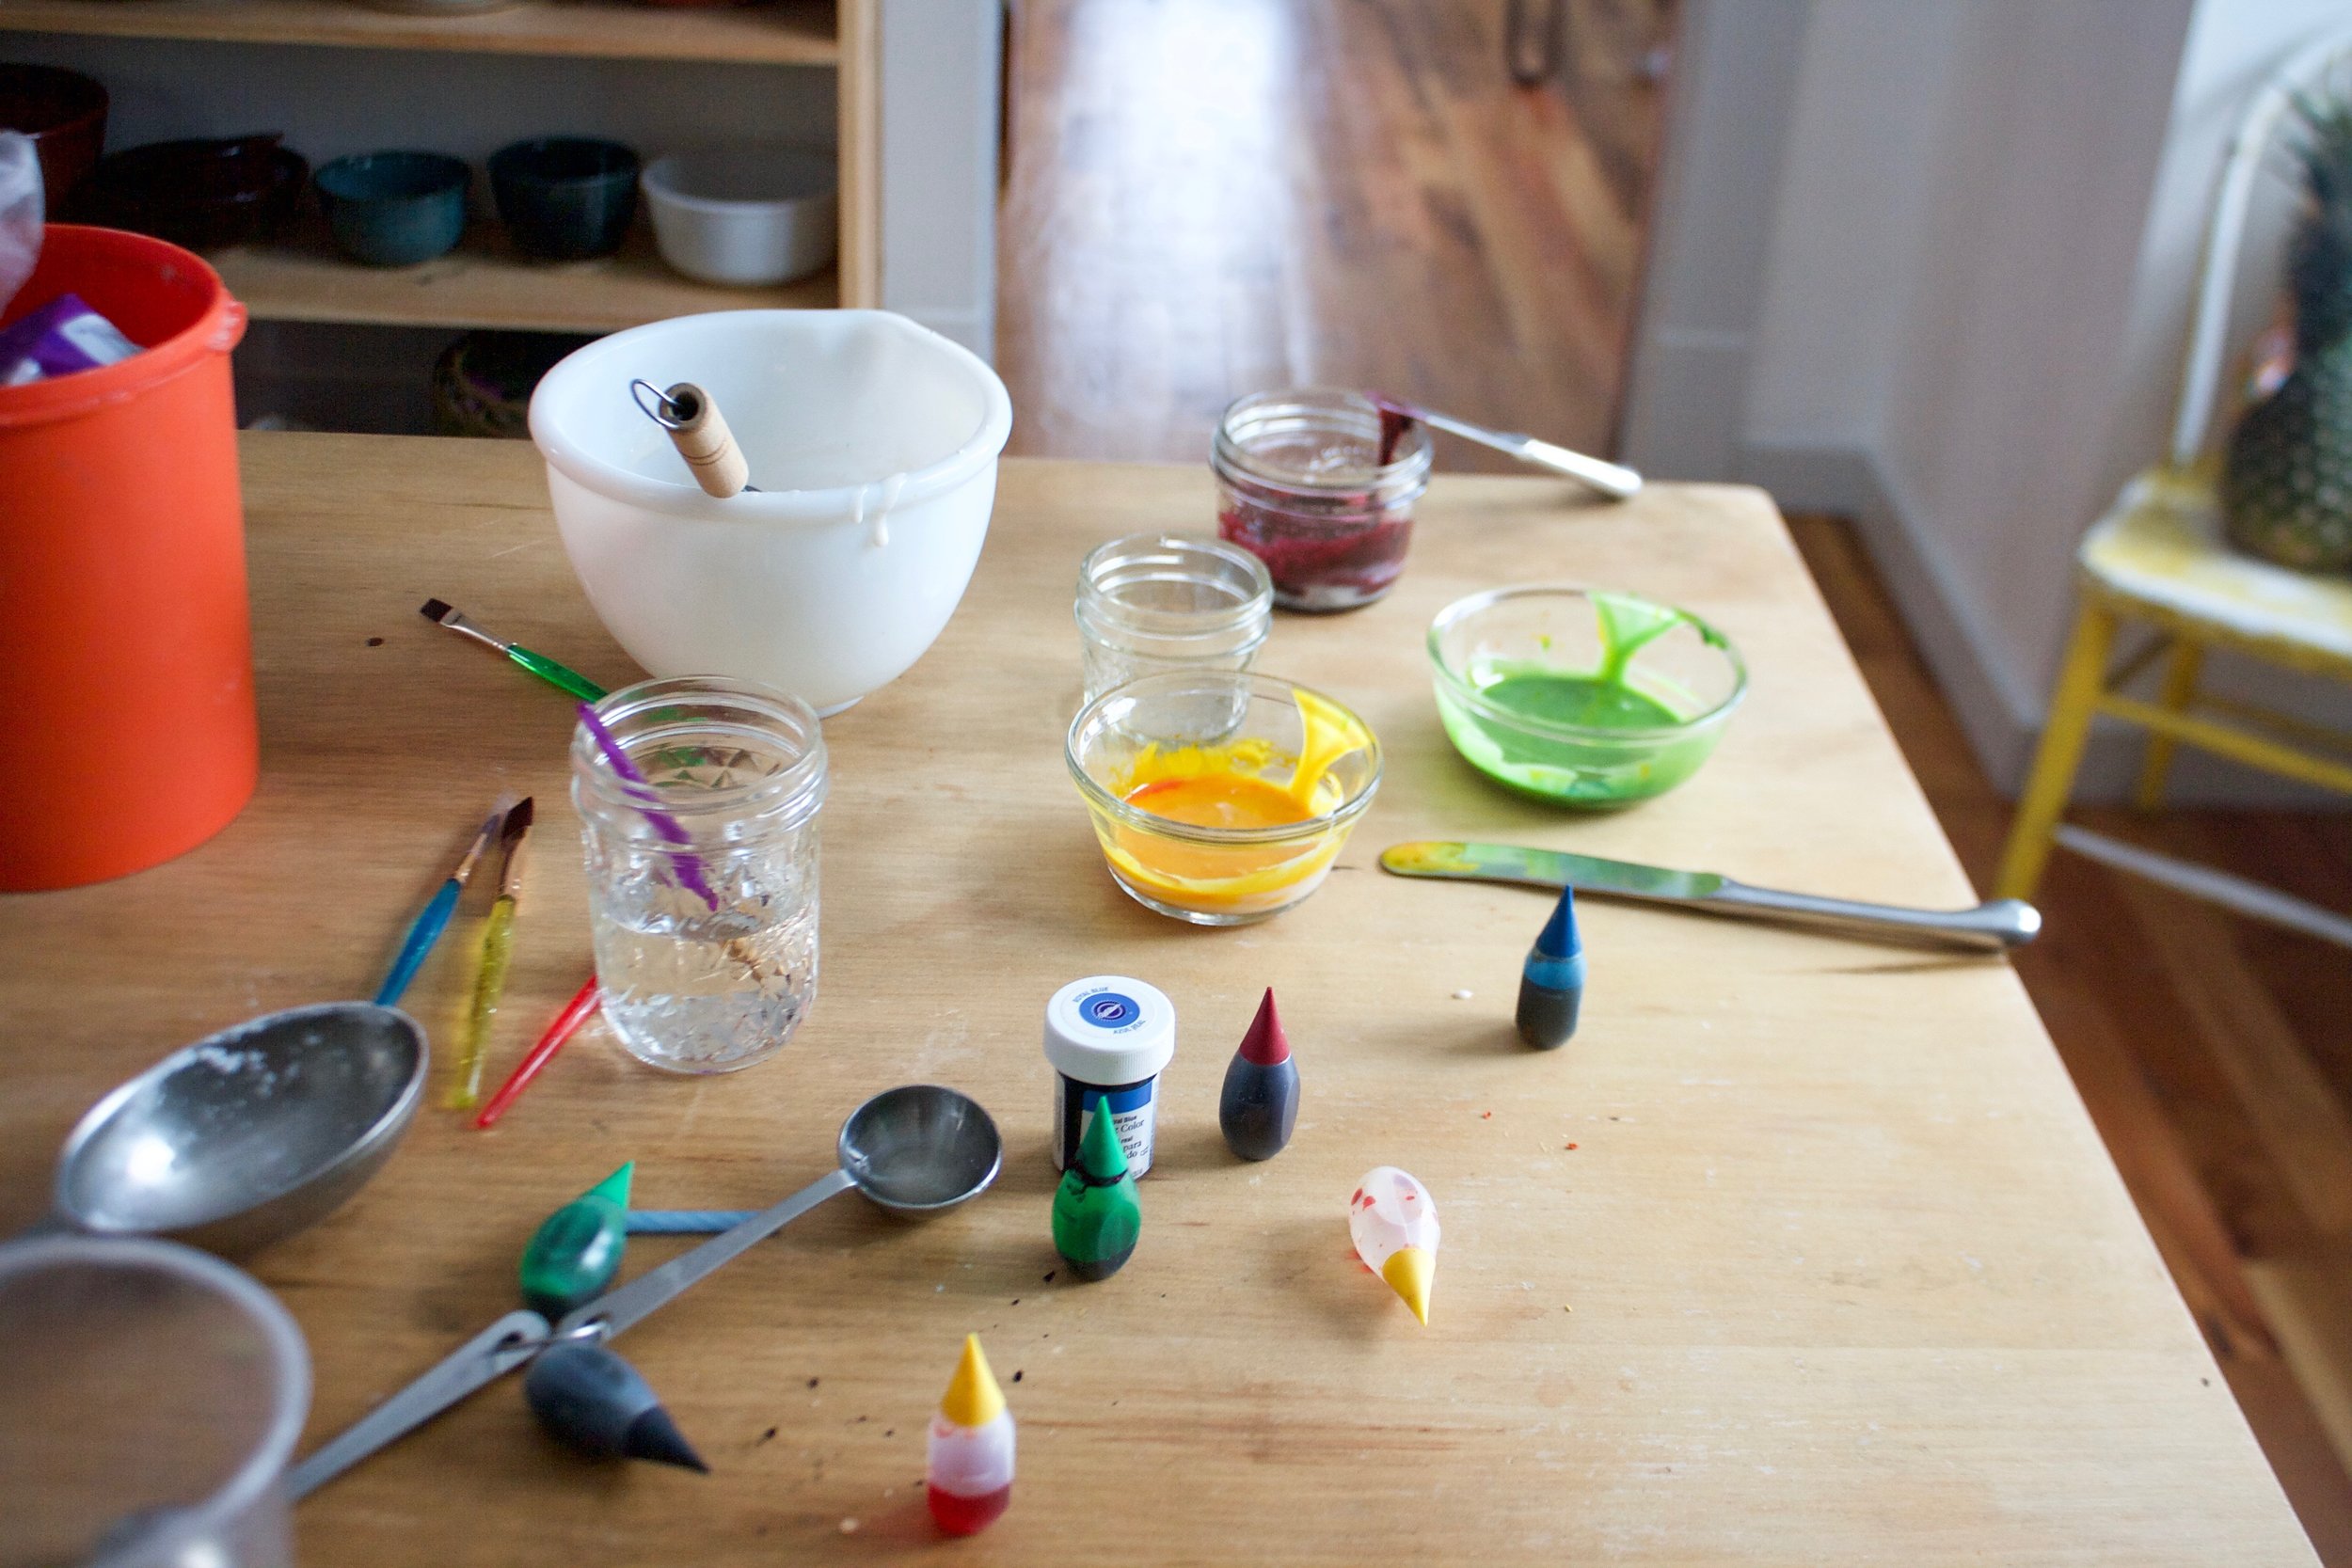
You of course need to get crafty with colors so color the icing  to your liking.

IMG_8904.jpg

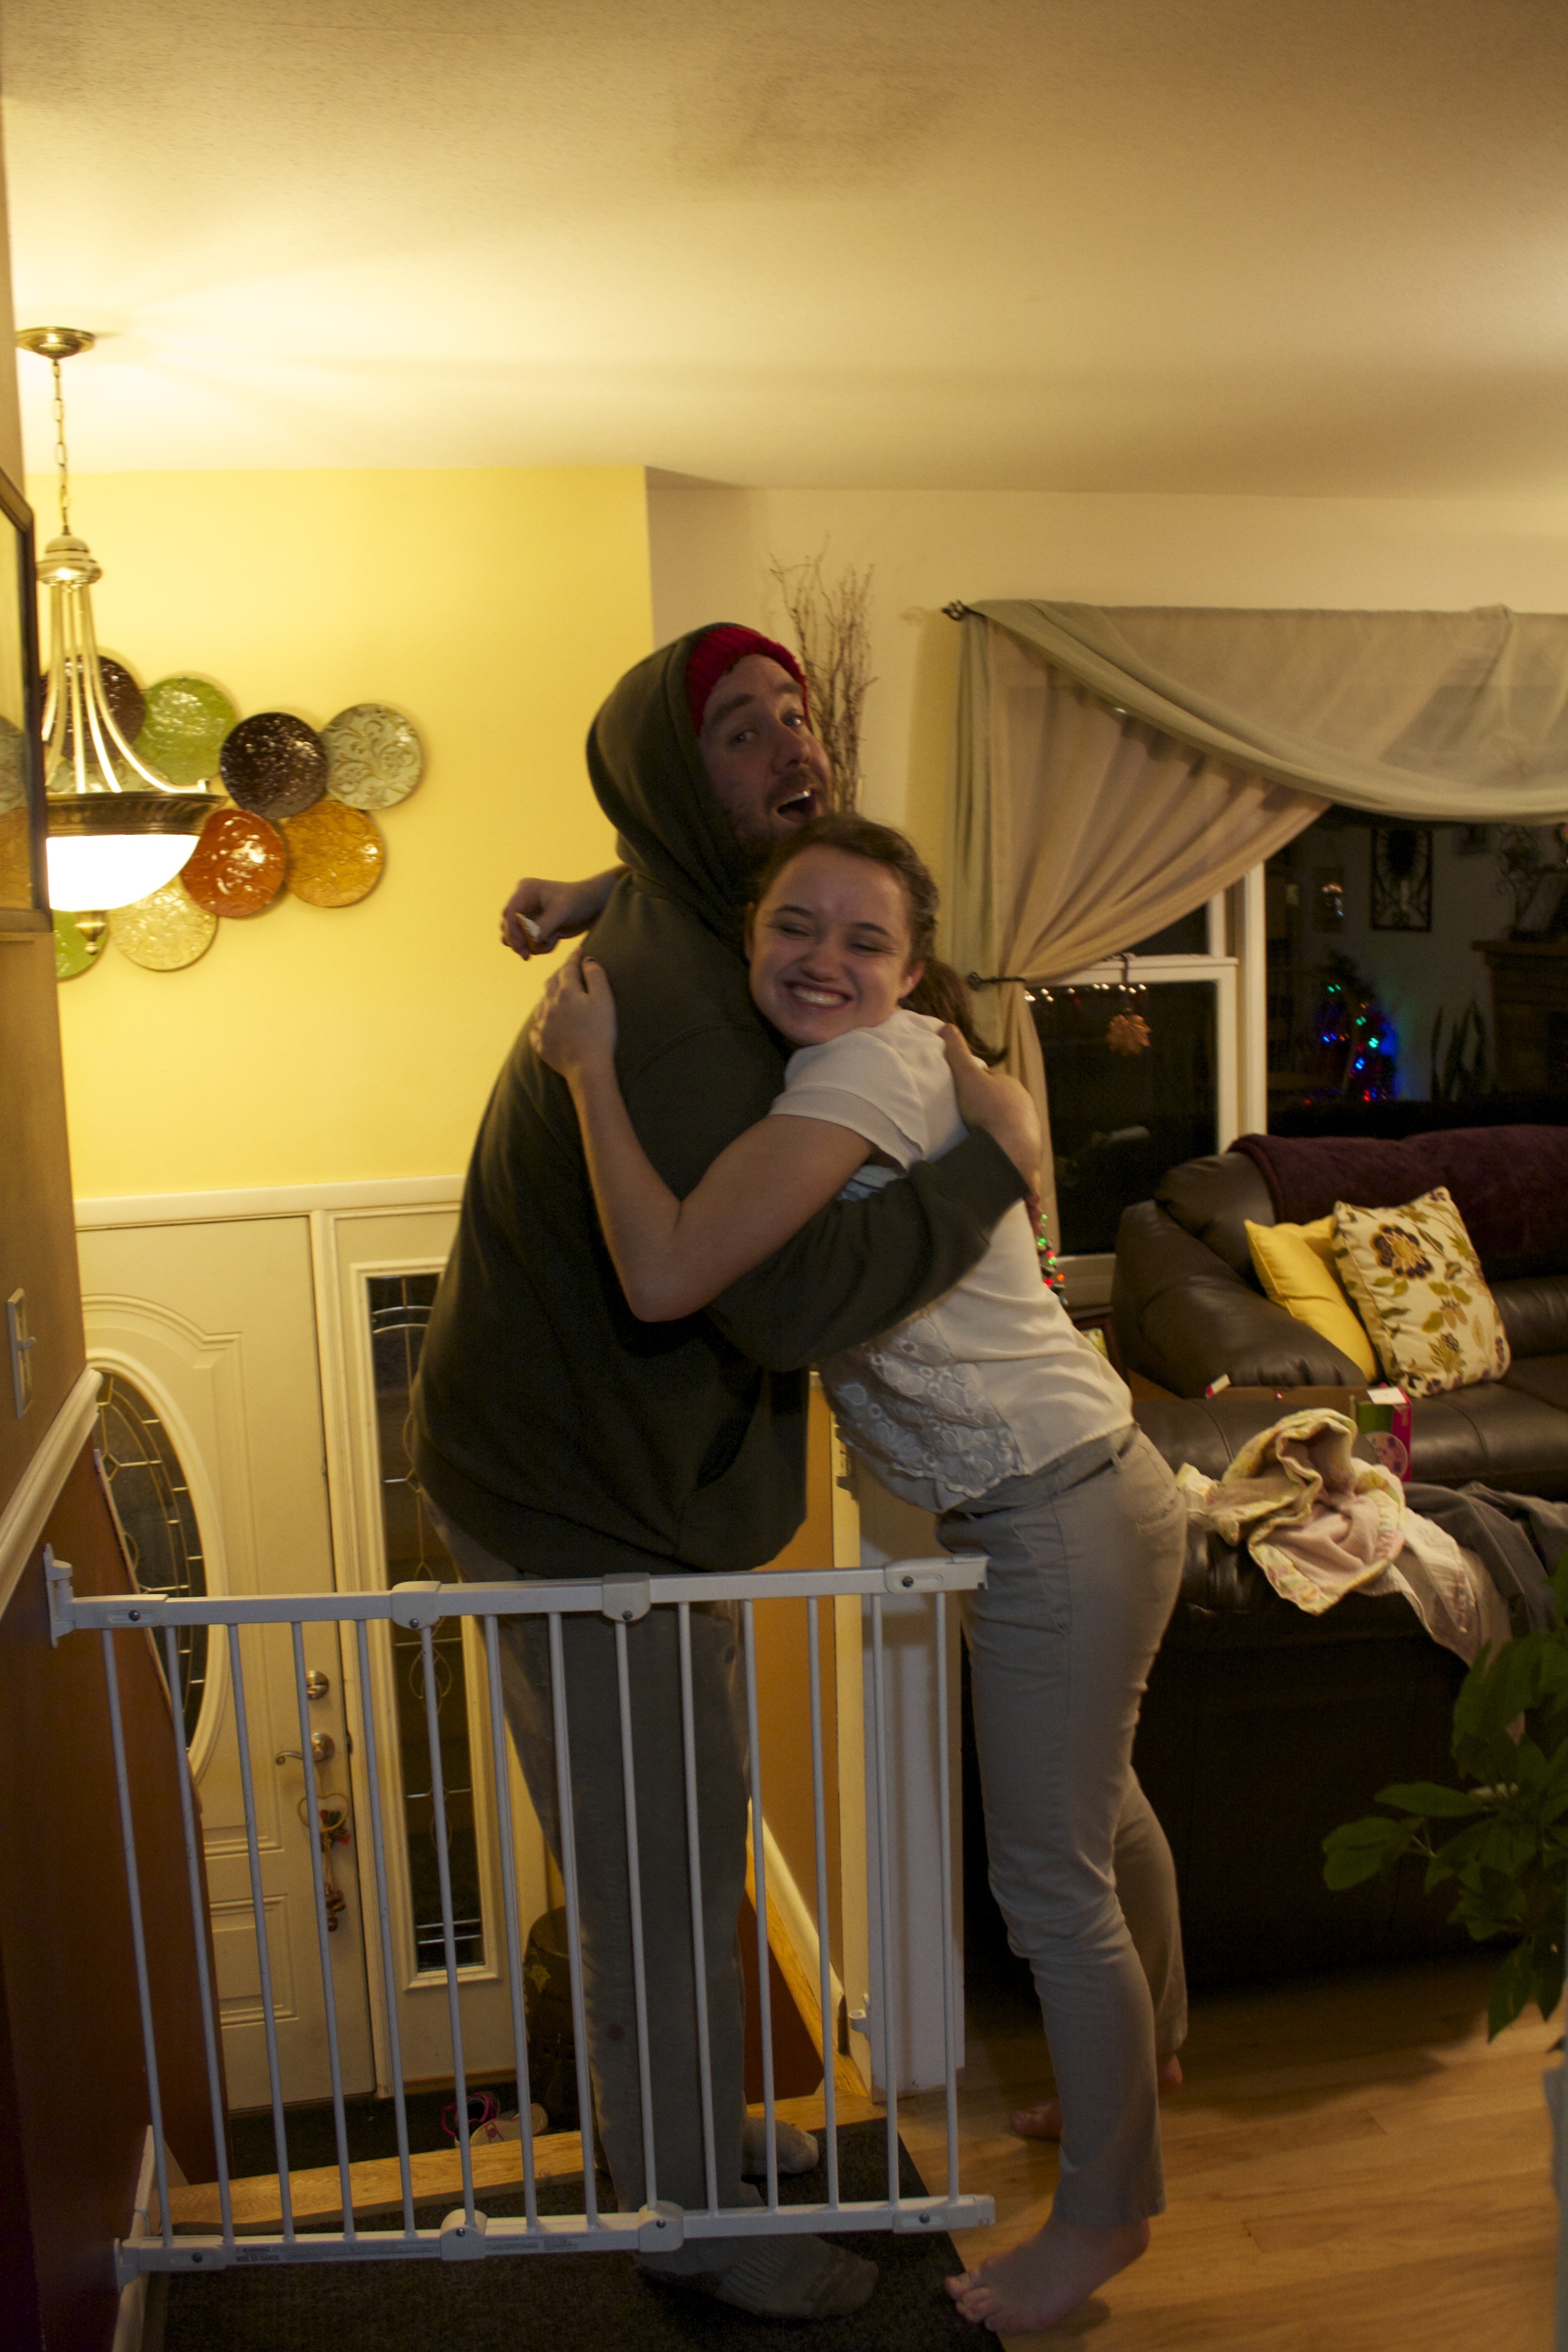
Then it's all about decorating. The mr and I did a few cookies ourselves before the cookie party began. We figured we wouldn't really get a chance to once all the littles showed up. We were right. 

Also I bought brand new synthetic paint brushes (important that they are new) to use to paint on the glaze. It was a very good idea. We loved it and so did all the little. 

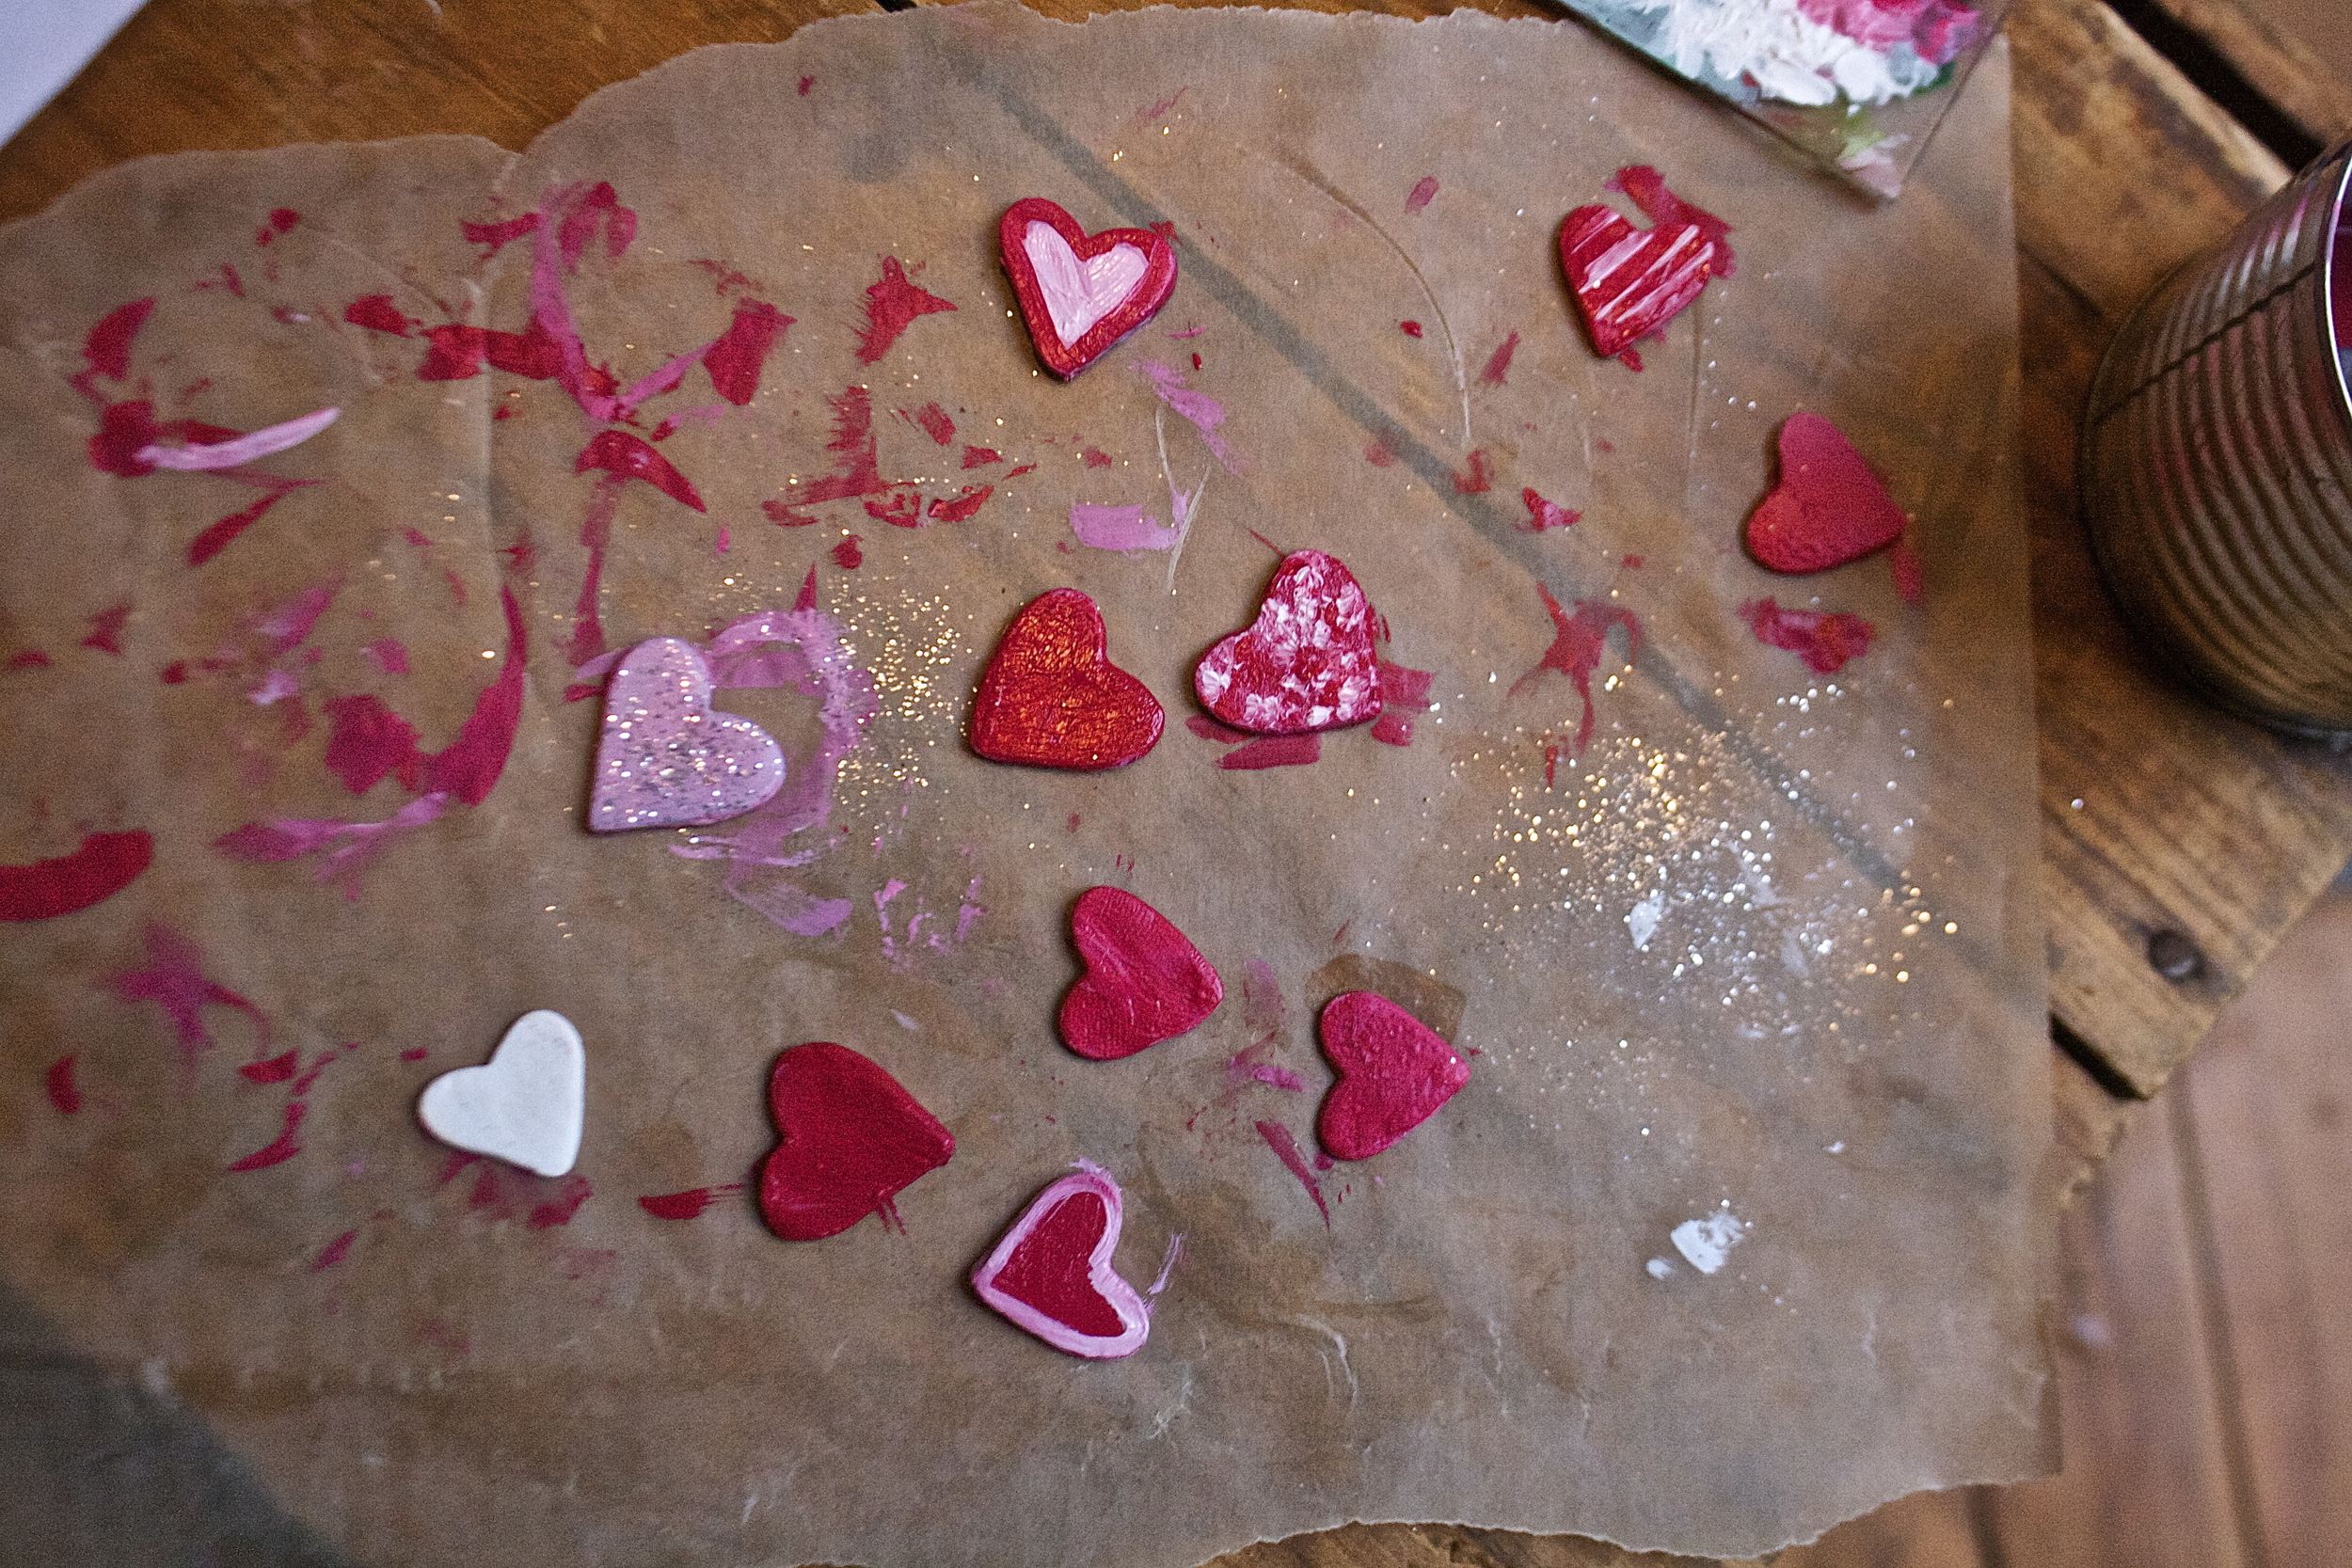
Our cookie masterpieces. Who doesn't love a rapper snowman?

Let the party begin. I ended up making 3 batches of cookies because the more cookies the better. And again, so smart to have the cookies all precut and ready. I couldn't imagine having to deal with cutting cookies with everyone. There would have been tears (most likely mine) 

IMG_8917.jpg

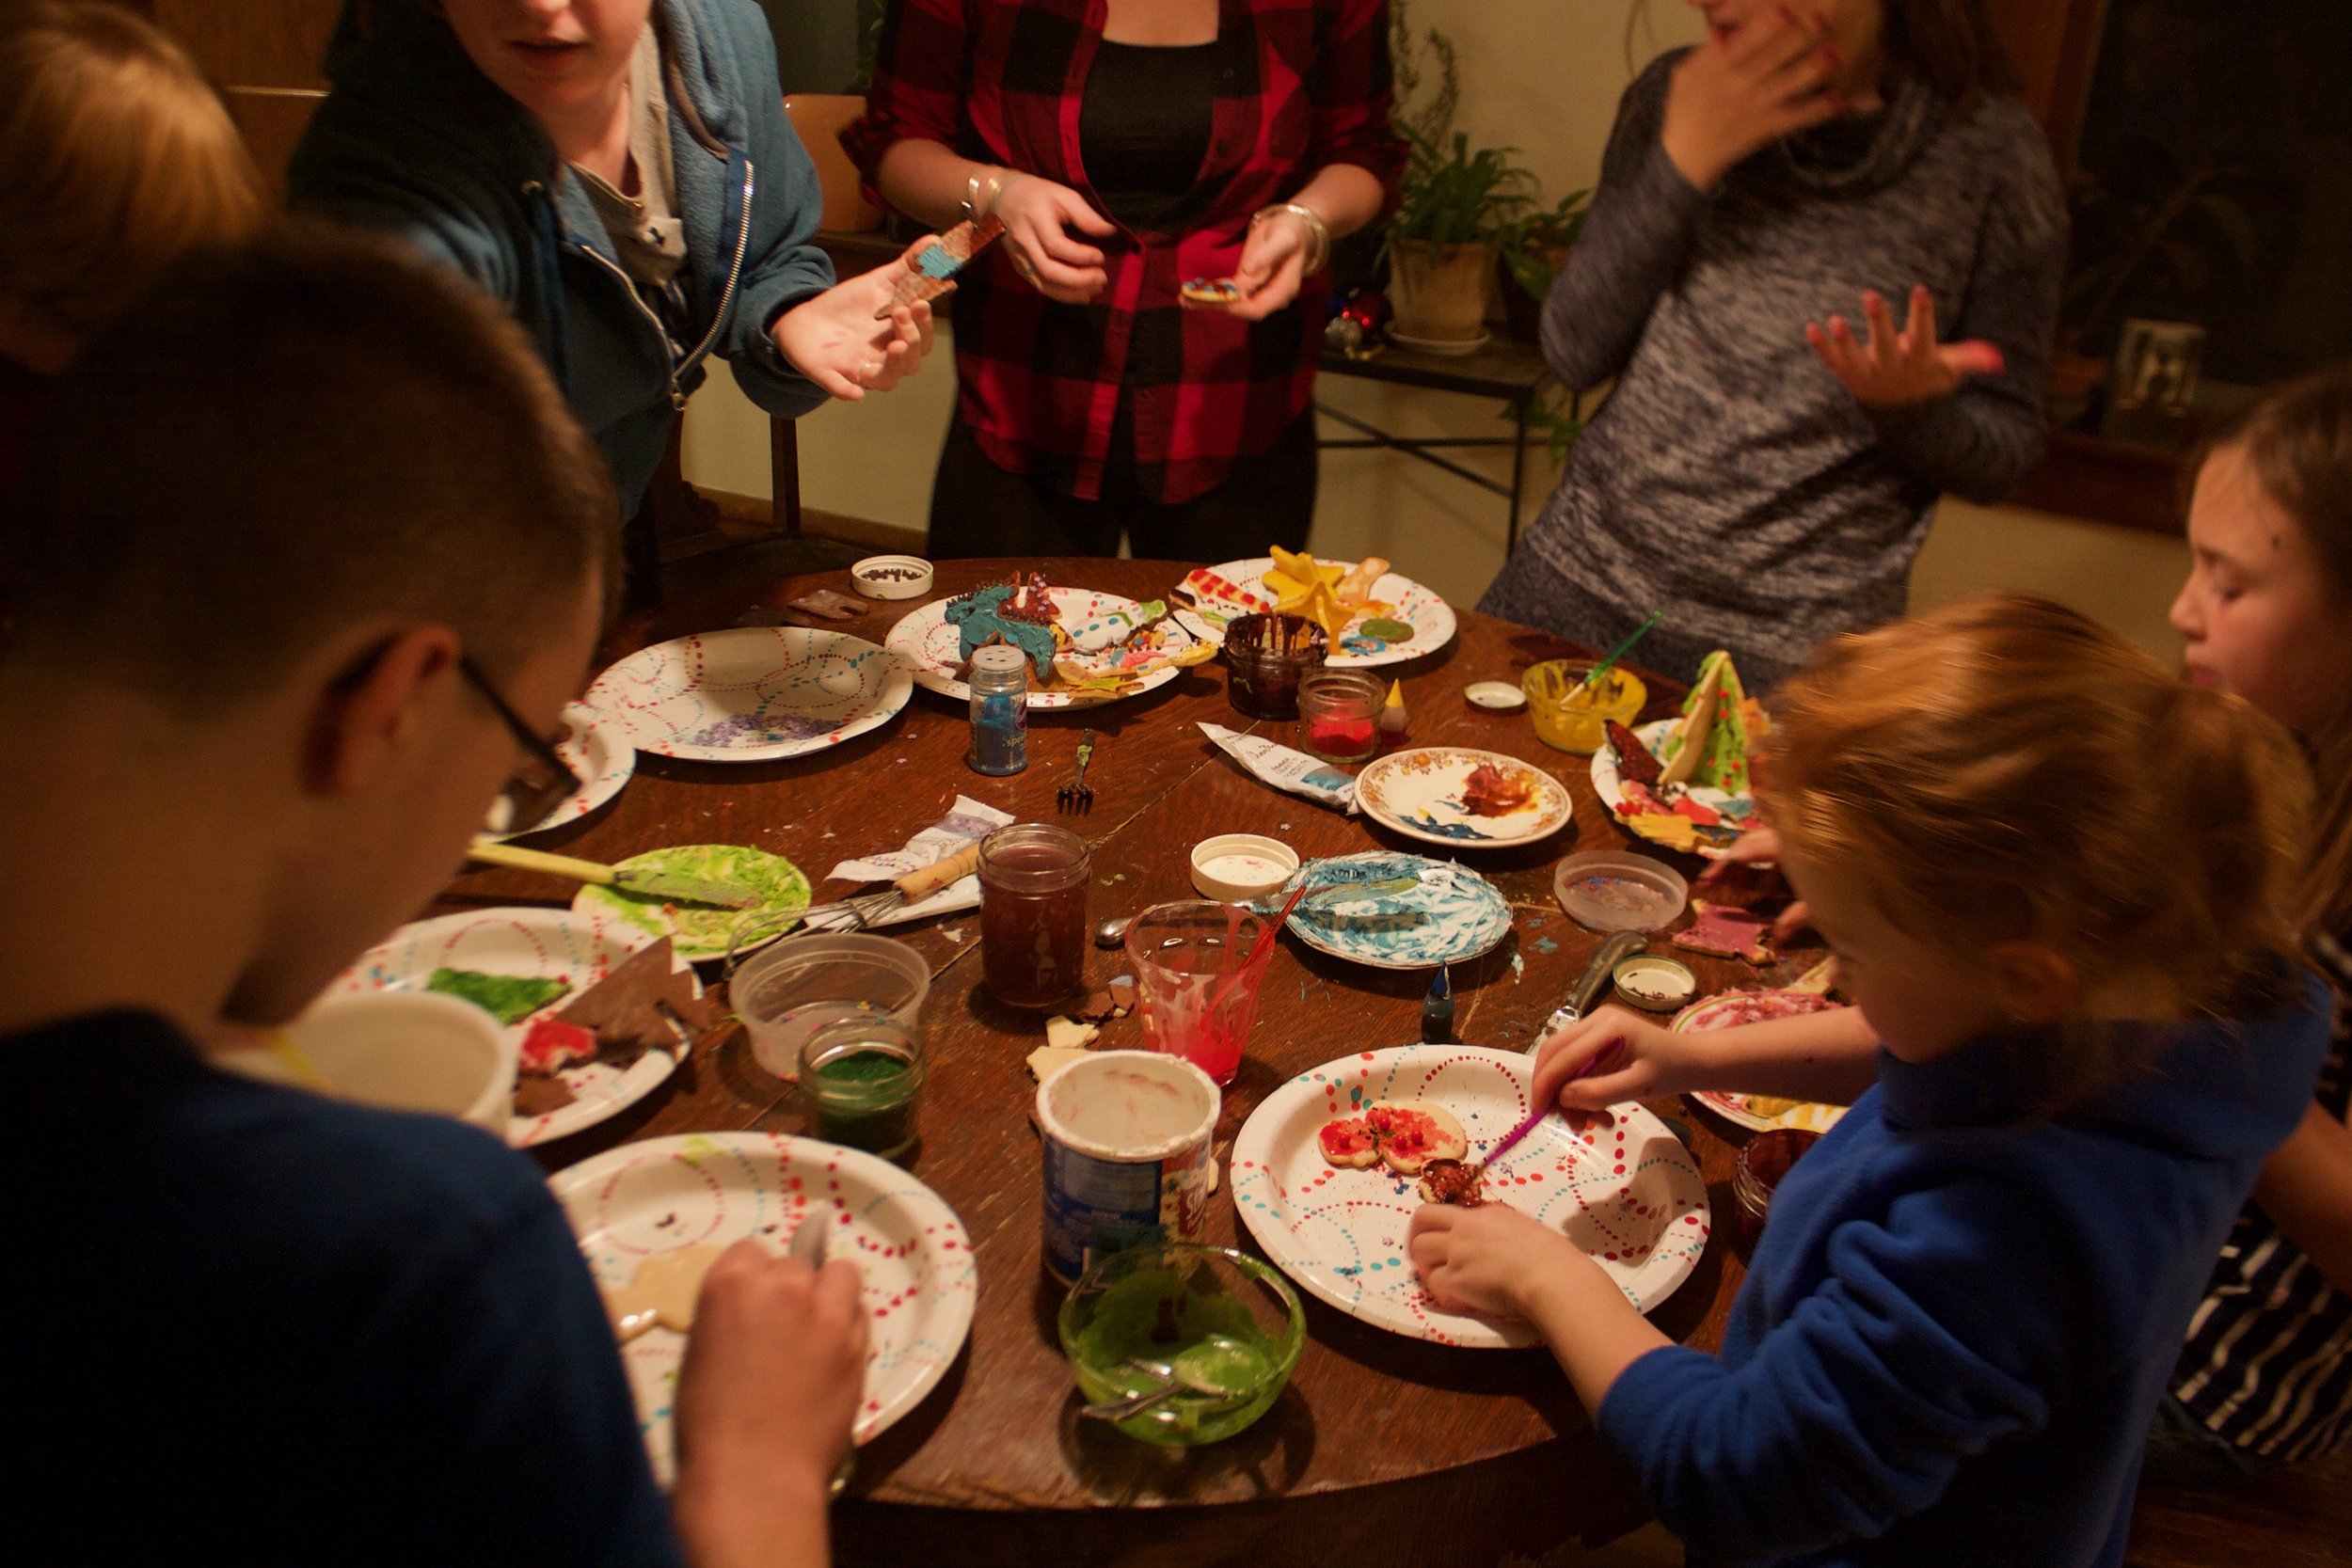
Christmas music on, happy little littles, it started out so wholesome and good.  Glaze, frosting, so many sprinkles. I could smell the sugar in the air. I also said that there was to be no cookie eating until after dinner so naturally I think that each little ate about 5 cookies before dinner. It would have been worse if I had they could eat any at all. 

And then we ate dinner and more cookies and they all went freaking crazy. Like running around screaming, stoping once in a while to maybe think they might throw up,  then kept on running and screaming.  Sugar can do crazy things. 

 Just a few of the creations from the night. There were snowmen, 3D trees and reindeer, and stars. I guess I don't have a snowflake which bummed me out but stars made do. And yes, that is indeed a target employee cookie.. so awesome.

All in all, the party was a success. The cookies came out great. The decorations were on point. The littles and big littles had fun and were all in a sugar coma by the end of the night.  Annnd my house is covered in a light film of stickiness. 

Enjoy your weekend and make lots of cookies because that is what you are suppose to do. 

-C


Lemon Sugar Cookies 

makes 20-25 cookies (all depending on you shapes ands sizes of cutters)

Cookie

  • 2 1/4  cups flour 
  • 1/2 teaspoon salt
  • 1 teaspoon baking powder
  • 1/4 cup squash puree
  • 3/4 cup white sugar
  • 1 teaspoon vanilla
  • 1/2 cup room temp  vegan butter
  • 1 tablespoons lemon juice
  • 2 teaspoons lemon zest

Icing 

  • 2 tablespoons corn syrup
  • 2 cups powdered sugar
  • 2 tablespoons plant milk or water
  • 1 teaspoon extract (vanilla, almond, or lemon)  
  • food coloring (optional) 

preheat oven to 350

In a large bowl beat  together butter, sugar, vanilla, squash, lemon zest and lemon juice until fully incorporated. Add in flour, salt, and baling powder and mix until it all comes together. When dough gets a little hard to mix with a spoon, use your hands and compress the dough into a ball.  Take dough and wrap in plastic wrap or place in a zip lock pulled to dough tight and place in the fridge for at least 1 hour or up to a day.

After the dough has had time in the fridge, remove and let sit for a few minutes.. Lightly flour the counter and roll dough out to about a quart inch thick. Grab your cookie cutter and cut away at rolled out dough. Place cut cookies on a baking sheet, gather up remaining dough and roll out all over again. Repeat process until all the dough has been used. Place cookies  in oven and bake for 10 minutes or until cookies are just barely turning golden brown.  If you like a crispier cookies, cook for 2-3 minutes longer. Remove and place on a cooling rack to cool. 

Prepare your icing.

Mix all the ingerdients together until full incorporated. Color to your liking. 

And once the cookies are  cool its time to start you decorating! You can dip, pour, paint, or pip icing onto cookies. Embellish with sprinkles and candies.

Eat your cookies 

In cookies, Dairy Free, decorations, desserts, holiday, Sweets, Vegan Tags vegan cookies, vegan sugar cookies, lemon sugar cookies, holiday, cookies, lemon, plant based, king Arthur flour, decorations, Christmas cookies, cut out cookies
Comment

Super Cute DIY Heart Pins

February 11, 2016 Colleen Stem
IMG_9084.jpg
IMG_9198.jpg

This past Christmas, my (kinda)mother- in-law gave me and the mr these really cool honey bee pins in our stockings. Nothing fancy, just a little pin, but I think it was one of the best gifts that I had gotten all year. The pin lives on my winter jacket.

And now I am into pins.

So a couple of the little's came over yesterday after school for crafts and dinner and I figured a bit of pin making would be a perfect little project for us to do. And being that it's the big V day coming up,  making these pins heart shaped was more then overly appropriate. (What's Valentines day without cute little hearts?) Well pin making we did, or I did, not so much for them. They made a few, but in the end, they were more excited to beat the crap out of the mr and to eat carrot shavings with peanut butter and nutella.. Totally ok with me because really, I was the one that wanted a little craft time and the mr did need to get his butt kicked.

Sure I made these pins pretty much for myself, but imagine the possibilities. Make a bunch to give out to your friends, family, neighbors, or even the mail man!? Or if you have yourself a little, how great would these pins be make and to give to all their little classmates. I know that if received one of these pins in my homemade shoe box mail box meant to collect all of my candy studded, drugstore bought valentines. I would have been elated and rocked that pin all year long on my super cool backpack.(grade schooler, they have all the fun) Right after I finished painting and gluing all my pins, Miley then decided that they were freaking awesome and wanted to make a bunch more.... Well little little, to late, time to go home. But I did give her a bunch to bring back with her. She will just have to bug her mom to make some more.

And sure, I mention valentines day when talking about these pins, but really, hearts are for everyday, and are still really great long after V day is over.

Handmade heart pins = love!

Stuff you need for some awesome pins.

  • Polymer clay (I used white but any color will do)
  • red and white paint (preferably enamel or a high gloss paint) and a paint brush
  • bar pin backs (I bought these at Michael 's craft store. 64 for like 3 bucks!)
  • industrial strength glue (E600 is great and is used and recommended by many a crafters)
  • rolling pin or wooden dowel
  • small heart shaped cutter
  • sharpie pen to write on pins (optional)
  • Glitter( also optional)

A couple notes. You could use red clay but I have found that when I buy the red dyed clay, its always harder to work with and plus, it stainsyour hands. Also, I like to seal the clay and enamel paint does the trick. If you don't want to paint it, just pain on a coat of clear sealer.

Start buy kneading a chunk of clay a little bit to get it to a workable state, then roll into a ball and roll out flat. I rolled mine out about 1/3 of an inch, but I also knew I wanted to squish it out a little flatter once I cut the shapes out.

Cut out your hearts, or if you want, free form them.  What I did was used my tiny heart cookie cutter to cut the initial shape, but then used my thumb and squished them all out a bit bigger.

Note here.. Hears are awesome and amazing, but other shapes....Go for it. You probably have a shit tone of those pin backs.

And just before you bake them, make sure that the pins you are using will fit behind the hearts. (if you notice any visible pin, just smoosh the heart out a little more).

Into the oven,, out of the oven. Read the package to make sure, but the stuff I used only needed to be baked for 15 minutes at 275

Once out of the oven, let completely cool and harden.

Once the hearts are cooled, go ahead and paint them. Use straight up one color, or mix and make a few different shades. (red, white and pink are nice together)

You can add some glitter to the wet paint to add a little bling....

Or add designs or what have you. Do whatever feels right.

Now stick a pin thingy on the back of each heart with a blob of glue. (If you use the E600, make sure to use it near a window or somewhere ventilated.. it really stinks for a few minutes)

Let the glue dry (this glue was completely dry within an hour, but follow glue package instructions)

And if you want, grab the sharpie, make sure the paint is really dry (at least an hour) and write a little something on the hearts.

And now the hard part.. which one goes to who and which one (or 4) do you keep for yourself. (you can always make more!)

Have fun!

-C

IMG_9192.jpg
In arts, crafts, decorations, DIY, holiday Tags DIY, Heart Pins, Super Cute, Home, homemade valentines, valentines day, simple, gift, pin, arts, crafts, polymar clay
Comment

Make Your Own Snow.... Wax paper Snowflakes

December 19, 2015 Colleen Stem
IMG_5957.jpg
IMG_5923.jpg

I think of myself as a problem solver. I see a problem and I look for a solution. And not to sound like a broken record, but the problem that I am having now is that it is winter here in Vermont, but you wouldn't know it cause it's 50 degrees and there is no f-ing snow. Yes, this is a problem for me. I don't think its just me, everything around here is acting weird.  My plants are not going into winter mode and are starting to droop and be sad. My fall allergies are coming back, plants are starting to bud again, Washer is shedding like crazy, and my snowshoes have not left the barn. It's just weird and it makes me sad.Vermont is suppose to be cold ans snowy right now. Sure, there are people that might like this wonky weather, think they are getting a little extra treat, but not me. NOT ME!  So this is the problem. And the solution that I have come up with, short of moving, is to cover all the windows with wax paper snowflakes.

See. Problem solver.

We have been spending a good amount of time over at the new house working away so this is where I decided to plaster my flakes. In between cleaning up pieces of broken wall and moving 500 lb bags of trash out of the house, I sat down at the little table, plugged in the Christmas lights, turned on some Christmas music, and totally zoned out. Sipping coffee and sniping away..it felt so right. And the results were quite good if I do say so myself. A window full of flakes that made me smile. Maybe the snow gods will see my effort and grace us with a huge ass storm. Wouldn't that be so lovely!

All you need to make some flakes is

  • wax paper (mine is slightly tan because it's not bleached)
  • scissors
  • tape

Optional things

  • glitter/glue
  • paint/brush
  • Christmas music
  • A hot beverage such as coffee or cocoa

Note. Why wax, well wax paper is really thin and makes cutting through all the folds easy. It also lets light shine through rather nicely and best part, the wax keeps the paper from getting soggy and gross from window condensation. But if you want, use paper. I don't mind.

IMG_5937.jpg
IMG_5938.jpg
IMG_5939.jpg
IMG_5940.jpg
IMG_5942.jpg
IMG_5944.jpg

This is how learned to make a snowflake... Start with a square piece of wax paper (any size you like) and fold it in half on the diagonal. Then fold that in half at the point.  And fold old again at the point. One more time after that. (from start to finish, 4 folds) You end up with a little dart like triangle with a little extra point at the top. Cut that extra bit off.

And snip away.. It can be thought-out or random (I like random snips)  Just make sure that you don't cut off all the folded paper parts cause that is what is holding it together.

Now for the most exciting part. Open (very gently) and see your snowflake creation.

Note. This is important to remember.. No snowflake is the same, and no snowflake is ugly.

Now tape the flake to where ever it should land (the window)

Stand back and enjoy all of the snow you can handle. I have gotten to one window, just 10 more to go!

This one is my favorite.

Happy weekend full of snow!

-C

(mini snow storm!)

In arts, crafts, decorations, DIY, holiday, paper crafts, photography Tags DIY Snow, snowflakes, wax paper snow flakes, winter, arts, crafts, holiday, funtimes, easy craft projects
Comment

Sunday Happy

December 6, 2015 Colleen Stem

YEAH! We got our tree this past weekend and now there is even less room to move around. (It takes up approximately1/4 of our living space, but I don't care. I love it!. We ventured south toth e rangers station, picked up our tree permit, and drove into the great mountains to find the smallest amount of (but still some) snow and the most perfect (so not even remotely close) tree growing snug, deep in the woods. We have been dong this for at least the past 5 years and every year, the trees we pick out get fatter and a little funnier. But they are always awesome and beautiful and make me the happiest! And now that we got our tree, I finally got to watch Elf. I say finally because me and the mr have a tradition where we string popcorn for the tree while watching it, so I usually wait until that night to watch it.(then I can watch it as much as I want after that)  Along with the popcorn, the mr suggested we do a paper chain (he is so smart) which came out so good and really classys up the tree.. I haven't taken any pictures of the decorated tree, but I will be sure to take some and show you later.

Other then the tree, this week was a world wind. Birthday parties, family crazy, new house stuff.  I powered through a couple of long nights and finished a quilt for one of the littles birthday. We have been going over to the new house almost everyday and doing a little this and a bit of that, on top of whatever else we do. Yup, another busy, fun and good, but very busy week. And now it's finally Sunday and all I am hopping for is a few hours of couch sitting with my book, and coffee, and some snow. (I have given up a little on winter here. What the F... Its just not right!)  And that's what I hope for you today, well I hope you take some time to do you and relax a bit. Maybe not go shapping ALL DAY or even feed the kids left over popcorn,  peanut butter sandwiches , and cookies for dinner tonight and just take some time to kick back. We all need it.

Oh, and to all of those celebrating.. Happy Hanukkah!

Internet things from the week to check.

-Just in case you need to know, here is a step by step to paper snowflakes 

- Research says, having a dog as a kid is amazing for your mental health

-Super into this interior look

-Speaking of interiors...

 -survival food…. not something I want to ever have to get down with

-$5 CHRISTMAS TREES AVAILABLE IN THE GREEN MOUNTAIN NATIONAL FOREST... This is what we do.

-Now I understand why some rugs cost like a million bucks.. Gorgeous Geometric Carpets Modernize An Ancient Weaving Technique

-The dutch, they know what they are doing. The many treats of a Dutch pre-Christmas celebration.

-See a salt shaker in a menu? Think twice. Sodium Warnings Hit New York City Menus

Have a great day!

-C

In decorations, holiday, photography, sunday happy Tags christmas, Christmas tree, VT national forest, forest, Cut your own tree, wood, nature, family, fun times, internet, photography, Vermont
Comment

Happy little Trees - Light box

December 5, 2015 Colleen Stem
IMG_4992.jpg
IMG_5069.jpg

I love me a good tree, pretty much any tree, real or fake.  And come December, my house if full of different little trees, of all sizes, shapes and colors. It's my holiday thing because really, there is nothing better then a tree.

And yeah, I was feeling crafty, and maybe a little bit sad that there is no snow around here. And we still hadn't gotten our real tree yet (but we just got it!) so I wanted to make some more little trees to make me feel better, and this time I wanted them to light up. I was also thinking that it might be nice to bring a few little tree decorations over to the new house so I have happy little trees over there while we are working. So yeah, I needed some more little trees. And I figure you do too, that's why I am sharing this.

This is a great project to do with a few littles (they make the trees, you use the hot glue and sharp blade) or make while baking bread and watching a festive movie.  You could even make and share with a loved one as a sweet little gift. And best part...it doesn't need to be packed away after the holidays because trees are not just for Christmas. These are pretty little winter trees, for everyone who is awesome and likes a tree to enjoy all winter long!(even if winter hasn't come yet)

The stuff you will need

  • A piece of cardboard about 12x16 (I used an old pizza box I found in the recycling)
  • assorted paper of size an color
  • white tissue paper (optional)
  • a strand of 20 lights (colored or white)
  • a ruler
  • scissors
  • hot glue gun
  • glue stick
  • tape
  • pencil
  • xacto knife

Note. If you have an empty shallow box that is a good size for you, just use that. And hot glue works best, bt can be subed out with any glue, or tape for that matter (if you don't mind seeing tape on your trees)

IMG_4829.jpg
IMG_4834.jpg

Start with making the cardboard box base. Measure each corner in 1 inch and cut our the corner. Repeat with all corners. Once they are allcut, fold each side at the cuts to make the sides.

Tape the corners together and now you got yourself a sallow box. (now you can make boxes for everything !!!) Set box aside

IMG_4859.jpg
IMG_4862.jpg
IMG_4863.jpg

Now to make the trees. Take a piece of paper and, depending if it is already a square or not, but it into a square. (does not have to be perfect, just eyeball it)

Got your square paper, now take an edge and fold it over about 1/2 inch. And then taking you scissors and snip of the corner edge at an angle (again, not going for perfections here)

The poin is the tip that was cut, now fold the two sides together.

So you can stop here ans glue or if you want light holes.....

IMG_4878.jpg
IMG_4880.jpg

Unfold the paper and with a pencil, mark off where you wnt the holes (random is good). Take the xacto blade and cut little x'x over each hole.

Then push through each x with the eraser end of the pencil

Now glue the cone together using the hot glue gun.

You will have a weird tail left on the bottom of the cone, so just trim that off and any extra that needs to come off to make it stand up straight.

Ta Da!! A paper cone tree. Now make a bunch of them, all different sizes and colors (or all the same size and color.. up to you) And not all of them need to have light holes in them either, a couple non light trees are good.

IMG_4994.jpg

Once you have made all the cone trees, grab the box base and set up the trees how you want them to be on the base

IMG_5004.jpg
IMG_5007.jpg

Take the trees off and mark the spots with the pencil. Grab the xacto and cut X's into the marks.

Take your lights and push the bulbs through (there will be a extra bulbs on the underside.... it makes the box glow.)

And tape down the trees back into place

So cute!

Note.. I stuck a couple extra lights through the box that have no trees. They will be covered in a minute with snow.. So you can do the same. (if you want)

Now you check it out!!! Love it right?  And stop here if you like, or go one more step and add some fake snow.

Before you tape down the trees, take glue stick and glue random pieces of tissue paper all over the box, leaving the lights uncovered. (I covered over the extra lights I popped through to make it look like glowing snow)

Stick trees back on.. same way with the tape (You might need to fanagle the trees a little bit to get them to stay)  and plug it in.

Ooooh...... Aaaaahhhh

This makes me happy.

Now go get some paper and start making some trees.

Have fun!

-C

In arts, crafts, decorations, DIY, holiday, paper crafts Tags Holiday, decoration, lights, tree, craft, DIY, Trees, Christmas trees, Paper cone trees, light box, winter crafts, night light
Comment
Older Posts →
 

https://thelovelycrazy.squarespace.com/config#/|/about/

Me. Food Maker.Food eater. Woo HOO!

STEM+NODE  SMALL BATCH AND ONE OF A KIND POTTERY

stem+node ceramics


____________________

Subscribe

GET NEW POSTS IN YO EMAIL

You are AWESOME!!!


@thelovelycrazy 2014-2021