• stem+node ceramics
  • HOME
  • Food Recipes
  • About
  • Contact
Menu

The Lovely Crazy

Street Address
City, State, Zip
Phone Number

Your Custom Text Here

The Lovely Crazy

  • stem+node ceramics
  • HOME
  • Food Recipes
  • About
  • Contact

Toasted Coconut And Corn Popsicles

June 1, 2019 Colleen Stem
IMG_9023.jpg
IMG_8962.jpg

Yes you read that right. Corn. In a popsicle.

What?

No it is not weird or gross or anything. I wouldn't do that to you. These popsicles are down right deeee-lightful. Rich and creamy and sweet. Both the creamy coconut and the toasted coconut pair perfectly with the sweet corn flavor. They truly are delicious and I think that if you give them a try, you will think so too. And really, now that it is like almost summer, who doesn't have a little extra corn laying around. So you might as well just make a batch.

And then you will thank me for introducing you to the goodness that is a toasted coconut and corn popsicle. Heck, the mr even ate one and he (still, after I have proven him wrong on a many occasions) says he hates corn. So if a corn hater likes these, imagine what a corn lover will think. HAHA. Corn lover.

To the popsicles!

The stuff. Corn, full fat coconut milk, shredded coconut, and maple syrup.

IMG_8851 2.jpg
IMG_8869.jpg

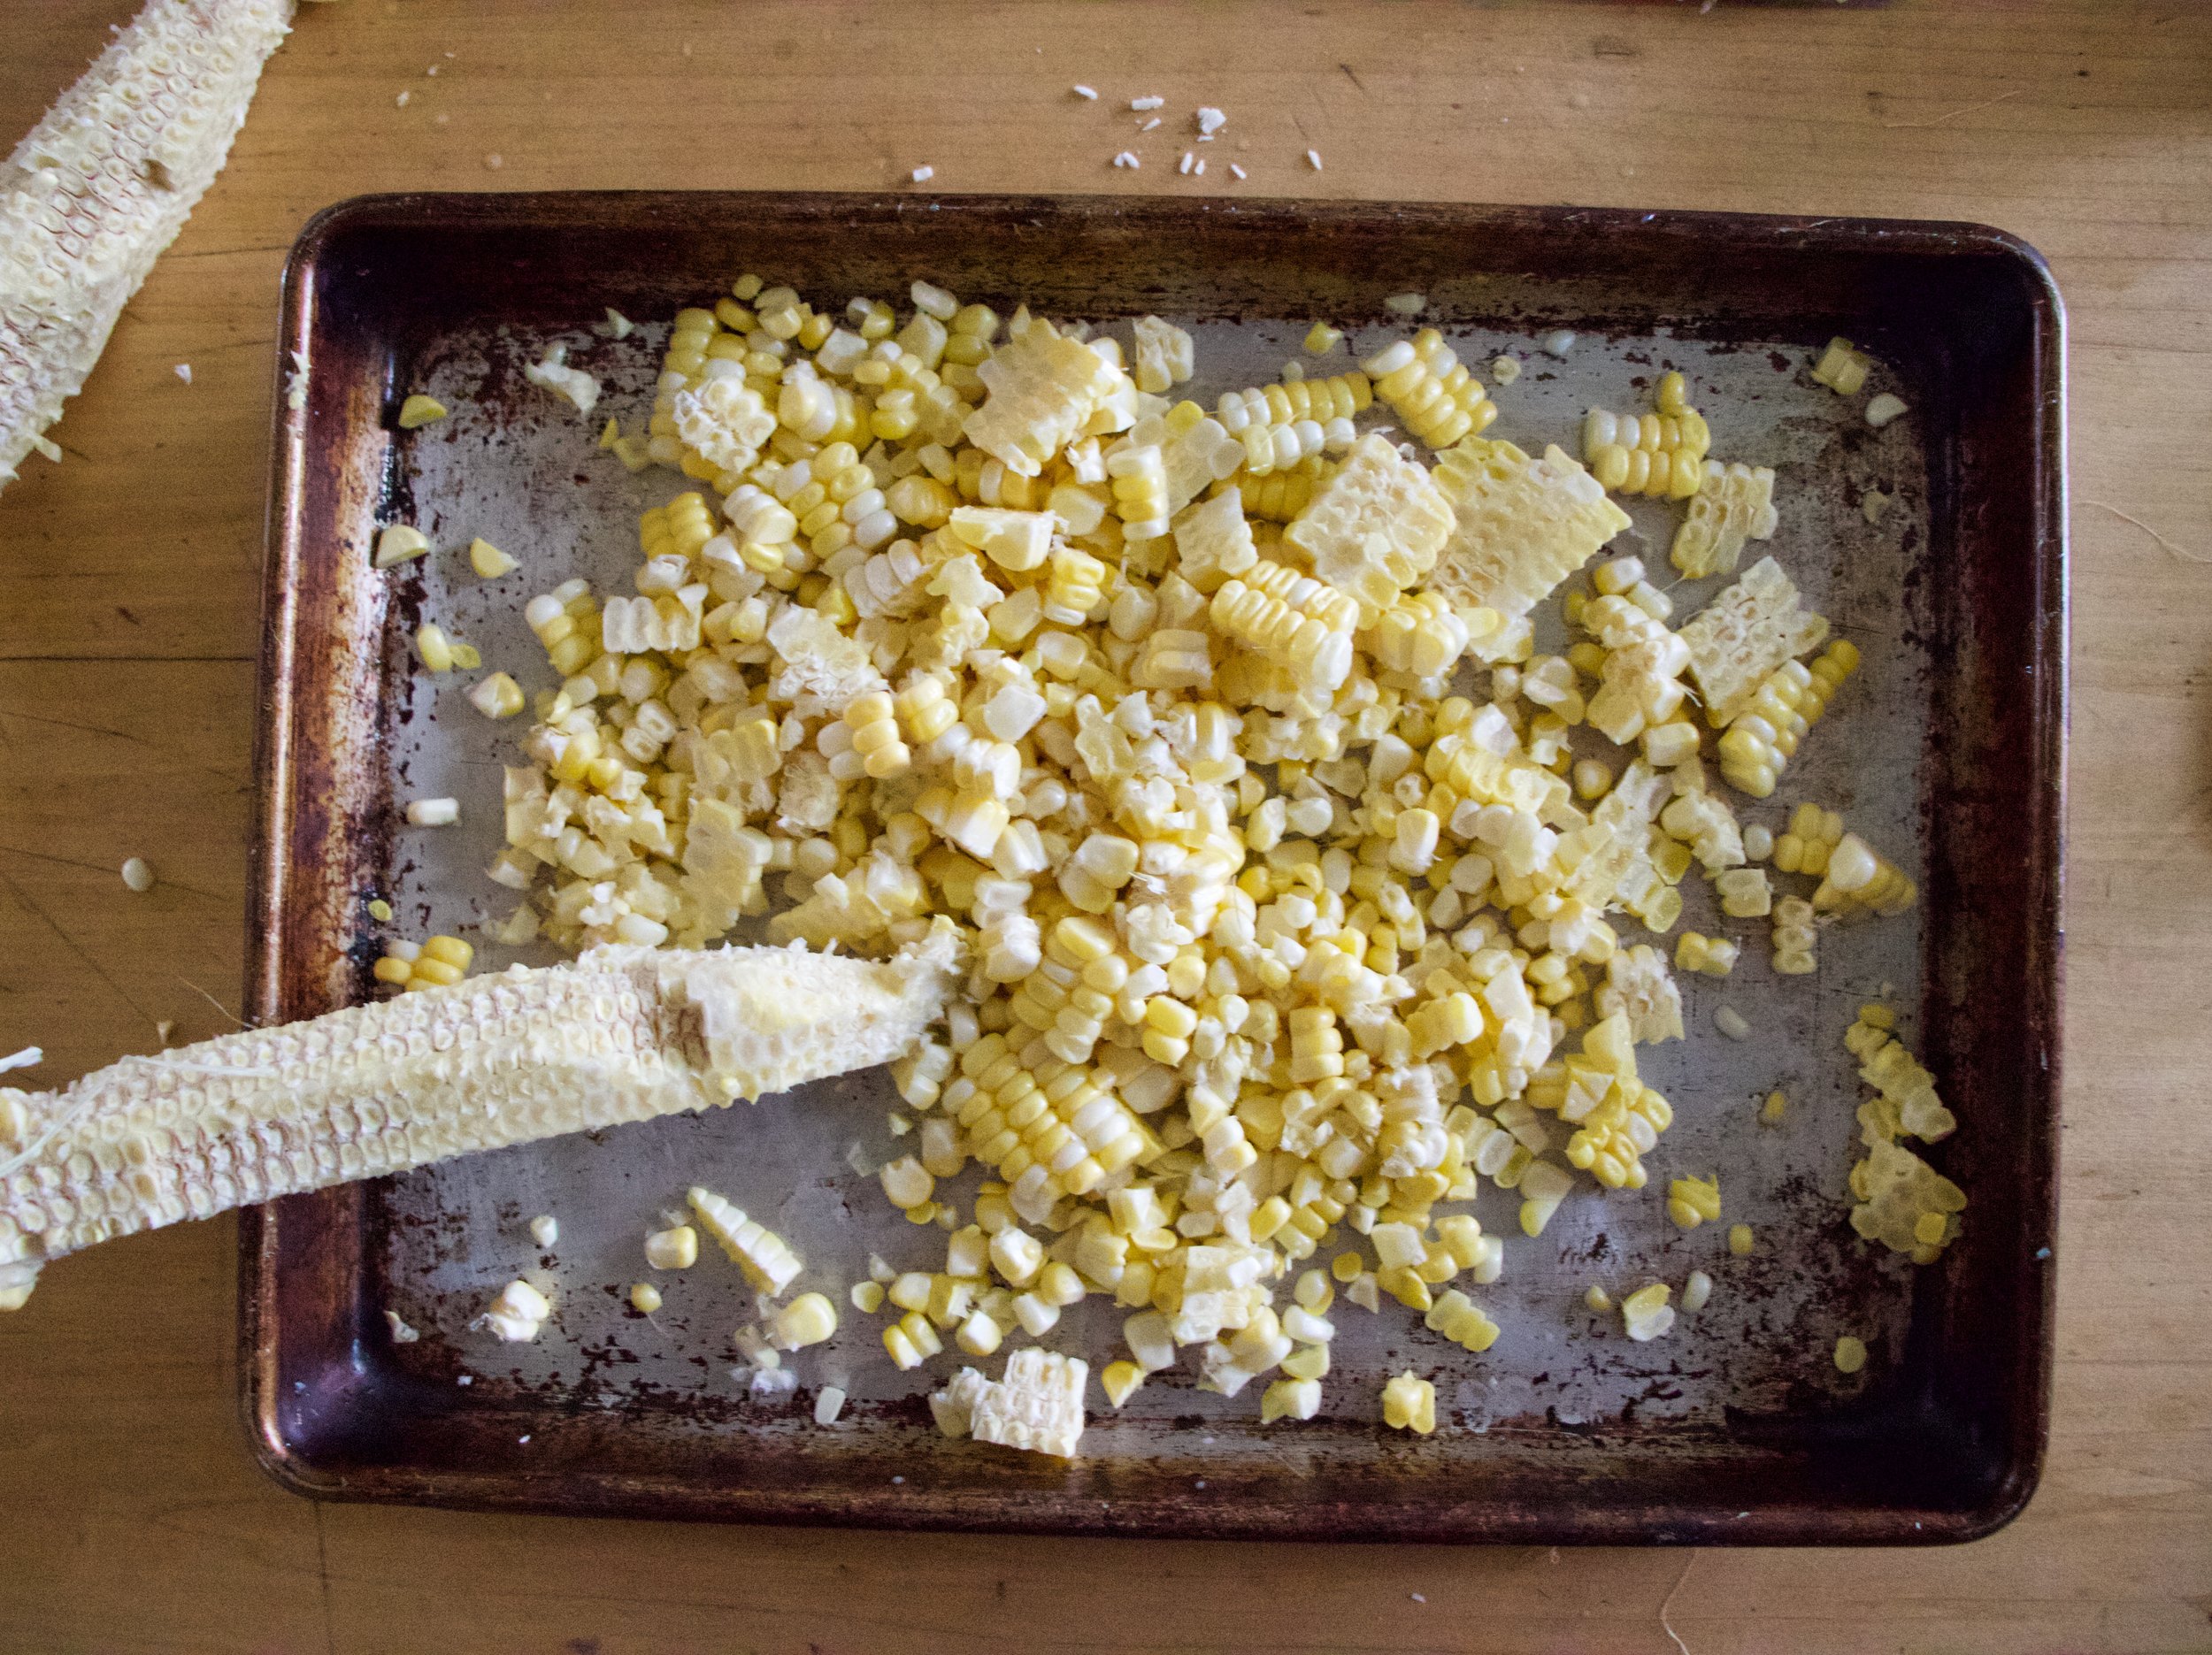
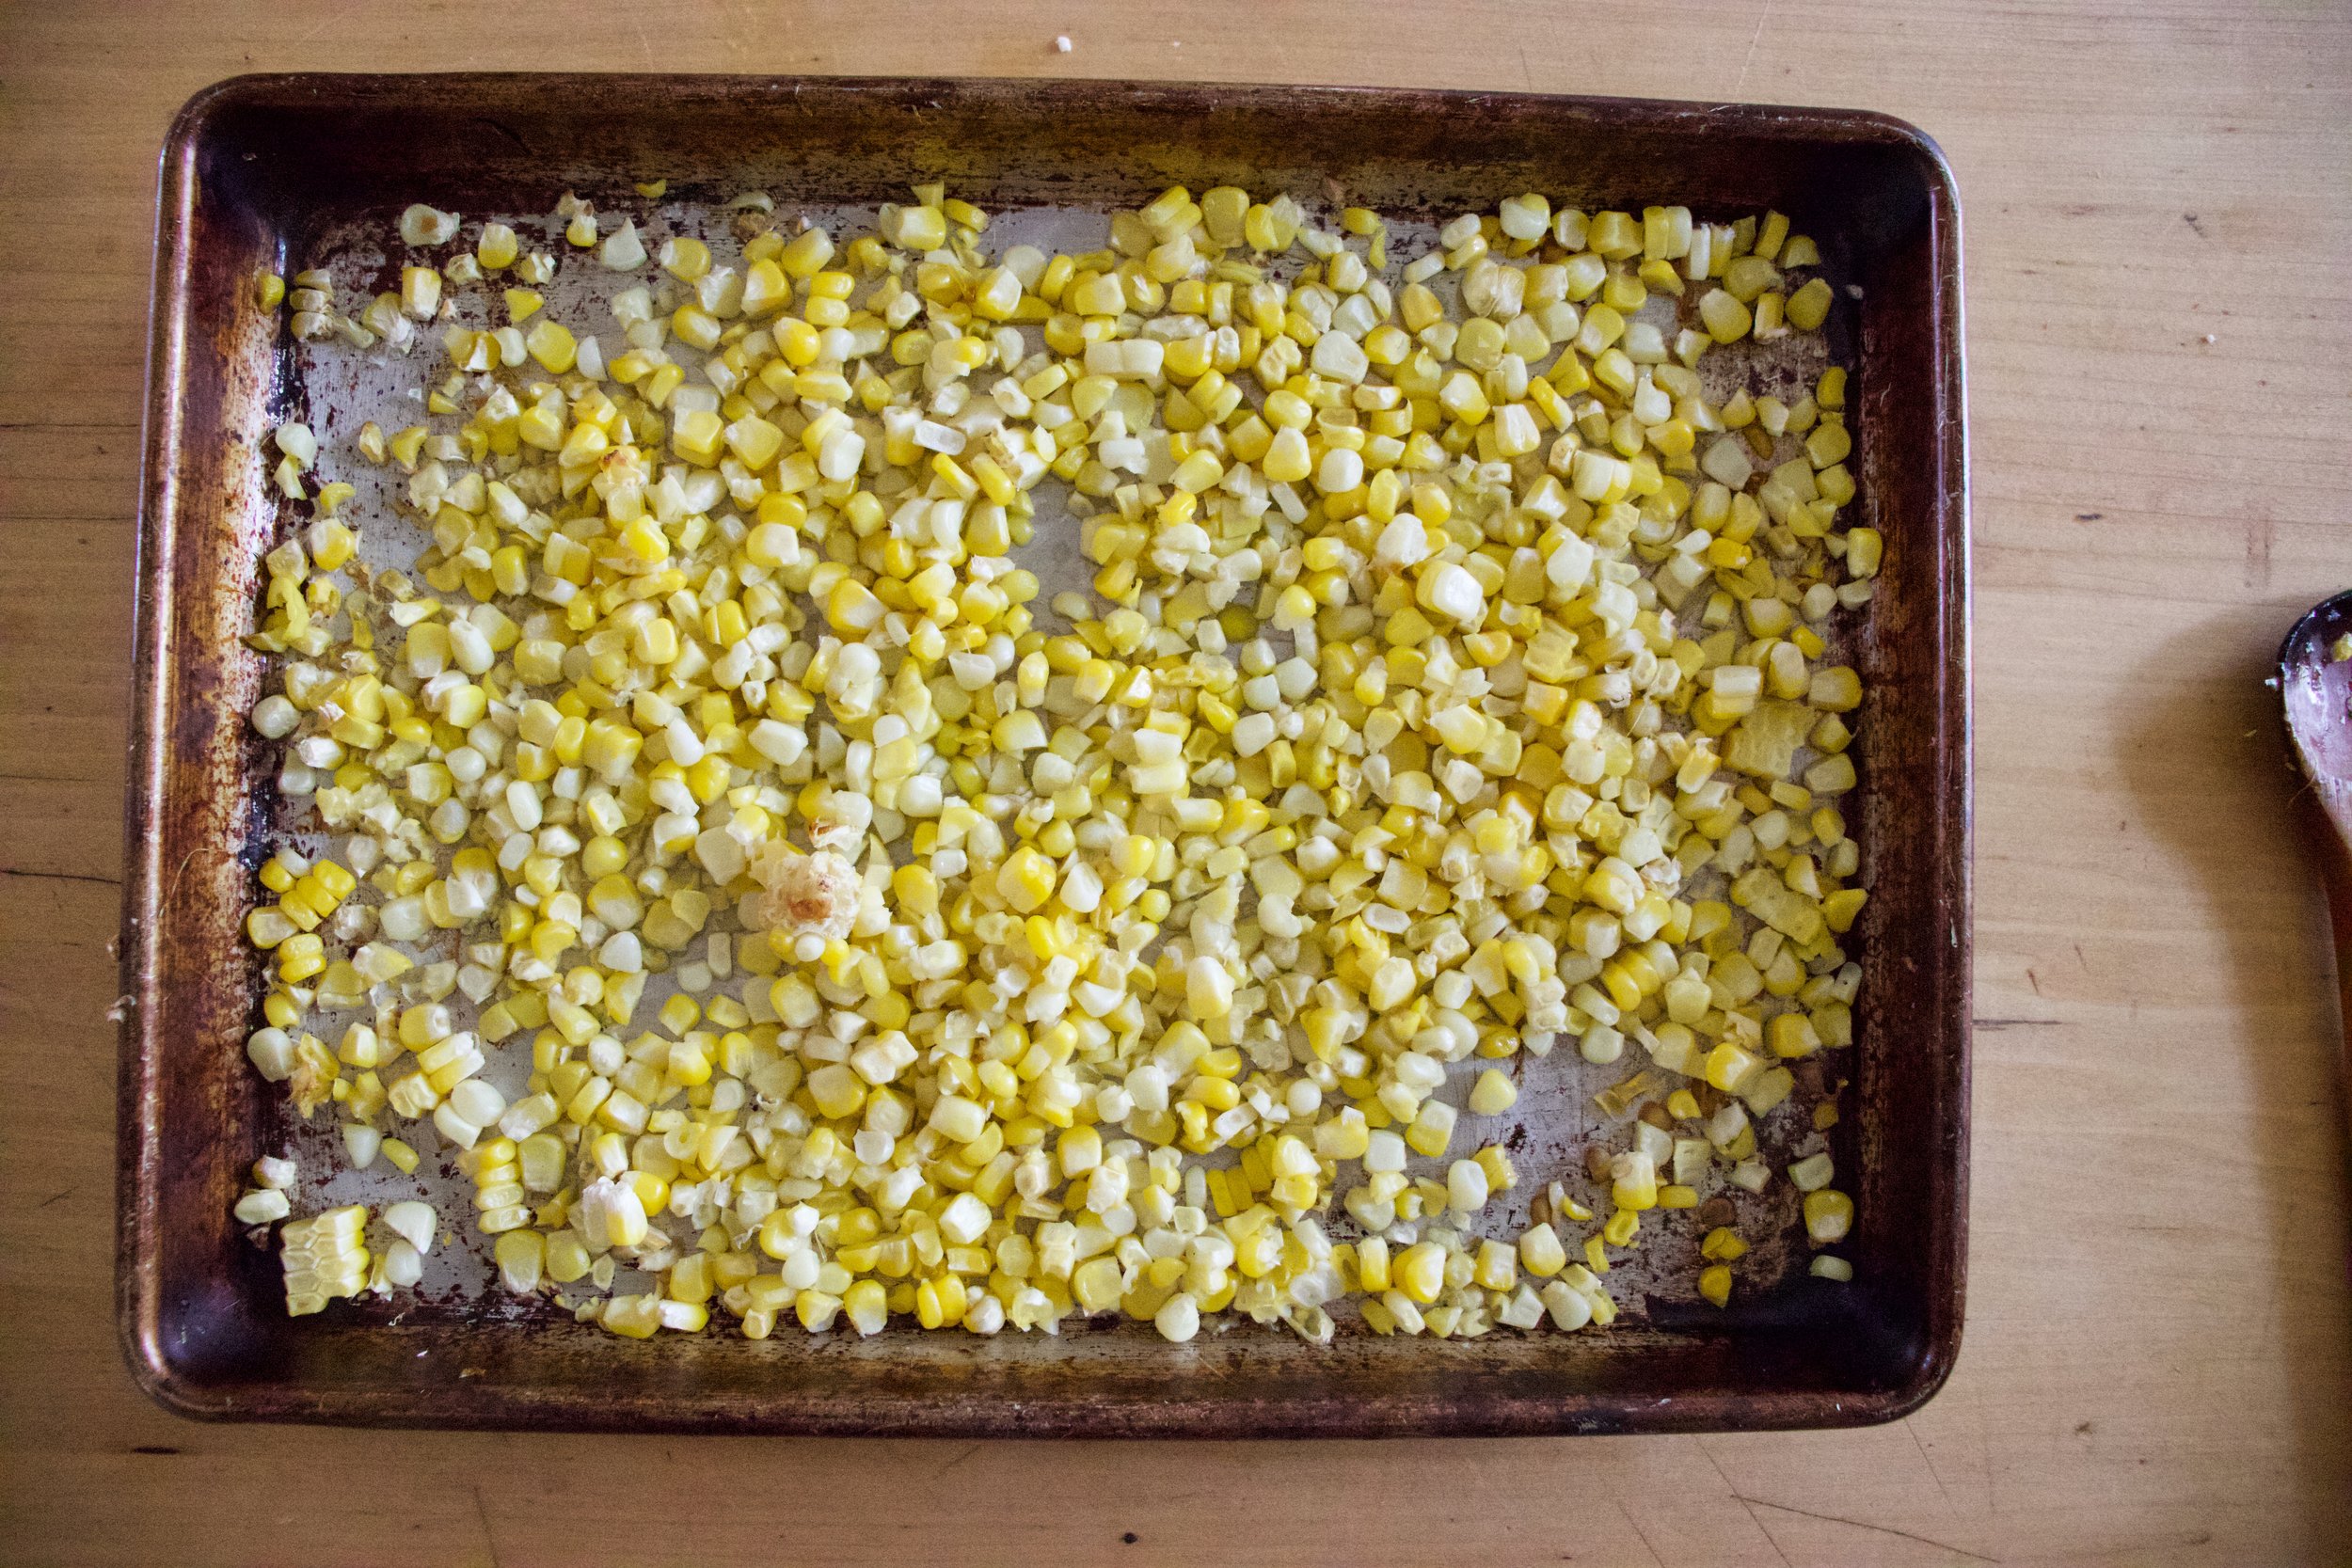
First, remove corn from cob and place on a baking sheet. Bake in oven for 10-ish minutes until corn is cooked and all nice and sweet.

IMG_8897.jpg

And don’t forget to toast the coconut. A few minutes in the oven is all it needs.

IMG_8879.jpg
IMG_8911 2.jpg

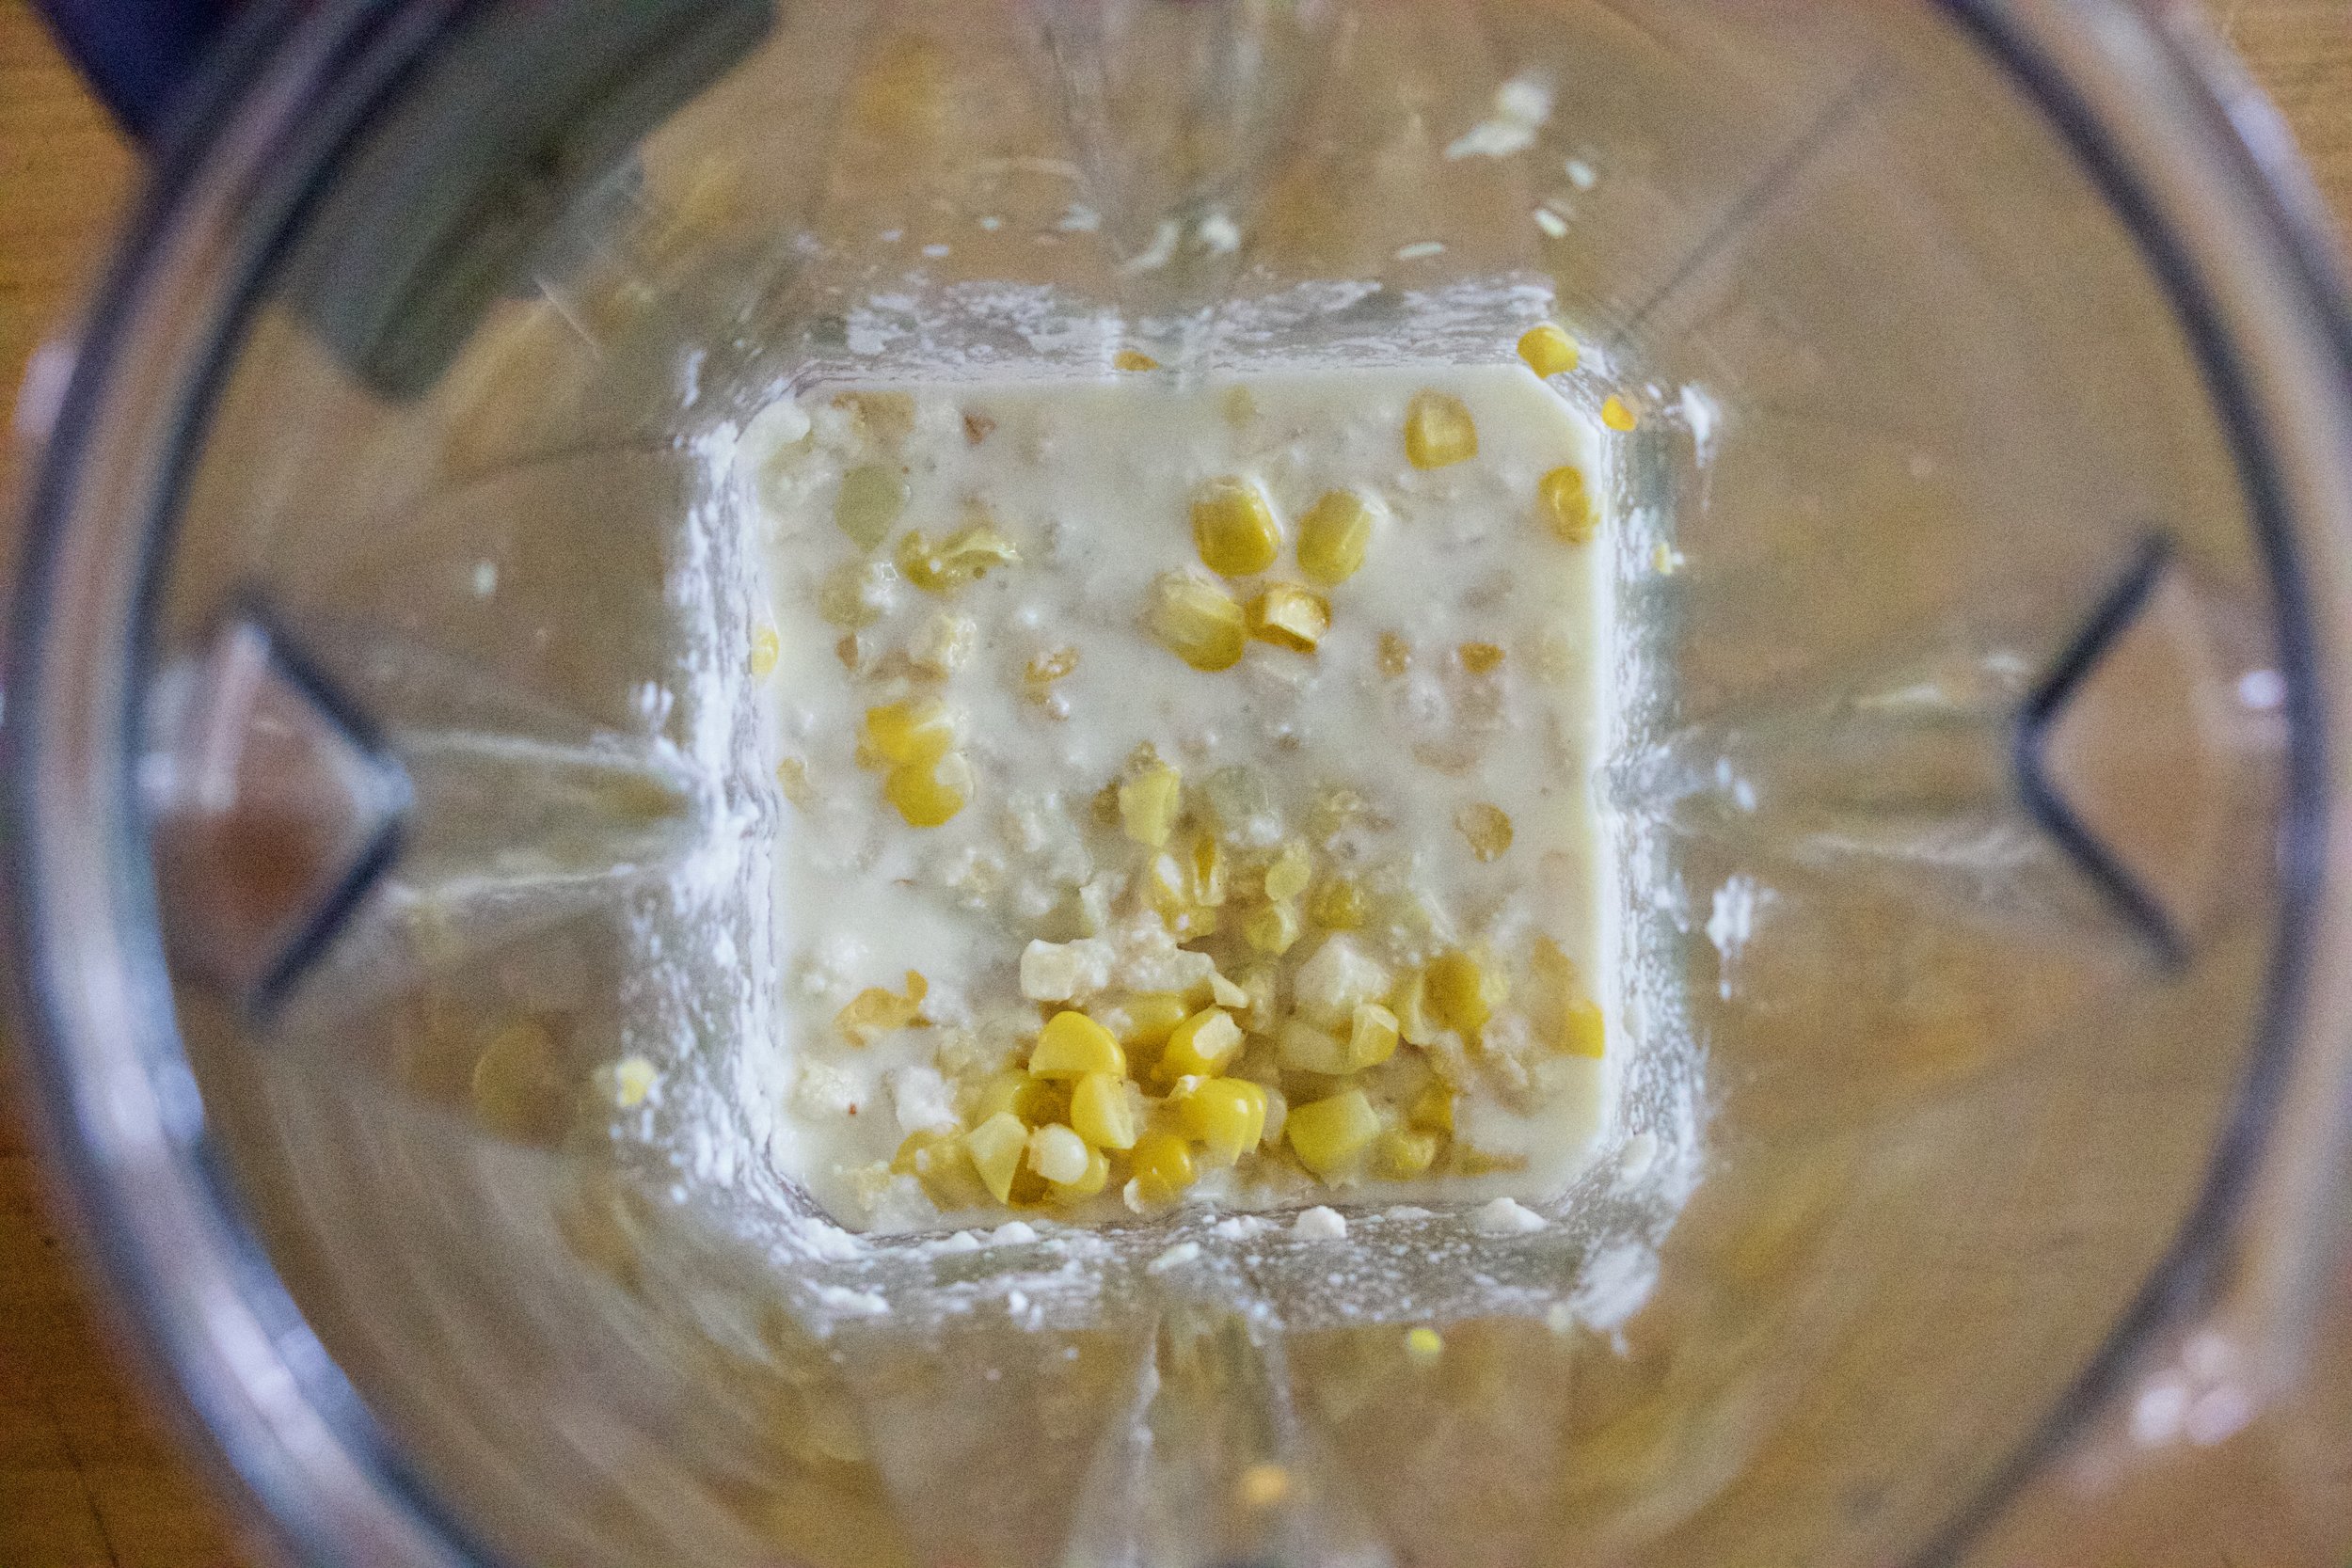
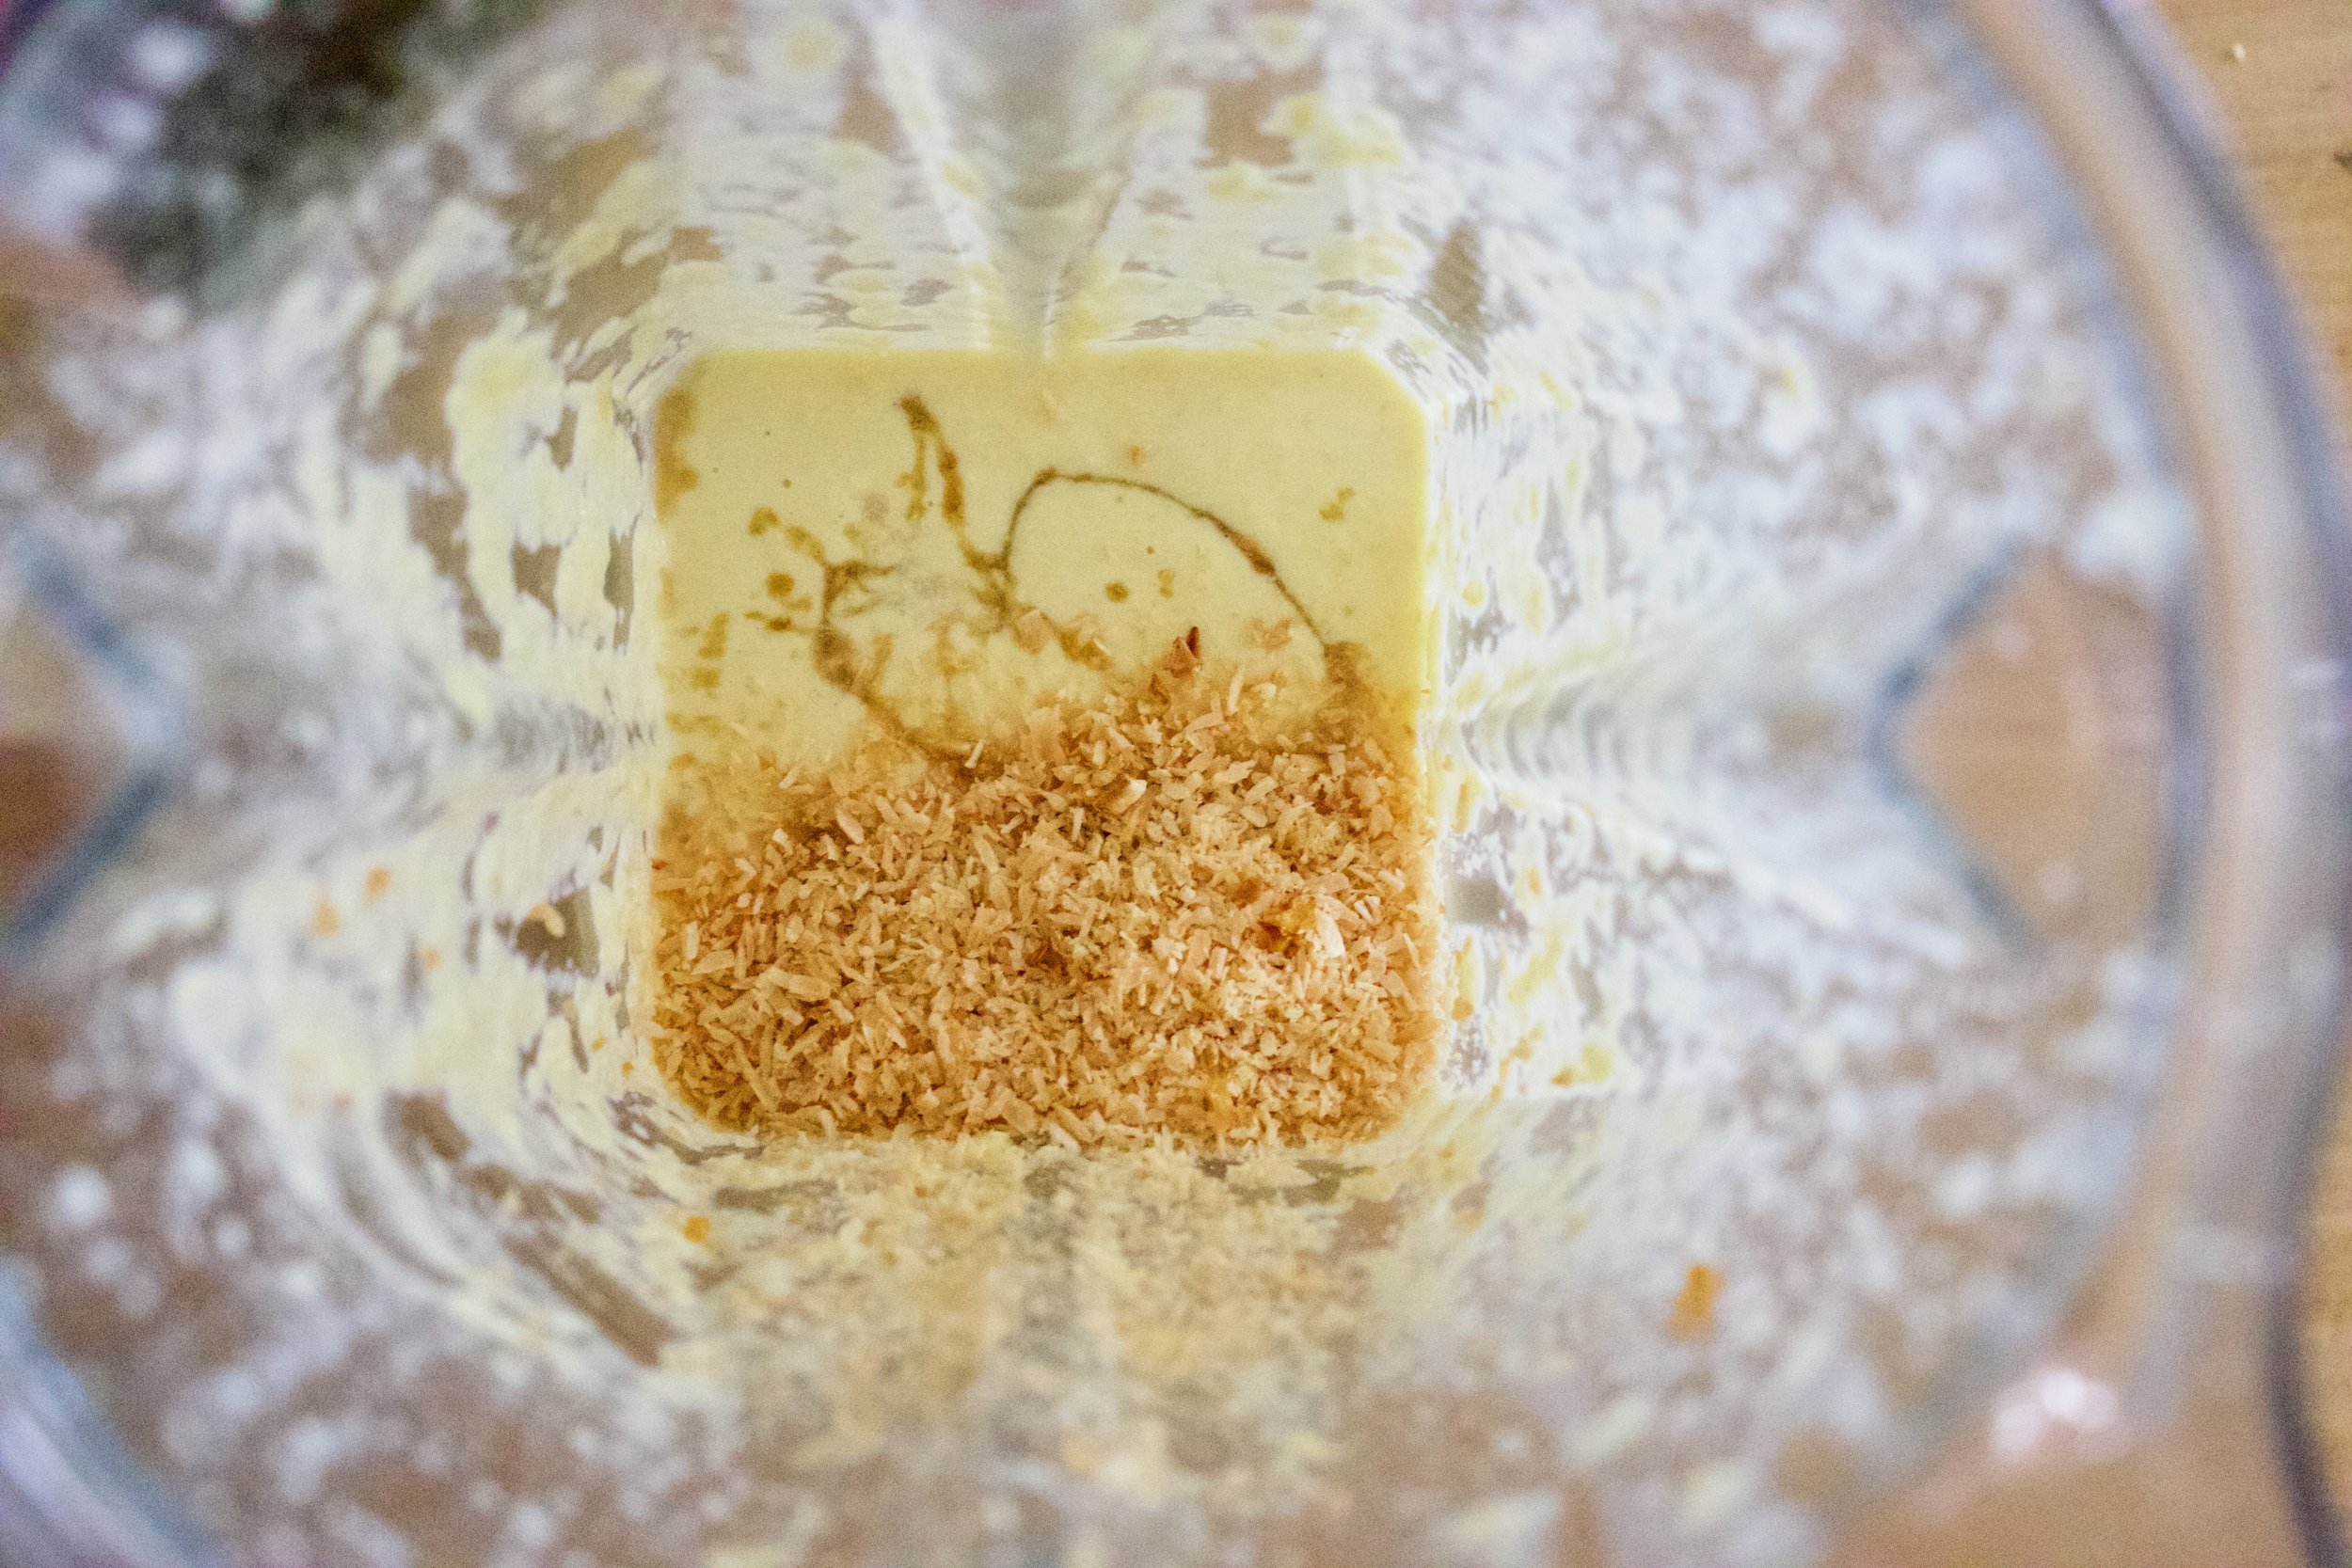
Now to blend. Corn and coconut milk go in first to blend until nice and smooth. Then add in the maple and coconut and blend until just combined. That will leave a little coconut texture. If you want it smooth, well just blend until completely smooth. Do what feels right to you.

IMG_8913.jpg

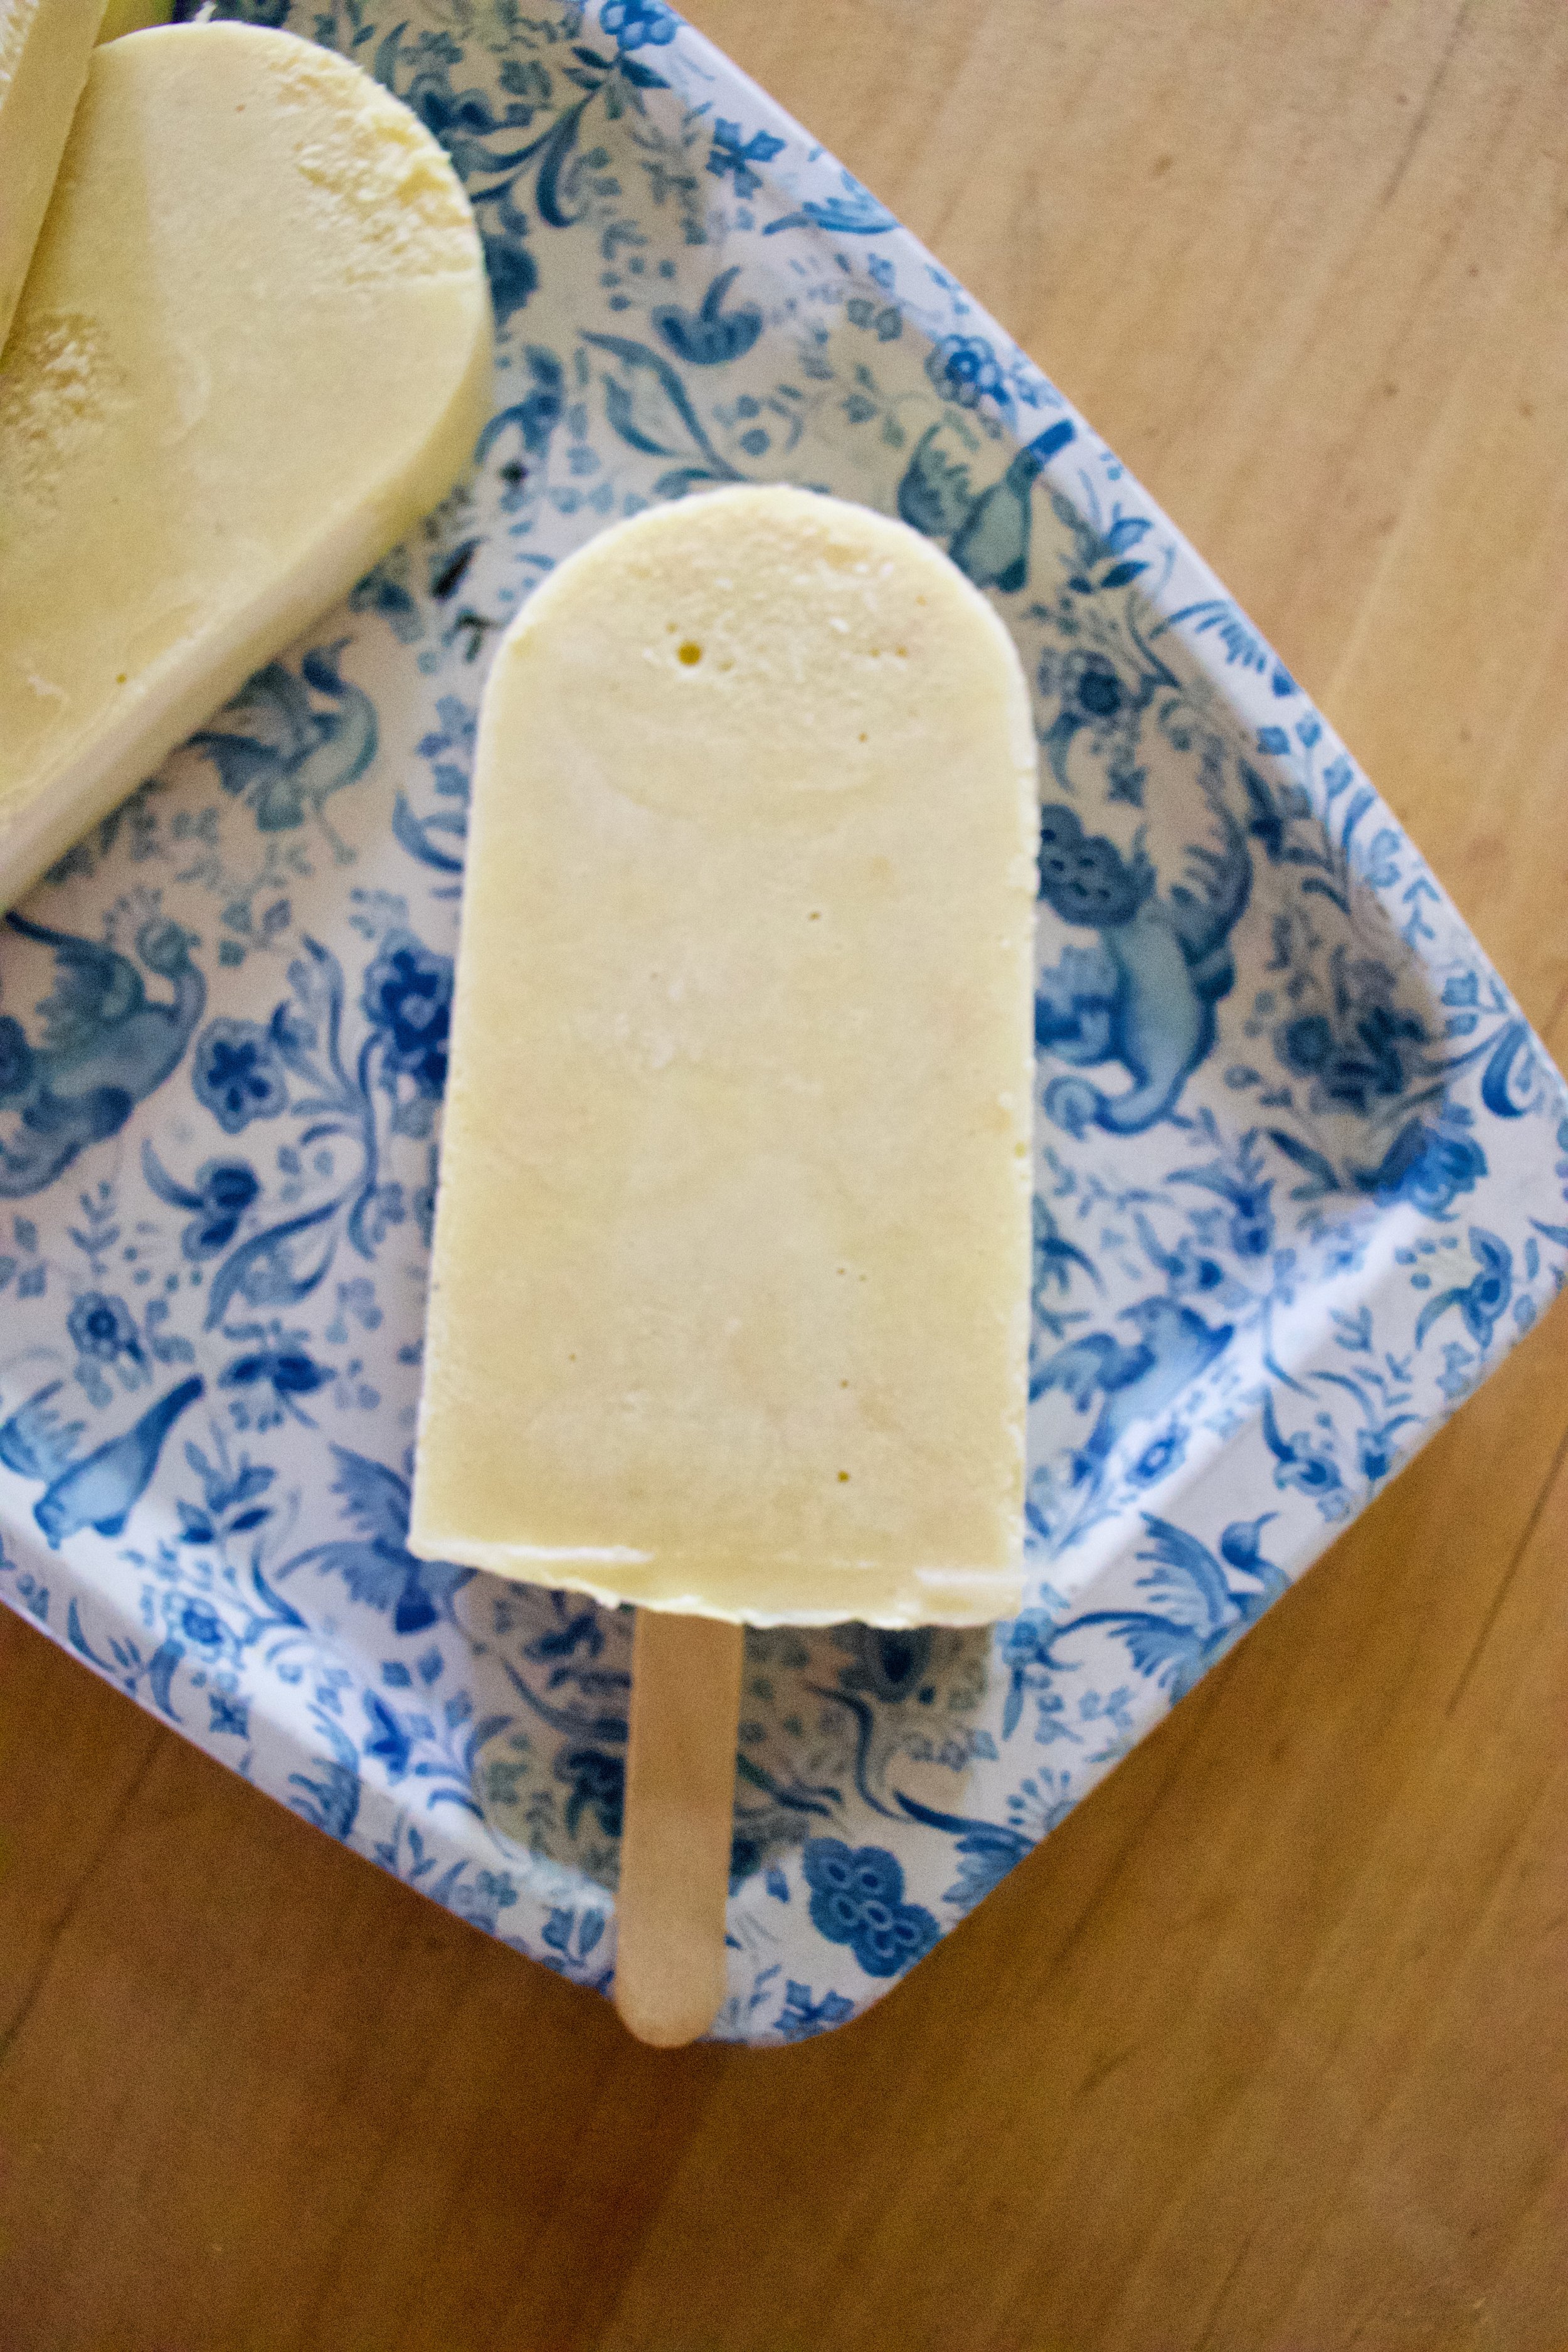
Thick, rich and creamy popsicle mixture.

IMG_8931.jpg

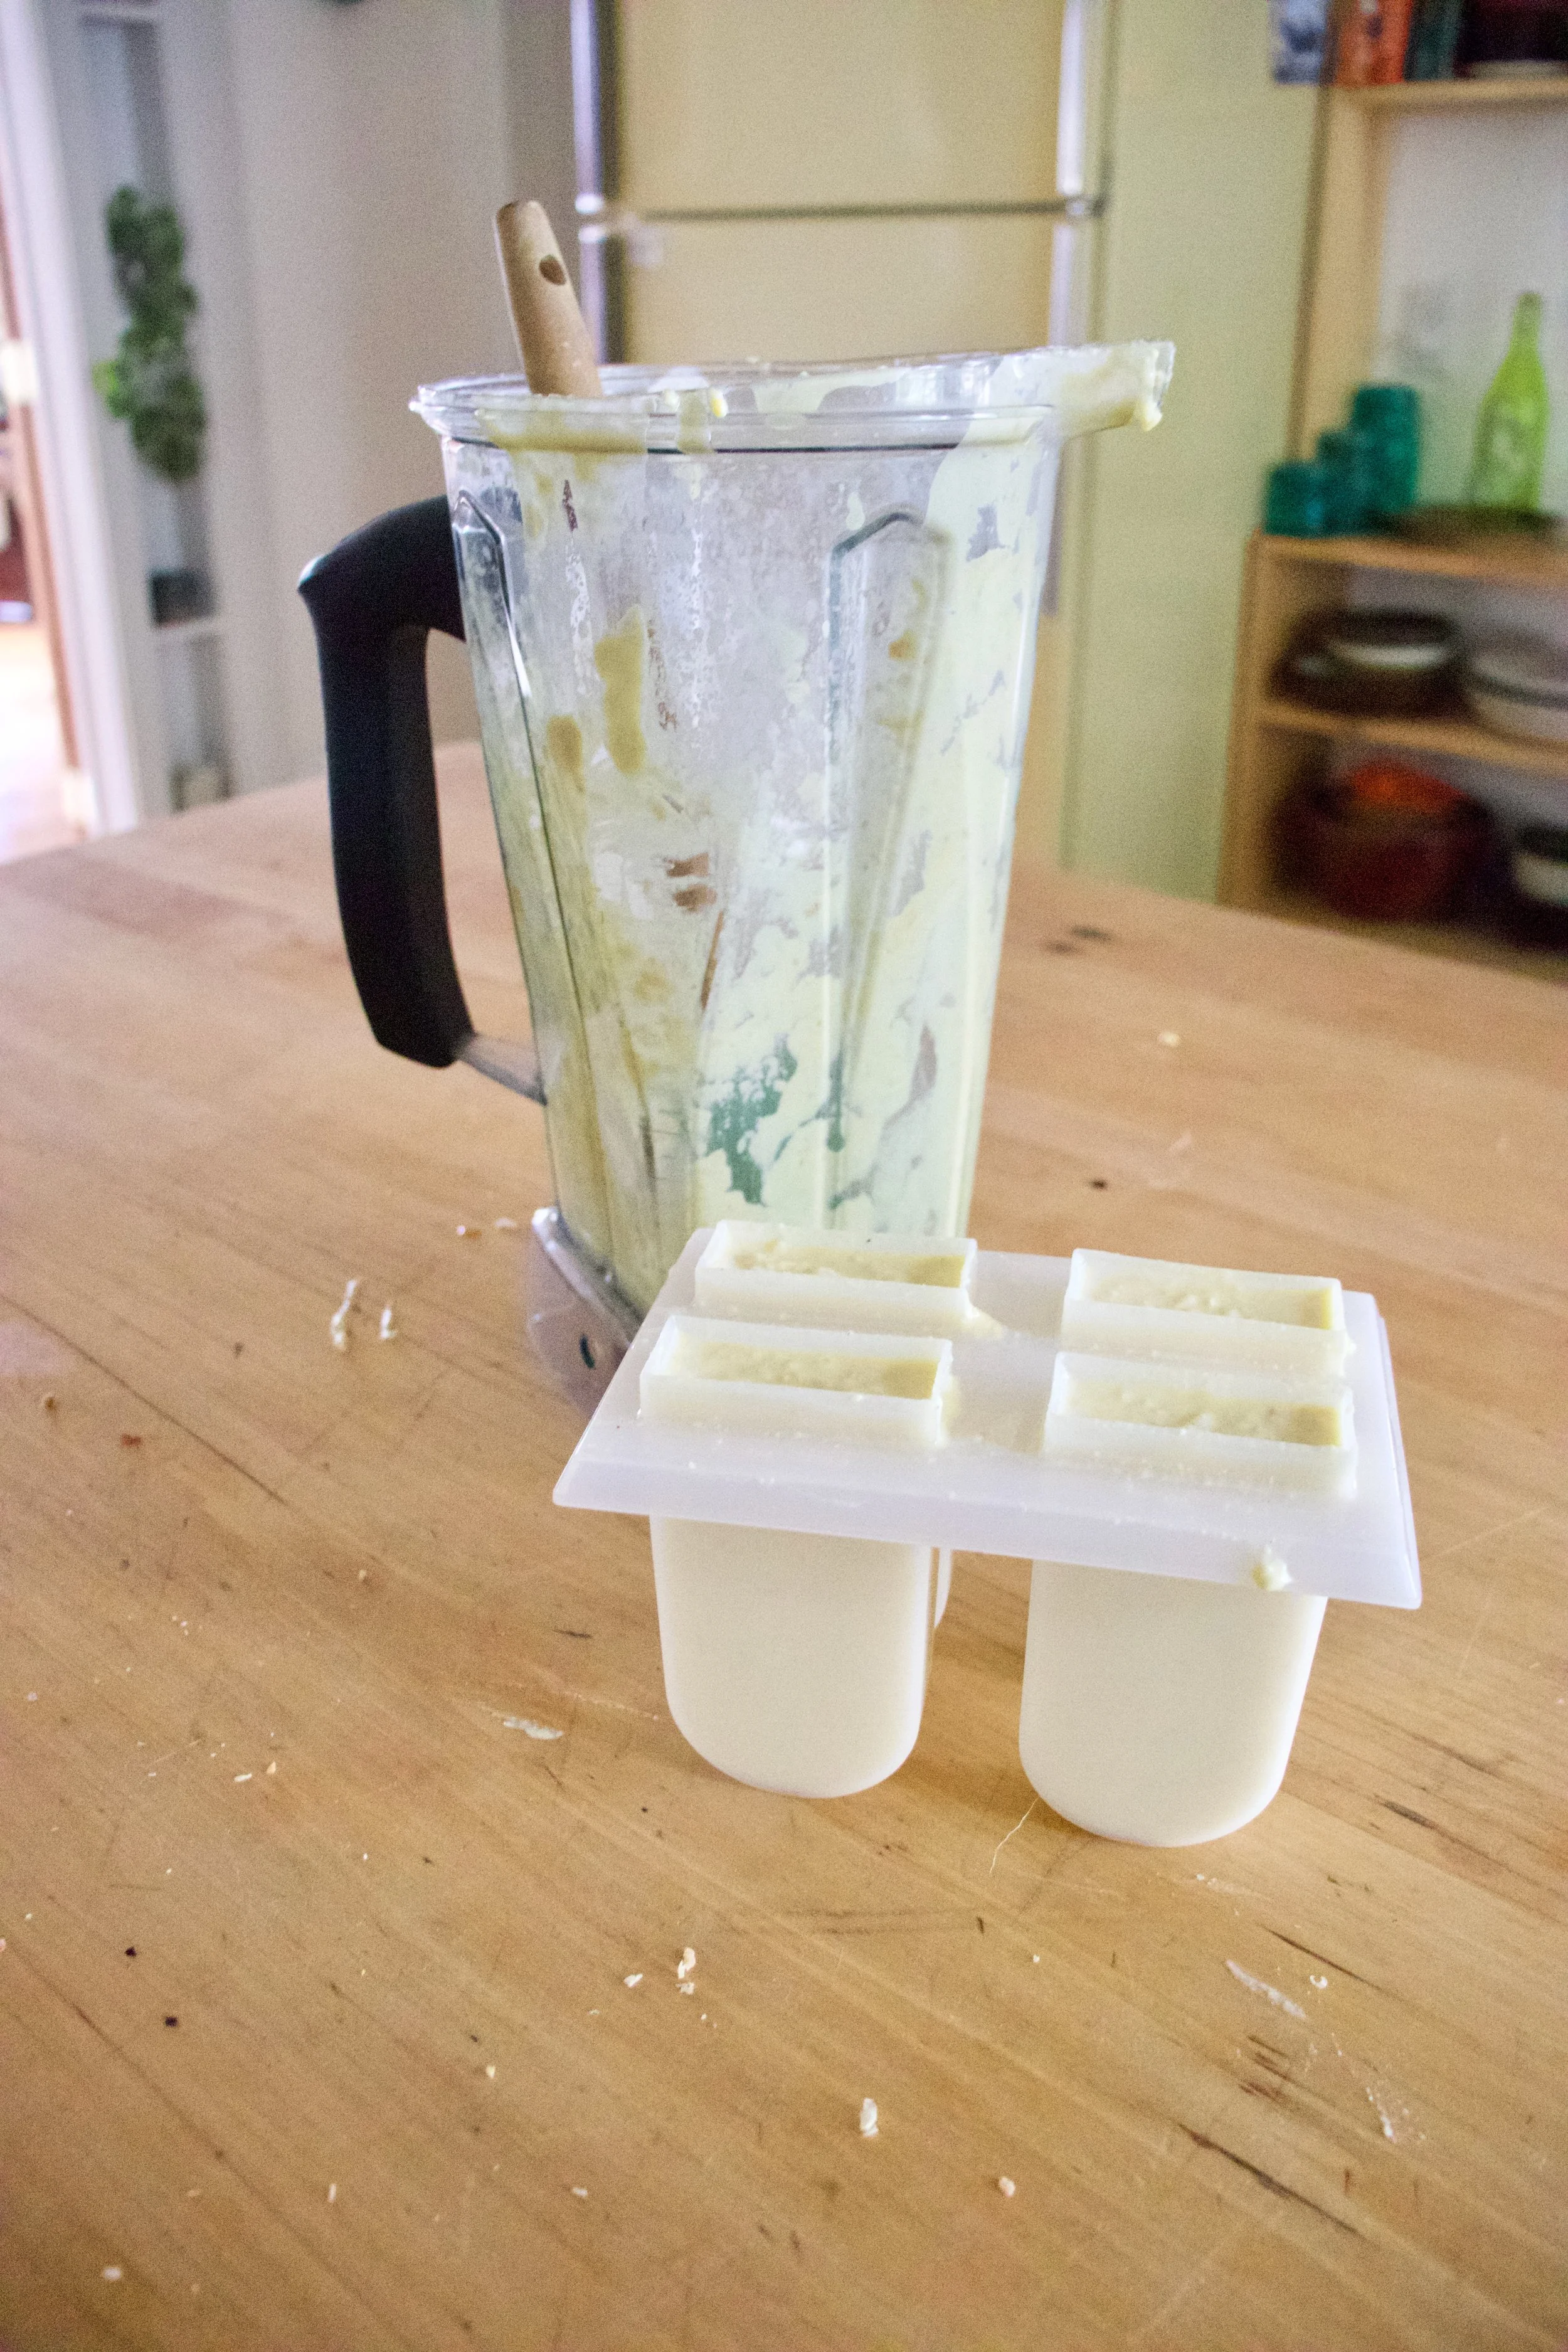
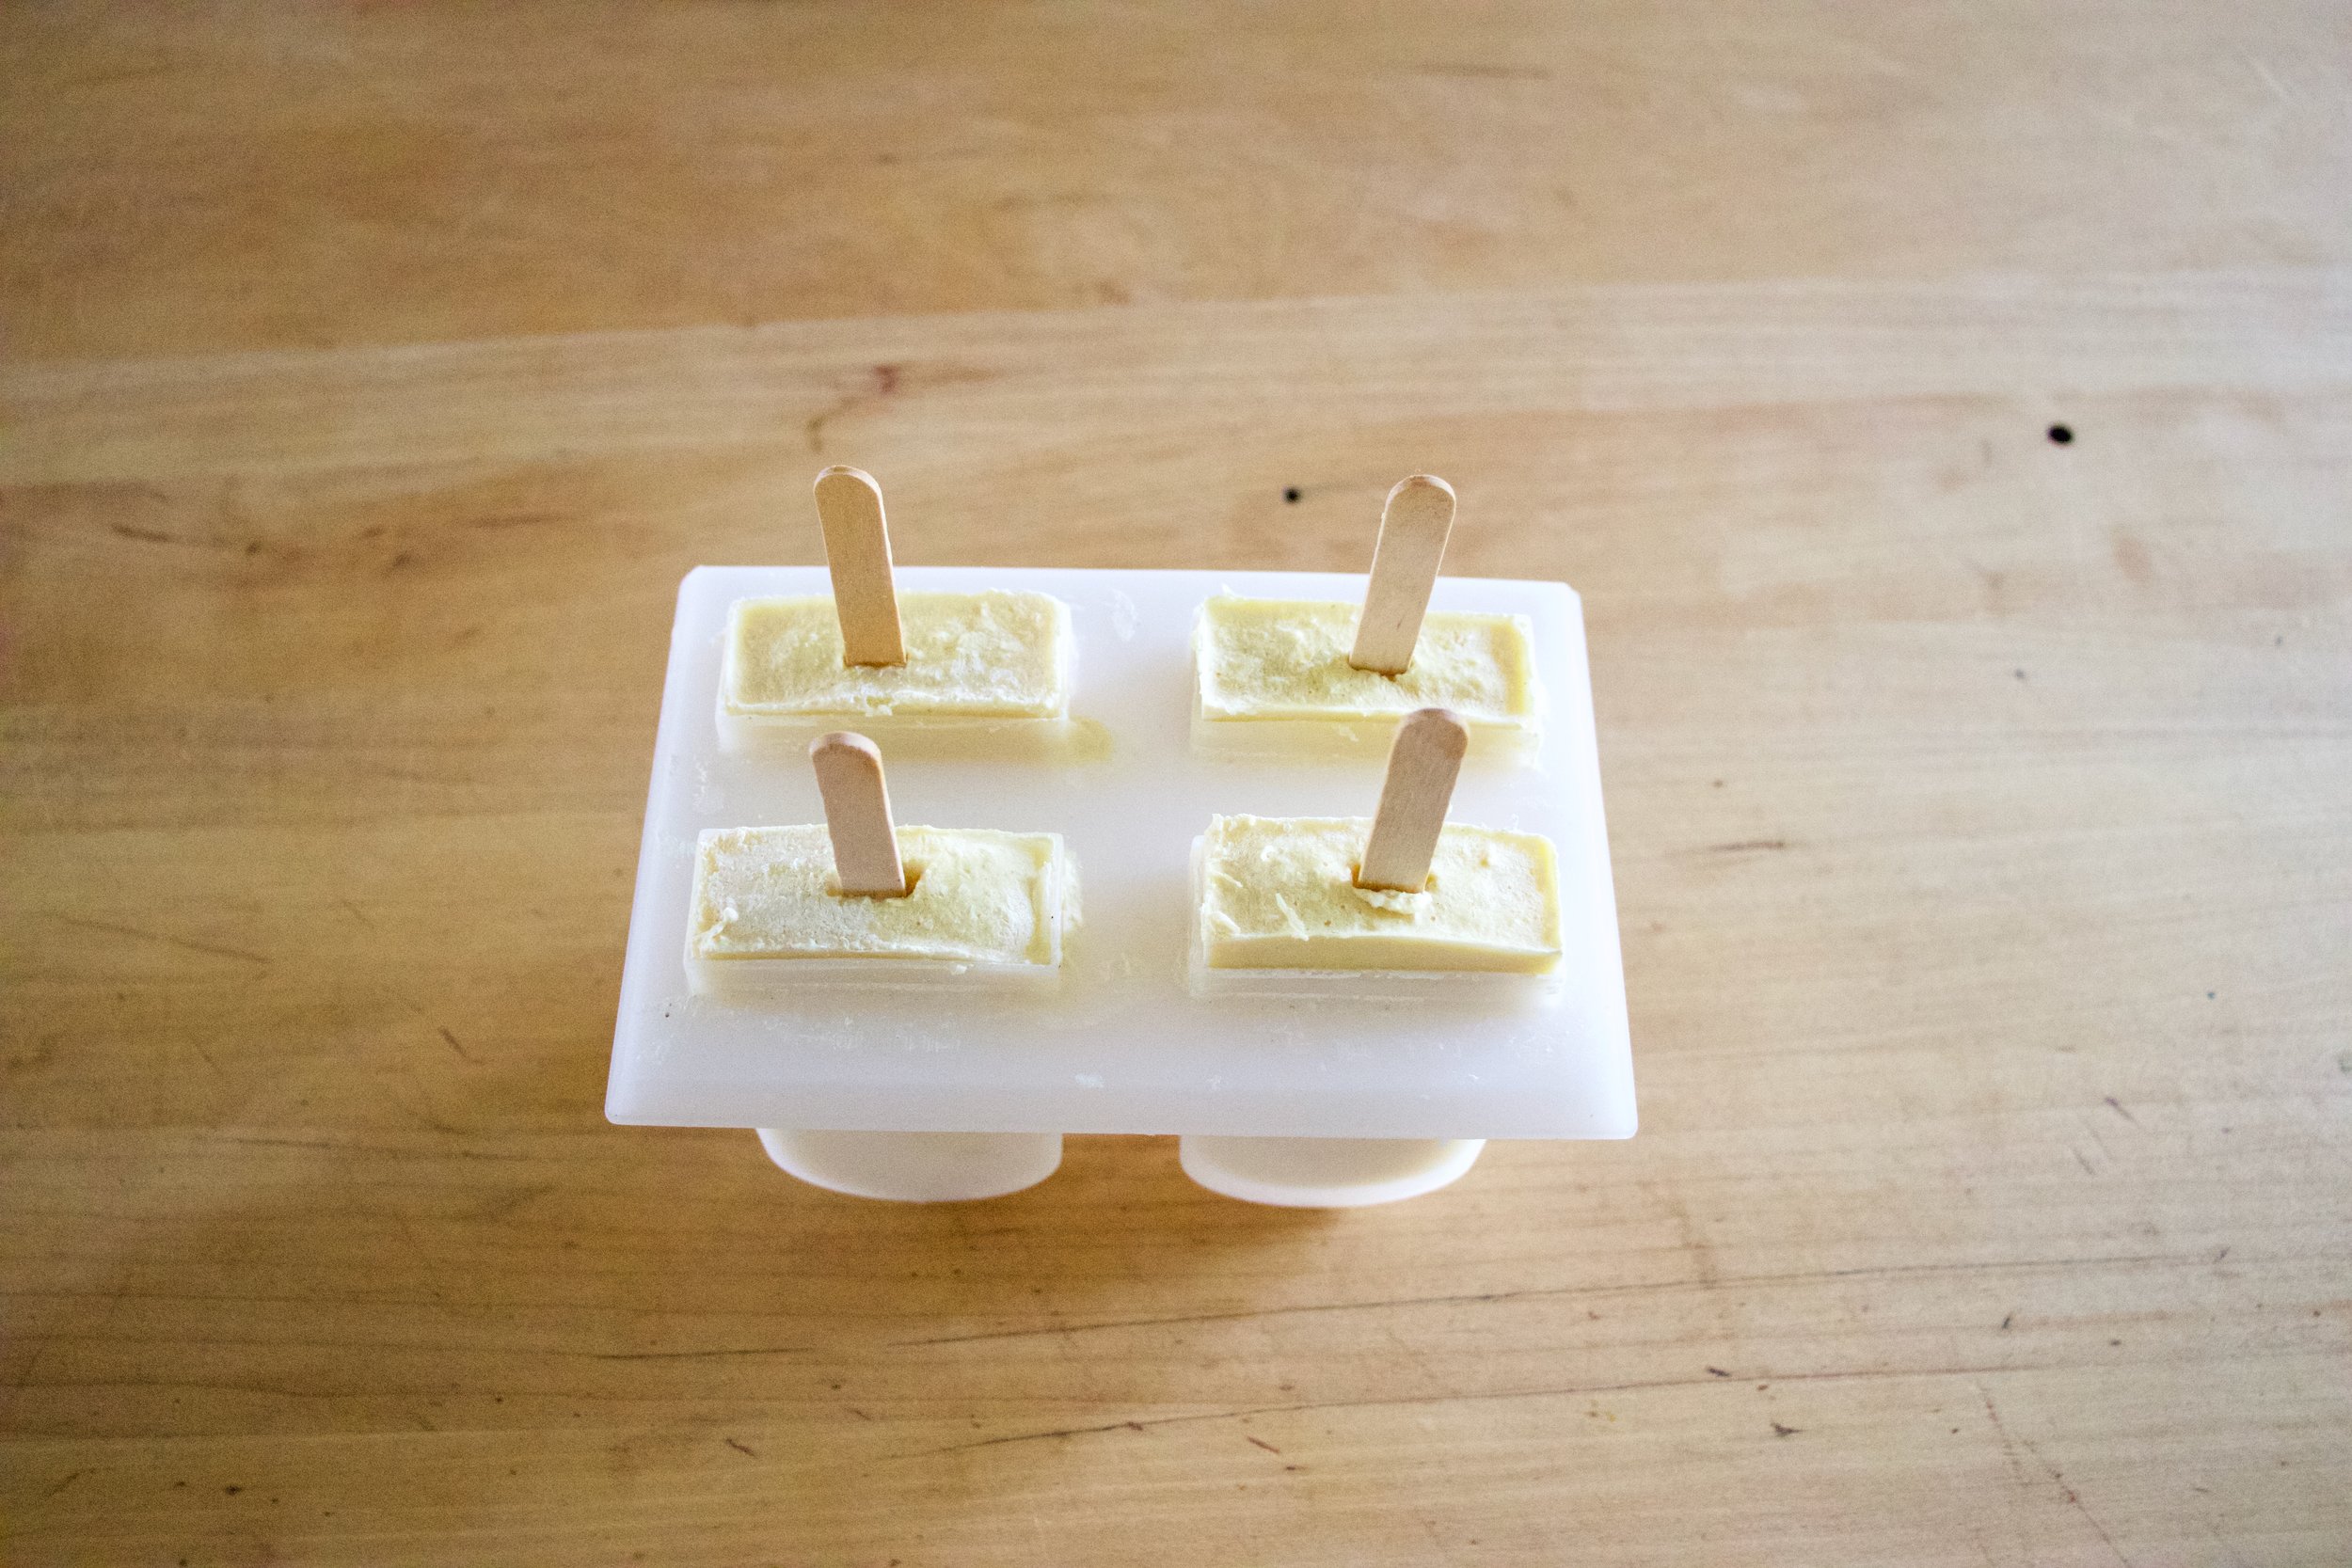
Now pour it into the molds and stick into the freezer. You could probably stick the sticks in now or wait a little while for the mixture to set a bit, but just don’t forget to get sticks in those popsicles before they completely freeze. That would suck.
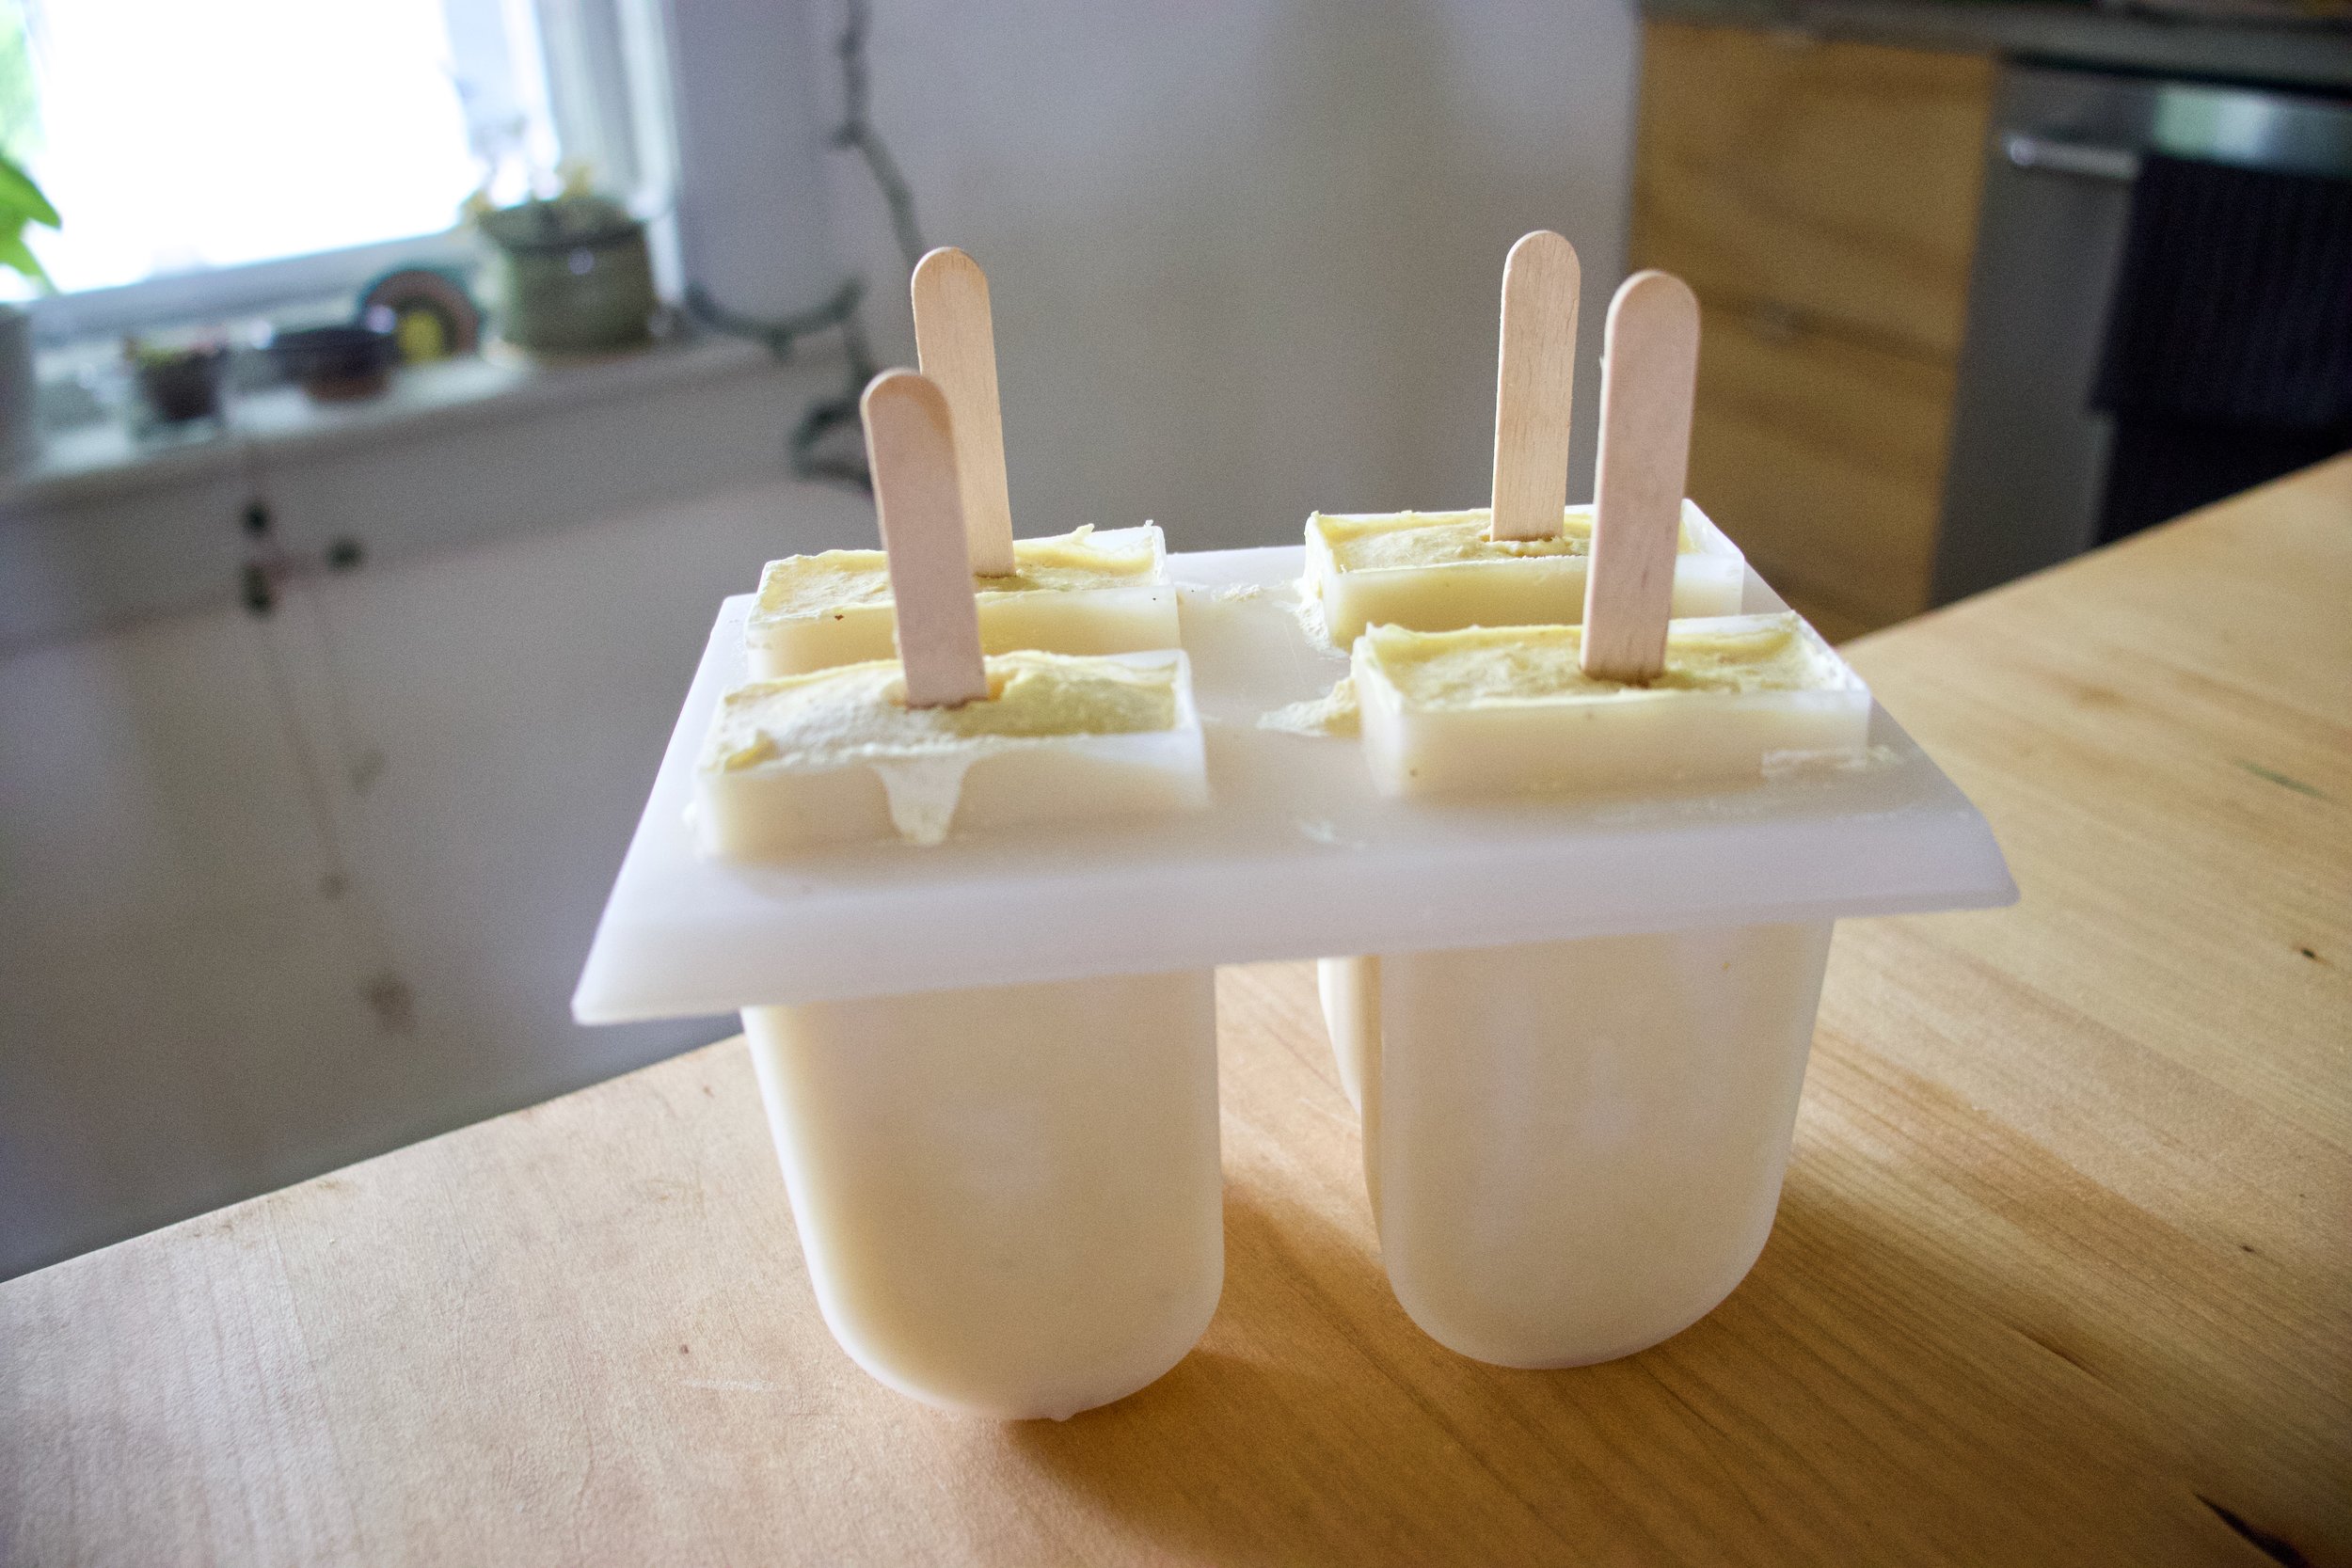
Frozen POPSICLES!

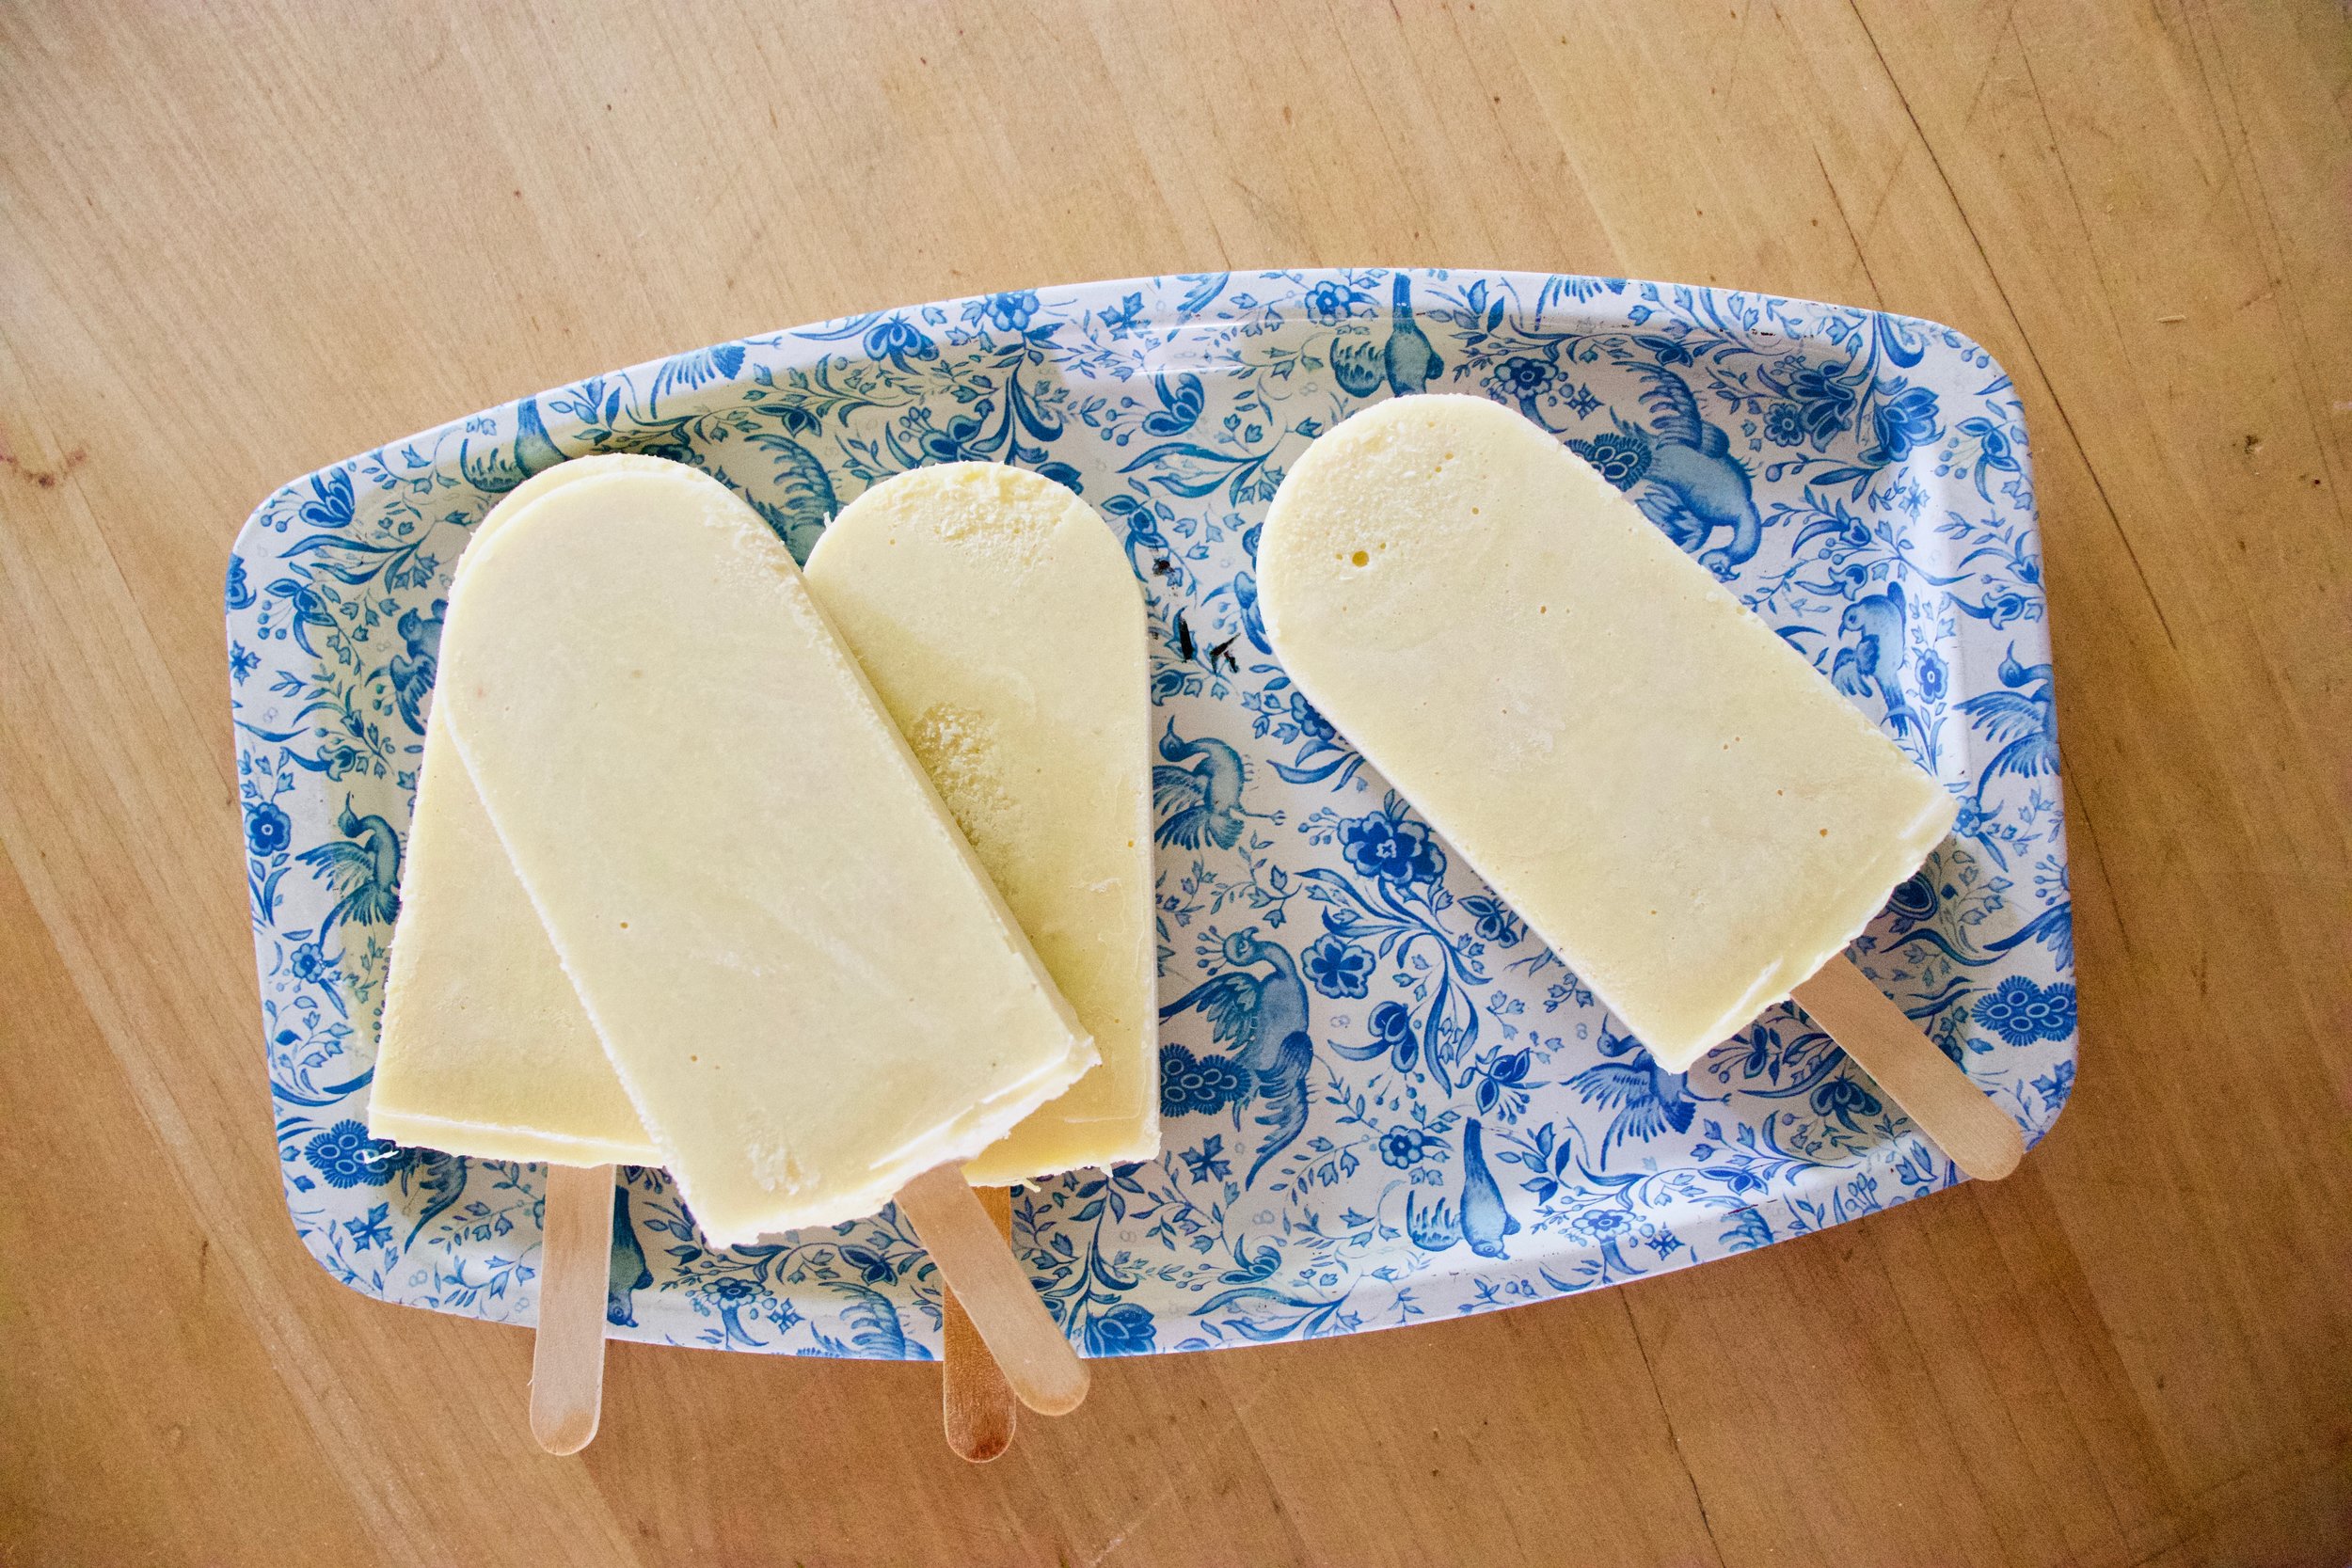
Pop those lovelies out of the molds and there you go.

The anticipation is over. Eat a popsicle

-C


Toasted Coconut And Corn Popsicles

makes 4 average sized popsicles

  • 2 ears corn (about a cup of corn kernels)

  • 1 cup full fat coconut milk (the canned stuff)

  • 1/4 cup shredded unsweetened coconut

  • 2- 4 tablespoons maple syrup

Note. If you have left over cooked corn, just use that. You don’t need to recook it so skip the cooking corn step.

Preheat oven to 400

Remove corn kernels from cob and place on a baking sheet pretty evenly. Pop into the oven for 10 minutes of so or until the corn is cooked through and nice and sweet.

Remove corn and dump it into blender and set aside to cool for a few minutes. Place the coconut onto the baking sheet and pop into the oven for 3-4 minutes to just lightly toast. When the coconut is toasted, remove from oven.

Grab the blender with the corn and pot in the coconut milk. Blend until smooth. Add in the maple (start with 2 tablespoons and work your way up to the sweetness you like) and the toasted coconut. Blend quickly just to combine for a slightly more textures popsicle or blend completely smooth if you would rather a smoother popsicle.

Pour mixture into popsicles molds and place into freezer. After the mixture sets up (about an hour) pop sticks into molds. Continue to freeze until completely frozen. Usually 4-6 hours.

And then when it is popsicle time, remove popsicles from molds and eat them.

In 5 ingerdients or less, Dairy Free, frozen, Popsicles, summer, Vegan Tags popsicles, popsicle week, toasted coconut, corn, toasted coconut corn popsicles, frozen, dairy free, vegan, breakfast, dessert, summer, plant based, 5 ingredients or less, toasted coconnut
Comment

Basic Socca

May 11, 2019 Colleen Stem
IMG_8294.jpg
IMG_8315.jpg

I am obsessed. For real. That might seem like a strong statement for a feeling about a food, but right now, it is truth. I spend more time then I want to admit thinking and drooling over Socca, which is, to those who do not know, the most basic chickpea flour pancake-y bread thing. Chickpea flour, water and salt. Cooked fast under the broiler in a screaming hot skillet. That is it. And it is amazing. Depending on how you make it, it can be creamy and soft or more cracker like with some crisp crunch to it. Either way, it is just so freaking good. Of course, what I am dreaming about regarding it is not just plan basic socca (which I have made 3 times in the past 3 days) but different flavored soccas (I have experimented with lot of seasoning, and they are all A+) with all sorts of different topping and using it in all sorts of different ways. But for now, I wanted to keep basic so we all know how good simplicity is. We will go from here.

There is no stopping me. There is no stopping the socca.

Now to my new favorite food, the socca.

IMG_8234.jpg
IMG_8238 2.jpg
IMG_8240 2.jpg

Chickpea flour, salt and water. That is it. Mix it all up.

IMG_8252.jpg

Batter all smooth and now in need of a rest. Half an hour or up to a day of rest is good.

IMG_8261.jpg

Now to cook the socca. You need to use something oven safe like cast iron. The trick here is to preheat the skillet while you are preheating the oven. Crank oven to 450 with the skillet in oven and once the oven reaches temp, turn oven over to a high broil. Let the skillet get really hot for another minute or two then remove skillet from oven (carefully!!!) and give it a splash of oil. Don’t preheat the skillet with oil in it or else it will start to smoke and get gross.

IMG_8266.jpg

Now that you got a nice hot and oiled skillet, grab the rested batter and pour half of it in. Tilt skillet around to coat bottom then stick skillet back into oven under broiler and cook for 4-8minutes. ( It depends on your broilers strength and your preference for blisters)

Out from the broiler. Cooked and slightly blistered. I went easy on this one. The next one got a few more blisters.

2 soccas, one a little thicker then the other. One a little more blistered then the other. Both in my belly.

So many Soccas to come.

So. many. Soccas.

-C


Basic Socca

makes two 10 inch soccas

  • 1 cup chickpea flour

  • 1 cup room temperature water

  • 1/2 teaspoon salt

  • olive oil for pan

Mix chickpea flour, salt and water together into a bowl until smooth. Let mixture rest for at least half an hour or up to a day.

When ready to make the socca, preheat oven to 450 with a 10 inch oven safe skillet (I used cast iron but any oven safe dish would work) in oven.

Once oven reaches temp, turn oven over to broil and place skillet under it for a minute to really heat the skillet. Carefully, with oven mitts, remove hot skillet from oven and brush or pour a smidge of oil into the hot skillet to coat bottom. Pour in half the batter and tilt around until bottom is coated then place skillet back into oven under broiler and cook for 4 -8 minutes or until the socca starts to blister. (it kind of depends on your broiler so keep a close eye on it) Remove from oven and slip socca onto cutting board. Sprinkle with salt and pepper. Drizzle with olive oil if you like. Then all you do is cut and eat.

Left over socca can be stored in fridge and reheated in oven or toaster.

Note. IF you want a slightly thicker socca, use a 8 inch skillet. For a thiner, more cracker like socca, pour in 1/3 of the batter at a time (you will end up with 3 instead of 2)

In 5 ingerdients or less, appetizers, biscuits and such, bread, Dairy Free, grain free, Gluten Free, pulses, beans, Vegan, snack, side dish Tags Socca, Chickpea flour, gram flour, besem flour, pulses, protein, vegan, gluten free, dairy free, crepe, wrap, bread, tortilla, crust, simple, easy, sweet or savory, beans, Italian
Comment

Banana Oat Smoothie

April 6, 2019 Colleen Stem
IMG_7190 2.jpg
IMG_7170 3.jpg
IMG_7159.jpg

It’s a smoothie. And no, we have never really been smoothie people in this house, but what can I say, sometimes smoothies happen, especially when you have about 20 ripe bananas in the fruit bowl with no room in the freezer and no need for 7 loafs of banana bread.

So I smoothied. And I like it (a lot).

This is a smoothie of simplicity. Nothing fancy. Simplest of simple. Straight to the point. And all sorts of good.

You might think, does this simple smoothie you speak of taste very good? Yes, yes indeed it does. It is all sorts of fantastic. Basically if you like creamy, nutty, oaty, bananery things, you will like this. And it’s a perfect breakfast, snack, dessert, or just wanting a little treat like thing that is not garbage food. A smoothie of all smoothies with the most basic ingredients. And takes about 15 seconds to whip up. Can’t complain about that.

To the smoothie goodness!

IMG_7097.jpg

The stuff. A ripe banana, some old fashion rolled oats, a pinch of salt, water, and a smidge of maple syrup if you want it.

IMG_7114.jpg

Everything goes into blender.

And blended until smooth. Hence the word smoothie.

Pour it into a cup (or if you are feeling primal, drink it straight from the blender… it’s totally cool)

And done.

A banana oat smoothie.

Let the good time roll!

-C


Banana Oatmeal Smoothie

makes 1 smoothie

  • 1 very ripe banana

  • 1/3 cup raw old fashion oats

  • 1 1/2 cups water

  • pinch of salt

  • a tablespoon or two of any sweetener you like (optional)

  • a pinch of cinnamon (optional)

Place everything into a blender and blend until smooth. Pour into a cup, sprinkle with cinnamon if you wish, and drink right away.

In 5 ingerdients or less, breakfast, Dairy Free, drinks, fruit, Gluten Free, quick and easy, Raw, snack, Vegan Tags Oats, old fashion oats, oat milk, banana, banana oat smoothie, Oatmeal, smoothie, simple, done in seconds, fresh, vegan, gluten free, dairy free, plant based, snack, breakfast, drink, dessert, healthy, protein, fruit, raw
Comment

Waterloupe (Watermelon and Cantaloupe) Slushies

August 11, 2018 Colleen Stem
IMG_1260.jpg
IMG_1145.jpg
IMG_1310.jpg

It's melon season! The past few farm shares have included at least 2,, if not 4, watermelons and cantaloupes... Can you imagine. eating 4 watermelons a week? That's a tall order, even for someone like me who could probably eat a whole watermelon in one sitting, it's just doing it 4 times a week might be a problem.  It's a whole lot of melon and not enough stomach, you know what I mean? 

So what do I do with so much melon? Well first off, whenever anyone comes over I try to get them to  eat as much of it as they can, which helps a great deal. Secondly, I cut it up and freeze some. But here is the thing, I love eating chunks of frozen cantaloupe, but frozen watermelon, never been my favorite so I usually just pass on sticking in the freezer, until now.

There is something magical that happens when you stick the frozen watermelon and cantaloupe together into a blender and making it into a slushy. It's like eating a ray of sunshine or maybe even a rainbow, just really satisfying and juicy, and sweet but not overly sweet, and just really freaking good. Especially with all the stupid hot and humid weather we have had lately, these slushies have really been hitting the spot.  Even the mr who says he dislikes watermelon was all into these melon slushies. (he likes things that he says he doesn't like all the time. I am pretty sure he is taste confused) Like  he was really into them. Usually I have to prompt him to tell me how something tastes, but not the slushy, he told me right away how good it was. I was like, I know dude, I just drank 2 of them myself. And I could have drank 2 more but I was trying to not get tot far ahead of myself. Moderation is key, plus I didn't;t have any more of the melons frozen. Time to restock the freezer. 

Go make yourself a slushy, it's juicy deliciousness will make you happy. 

IMG_1165.jpg

The stuff. Watermelon and cantaloupe. There should be a lime in there too but it must have rolled away.... 

Chop some of each of the melon up, remove the rinds, and place on a big baking sheet and stick into the freezer until frozen. You can do as little as 2 cups  of each or as much as a whole melon, it's up to you. (I suggest freezing extra)

IMG_1216.jpg

Frozen melon. And now you can slushy.

IMG_1222.jpg
IMG_1237.jpg

Equal parts watermelon and cantaloupe go into blender, along with the juice of half (or more to taste) a lime and you are probably going to need to add about 1/2 a cup of water, to help the blender blend it all together.  And that's it. You blend until it's all slushy.

IMG_1309 4.jpg

Pour into cups, garnish with a lime and/or little chunks of melon and you are good as golden. 

IMG_1309 4.jpg

From now on, or until summer is over and I run out of melon, I will be keeping the freezer stocked, especially because I know that the next few weeks are suppose to be stupid hot again. 

Waterloupe slushies. Summertime goodness. 

-C


Waterloupe (Watermelon And Cantaloupe) Slushies


  • about 2 cups  of a watermelon
  • about 2 cups of a cantaloupe 
  • 1 lime
  • 1/2- 1 cup water 

Note. The amounts above are for two  2 cup slushies. You can, and should, freeze a crap load more melon for future slushies.  Also, no one would fault you for maybe adding a little nip of some clear alcohol to this slushy situation to make it more of an adult drink......

Cut up a watermelon and a cantalopjue. Eat some and reserve at least 2 cups of each. Remove the rinds from the melons and cut into cubes. Place melon on a baking sheet and stick into the freezer until frozen. 

Once frozen, place equal parts frozen watermelon and cantaloupe into the blender with the juice of a lime. Turn blender on. Slowly add in water until the blender can handle blending the frozen fruit. Blend until smooth. Pour into cups, garnish if you want with more melon and lime, then get to drinking. 


In 5 ingerdients or less, drinks, frozen, fruit, quick and easy, Raw, summer, Vegan Tags Waterloupe (Watermelon And Cantaloupe) Slushies, watermelon, slushies, slushy, cantaloupe, fruit, vegan, easy, cold treat, gluten free, no added sugar, fresh, raw, dairy free, drinks, cocktail
Comment

Cilantro Lime Roasted Potatoes

June 9, 2018 Colleen Stem
IMG_3021.jpg
IMG_3010.jpg
IMG_2812.jpg

I picked up the first summer farm share this week. (Whoo Hoo!!) In it included lettuce, spinach, kale, cilantro, and potatoes. A heavy on the greens, start to the season, but I am never going complain when it's heavy on the greens. I could eat greens, any greens, by the bucket full (and basically do). And there was pyo cilantro, which I wasn't expecting for a least a week or two so that was just fantastic because oh how I have missed fresh herbs. 

So greens went directly to my stomach without a chance, but the potatoes and cilantro I left so I could make something to share with the mr. Roasted potatoes because that's my favorite way to eat a tater and covered in lots and lots of cilantro because yes, and when you eat cilantro, you must eat a lot of it. Lime juice for good measure and you got yourself a dank little potato dish if I do say so myself. 

The stuff. Potatoes, cilantro, limes (you probably only need one), garlic, olive oil, and salt and pepper.

After washing your potatoes, dice them into mouth sized pieces and place them into a pot of cold water 

Dice potatoes go into pot and need a little boil. If you have a pinch of salt to toss into the water, well you should do that.

IMG_2853.jpg

After boiling for a few minutes, give the poe test, if you can kind of pierce a potato with a fork, they are done.  You don't want to completely cook the potatoes, you just want them juuuust barely fork tender.. Once they get there, strain them.

Let the potatoes drain for a minutes or two to make sure all the water is gone. In the mean time, mince up the garlic.

IMG_2880.jpg

Add the garlic with a big pinch of salt and pepper and a glug glug of olive oil back to the pot (you could use a new bowl, but why dirty another dish?)

Add in the drained potatoes and toss around until they are all evenly coated.

Dump potatoes onto a baking sheet (if you think of it, preheat the oven with the baking sheet in it... just make sure to be careful when handling hot pans)

Into the oven those taters go to roast and be great.

And sometime between putting the potatoes in the oven and taking them out, chop up the cilantro.

IMG_2937.jpg

Once potatoes are all nice and golden roasted, remove from oven and drizzle and toss the juice of the lime all over. Place the potatoes back into the oven for a few minutes to let them crisp up again.

IMG_2972.jpg

And then you toss all that chopped cilantro all over those potatoes.

And then eat them. Maybe serve with salsa and whipped avocado because that is what I did and I did good.

-C


Cilantro Lime Roasted Potatoes 

Serves 2-4 peoples

  • 2 1/2  pounds small yellow potatoes
  • 1 bunch cilantro
  • 4-6 cloves garlic 
  • 1 juicy  lime
  • 2-3 tablespoons olive oil
  • salt and pepper

Preheat oven to 425 with the baking sheet preheating in the oven as well.

Wash potatoes well and chop into pieces about an inch or so big and place in a big pot of cold water. Once you got all the potatoes in the pot, add a pinch of table salt and bring the potatoes to a boil. Cook for 5-8 minutes or until the potatoes are just barely fork tender.. don't over boil them. Drain potatoes.

In either the empty pot (less dishes) or a bowl, combine 2 tablespoon oil with the garlic, a good pinch or two of pepper, and same with salt. Mix around then add in the potatoes. Toss to coat and if you feel that you might need little more oil, drizzle in a bit more. 

Dump coated potatoes onto a  preheated baking sheet and place in oven for about 40-50 minutes, giving the potatoes a good stir after 30. You want the potatoes to be a nice roasted brown. Once roasted, pull potatoes from oven and squeeze the juice of the lime all over the potatoes. Toss and place the potatoes back into the oven for a few minutes just to crisp up a bit. While the potatoes are crisping up, chop the cilantro. After the few minutes, pull the potatoes back out and toss with the cilantro. Season with more salt and pepper if needed and then just eat them. I like to serve with salsa and some avocado situation, but ketchup or naked works too.


In 5 ingerdients or less, Vegetables, Vegan, side dish, Potato Tags cilantro lime roasted potatoes, potatoes, roasted, vegan, gluten free, cilantro, lime, side dish, vegan side dish, dinner, Farm share, CSA, Intervale community farm, brunch potatoes
Comment
← Newer Posts Older Posts →
 

https://thelovelycrazy.squarespace.com/config#/|/about/

Me. Food Maker.Food eater. Woo HOO!

STEM+NODE  SMALL BATCH AND ONE OF A KIND POTTERY

stem+node ceramics


____________________

Subscribe

GET NEW POSTS IN YO EMAIL

You are AWESOME!!!


@thelovelycrazy 2014-2021