• stem+node ceramics
  • HOME
  • Food Recipes
  • About
  • Contact
Menu

The Lovely Crazy

Street Address
City, State, Zip
Phone Number

Your Custom Text Here

The Lovely Crazy

  • stem+node ceramics
  • HOME
  • Food Recipes
  • About
  • Contact

Peachy Sweet Buns

July 28, 2018 Colleen Stem
IMG_0581 3.jpg
IMG_0718.jpg
IMG_0652.jpg

Who doesn't like a good bun, right?  And just because this is where my mind wonders, peachy sweet buns. Doesn't that sound like a pick up line or something you say to your significant other. Like, "Oh hey peachy sweet buns, you are looking good. Woo hoo"........ Anyway, this is not about anyones peachy sweet buns, it it about actually sweet buns so u-hum, yeah. 

I am not trying to float my own boat here, but I am really really good at making buns, and you know what, I bet that you are too. They may seem a little intimidating, but really, it's quite easy. I think what throws some people off is the yeasted dough and having to knead and waiting for the dough to rise, but don't let that stop you from sweet sweet buns. They are no harder to make then a boxed cake (maybe a little harder) and the results are by far more amazing and delightful (we don't use the word delightful enough around here) then any old box or pre-made thing will ever be. Ever. Freshly made buns are what is right in this world.

If you are awesome and decide to make buns like any good person with a baking itch or a need for some sweet bun goodness does, make them peachy because its peach season and how can a peach bun not be that much more amazing?  Just think. Soft sweet dough, jammy cinnamon peaches, covered in a sweet lemony glaze......

Go on now, go and get yourself some peachy sweet buns.

IMG_0369.jpg

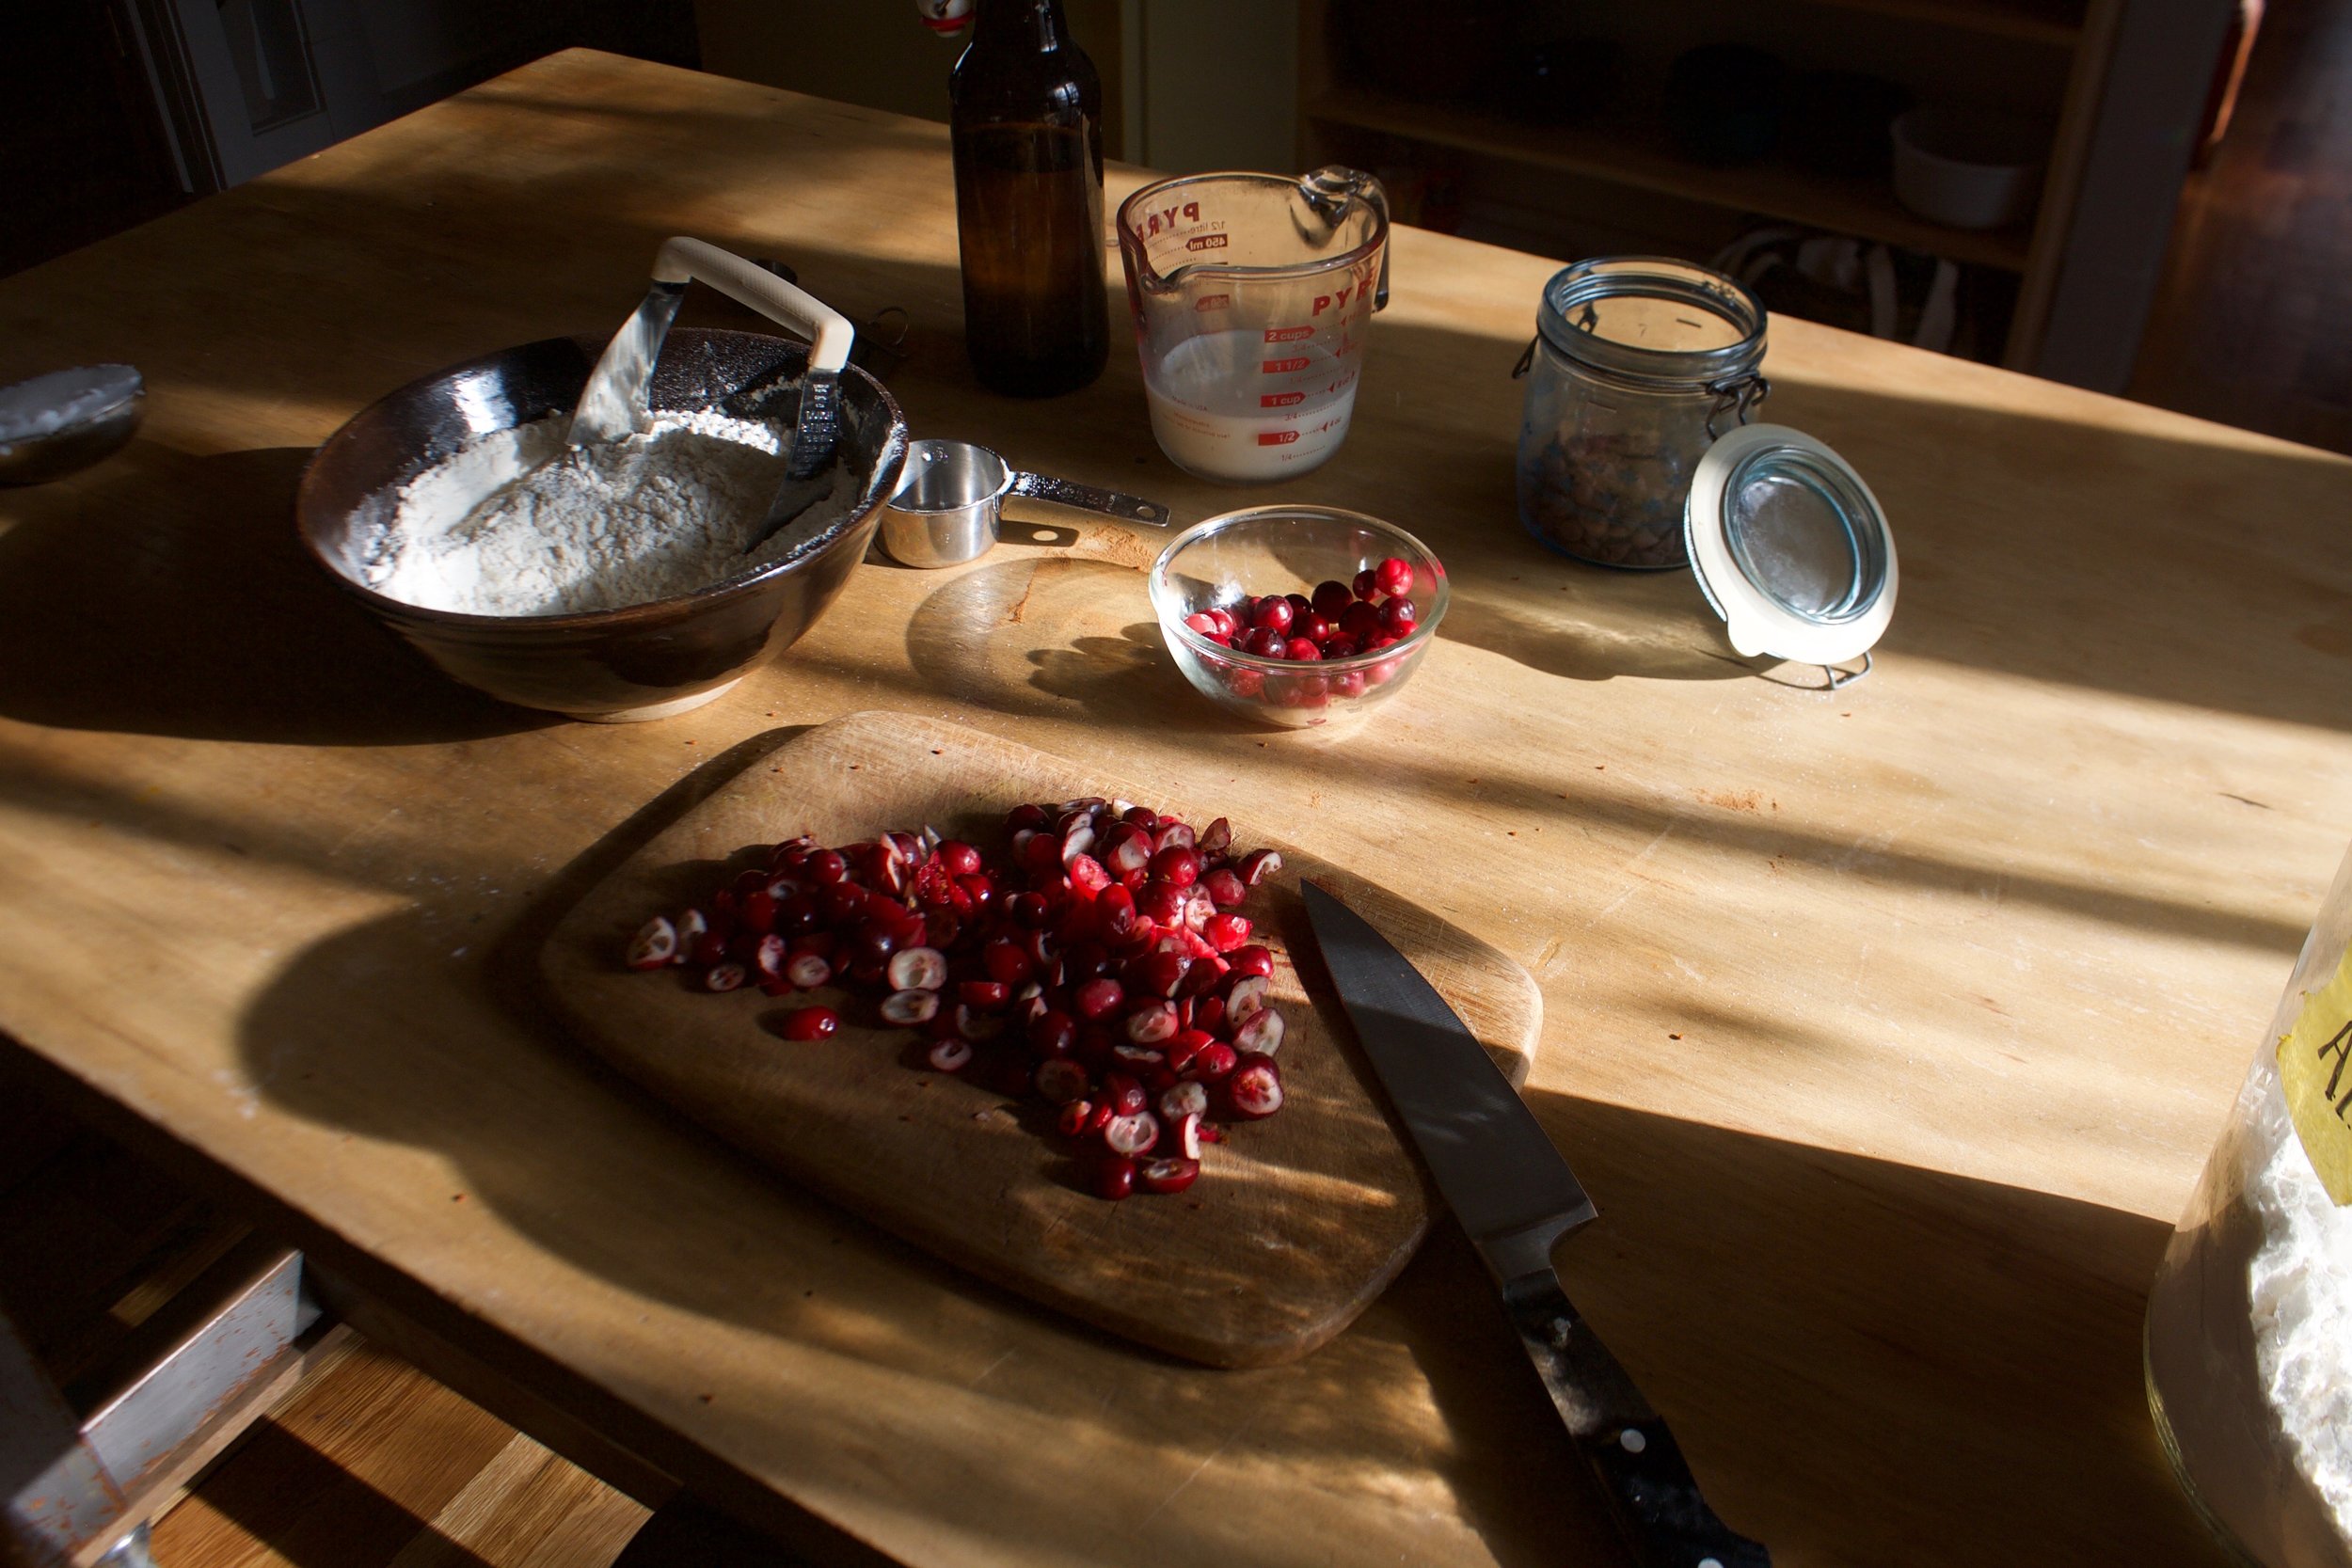
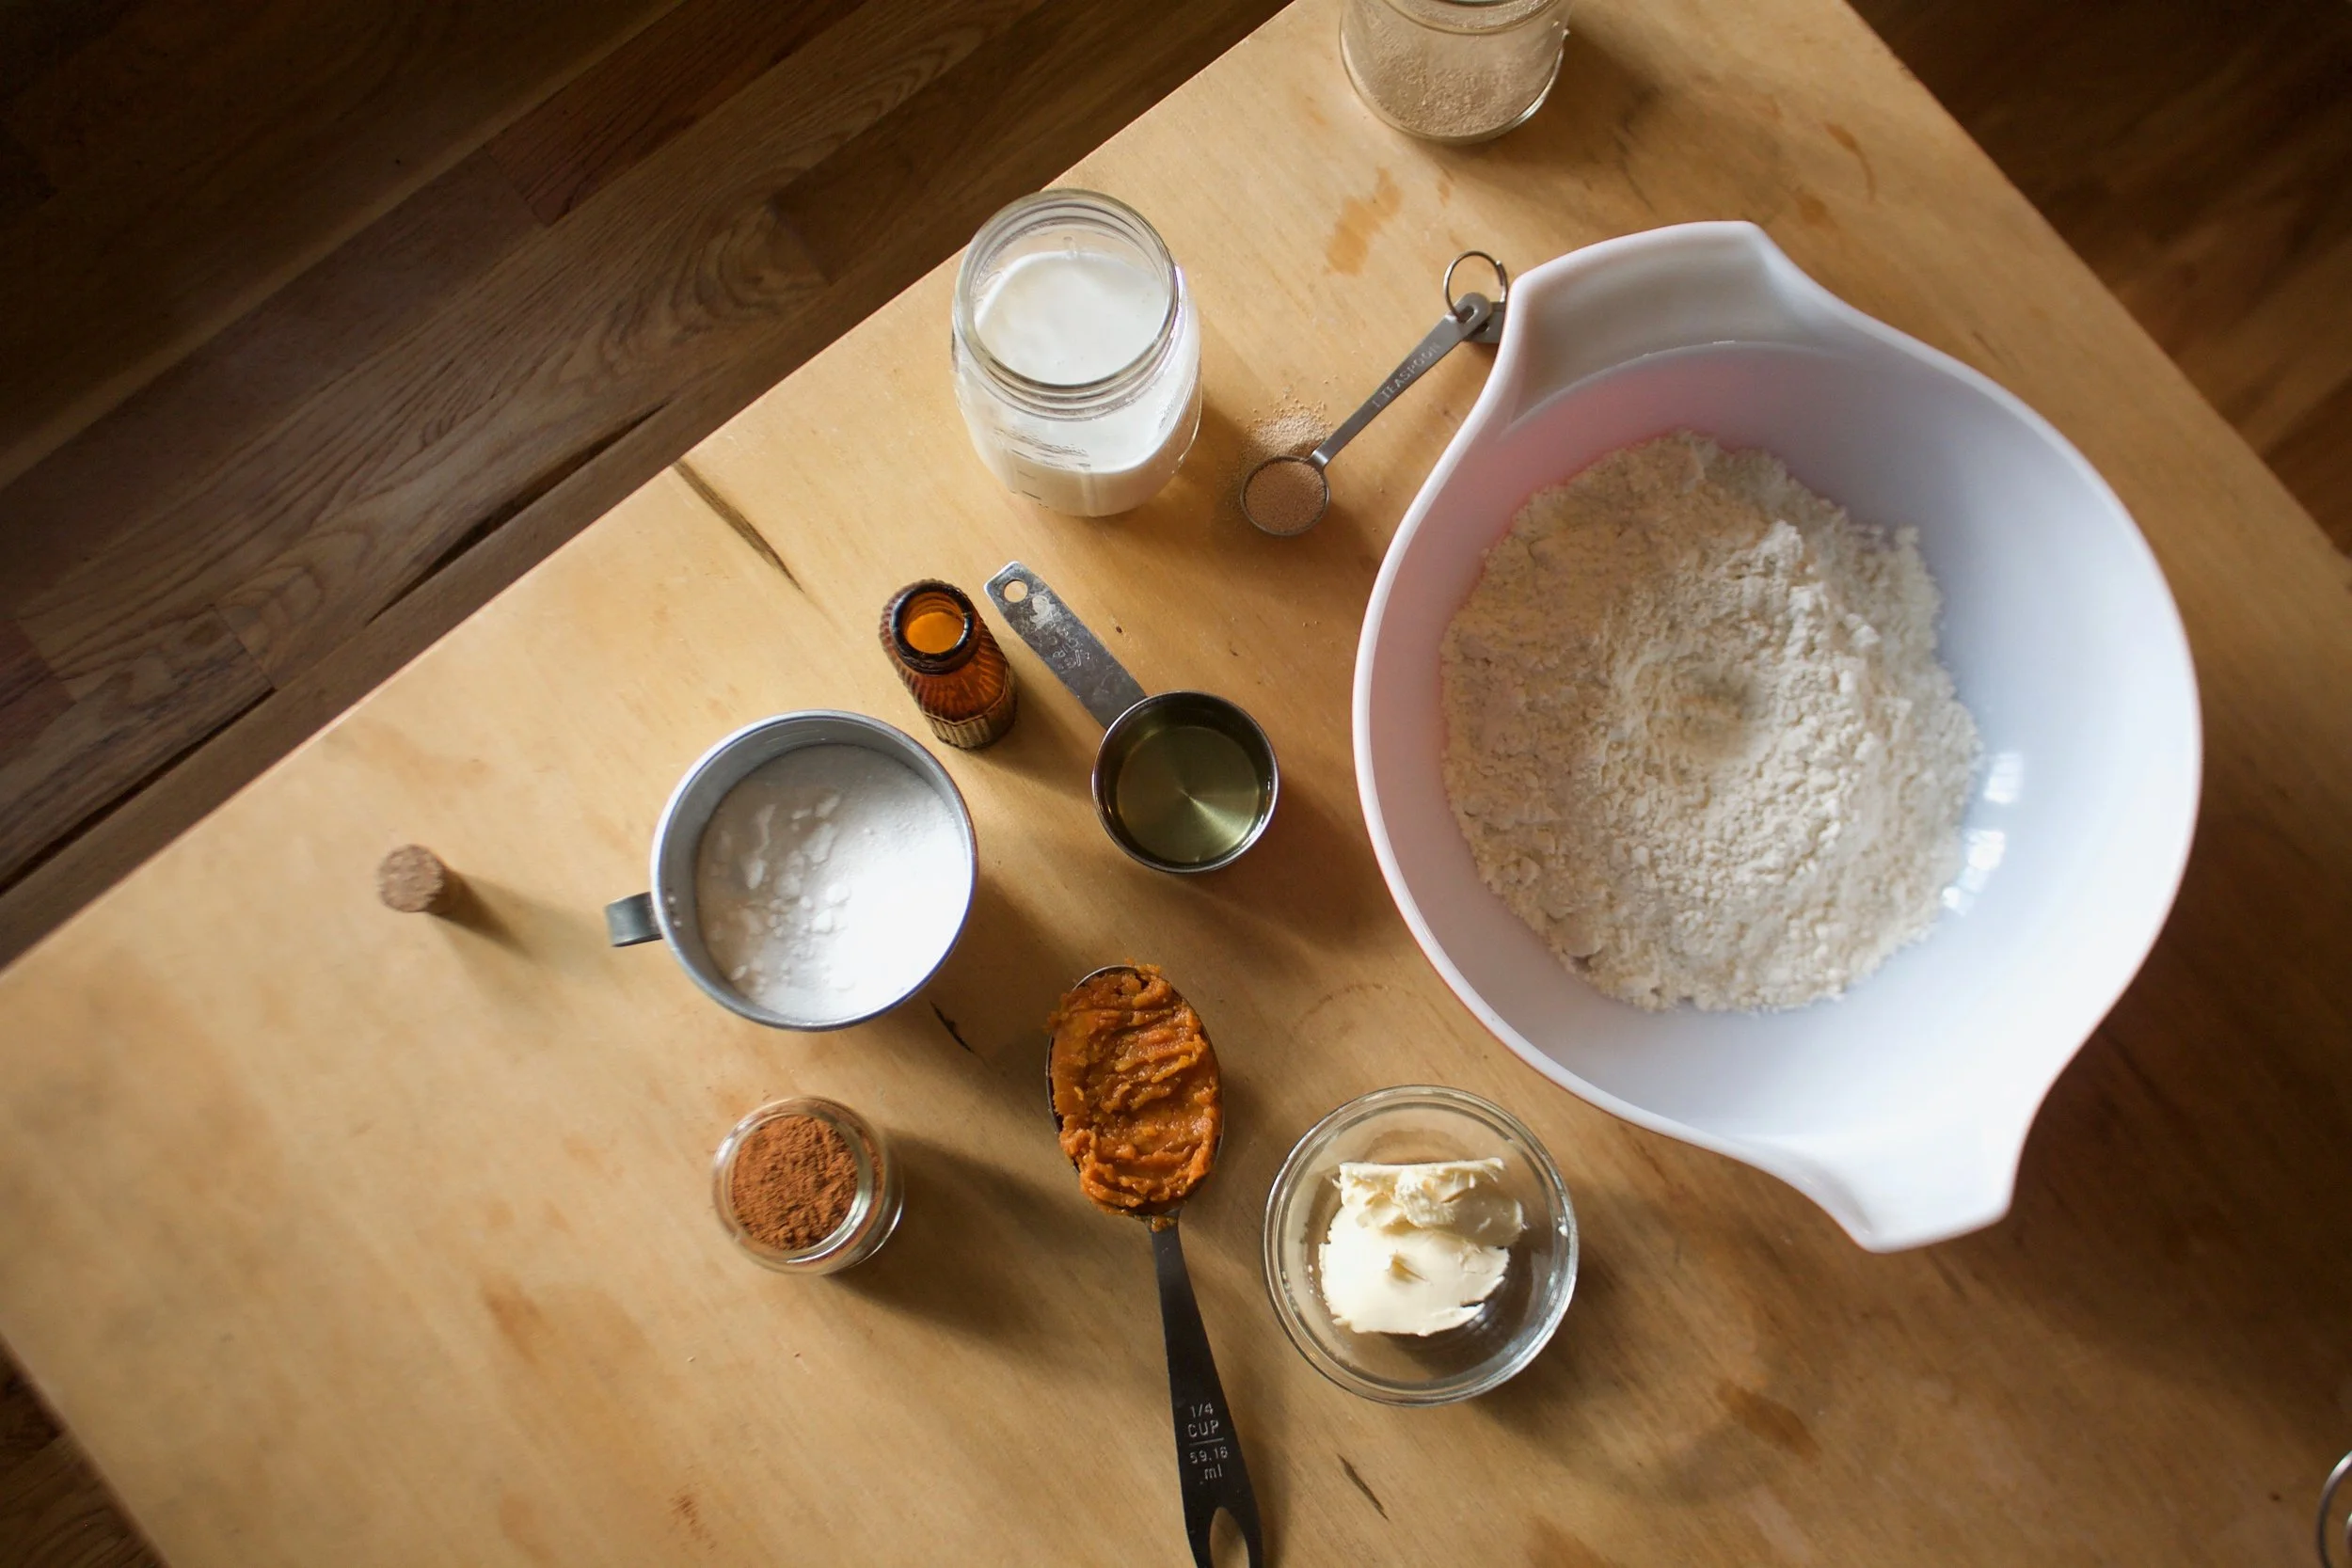
The stuff. Flour and salt in the bowl, melted earth balance, brown sugar, yeast, warm soy milk, cane sugar, cinnamon, powdered sugar, a couple of lemons, and af course, peaches.

IMG_0374.jpg
IMG_0396.jpg

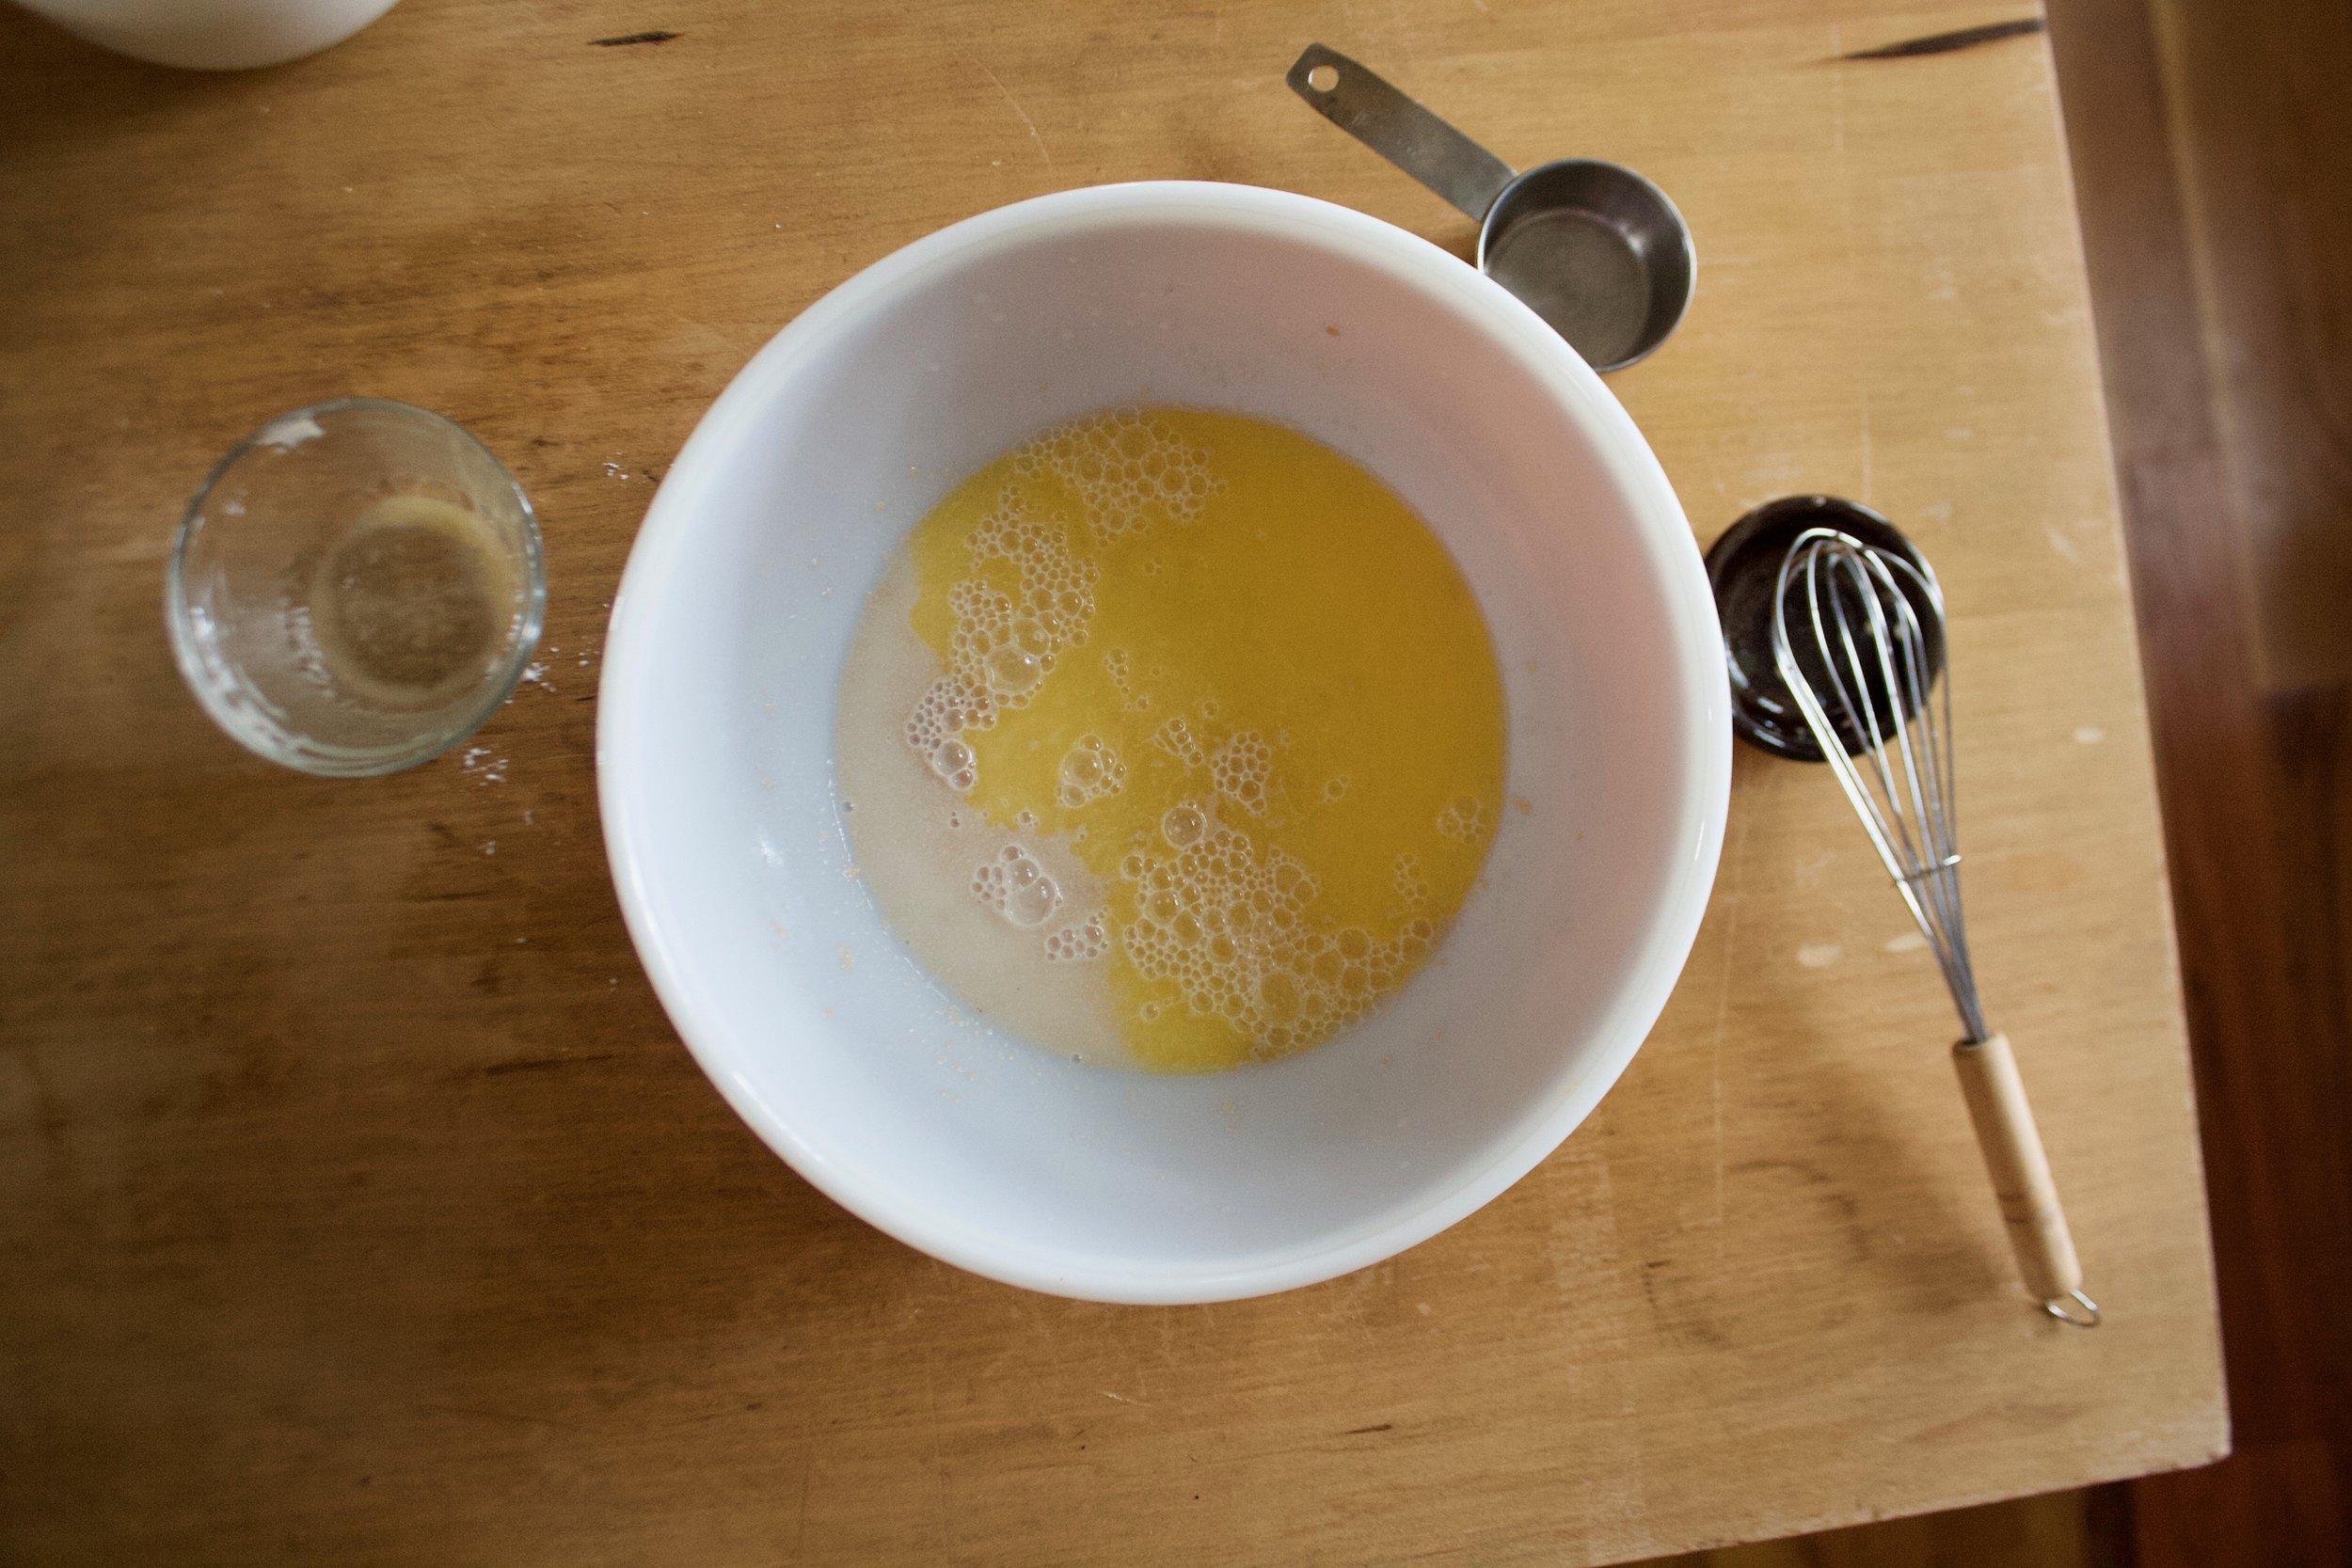
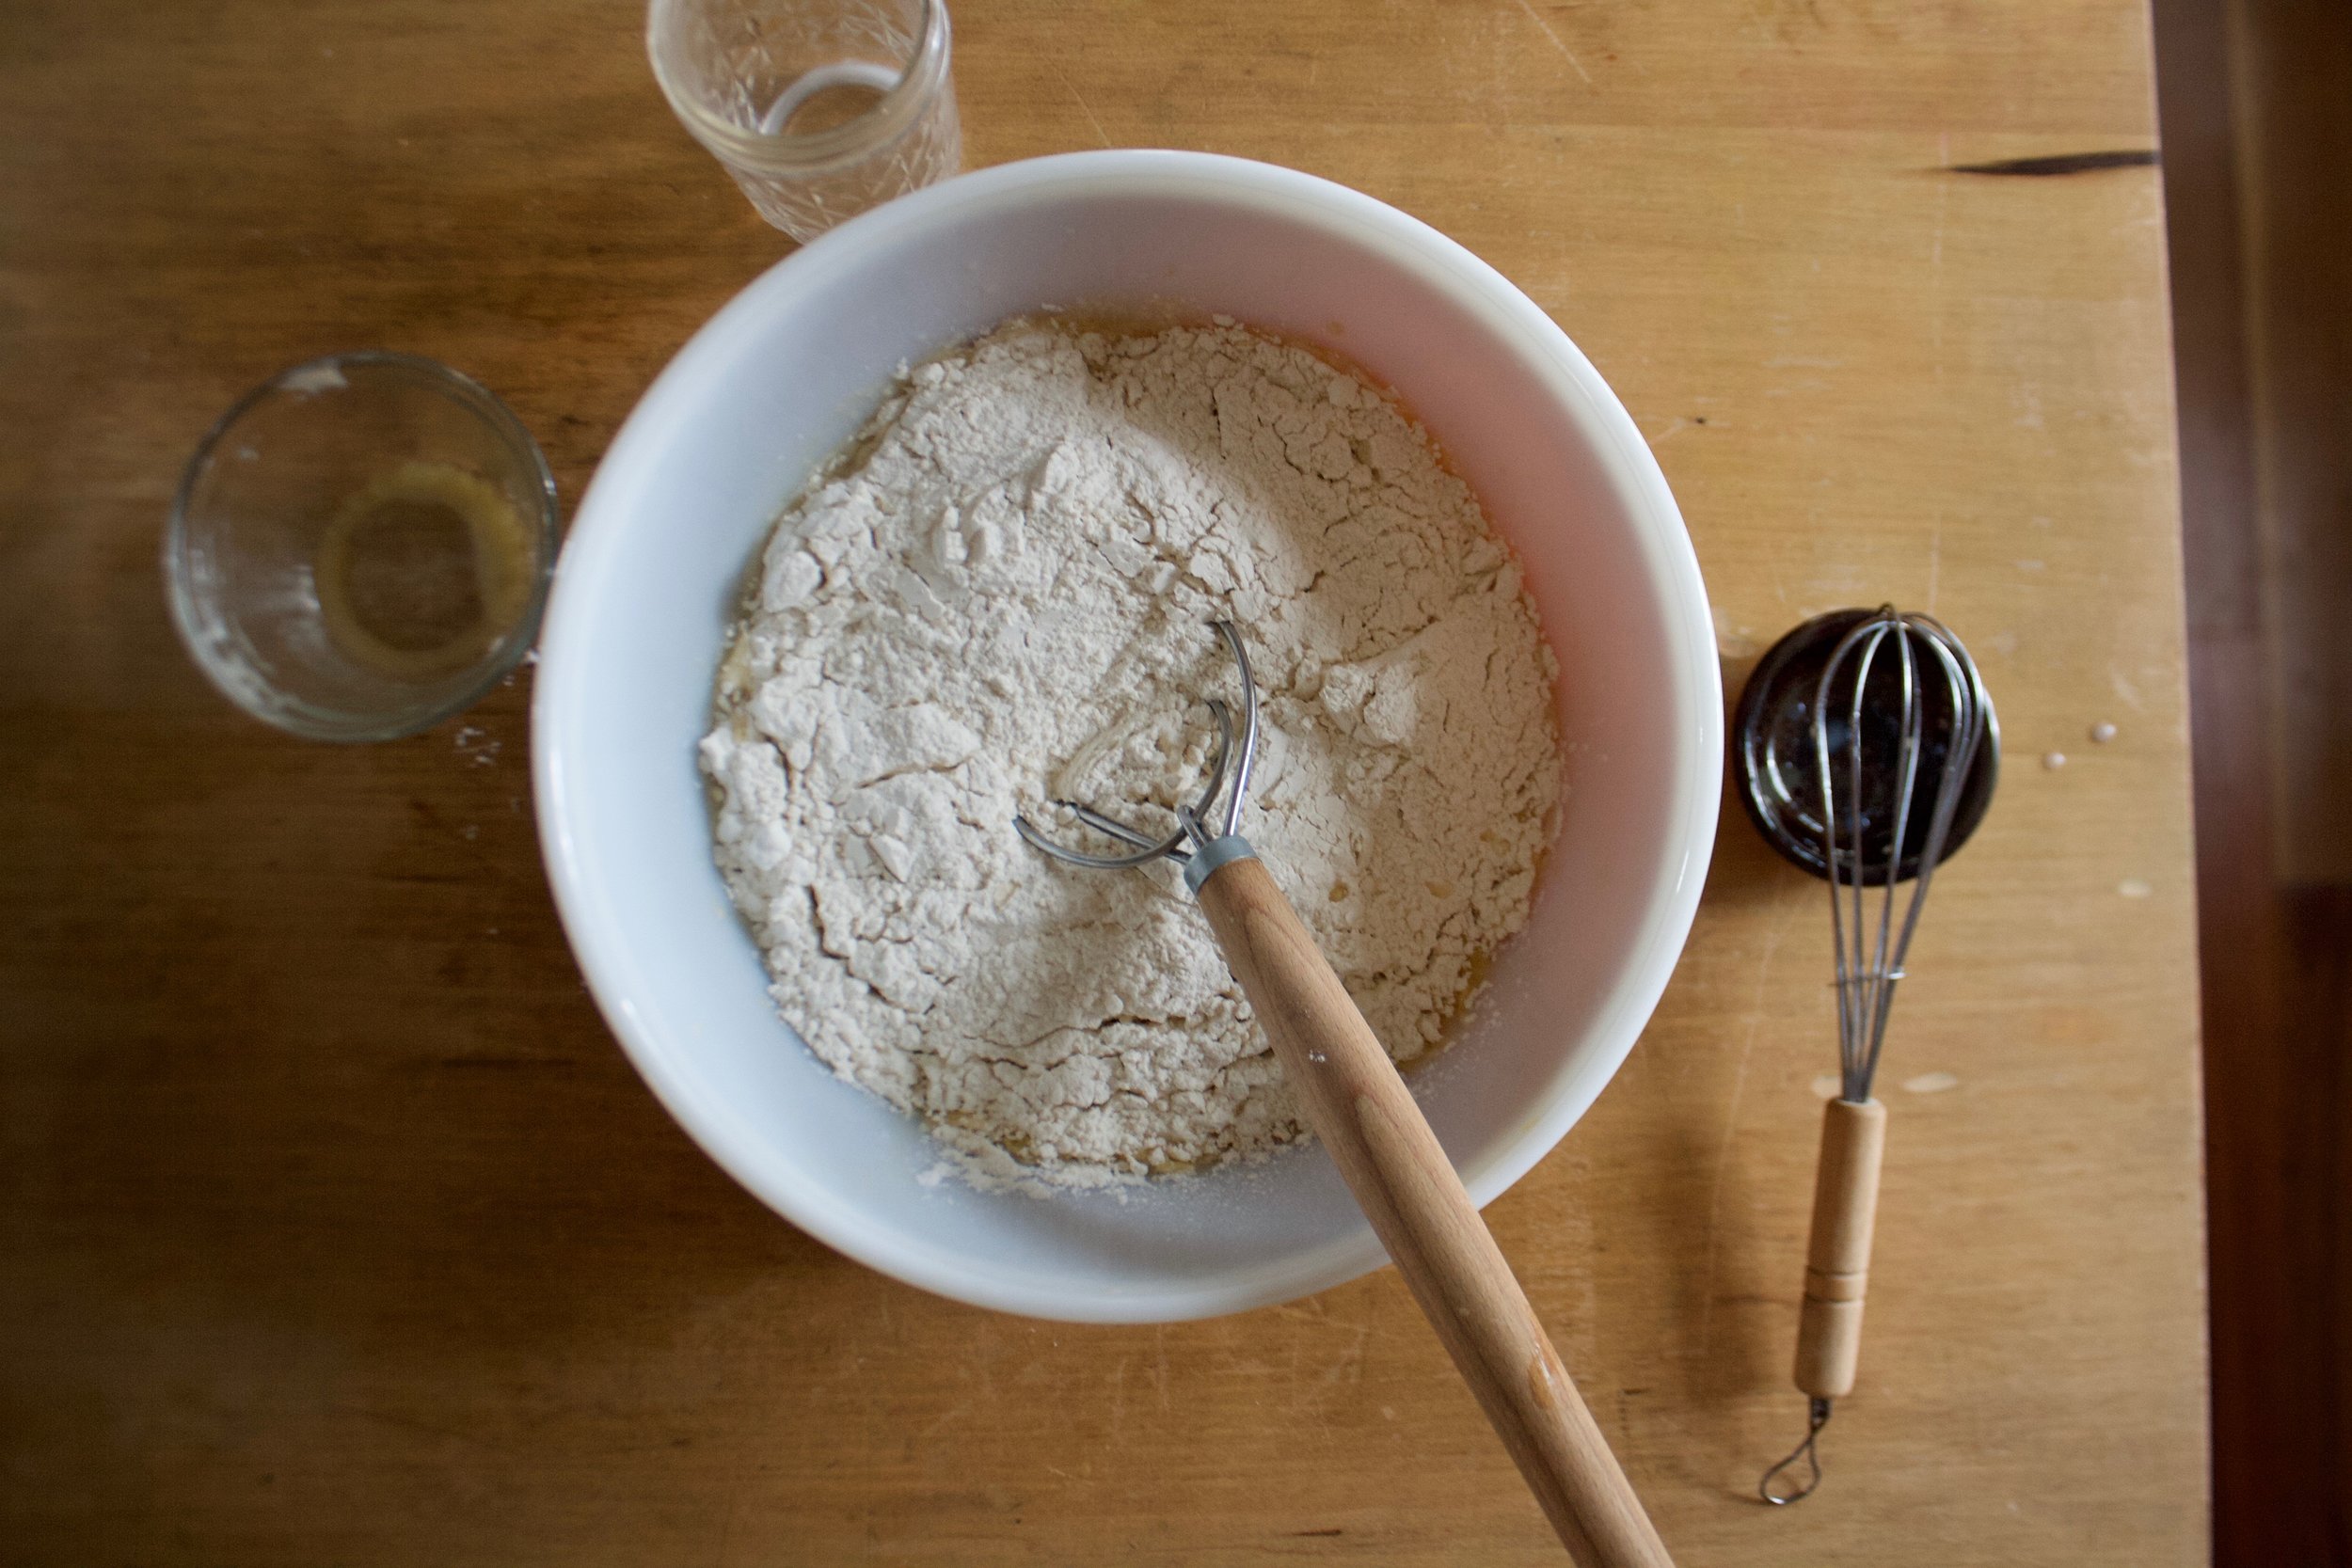
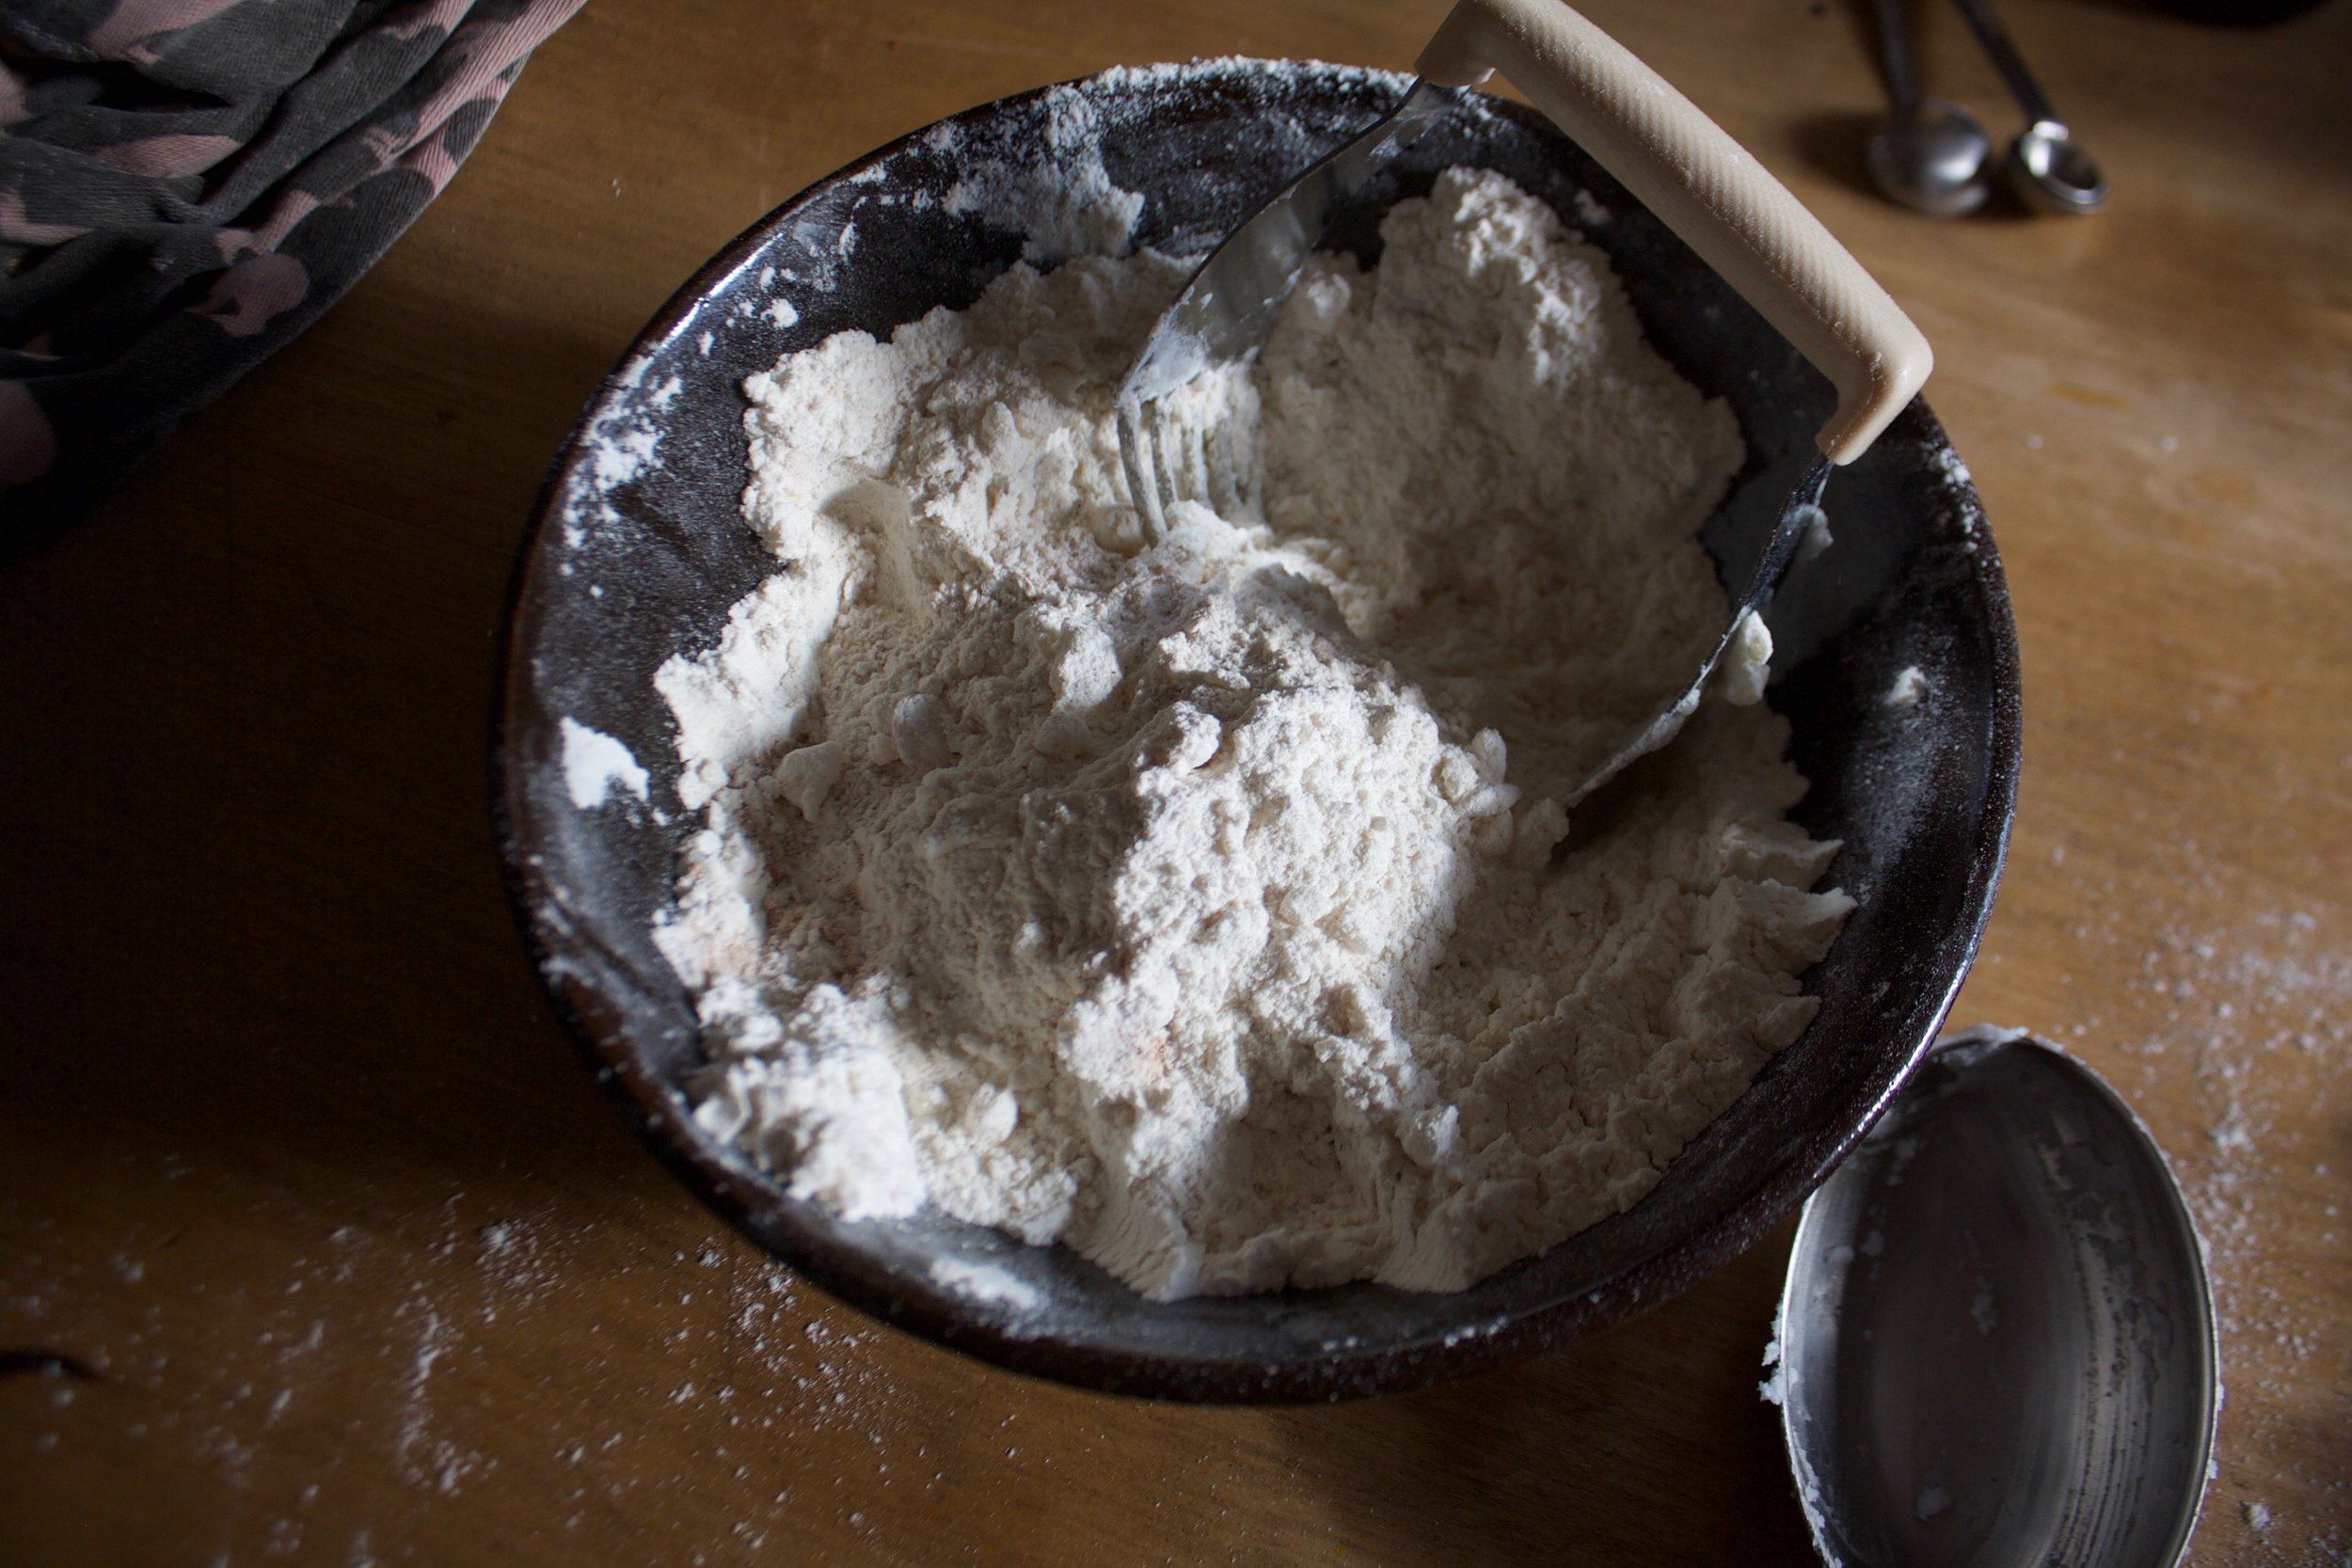
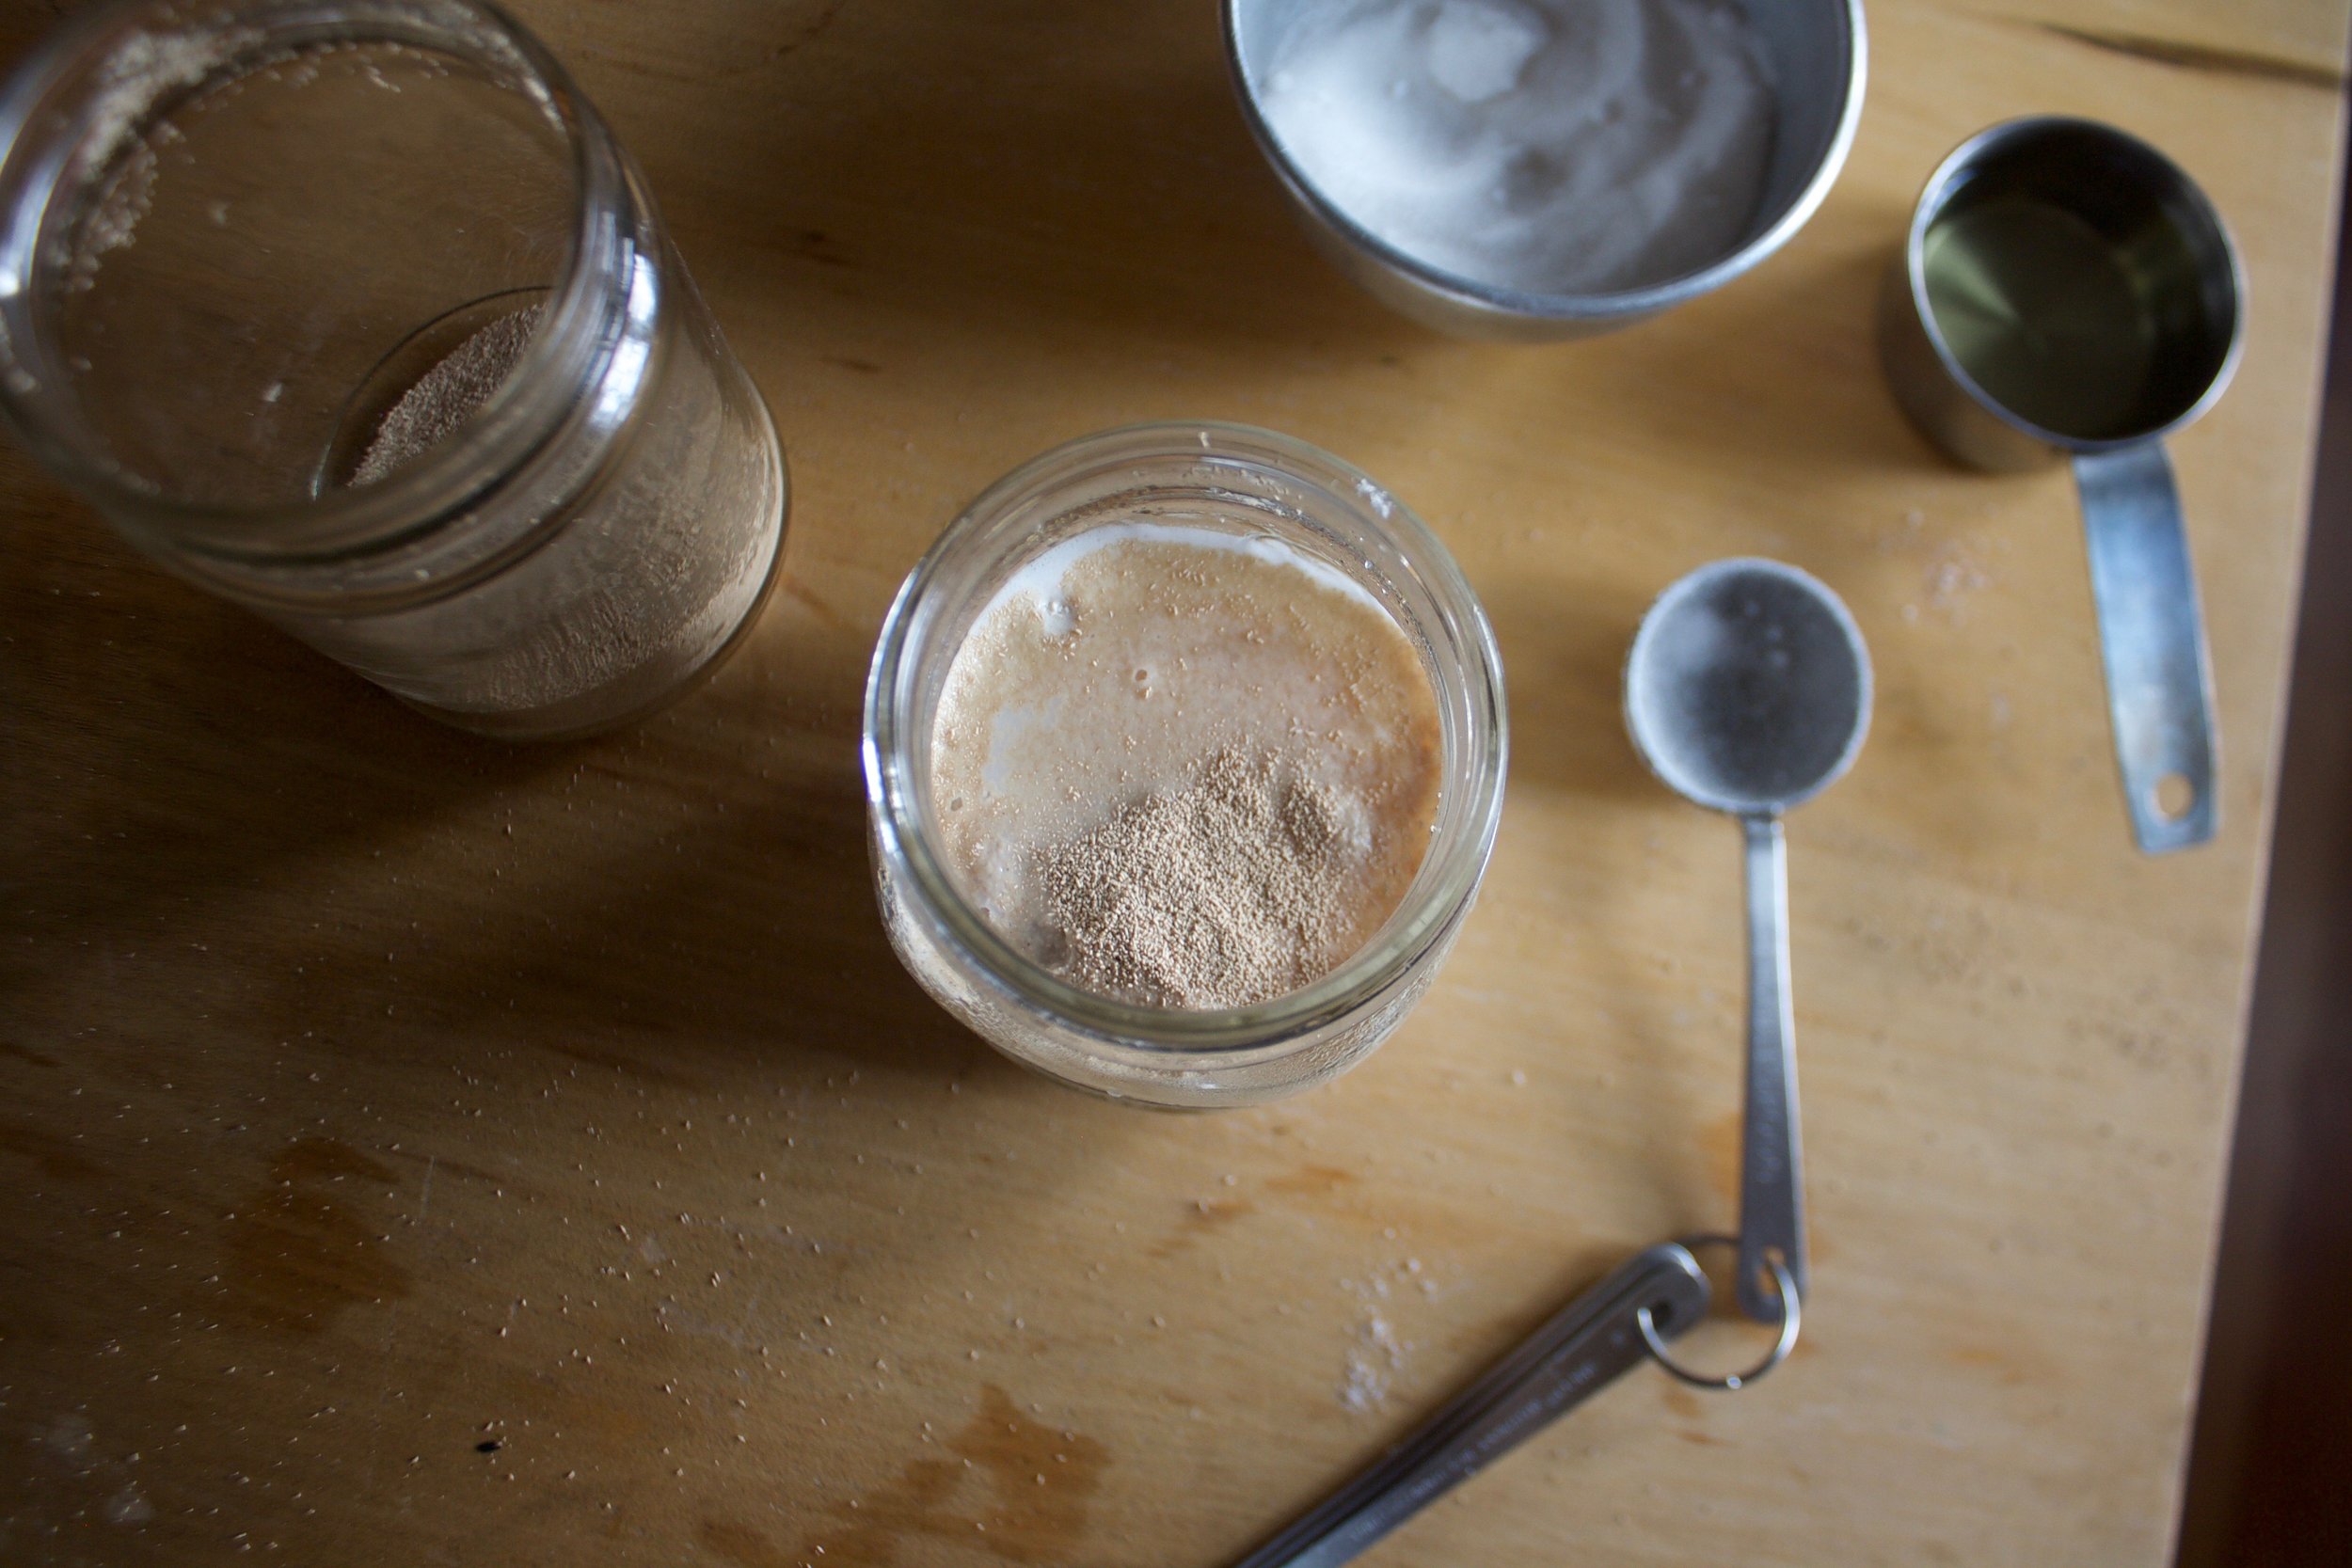
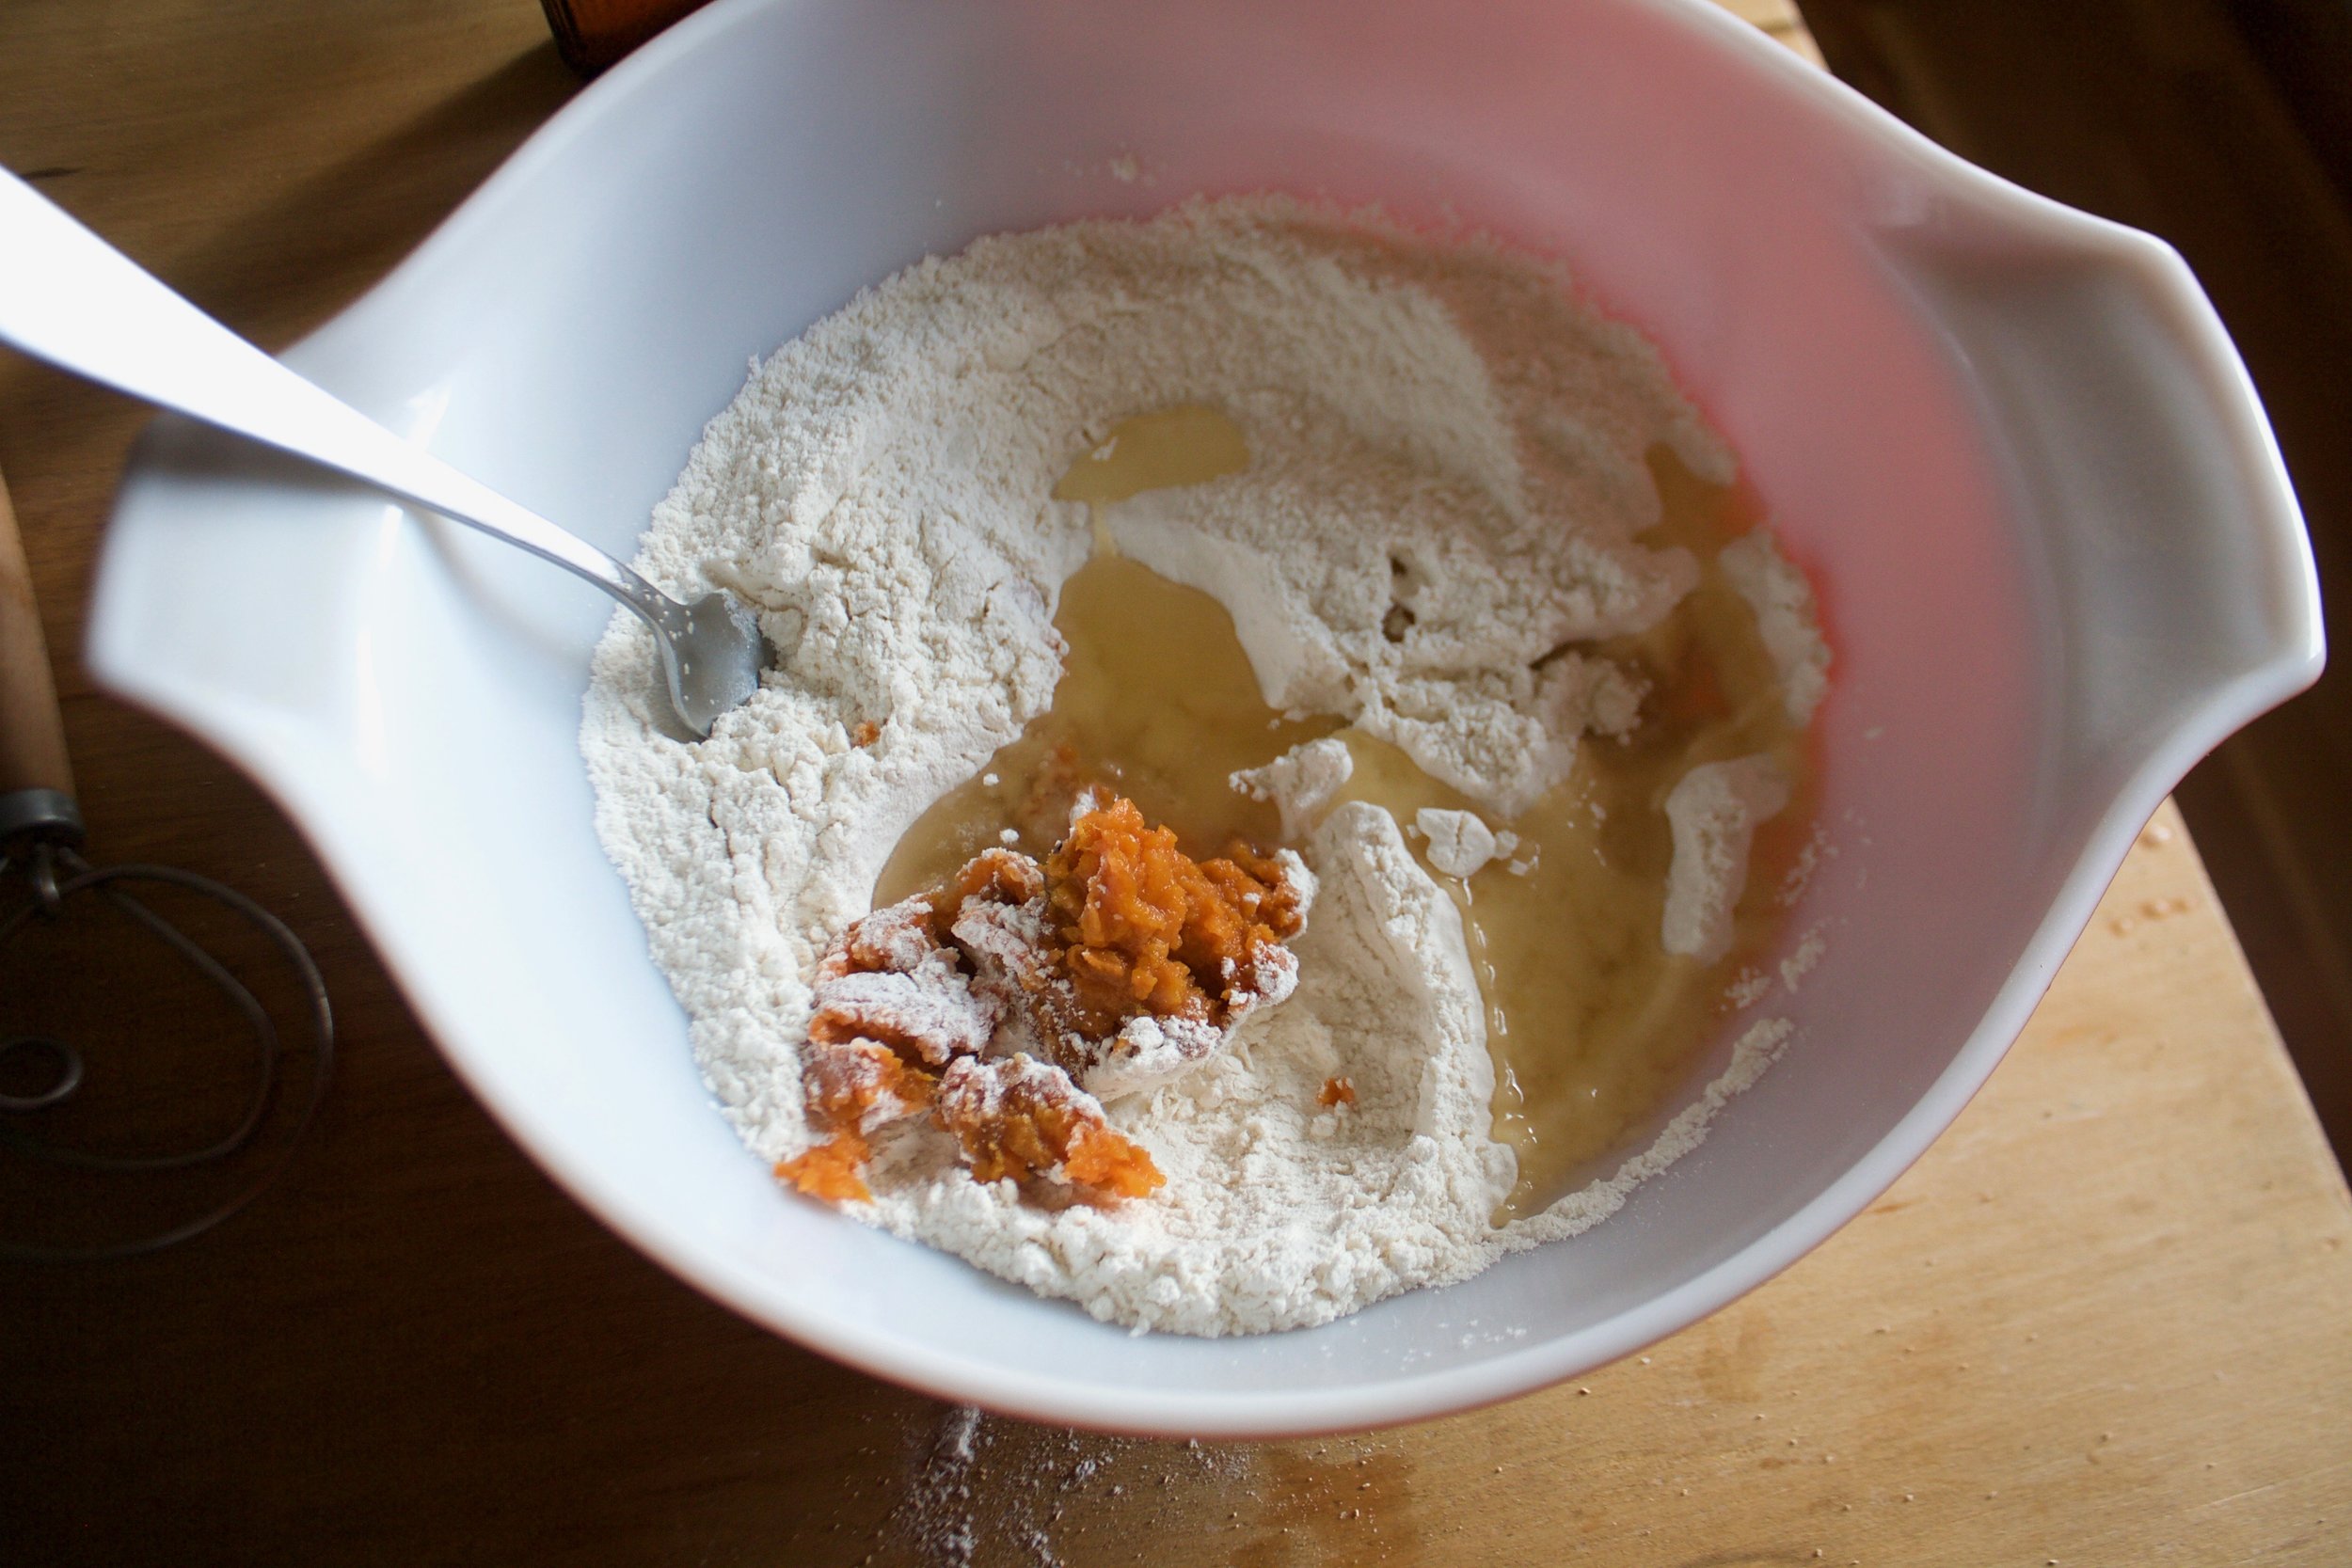
Warm (not hot) soy milk, yeast, cane sugar, an melted (but again, not hot) earth balance go into a big bowl and get whisked around. Then add in the flour and salt ans mix around until you just can't.

IMG_0402.jpg

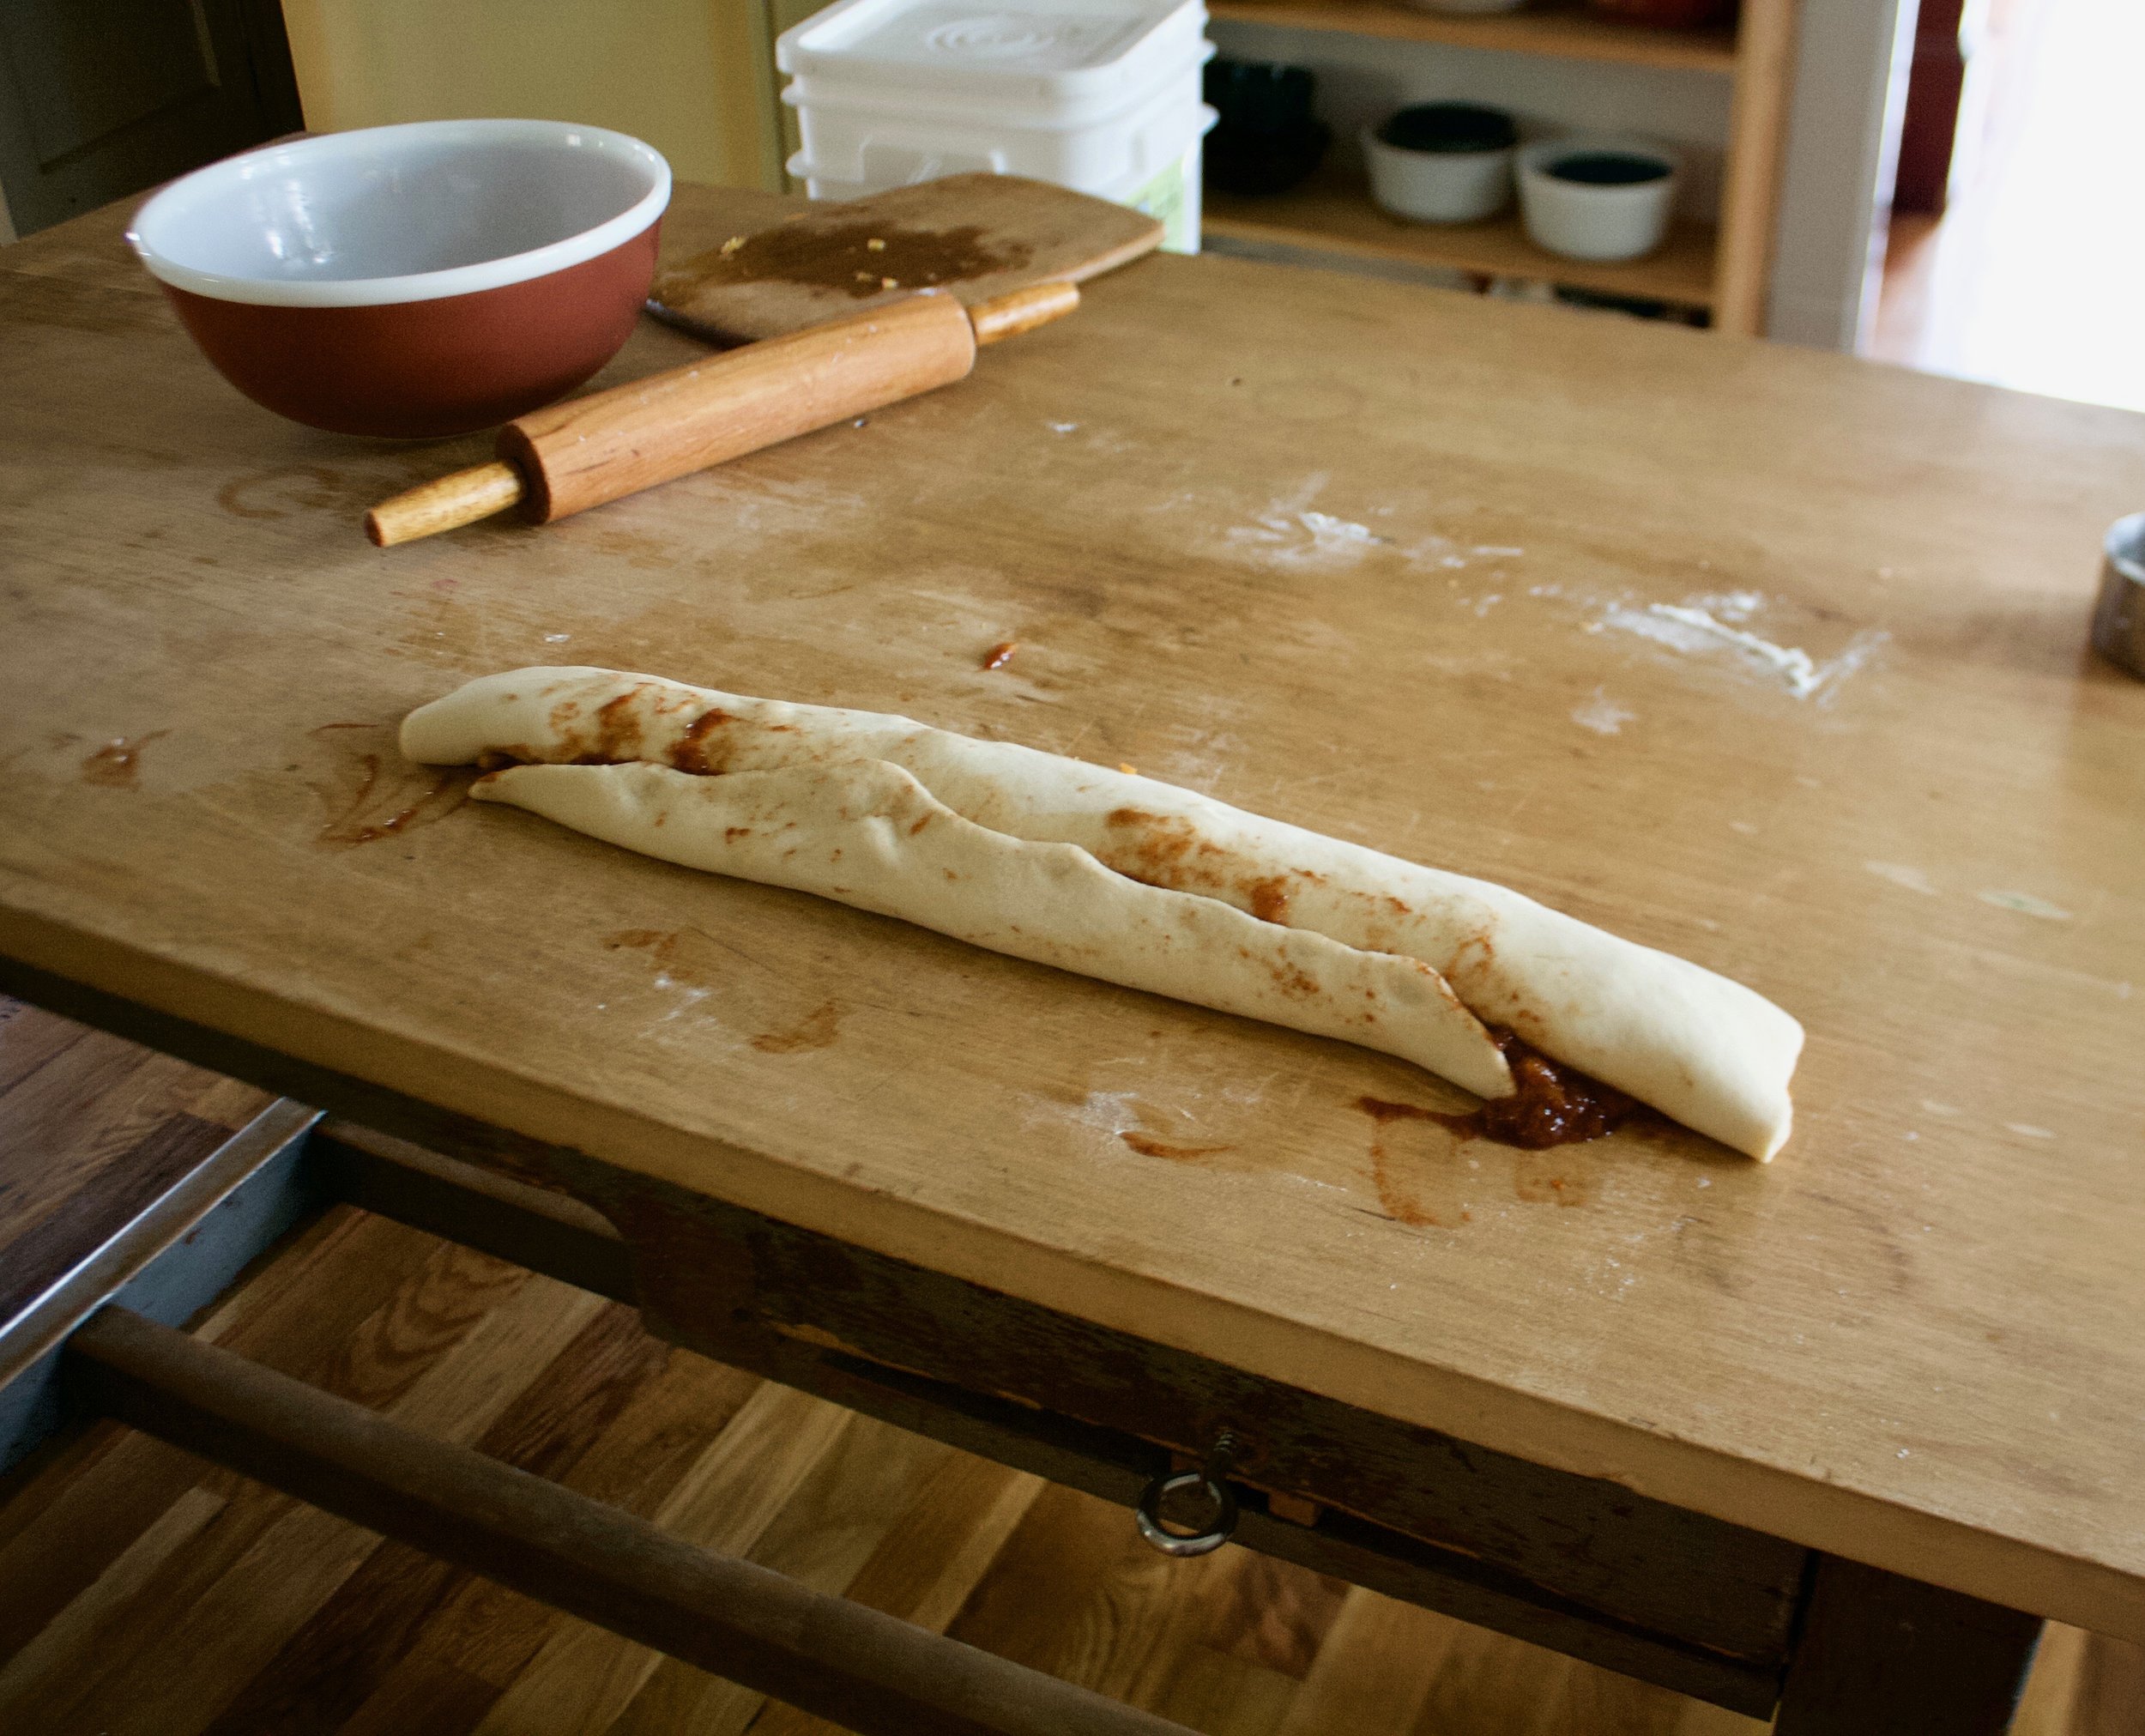
Time to knead. Dump the dough ad all the little bits onto a flour surface. Gather it all together and knead away, for about 5-8 minutes, or until the dough looks like....

This. Nice and soft and glossy.  Lightly grease the bowl ans stick the dough back into it, covered with a towel, and set for about 1 hour to rise and double in size. 

IMG_0415.jpg

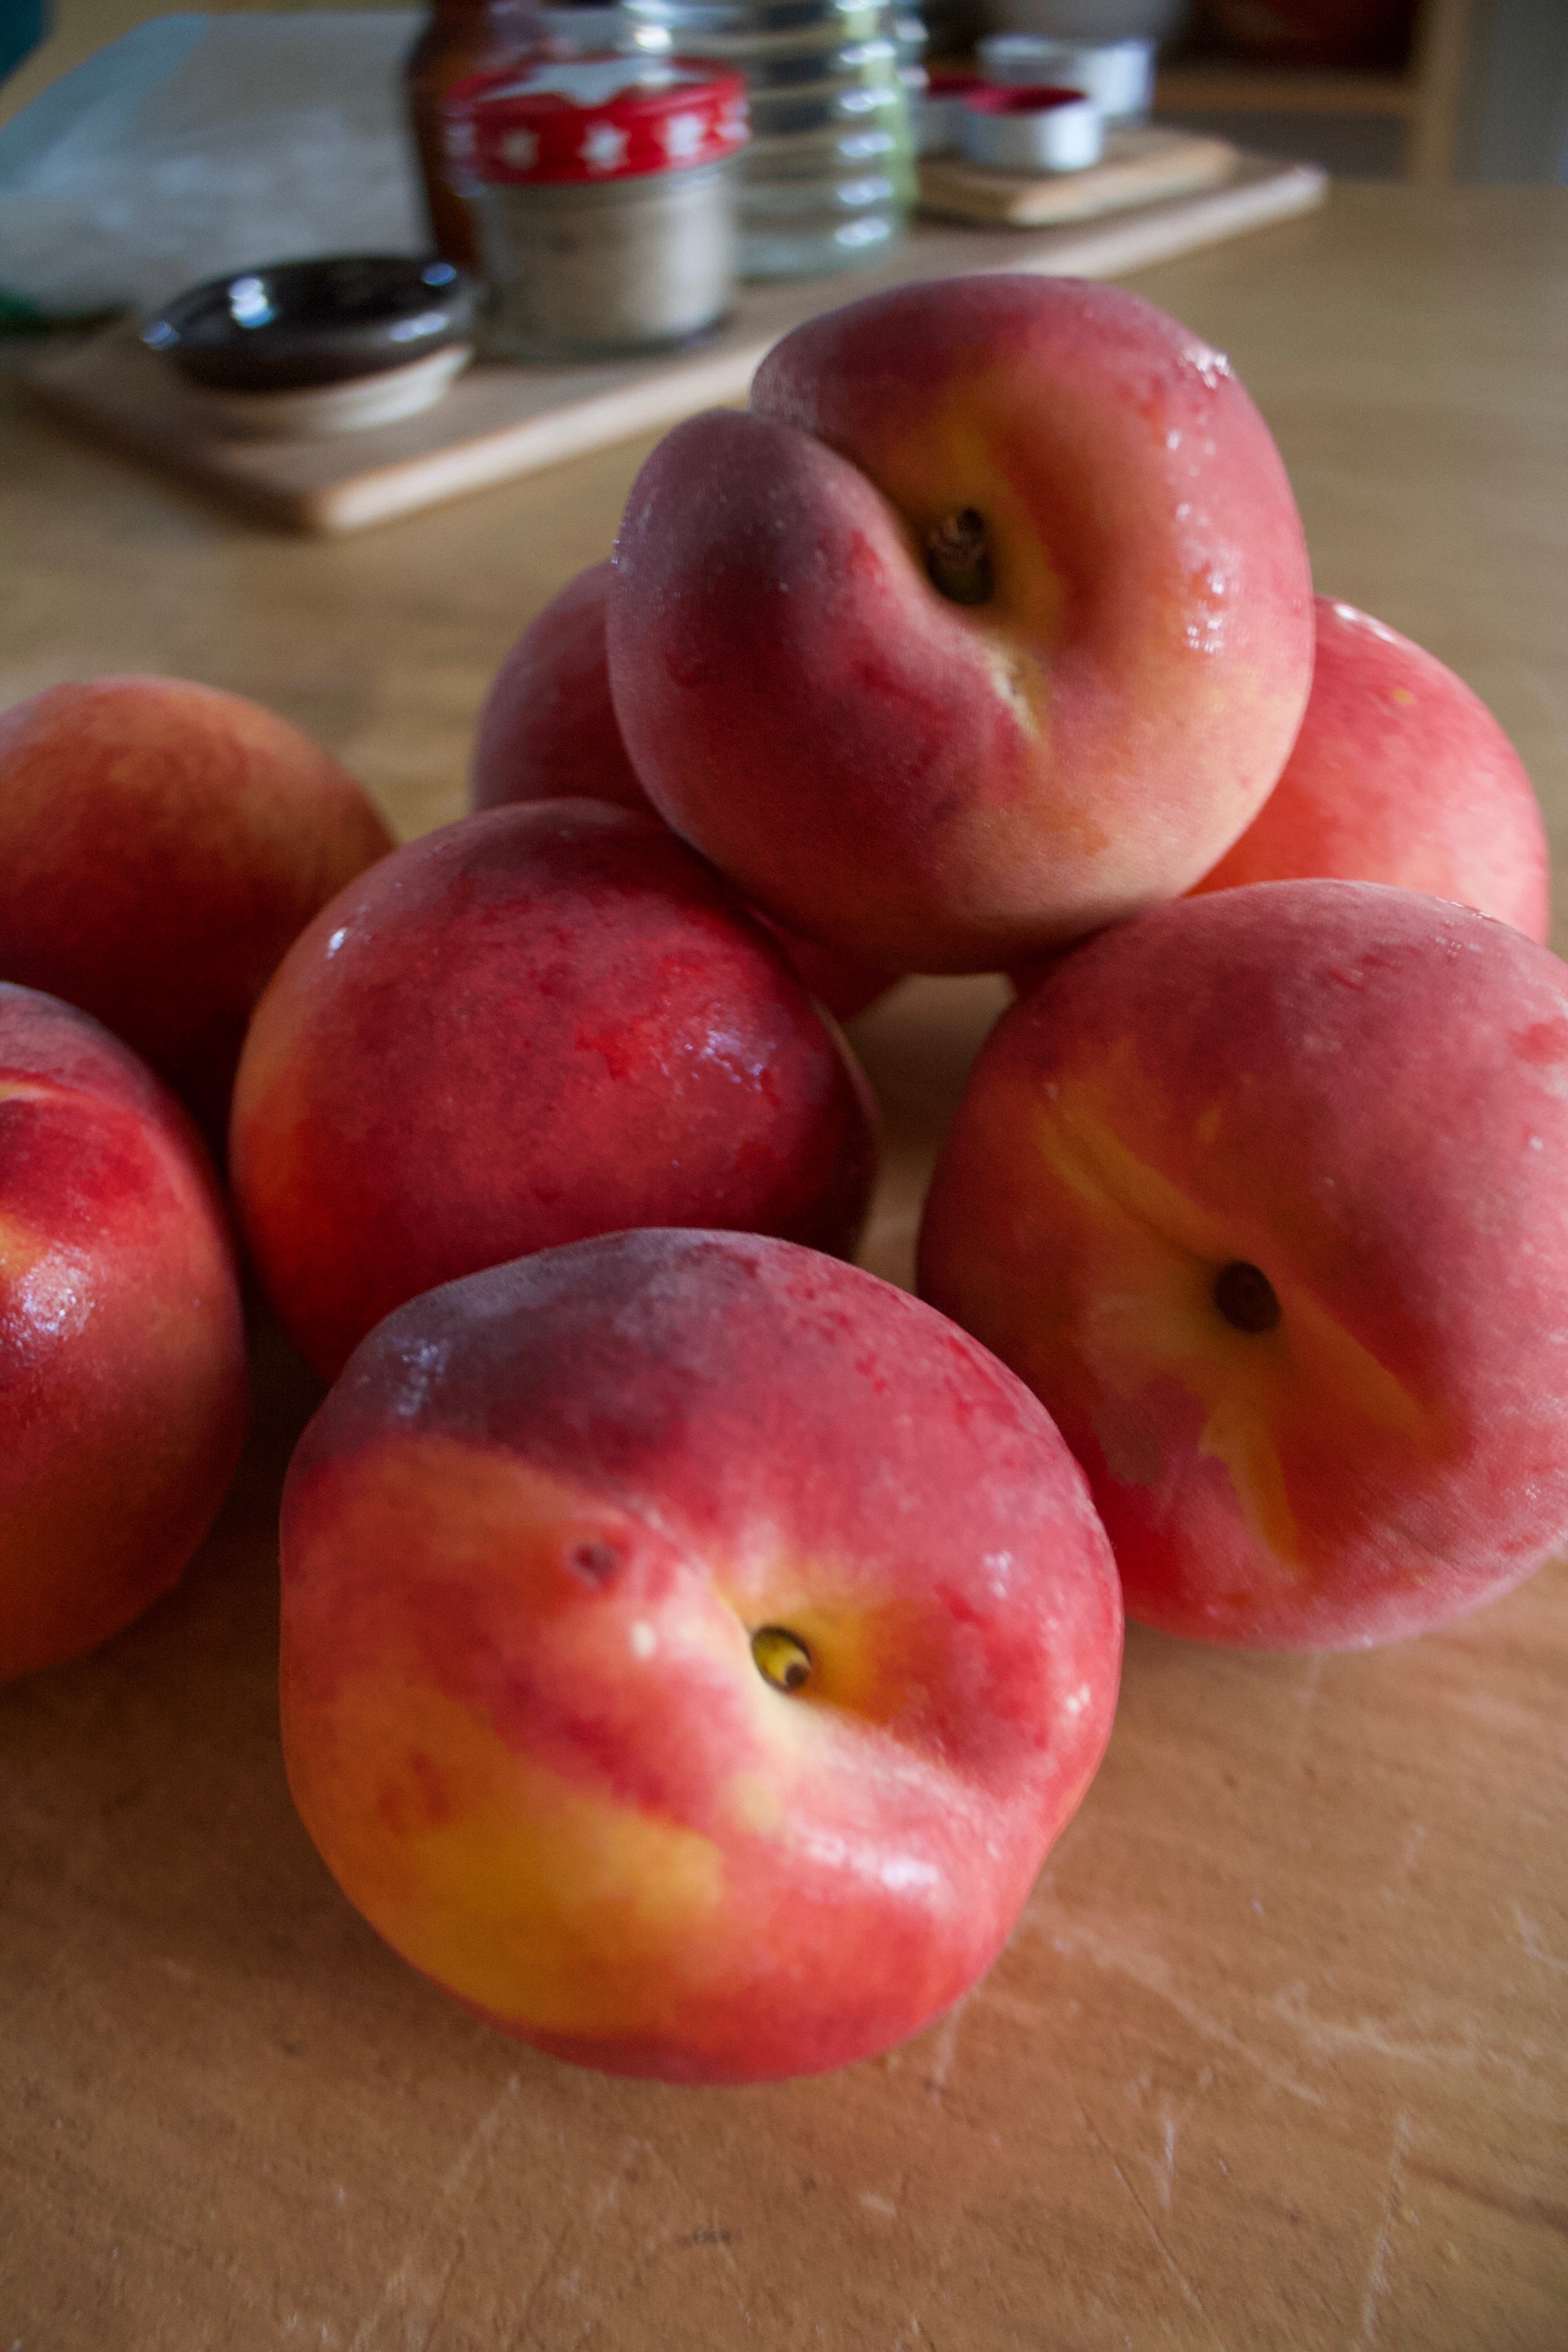
As soon as the dough is set ti rise, start on your peach filling. Chop up enough peaches that you have about 2 1/2 cups of chunks.

IMG_0435.jpg
IMG_0459.jpg

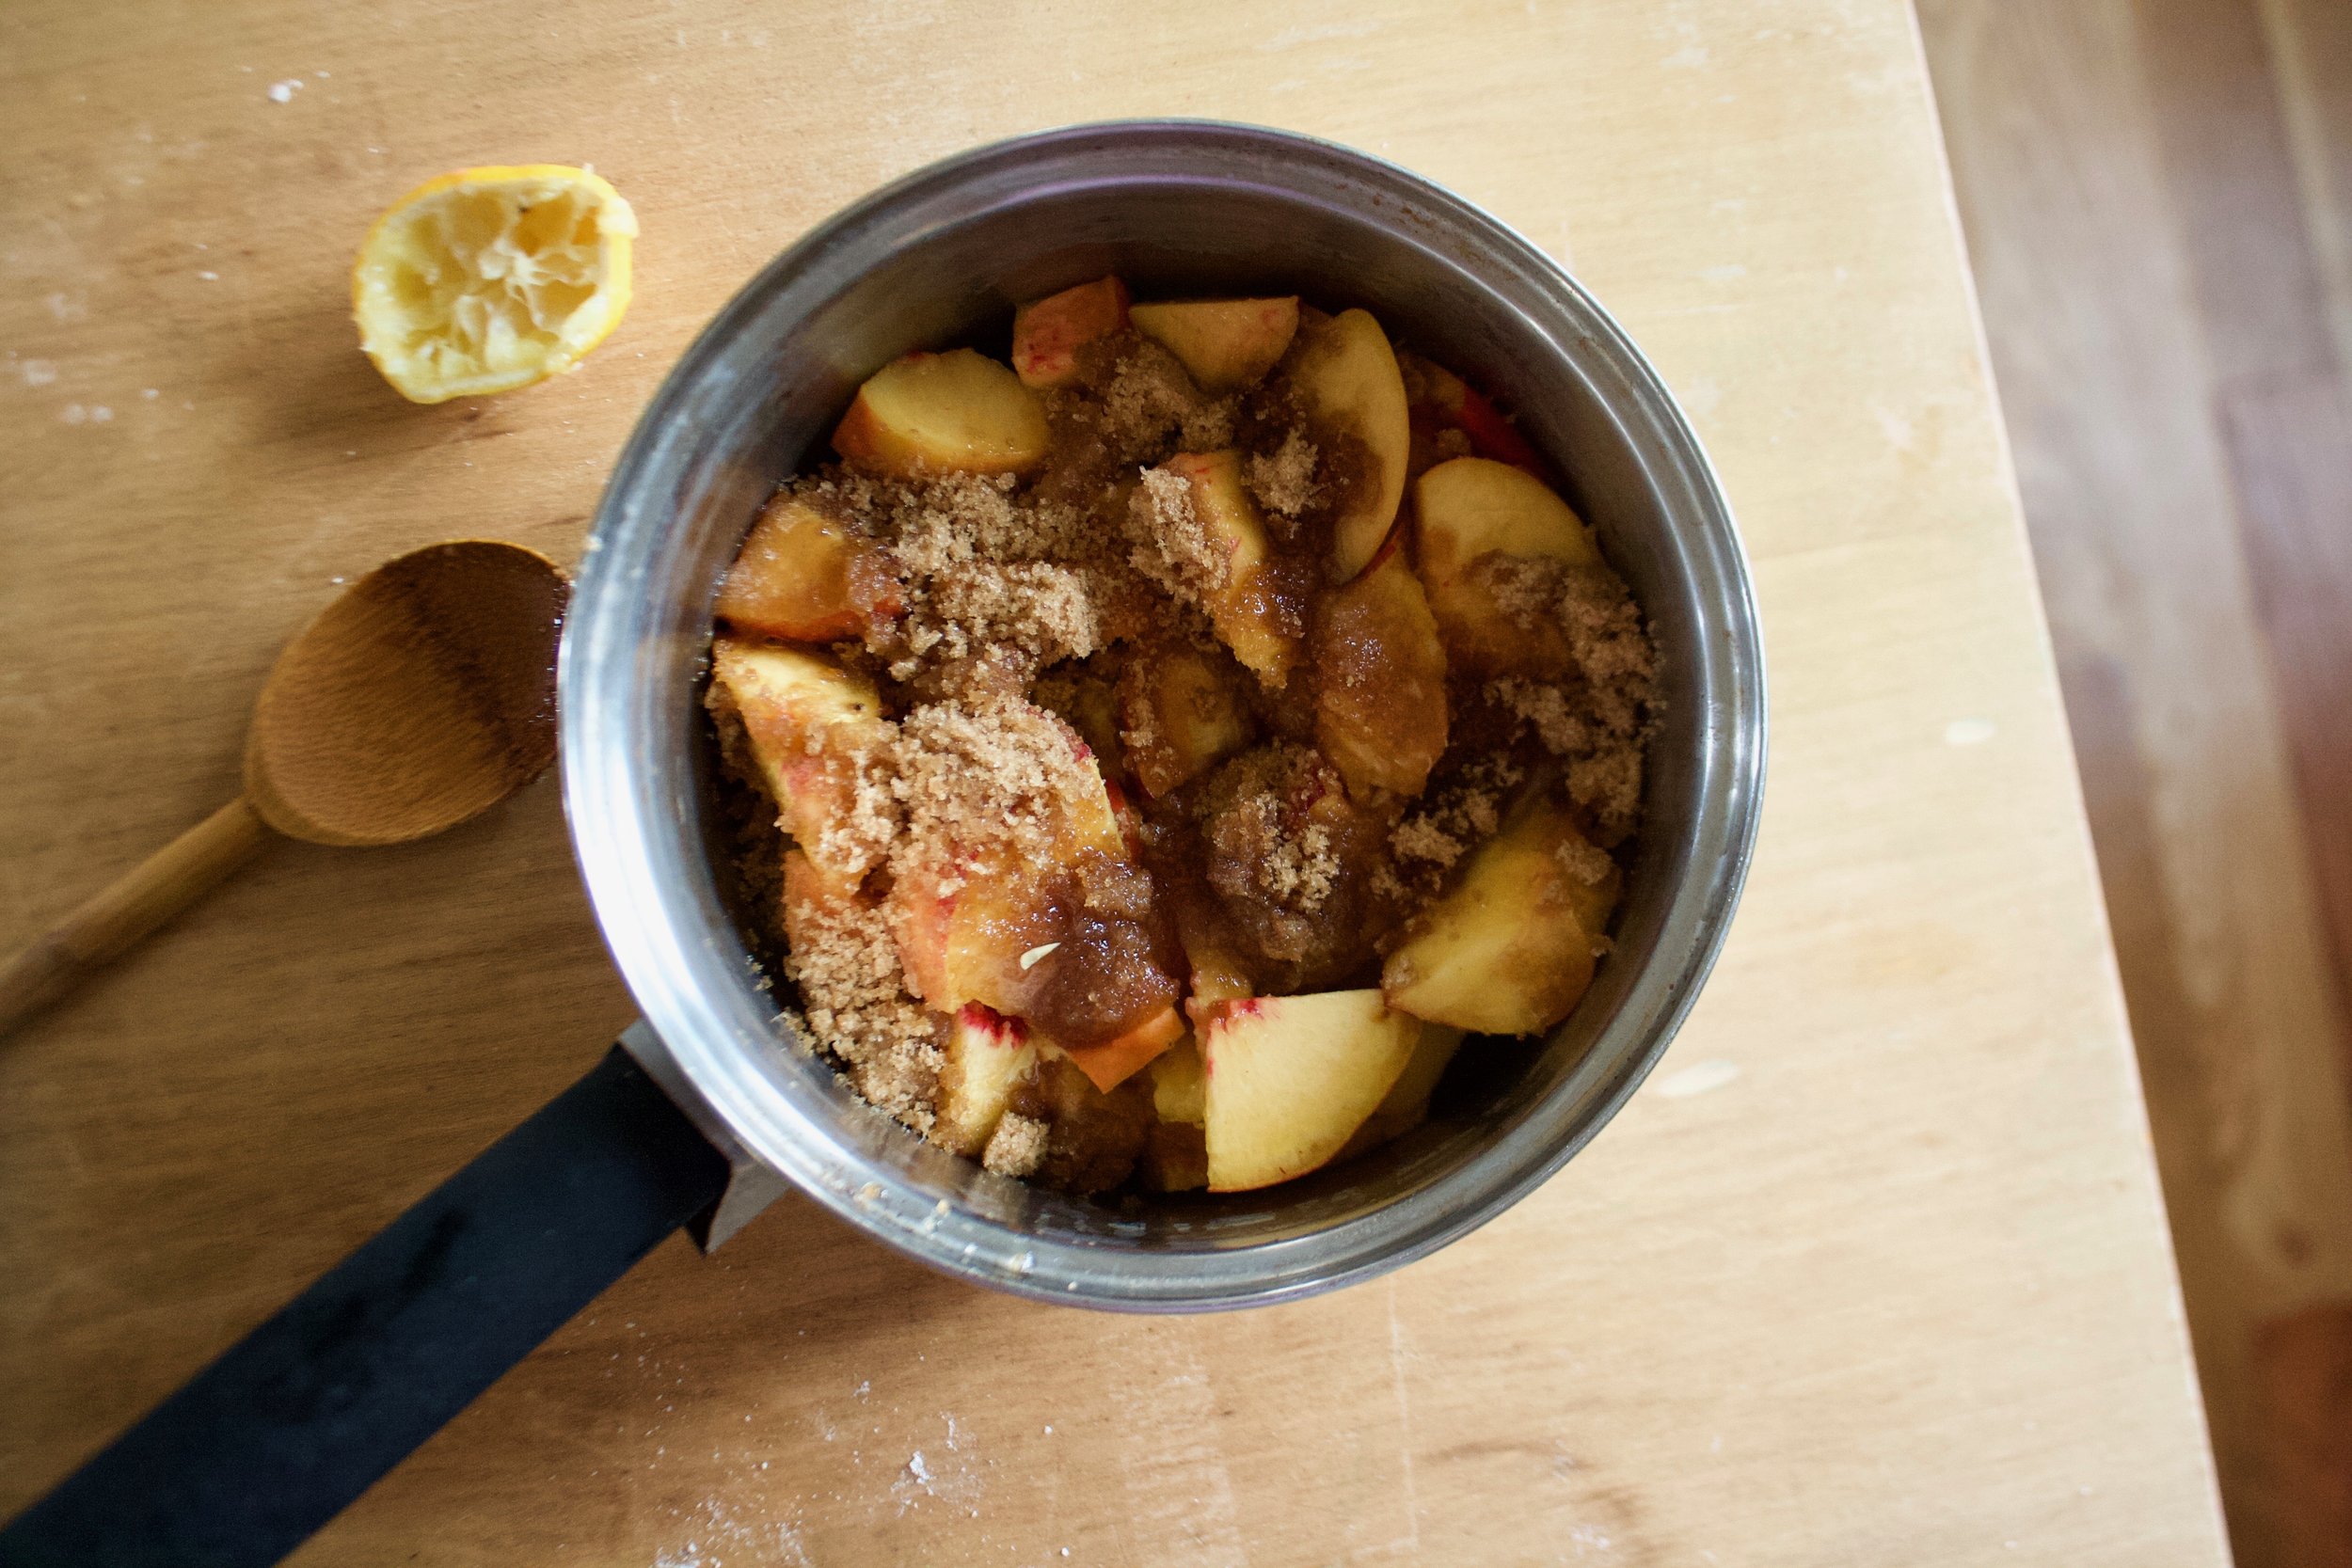
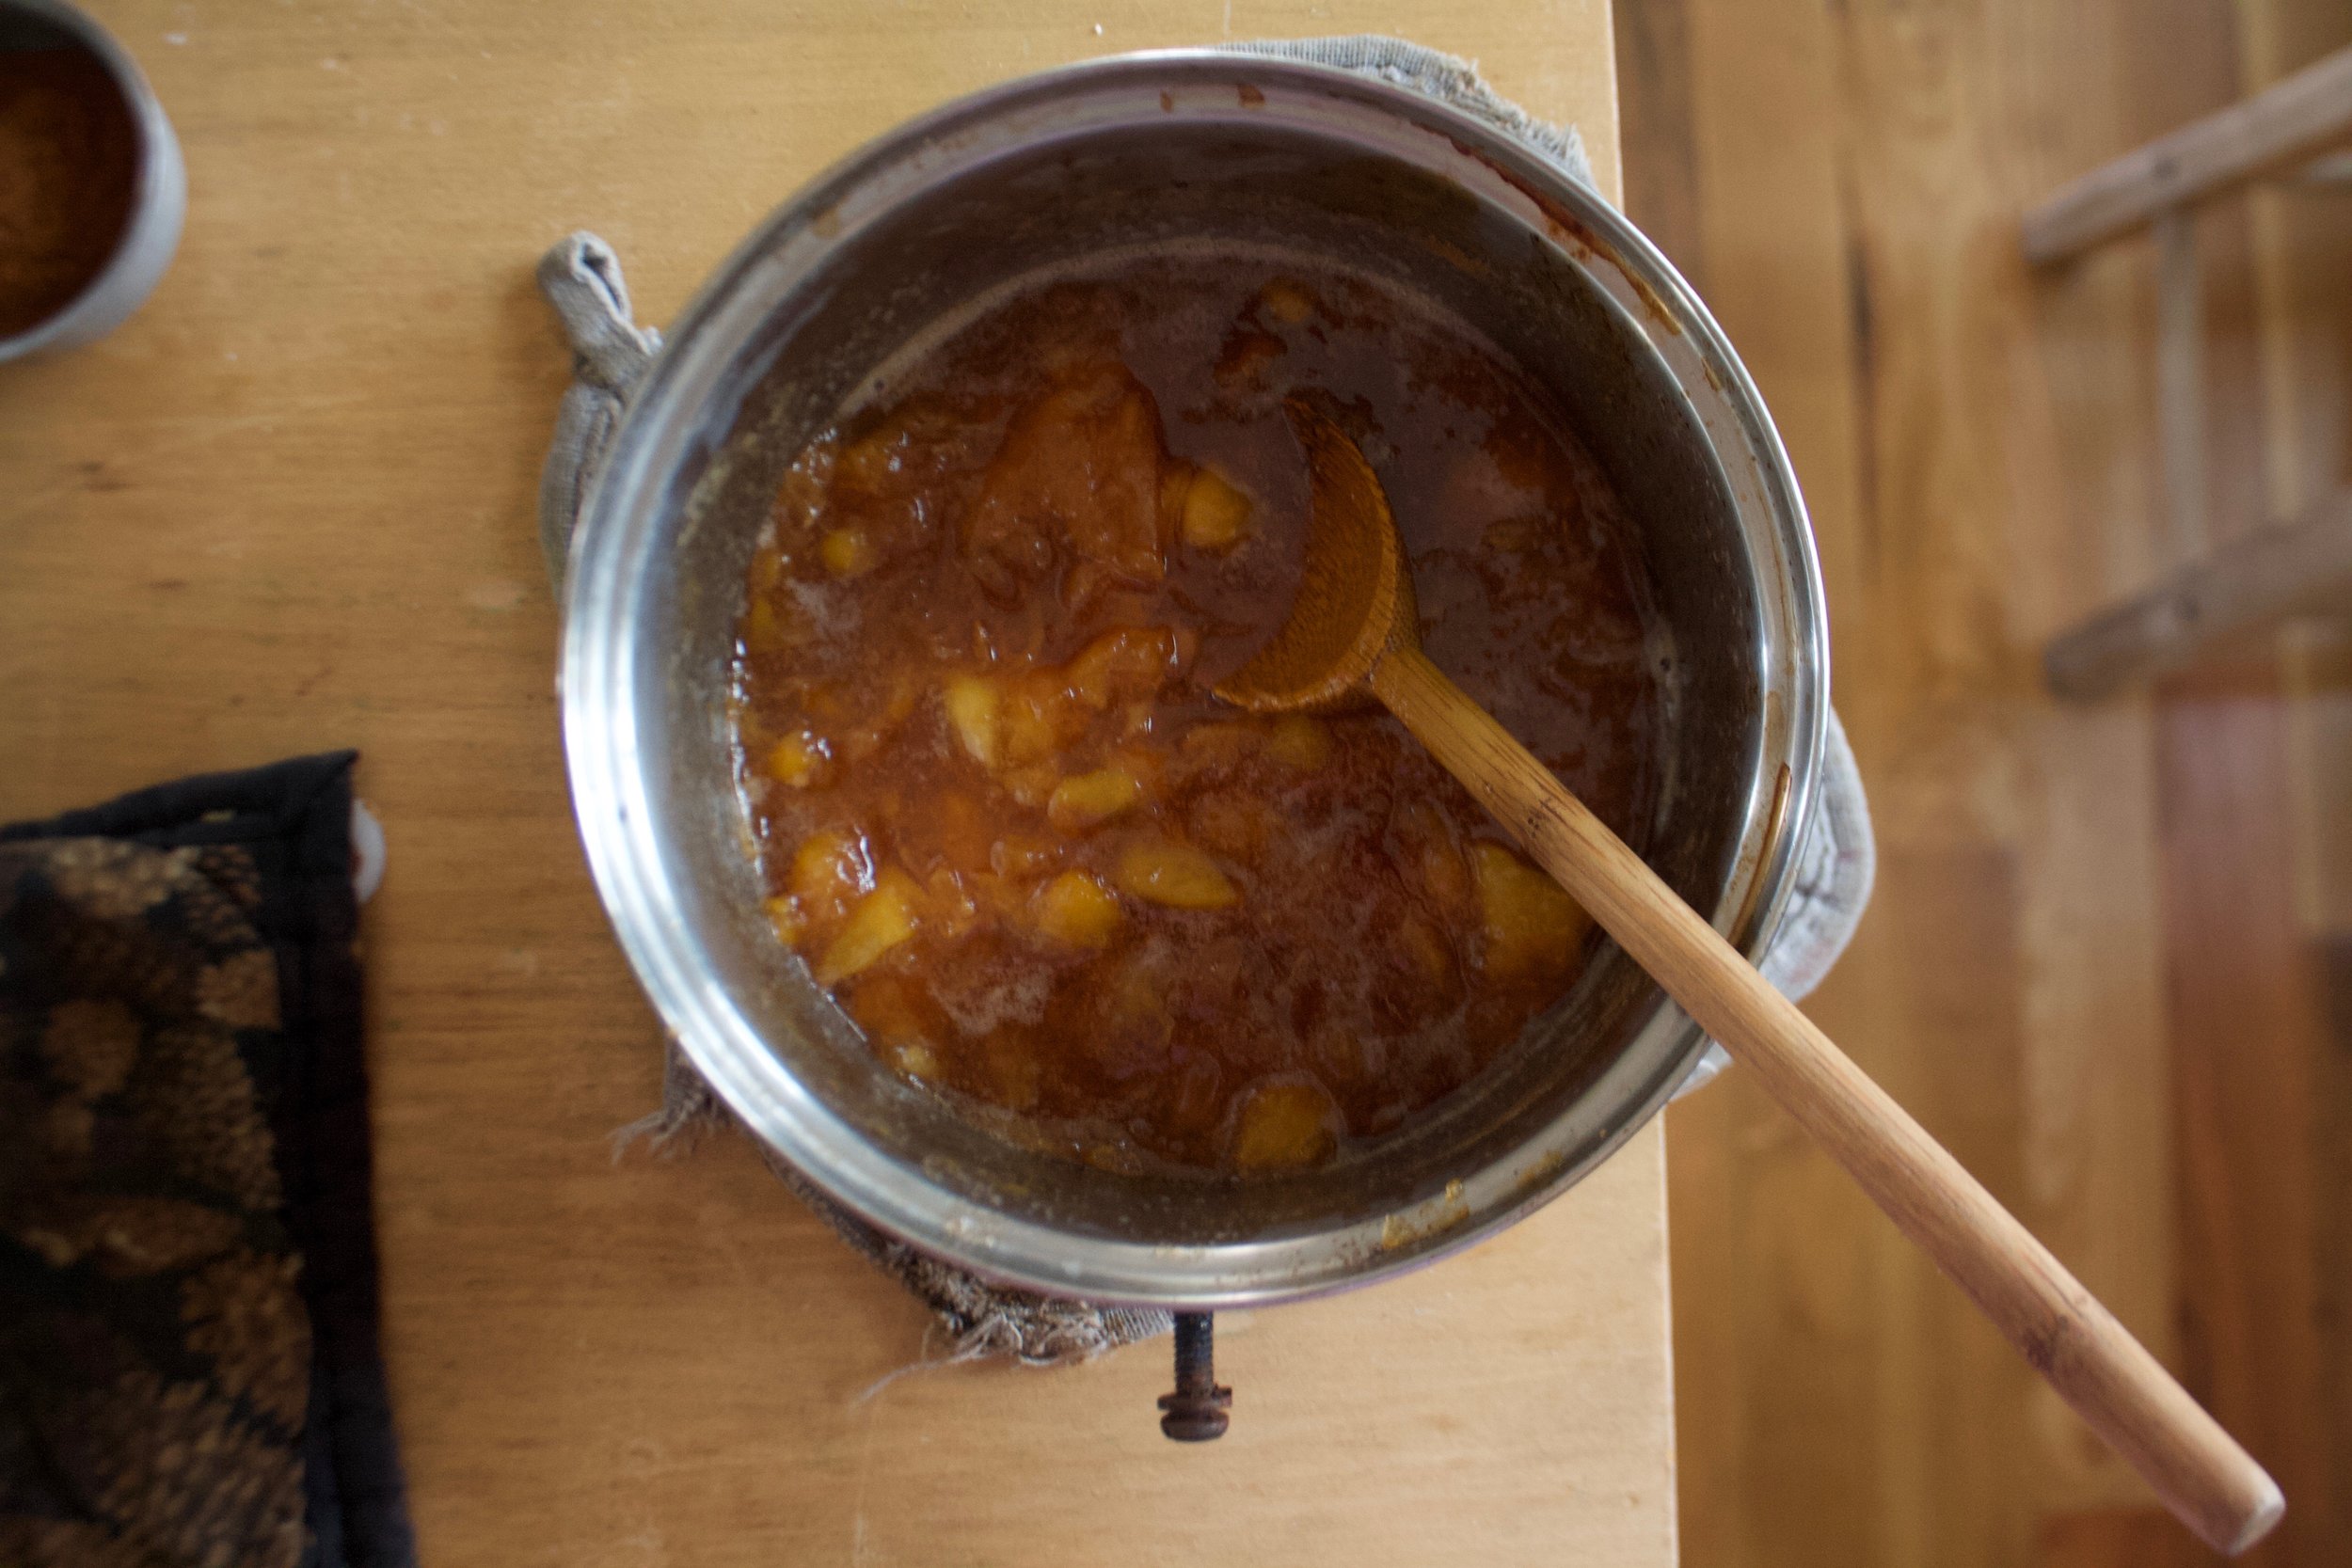
Brown sugar and peach chunks go into a pot and stuck on a medium heat until they start to bubble then set to a low simmer for about 20 minutes or until the peaches all break apart and reduce by half.

IMG_0490.jpg

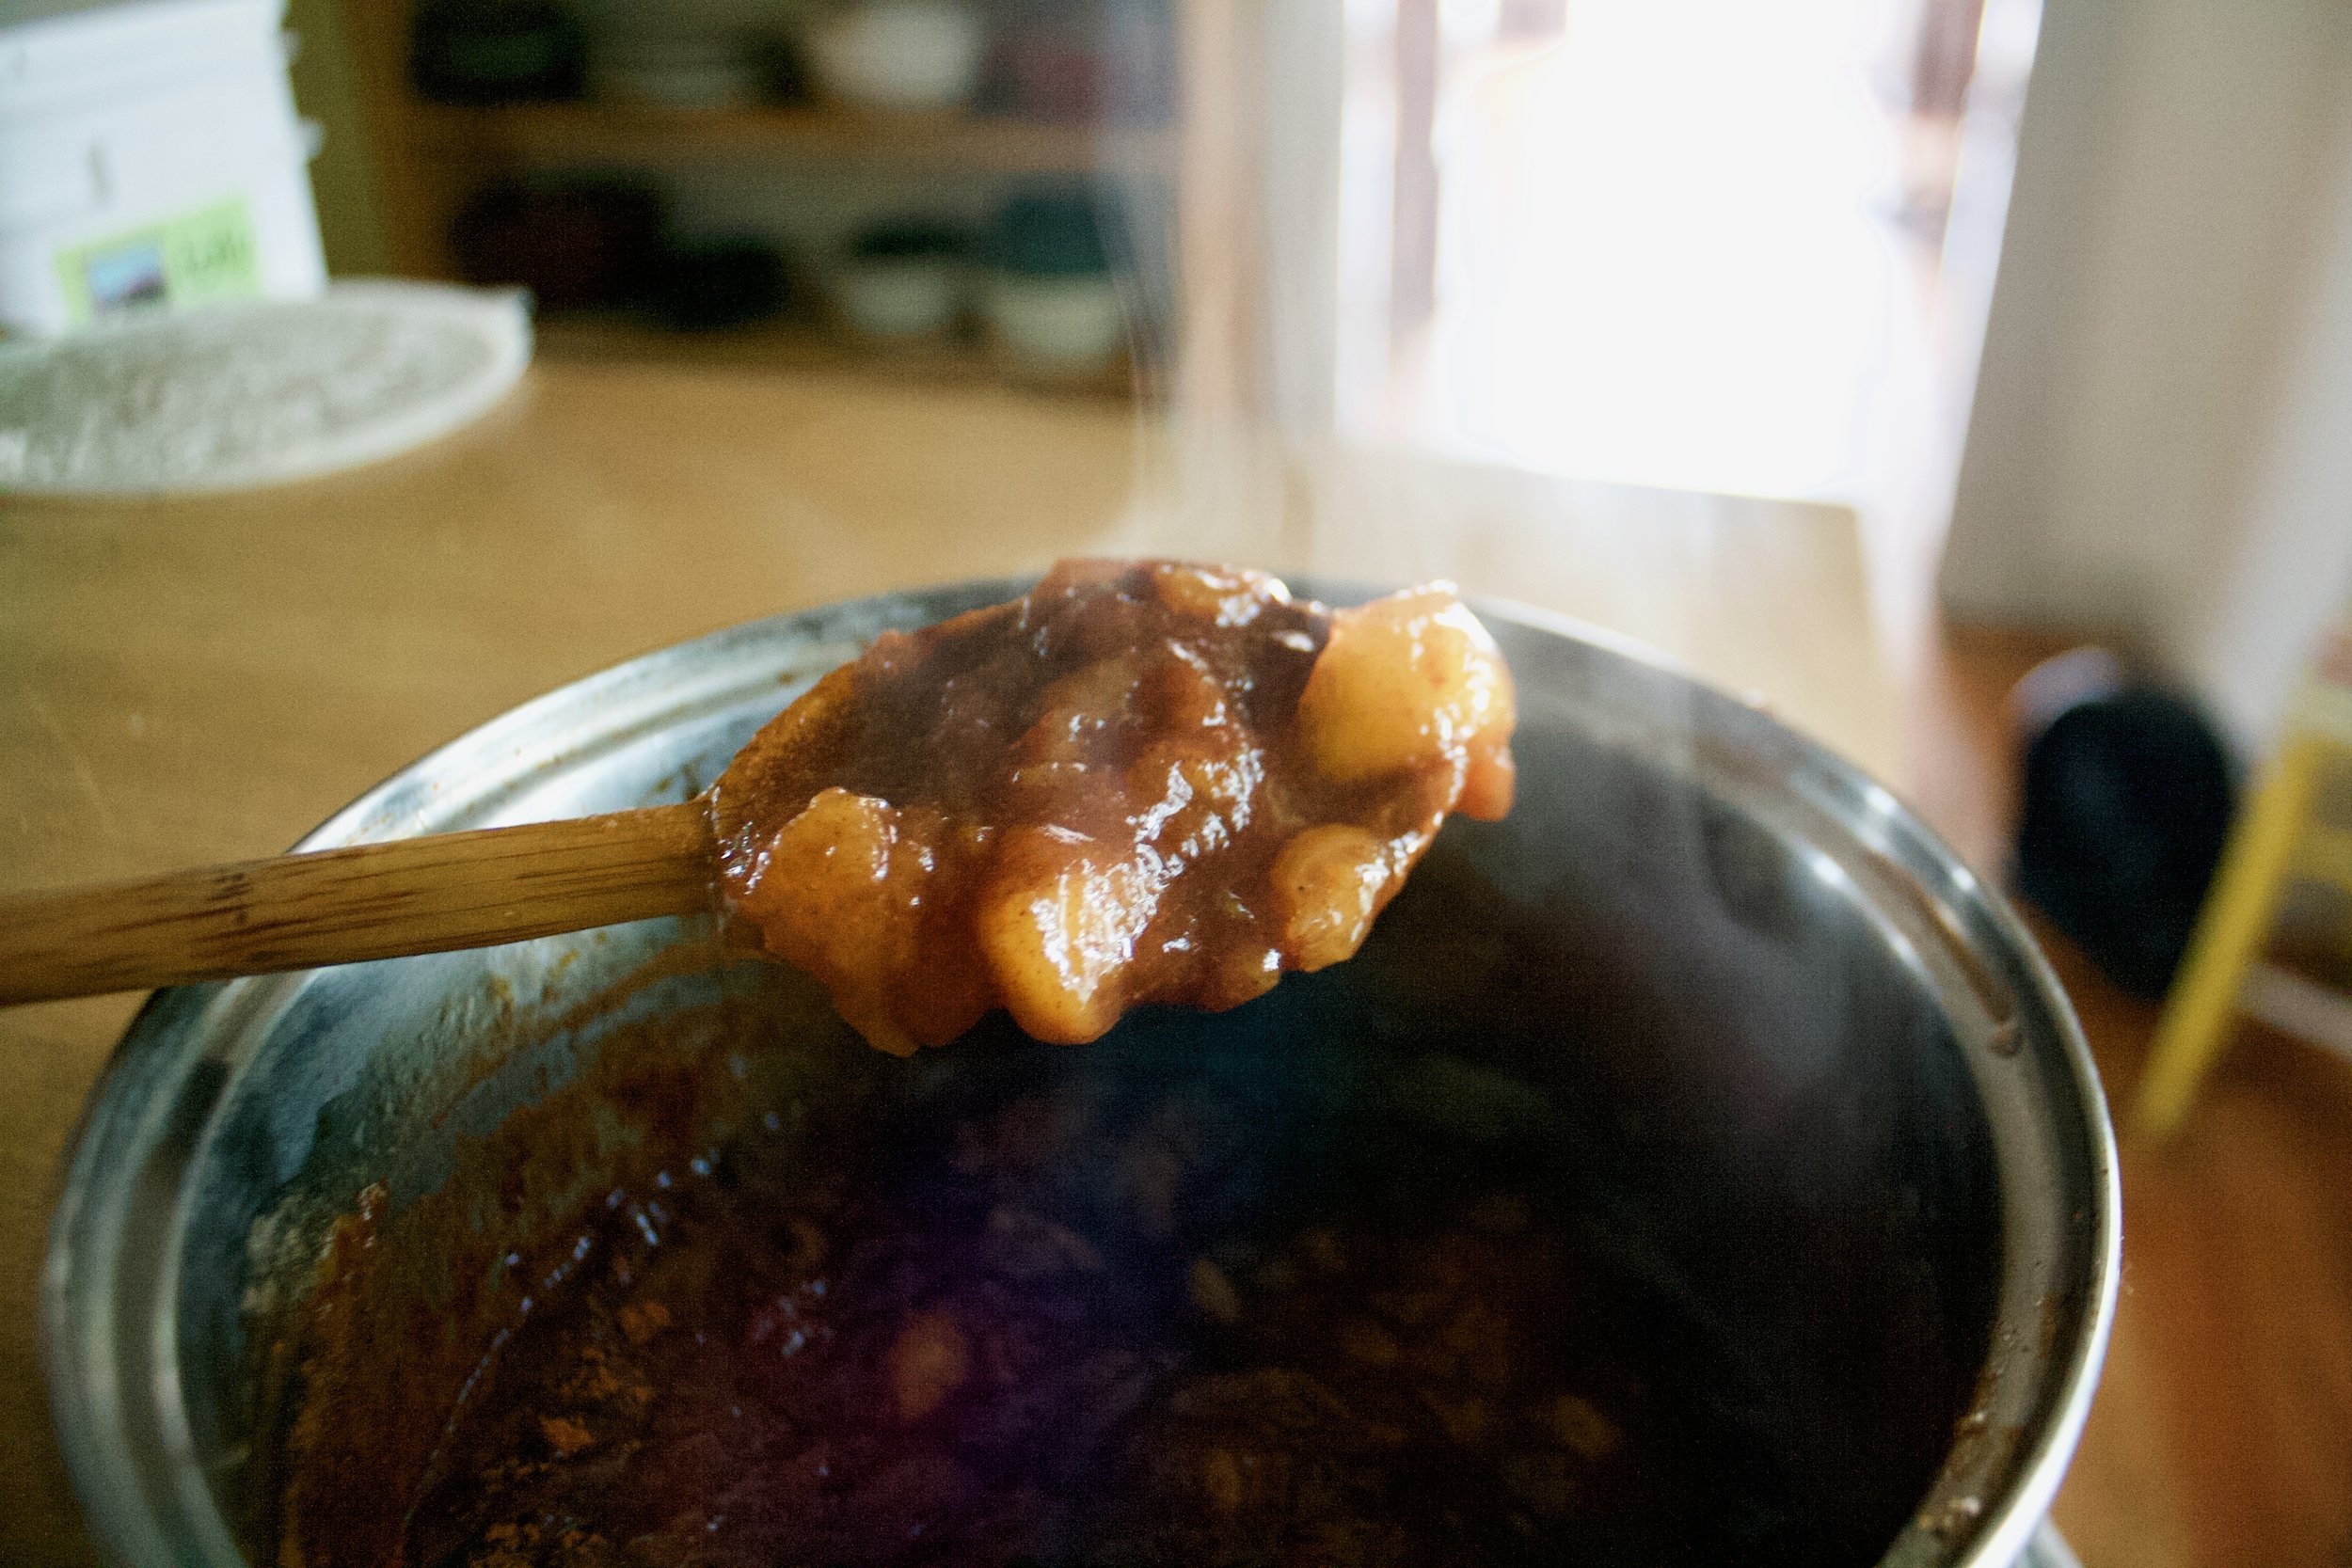
Add in the cinnamon and stir.. Peachy goodness. Now quick and stick that shit in the fridge or freezer to cool down.

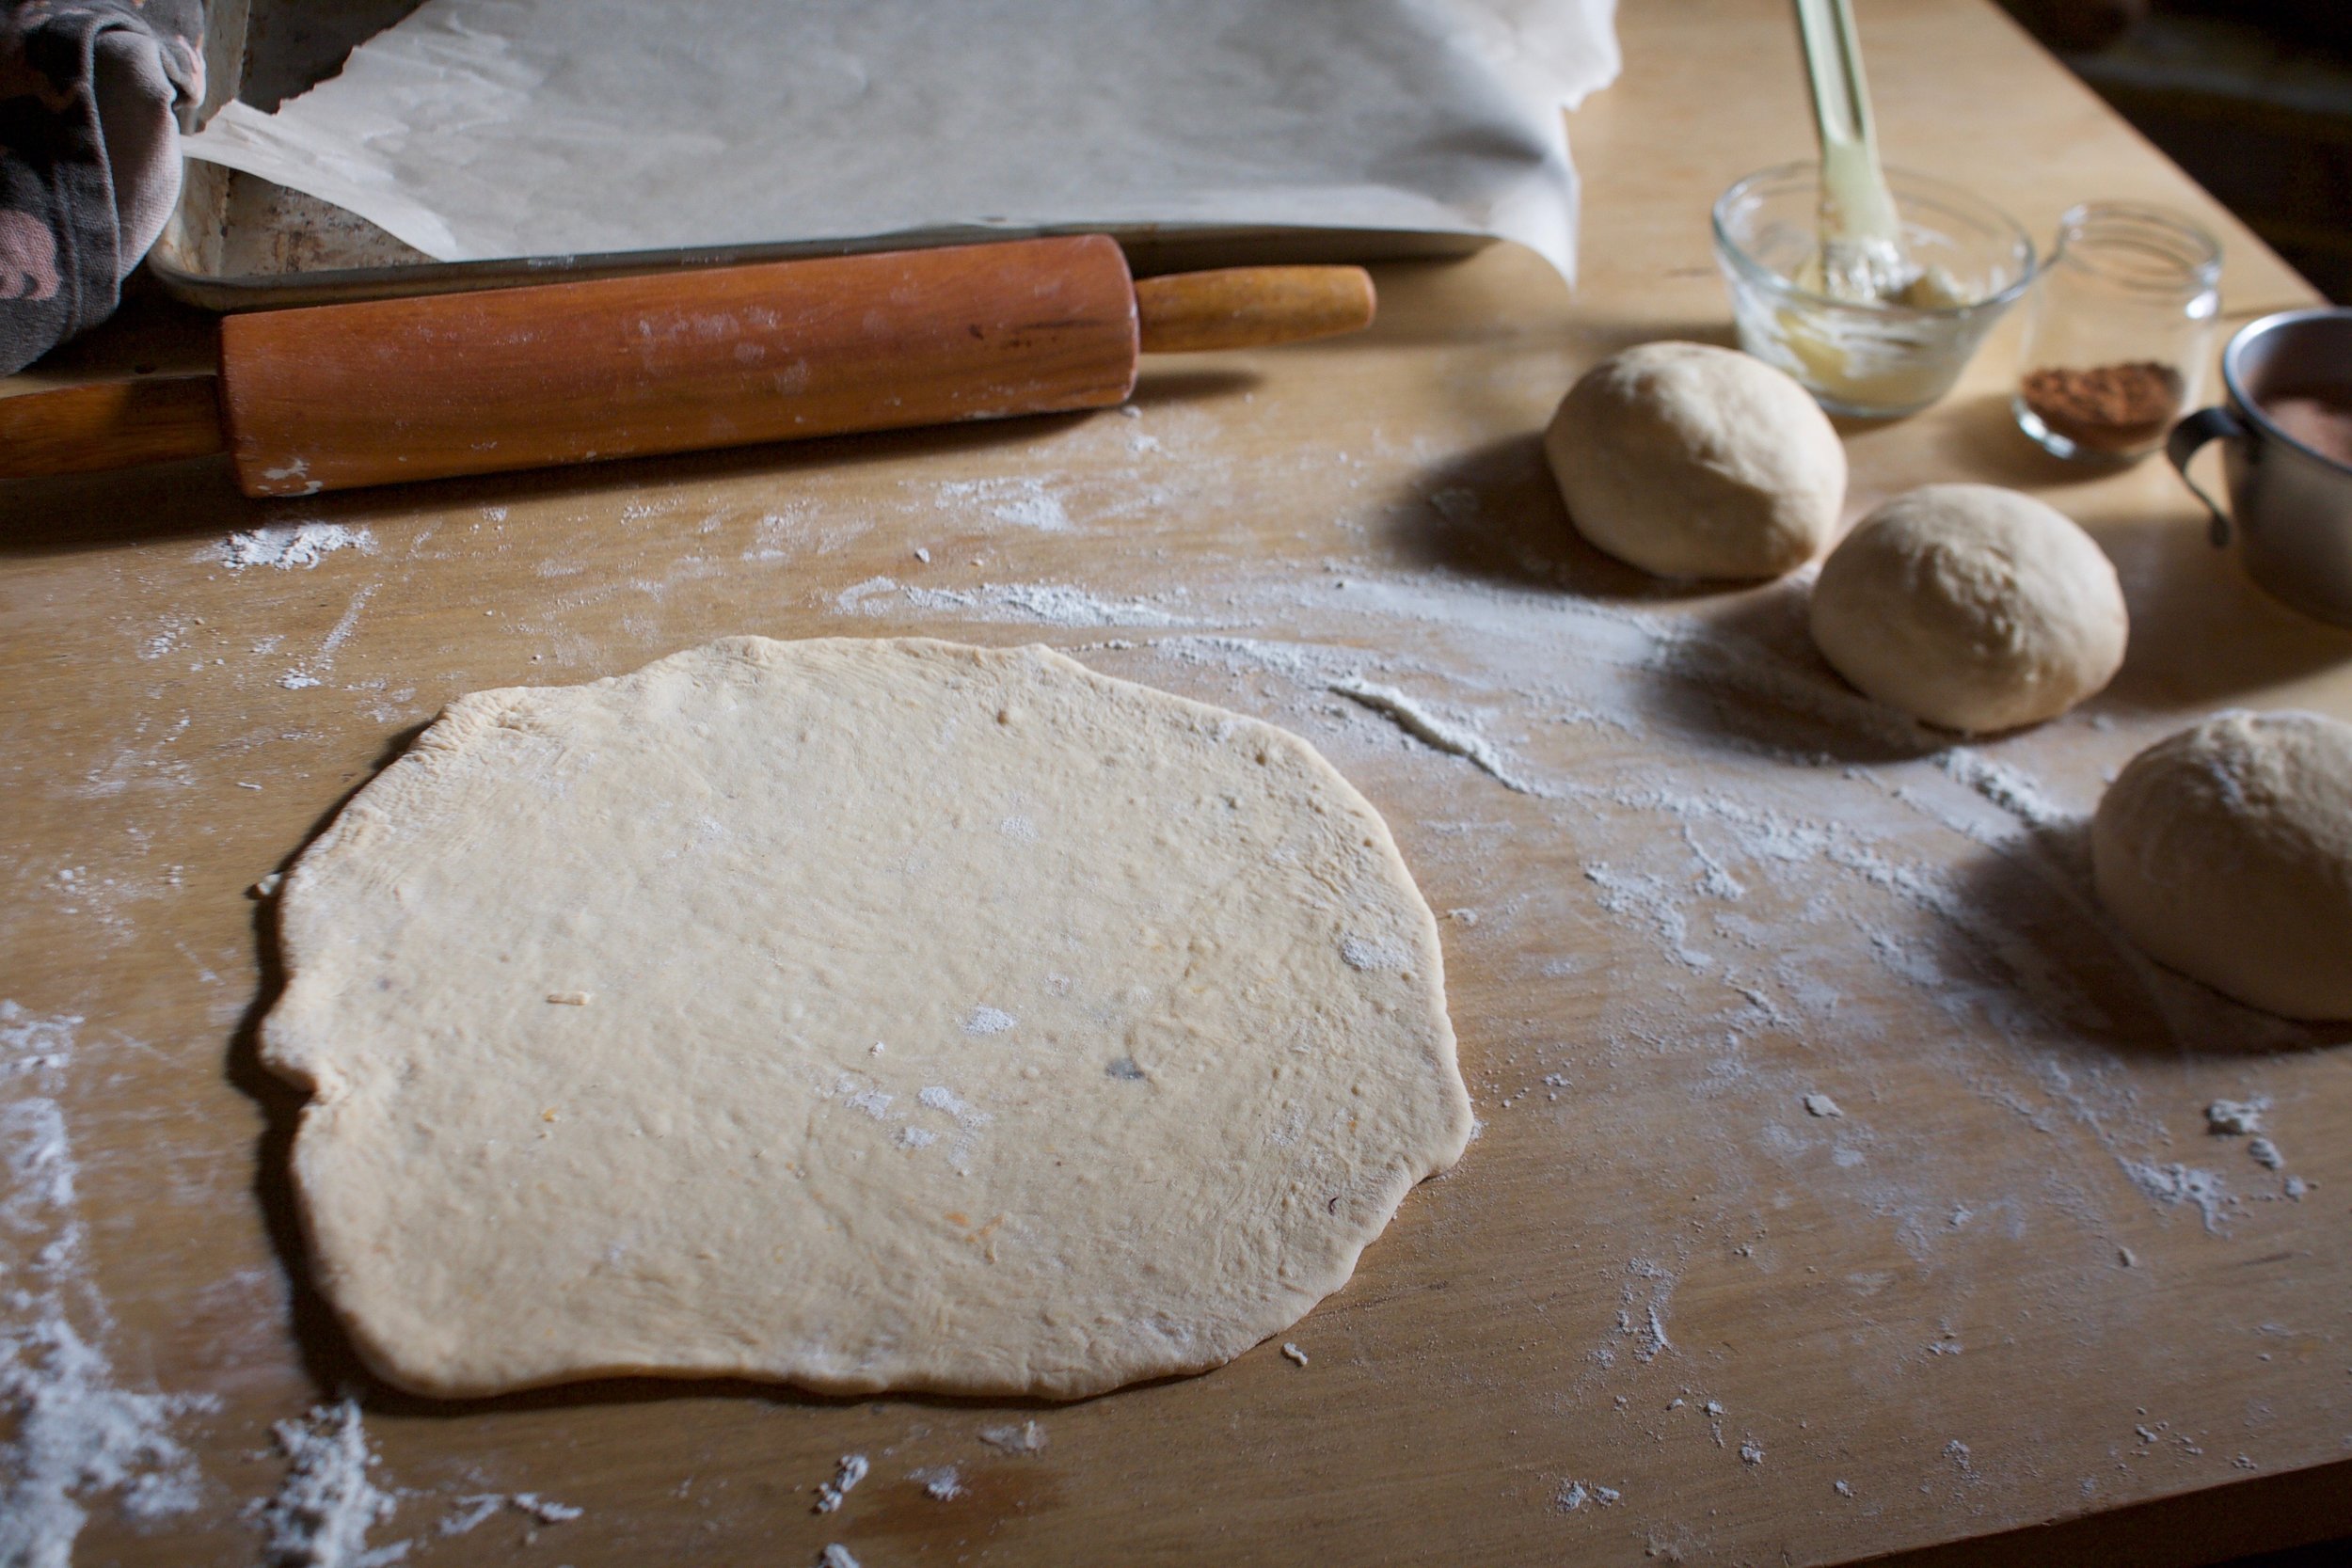
BOOM. Dough did what it's job and doubled. Time o make the buns. 

IMG_0504.jpg
IMG_0509.jpg

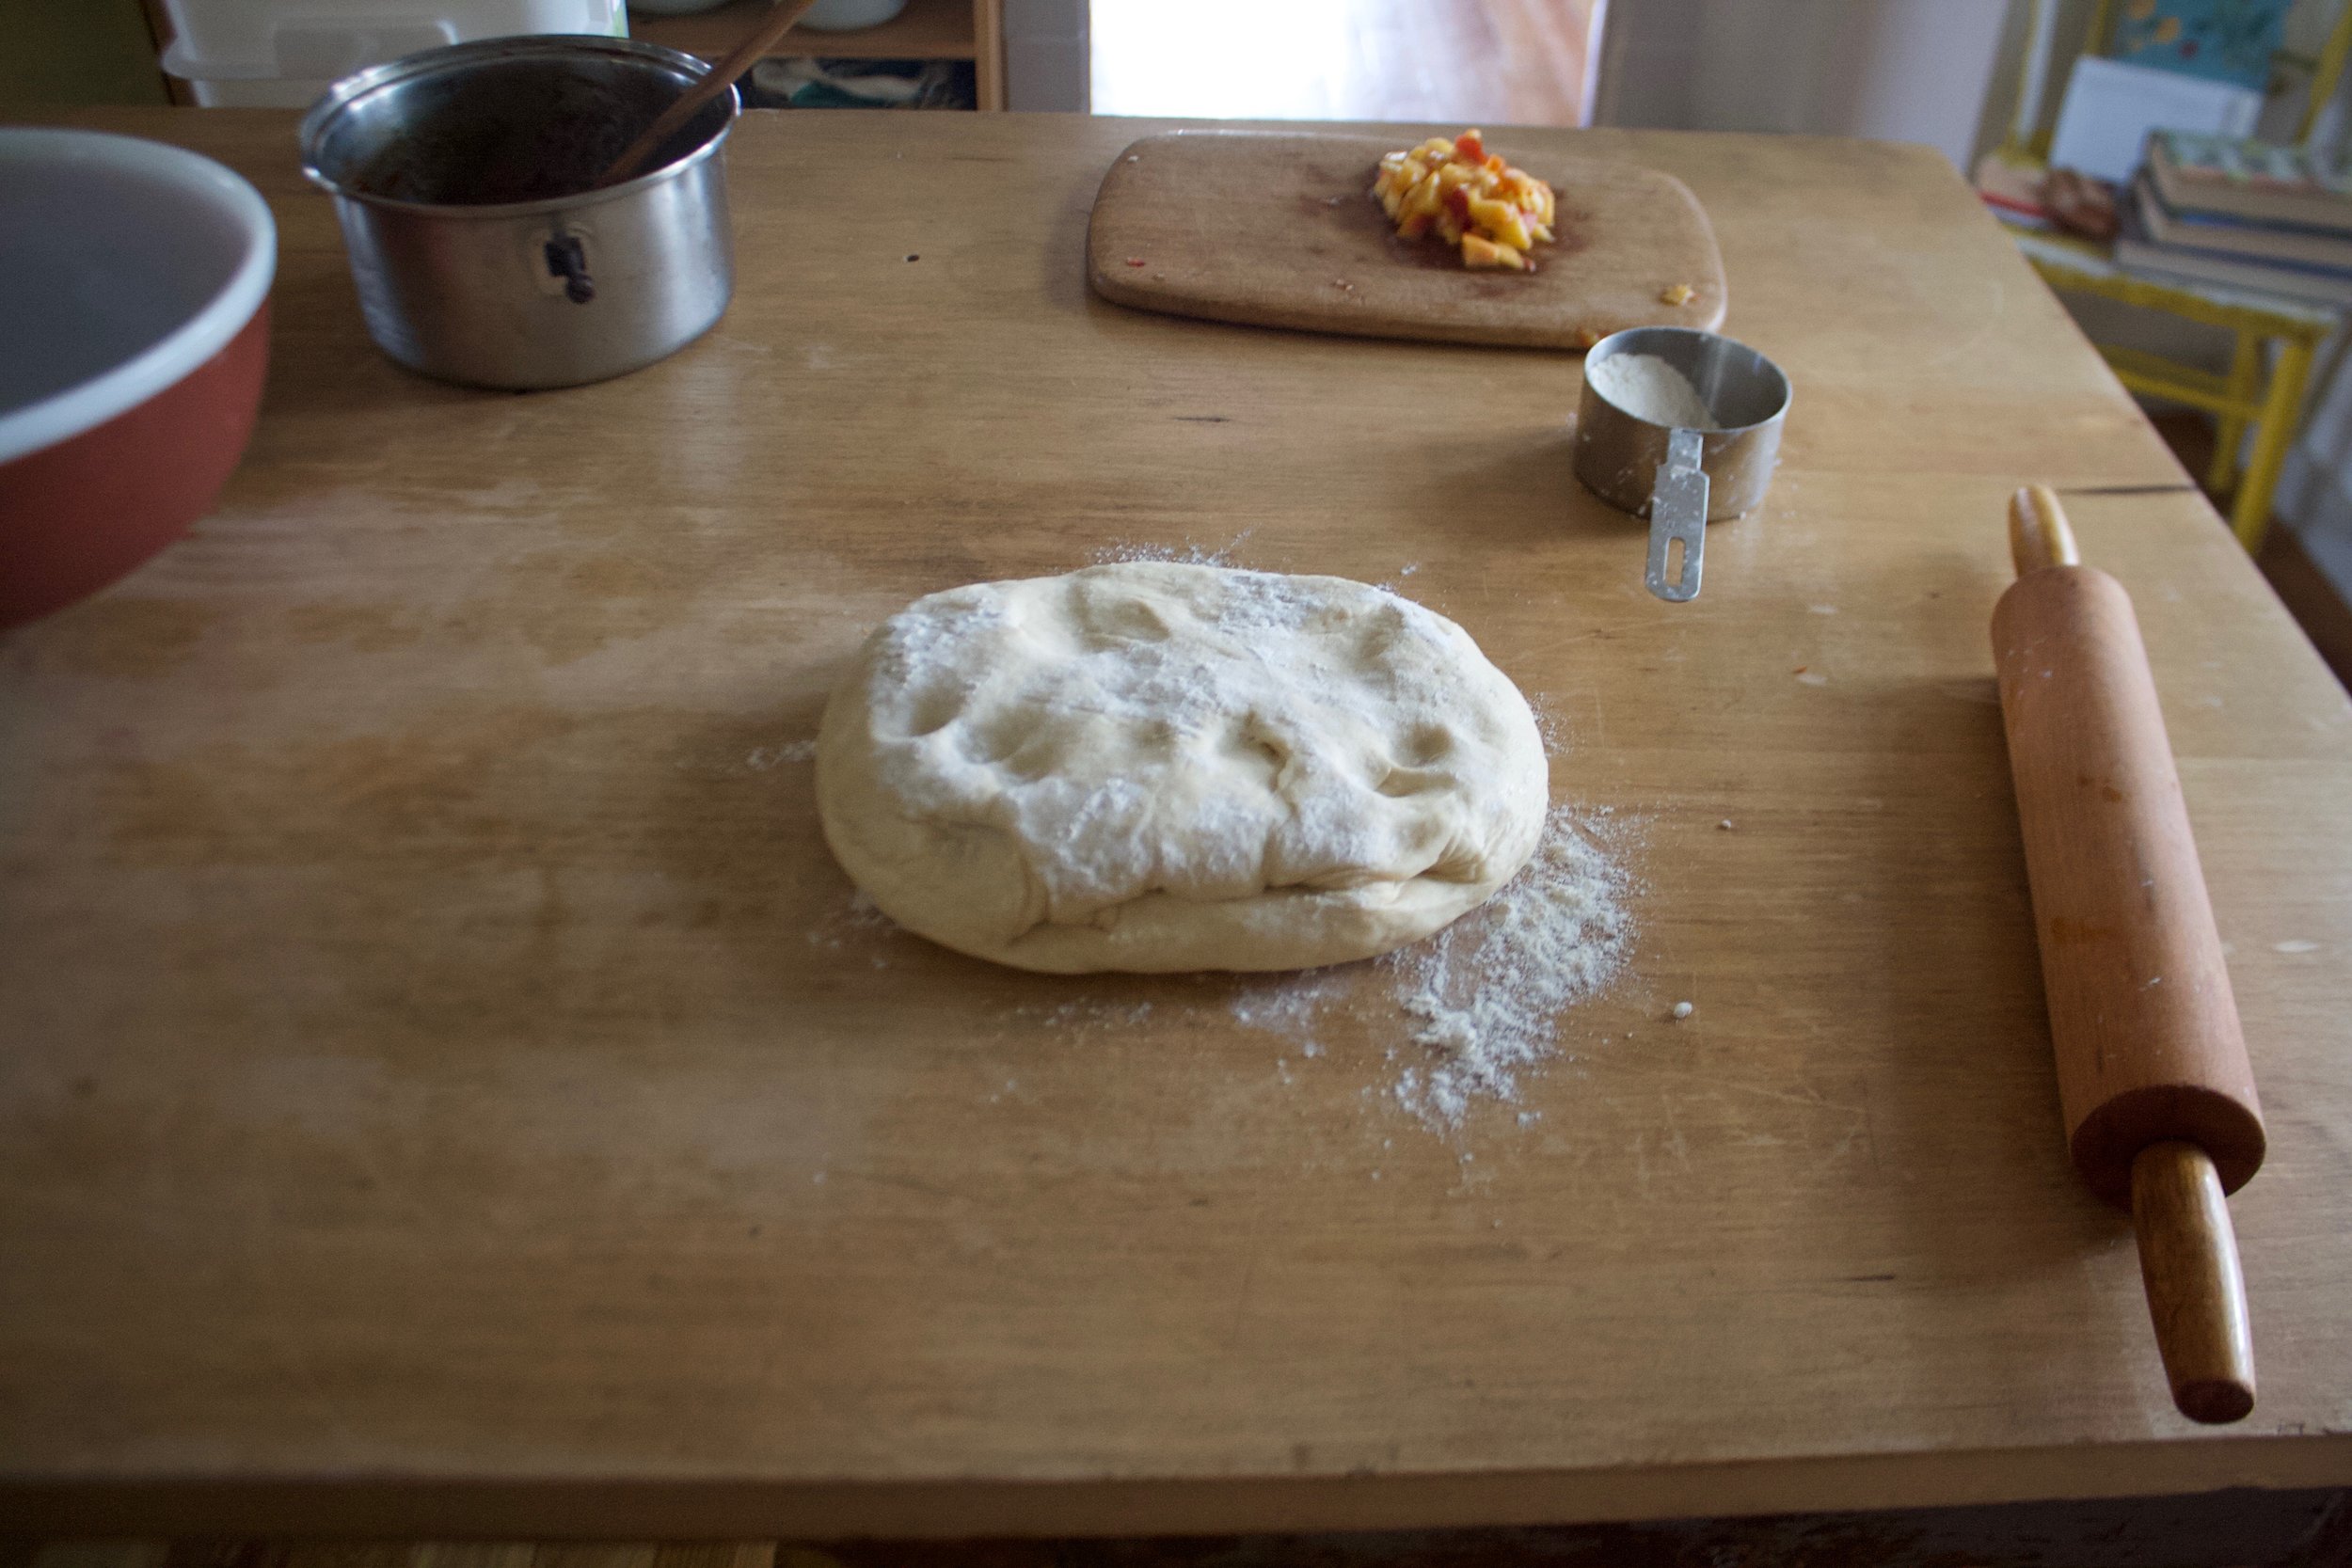
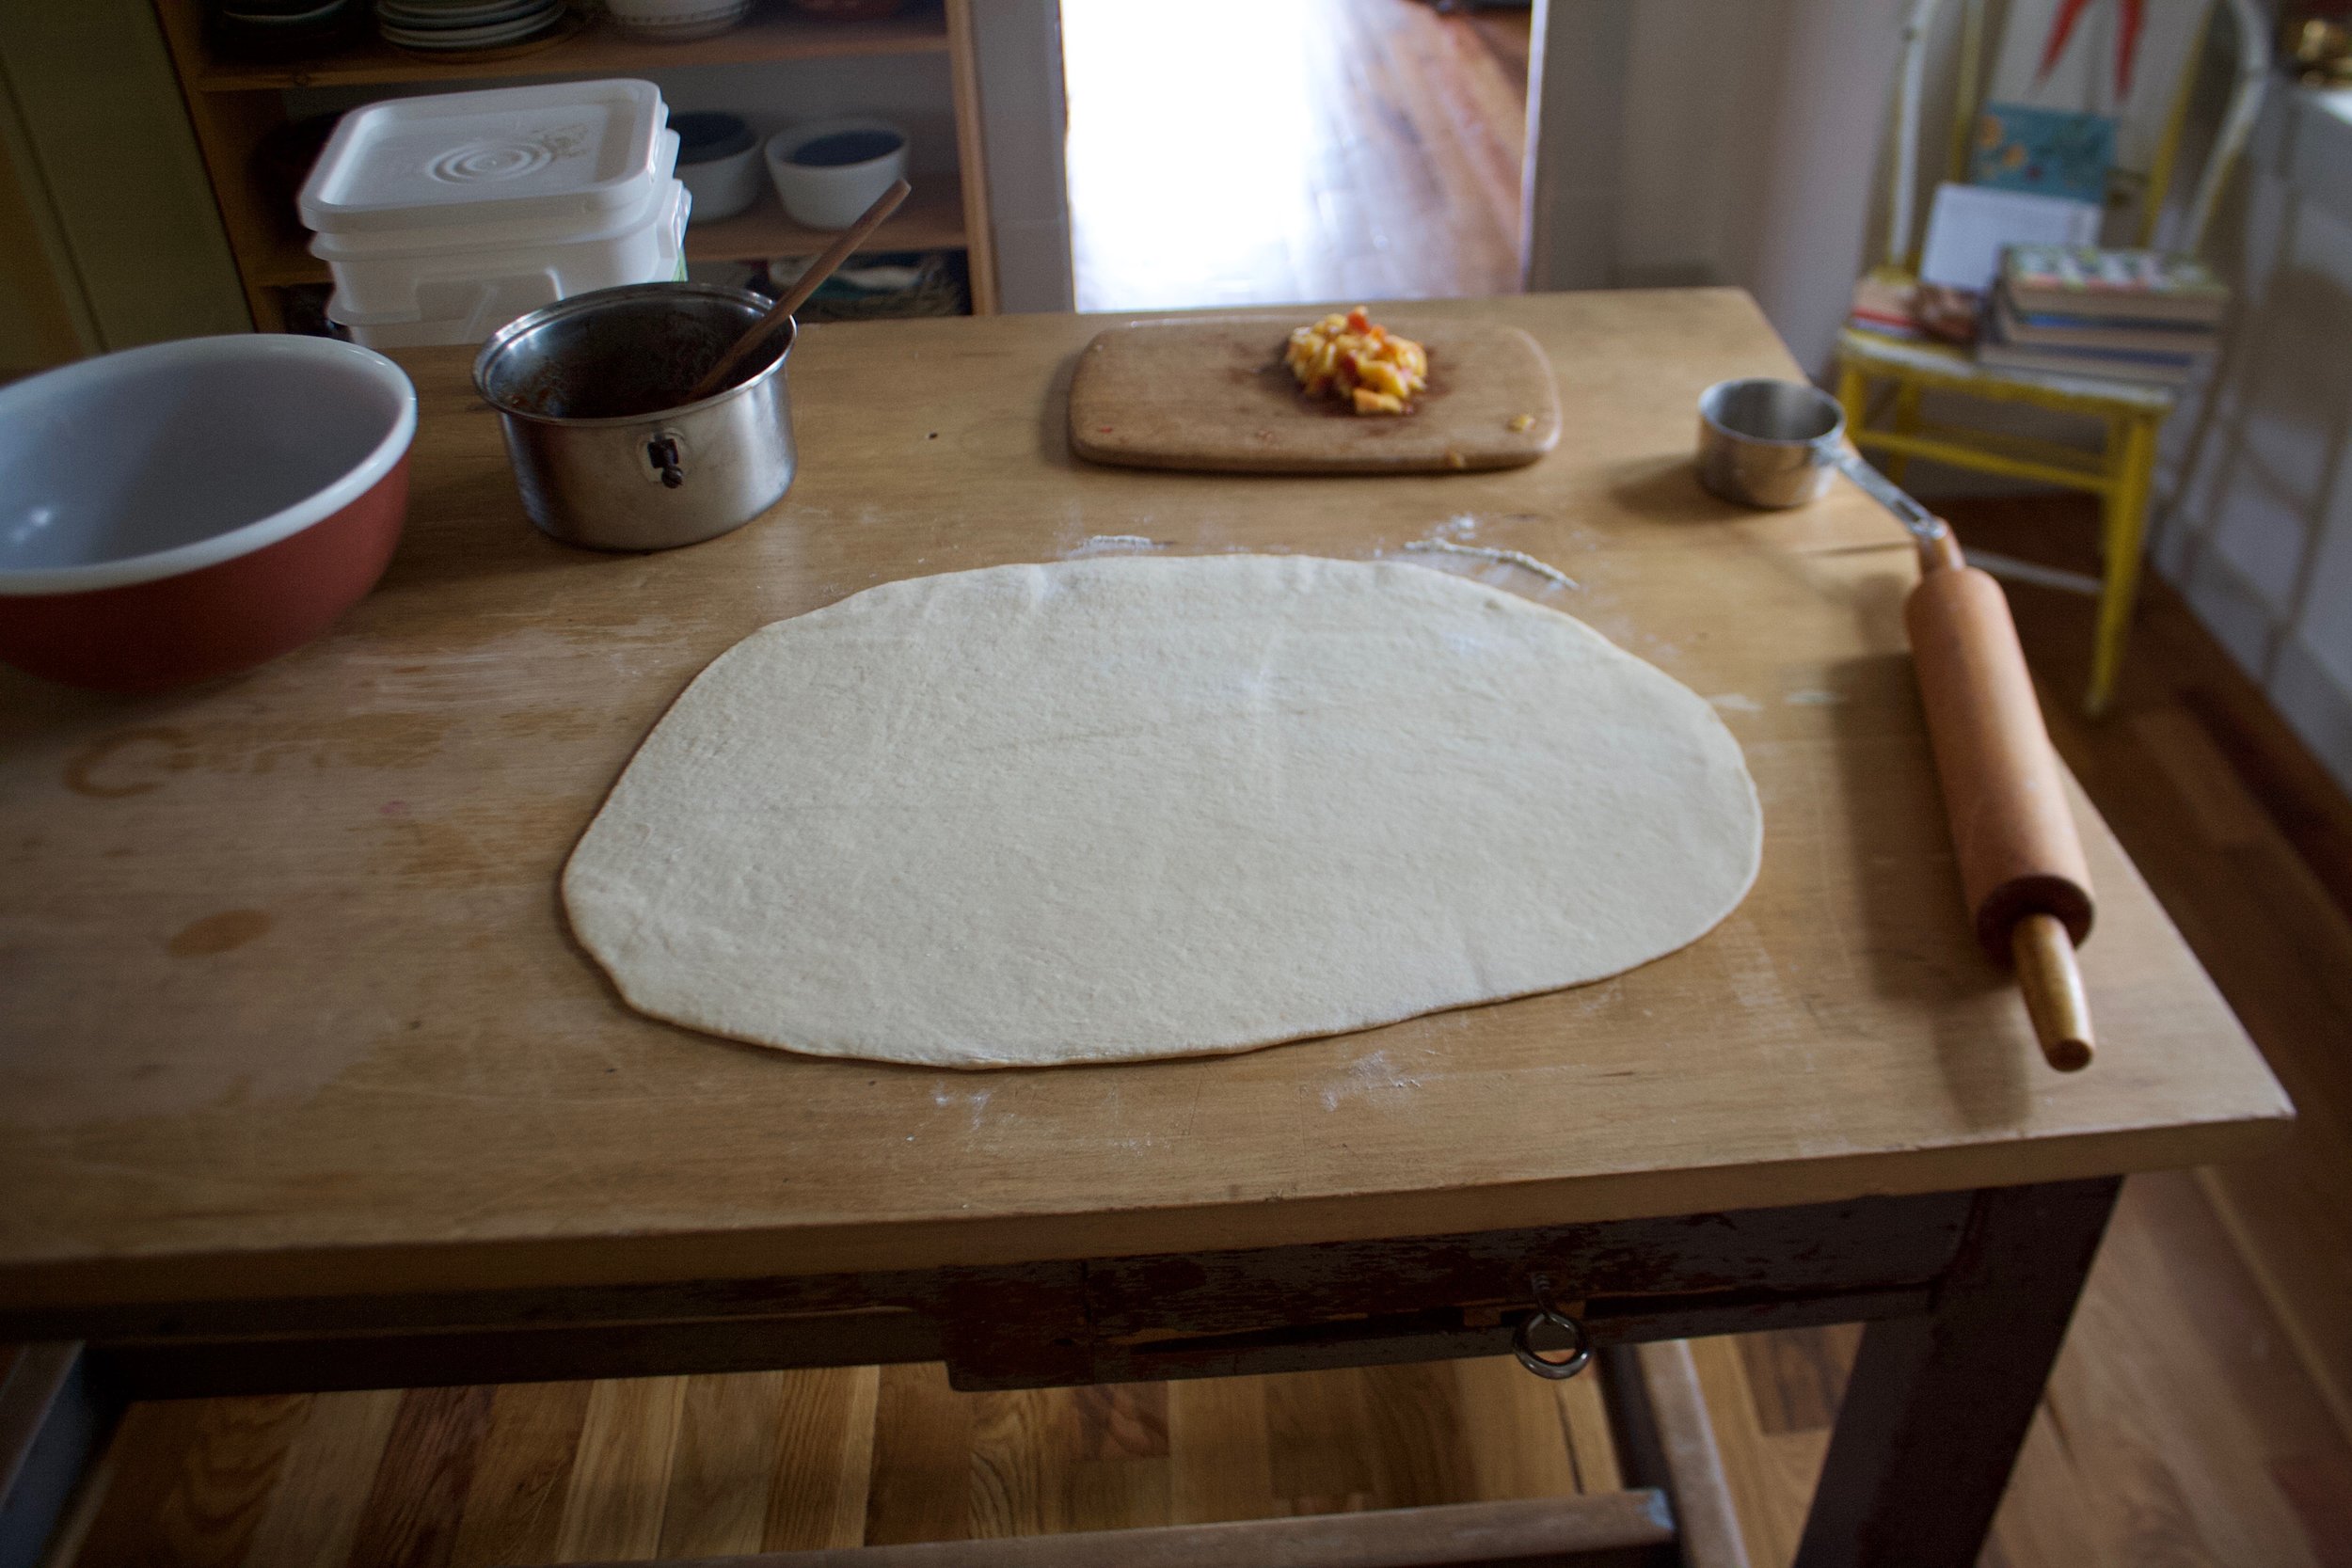
Place the dough on a lightly floured surface and roll our into a rectangle of sorts that is about 1/2 an inch thick 

IMG_0513.jpg

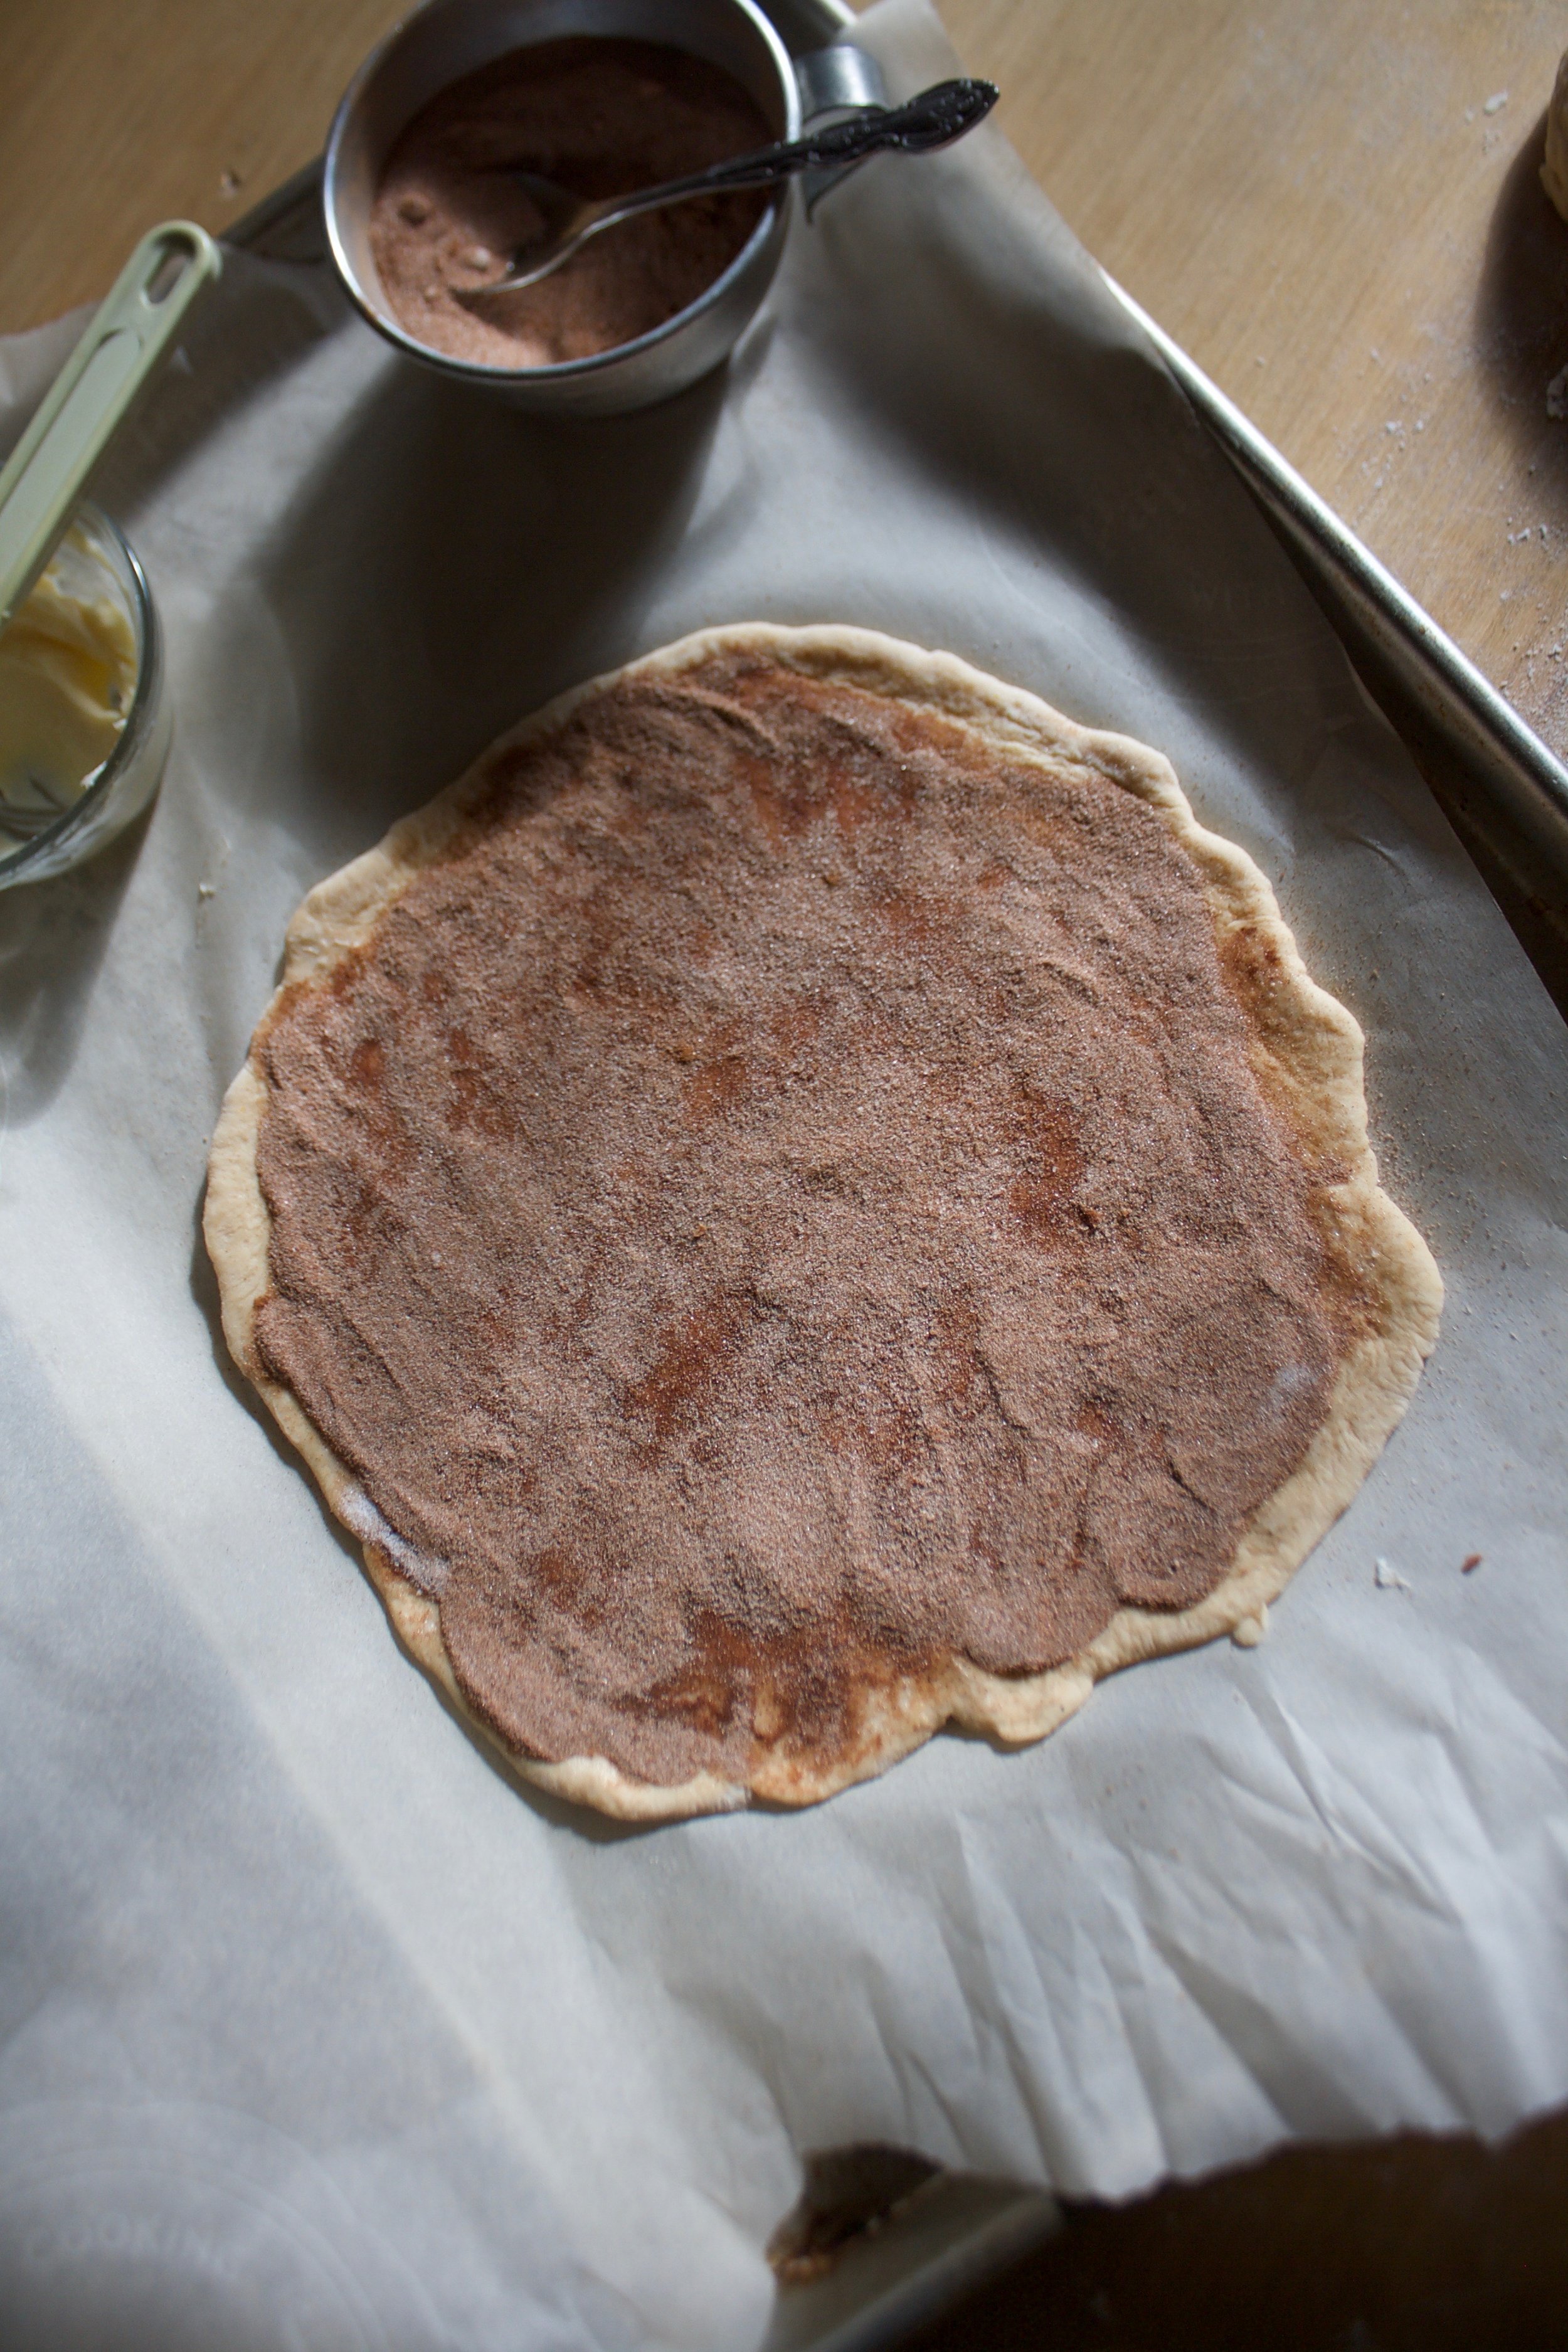
Cover the surface with all the peachy jammy goodness, and sprinkle on the remaining finely chopped peaches.

IMG_0519 2.jpg
IMG_0522 3.jpg

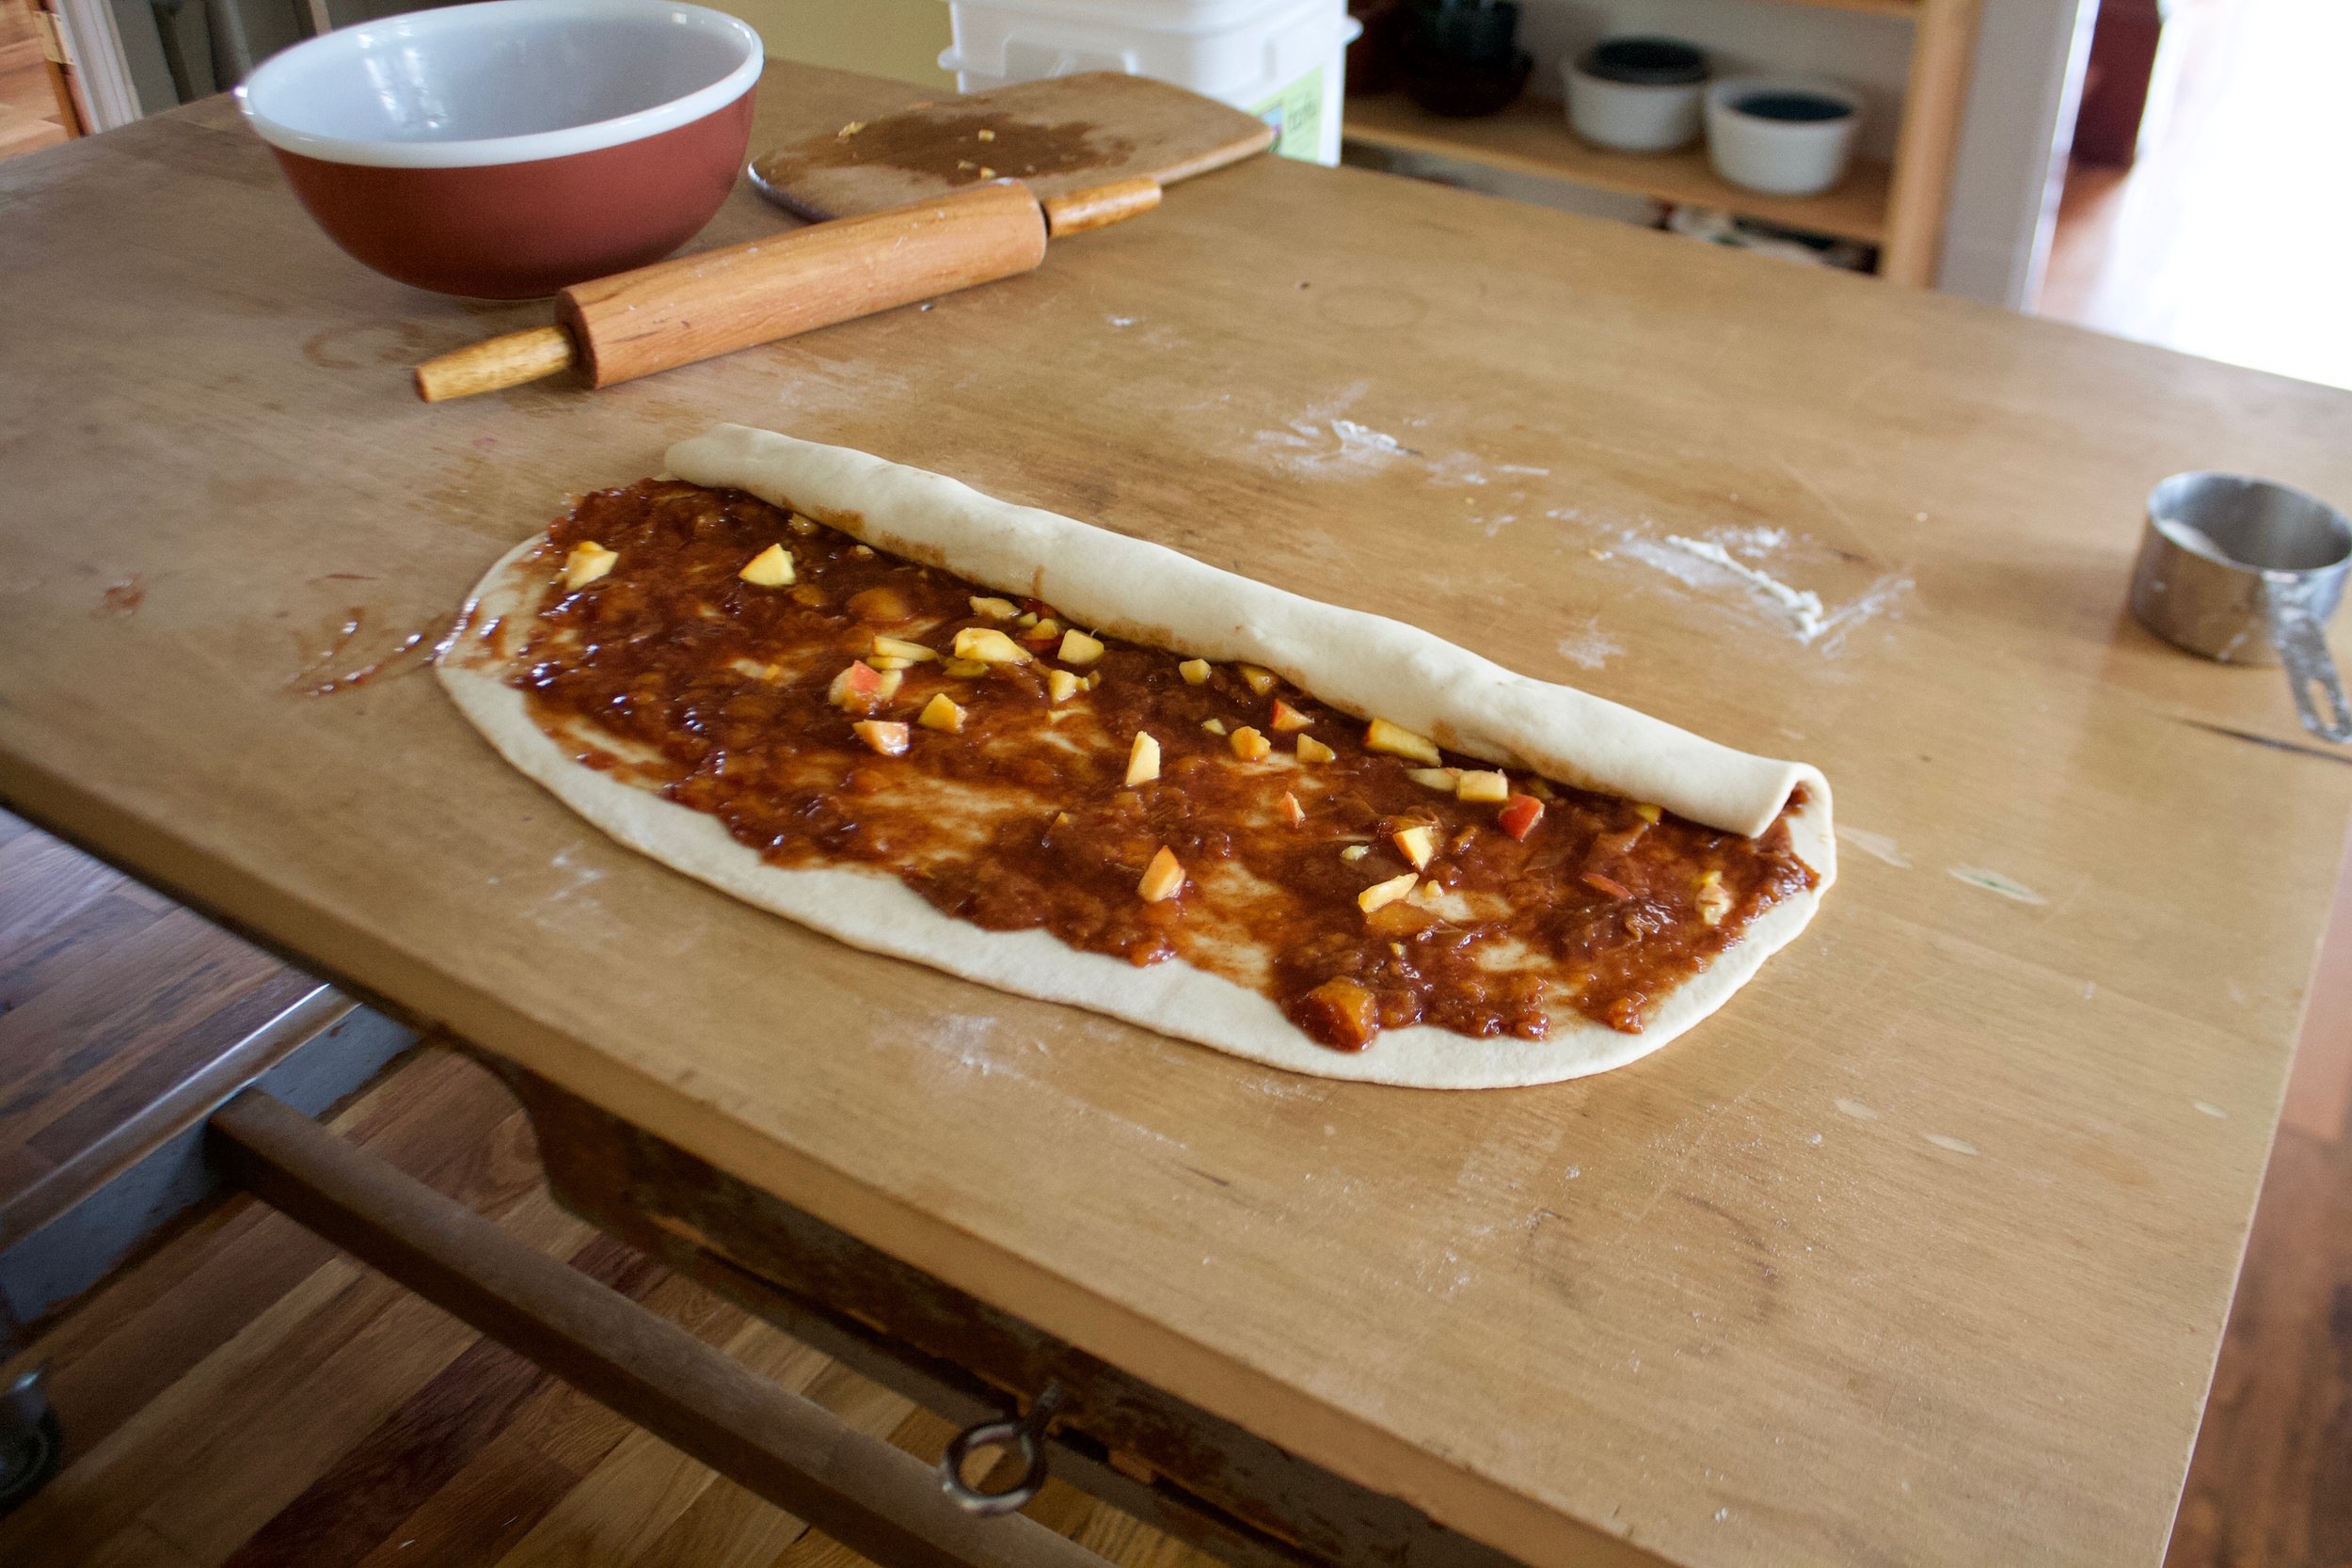
And roll, as tightly as you can, without squeezing all the filling out. I roll towards me, but roll away from you if it is easier.  It might get a little sloppy... it's ok, just lick your fingers and keep going. 

Rolled and cut into 12 pieces.

Place the rolls carefully onto a grease and parchment lined baking 9x13 baking dish. In my picture I used a baking pan, which was not what I wanted to do, but I wasn't thinking properly and so that's what I did. Something with sides is preferable, but the baking pan did the job so really, your call. 

When you place the buns in the dish, place them toughen a bit, it helps then bake up high instead of out.  And any remaining go on jam that spilled out can get scraped right on top of the buns, if you didn't already eat it.

Now into the preheated oven these  babies go.

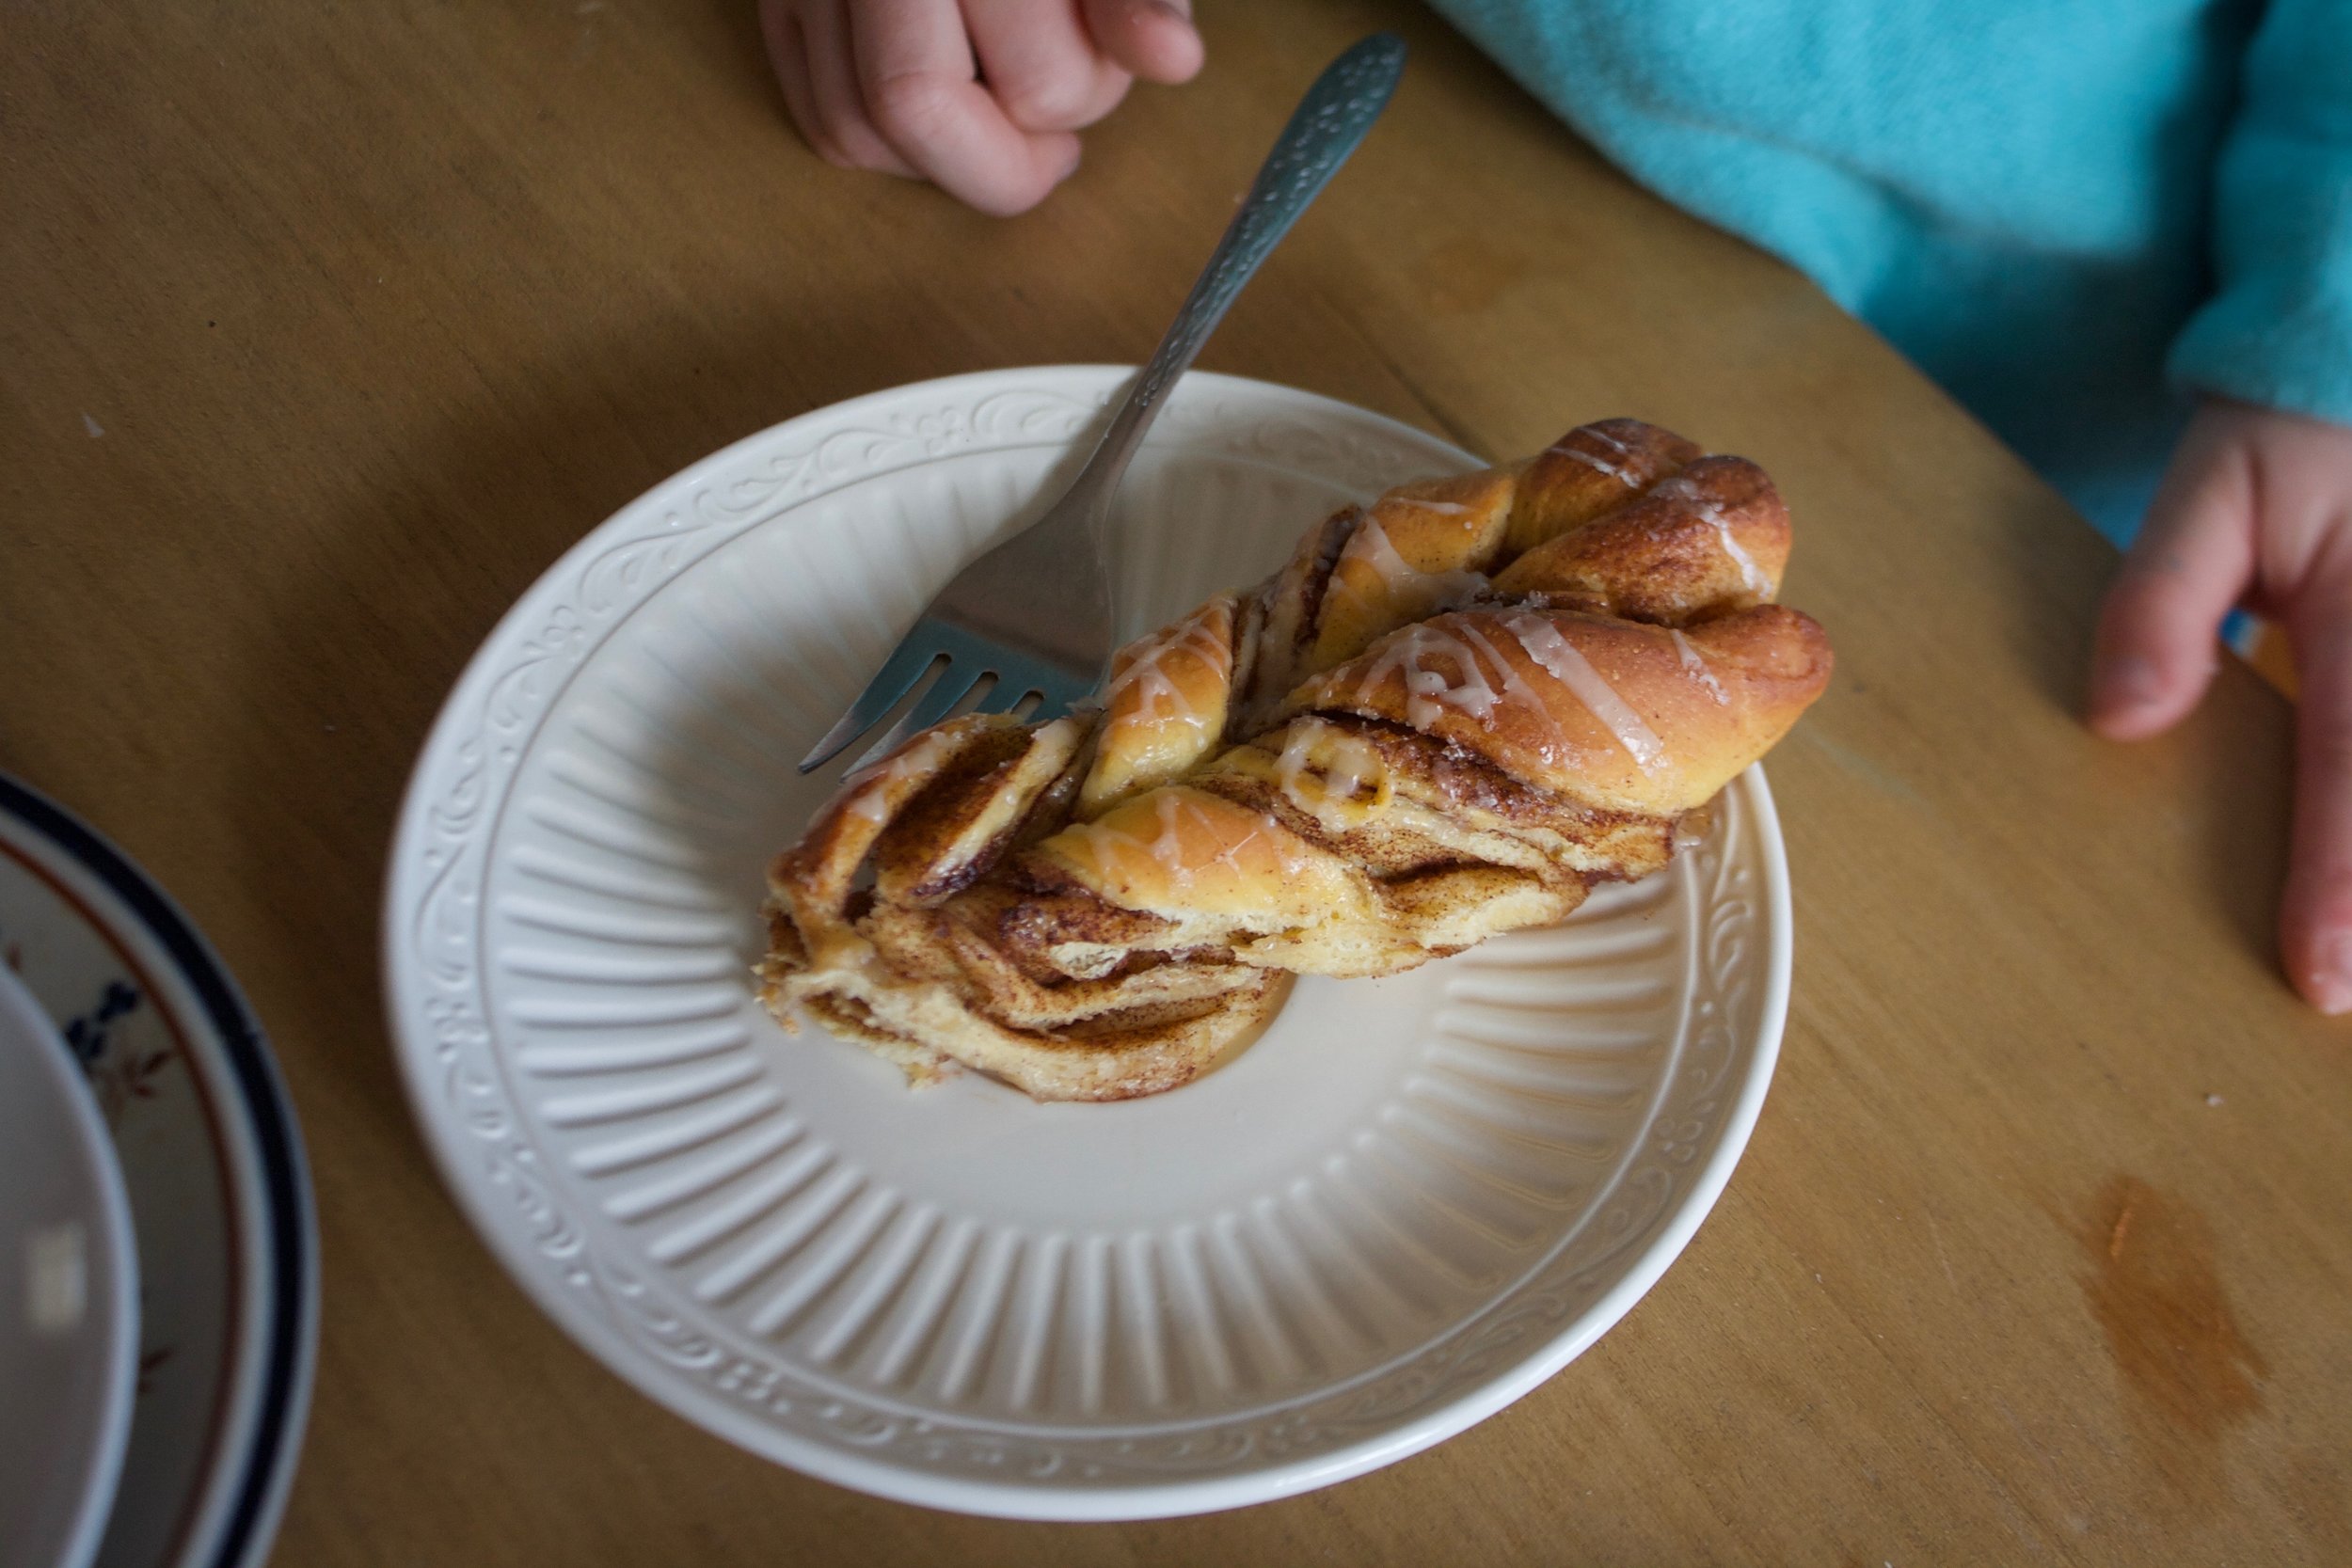
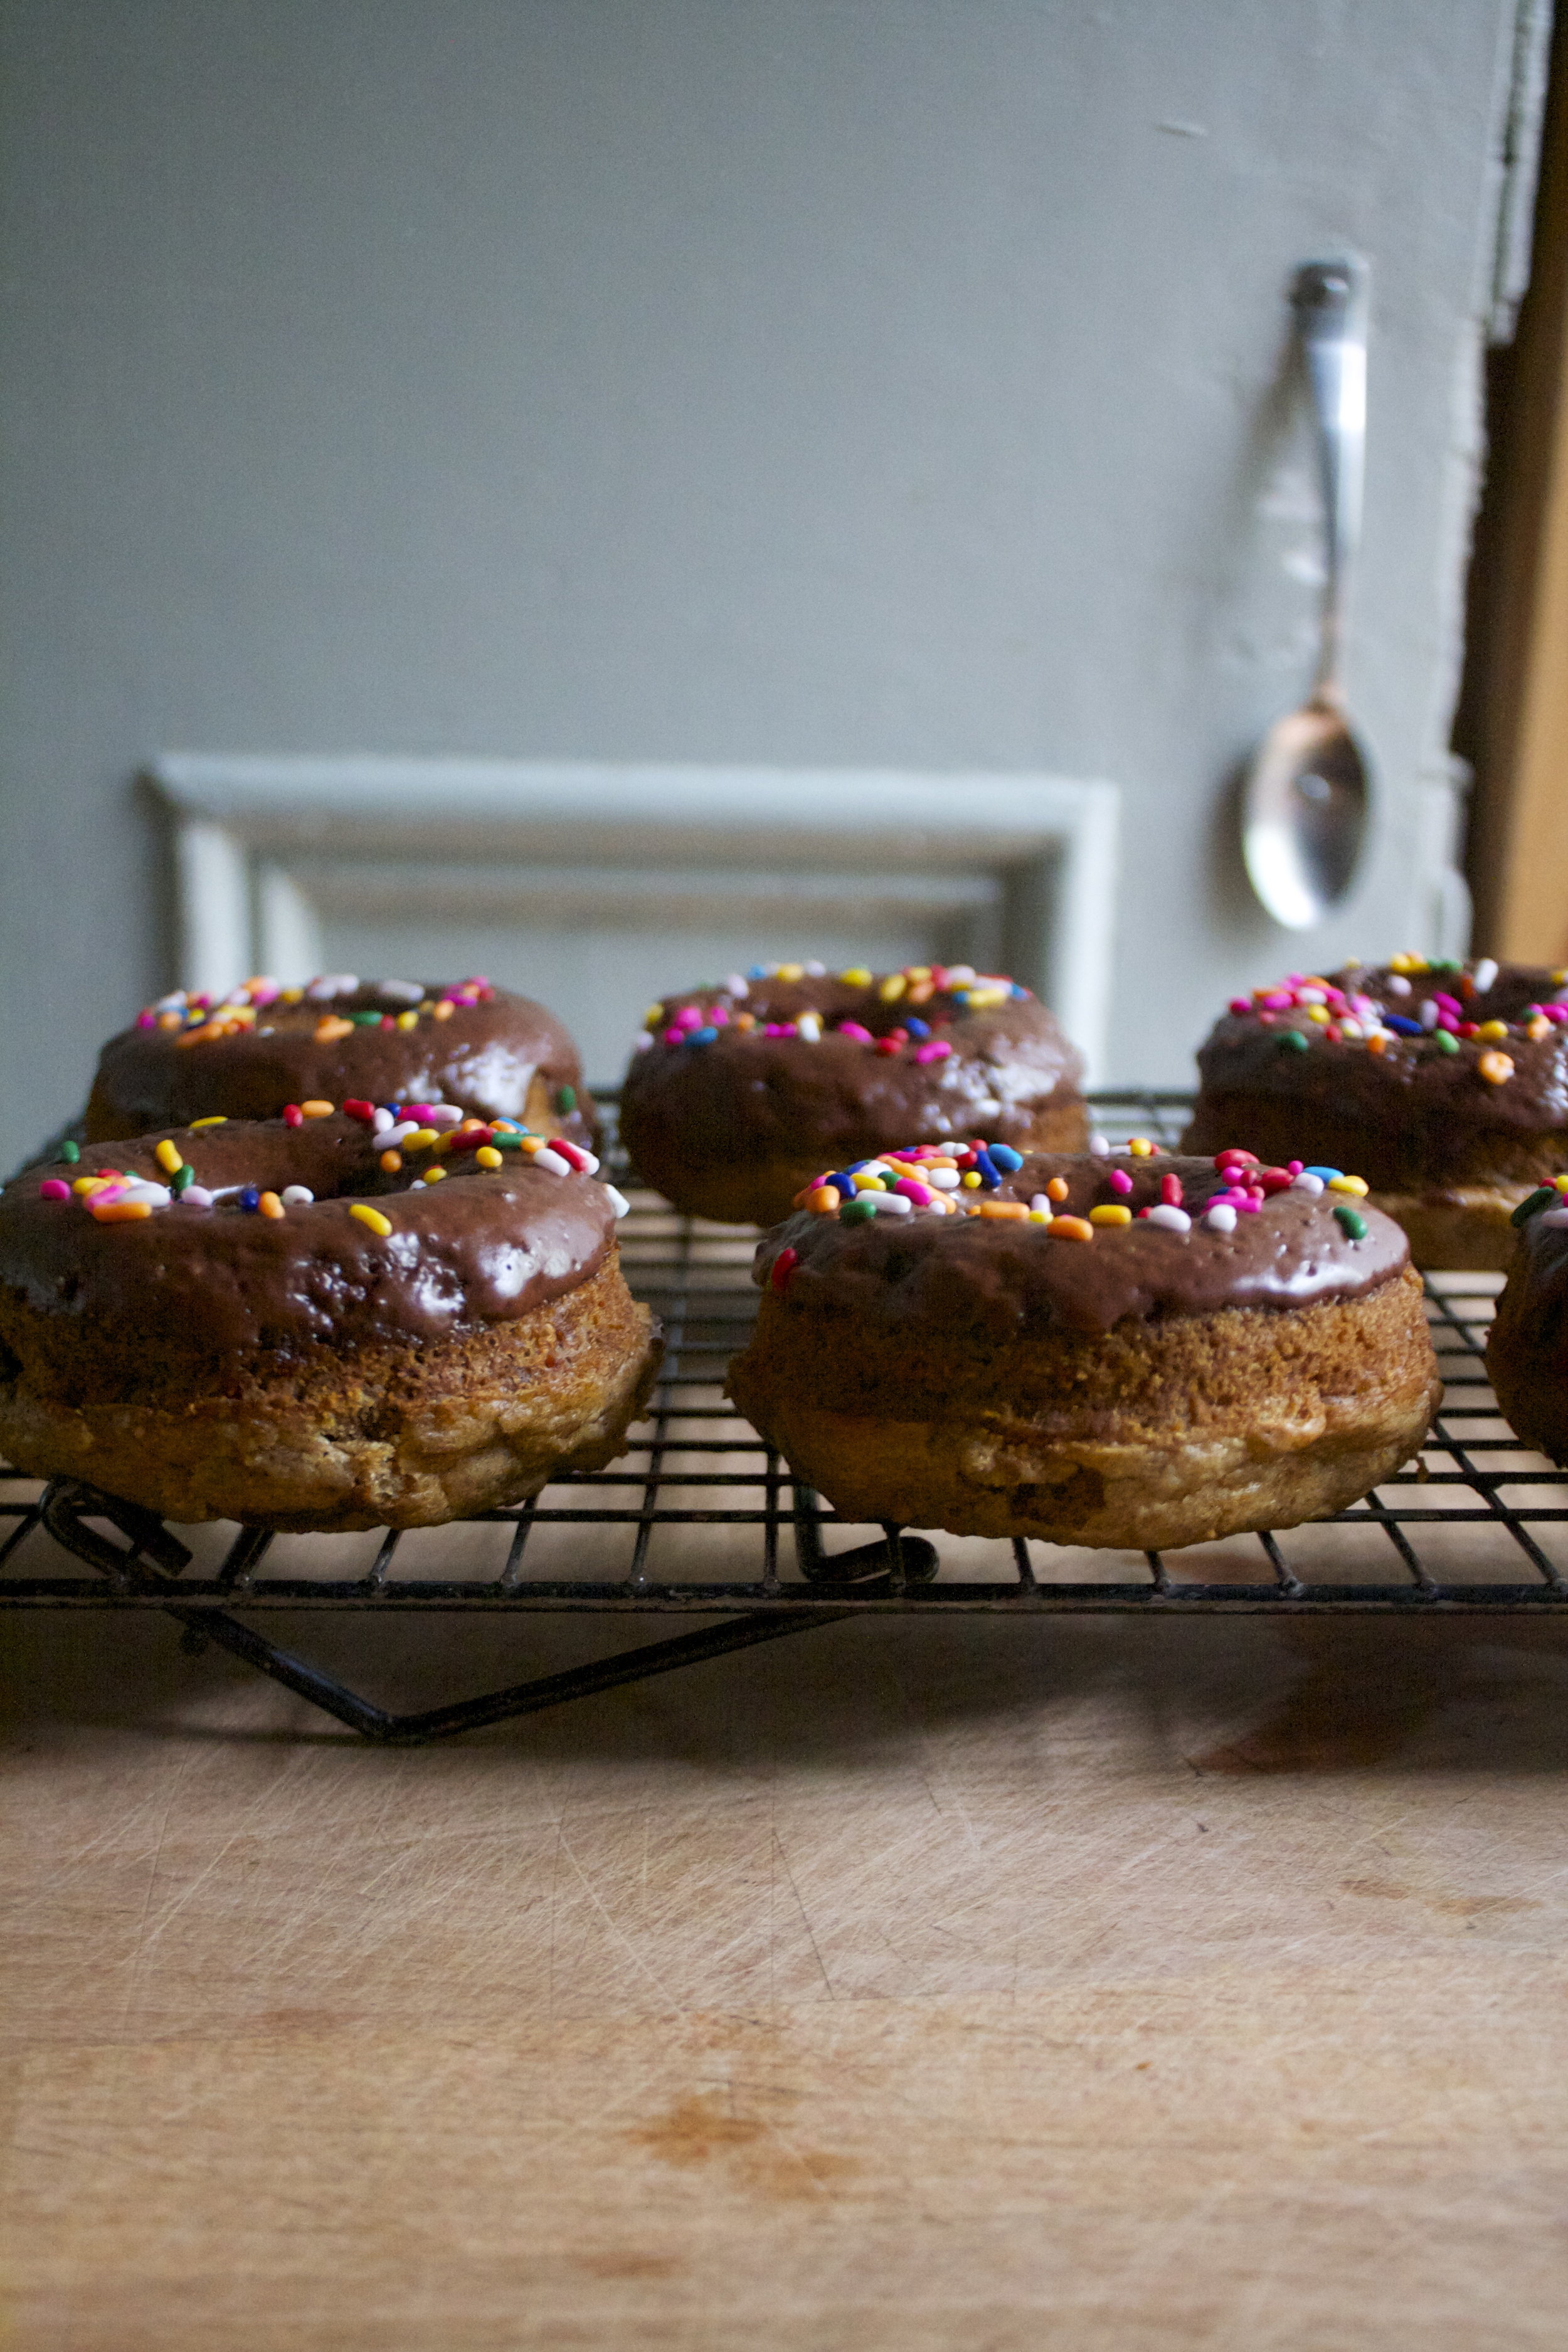
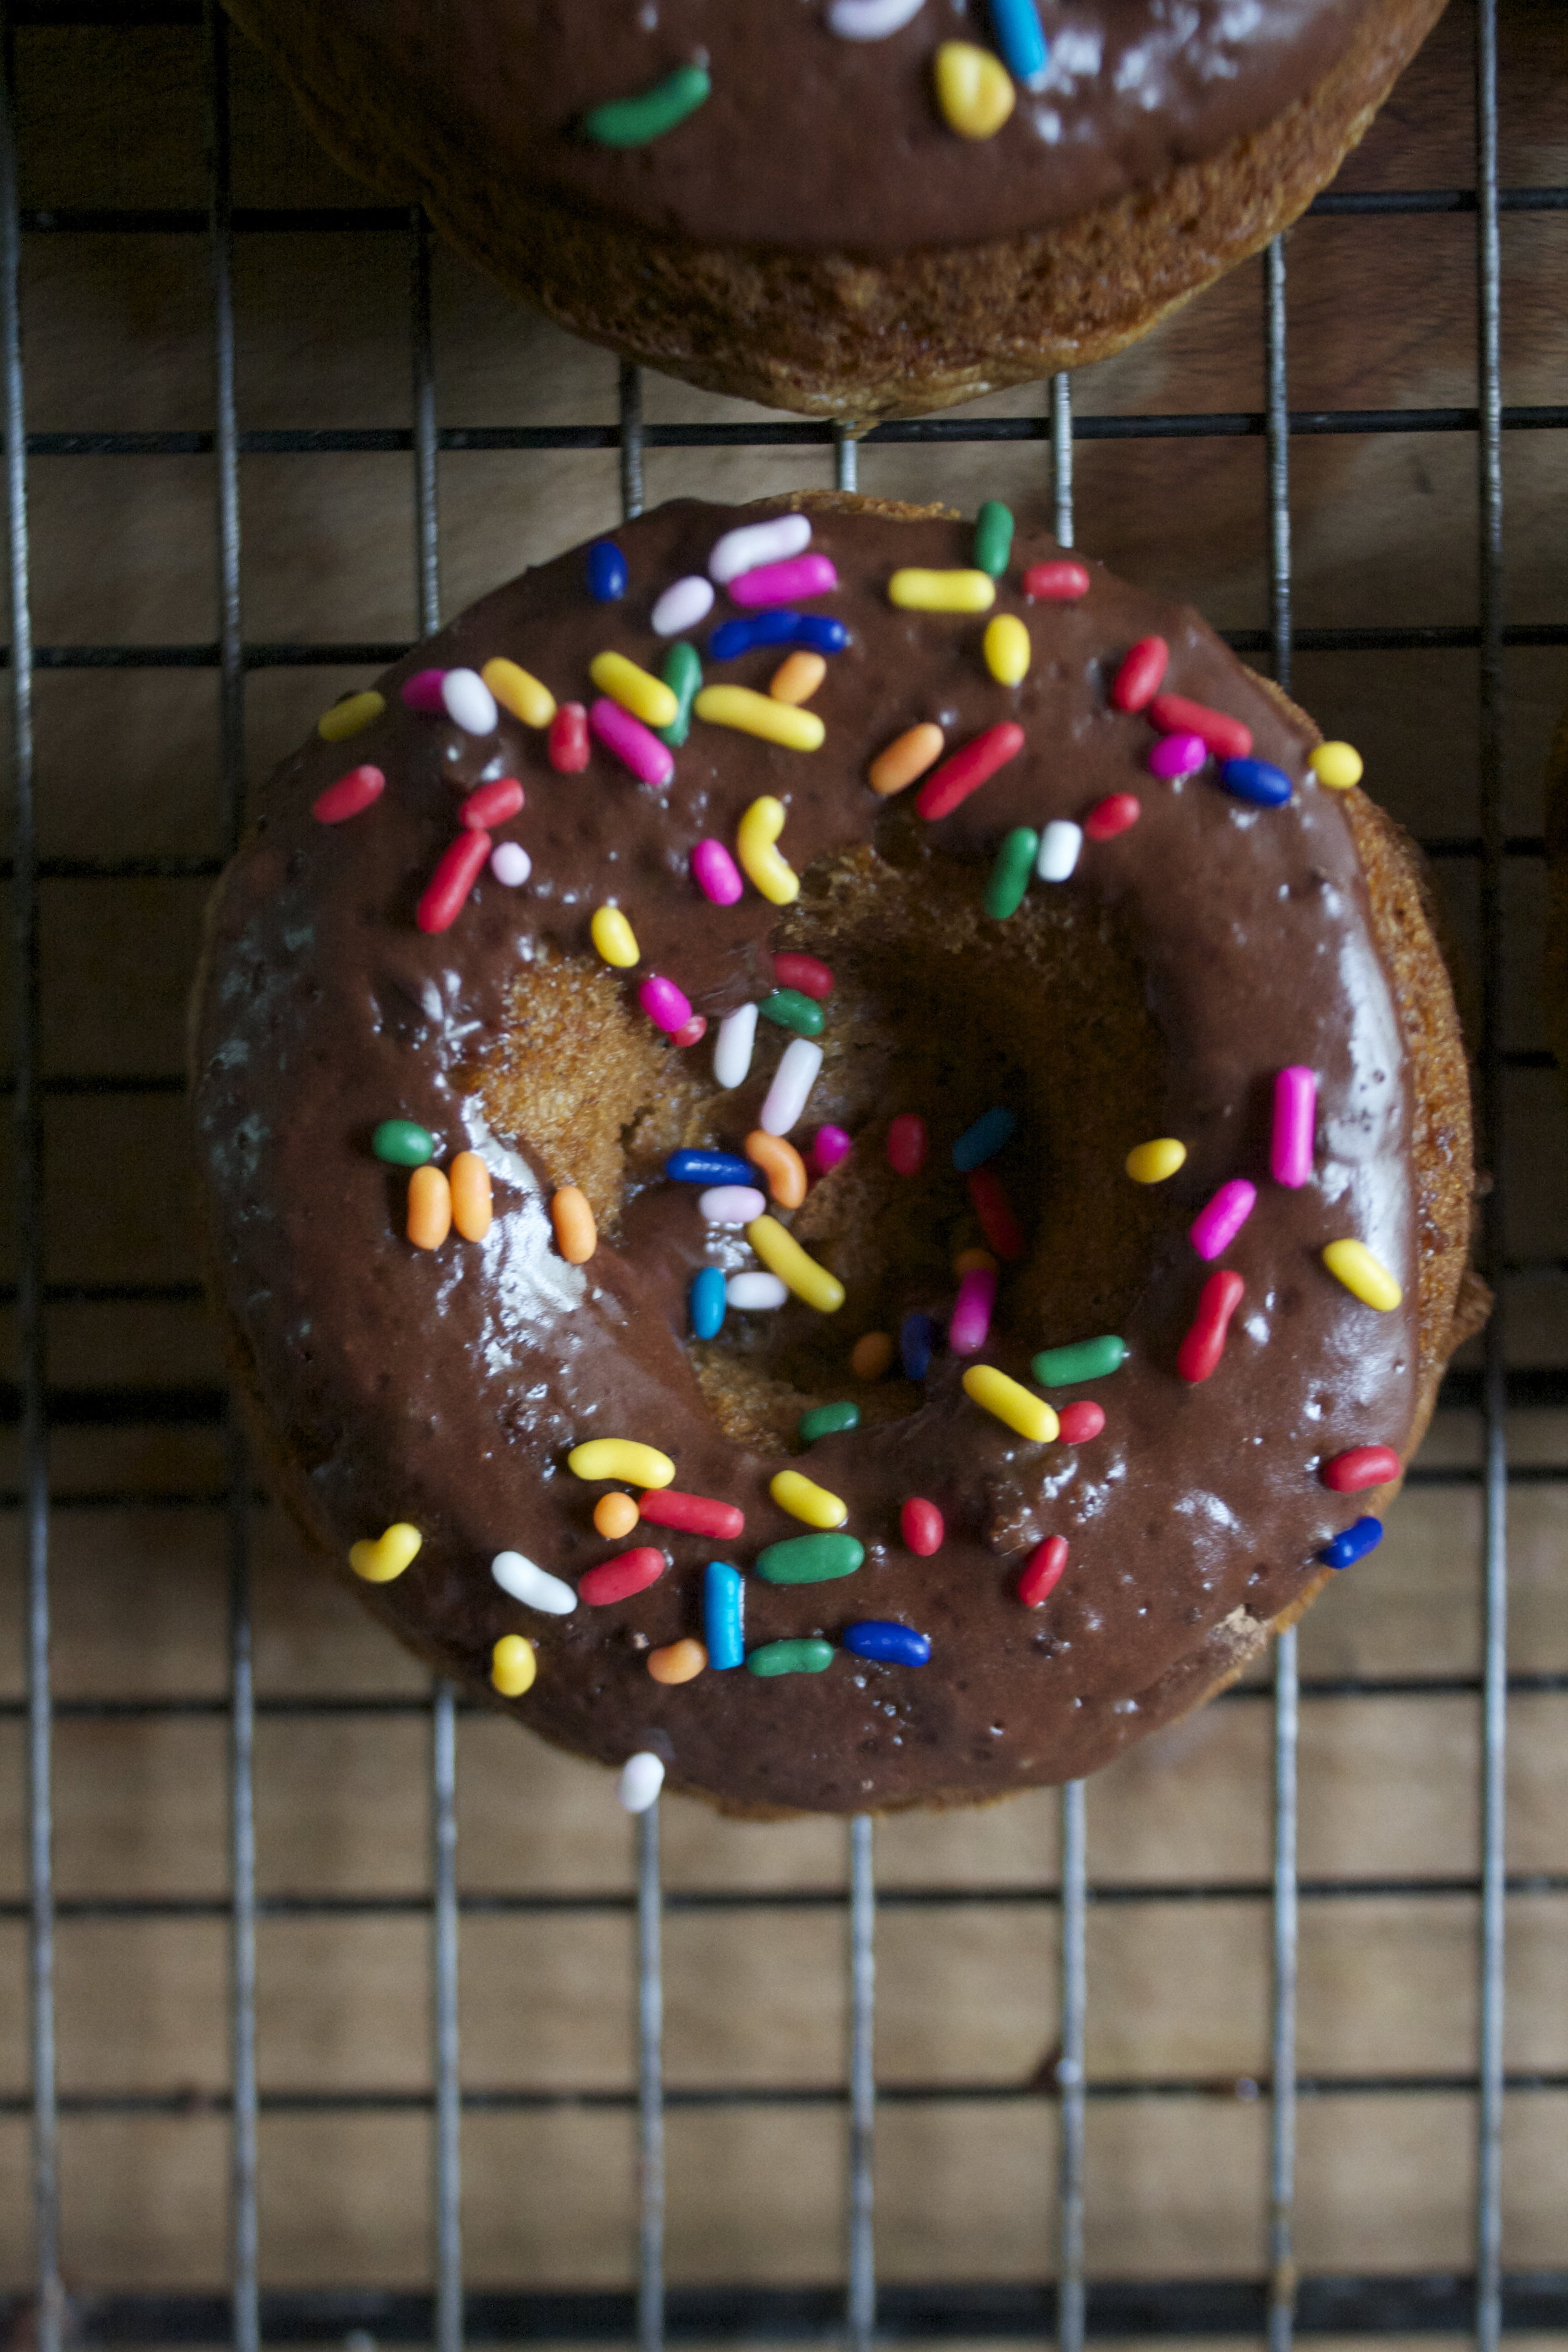
Look at those beauts. And they smell. A-MAZ-ING!! 

IMG_0566.jpg

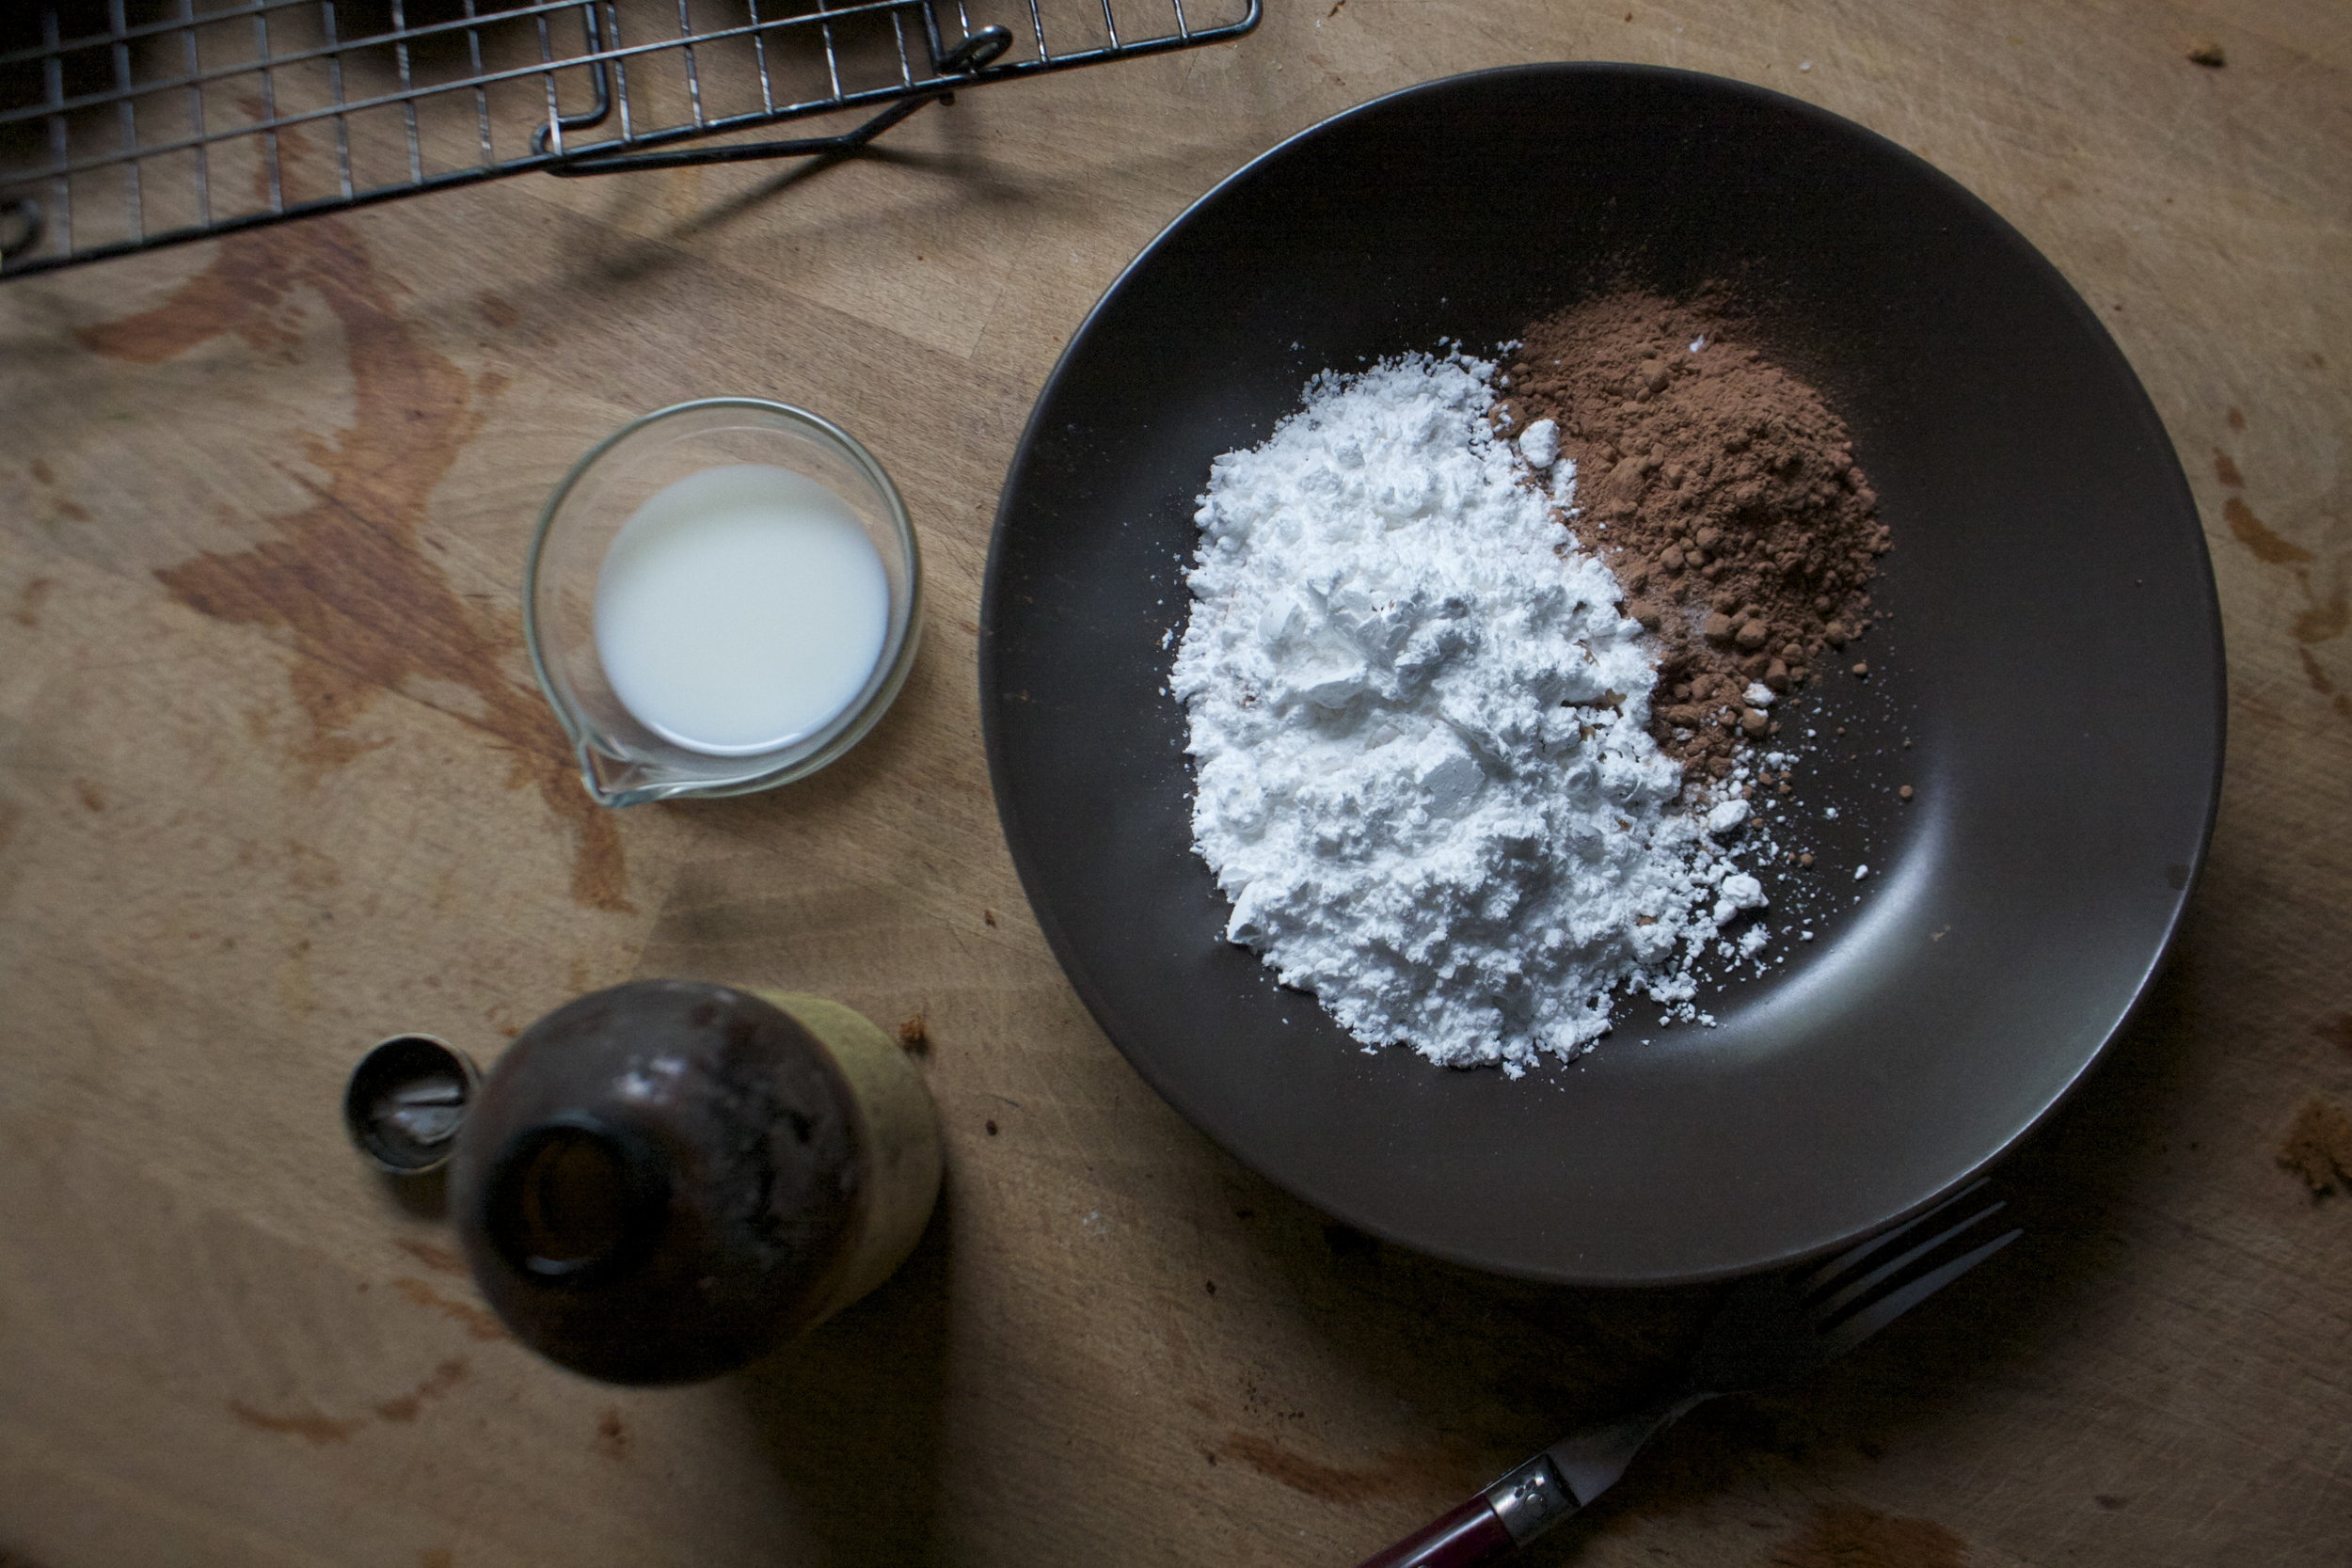
Right away get that glaze made. Powdered sugar, lemon zest, ans lemon juice. Super easy, just add the zest and juice to sugar and mix until smooth and glaze. 

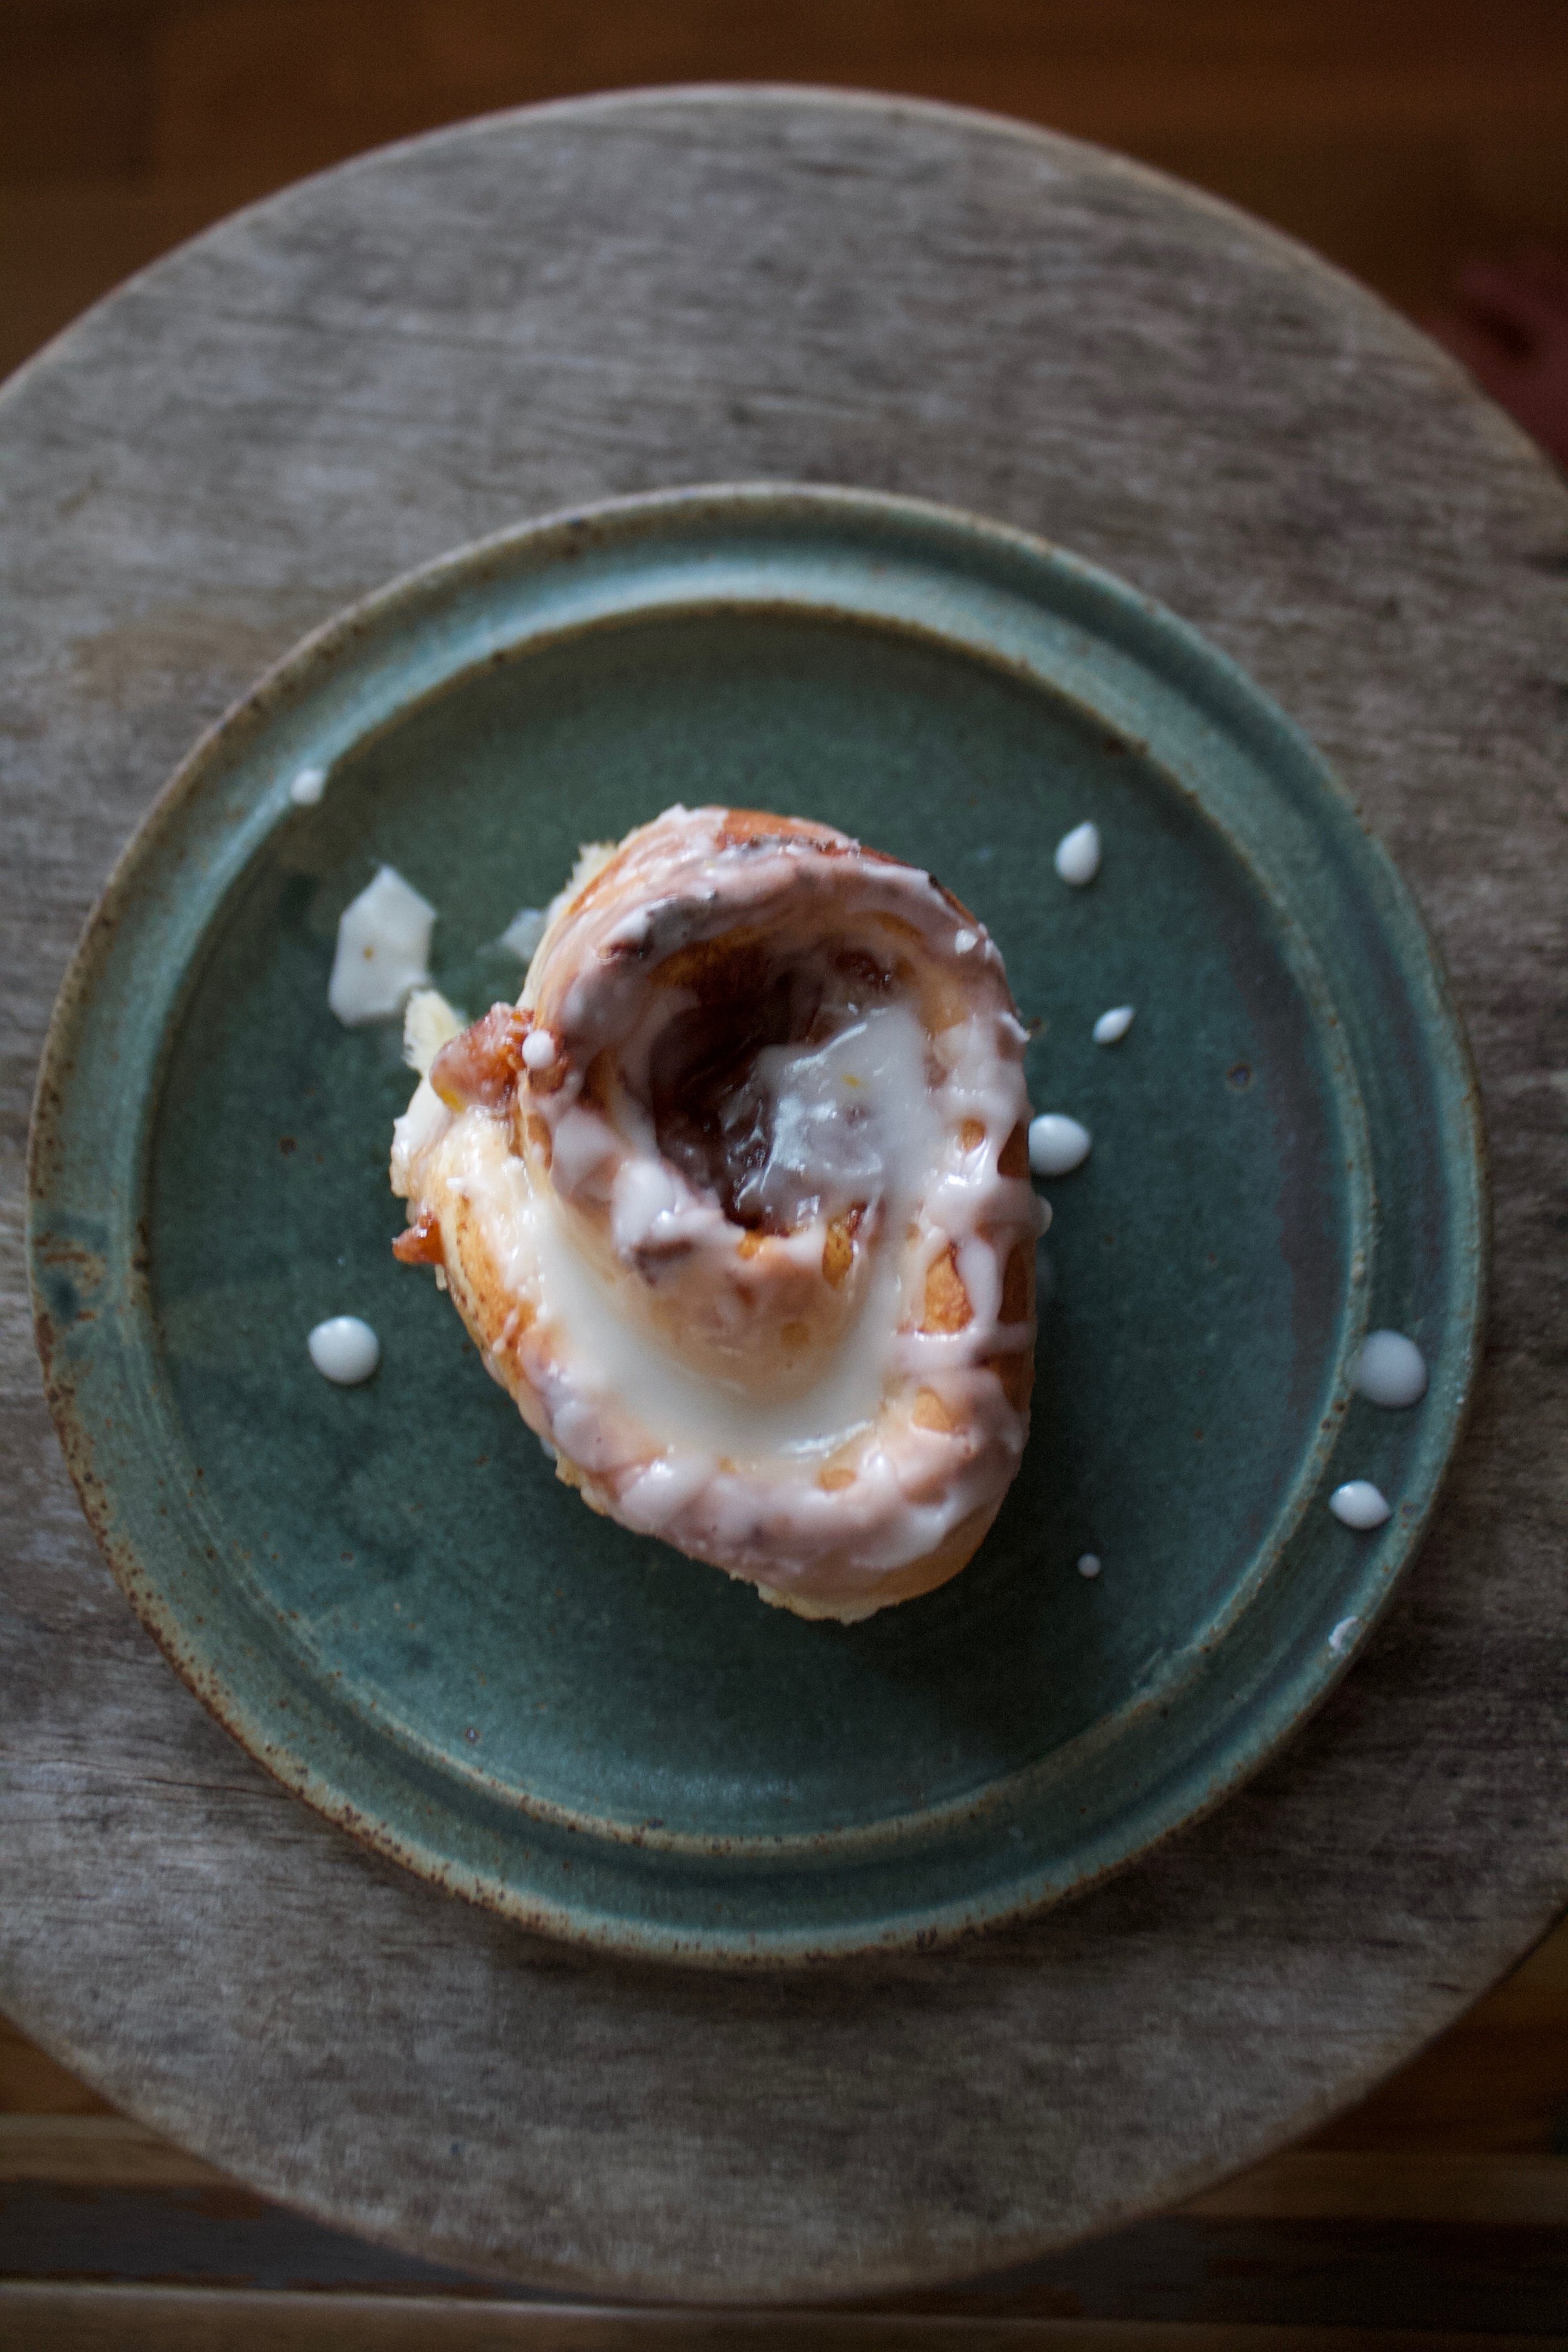
Pour glaze over warm buns. Make sure to hit them all or someone is going to be pissed they didn't get enough glaze..... 

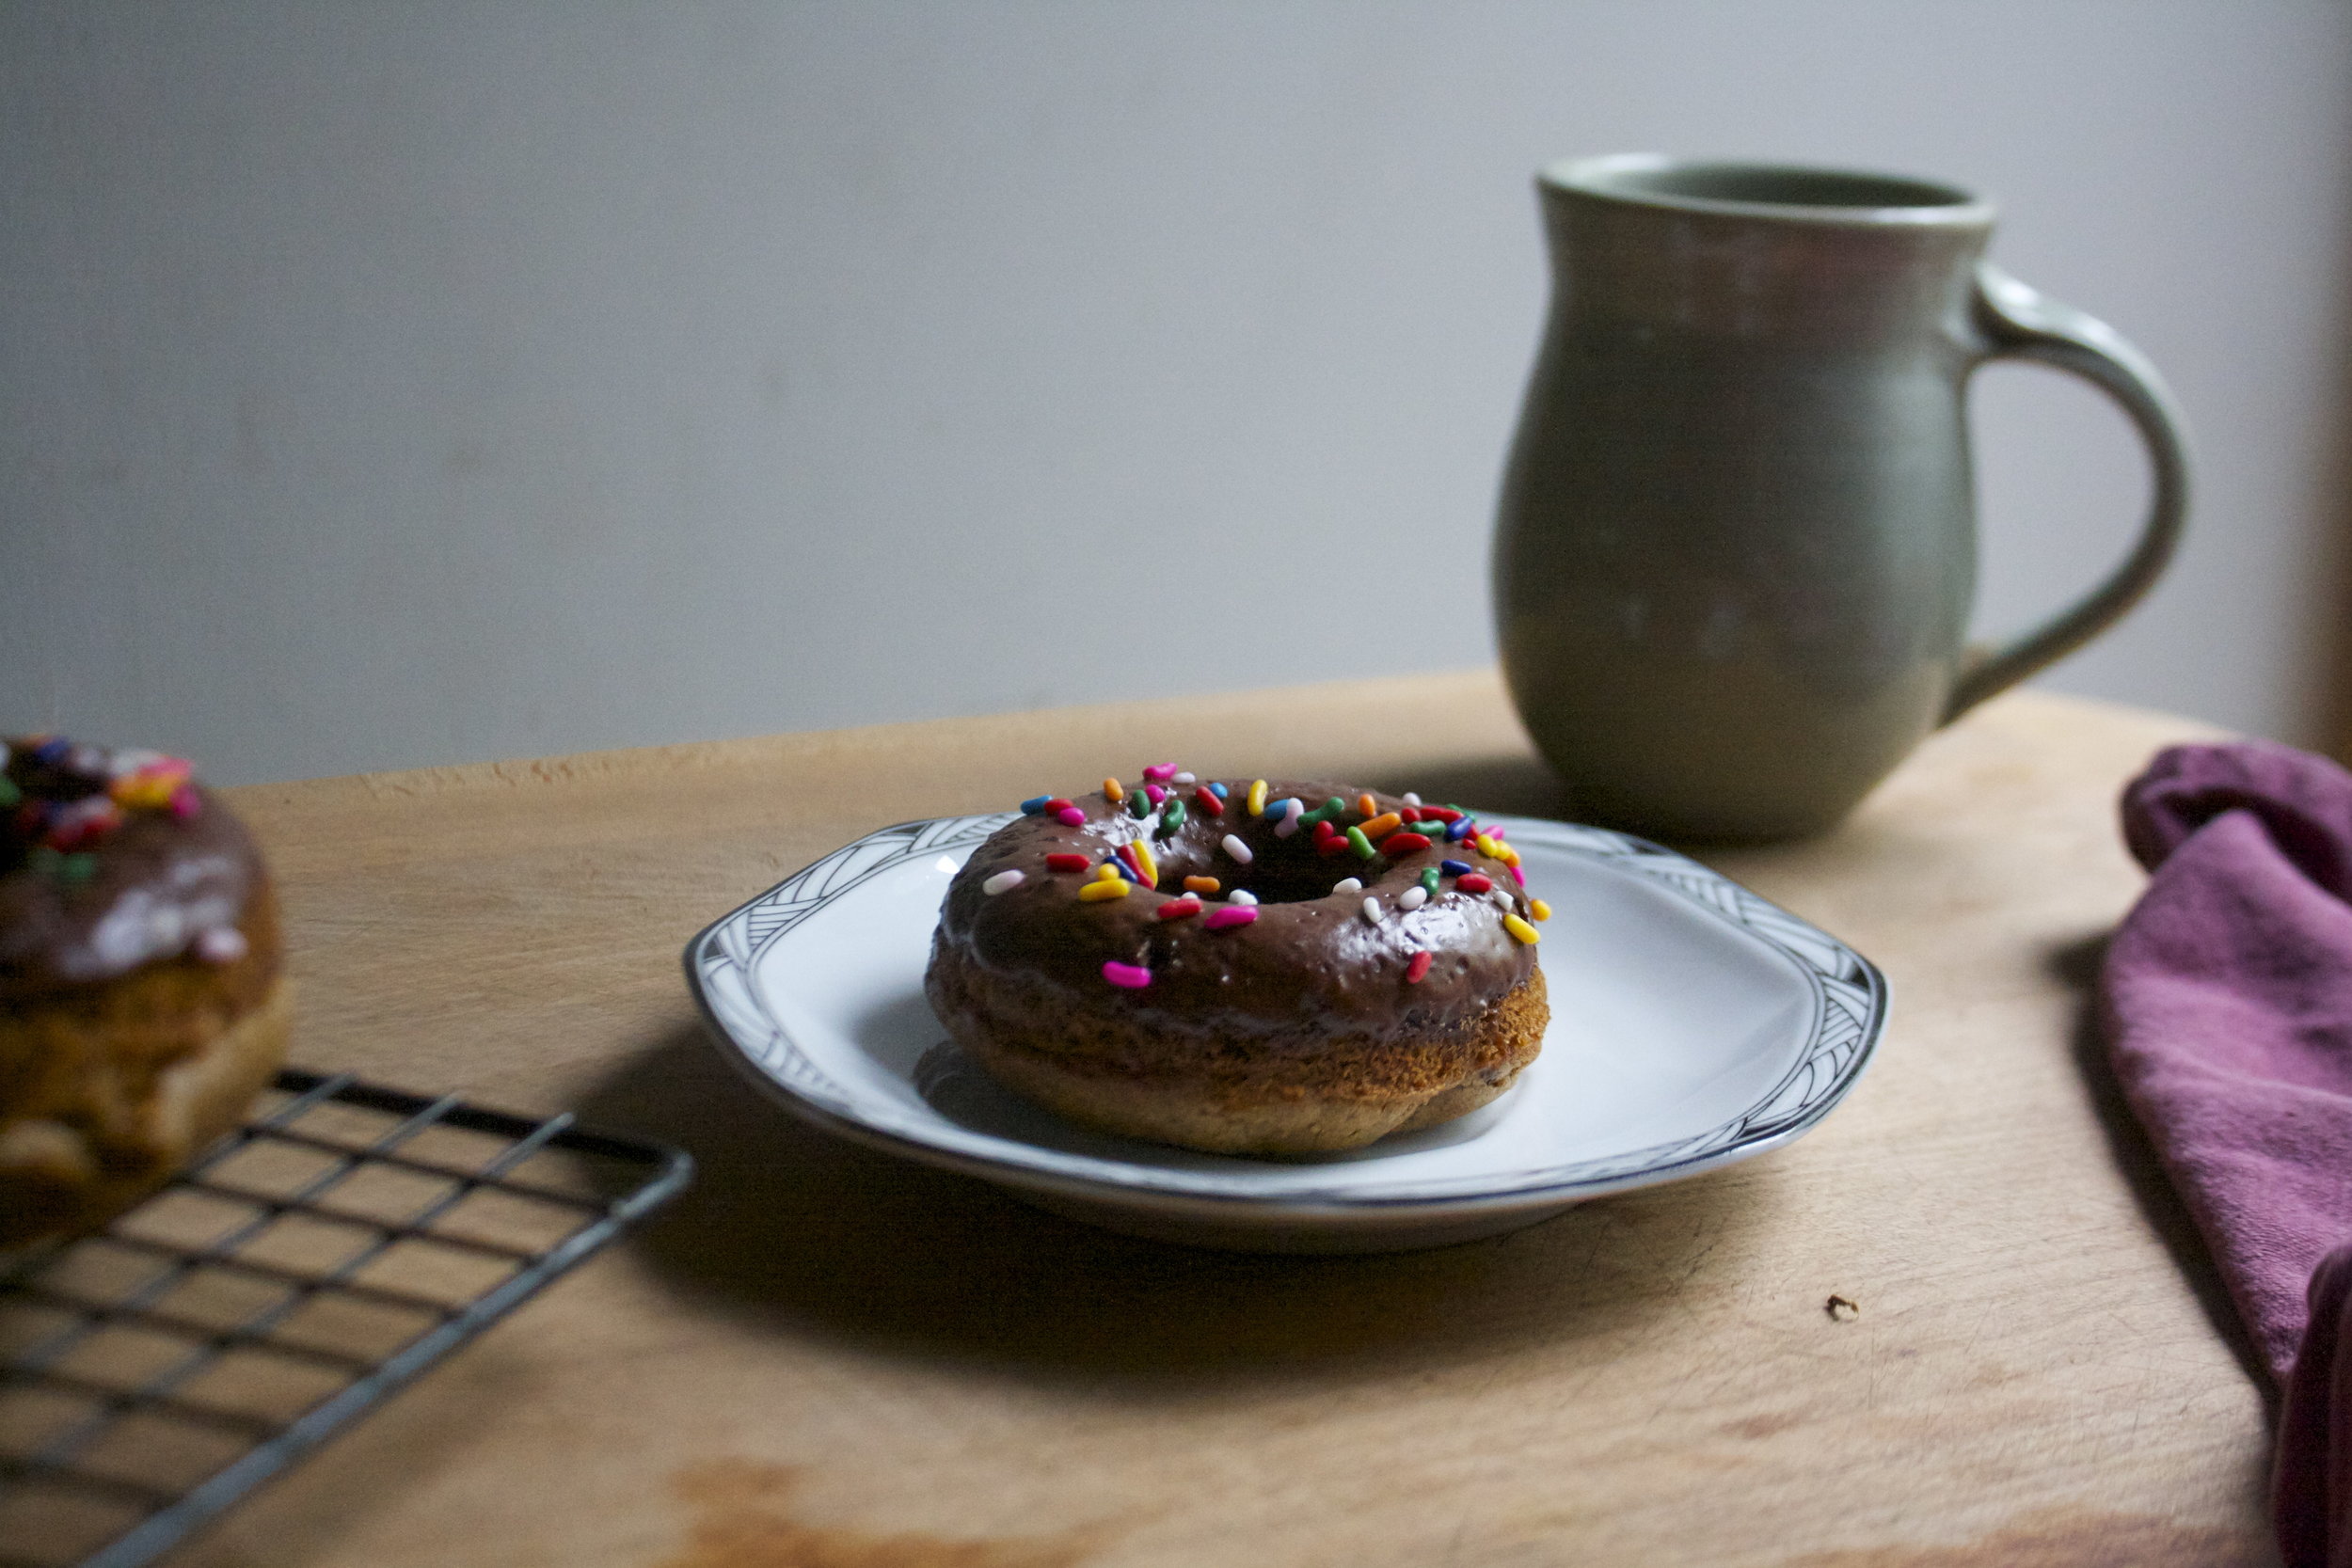
Then it's really just up to you whether you wait for coffee or tea or not, but really, just eat right away. There should be very little time between newly glazed buns and a bun in your face.

Enjoy the peaches!

-C


Peachy Sweet Buns

Makes 12 Buns

  • For the Dough 
    • 3 1/2 cups all purposes flour
    • 1/4  cup cane sugar
    • 1 cup warm soy milk
    • 2 teaspoon or 1 packet yeast
    • 4 tablespoons melted vegan butter 
    • 1 teaspoon salt
  • For the Filling 
    • 3-4 good sized ripe peaches (about 3 cups chopped peaches)
    • 3/4 cup brown sugar
    • 1 tablespoon cinnamon
    • Juice of half a lemon
  • For the Glaze
    • 1 lemons
    • 1 1/2 cup powered sugar

In a large bowl mix together the yeast, warm (not hot) soy milk, sugar, and melted but cooled butter. Now add in  the salt and the flour. Mix until it's too hard to mix then dump it all onto a lightly floured surface and knead for 7-10 minutes until the dough is  soft, elastic-y, and smooth. Place dough back into a clean lightly greased bowl and drape with a damp towel. Let dough rise for about 1 to 1.5 hours or until it has doubled in size.

While the dough is rising, chop the peaches up until you have about 3 cups. Place 2 1/2 cups of the  peaches into a medium sized pot with the brown sugar and lemon juice and stick on medium heat. Set the rest aside. Cook for about 20 minutes, stirring and mashing with a wooden spoon every few minutes, until mixture has become thick and reduced by about 1/2. Remove from heat, stir in cinnamon,  and place in fridge to cool. 

Once thee dough has doubled, dump onto a flour surface and roll our into a retacnge that is about 1/2 inch thick  Grab your peach mixture and spread the mixture evenly over the dough. Evenly distribute  the remaining chopped peaches over jam.  And then it's the to roll.

Start from the long side and start to roll toward the other end, keeping it as tight as possible without squeezing out all the filling.  Once rolled, slice into 12 even sized buns.

Place on a lightly greased and parchment lined 9x13 inch baking sheet or pan and let rest and rest for another20 minutes or so. OR if you want to wait to bake them off, cover them with plastic and set into the fridge for up to 24 hours. When you are ready to bake, remove from fridge and let the buns set on counter to come to room temperature before baking. 

Preheat oven to 350.

Place rolls into oven. Bake for 30-35 minutes or until all the buns have gotten a nice golden brown on top, and if you want to take the internal temp, that the temp has reached 190. 

Once the buns are done  baking, mix together the zest and juice of the lemon and powdered sugar. If the glaze seems to thick, add more juice or water, to think, add more sugar. Pour glaze all over warm (but not hot) buns.

And now all you need to do is serve up those buns right away, nice and warned.

Any left overs should be stored in the fridge for 3-4 days but should definitely be warmed up in the microwave for a minute or two before serving. They also freeze well too. 

In Vegan, Sweets, sweet breads and muffins, fruit, desserts, Dairy Free, brunch, breakfast, bread Tags Sweet buns, Sweet rolls, peachy sweet buns, peach cinnamon rolls, vegan, vegan sweet rolls, plant based, breakfast, brunch, dessert, dairy free, egg free
Comment

Green Salad with Candied Almonds, Avocado, And A Blueberry Lemon Vinaigrette

April 7, 2018 Colleen Stem
IMG_1338.jpg
IMG_1329.jpg
IMG_1362 2.jpg

We need fresh, we need green, we need color.

We need salad.  

The other night I made Megan's birthday dinner which consisted of pizza and salad. The pizza was pizza and everyone loved it and ate it, but what surprised me was how everyone was really into the salad. A big ass bowl or fresh greens with onions and I think carrots and cabbage and some cranberries I pulled form the freezer and candies almonds. Simple and not fussy, and everyone was just so happy to eat it. I felt like a salad genus and now I am full on into making fun awesome spring salads. (I have to keep reminding myself that yes, it is indeed spring. So what we got snow yesterday, it will melt, right???? ) 

So I bring to you a a bowl of fresh crispy spring greens with crunch and bite and creaminess and flavor. A salad that will bring you joy and satisfaction and maybe even anticipation for your next salad adventure. Not to mention a salad that looks so dang pretty. 

Get into the green. You will be as happy as a rabbit in a garden. 

The stuff. Greens, red onion, an avocado, almonds, blueberries, and a lemon. Also need some maple syrup, olive oil, red wine vinegar, and salt and pepper. 

A couple teaspoons of maple  go in with the almonds. Really toss make sure they are all coated.

IMG_1270.jpg

Place the almonds into a hot skillet cook for about 5-7 minutes or until the maple has become sticky and the almonds no longer raw. 

IMG_1278 2.jpg

When they are done, dump them onto a piece of parchment to cool. Don worry if they clung a little, you can break them apart once they are hard. 

Easy ass dressing. Blueberries. juice from the lemon, olive oil, vinegar, a tiny splash of maple, and a good pinch or pepper. 

Blended then done. Taste and season with salt if needed. 

IMG_1309.jpg

Avocado gets cut into small chunks and the onion get s thinly sliced.

It's all ready, so now make a salad

IMG_1331.jpg

And now eat a salad. 

-C


Green Salad With Candied Almonds, Avocado, And A Blueberry Lemon Vinaigrette

Makes 2-3  salads 

  • 1/4 pound greens ( I used spring mix but mesclun mix or spinach is good too) 
  • 1/2  red onion
  • 1 avocado

For the Almonds 

  • 1/3 cup raw halved or slivered almonds
  • 2 teaspoons maple syrup 

For the Blueberry lemon Vinaigrette 

  • 1/3 cup blueberries (I used  frozen)
  • 1 lemon
  • 1 Tablespoon olive oil
  • 2 Tablespoon red wine vinegar
  • 1/2 teaspoon maple syrup
  • pinch or salt
  • pinch or pepper

To make the  candied almonds, preheat a skillet to on medium heat on top of the stove. Place almonds into a small bowl and drizzle with maple syrup. Stir to coat. When the pan is hot, dump the maple covered almond into it and spread them out. Cook for a 3 minutes, then give a stir and cook for a 3 or so more minutes or until the maple has evaporated and the almonds are starting to brown. Dump the almonds directly onto a piece of parchment paper to cool and hardened. Do worry if they stick together a bit, you can break them apart after. 

To make the vinaigrette, place the berries into a jar (if using stick blender) or blender with the juice of the lemon, olive oil, vinegar, maple, and a pinch of pepper Blend until smooth. Taste then add a very small pinch of salt or more to taste. 

For salad. Thinly slice the onion and dice the avocado. Place greens into bowl(s) and toss with onions and avocado. Top with  candied almonds and drizzle all over with the vinaigrette. Grab a fork and eat.

Any left over dressing will last in fridge for about a week and left over almonds will be good for.a few weeks in a airtight container.   

In breakfast, brunch, Dairy Free, dinner, Dressing, fruit, Gluten Free, grain free, Nuts, salad, Spring, Vegan, Vegetables Tags Green Salad With Candied Almonds, Avocado, And A Blueberry Lemon Vinaigrette, Vegan, Salad, Candies Almonds, Maple, Blueberry Lemon Vinaigrette, Fresh, Spring, Greens, Vegetables, plant based, gluten free, grain free, healthy, avocado, breakfast salad, lunch salad, dinner salad
Comment

Fresh Cranberry Chocolate Chip Scones

December 2, 2017 Colleen Stem
IMG_8304.jpg
IMG_8333.jpg
IMG_8362.jpg

I am on full fledged baking mode. I bought the Costco sized bag of flour, stocked up on spices and chocolate chips, and am counting down the days to when all the littles come over for the cookie decorating party. But I am also trying to pace myself because I don't need to have cookies, cake, and candies all over the house quite yet. The season is young and the time for stuffing your face with all the candies and cookies awaits. Until then, (next week sounds about right) sensible baking like bread and scones (yes, scones are sensible)

The other morning I woke up and was very determined that I must make scones. I don't really know why scones, maybe it was the news of Prince Harrys engagement  (the dream of being princess is now dead)  but it was a fierce determination..  And they had to be cranberry because well, I have a tone of cranberries in the fridge. And I know I could have made them just cranberriy, but why not add a little chocolate. Still sensible in my book.  So scones I did make. And after he shared one with Barb, the mr has been eating them for breakfast which is just another reason why they are sensible...they are breakfast food. 

The stuff. Flour, baking soda, baking powder, and salt (all in the bowl). Sugar, coconut oil, cinnamon, soy milk and vinegar. And of course fresh cranberries and chocolate chips.

IMG_8253.jpg

The sugar and cinnamon go into the bowl with the rest of the dry...whisk it all together. Oh, and preheat the oven.

Mix a tablespoon of vinegar into the milk so it starts to sour.

Coconut oil gets cut in to the mixture.. You want a course crumb, kind of like pea sized chunks of oil mix around in there.

And now rough chop the cranberries which is a little difficutl because they all want to roll away, but you can do it. 

I rough chopped the chocolate chips as well because why not.

Mix the cranberries and chocolate into the mixture until evenly incorporated.

IMG_8269.jpg

Then dump the milk in.

Gently mix until the dough just comes together. Dump our onto a well floured surface. 

IMG_8281.jpg

Pat the dough into a circle and flatten out until it's about an inch and a half thick. Cut the circle into 8-10 equal pieces. 

Place the scones on a baking sheet and brush with a little milk. Pop them into the preheated oven 

Pop them out when they are all nice and golden brown. 

Place them on a cooling rack.

And watch them disappear or like a sensible person, eat one everyday for breakfast. 

Have a great weekend.

-C


Fresh Cranberry Chocolate Chip Scones 

makes 8-10 scones

  • 2  1/4 cups flour 
  • 1/3 cup  sugar
  • 1 teaspoon cinnamon 
  • 1  teaspoon baking powder 
  • 1 teaspoon baking soda
  • 1 teaspoon salt
  • 1/2 cup coconut oil
  • 1 hefty cup fresh cranberries
  • 1/2 cup chocolate chips
  • 3/4 cup plant milk plus about a tablespoon more for brushing on top
  • 1 tablespoons apple cider vinegar 

Preheat oven to 375. 

In a large bowl whisk together the flour, salt, baking soda, baking powder, cinnamon, and sugar. Add the vinegar to the milk and set aside. With a pastry cutter or 2 knives, cut the coconut oil into the dry mixture until it becomes a course crumb. 

Rough chop the cranberries and the chocolate chips (optional on the chocolate chips) and toss both into the bowl. Give it a quick mix to coat it all then dump in the milk. Mix until the dough comes together (DON"T OVER MIX) then dump the dough onto a lightly floured surface. Gather the dough into a ball and flatten out into a disk that is about and inch and a half thick. Cut into 8-10 equal sized wedged and place not a baking sheet. Brush the tops with a little milk and pop into the preheated oven.

Bake for 25 minutes or until the tops are all nice and golden brown. Remove from oven and place on a wire rack to cool.

Then eat them .

In bread, breakfast, brunch, Dairy Free, desserts, Sweets, Vegan Tags Fresh Cranberry, Scones, Chocolate Chip, Fresh Cranberry Chocolate Chip Scones, vegan, plantbased, King Arthur flour, oceanspray, ocean spray, holiday, breakfast, desserts, quick and easy
Comment

Cinnamon Star Bread

November 11, 2017 Colleen Stem
IMG_8098.jpg
IMG_8089.jpg
IMG_8113.jpg
IMG_8110.jpg

I have been so excited all week to make this star bread. About a week ago, while perusing  King Arthur Flour recipes, I saw this  amazing star shaped cinnamon bun situation and just knew that I had to make it. I checked the recipe, made a a bunch of tweaks (made it vegan and a little simpler) and set a date with the oven. I figured that Friday was the day because well, this bread is basically a really pretty cinnamon bun and cinnamon buns are great for the weekend and plus the temperature in the world dropped to like super freaking freazing cold and what better way to stay warm then to crank the oven. 

And make it I did. And honestly. this was one of the most satisfying bread bakes that I have had in a while. It is just so dang pretty and smells so good and was honestly way easier to make then it looks (seriously, really simple). I don't know if I am ever going to be ale to make cinnamon buns the regular way again. I mean look at this.  And best to let you know that it feeds a crowd, which is fantastic if you are going to be having any big family/friend gatherings in the next month or two. (or if you are just awesome and want to eat the whole thing to your face). Think about it, if you make this for the people (or yourself)  how cool and awesome and fancy you are going to seem. It's really a win win win all around here so I don't see a reason to not make it. Trust me, and thank me later. 

The stuff of stars. Flour. salt. yeast and soy milk. A little oil, sugar, mashed sweet potato, earth balance  and cinnamon. 

To start, a  couple of tablespoons sugar and the yeast go into the warm soy milk to kick start that yeast and get mixed together.

Salt, oil, and mashed sweet potato go into the big bowl with the flour.

IMG_7981.jpg

Then the yeast mixture gets pouted in too. Get ready to mix. And mix.

IMG_7985.jpg

And after mixing, some kneading.  A well floured surface with a extra flour on the side is needed here. You are going to want to knead the dough for about 5 minutes, adding a little flour whenever the dough gets to sticky. 

Once the dough is nice and smooth looking, cover it in oil and stick it into a bowl and cover it  and let  rise for about an hour. 

Make your cinnamon sugar mixture while waiting . 

IMG_8000.jpg

Dough doubled in size and dumped onto the well flour counter. 

IMG_8011.jpg

Take a dough cutter or knife and divided the dough  into four equal pieces and roll each piece into ball.

While keeping your surface well floured, roll a dough ball into circle (or as close to a circle as you can get it) about 12 inched wide 

IMG_8019.jpg
IMG_8024.jpg

Place rolled dough onto parchment paper and cover the surface with  earth balance. Then sprinkle a third of the cinnamon sugar mixture all over that.

Grab another ball of dough and roll it out the same size as the first and place on top the first dough. Repeat the earth balance and sugar mixture and then cover that with another rolled out dough. Earth balance and sugar mixture one more time, then the last dough.

All stacked up.Take the rolling pin and give the whole stacked thing a gentle little roll, just to make sure all layers are stuck together.

IMG_8039.jpg

The fun part. Grab a small circle cutter or lid (I used small jar lid) and place directly in the middle. Take your dough cutter and score your cuts. Score into quarters then each corner into six pieces. You end up with twenty-four pieces. There needs to be a even amount of pieces in order for the design to work so you could do  22-16 pieces. I wouldn't  go less.

IMG_8041.jpg

To get the twist, grab a piece in each hand, give a little tug and twist the pieces towards each other 3 times. Take the ends and kind of tuck and pinch them together.  Repeat until all the pieces care twisted. 

 This is probably the most pretty cinnamon thing I have ever seen. 

Slide the star on the parchment onto a baking sheet and cover to rise and rest for about half hour or so and get the oven preheated.

After the second rise and right before you stick it into he oven, brush the top with a little plant milk.

And into the hot oven it goes. 

Aaaaa. So freaking pretty! 

After a few minutes, if you decided you want a little glaze action, go for it. I made up a super simple one, just a splash of vanilla in powder sugar with a splash of milk. 

Drizzled and ready for action. 

Now let the people eat. 


Cinnamon Star Bread

makes 12-13 servings 

For the dough 

  • 2 3/4 -3 cups all purpose flour plus more for kneading.

  • 1/4 cup mashed sweet potato *

  • 1 1/4 cup warm soy (or any plant) milk plus 1 tablespoon to brush on pre bake

  • 1/4 cup neutral oil plus 1 tablespoon to coat dough

  • 1 packet or 2 teaspoon yeast

  • 2 tablespoons sugar

  • 1 teaspoon salt

for filling

  • 7 tablespoons sugar

  • 2 tablespoon cinnamon

  • 3 tablespoons room temperature earth balance

For icing (optional)

  • 1/2 teaspoon vanilla

  • 1/2 cup powdered sugar

  • 2-3 teaspoons plant milk

*I just mashed up a 1/4 cup of a roated sweet potato that I had in the fridge. If you don't have a roasted potato laying around, you can steam of roast a sweet potato and mash it up for this. 

Measure milk into a large jar or bowl. Mix in 2 tablespoons sugar and the yeast. Set aside to activate. In a large bowl mix together the lesser amount of flour and salt. Add in the sweet potato, oil, and the soy yeast mixture. Mix together with a wooden spoon or dough spoon until you can't. If the dough seems really wet, add in another 1/4 cup of flour.  Once mixed as well was you can get it, dump the dough onto well floured surface. Start kneading the dough, adding a little flour as you go if needed. Knead for about 5 minutes or until the dough is a nice soft but not to sticky uniform ball. Cover dough with a little oil and place into large clean bowl. Cover with a towel and let dough rise in a warm place for about an hour or until it doubles in size.

Mix the cinnamon and sugar together while waiting.

Once dough has risen, dump it onto a well floured surface and divide into 4 equal pieces. Roll each piece into a ball then grab the first ball and roll out into a large circle about 12 inches wide. Don't worry hear if the circle is not perfect, its going to be fine. Place first circle onto piece of parchment paper and cover the surface with 1 tablespoon of earth balance. Sprinkle with a third of the cinnamon sugar mixture. Grab another dough ball and roll out to the same size as the first and place onto of the cinnamon sugared dough. Repeat the earth balance cinnamon sugar and top with another rolled out dough. Once more with the remaining earth balance and cinnamon sugar and top with the last rolled out dough. Take rolling pin and give the whole stacked thing a little roll to make sure it's all stuck together well.

For the design part. Grab a small circle shaped thing about 2 inches wide (I used a jar lid) and place directly in the center of the dough. Take a dough cutter or sharpe knife and lightly score into quarters then each quarter into 6 pieces You could also cut less pieces, but the main thing you need is to have an even number of pieces for the design to work. Once your lines are good, cut the lines by pushing down into the dough and not slicing back and forth.  Grab a piece in each hand and gently  twist the pieces towards each other 3 times then pinch the ends together. Repeat until all the pieces are twisted together. Slide the star onto a large baking sheet, cover, and let rest and rise for another 1/2 hour. 

Preheat oven to 400

When the star is risen again and right before it's going into the oven, brush the top with a little plant milk. Pop it into the oven and bake for about 20- 25 minutes, or until the top is a nice deep gold brown.

Remove from oven and let cool a little bit. If you want a little icing, mix together the vanilla, powdered sugar, and plant milk. Wait until the star is less the hot and drizzle all over.

And now it's time to get at it. Eat what you want and store the rest in an air tight container. 

In breakfast, bread, brunch, Dairy Free, desserts, Vegan Tags Cinnamon Star Bread, Cinnamon buns, vegan, Vegan cinnamon buns, King Arthur flour, breakfast, dessert, plant based, bake along, yeasted bread, feeds a crowd, food design
6 Comments

Pumpkin Donuts with Chocolate Glaze

October 14, 2016 Colleen Stem
IMG_1867.jpg
IMG_1865.jpg

As a reward to ourselves for finishing the floor laying week (what a freaking week, I will share some pictures soon) I stayed home for a little while yesterday morning and made some donuts for the mr ( I got to bake and do a little knitting and he got donuts.) Initially I was gonna make a cake, had it on my agenda for a cake at some point this week, but last minutes I felt the need to use my unused donut pan. I think it was a good call. Donuts don't require as much pumpkin puree.  I roasted a pumpkin a few days ago for the purpose of baking a cake with it but have slowly eaten most of it (on accident) so that there was just enough left to make the donuts. I have no willpower when it comes to roasted squash, I can't stop eating it.

Anyway,  I had me a mighty fine morning of trashing the kitchen, using my pretty mixing bowls, basking in the glory of the residual heat coming from the oven, and making the house smell all nice and fall spicy. And now there are donuts in the house with lots of sprinkles and only the mr to eat them. He really really likes them, like a lot. (me "don't eat all those f*ing donuts dude, save some for later!")

Another reason donuts were a good call, they are easy to share. Maybe I should go drop off a few to a friend. Any takers?

The donut stuff. Flour, baking soda, baking powder, and salt are in that bowl. Then we have pumpkin puree(homemade or canned) soy milk(or any milk), brown sugar, cinnamon, oil, and apple cider vinegar

All the wet stuff gets mixed together and the dry stuff plus the cinnamon gets whisked together too.

Wet into dry and mixed until combined.

Scoop batter into well greased donut pan and don't do what I did and overfill (I always forget not to overfill). My fist batch came out a little bit bigger the expected with holes. No biggie.

Once pan is filled,  pan goes into preheated oven. Bake until golden perfection (about 15-18 minutes or until a tester comes out clean)

Slightly overflown donuts cooked to all the goodness and popped out of the pan to cool on a cooling rack.

Glaze stuff. Powdered sugar, cocoa powder, a pinch of salt, a splash of vanilla, and a bit of soy milk....Mix it all together and that's that.

Completely cooled donuts (very important to be completely cooled) go heads down into the bowl of glaze.

All glazed and looking good but I think somethings missing.....

Oh yeah, sprinkles.

Pumpkin, chocolate, sprinkles. BOOM!!!

Happy Friday!!!!


 Pumpkin Donuts with Chocolate Glaze

makes 10 donuts

For donuts

  • 1 1/4 cups all purpose flour
  • 1 teaspoon baking powder
  • 1 teaspoon baking soda
  • 1/2 teaspoon salt
  • 1 tablespoon cinnamon
  • 1/2 cup pumpkin puree
  • 1/2 cup brown sugar
  • 1/2 cup soy milk (any milk works)
  • 3 tablespoons neutral oil like canola
  • 1 tablespoon apple cider vinegar

For the glaze

  • 7 heaping tablespoons powdered sugar
  • 2 tablespoons cocoa powder
  • 2 tablespoons soy milk
  • splash vanilla
  • pinch of salt
  • sprinkles!!!!...optional

Preheat oven to 350

In a big bowl, mix together the flour, baking powder and baking soda, salt, and the cinnamon. In a separate bowl mix together the pumpkin puree, sugar, soy milk, oil and the apple cider vinegar. Dump the wet mixture into the dry and mix until combined.

Ready the donut pan by really making sure it is well grease. Fill each donut mold about a 3/4 way full. I use a spoon but you could transfer that batter to a piping bag if you want. Place pan into oven and bake for 15-18 minutes or until the donuts are golden brown and a fork stabbed into one comes out clean. Pop donuts out of mold and let cool completely on a cooling rack.

Note. I have one pan that does 6 at a time. I had to wash, dry and re-grease the panto bake all the donuts.

Once donuts are cooled, gather the glaze ingredients. In a shallow bowl whisk together the sugar, cocoa, and salt. Add in a splash of vanilla and then the soy. Mix together until a glossy not to thick but not to thin consistency . If its too thick, add in another splash of milk, to think, more powdered sugar.

To glaze, take each donut and place face down in glaze and give it a little twirl.  Remove and place back on cooling rack (glaze size up) and cover with sprinkles. (optional)

Then eat the donuts

Any uneaten can be placed in airtight container for 2-3 days or can be stuck into freezer.

In vermont, Vegetables, Vegan, fall, desserts, Dairy Free, cake, brunch, breakfast, donut Tags pumpkin, donuts, doughnuts, pumpkin donuts, chocolate glaze, vegan, fall, baked goods, dessert
Comment
← Newer Posts Older Posts →
 

https://thelovelycrazy.squarespace.com/config#/|/about/

Me. Food Maker.Food eater. Woo HOO!

STEM+NODE  SMALL BATCH AND ONE OF A KIND POTTERY

stem+node ceramics


____________________

Subscribe

GET NEW POSTS IN YO EMAIL

You are AWESOME!!!


@thelovelycrazy 2014-2021