• stem+node ceramics
  • HOME
  • Food Recipes
  • About
  • Contact
Menu

The Lovely Crazy

Street Address
City, State, Zip
Phone Number

Your Custom Text Here

The Lovely Crazy

  • stem+node ceramics
  • HOME
  • Food Recipes
  • About
  • Contact

Millet with mushrooms, onions, Greens and a mustard vinaigrette

June 8, 2019 Colleen Stem
IMG_9275.jpg
IMG_9282 2.jpg

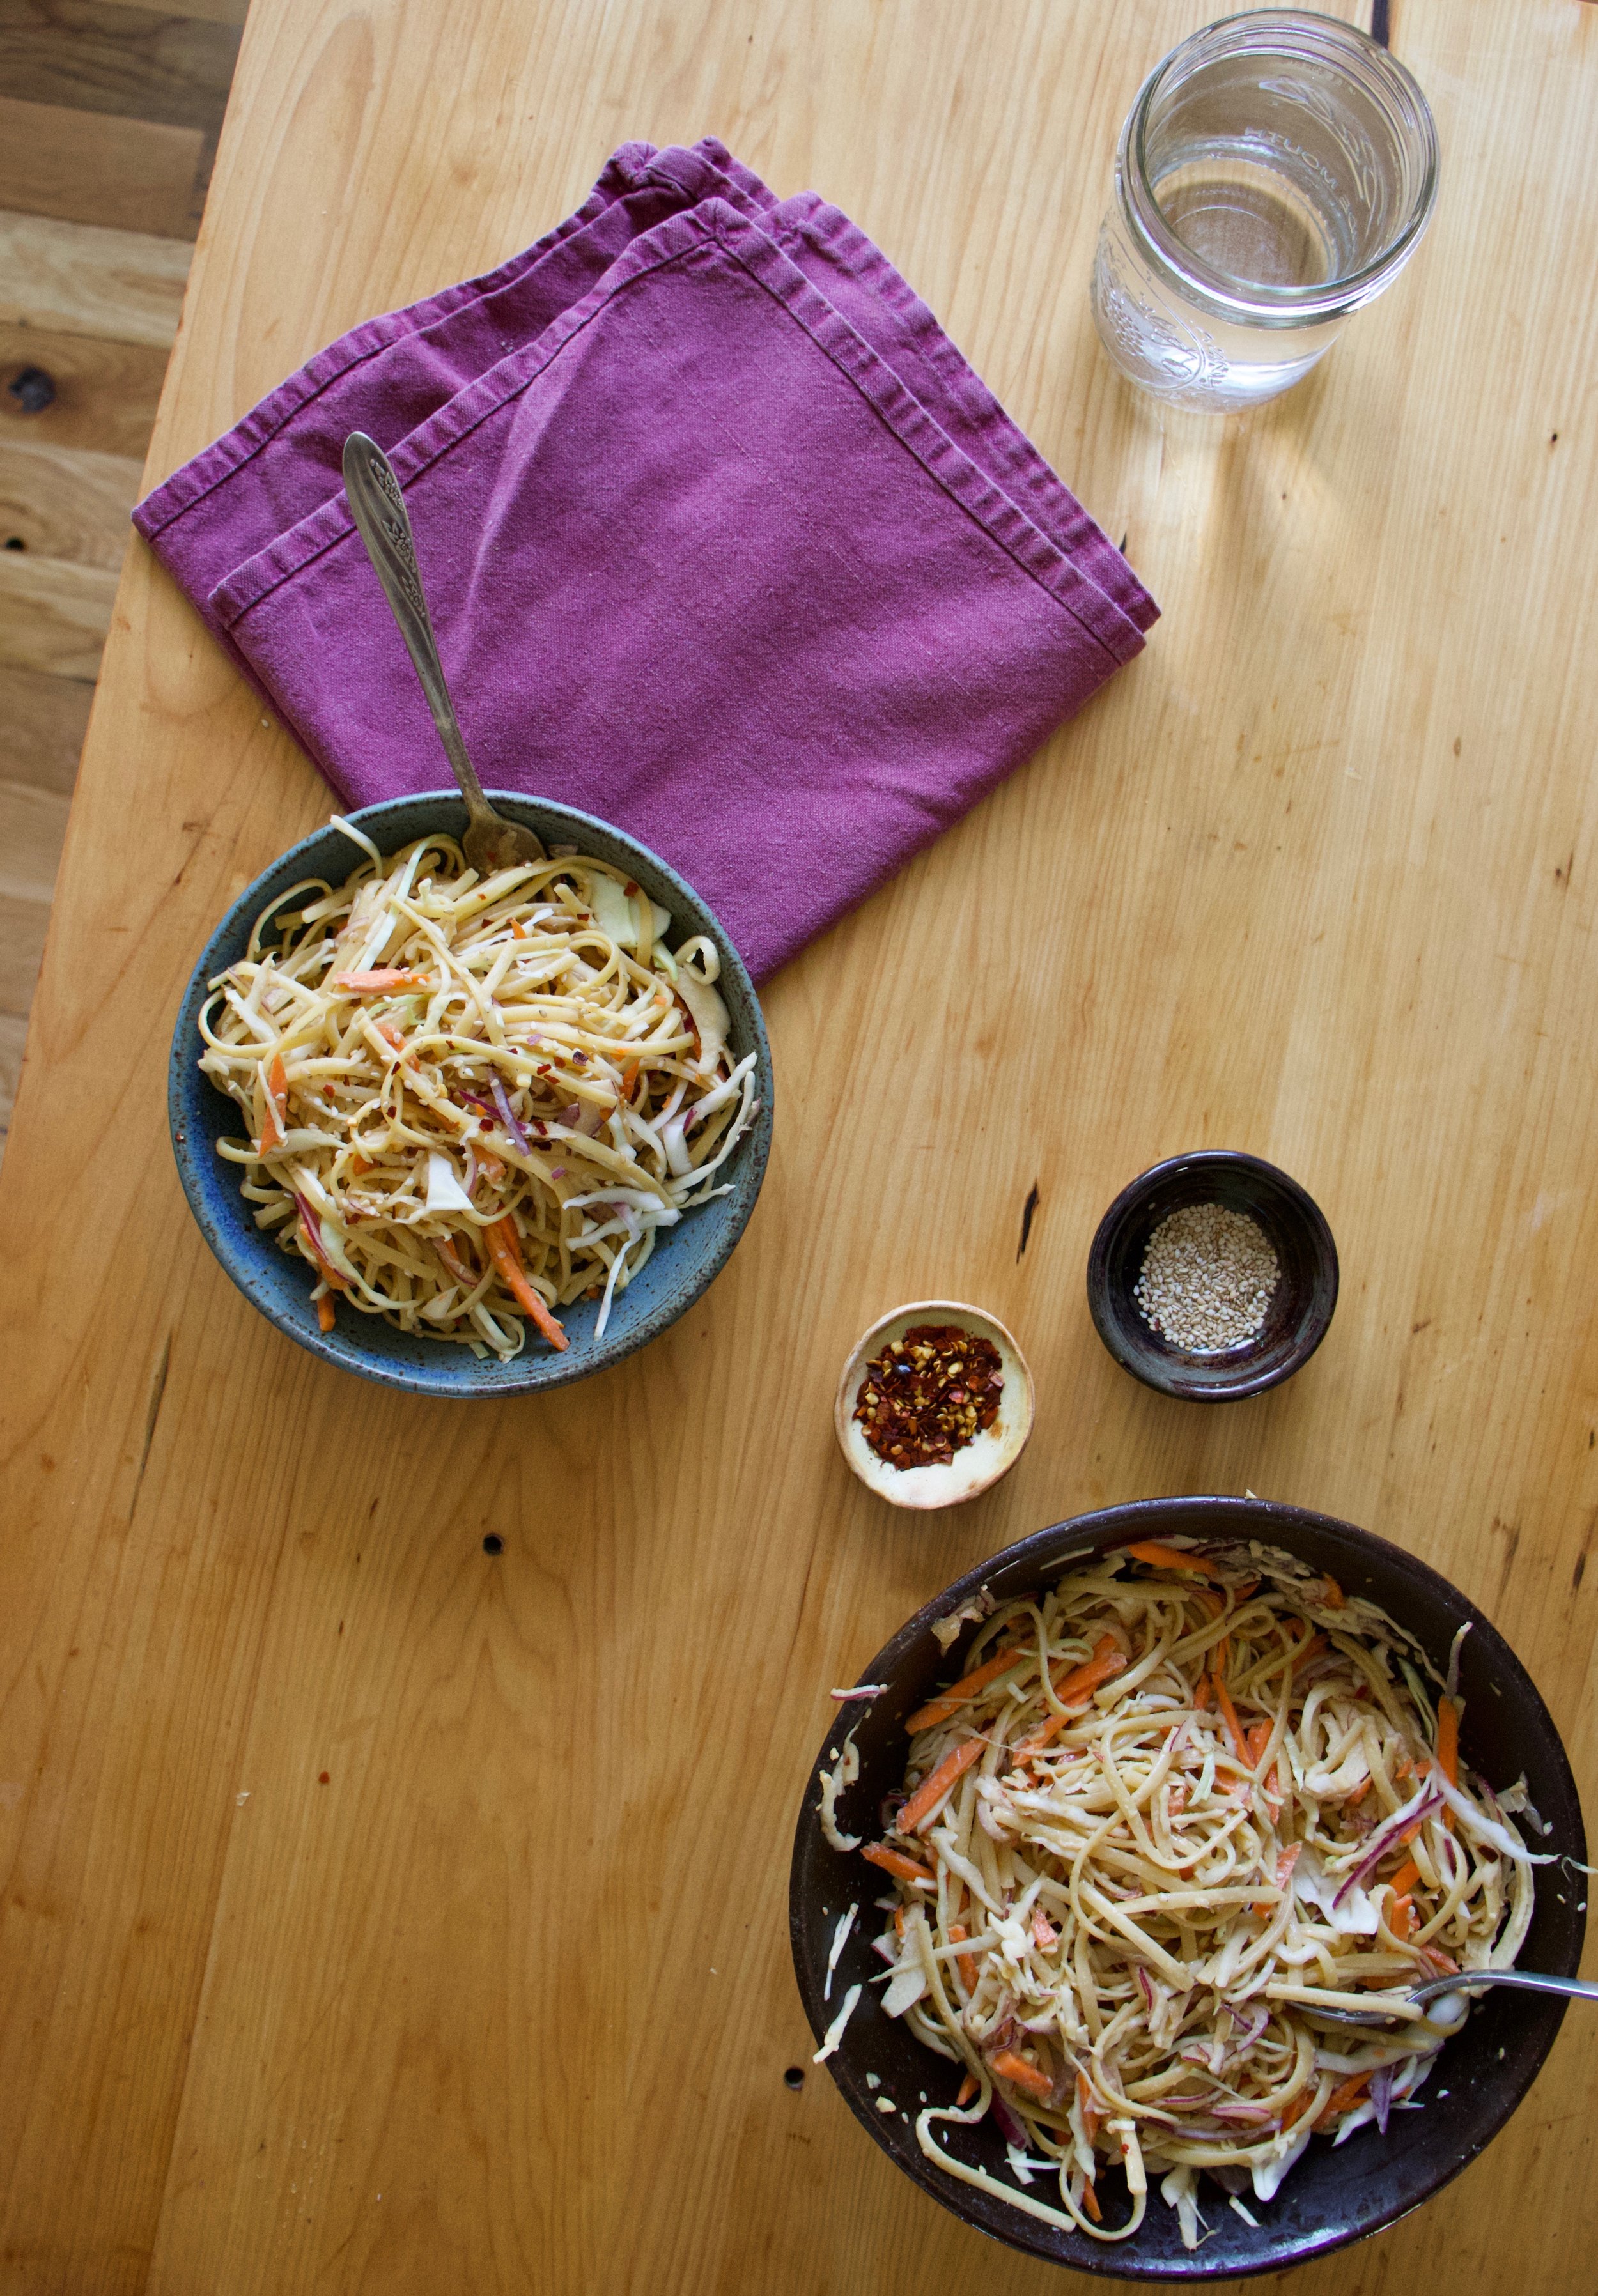
Salad season is here. Green salads, fruit salads, potato salads, and grain salads. All the salads and we are not mad about it.

This is a good grain salad using millet, which I am sightly surprised to hear that a lot of people have never had. Millet is kind of like quinoa, but not. I cooks fluffy and looks kind of the same, and is gluten free like quinoa. I think the biggest difference is that millet is slightly softer and tastes a bit more nutty. It also is really good at absorbing liquid flavors.

But who are we to compare. The main thing is that it is nutritious and delicious so we will eat it.

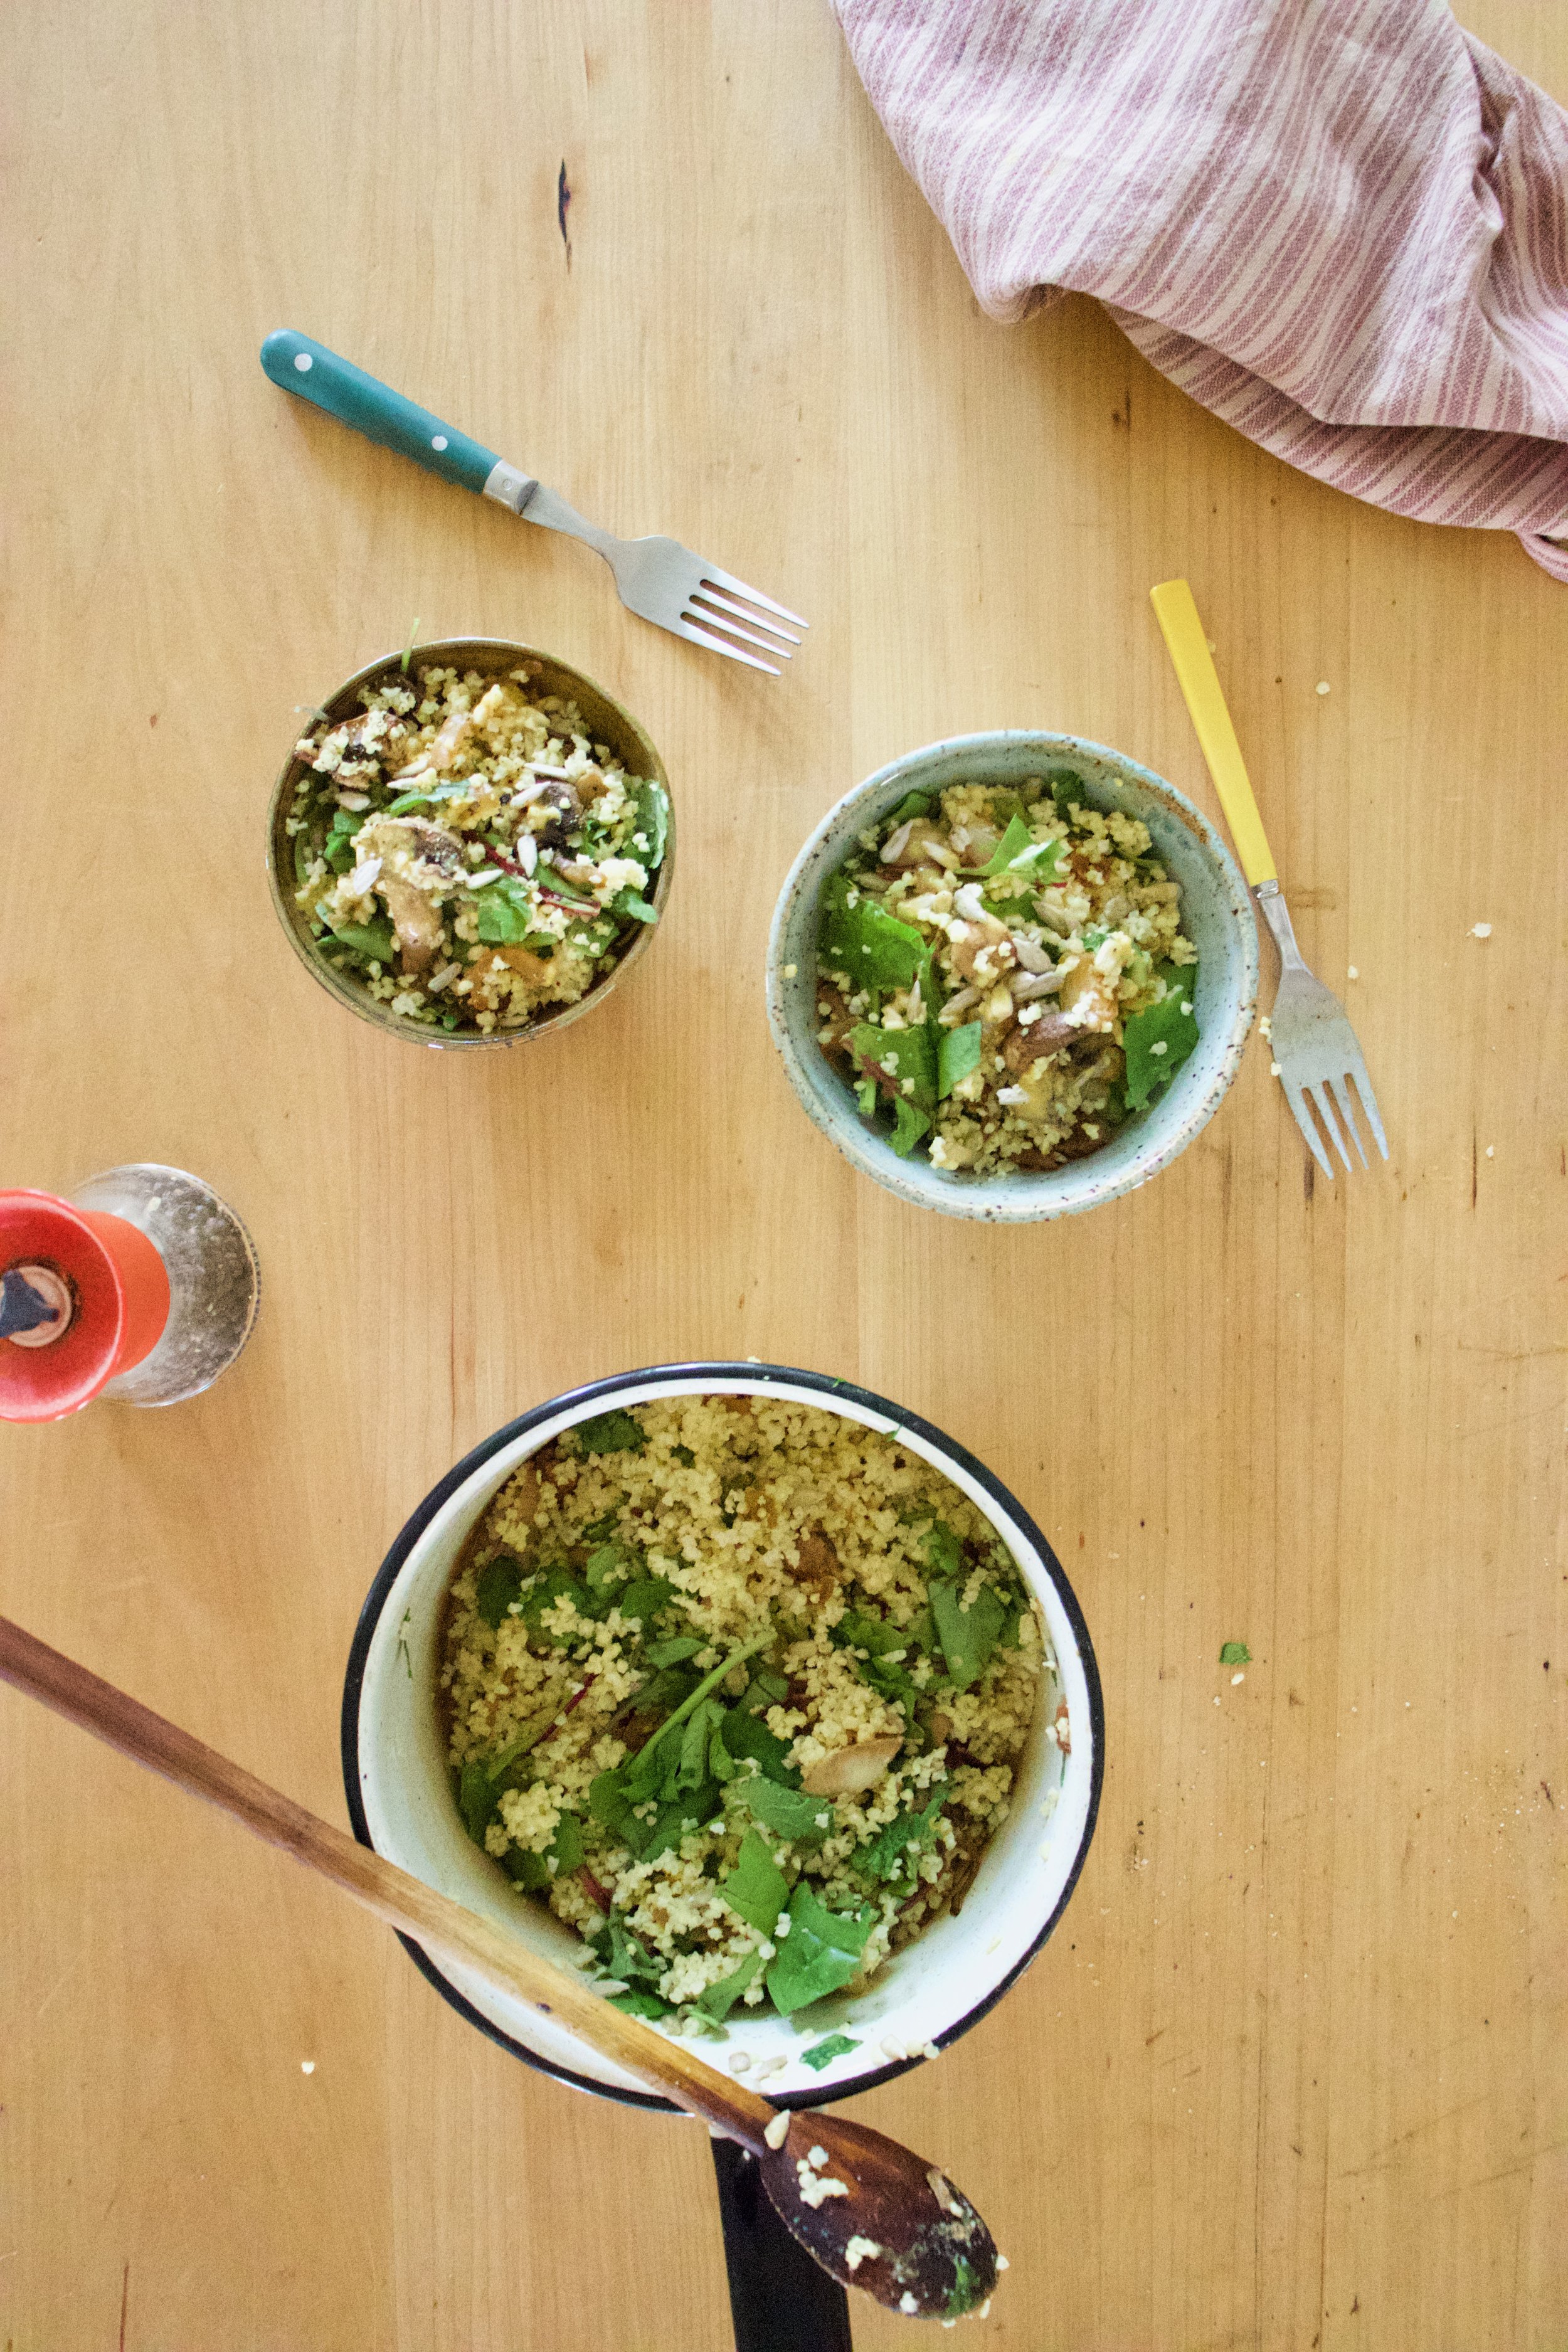
Back to the salad. This is one of those grain salads that is good cooked and served warm but only gets better with a little age (like an hour or a day) in the fridge. Served hot or cold or room tempature, and is hearty enough to be meal like but is also a fantastic addition as a side to any of you meal plans. Like maybe a BBQ? Whatever the occasion, or non occasion, this is just a really good grain salad situation and I think you will be pleased, smiling all smiles while eating it.

To the millet salad.

IMG_9091.jpg

The stuff. Millet, a couple handful of greens, a few mushrooms, an onion, dijon mustard, a little maple syrup, red wine vinegar, a lemon, a couple cloves or garlic, some toasted sunflower seeds, and salt and pepper.

IMG_9099.jpg

Start by giving the millet a little toast, just enough to really up the nutty flavor and make it that much more yummy. It only takes a few minutes in a skillet on medium heat. Not an entirely necessary step, but you should do it.

IMG_9107.jpg

Toasted millet goes into pot with water. Bring pot to a boil and then turn to the lowest simmer and cover.

IMG_9112.jpg
IMG_9128.jpg

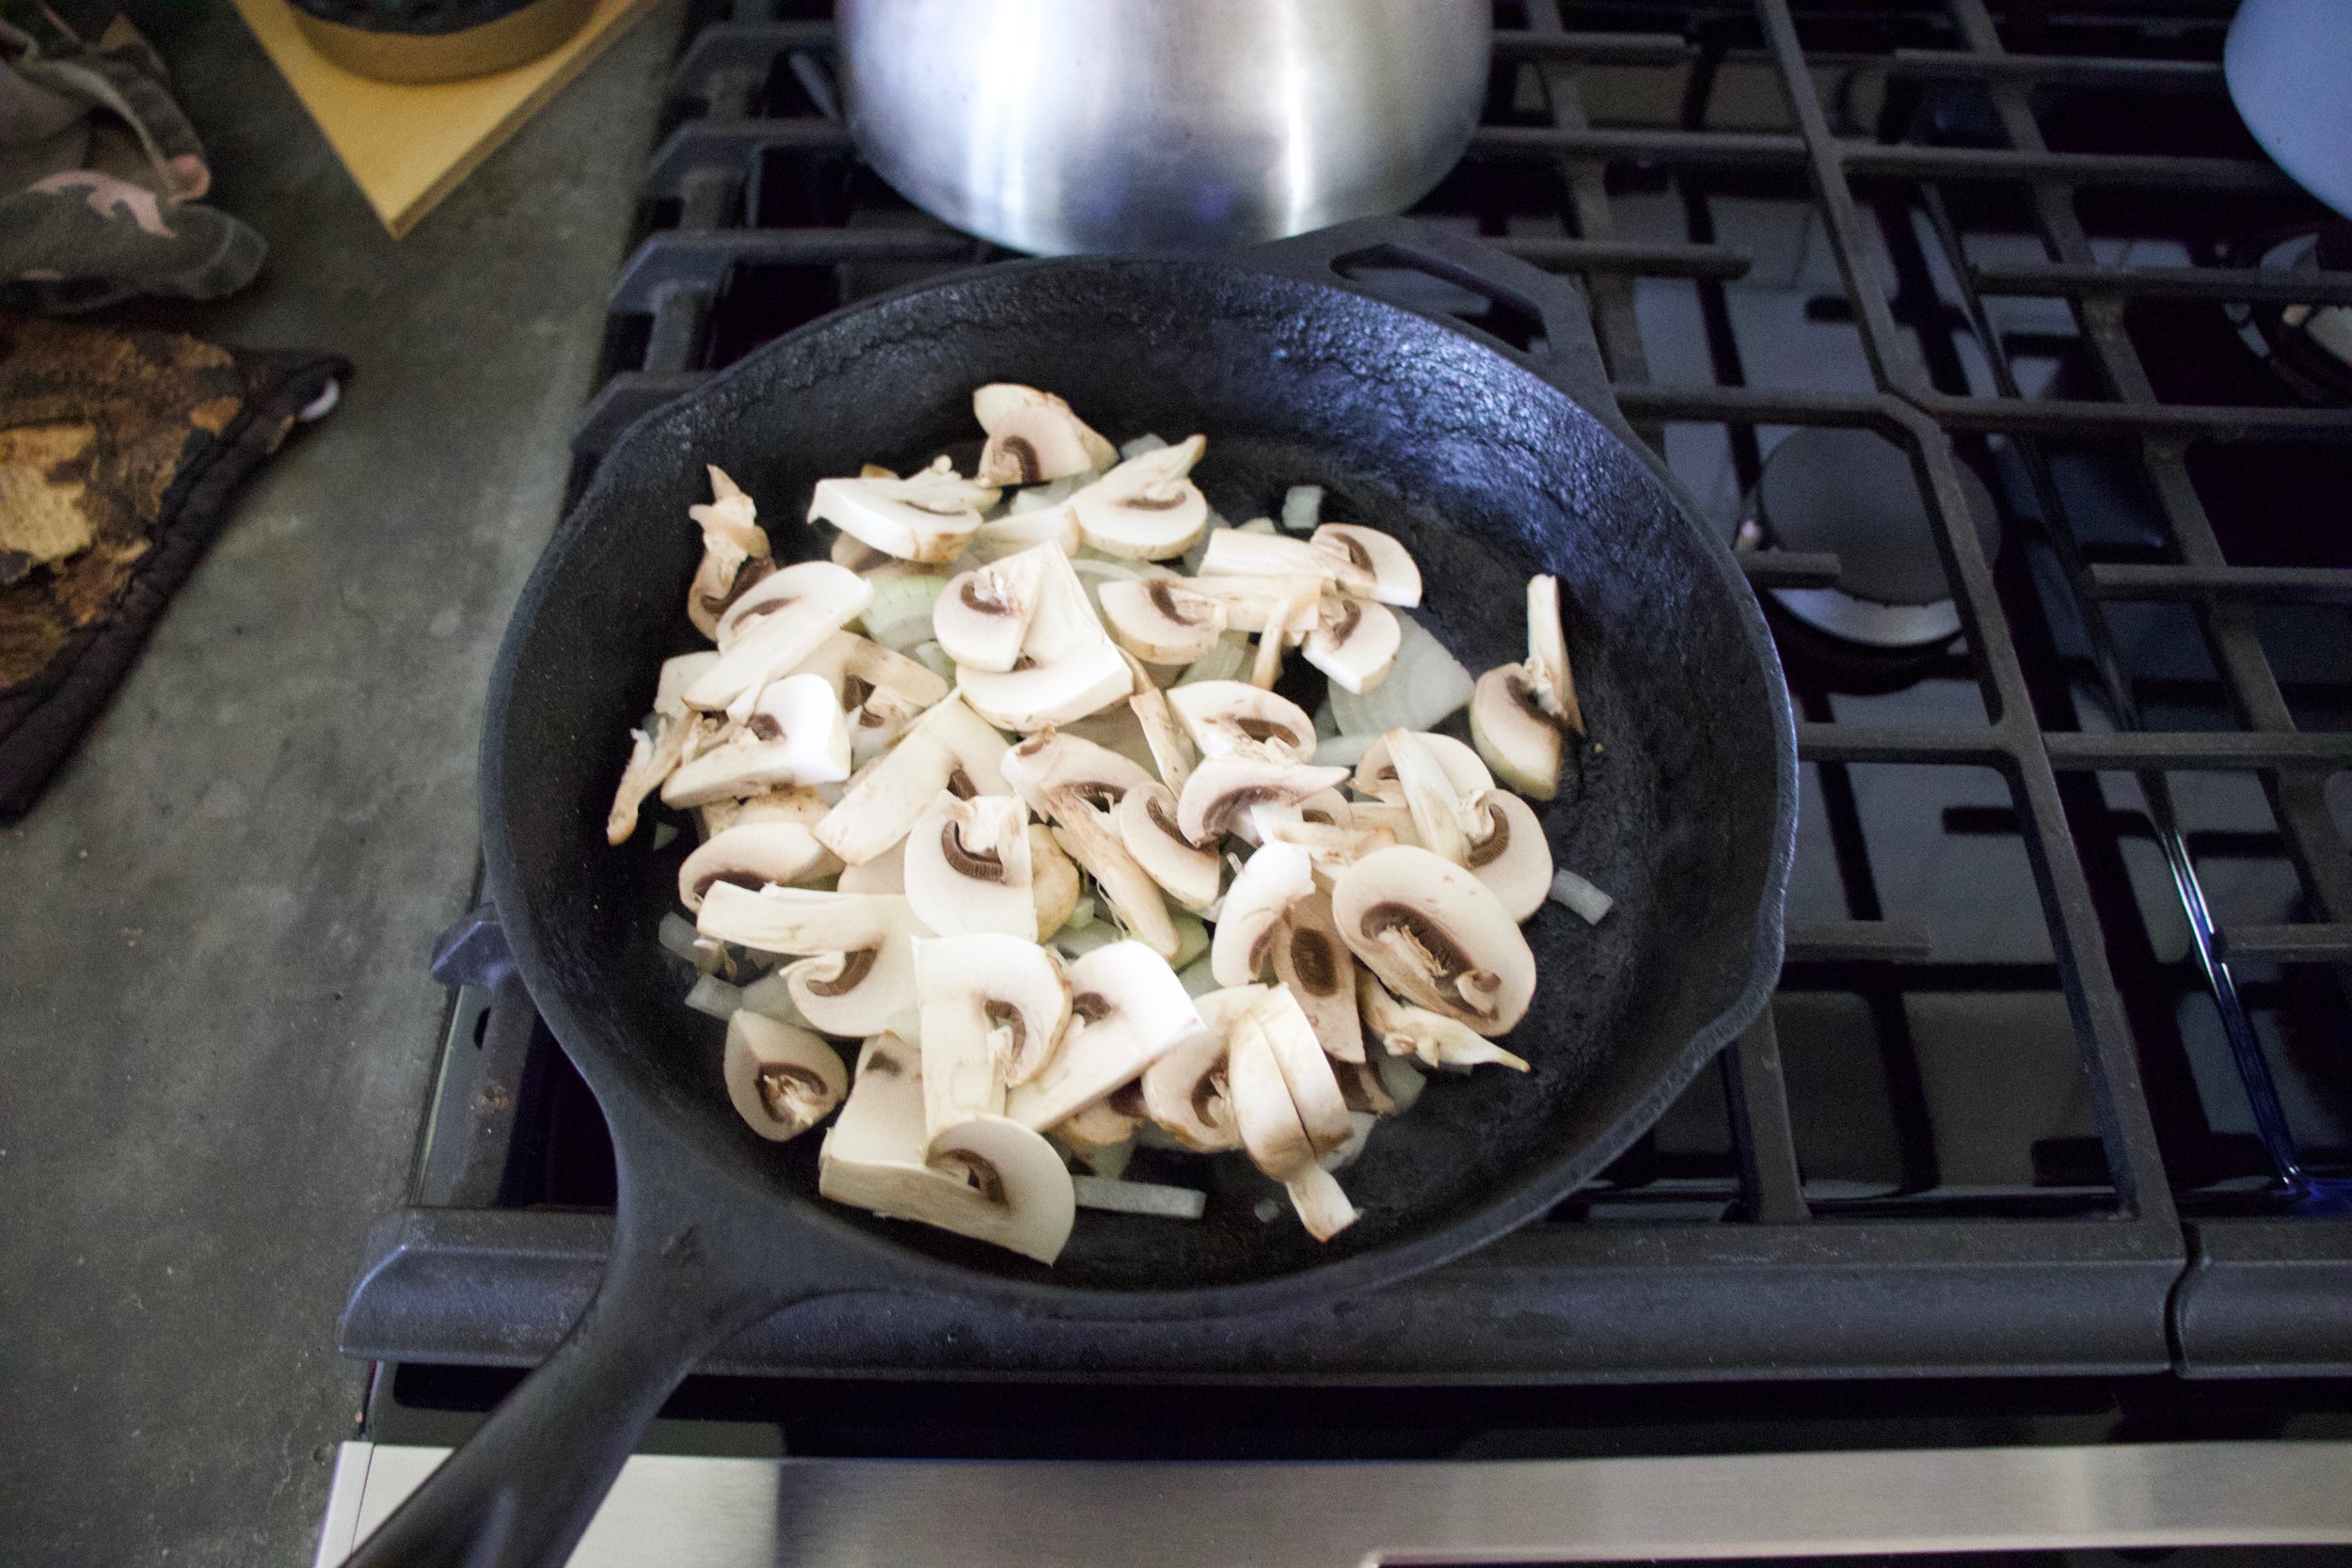
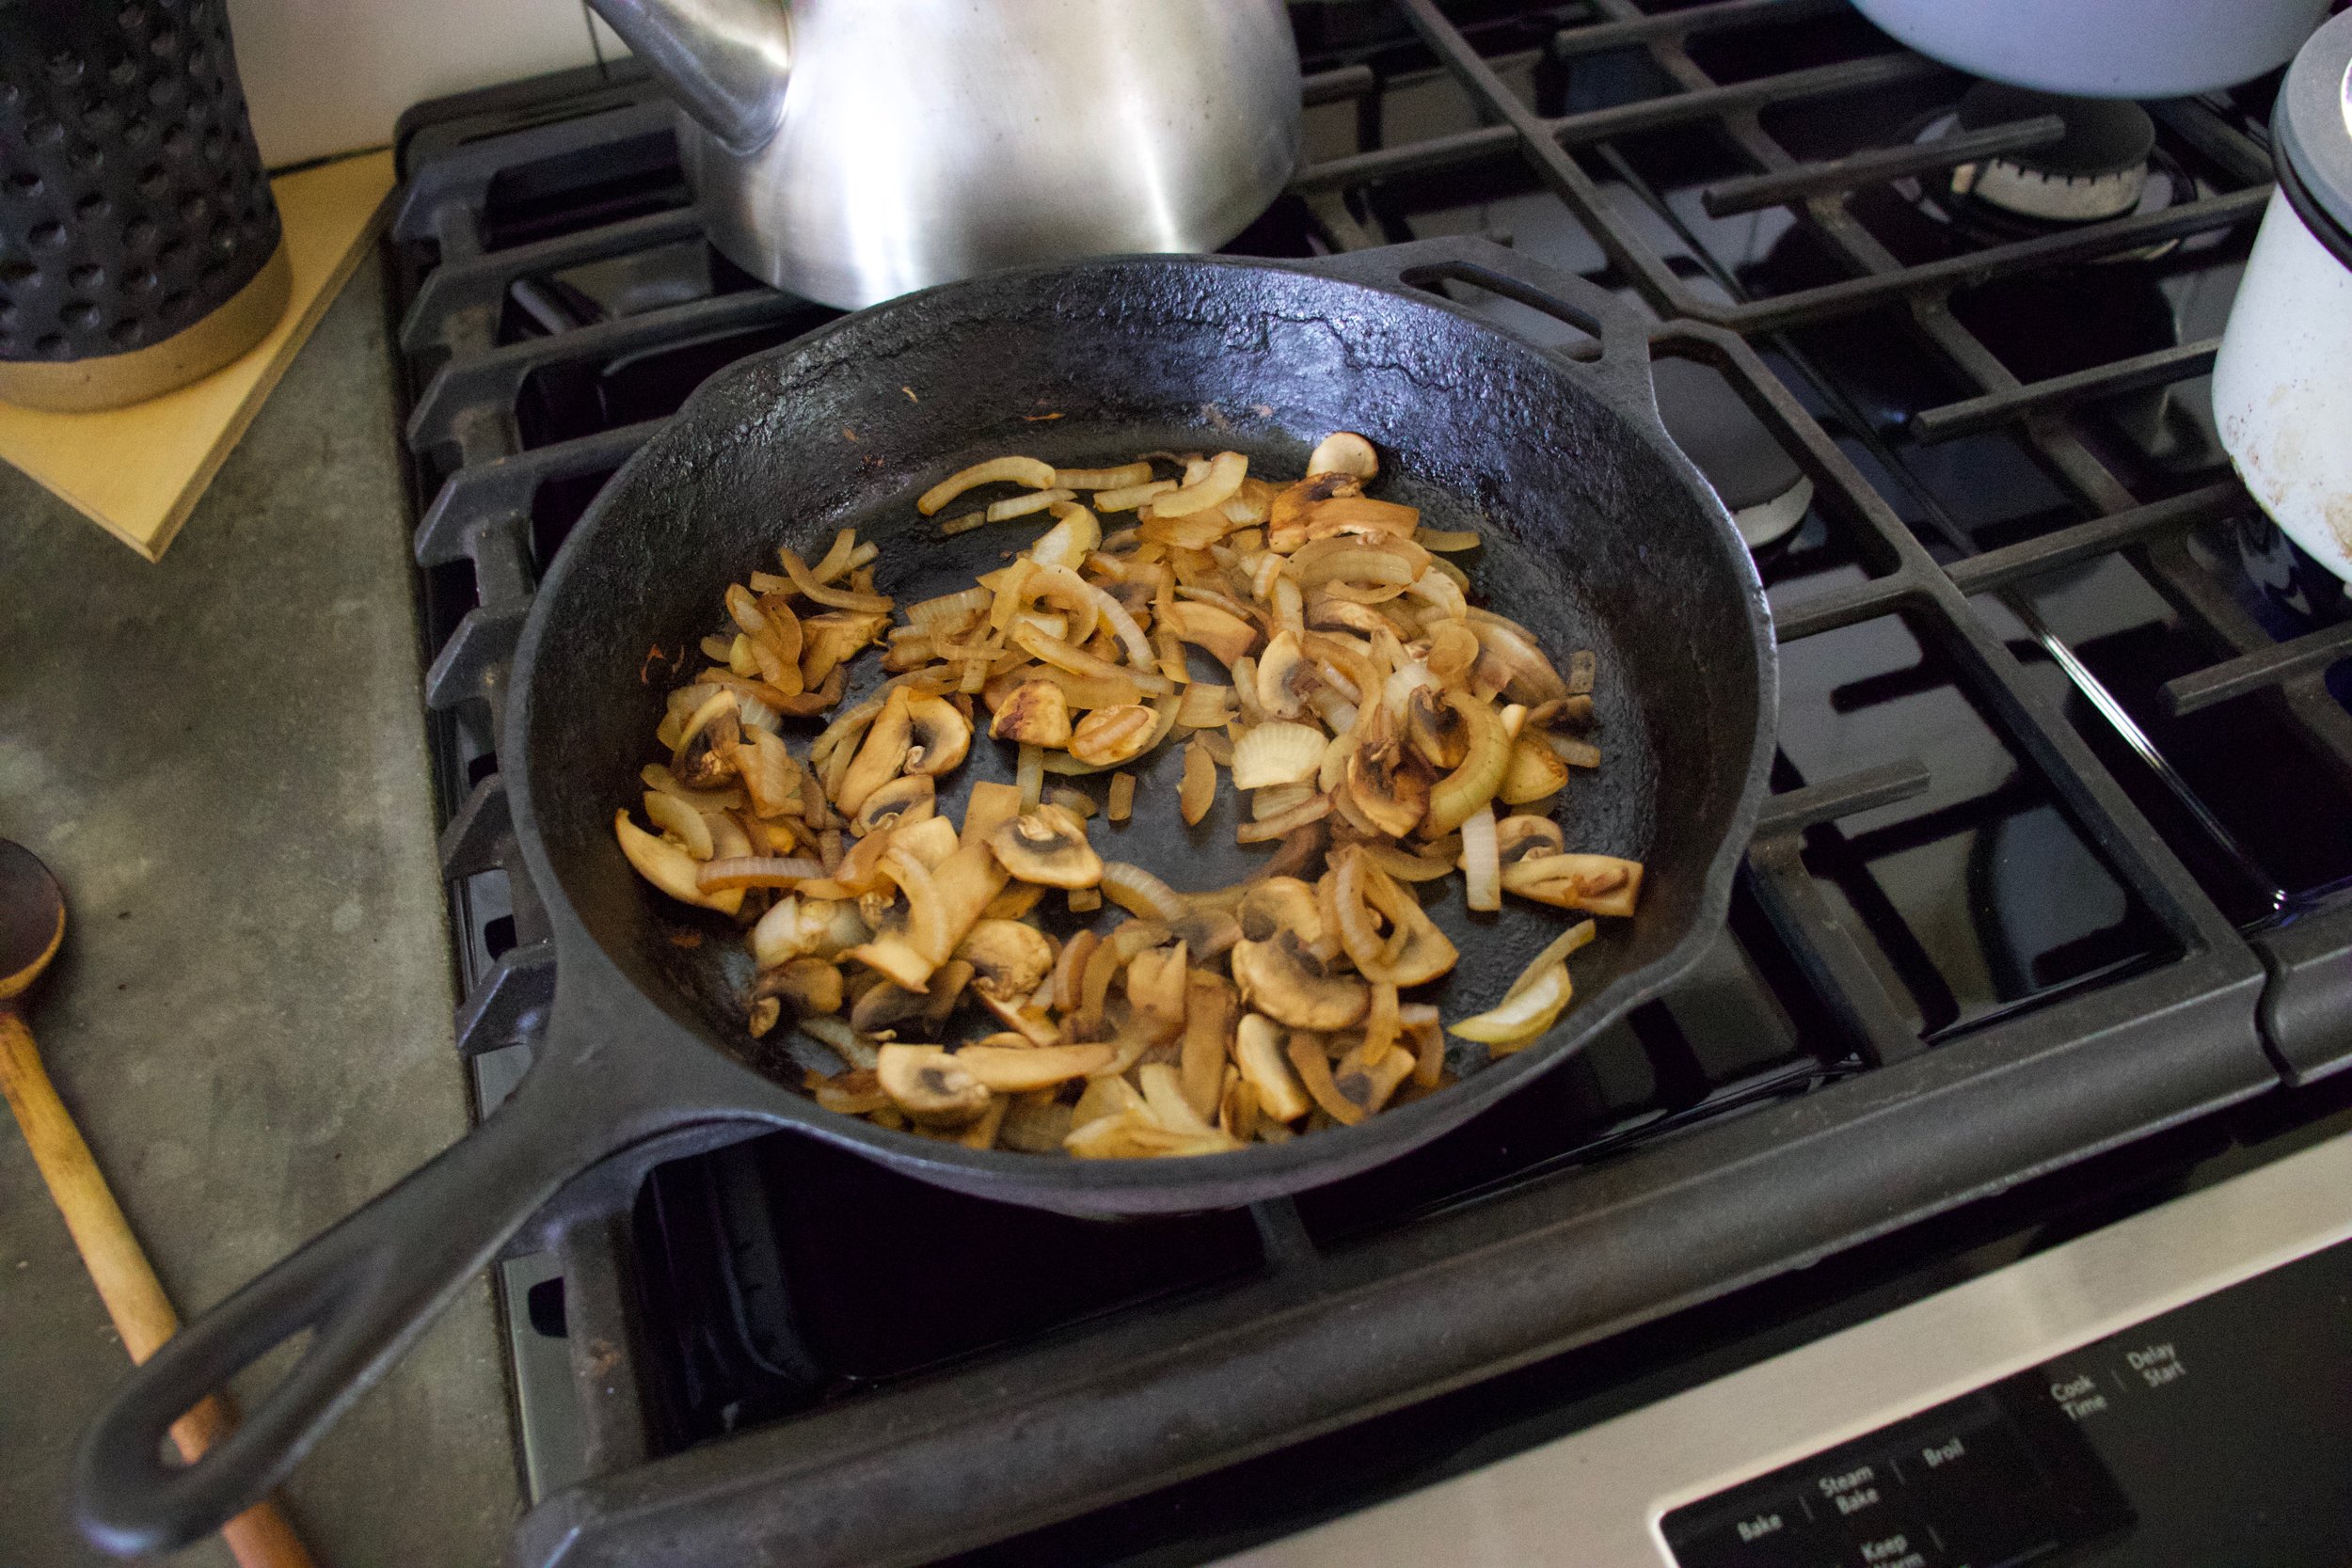
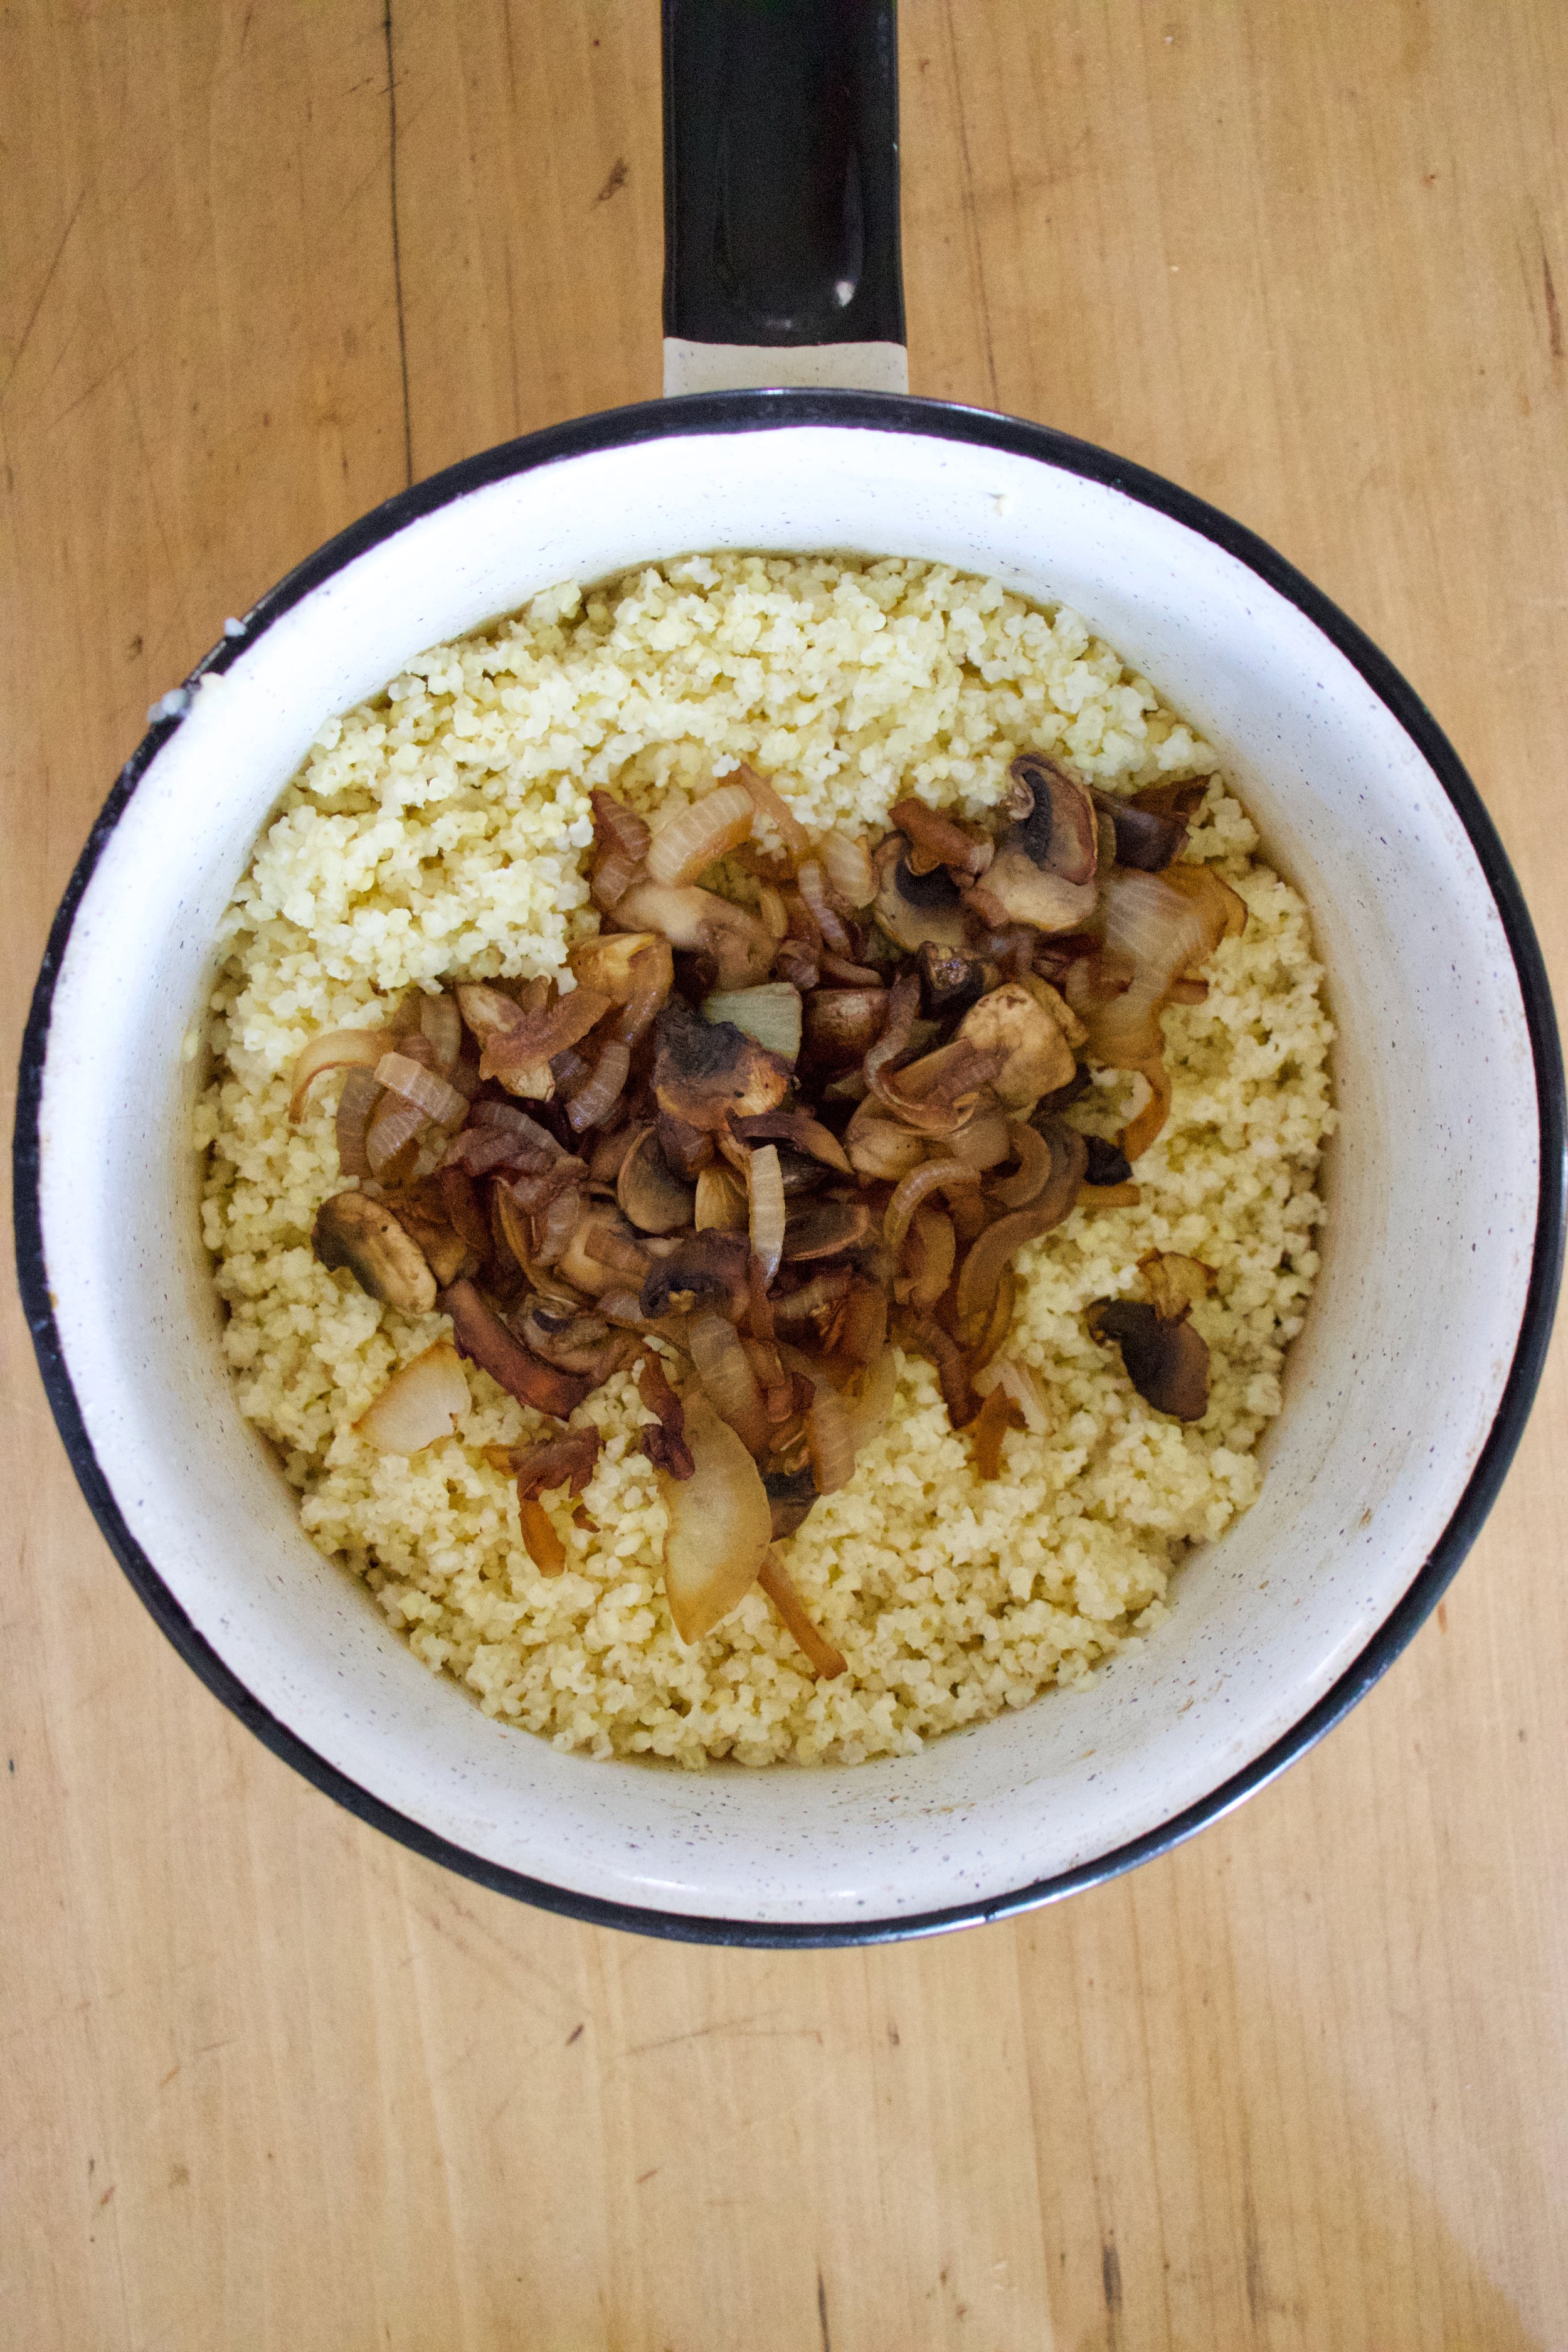
While millet is cooking, get to the mushrooms and onions. Chop the onion thin and small and the mushrooms thin and small as well. Place them into the skillet with a drizzle of oil and place on medium heat. Mix around every now and then and cook until the mushrooms and onions are soft and a nice golden brown.

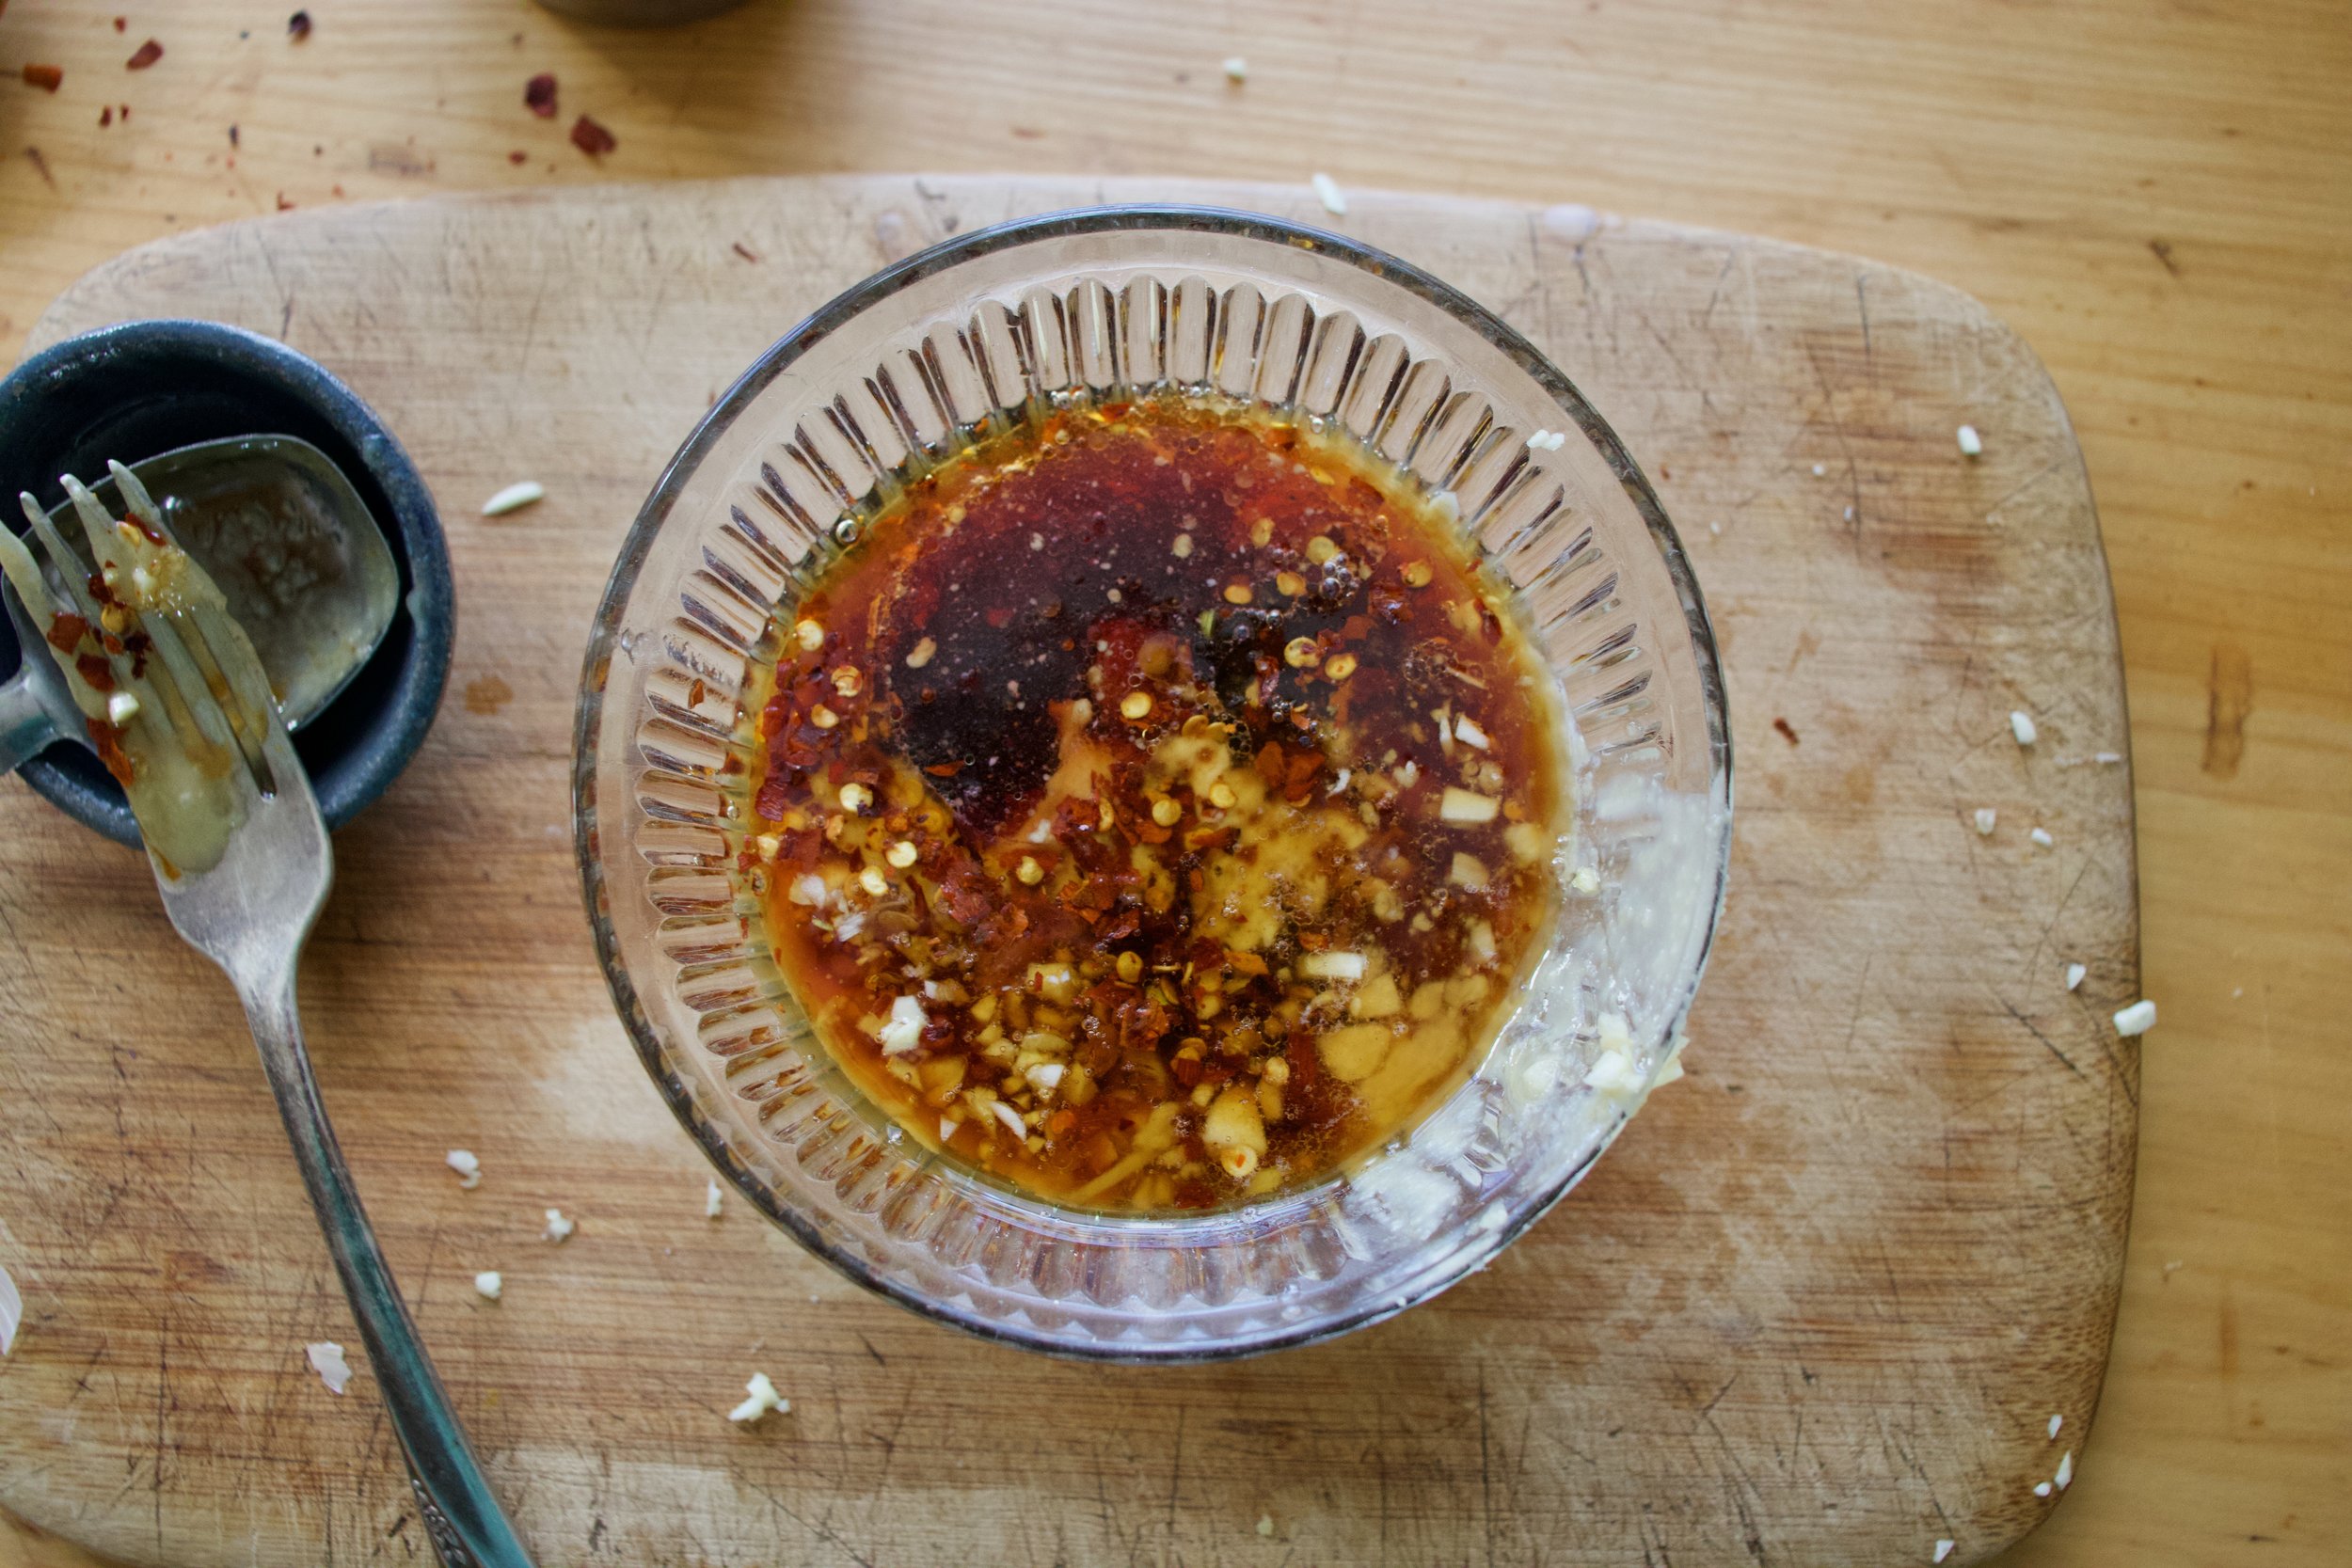
And make the vinaigrette. Minced garlic, mustard, vinegar, the juice of the lemon, and maple syrup get put into one place.

IMG_9137.jpg

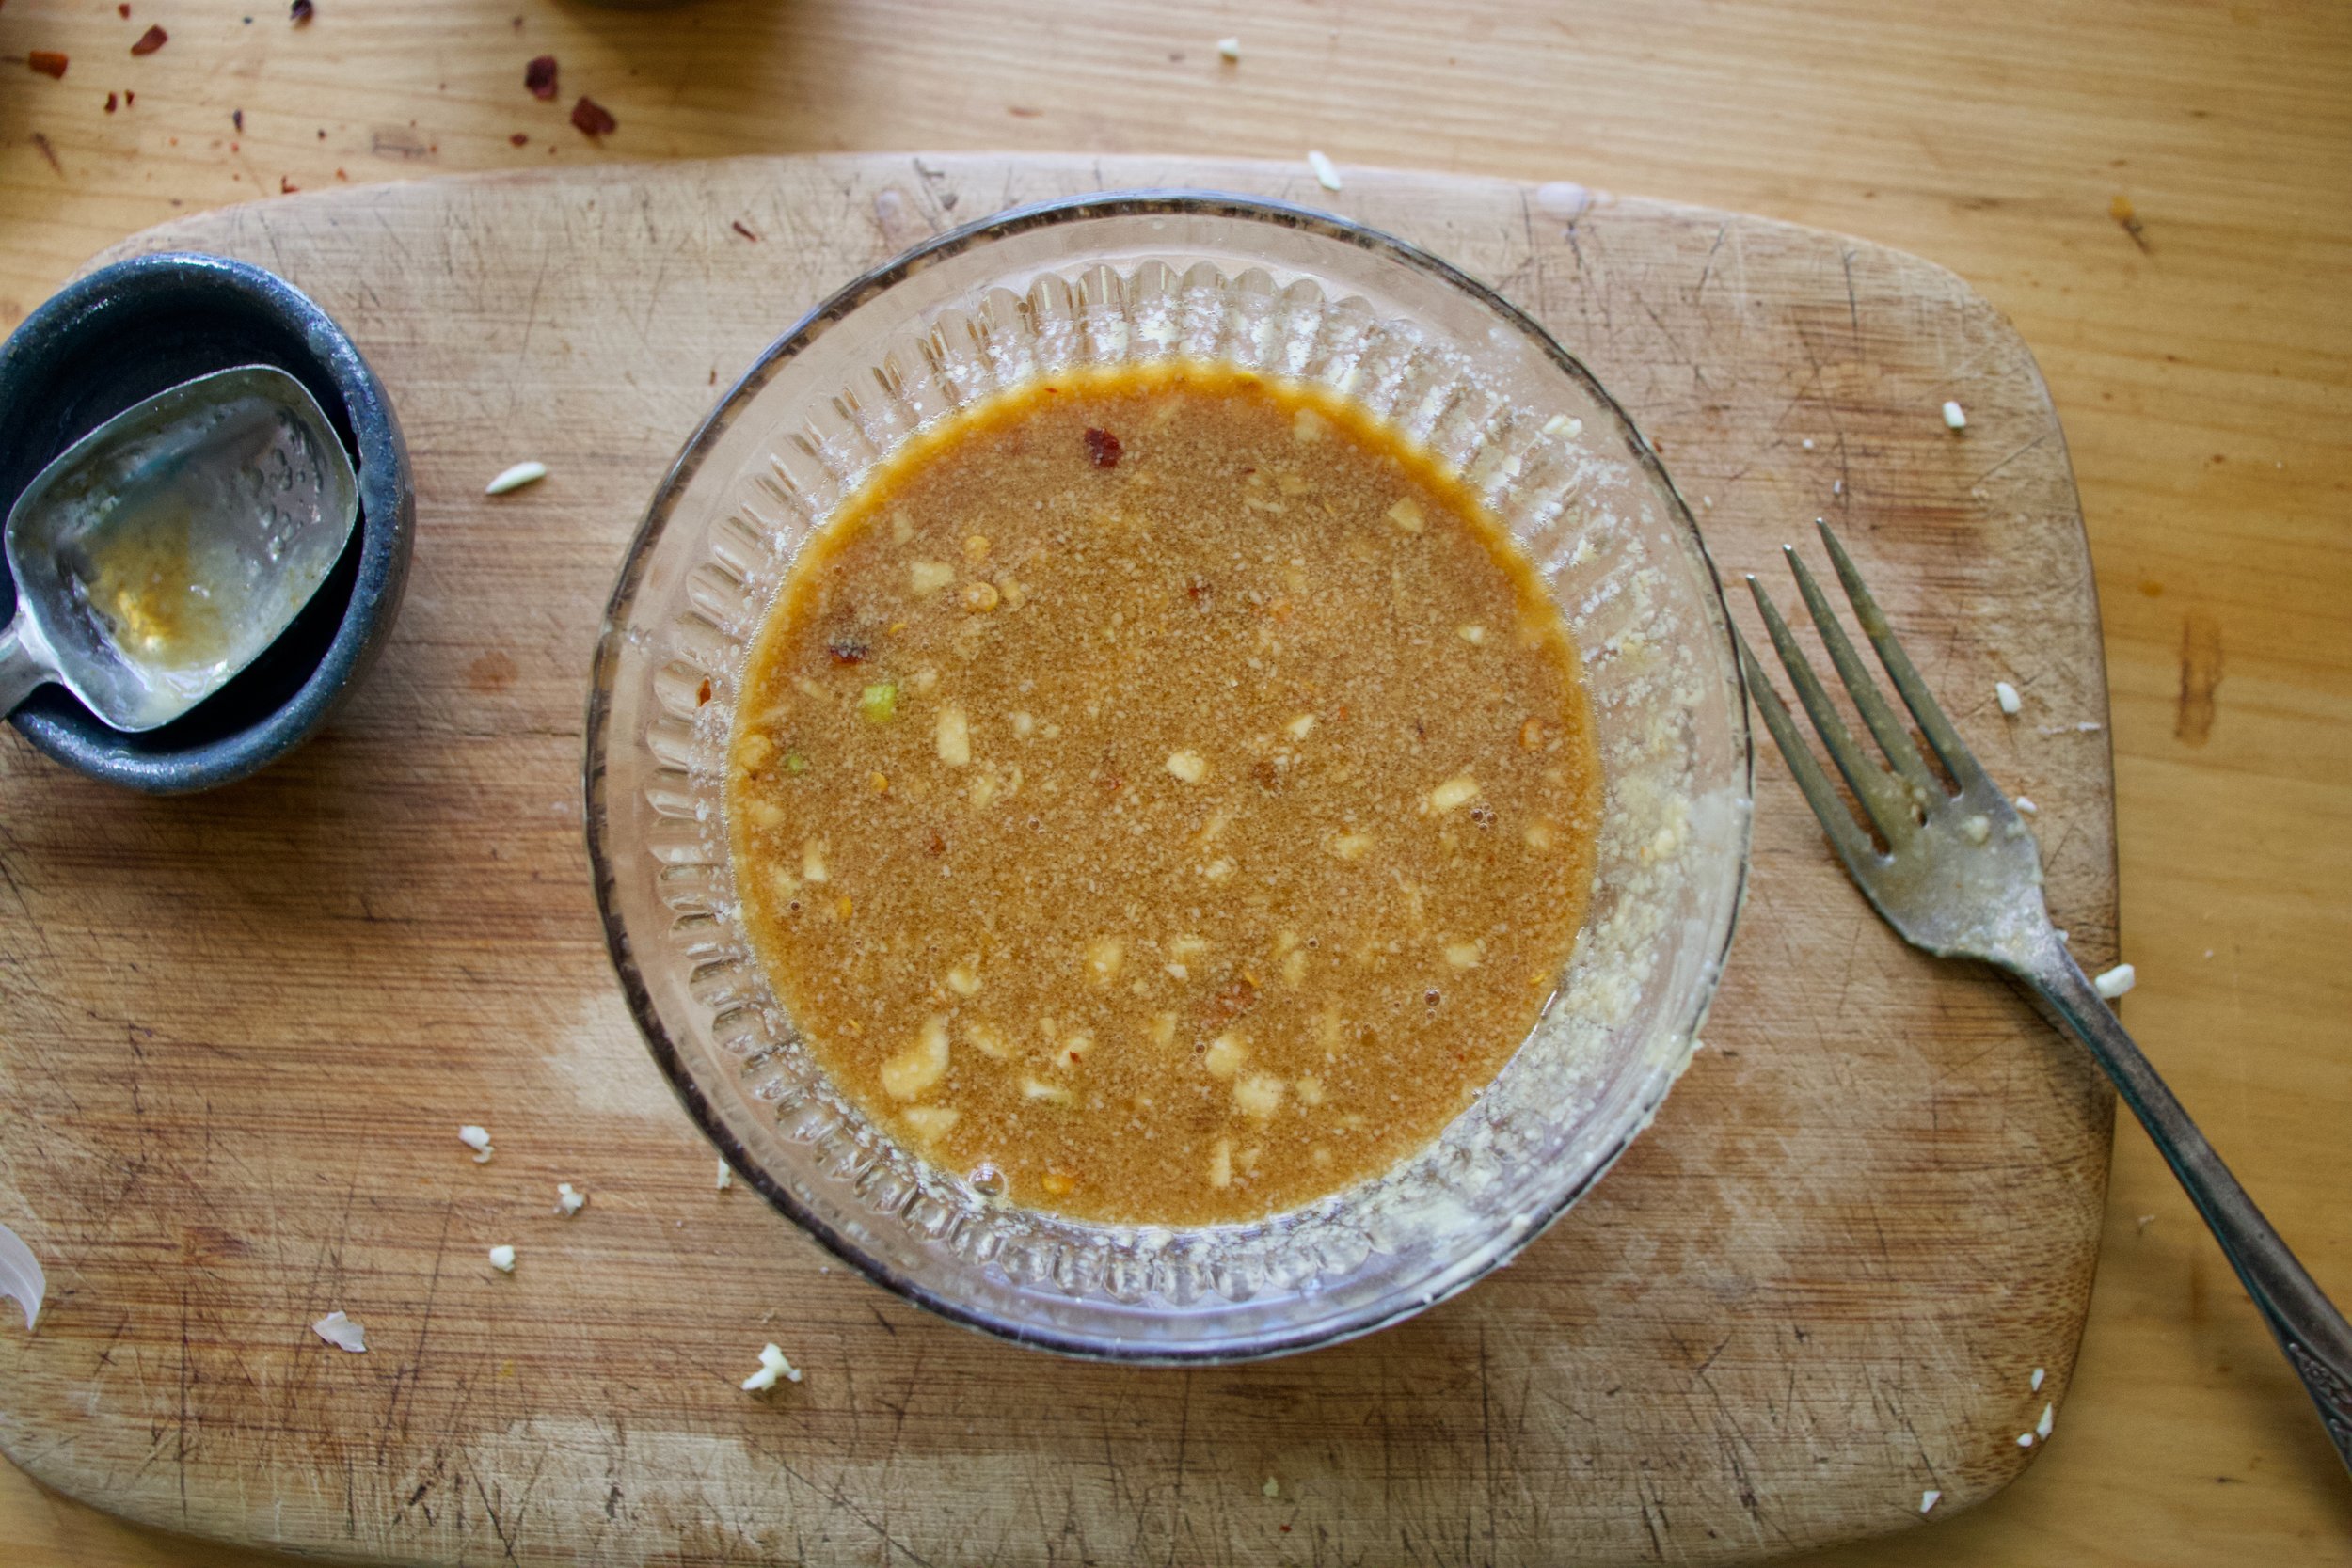
Mixed and now all is one.

IMG_9147.jpg

Millet. Cooked and fluffed and ready to go.

IMG_9158.jpg
IMG_9177.jpg

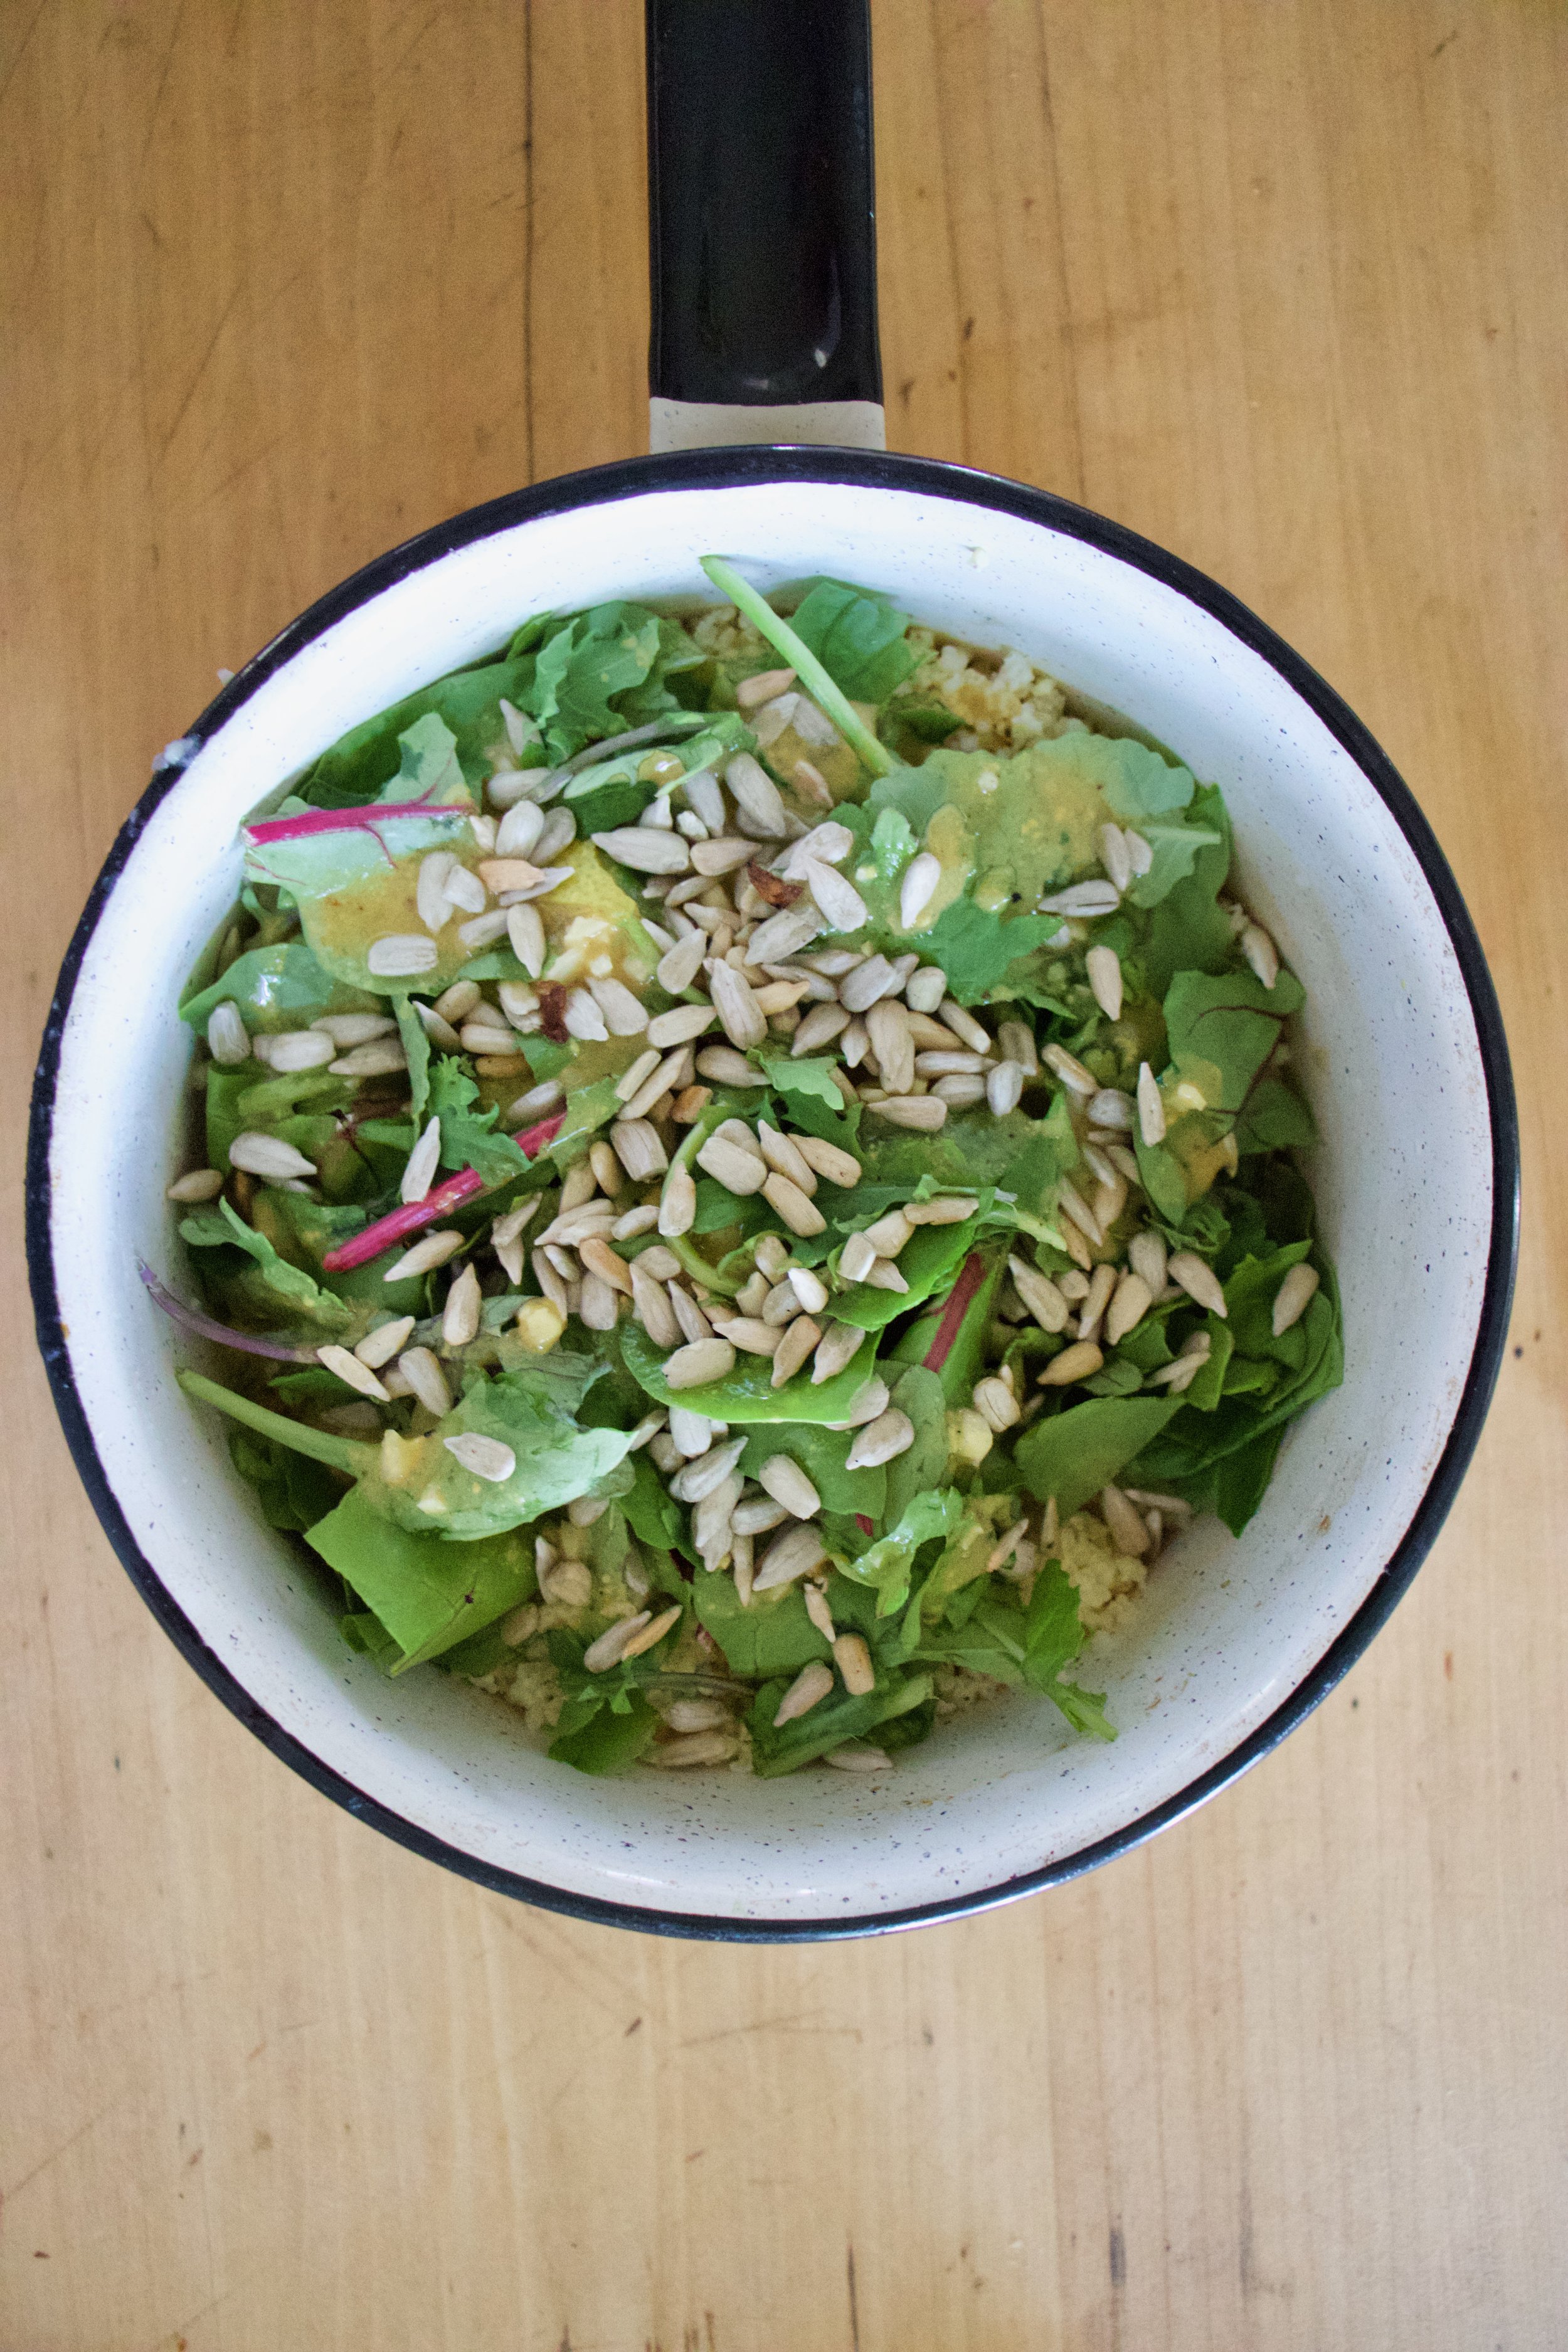
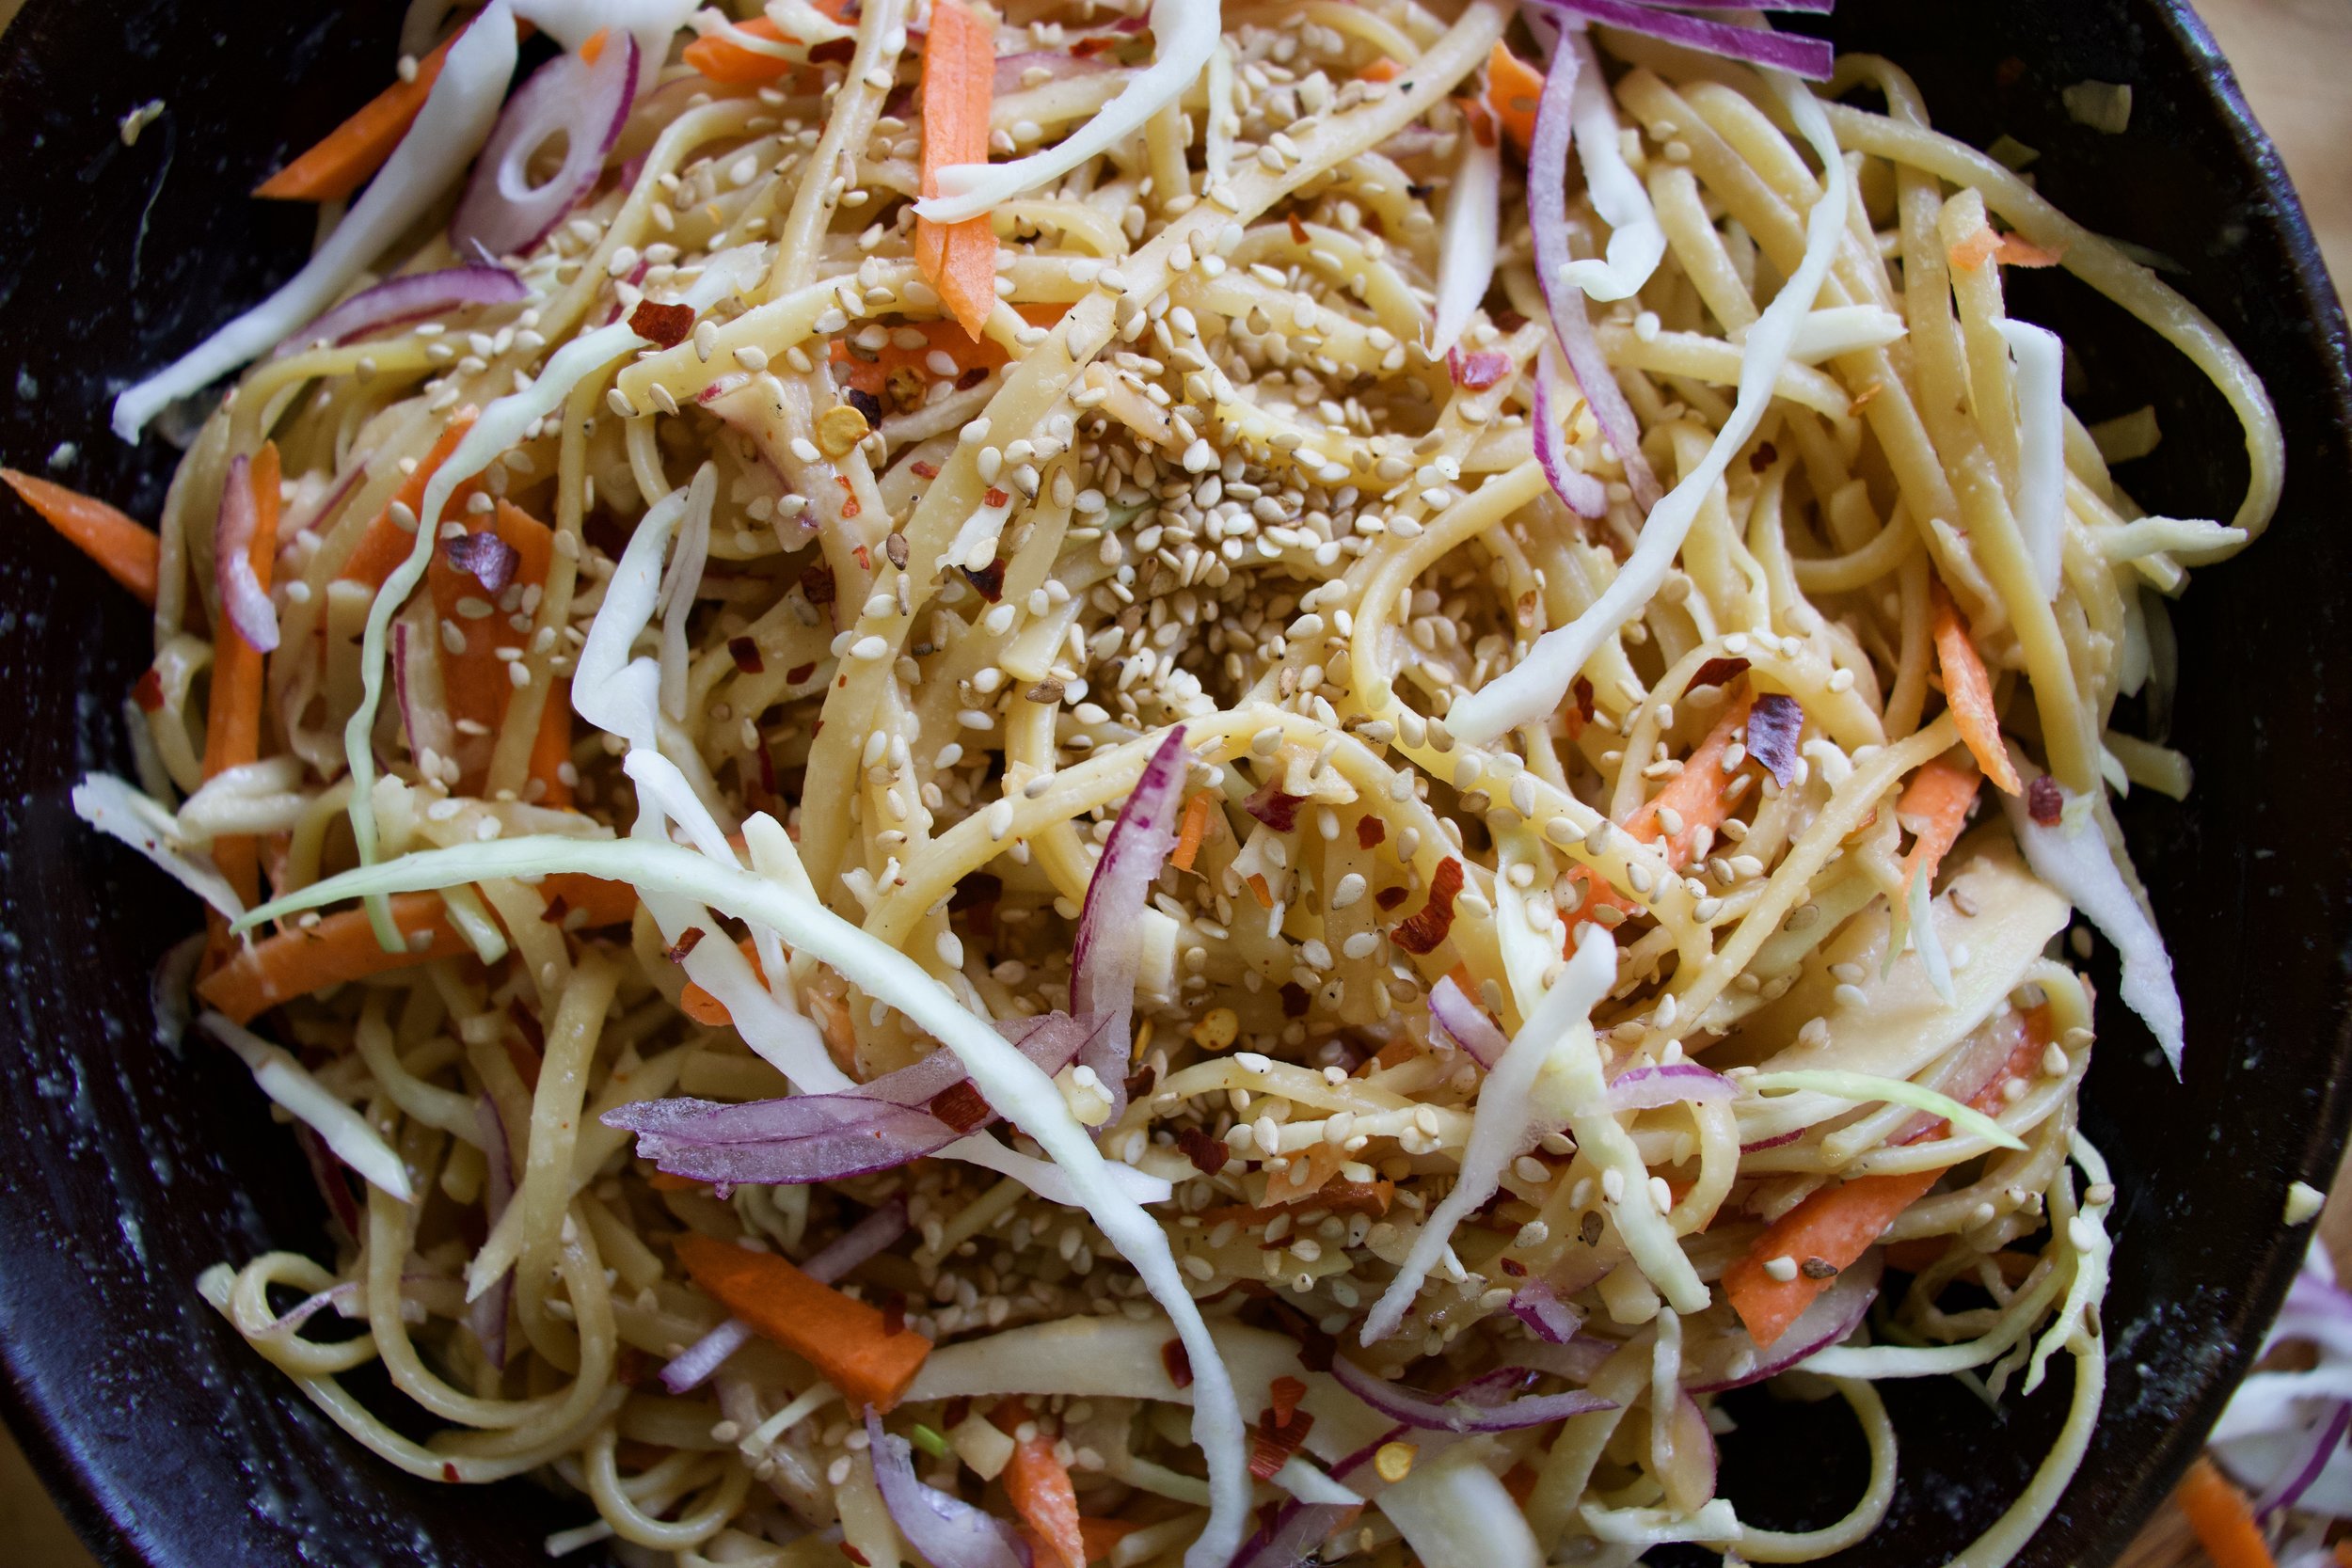
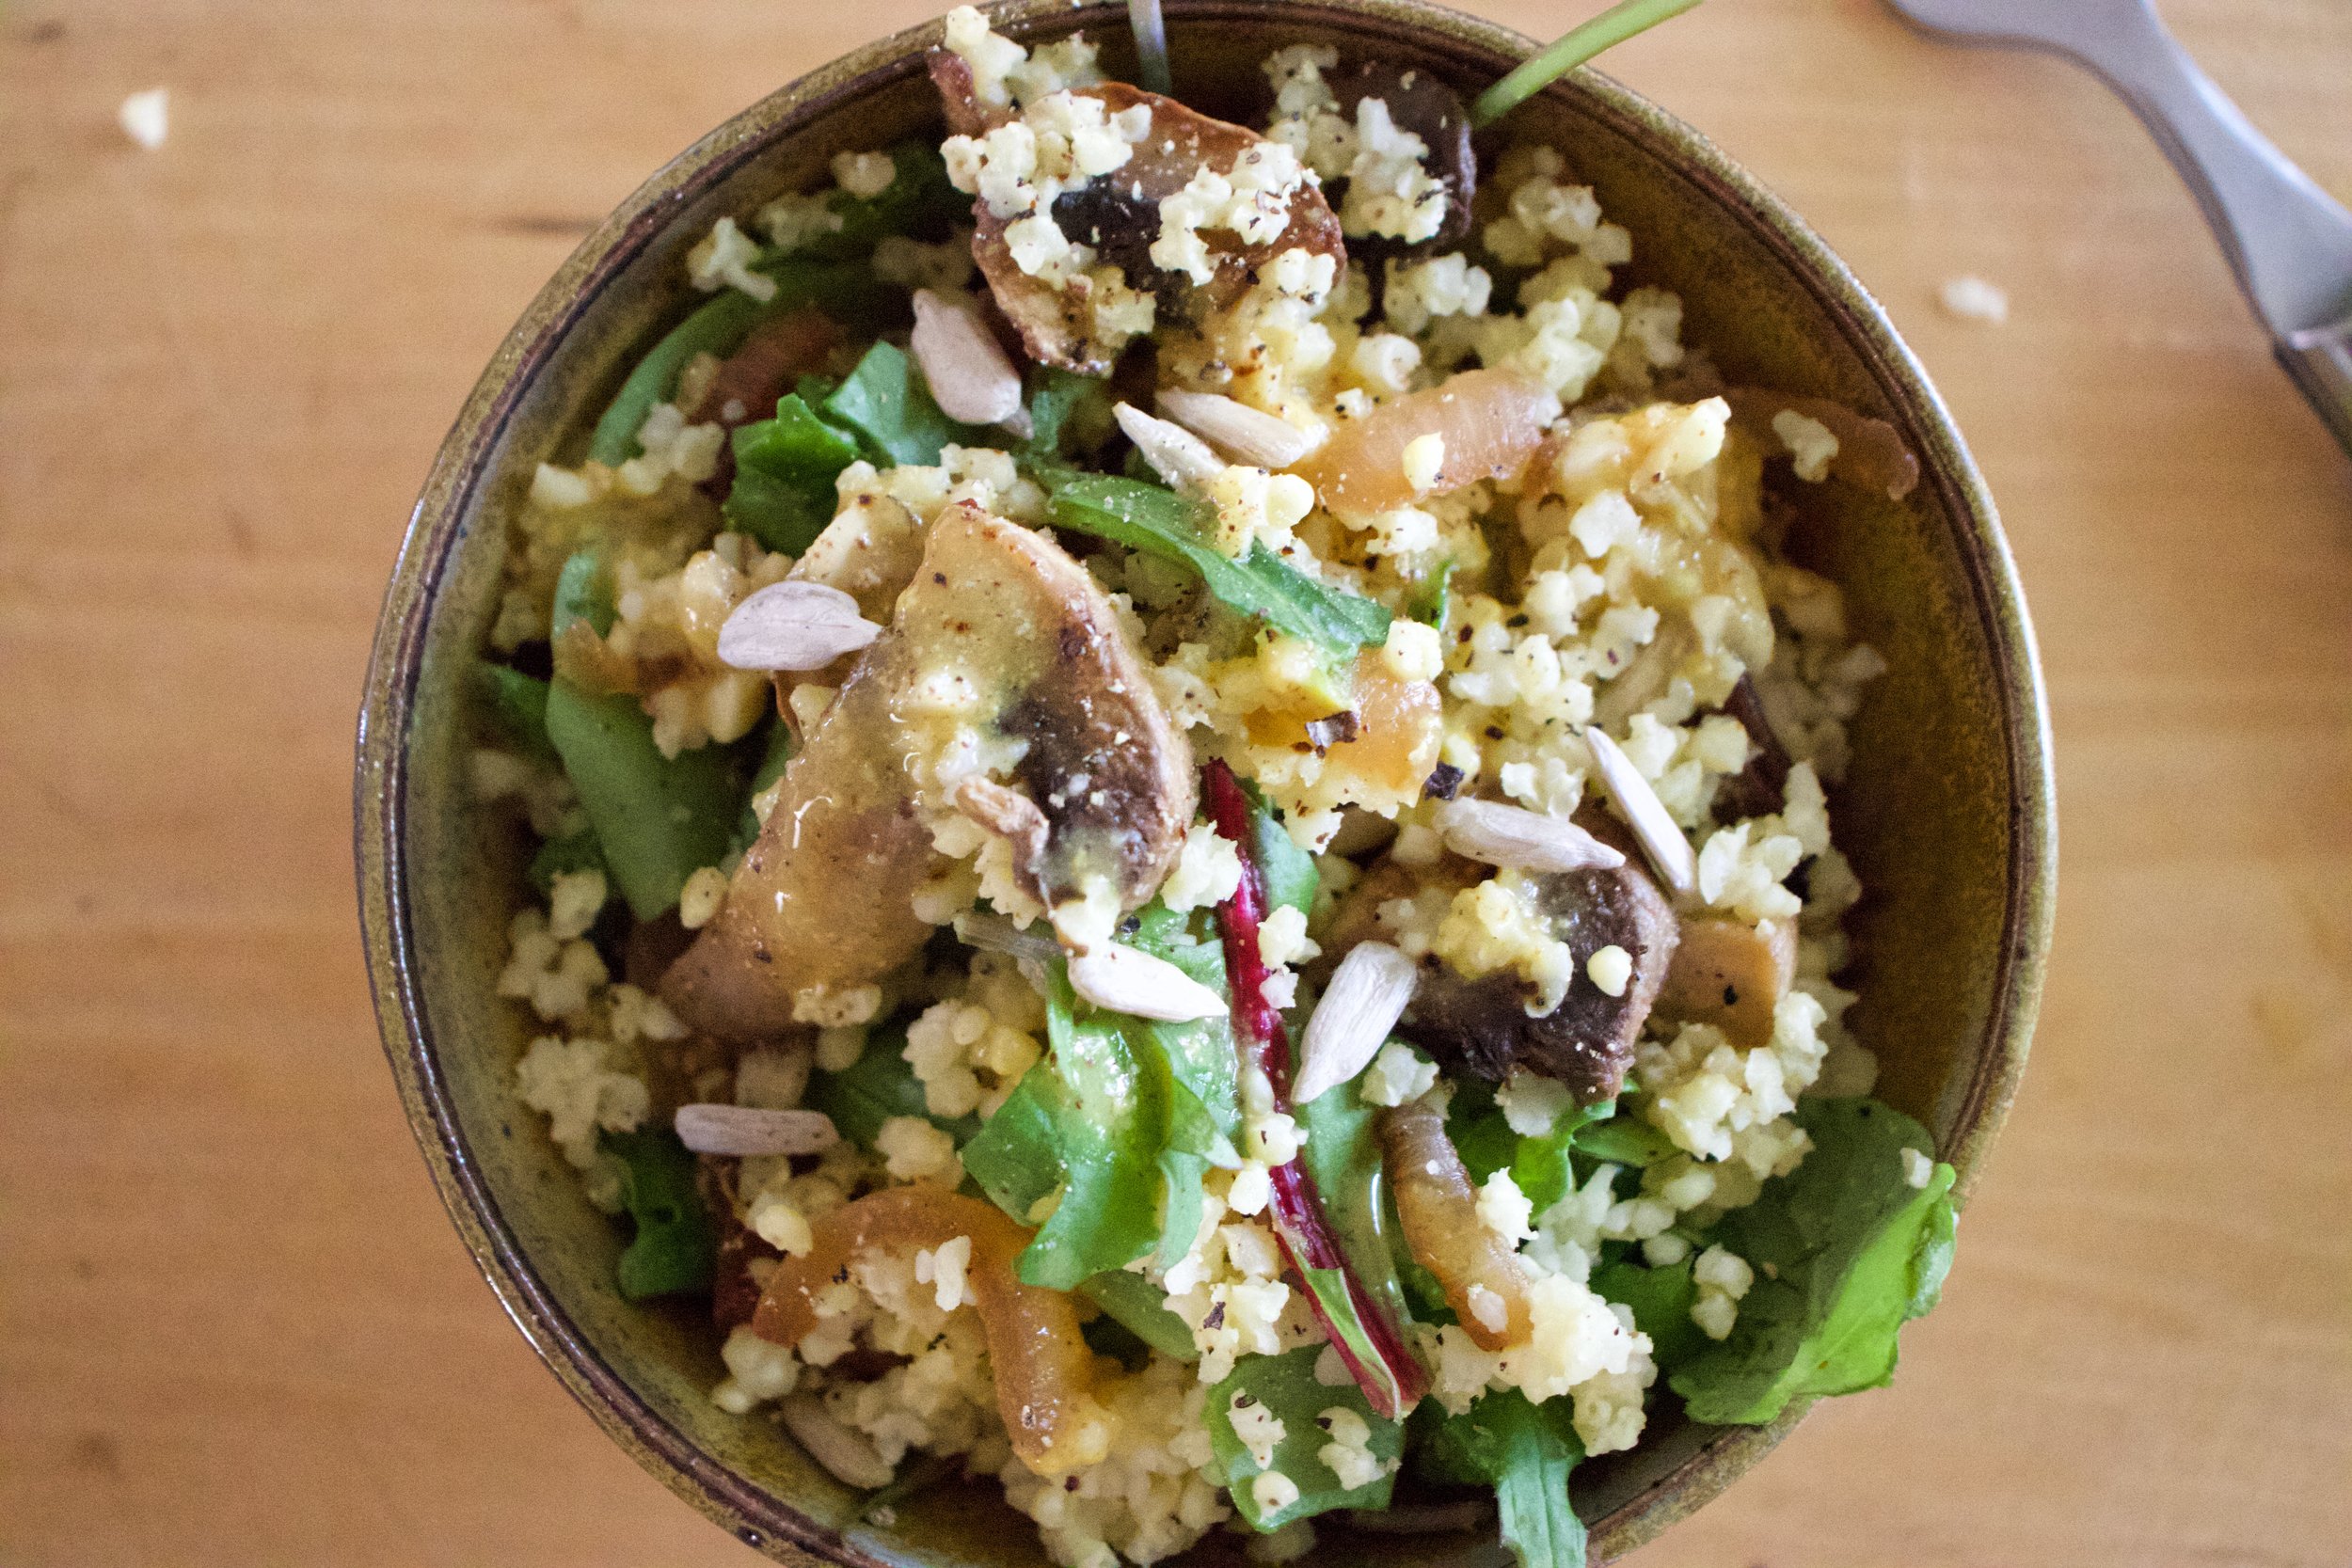
Cooked mushrooms and onions go into the pot, along with the greens, the sunflower seed, and the vinaigrette. This step can be right away or you can wait a little while for things to cool as to not wilt the greens. Up tp you.

IMG_9185.jpg

Mixed with love and hunger.

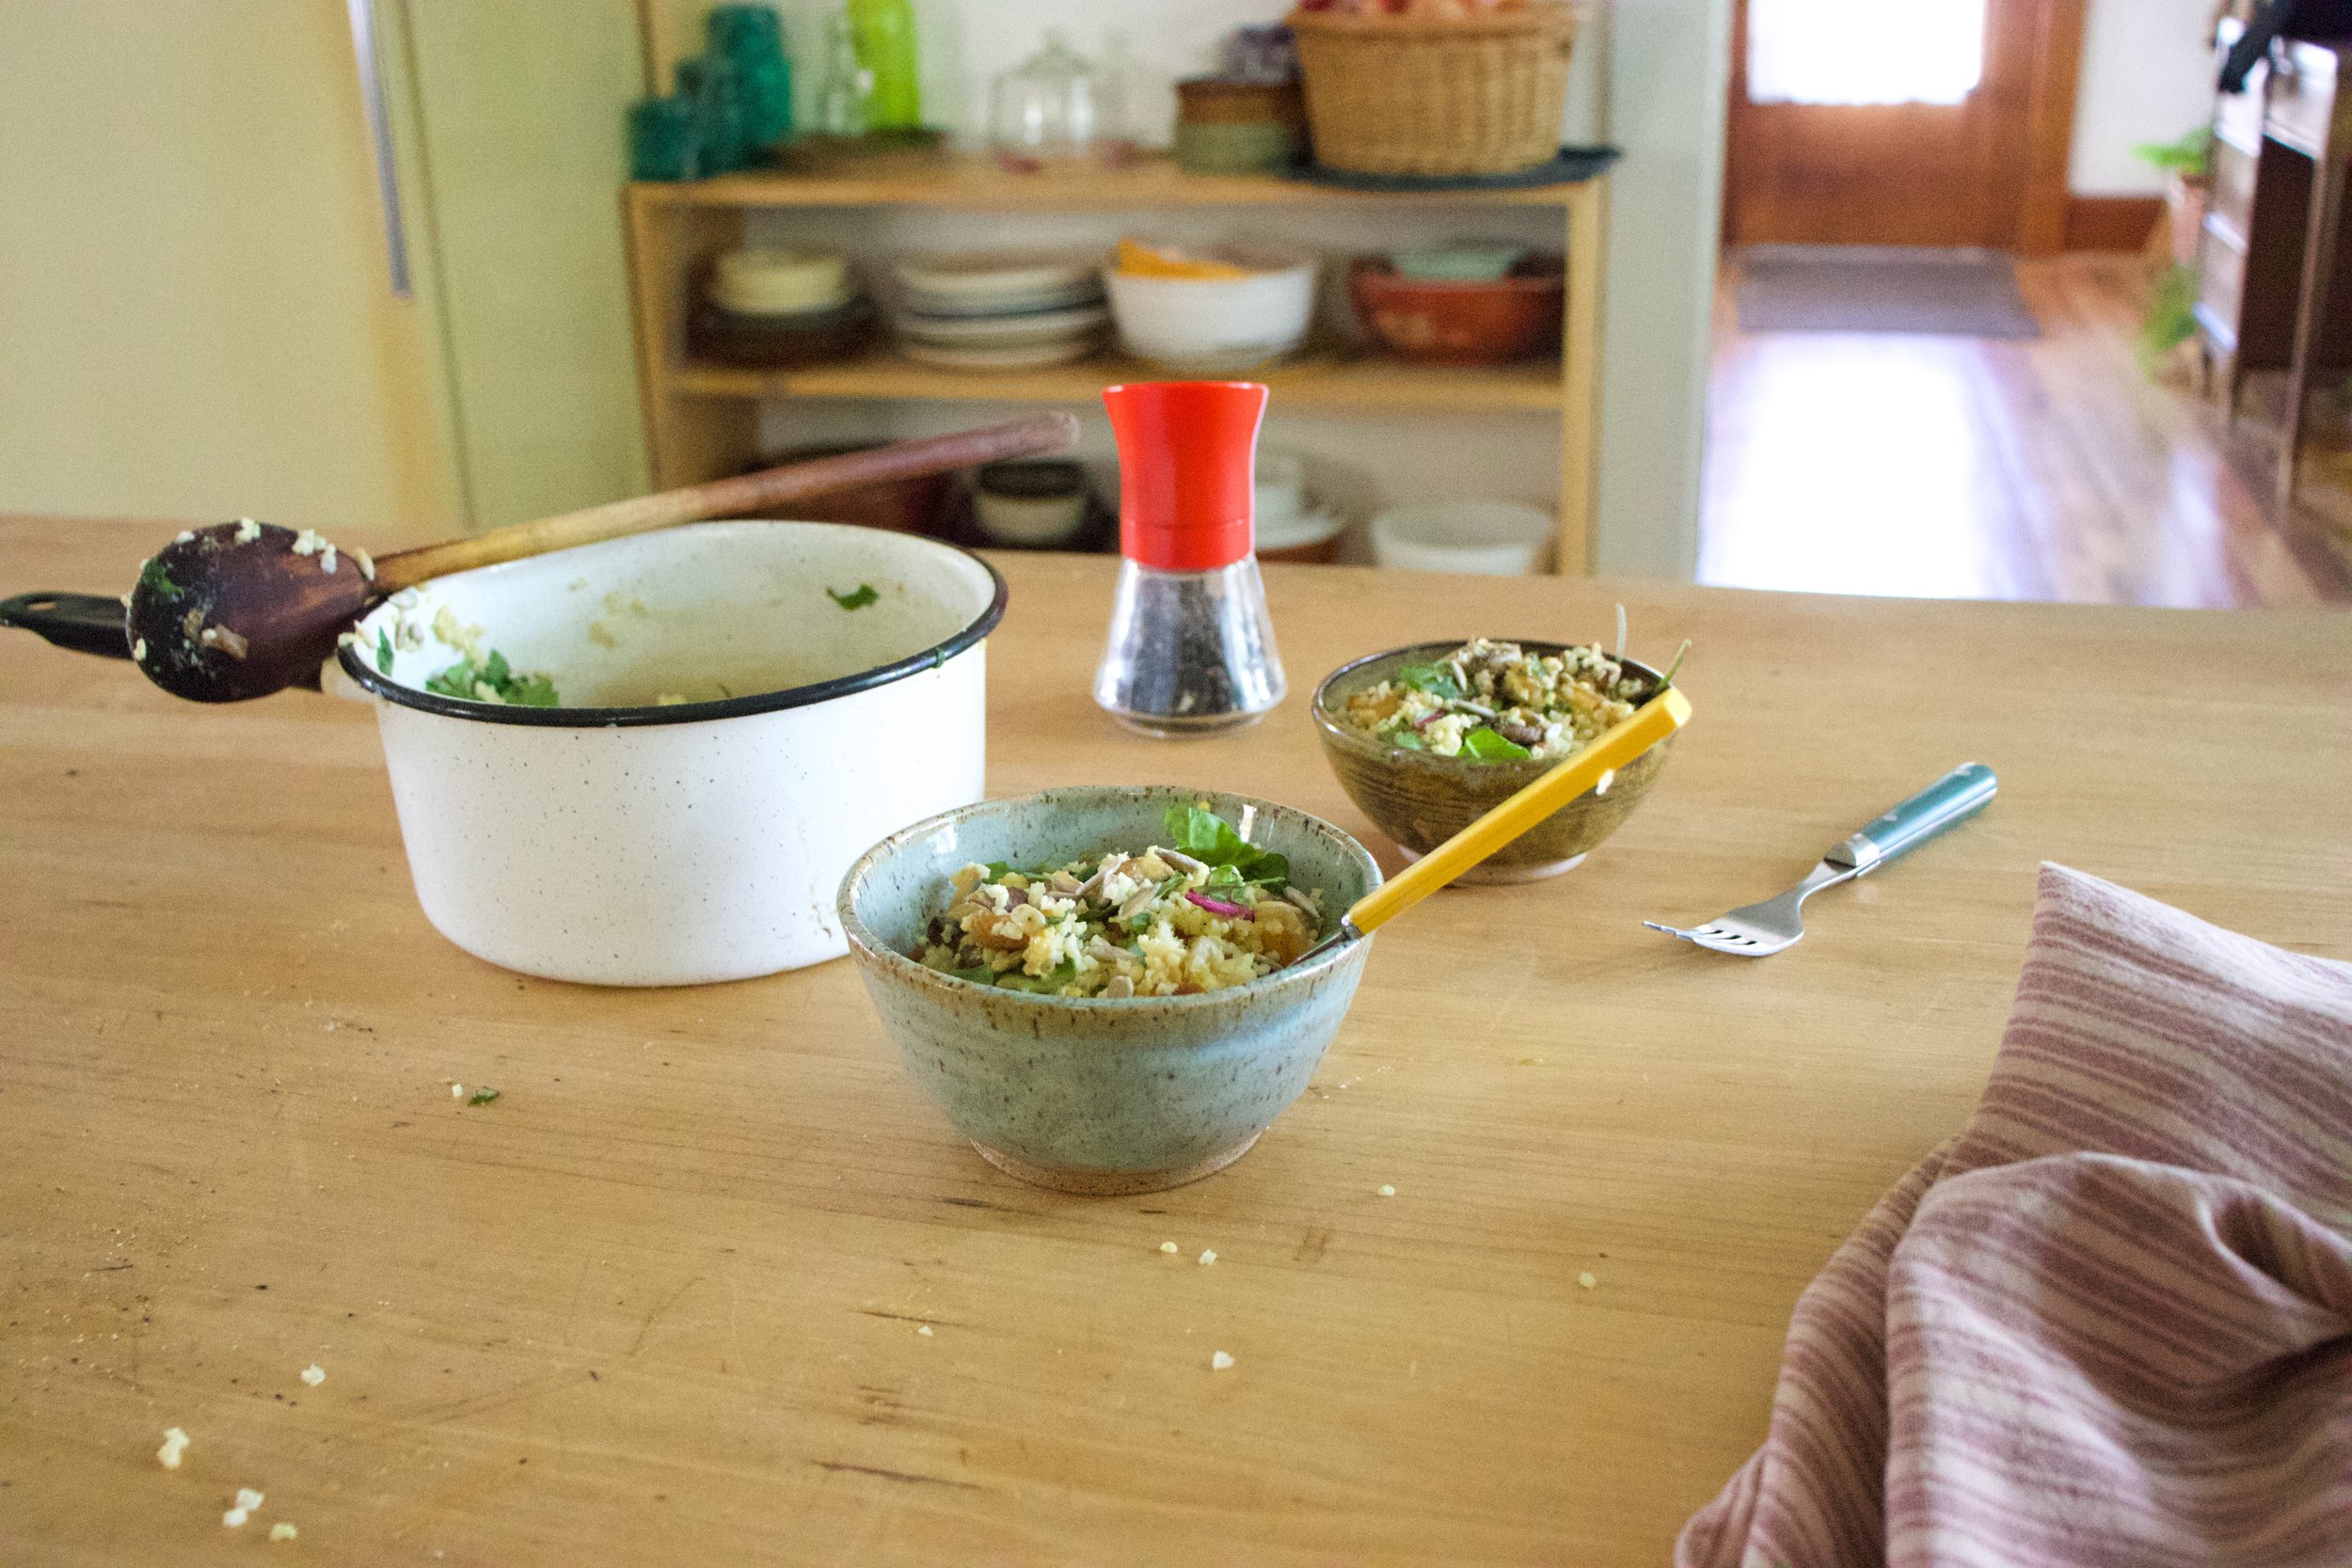
Even if you are making it ahead of time, just do yourself a favor. Grab a bowl, grab a fork, and get down on it.

-C


Millet with mushrooms, onions, Greens and a mustard vinaigrette

Seves 4-6

  • 3/4 cup uncooked millet

  • 2 cups water

  • 1 sweet onion

  • 3-4 big button mushrooms

  • Large handful or two of bitter greens like arugula, spinach or a mixture.

  • 2 tablespoon brown or dijon mustard

  • 2 tablespoon red wine vinegar

  • 1 teaspoon maple syrup

  • 2 cloves garlic

  • salt and pepper

  • handful toasted sunflower seeds

To start, toast millet. Dump the uncooked millet into a pan and place on a medium heat tt for about 5 minutes or until you start hearing the millet crackle.This gives the millet a slightly more nutty flavor but you can skip this step if you don’t care.

Dump millet and water into medium pot. Place on high heat until water starts to boil then tun heat down to simmer and over. After about 15 or 20 minutes, when most of the water is gone, turn pot completely off. Let sit, covered for another 10ish minutes then take a fork and fluff it.

While the millet is cooking, cook the veggies. Grab the onion and slice it up into thin pieces. Clean off the mushrooms and chop them into small thin pieces too. Place the chopped stuff into the skillet with a drizzle of olive oil and a pinch of salt and place on a medium heat. Stir occasionally and cook for about 15 minutes or until the onion and mushroom are a nice dark, golden brown.

And make the mustard vinaigrette. Mince garlic and place into a jar or bowl with the vinegar, the mustard, the maple, and the juice of the lemon. Mix and set aside.

Once the millet is cooked, the mushrooms and onions are cooked, and the vinaigrette is made, all you have left to do is mix everything together. You can do this while things are slightly warm which will wilt the greens a bit, o let them cool so the greens stay fresh. Up to you. (I like the greens fresh)

Finally, dump cooked mushrooms and onions into pot with cooked millet. Add in the greens and sunflower seeds and drizzle the vinegertte all over. Toss around until fully mixed. Sprinkle with lots of fresh cracked pepper.

Then eat. Or place in a container to bring to the BBQ.

In BBQ, Dairy Free, Gluten Free, grains, salad, seeds, side dish, Spring, Vegan, Vegetables Tags Millet with mushrooms, onions, Greens and a mustard vinaigrette, gluten free, millet, vegan, salad, grain salad, grain bowl, grain, mushrooms, plant based, sunflower seeds, mustard, vinaigrette, dinner, BBQ, make ahead, healthy, dairy free
Comment

Basic Socca

May 11, 2019 Colleen Stem
IMG_8315.jpg
IMG_8294.jpg

I am obsessed. For real. That might seem like a strong statement for a feeling about a food, but right now, it is truth. I spend more time then I want to admit thinking and drooling over Socca, which is, to those who do not know, the most basic chickpea flour pancake-y bread thing. Chickpea flour, water and salt. Cooked fast under the broiler in a screaming hot skillet. That is it. And it is amazing. Depending on how you make it, it can be creamy and soft or more cracker like with some crisp crunch to it. Either way, it is just so freaking good. Of course, what I am dreaming about regarding it is not just plan basic socca (which I have made 3 times in the past 3 days) but different flavored soccas (I have experimented with lot of seasoning, and they are all A+) with all sorts of different topping and using it in all sorts of different ways. But for now, I wanted to keep basic so we all know how good simplicity is. We will go from here.

There is no stopping me. There is no stopping the socca.

Now to my new favorite food, the socca.

IMG_8234.jpg
IMG_8238 2.jpg
IMG_8240 2.jpg

Chickpea flour, salt and water. That is it. Mix it all up.

IMG_8252.jpg

Batter all smooth and now in need of a rest. Half an hour or up to a day of rest is good.

IMG_8261.jpg

Now to cook the socca. You need to use something oven safe like cast iron. The trick here is to preheat the skillet while you are preheating the oven. Crank oven to 450 with the skillet in oven and once the oven reaches temp, turn oven over to a high broil. Let the skillet get really hot for another minute or two then remove skillet from oven (carefully!!!) and give it a splash of oil. Don’t preheat the skillet with oil in it or else it will start to smoke and get gross.

IMG_8266.jpg

Now that you got a nice hot and oiled skillet, grab the rested batter and pour half of it in. Tilt skillet around to coat bottom then stick skillet back into oven under broiler and cook for 4-8minutes. ( It depends on your broilers strength and your preference for blisters)

Out from the broiler. Cooked and slightly blistered. I went easy on this one. The next one got a few more blisters.

2 soccas, one a little thicker then the other. One a little more blistered then the other. Both in my belly.

So many Soccas to come.

So. many. Soccas.

-C


Basic Socca

makes two 10 inch soccas

  • 1 cup chickpea flour

  • 1 cup room temperature water

  • 1/2 teaspoon salt

  • olive oil for pan

Mix chickpea flour, salt and water together into a bowl until smooth. Let mixture rest for at least half an hour or up to a day.

When ready to make the socca, preheat oven to 450 with a 10 inch oven safe skillet (I used cast iron but any oven safe dish would work) in oven.

Once oven reaches temp, turn oven over to broil and place skillet under it for a minute to really heat the skillet. Carefully, with oven mitts, remove hot skillet from oven and brush or pour a smidge of oil into the hot skillet to coat bottom. Pour in half the batter and tilt around until bottom is coated then place skillet back into oven under broiler and cook for 4 -8 minutes or until the socca starts to blister. (it kind of depends on your broiler so keep a close eye on it) Remove from oven and slip socca onto cutting board. Sprinkle with salt and pepper. Drizzle with olive oil if you like. Then all you do is cut and eat.

Left over socca can be stored in fridge and reheated in oven or toaster.

Note. IF you want a slightly thicker socca, use a 8 inch skillet. For a thiner, more cracker like socca, pour in 1/3 of the batter at a time (you will end up with 3 instead of 2)

In 5 ingerdients or less, appetizers, biscuits and such, bread, Dairy Free, grain free, Gluten Free, pulses, beans, Vegan, snack, side dish Tags Socca, Chickpea flour, gram flour, besem flour, pulses, protein, vegan, gluten free, dairy free, crepe, wrap, bread, tortilla, crust, simple, easy, sweet or savory, beans, Italian
Comment

Sesame Noodles

March 30, 2019 Colleen Stem
IMG_7054.jpg
IMG_6911.jpg

It is getting oh so much nicer out yeah? Springing and such, well kind of. Still a wee bit chillier then it should be around here but still, it is spring and I am taking it.

And with the spring, I feel the itch, the itch to spend all of my free time outside. Out doing things that are not inside because I spent the last 7 long months inside way too much. I needed to be outside as much as possible and as it gets even nicer and warmer and garden temperature-able, I am basically going to be living outside.

Bring in sesame noodles. Super fast, super easy, super duper in every way. Make a big old batch and eat now, eat later, eat hot or eat cold. Everyone loves them, they love you, etc. etc… A perfect meal to have in rotation when you know that you are not going to have or want to spend much time cooking in the kitchen because you will be outside playing in the dirt and soaking up the sun. And think about all the picnics and BBQ’s to come. These suckers are fantastic to have at any outdoor eating event. They are even peanut free so you can safely bring them to potlucks and such and don’t have to worry about accidentally kill a peanut allergy person. And you can make them gluten free as well if you sub in your favorite gluten free pasta. These noodles, I am telling you. They are a winner in every way.

So with out further ado, the noodles!

IMG_6790.jpg

The stuff. Spaghetti noodles, tahini, a few cloves of garlic, some toasted sesame oil, soy sauce, red wine vinegar, honey (used whatever sweetener you like), red pepper flakes, tasted sesame seeds some cabbage, half a red onion and a carrot.

IMG_6854.jpg

Get pasta cooking. Boil water, drop noodles in, you know the drill. Cook as long as the the noodles need cooking, just make sure to not over cook them cause soggy noodles are nasty.

Chop, shred and julienne the cabage, onion and carrot. Nice and thin.

Mince the heck out of the garlic. Or use a garlic press if you want.

IMG_6843.jpg
IMG_6848.jpg

Now make the sauce. Add the minced garlic, along with the soy, sesame oil, vinegar, sweetener, and chili flakes to the bowl with the tahini. Mix, mix, mix until it is all incorporated and not lumpy. And that is that.

Noodles should be done by now so strain them out.

IMG_6864.jpg

Add the prepared veggies to a big bowl.

IMG_6876.jpg

Add in the cooked noodles

IMG_6899.jpg

Cover with sauce and toss all around until all the noodles are coated and delicious. Sprinkle with sesame seeds and a pinch or so more of pepper flakes.

And then it is time. Eating time.

Happy spring!

-C


Sesame Noodles

serves 3-6

  • 3/4 lb (3/4 of a package) of your favorite spaghetti noodles (or linguine or similar noodle)

  • 2 tablespoons toasted sesame oil

  • 1/4 cup soy (low sodium if you have it and gluten free tamari if needed)

  • 3 tablespoons red wine vinegar

  • 3 tablespoons tahini

  • 2-4 teaspoons red chili flakes

  • 1-2 teaspoons sweetener of choice (maple, honey, or brown sugar)

  • 4-5 cloves garlic

  • 1-2 tablespoons toasted sesame seeds

  • about a 1/4 head of cabbage

  • a carrot

  • small red onion

Bring a pot of water to a boiling cook the noodles as directed on package. You want them al dente, cooked all the way, but barely. No soggy noodles. (unless you like them soggy)

In the mean time, shred the cabbage, julienne the carrot (or shred it) and slice the onion so very thinly. Place into a large bowl. Now mince garlic and place into a bowl along with the soy, sweetener, vinegar, tahini, sesame oil and a teaspoon or two (more for spicier) of chili flakes and whisk until completely incorporated. Taste and adjust if needed. Add more tahini for more body, more sweetener if needed or more hot pepper flakes for more spice.

Once noodles are cooked, drain and place into large bowl along with the shredded and julienned veggies. Pour in the sauce and toss it all around until all the noodles are covered. Sprinkle in the toasted sesame seeds and a small pinch more of the red pepper flakes.

Eat. Eat warm, room temp, or cold. They are delicious any way.

Any left overs just stick in fridge. Can be reheated or not. Also, you can make the sauce and the noodles a few day ahead of time of when you want to have the dish Just mix the sauce with the noodles when you are about to serve them… So simple!

In BBQ, dinner, Gluten Free, Pasta, quick and easy, sauce, side dish, Spring, Vegan, Vegetables Tags sesame noodles, gluten free, vegan, plant based, easy, cold noodles, dinner, lunch, picnic, potluck, nut free, spring, simple, side dish, dairy free
Comment

Roasted Maple Cumin Cauliflower with Tahini

February 16, 2019 Colleen Stem
IMG_5476 2.jpg

Nothing here but a mere craving, the fact that I had a fresh head of cauliflower, and I really wanted tahini. TA DA. I made exactly what I wanted and it was so so sooooo good. Maple Cumin is one of those super A+++ taste pairings and anything roasted cover in tahini is basically going to be a win so I had no fear when making this dish that it was going to be anything but fanatic.

And of course I was right. It was so freaking good, like now I am going to make it again and again because I don’t want make cauliflower any other way ever or at least until I get sick of it or of roasted vegetables. But that probably won’t happen for a while.

So if you like cauliflower and tahini and amazingness, here, make this.

To the cauliflower

The stuff. A head of cauliflower, tahini, maple syrup, cumin powder, red wine vinegar, salt and pepper, and olive oil.

IMG_5385.jpg
IMG_5396.jpg

Break or cu the head of cauliflower up into florets and toss with a little oil, the maple and cumin, and a little salt and pepper.

IMG_5397.jpg

Scatter on a baking sheet and stuff it into a hot oven.

IMG_5425.jpg

Meanwhile mix tahini with vinegar, salt and pepper, and enough warm water to thin out.

Roasted all nice and crisp and delightful.

And now you gather up all that cauliflower and cover with all the tahini you want. Grab a bowl, or just eat off baking sheet, and get to it.

And there is no shame in eating a whole head of cauliflower because hey, its cauliflower.

-C


Roasted Maple Cumin Cauliflower with Tahini

Makes a meal for one or a side for a few

  • a head of cauliflower

  • 3 teaspoons cumin

  • 2 tablespoons maple syrup

  • olive oil

  • 3 tablespoons tahini

  • 2 tablespoons red wine vinegar

  • 2-3 tablespoons warm water

  • salt and pepper

Preheat oven to 450

Break or cut the cauliflower into medium sized florets. Place in a bowl and drizzle with a teaspoon or so olive oil and toss around. Drizzle in maple, add in the cumin, and a pinch of salt and pepper. Toss until coated then dump the cauliflower onto a baking sheet. Place in hot oven for 25-30 minutes or until roasted to your liking.

While that’s roasting, mix up the tahini, vinegar, and a pinch of salt and pepper. Add in warm water until the mixture is a drizzlable consistency.

Once cauliflower is out of oven, cover with tahini.

Now eat.

There will be no left overs so don’t worry about it.

In dinner, Gluten Free, grain free, quick and easy, side dish, Vegan, Vegetables, snack Tags Roasted Maple Cumin Cauliflower with Tahini, vegan, cauliflower, plant based, maple cumin, tahini, roasted, vegetables, side dish, main dish, gluten free, grain free, dairy free, whole food, simple, easy
Comment

Potatoes in Tomatoes with Chick Peas and Onions

January 26, 2019 Colleen Stem
IMG_4866.jpg
IMG_4898.jpg

Potatoes in tomatoes. It just has a nice ring to it. And to tell the truth, that is the only reason I made this dish, because it sounds good.

Ok, not really the only reason, but it was the start, that and I have been sitting on some potatoes for a little while and it was time for them to be eaten. Enter in the tomatoes. I figures cooking the potatoes in tomatoes is alike to a ketchup and french fry situation. Not completely the same, but you get the idea. Add in chickpeas for good measure and onion because I wanted to and that is that. Nothing fussy, one pot, easy, hearty, and good.

Also not hurting anyone that these potatoes take a little while to bake. I could have made this dish in a way that made them cook faster (like parboil the potatoes) but I wanted the heat from the oven. It has been pretty freaking dang cold out so I liked having the heat, it adds another dimension to the term comfort food (as in me being comfortable hanging out next a hot oven).

Anyway, nothing too fancy, just all around tasty dish. It is just what you need to bake and eat on any given cold winter day. And it sounds nice too. Just say it aloud. Potatoes in Tomatoes. Right? Now you see, it had to be done.

To the potatoes in tomatoes!

The stuff. Potatoes, crushed tomatoes, cooked chick peas, an onion, a few cloves garlic, Italian seasoning, salt and pepper and a bit of olive oil.

Start by chopping the onion and mincing the garlic.

Get it all into a cast iron pan or oven safe skillet with a little olive oil. Add the spices and give it some heat on the stove top while you cut potatoes.

Now cut those potatoes nice and thin. A mandolin works wonders but a knife will do just as well, just try to keep the thickness all the same.

IMG_4764.jpg
IMG_4766.jpg
IMG_4765 2.jpg

Potatoes are cut and onion mixture has sweated a bit so now you add in the chick peas (with liquid) and half the crushed tomatoes. Stir it all up.

Layer on potatoes, drizzle with a tiny bit of olive oil and give them some salt and pepper love.

IMG_4797.jpg

Dump the rest of the tomatoes on top then add in water, enough that all the potatoes are completely submerged.

Now into the oven they go.

Doesn’t that just look all fantastic? I mean really really , A+ good, no? If you are feeling extra crispy, you could even stick the skillet under the broiler for a few minutes right before you pull it out.

IMG_4860.jpg

And that is that. Potatoes in tomatoes with chick peas and onions. A simple but very satisfying dish to keep your cold belly full of warm goodness.

Be well.

-C


potatoes in tomatoes with chick peas and onions

  • About a pound or so of white or red potatoes

  • 3 cups (or a 28oz can) crushed tomatoes

  • 2 cups (or a 16 oz can) cooked chickpeas in liquid

  • 1 large onion

  • 2-3 close garlic

  • 2 tablespoons Italian seasoning

  • 2-3 cups water

  • olive oil

  • salt and pepper

Preheat oven to 400

Grab onion and dice into small pieces. Mince the garlic. Grab a medium sized oven safe skillet and toss the onion and garlic in with a tablespoon or so of olive oil and the seasoning. Place on medium heat and cook for a few minutes until the the onion is slightly cooked and fragrant. Remove from heat. Mix in the chick peas with liquid and half of the crushed tomatoes.

Rinse potatoes and slice into 1/4 inch thick rounds. Place tomatoes into the skillet, layering any way you want. Drizzle the top with like a teaspoon olive oil then sprinkle the tomatoes with salt and pepper. Spread the rest of the crushed tomatoes over the potatoes then pour the water in. If the potatoes are not completely submerged in water, add more until they are. Cover the skillet with a lid or tin foil.

Place skillet in oven and bake 40ish minutes then remove lid or foil and bake for another 25-30 minutes or until potatoes are fork tender and slightly crispy on the edges. Depending on the type of patotoes you use,(like a really firm and waxy yellow potato) you might need to add more water to the skillet and cook for longer. If that is the case, just pour more water over until the potatoes are submerged again and keep baking until cooked.

For extra crispy, when potatoes are done, place skillet under broiler for a few minutes until crisp to your liking.

Pull from oven, let cool a minutes or two then dig in.

In beans, Vegan, side dish, pulses, one pot meal, entree, dinner, casserole Tags Potatoes in Tomatoes with Chick Peas and Onions, Potatoes, Tomatoes, chick peas, pulses, beans, vegan, dinner, meal, side dish, plant based, gluten free, whole 90, comfort food, dairy free, One pan meal, vegetarian
Comment
← Newer Posts Older Posts →
 

https://thelovelycrazy.squarespace.com/config#/|/about/

Me. Food Maker.Food eater. Woo HOO!

STEM+NODE  SMALL BATCH AND ONE OF A KIND POTTERY

stem+node ceramics


____________________

Subscribe

GET NEW POSTS IN YO EMAIL

You are AWESOME!!!


@thelovelycrazy 2014-2021