• stem+node ceramics
  • HOME
  • Food Recipes
  • About
  • Contact
Menu

The Lovely Crazy

Street Address
City, State, Zip
Phone Number

Your Custom Text Here

The Lovely Crazy

  • stem+node ceramics
  • HOME
  • Food Recipes
  • About
  • Contact

Butternut Squash and Apple Parfait

January 8, 2022 Colleen Stem
IMG_8611.jpg
IMG_8613.jpg

I have a thing for squash and apples. I roast them together all the time. It is a combination that I never get sick of. I go savory mostly but once in a while I’ll go the slightly sweeter route. This is one of those times. And I also opted to make it seem fancier then my average eating situation (eating with fingers of baking sheet) and added a few steps, and made parfaits out of them. (Parfaits are fancy right?) The result is amazing and maybe even more delicious then ever before. That’s saying something.

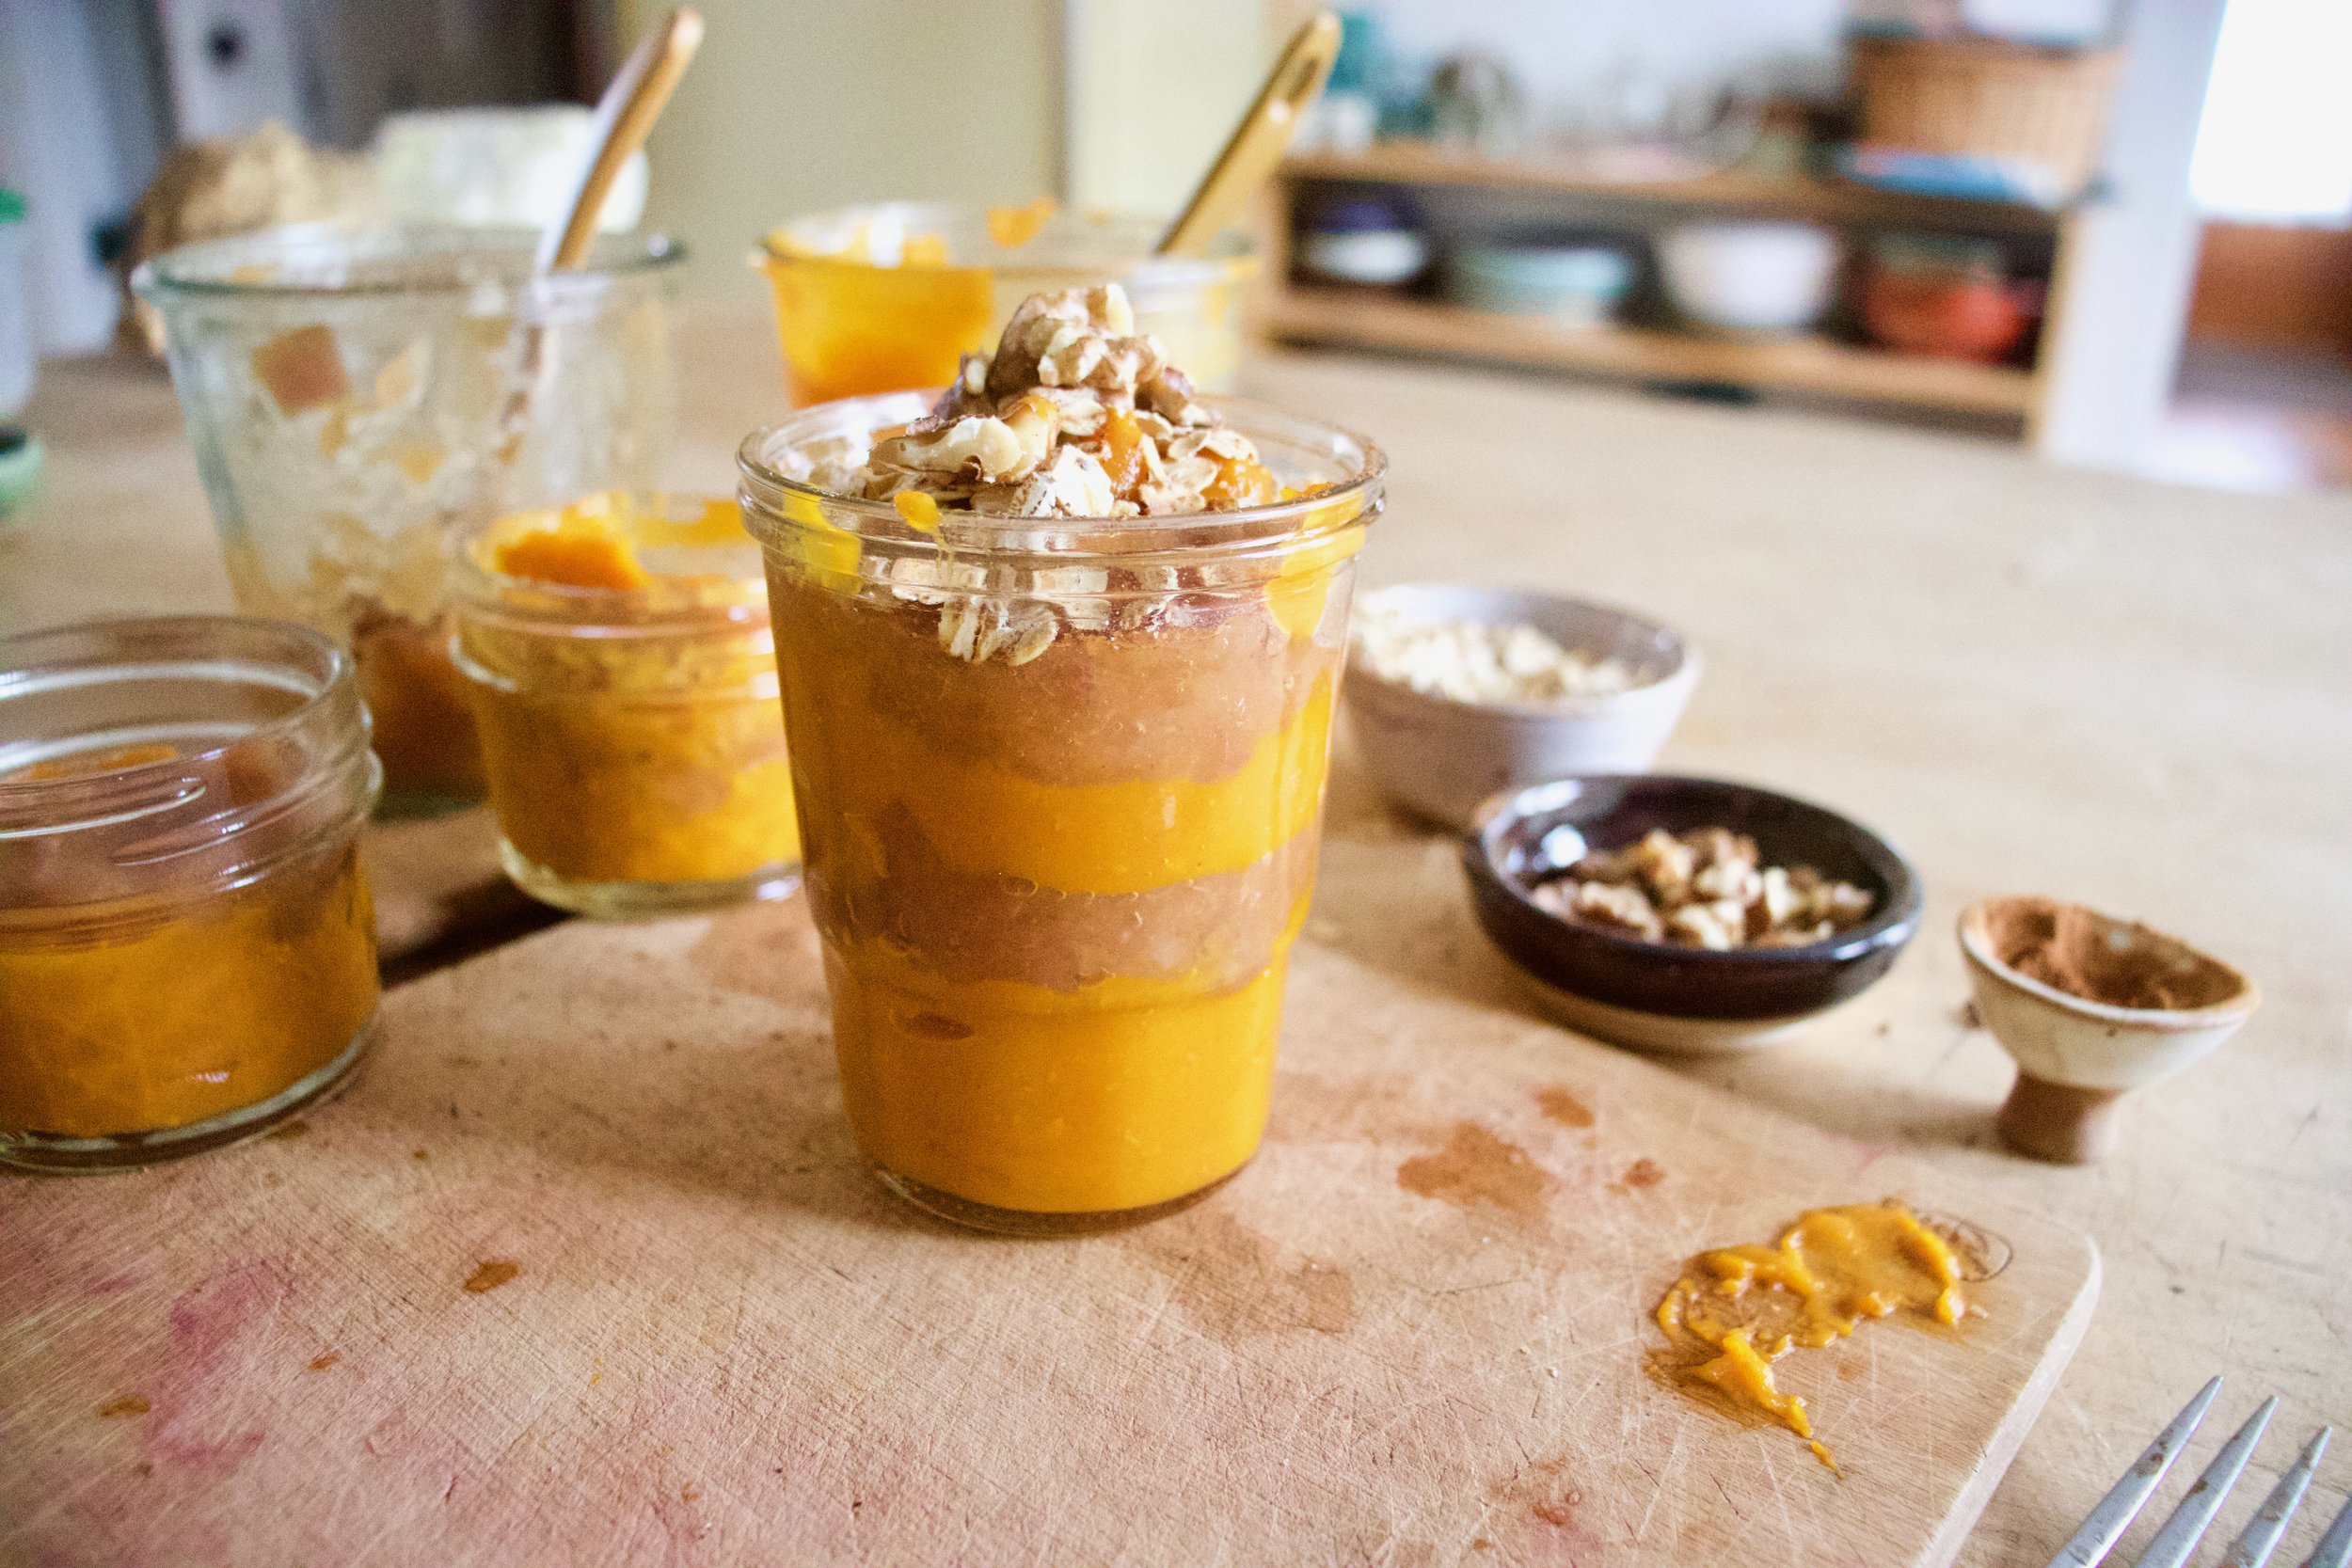
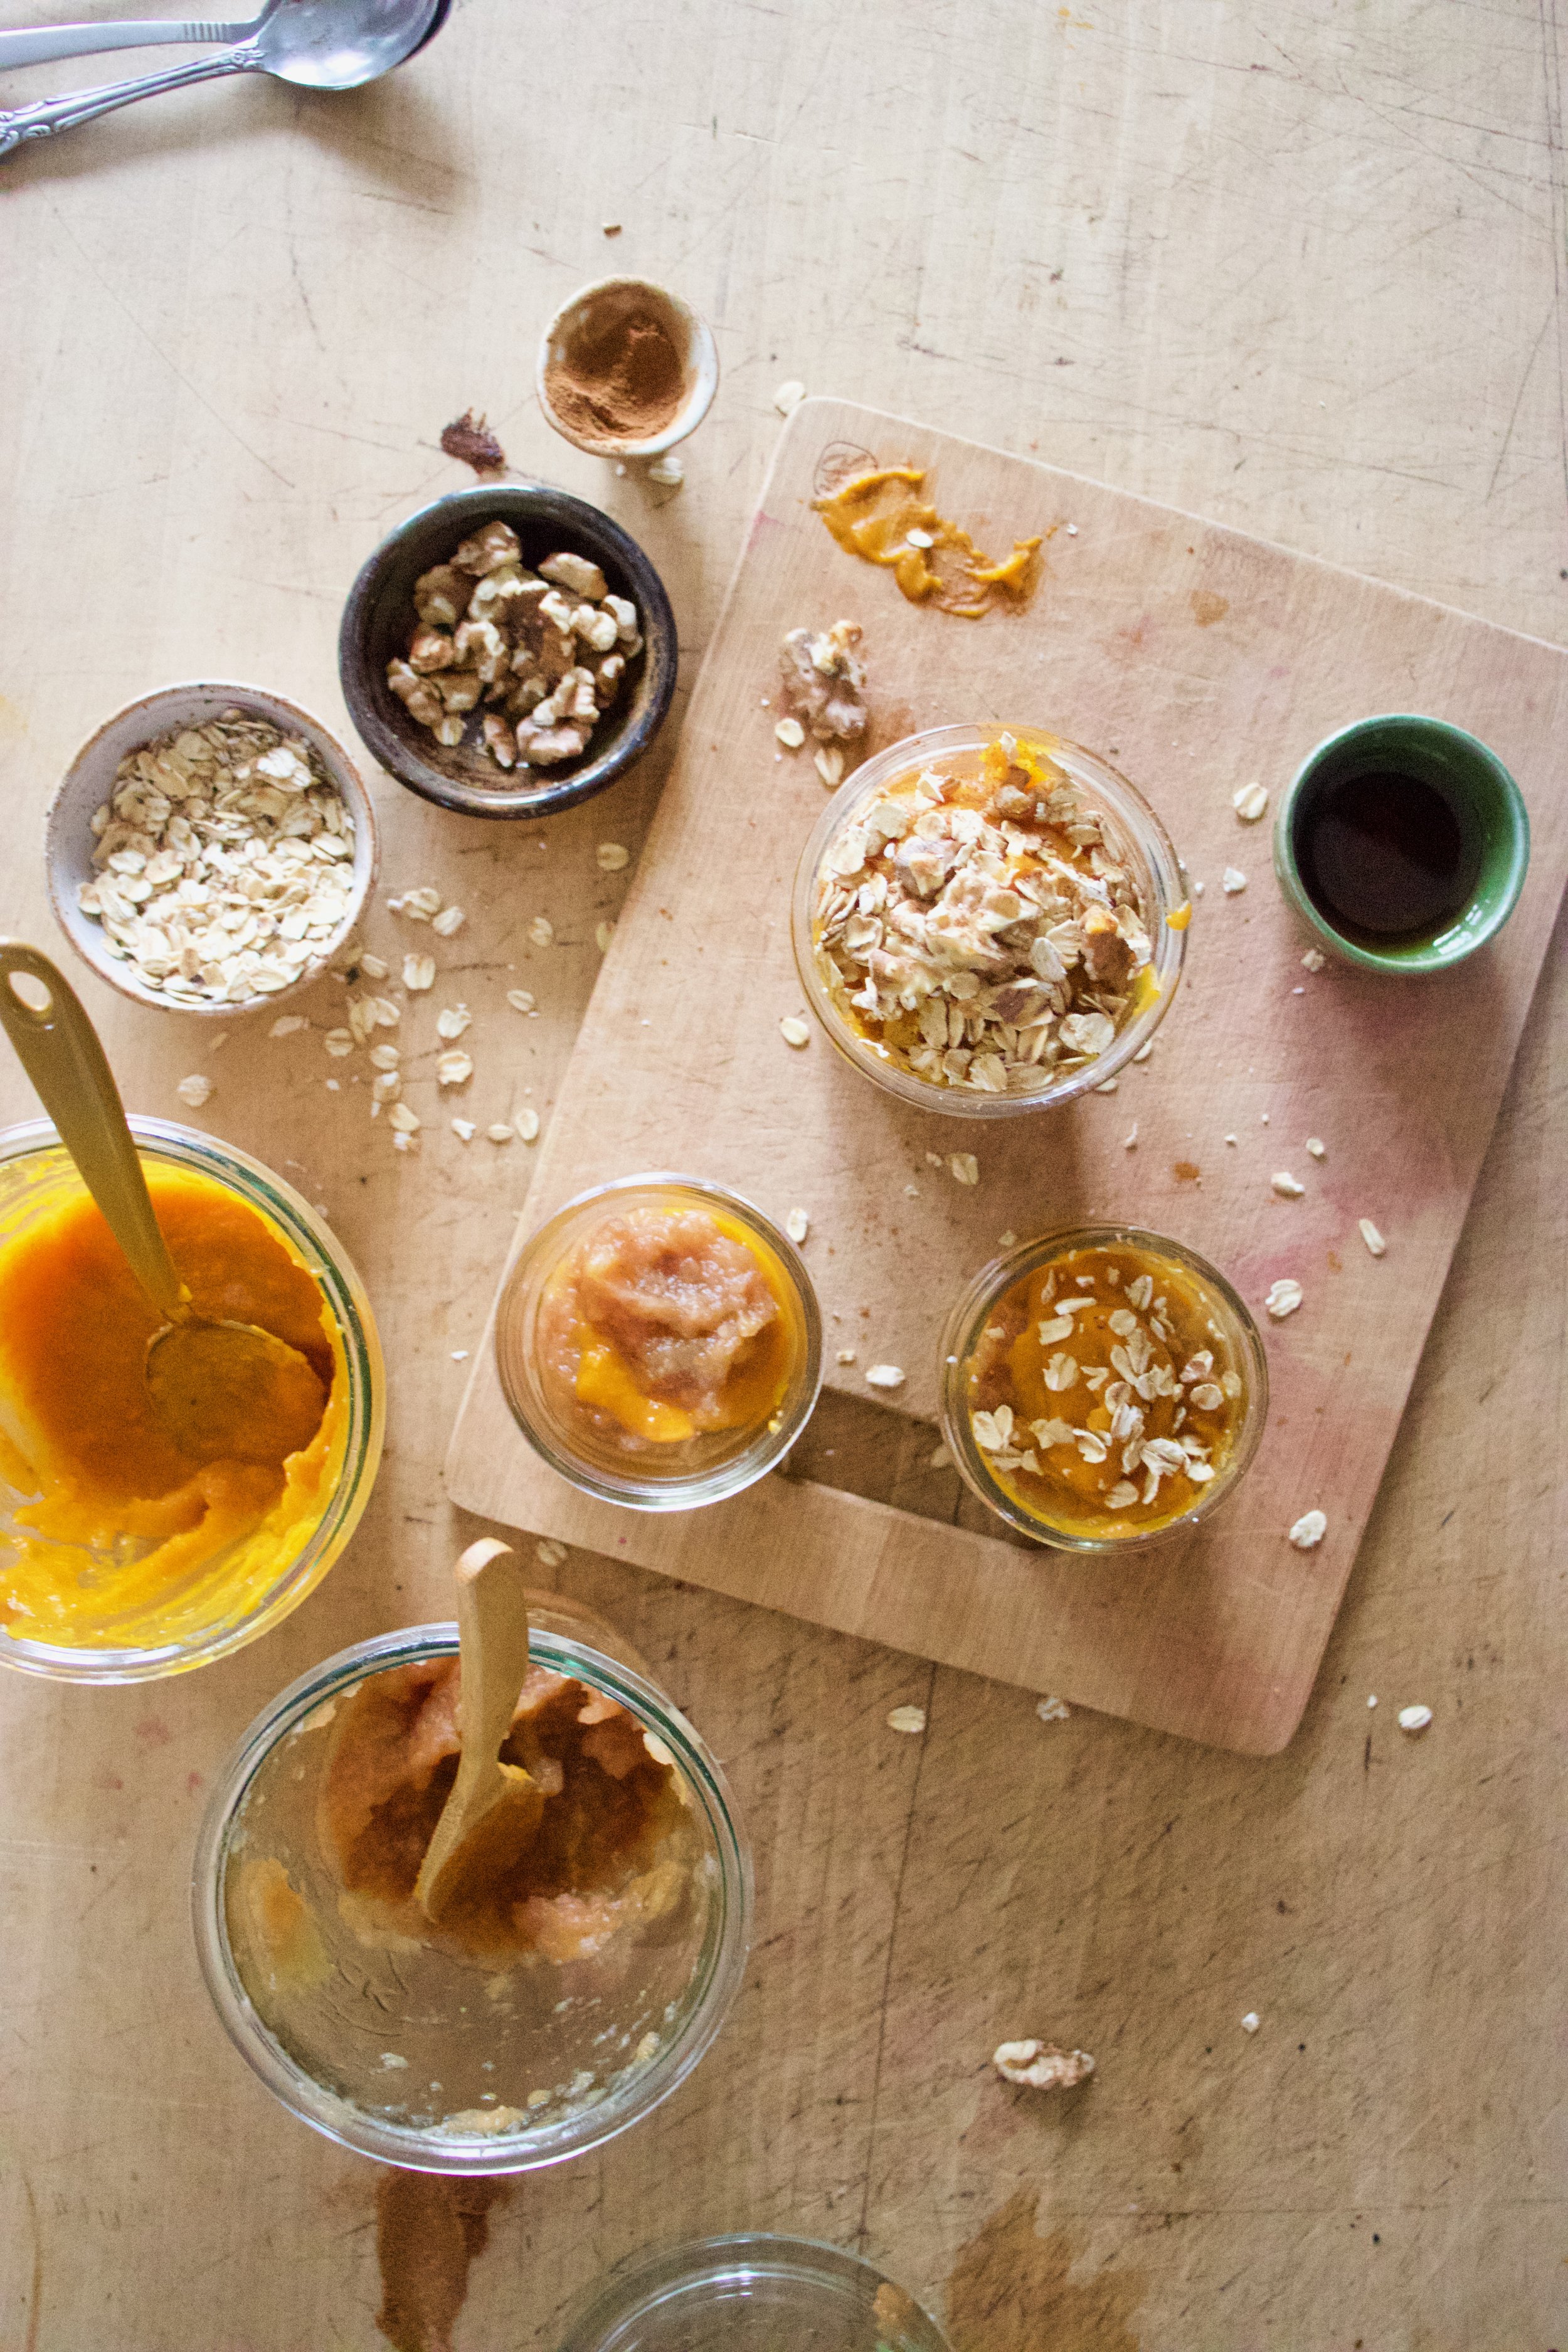
Basically what these parfaits consists of is layers of creamy pureed roasted butternut squash and slightly chunky cinnamon applesauce topped with oats and walnuts. That might not sound fancy or even that spectacular but you know when you underestimate something but once you experience it you are very much surprised by how fantastic it really is? Well if you are doubting me then that is what will happen here because this parfait situation even surprised me at how much I loved it.

So if you are in need of a breakfast, lunch, snack, or dessert that will satisfy all of your hunger needs then you should most definitely try this out. It is simple and easy to make, super healthy, can be made ahead or time, and looks cute. (Did I just call a parfait cute? Yes, yes I did.) And again, super freaking delicious of course.

Now to the parfaits!

The stuff. Butternut squash, a couple of big apples, old fashion oats, walnuts, maple syrup, cinnamon, and almond milk.

IMG_8540.jpg
IMG_8554.jpg
IMG_8567.jpg
IMG_8571.jpg

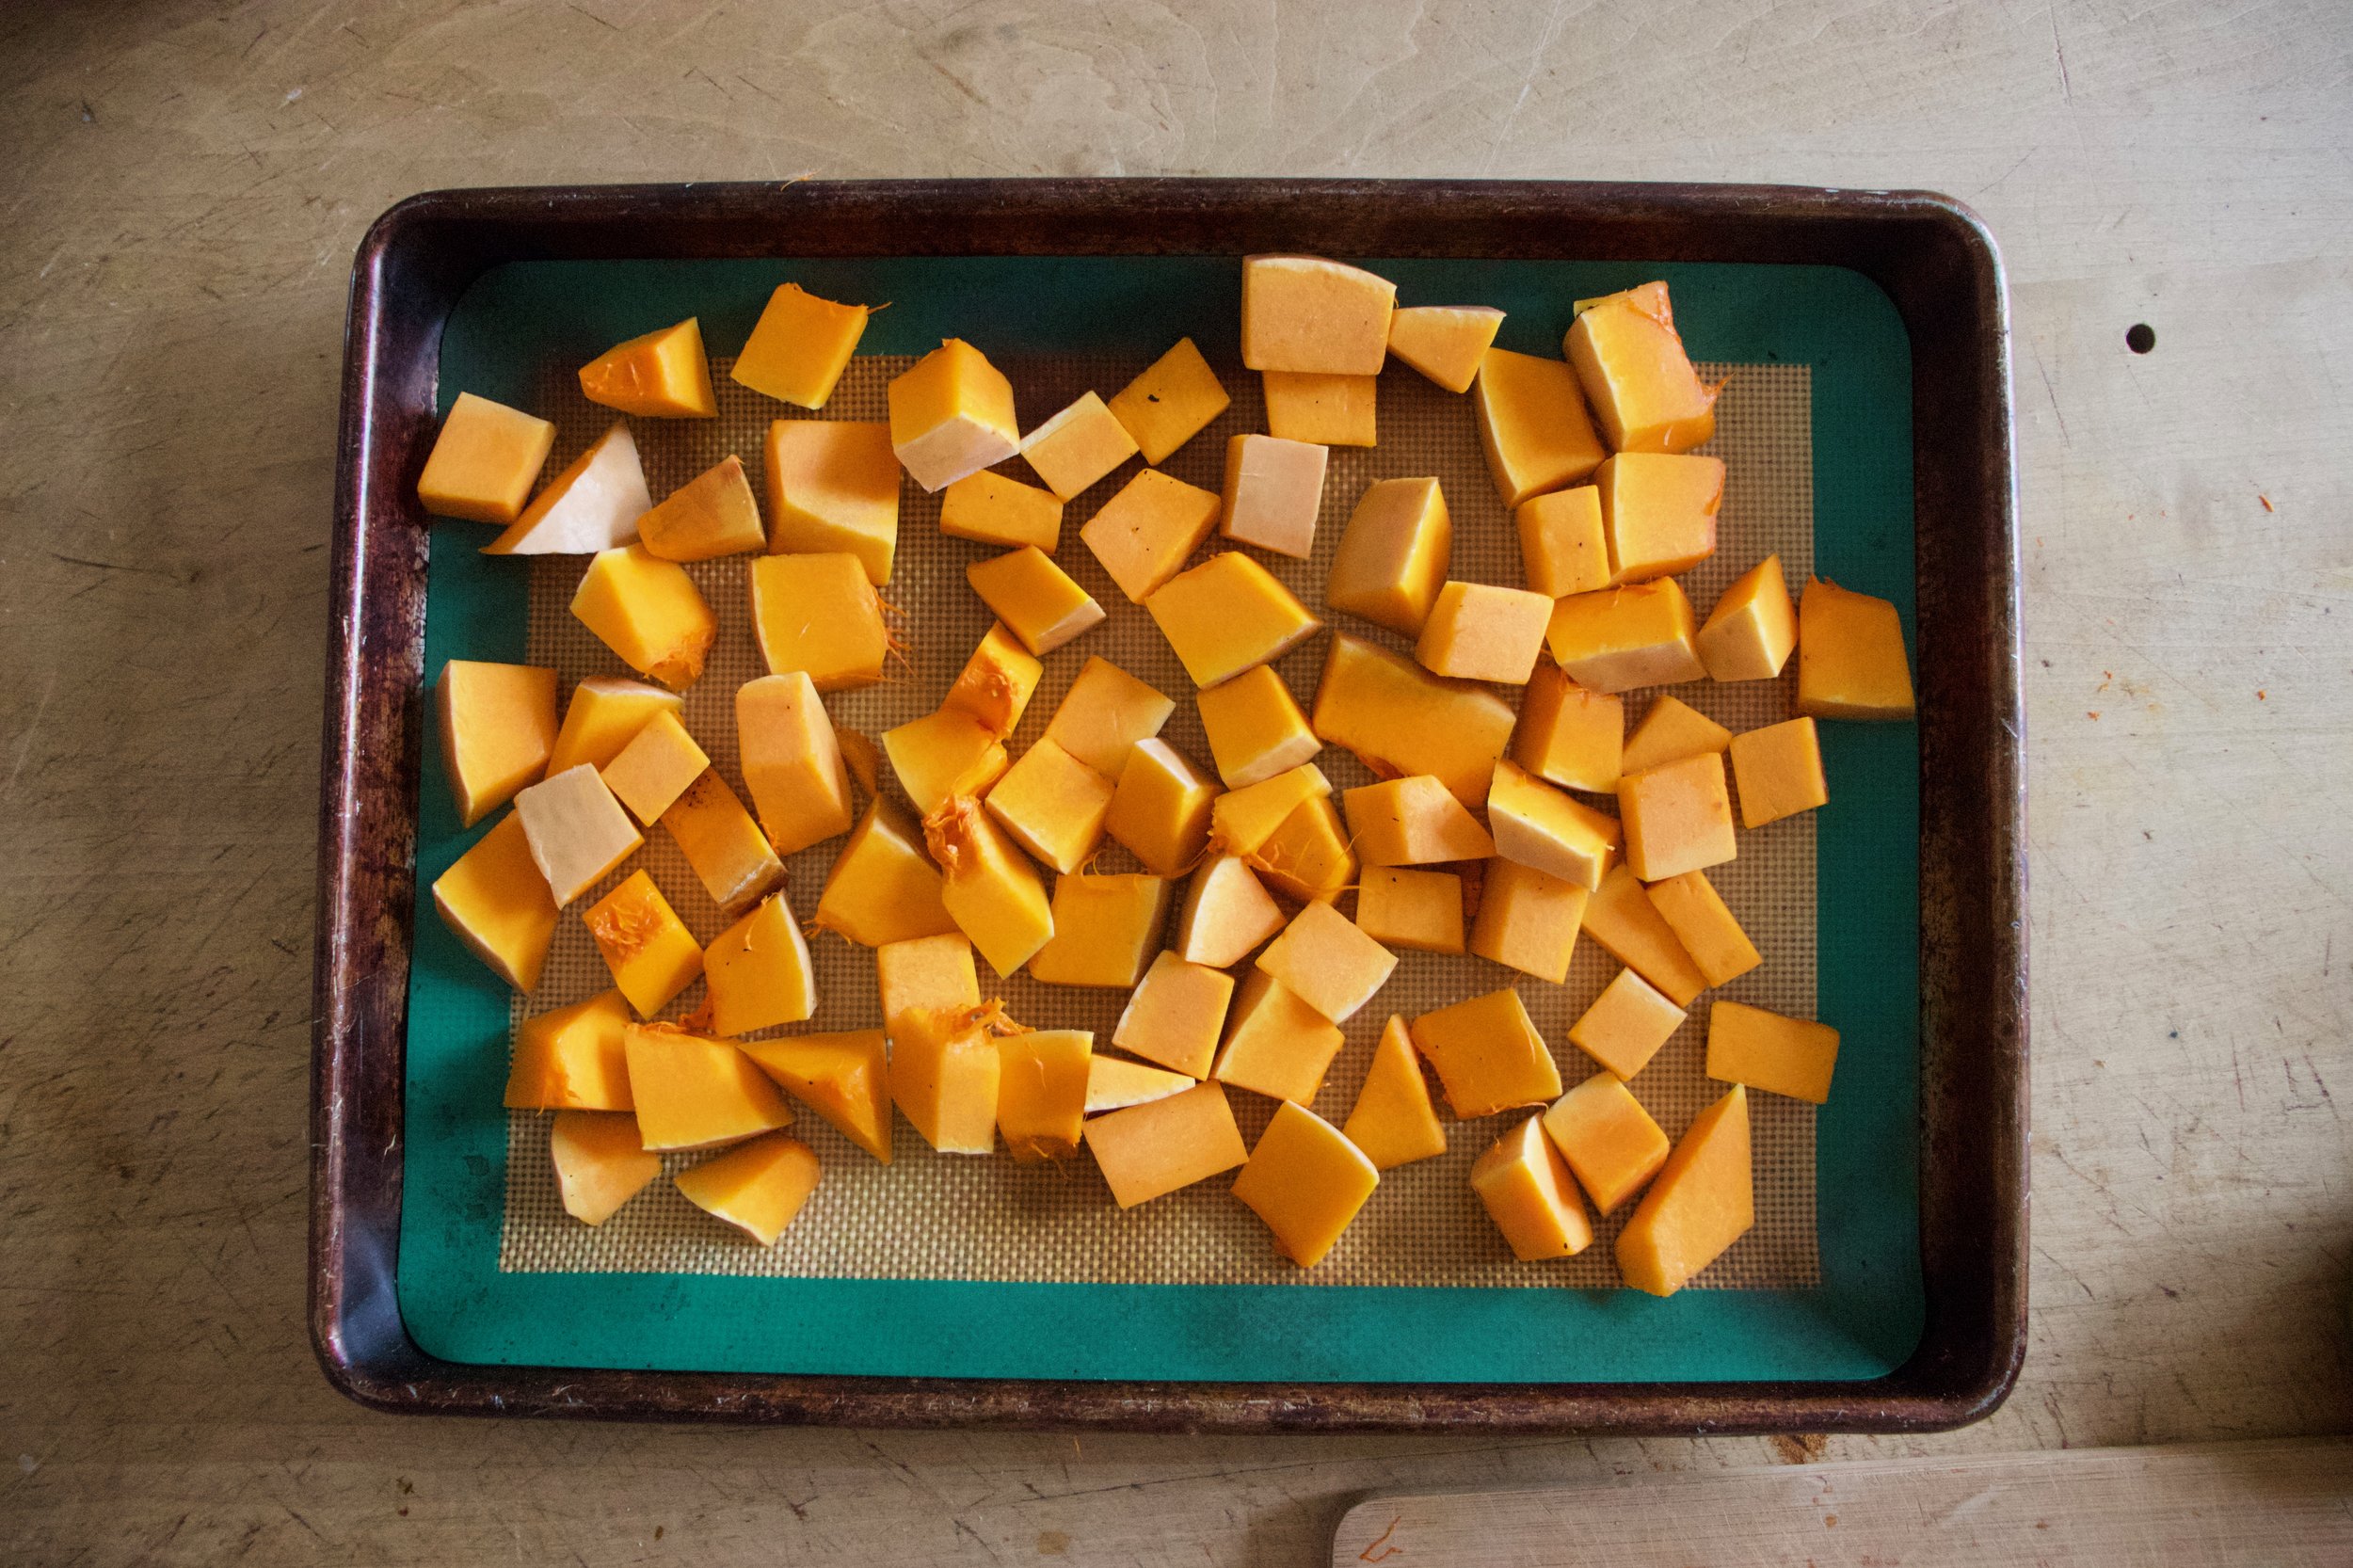
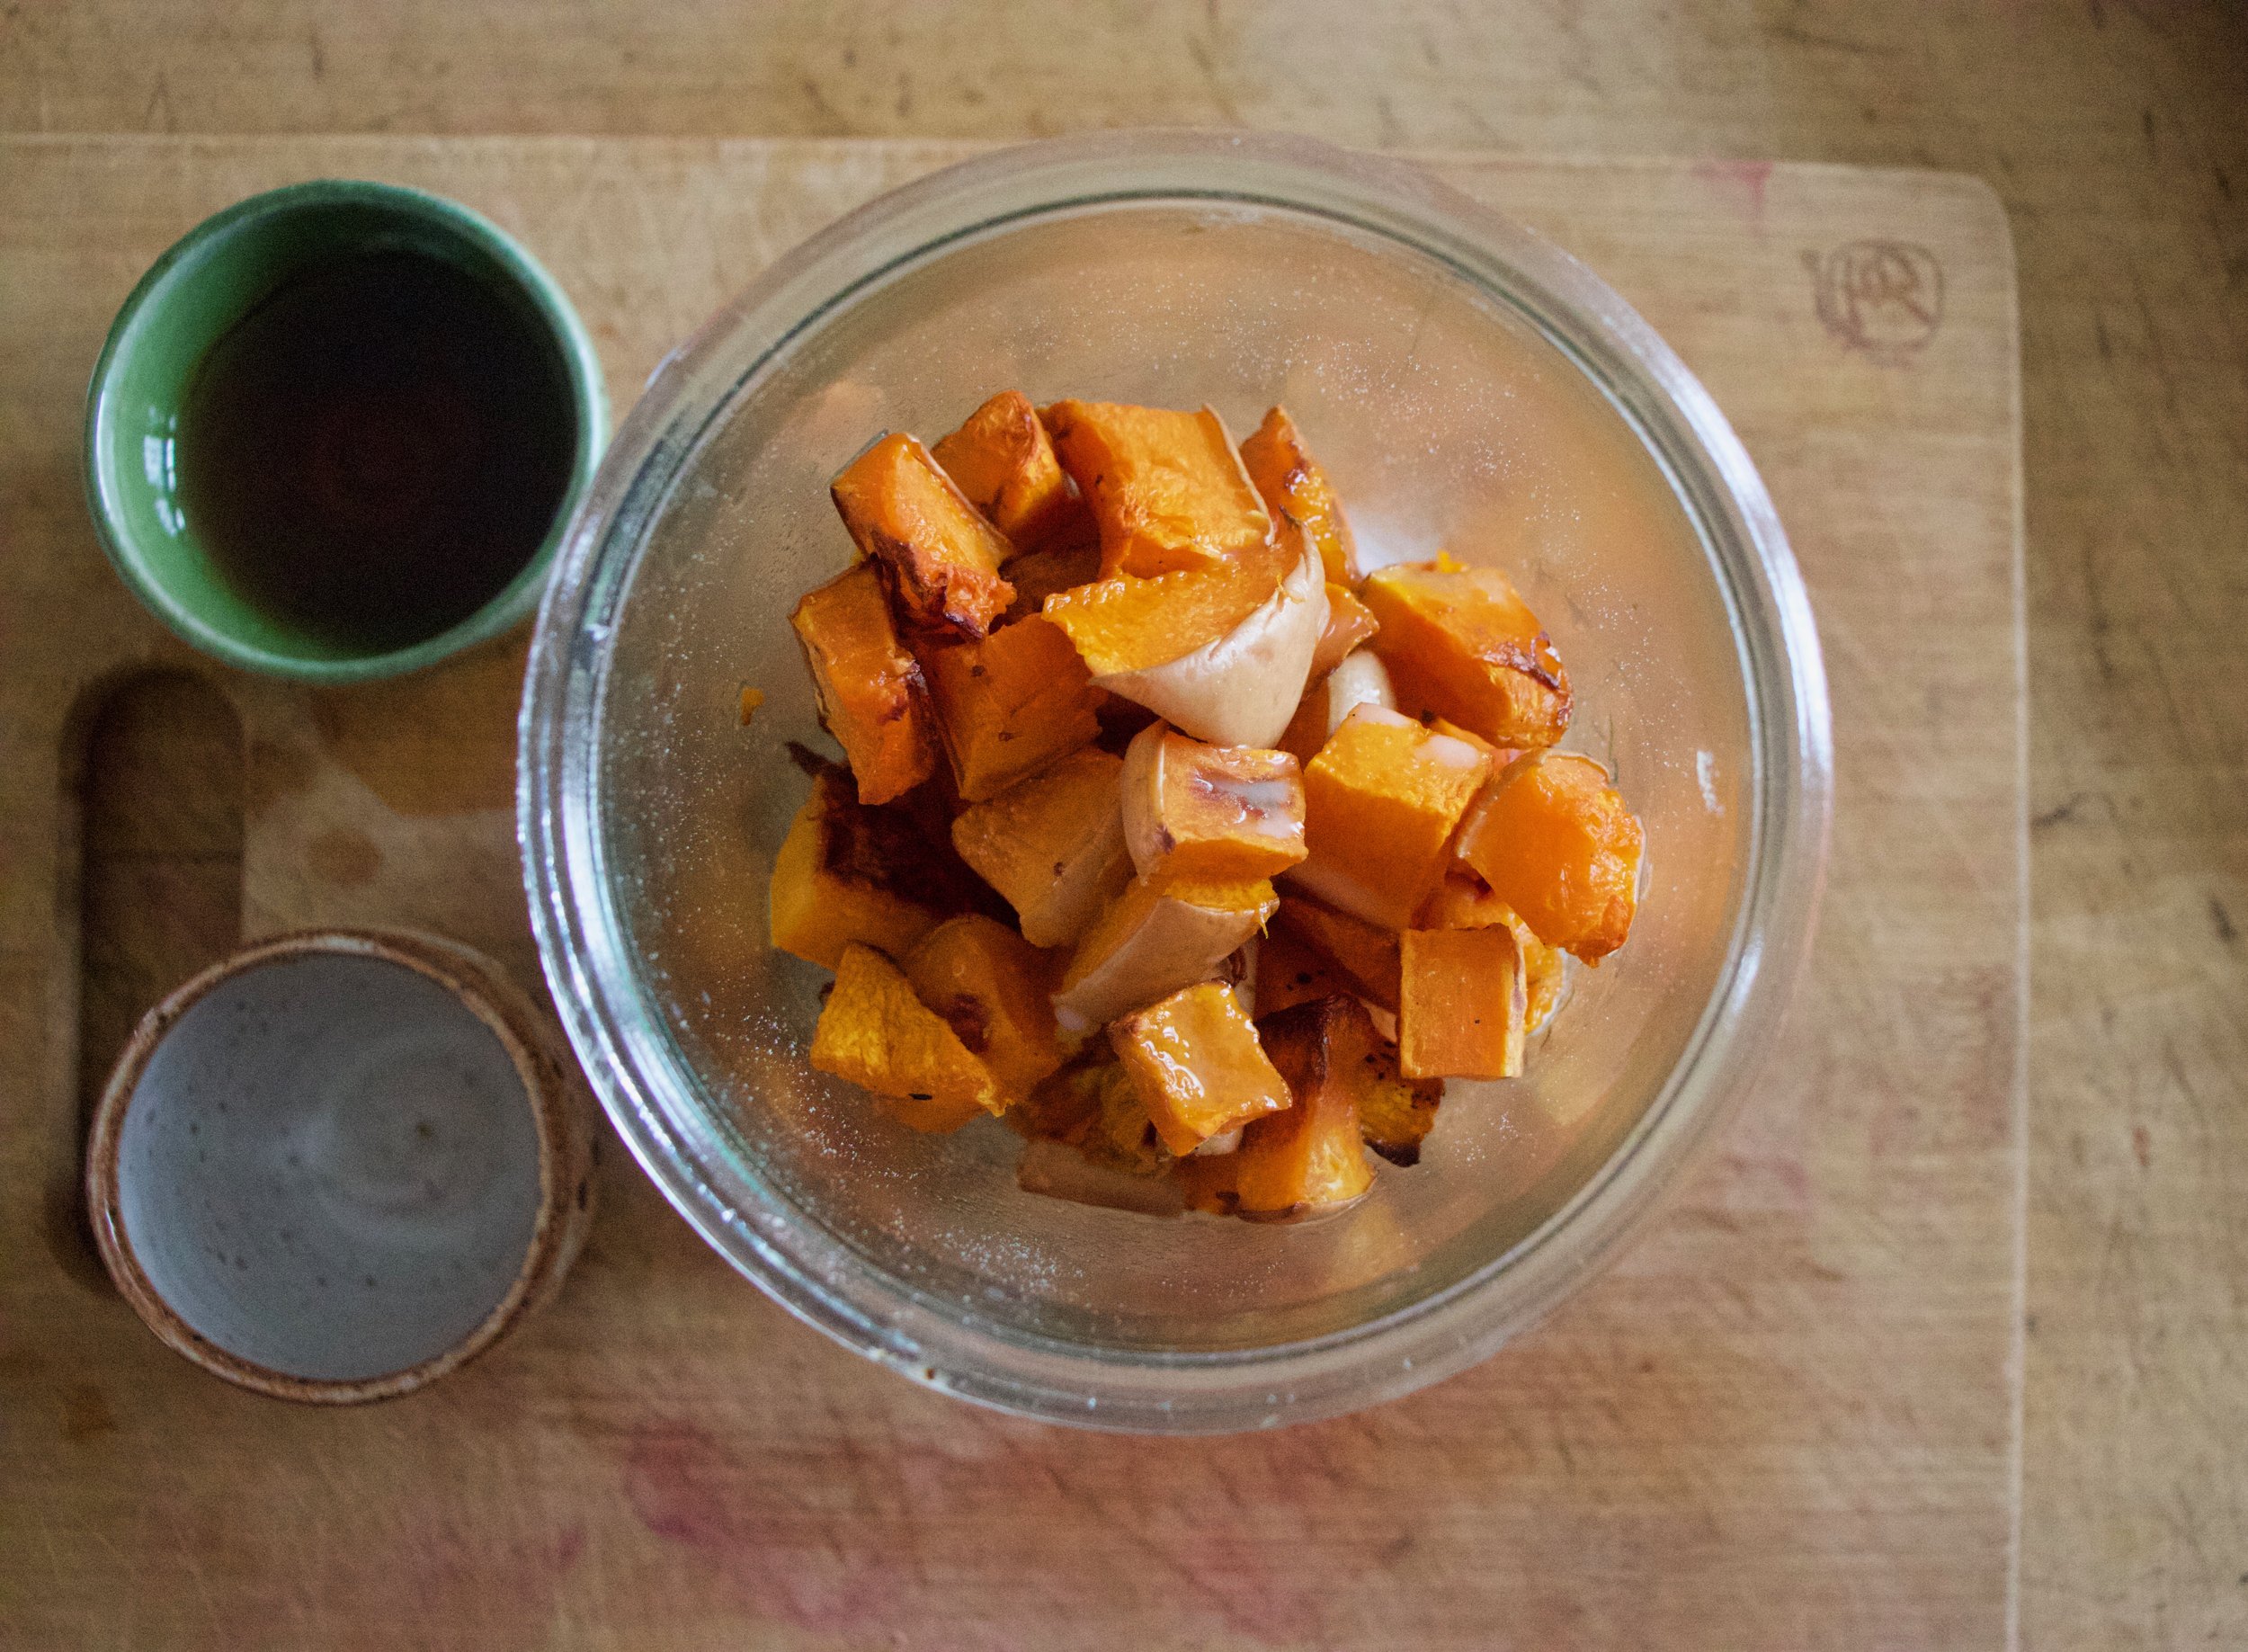
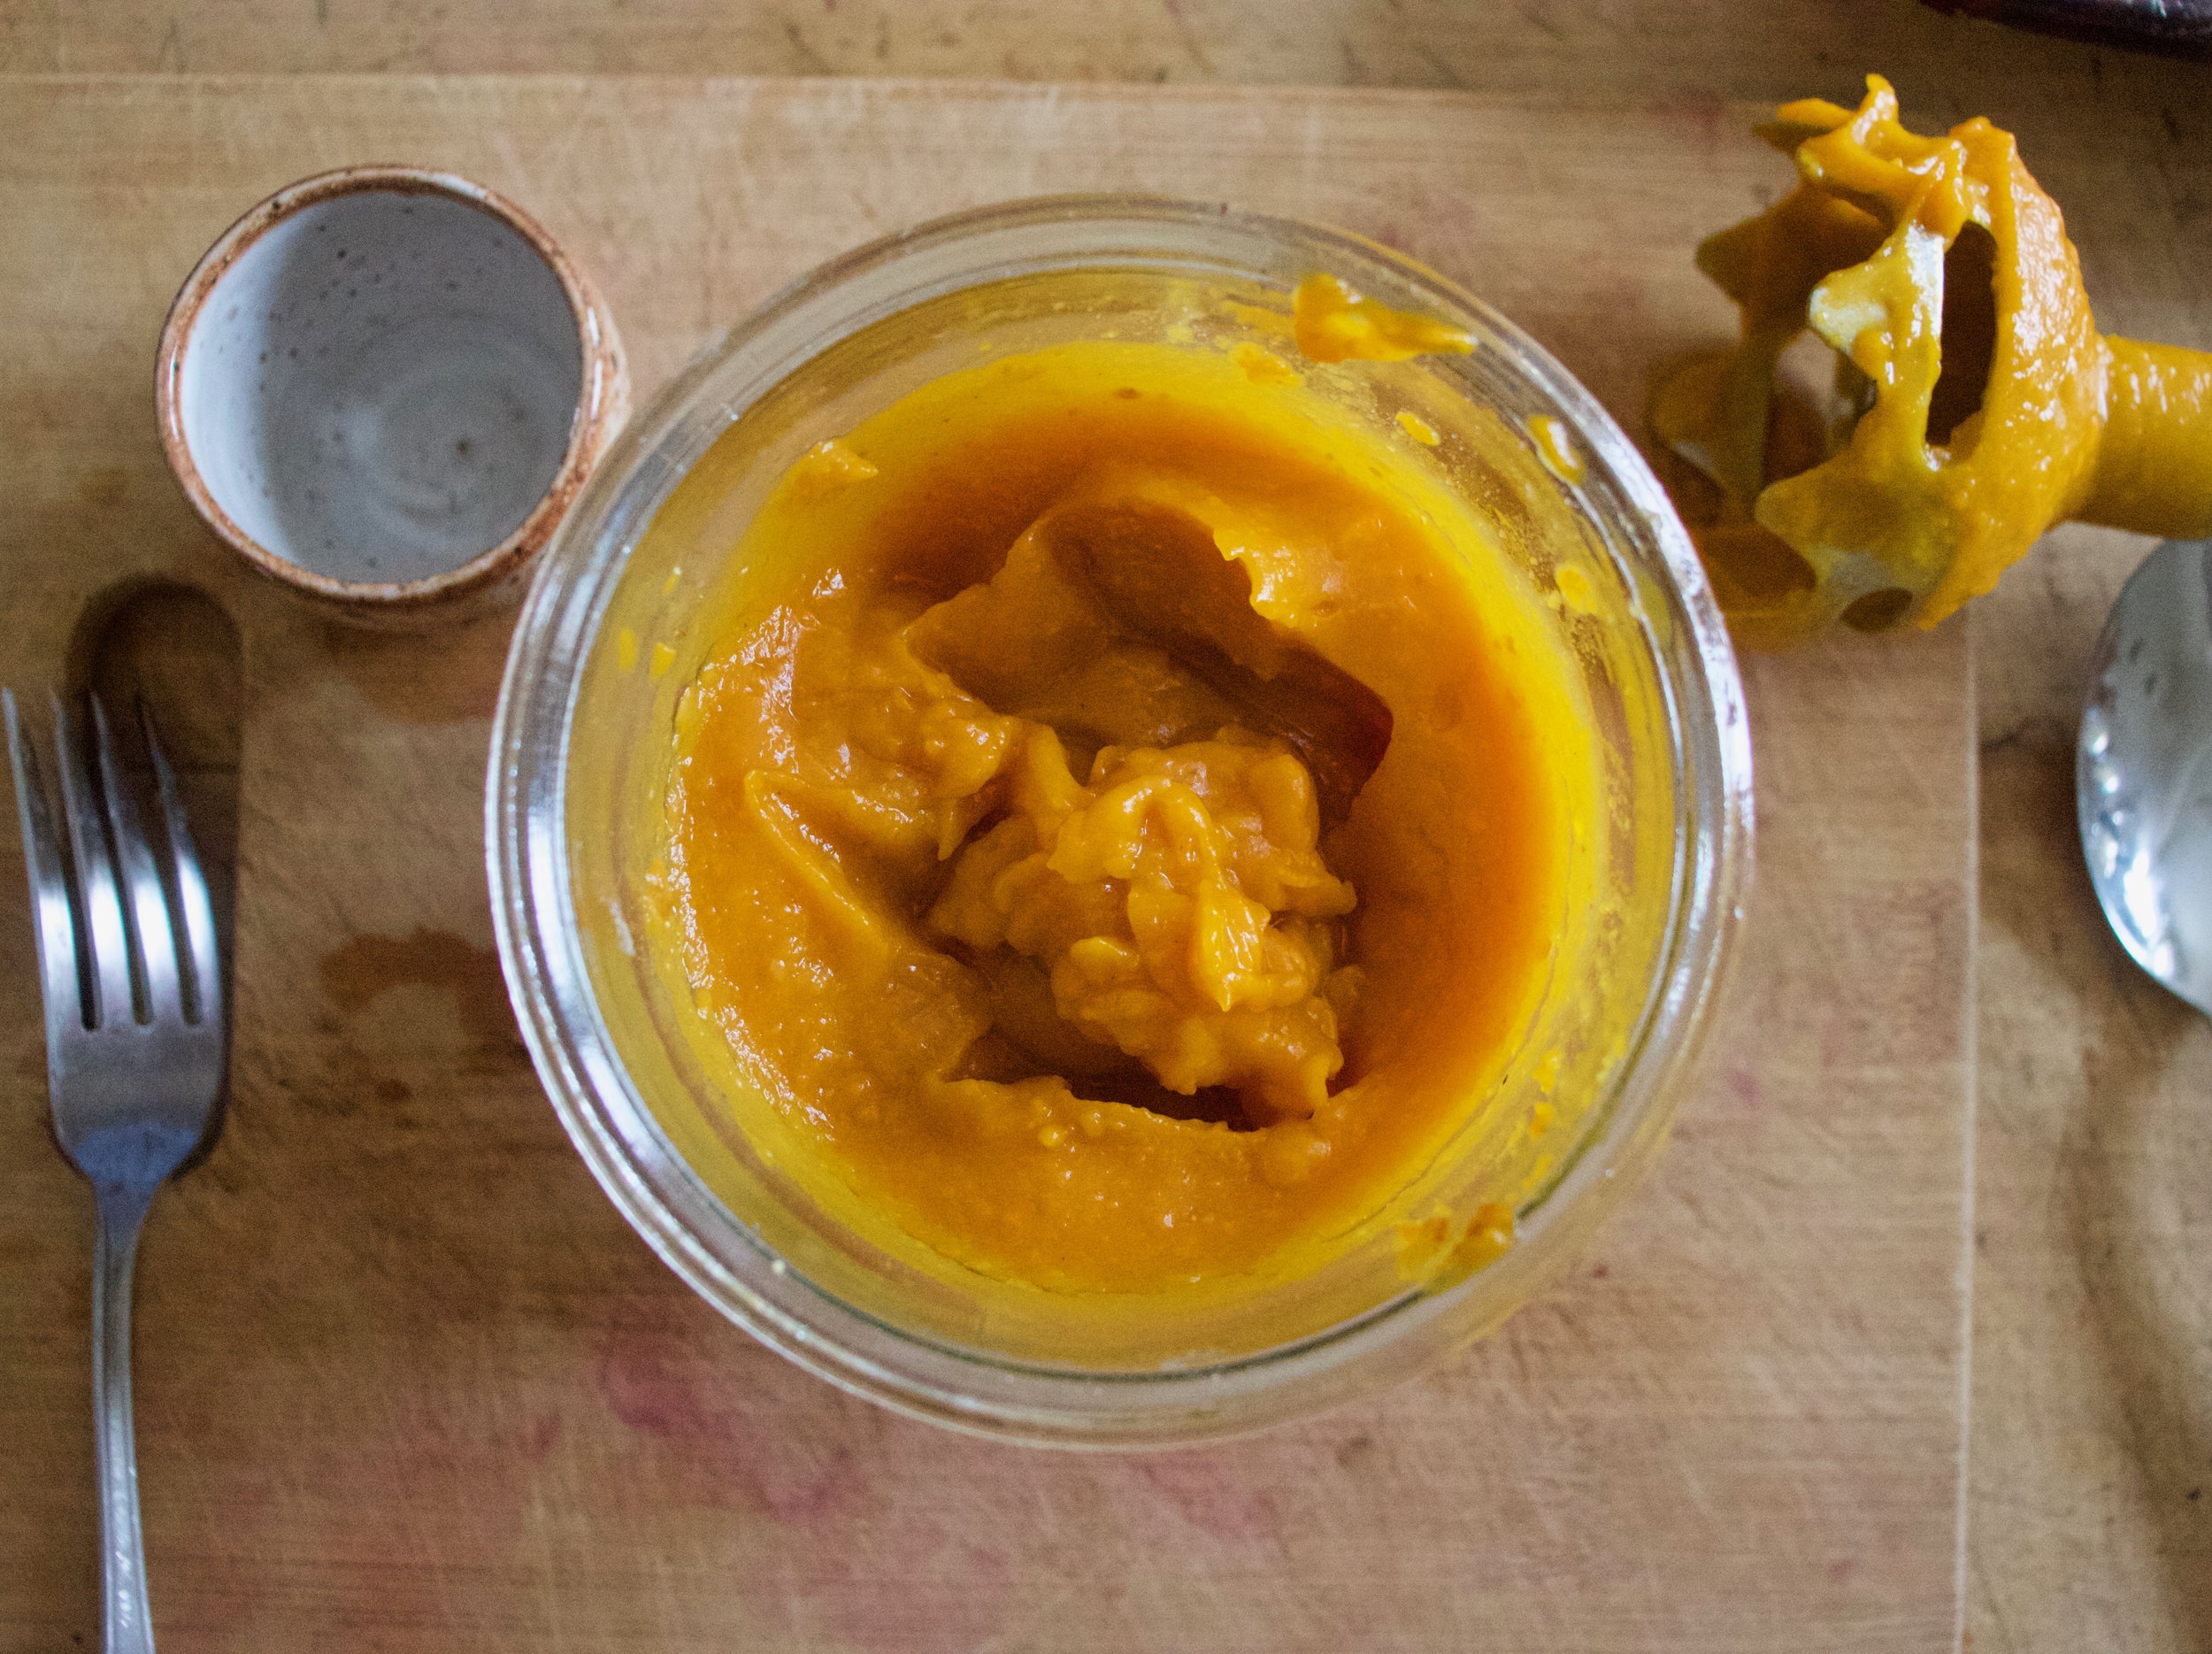
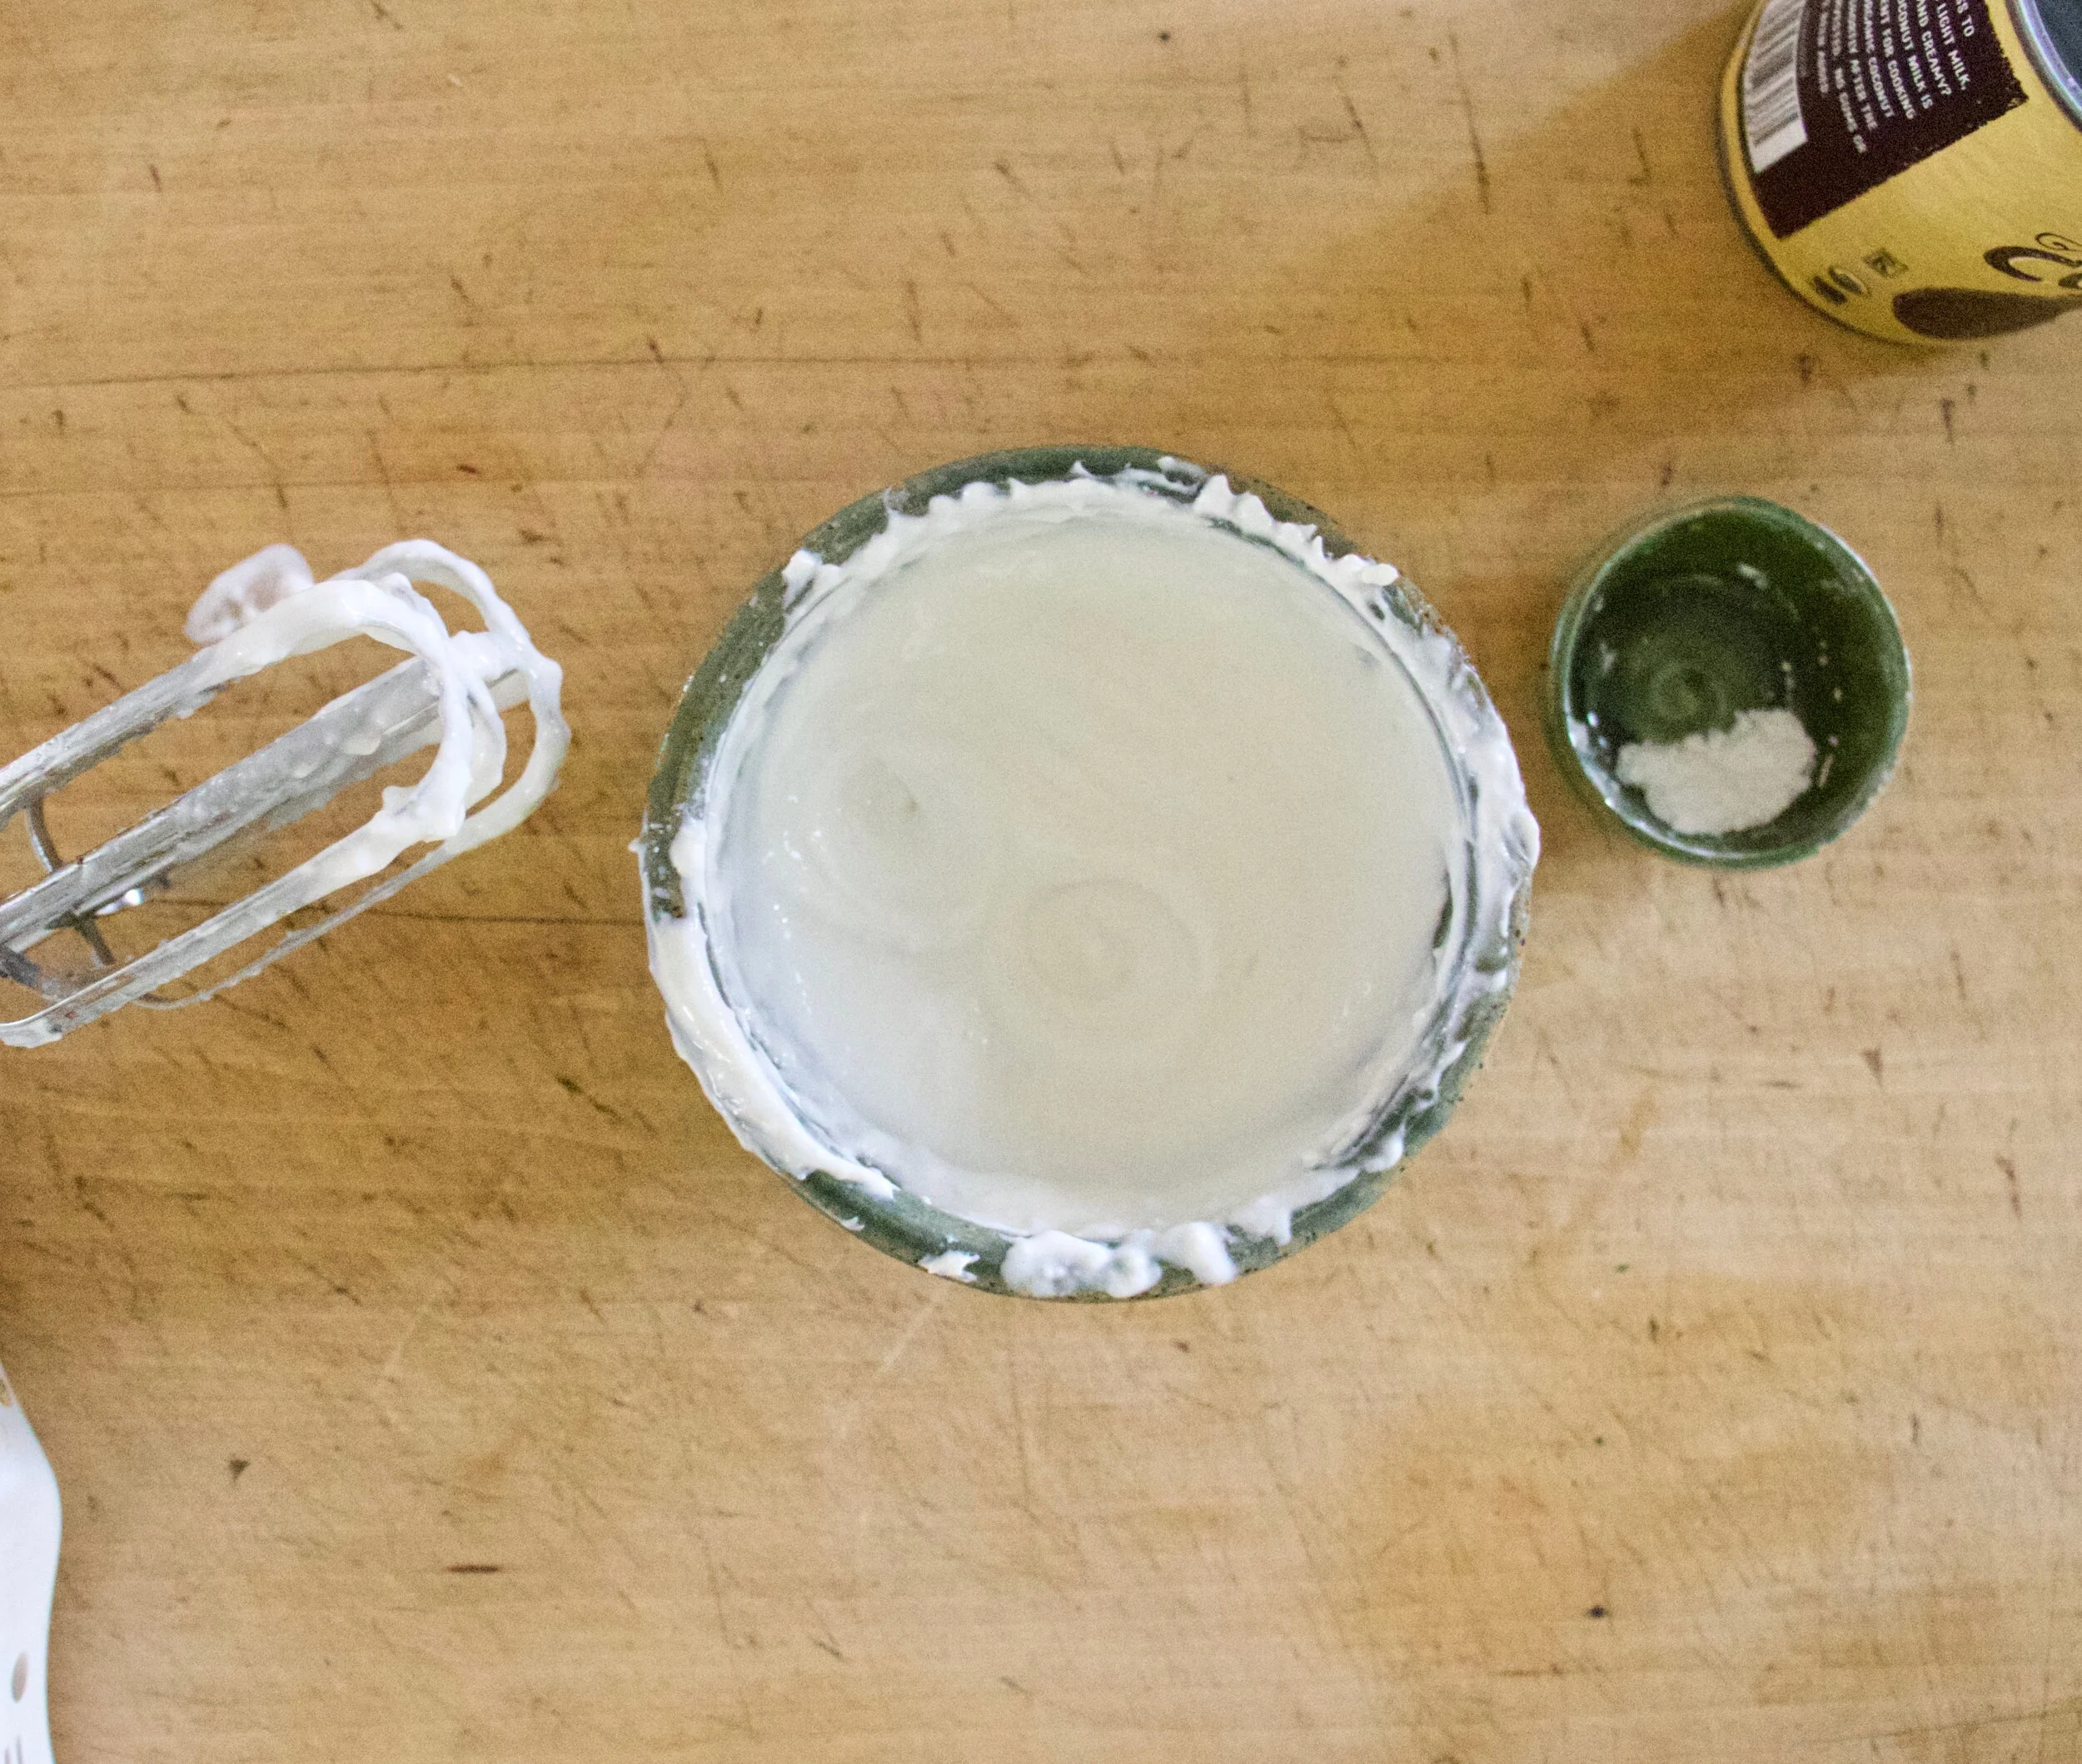
For the squash you need to roast it so do that. Place on a baking sheet and roast until tender. Once cooked transfer to a blender or jar (if using stick blender) , add in milk or water and blend until smooth. Add in maple to taste.

IMG_8544.jpg
IMG_8548.jpg
IMG_8556.jpg
IMG_8584.jpg

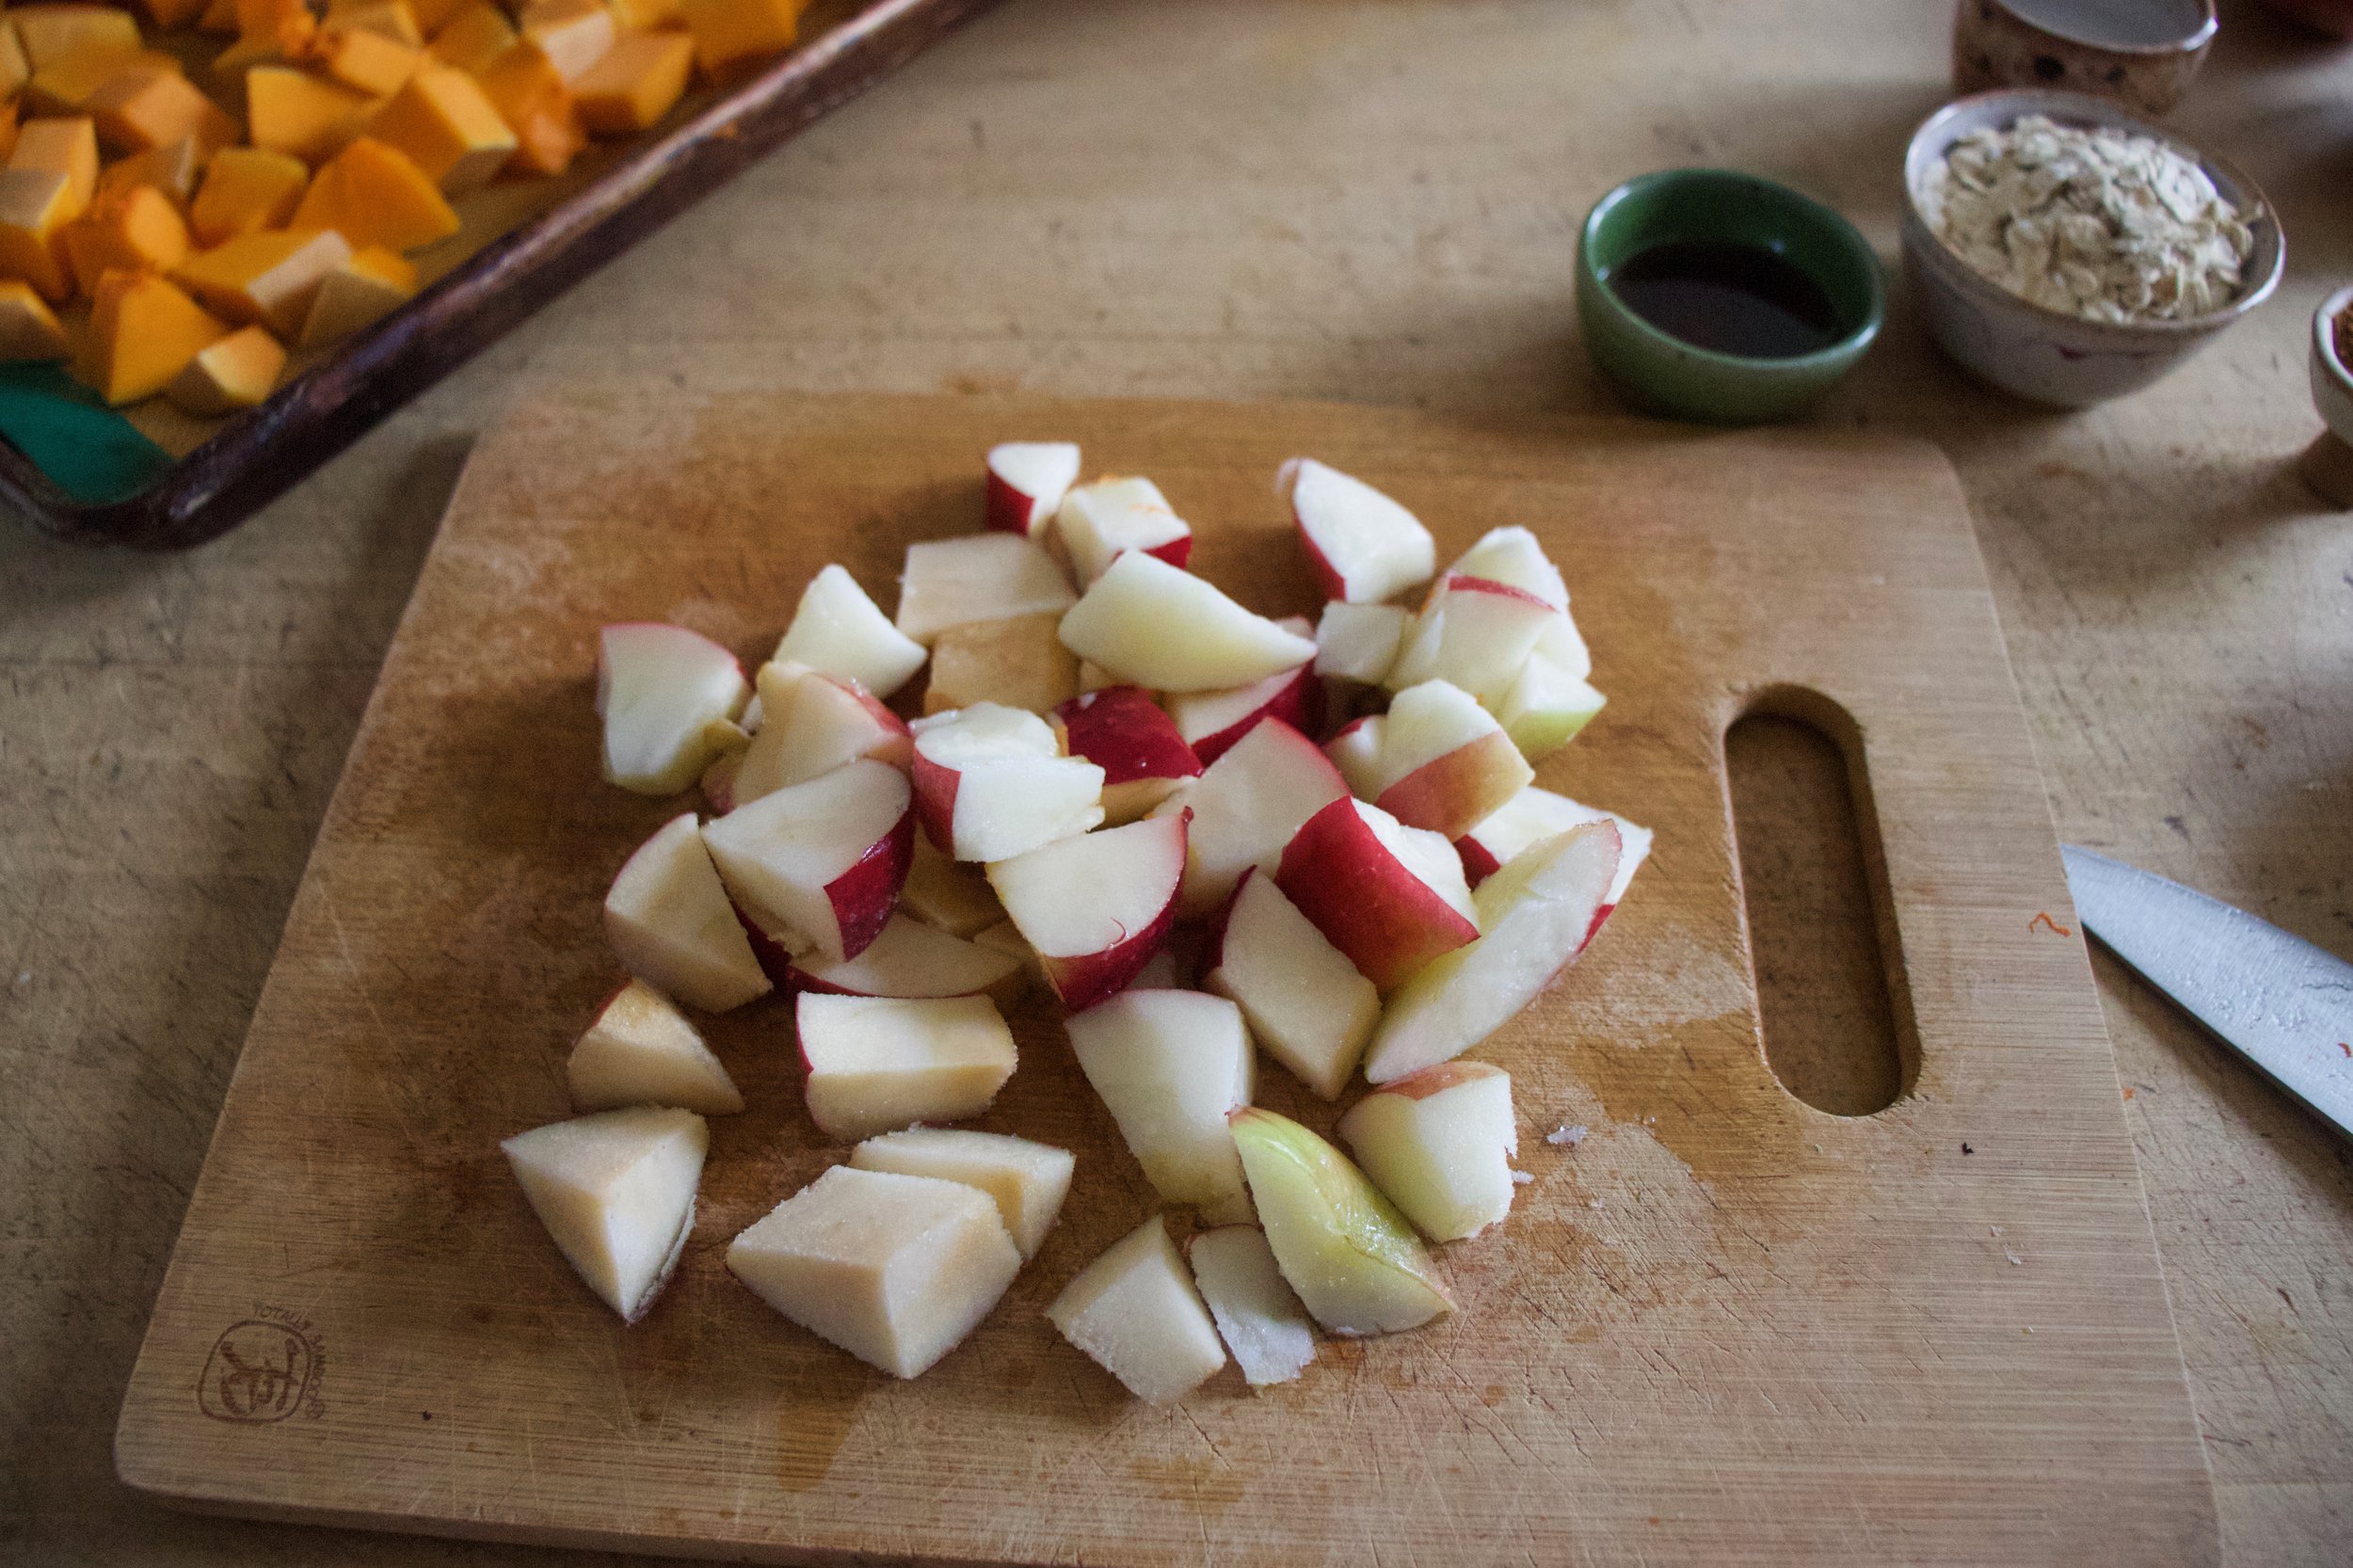
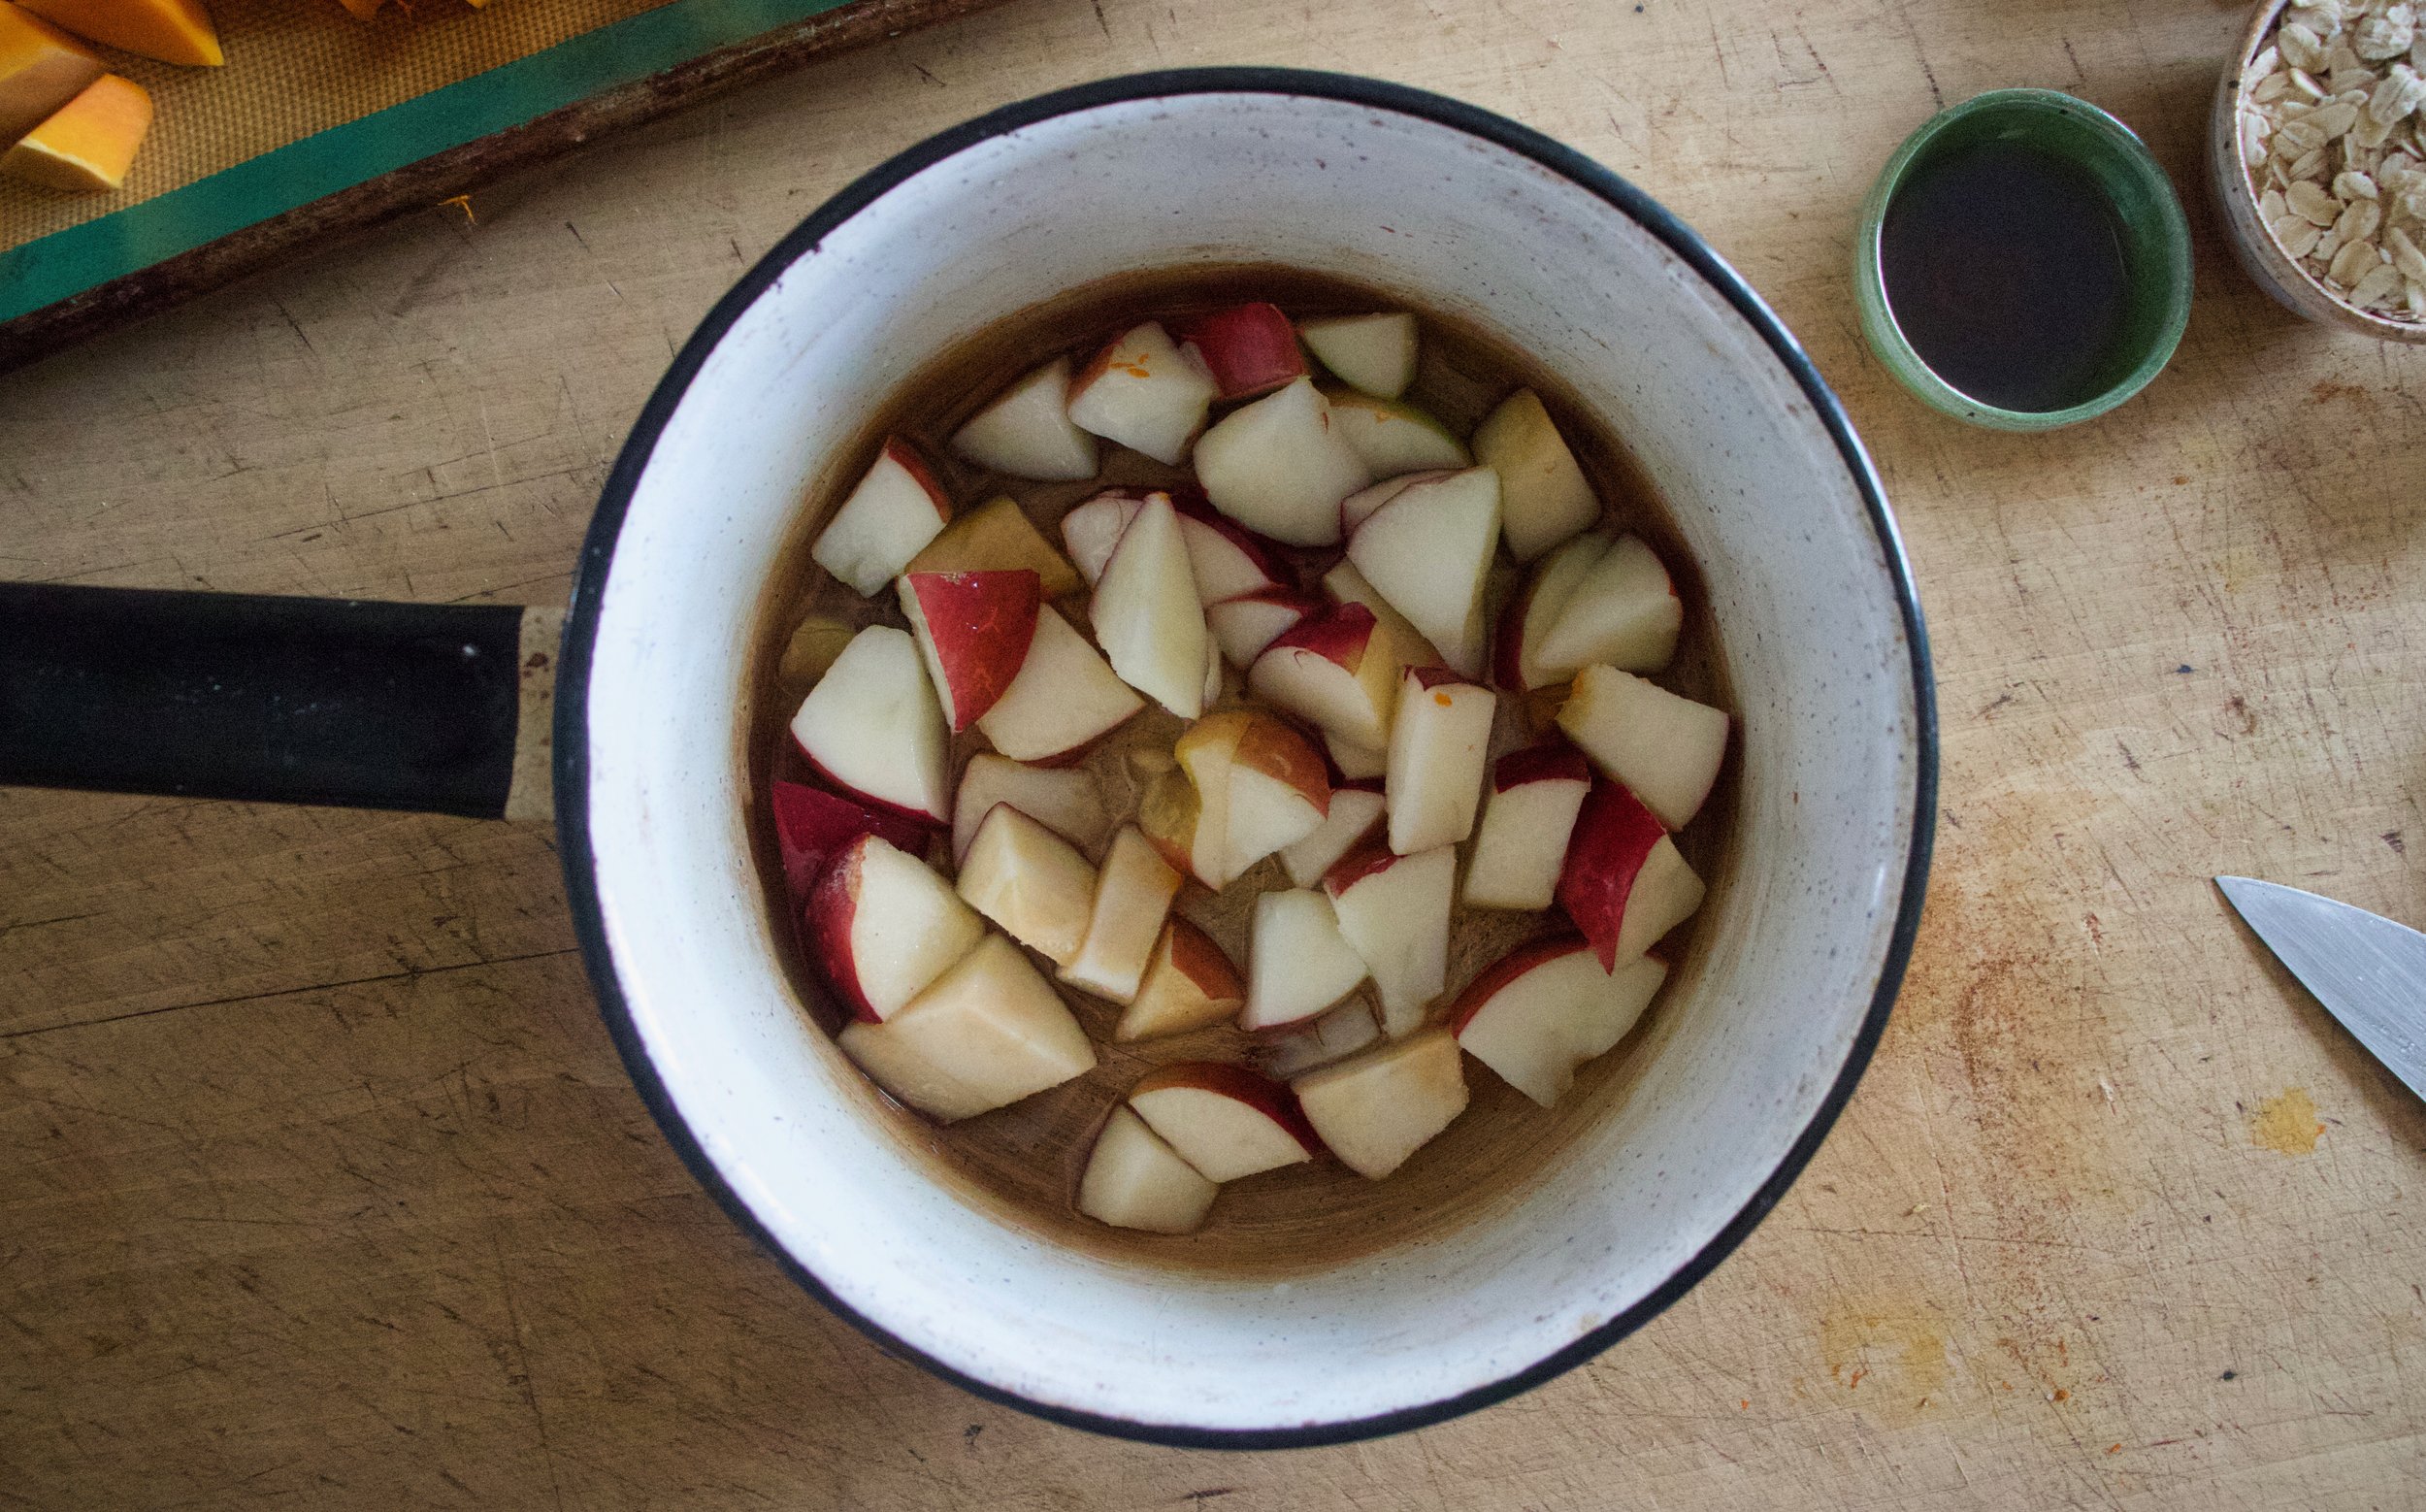
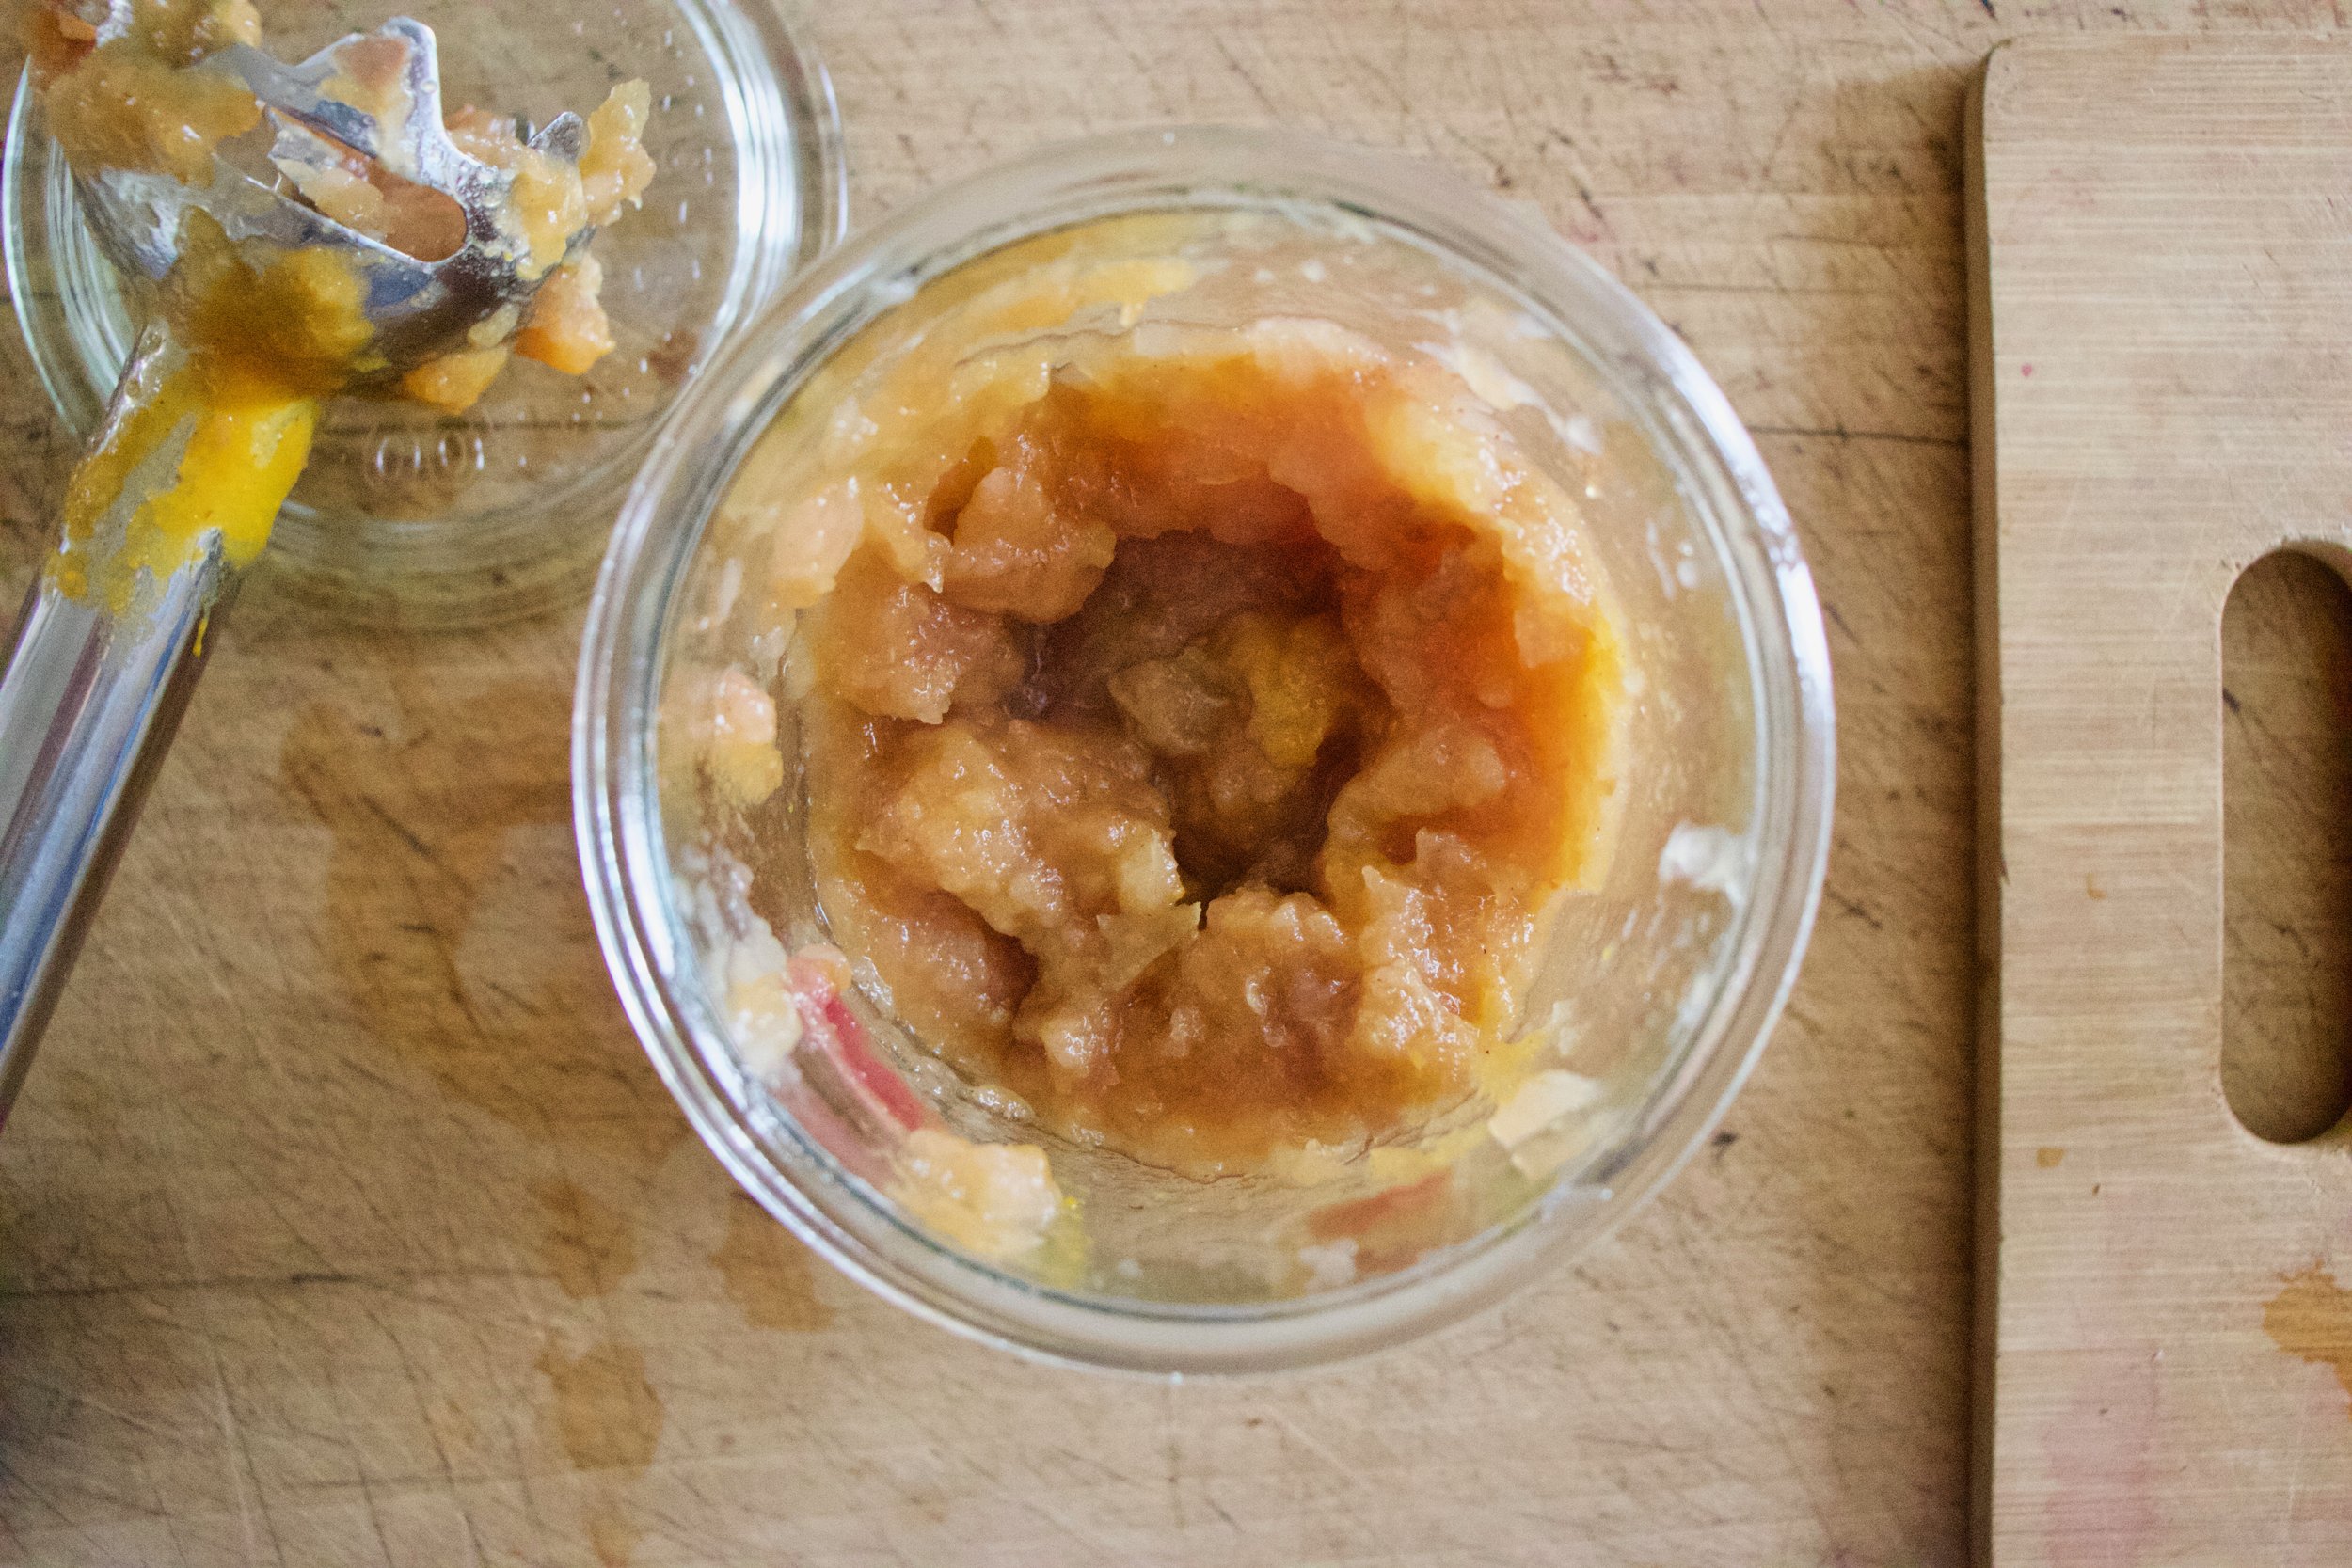
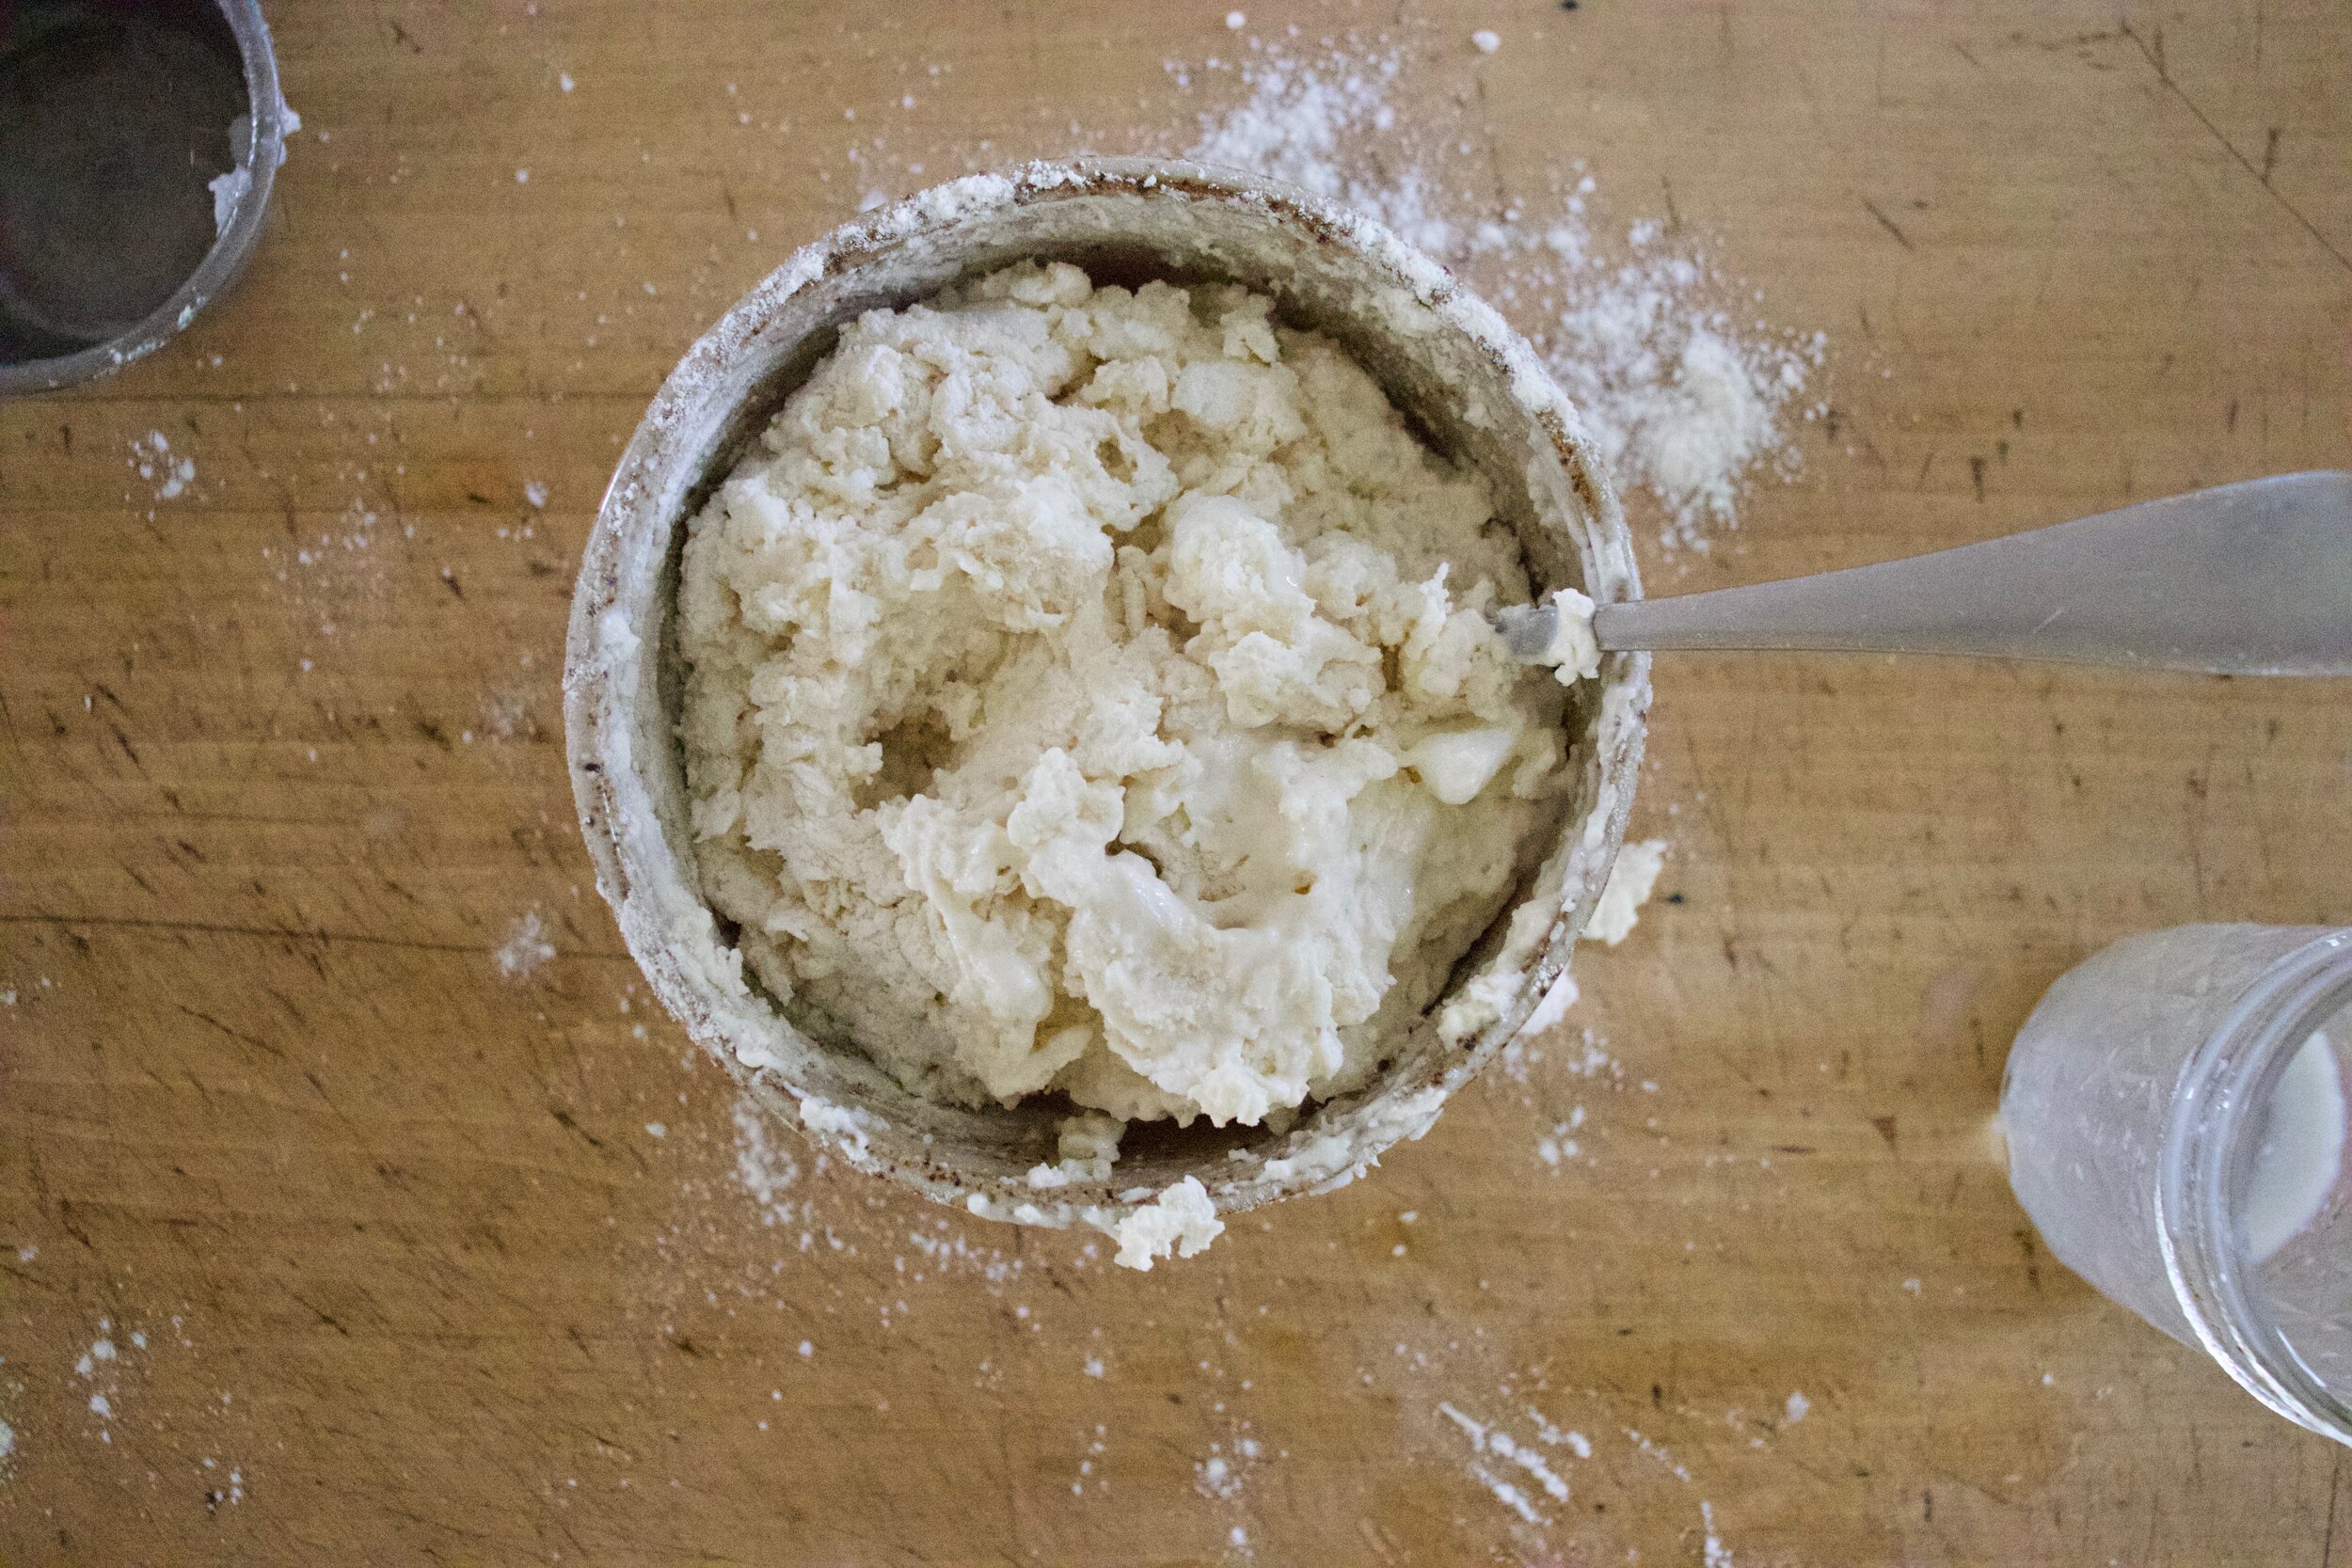
For apples. Core and chop apples into small pieces and place into a pot with water. Cook on medium heat until apples completely break down. Then either transfer to a blender or use as stick blender and blend until slightly smooth but still a bit chunky. Stir in some cinnamon.

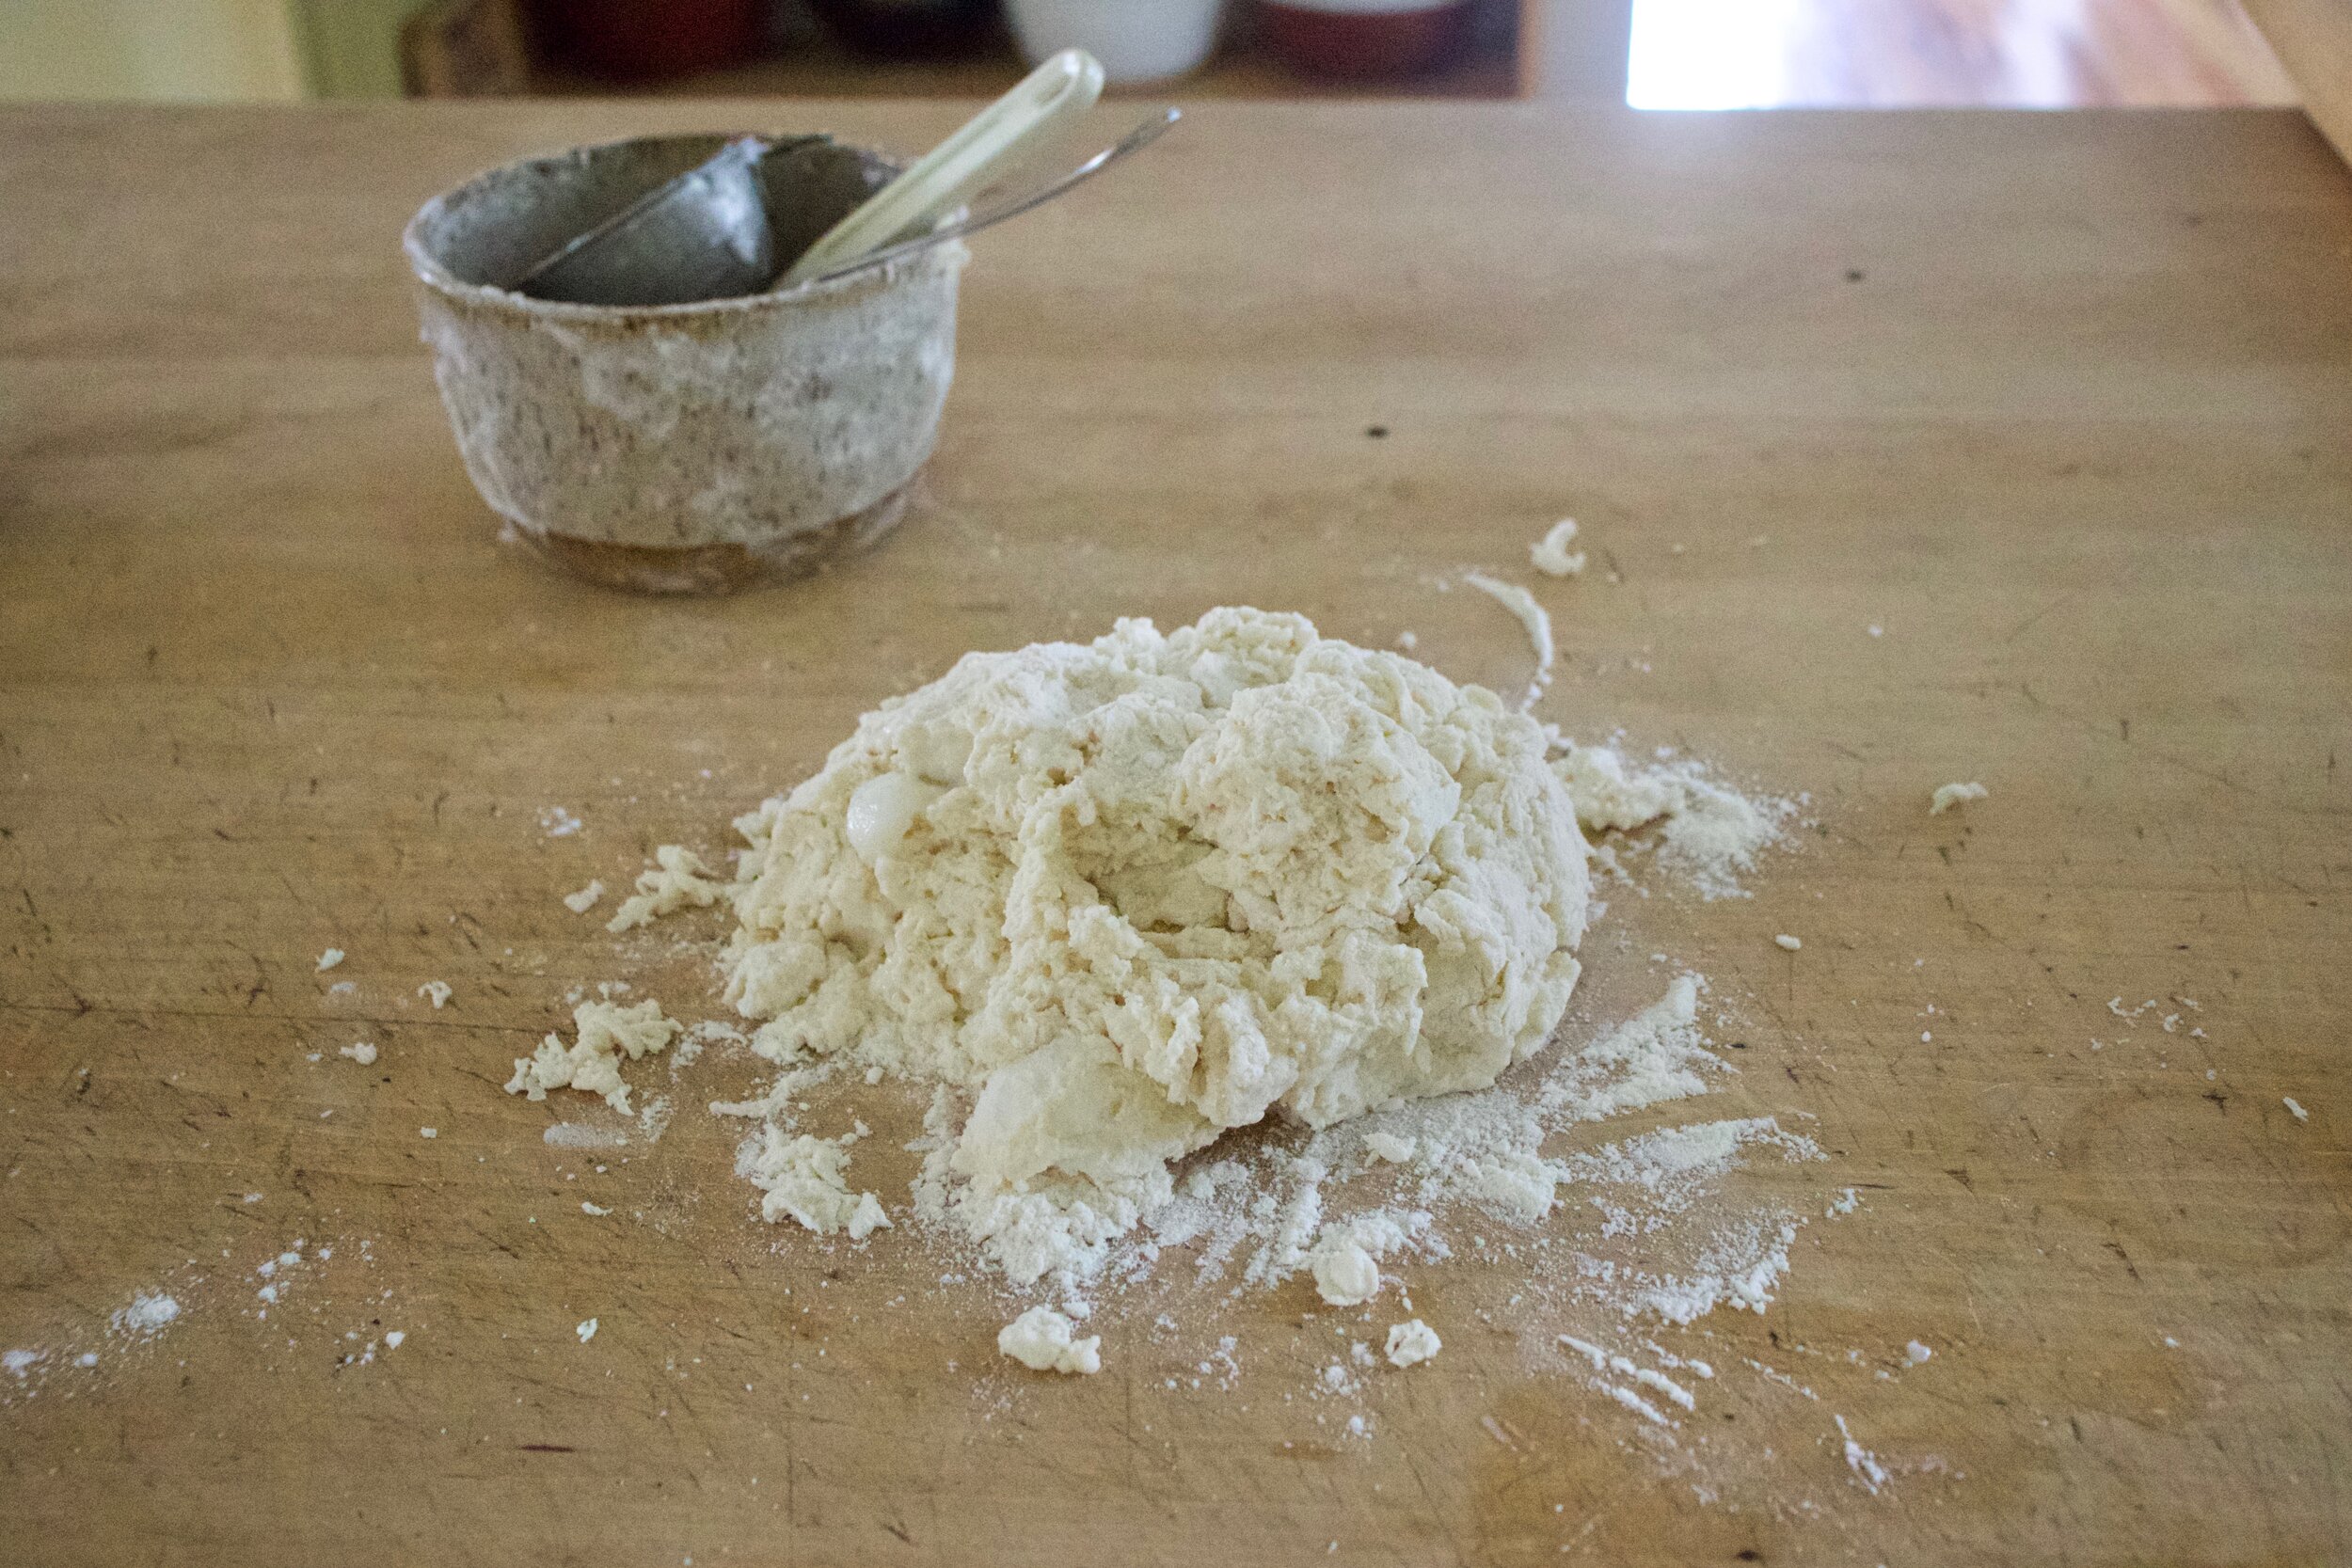
And toast up the oats and walnuts, in the oven, just for 5-8 minutes.

Now assemble. You can do this while the stuff is still warm or wait until it is cold. Delicious either way.

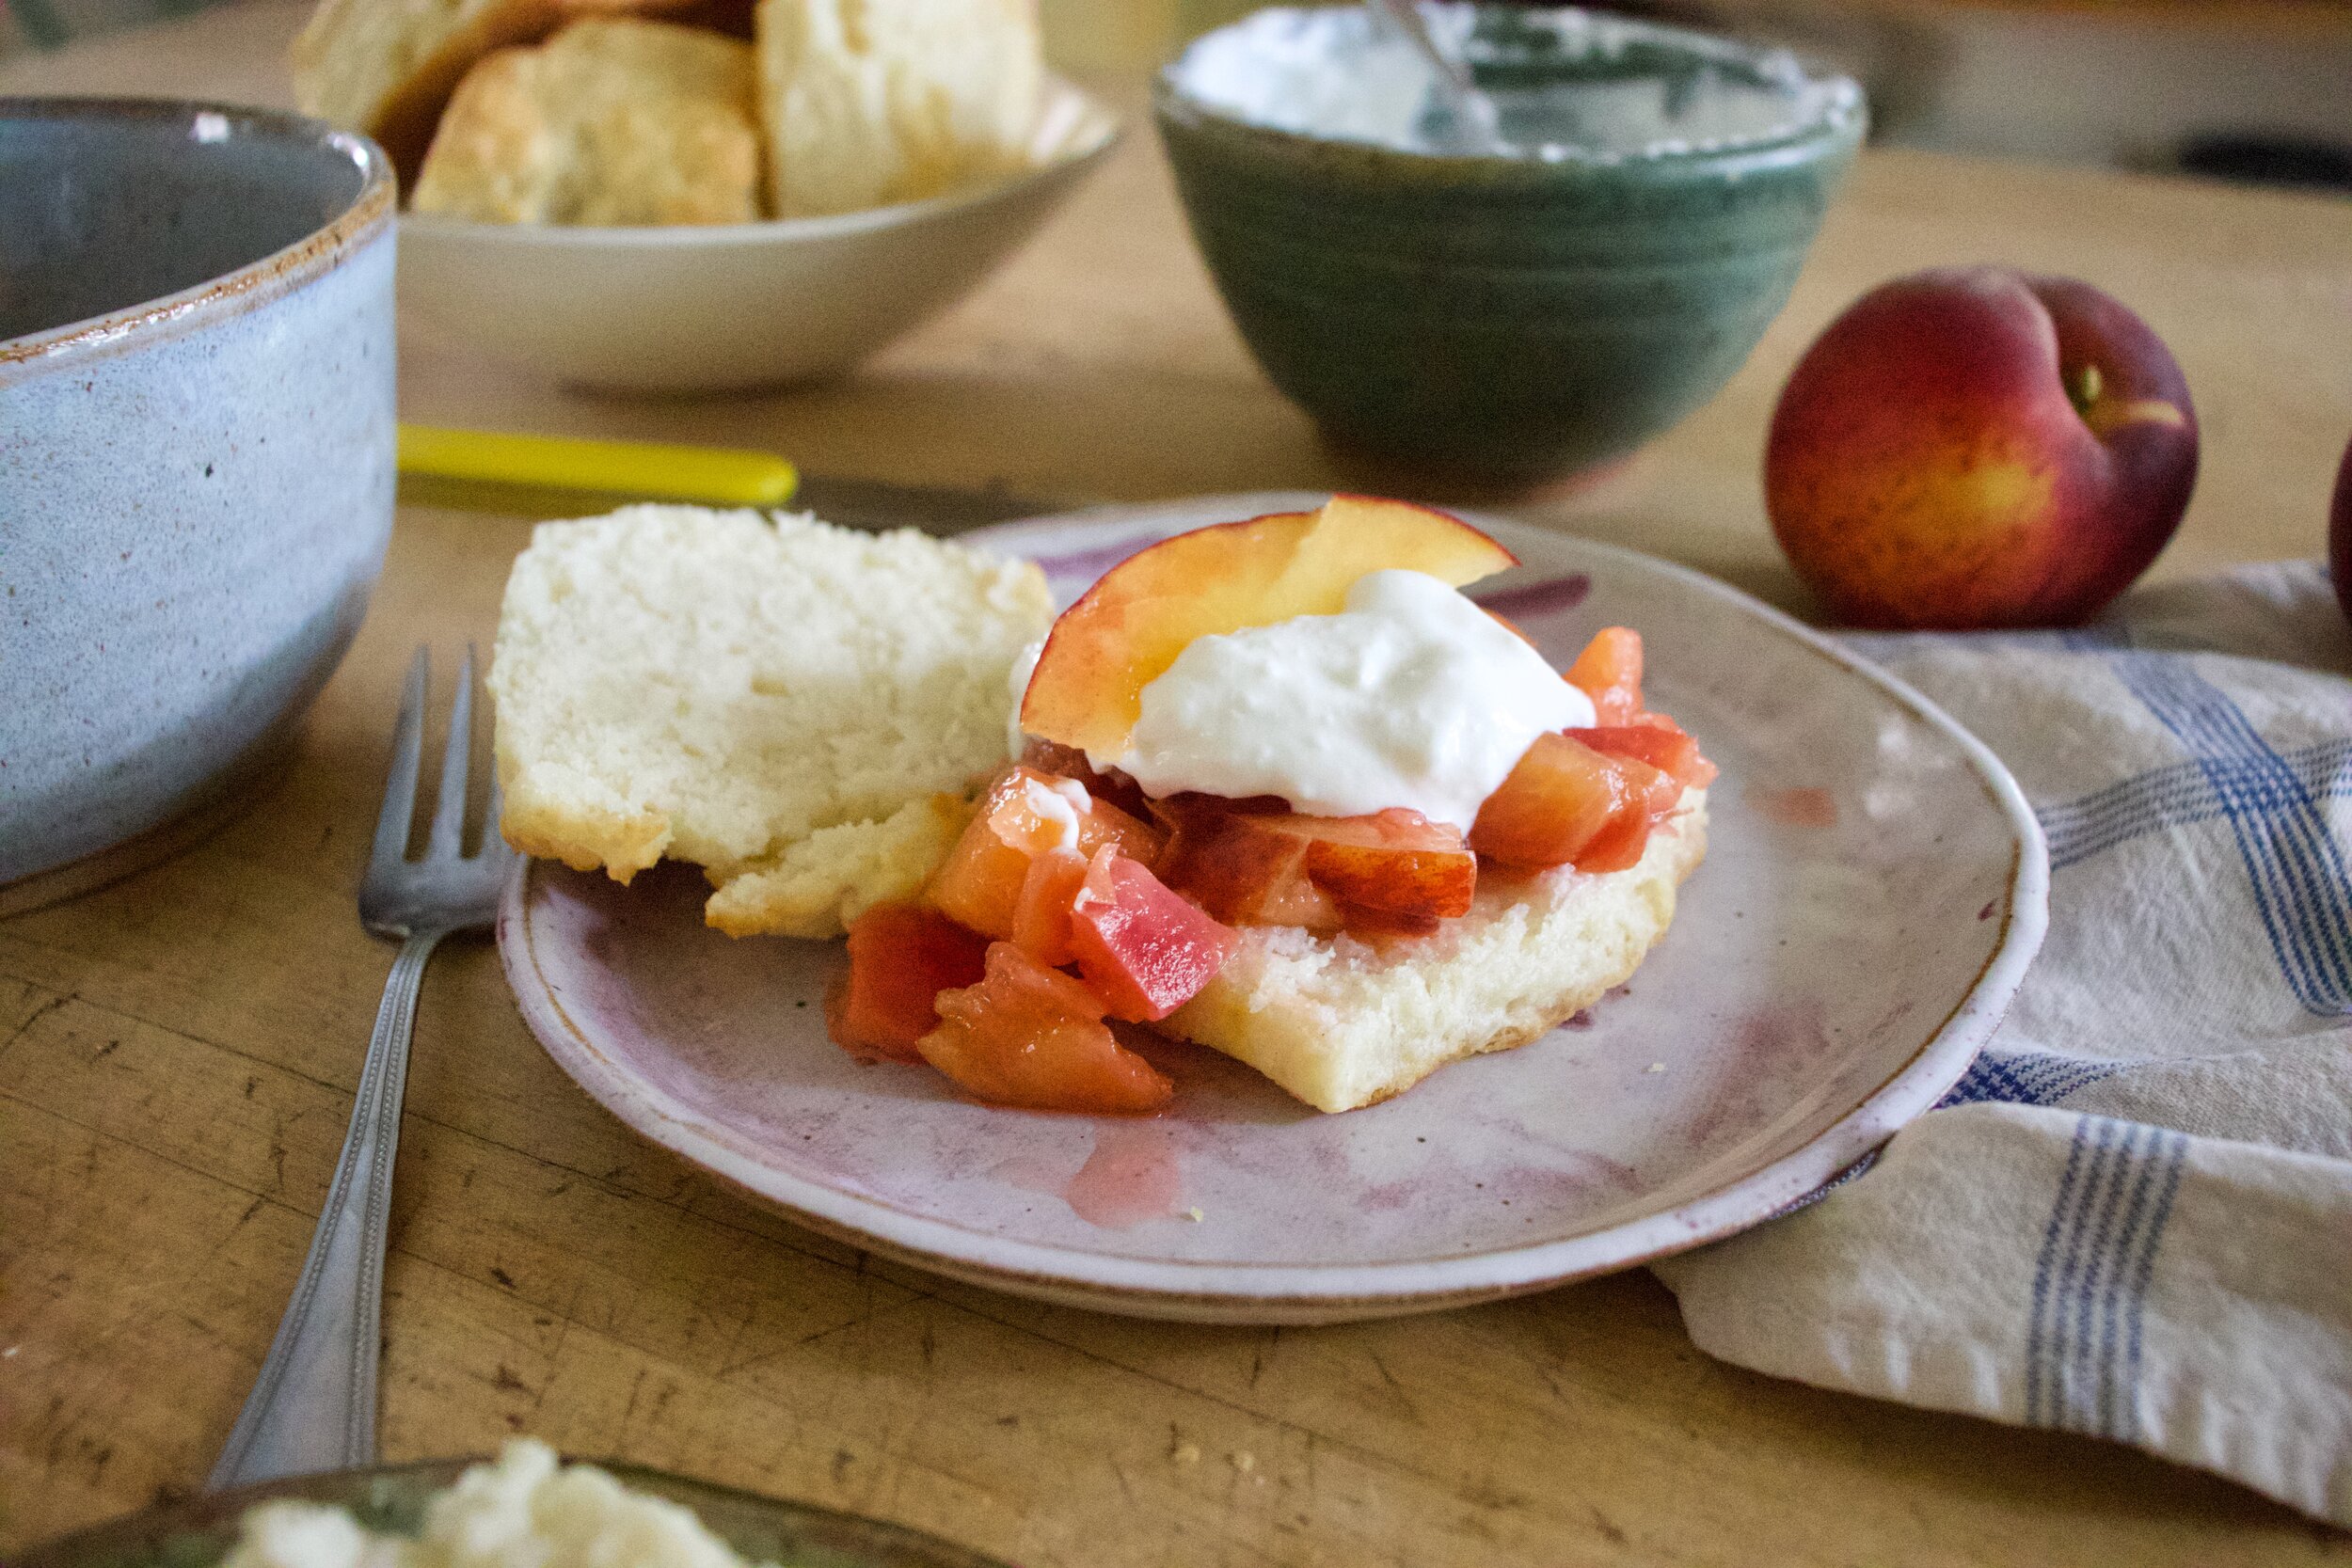
So basically all you do is layer a bit of the squash and then apple a few times in a bowl or jar then top with toasted oats and walnuts. Simple as that.

Ans then you eat it. Or wait and eat it later. Or do what I did and assemble a few jars for the week but then eat all of them in one day. I couldn't stop myself. It was just too freaking good.

-C


Butternut Squash and Apple parfait

makes 2-3 parfaits

  • 3 cups cubed butternut squash

  • 2 large apples (I used Macs)

  • 1/2-3/4 cups plant milk (or water)

  • 1-2 teaspoons maple syrup (optional)

  • 1-2 teaspoon cinnamon

  • 1/2 cup old fashion oats

  • 1/4 cup walnut pieces

  • 1/2 cup water

Preheat oven to 425.

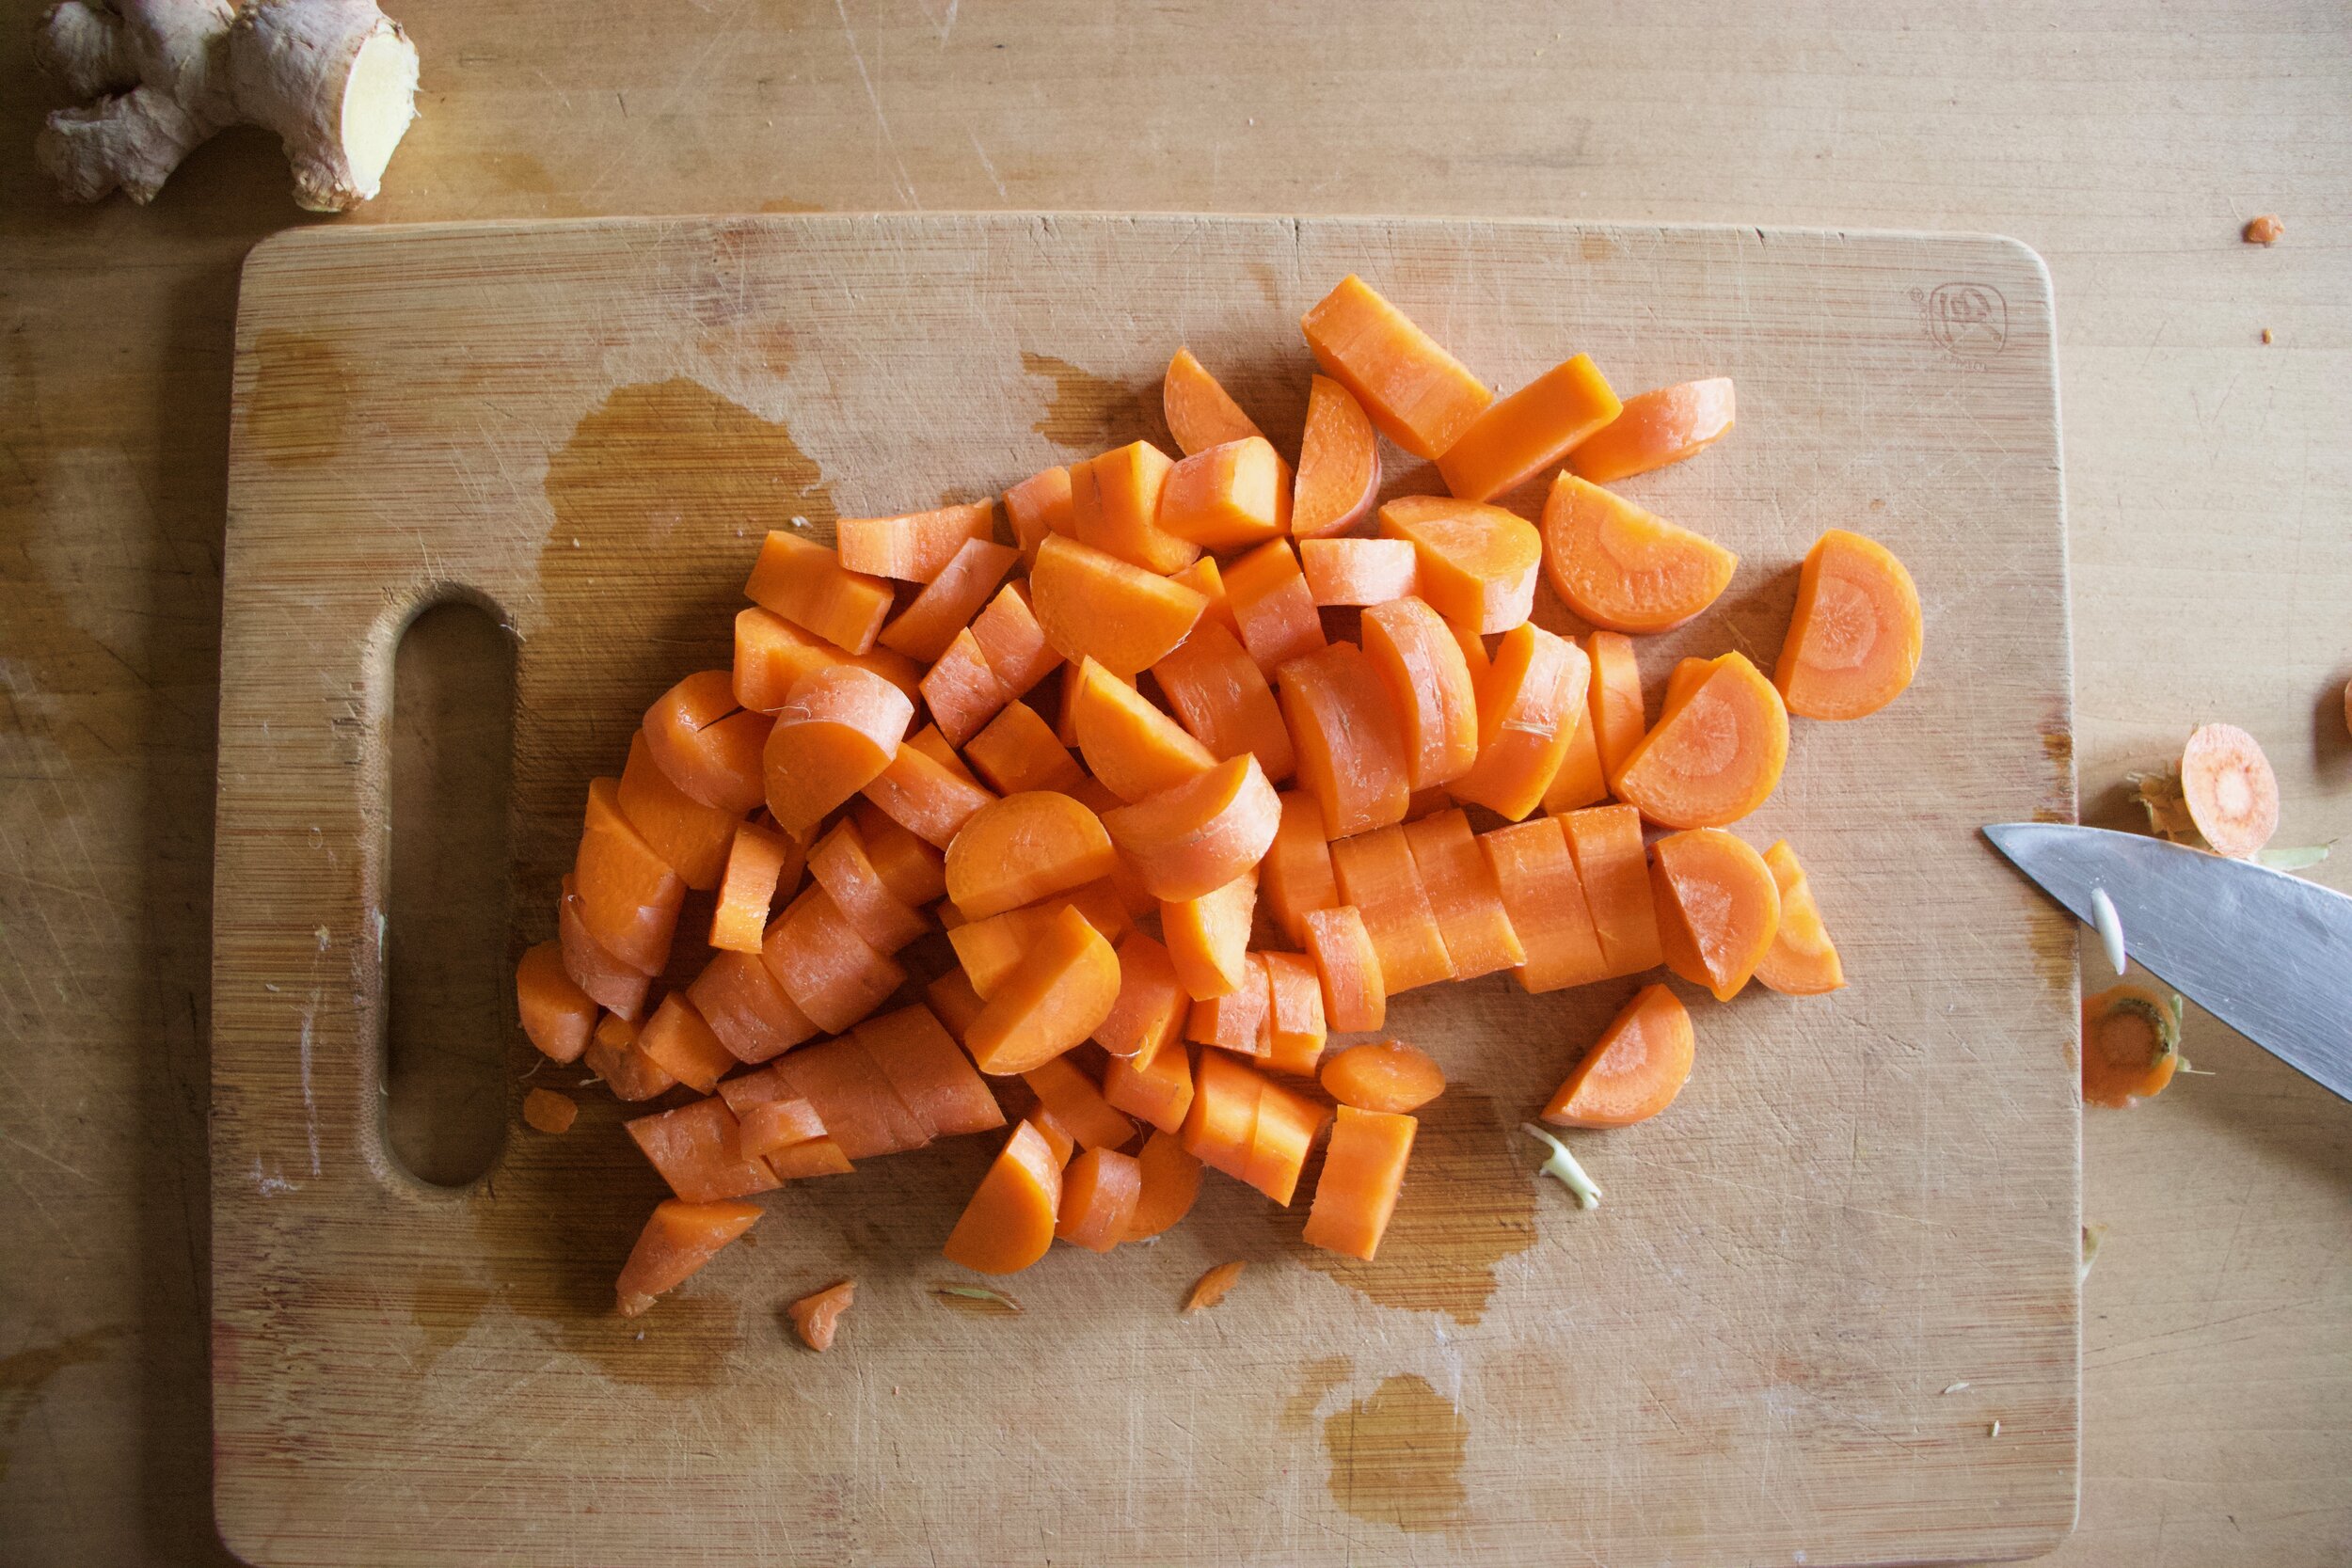
Place cubed squash on a lined baking sheet and stick into hot oven and roast until fork tender.

While squash is roasting grab apples, cut and remove core and seeds, chop into smaller pieces and place into a pot with enough water to submerge the apple. Place on medium heat, stirring every few minutes, and cook until the apple starts to break down. If the water evaporates, add in more. When apples are soft and falling apart remove from heat and let cool a few minutes then either transfer to a blender or using a stick blender, blend until less chunky, but not completely smooth. You could also just smash it use with a fork. Add in a teaspoon or so of cinnamon and mix.

Once squash is roasted , remove from a pan and place either in a blender, or a jar or bowl if using a hand blender, add in 1/2 cup milk or water, and blend until smooth. If it seems really thick still, add in more liquid. Also add in maple to taste.

While oven is still hot, place oats and walnuts on baking sheet and place in oven for 5-8 minutes or unit walnuts and oats are toasted.

To assemble parfaits grab a bowl or jar and layer in a bit of squash then apple a few times. Top with some toasted oats and walnuts and sprinkle with more cinnamon and drizzle more maple if you want.

Eat warm or cold. Store left overs in fridge for up to a week.

Tags Butternut Squash and Apple Parfait, fruit, squash, walnuts, oats, apples, plant based, dairy free, vega, sugat free, sugar free, healthy, snack, easy, simple, dessert, make ahead, breakfast, gluten free, food
Comment

Tomato Basil and White Bean Orzo Pasta Salad

August 28, 2021 Colleen Stem
IMG_7155.jpg
IMG_7160.jpg

Another heatwave. I tell you what, If I never live through another 90 + degree day, it will be too soon.

What to eat during a heat wave? Well maybe you don’t care and have air conditioning in your kitchen so you cook whatever. I don’t have air conditioning and after a few days of boiling temps, there is no freaking way I am turning on the oven. I can barely turn on the stove top to boil water, but I did, I boiled water, I just did it early in the morning before the temperatures starting rising again. (A pro tip for you.) That is one of the great things about pasta salad, you can make the pasta ahead of time. You can even make the whole salad in the morning and then you don’t have to do a damn thing when it comes to dinner besides lifting a fork to your face, which I know can be a feat when all you want to do is melt, or slap at something, but still.

This pasta salad, well it is not you everyday pasta salad. It has beans, fresh basil, and a dressing that is made by blending up the most delicious seasonal tomatoes until rich and creamy and dumped all over the orzos. . It is probably going to be the best tasting pasta salad you will ever eat. The thing is, you really need to make it soon because sure you can get tomatoes all year round but don’t do that. Do yourself a favor and make it now while the tomatoes are plentiful and at their peak of deliciousness. And also you don’t have wait for a heatwave to make it. This is a good meal to have at the ready all throughout tomato season, and just in case, a heat wave.

Now to the pasta salad!

IMG_7072.jpg

The stuff. Just picked tomatoes, some fresh basil, cooked navy beans, orzo pasta, olive oil, red wine vinegar, garlic, and salt and pepper.

IMG_7078.jpg

Rough chop tomatoes into small pieces. Also peel and dice garlic into small pieces.

IMG_7082.jpg
IMG_7083.jpg

Place the tomatoes, garlic, and a good pinch of salt into a blender (I used a hand blender) and blend unit smooth. Add in the vinegar and oil and bend until the mixture starts to emulsify and becomes smooth and creamy.

IMG_7098.jpg
IMG_7106 2.jpg

Cook and strain pasta as instructed. Keep in on the al dente side.

Chop up basil into thin ribbons or whatever.

IMG_7115.jpg
IMG_7116.jpg
IMG_7124.jpg

Then dump pasta into a large bowl. Add in cherry tomatoes ( I cut mine in half) and beans. Dump in half the sauce and mix around then mix in the chopped basil.

If you are eating it right away, add in the rest of the sauce. If you are keeping it for later, place pasta and sauce in fridge and a before you are planning on serving it mix in the remaining sauce.

IMG_7134.jpg

Looks so good right! Season with salt and pepper to taste and then you know…

IMG_7168.jpg

Grab a bowl and eat it. Probably should grab a from too, eating this with your hands might get messy.

Stay cool friends!

-C


Tomato Basil and White Bean Orzo Pasta Salad

serves 2-3 as a meal or more as a side

  • 2 cups dried orzo pasta (12 oz)

  • 2 large heirloom tomatoes (about 2 cups chopped)

  • 1 1/2 cups cherry tomatoes (or chopped tomatoes)

  • 1/3 cup olive oil

  • 2 tablespoons red wine vinegar

  • 1 1/2 cups cooked and drained white beans ( I used navy but any white bean will do)

  • 1 cup packed basil leaves

  • 2 cloves garlic

  • salt and pepper

Start with making the tomato dressing. Rough chop the 2 large tomatoes into smaller pieces and peel and chop garlic. Place the tomatoes in a blender (or a large jar if using a hand blender) with the garlic and a good pinch of salt and a little pepper. Blend until smooth. Add in the vinegar and oil and continue to blend until the mixture becomes thick and creamy. Taste and add more salt and pepper if needed .

Prepare orzo pasta as instructed on package (make it al dente)

Grab basil and chop into smaller pieces.

Once orzo is cooked and drained, dump it into a large bowl. Add in the beans and cherry tomatoes (slice in half if they are on the large size) and pour in half if the tomato sauce. Mix unit incorporated. Toss in the basil.

Now if you are going to eat right away mix in remaining sauce. If you plan on refrigerating and eating later, save the remaining half of the sauce and mix it in right before serving.

Store left overs in fridge for up to 5 days.

In beans, dinner, quick and easy, salad, side dish, summer, Vegan Tags Tomato Basil and White Bean Orzo Pasta Salad, tomatoes, summer, heirloom, vegan, salad, pasta, easy, make ahead, heat wave, fresh, basil, no bake, beans, plant based, pulses, healthy, bbq, orzo
Comment

Peach Shortcake

June 5, 2021 Colleen Stem
IMG_5668.jpg
IMG_5680.jpg
IMG_5687.jpg

My fruit bowl went from the odd apple and lots of oranges to an overflow of peaches cause its summertime fruit time!

I might have gone a little overboard with the first purchase of peaches and bought like 12 lbs. (Yeah I did). But I knew I wanted to make these shortcakes for the mr and Barb so I figured there is a couple pounds right there that are not going into my mouth so It was like I bought 10 lbs and I can eat 10 lbs of peaches in a week no problem. Facts!

It was weird, I don’t usually plan to far in advances on what I am going to bake but for some reason I had it in my head that I needed to make shortcakes with peaches. Everyone is always making strawberry shortcakes but then stops it there and I don’t know, it just seems like the world needs to expand their fruit and shortcake minds and mix it up. Yes strawberries are fantastic but so is all the other fruit out there. Especially peaches. Peaches are a good fruit to start mixing it up with.

See, I got you. Now to the peach shortcake!

IMG_5560.jpg

The stuff. Flour baking powder, salt, sugar, coconut oil, plant milk, a can of coconut milk, powder sugar, and ripe peaches.

IMG_5597.jpg

Start by cutting up peaches. Remove pits and dice small. You can peel them but why?

IMG_5604.jpg

Place diced peaches into a bowl and toss with a little sugar. Set aside.

IMG_5565.jpg
IMG_5567.jpg
IMG_5573.jpg

Make the biscuits. Toss all the dry together then cut in the very cold coconut oil. You want to have grainy, small little chunks of oil. Next add in the very cold milk and gently fold in with a fork until is is absorbed be gentle to not over mix..

IMG_5581.jpg

Dump the shaggy dough onto a lighhy scoured counter and gather together.

IMG_5590.jpg

roll dough out into a shape that is about 1 1/2 inches thick (I went with rectangle) and cut into 6-8 equal sized pieces.

IMG_5596.jpg

Place cut biscuits on a lined baking sheet, brush tops with a little milk, and sprinkle the tops with a bit of sugar.

Pop into the oven to bake. 20-25 minute unlit golden brown.

IMG_5622.jpg

Pretty bakes biscuits.

IMG_5632.jpg

And last buy not least, the coconut whipped cream. Take the can of coconut milk from fridge and scoop our the thick cream part. Place into a cold bowl and beat until thick and creamy. Beat in a teaspoon or so of powered sugar if you want a little sweetness.

IMG_5676.jpg

And then you add it all together. Cut a biscuit in half. scoop on some juicy sweet peaches, then top with a plop of coconut cream.

Summertime in the mouth.


Peach Shortcake

make 6-8 shortcakes

  • 2 cups flour

  • 1/2 cup very cold coconut oil

  • 1 teaspoon salt

  • 1 tablespoon baking powder

  • 1 tablespoon sugar

  • 1 cup very cold plant based milk

  • 5-6 fresh ripe peaches

  • 1-2 tablespoon sugar for peaches (greater amount for sweeter peaches)

  • 1 can full fat coconut milk chilled for 24 hours

  • 1 teaspoon powdered sugar whipped coconut cream (optional)

Start buy cutting up peaches. Remove pits,(peel them if you must) ,and dice into small pieces. Place into a bowl and toss with a tablespoon or so of sugar. Set aside.

Preheat oven to 400

Now for the biscuits. Place flour, baking powder, 1 tablespoon sugar, and salt into a bowl. Mix until incorporated. Add in the very cold coconut oil and cut in with a fork or pastry cutter until the mixture is crumbly but the oil is NOT completely in mixed in. You want the little chunks of oil. Next dump in the very cold milk. Gently mix with a fork unil all the liquid is absorbed and a shaggy dough has formed. Dump dough onto a lightly floured surface and gather together. Pat flat with hands into a rectangle that is about 1 1/2 inches thick ten cut into 6-8 equal sized pieces. Place onto a line baking sheet, brush tops with a little milk and sprinkle with a bit of sugar. Pop into hot oven and bake for 20-25 minutes or until a nice golden brown on top and bottom. Remove form oven and let cool on a wire rack.

For coconut cream. Remove canned coconut milk from fridge, open it and scoop to the top layer of thick coconut cream. Place into a cold bowl and whip with a beater or by hand until thick. If you want to add a little sugar, beat in a teaspoon or so of powdered sugar.

To assemble. Grab a biscuit, cut in half and place on plate or in bowl. Scoop on some peaches and then add a plop of whipped coconut cream. Grab a eating utensil (spoon or fork, you do you) and eat.

In brunch, desserts, fruit, Sweets, biscuits and such Tags Peach Shortcake, coconut cream, vegan, summer, stone fruit, biscuits, dessert, make ahead, plant based, dairy free, peaches
Comment

Carrot Ginger Falafel With Tahini Cabbage slaw

November 2, 2019 Colleen Stem
IMG_3399.jpg
IMG_3442.jpg

If you are a falafel fan, as I am, then this one is for you. Carrot ginger falafel. Oh yes. Warm and spicy and carroty and all the things that are good, packed into a chickpea ball of mouth sized proportions. When I thought of it it sounded good, When I made it and ate it, it was everything and more I could have asked for in a freaking fantastic falafel. As for the tahini cabbage slaw, I might just be making it in my house every dang day. Super easy, super tasty, goes with the falafel like whoa but is just as good eaten on it’s own. Eaten together the pair make every inch of mouth space happy. A happy mouth space, what more can you ask for?

To the falafel!

The stuff. Cooked chickpeas, carrots, a piece of fresh ginger, tahini, soy sauce, cabbage, an onion, a few cloves of garlic, red wine vinegar, some cumin and red pepper flakes, a lemon, chickpea flour, salt and pepper, and oil.

IMG_3272.jpg
IMG_3276.jpg

Start off by chopping the carrots into small pieces. Then cut half of the onion into small pieces. Rough chop the garlic and the ginger as well. No need to peel ginger unless you really want to.

Place it all into food processor and pulse until a small crumble.

IMG_3287.jpg

Carrot onion garlic ginger mixture.

IMG_3299.jpg
IMG_3310.jpg

Dump mixture into a skillet with a splash of water. Add in the cumin, chili flakes, and a good pinch of salt and pepper and cook on the stove for 5-8 minutes until the crumble softens and becomes fragrant.

Dump carrot ginger mixture back into food processor along with the chickpeas, chickpea flour, and the juice of the lemon. Puree until smooth.

IMG_3335.jpg

Carrot ginger falafel mixture. Now stick it in the fridge. For a little while to a day, just to let it set up a bit.

IMG_3340.jpg

And in the mean time you can make the slaw. Shred cabbage and cut up onion all nice and thin.

IMG_3348.jpg
IMG_3358.jpg

Dump tahini, soy, vinegar, and a few tablespoons warm water into bowl and mix until creamy and good.

IMG_3363.jpg

Toss in that cabbage and onion. Now you have tahini cabbage slaw.

IMG_3375.jpg

Now to cook falafel. Grab the batter, scoop into balls then smoosh into disks. Place in a light oiled skillet and brown each side a nice golden brown.

IMG_3389.jpg
IMG_3392.jpg

After browning, place on a baking sheet. Once all the falafel has been browned, place the baking sheet into the oven to finish up cooking. 20 minutes or so and you got yourself falafel.

Then eat it. Falafel topped with tahini cabbage slaw. That is how it’s done, with or without wraps or pitas or whatever your want. Just as it is. Falafel, cabbage slaw, into mouth.

Good things friend.

-C


Carrot Ginger Falafel With Tahini Cabbage slaw

serves 3-4 people or makes 14-16 falafel balls

  • For the falafel

  • 2 cups cooked chickpeas drained

  • 3-4 carrots (around 2 cups diced)

  • 1/2 of a red onion

  • 2 inches fresh ginger

  • 2-3 cloves garlic

  • 1 teaspoon cumin

  • 1/2 teaspoon chili flakes

  • 1/3 cup chickpea flour (can sub in oat flour if needed)

  • juice of a small lemon

  • salt and pepper

  • For Tahini Cabbage Slaw

  • 1/2 head red or green cabbage (about 3 cups shredded)

  • 1/2 of a red onion

  • 3 tablespoon tahini

  • 1 tablespoon soy or liquid aminos

  • 2 tablespoon red wine vinegar

  • a few tablespoons warm water

Grab carrots and red onion. Chop carrots into small chunks and cut onion in half. Cut one half into chunks. Place in food processor. Take the ginger and cut into small chunks (you don’t need to peel it) and peel and slice garlic and cut into small pieces. Add that to the food processor. Pulse the mixture into a very small crumble then dump the mixture into a skillet with a splash of water. Add in the cumin, chili flakes, and a good pinch of salt and lots of pepper, and place on medium heat and cook for 5-8 minutes until soft and fragrant. Once cooked, scoop back into food processor along with the chickpeas, chickpea flour, and the juice of the lemon. Turn on and and puree until smooth, stopping when needed to scrap down the side. Then either dump mixture into a bowl or leave in the container you processed it in and place in fridge for 1/2 hour to a day.

When ready to cook, preheat oven to 400.

After letting the dough sit for a bit, remove from fridge. Grab skillet and lightly oil it and place on medium heat. Take a cookie scoop or just a spoon and scoop balls of falafel into your hand and roll them around so they are packed together. Smoosh then balls a little into disks and place into hot skillet. Let cook until bottom is golden brown then gently flip and cook the other side until browned. Place cooked falafel on a baking sheet. Once you have browned all the falafel, place into oven to bake for about 20 minutes or until the falafel has firmed up to your liking.

To make the tahini cabbage slaw. Shred cabbage and cut the remaining half of red onion into thin pieces. Place tahini, soy, vinegar, and 2 tablespoons warm water into a big bowl. Mix together until light and creamy. If the mixture seems to thick, add another tablespoon of warm water. When happy with consistency, add in the cabbage and onion and toss around until everything is coated.

Now when the slaw is made, the falafel is cooked, you eat it. Serve with warm pita or wraps or a bed of greens or nothing. Just slaw on top of falafel. And FYI, this whole shebang can be eaten hot or cold or anywhere in between.

In Vegetables, Vegan, pulses, grain free, Gluten Free, entree, Dairy Free, beans Tags Carrot ginger Falafel, falafel, cabbage slaw, tahini, vegan, gluten free, dairy free, vegan dinner, beans, pulses, vegetables, healthy, plant based, spices, diner, food, easy, make ahead, vegetarian, everyone will eat, food restrictions, grain free
Comment

Millet with mushrooms, onions, Greens and a mustard vinaigrette

June 8, 2019 Colleen Stem
IMG_9275.jpg
IMG_9282 2.jpg

Salad season is here. Green salads, fruit salads, potato salads, and grain salads. All the salads and we are not mad about it.

This is a good grain salad using millet, which I am sightly surprised to hear that a lot of people have never had. Millet is kind of like quinoa, but not. I cooks fluffy and looks kind of the same, and is gluten free like quinoa. I think the biggest difference is that millet is slightly softer and tastes a bit more nutty. It also is really good at absorbing liquid flavors.

But who are we to compare. The main thing is that it is nutritious and delicious so we will eat it.

Back to the salad. This is one of those grain salads that is good cooked and served warm but only gets better with a little age (like an hour or a day) in the fridge. Served hot or cold or room tempature, and is hearty enough to be meal like but is also a fantastic addition as a side to any of you meal plans. Like maybe a BBQ? Whatever the occasion, or non occasion, this is just a really good grain salad situation and I think you will be pleased, smiling all smiles while eating it.

To the millet salad.

IMG_9091.jpg

The stuff. Millet, a couple handful of greens, a few mushrooms, an onion, dijon mustard, a little maple syrup, red wine vinegar, a lemon, a couple cloves or garlic, some toasted sunflower seeds, and salt and pepper.

IMG_9099.jpg

Start by giving the millet a little toast, just enough to really up the nutty flavor and make it that much more yummy. It only takes a few minutes in a skillet on medium heat. Not an entirely necessary step, but you should do it.

IMG_9107.jpg

Toasted millet goes into pot with water. Bring pot to a boil and then turn to the lowest simmer and cover.

IMG_9112.jpg
IMG_9128.jpg

While millet is cooking, get to the mushrooms and onions. Chop the onion thin and small and the mushrooms thin and small as well. Place them into the skillet with a drizzle of oil and place on medium heat. Mix around every now and then and cook until the mushrooms and onions are soft and a nice golden brown.

And make the vinaigrette. Minced garlic, mustard, vinegar, the juice of the lemon, and maple syrup get put into one place.

IMG_9137.jpg

Mixed and now all is one.

IMG_9147.jpg

Millet. Cooked and fluffed and ready to go.

IMG_9158.jpg
IMG_9177.jpg

Cooked mushrooms and onions go into the pot, along with the greens, the sunflower seed, and the vinaigrette. This step can be right away or you can wait a little while for things to cool as to not wilt the greens. Up tp you.

IMG_9185.jpg

Mixed with love and hunger.

Even if you are making it ahead of time, just do yourself a favor. Grab a bowl, grab a fork, and get down on it.

-C


Millet with mushrooms, onions, Greens and a mustard vinaigrette

Seves 4-6

  • 3/4 cup uncooked millet

  • 2 cups water

  • 1 sweet onion

  • 3-4 big button mushrooms

  • Large handful or two of bitter greens like arugula, spinach or a mixture.

  • 2 tablespoon brown or dijon mustard

  • 2 tablespoon red wine vinegar

  • 1 teaspoon maple syrup

  • 2 cloves garlic

  • salt and pepper

  • handful toasted sunflower seeds

To start, toast millet. Dump the uncooked millet into a pan and place on a medium heat tt for about 5 minutes or until you start hearing the millet crackle.This gives the millet a slightly more nutty flavor but you can skip this step if you don’t care.

Dump millet and water into medium pot. Place on high heat until water starts to boil then tun heat down to simmer and over. After about 15 or 20 minutes, when most of the water is gone, turn pot completely off. Let sit, covered for another 10ish minutes then take a fork and fluff it.

While the millet is cooking, cook the veggies. Grab the onion and slice it up into thin pieces. Clean off the mushrooms and chop them into small thin pieces too. Place the chopped stuff into the skillet with a drizzle of olive oil and a pinch of salt and place on a medium heat. Stir occasionally and cook for about 15 minutes or until the onion and mushroom are a nice dark, golden brown.

And make the mustard vinaigrette. Mince garlic and place into a jar or bowl with the vinegar, the mustard, the maple, and the juice of the lemon. Mix and set aside.

Once the millet is cooked, the mushrooms and onions are cooked, and the vinaigrette is made, all you have left to do is mix everything together. You can do this while things are slightly warm which will wilt the greens a bit, o let them cool so the greens stay fresh. Up to you. (I like the greens fresh)

Finally, dump cooked mushrooms and onions into pot with cooked millet. Add in the greens and sunflower seeds and drizzle the vinegertte all over. Toss around until fully mixed. Sprinkle with lots of fresh cracked pepper.

Then eat. Or place in a container to bring to the BBQ.

In BBQ, Dairy Free, Gluten Free, grains, salad, seeds, side dish, Spring, Vegan, Vegetables Tags Millet with mushrooms, onions, Greens and a mustard vinaigrette, gluten free, millet, vegan, salad, grain salad, grain bowl, grain, mushrooms, plant based, sunflower seeds, mustard, vinaigrette, dinner, BBQ, make ahead, healthy, dairy free
Comment
Older Posts →
 

https://thelovelycrazy.squarespace.com/config#/|/about/

Me. Food Maker.Food eater. Woo HOO!

STEM+NODE  SMALL BATCH AND ONE OF A KIND POTTERY

stem+node ceramics


____________________

Subscribe

GET NEW POSTS IN YO EMAIL

You are AWESOME!!!


@thelovelycrazy 2014-2021