• stem+node ceramics
  • HOME
  • Food Recipes
  • About
  • Contact
Menu

The Lovely Crazy

Street Address
City, State, Zip
Phone Number

Your Custom Text Here

The Lovely Crazy

  • stem+node ceramics
  • HOME
  • Food Recipes
  • About
  • Contact

Pineapple Jalapeño Hot Sauce

September 26, 2020 Colleen Stem
IMG_0693.jpg

It’s that time of year again. Time to make the hot sauce!

This year I wanted to do a little twist on my usual plain old jalapeño hot sauce. And to be honest, I wanted to use up the pineapple juice that I had stashed away in the pantry that I was using to make popsicles for the littles all summer. But mostly it’s because pineapple and jalapeño are a fantastic flavoring pairing and I knew that adding the pineapple to the hot sauce would only be a great idea.

A great idea it was.

This hot sauce is basic. Hot peppers, vinegar, and a little onion, garlic, and salt. The pineapple juice adds more body, some sweetness, and just a nice undertone of pineappleiness that you didn’t know you really wanted. It is really really good. And about the jalapeños. They are one of those peppers that can be pretty mild but also can get pretty dang hot. I am not sure of the variety that I have been picking at that farm for the past few years (that is where I get my peppers), but they are always on the pretty dang hot side so my hot sauces always have a good amount of kick to them. If you find your peppers to be a little too mild for you, well go ahead and add a few habaneros to the mix.

Now to the hot sauce!

IMG_0565.jpg

The stuff. Jalapeños of course (green, red, or both. I picked both), an onion, a couple cloves garlic, pineapple juice, white vinegar, and salt.

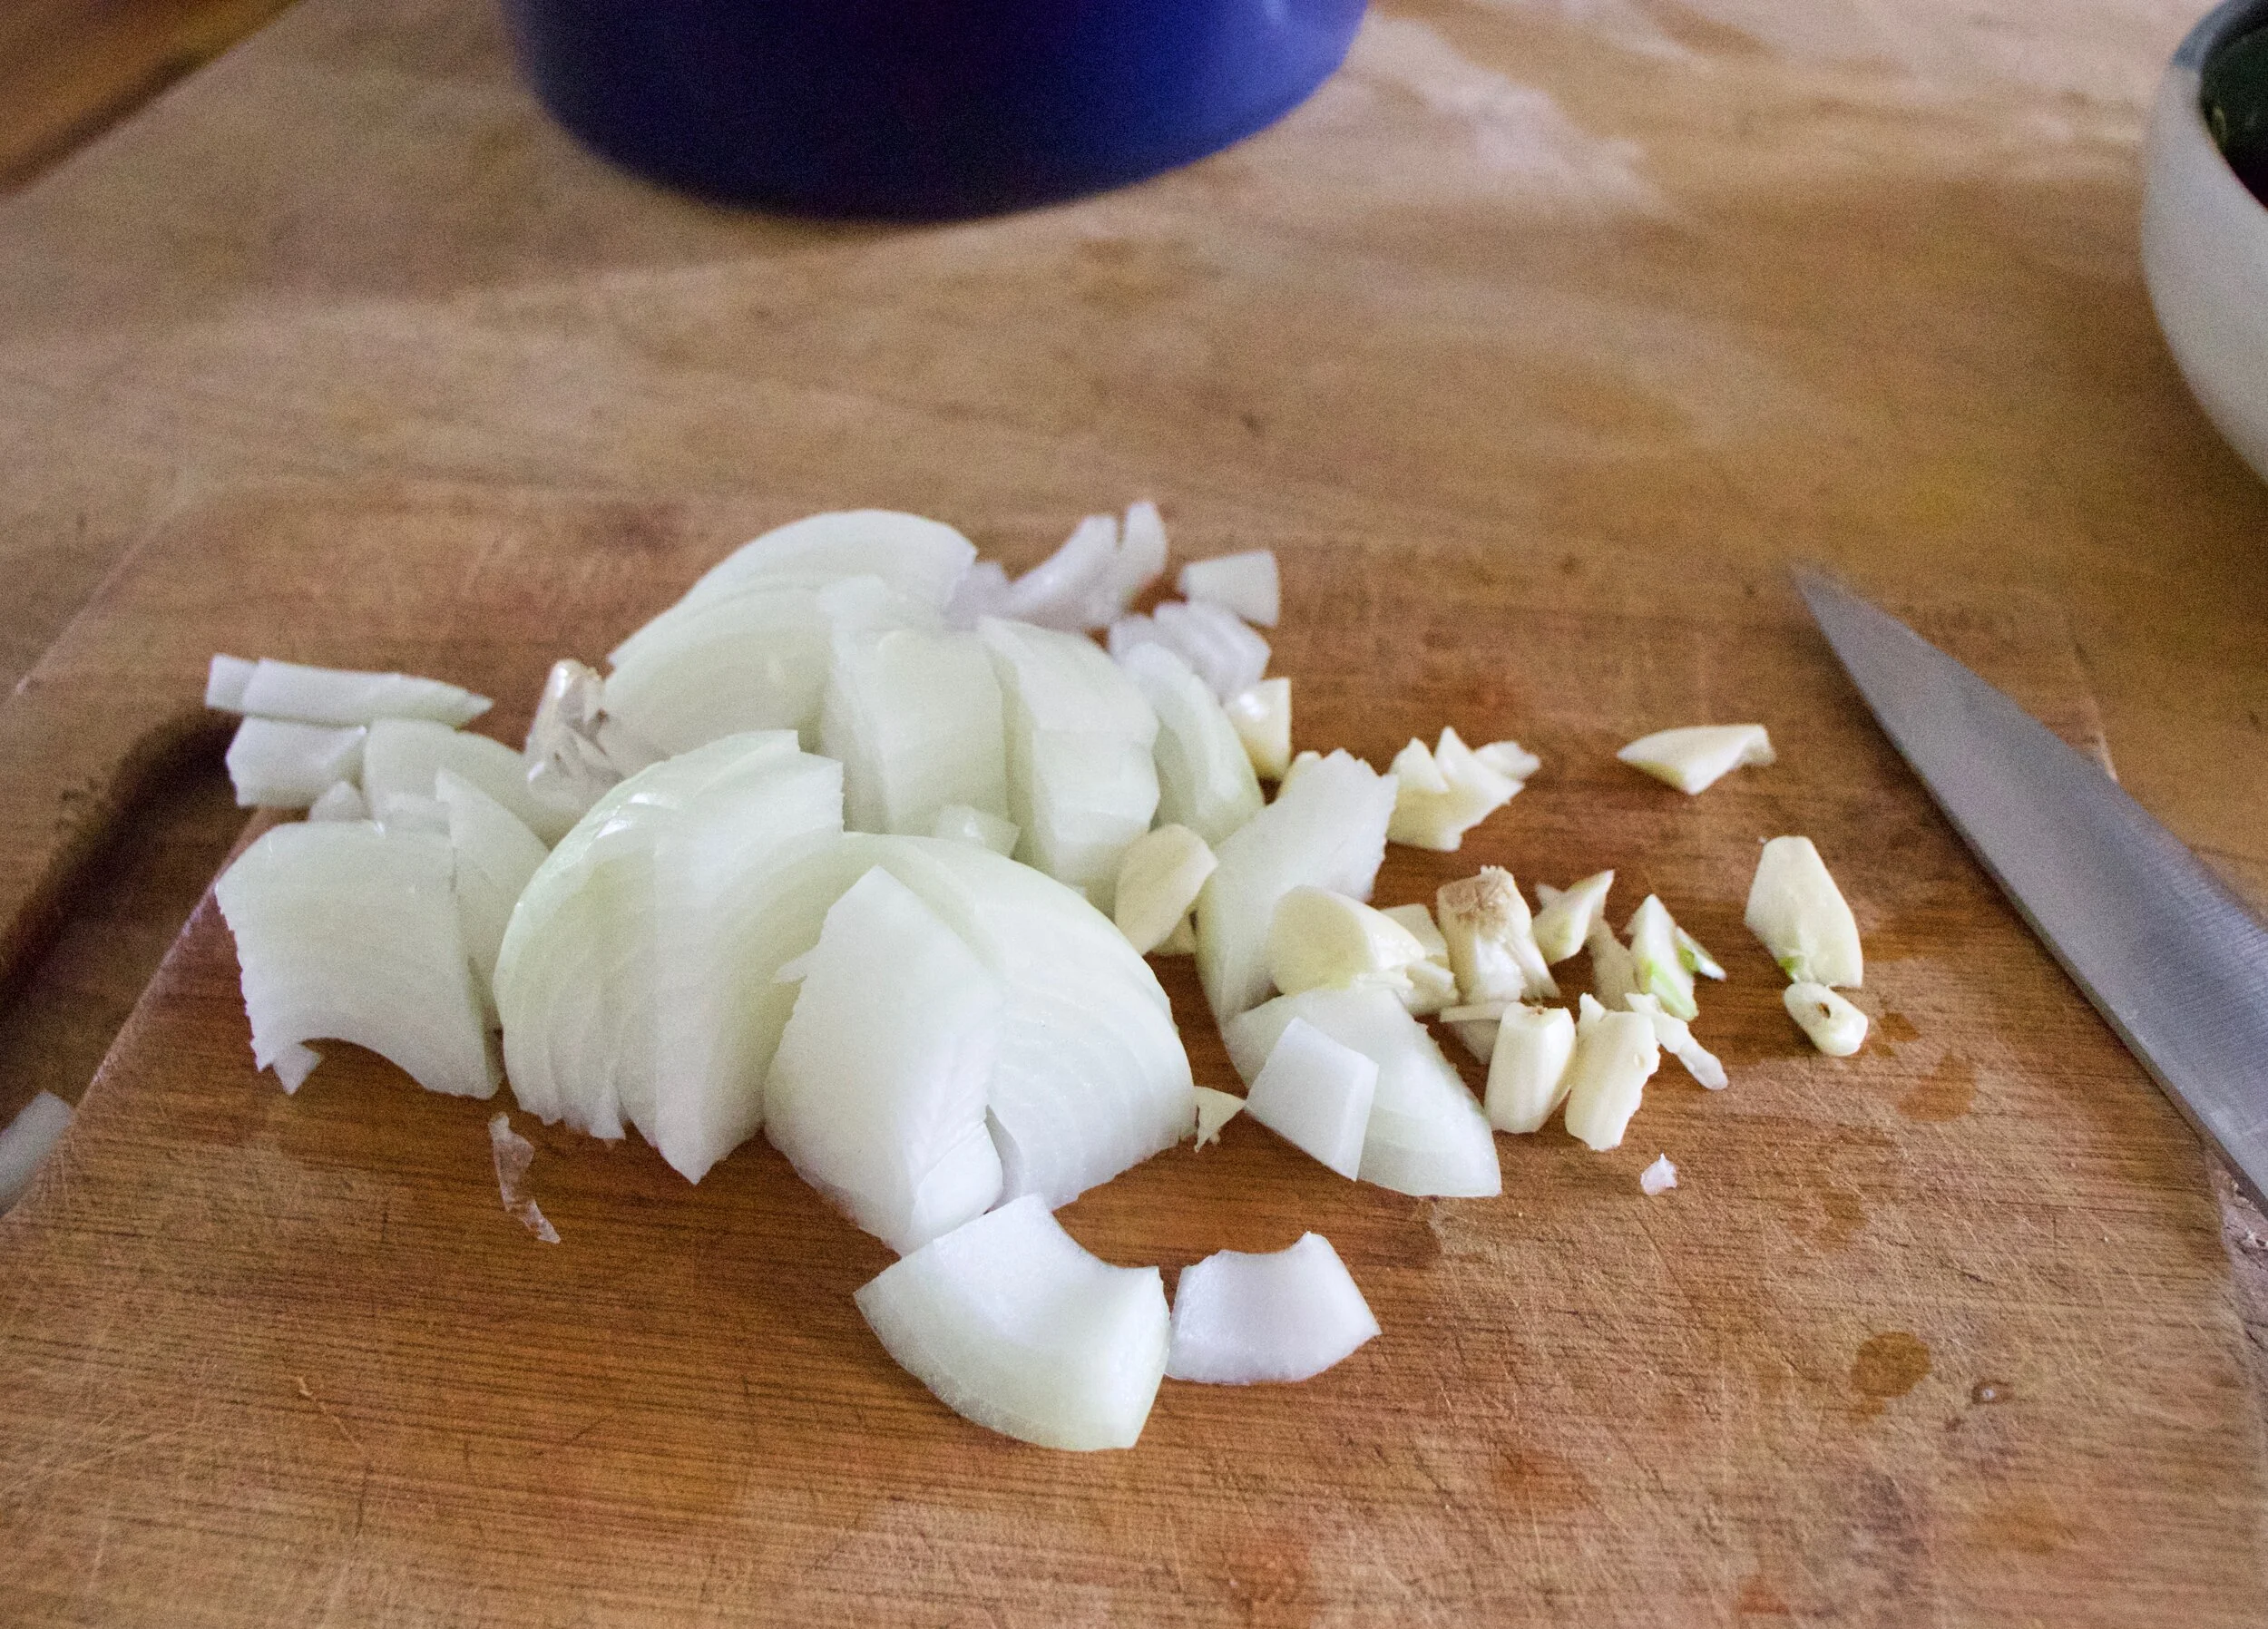
Chop onion and garlic up into chunks on the small side.

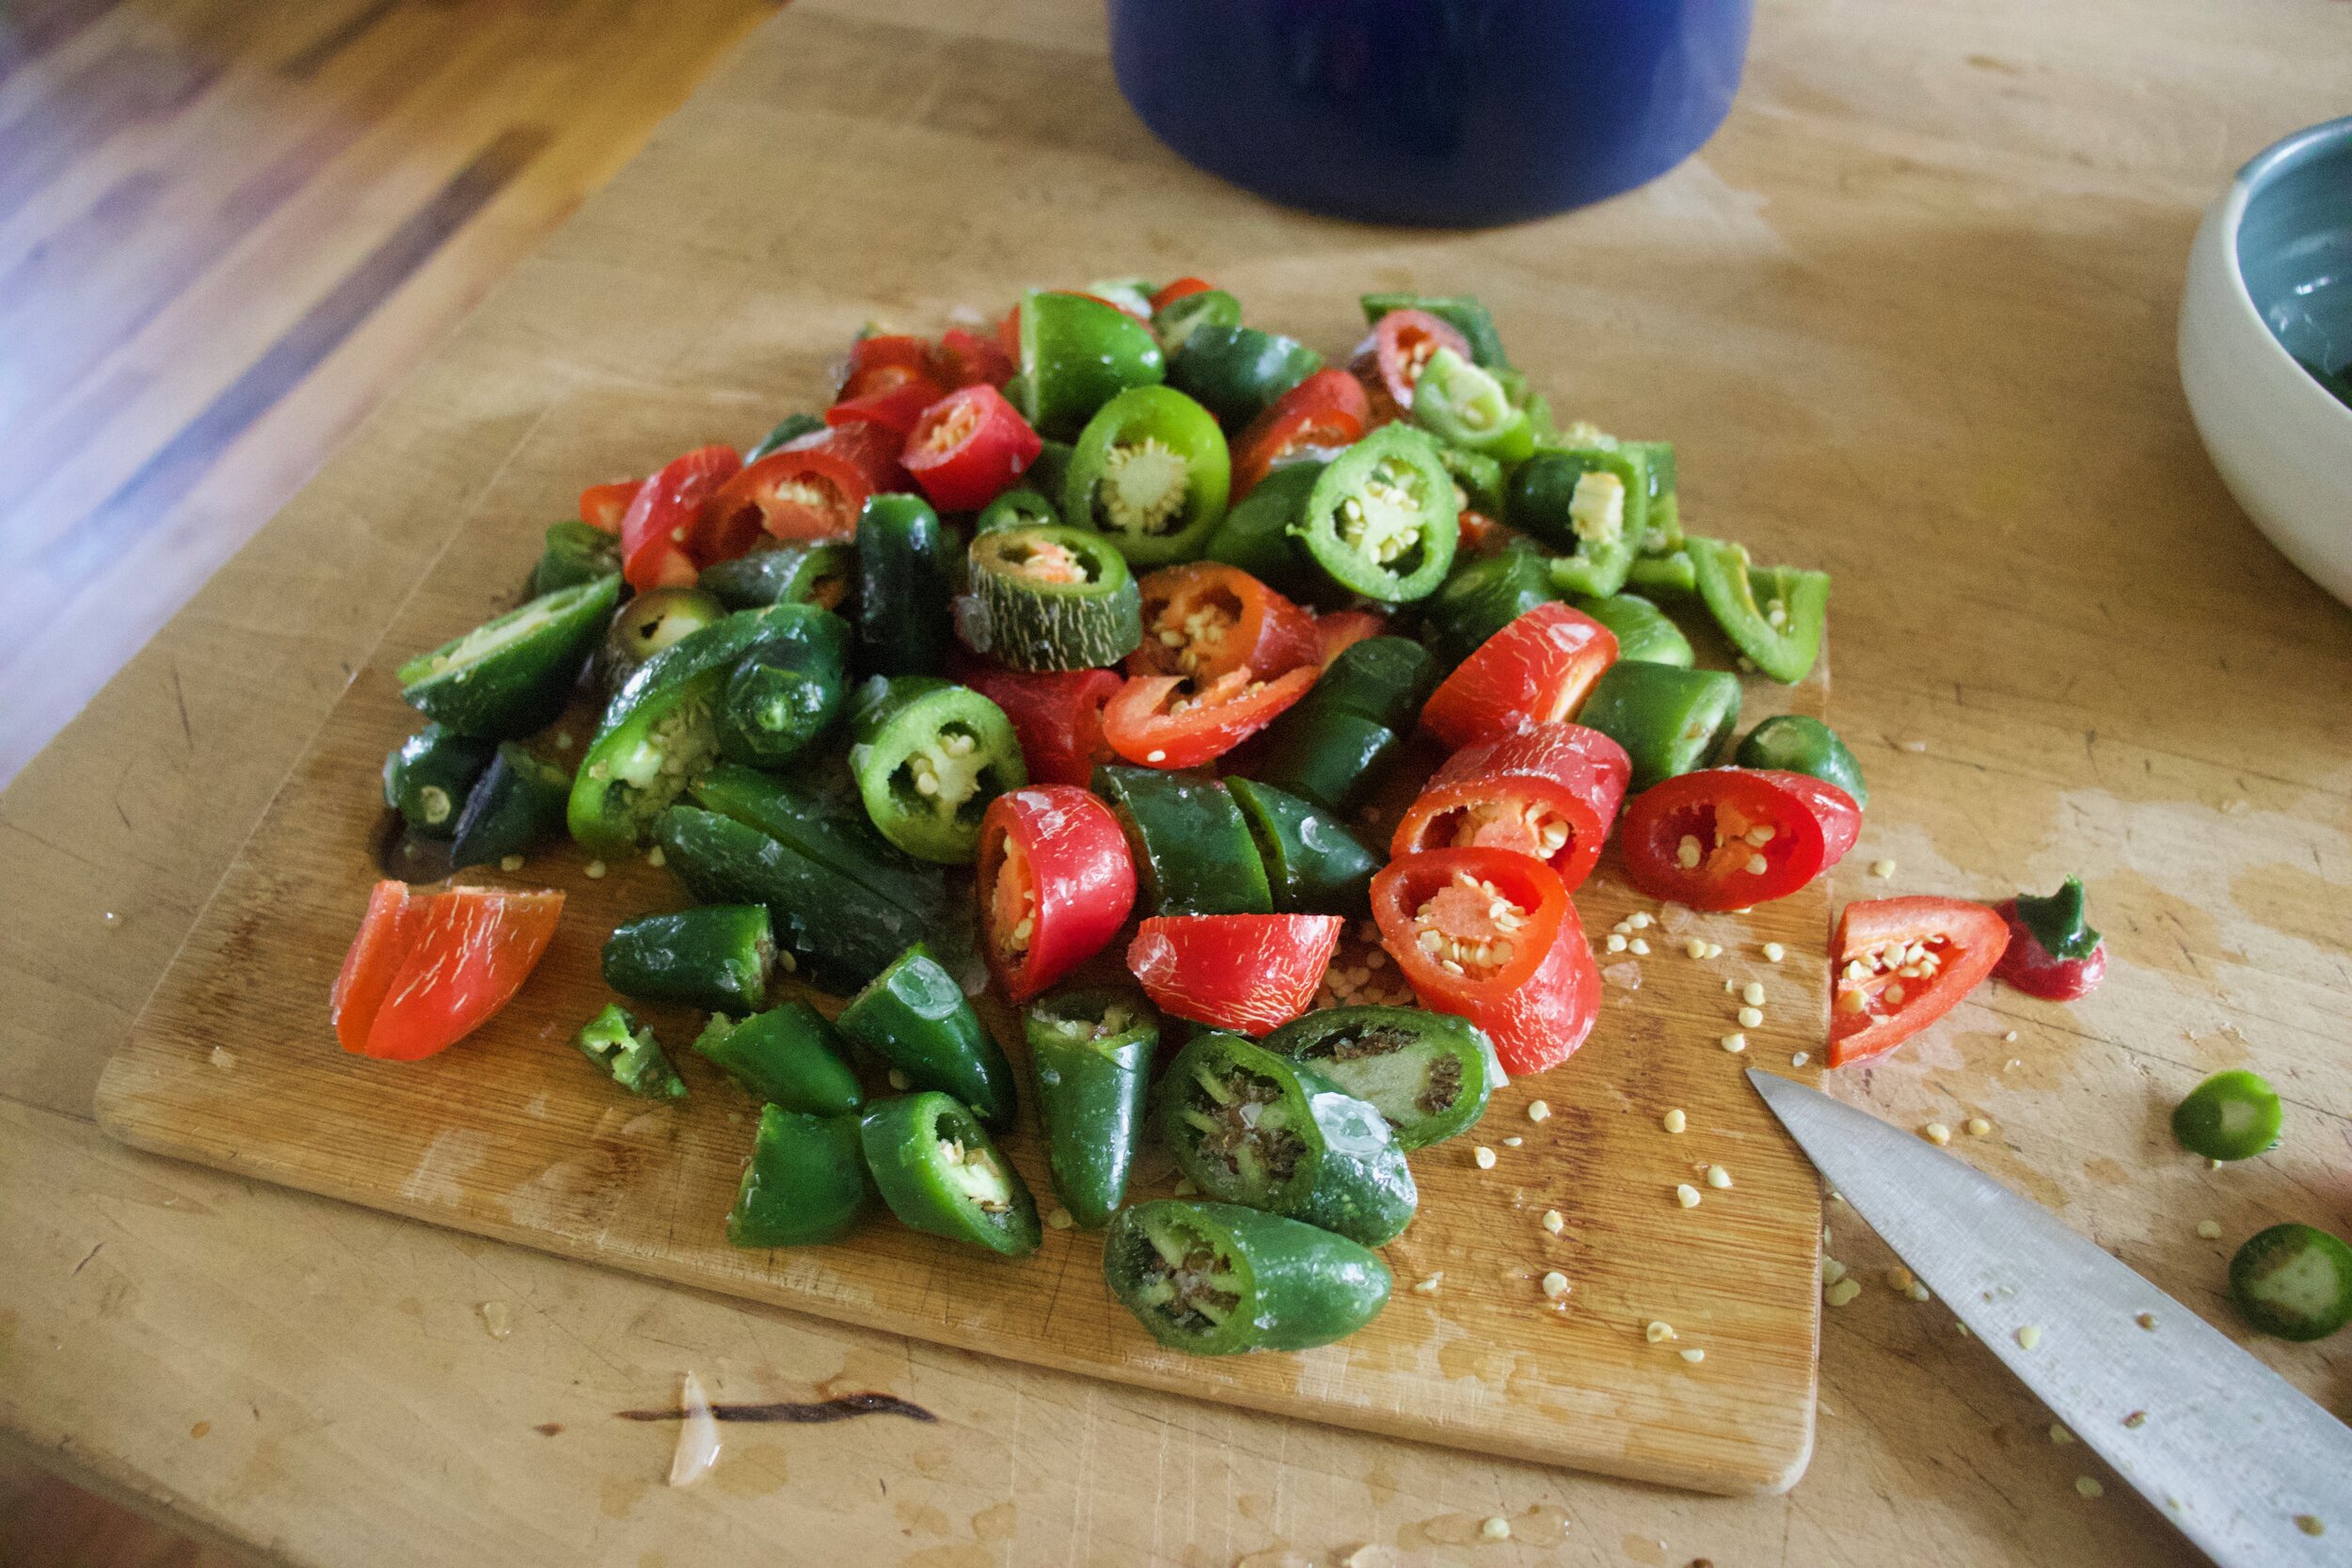
Jalapeños. Chop them up. You want to get rid of the stems and depending on how hot you want your sauce, you might want to remove the seeds and ribs. I don’t bother because we like it hot, but also it’s annoying. HA.

Note. When dealing with any hot peppers, make sure to not touch your face during or after. You will feel it. They are hot.

IMG_0579.jpg

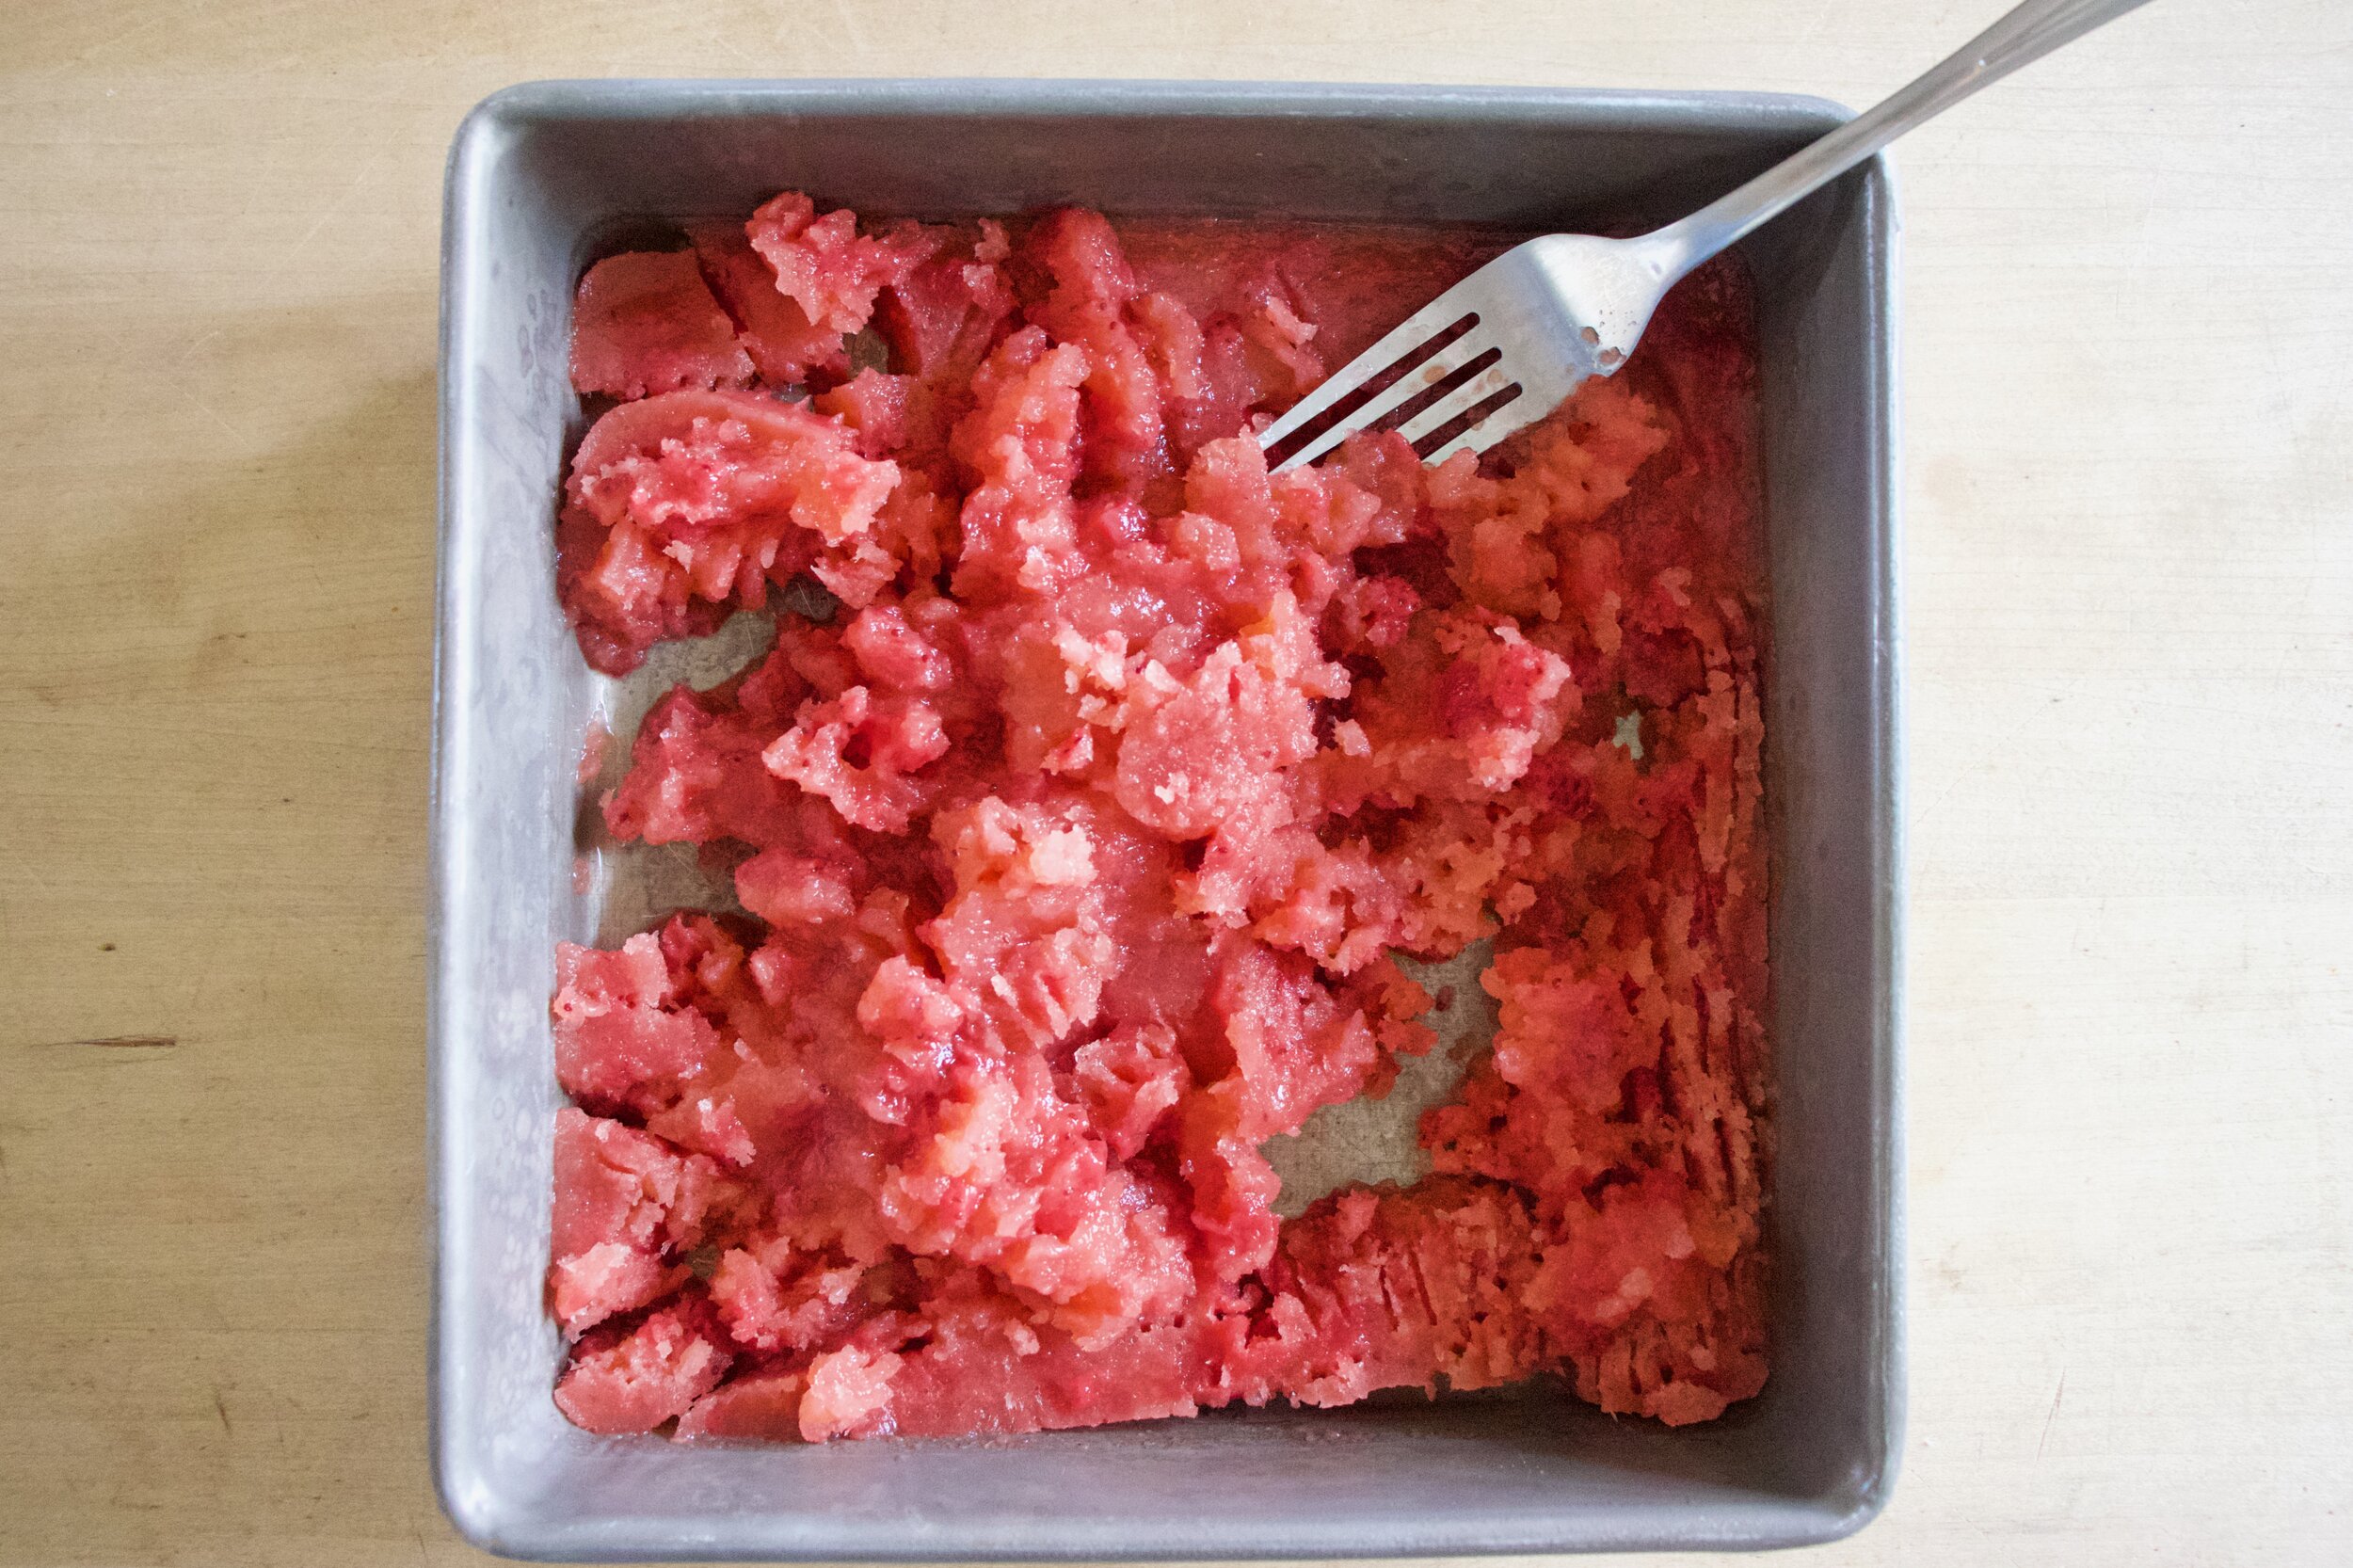
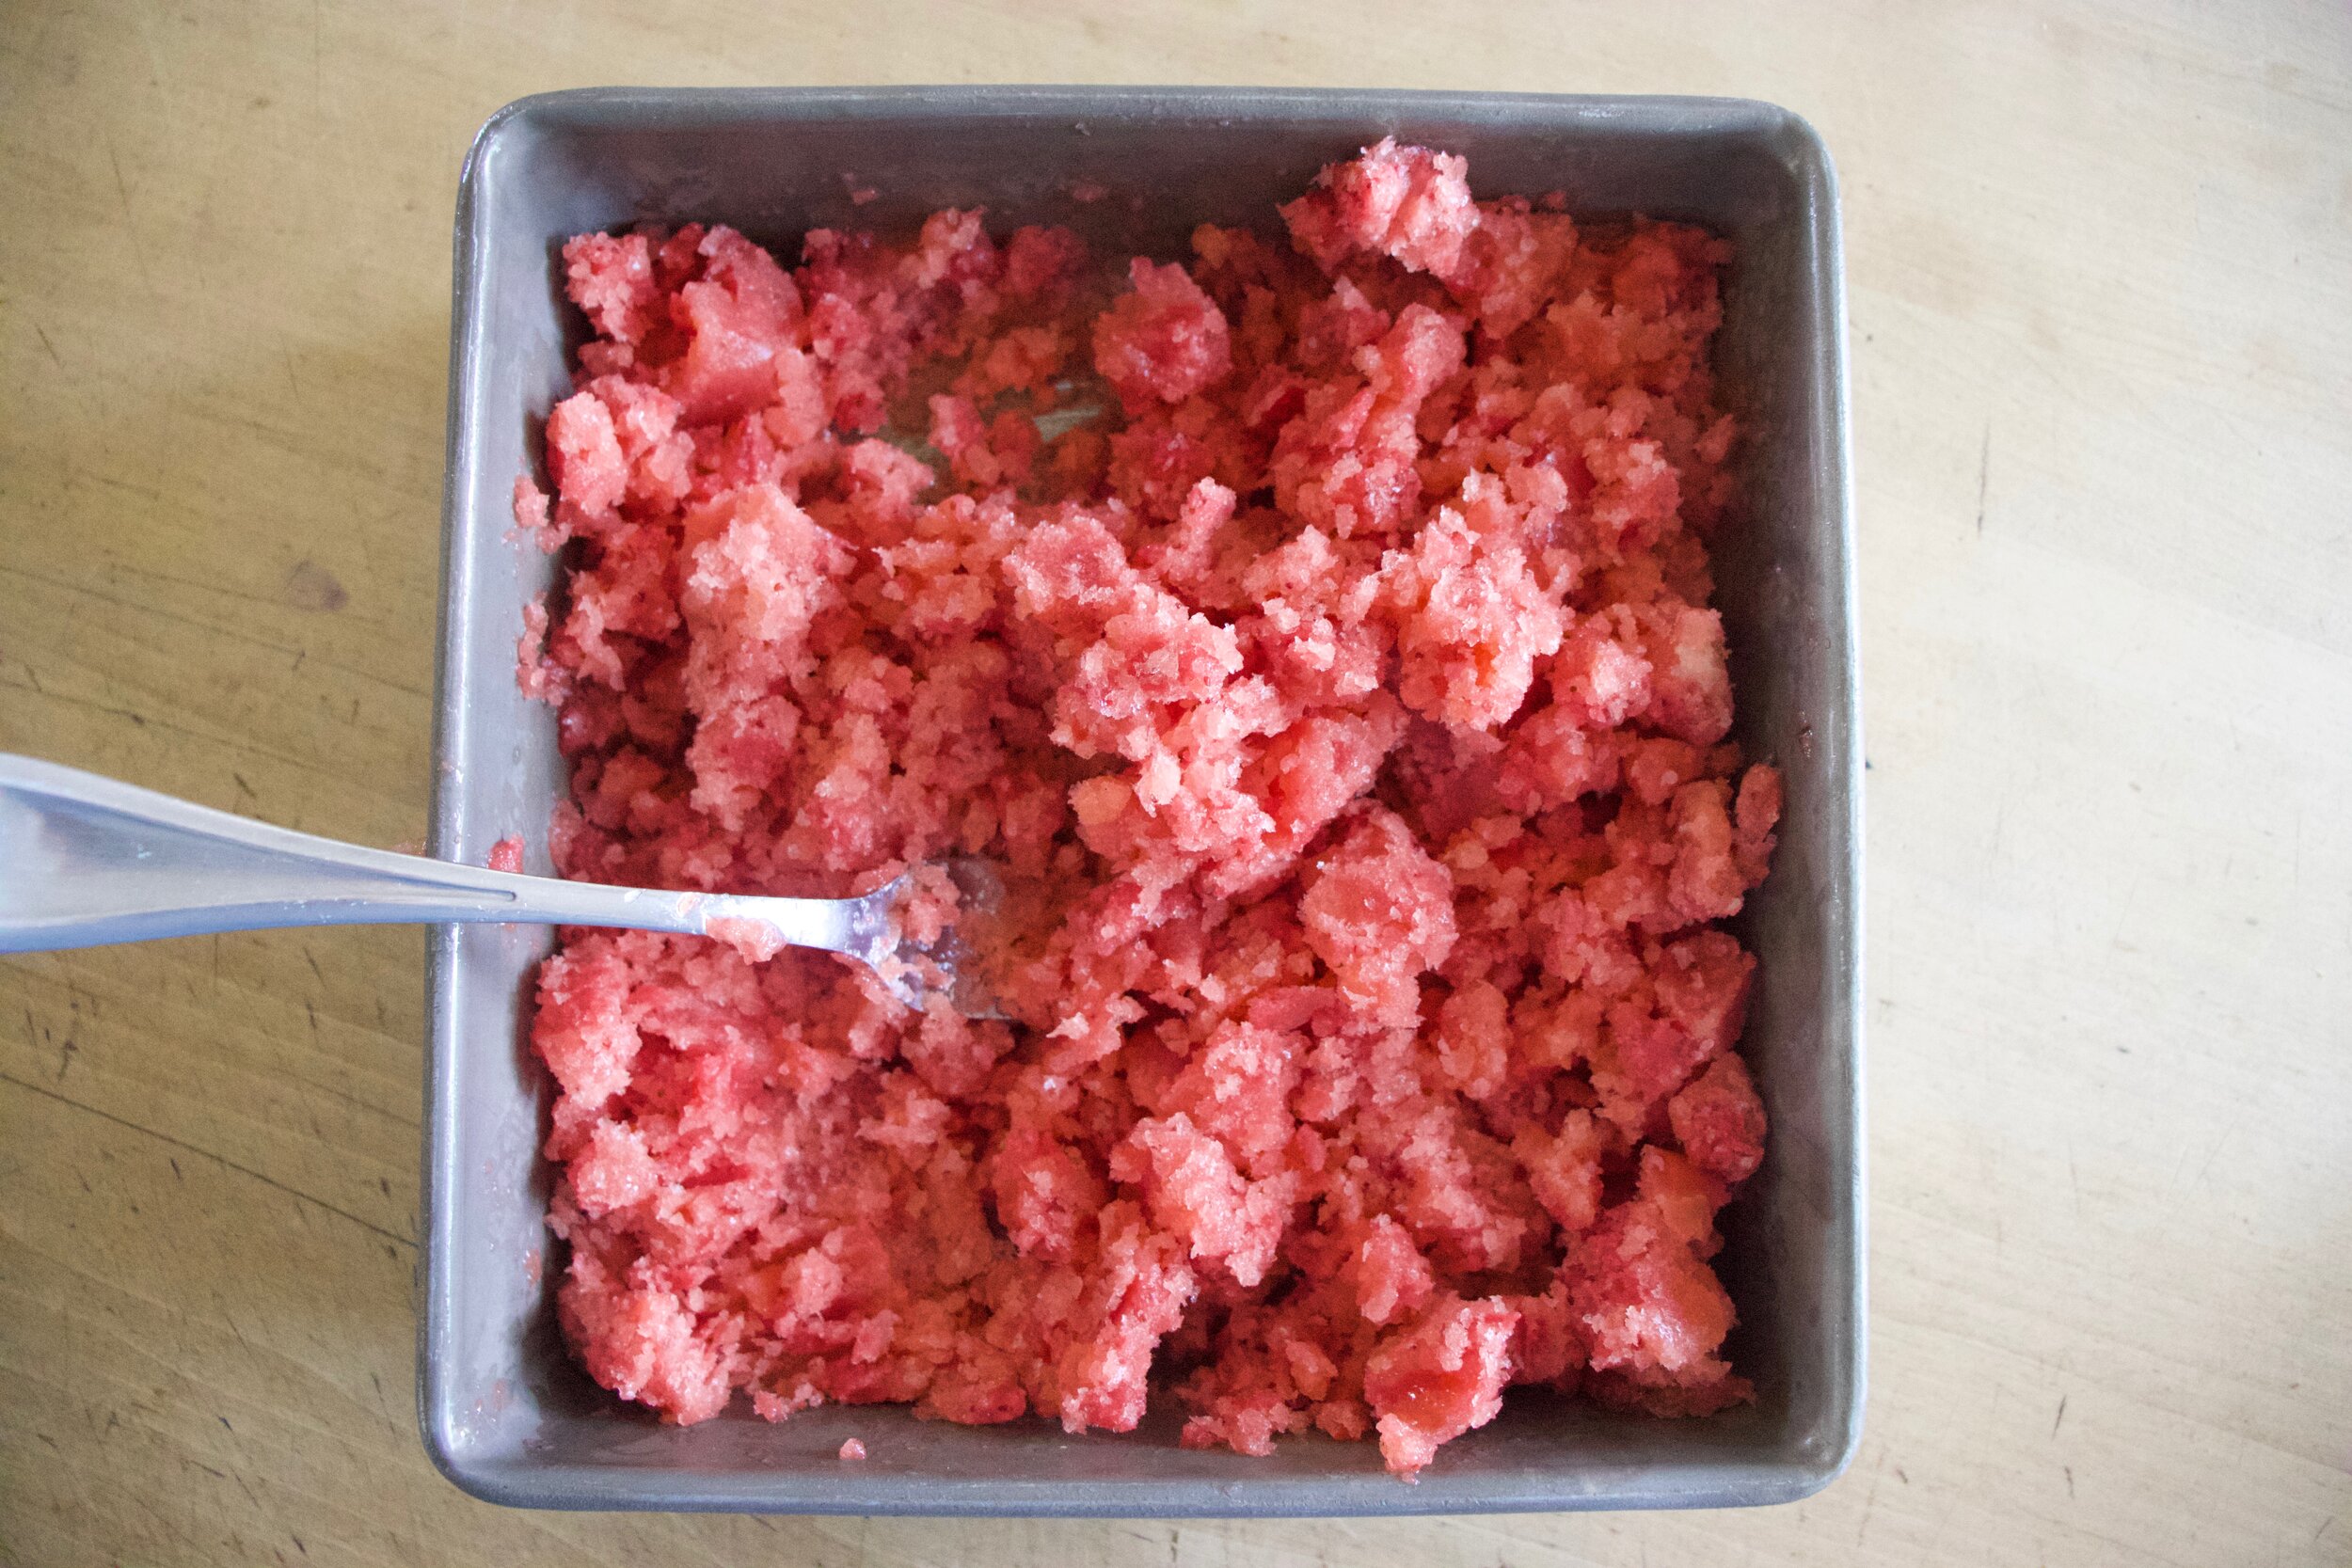
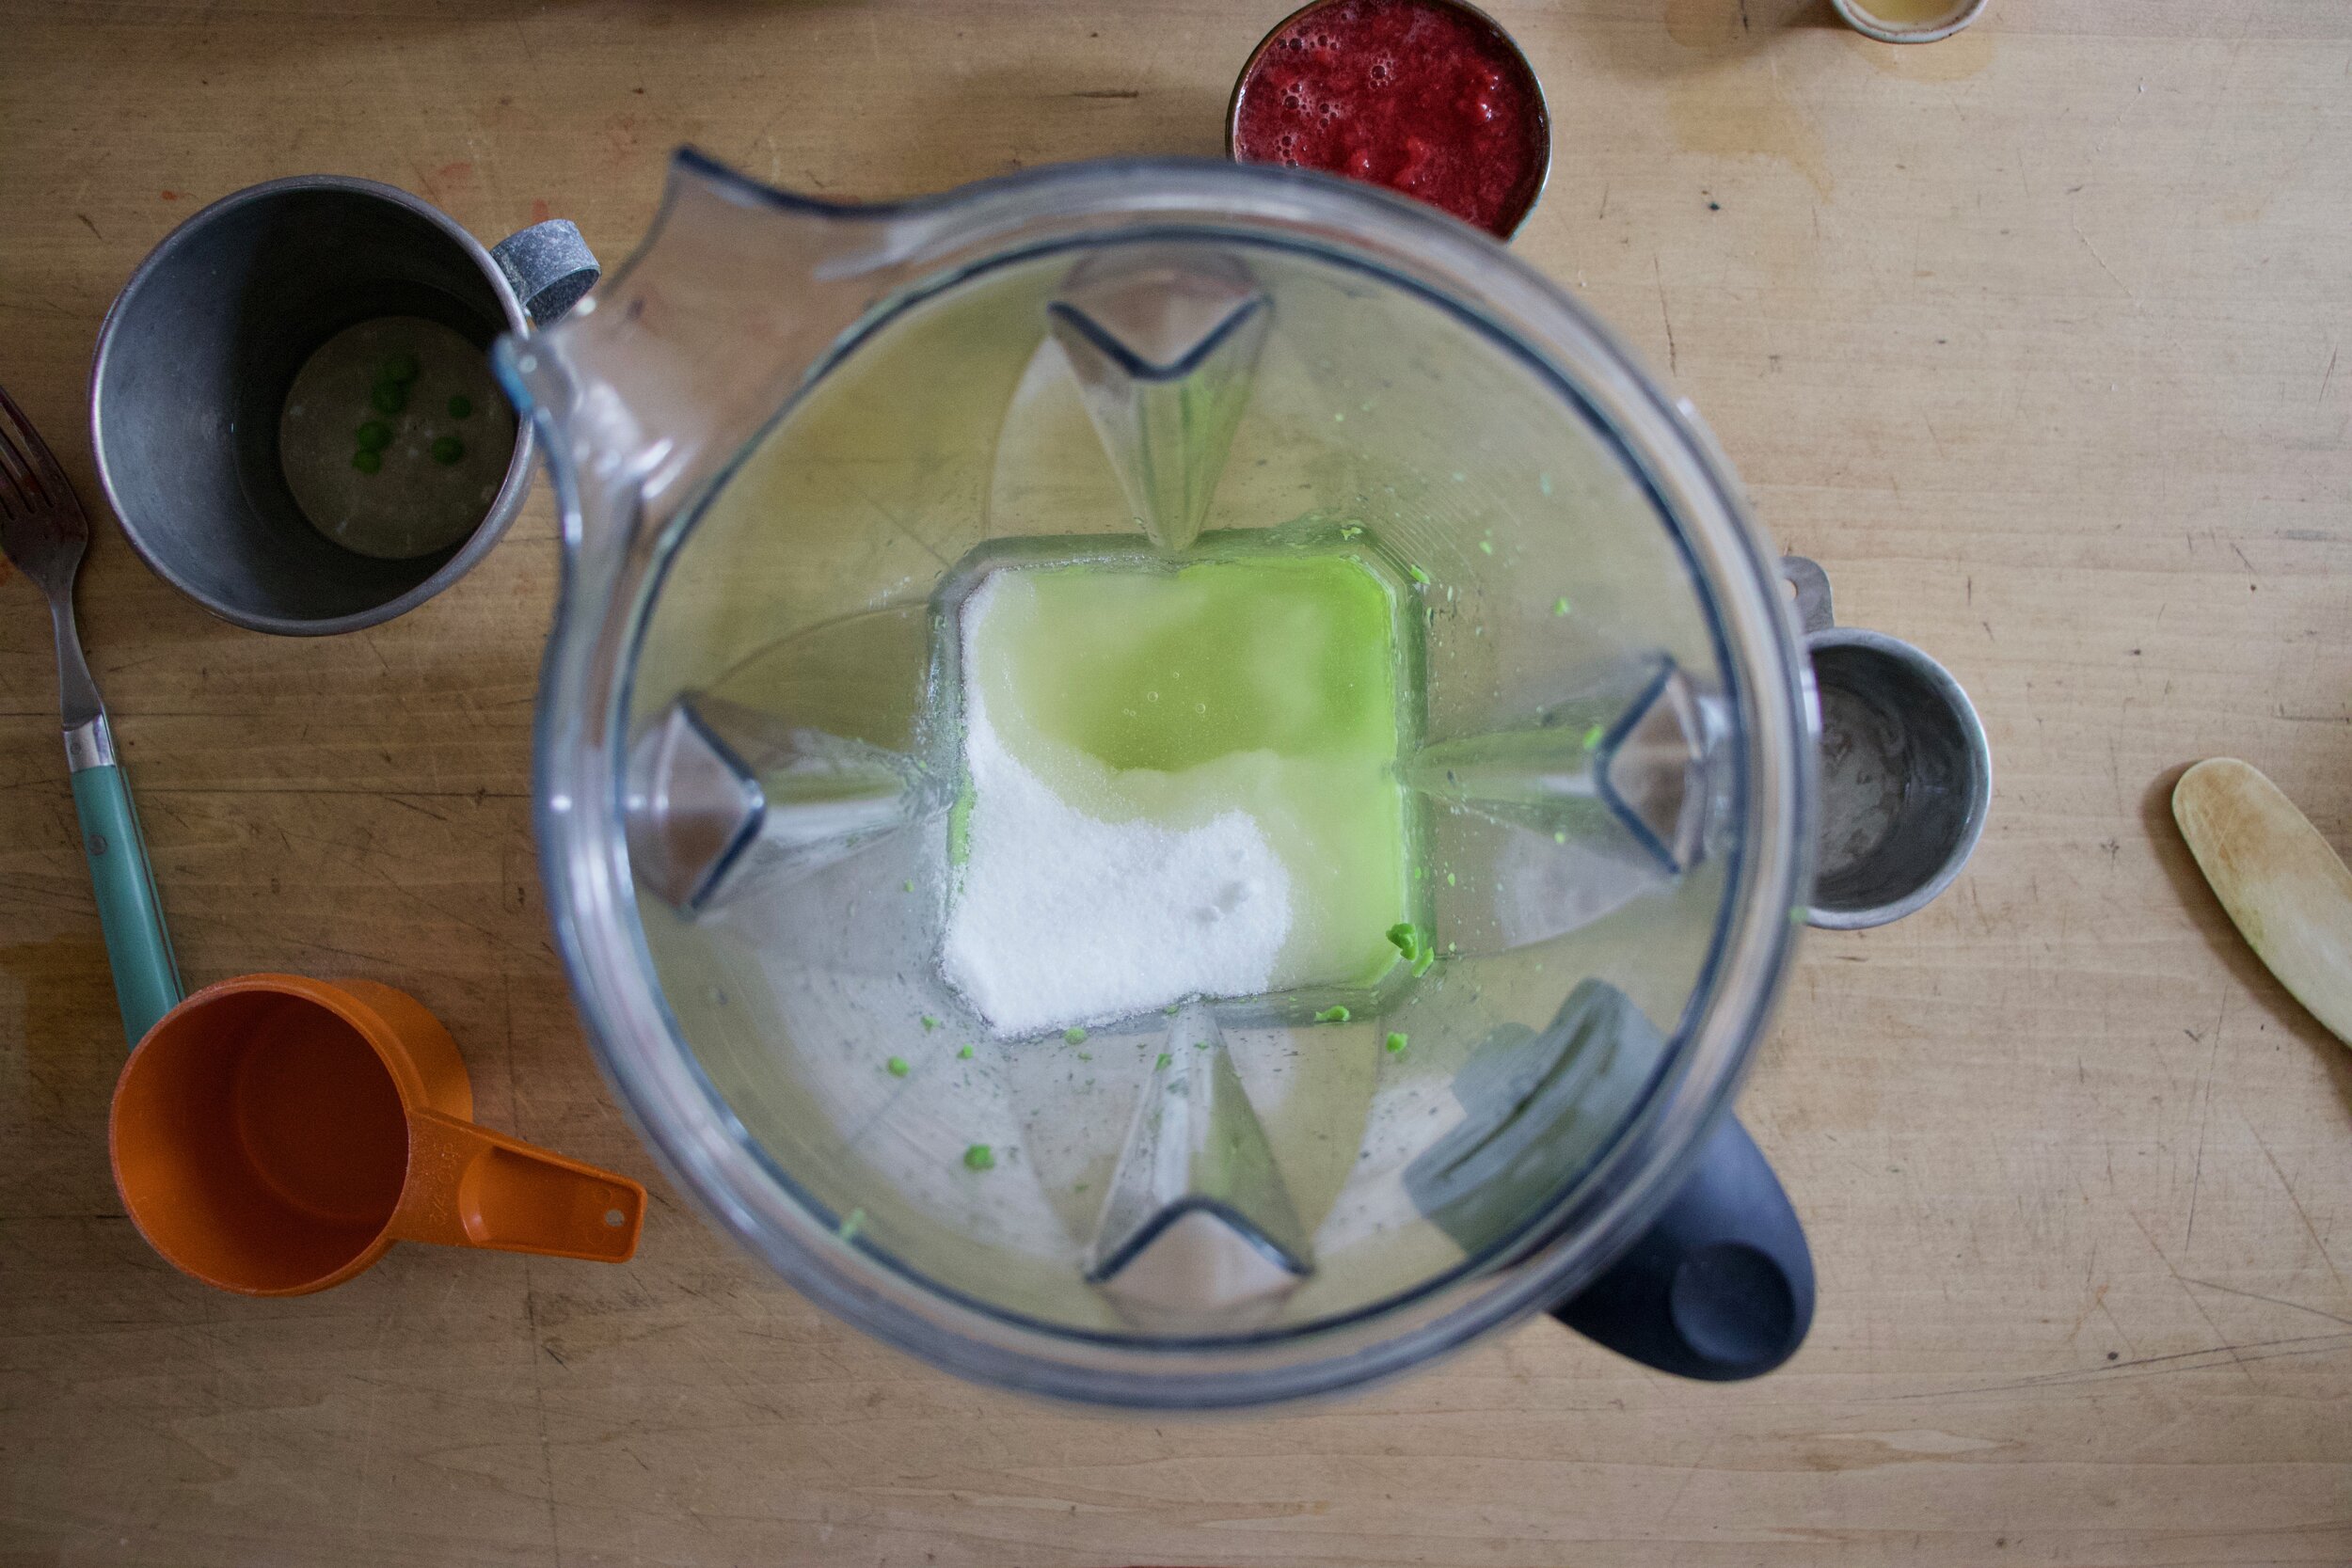
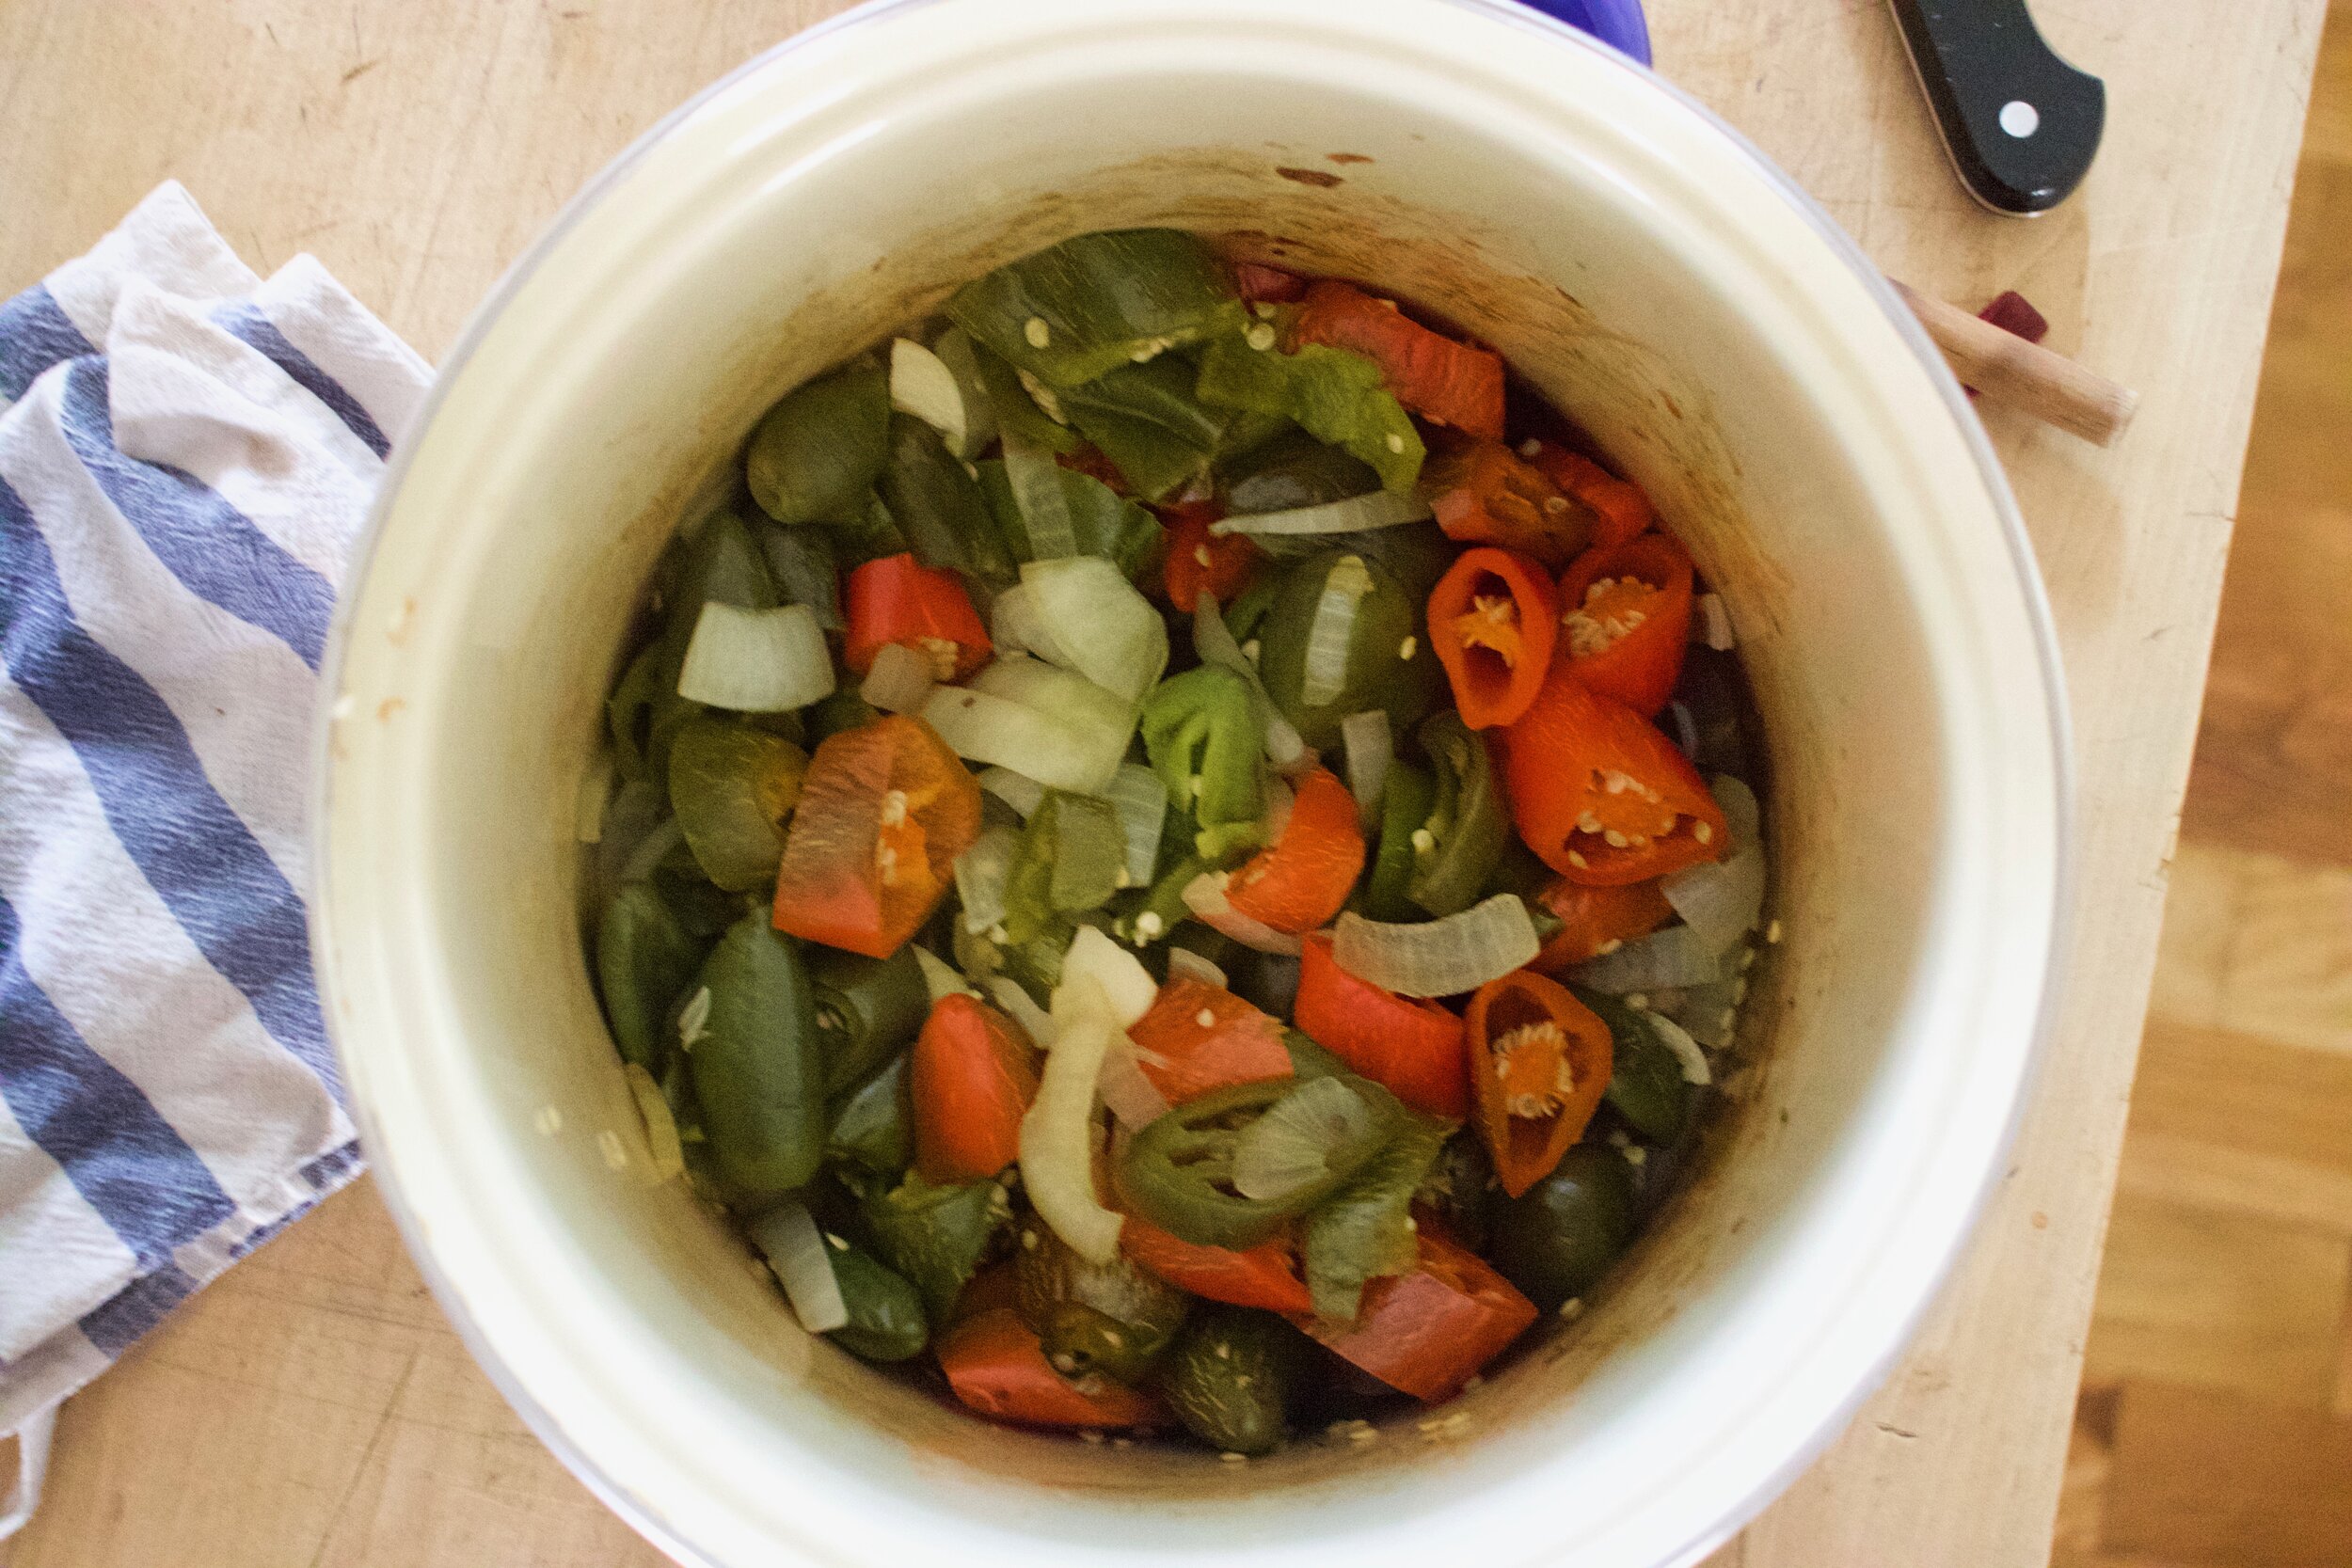
Toss it all into a pot. Sprinkle with salt and add a splash of water. Place on stove on medium heat to give the peppers and onion a little head start on cooking.

IMG_0593.jpg
IMG_0604.jpg

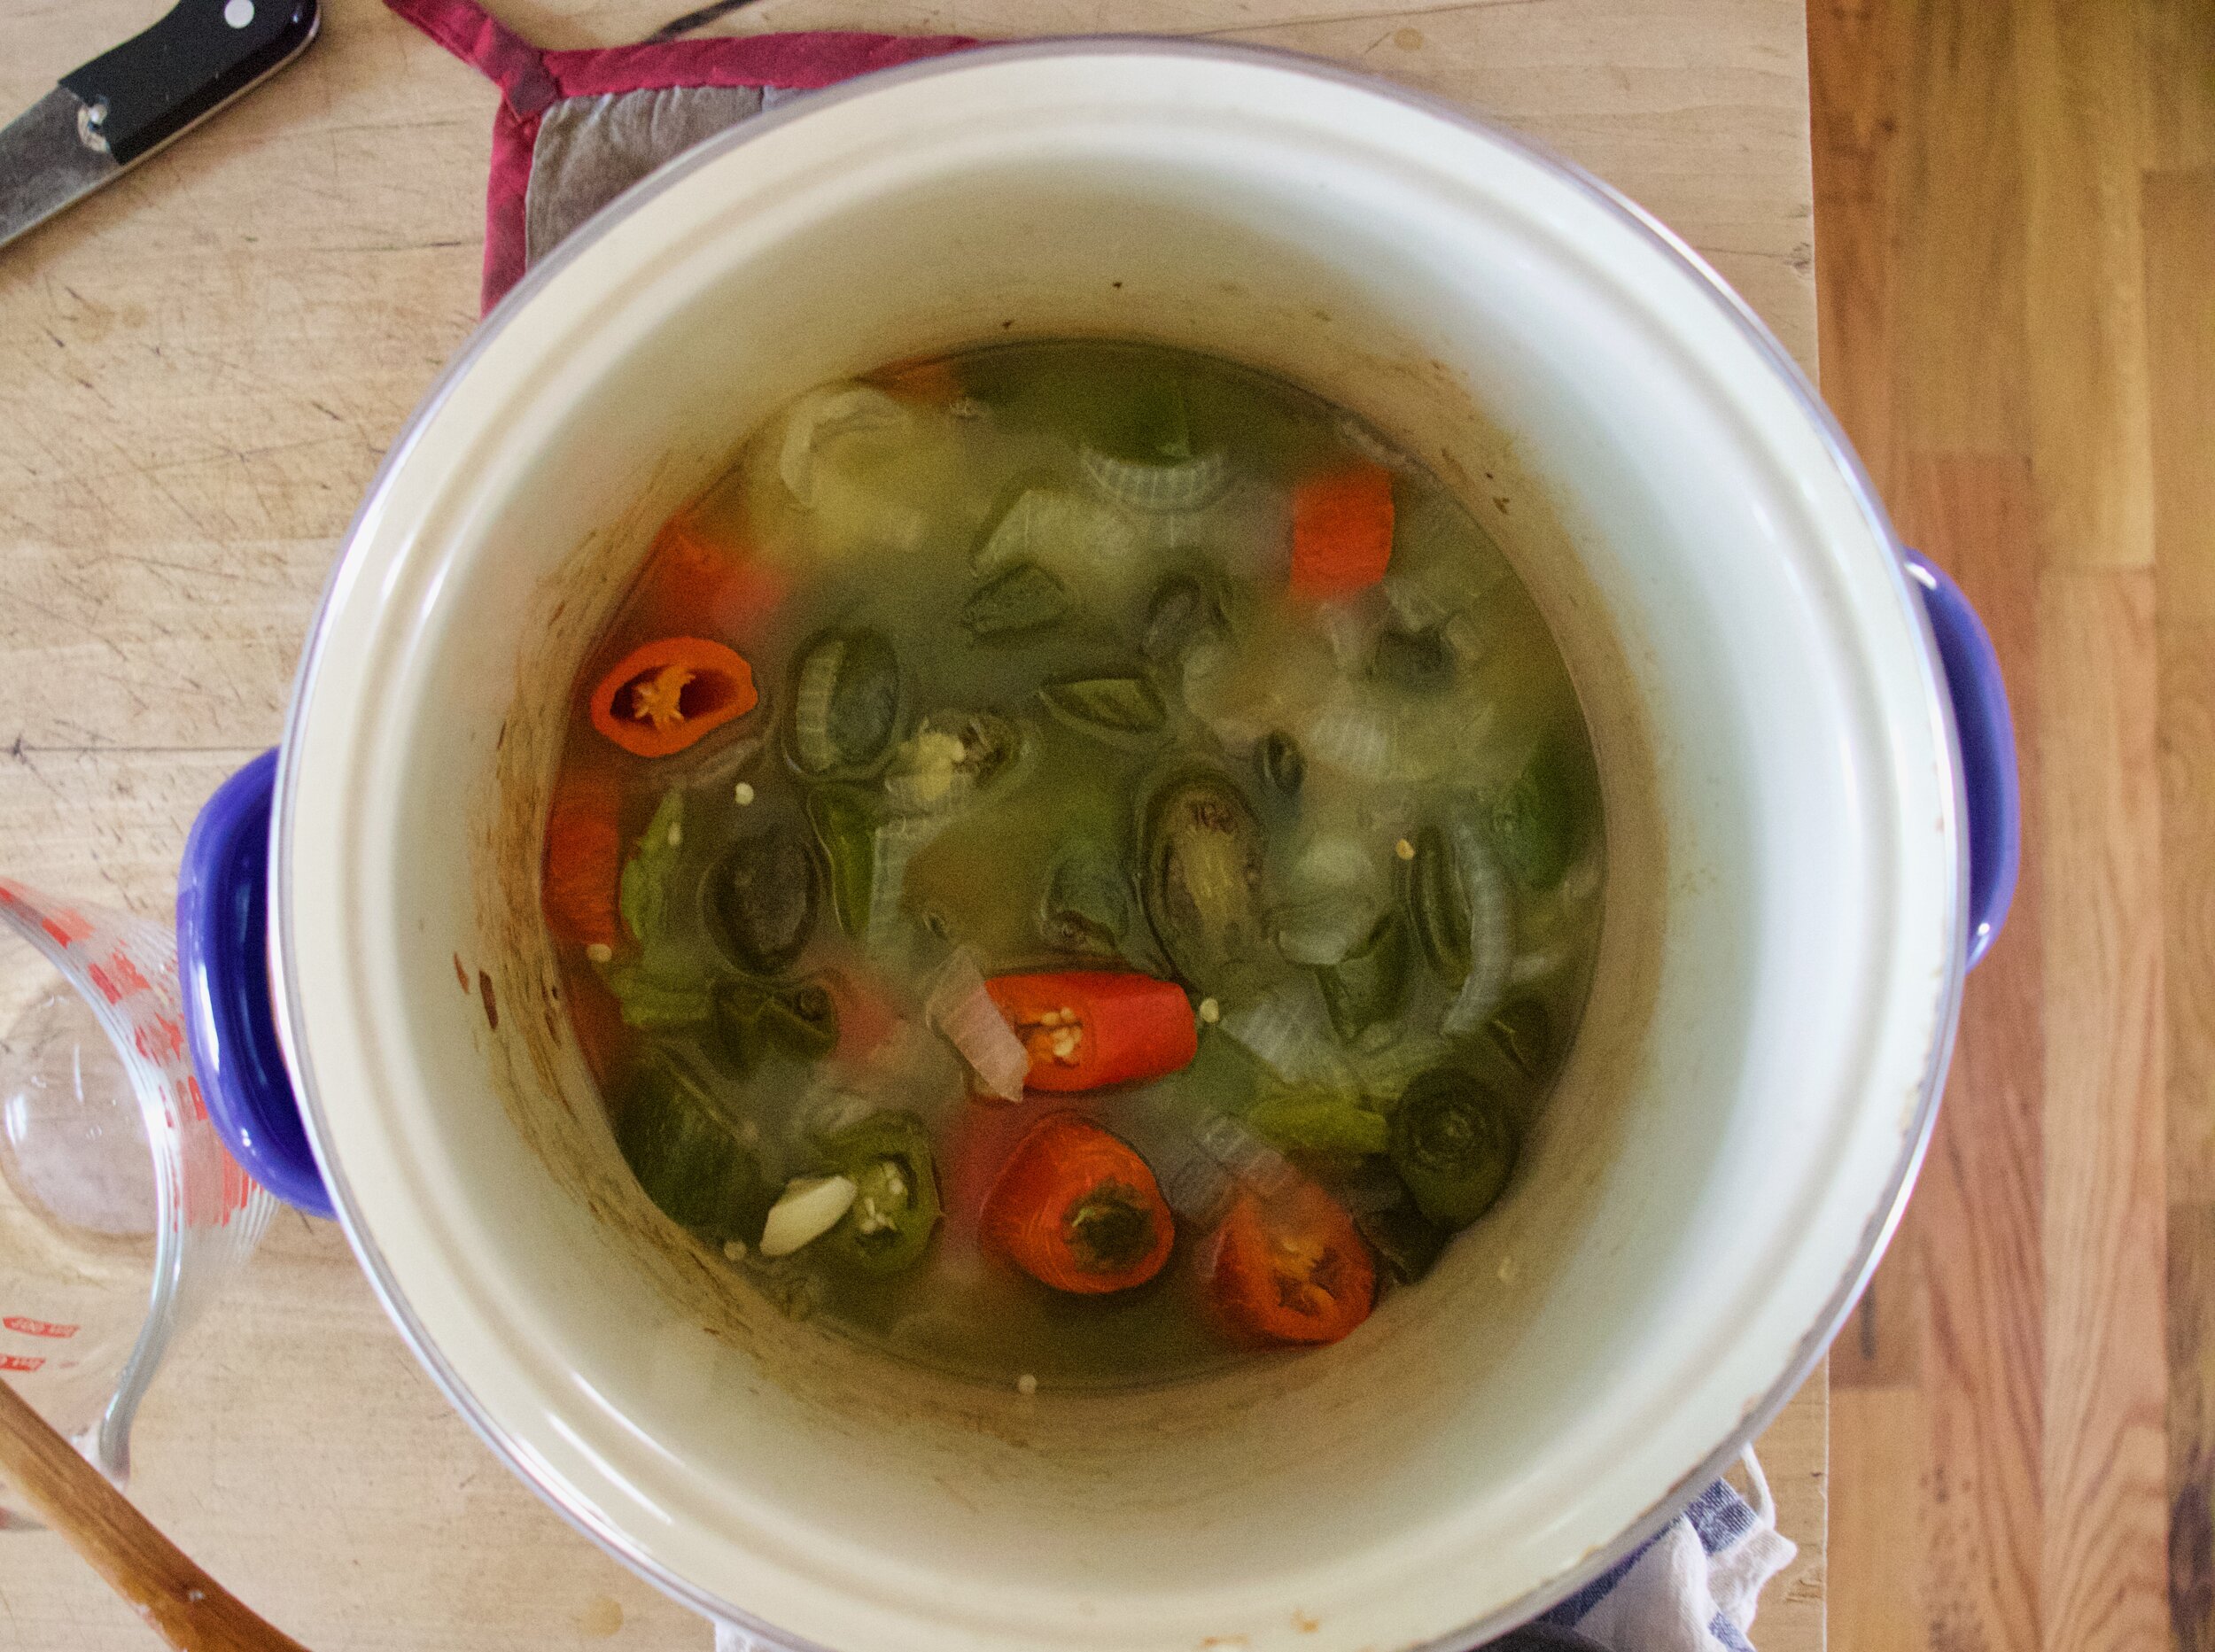
After softening the peppers and onions for about 10 minutes, add the liquid.

IMG_0612.jpg

Partially cover with a lid and simmer the peppers until they are fall apart tender. Probably about 35-40 minute.

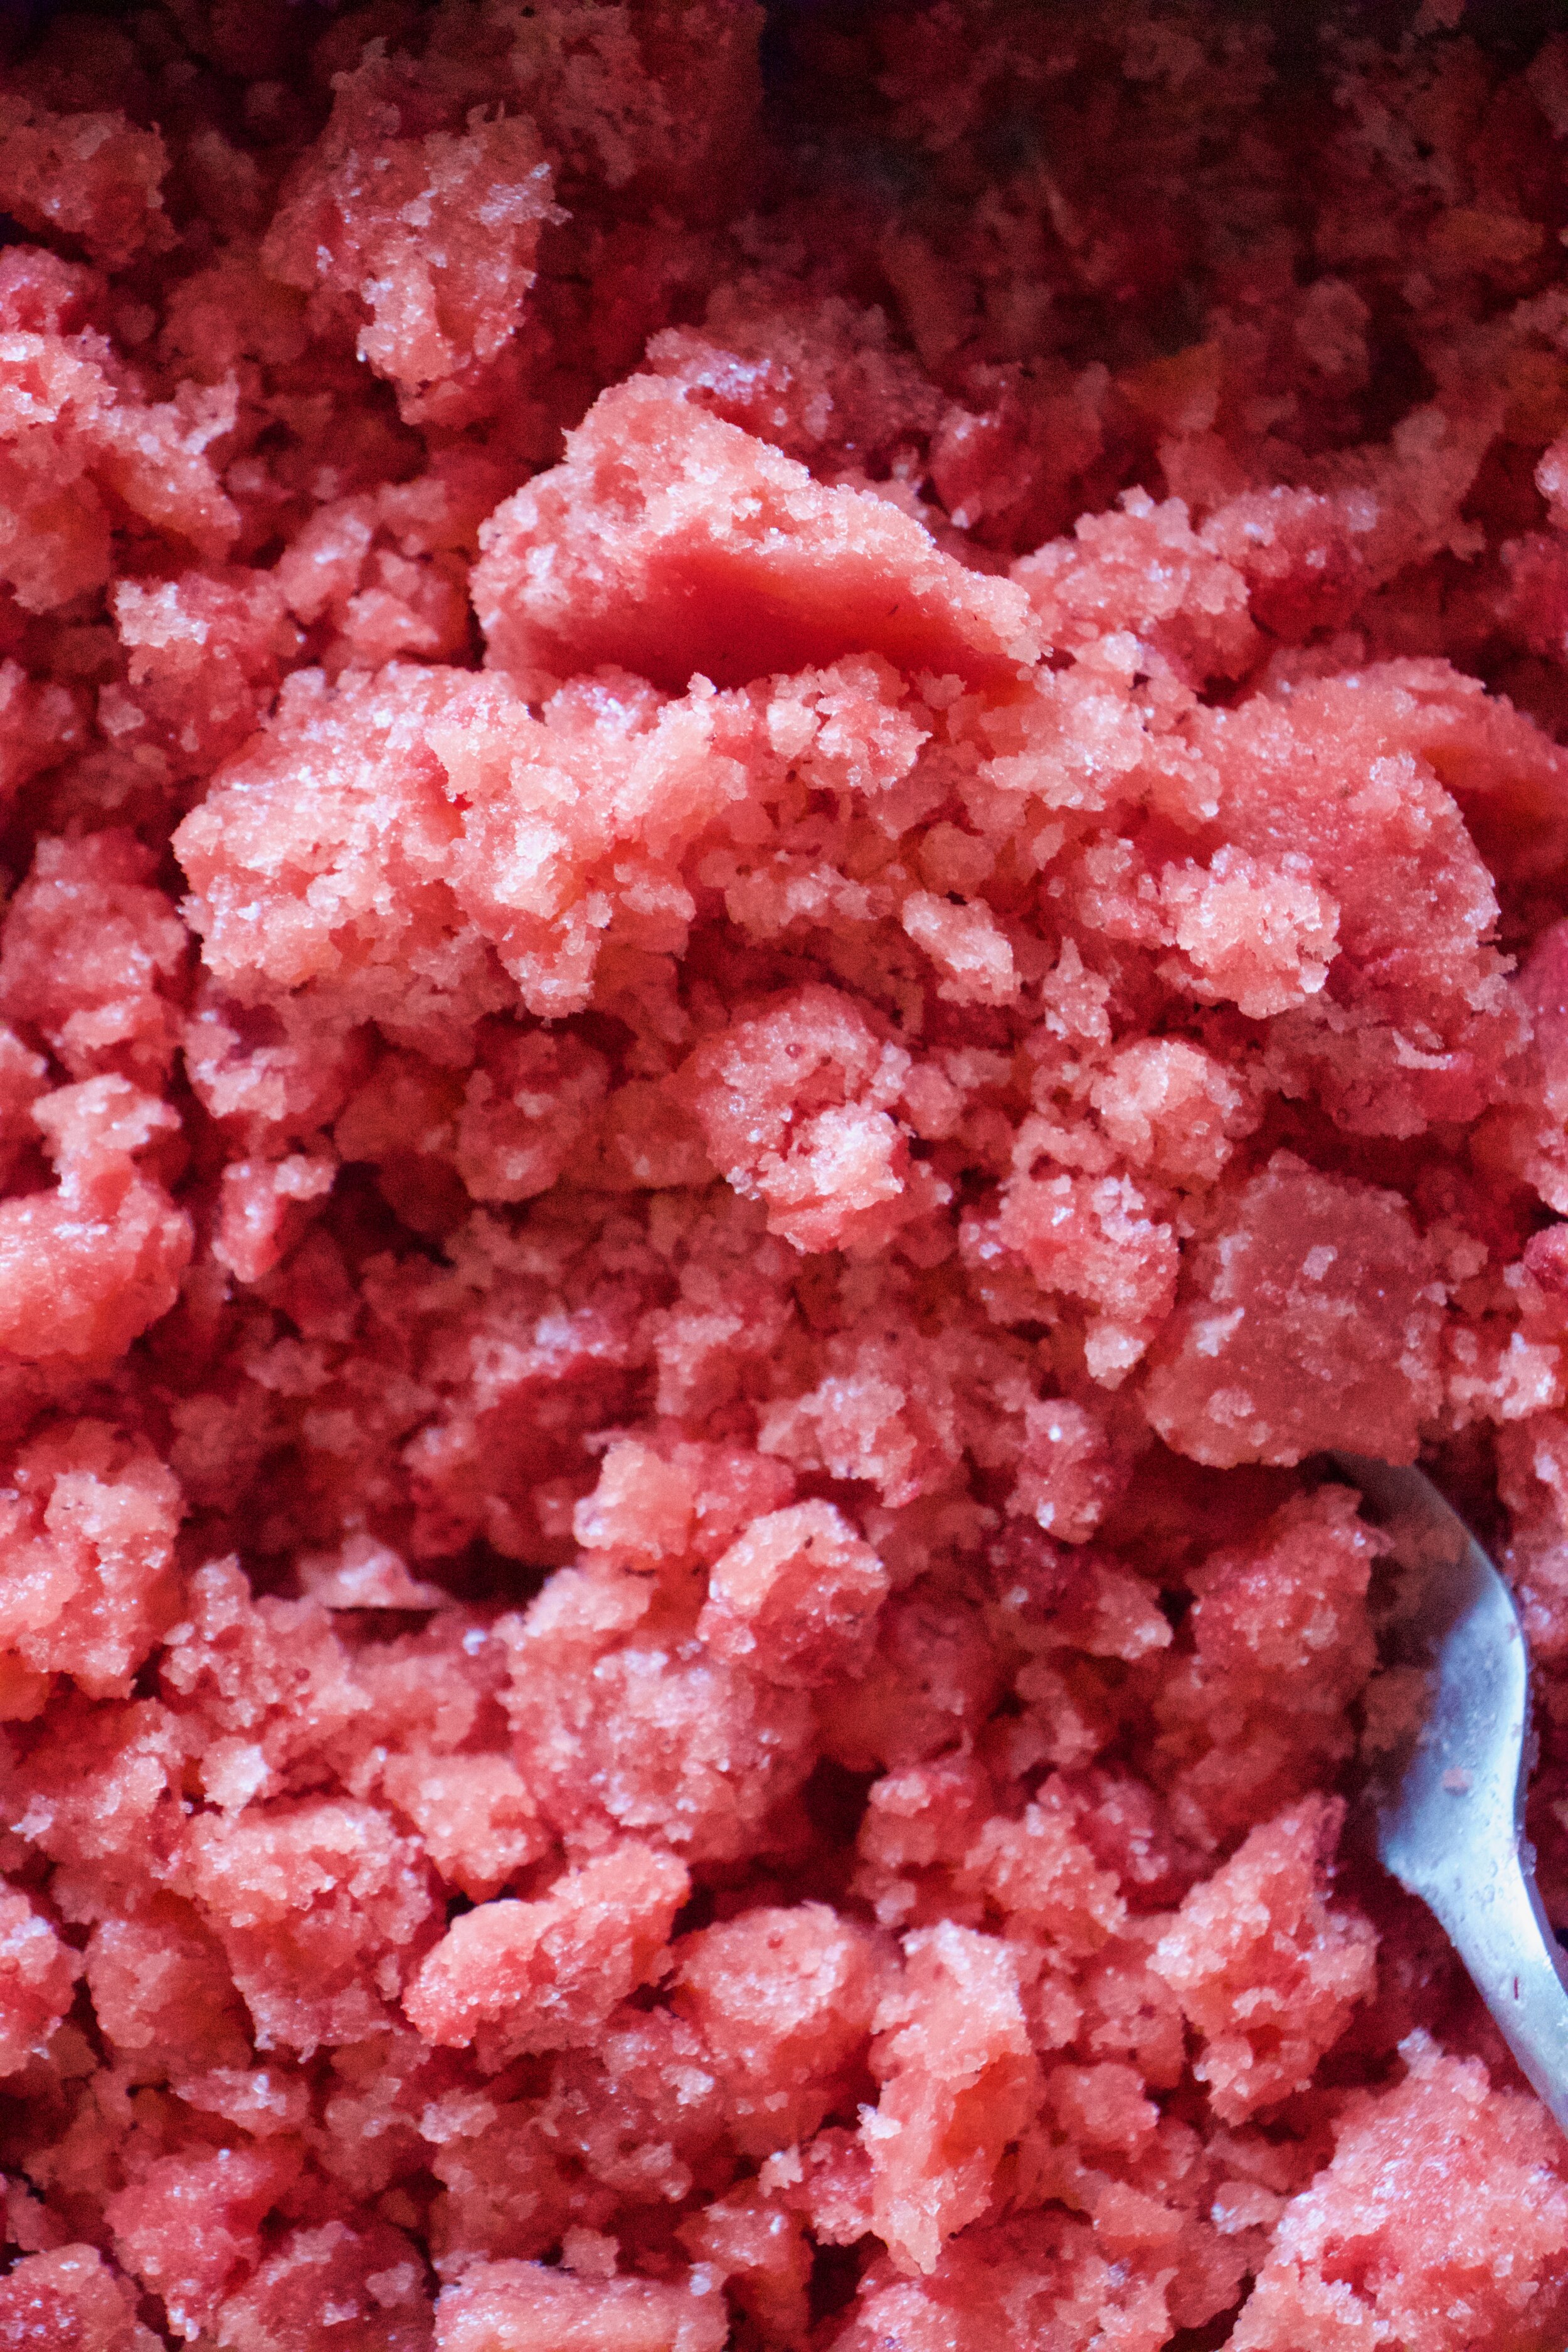
Peppers so soft, ready to go.

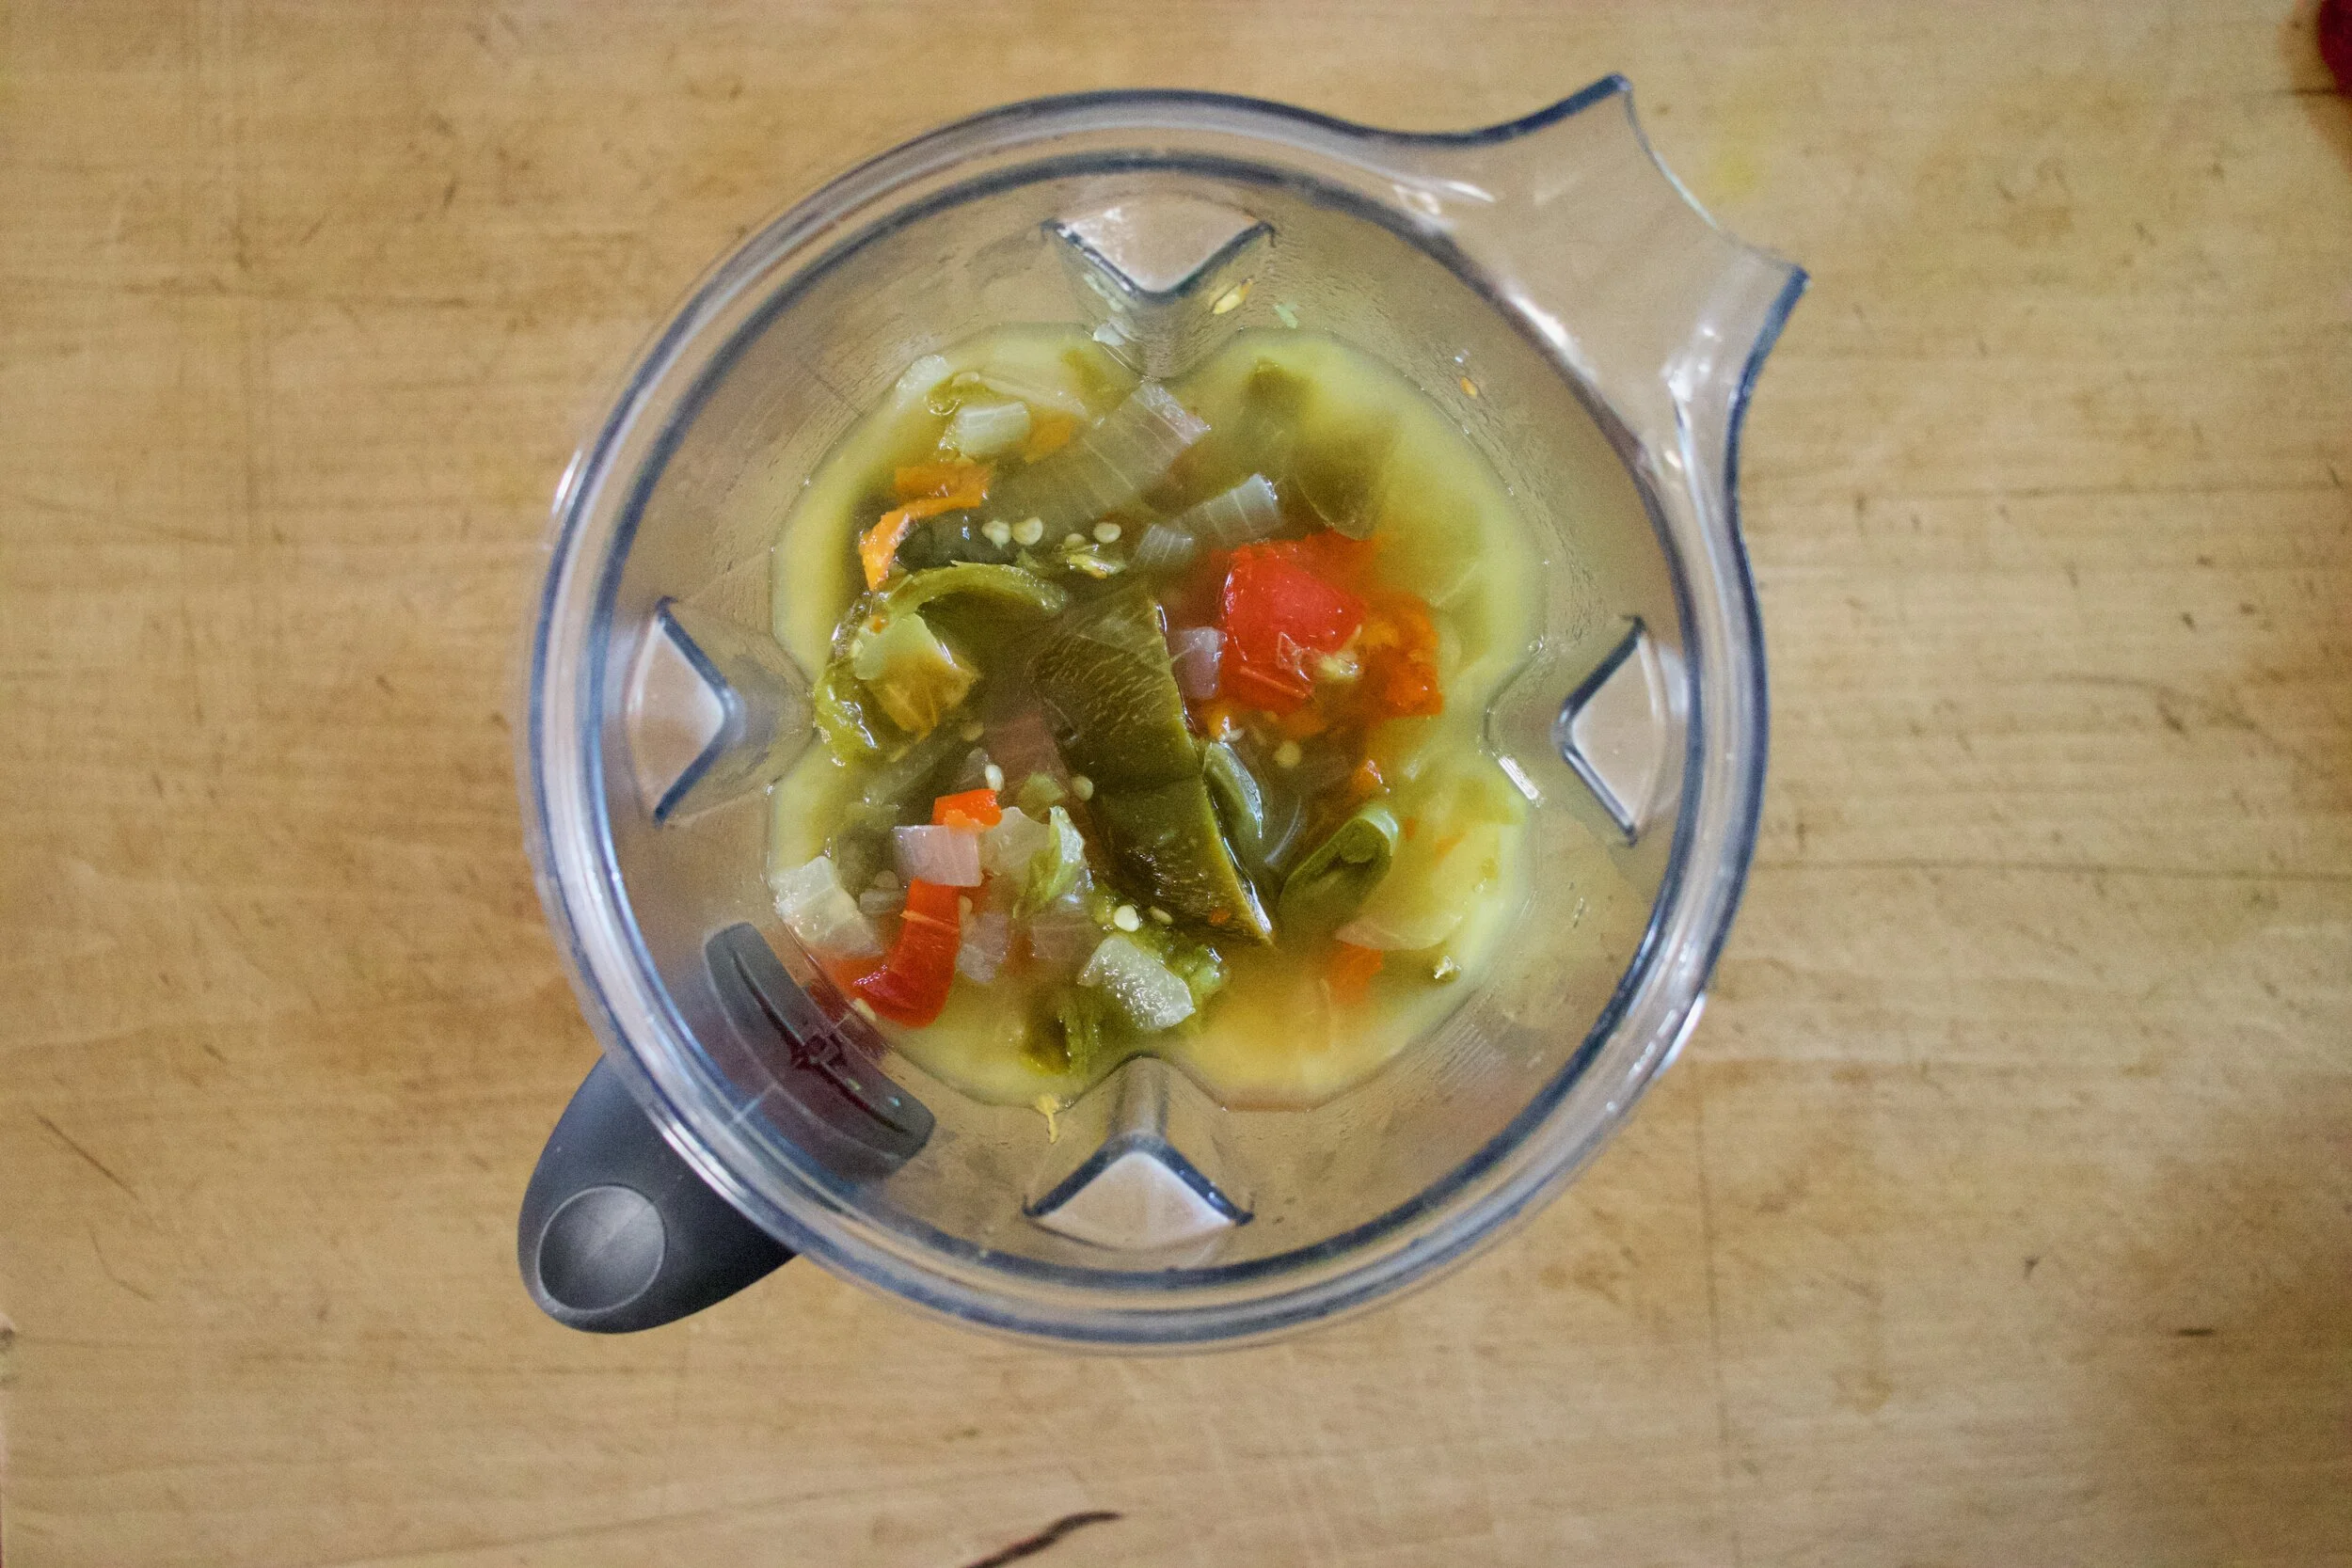
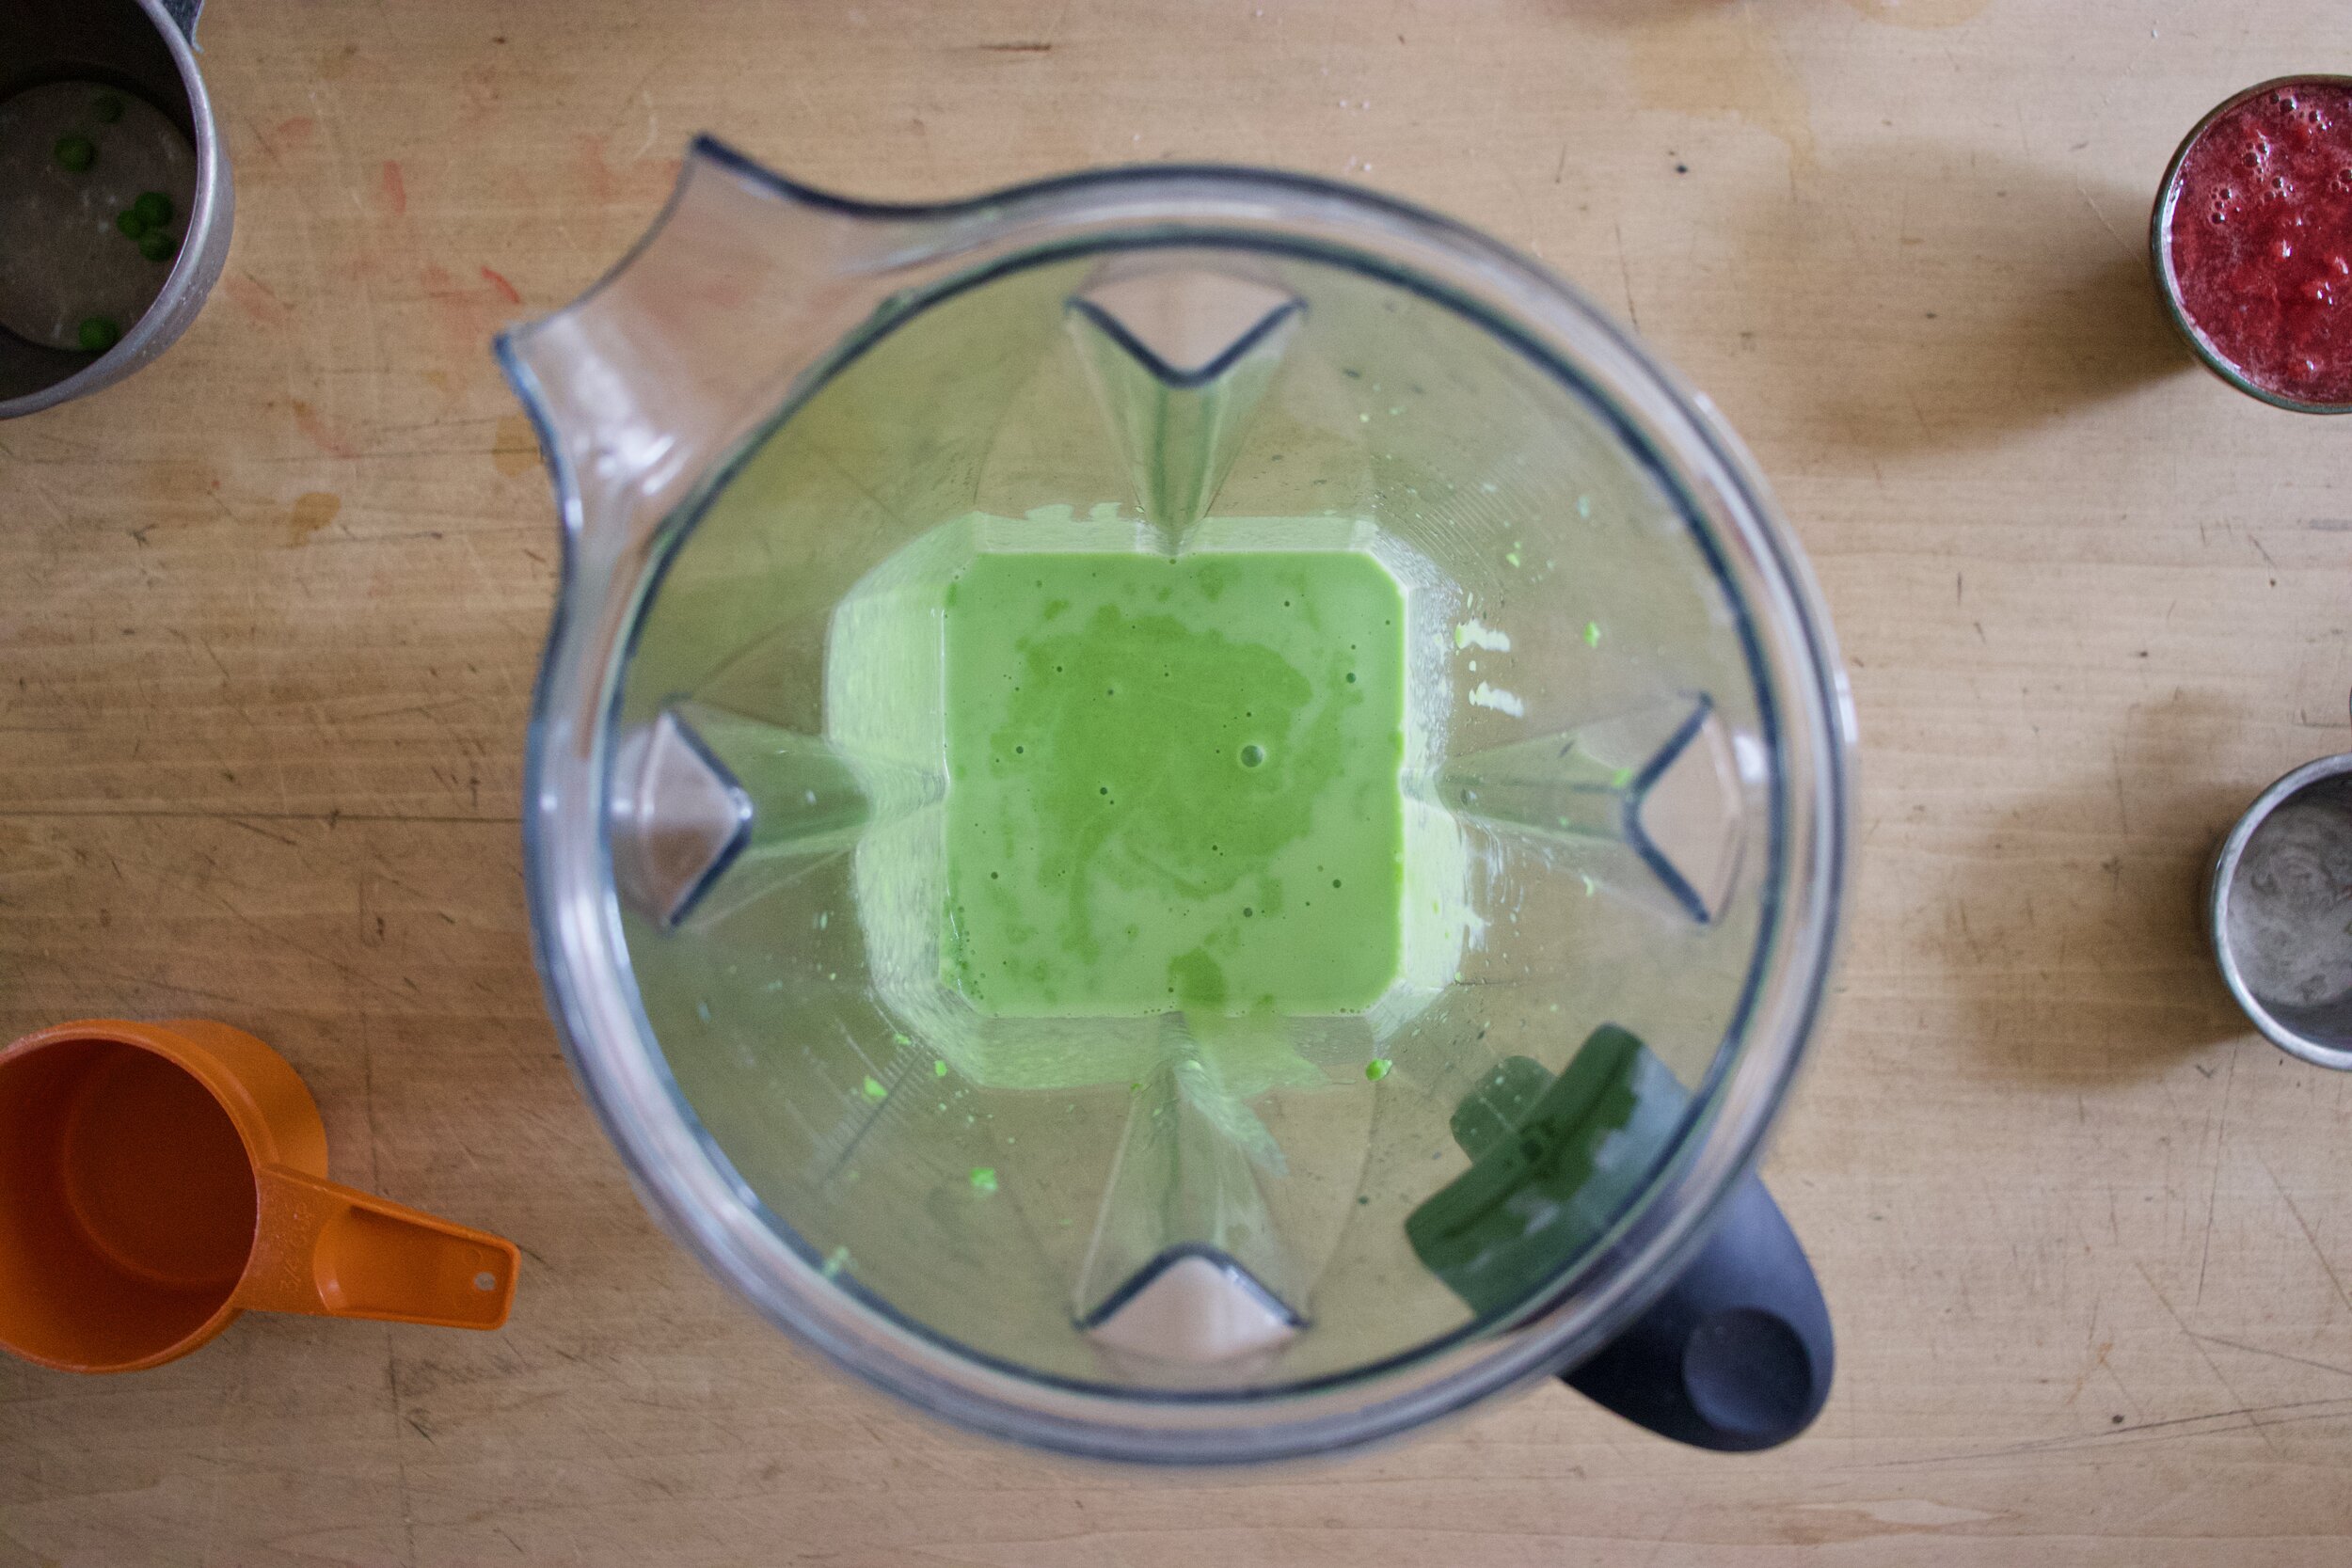
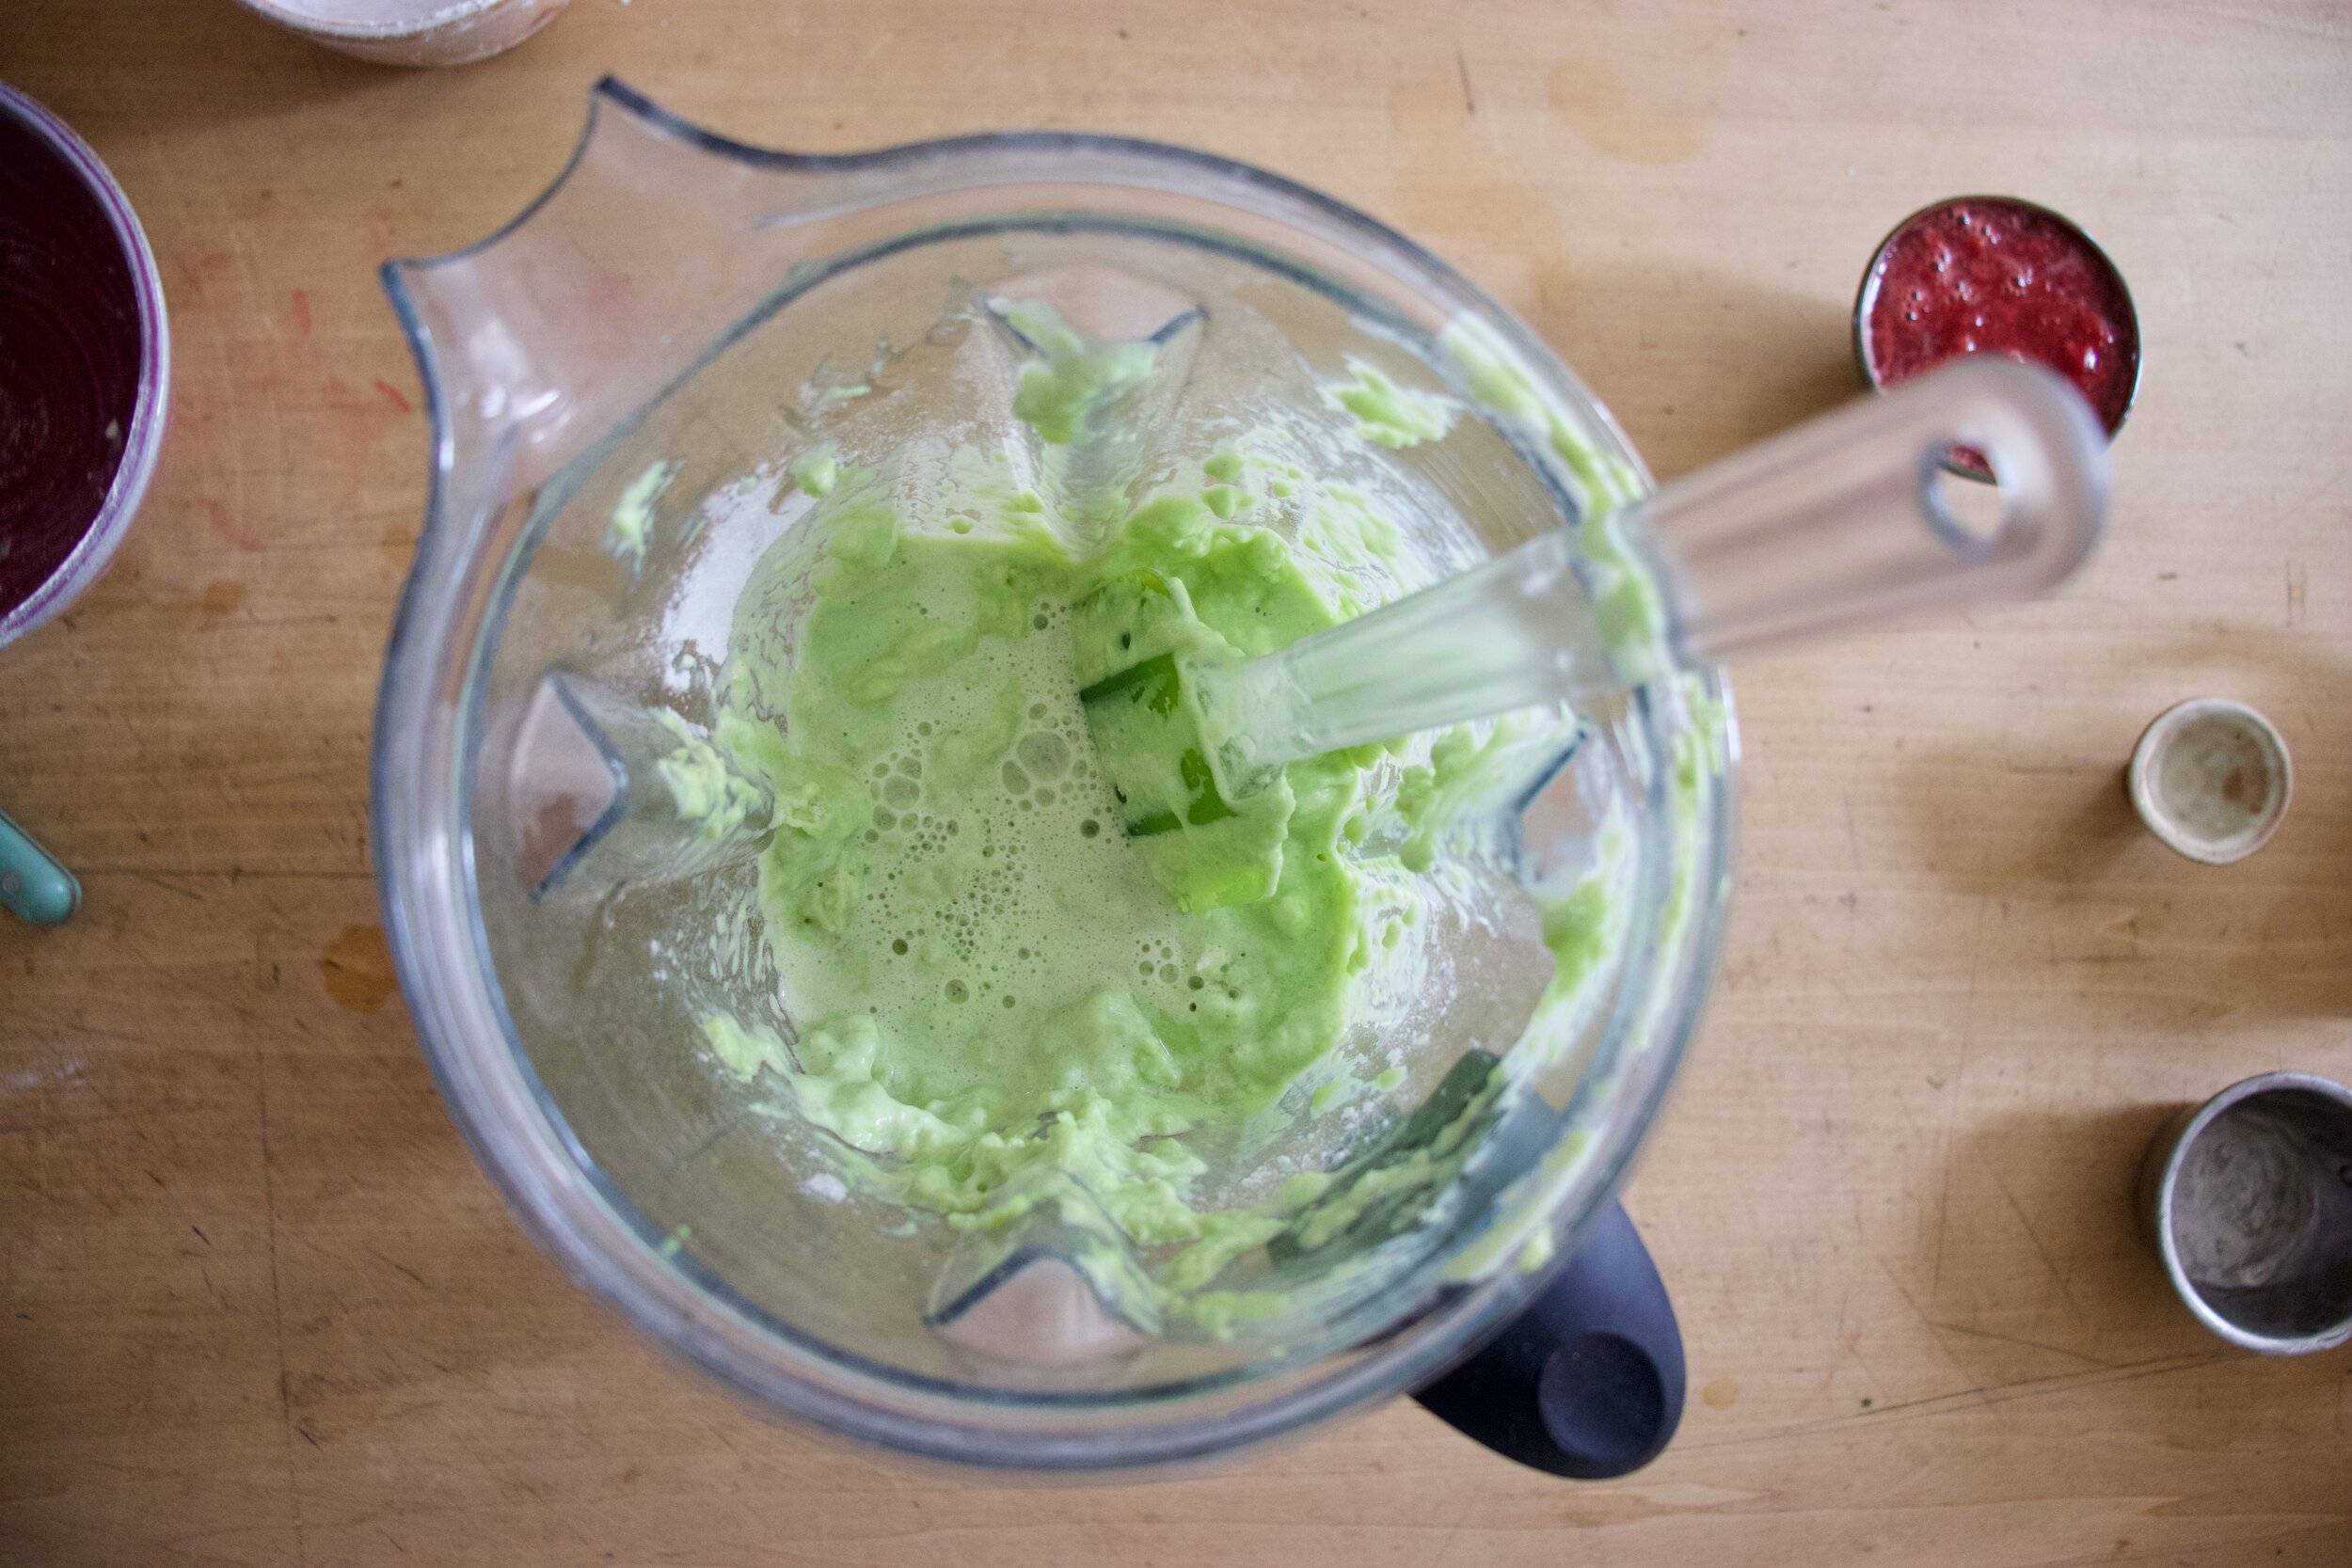
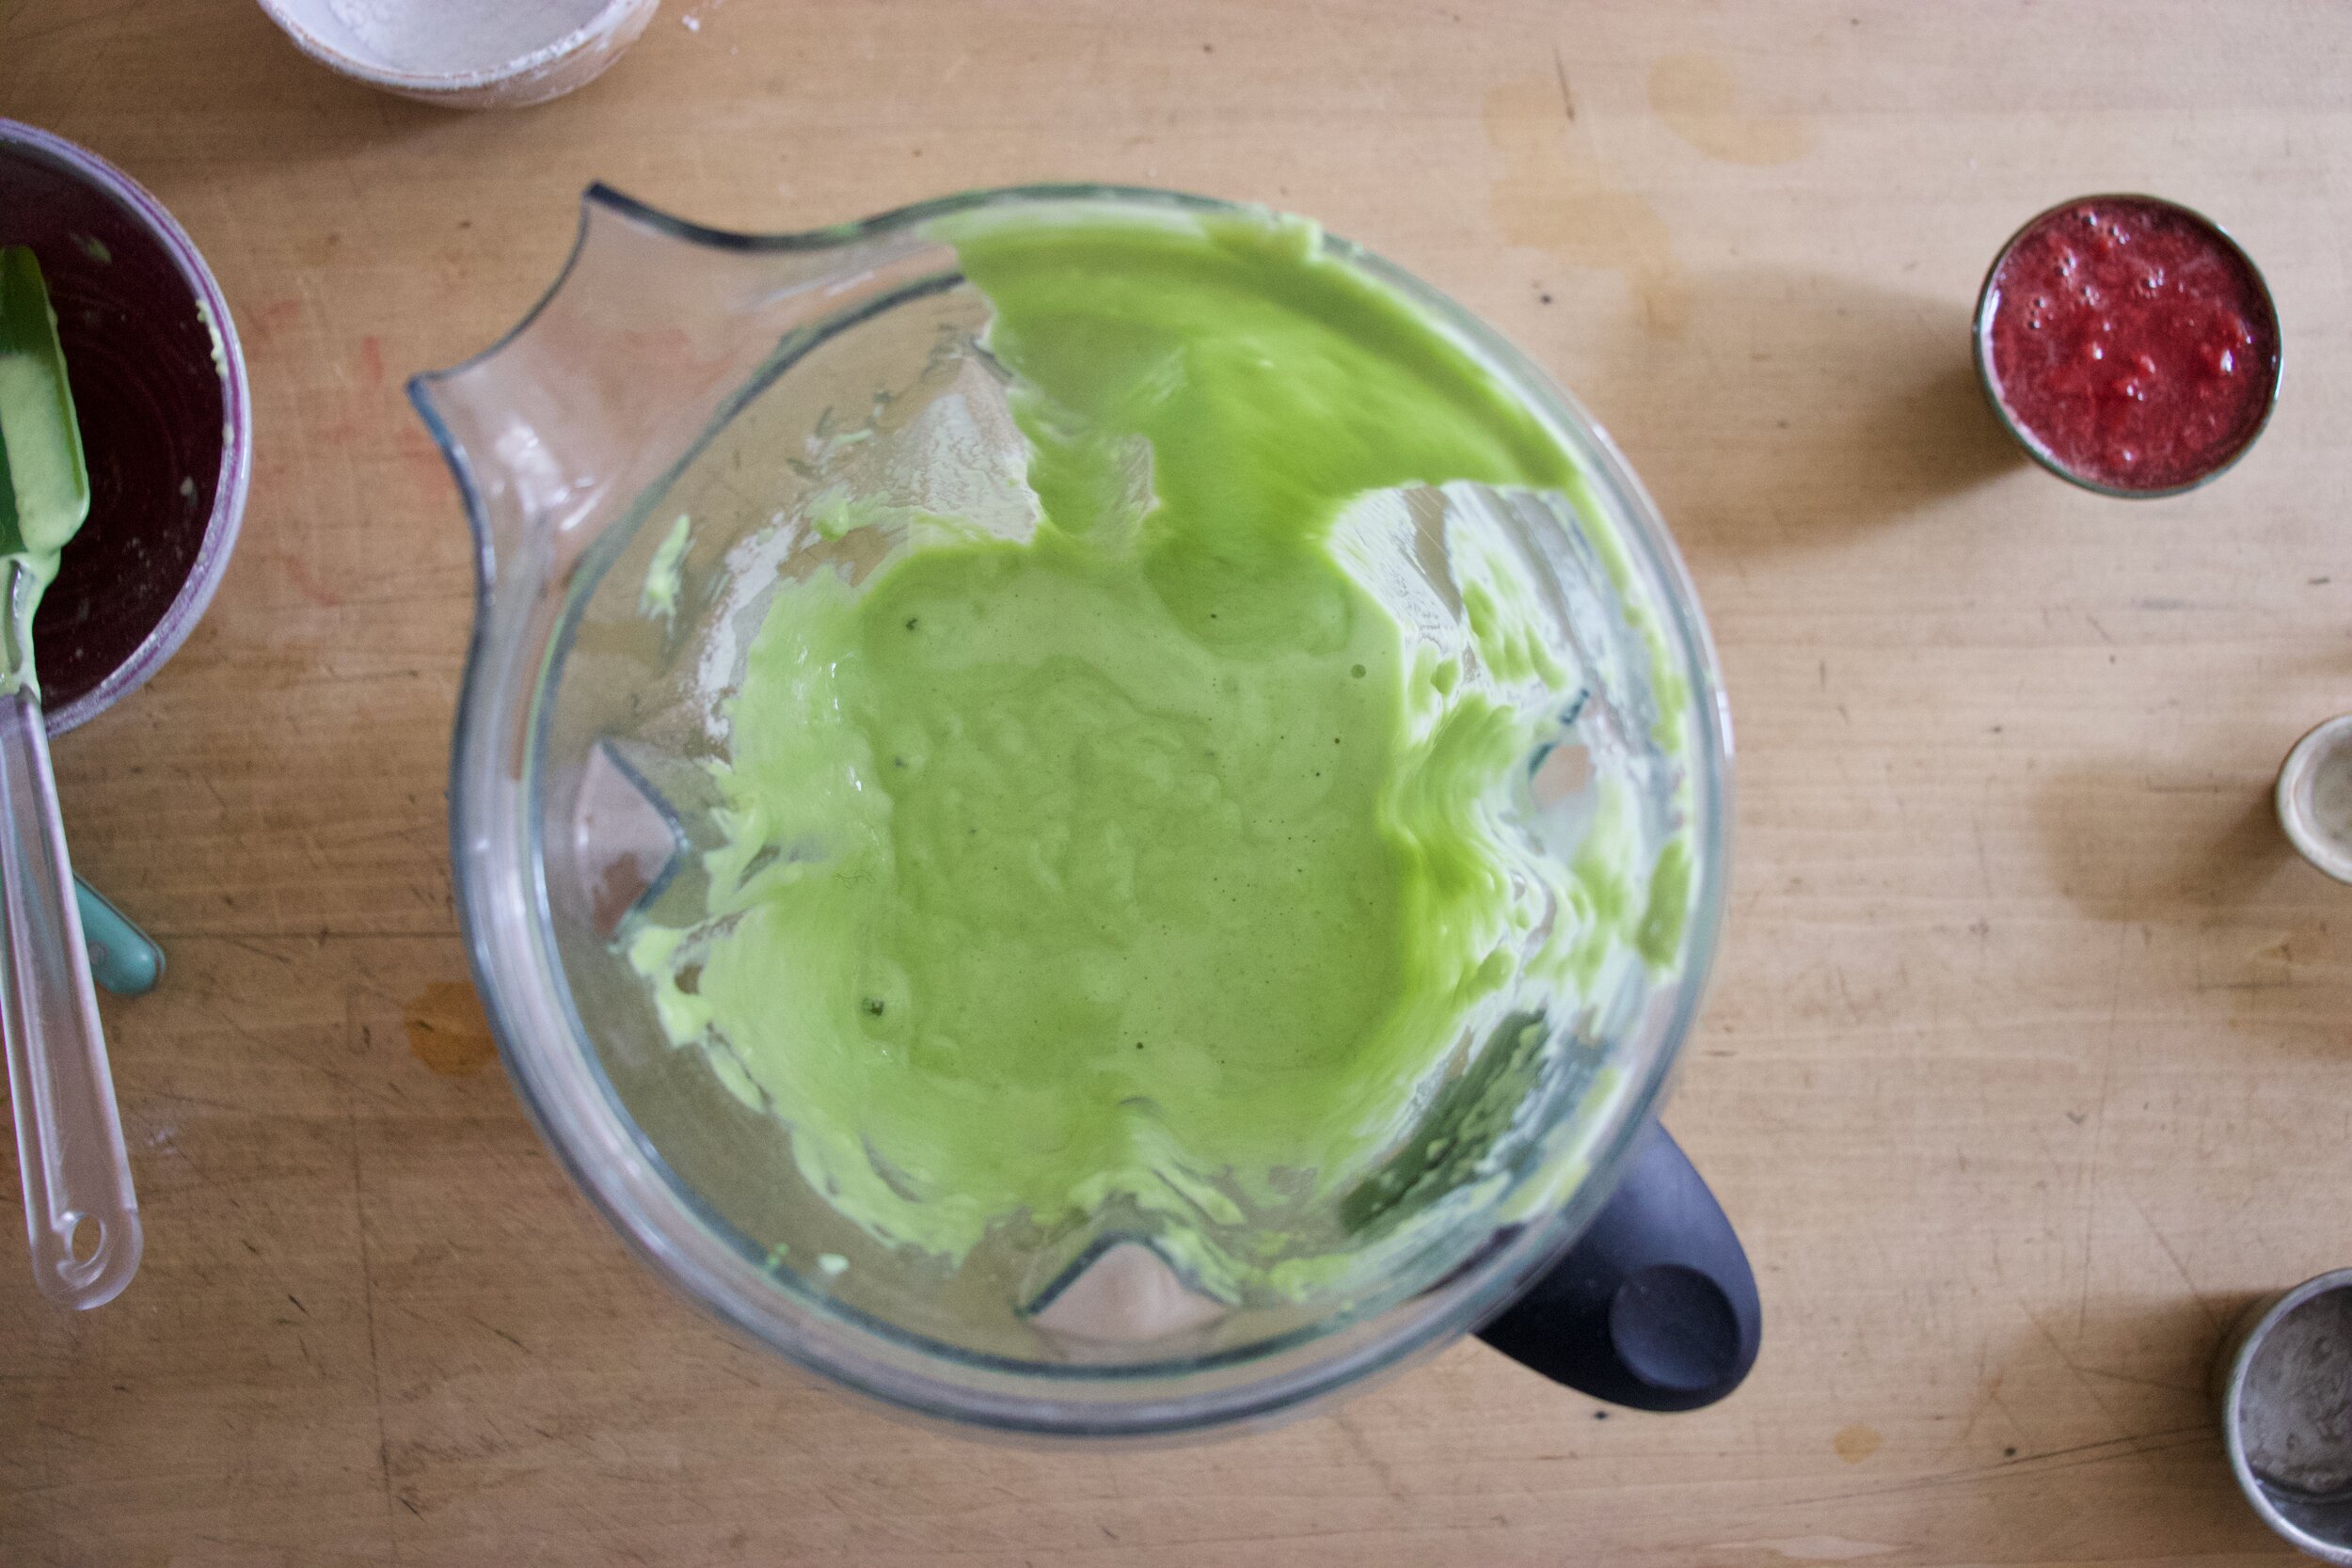
Let it cool a few minutes then dump it all Into a blender. Blend until completely blended.

IMG_0650 2.jpg

Smooth as smooth can be.

Taste it (like dip a carrot of a piece of bread into it) and add more salt if nessacery. Also, if it is too thick for your liking, add a little water to thin it out.
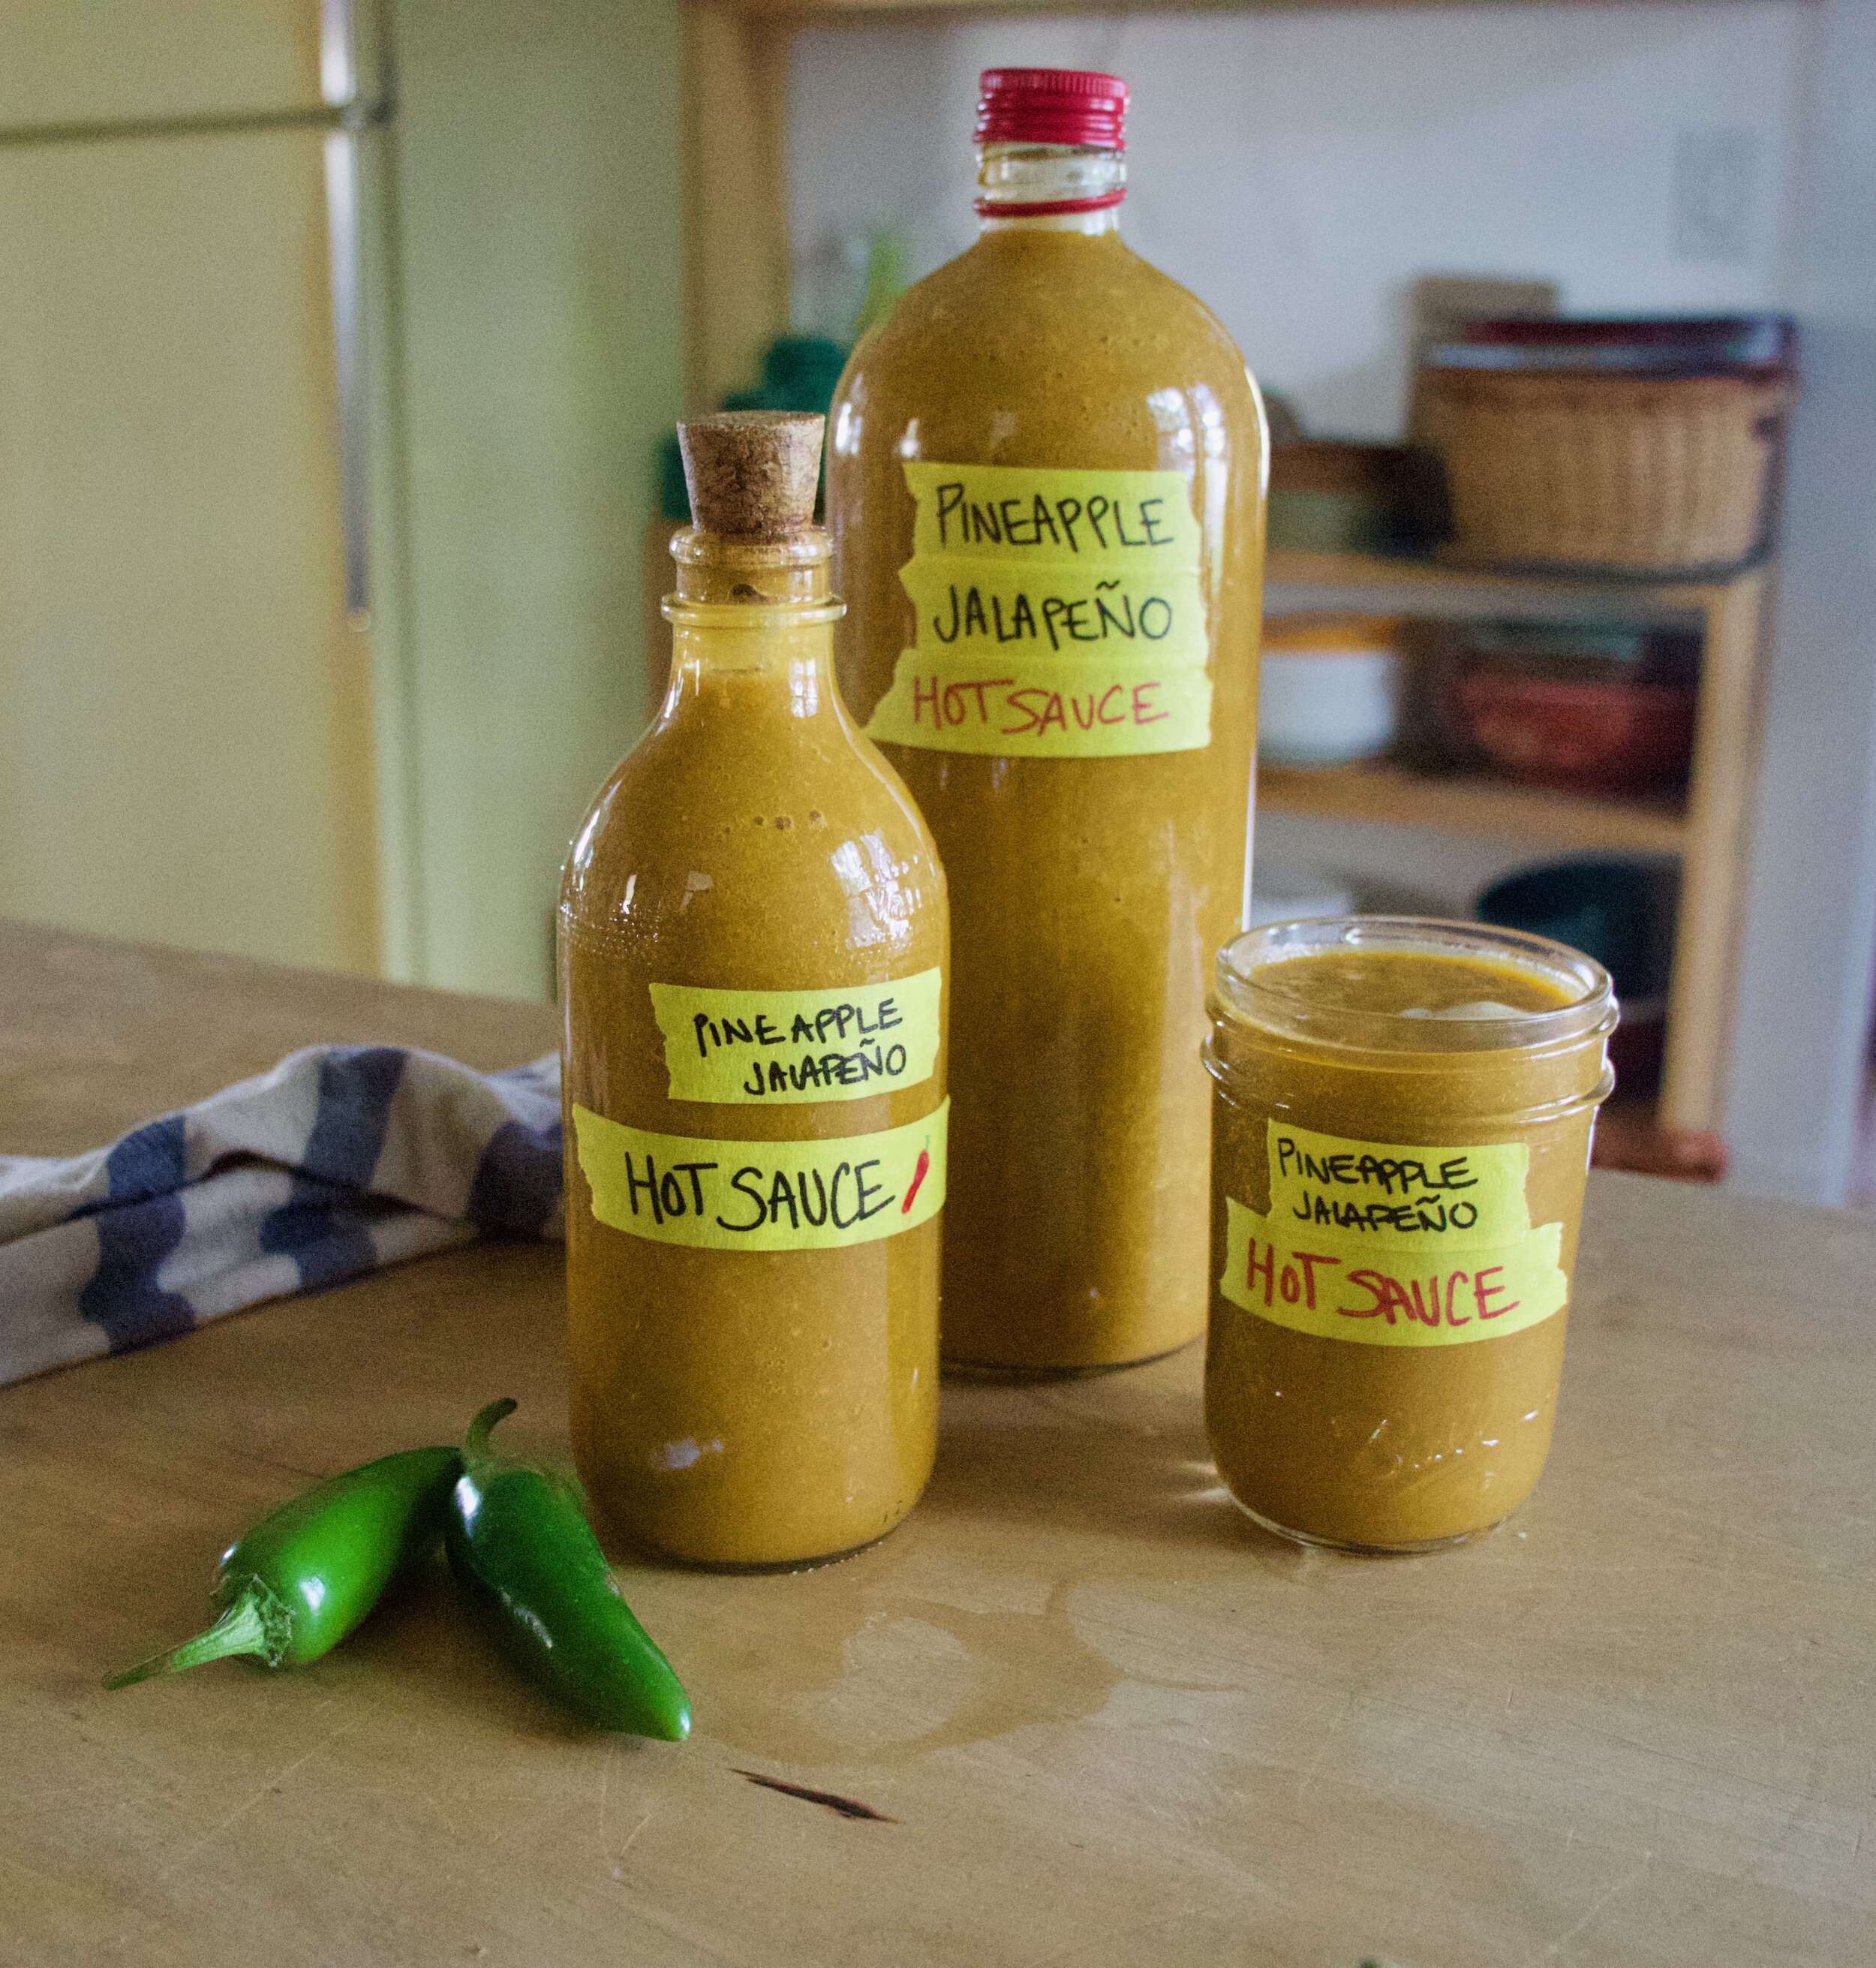
IMG_0655.jpg

Now bottle it up!

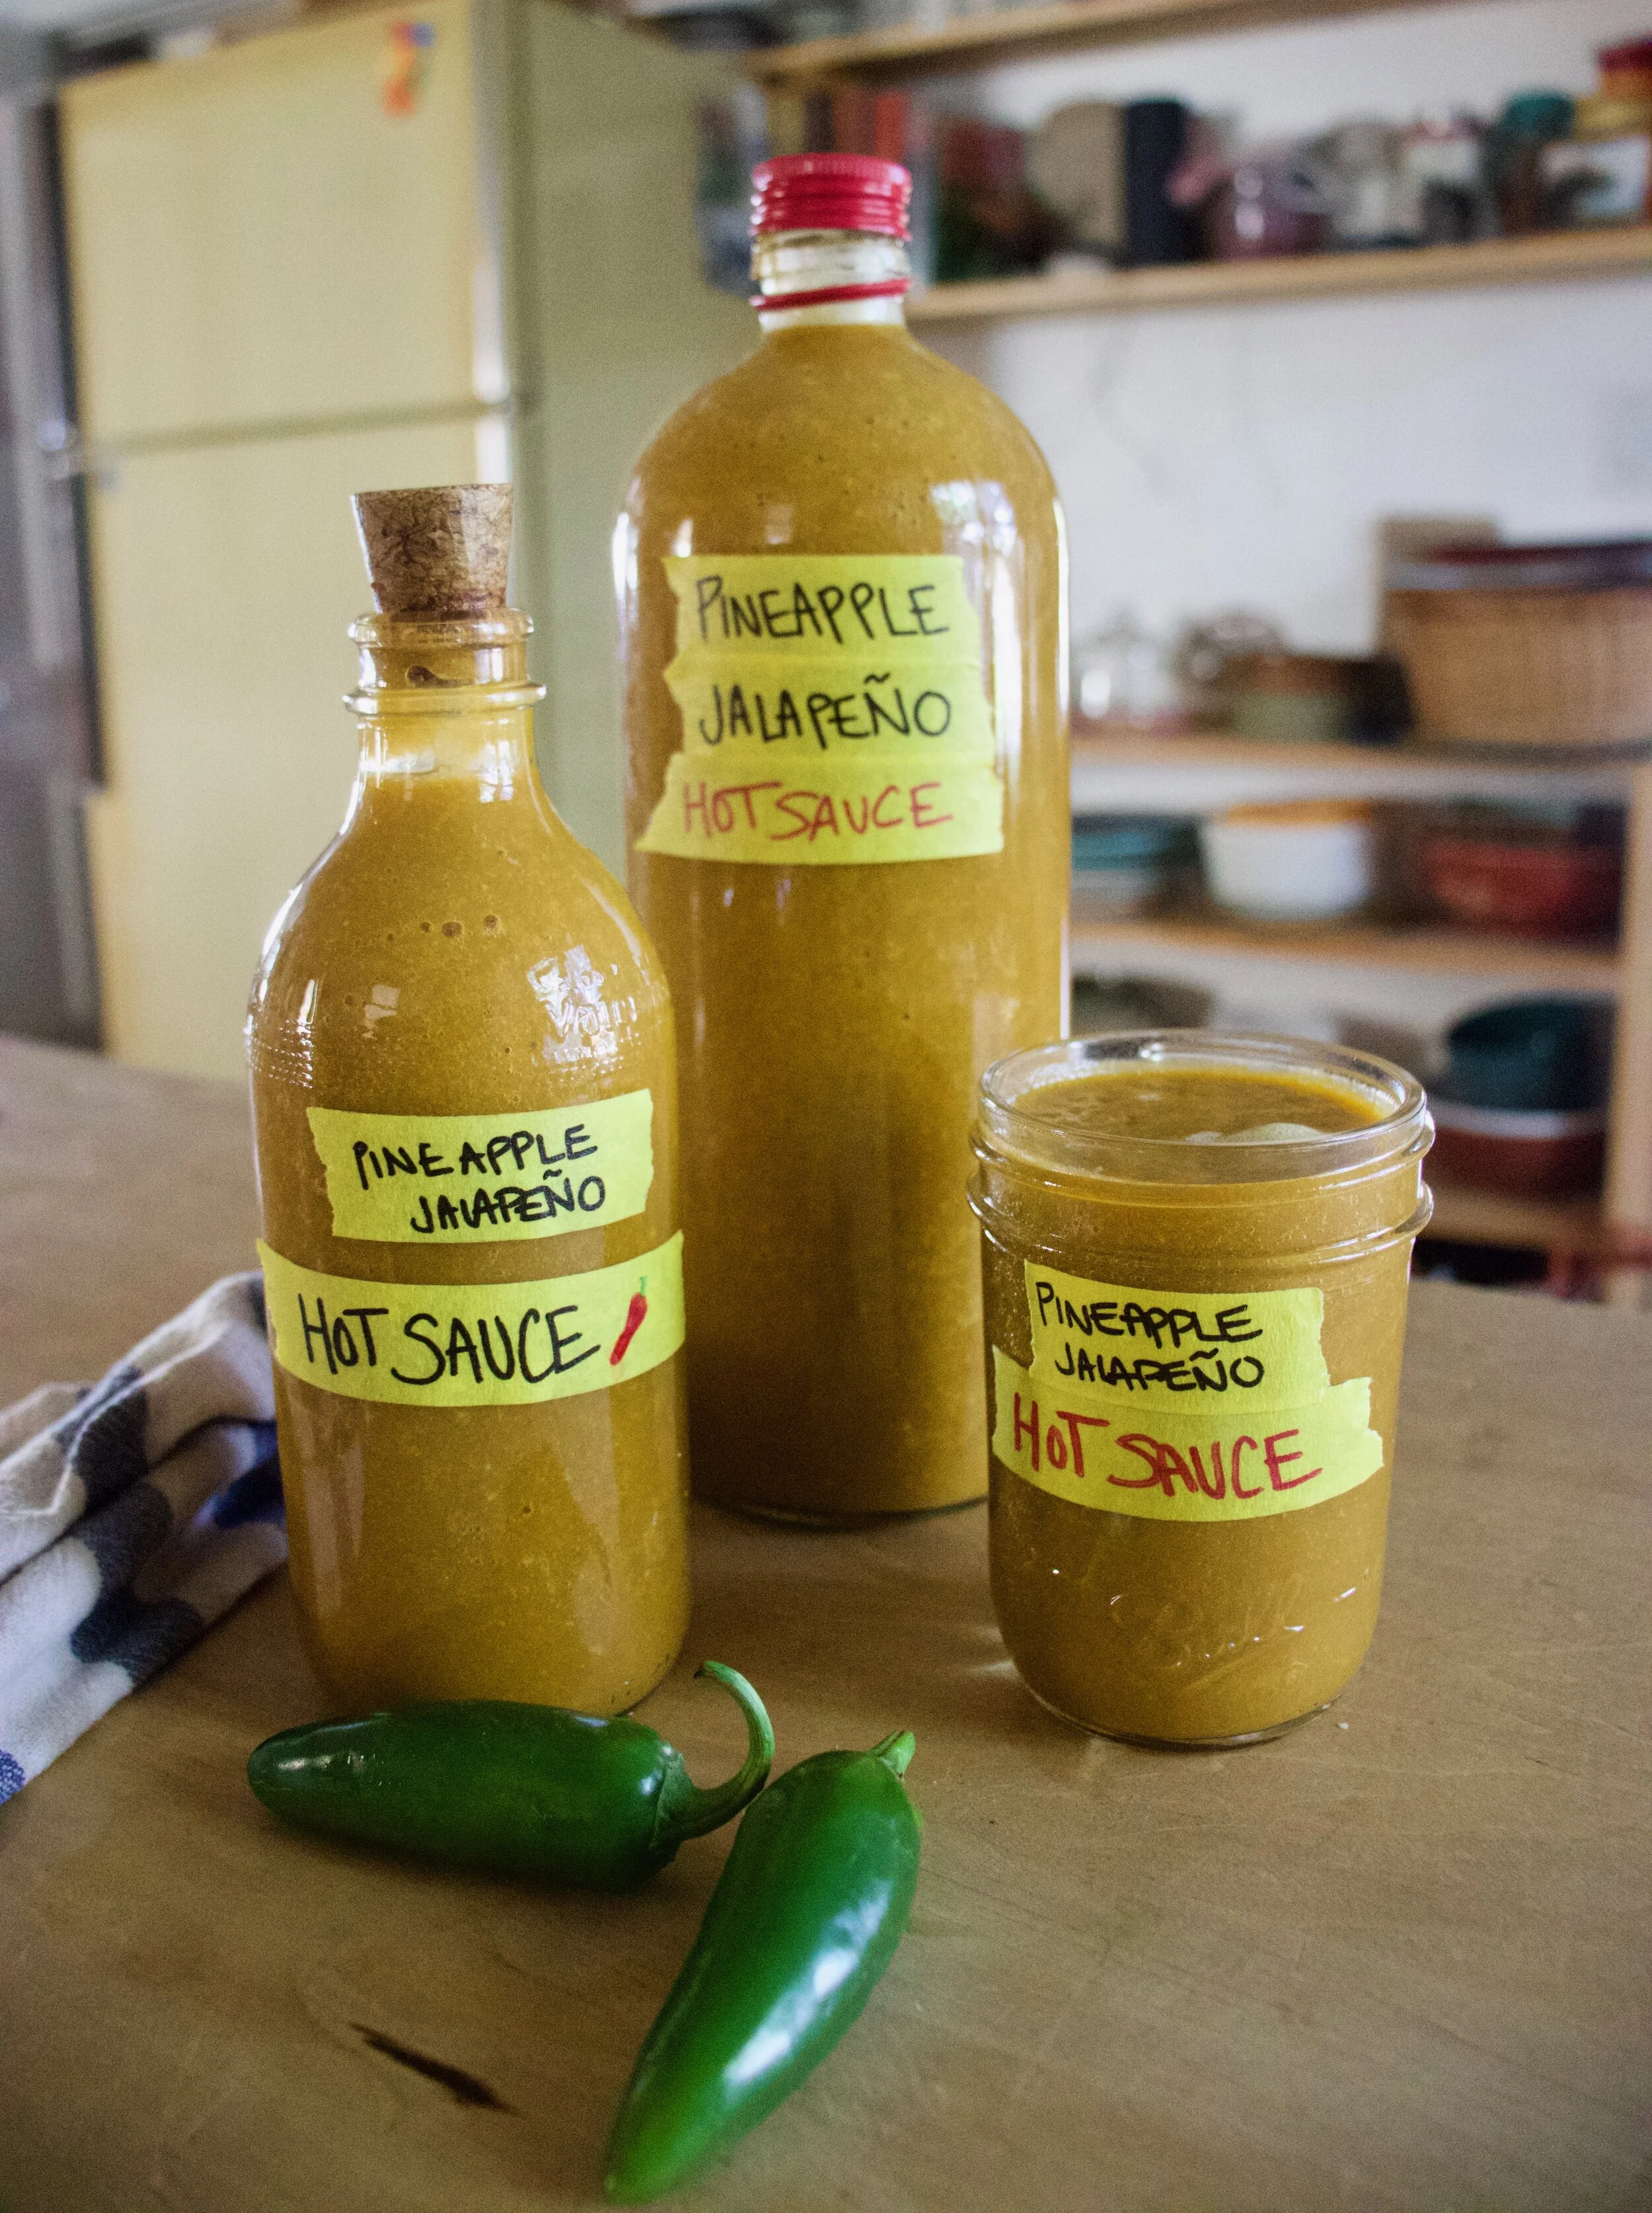
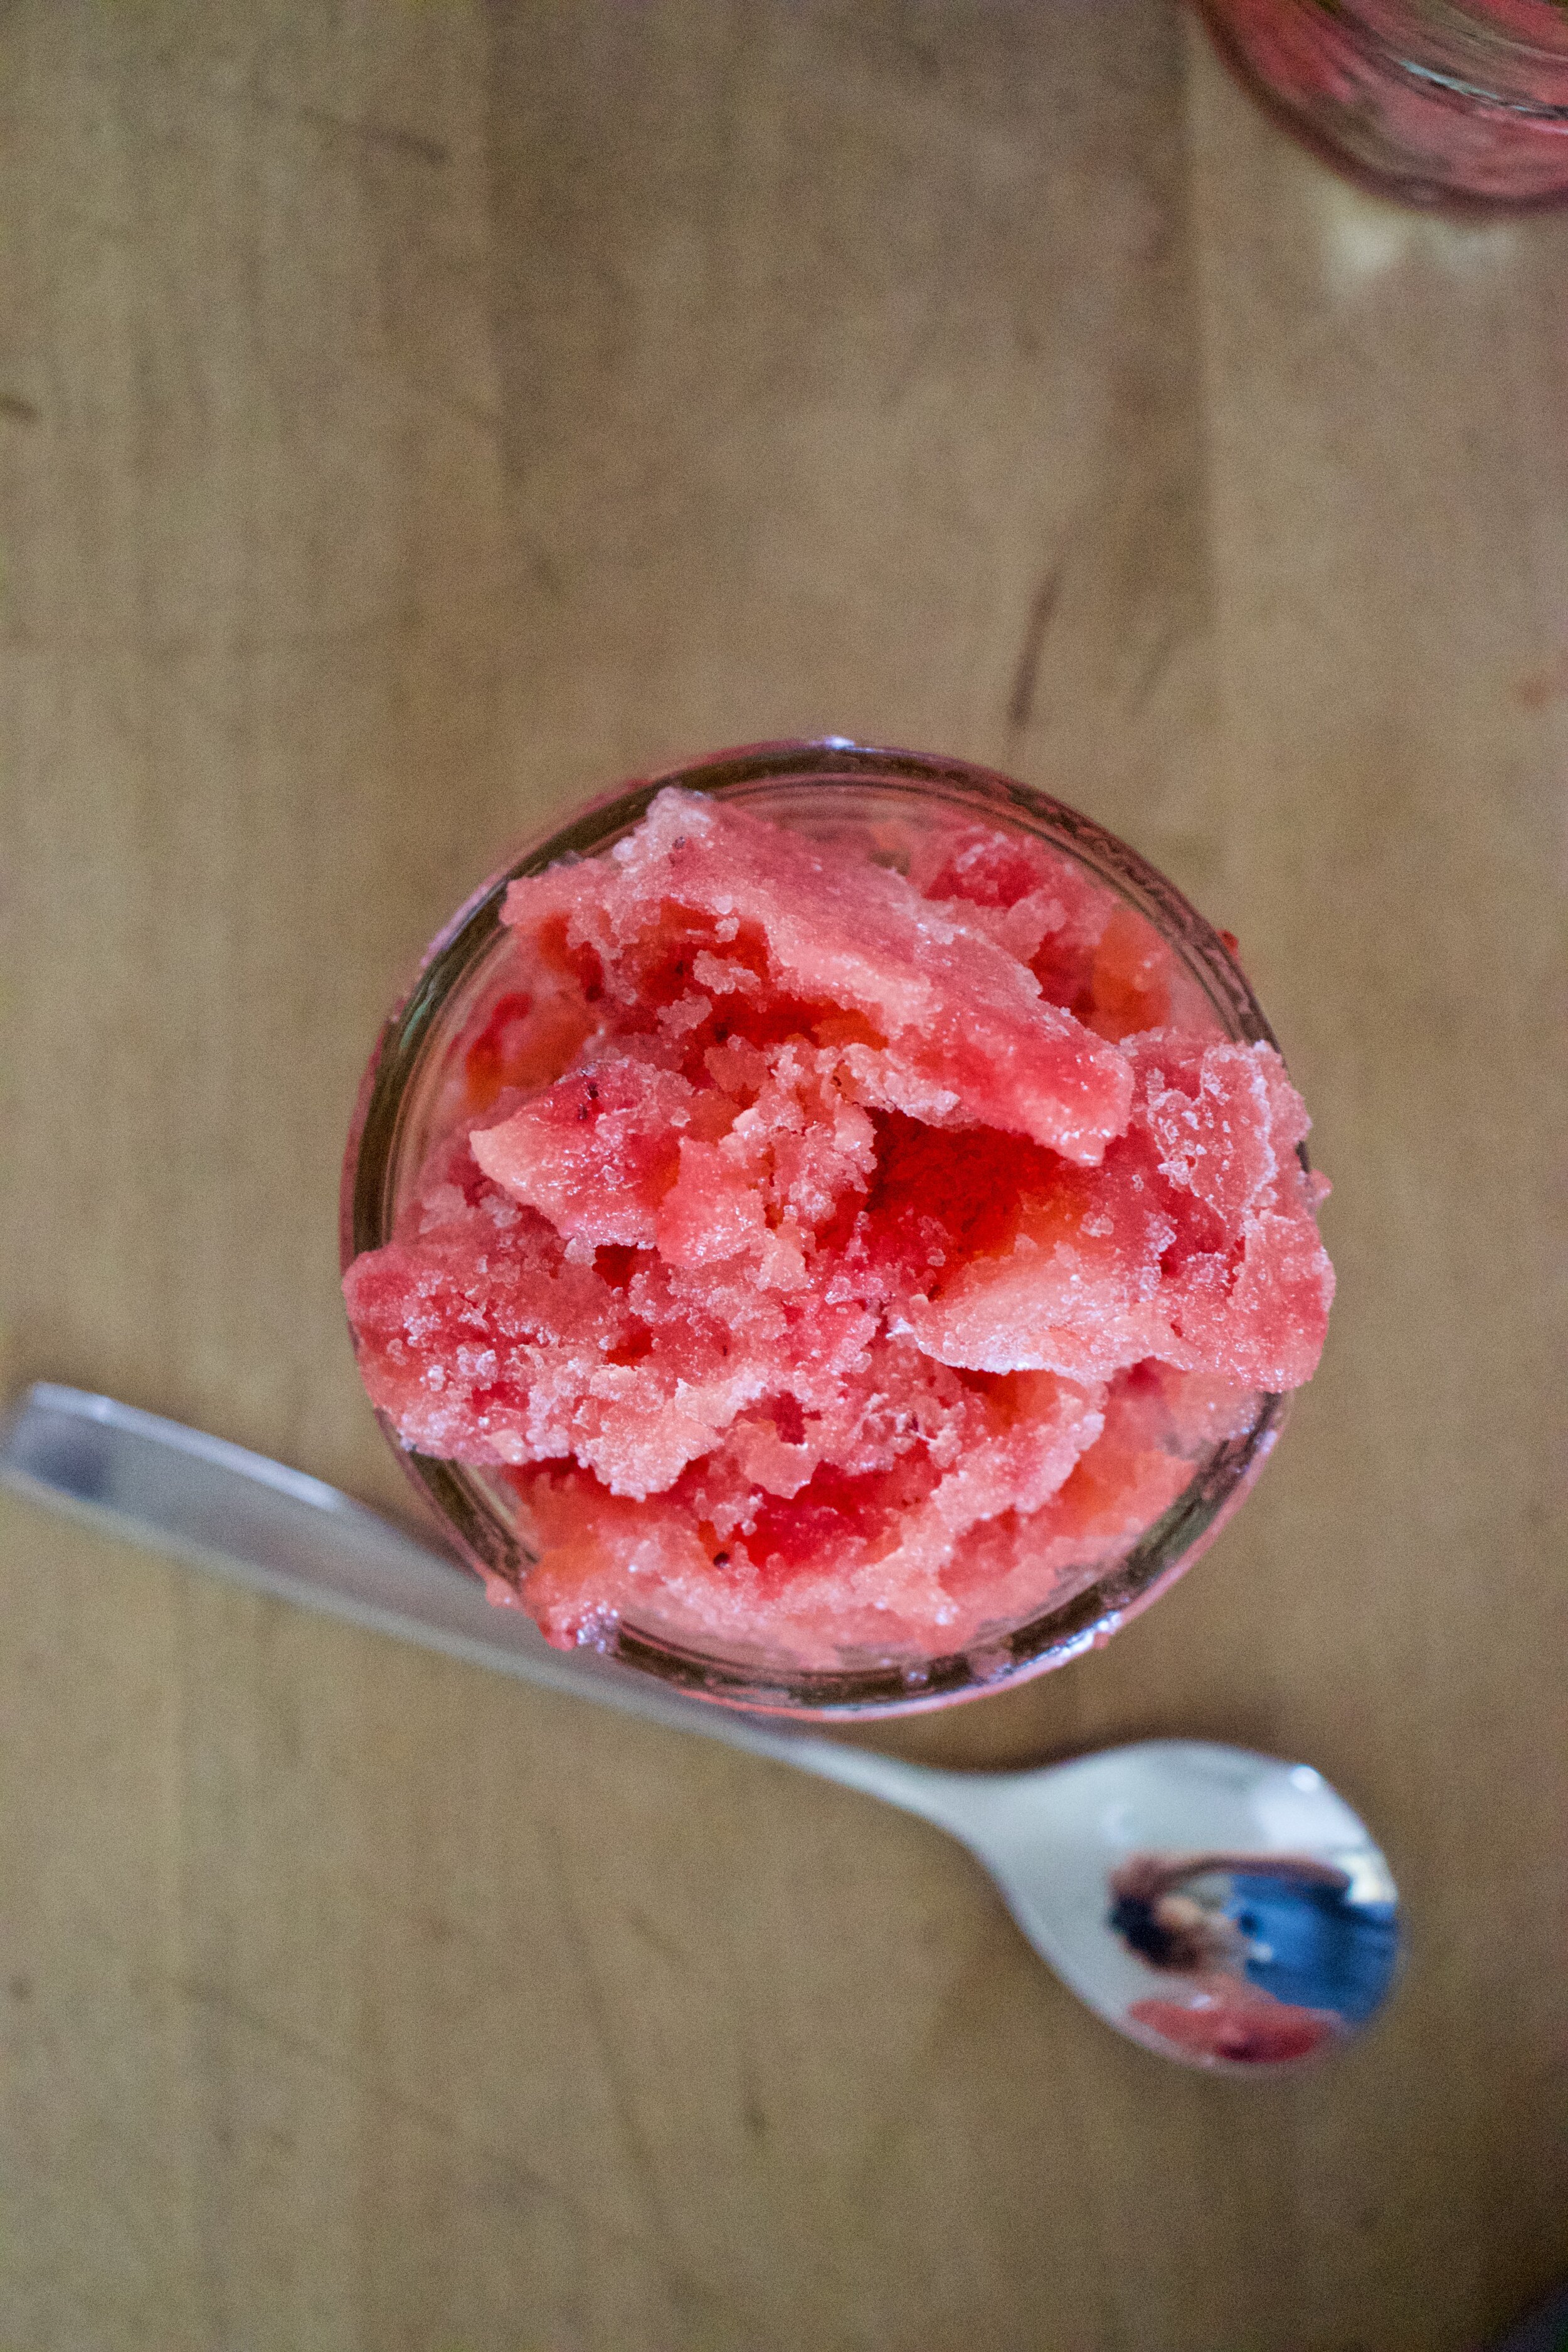
Hot hot hot sauce for the taking.

And look here, enough for you and maybe even a friend or two… Holidays are coming!

Enjoy the sauce!

-C


Pineapple Jalapeño Hot Sauce

makes between 5-6 cups

  • 25-30 good sized jalapeños (green or red or both)

  • 2-3 cloves garlic

  • 1 medium yellow or white onion

  • 2 cups pineapple juice or puree

  • 2 cups white vinegar

  • 2 teaspoons salt

  • water

Cut the onion into small chunks and roughly mince the garlic. Grab jalapeños and remove stems. Remove seeds and ribs if you want less heat in the sauce, then chop into small pieces. Place the onion, garlic, and peppers into a big pot with a splash of water. Sprinkle with salt and stick on stove on medium heat and cook for 5-10 minutes or until you can smell the onion and peppers starting to cook.

Dump in the pineapple juice and 1/2 the vinegar. Stir and bring to a boil. Once boiling, partially cover then reduce heat to low. Simmer for about 30-40 minutes or until peppers are very tender.

NOTE.. Have a window open or exhaust fan going.. the fumes are spicy!

Once peppers have soften, remove form heat and let cool a few minutes. Dump or scoop the contents of pot into a blender. Add in the remaining vinegar and blend until very smooth. Once blended, taste and season with more salt if needed. Also if the consistency is to thick for your liking, add in a little water to thin out.

And then bottle it. Whatever sized jars you like, just make sure the lids are not metal if you can avoid it. The acidity of the vinegar will corrode the metal.

Add a label, stick in fridge, and eat on whoever the heck you want! (Also makes a great gift and there is defiantly enough here to give some away!)

Note. It only gets better with age!

In condiment Tags Pineapple Jalapeño Hot Sauce, vegan, gluten free, jalapeño, hot sauce, homemade, dairy free, pineapple, sauce
9 Comments

Chocolate Pear Cake

August 15, 2020 Colleen Stem
IMG_9833.jpg
IMG_9880.jpg

I just love a pretty cake and this cake sure is pretty.

It is a chocolate cake with pears sunken into it. A cake made of necessity because I had (and still do) a giant bowl of pears on the counter that need to be eaten. I love the pears, they are delicious, but I can’t possible eat all of them before I end up having to just sauce them all. (I think most of the rest are gonna be sauce) Plus it is finally not stupid hot out and I am getting that cool weather, hang at home with a sweater on, all the apples and pumpkins, fall time feeling that included the itch to bake things. That feeling, it’s coming on strong and I’ll be honest here, I am soooo over summer. Bring on the fall!

Also, note about cake. Because each piece has half a pear sunken into it, I would there by think that this cake might actually be considered a health food. (hehehe) Yeeeah, no, but it is good. The mr already ate half.

Now to the cake!

The stuff. In the bowl there is flour, cocoa powder, baking soda and powder, salt, and cinnamon. Also need brewed coffee, sugar, oil, vanilla, apple cider vinegar, and some little pears.

IMG_9751 2.jpg
IMG_9754 2.jpg
IMG_9765.jpg

Make cake bater. Whisk together all the dry until really really mixed and there are no clumps then add in all the wet.

Mixed and ready batter.

IMG_9776.jpg
IMG_9780.jpg

Now cut the pears in half and remove the stem and seeds. Slice each half into 1/4 inch thick pieces but keep each sliced pear together.

And sure, some people might say, should I peel the pears? And the answer is no, you should not, but you can if you want. But don’t. Unless you want to.

Place the sliced cut havles cake down into the batter. Make them look pretty.

Then into the hot oven it goes to bake.

Wow wow! So pretty! Now let it cool a bit.

IMG_9816.jpg

When cooled off, cut into pieces. Each piece gets a pear.

Cake on plate, grab a fork, and eat.

-C


Chocolate Pear Cake

  • 4-5 small pears (like Forelle Pear or another smaller variety)

  • 41 3/4 cups all purpose flour

  • 1/3 cup cocoa powder

  • 1 cup white sugar

  • 1 1/2 teaspoon baking powder

  • 1 teaspoon baking soda

  • 1/2 teaspoon salt

  • 2 teaspoon cinnamon

  • 1/2 cup neutral flavored oil

  • 1 1/4 cups hot coffee

  • 2 tablespoon apple cider vinegar

Preheat oven to 350

Start with cutting up the pear. Cut each pear in half, remove all seeds and the stem, then slice each half into 4-5 1/2 inch thin pieces, keeping the pieces of each half together.

Grab a big bowl and dump in the flour, baking powder and soda, cinnamon, salt, cocoa powder, and sugar. Whisk well until completely combined and there are no clumps of cocoa of flour. Now add in the oil, vanilla, coffee, and vinegar and mix until just combined. Pour batter into a well greased pan. (use a 9x9 or 8 inch round)

Grab cut up pear halves and place halves, cut side down into the batter. 3 across and 3 down, or just any way that you think looks pretty. And once you got your pears in, place the pan into the oven. Bake for 28-32 minutes or until you get a clean fork when poked for doneness.

Remove from oven and let cool for a bit on a wire rack. Once cooled, cut it up and eat it

Left over cake is good covered at room temperature for a day or two but should be sorted in fridge, covered, for up to a week.

In Vegan, cake, Dairy Free, fruit Tags Chocolate Pear Cake, vegan, pears, cake, chocolate cake, fruit, fall, plant based, oil cake, dairy free, dessert, bake feed, homemade, recipe, easy, fast, delicious
Comment

Apple Strawberry Granitas

May 30, 2020 Colleen Stem
IMG_8297.jpg
IMG_8250.jpg

Ever since schools have been canceled and we have turned to homeschooling, the school systems around my parts have been dropping lunches off to all the littles. Both my sisters with littles have been getting food every day and it is great and amazing and makes me less worried about all the kids that really depend on school for food. Thank you school systems for being awesome!

The thing with the food is that you get what you get. Just about everyday, packed with the lunches,are either applesauce cups or strawberry puree cups.

The little shits, well none of them eat them. I don’t know if they just don’t like them or are sick of them but yeah, they are really starting to pile up. And so sisters have been sending apple and strawberry cups my way and now I have shit ton too.

I figured I would just bake with them and that is what I have been doing, but I still have so many and it is way to hot to be baking all the time. What to do with an excess of fruit puree cups? Freeze them. And make them into granitas. Whats a granita? A granita is flaked frozen fruit, kind of like a slushy you eat with a spoon. And wouldn’t you know, once the applesauce and strawberry cups were frozen and called something else, the littles were all over them. I am a genius.

It also helped that is was like a 95 degrees out and when it is that gross, no one wants to eat anything that isn’t frozen. Blah. Too hot way too early!

So if you find yourself with an excess amount of fruit cups or just want to make a healthy and delicious cold treat for your littles or yourself, do this.

Now to the apple strawberry granitias!

The stuff. Applesauce cups and strawberry puree cups. If you don’t have the actually cups, you can use applesauce from a jar or homemade and make your own strawberry puree by tossing fresh or frozen strawberries into a blender. Easy peasy.

The apple and strawberry purees into a bowl

IMG_8217.jpg

Mix together. Have a taste, it is delicious.

IMG_8223.jpg

Dump mixture into a baking sheet or pan, preferably a metal one, and place in freezer.

IMG_8236.jpg
IMG_8239.jpg

After about and hour, once it is slightly frozen, remove from freezer. Grab a fork and scrape the puree to kind of fluff it up. Place back into freezer for another hour and repeat one or two more time until the texture is nice and fluffy. Once you like texture, place in freezer for another 1/2 to really freeze up.

When you are ready to eat, scoop and serve.

Once scooped, eat. Right away because frozen things don’t stay frozen for long!

-C


Apple Strawberry Granitas

makes about 4 servings

  • 2 applesauce cups (or 2 cups applesauce)

  • 2 strawberry cups (or 2 cups strawberries pureed)

  • 1 tablespoon sugar (optional)

Dump the applesauce and strawberry puree into a bowl. Mix together and taste. If you think it could use a little sugar, mix it in. Remember, once frozen, it won’t taste quite as sweet.

Dump mixture into a baking pan or sheet, preferable a metal one, and place in freezer. After about an hour, or once it has frozen a bit, remove from freezer, grab a fork, and scrape the puree to losses it up. Place back in freezer for another hour. Repeat with the fork one or two more times until the texture is that of fluffy ice. After the last scrape, keep in freezer for another 1/2 hour or so to get it really frozen again then when you are ready, scoop out into bowl and eat.

Any that doesn’t get eaten right away, keep in freezer. You can transfer to a smaller container with a lid.

In 5 ingerdients or less, frozen, fruit Tags frozen, fruit, dairy free, food, vegan, dessert, apple strawberry granita, granita, applesauce, fresh, homemade, fruit cups, school lunches, summer
Comment

Chickpea Flour Onion Rings

May 16, 2020 Colleen Stem
IMG_8021.jpg
IMG_8005.jpg

I love me some onions, I mean I eat one everyday so I asked myself why the heck haven’t I made onion rings before? Probably because when I usually think onion rings, I think greasy and fried and that is not really my jam. But early in the week the lightbulb went off in my brain. I have been making a lot of stuff with bean flours lately and thought that chickpea flour would make an excellent batter for onions. And low and behold, I was right. Very very right.

These onion rings are so f-ing amazing. Sure they might not be the most traditional of onion ring but they are for sure just as good. A spicy crispy crunchy outer layer with a soft and creamy onion inside. Baked, not fried, and just really delightful. Easy to throw together and yeah, you got onion rings. I have made them twice this week already. Probably going to make them again tonight because why the hell not? They are simply a vegetable covered in bean. I should be eating them every day and you probably should be eating them everyday too.

Now to the onion rings!

IMG_7970.jpg

The stuff. Onions (I used valida but any sweet variety will work) chickpea flour, spices (garlic, ginger, cumin, chili powder, paprika, and a pick or red pepper flakes), warm water, oil, and salt and pepper.

IMG_7971 2.jpg
IMG_7973 2.jpg
IMG_7976 2.jpg
IMG_7980 3.jpg

Mix up the batter. All the spices get mix together with the chickpea flour. Add in the water and then mix unit completely combined and all batter like.

IMG_7983.jpg

Cut onions into rings.

IMG_7990.jpg

Dip the onions into the batter and place on a oiled baking sheet. Try not to overlap too much and use the insides of large rings to place the small ones!

IMG_7999.jpg
IMG_8006.jpg

Into the oven and out of the oven. Crispy, dark, and delicious!

Get those rings onto a plate while they are hot, grab some dipping sauce of choice (tahini for me) and eat.

Get into this.

-C


Chickpea Flour Onion Rings

  • 3/4 cup checkpea flour

  • 1 teaspoon each cumin and chili powder

  • 1/2 teaspoon each garlic, paprika and ground ginger

  • pinch of red pepper flakes

  • 2 medium sized valida onions (or whatever onions you have)

  • 3/4 cup warm water

  • 1/2 teaspoon salt

  • cracked pepper

  • tablespoon or so of oil to oil baking sheet

Preheat oven to 425.

In a wide bottomed bowl mix together the chickpea flour. salt. and all the spices. Add in the warm water and mix until completely incorporated and smooth. You want the batter to coat the onions when dipped but not be overly thick. If you think it needs to thicken up a bit, add a tablespoon more chickpea flour. To thin it, just add a splash more water.

Grab onions and peel off papery skin then slice into 1/4-1/2 inch rounds. Take onion rings and dip them into the batter then place rings on a large oiled baking sheet. Try not to overlap to much and definitely place smaller rings inside bigger rings. Also use a second baking sheet if you need to.

Once rings are all battered, place in preheated oven and bake for 40 minutes, giving them a flip atfter about 25-30 minutes.

Once dark brown and crispy, remove from the oven. Place rings on a plate and eat. Dipping sauce recommendation is tahini but anything or nothing at all is also right.

In appetizers, Gluten Free, grain free, pulses, quick and easy, side dish, Vegan, Vegetables Tags baked onion rings, chickpea flour, gluten free, onion rings, dairy free, baked, plant based, easy, simple, healthy, protein, side dish, onion, savory, spicy, food, homemade, fresh, yummy, eater, delicious, vegan, grain free, pulses, beans, besem flour
Comment

Sweet Pea Snack Cake with Strawberry Glaze

May 9, 2020 Colleen Stem
IMG_7904.jpg
IMG_7962.jpg

It started a few nights ago when I was eating my after dinner dessert snack. A big bowl of fresh strawberries. But there was something missing. I wanted a little something else to add to my dessert so I opened the freezer to see if there was any frozen bananas. What caught my eye was the bag of peas. And it just seemed right so I poured some into a bowl, dumped hot water on them to thaw, and mixed them into the bowl with the strawberries. Now I got to tell you, it was one of the most satisfying delicious desserts I have had in a long time. Think about it. Peas are sweet and creamy and strawberries are sweet and tart. The combination might seem a little strange but haven’t we learned by now that I am always right about flavors? HAHA. But really. It’s one of my new favorite snacks.

Now how to share my newfound love of peas and strawberries? Well cake of course. I figured people are less hesitant to try new flavor combinations when in cake form because everyone wants cake. And I was right. Plus it is a real looker if I do say so myself. Bright green cake with bright red strawberry glaze. A spring time snack with the spring time feels. Everything about this cake is right on point with all the things. And it is super fast and easy to make to boot because it’s all thrown together in a blender.

You really can’t go wrong here friends. And if you happened to be needing a little something something to snack on with your mama this weekend, well I think you just found the perfect snack.

Now to the cake!

The stuff. Peas,strawberrie jam of perceives (I had just made it so it is still warm) Flour, sugar and powdered sugar, baking soda and powder, salt, oil, and vinegar.

IMG_7720.jpg
IMG_7726.jpg
IMG_7734.jpg
IMG_7739 2.jpg
IMG_7756.jpg
IMG_7770.jpg

Super easy here. Place peas into blender and blend until smooth. Add oil and sugar and blend until incorporated. Then add in all the dry. Before you blend, take a spoon or spatula and hand mix it a little. Add in a cup of water and vinegar then pulse until incorporated. Don’t over blend it or else it will be tough.

Pour batter into a well greased pan and pop into a hot oven. Bake.

Afer about 25 minuts, check for doneness. When the fork or tester comes out clean, it is done!

Pop cake out and let cool on a wire rack.

IMG_7805.jpg
IMG_7813.jpg

And glaze. Warm up the jam in the microwave on on stove until loose then mix jam with powdered sugar.

When the cake has cooled, grab a fork and stab holes all over so when you pour glaze on it will kind of seep into said holes.

Pop cake back into pan (or don’t if you dont want too) and pour glaze all over top.

A dusting of powdered sugar for looks and done and done. Cut into squares, pop a piece on a plate, and snack away.

-C


Sweet Pea Snack Cake with Strawberry Glaze

makes a 9x9 cake

  • 2 cups all purpose flour

  • 3/4 cup white sugar

  • 1 1/3 cups sweet peas (fresh or frozen and thawed)

  • 1 cup water

  • 1/3 cup oil

  • 1/2 teaspoon salt

  • 1 teaspoon baking powder

  • 1 teaspoon baking soda

  • 1 tablespoon vinegar

  • 1 cup powdered sugar

  • 3 tablespoon strawberries jam or preserves

Preheat oven to 350

Place peas into blender ans blend until smooth. Add in oil and sugar and blend until incorporated. Next add in baking soda and powder and then flour on top. Grab a spoon or spatula and mix a little to give the batter a head start then add int he water and vinegar. Pulse in blender for a few seconds, scrap sides, then pulse again until it just become a cohesive batter. Don’t oven blend it or that cake will be tough.

Pour batter into a well greased 9x9 baking tin and place into hot oven. Bake for about 25 minutes or until golden brown and a tester comes out clean. When it is done, pop out of oven and pop cake out of tin to cool on a wire rack.

Once cake is cooled, place back into baking pan. Mix together the powdered sugar and jam then either microwave it or heat on stove for 30ish seconds until warmed and pourable. Grab a fork and stab holes all over top of cake then pour glaze all over.

Sprinkle some more powdered sugar on top for looks, but other then that, it’s now time to eat.

Cake that is not eaten is best keep at room temperature for 2-3 days. Can be frozen too.

In cake, Dairy Free, desserts, fruit, quick and easy, Sweets, Vegan, Vegetables Tags Sweet Pea Snack Cake With Strawberry Glaze, cake, vegan, dairy free, plant based, peas, dessert, snack cake, homemade, mothers day, spring, blender cake, easy, fast, green cake
Comment
← Newer Posts Older Posts →
 

https://thelovelycrazy.squarespace.com/config#/|/about/

Me. Food Maker.Food eater. Woo HOO!

STEM+NODE  SMALL BATCH AND ONE OF A KIND POTTERY

stem+node ceramics


____________________

Subscribe

GET NEW POSTS IN YO EMAIL

You are AWESOME!!!


@thelovelycrazy 2014-2021