• stem+node ceramics
  • HOME
  • Food Recipes
  • About
  • Contact
Menu

The Lovely Crazy

Street Address
City, State, Zip
Phone Number

Your Custom Text Here

The Lovely Crazy

  • stem+node ceramics
  • HOME
  • Food Recipes
  • About
  • Contact

Moroccan chickpeas and Carrots

May 15, 2021 Colleen Stem
IMG_5410.jpg
IMG_5415.jpg
IMG_5388.jpg

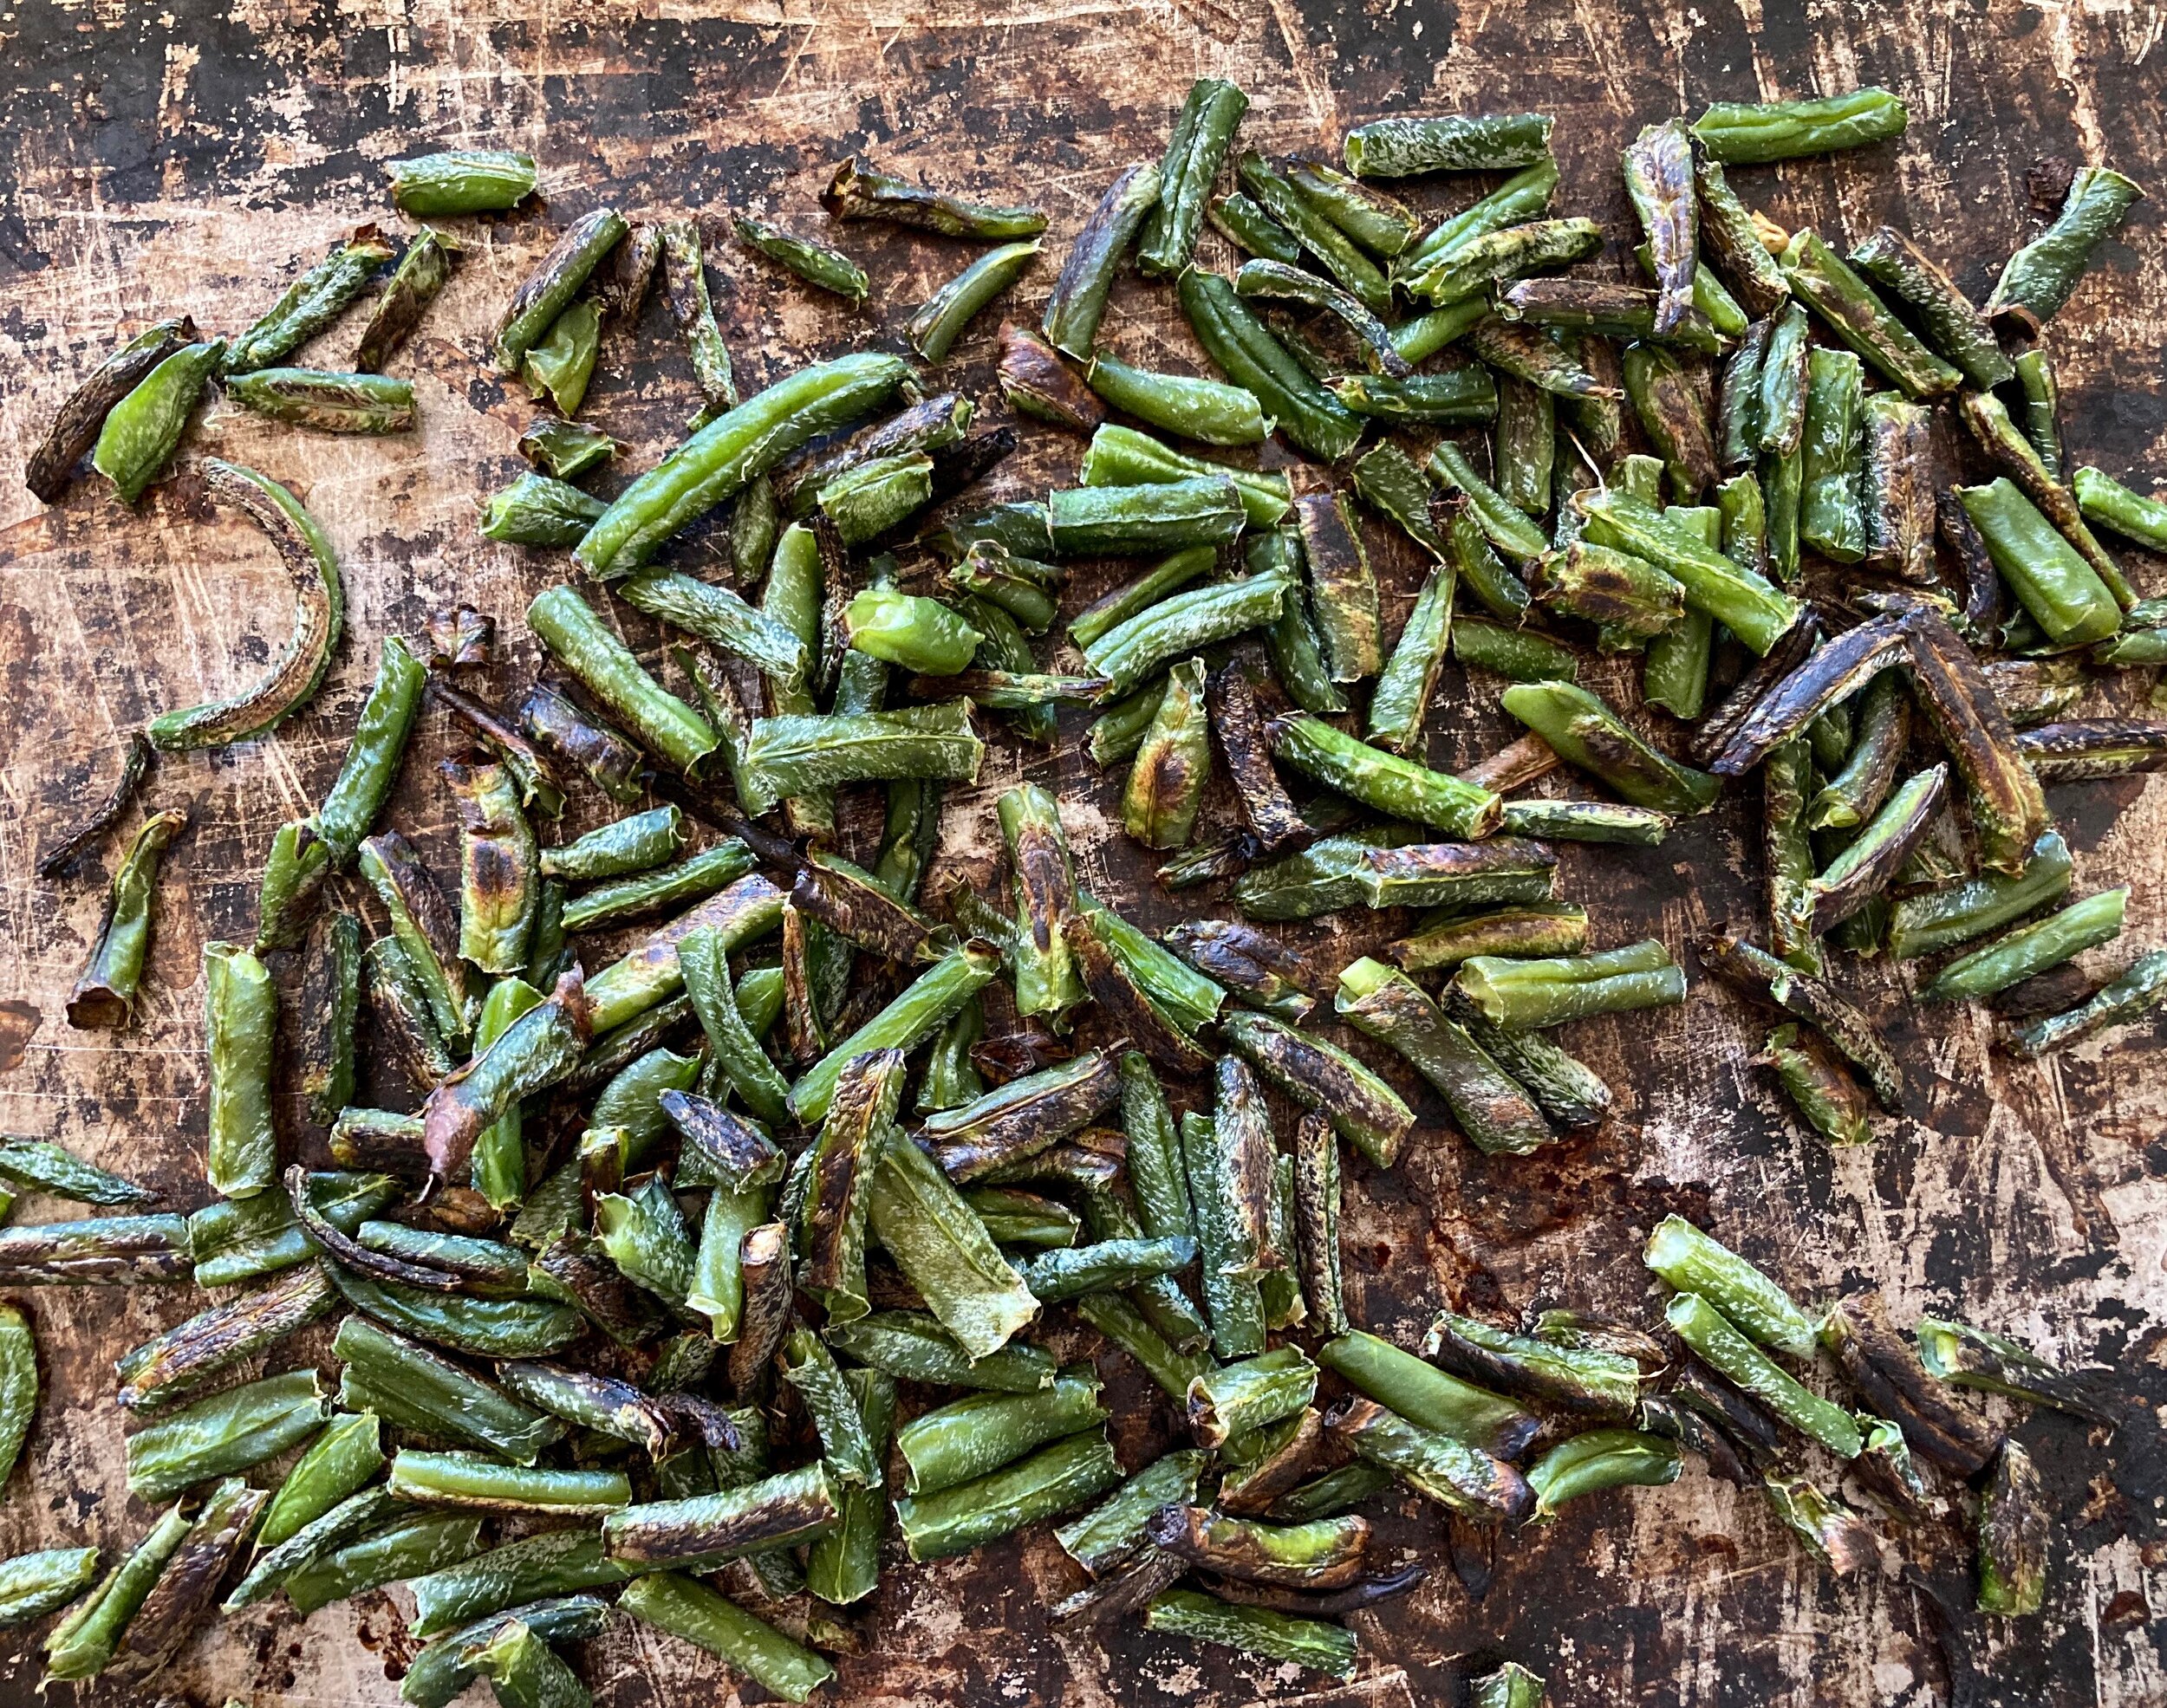
It’s the time of year again, the few weeks time between winter veggies and spring veggies. Farm share is over, asparagus season is pretty much over. The greens, beans, and peas are still growing and the chest freezer is empty. I am living off greens and the few roots that I stashed in the fridge. Yeah I know I can just go buy veggies at the grocery store (the mr informed me…) but nothing is very good there right now either. Poor me right!

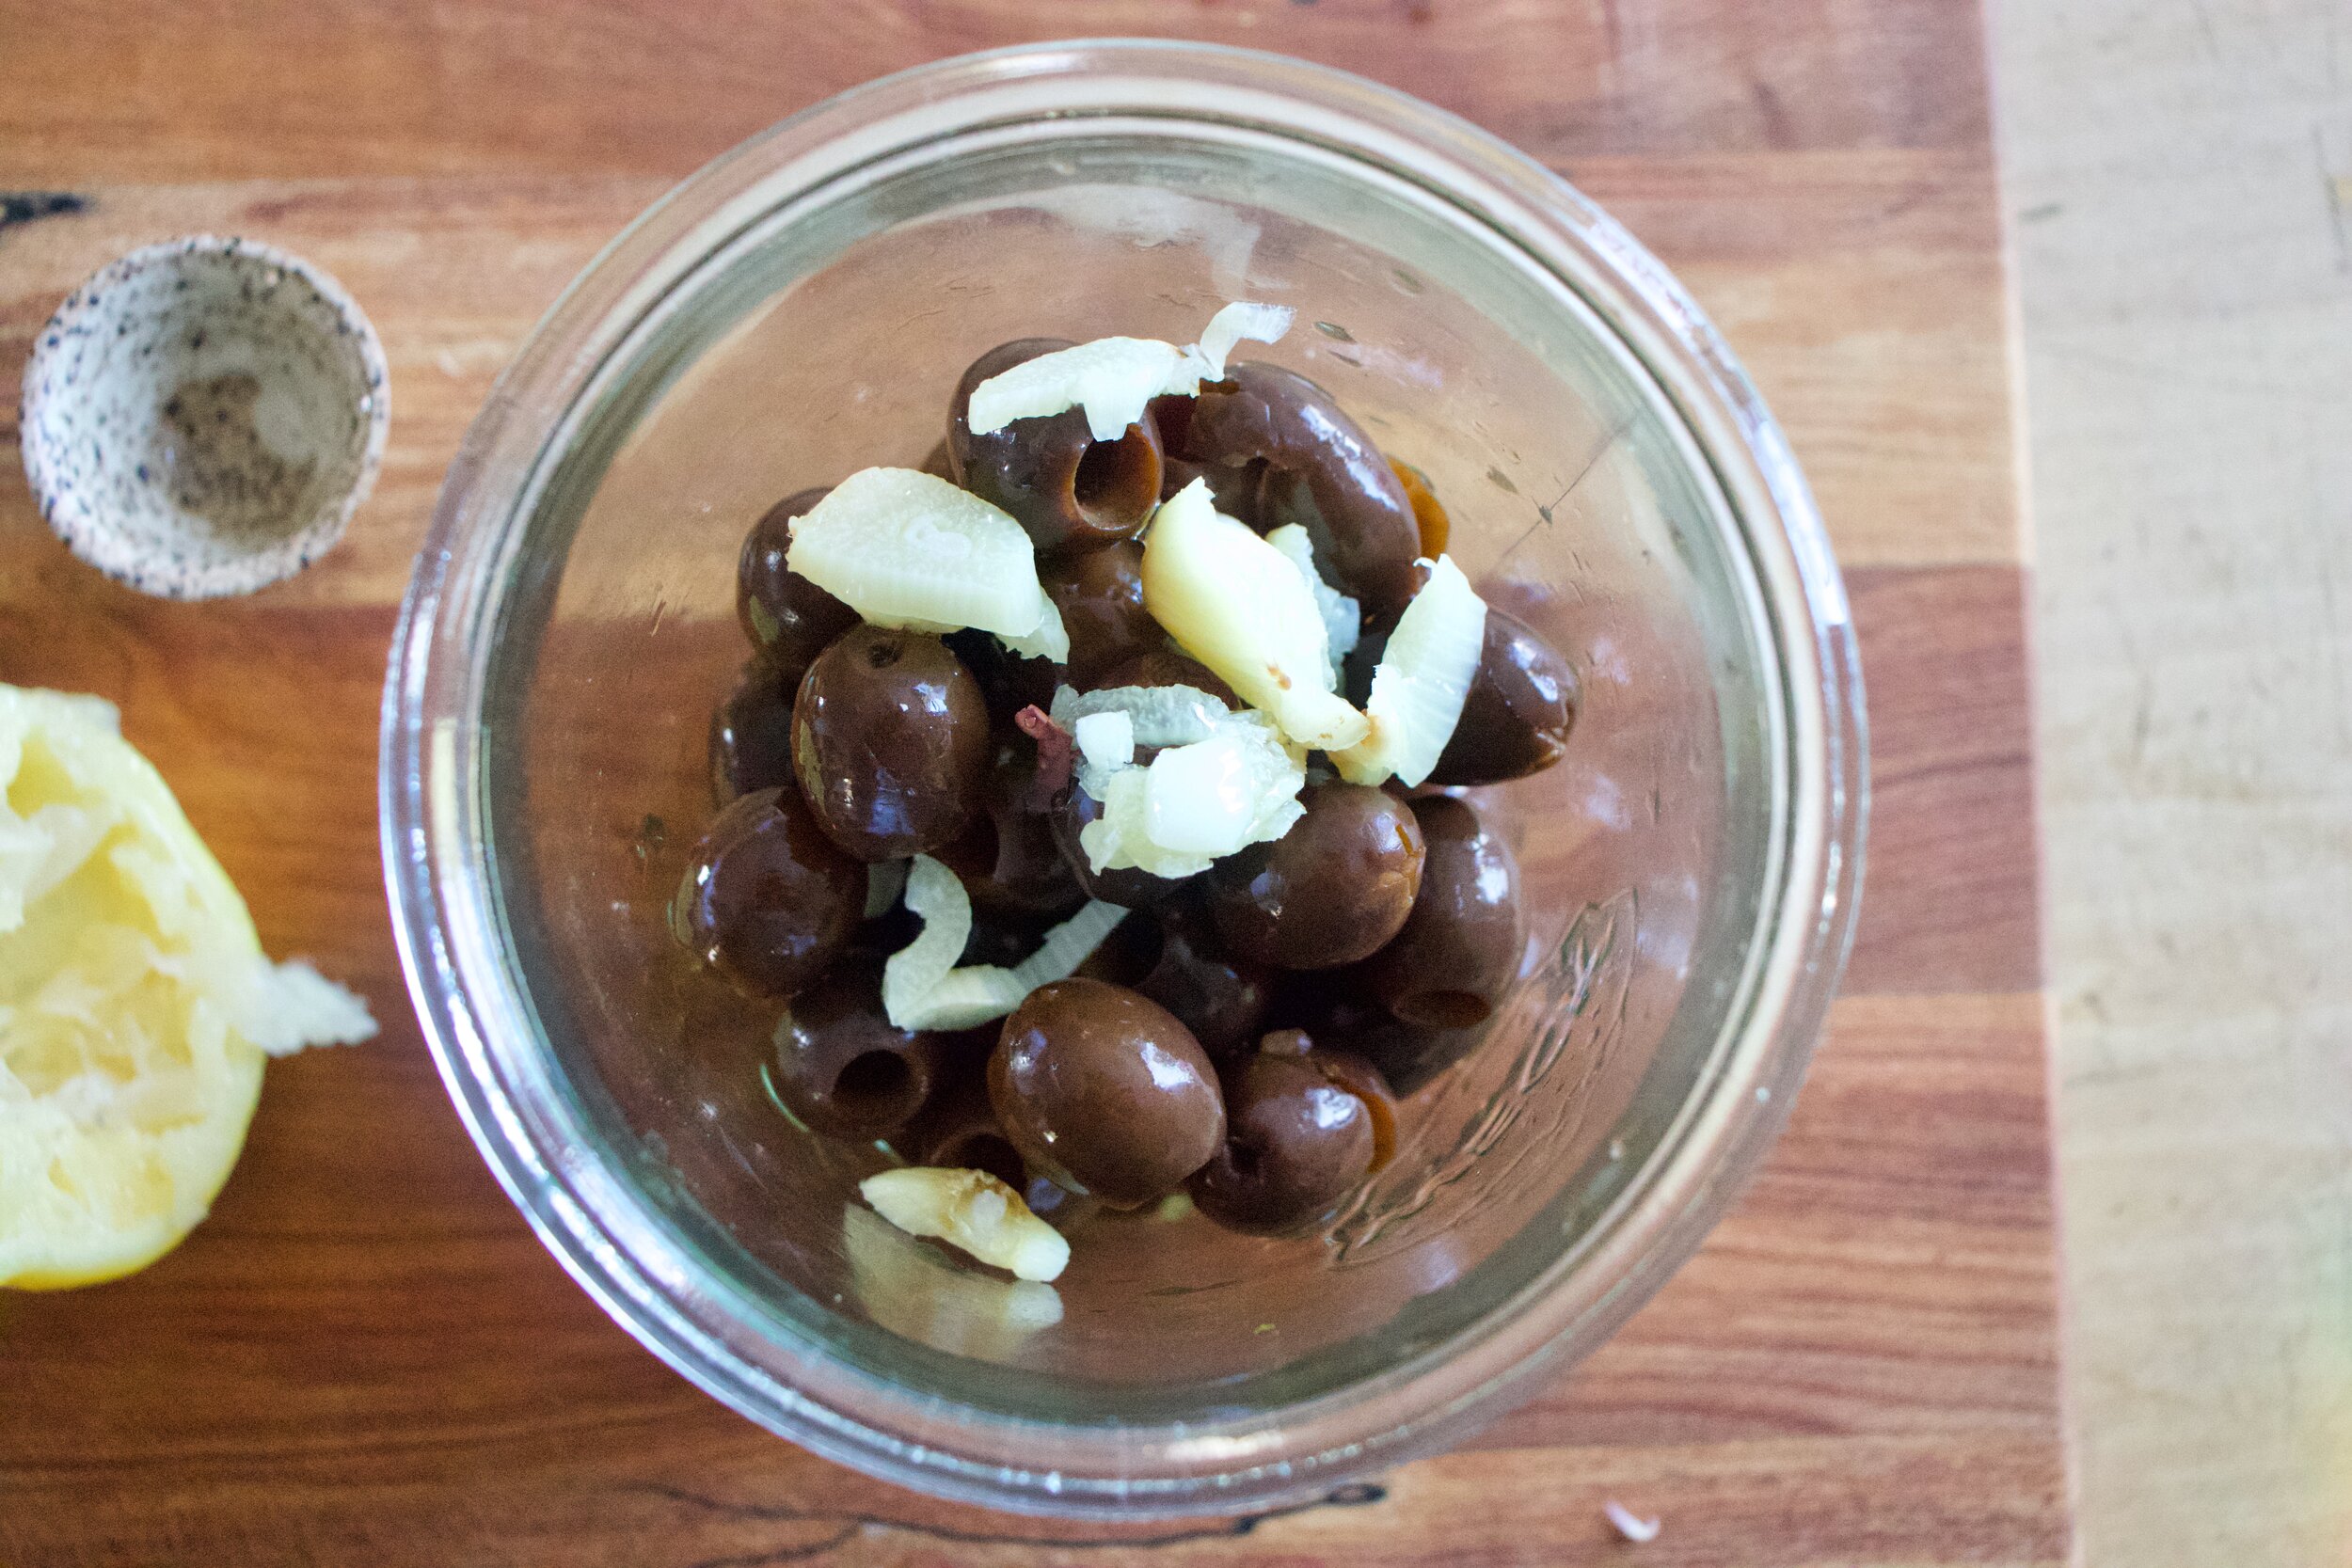
But what I do have and always have is carrots and I always have chickpeas. I also always have all the spices and I am never going to run out of raisins because well, Megan keeps giving me boxes and boxes of them.( I went from 5 lbs to like now having 10 lbs) so right here I got stuff to feed myself.

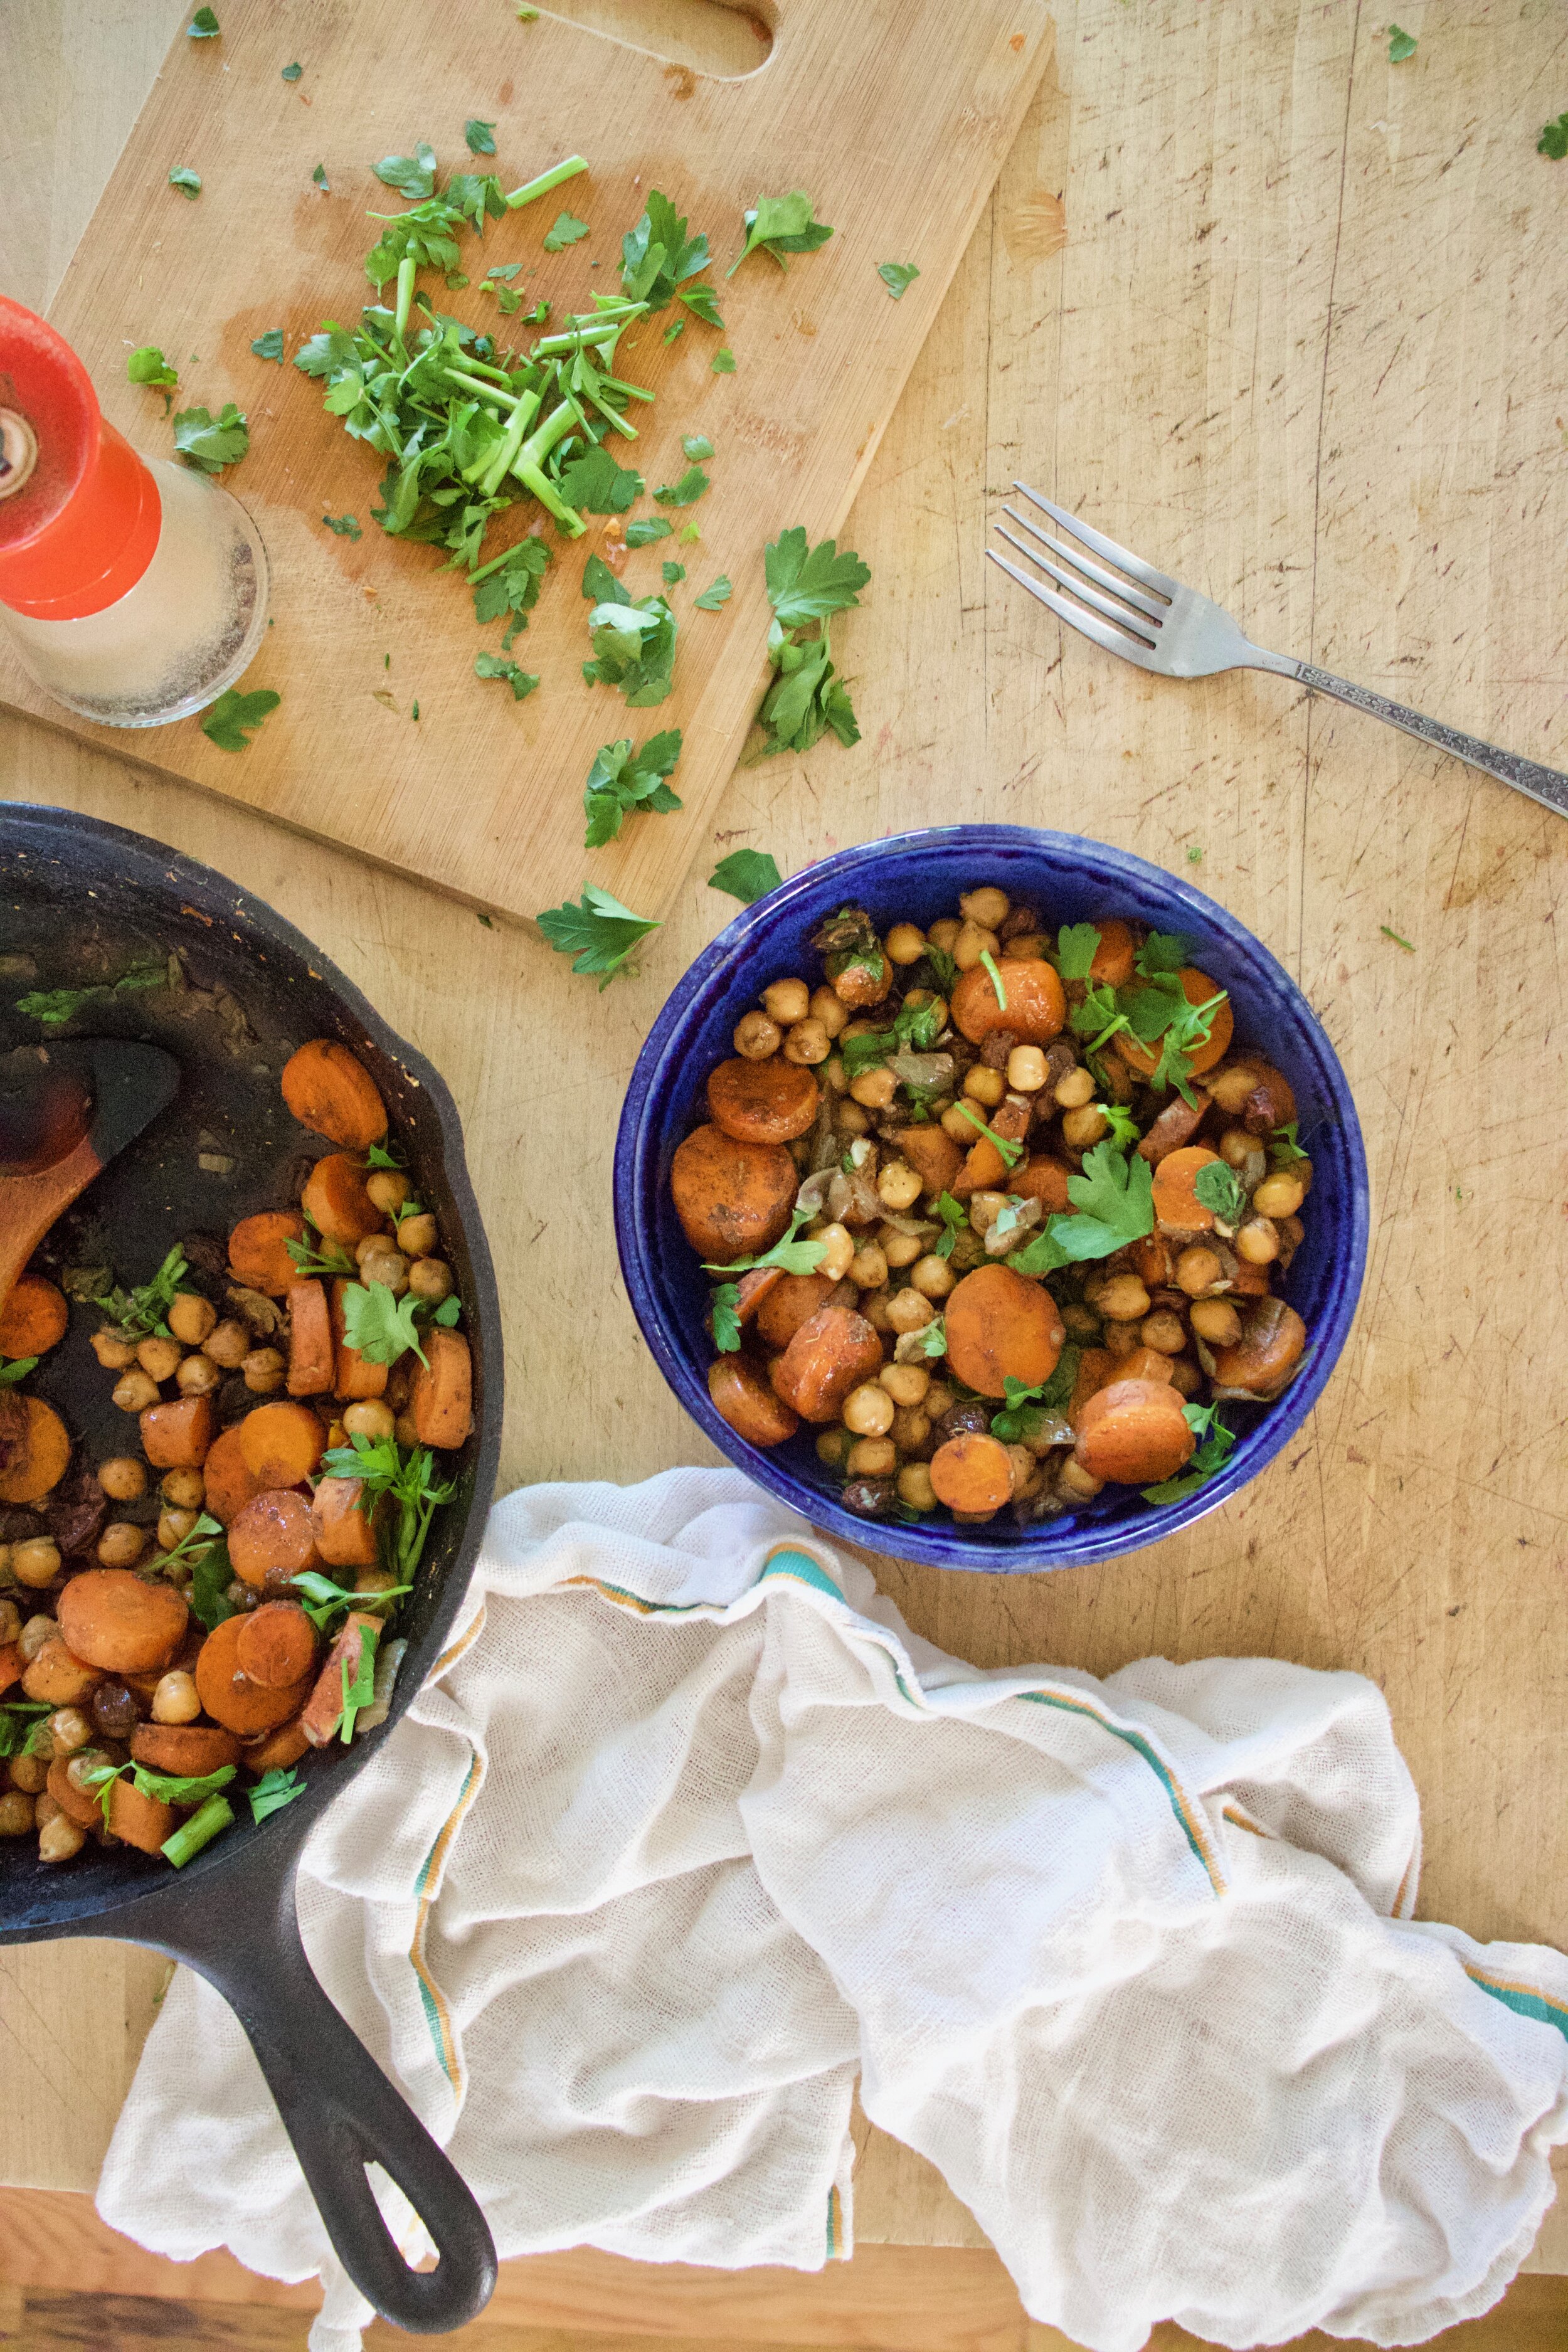
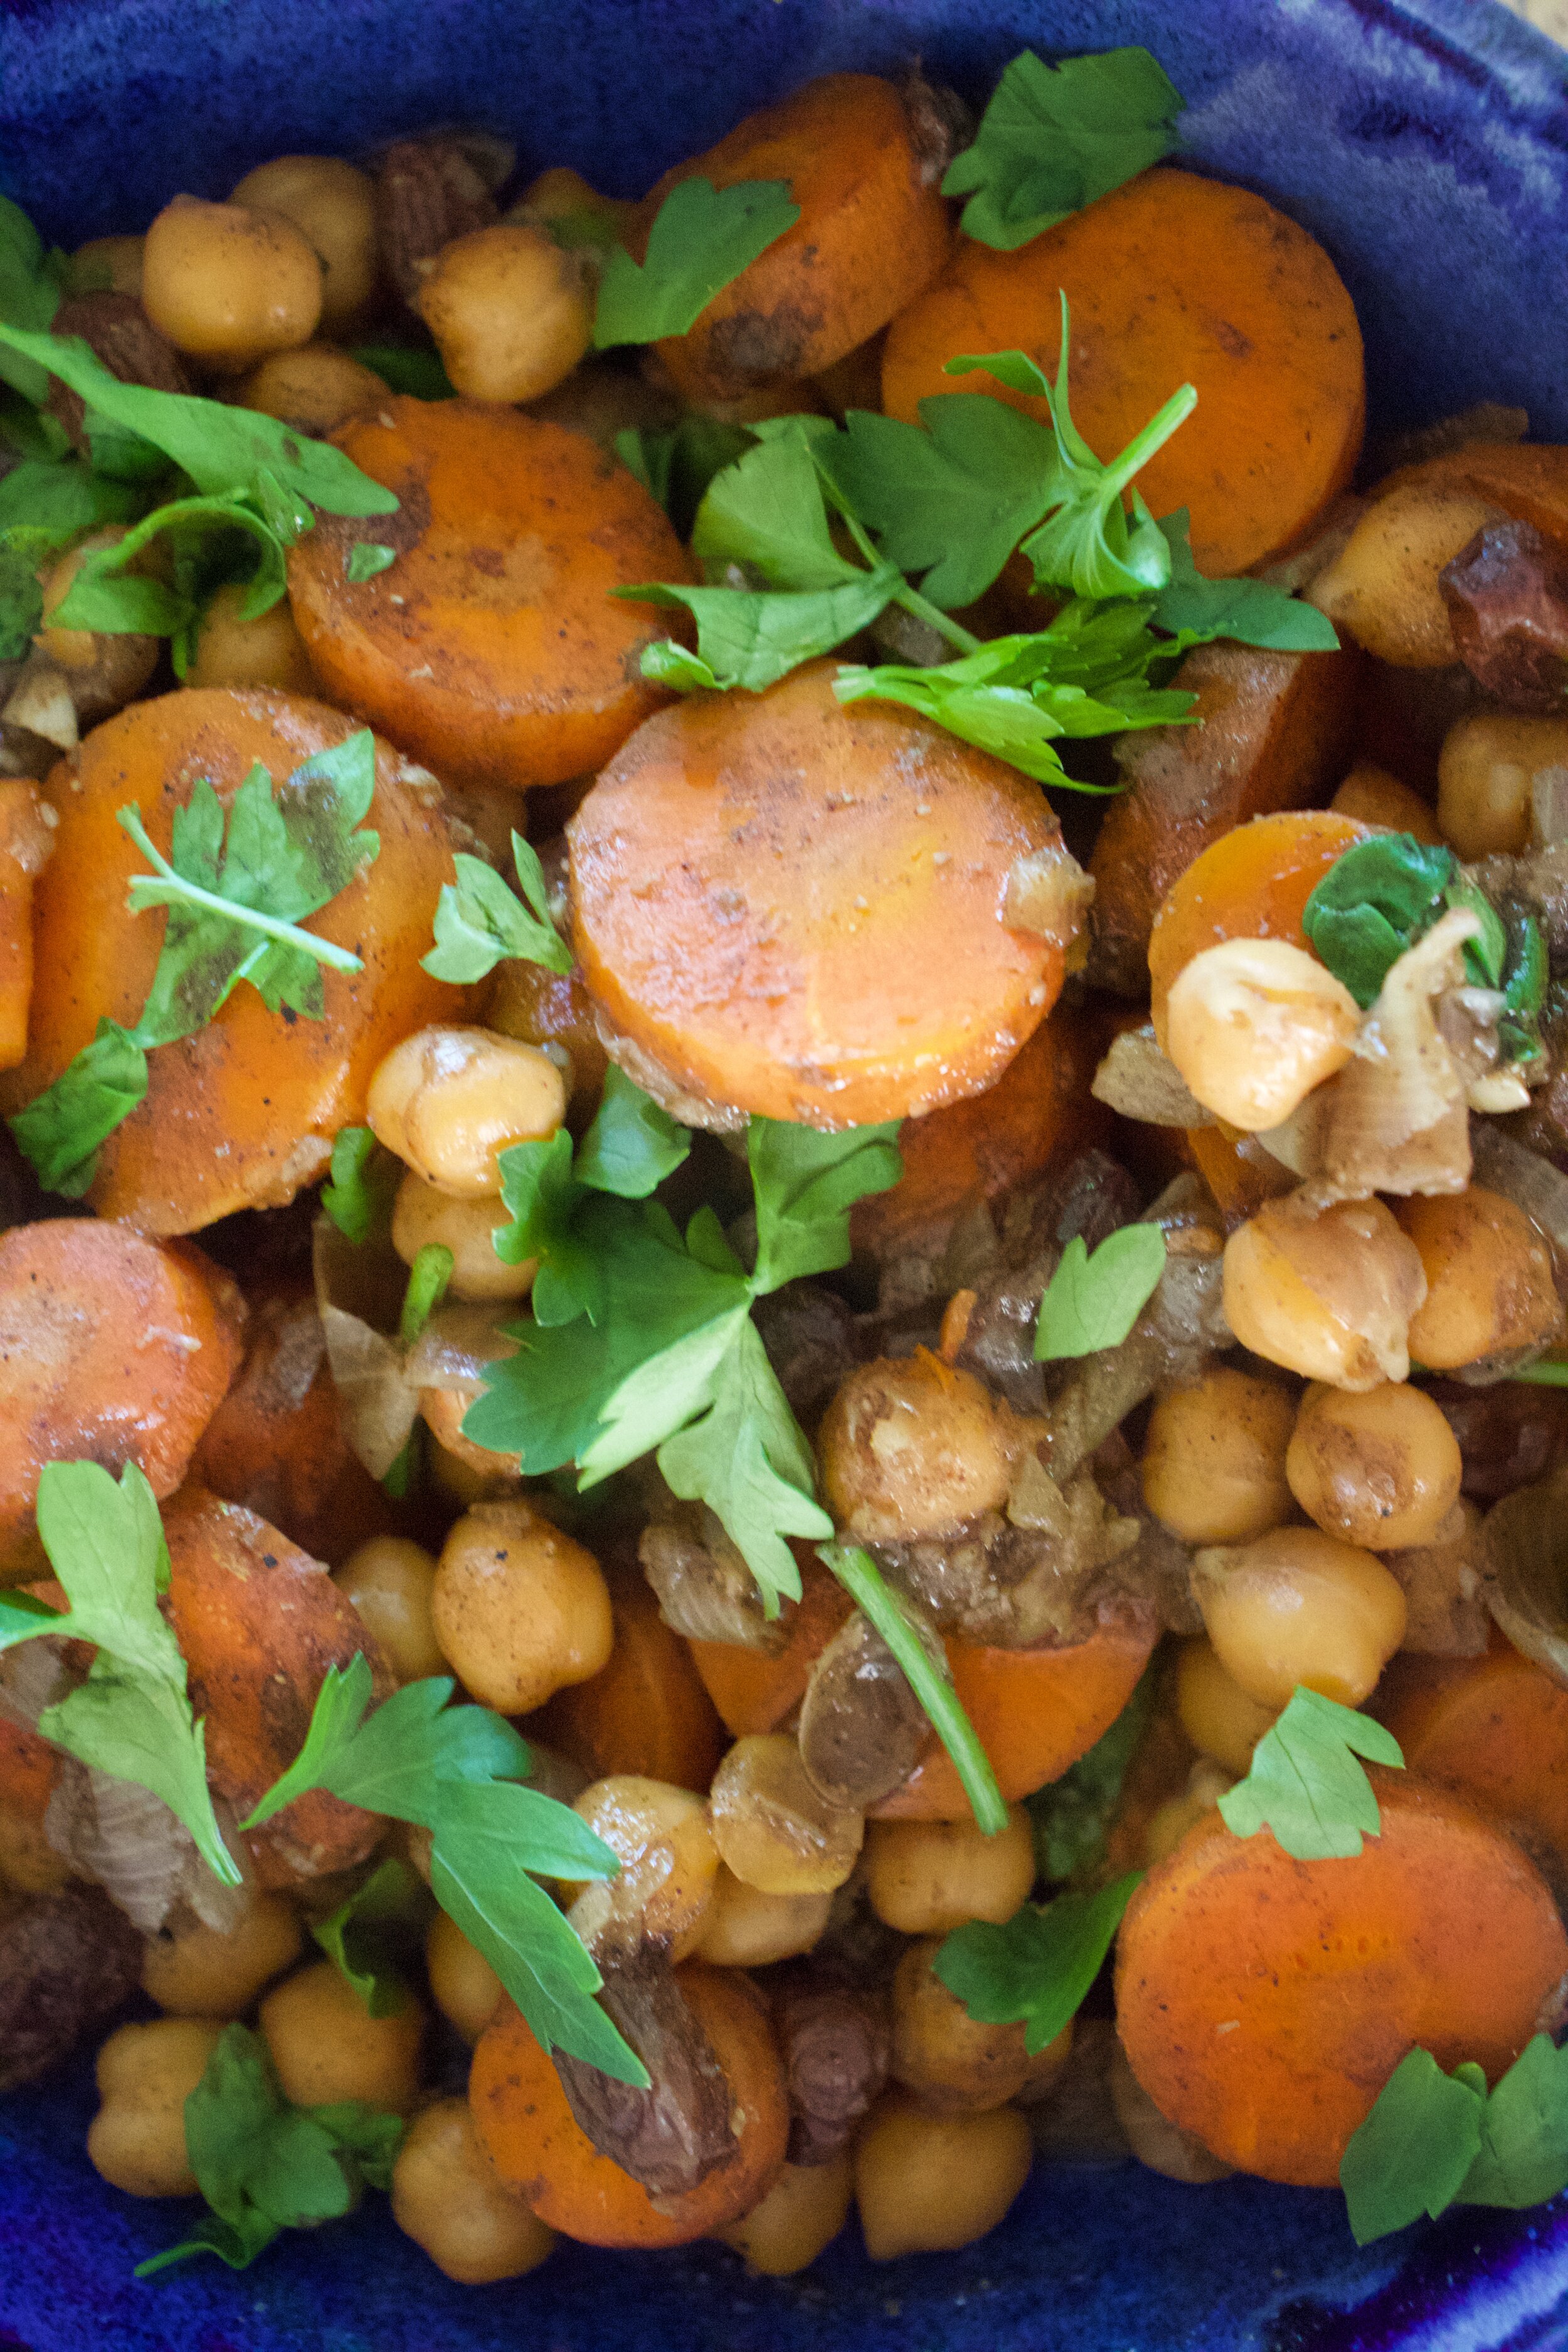
Moroccan chickpeas and carrots. The flavors are very similar to a Indian which I love so much. Cumin, ginger, cinnamon, coriander, and many more. A smokey sweetness that is oh so good. Add that to a big pile of cooked up chickpeas and carrots, sprinkled with raisins, and finished off with fresh parsley. I mean, doesn't that just sound splendid? (It does because it is.) This dish makes not having much in the way of fresh food tolerable. I made a big batch and ate it all day long because you can’t got wrong with carrots and chickpeas. No, no you can’t.

To the Moroccan chickpeas and carrots.

IMG_5285.jpg

The stuff. Carrots, chickpeas, spice blend (cumin, ginger, coriander, cayenne pepper, cinnamon, clove), a small onion, raisins, garlic, fresh parley, and salt and pepper.

IMG_5289.jpg

Start with mincing garlic and chopping th onion up into small pieces.

IMG_5292.jpg

Toss it into a oven safe skillet, add about 1/2 cup water and set on medium heat to start to cook.

IMG_5300.jpg

in the meantime, cut up carrots. Rounds about 1/2 inch thick.

IMG_5305.jpg
IMG_5309.jpg

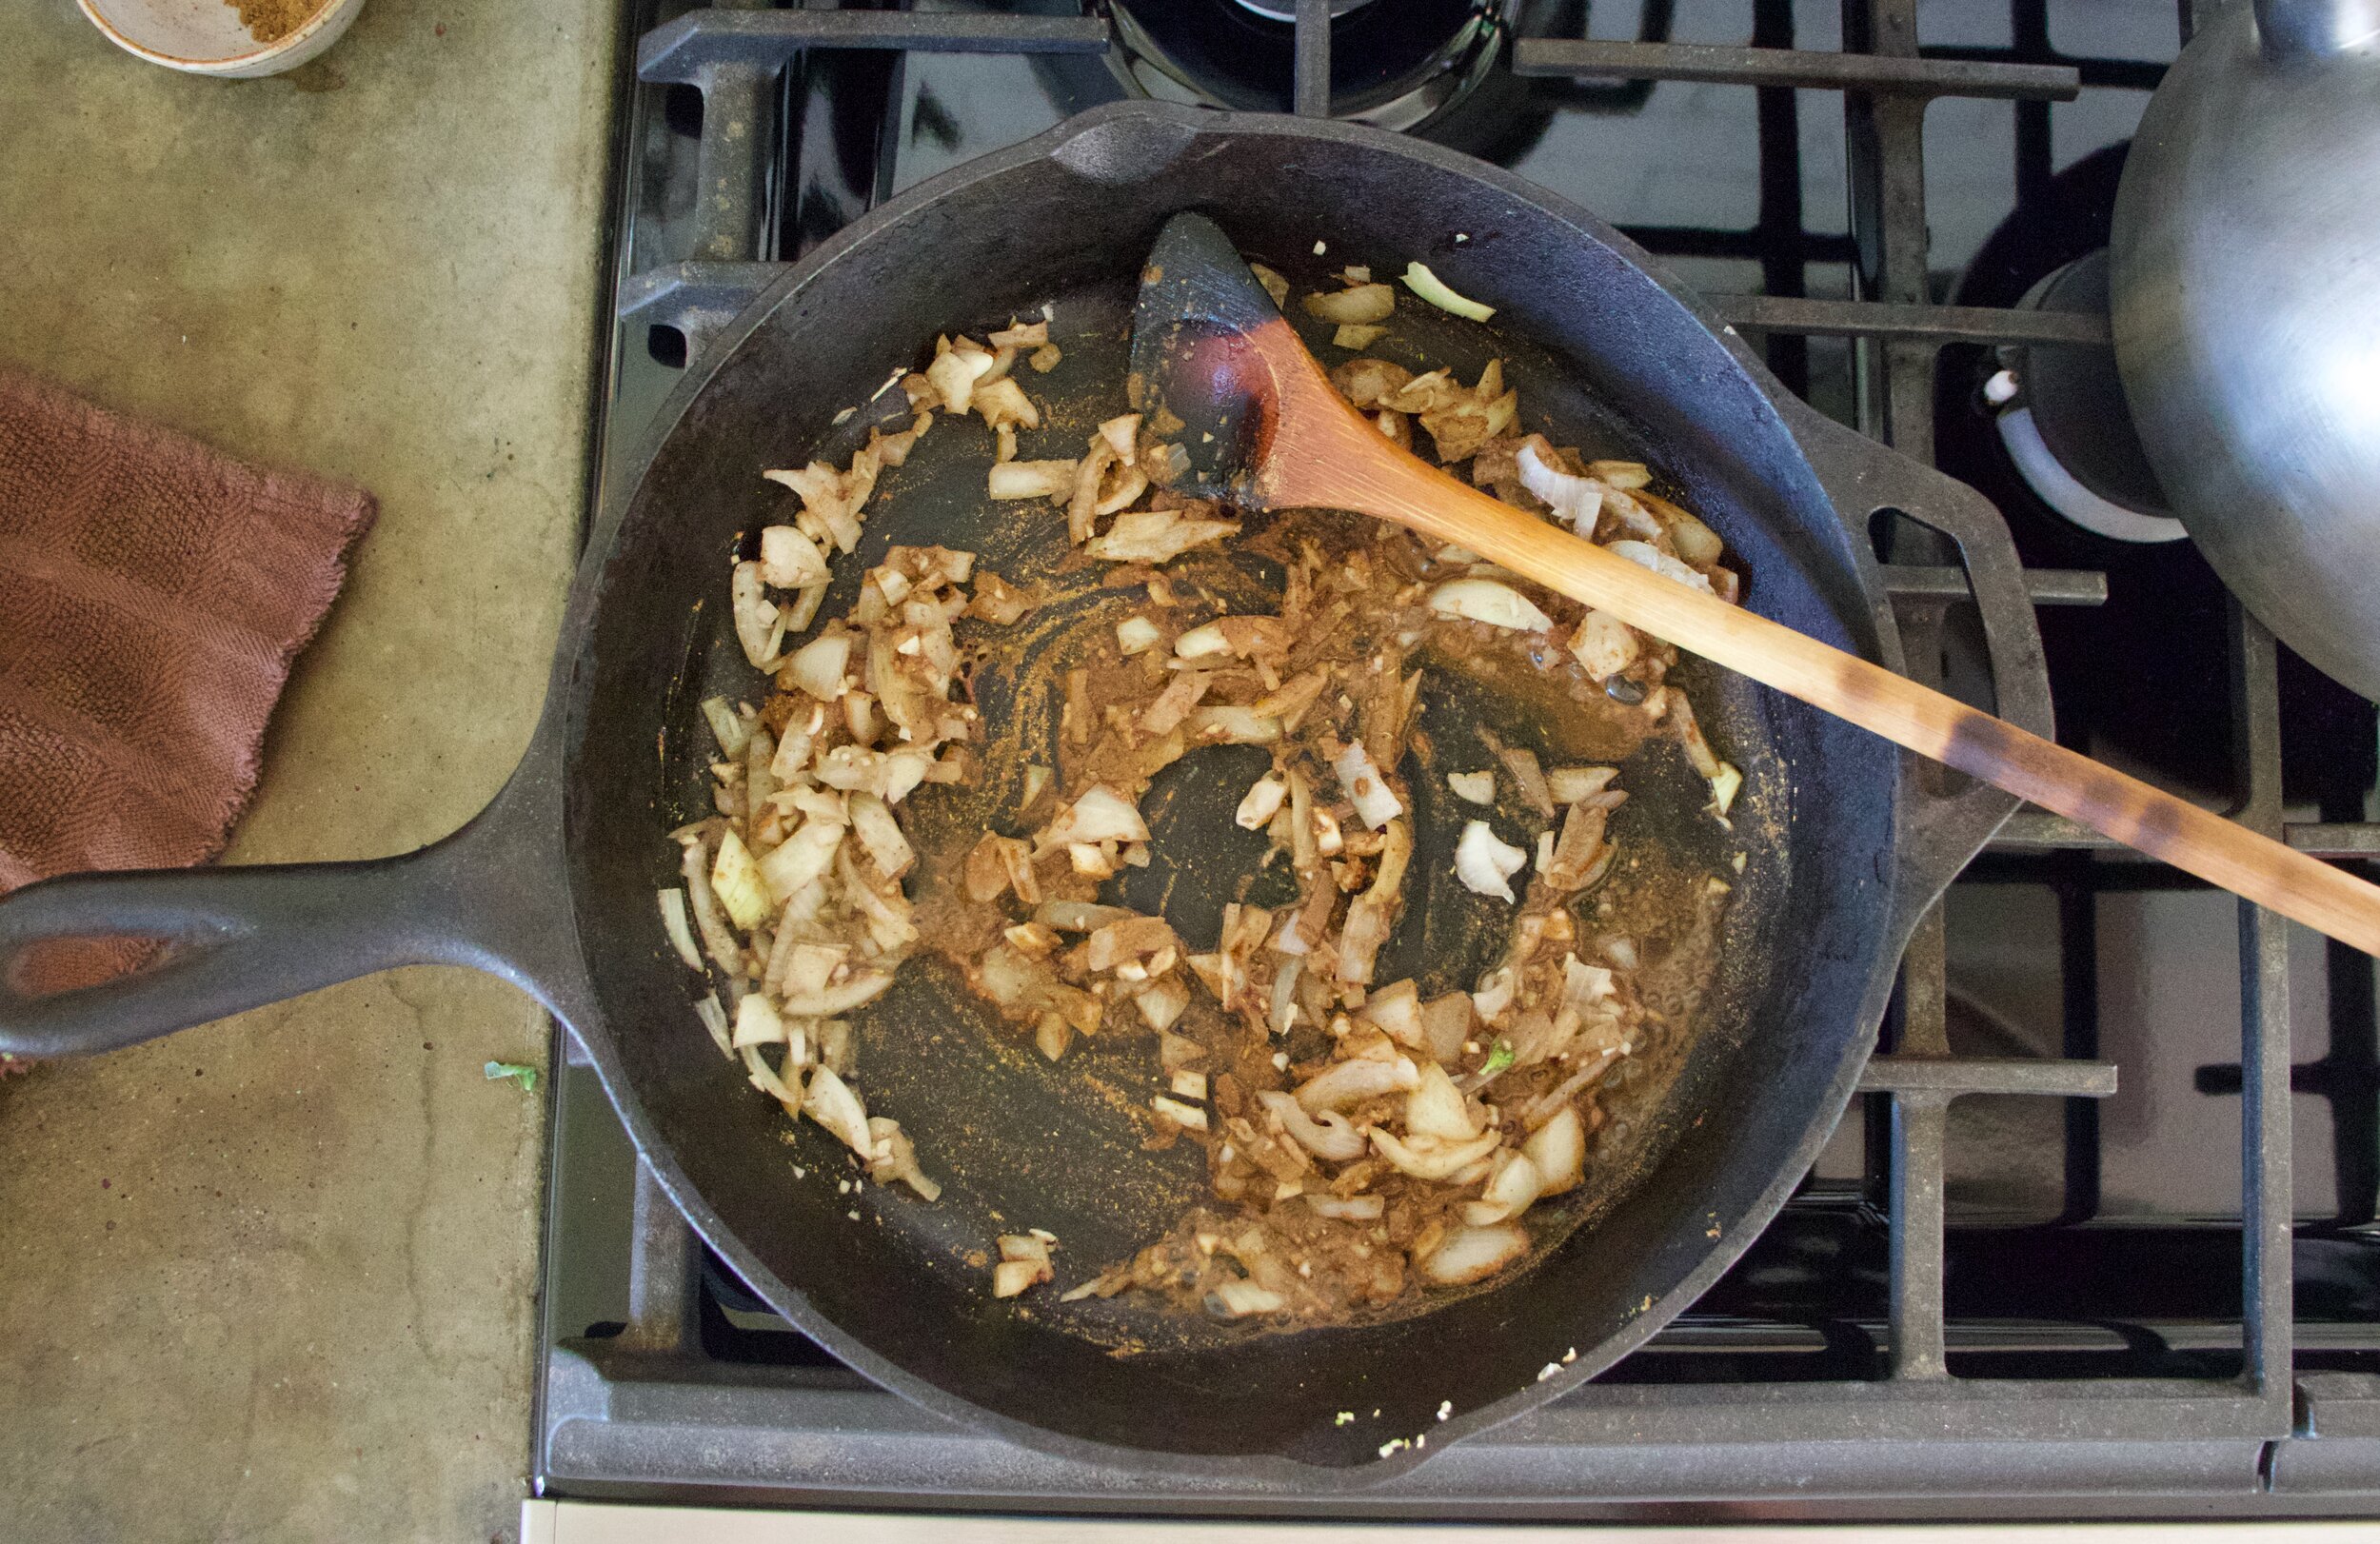
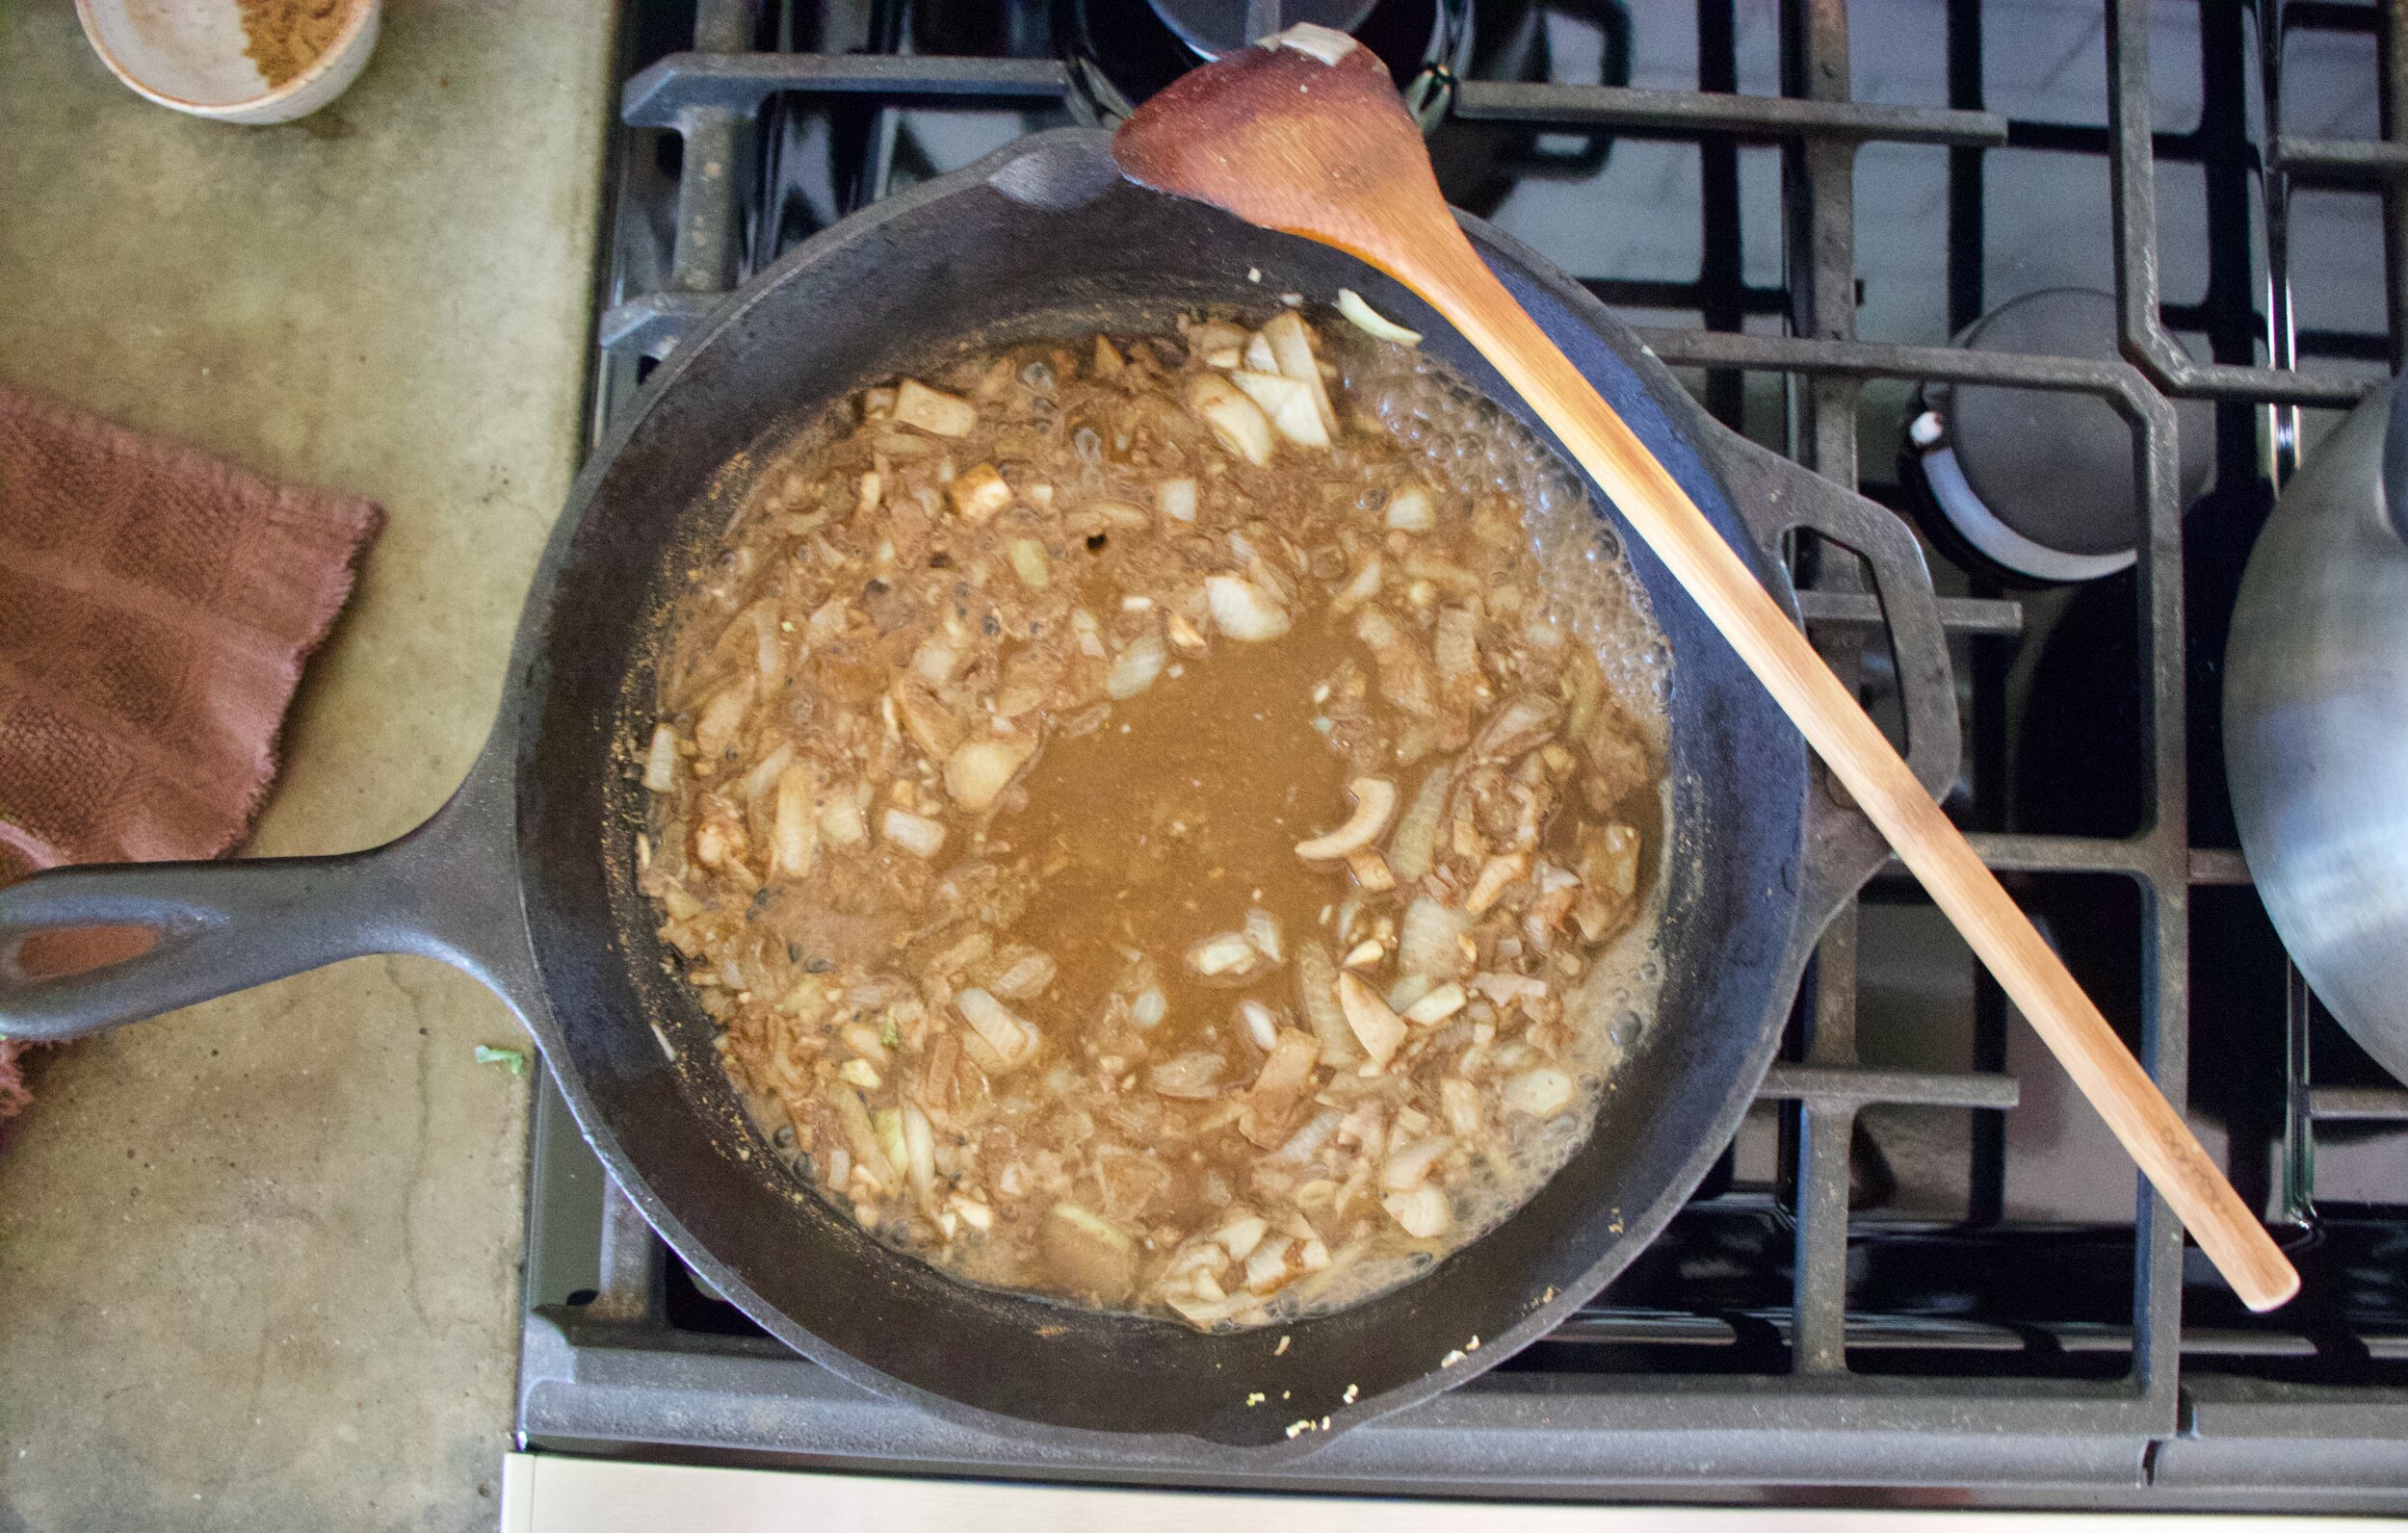
once all the water evaporates from the onions, add in the spices and stir around. Let cook for a minute then add in about a 1/2 cup more of water.

IMG_5323.jpg

Now add in the carrots, the chickpeas (with liquid) and the raisins. Bring the liquid to a boil then transfer the skillet to the oven. Cook for about 25 minutes.

IMG_5340.jpg

While the stuff is in oven, rough chop up parsley.

IMG_5365.jpg

And once the carrots are tender, remove form oven, let cool for a few minutes, then mix in all the fresh parsley and season to taste with. salt and pepper

IMG_5405.jpg

Grab a bow and a fork and do it…Eat.

-C


Moroccan chickpeas and Carrots

  • 1 lb of carrots

  • 1 can chickpeas with liquid

  • 1/3 cup raisins

  • 1/2 teaspoon each of cinnamon, cayenne pepper, and ground coriander

  • 1 teaspoon each cumin and ground ginger

  • 1/8 teaspoon ground clove or allspice

  • 2 cloves garlic

  • 1 small onioin

  • I bunch parsley

  • water

  • salt and pepper

Preheat oven to 400 degrees.

Mince up garlic and chop up onion into small pieces. Place into a oven safe skillet and stick skillet on stove on medium heat. Add about 1/2 cup of water to the skillet and start to cook down the onions.

Clean carrots and cut them into 1/2 inch rounds. (Peel if you want but I don’t so..)

Once water have evaporated from skillet add in all the spices along with a pinch of salt. Let cook for a minute then add in about 1 cup of water. Also add in the cut up carrots, the chickpeas and liquid (or 2 cups cooked chickpeas and 1/2 more cup water), and the raisins. Mix around and bring the liquid to a boil. Once boiling, transfer skillet to the oven. Bake for 25-30 minutes or until carrots are tender.

Remove from oven and let cool for a few minutes. Rough chop the parsley then toss it in. Season to taste with salt and pepper. Eat.

In Vegan, side dish, pulses, beans Tags Moroccan Chickpeas And Carrots, vegan, dinner, spices, carrots, beans, chickpeas, raisins, food, grain free, plant based, healthy, oil free
2 Comments

Chili Lime Jicama Slaw

April 24, 2021 Colleen Stem
IMG_4889.jpg

I don’t know about you but springtime has got me wanting to eat all the things that are fresh and bright and not super heavy. Things like big salads are on the top of my list. Or slaws like this jicama slaw. It is A+ and perfect for springtime munching.

Jicama. Maybe you have heard of it, maybe not. It is a vegetable, a tuber to be precise. And it tastes like a crunchy, juicy, not sweet apple, but also kind of reminds me of kohlrabi. And it slightly nutty, with a hint of potato? Just know it is delicious. You might have even had it and not even been aware of it, in say a salad or maybe spring rolls. Anyway, if you haven’t had it, it is definitely worth trying like in this slaw which is basically just jicama with cabbage, carrot and onion tossed in a cumin chili lime situation. It is fresh and crunchy and spicy and filling and all the things that I want be eating right now.

What we have it a really dang tasty and a quick toss together situation. What more can we ask for?

To the jicama slaw!

IMG_4860.jpg

The stuff. A small jicama, a carrot, a hunk of red cabbage, chili powder, cumin, a lime, red wine vinegar,a little maple syrup, and salt and pepper.

IMG_4865.jpg

Cumin, chili, maple, and vinegar go into a big bowl and get mixed around. Pop the bowl into the microwave if you can and heat it up for like 30 seconds, just o take a bit of the rawness of of the spices.

IMG_4872.jpg

Now peel the jicama. Use a sharp knife and carefully peel away the brown skin from the white flesh. Do not leave any of the skin on cause it is not good to eat!

IMG_4877.jpg

Once the jicama is peeled, grab a mandolin and julienne it (or cut into thin matchsticks with a knife). Then julienne the carrot and shredded the cabbage and onion.

IMG_4879.jpg

Dump all the veggies into the bowl with the spices then add in the juice of the lime and a pinch of salt and pepper.Toss around until evenly combined and coated.

IMG_4897.jpg

There you have it. Chili lime jicama slaw. Now you eat it. As a side to any dish you wish or just as it is, a big bowl of goodness.

-C


Chili Lime Jicama Slaw

Serves 3-4 (as a side)

  • 1 medium Jicama (around 3 cups julienned)

  • 1 small carrot

  • 1 small onion

  • a small hunk of red cabbage

  • a lime

  • 3/4 teaspoon cumin

  • 3/4 teaspoon chili powder

  • 1 teaspoon maple syrup

  • 1 tablespoon red wine vinegar

  • salt and pepper

Place cumin, chili, maple, and vinegar into a large bowl. Mix around and pop into the microwave for 20-30 seconds just to heat it up a bit and remove some of the rawness of the spices.

Peel the jicama. Do it with a knife (so carefully) and remove all of the tough brown skin away from the white flesh. (Do not eat skin..It can make you sick). Now either with a mandolin of a knife, julienne the jicama along with the carrot. Use a thicker setting for the jicama and a thinner one for the carrot. Shred or thinly slice up the cabbage and onion as well. Toss all the veggies into the bowl with the spices. Squeeze in the juice of the lime, add a pinch or two of salt and some black pepper and toss around until everything is evenly combined and coated.

You can eat it right away but It taste better when it has had a chance to sit for a little while.

Serve cold along with anything. Or eat on it’s own. Store left overs in fridge for up to a week.

In quick and easy, Raw, salad, Vegan, Vegetables Tags Chili Lime Jicama Slaw, jicama, slaw, raw, salad, plant based, grain free, gluten free, dairy free, vegetable, fresh, spring, easy, chili lime
Comment

Sweet Potato Steaks on Arugula and Kale with Pea Avocado Cream

April 10, 2021 Colleen Stem
IMG_4654.jpg

All I want to do is eat fists fulls of arugula. Ok, maybe that is not all I want to do, but it is something that I have been doing a lot. I have always really like arugula but as of right now, it is my top choice green!

Anyway, big green salads are all I want to eat because it is spring and all and greens are the best in the spring. But I still am eating a lot of roots and will be eating them for a few more weeks unit winter farm share dies down. And because it is the end of the season, the choice of roots is dwindling and we basically get a bucket of carrots, beets, and sweet potatoes. Lots of sweet potatoes, which by the way, I am not made about. And greens, We get lots of greens!

So my new favorite salad comes to fruition. Thick cut sweet potato steaks on a bed of fresh spring arugula and kale toped with a thick creamy avocado pea situation and some toasted walnuts for flair and crunch. I mean, is your mouth watering and your tummy grumbling yet?

Mine is but that is just how it always is.

Now to the steaks and salad!

IMG_4603.jpg

The stuff. A sweet potato, some arugula and tender kale, peas (frozen and thawed) half an avocado, some toasted walnuts, a lemon, and salt and pepper.

IMG_4609.jpg

Start by cutting the sweet potato into thick steaks. 4-5 same thickness slices if you may.

IMG_4612.jpg
IMG_4617.jpg

And no roast up the sweet potato steaks. Just place hem onto a baking sheet and pop them into a hot oven. Bake for 2-30 minutes, flipping over after 15-20 minutes. Once tender, remove from oven and set aside.

IMG_4629 2.jpg
IMG_4632.jpg

While sweet potatoes are baking, make pea avocado cream. Place peas and avocado into a blender or cup if using a hand blender along with the juice of the lemon and about a tablespoon of water. And a small pinch of salt. Blend until smooth. Add more water a tablespoon at a time until you get a thick but pourable constancy.

IMG_4644 2.jpg

Now rough chop the kale and toss together with the arugula and place in a large salad bowl

IMG_4650.jpg

Place the sweet potato steaks on top of the greens. Note here that the sweet potato steaks can be hot, warm, or cold. The are good all the ways.

IMG_4653 2.jpg

Then top it all with the pea avocado cream. Toss on the toasted walnuts and add some more black pepper and that be that. Grab a fork and a knife if you wish and get to it.

So much goodness in the mouth!

-C


Sweet Potato Steaks on Arugula and Kale with Pea Avocado Cream

serves 1-2

  • 1 medium sweet potato

  • 1/2 cup frozen (and thawed) green peas

  • 1/2 of an avocado

  • a small lemon

  • 2 large handfuls of fresh arugula

  • 4-5 leaves of tender kale

  • 1/4 cup toasted walnuts

  • around 1/4 cup cold water

  • salt and pepper

Preheat oven to 450. Wash sweet potato and cut into 4-5 equal thickness slices. Place cut pieces on a baking sheet and sprinkle with salt and pepper and pop into oven. Bake for 25-30 minutes, flipping after 15 or until the sweet potato is tender. Remove from oven and let cool a bit.

While sweet potato is baking off, make pea avocado cream. Place the peas and avocado into a blender or cup if using a hand blender, add in the juice of the lemon and a pinch of salt. Blend until smooth. Add in a tablespoon or two (or more) to thin out until it is still thick but pourable. Also rough chop the kale and mix together with the arugula in a big salad bowl.

Once sweet potato steaks have baked and cooled off a little bit (you can eat them hot or cold so whatever temperature you want), place them on top of the greens then top with the pea avocado cream, sprinkle on toasted walnuts, more black pepper, and maybe a squeeze of more lemon if you have it.

Then grab a fork and knife and start eating.

In Vegan, Vegetables, winter, Spring, salad Tags Sweet Potato Steaks on Arugula and Kale with Pea Avocado Cream, Arugula, kale, sweet potato steaks, vegan, grain free, dairy free, gluten free, plant based, dinner, salad, roots, winter, spring, avocado, peas, walnuts, easy, heathy, quick, delicious, yummy
Comment

Crispy Green Beans

March 6, 2021 Colleen Stem
IMG_0704.jpg

I rely pretty heavily on frozen produce in the mid to late parts of winter. I do have my winter farm share but that is never enough so I pack my freezer as full as I can with stuff in the fall (mostly shredded zucchini and lots of tomatoes and eggplant). And then sometime between Christmas and New Years its pretty much gone. Once that happens I start in with store bought frozen veggies. I usually by frozen broccoli, peas, and green beans and right now me and the frozen green beans are having a moment.

I don’t know how it started but almost everyday I dump like half a bag of frozen green beans (sometimes a whole bag) onto a baking sheet without any oil or seasoning, and pop it into a hot oven for like 15 minutes. And that is it. I pull them put and they are crispy, crunchy, and probably one of the tastily way a green bean can be eaten (besides fresh). And the weird thing is, I have tried to mimic the crispness and crunchiness with fresh green beans but it never works out. There is something about roasting them frozen that gives them the perfect crispy texture. And no no to oil. They don’t need it, it only makes the beans soggy.

So it might seem kind of weird and it’s not a recipe, but I highly, HIGHLY, suggest that next time have a hankering for a tastely crunchy treat, try roasting some frozen green beans. And then let me know if you become addicted too.

Sometimes it’s the simplest things, you know?

IMG_0694 2.jpg

Frozen beans go straight from freezer onto baking sheet and into the oven.

IMG_0700.jpg

They then come out crispy. That's it.

IMG_0703.jpg

And yes, I usually just eat them off the baking sheet with my fingers because why bother dirtying a dish?


-C


Crispy Green Beans

  • Frozen green beans

Preheat oven to 400

Dump frozen green beans onto a non oiled baking sheet single layered and place into hot oven. Bake for 15-20 minutes or until crispy. Remove and eat.

In Vegan, snack, side dish Tags crispy green beans, frozen green beans, one ingredient, snack, vegan, vegetable, plant based, simple, delicious, grain free, gluten free, beans, winter, roasted, no oil
Comment

Black Olive Tapenade

February 6, 2021 Colleen Stem
IMG_3602.jpg

A few weeks ago I bought a tub of hummus that came with a few toppings that you add in yourself. I don’t normally buy that kind of stuff but it was on sale and you know, had to try it. Turns out the hummus was good on it’s own so the toppings never got mixed in. They did get eaten though, just as sandwich spreads. One of the toppings that it came with was olive tapenade and let me tell you, the mr ate the shit out of it. Yes we love olives in this house (I hated olives unit one magical day a few years ago and now I freaking love them) but it has been so long since I have done much more then throw a few on a pizza or into a salad or just eat then straight. Now, well now we have to have olive tapenade on hand at all times. Spreadable, blop-able olives. Good on us.

This olive tapenade is the simplest as simple can get. Basic canned black olives, a little garlic, a splash of oil to make it a little more spreadable, and some lemon juice. I know that some tapenades call for fresh herbs, maybe nuts, or some other stuff, and by all means that is good too, but there is no shade in going simple. Simple taste damn good.

Now to the olive tapenade.

IMG_3526.jpg

The stuff. A can of pitted black olives, a couple cloves of garlic (raw or roasted) a little olive oi, and a lemon.

IMG_3536.jpg
IMG_3555.jpg

Place olives (make sure there are no surprise pits), chopped up garlic, about half a lemons worth or juice, and oil into a food processor or a jar (if using a hand blender) and blend until combined. Keep as chunky or go as smooth as you like. We like smooth with a few little chunks.

IMG_3595.jpg

And that is it. You now eat it, any way you want. The mr really likes his olive bread toast situations, as for me, I like it on salads, used as veggie dip, or eaten straight from jar with a finger. Just living my truth.

-C


Black Olive Tapenade

makes a hefty cup of tapenade

  • 1 can pitted black olives

  • 2 cloves garlic (raw or roasted)

  • 1 teaspoon-1 tablespoon olive oil

  • a lemon (optional)

Stain olives from liquid, check for any stray pits, and place in a food processor or jar (if using a hand blender) along with the garlic, the lesser amount of oil, and a squeeze of lemon. Pulse or blend until spreadable and leave as chunky or go as smooth as you would like. Taste and add more lemon juice and or olive oil to your liking.

Eat it up with chips, bread, on salads or pastas. And yea spoonfuls to the mouth. Any left over store in a airtight jar in fridge for a week or so.

In condiment, quick and easy, Vegan Tags Black Olive Tapenade, vegan, plant based, spreads, topping, olive, gluten free, grain free, simple, easy, party, condiments
Comment
← Newer Posts Older Posts →
 

https://thelovelycrazy.squarespace.com/config#/|/about/

Me. Food Maker.Food eater. Woo HOO!

STEM+NODE  SMALL BATCH AND ONE OF A KIND POTTERY

stem+node ceramics


____________________

Subscribe

GET NEW POSTS IN YO EMAIL

You are AWESOME!!!


@thelovelycrazy 2014-2021