• stem+node ceramics
  • HOME
  • Food Recipes
  • About
  • Contact
Menu

The Lovely Crazy

Street Address
City, State, Zip
Phone Number

Your Custom Text Here

The Lovely Crazy

  • stem+node ceramics
  • HOME
  • Food Recipes
  • About
  • Contact

Blueberry Orange and Pistachio Cabbage Salad

January 15, 2022 Colleen Stem

Ever since the mr got a gigantic bag of pistachios from my Dad for Christmas he has been eating them almost every night and not once has he asked if I wanted some. And I know he has been trying to hide them in the pantry on me, (obviously he has failed since it is MY pantry) so I took some when he was not home. Does that make me an asshole? Maybe a little but I share ALL of my food with him so he can give up a couple small handfuls of nuts.

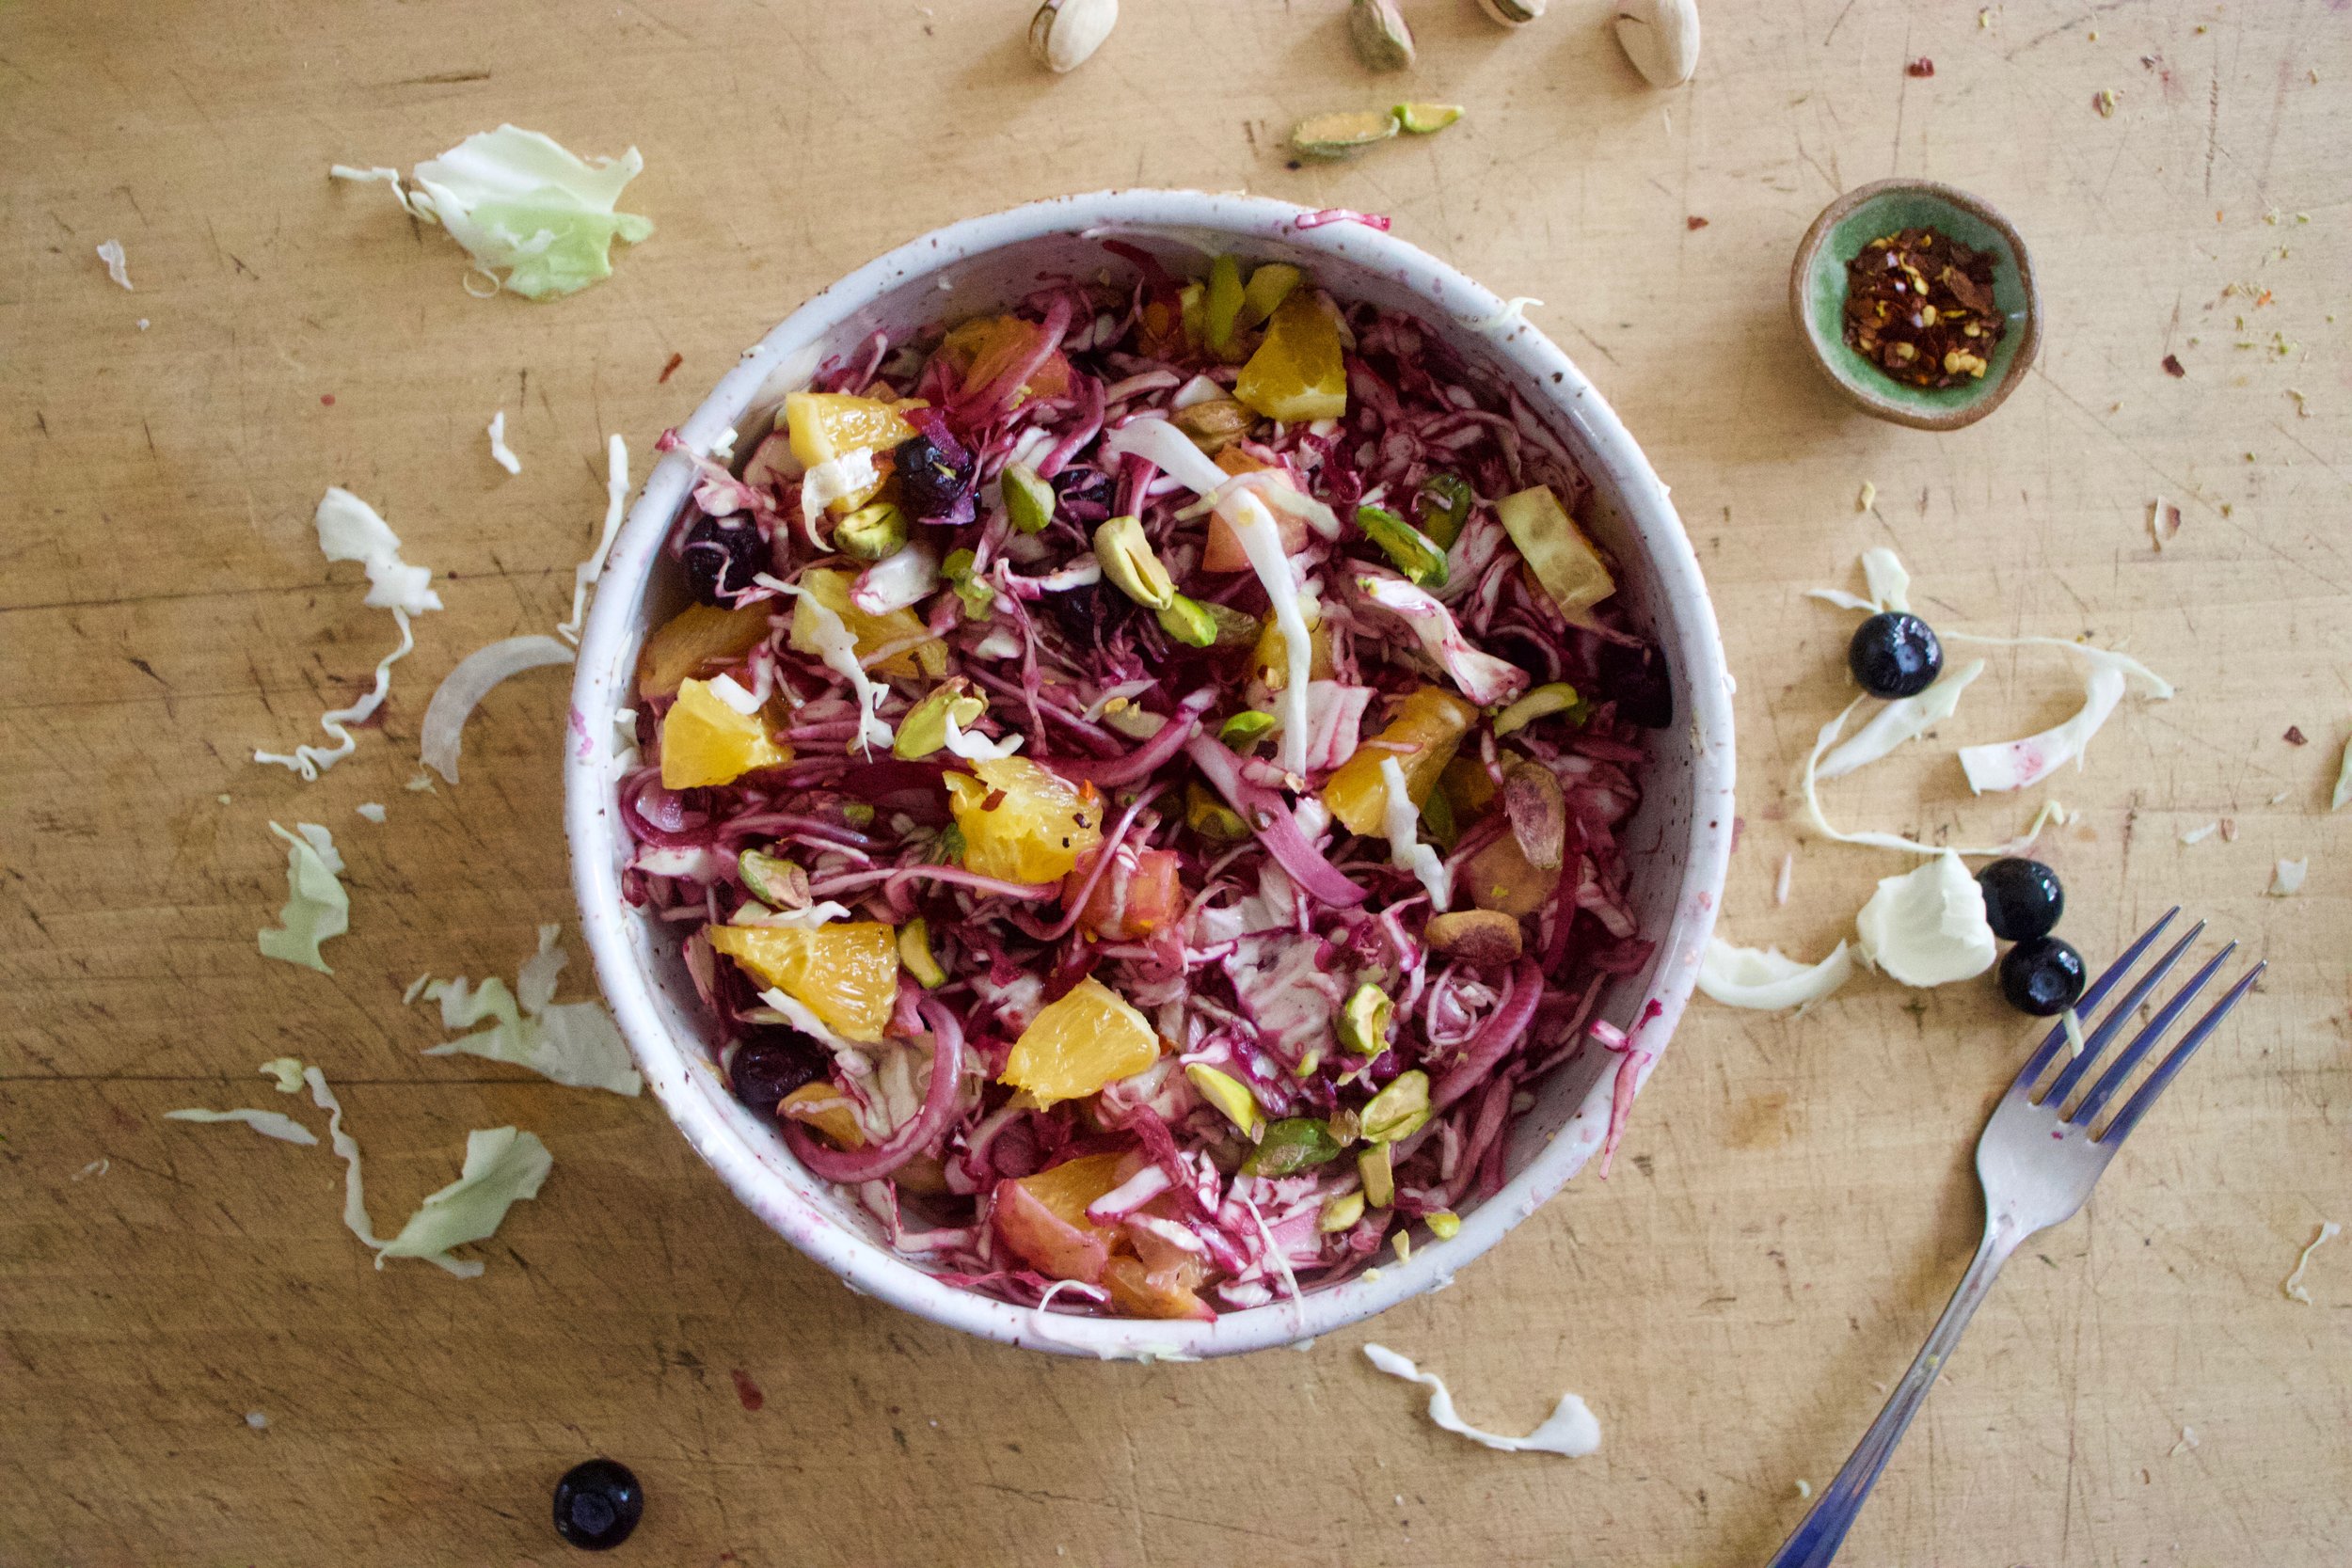
Anyway I made salad with my stolen pistachios. A big cabbage salad with orange and blueberries because they pair amazingly with pistachios and plus I want to eat all the citrus right now. The blueberries, well they go so well in a savory situation and I wanted them in there too. (Plus the the color from the berries makes the salad so pretty!) So I made the salad and it was delicious. I ate some but you know what? I ended up sharing my stolen pistachio salad with the mr. And he liked it too, especially the pistachios. And he didn’t ask if I took then from him so I took that as a invitation to take more… Thats what it means right?

Now to the blueberry orange and pistachio cabbage salad!

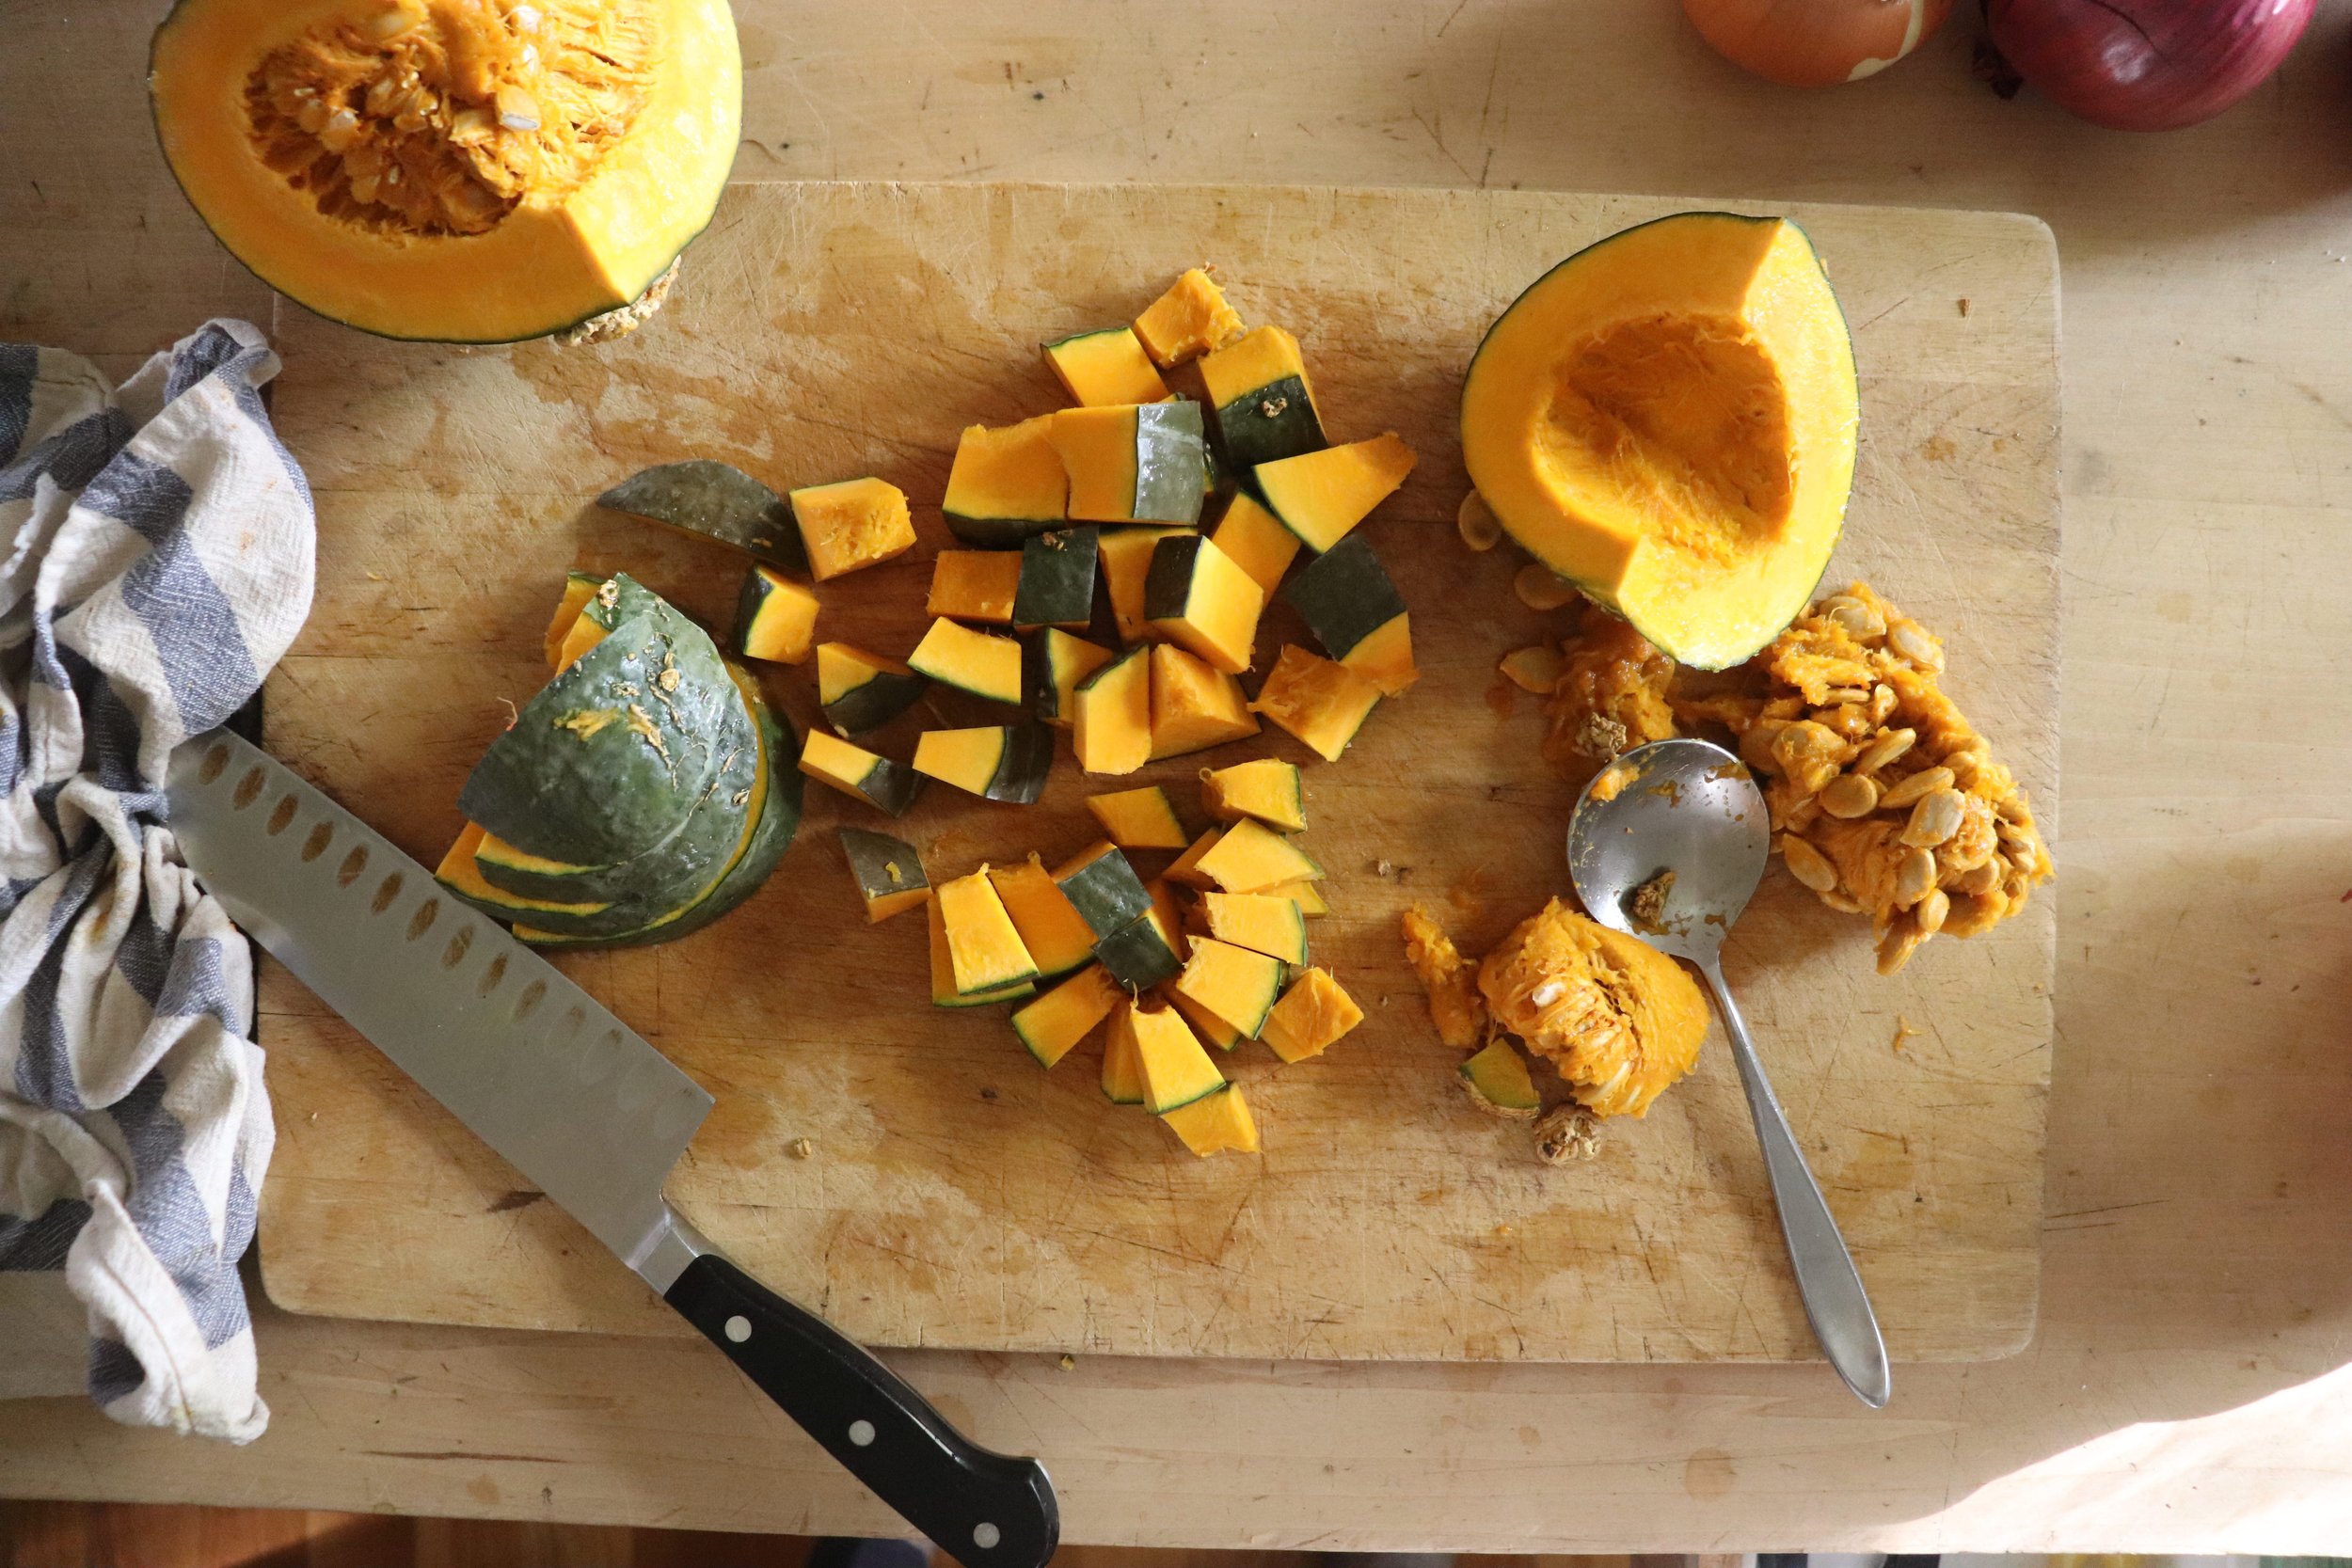
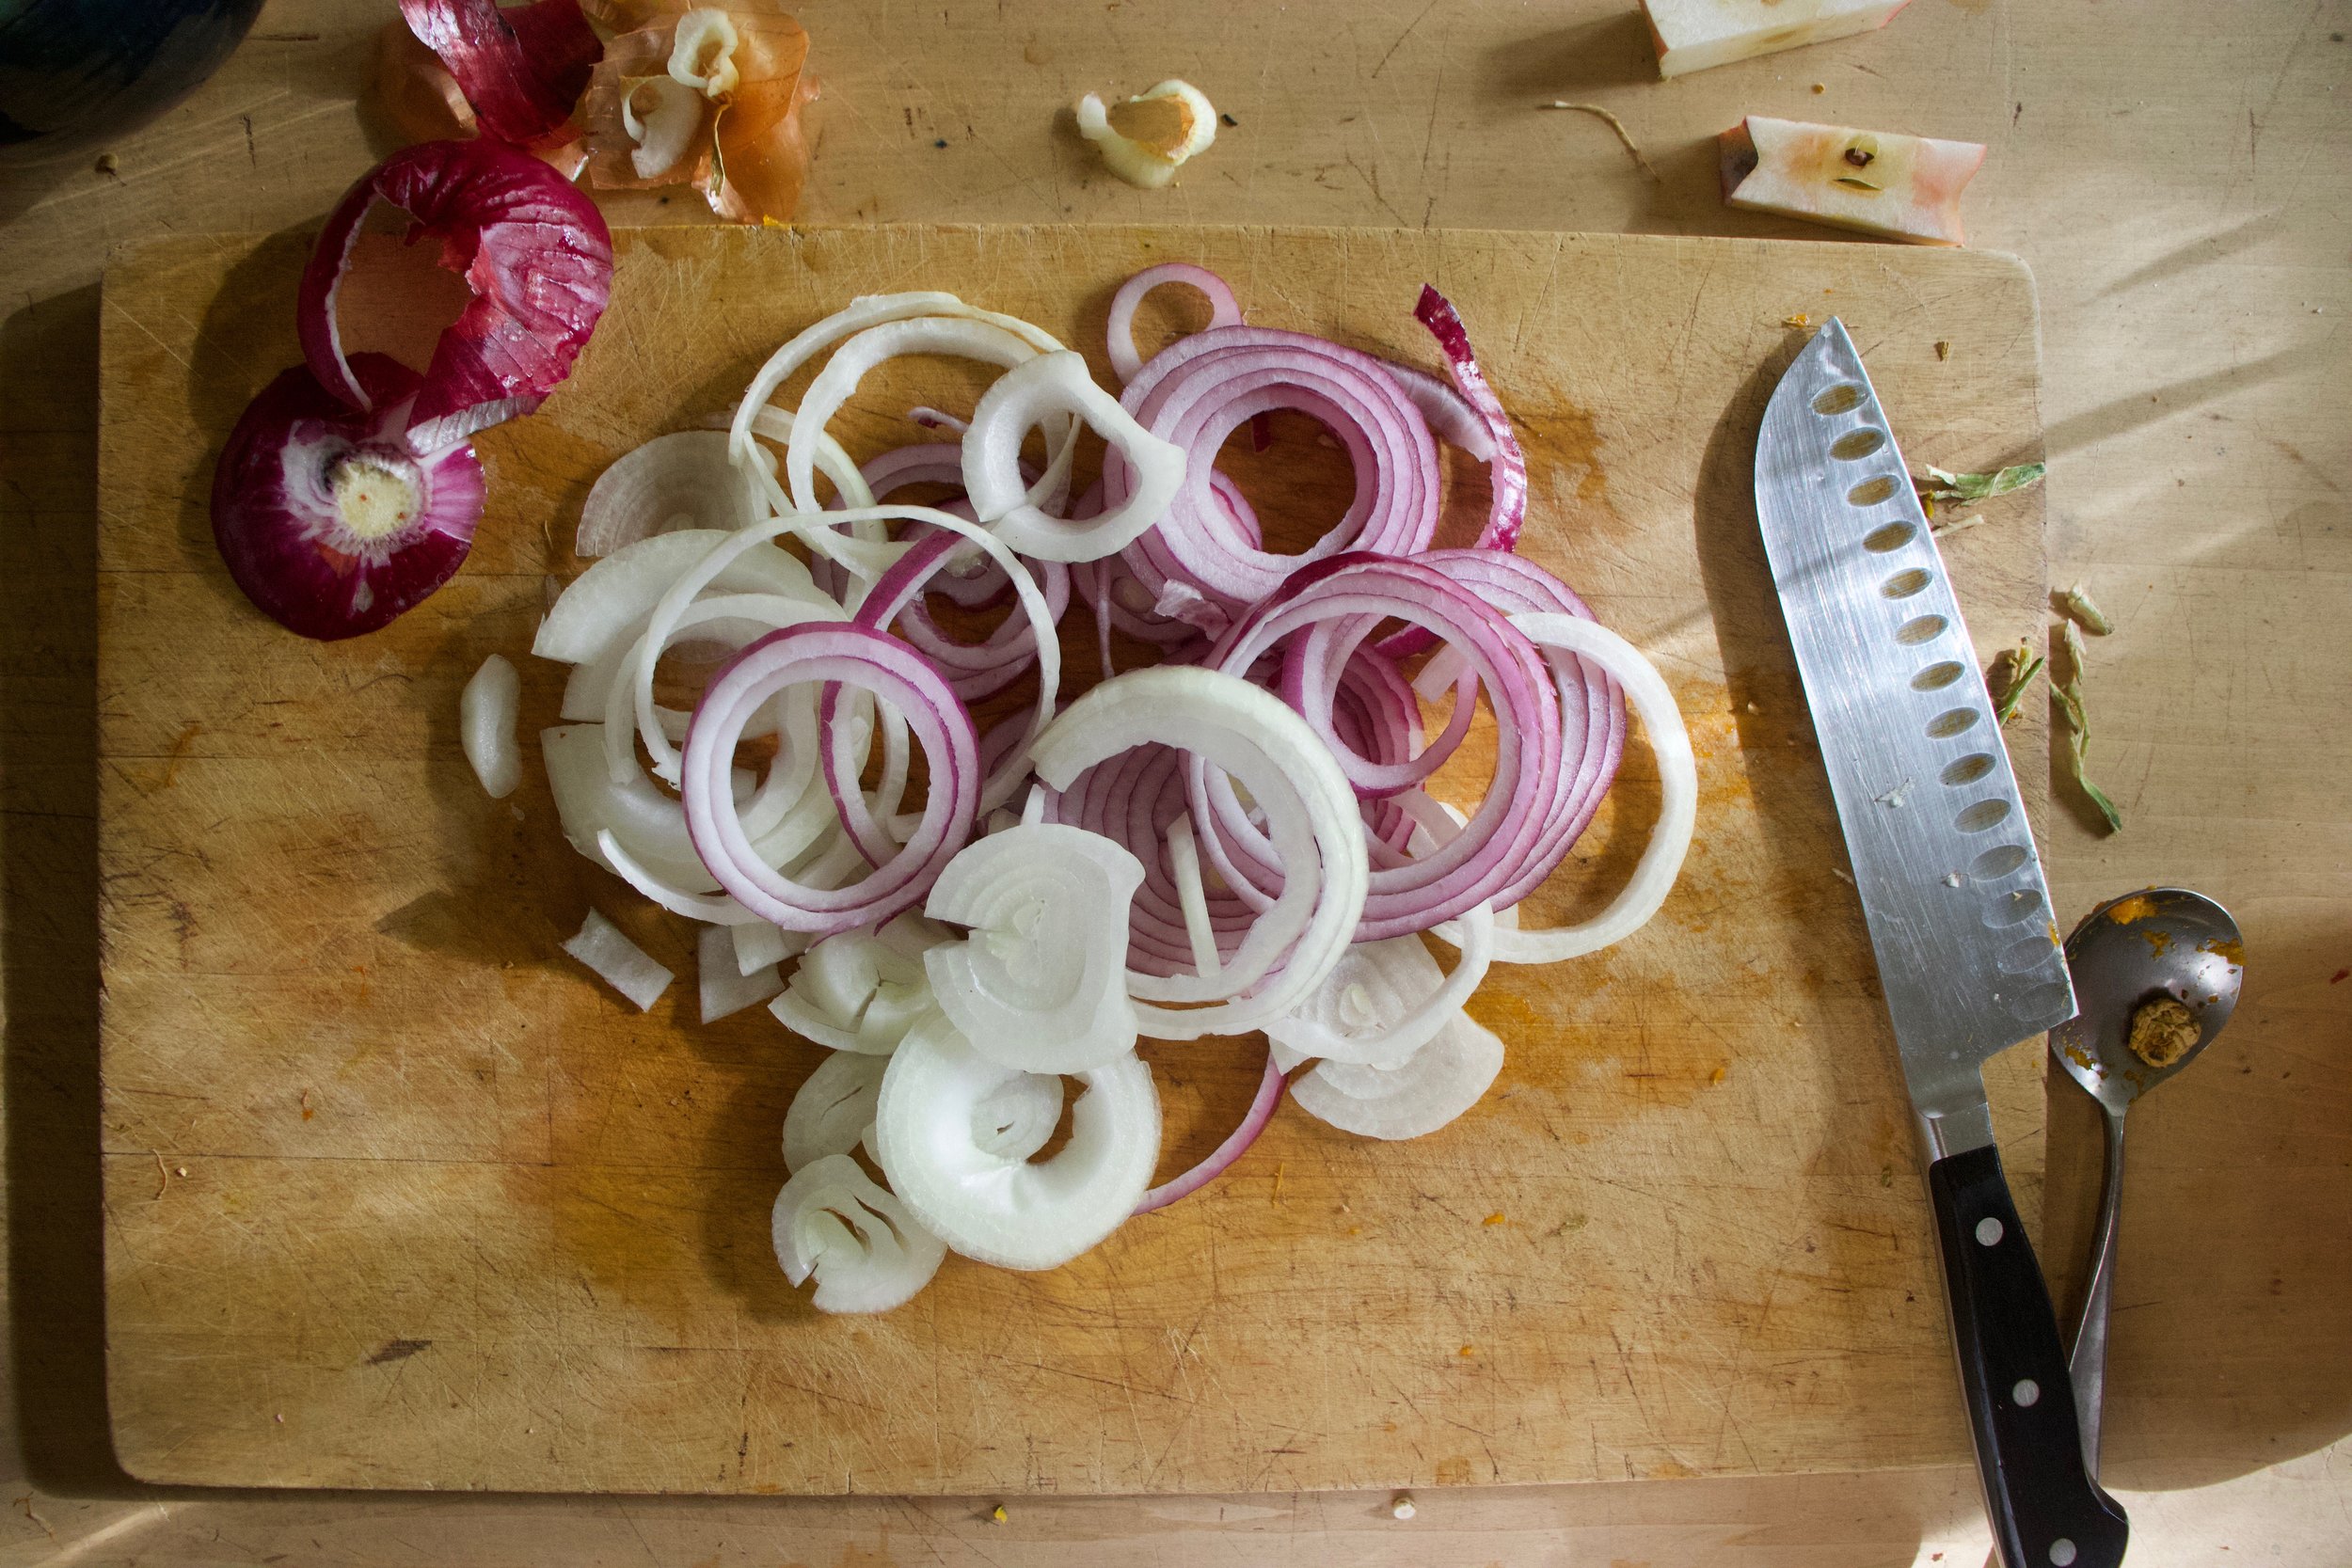
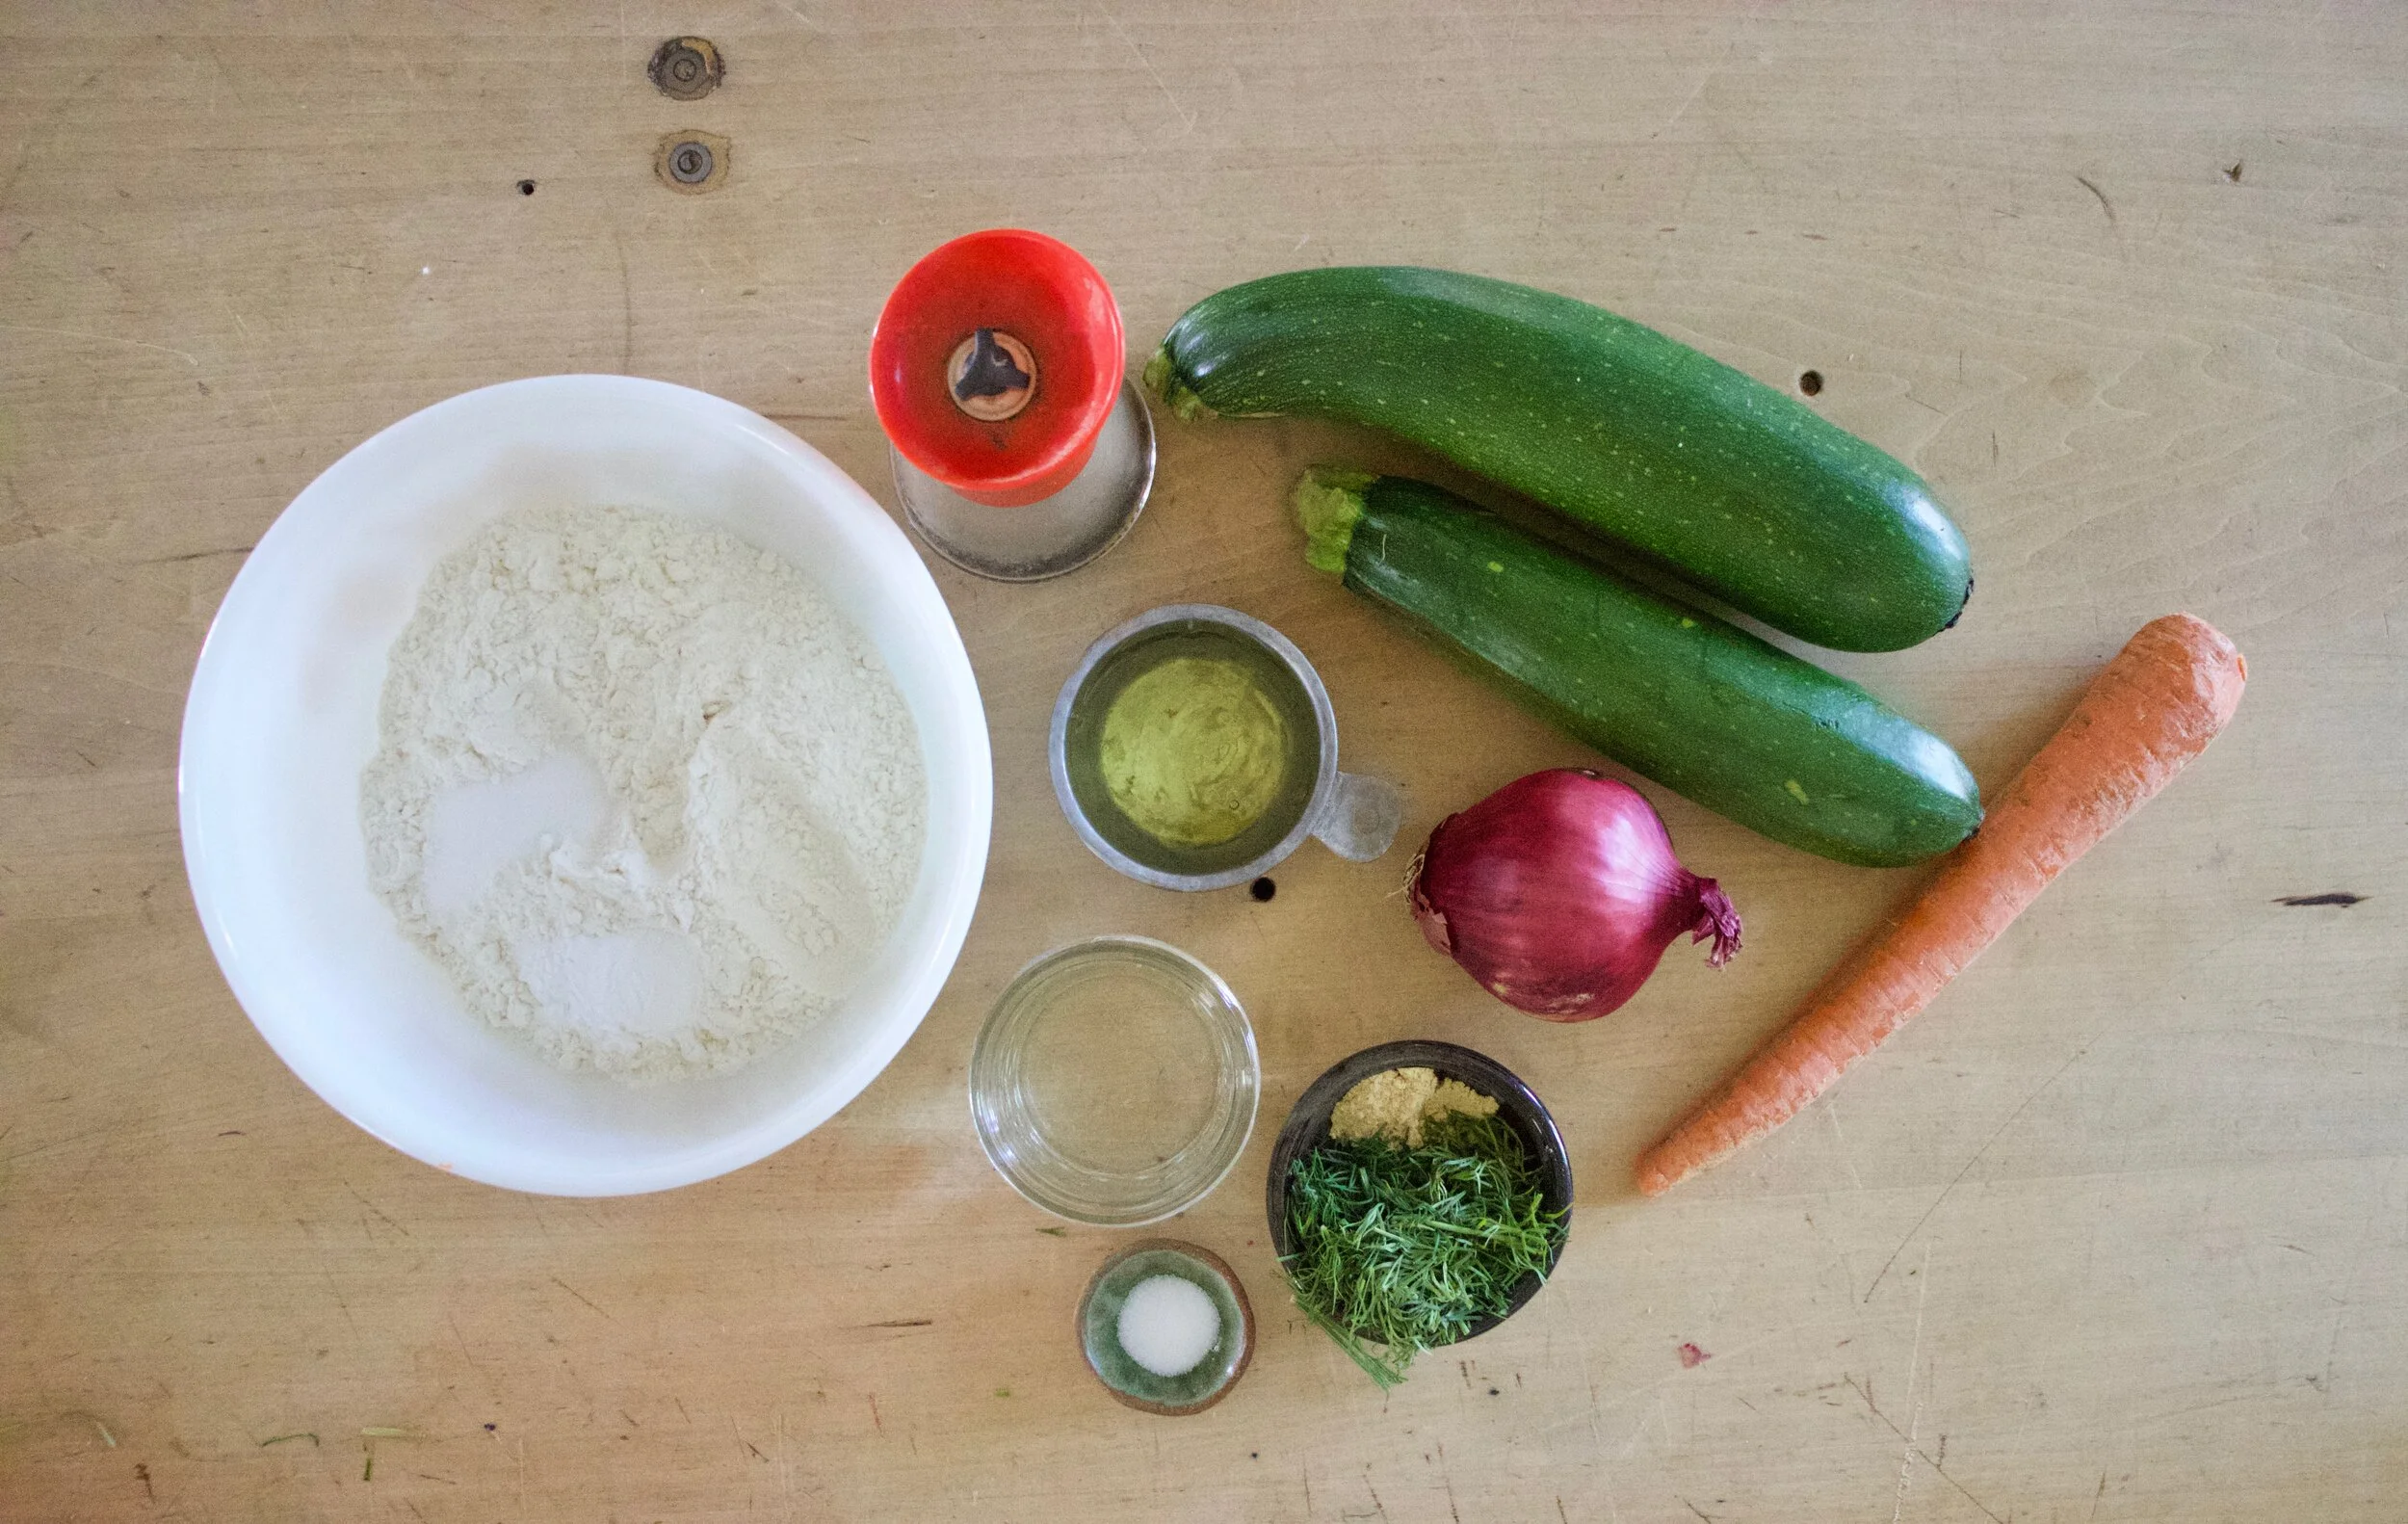
The stuff. Cabbage, frozen blueberries, a big navel orange, pistachios, an onion, salt and pepper, red wine vinegar, maple syrup, and red pepper flakes.

IMG_8641.jpg
IMG_8663.jpg

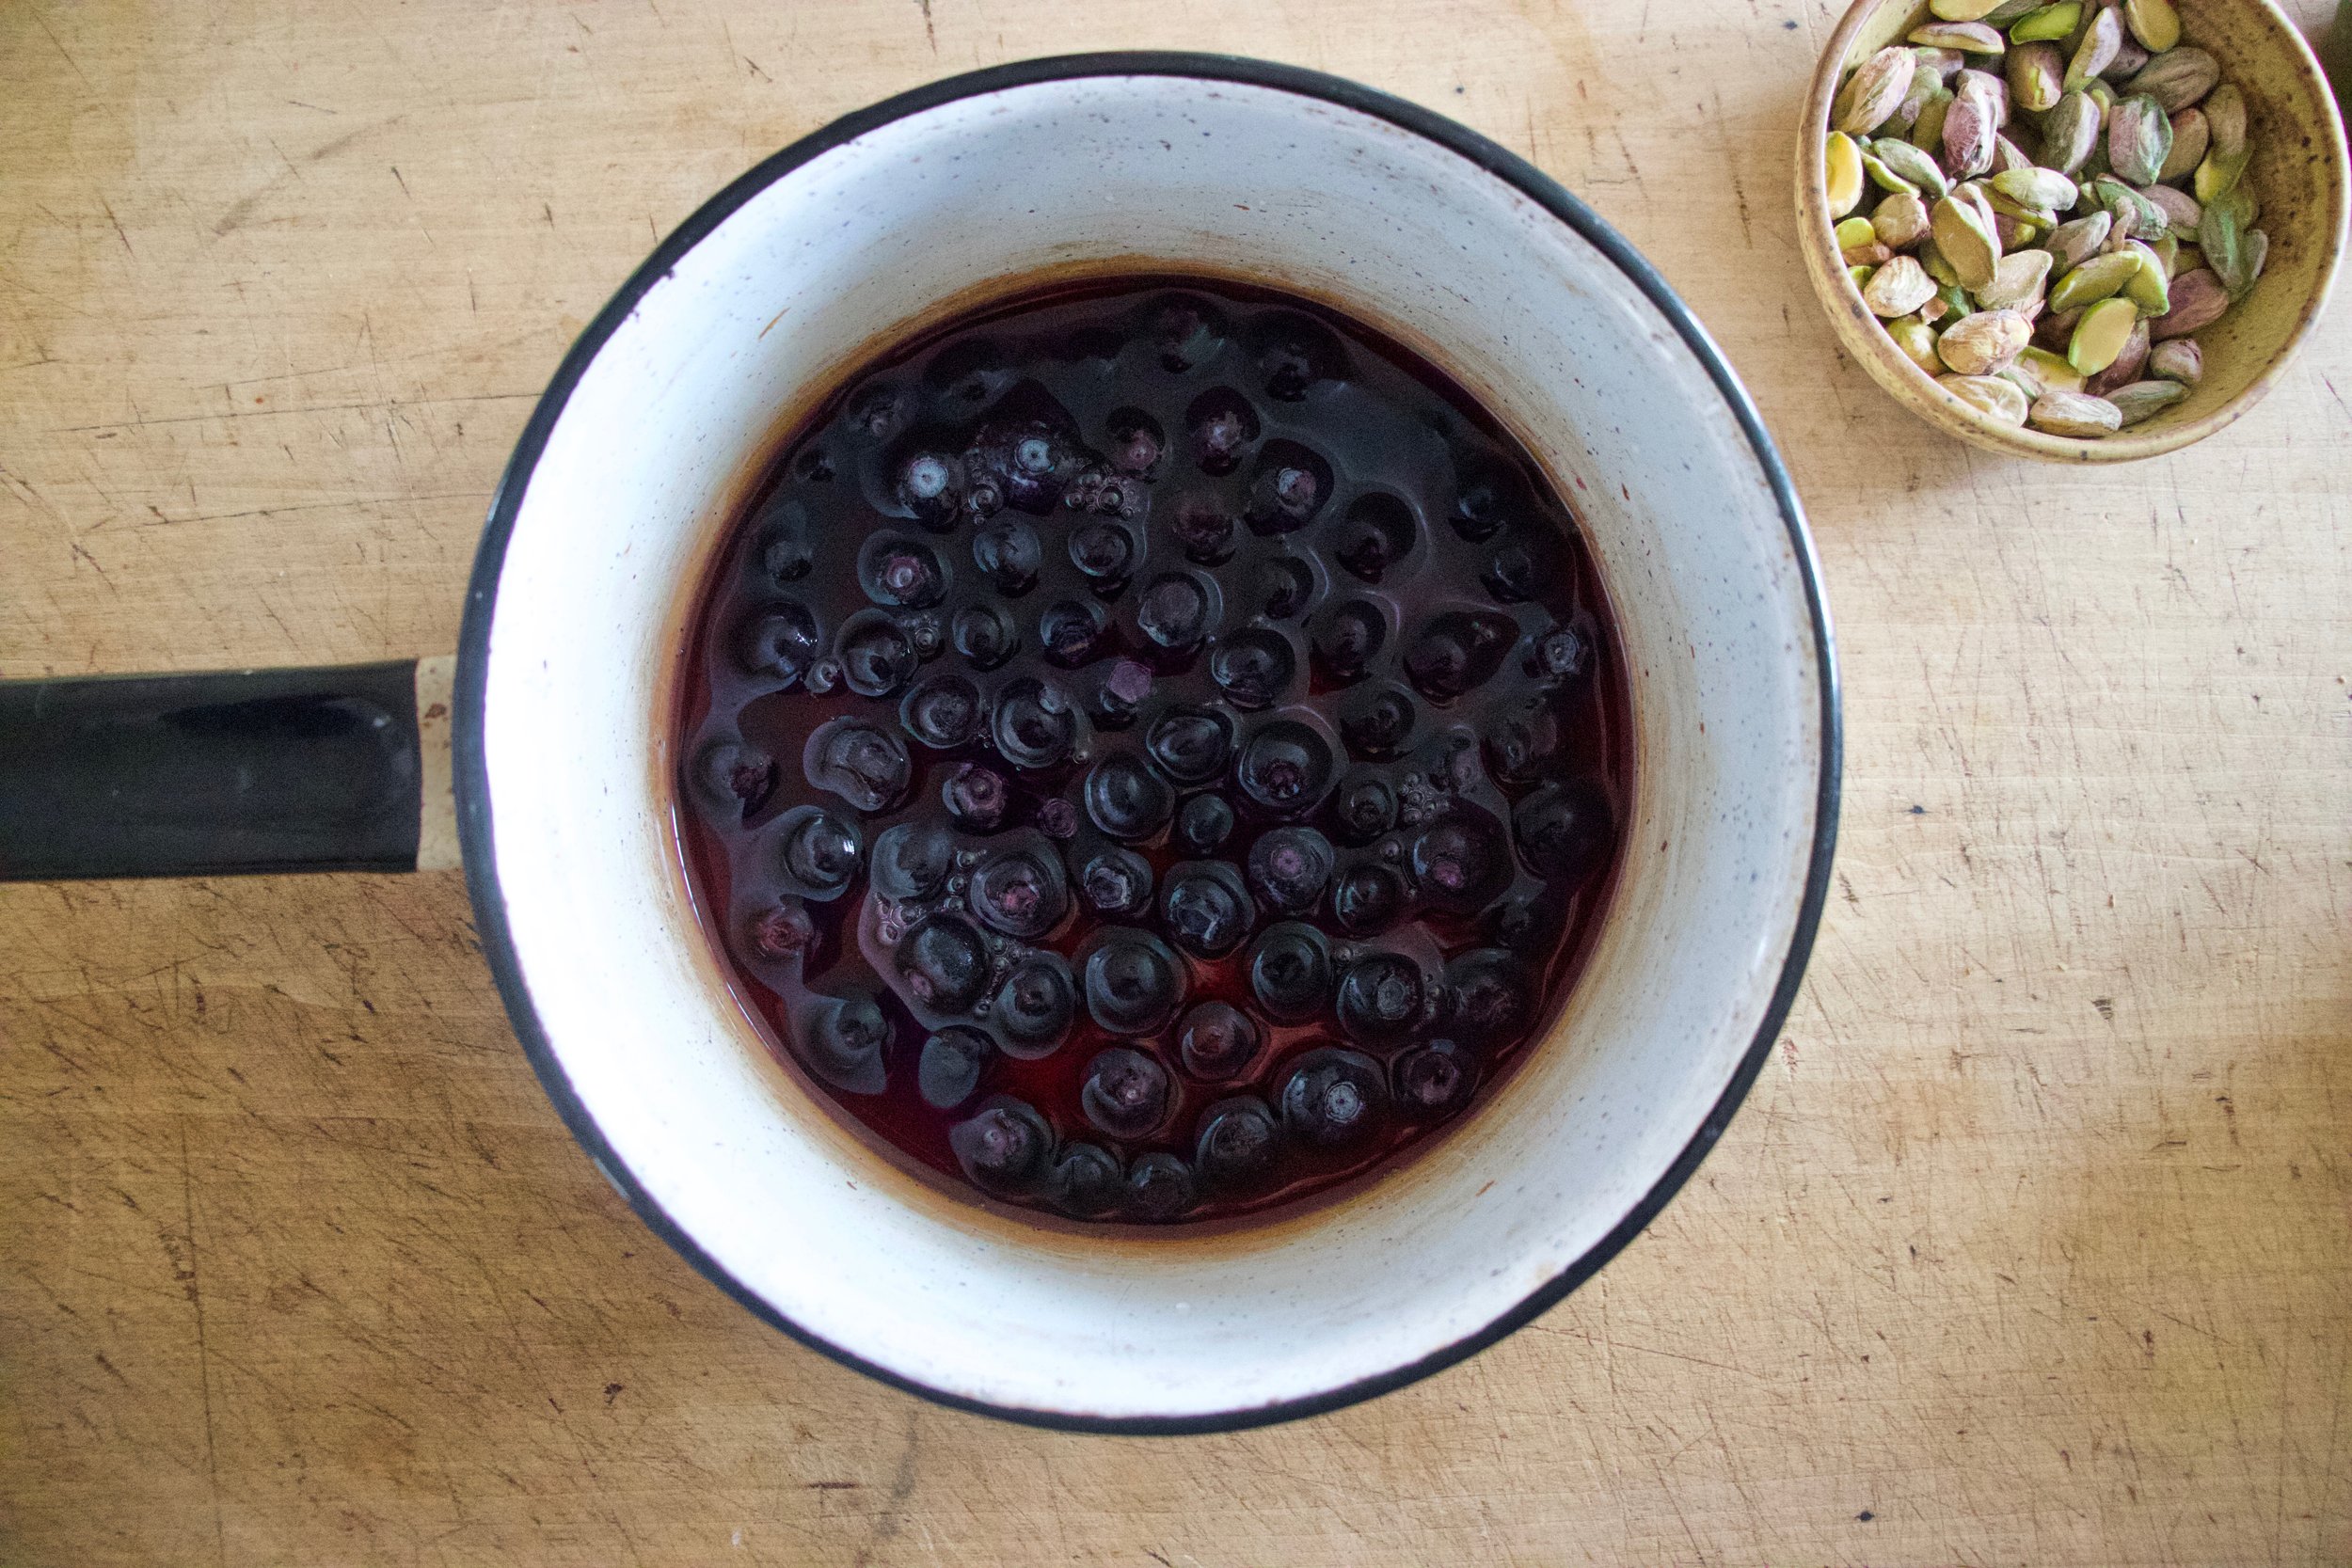
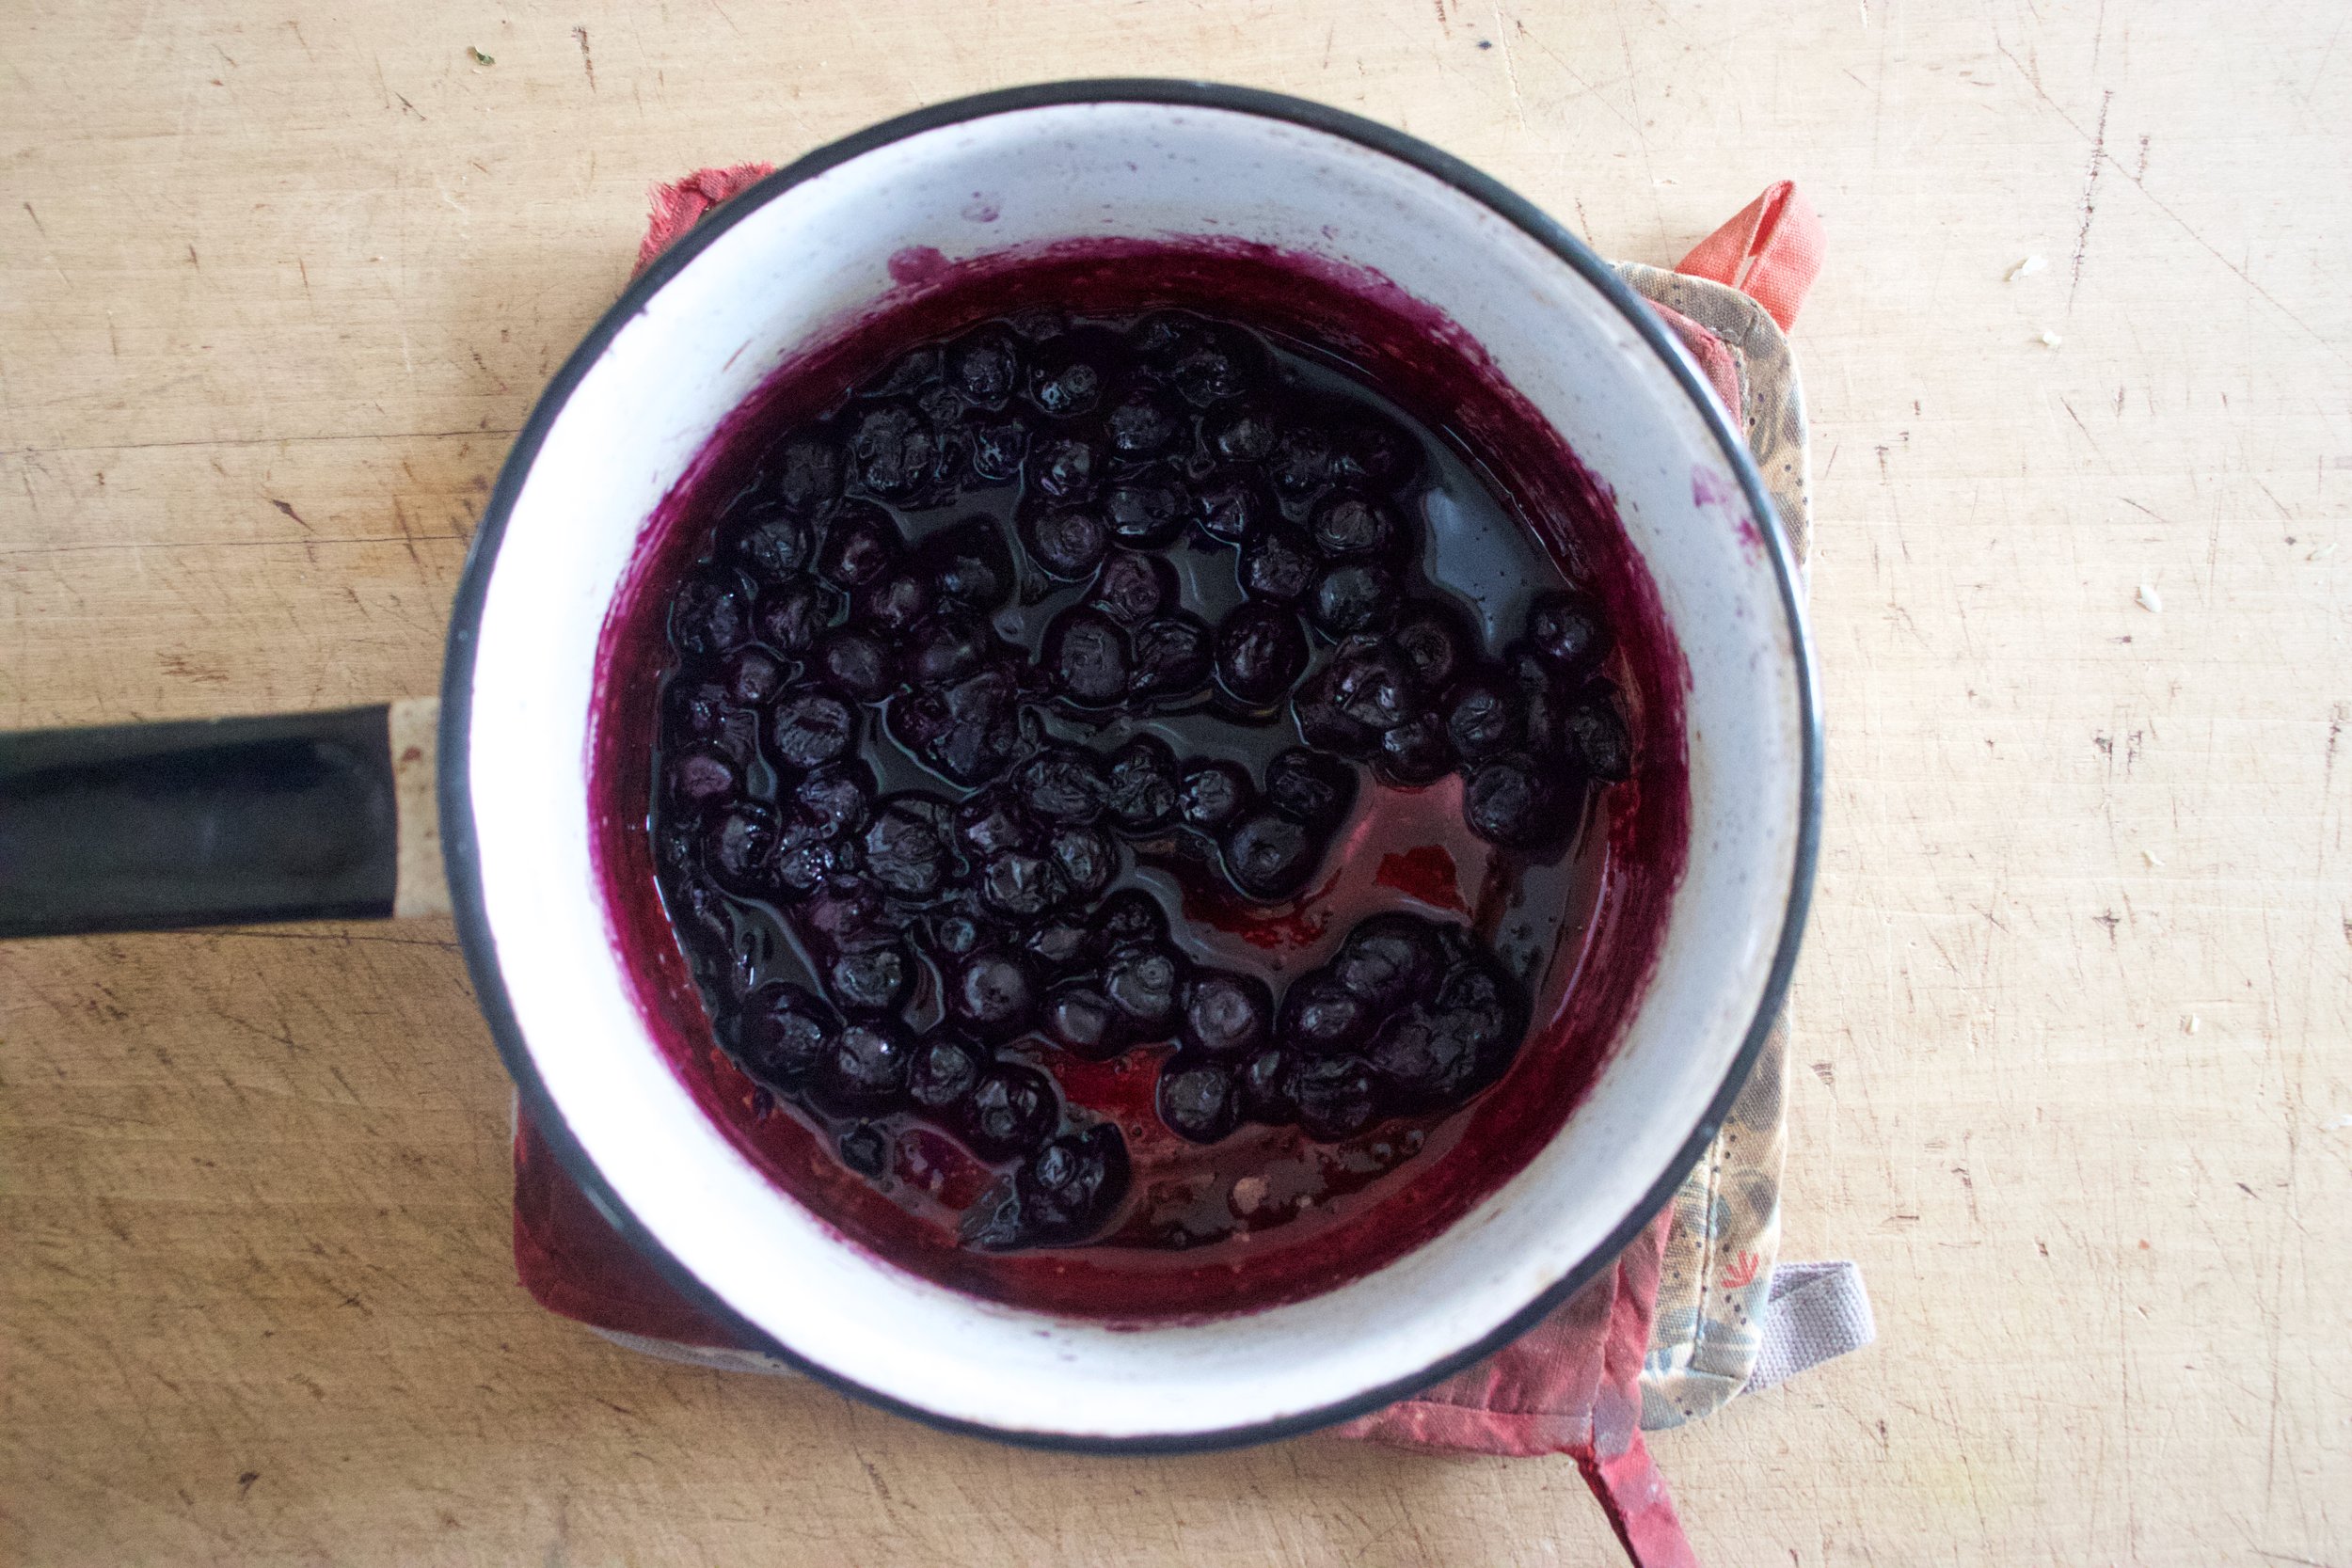
Start by adding the blueberries to a pot with the maple and a little water. Place on medium heat and cook until blueberries pop to the touch and the liquid has reduced to ta thin syrup like consistency.

IMG_8646.jpg
IMG_8651.jpg

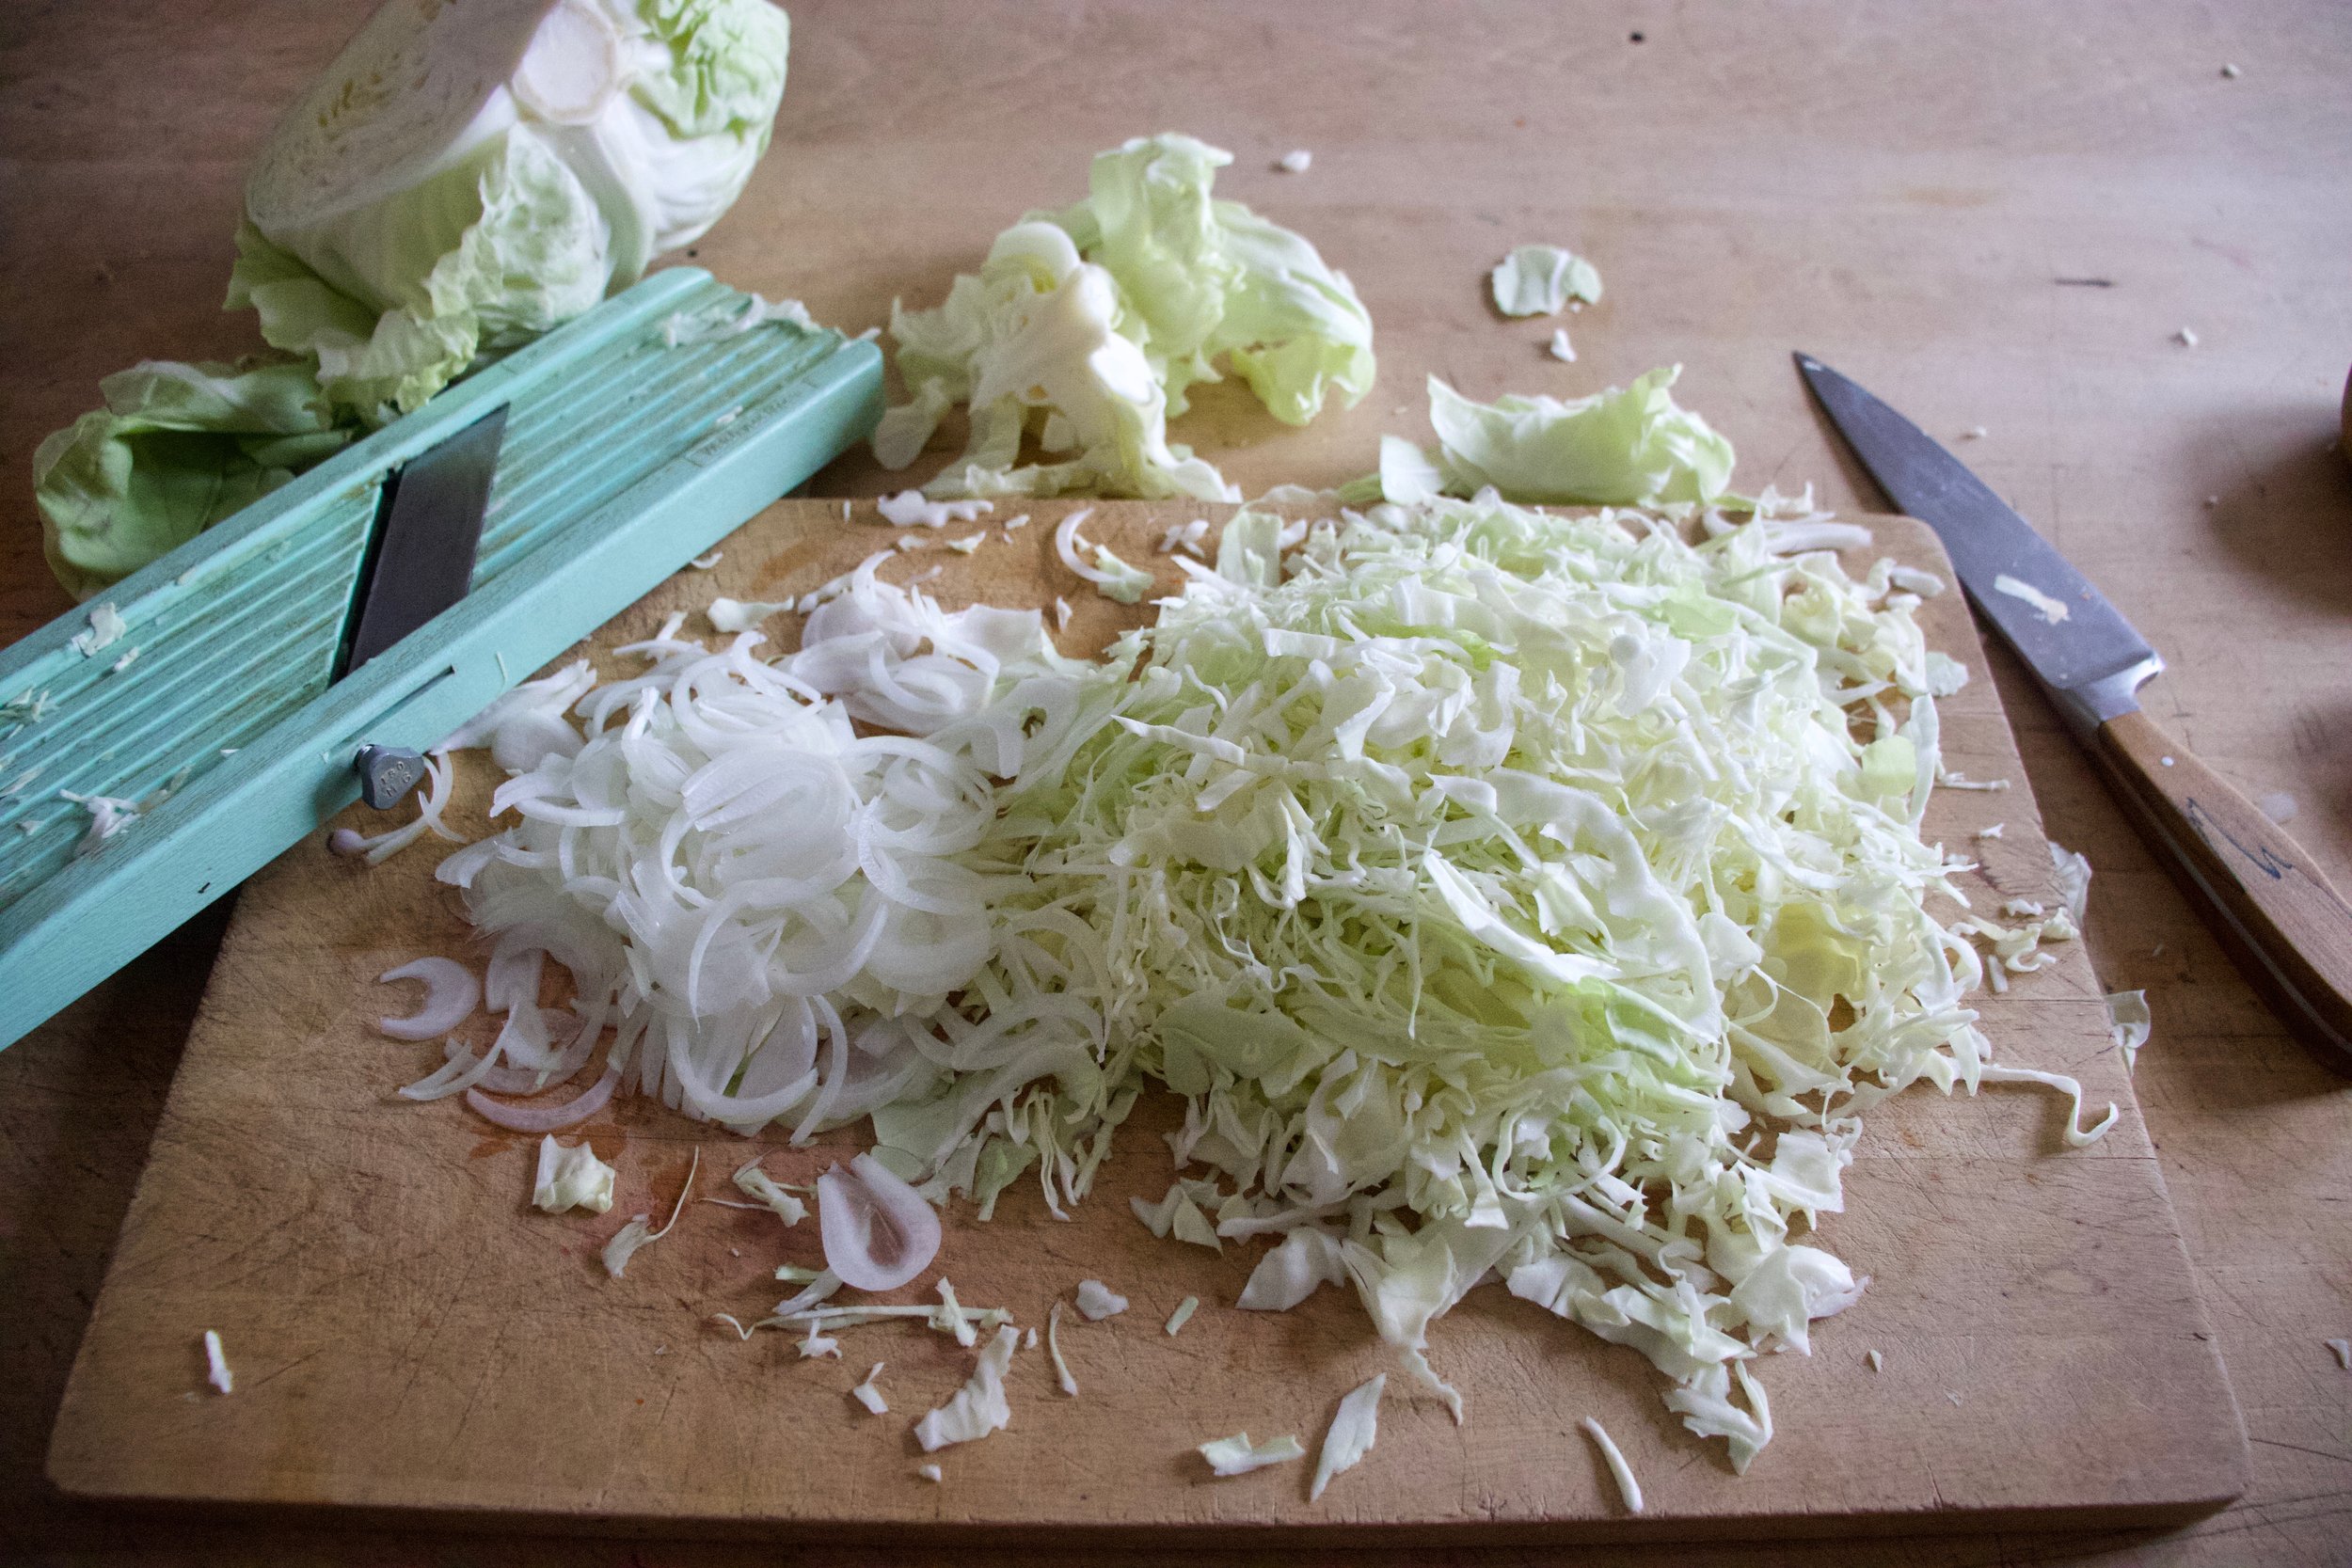
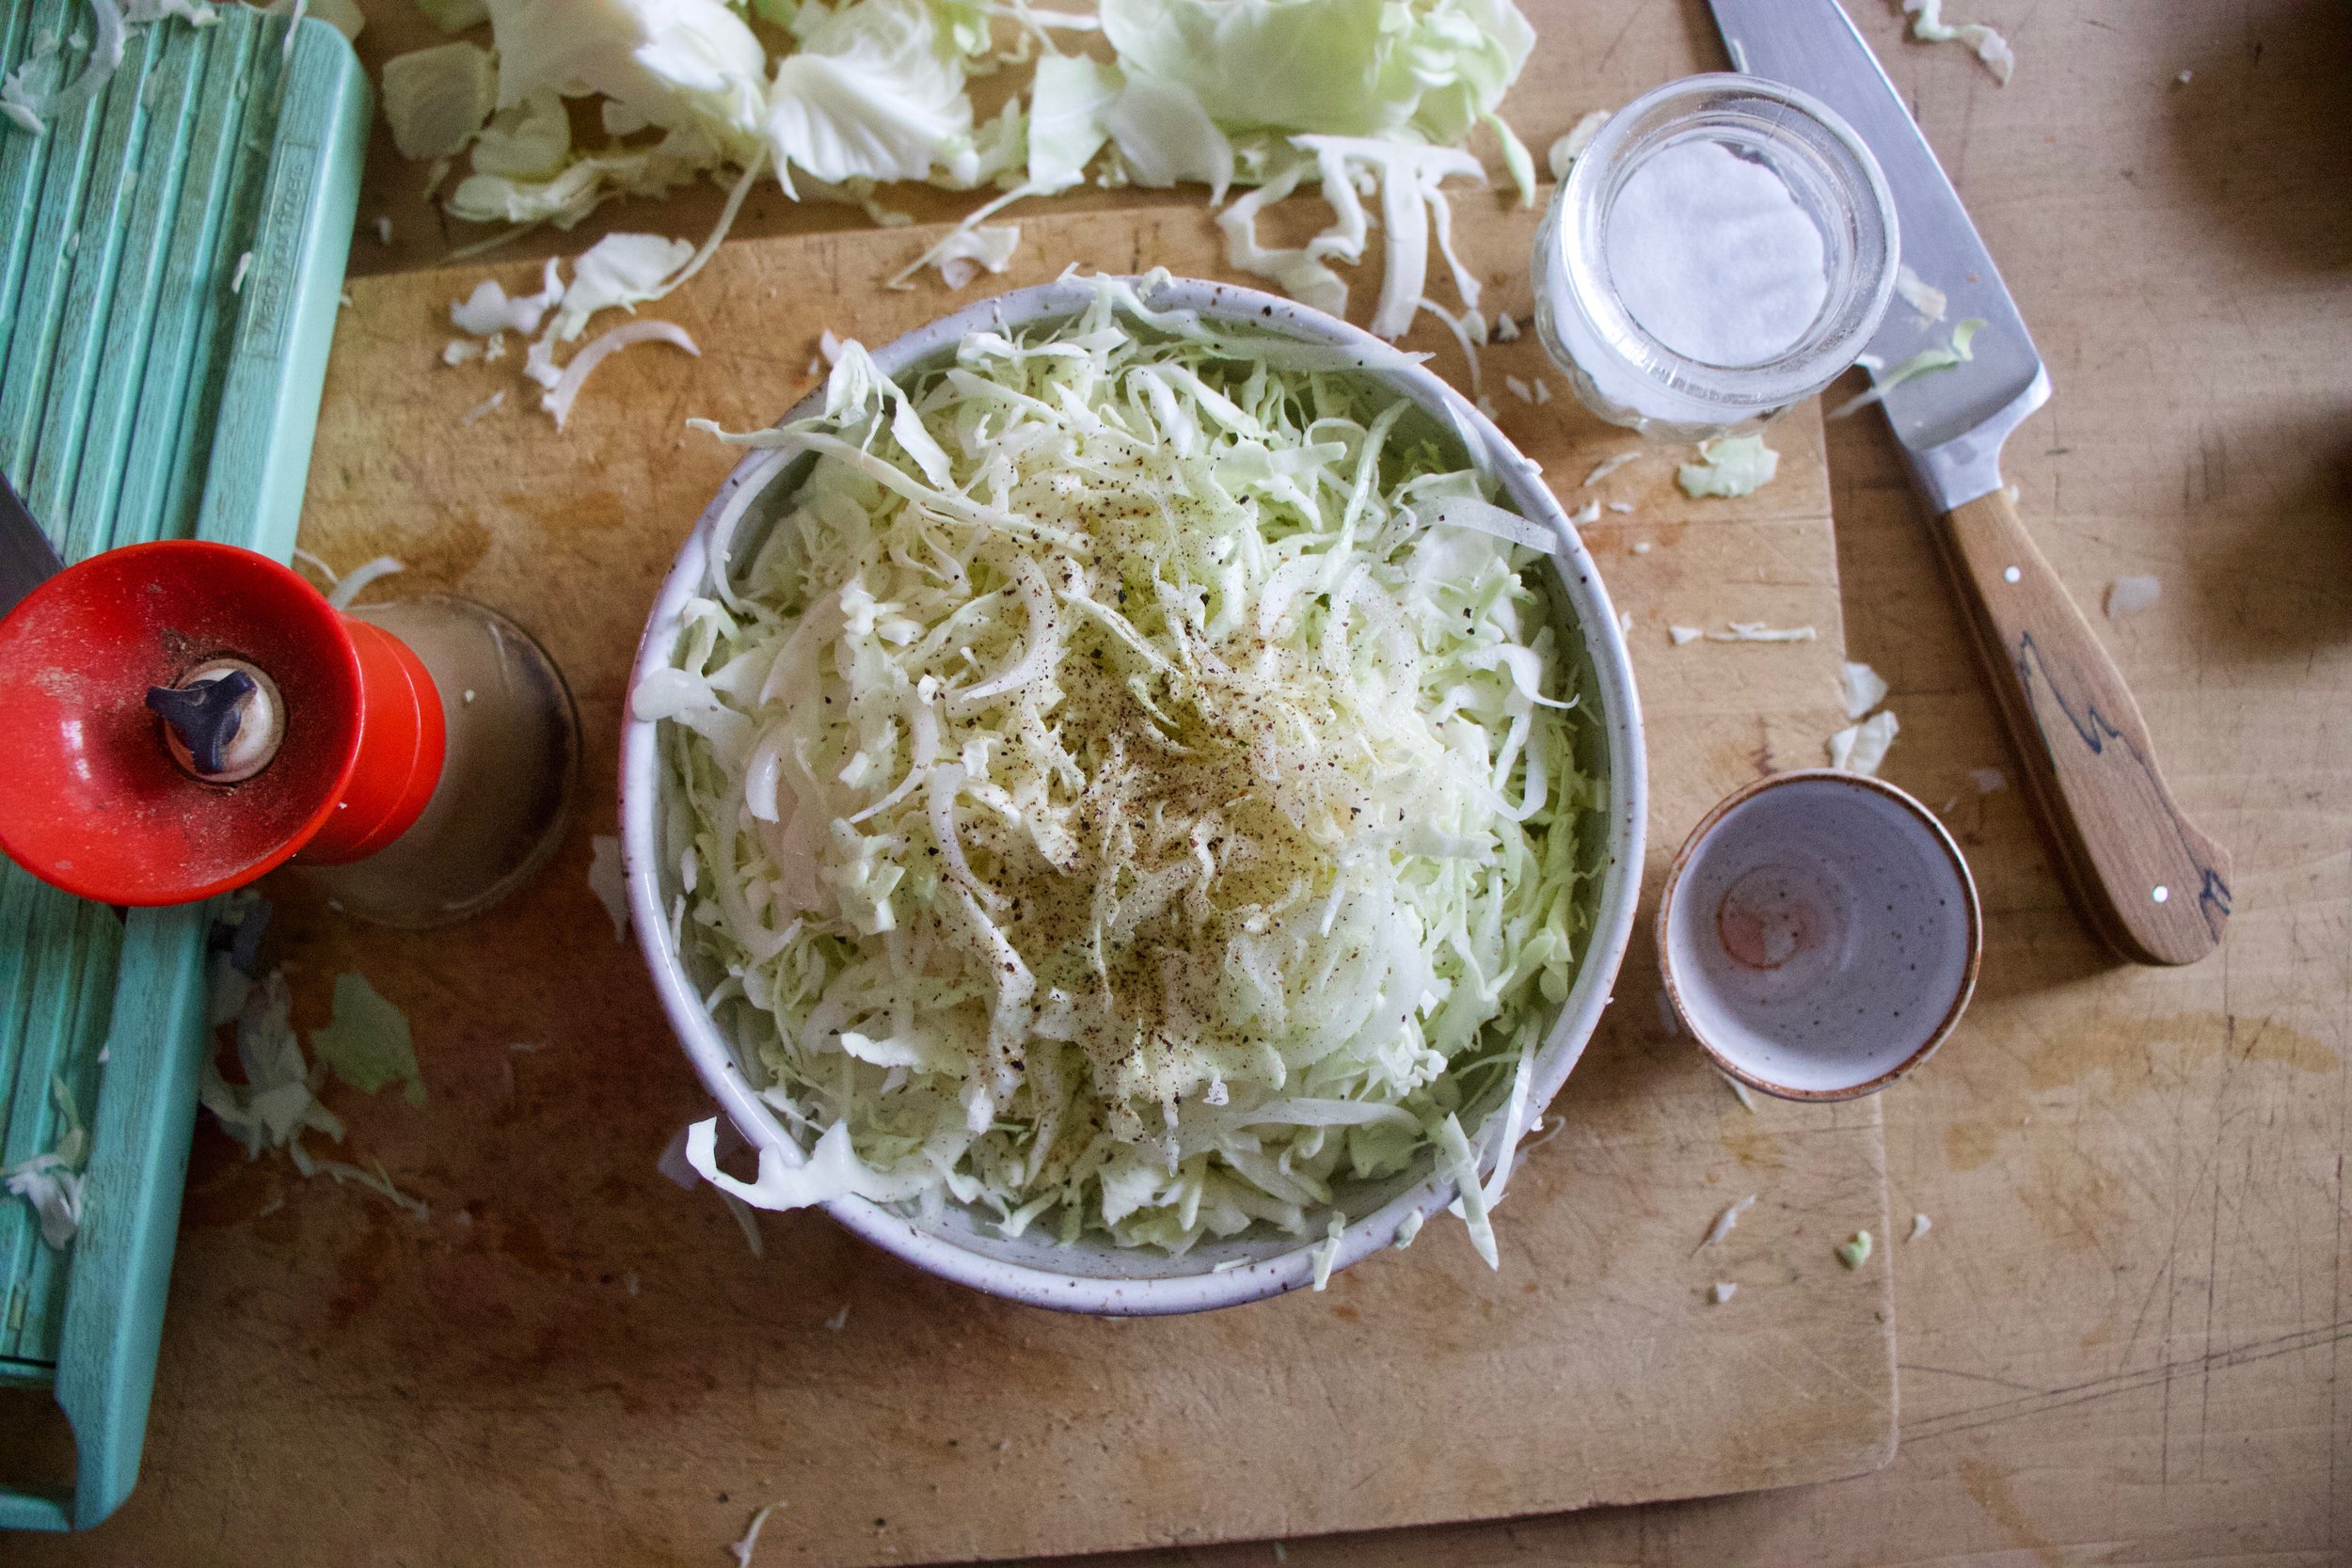
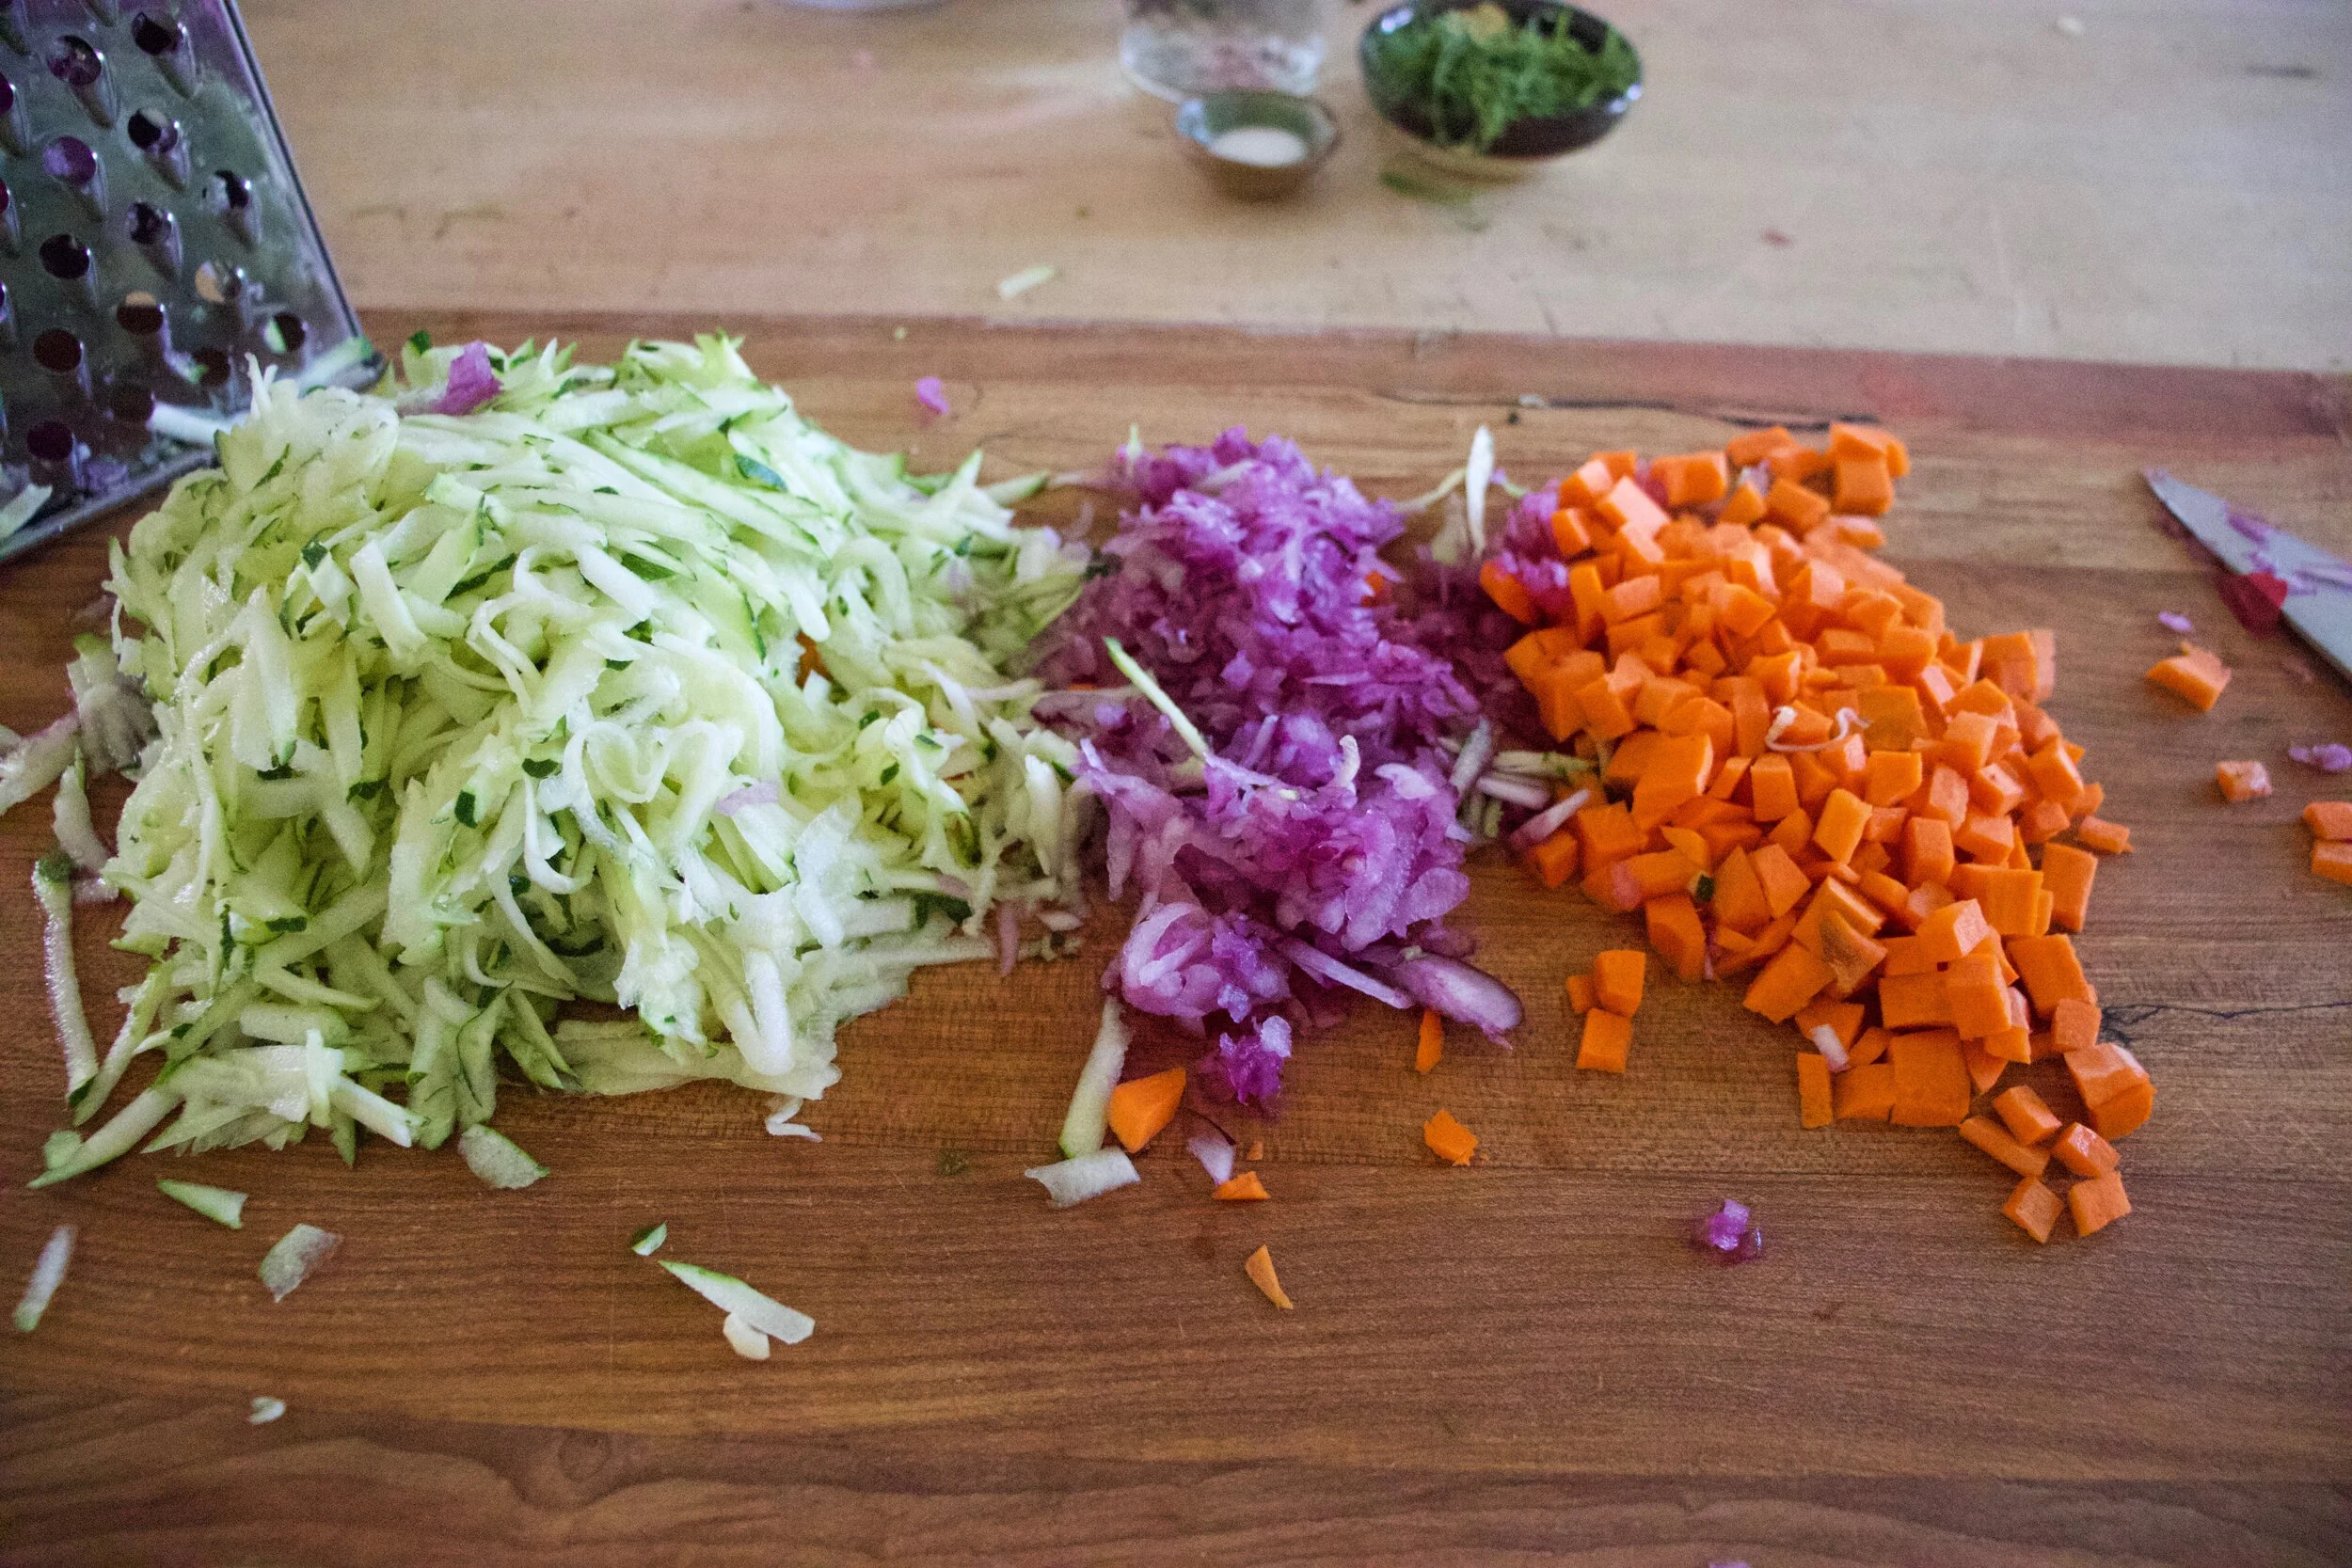
While blueberries are doing that, grab cabbage and shred as thin as you like. Also grab onion and slice a thin as you can. Place both into a big bowl and sprinkle with salt and pepper and red wine vinegar.

Take orange and cut in half. Remove peel and pith from one half and cut into small segments.

IMG_8666.jpg
IMG_8670.jpg

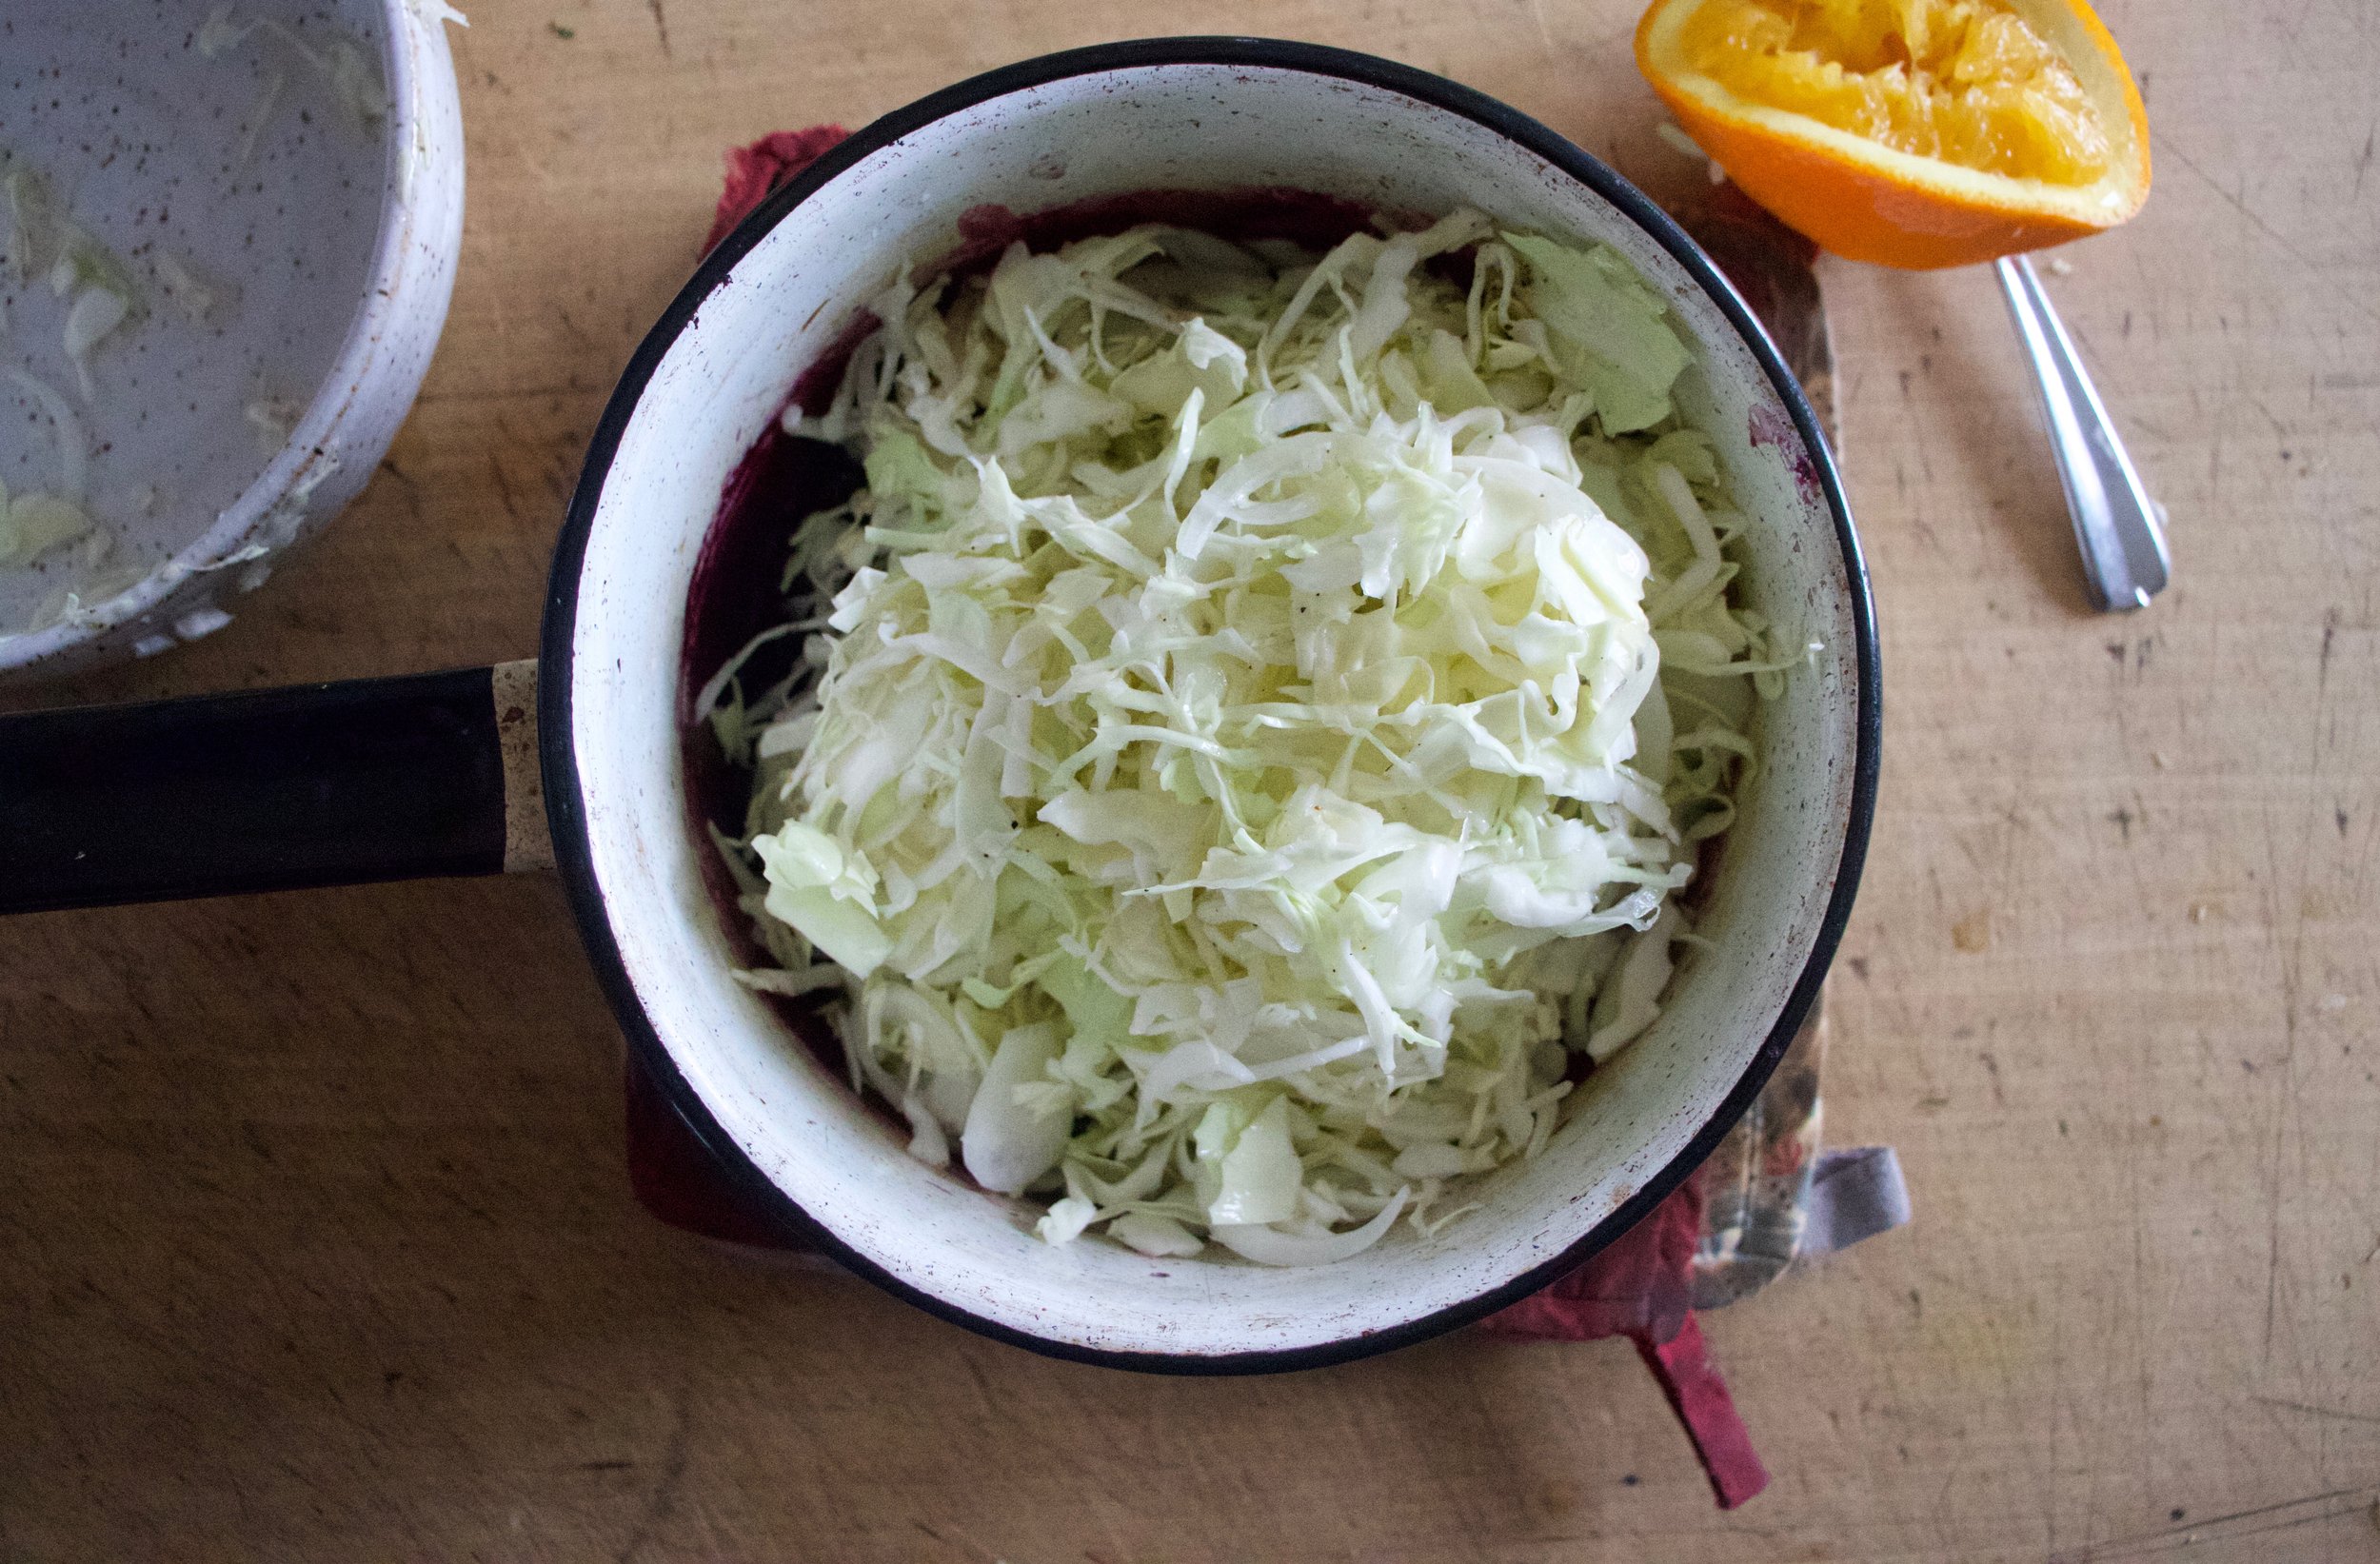
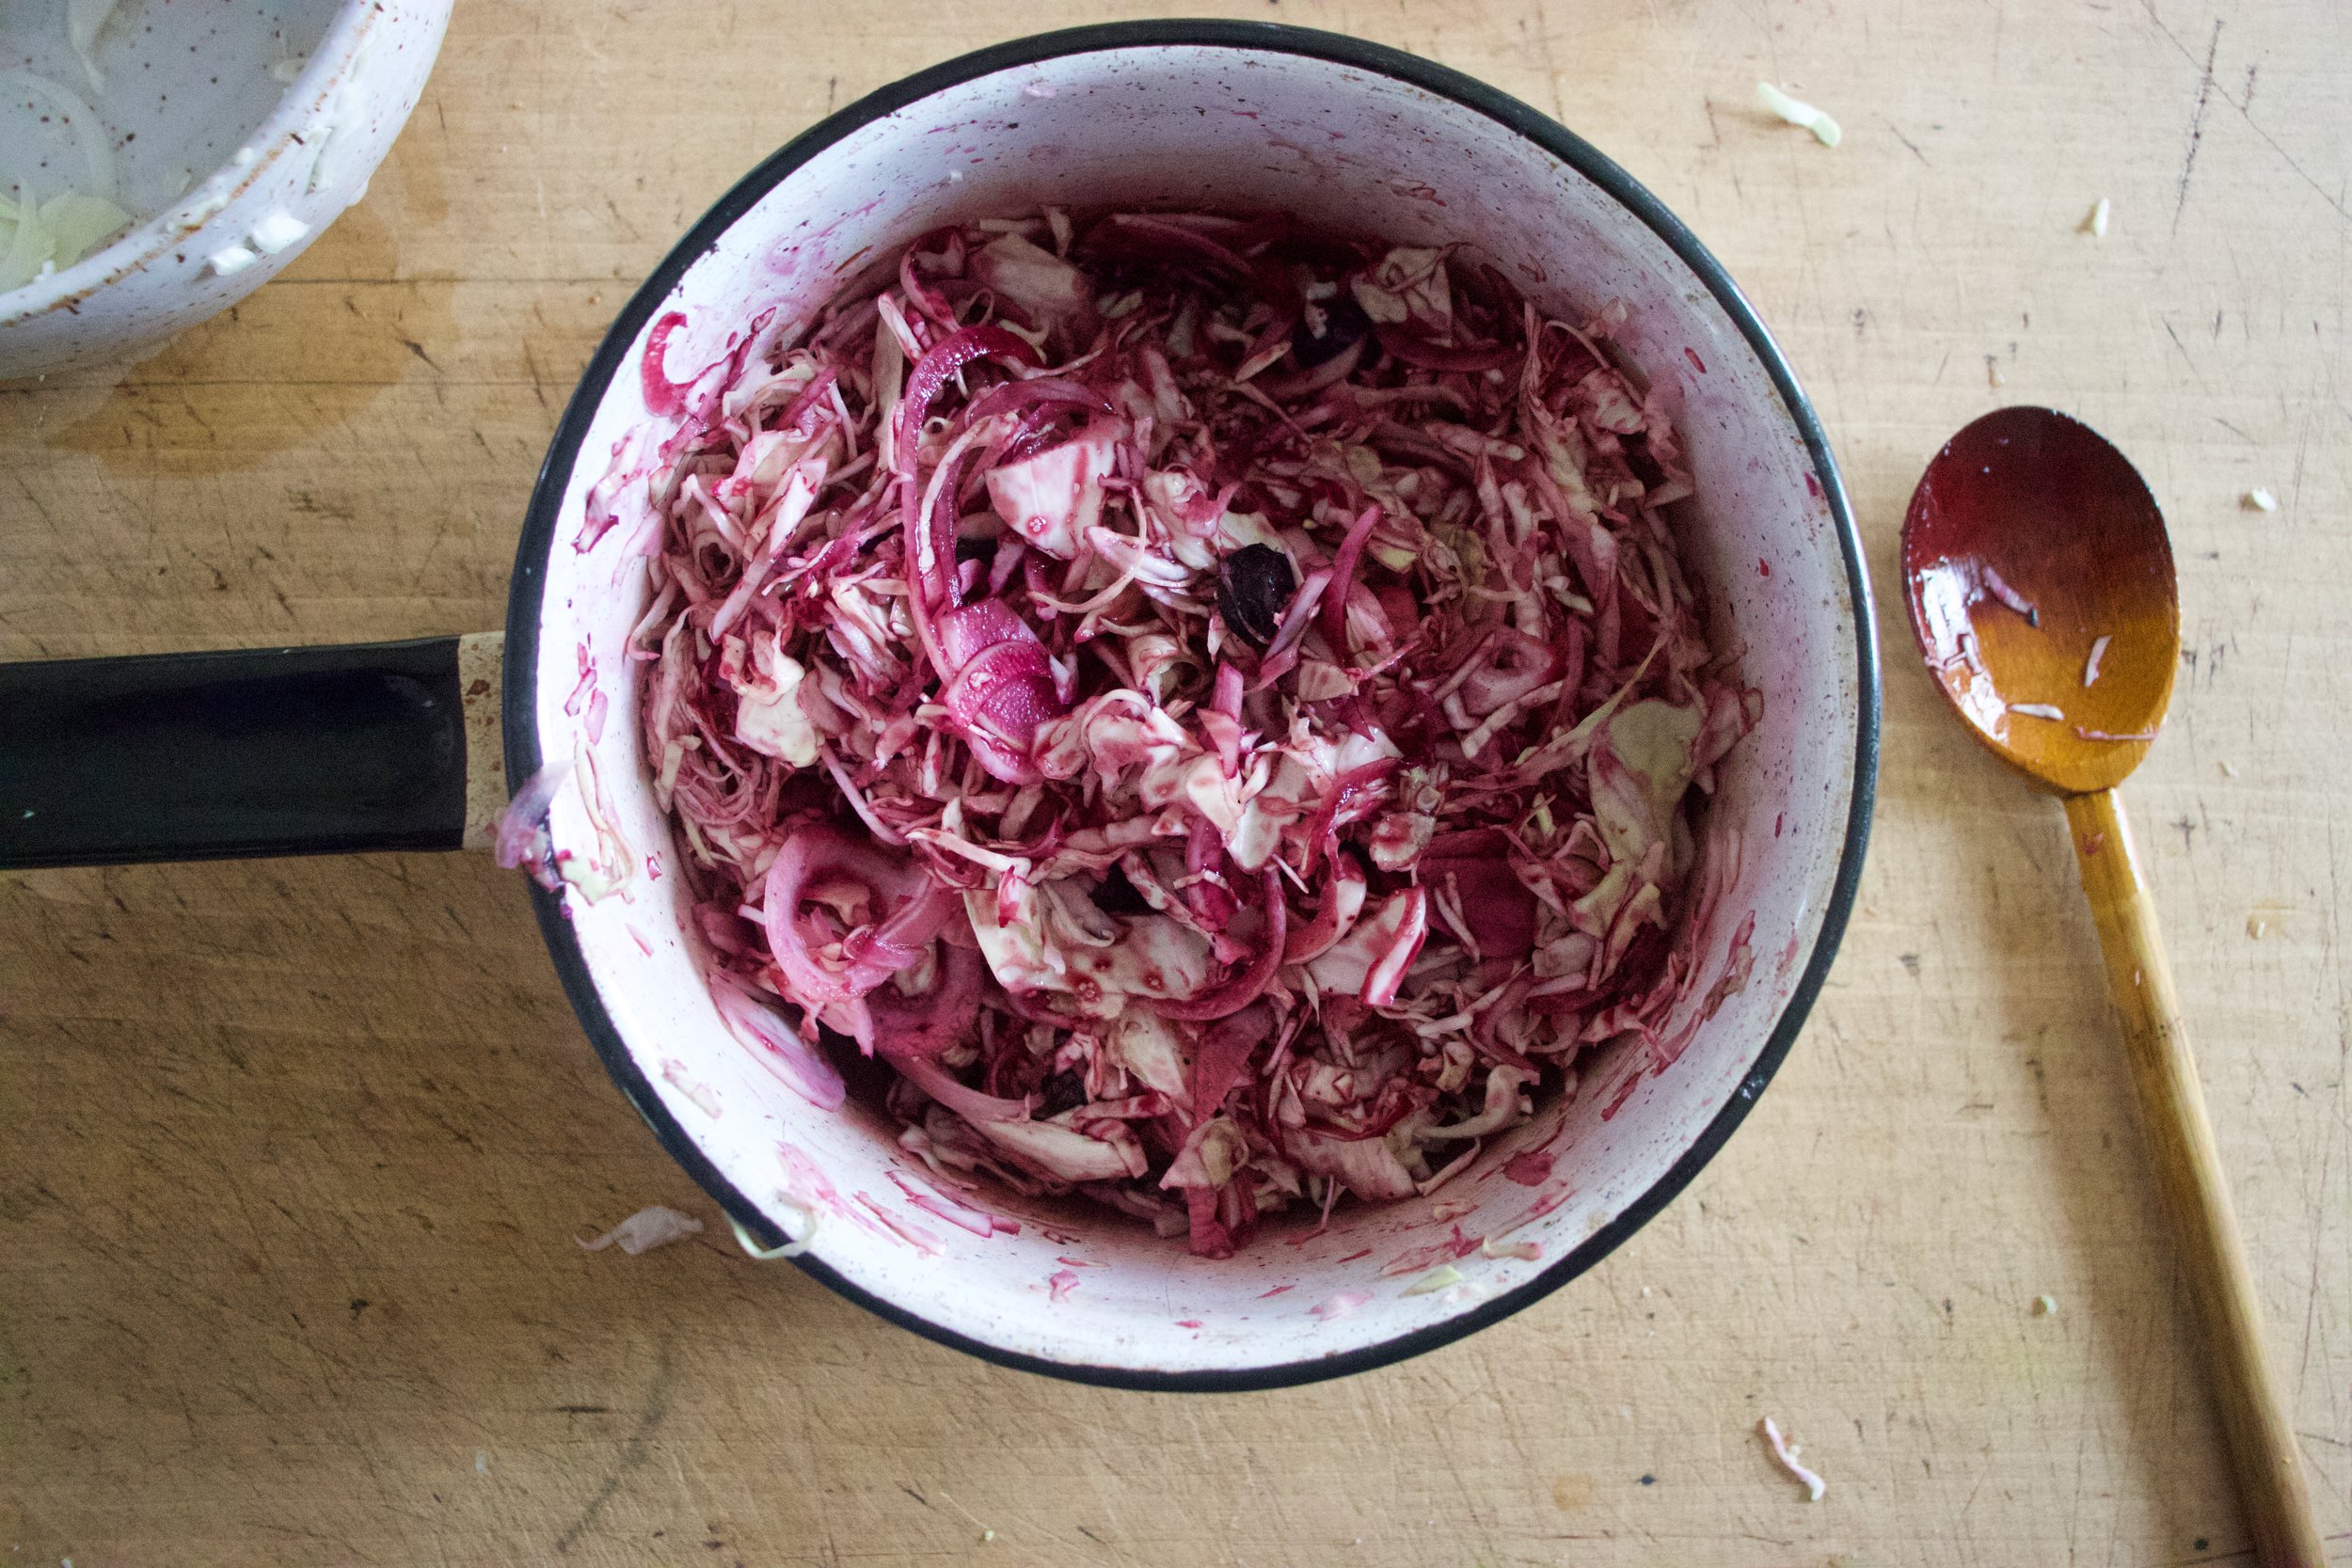
Once the blueberries are cooked, dump the cabbage and onion mixture into warm pot. Squeeze the juice of remaining half orange and toss around until everything is evenly coated.

Dump it all back into the bowl and add the orange pieces and pistachios.

Toss around, add in a pinch of red pepper flakes and eat away.

-C


Blueberry Orange and Pistachio Cabbage Salad

  • 4 cups shredded cabbage (about 1/2 a head)

  • 1 small onion

  • 1 1/2 cups frozen blueberries

  • 1/2 - 1 cup water

  • 2 teaspoons maple syrup

  • 1 orange

  • 2 tablespoon red wine vinegar

  • 1/2 cup pistachios

  • salt and pepper

  • red pepper flakes (optional)

Start by placing blueberries into a medium pot with 1/2 cup of water and maple. Place on medium heat and cook for about 8-10 minutes or until the blueberries pop to the touch and the liquid has reduced to a thin syrup. Remove from heat.

Grab cabbage and shred or cut into thin pieces. Also grab onion and cut into thin rings. Place into a bowl, add in a good pinch of salt and pepper and the vinegar and toss around. You can do this while the blueberries are cooking,

Now take the tossed cabbage and onion and dump into the pot of warm blueberries. Toss around unit everything is nice and purple and dump it all right back into the big bowl.

Cut orange in half and add the juice of one half. Take the other half and remove the peel and pith and cut remaining orange into small pieces.

Add orange and pistachios to the salad and toss. Season with more salt and pepper if needed and add a pinch or so of red pepper flakes.

Eat.

Can be serves warm or cool and left overs only taste better. Store in fridge in fridge for up to 5 days.

In salad, fruit Tags Blueberry Orange And Pistachio Cabbage Salad, vegan, plant based, salad, slaw, berries, pistachio, orange, fruit, vegetable, grain free, gluten free, dairy free, healthy
Comment

Roasted Celeriac and Squash with Apples and Onions

November 13, 2021 Colleen Stem

One of my most favorite root veggie has arrived in the farm share…Celeriac, also know as celery root and nothing has made me happier (with like food stuff)!. I know a lot of people do not know the deliciousness of the root and that makes me a little sad for them, but hopefully this simple little recipe inspires you to go get some and try it. Yeah sure it looks a little crazy, a little gnarly, but what do looks got to do with t? Celeriac taste like the best celery/apple/potato all mixed together but only better. And when it is roasted it gets nice a soft and just so freaking tasty. When I pick up my share, I make sure to get enough celeriac to eat a whole bulb a day.

So now that we all know how amazing celeriac is, we can roast it with some other amazing stuff. Squash, apples, and onions. All tossed together. All roasted til tender. All super delicious on their own but maybe even better together. A easy little dish that is perfect to make for a quiet evening at home, a mid day snack, breakfast, or to place on the table at any holiday meal. It is that versatile and really, you don’t need to have a specific reason to make it, just do. You won’t be sorry.

Now to all the roasted things!

The stuff. A large celeriac bulb, a small kobocha squash, a couple apples, a couple onions, apple cider vinegar, and salt and pepper.

IMG_7804.jpg
IMG_7805.jpg
IMG_7810.jpg
IMG_7823 2.jpg

First thing is to cut everything up. Cube the squash, celeriac, and apple to about the same size and the onion just cut into rings.

Toss all the cut up stuff onto a lightly oiled sheet pan, toss with a tablespoon or so vinegar and sprinkle a pinch of salt and pepper and place in the oven. Roast for about 1/2 hour, but flipping and drizzling another tablespoon or so of vinegar all over about 20 minutes in.

Roasted and done. Taste and season with more salt and pepper if needed.

Now scoop it all into big bowl and serve it or just eat it all to your very own face like I did. No shade in that.

-C


Roasted Celeriac and Squash with Apples and Onions

  • 1 large bulb (softball sized) of celeriac

  • a small winter squash (can use any variety. I used kabocha)

  • 2 medium apples (I used Macs)

  • 2 onions. Red, yellow, or one of each

  • salt and pepper

  • A couple tablespoons of apple cider vinegar

Preheat oven to 425

Grab squash and cut in half. Remove seeds then cut into cubes about 1/2 and inch thick. Grab celeriac and peel it if you want (I do not peel it) then cut into cubes the same size ad the squash. Now the apples. Cut in half, remove seeds, and cube. And lastly grab onions and slice into 1/2 thick rings.

Toss together all the cut up stuff and place onto a lightly oiled baking sheet and sprinkle with a couple tablespoons of vinegar and a pinch of salt and pepper. Stick the pan into the hot oven and roast for around 20 minutes, removing to give everything a flip and drizzle on another tablespoon of vinegar, then place back in oven for about another 10 minutes or so or until everything is lightly browned and fork tender.

Remove form oven and transfer into a big bowl. Serve right away or at room temperature or heck, it taste freaking awesome cold too.

Tags celeriac, celery root, vegan, vegetable, thanksgiving, fall, side, side dish, snack, healthy, plant based, dairy free, gluten free, squash, winter, apple, onion, easy, simple, fast, food52, bon appetite
Comment

Just Freeze the Tomatoes

September 11, 2021 Colleen Stem
IMG_4170.jpg

Do you have a shit ton of tomatoes? Do you not have the capacity in you body to eat them all fresh or the will or desire or time to can them but really want to save some tomatoes for later? Well you know you can just freeze them right?

Yup. You don’t have to do anything fancy, pretty much anything at all. Just wash, remove any green stuff, then pop the whole tomatoes (any variety, large or small and tomatillos for that matter. Just remove the papery skin.) into a freezer bag or airtight freezer container and stick in the freezer. That is it.

IMG_4657.jpg
IMG_4658.jpg

Then all winter long (or until you run out) you will have peak summer tomatoes right there ready to be dropped into soup, roasted into deliciousness , simmered into a thick and luscious sauce, or do whatever the heck you usually do with tomatoes besides eating them fresh. I mean, you can even eat them frozen too. Not a bad little snack if I do say so myself.

Happy tomato-ing!

-C

In kitchen tips, Vegetables, Vegan, fruit, summer Tags tomatoes, freeze tomatoes, canning, no can, summer, produce, vegetable, fruit, easy, no waste
Comment

It’s Hot Out. Make some Popsicles.

July 10, 2021 Colleen Stem
image-asset-4.jpeg
image-asset-3.jpeg
image-asset-1.jpeg
image-asset.jpeg
image-asset-5.jpeg
image-asset-2.jpeg

It is hot out Dumb hot. What do you do to stay cool? Me? Well besides spending my time splayed out on the kitchen floor (it’s the coolest spot in the house), I like to eat frozen food, sometimes in the form of popsicles. And it has been freaking stupid hot way too much already this year and I haven’t made nearly enough popsicles. That ends now. Dealing with the heat sucks and I deserve a freaking popsicles and so do you.

Here are a few of my favorites.

  • Roasted Banana Strawberry Popsicles

  • Avocado Mango Popsicles

  • Carrot Ginger Orange Popsicles

  • Toasted Coconut And Corn Popsicles

  • Rhubarb Popsicles

  • Pineapple Cucumber Spinach Popsicles

Next week I’ll share one of my new favorite, a sweet potato fudgesicle. I was going to share it this week but I ended up eating the frozen sweet potatoes that I had intended to use. Oops.

Stay cool. Eat popsicles!.

-C

In frozen, Popsicles, Vegan Tags popsicles, summer, stay cool, heat wave, vegan, frozen, healthy, plant based, fruit, homemade, vegetable, roundup, recipes
Comment

Zucchini Dill Empanadas

June 19, 2021 Colleen Stem
IMG_6054.jpg
IMG_5986.jpg
IMG_6004.jpg

YAY for the first zucchinis of the season! Zucchini is one of the main reasons I tolerate summer. Sure I complain a lot about being hot all time and the sun being just too freaking bright but the zucchini helps make it all worth dealing with.

Empanadas. Little hard pies. A perfect little vessel to stuff some zucchini into. Add some dill and it makes it all the better. I mean who wouldn't a zucchini and dill stuffed pastry on a warm summer afternoon (or whatever time you feel like eating). They are super easy to make, light and crispy, and are little pies of zucchini. What is not to like? Plus they require no utensils to eat them . Think about it, Make batch, throw them into a picnic basket and head to a nice little grassy patch under a tree. Doesn't that sound just so nice? That does sound nice. Why didn't I do that? Oh because I was busy being pissy because I made a perfect batch and while letting them cool off in the oven for a few minutes I accidentally turned on the broiler and burnt a few. But whatever, the mr actually really liked them burnt so no harm no foul, But next time I make them it will definitely be for a picnic.

Now to the zucchini dill empanadas!

IMG_5851.jpg

The stuff. Zucchinis, a carrot and a onion, some dill and ground ginger, salt and pepper, water, oil, flour, and baking powder.

IMG_5862.jpg

Start with making the filling. Chop the carrots into little cubes then grate up the onion and zucchinis.

IMG_5869.jpg

Gather the zucchini and onion into a tea towel (or cheese cloth) and squeeze out he excess liquid. ( I squeezed it into the dough mixture)

IMG_5892.jpg
IMG_5901.jpg

dump the zucchini and onion into a heated and lightly oiled skillet. Add in the carrots, the ginger and dill, and a good pinch of salt and pepper. mix around a cook until the zucchini has gone cooked down and the carrots are slightly tender. Remove from heat.

IMG_5905.jpg
IMG_5907.jpg

Now make the dough. Ad the wet the dry and mix around unit a shaggy dough form then knead it for about a minute and place in a clean bowl covered with a towel to rest for 15 or so minutes.

IMG_5910.jpg
IMG_5919.jpg

After the dough has rested, dump into counter, pat into a disk and cut into 12 equal pieces.

IMG_5924.jpg

Then roll each piece into a ball. Take a ball and on a lightly floured surface, roll out into a disk.

IMG_5930.jpg
IMG_5931.jpg
IMG_5939.jpg

Then add the filling, A couple heading tablespoons of cooled filling go Into the middle. Have a little bowl or water and dip a finger into the bowl and run wet finger around the edge od dough. Fold the filed disk in half and lightly press the dough together. Now you can either try to twist the edges or just crimp them with a fork. Take a knife and cut a little steam vent into he top the place onto a baking sheet. Repeat until all empanadas are made.

IMG_5942.jpg

Brush tops with a little oiled sprinkle with pepper. Pop into the oven to bake.

IMG_5964.jpg

Pro tip. Don’t accidentally turn on the broiler right before you pull them out (especially if they were perfect. But in all honesty the mr liked the burnt ones so whatever.) Once they are nice and golden brown, pop them out of the oven.

IMG_6023.jpg

Now toss them onto a plate and start feeding your face. No utensils required. Dipping sauce is up to you.

-C


Zucchini Dill Empanadas

makes 12

For dough

  • 2 1/4 cups all-purpose flour

  • 1/2 teaspoon salt

  • 1/2 teaspoon baking powder

  • 1/3 cup vegetable oil

  • 1/2 cup cold water

Filling

  • 2 small zucchinis (3 packed cups grated)

  • a small onion

  • a carrot

  • 2 tablespoons fresh or 1 tablespoon dried dill

  • 1/2 teaspoon ground ginger (optional)

  • salt and pepper

  • vegetable oil

Start with making the filling. Chop the carrot into small little cubes then shred the zucchini and onion on a box grater. Gather the zucchini and onion and place in a clean tea towel of cheese cloth and ring to excess liquid. Place the carrot and the zucchini and onions into a preheated and lightly oiled skillet. Add in the dill, ginger, and a pinch of salt and pepper. Cook down for 7-9 minutes or until zucchini has lost a lot of liquid and the carrot pieces are fork tender. Remove from heat and let cool.

Make dough. Place the dry ingredients into a bowl and mix around. Add in the water and oil and mix until it comes together into a shaggy dough. Dump out onto counter and knead for about a minutes them place dough back into the bowl ( wipe it out) and cover with a towel. Let dough rest for 15 or so minutes.

Preheat oven to 375.

Once dough has rested, plop onto counter, pat into a disk shape, then cut into 12 equal pieces and roll each piece into a ball. Lightly flour the counter and start to roll each ball out into a round disk about 4-5 inches wide. You can one at a time and fill it or roll them all out and fill all at the same time.

To fill, take about 2 heaping teaspoons of the cooled filling and place in the center of the rolled out disk. dip your finger into water and and run it around the edge of the dough then fold in half and lightly press the edge together. Then either twist the edge or crimp the edge with a fork. Take a knife and cut a small slit into the top then place on a baking sheet. Once all the empanadas are on the sheet, lightly brush the tops with oil and sprinkle with black pepper. Pop into the oven and bake for 20 -25 minutes or unit the empanadas are a nice golden brown.

Remove from oven. Eat while hot.

Place any left overs in a container in the fridge for 5-7 days. Reheat in oven or toaster oven.

In Savory, summer, Vegan, Vegetables, pie Tags Zucchini Dill Empanadas, vegan, plant based, empanada, dill, summer, zucchini, easy, home made dough, fresh, dairy free, vegetable, hand pie
2 Comments
Older Posts →
 

https://thelovelycrazy.squarespace.com/config#/|/about/

Me. Food Maker.Food eater. Woo HOO!

STEM+NODE  SMALL BATCH AND ONE OF A KIND POTTERY

stem+node ceramics


____________________

Subscribe

GET NEW POSTS IN YO EMAIL

You are AWESOME!!!


@thelovelycrazy 2014-2021