• stem+node ceramics
  • HOME
  • Food Recipes
  • About
  • Contact
Menu

The Lovely Crazy

Street Address
City, State, Zip
Phone Number

Your Custom Text Here

The Lovely Crazy

  • stem+node ceramics
  • HOME
  • Food Recipes
  • About
  • Contact

Carrot Cake with Salted Date Sauce

March 26, 2016 Colleen Stem
IMG_1590.jpg
IMG_1578.jpg

As a kid, my favorite holiday was Easter. Every year my parents would fill up brightly colored plastic baskets with handfuls of neon colored plastic "grass" and top it with all sorts of candy, coloring books, bubble, and sidewalk chalk. They were beautiful and amazing.  It was like getting a basket of fun and a bunch of sugary candy to keep you going to have all that fun all day long. And the egg hunts. Plastic eggs full of candy hidden all over the house ans yard. We would all have our emptied out baskets running around full of excitement, ready to take out any sibling in our path just to be the one to get the next egg. We were ruthless and I am pretty sure every year someone would end up crying. Now, as an adult, I am not allowed to participate in the egg hunt. (but I still try to make my sibling cry)  Nope, now I get to hide the eggs and sit back and watch the new generation of littles tripping each other and stealing eggs from one another. The carnage!

And also at Easter there is cake. Is there a rule that says you have to make carrot cake for Easter? I think there must be because it is when everyone and their moms busts this cake out. And everyone's carrot cake it the best because they made it the right way, like with raisins or pineapple or walnuts. There are so many things that can be added to this cake that it's a little overwhelming. So I made a carrot cake that was mainly about the carrots. Nothing added, no nuts raisins or coconut (although you could add i if you wanted) and it's made into a pretty bundt cake, which in turn makes mine the best.

This here cake was destined for tomorrows Easter table. I made it with no nut produces cause the nephew has the deadly nut allergy. But when I went and made the date sauce, I kinda let that slip and used almond milk. Oops. So now I have a whole big carrot cake sitting on the counter with it's destiny shattered. So sad, but I think its will survive cause the mris really into it and has already eaten a few pieces. I figure that because it's a carrot cake, he can eat a few more. It's almost like eating a vegetable....almost. And now I need to make a new cake to bring over or I might just stop at the store and buy some oreos on my way over tomorrow. The littles will like that.

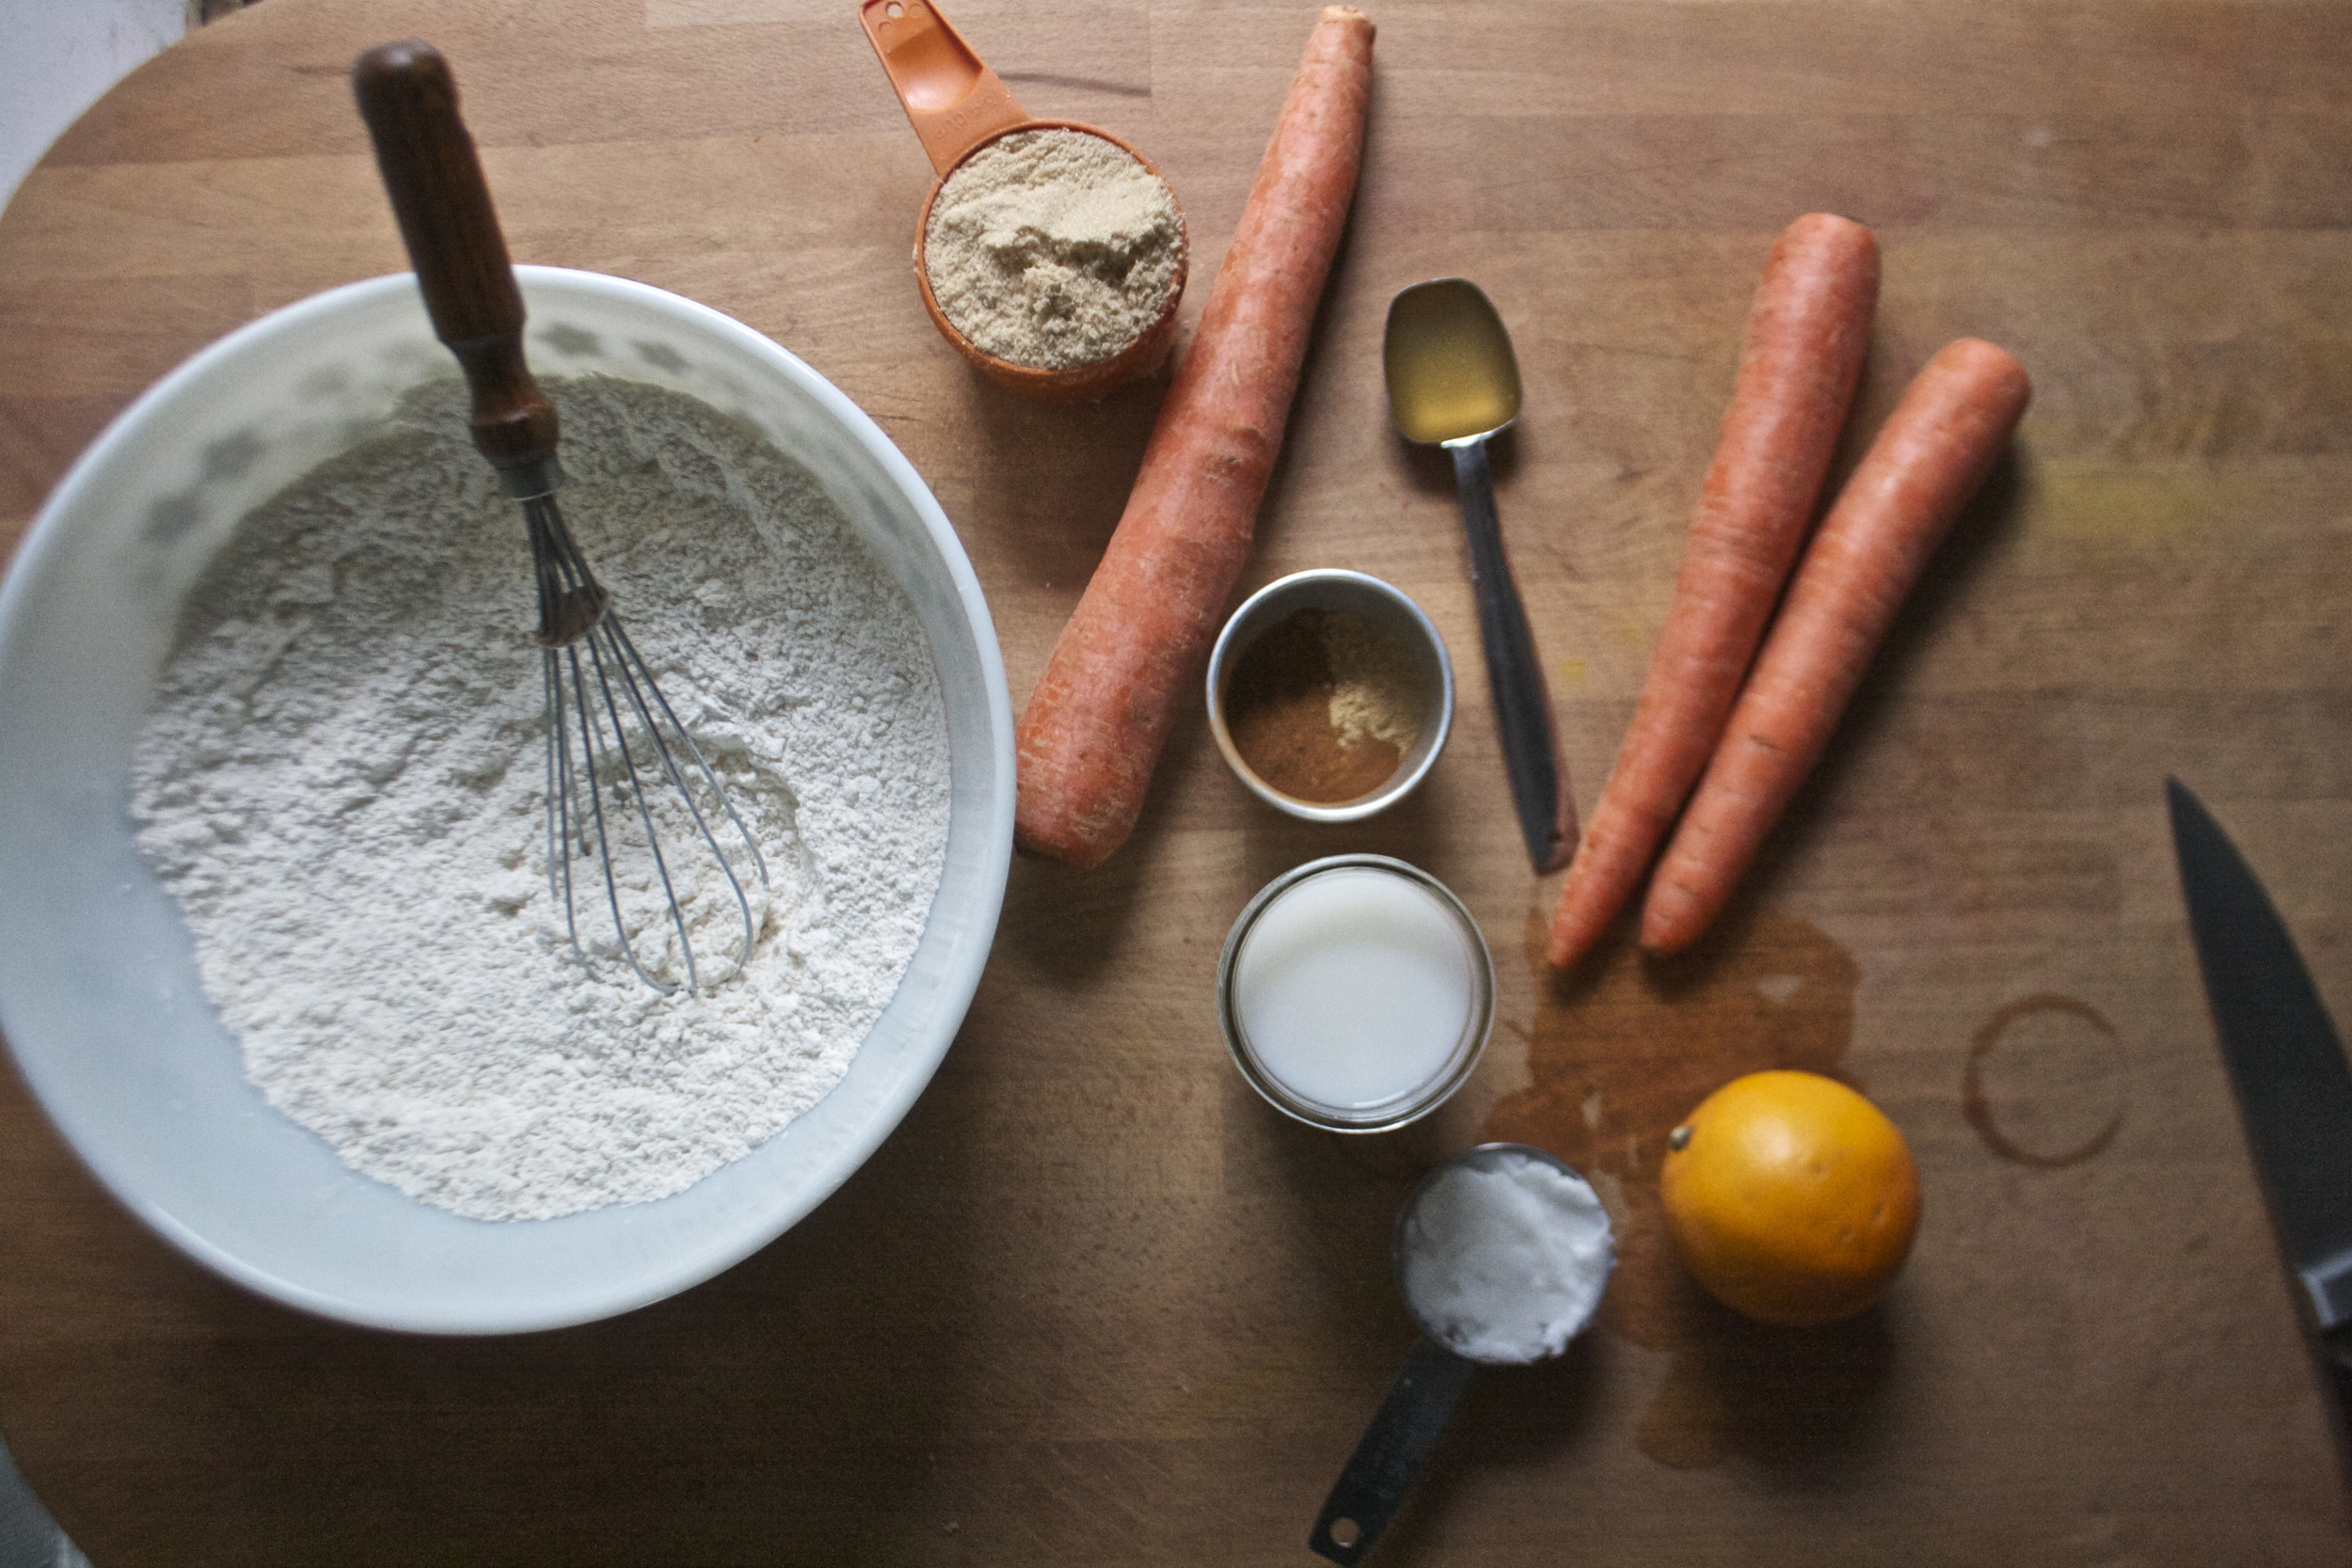
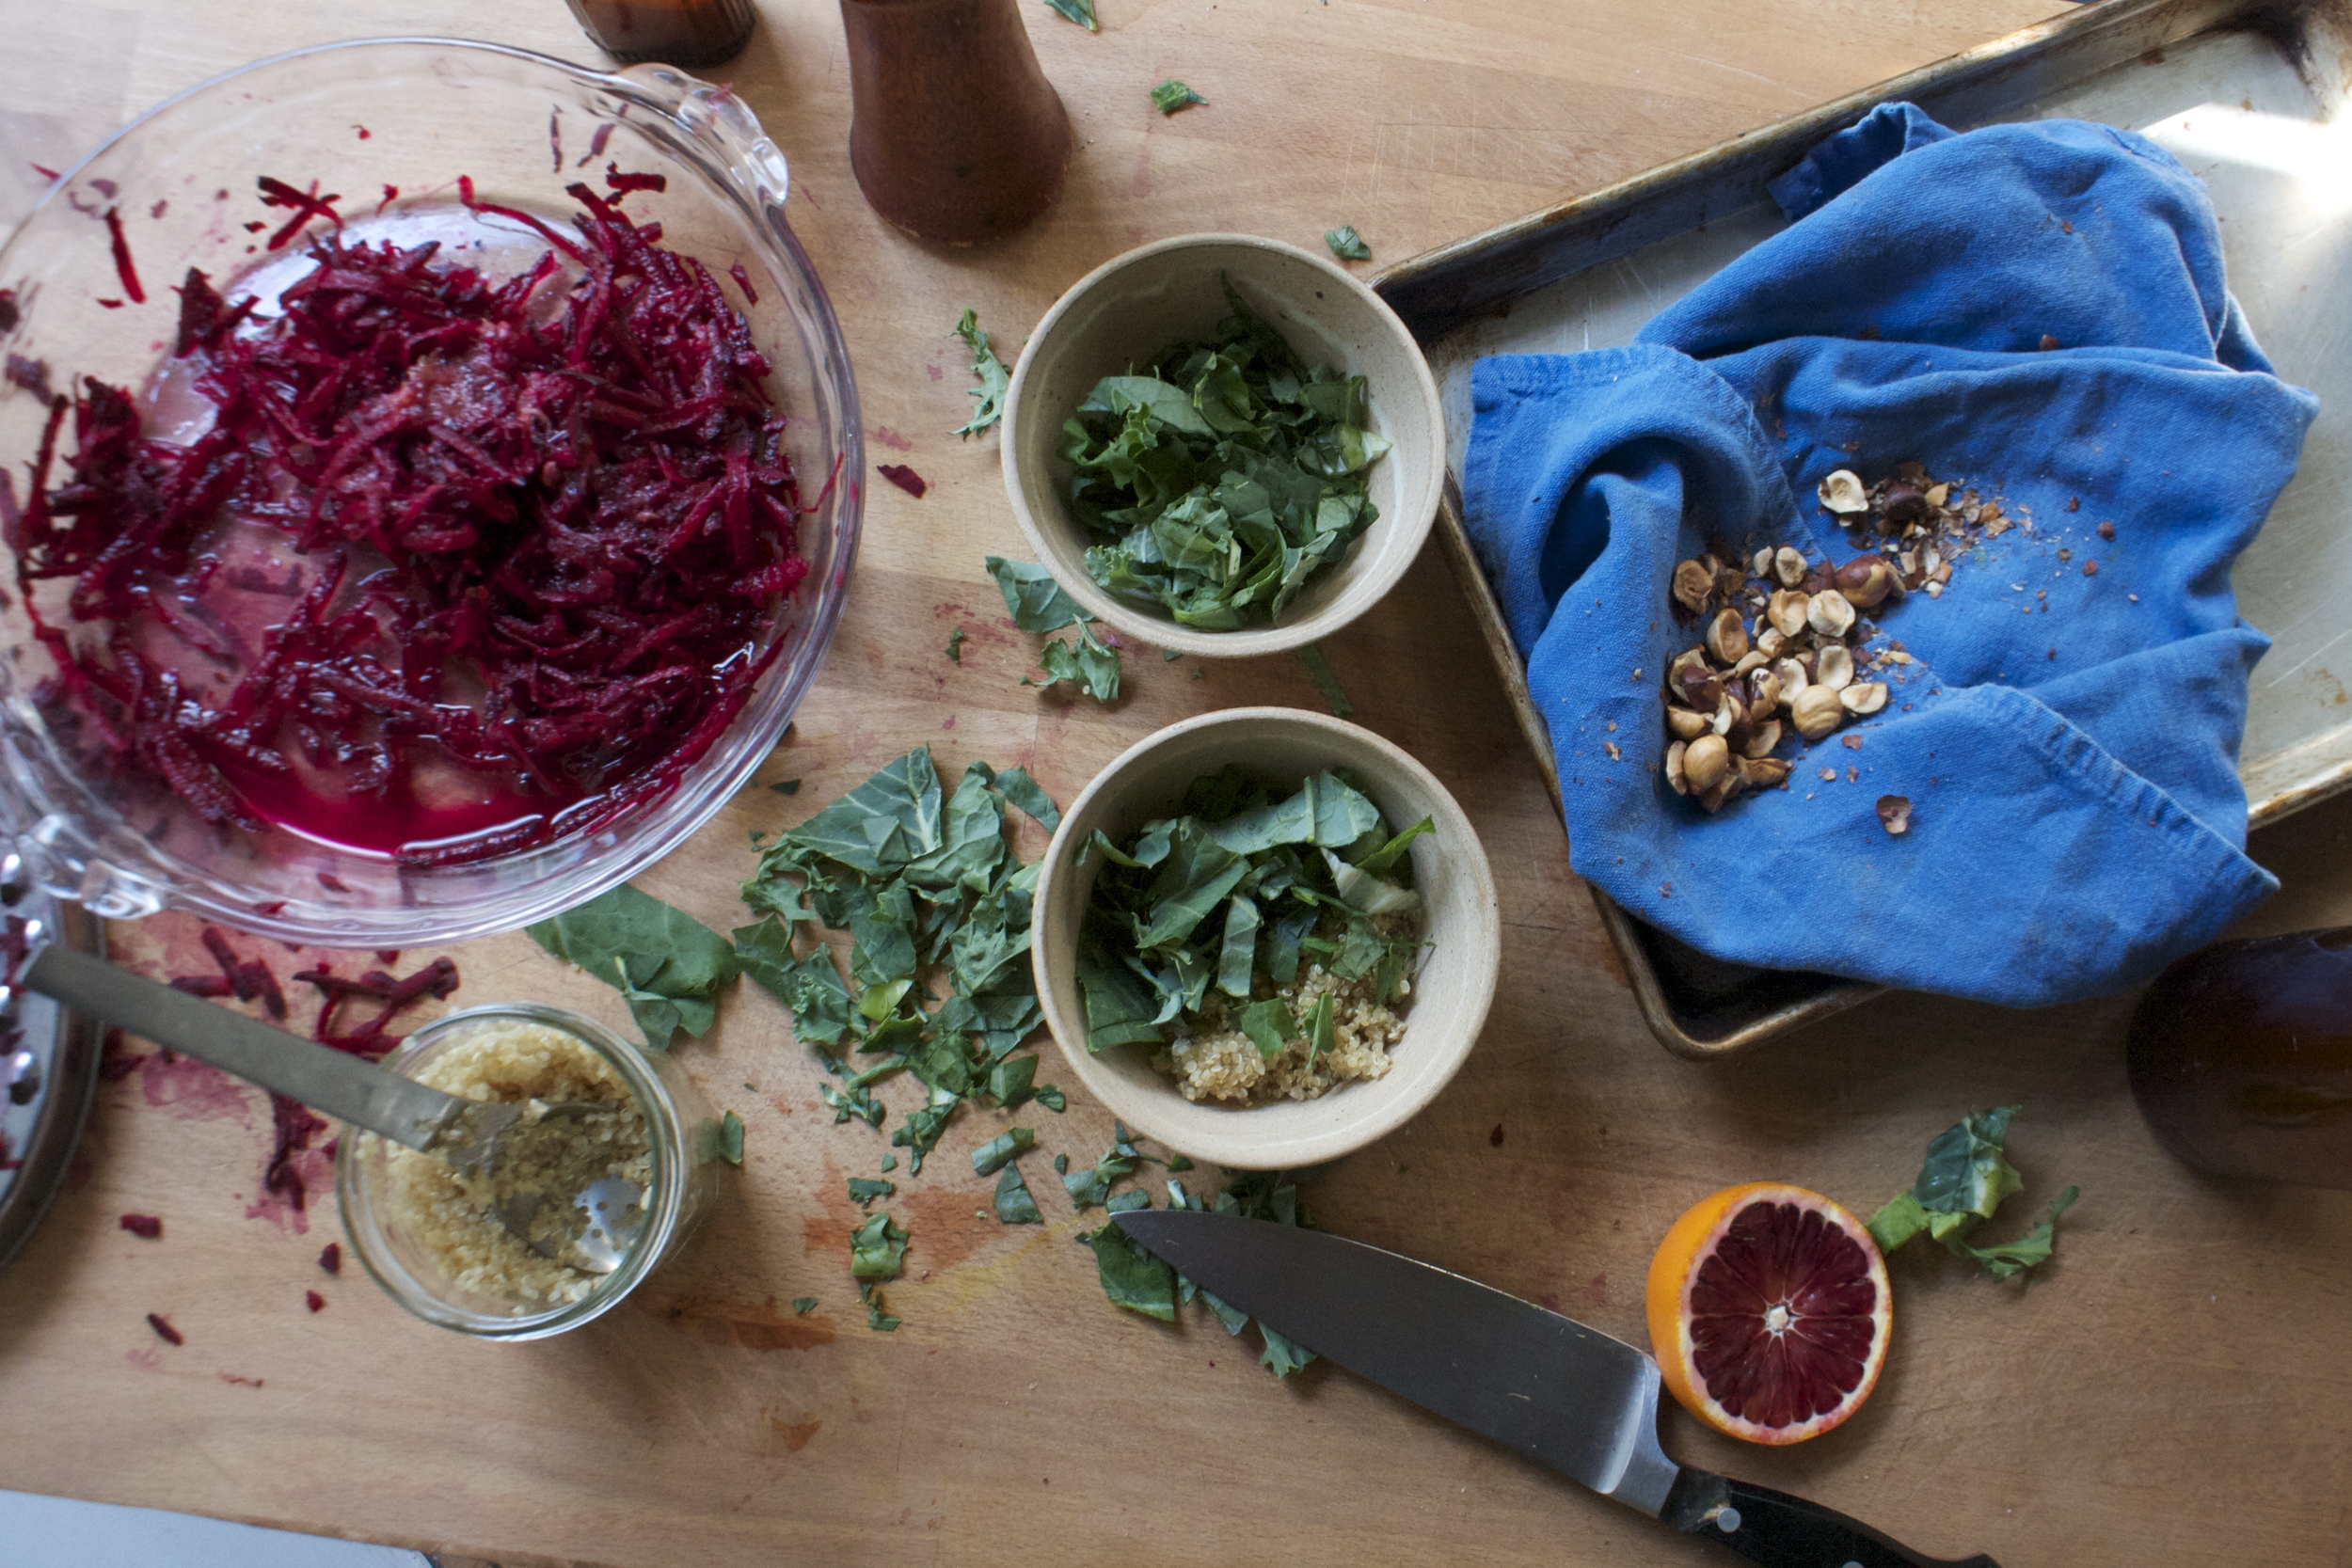
The stuff. A bowl containing flour, salt, baking powder ans baking soda.  Also need a few really big carrots, a bit of brown sugar, and ground up cinnamon and ginger. Coconut oil, soy milk, an orange (for it's zest) and a little apple cider vinegar are going into this cake too.

IMG_1374.jpg
IMG_1398.jpg

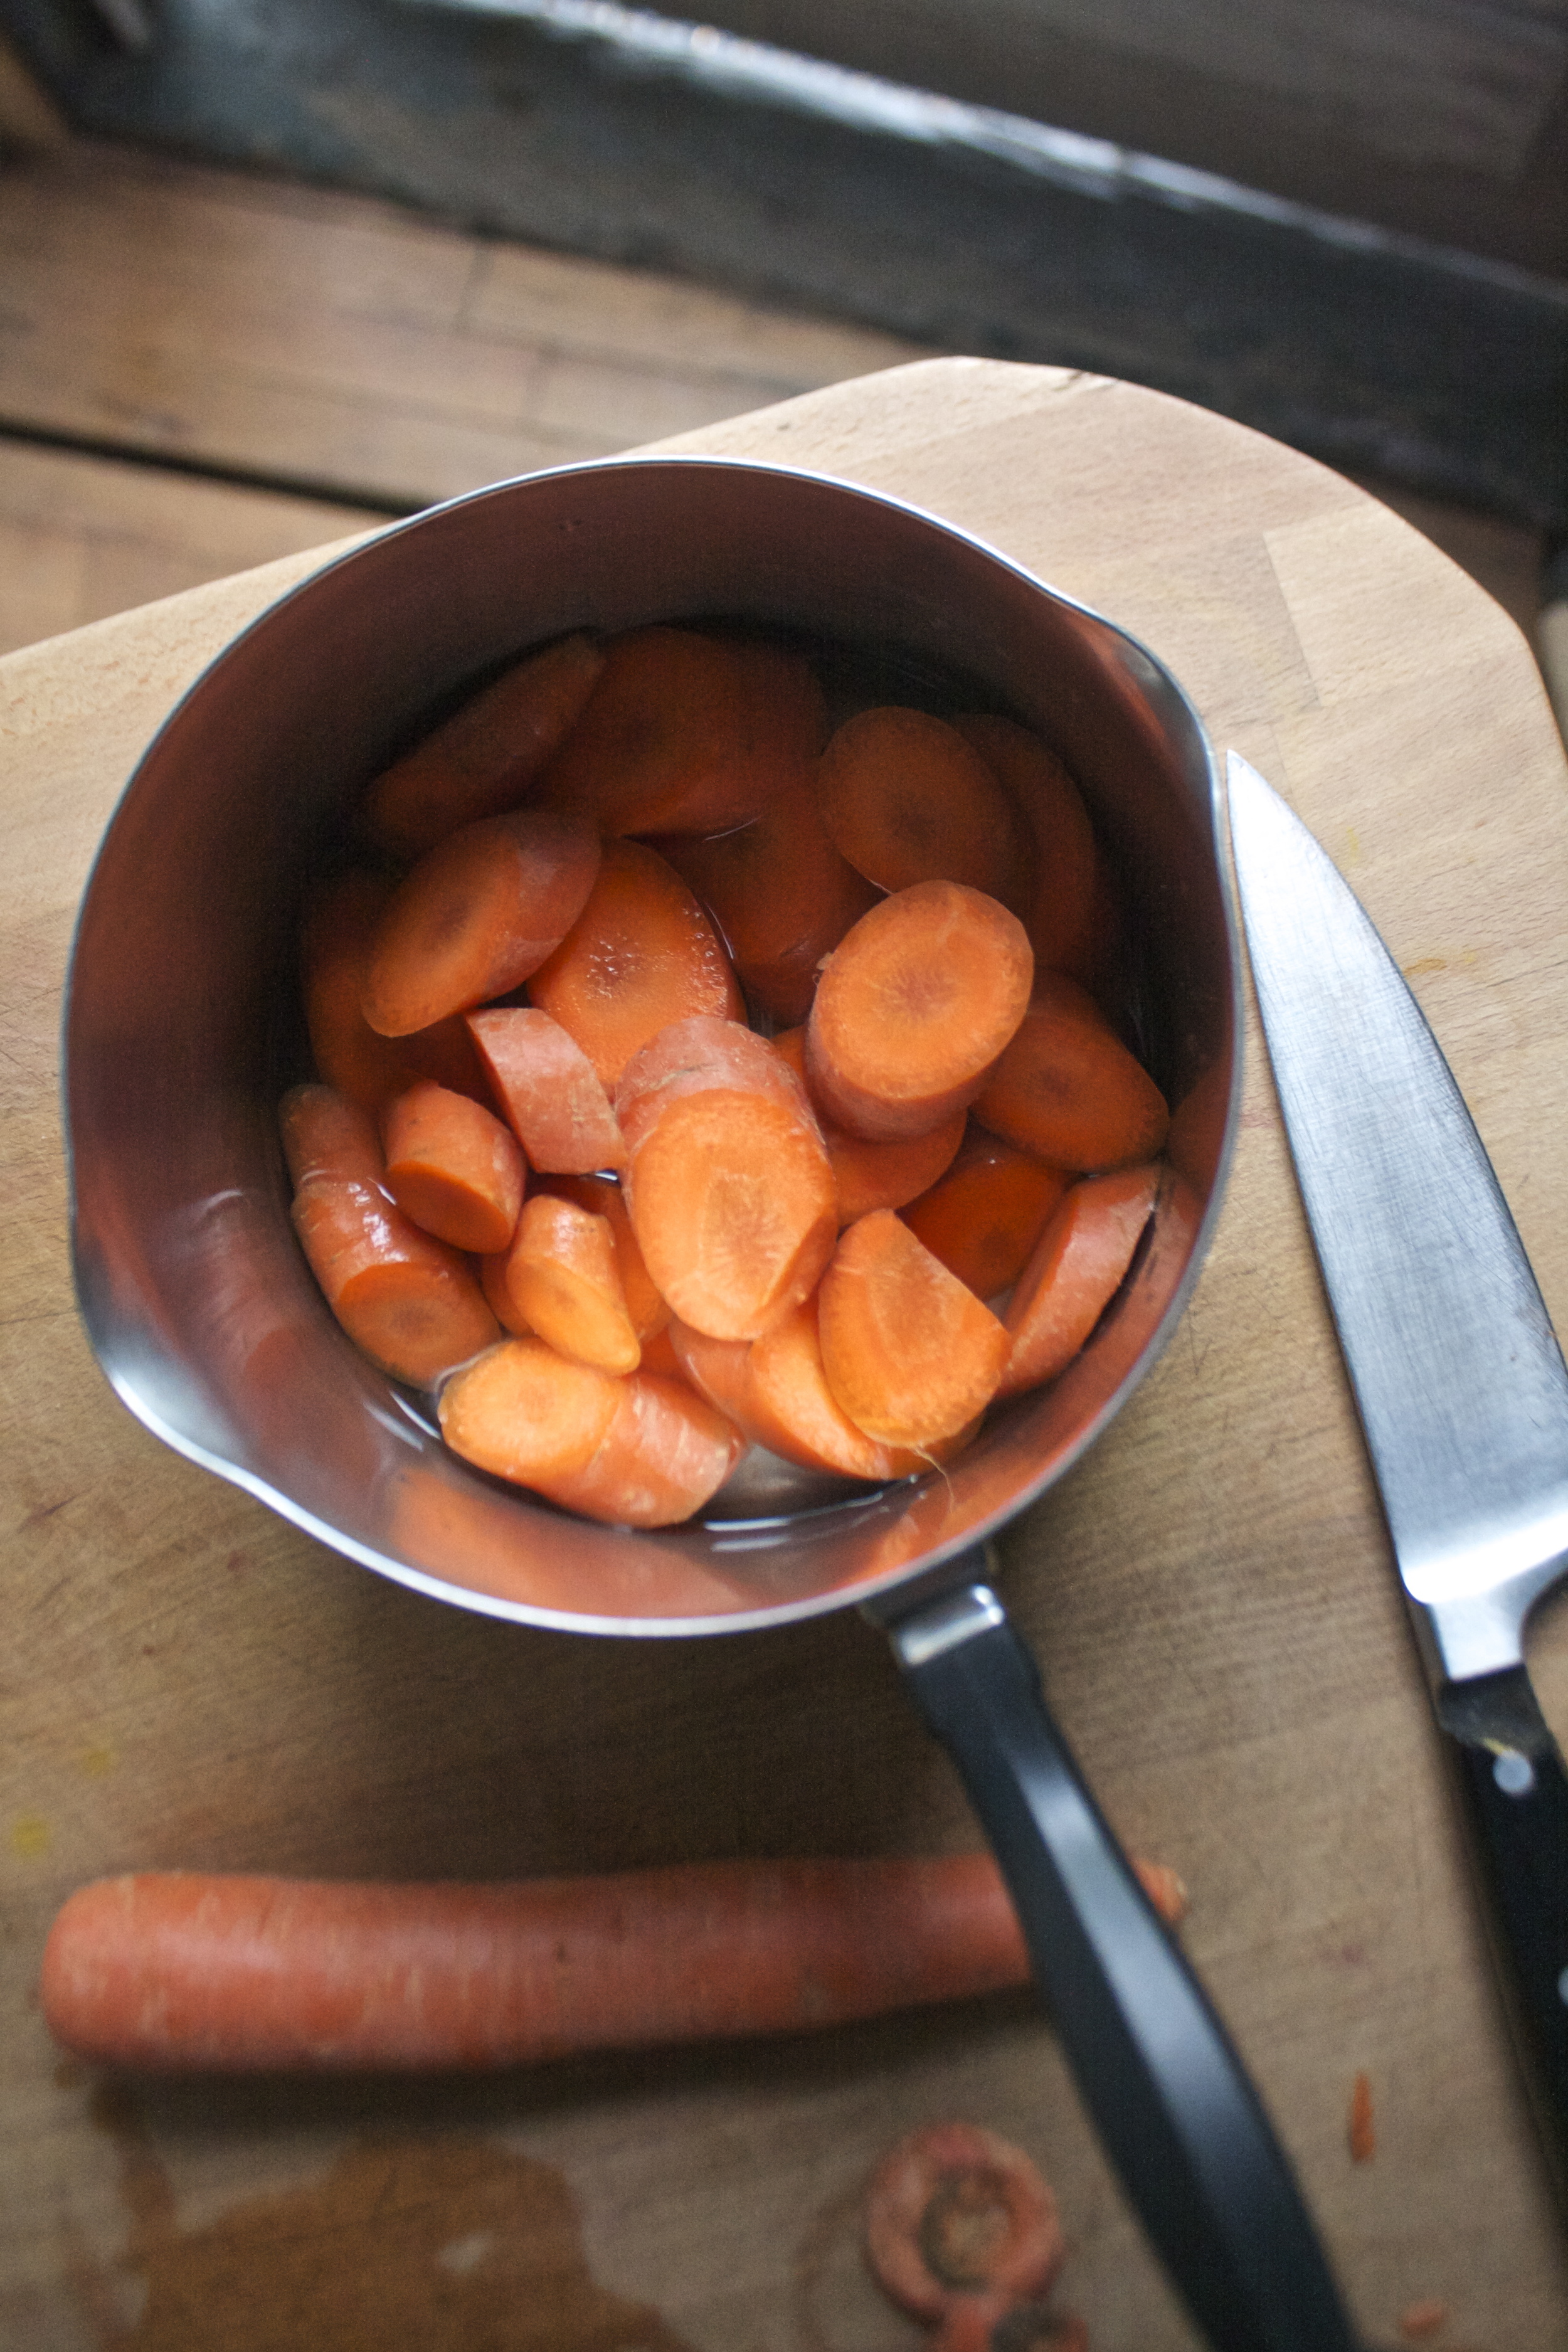
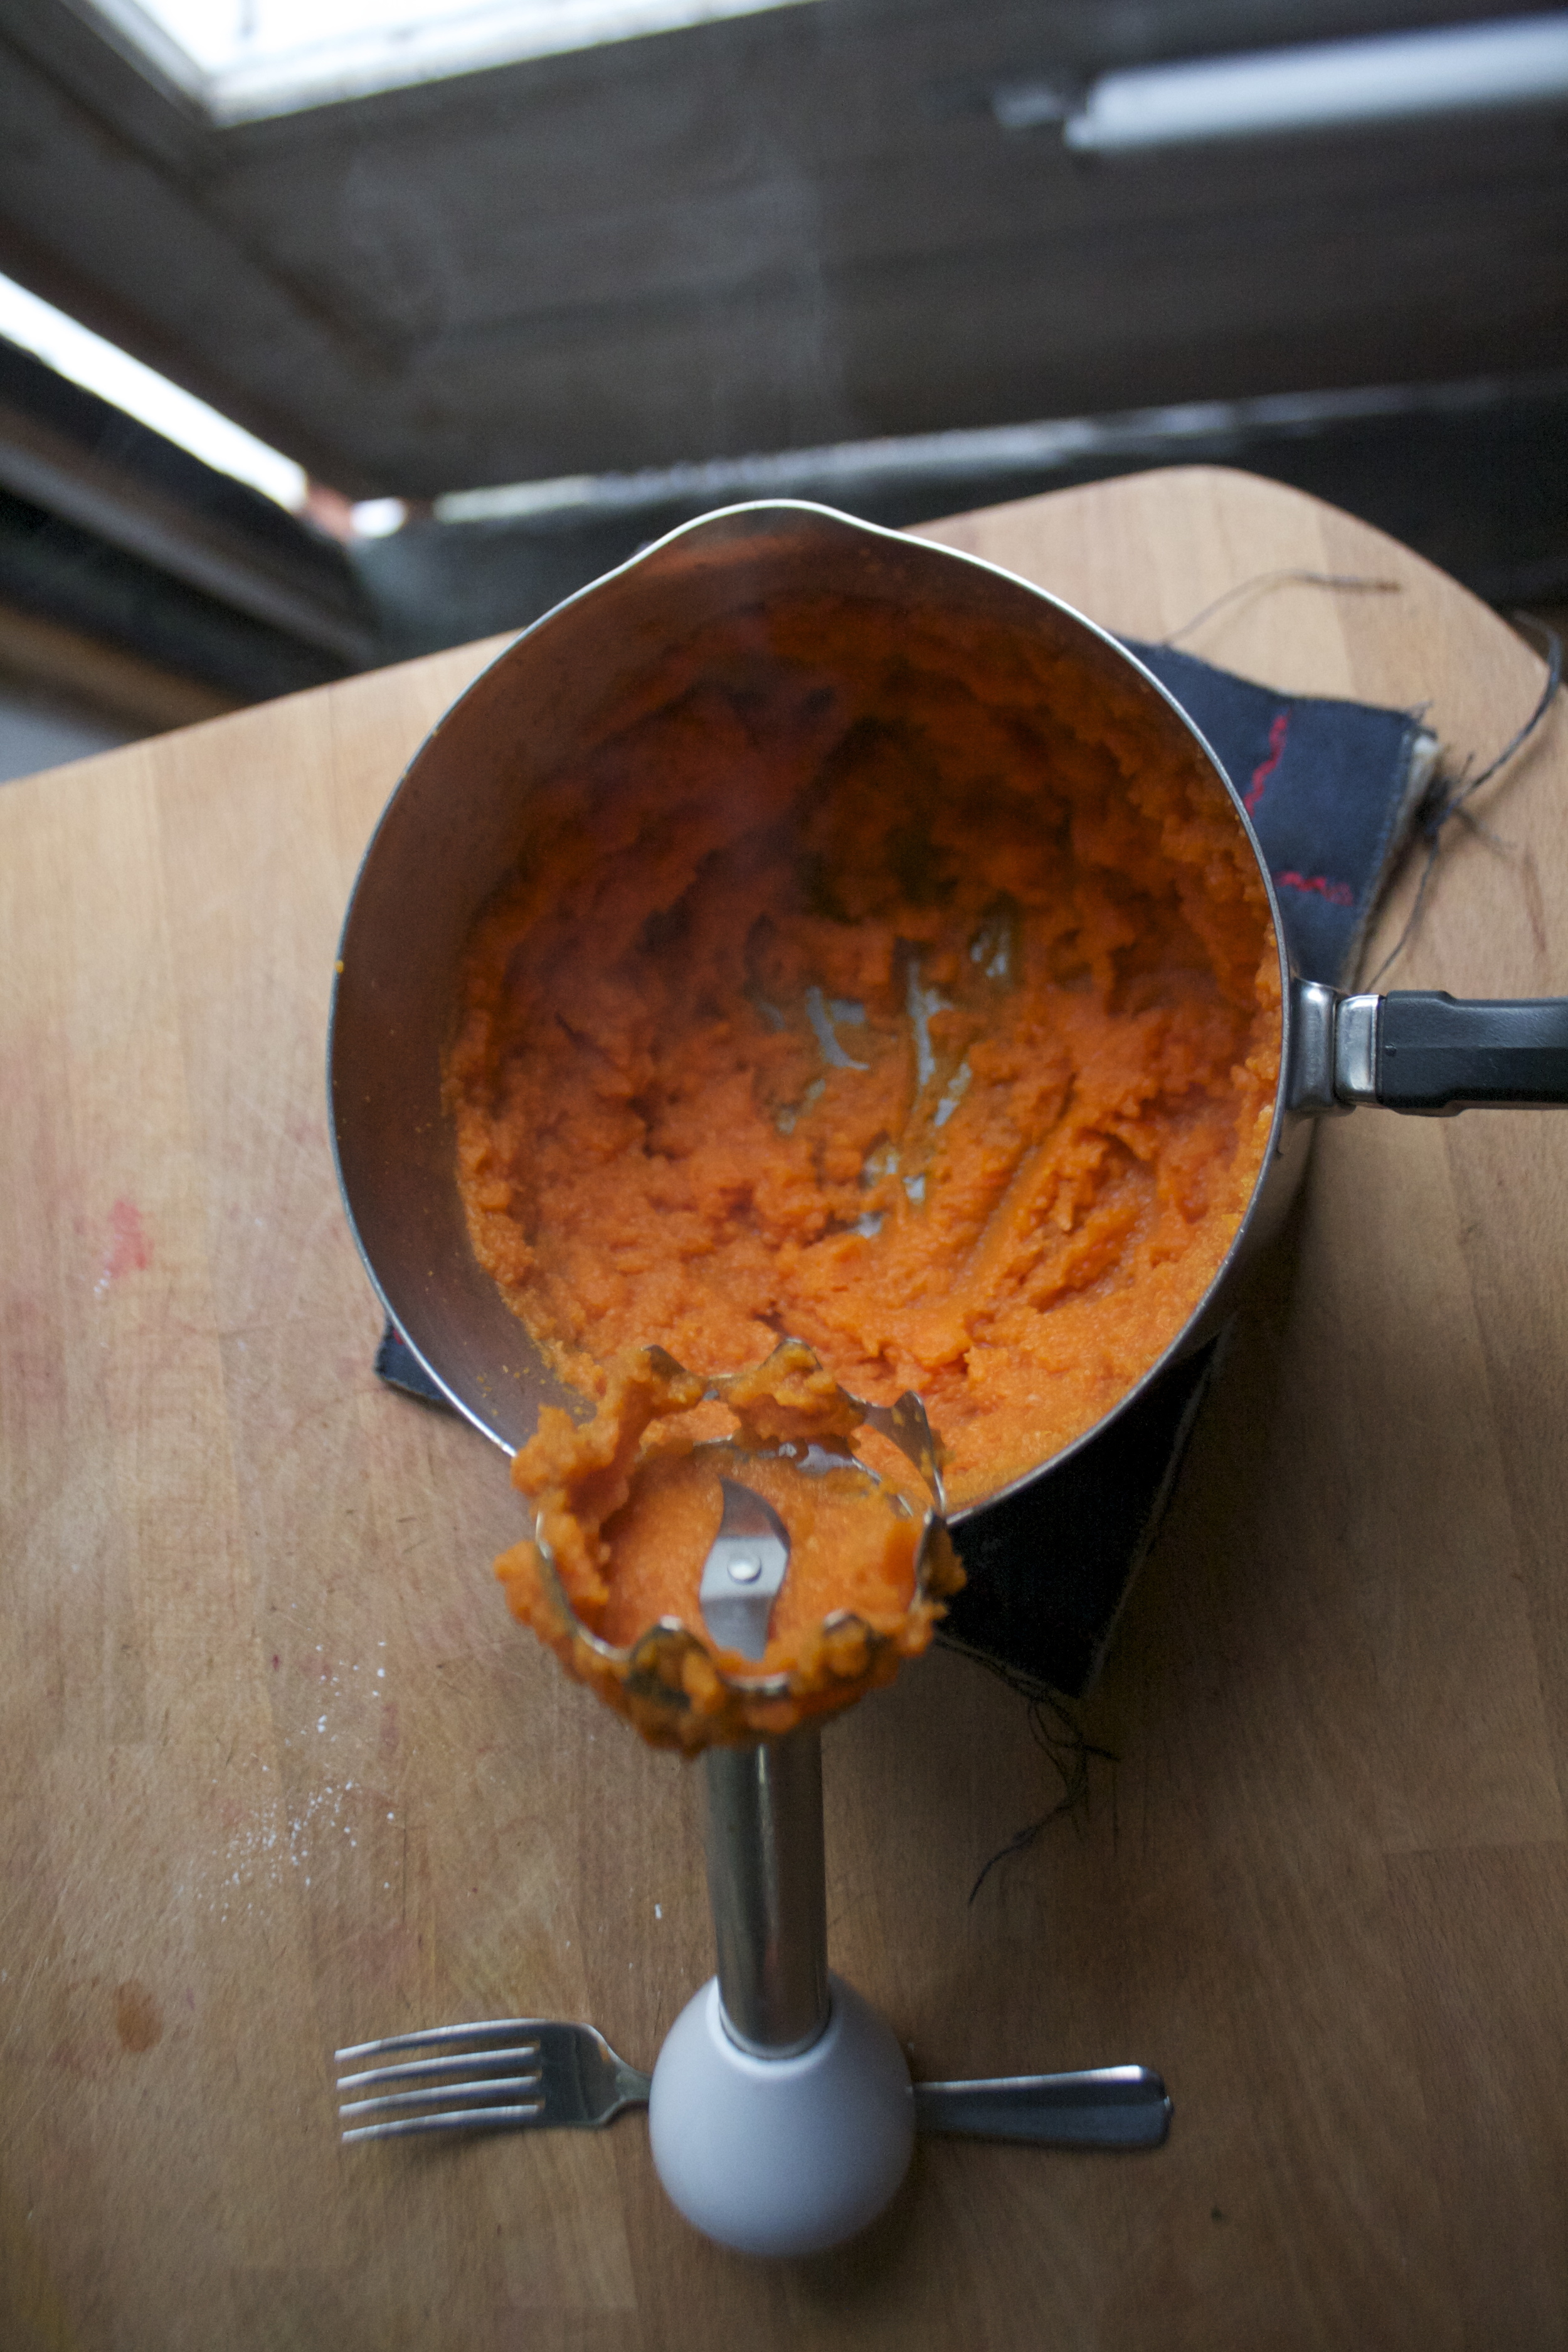
Start by chopping up 2 of the biggest carrots and tossing the into a pot with about an inch of water. Stick the pot on the stove and cook until the carrots are nice and tender. Then blend those tender carrots up.

I had a hard time not eating all of the carrot puree, so maybe if you want, cook up a few extra carrots ans have yourself a pre-carrot cake carrot snack.

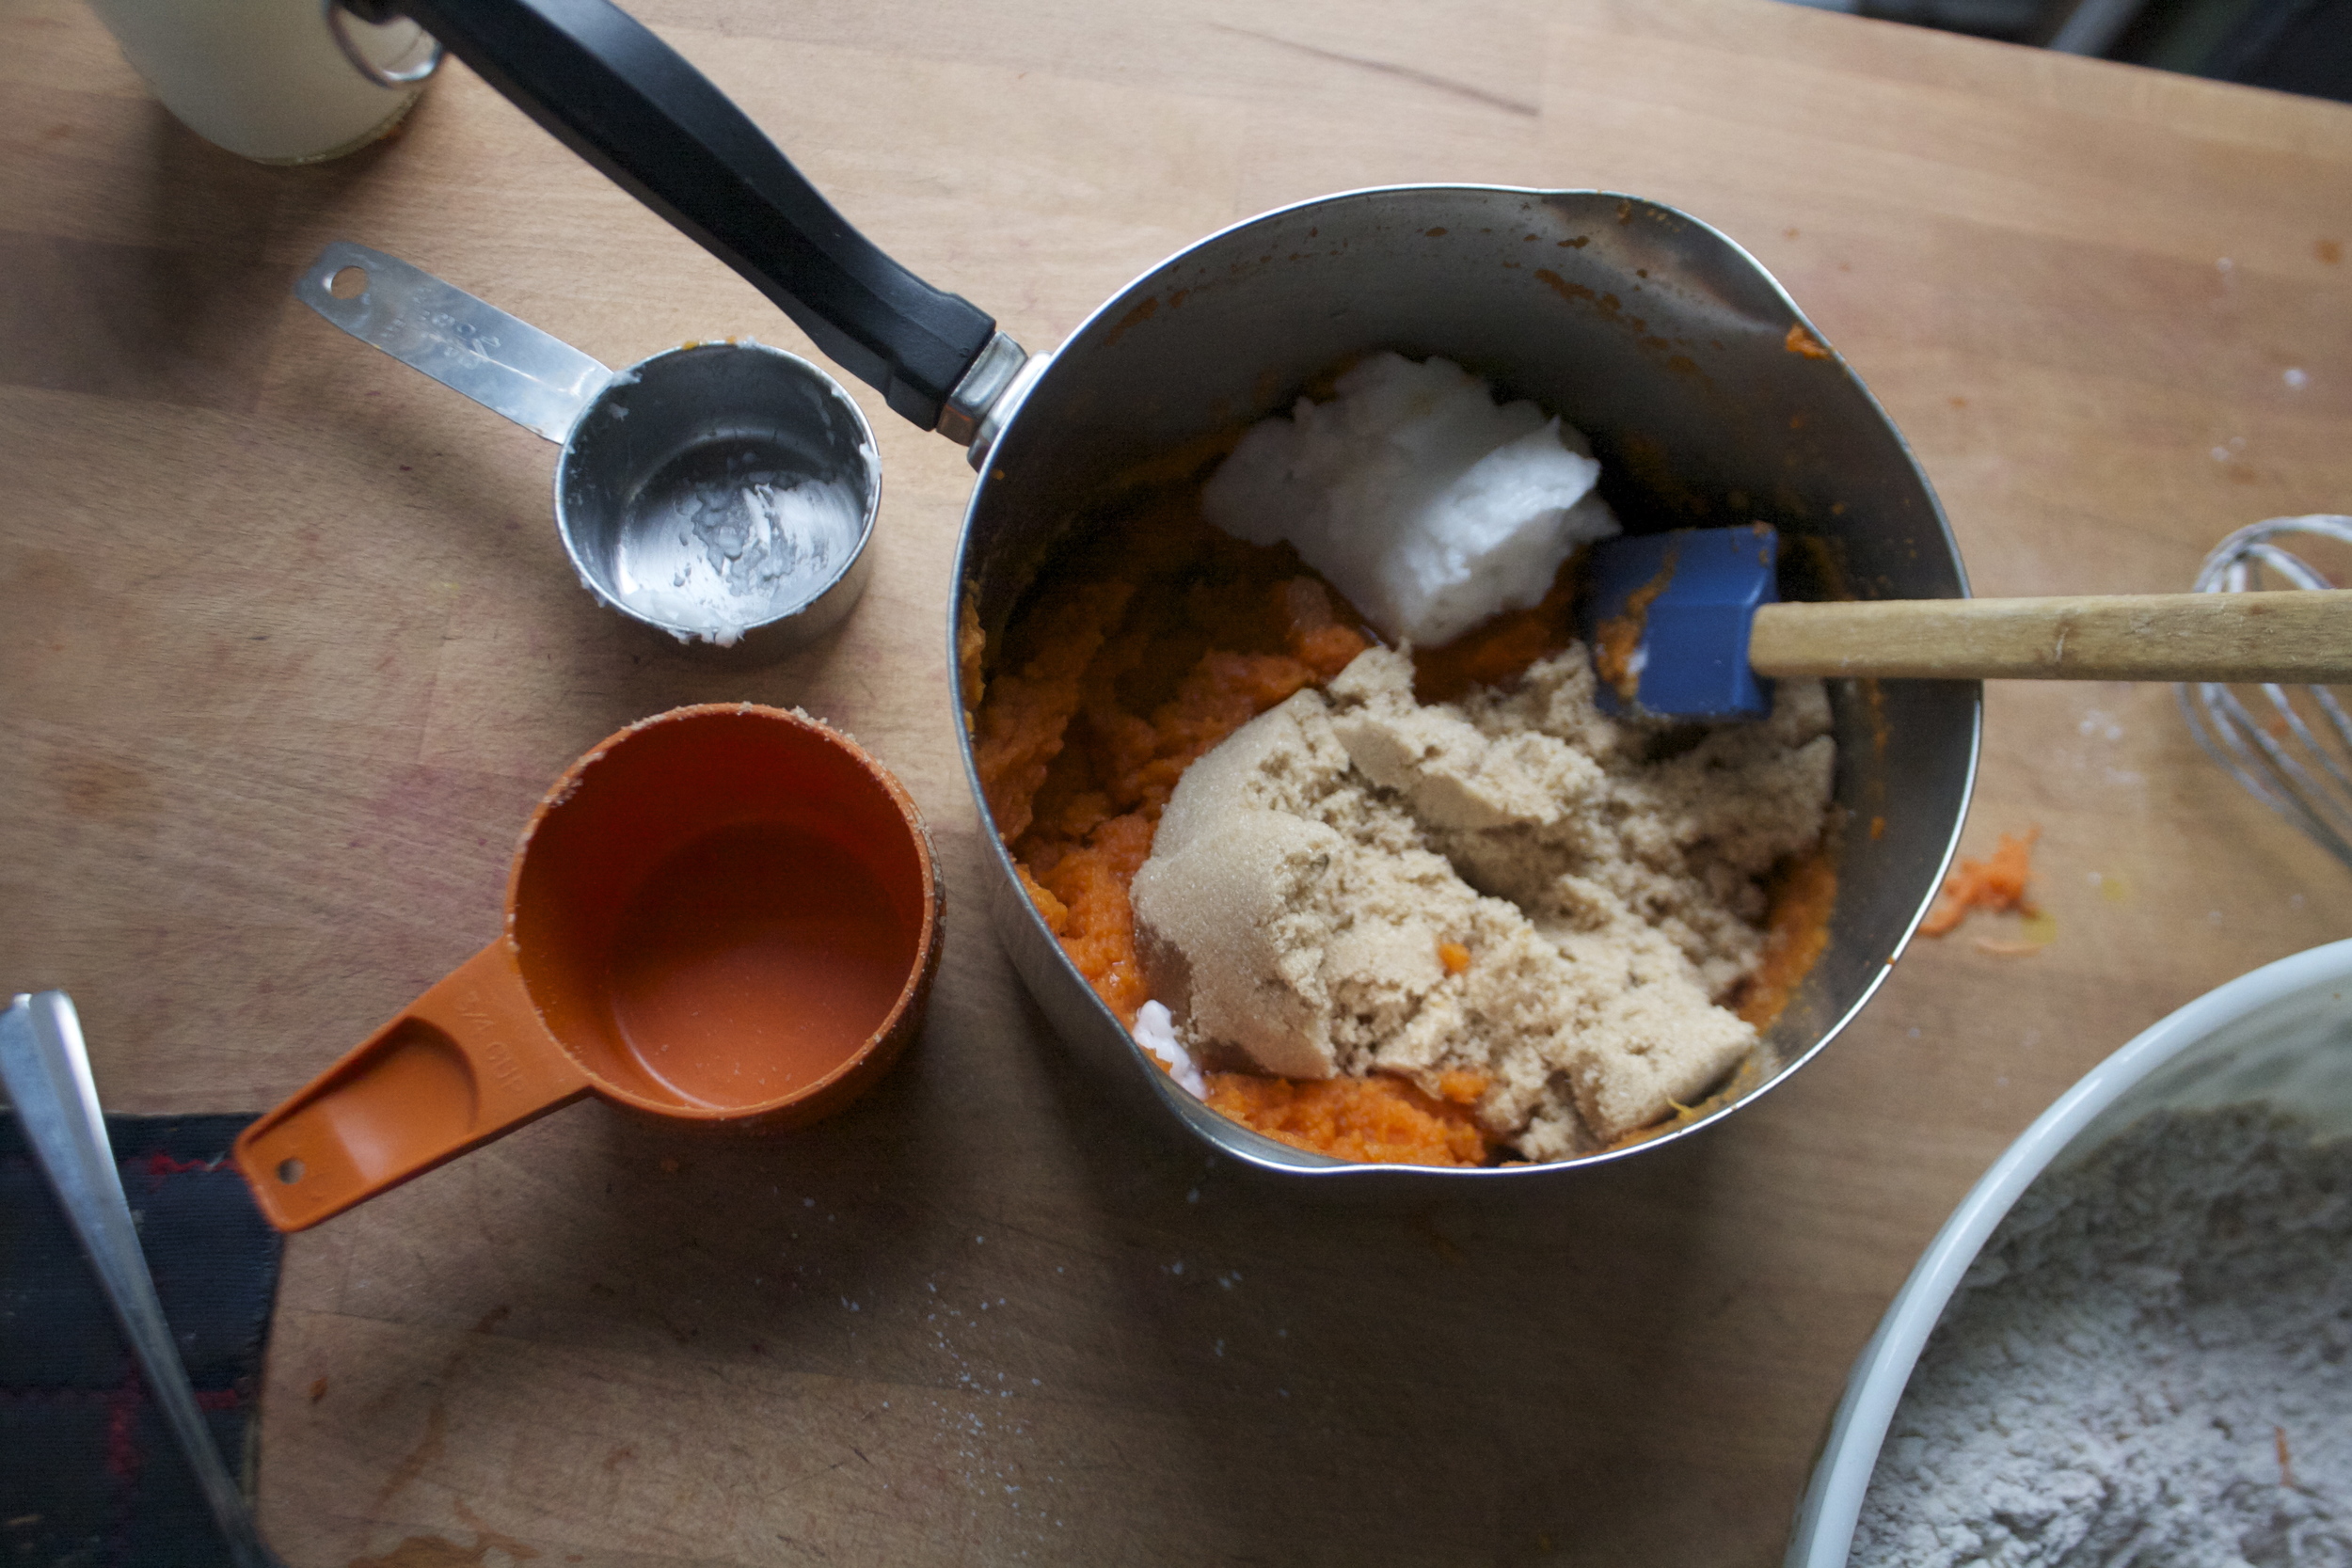
And while the carrot puree is still warm, add in the coconut oil and the sugar. Mix it until the oil is melted ans it's one cohesive mixture.

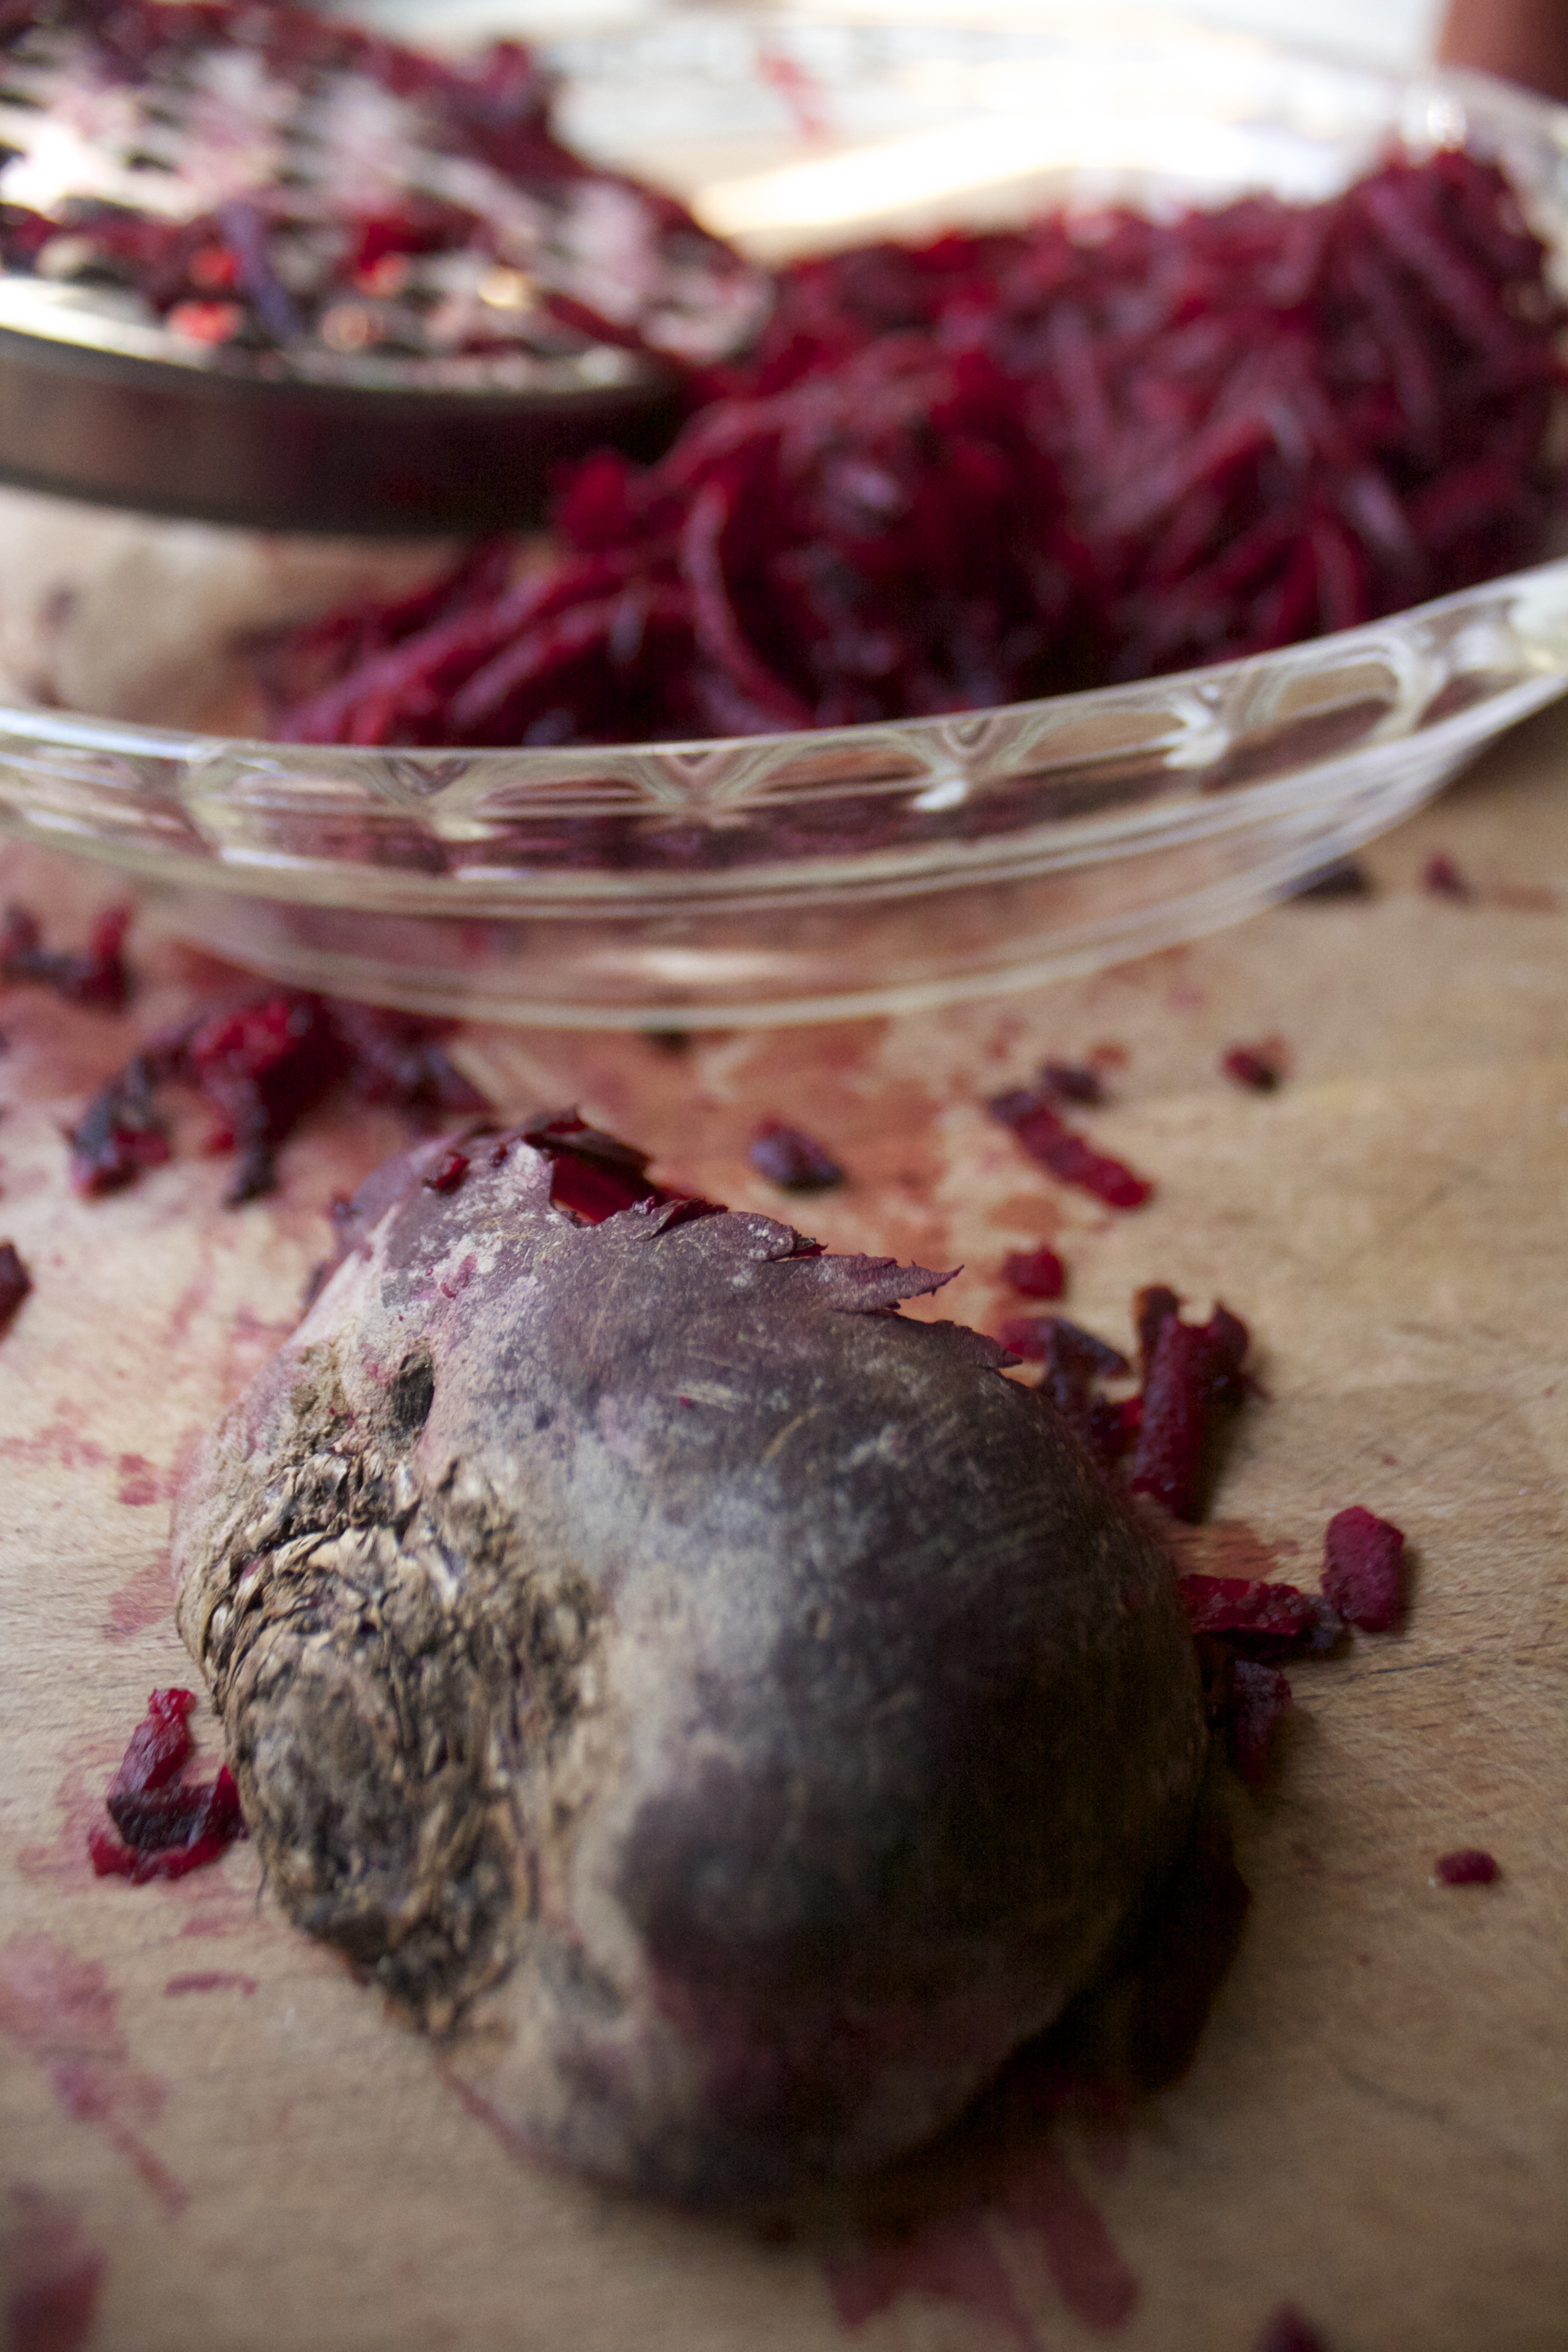
And take that last carrot ans grate it up into the flour. Also add in the spices and the zest of the orange.

Note. I used a small holed grater so that the carrot shreds would be small and add texture to the cake but not make it too chunky. But use a normal grater..it's all about your carrots chunk prefernce here.

Now dump the wet carrot mixture into the dry and start to mix

Adding in the soy and the vinegar to complete the batter.

And scooped that batter into a oiled bundt pan and get it into the (preheated) oven to bake.

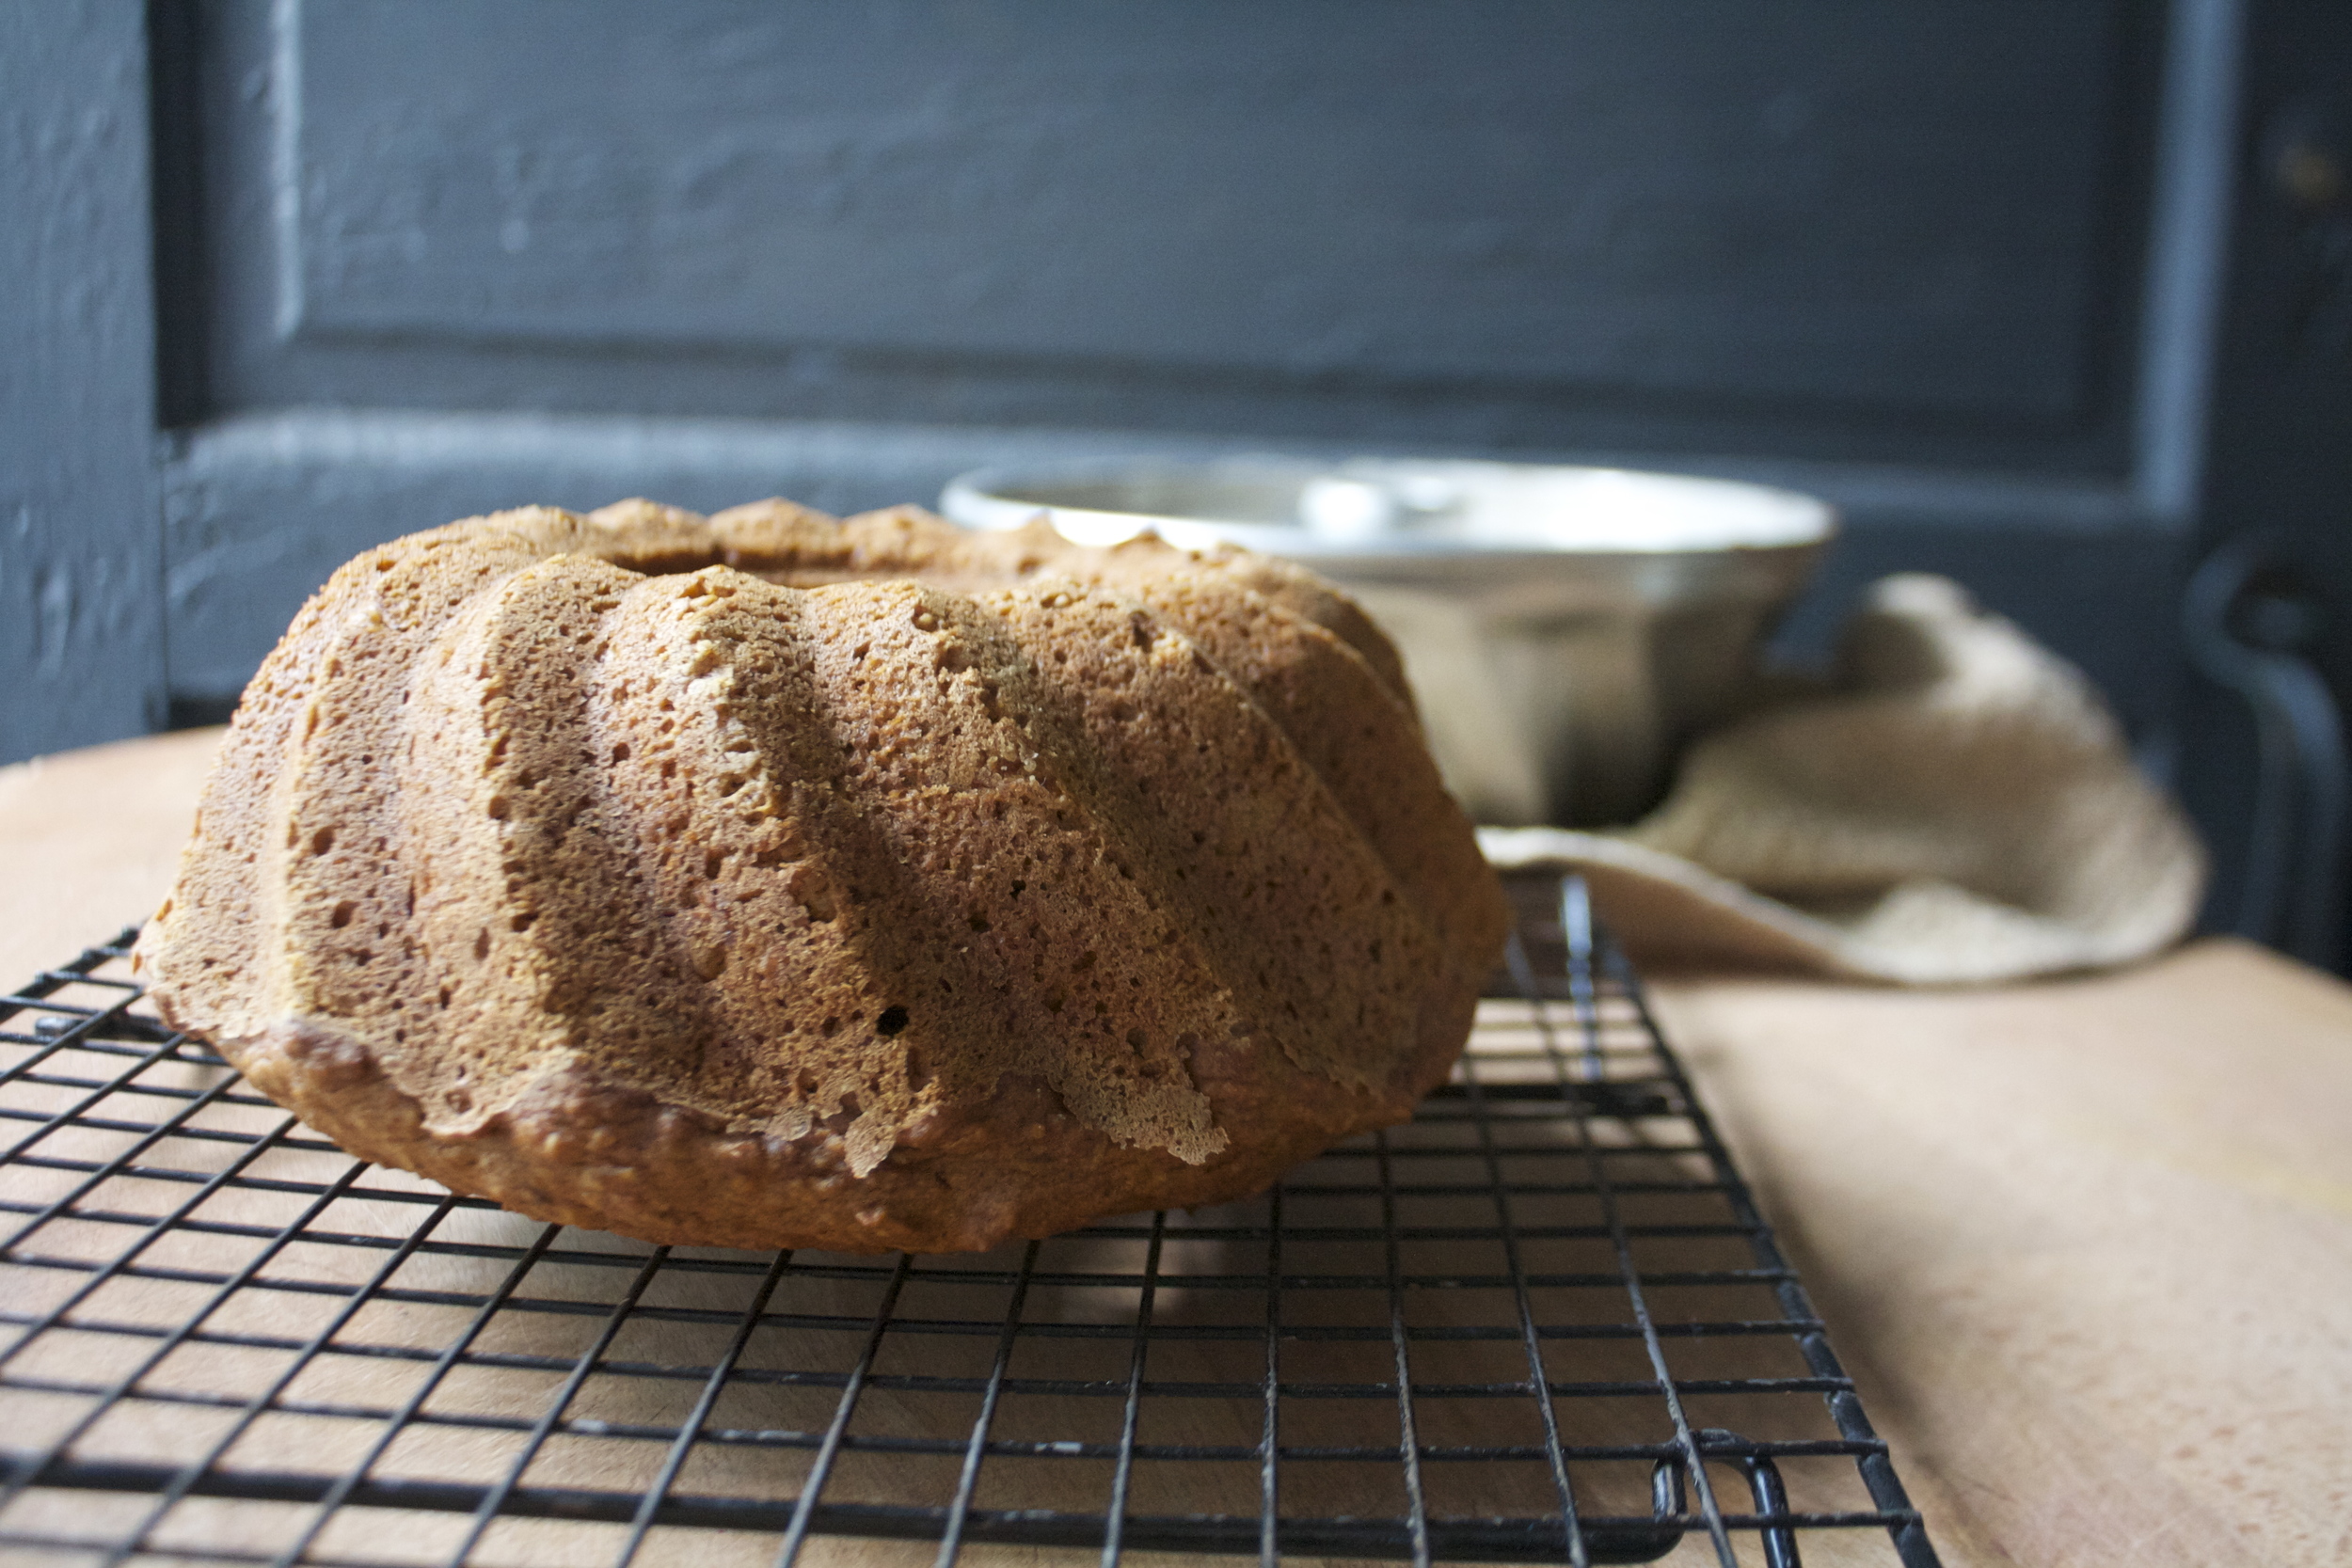
After about an hour, the cake is ready, golden brown and smelling like any good carrot cake should. Remove from the oven and turn the cake out from the cake pan and stick on on a rack to cool. This cake is waiting for me to decide what, or if I want to frost, drizzle, or sauce it up..... I think it wants as little something.

Ok, I figured it out. Date sauce.

The stuff. Fresh medjool dates, almond milk and sea salt.

IMG_1488.jpg
IMG_1493.jpg

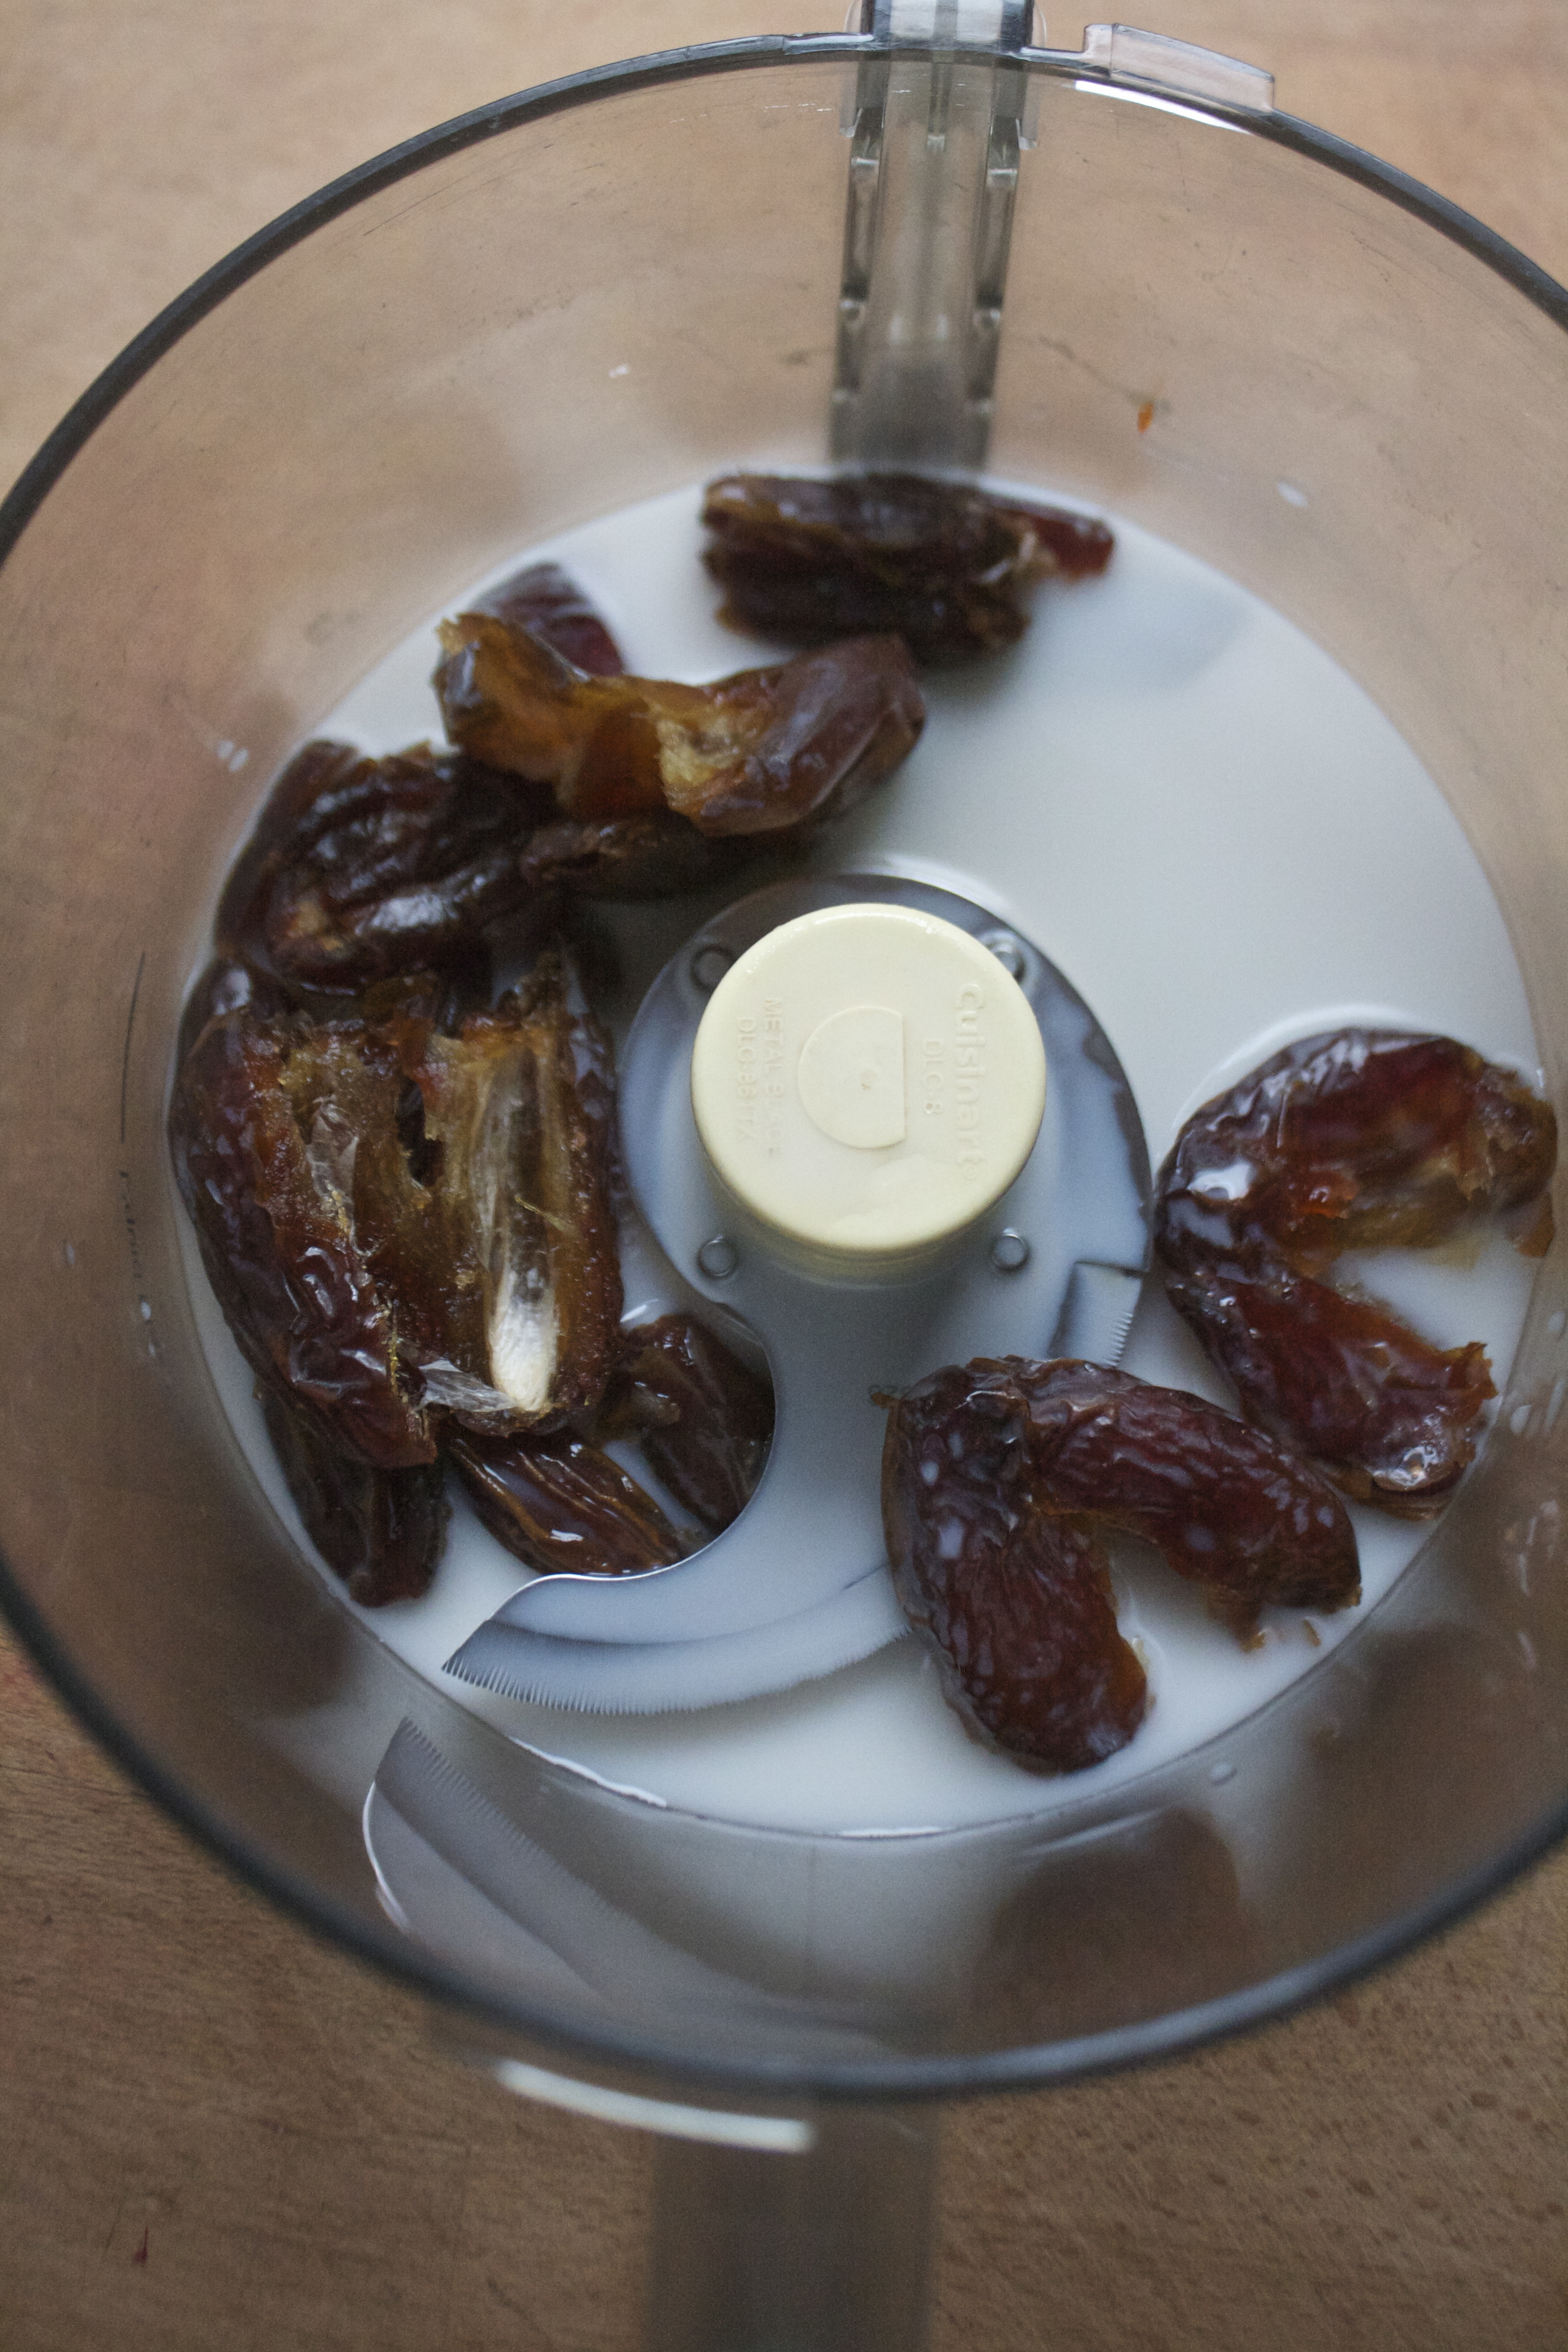
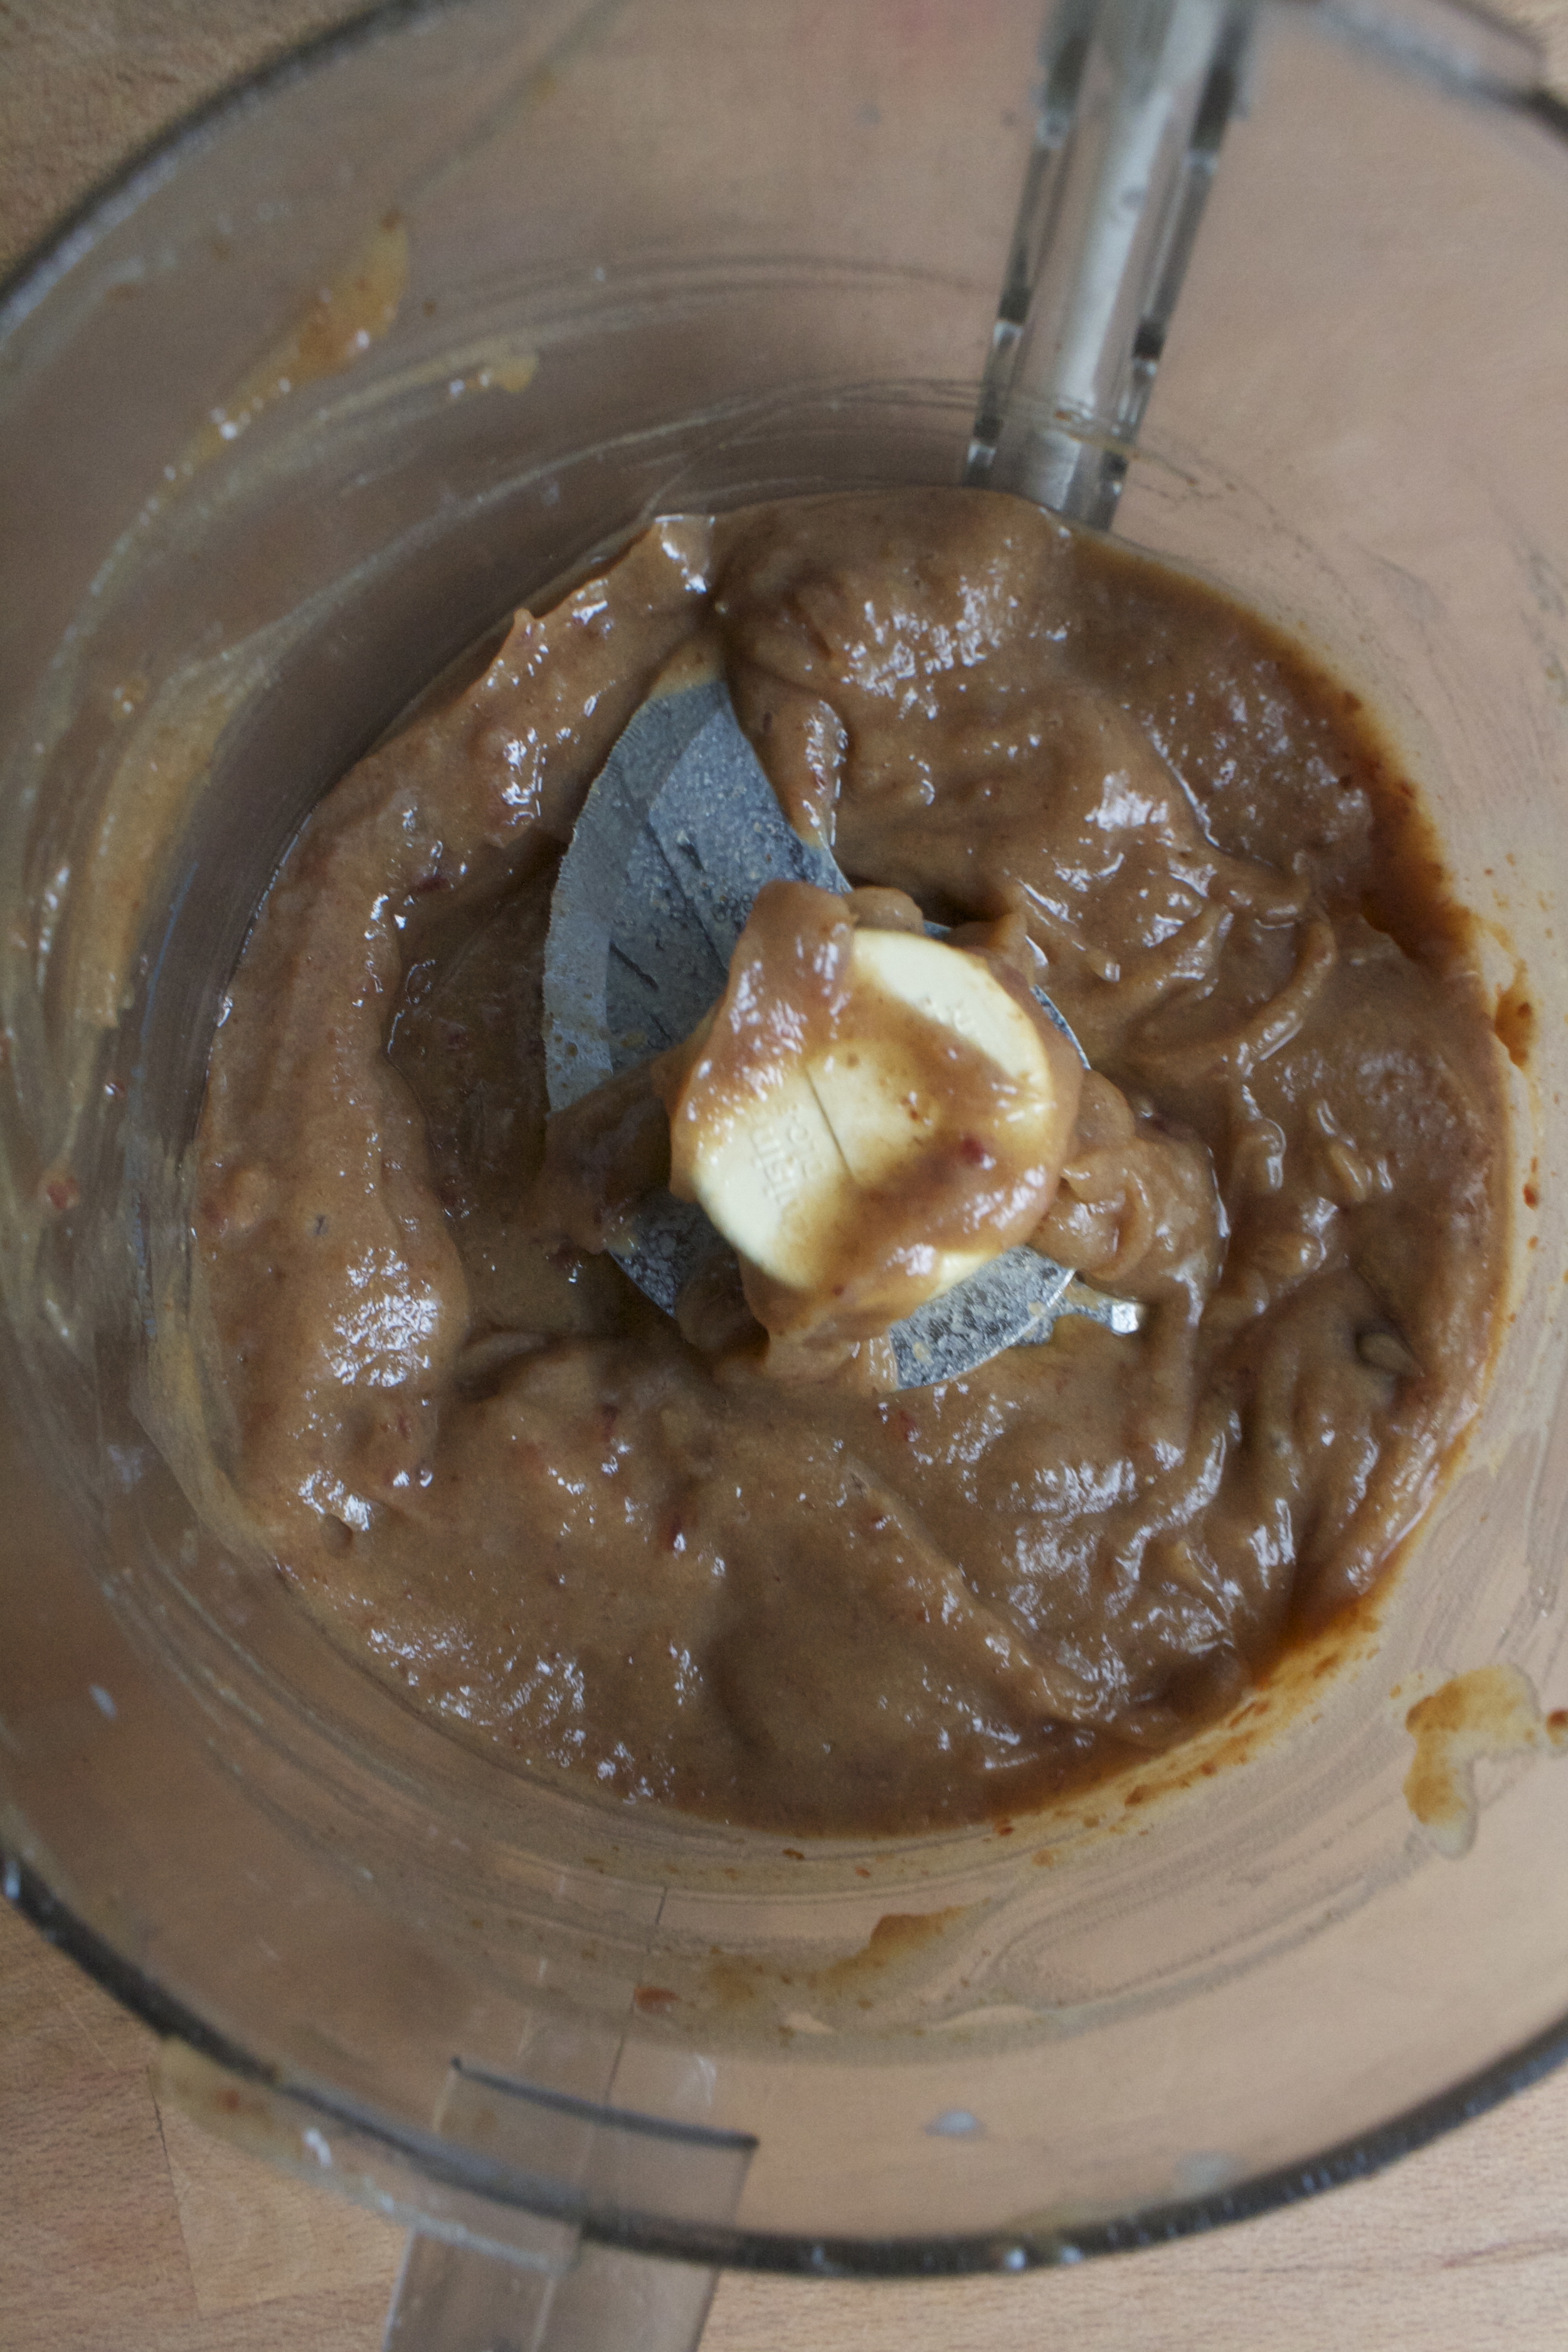
Date (pits removed) into the food processor along with the milk and a good pinch of sea salt.  Blend until it turns into a nice smooth, fluffy sauce.

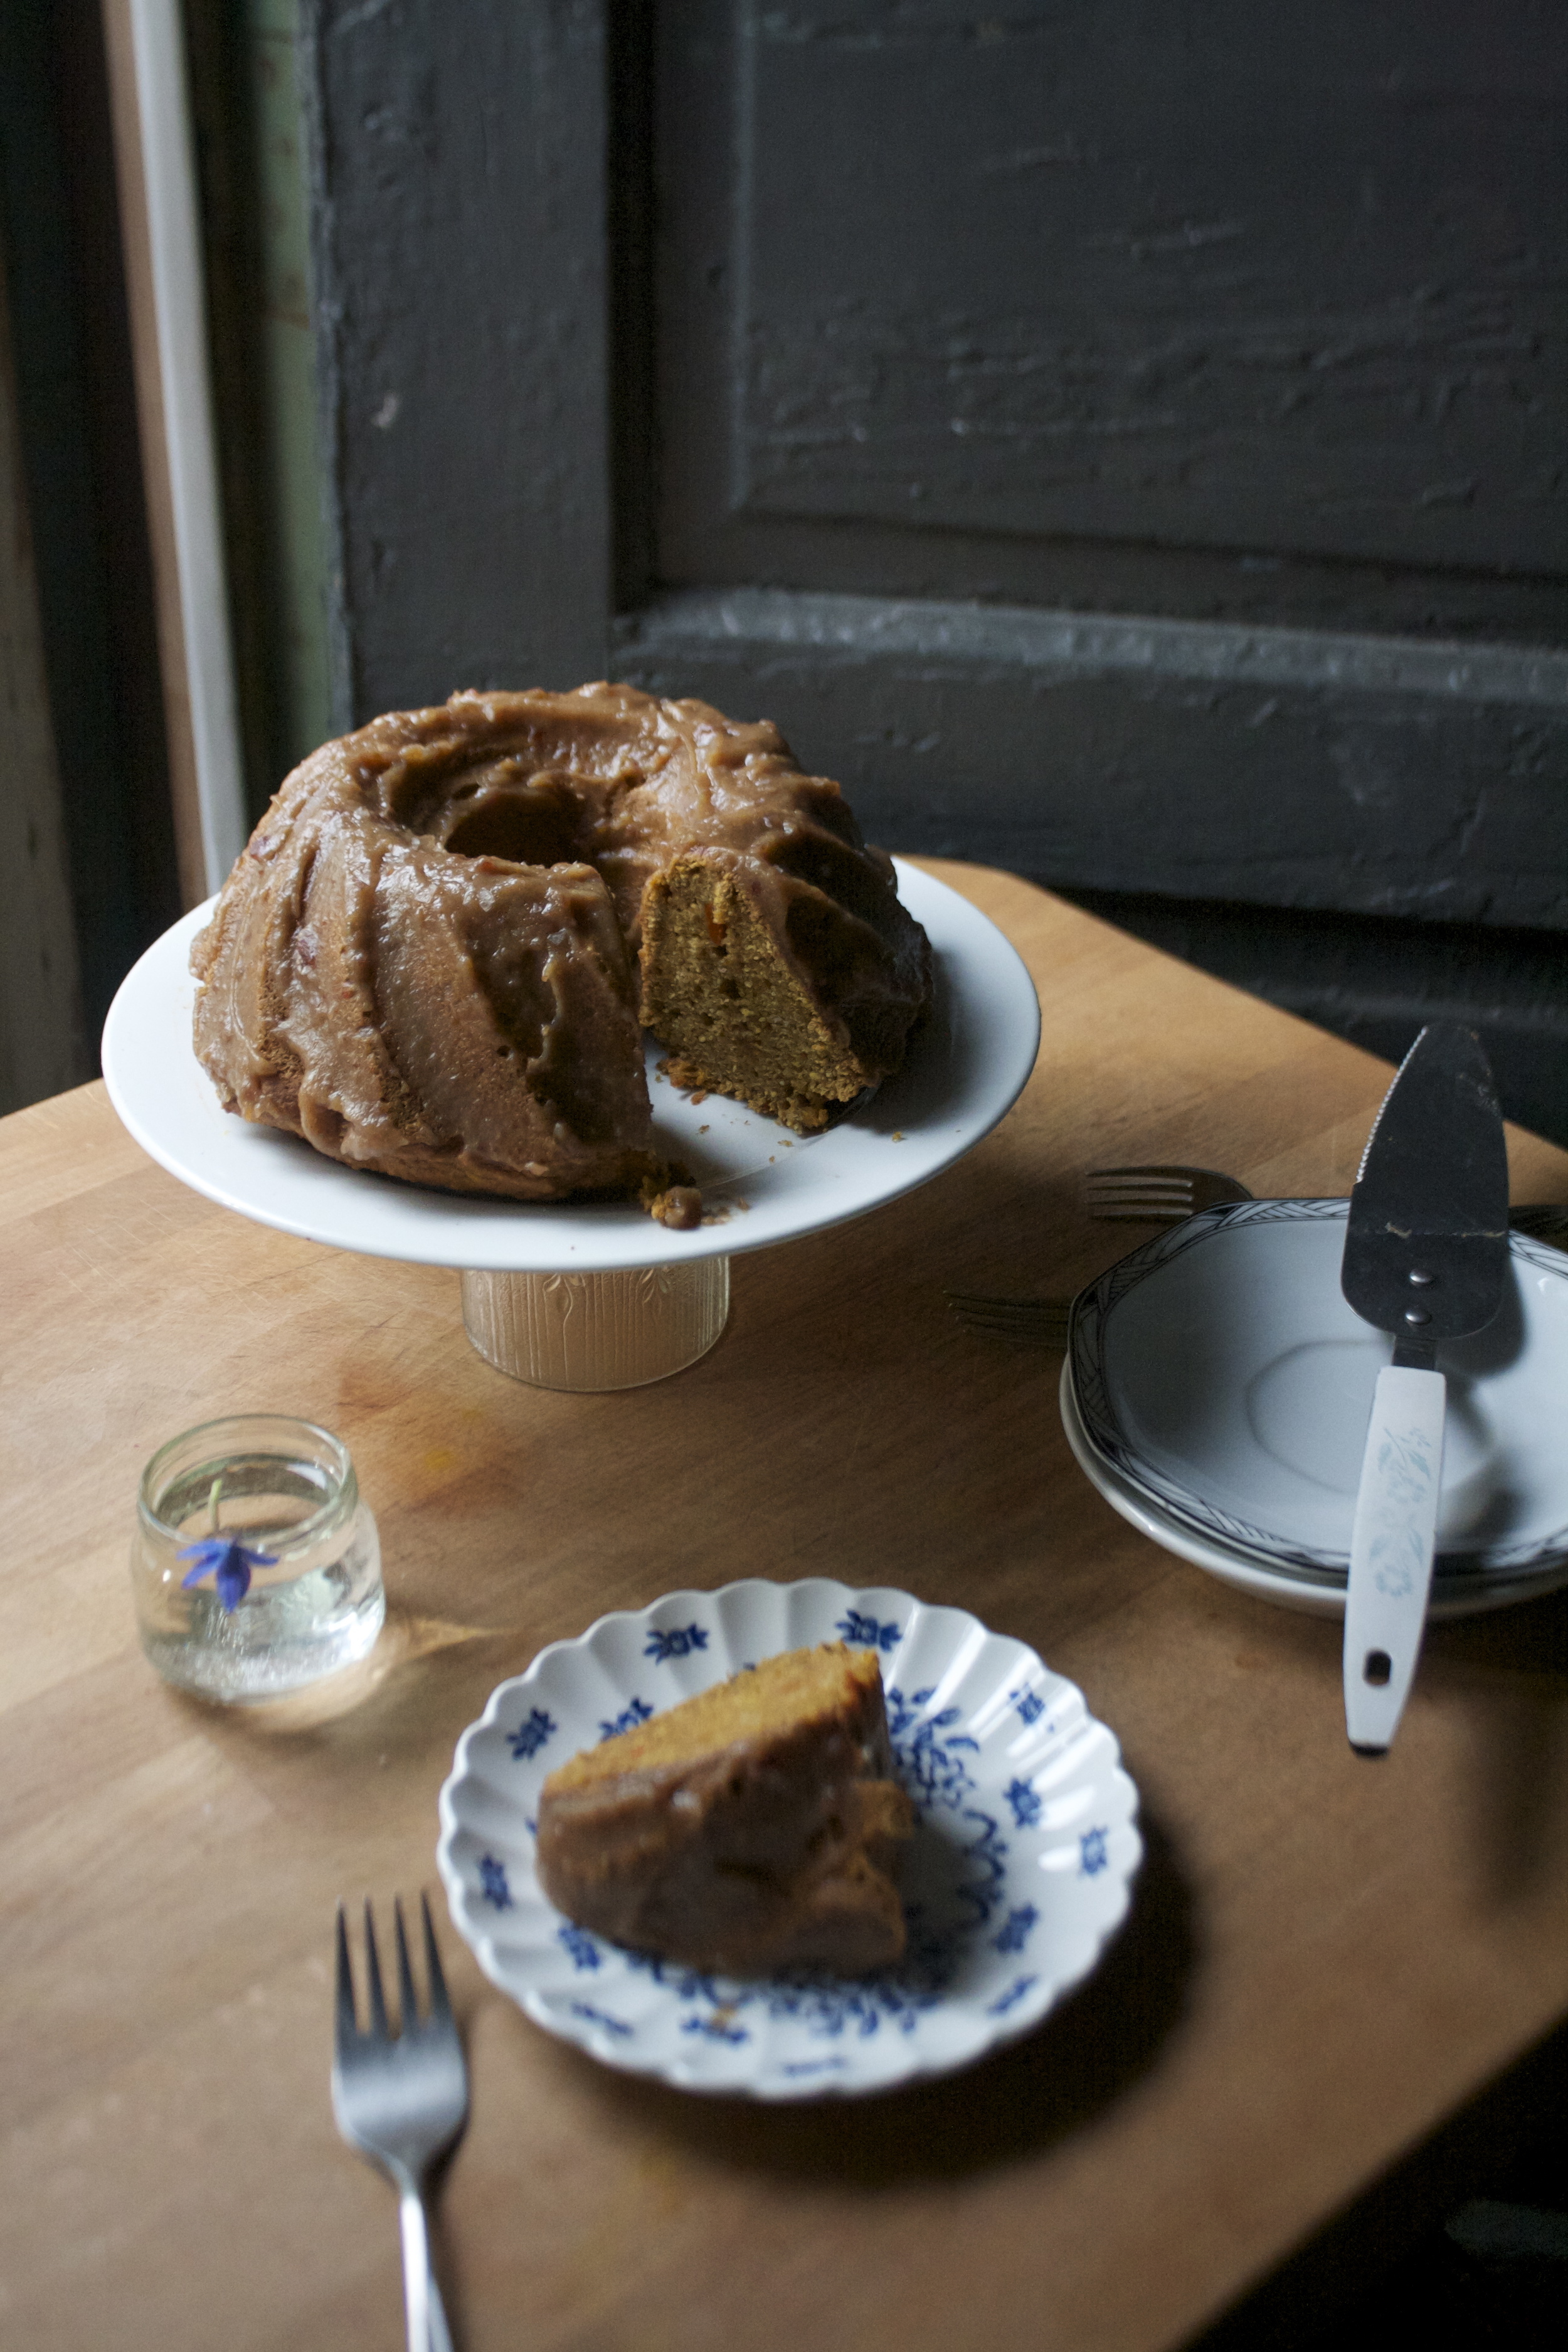
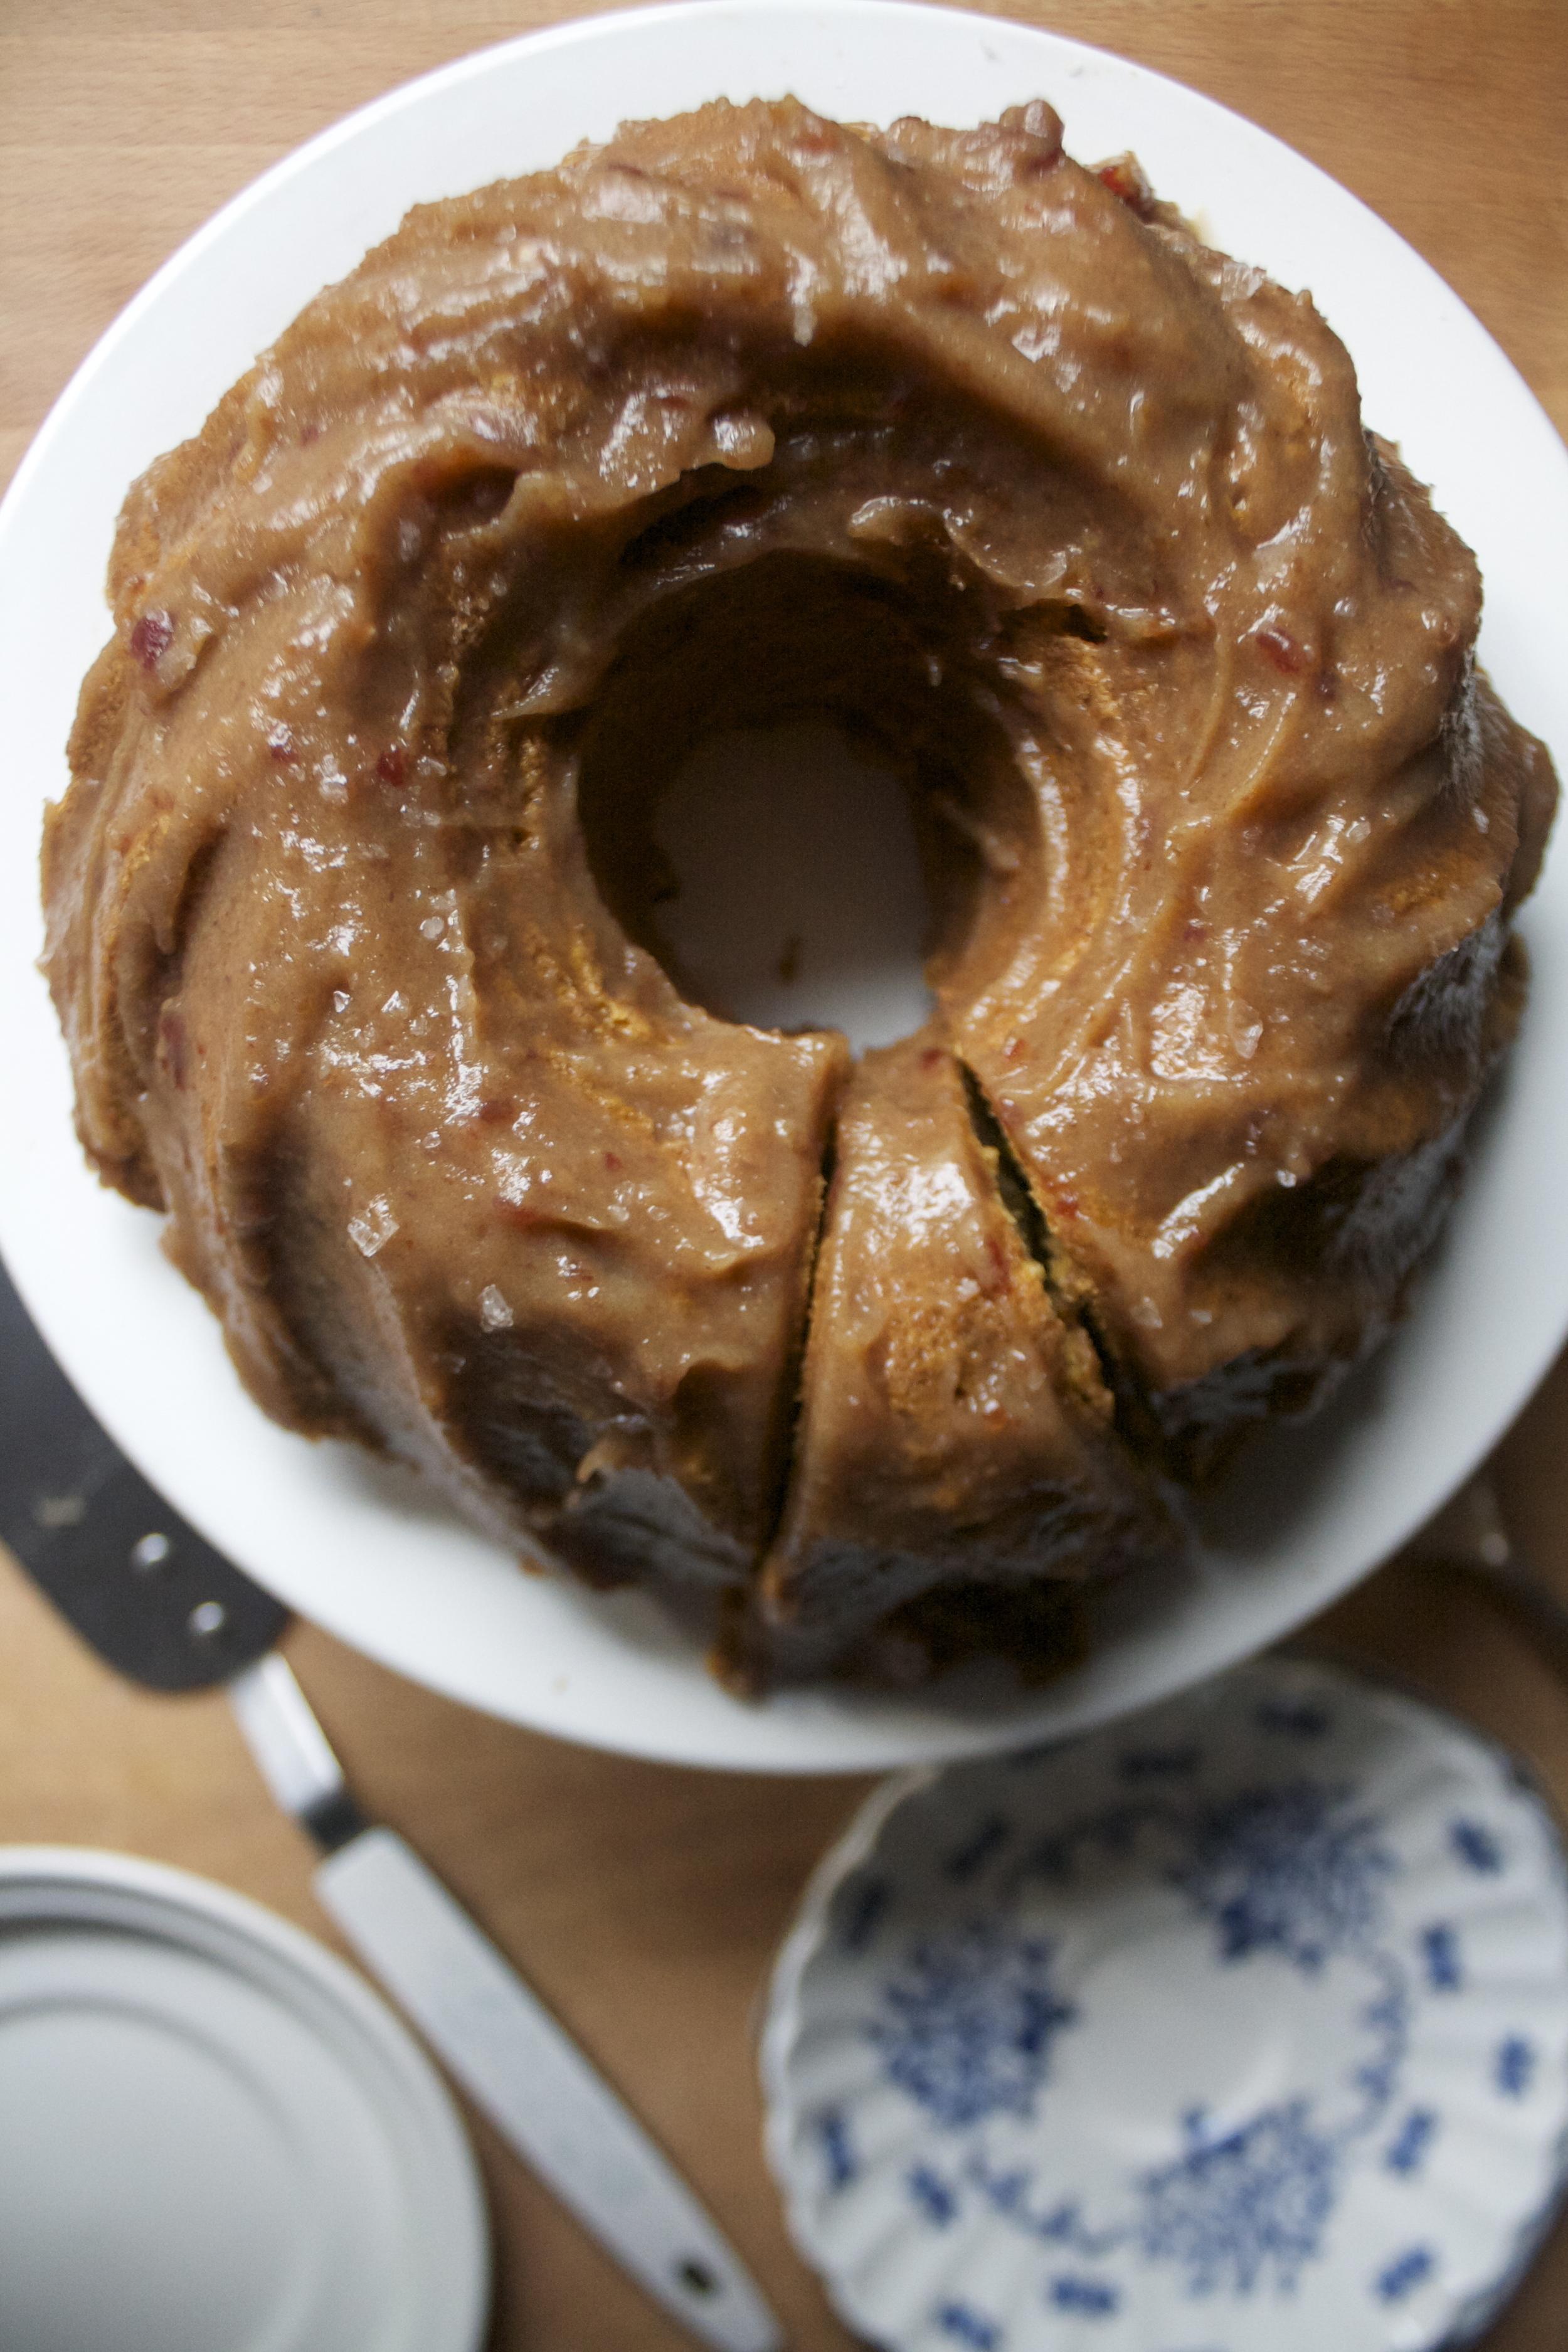
Take that sauce and spread it all over the cake. As much or as little as you want (you might have left over date sauce but its ok, you can just eat. It will last for about a week in the fridge and goes great with just about anything) Once fully sauced, sprinkle the cake with flaked sea salt.

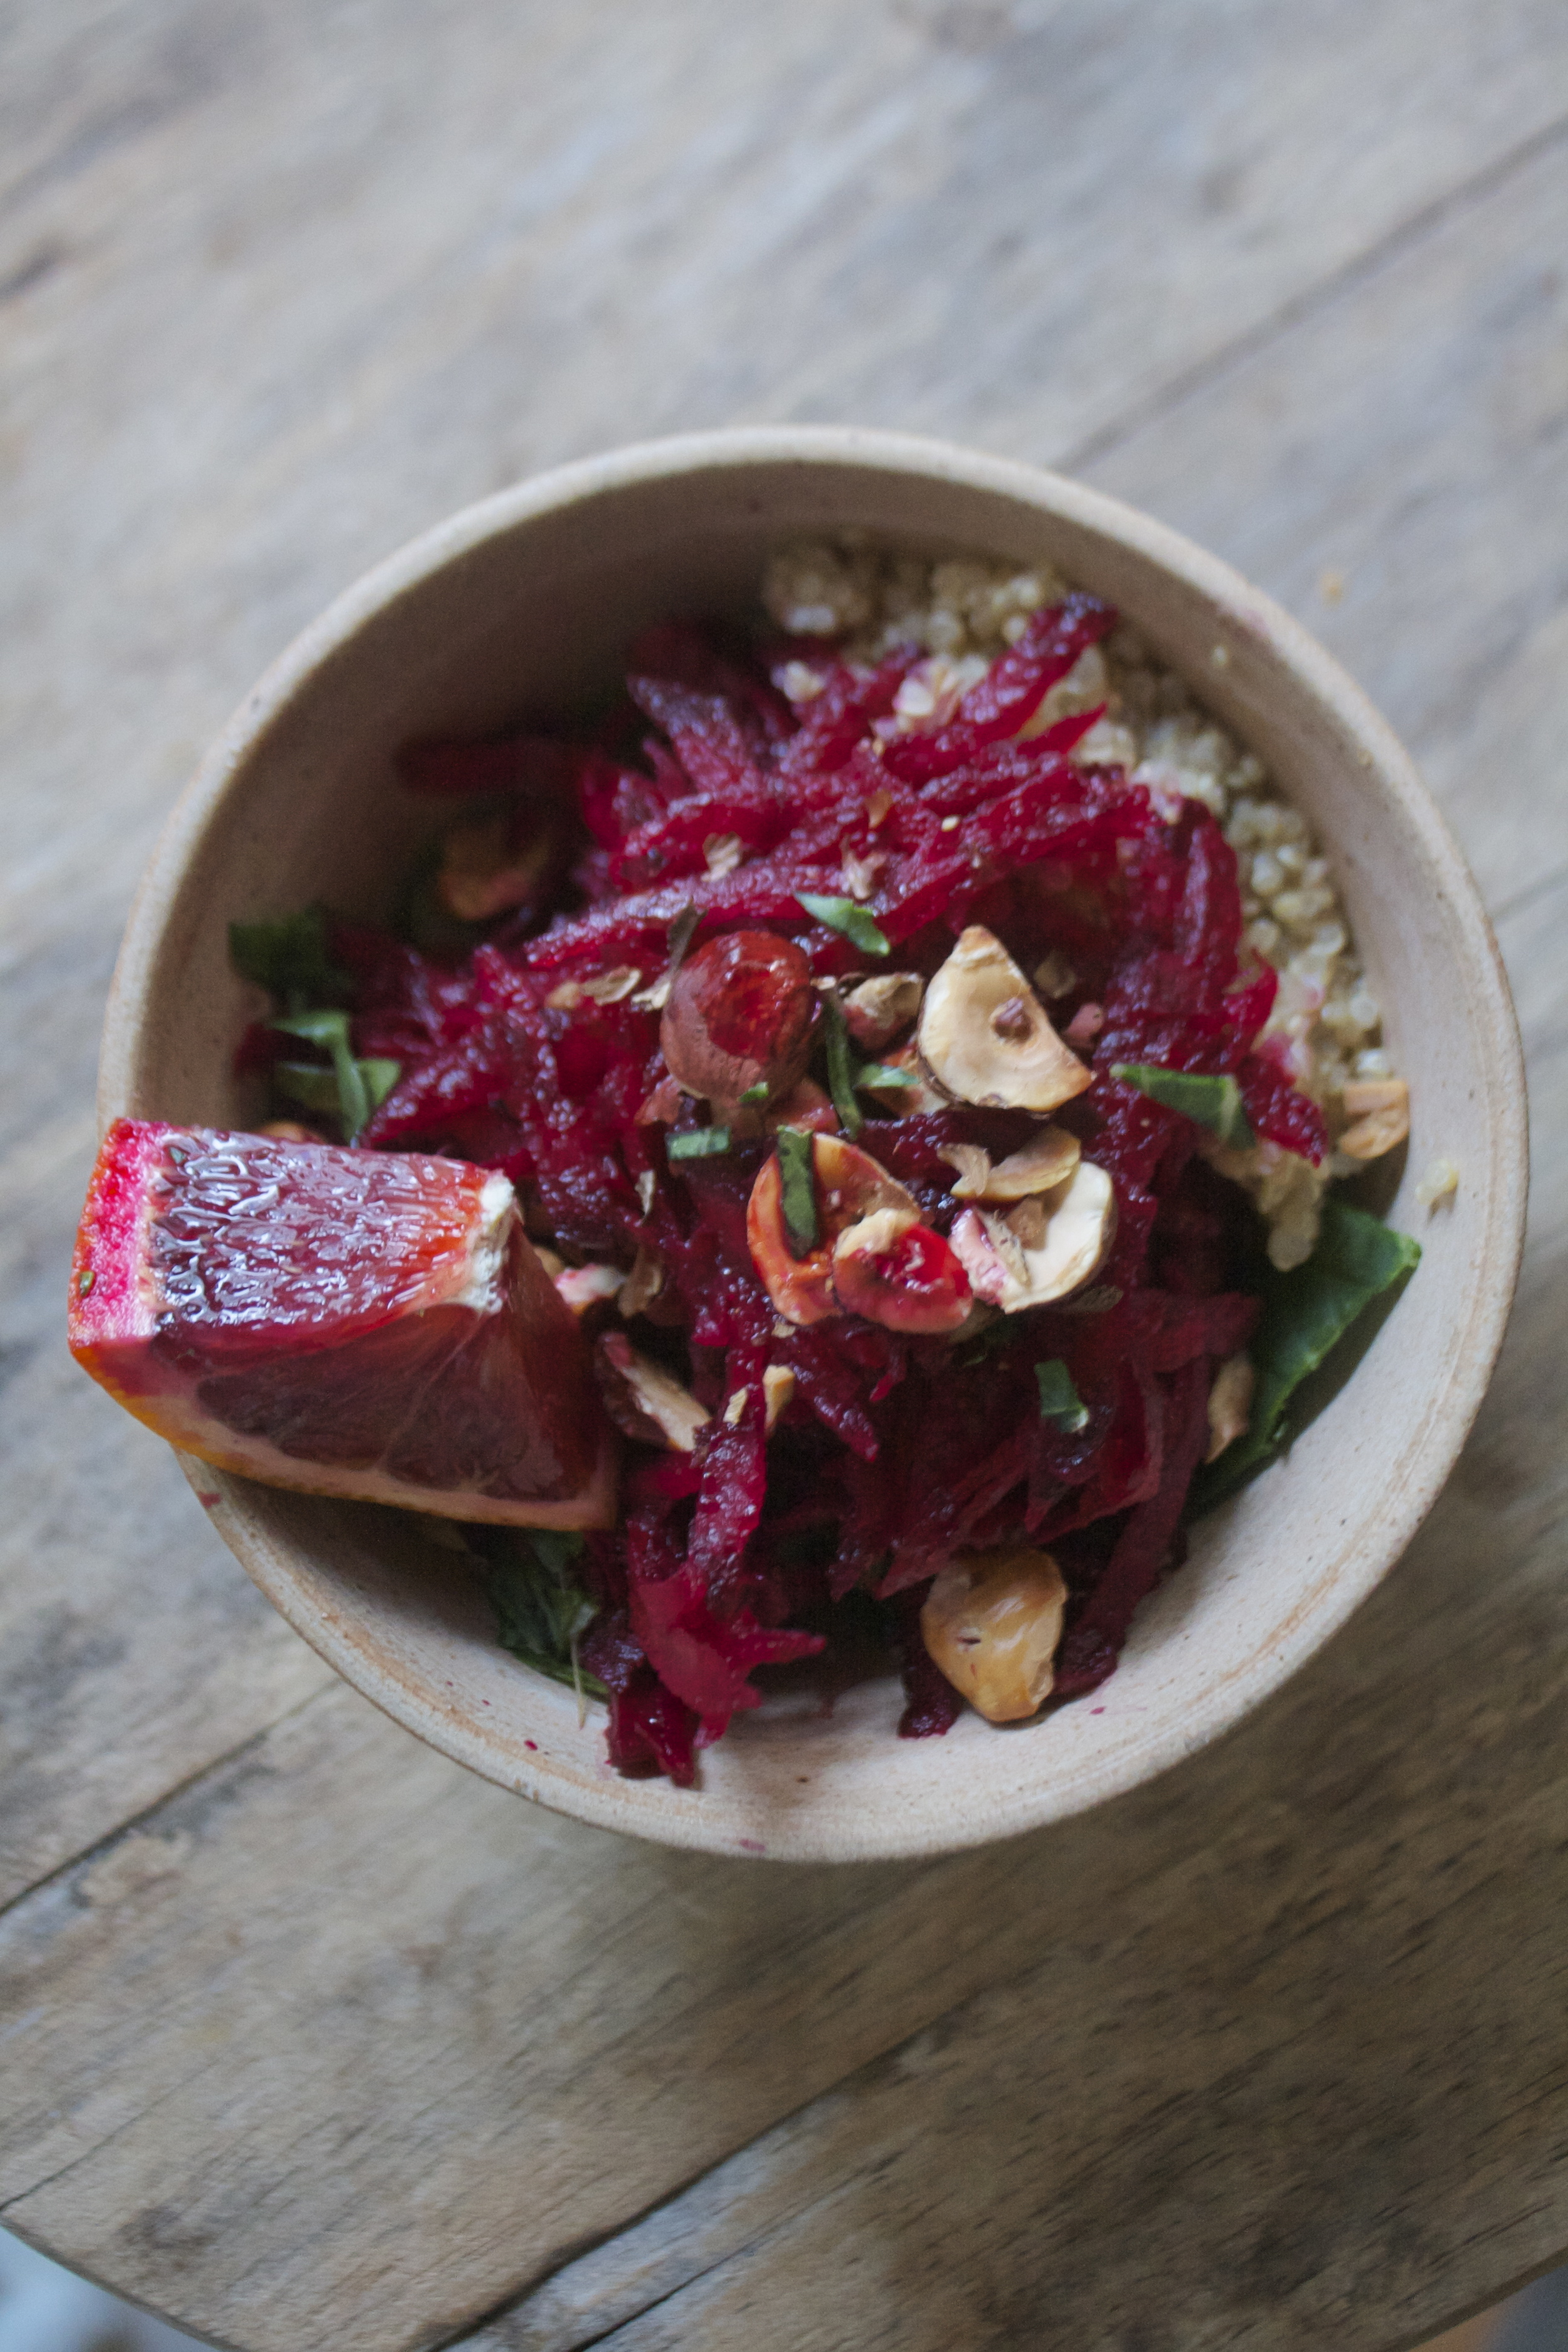
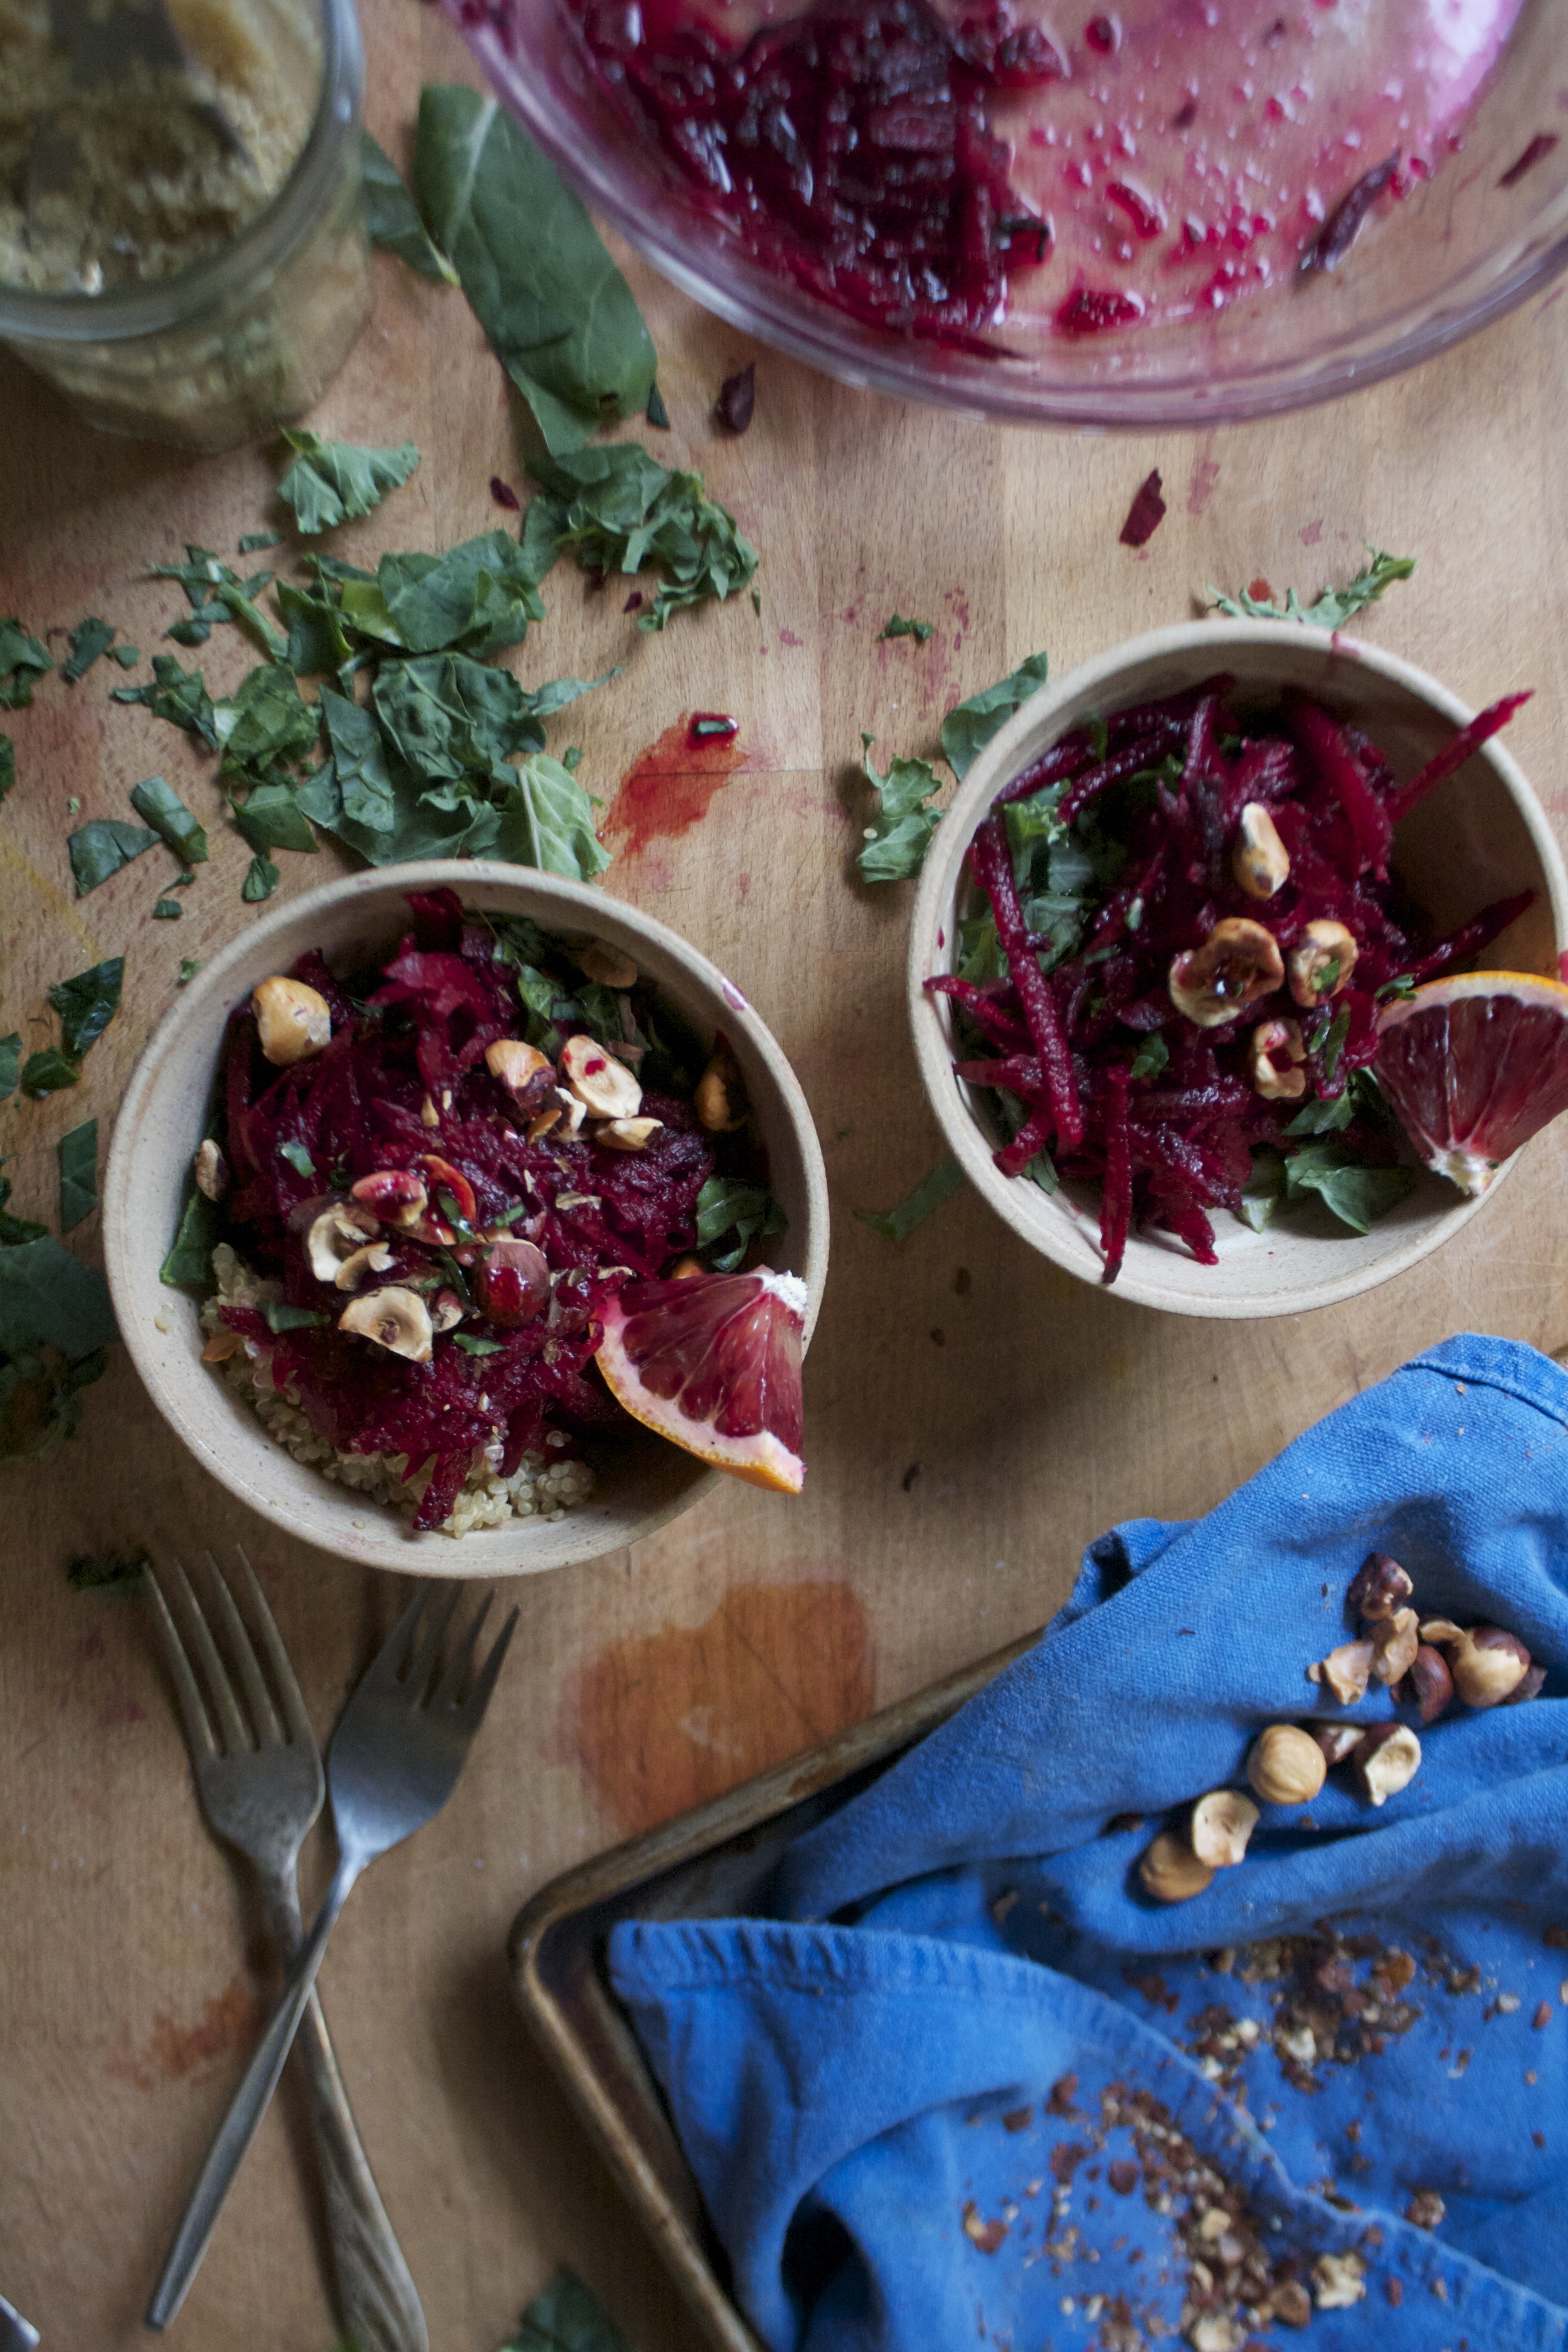
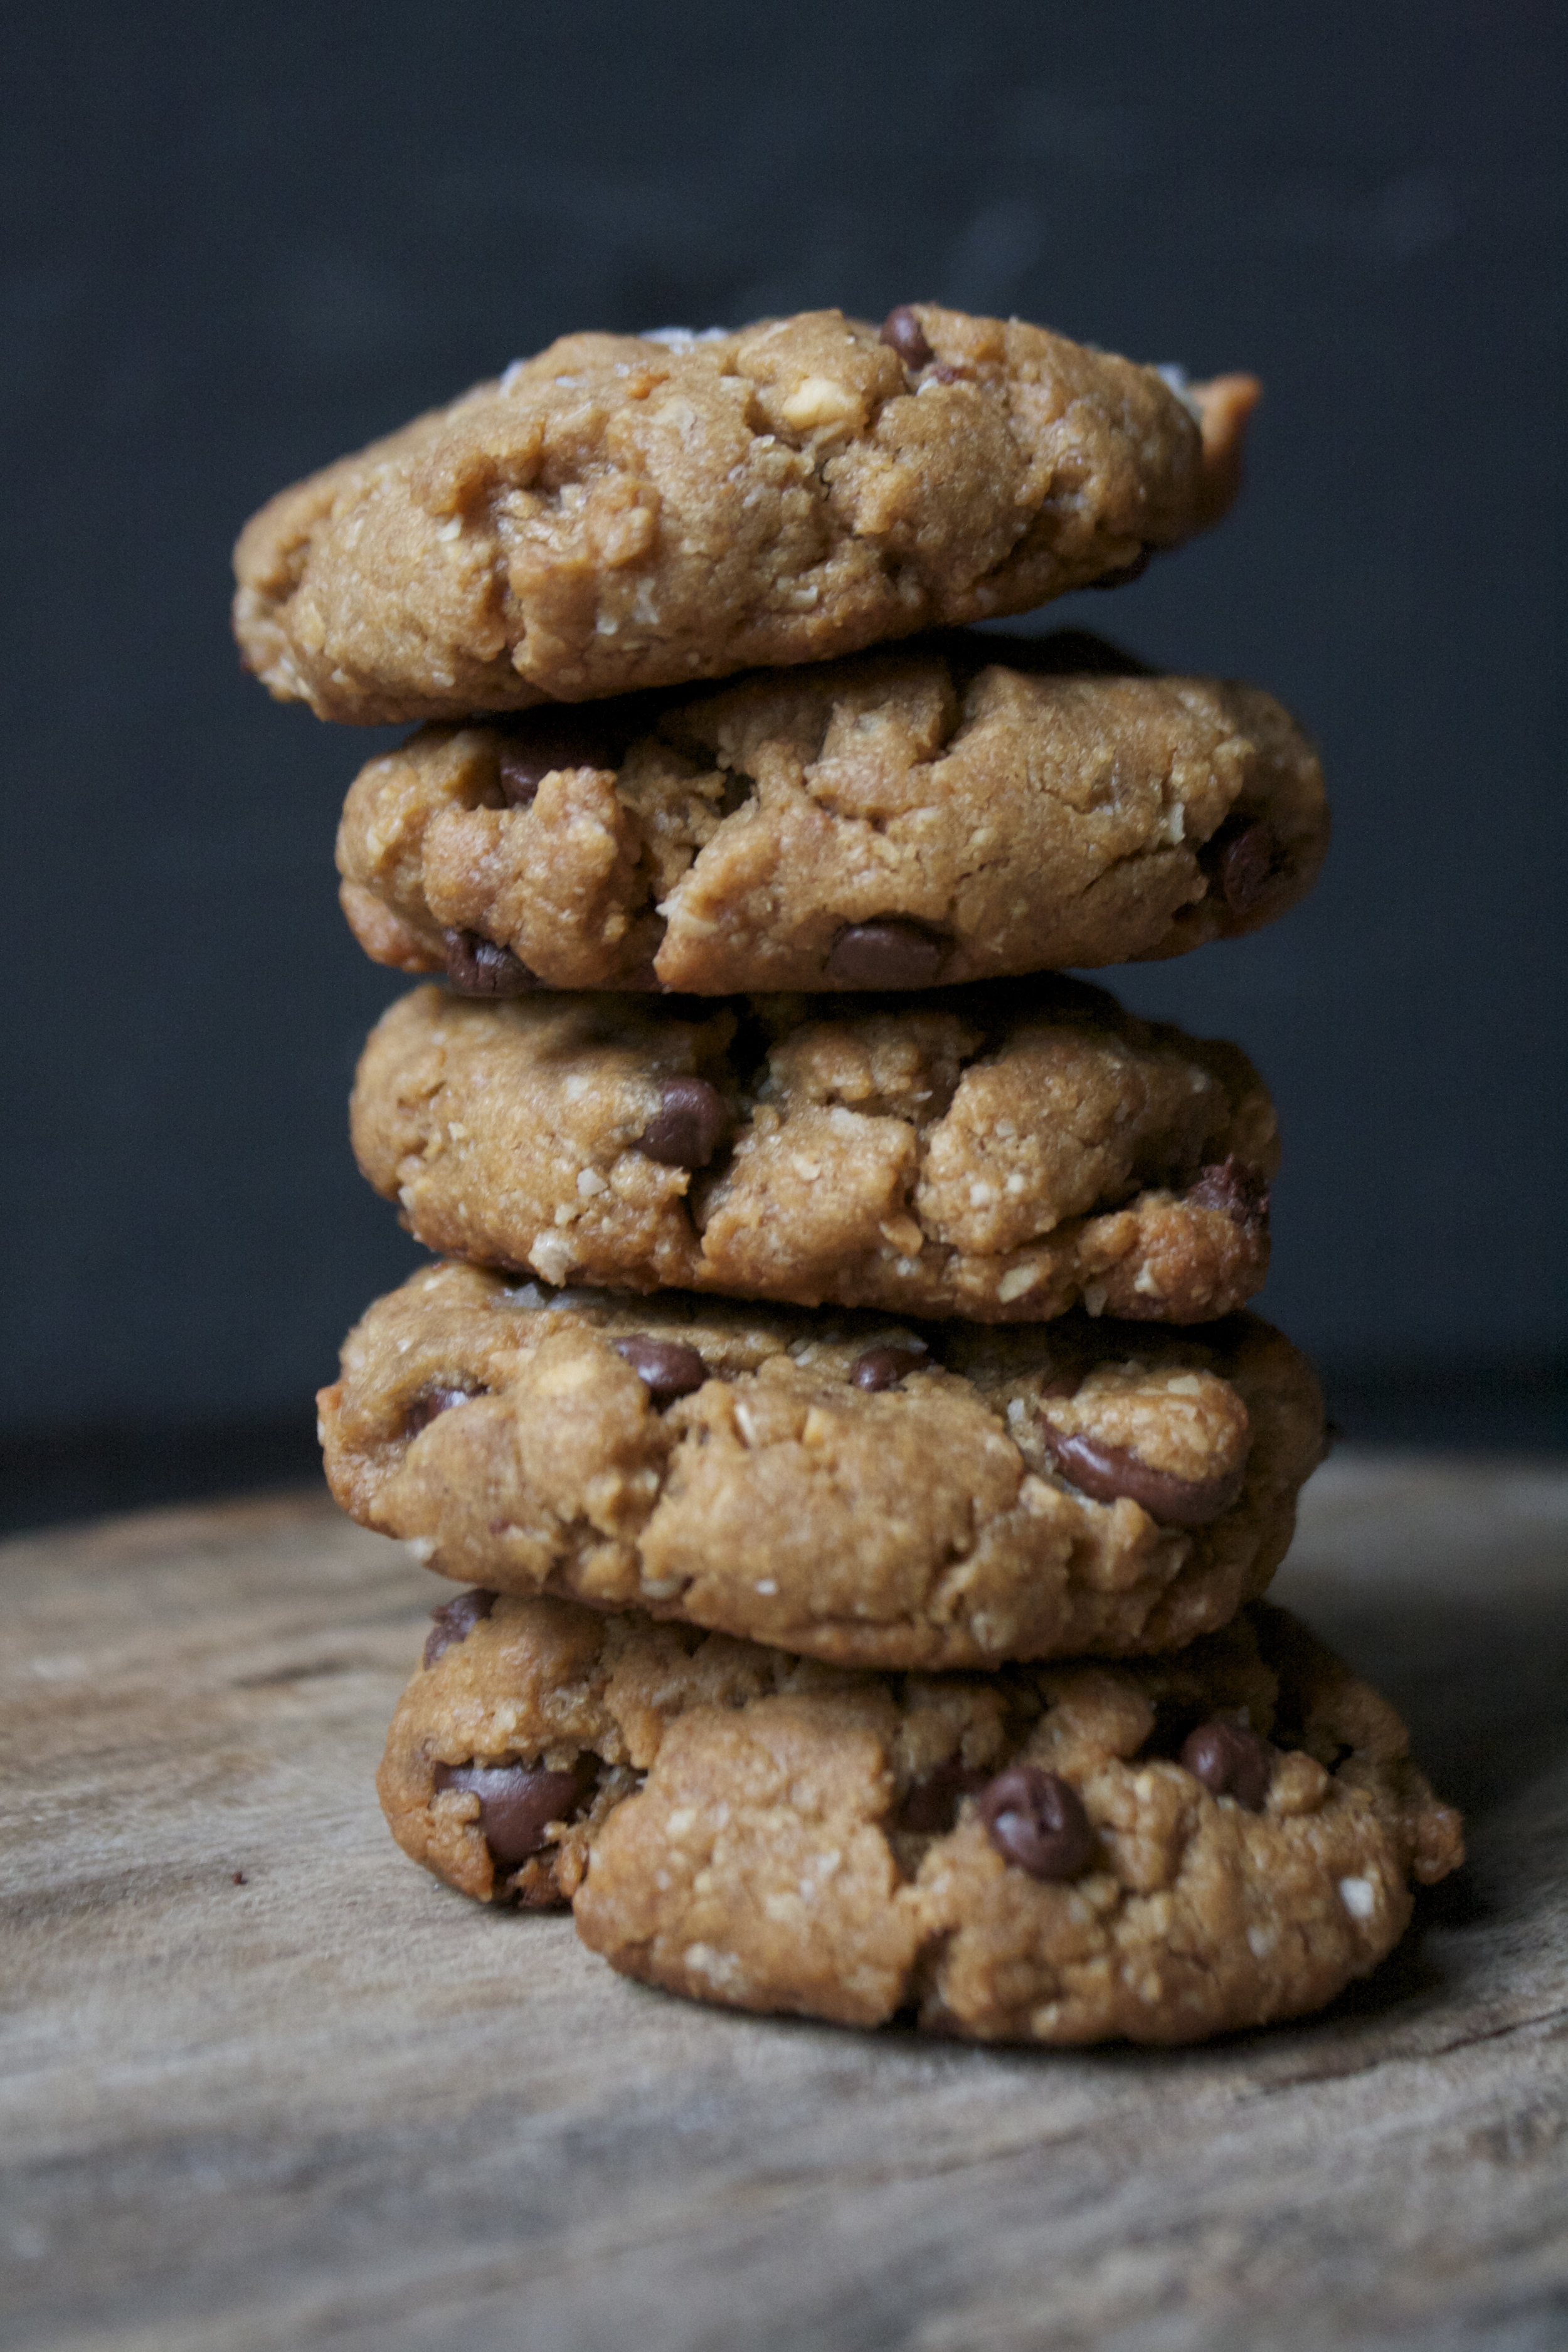
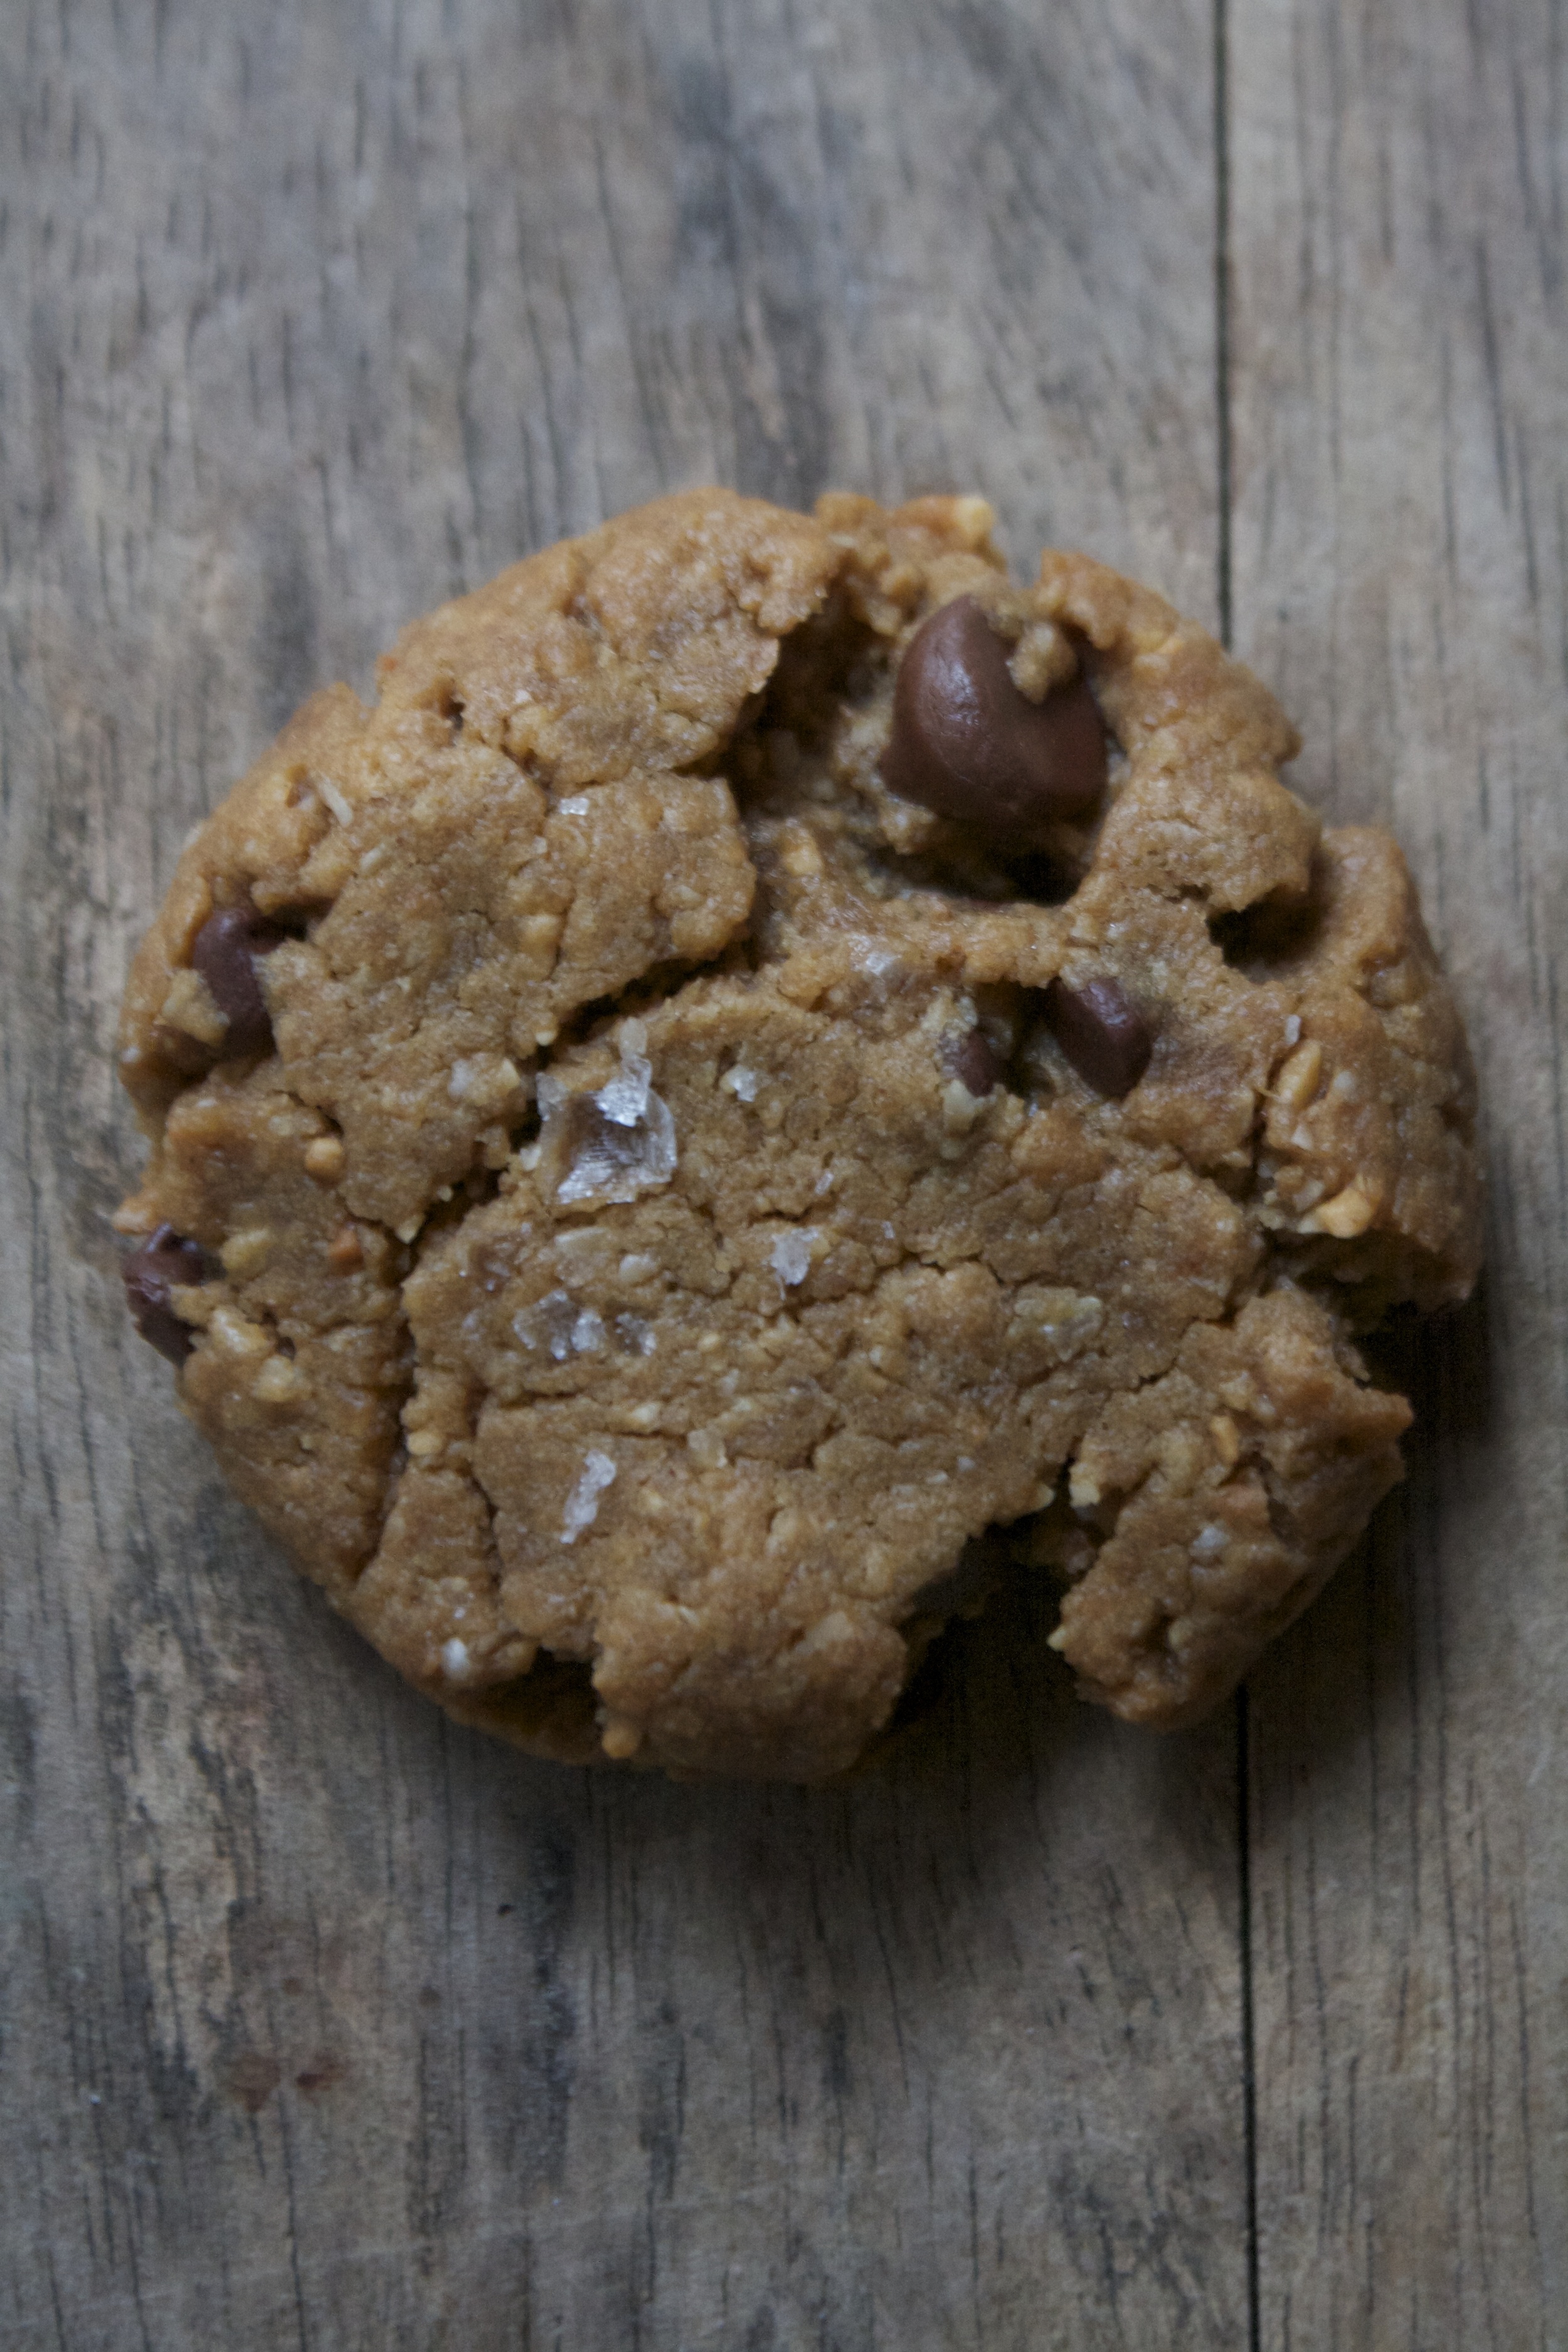
Sliced, plated, and ready. It's carrot cake time.

Have a great weekend, eat all your candy at once!

-C


Carrot Cake with Salted Date Sauce

Makes a bundt cake (but could be made into a 9x13 sheet cake)


  • 2 1/2 cups flour
  • 1 teaspoon baking soda
  • 2 teaspoons baking powder
  • 1 teaspoon salt
  • 3/4 cup brown sugar
  • 1/3 coconut cup oilany oil works)
  • 1 tablespoon apple cider vinegar
  • 3 large carrots (makes about 2 cups carrot puree and 1/2 cup of raw grated carrot)
  • 1 heaping tablespoon cinnamon
  • 1 teaspoon ginger

Salted Date Caramel

  • 1 cup medjool dates (pitted)
  • 1 cup almond milk (or any milk you want to use)
  • sea salt

Start by chopping up 2 of the biggest carrots and placing them into a pot with water about an inch of water. Stick on stove and bring to a boil then reduce to a simmer until the carrots are fork tender. When done, puree them with any means nessasary (hand blender, regular blender, food processor) Add the coconut oil and sugar to the warm carrot puree and mix until oil is melted.

Preheat oven to 350

In a large separate bowl, mix together the flour, baking soda and powder, salt, and the spices. Grate the smallest carrot in with the dry.

Take the wet carrot mixture and dump into the dry and mix, adding in the soy milk and the vinegar as you mix. Once everything is completely incorporated, pour mixture into a well oiled bundt pan and stick the cake into the preheated oven

While the cake is baking, make the date sauce. Just take the dates, remove pits if they have any and place in a food processor with a good pinch of sea salt and the almond milk. Pulse a few times, scrap down the sides, and keep blended, stopping to scrap sides if needed, until a nice thick smooth sauce is formed. If you want a thinner sauce, just add more milk til you get your desired consistency.

Now check cake. Once it's golden brown and a tester comes out clean (between 50 minutes to an hour) remove from oven. Let cool for a few minutes in pan the then turn it over onto a wire rack to finish cooling off. Once the cake is cool, dump the date sauce all over it then sprinkle with another good few pinches of the sea salt.

And now eat it. This is a cake that needs no fork, but you can go ahead and use one if you must.

In Vegetables, Vegan, Sweets, snack, sauce, recipes, holiday, desserts, Dairy Free, brunch, breakfast, cake Tags Carrot Cake with Salted Date Sauce, vegan, dates, carrots, veggies, plant based, easter, cake, bundt, spring
Comment

Raw Beet and Orange Salad with Roasted Hazelnuts

March 24, 2016 Colleen Stem
IMG_1238.jpg
IMG_1232.jpg

My fingers are almost always stained a bright pink. My cutting board and counter tops, pink. Look closely at at dish towels and you will find pink blotches all over them as with any of my light colored clothes. You would think after years of trying to remove beet stains form everything that I would have gotten a system down or at least had a designated cutting board for them, but no. That would be to easy and really,  I think I kinda don't care.  So pink my things will be.

Beets. You either love them or you hate them. I love them (so much), the mr, well I am making him love them. He needs to love them because I end up putting beets in everything. If you are a hater, there is still turn into a lover. But maybe you have never even eaten a beet or haven't in a long long time.  I am actually surprised at how many people I have talked to that have never tried beets before. If you are one of those people, stop being that person and eat one already. OR if you think you hate them, why don't you give them a second try, I bet you will change your mind. Sweet but earthy and nice and crisp but kind of juicy..they really are super tasty. And not to mention all the great health benefits(you can look those up yourself) Yup, beets be the shit!

 And I love a good roasted beet, but really, I prefer my beets raw. Which brings us to this salad. A simple salad of grated up beets, orange juice and toasted hazelnuts. Fast, easy, and tummy satisfying.  As long as you don't hate beets (how could you) then you will love it.

Now you get those beets!

The stuff. A big beet, (or two smaller ones) an orange,( I bought navel oranges and sliced into this one to find it was a blood orange... not complaining), hazelnuts (raw or toasted) apple cider vinegar, and salt and pepper. Optional but also very nice, some greens and or some type of grain. (I happen to have a some quinoa in the fridge)

IMG_1152.jpg
IMG_1179.jpg

Hazelnuts. If yours are already toasted, then no need to do it again, but if they are raw, toss them into the oven for a few minutes (hazelnuts taste so much better toasted)

And grab the beet and a shallow dish and grate it all up.

Add to the beet the juice of the orange, a small splash of vinegar to cut the sweetness, and salt and pepper to taste. Give it a good toss and let it sit for at least 5 minutes, if not longer.

And if the hazelnuts are in the oven, take them out when they are slight golden brown. If you want to remove the skins, just stick them in a clean towel and rub it off.

Everything all ready to go.. Any extras are added to bowls.

Beets into bowls, topped with toasted nuts and a cute little orange segment.(if you happen to have one lying around)

Isn't that just something. Beets are so pretty,, but more importantly, so freaking tasty good.

Enjoy Today!

-C


 Raw Beet and Orange Salad with Roasted Hazelnuts

makes enough for 2 people as a side

  • 1 large beet or 2 smaller beets
  • 1 orange (I used blood orange but any orange would be good)
  • handful of hazelnuts (either already roasted or raw that need to be roasted)
  • apple cider vinegar
  • salt and pepper
  • Optional - quinoa (any grain would work) and or greens

If you hazelnuts are raw, toss them onto a baking sheet ans place them into the oven at 300 for about 6-8 minutes until slightly golden brown and smell so nice. When done remove and if you don't like the skins, place nuts in a clean towel and rub the skins right off.

Wash beet(s) and grate into a swallow bowl. I don't peel mine, but peel if you must. Add in the juice of the orange, a splash of vinegar and a dash of salt and pepper. Mix around and let sit for at least 5 minutes (the longer the better)

When you are ready for food, grab a bowl (add anything you want to add to the bottom, like quinoa or greens) and fill that bowl up with the beet salad and top with roasted hazelnuts.

Grab a fork and eat.


In Vegetables, Vegan, salad, recipes, Raw, Gluten Free, dinner, Dairy Free, 5 ingerdients or less Tags Raw Beet and Orange Salad with Roasted Hazelnuts, raw, beets, clean eating, fresh, local, roots, vegan, salad, nuts, plant based, orange
Comment

Cabbage and Kidney Bean Pot Roast

March 17, 2016 Colleen Stem
IMG_0926.jpg
IMG_0945.jpg

Every year I look forward to St Patrick's day.. And not because I am Irish, (which I am) or because I want to drink on excess (which I do not) and no,  green eggs and ham are not something that I plan on making. No Ido not look forward to any of those things (although I actually do like to pinch the littles that wear no green and talk about pots of gold and rainbows) I love this time of year because cabbage is always on a freaking super sale everywhere you go.  Something that is usually 80-99 cents a pound goes down to like 20 cents a pound. And for someone that eats like 10 heads of cabbage a week, this is a hug savings. SO yeah, I buy so so much (I have already bought 12 heads, but I actually plan on buying a full case before the sale is over)

No, I am not crazy, I will eat it all..... and I am going to be making so much sauerkraut. Woo hoo!

But until then. A cabbage pot roast. Yes. I remember growing up my mom would make pot roasts once in a while. A big pot full of big chunks of veggies topped with a big slab of some kind of meat. I never liked the meat, but I always loved the big chunks of the veggies at the bottom of the pot. So I figured I would make a big pot roast, replace the meat with a head of cabbage (I have so much) and add beans because protein and because they are just so good. . And when it's all cooked and said and done, you end up with a big pot of plump and so flavorful veggies and beans and the most tender wedged of roasted braised cabbage.  This is my kind of pot roast.

Now go quick.. the cabbage sales will be over soon.

The stuff. One good sized head of cabbage, a few carrots, a big onion, and a hunk of rutabaga. Also have some dried kidney beans, caraway and fennel seeds, dried ground mustard, a bay leaf, some garlic, and salt and pepper. And water... water is needed.

Note. You can use just caraway or just fennel and you can replace or even add a potato in place of the rutabaga.

Dried beans, fennel and caraway into a pot with water. Stick the pot on the stove ans bring to a boil, then to a simmer to give the beans a quick head start before going into the oven.

While the beans are simmering, dice up the garlic and chop up the veggies into big chunks... you don't want small chunks or they will kind of turn to mush while cooking.

And turn over the cabbage head, take a knife, and slice a deep x into the core. DO THIS or else the inside of the cabbage will not cook through. Oh and preheat the oven to 375.

Beans looking a bit plumped..

IMG_0838.jpg
IMG_0843.jpg

Top those beans with all the chopped veggies,(don't stir them in., you want to keep the bean under submerged in the water) sprinkle those with the mustard, salt and pepper and place that lovely cabbage head right on top...

Place a lid on the pot and slide it into the oven to cook away. It's going to take a bit of time (about an hour) but it's pretty much hands off. Just take a look after about 45 minutes, check the bean doneness, add in another cup or so of water and place lid bacck on and cook for another 12-20 minutes until the beans are done. When they are, take the lid off, crank the oven to 450 and cook for another 15 or so minutes until the cabbage gets all golden brown

Look at that... Tender roasted veggies, plump beans. Everything about this is right.

Grab a knife and cut the cabbage (its so tender) into big wedges.

A wedge into a bowl along with a big spoonful or two of the beans and veggies..

Finished with a dash of salt and pepper and (not shown here,) lots of mustard.. Oh cabbage... you are so good!

Eat away and Happy St Patrick's Day.

-C


Cabbage and Kidney Bean Pot Roast

serves 3-4

  • 1 cup dried kidney beans
  • 3-4 cups water
  • a medium sized head of cabbage
  • 2-3 carrots
  • 1 large onion
  •  a potato or a a small rutabaga(or both)
  • 1 heaping teaspoon caraway seeds
  • 1 heaping teaspoon fennel seeds
  • 1 heaping teaspoon ground mustard
  • a bay leaf
  • salt and pepper

Place the fennel, the caraway, and the bay leaf into a large dutch oven along with the dried beans and 3 cups of water. Place on the stove and being to a boil then, turn heat to low and simmer the beans for about 15 minutes.

While beans are simmering, chop up the carrot, onion and rutabaga into big chunks and dice up the garlic. Take head of cabbage and slice a deep x into the core.

Preheat oven to 375

Once the beans have simmered a bit, add in the chunks of veggies, the ground mustard and salt and pepper (Don't stir, you want to keep the bean submerged in the water). Place the head of cabbage right on top of the veggies and sprinkle with salt and pepper.

Place a lid on the pot and stick the whole thing into the oven. After about 45 minutes, check the roast and the beans for doneness and adding in another cup of water id needed. Back into oven with the lid for another 15-20 minutes or until the beans are tender Onnce they are, remove the lid form the pot and crank the oven up to 425. Cook for another 15 minutes or so until the cabbage turns a nice golden brown.

Remove from oven, let cool for a few minutes, cut the cabbage head into wedges and serve it up with big spoonfuls of beans and veggies.

Eat until your full.

.

In beans, Dairy Free, dinner, entree, Gluten Free, grain free, holiday, photography, pulses, recipes, Savory, Vegan, one pot meal, Vegetables Tags Cabbage and Kidney Bean Pot Roast, cabbage, kidney beans, pulses, vegan, gluten free, plant based, healthy, veggies, clean eating, entree, pot roast, beans
Comment

Oven Baked TATER TOTS

March 15, 2016 Colleen Stem
IMG_0627.jpg
IMG_0575.jpg

Tuesday tater tot time!

Sometimes you just want a tater tot. So what are you to do about it? Well I fought off the feeling for far too long (why? I do not know) and finally gave in got my shit together, got some potatoes, and made the tots. And then I was happy.

What was taking me so long?  Tater tots are freaking good.

These are nothing like those tots that were served in the lunch room cafeteria that we all know and loved. No these are sooooo much better, and probably (definitely ) way way healthier too cause they are baked, not fried. And to make'em even better, after making the tater tot tower you're ready to eat, you can eat them up with whatever dippy type thing you can think of. Sure you could go with straight up ketchup (me, not a fan) or you could go nuts and make a big bowl of guacamole, grab the mustard and the hot sauce, and do that. Tater tots go so well with all sorts of stuff. (I was even thinking peanut butter but stopped myself for the time being)

. Next time I make them, I am so going to make a tater tot castle!

Tots away!

The stuff. Potatoes (duh), an onion, garlic powder, olive oil, and salt and pepper.

First thing to do is boil the potatoes...just a bit. Cut each potato into 4 wedges and stick into a big pot full of cold water, salted water. Stick pot on the stove ans bring to a boil, then turn heat down a little and continue to cook the potatoes until they are just barely for tender. Strain from the water and set aside to cool.

Once the potatoes have cooled off enough where you can handle them, grab a grate and grate them all up, along with the onion. ME, trying to use the least amount of dishes possible, I just grated it all onto the baking sheet that I was using to bake the tots off.... Worked like a charm. And once your taters and onion are grated, sprinkle in the garlic powder, a good amount of salt ans pepper ans drizzle it all with a little bit of olive oil. Mix it all around (I used my hands but a fork would work) and if you are using the baking sheet , just push the mound to one side.

And start forming the taters into tots.... Just grab a handful and squeeze it together into a tot shape.

Note. Have a dish towel close by to wipe your hands when they get to starchy... the tots stick together better when made with dry hands.

Tots ready for the oven. Bakes for 30-35 minutes at 400.. Flip after about 20 minutes.

Golden brown, all crispy an tot like. Ready for your eating pleasure.

Plate them up, serve with your favorite condiments (try guacamole , mustard and hot sauce) and eat them. Eat them all.

-C


Oven Baked Tater Tots

serves 3

  • 2 big russet potatoes
  • 1 sweet yellow onion
  • 1 tablespoon or so garlic powder
  • olive oil
  • salt and pepper

Slice the potatoes lengthwise into quarters and place into a pot of cold, salted water, making sure the potatoes are completely submerged.  Bring the potatoes to a boil then turn heat to medium and keep boiling until the potatoes are just barely fork tender., like 8-10 minutes. Drain the potatoes and let them cool.

Preheat oven to 400

Once cooled, grate the potato, along with the onion into a bowl or onto a baking sheet. Sprinkle with the garlic powder, add a good amount of salt ans pepper and drizzle with olive oil. Toss around until its evenly coated then start forming the mixture into tots. Place the tots on a baking sheet and once all the tots are formed ans ready to go, stick into the oven. Bake for about 20 minutes, remove, flip them over, then continue to bake for another 10-15 until they are all nice and golden brown.

Remove from oven, grab your favorite condiments and eat right away.


In Vegetables, Vegan, Savory, recipes, Paleo, grain free, Gluten Free, dinner, Dairy Free, brunch, breakfast, 5 ingerdients or less Tags tater tots, potato, oven baked tater tots, plant based, vegan, gluten free, clean eating, side dish
Comment

Peanut Butter Chocolate Chip Oat Cookies

March 8, 2016 Colleen Stem
IMG_0377.jpg
IMG_0367.jpg

One of the mr's little brothers really likes peanut butter cookies. He is always asking me to make them for him so this past weekend, for his 24h birthday, I did just that. Peanut butter chocolate chip birthday cookies,  Just for him. (I know, I am the best)

After rushing home the evening before to make this awesome cookies for the boy, I waited until a decent time the next day and I shot him a text.. "Happy Birthday! Where are you?, I want to bring you cookies!". That was at noon. I get a text back around 3... "just woke up, I'll come get them later." (Sleeping until 3pm.. that must have been a crazy ass birthday morning!)

Well guess what. That little shit didn't come get the cookie that I made all special like for him so now the mr has slowly been picking them off. And the mr. says that these cookies are like magic. That they are so freaking good, probably the best peanut butter cookie he has ever had.  (he doesn't usually say things like that about cookies so the really must be amazing)

So if you are reading this Qui.. you have a a few magic cookies left...but I can't promise anything after tonight.  The sister is coming over for dinner and I'll just give them to her for dessert..........

The stuff. Rolled oats, peanut butter, brown sugar, sea salt and chocolate chips. Also a bit of baking soda, some vanilla extract and a bit of water.  You need no flour, eggs or butter, these cookies are all about simple goodness.

Notes. Chunky or smooth peanut butter is cool here and you can use natural or skippy.. the skippy cookie will just be a bit sweeter. And the sea salt. If you don't have sea salt, add a teaspoon of table salt to the cookie batter. The sea salt is for the tops of the cookies and you should NOT use table salt for that.

IMG_0232.jpg
IMG_0233.jpg

Start by sticking the oats into a food processor and blending until your oats become oat flour.

Then dump everything else in (water first), EXCEPT the chocolate chips.

And pulse until it all comes together into a yummy peanut butter cookie dough.

Dump the dough into a bowl and now mix in the chocolate chip.  Once you do that, stop eating the dough and stick the bowl in the fridge for 10-15 minutes to slightly chill.... 

After the bout in the fridge, grab your dough and scoop out like sized balls of dough and place them on baking sheet. Give each ball a smoosh (use a fork or your fingers) and sprinkle the tops with a small little pinch of sea salt (again, if you don't have sea salt, so not use table salt... just skip this)

And into the oven they go...

Only until slightly golden brown and just starting to look almost done..... that's when they are done (about 8 minutes)

Let the cookies cool for a minutes on the baking sheet then transfer to a wire rack to finish.

Super awesome and super duper duper good. Made with love and good intentions for a little shit... but left to be eaten by others

But really these are so easy and fast to make. I'll probably just end up making the boy a new batch. (again, so nice)

Have a super duper day!

-C


Peanut Butter Chocolate Chip Oat Cookies

Make about a dozen

  • 1 cup old fashion oats
  • 1/2 cup warm water
  • 1 heaping cup peanut butter (creamy or chunky)
  • 2/3 cup brown sugar
  • 1/2 teaspoon baking soda
  • 1 teaspoon vanilla extract
  • 1/2 ish cup chocolate chips/chunks (the tiny chips work the best)
  • flaked sea salt (optional)

Note. Flaked sea salt is a perfect finish for the cookie but if you don't have it or don't want to use it, add a teaspoon of table salt to the cookie batter but don't sprinkle the tops with it.

Place oats in food processor ans blend until it turns into flour. Add in water, pulse, then add in the rest, EXCEPT the chocolate chip.  Pulse until a dough forms. Dump the dough into a bowl and now mix in the chocolate chips.

Stick the dough in the fridge for about 15-20 minutes.... In the mean time, do the dishes and a little cookie dance.

Preheat oven to 350.

With a scoop or spoon. scoop out your preferred sized cookies onto a baking sheet. Give each cookie ball a little smoosh with either a fork for a pattern or just your fingers. Sprinkle each smooshed cookie with a pinch of sea salt.

Stick the cookies in oven and bake for 8-9 minutes, until just barely golden brown. Remove from oven, let cool for a minutes then remove from sheet to cool on a wire rack.

Place a cookie or two on a plate, stash the rest away (or else you will eat them all) grab a nice cold glass of some milk situation or a pipping hot cup of coffee and sit down with a good book or even a smutty magazine (no judgment here), read, eat cookies and be happy.

Enjoy!

In Vegan, Sweets, snack, recipes, Gluten Free, desserts, Dairy Free, cookies Tags Peanut Butter Chocolate Chip Oat Cookies, cookies, oats, vegan, gluten free, egg free, vegan gluten free cookies, clean eating, plant based, healthy foods, treats, dessert, peanut butter, easy
Comment
← Newer Posts Older Posts →
 

https://thelovelycrazy.squarespace.com/config#/|/about/

Me. Food Maker.Food eater. Woo HOO!

STEM+NODE  SMALL BATCH AND ONE OF A KIND POTTERY

stem+node ceramics


____________________

Subscribe

GET NEW POSTS IN YO EMAIL

You are AWESOME!!!


@thelovelycrazy 2014-2021