• stem+node ceramics
  • HOME
  • Food Recipes
  • About
  • Contact
Menu

The Lovely Crazy

Street Address
City, State, Zip
Phone Number

Your Custom Text Here

The Lovely Crazy

  • stem+node ceramics
  • HOME
  • Food Recipes
  • About
  • Contact

Pomegranate Orange Poppyseed Muffins

January 12, 2019 Colleen Stem
IMG_4341.jpg
IMG_4319.jpg

I love pomegranates but barely ever buy them because they are usually really expensive. A few weeks ago I was pleasantly surprised to find that that the grocery store was selling them at a reasonable price so I bought one. Duh. Anyway, that was a few weeks ago and I have had the pomegranate chillin in the fridge, just waiting for the perfect time to bust open and retrieve all the bright pink jewel like seeds. But I also kind of forgot about it. It was hiding behind a giant rutabaga. When I finally grabbed the rutabaga for some soup, the pomegranate reviled itself again. It was time, it needed to be eaten. And me being me, I can’t not share right? So I asked the mr what he wanted me to bake. He said muffins, and that is how I came to pomegranate orange and poppyseed muffins. Look at me, poster child for sharing good things. I should get a gold star!.

Anyway, these muffins came out awesome. First, they smell so good because anything baked smells good but the orange really shines and the smell is still lingering in my hair. Secondly, people really were into them. The mr said they were amazing when I finally let him eat one (two actually because I made them mini) and when I brought them over to Megans house for dinner, my Dad at one, then two, then three.. ..He stopped at 5, and this was after dinner. When a guy eats 5 muffins and is not a muffin man, you take it as a good sign.

Do yourself a solid this cold ass weekend and bake something. These muffins are a good place to start.

To the muffins!

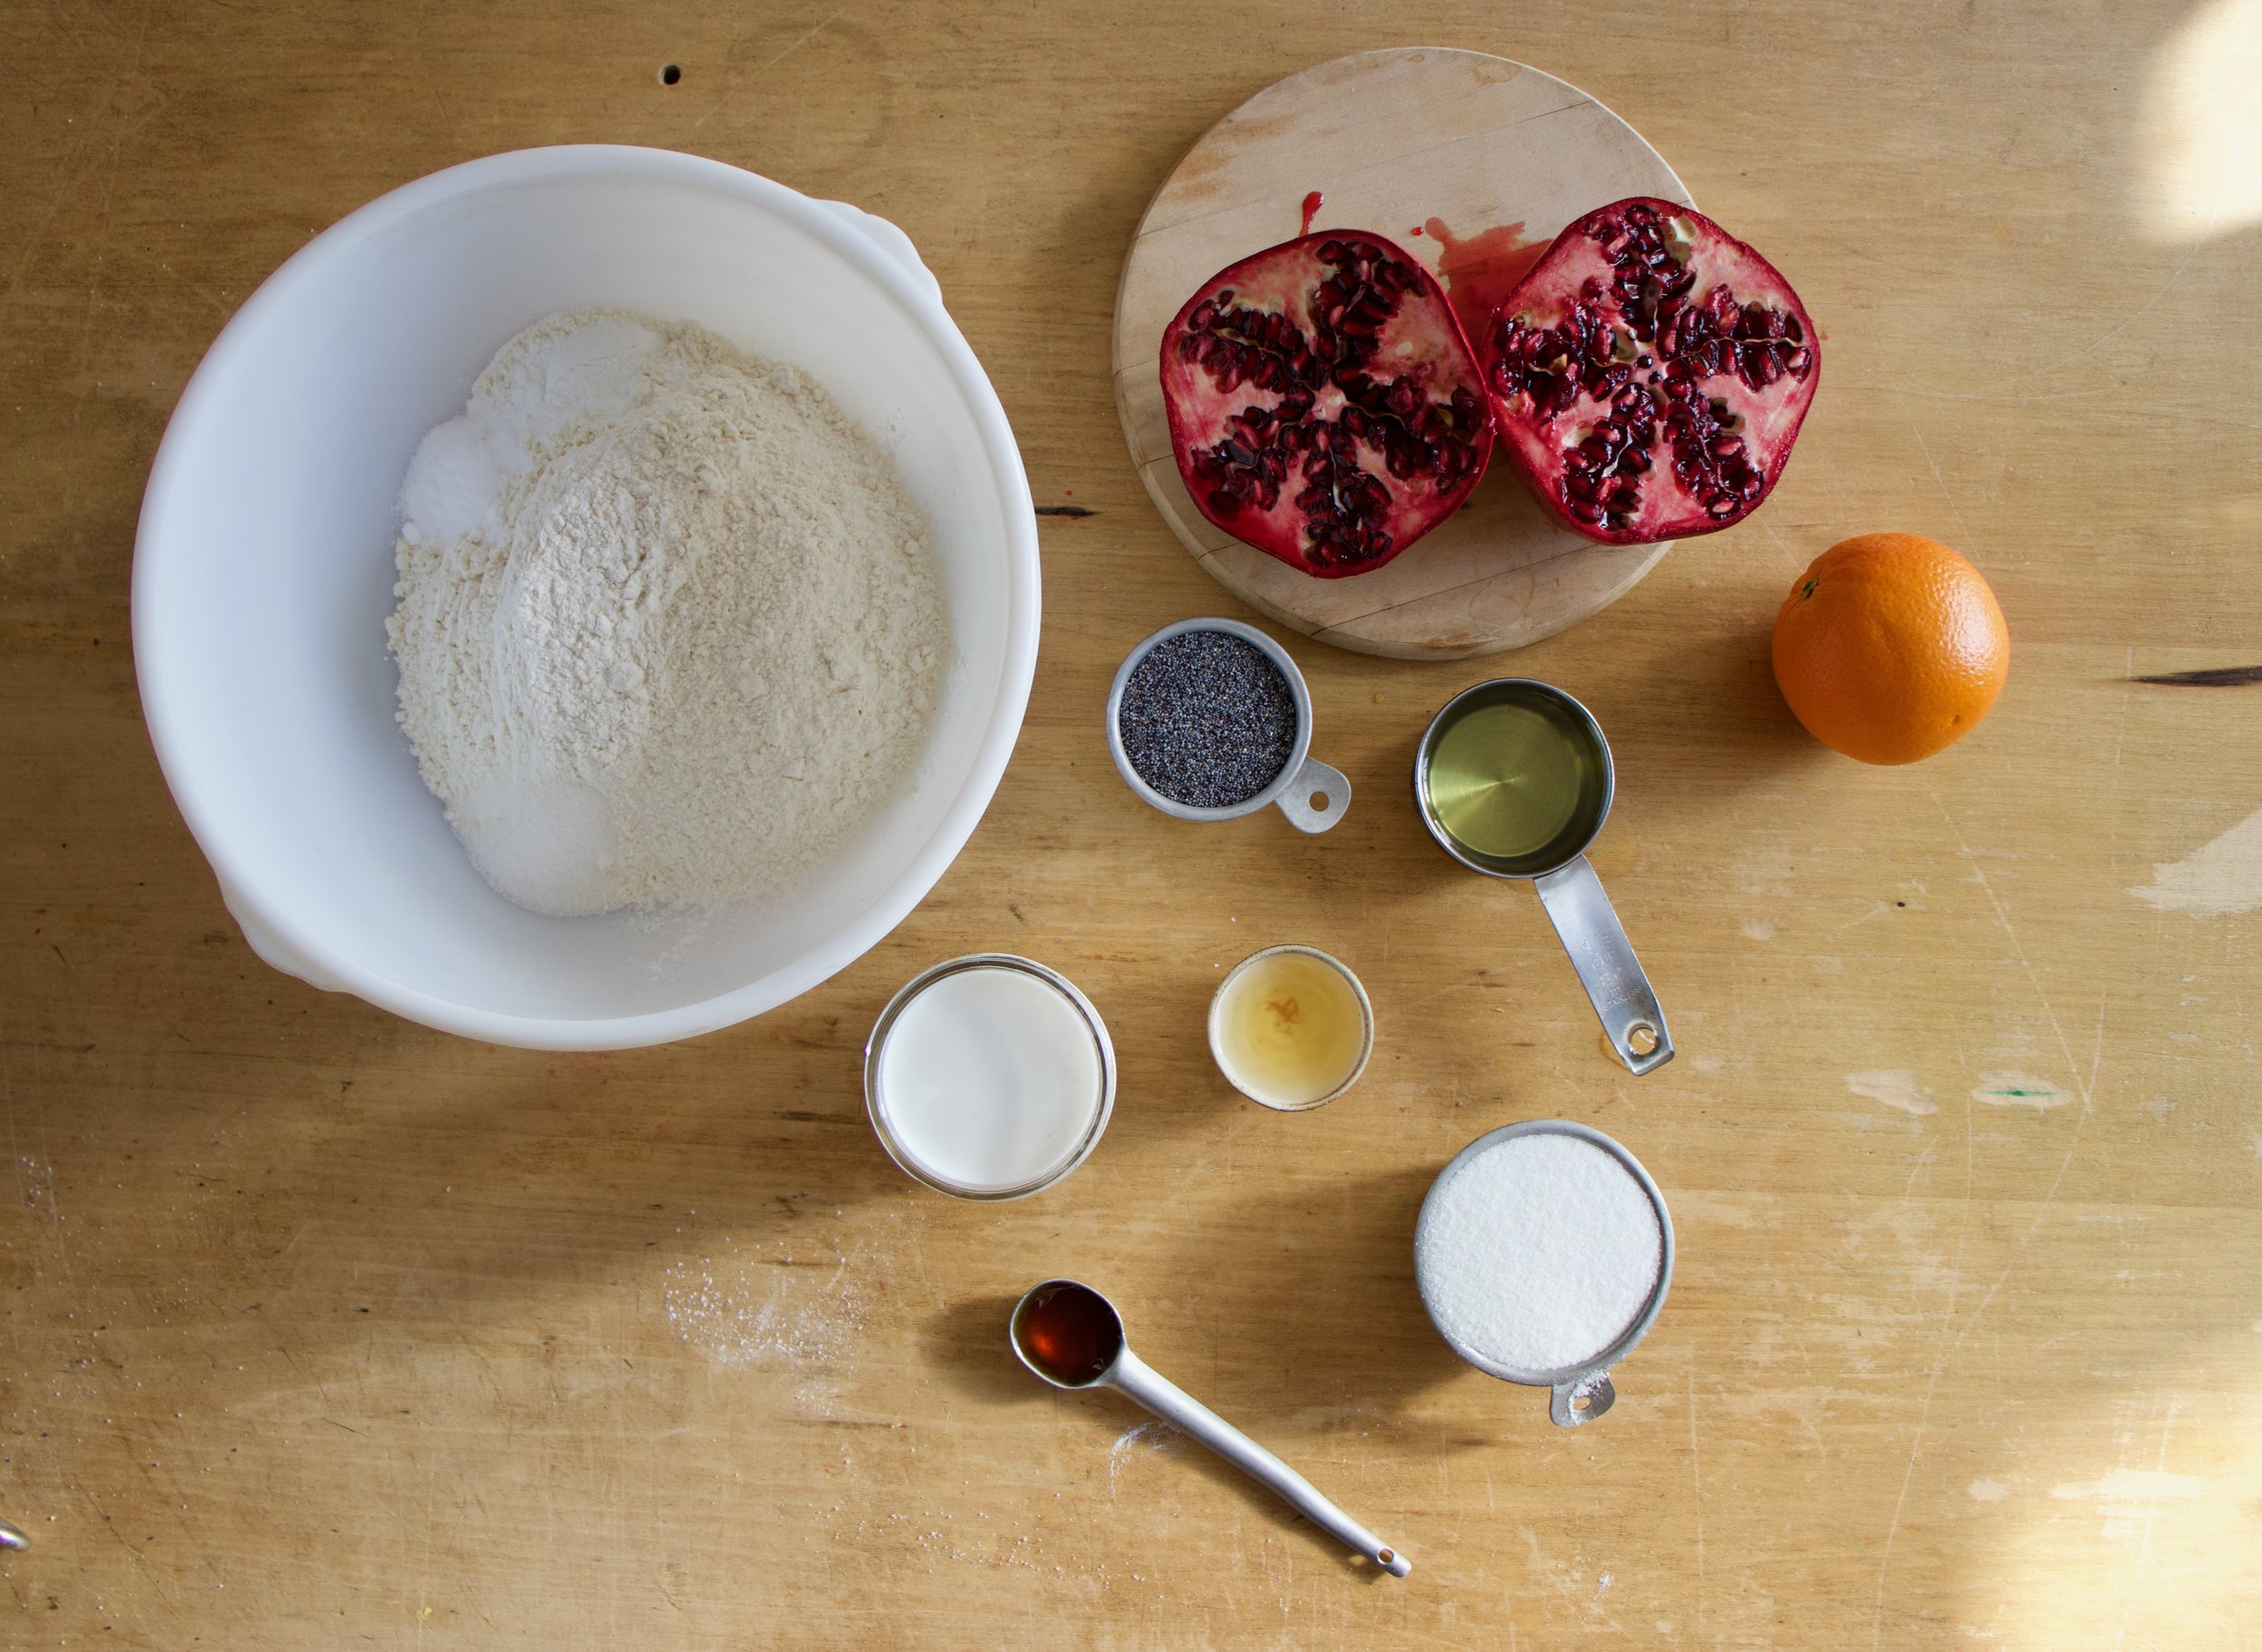
The stuff. Flour, baking soda and powder, and salt in a bowl. Poppy seeds, an orange, a pomegranate, sugar, oil, vanilla extract, and a little apple cider vinegar.

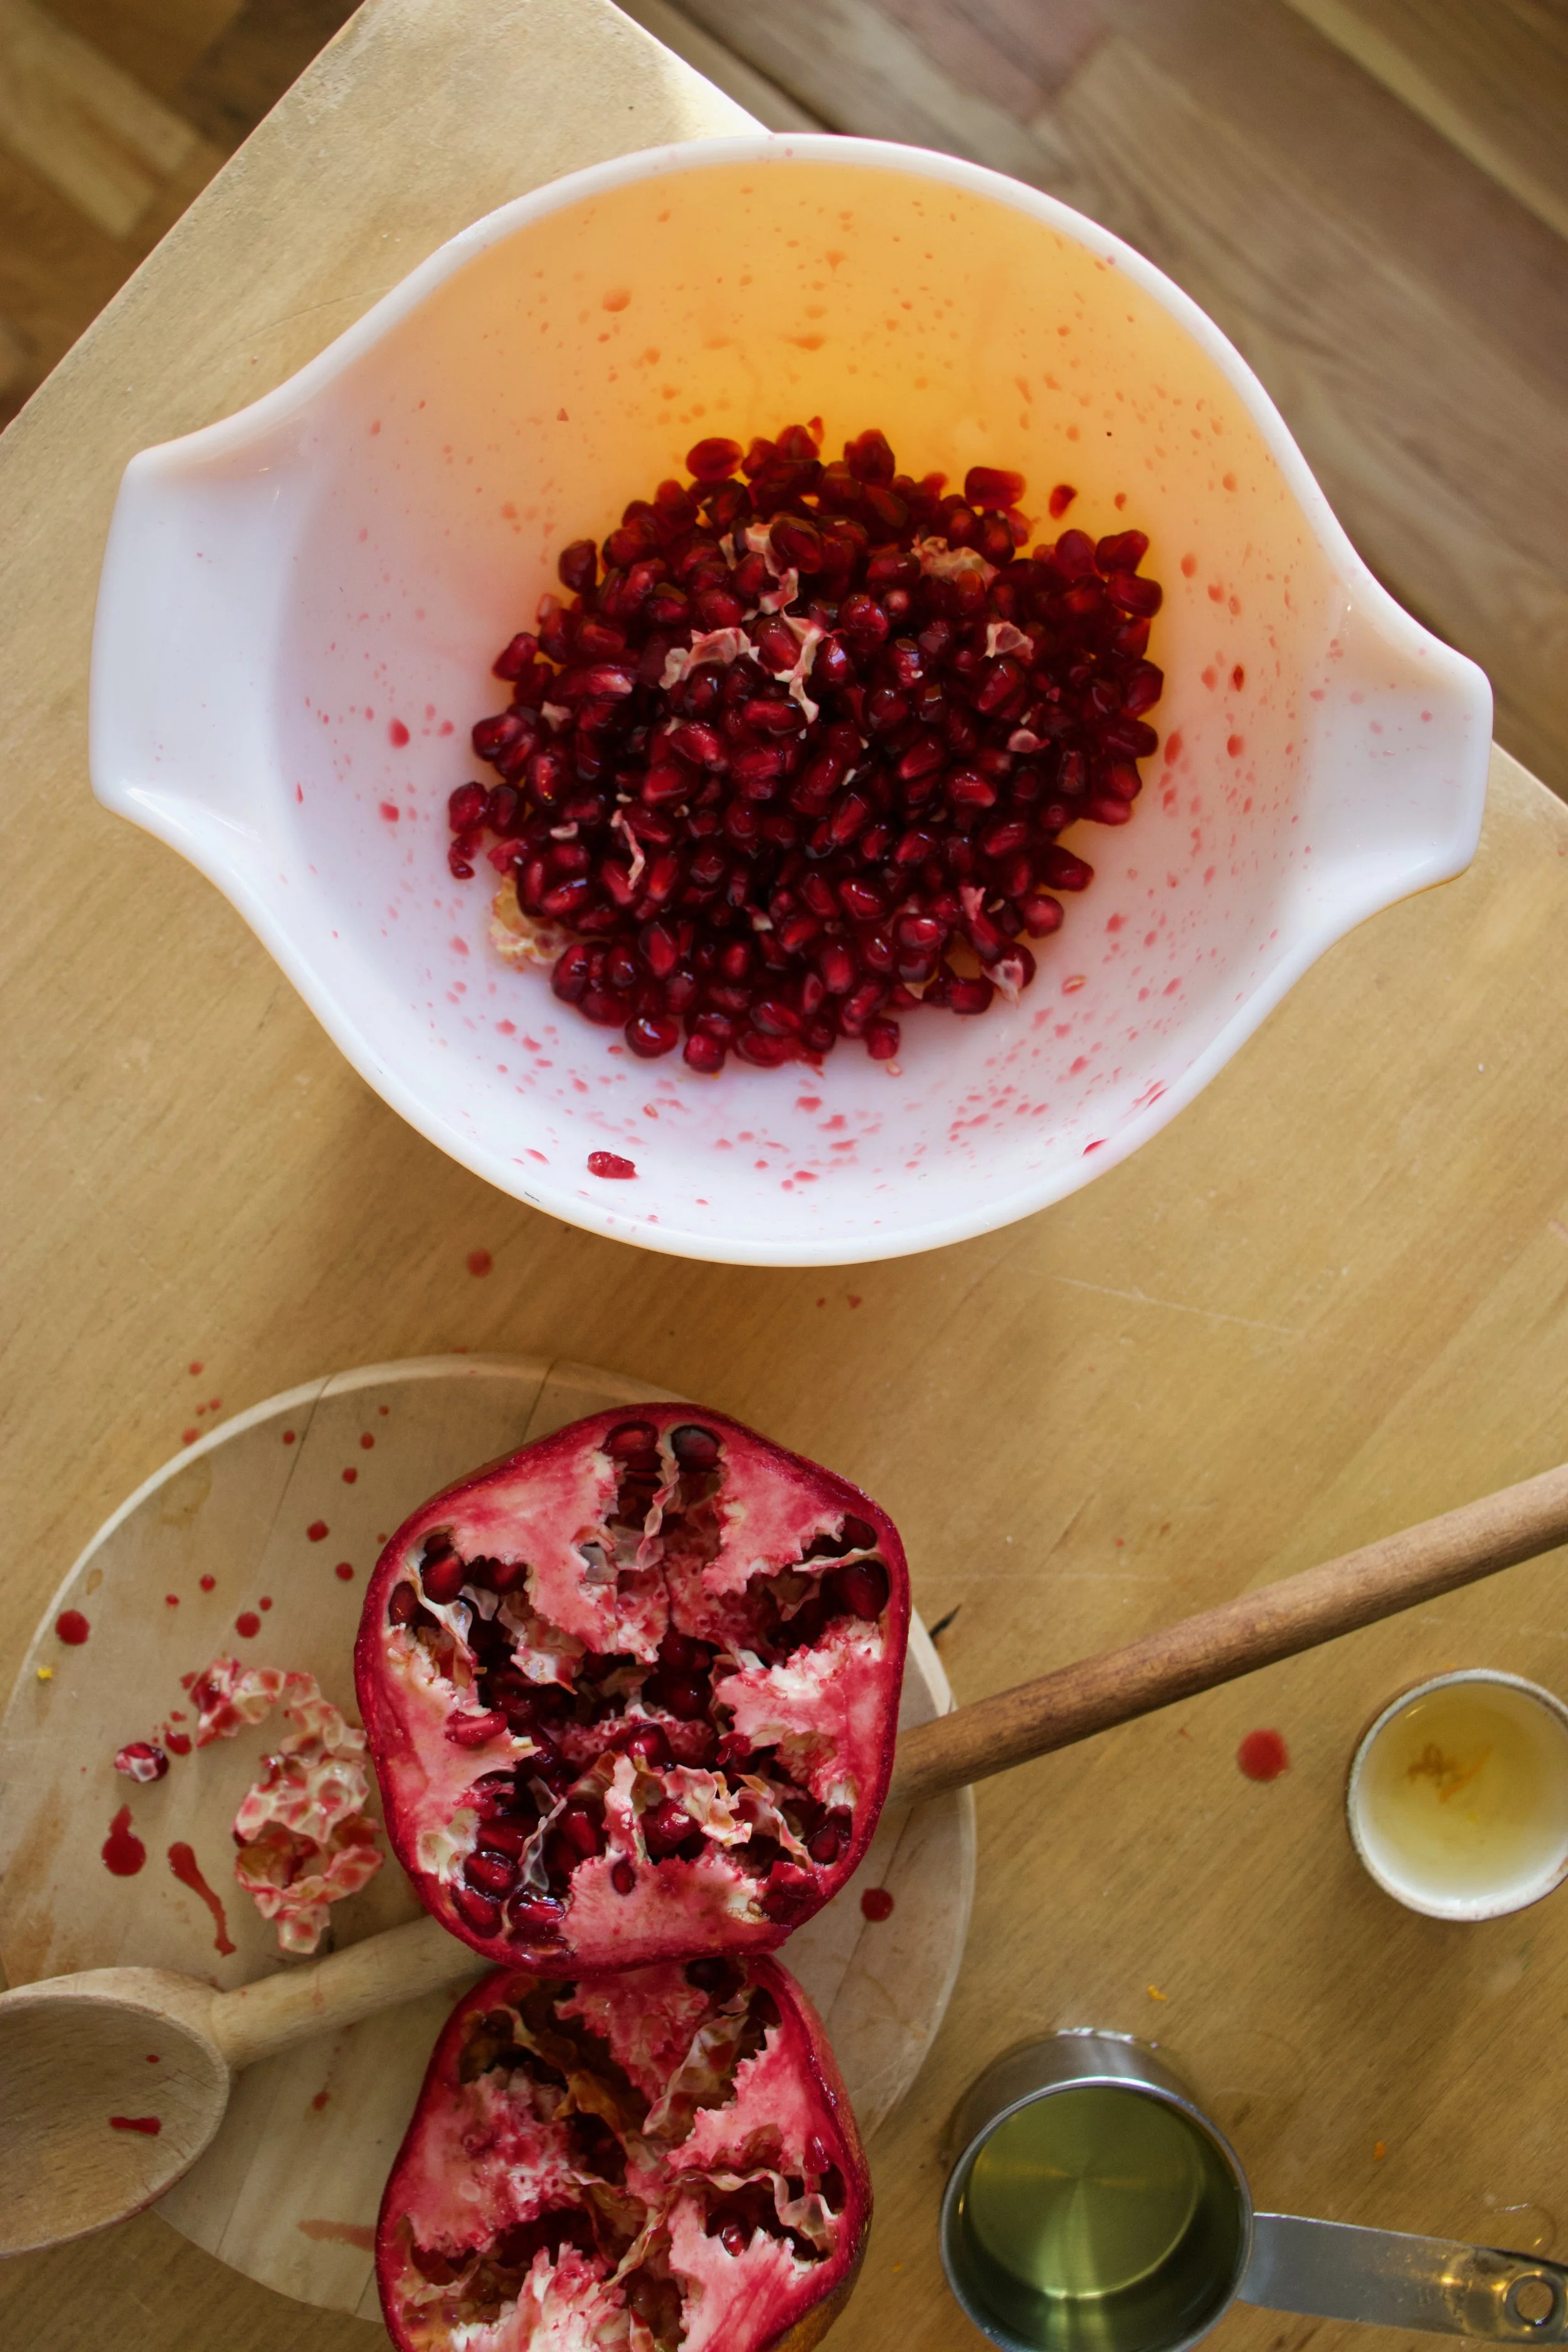
First, remove arils from the pomegranate. Cut the fruit in half, hold the cut side face down in your hand and place over a large bowl. Take a wooden spoon and wack the outside of the fruit and the seeds will just fall out. And yes , the juice stains so watch out.

Next, whisk together all the dry ingredients and add in the sugar, poppyseeds and the zest of the orange. Whisk again to combine.

IMG_4101.jpg

And then add in the oil, milk, vanilla, and the juice of the orange.

IMG_4118.jpg

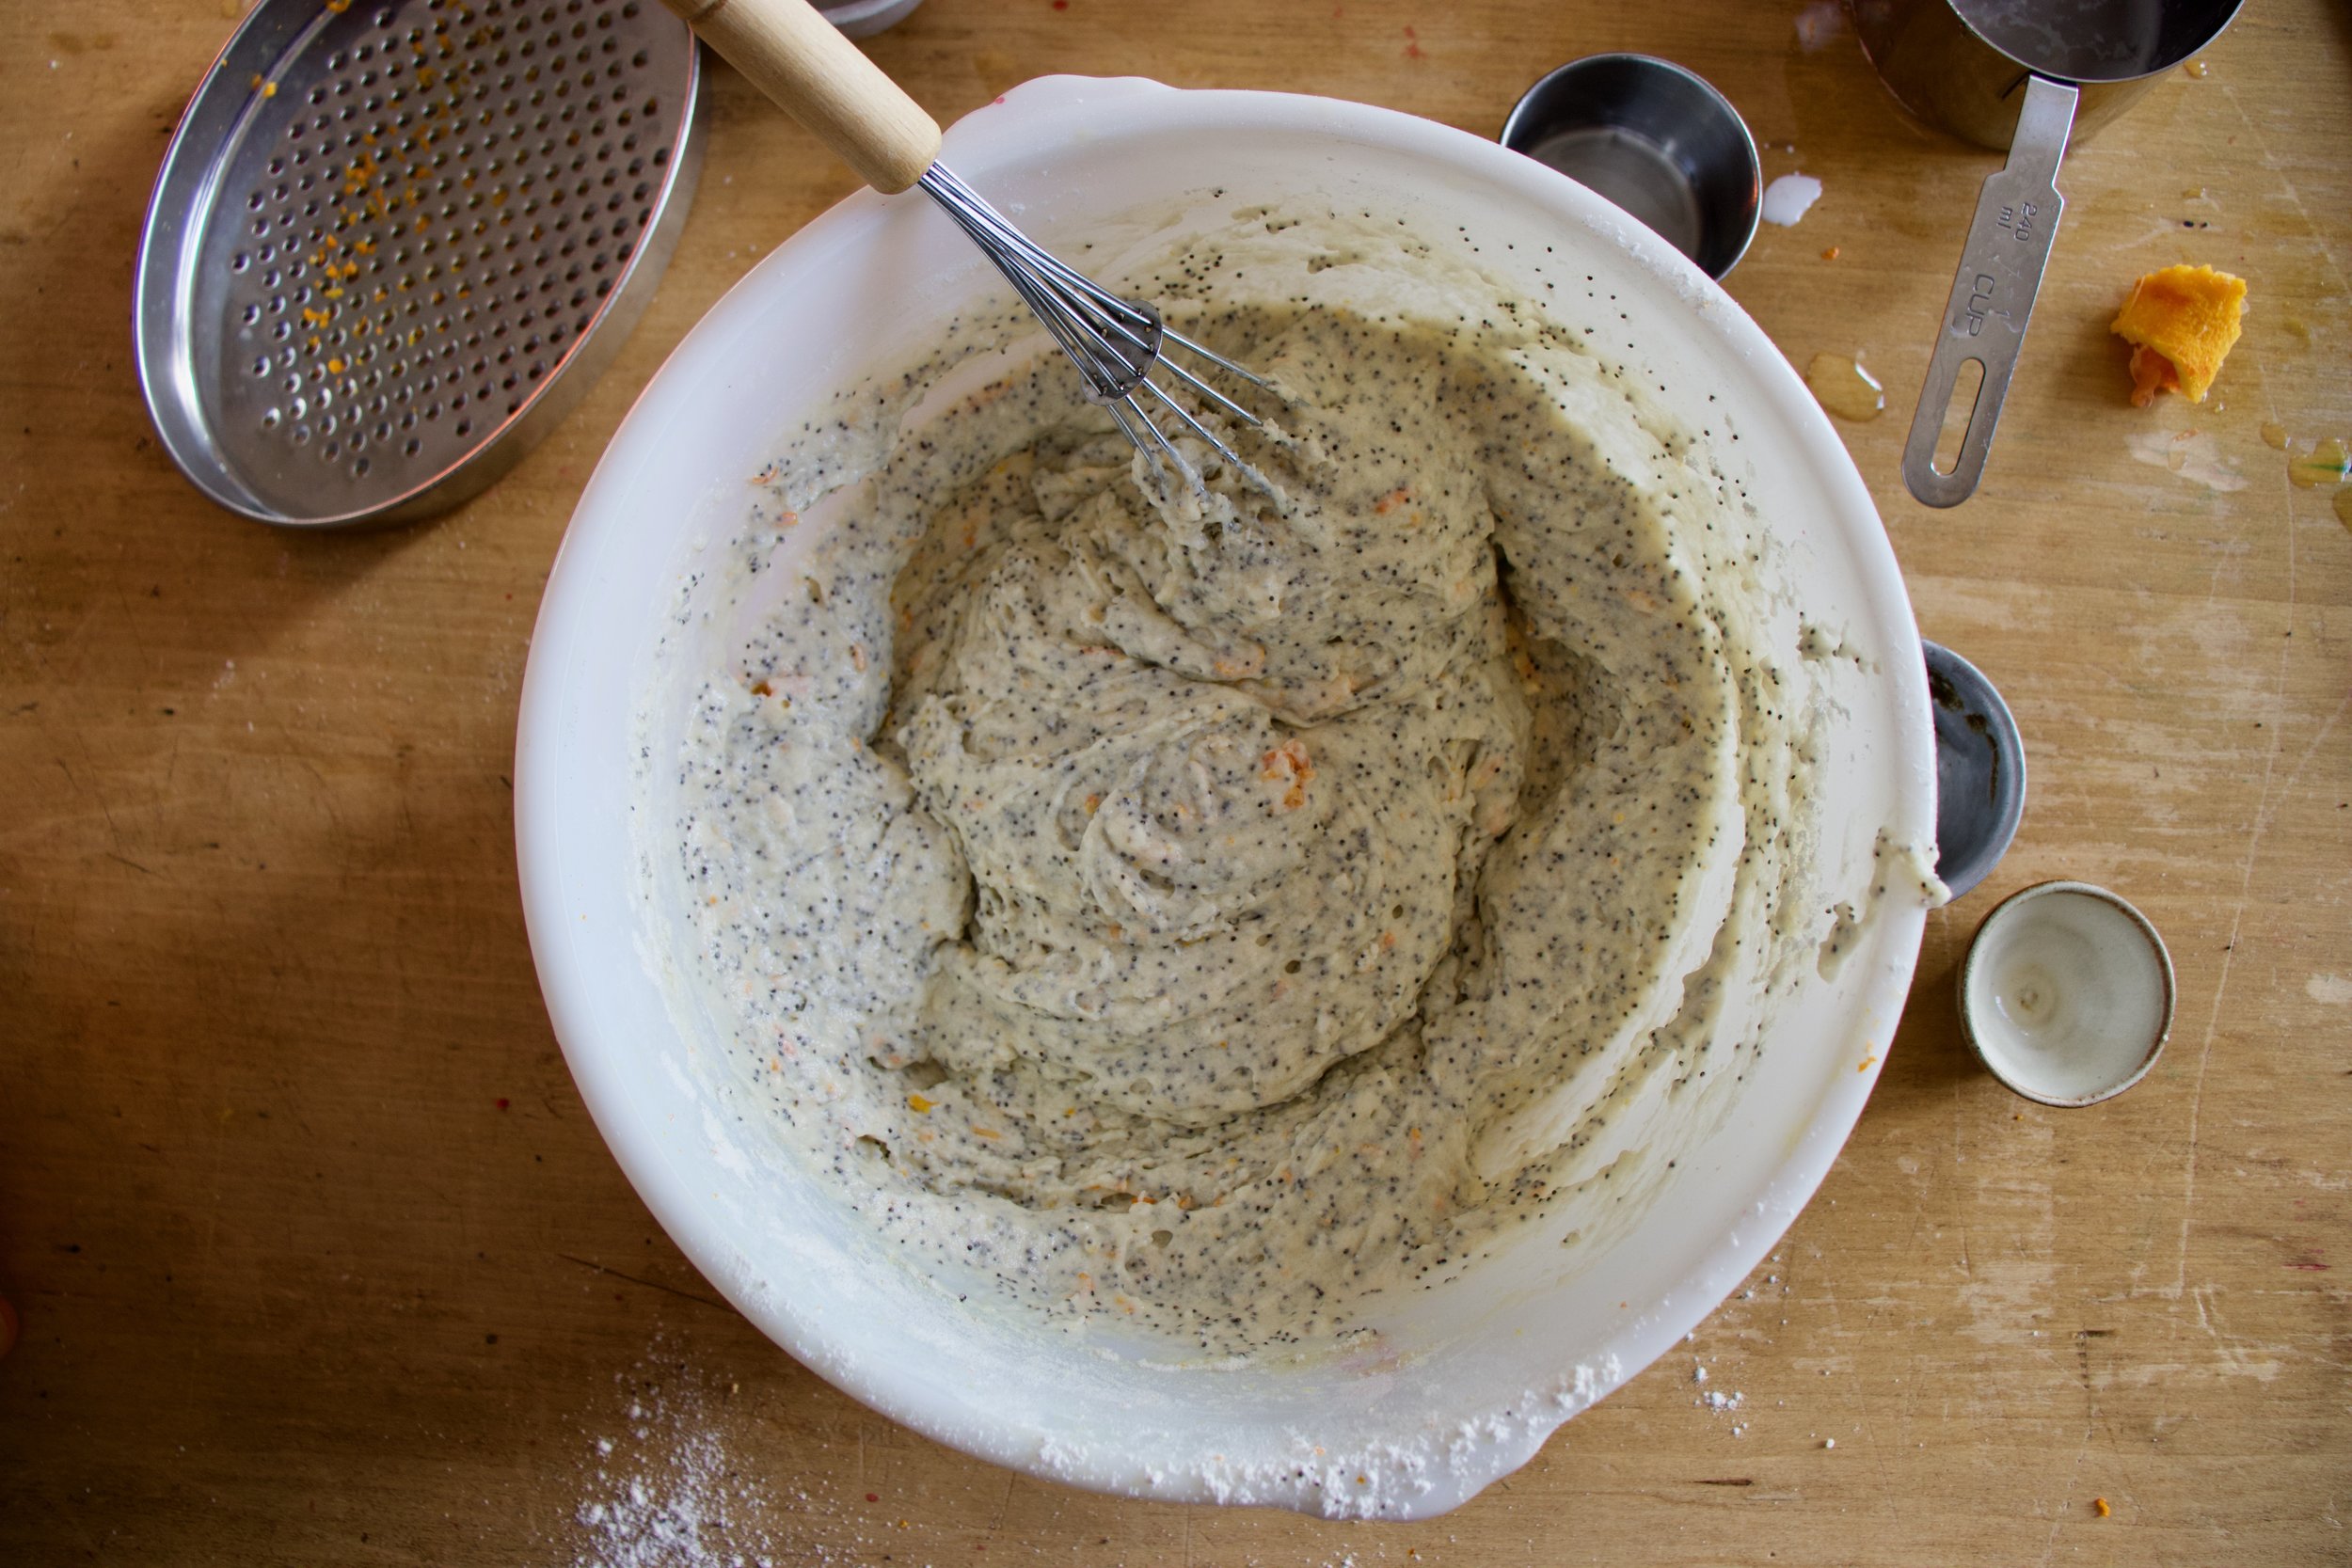
Mix until just combined. Don’t over mix or the muffins will get gummy.

IMG_4120.jpg

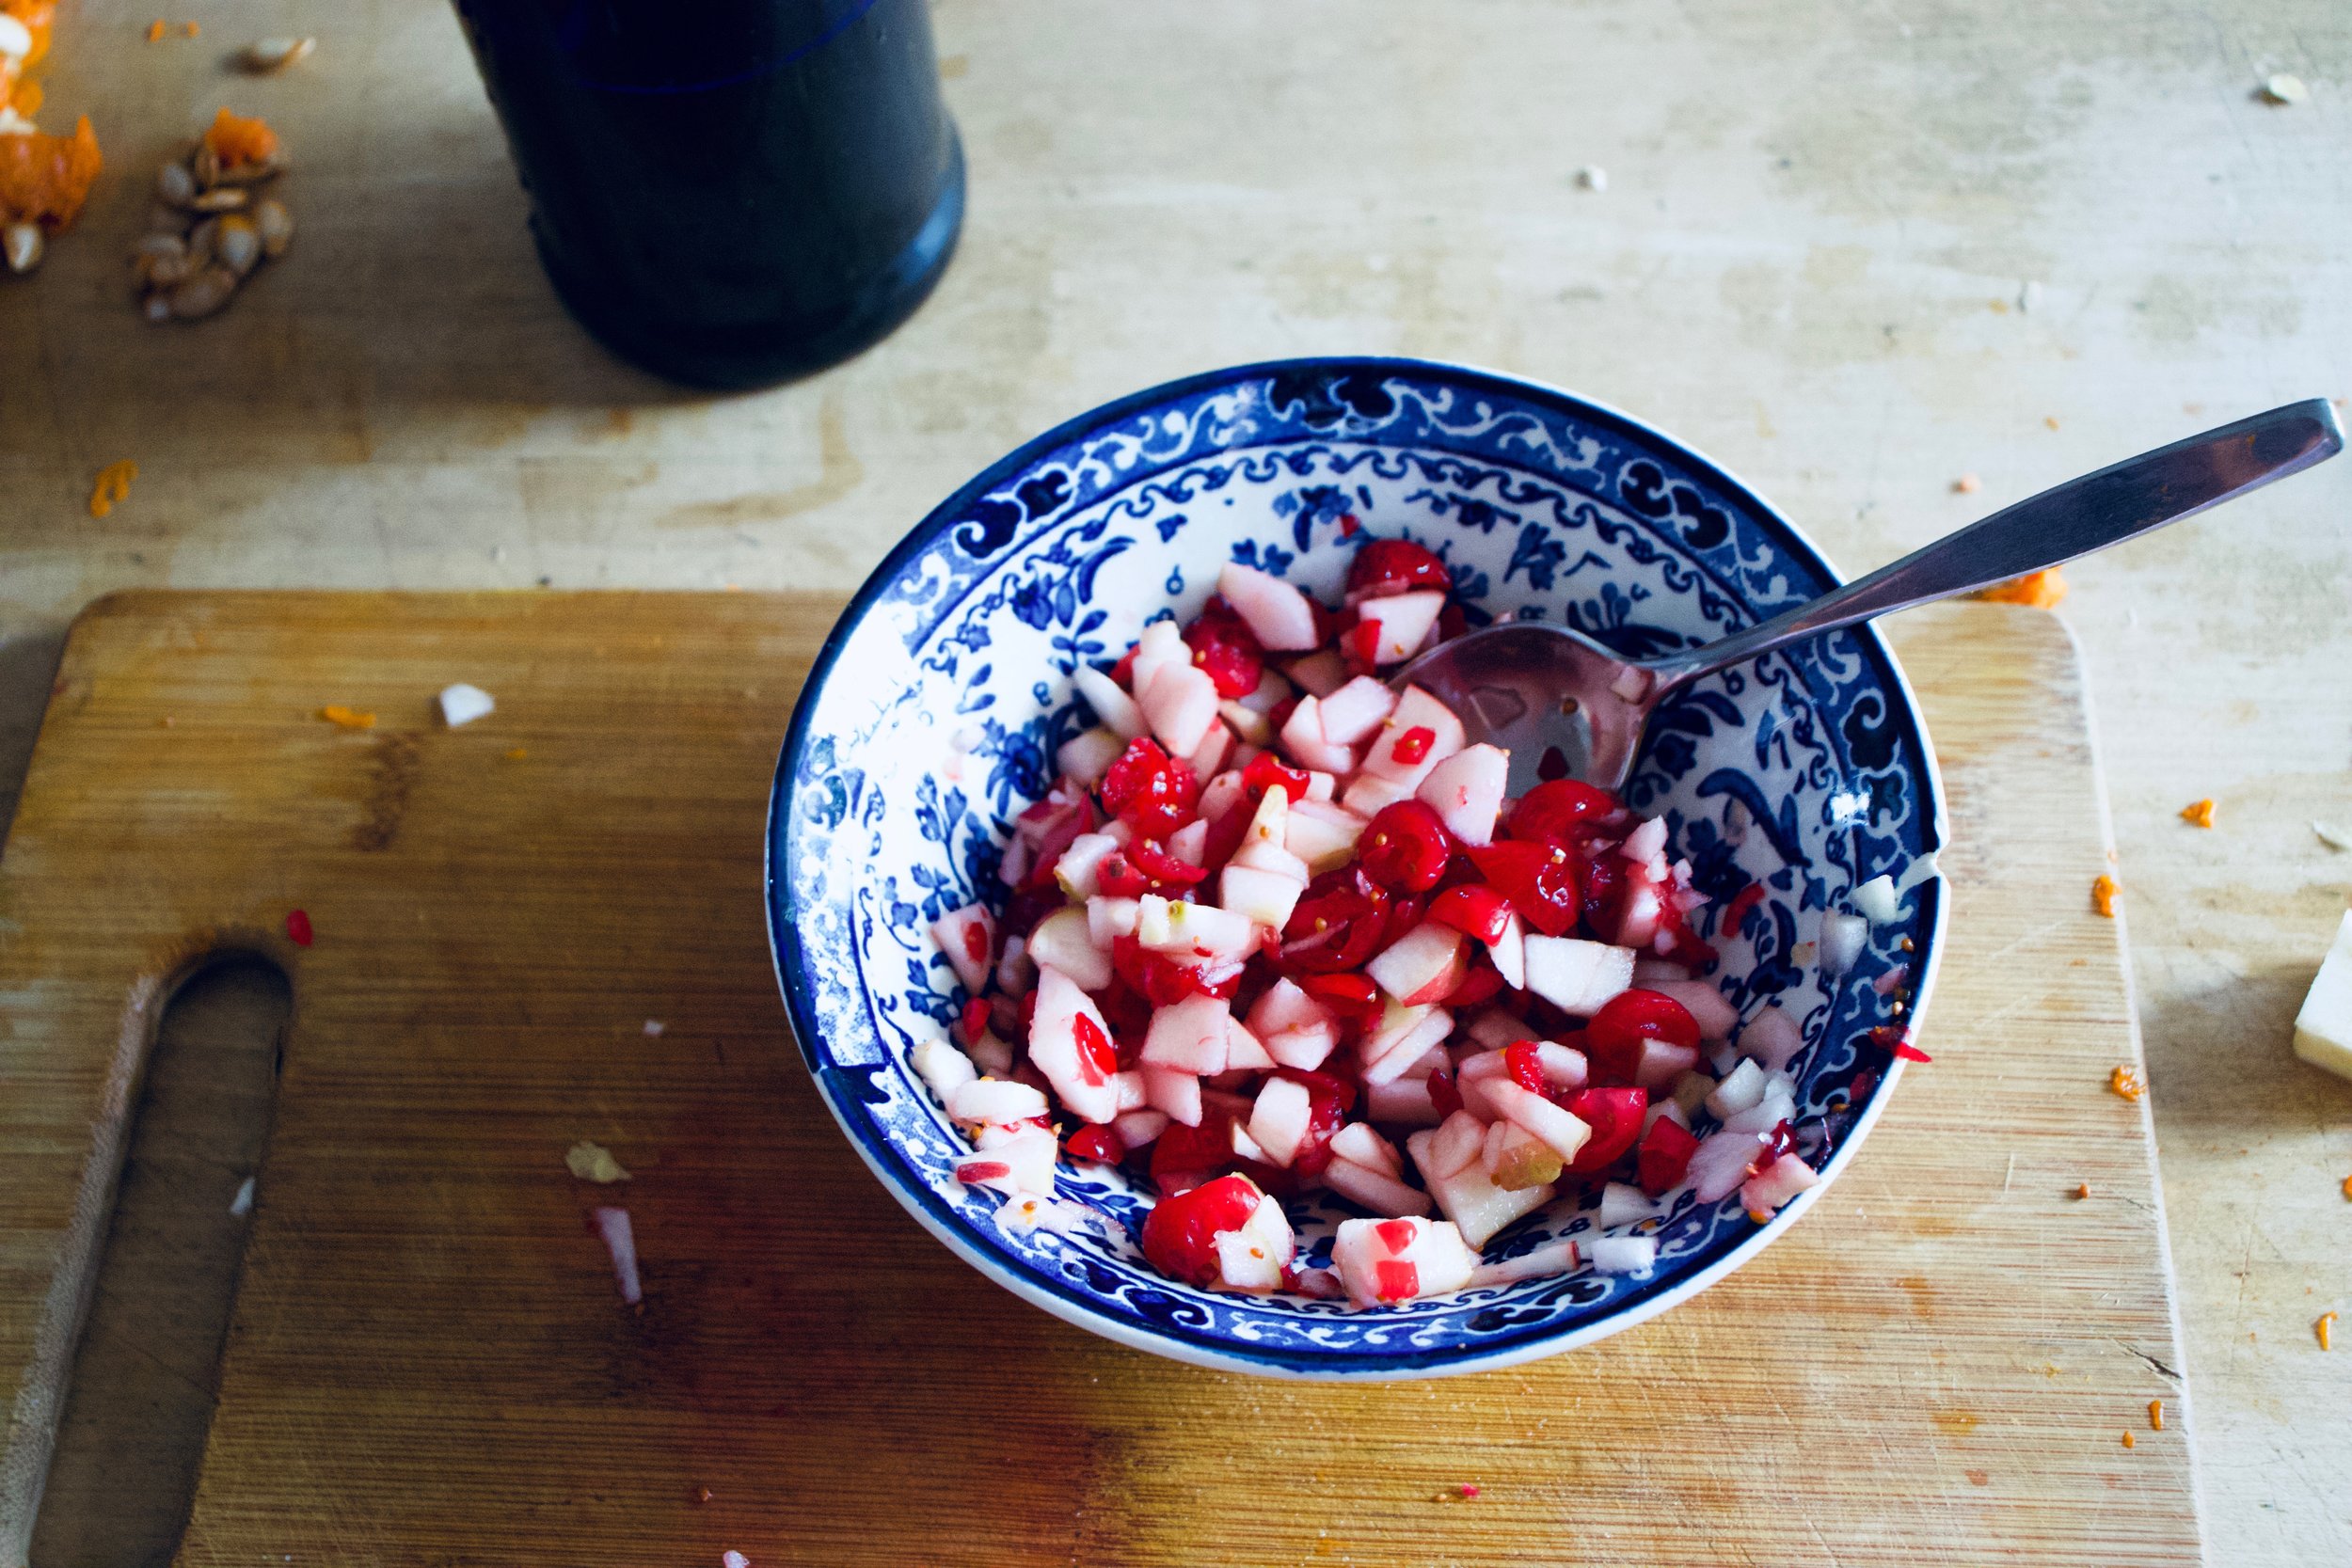
Last but not least, fold in the pomegranate arils.

Such a pretty muffin batter.

Scoop batter into well greased muffin tins and pop into a preheated oven.

IMG_4216.jpg

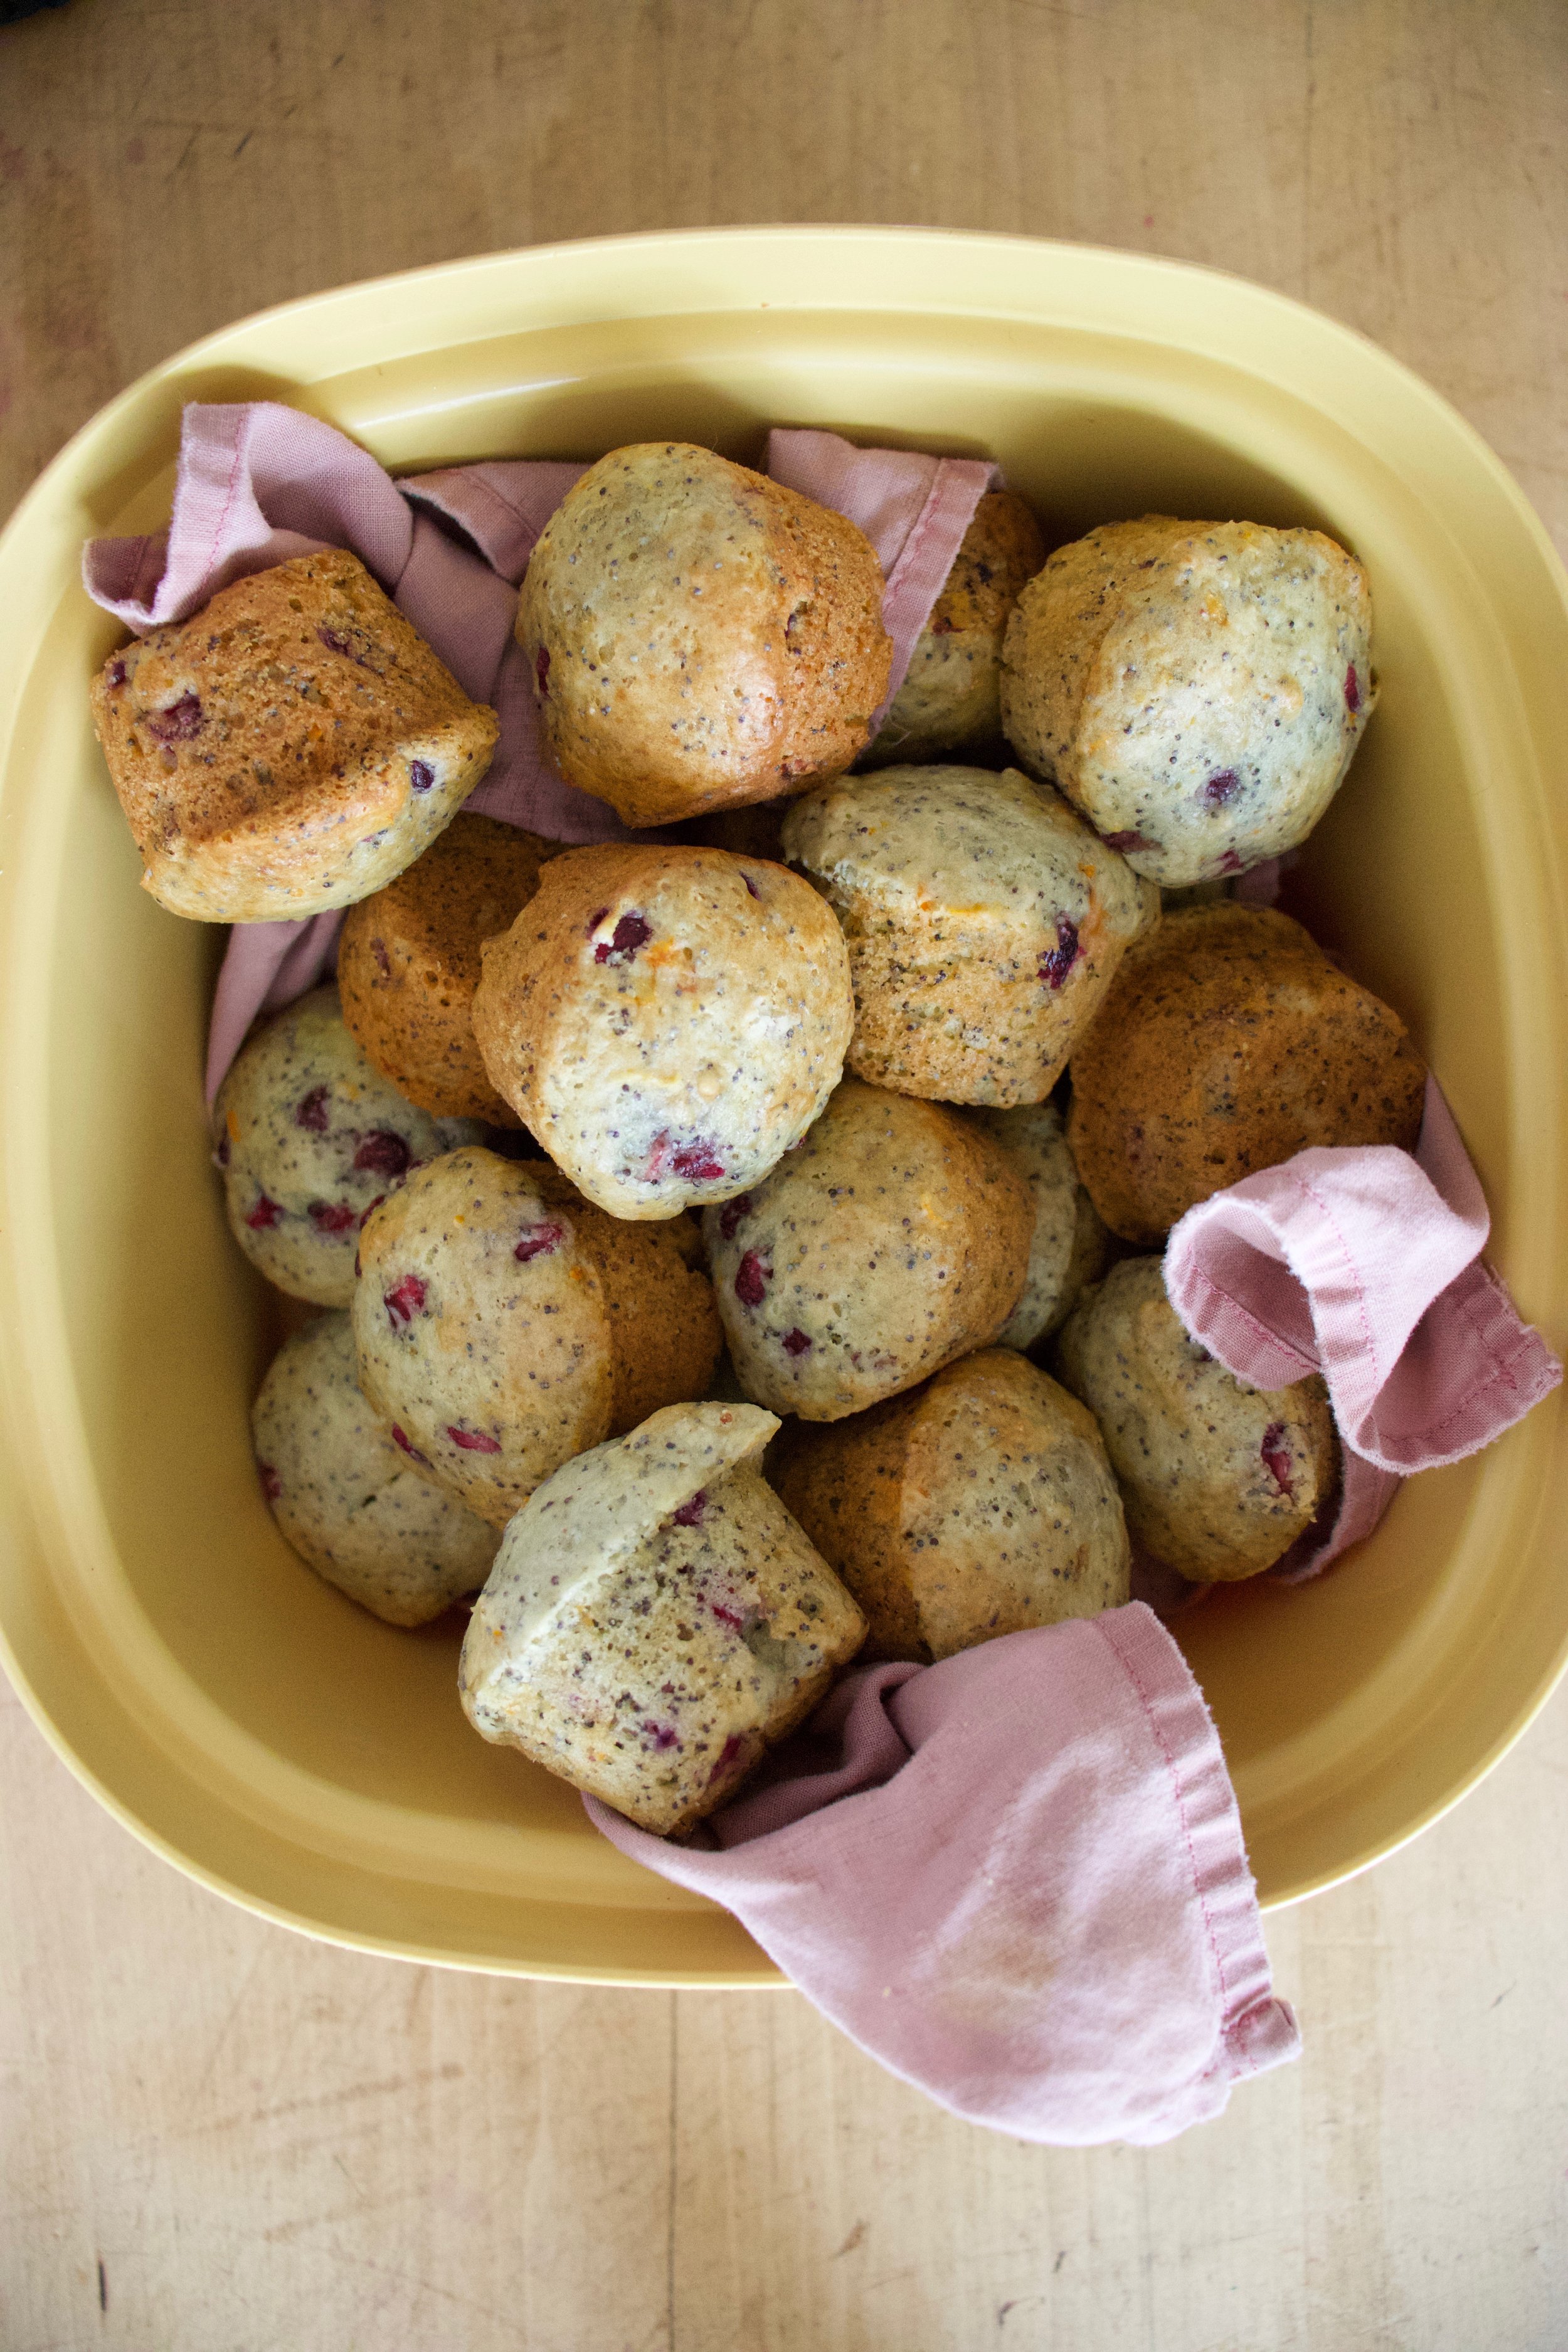
Orange and crimson and golden brown goodness.

Out of tins and onto a rack to cool

IMG_4224.jpg

Pretty muffins

IMG_4273.jpg

And now you eat.

Stay warm this weekend and bake some muffins.

-C


Pomegranate Orange Poppyseed Muffins

makes 24 mini muffins or 12 regular muffins

  • 2 cups all purpose flour

  • 2 teaspoon baking powder

  • 1 teaspoon baking soda

  • 1 teaspoon salt

  • 1/2 cup white sugar

  • 1/3 cup canola oil

  • 1 teaspoon vanilla

  • 1 tablespoon apple cider vinegar

  • 1 cup soy or plant based milk

  • 1 orange

  • 1/4 cup poppyseeds

  • 1 cup pomegranate arils

Note. To easily remove arils (the seeds) from a pomegranate, cut it in half, hold the cut side down in the palm of your hand over a large bowl and wack the outside of the fruit with a wooden spoon. The arils will fall right out into the bowl.

Preheat oven to 350

In a large bowl, whisk together the flour, baking soda, baking powder, salt, and sugar. Zest the orange into the bowl and add in the poppyseed and whisk. Next add in the oil, juice of the orange (about 1/4 cup) the milk, and the vanilla. Mix until just combined. Fold in pomegranate seeds.

Scoop batter into well greased muffin pans and place in oven to bake until golden brown and a tester stuck into the muffins comes out clean, which should take about 15 minutes (22 fish if normal sized)

Once baked, pull form oven and pop from pans. Place on a wire rack to cool.

Eat at your leisure.

In Vegan, sweet breads and muffins, seeds, fruit Tags Pomegranate Orange Poppyseed Muffins, pomegranate, Seeds, Vegan, muffin, breakfast, dessert, plant based, King Arthur flour
1 Comment

Quick Pickled Green Beans

December 29, 2018 Colleen Stem

Any time is a good time for pickles, but now is a great time. There has been so much baking, heavy, rich, and time consuming foods in the past month that I think everyone could use themselves a good helping of veggies and maybe a little brightness, like a good pickled green bean. Freshy, crisp, and clean. A jar of happy green goodness. (Don’t you describe jars of pickles just like that, a happy green jar of goodness?)

Around there parts, it’s kind of a holiday tradition with the mr to get a jar or two of pickled beans. I don’t know exactly how it started, but they are something that he has been getting every year. So this year instead of buying him a jar, I just made them. And let me tell you, it is a heck of a lot cheaper to make your own then it is to buy them, plus I think mine taste better if I do say so myself. These pickles are of the refrigerator kind so there is no processing or stress of bad seals. Nope, these pickles take all of 15 minutes to make, a day to pickle up nice and good in the fridge, and that is that. Ready to go, ready to eat. A small task, nothing fancy, nothing a small child could not handle (um.. well I would not let a small child near boiling water so nix that but a medium to large child, yeah sure.)

Pickled green beans. You know you want them so go and make them.

To the pickled beans!

The stuff. Fresh green beans, white vinegar, salt, peppercorns, garlic, dill and a dried cayenne pepper. The dill and cayenne pepper are optional and you can use any spices you want, but these are good ones to try.… Next batch I am going to do fresh turmeric and ginger, see how that comes out.

IMG_3814.jpg
IMG_3816.jpg

The hardest and not hard at all part. Blanch the beans. Basically just toss the beans into a boiling pot of water for 2ish minutes then scoop them out into a bowl of ice water. Easy peasy.

Jar preparation. I figured I would do two flavors, a spicy cayenne and a dill. (Cayenne for me, dill for the mr) Both jars get a chunked up glove of garlic and some slightly smashed up peppercorns. The hot pepper goes into one and the dill into the other.

IMG_3840.jpg

Then make the brine. Just boil the vinegar with salt. Nothing fancy.

IMG_3834.jpg

You got the jars ready and the brine made so now you just pack the two jars with the blanched beans. You might need to snip a few in order to fit, but I just eat those ends anyway so I am doing myself favor here.

IMG_3848.jpg

Then you pour equal amounts of the brine into the jars then top off the the jars with ice water. Place a lid on those suckers and give them a good shake and into the fridge they go. 24 hours give or take and that is that.

And now you got pickled green beans. The question is weather you eat a few at a time or if one jar constitutes a vegetable serving and you eat the whole jar at once.

I say eat the whole jar. Not like it took very long to make right? So maybe you just a few extra jars.

Have a lovely weekend.

-C


Quick Pickled Green Beans

maks 2 pint jars

  • 1 pound green beans

  • 2 cups water vinegar

  • 1 1/2 - 2 cups cold water

  • 2 teaspoons salt

  • 1 teaspoon whole or slightly crushed peppercorn

  • 2 big cloves garlic

  • A tablespoon dried dill and a dried cayenne pepper (optional)

Rinse green beans. Bring a large pot of water to a boil and grab a large bowl and fill with cold water and a few ice cubs. Place half the green beans in the boil water and let cook for about 2 minutes. Scoop them out and place into the bowl of ice water. Repeat for the second half of beans.

Place the vinegar and salt in a small pot (or use the pot you used to boil water) and bring to a boil. Set aside

Grab 2 pint jars making sure the are nice and clean. Peel and cut the garlic into a few pieces and place into the bottoms of the jars. Add the dill to one and cayenne to the other (or whatever spices you do or don’t want to use) Give each jar some of the peppercorns then start packing the balanced beans into the jars. Try to make them all straight so you can fit in as may as you can, and if the bean is to long, just cut to fit (eat the ends) Once both jars are packed pour equal amounts of the vinegar brine to the jars. Top off each jar with cold ice water. Place a lid on the jars, give it a good shake and place jars into the fridge for 24 hours. After the wait, pop the lid and eat.

Pickled beans will last about a month in the fridge but really, if you have them for more then a week, that is just a shock.

Note about lids. I use plastic lids when dealing with anything acidic. The metal lids will work but will rust after a while and sometimes leaves metallic taste. If you only have metal lids, use a piece of wax paper in between the kid and jar.

In beans, quick and easy, snack, Vegan, Vegetables, Pickled Tags Quick Pickled Green Beans, Green beans, Quick Pickles, Pickles, Vegan, plant based, vegetable, beans, pickling, canning, refrigerator pickles
Comment

Apple Cranberry Butternut Squash Soup with Apple Cranberry Relish

November 24, 2018 Colleen Stem
IMG_2608 2.jpg
IMG_2498 2.jpg

Soup is all about comfort and I needed comfort this week. What with being all sad and slightly stressed with a little touch of the holiday blues. And I needed something to warm me up because is has been freaking chilly cold. I needed soup. But I wanted something slightly special, not the everyday, but also not anything fussy or finicky. A soup that I could make really fast or let sit on the stove all day. A soup that would bring a little brightness without being overly rich. A soup to take away the chill and make me happy.

Is that asking to much of a soup? I think not.

This soup, it did it all. But also take into account, this soup is not for the people that do not like squash. Or for the people that do not like apples or cranberries. Or for people that do not like thick creamy soups. But if you are not one of this people (you are a person that likes squash, apples and cranberries, and creamy soup) then this soup is for you. It is for us. Creamy, flavorful, slightly sweet and spicy with a little tang and just so dang delicious. It is like a warm blanket of soup. Comfortable and lovely. I have basically eaten an entire pot all to myself in the past two days.

It has been just what I needed.

Join me.

IMG_2453.jpg

The stuff. A butternut squash, a couple apples, and some cranberries. Also a carrot, an onion, some fresh ginger, a few cloves garlic, cumin and chili powder, salt and pepper, apple cider vinegar, and a little olive oil.

IMG_2473.jpg

Start by chopping up the carrot and the onion. Small pieces just because they cook a little faster.

Peel and grate or mince some fresh ginger too.

IMG_2479.jpg
IMG_2485.jpg

Toss that all into a big pot with a splash of olive oil and a splash of water and cook on a medium heat until tender and fragrant.

While the veggies cook, chop the squash into small cubes. Remove the seeds, but no need to peel.

IMG_2490.jpg

And chop up the apple too, but set aside a half of one for the apple cranberry relish.

Now toss all that into the pot along with the cranberries.

Add the spices, salt and pepper, a few splashed of apple cider vinegar, and water to cover it all. Then place it on stove, bring to a boil, then turn heat to medium and let cook.

While the soup is cooking, make the relish. Mince the half apple along with about 1/2 cup of cranberries.

IMG_2523 2.jpg

Place in a bowl with a pinch of salt and a few splashed of apple cider vinegar. Then just let it sit and meld.

Soup is looking good. Everything is soft and falling apart and ready to go.

IMG_2538.jpg

Blend it all until smooth.

IMG_2554.jpg

Thick and creamy goodness right here. If it is to thick, add more water, too thin, cook it down a little longer. The consistency is up to you.

Now all you need to do is ladle soup into bowls and top with a couple spoonfuls of the relish.

IMG_2569 2.jpg

This is comfort. This is good.

Have a great, comfy weekend.

-C


Apple Cranberry Butternut Squash Soup with Apple Cranberry Relish

makes 6-8 servings

  • 1 small butternut squash (about 5 cups cubed)

  • 1 large onion

  • 1 carrot

  • 2 macon or mac apples

  • 2 cups fresh cranberries (you can use frozen too)

  • 2 tablespoon cumin

  • 2 tablespoons chili power

  • 2-3 cloves garlic

  • 2 tablespoon fresh minced or grated ginger

  • 4-5 tablespoon apple cider vinegar

  • olive oil

  • salt and pepper

  • 6 cups water

Start by chopping the onion and carrot into small pieces. Place into large heavy bottom pot with a splash of water and a tiny splash of olive oil. Mince the garlic and peel and mince ginger. Toss into the pot as well and place it on a medium heat to cook until the veggies are tender and fragrant.

While the veggies are cooking, dice up the butternut squash. Remove any seeds but there is no need to peel. Also dice up the apples, reserving 1/2 of one for the relish. Place the chopped squash and apples into the pot with the cooking veggies along with 1 1/2 cups of cranberries , the chili powder and cumin, 2-3 tablespoons apple cider vinegar, and the water. Place the pot back on the stove, bring it to a boil, then reduce heat to medium and let cook.

Once soup is on the stove, take reserved half apple and the other 1/2 cup of cranberries and dice into very small pieces. Place into a bowl with a little pinch of salt and 2 tablespoons apple cider vinegar. Toss around and set aside.

And back to soup. Once the squash is tender and starting to fall apart, it is time. Remove from heat and either with a immersion blender, or a regular blender, blend the soup until smooth. After its blended and creamy smooth, check for thickness. If you think it is too thick, add more water. Too thin, place back on stove and cook down until it thickens up a bit more.

When you are ready to serve and eat, ladle soup into a bowl and top with more pepper and a spoonful or two of the apple cranberry relish.

Then eat and feel cozy.

In Dairy Free, Gluten Free, grain free, holiday, soup, Vegan, Vegetables, fruit Tags Apple Cranberry Butternut Squash Soup with Apple Cranberry Relish, Vegan, vegan soup, dairy free soup, gluten free, plant based, dinner, comfort
2 Comments

Black Bean Tortilla Chips

May 5, 2018 Colleen Stem
IMG_1812 2.jpg
IMG_1840.jpg

The mr has a soft spot for tortilla chips. He doesn't get chips often, but when he does it is usually the super fried, super salty, in a plastic bag, tortilla chips. And I am ok with that because it is not often and the dude deserves chips when he wants them. But I hate how crappy they are for him, especially all the salt. So much salt that I can smell it in my mouth (yes, I said that right). So, as with everything else we eat in the house, I now make chips from scratch. (Slowly I have eliminated just about everything that is pre packaged and started making it myself. I think it's pretty much just the dried pasta and the mr's yogurt and cheese that I haven't gotten to.Yet.) This way he can eat his chips and I don't have to sit there tasting the smell and thinking about the crap that he is eating.  I know I say this a lot, but lets just take a minute here and acknowledge how I really am the best girlfriend ever. 

Ok, now about these chips. I have made plan tortilla chips a few times before and figured it was time for a twist.  In come black beans. Why, because I was pretty sure beans were going to be awesome, and lo and behold, I was completely right. Adding the beans take little to no more effort then making the chips without, and bonus here, more fiber and protein and good stuff going into a chip. Then they are lightly oil, lightly salted, and eaten without any guilt because I made them and they are the best. Seriously, the mr thinks they are amazing and doesn't miss those pre package ones a bit.  And sure, they might take a little time and minimal effort, but really they are super easy and the time and effort to make them is probably no more then going into a store, waiting in line to pay, and driving home to eat your chips. You can have these chip made in that amount of time. So you might as well just make them.

To the chips. 

The stuff. Masa harnia, black beans, water, salt, and a little oil. There should be a lemon or lime here too, but I forgot to stick it into the picture. Oops. 

IMG_1707.jpg
IMG_1710.jpg
IMG_1713.jpg
IMG_1716.jpg

Pretty easy.  Add the beans to a food processor and blend untill completely smooth. Add in the masa and pulse then gradually add in water until a dough forms. Stop and feel the dough. If it feels like play dough and comes together into ball easily, then you are good. If it is to wet, add a little more masa, to dry, more water.

IMG_1719.jpg

Dump the dough onto the counter and form into a ball. Place the doguh into a bowl and cover with a damp closer for 15-30 minutes to let the dough rest.

After the rest, divide the dough into 12 pieces and roll into balls. Place the balls onto a damp cloth and cover while you are making the tortillas so they don't dry out. 

IMG_1735.jpg
IMG_1741.jpg
IMG_1739.jpg

To flatten those balls into tortillas.  After doing this a bunch of times, I have a system that works the best for me.  I use a large ziplock bag (the plastic is a little thicker and easier to deal with, plus I don't use plastic wrap), a cutting board, and a rolling pin. Place a dough ball into the center of the bag then take the cutting board and press directly on top, placing all your weight onto it. It gets flat, but not flat enough so take the rolling pin and flatten some more. Then press the rolled out dough with the cutting board one last time. Carefuly remove from bag and place direrely onto a hot dry skillet. 

Cook each side 3-4 minutes or until it starts to get a few light brown spots. Once cooked, place on a plate or baking sheet. If I were just making tortillas, I would place then in between a kitchen towel to keep them warm, but because they are destined for chips and don't care. 

IMG_1758.jpg

Black bean corn tortillas. Hey, you could stop here and make a taco or something if you need to. Feel free to use a tortilla or two before using the rest to make the into chips. 

IMG_1769.jpg

So chips. Grab baking sheets, oil, salt, a knife, and the tortillas. Take a few of the tortillas and oil them. (The easiest way I found to do this is to rub oil on with my hands then rub the oil onto the tortillas. ) Oil 3 at a time, stacked them on top of each other and cut into 8 triangles, 

Get as many of the triangles onto a baking sheet as you can, without overlapping.  Once all nice and tight, sprinkle the tops with salt and pop them into preheated oven. 

Pull the chips out of the oven when they are crispy and done (about 10 minutes) then squeeze a little lemon juice all over the chips. Toss around and pop the pan back into the oven for another minute or two just so the juice doesn't  leave the chips soggy.

Dump cooked chips  onto a wire rack to cool. Eat as you work, you deserve it.

IMG_1837.jpg

Pile chips into a bowl, and serve with some salsa or guacamole or whatever you eat you chips with.  They are your chips. 

-C


Black Bean Tortilla Chips 

Makes 98 chips, or like a good sized bag worth

  • 2 cups masa harina 
  • 1 cup cooked black beans in bean juice
  • 1- 1 1/4  cups warm water
  • couple teaspoons neutral oil (I used grape seed oil)
  • 2-3 teaspoons salt
  • A lemon or lime

Beans go into a food processor and blended until completely smooth. Add in the masa and blend, slowly adding 3/4 cups water until a dough starts to forms.  Stop and check dough. It should feel like play dough and come together easilty onto a ball. If it feel wet, add in a couple of tablespoons more of the masa. If it is still too dry and crumbly, add in more water until it's to the right consistnacey. Dump dough onto counter and form in a ball. Place dough in a bowl and cover with a damp towel and let sit for abut 15-30 minutes.

Preheat a skillet on medium high heat on stove.

Once dough has rested, divide into 12 pieces and roll into balls. Place balls onto a damp towel and cover when not working with them. Grab a large ziplock bag, a cutting board, and a rolling pin. Take a dough ball and place in the center of the bag. Press down with the cutting board, placing all your weight on top. It got flat, but not flat enough. Continue to flatten out with the rolling pin until it is about  1/8 inch thick. Press again one last time with the cutting board. Gently remove from bag and place directly onto the hot skillet. Cook each side for 3-4 minutes or until it  starts to get a few light brown spot. Place cooked tortilla on a baking sheet or in between a kitchen towel. Repeat until all 12 dough balls are cooked into tortillas.

Preheat oven to 375

Working in 3's. dump a little oil onto your hand then lightly rub it all over the tortillas. Stack them on top of each other then cut into 8 wedged. Place wedges onto a baking sheet, get as many as you can onto sheet without any overlapping, then sprinkle with salt. to taste. If you have them, use multiple baking sheets.  Place in oven for about 10-12 minutes or until the chips are crispy. Remove and sprinkle lemon juice all over the chips. Toss around and place back into oven for a minute or two just until lth lemon juice evaporates. Remove and dump chips onto a wire rack to cool.

Eat chips. Any left over can be placed into a airtight container or bag and will last about 3-4 days. 

In 5 ingerdients or less, beans, Dairy Free, Vegan, snack, Savory, pulses, Gluten Free, crackers and chips Tags Black Bean Tortilla Chips, Masa harina, chips form scratch, cinco de mayo, cron chips, Vegan, Gluten free, plant based, beans, black beans, black bean chips, corn chips, snack, chips, dairy free, gluten free
1 Comment

arugula walnut chickpea burgers with quick pickled radishes and onions 

April 21, 2018 Colleen Stem
IMG_5321.jpg
IMG_1552.jpg

I love me some spring time fresh greens, especially arugula. The last farm share pick up there was arugula for the first time since late fall and as soon as I saw it my mouth started to water for the fresh springy, peppery taste of  fresh spring time greens. As I bagged my greens, I shoved a fist full into my mouth. Ah, nothing better then a mouth full of fresh greens after a long long winter. Am I right or am I right?

I ate  a lot of those greens fresh, but did you know that arugula makes for a nice accompaniment to walnuts and chickpeas? And if you mashed all that together with a few other things and shaped the mixture into patties and you get yourself some dank ass burgers?  Well now you know. And now you can make them for yourself and experience the greatness of spring fresh arugula. Just make sure you have enough fresh to shove a handful into your mouth. It is spring time refreshing. 

The stuff. Chickpeas, arugula, walnuts, and big onion, and some radishes. Also a couple carrots, some oats, a few cloves of garlic, a Leon, salt and pepper, red wine vinegar, and a little olive oil. 

IMG_1449.jpg

To start, halve the onion. Thinly slice one half and thinly slice the radishes

Scoop it all into a bowl, sprinkle with salt and toss in vinegar. Set aside on the counter to do it's thing. 

Chop the rest of the onion, the carrots, and the garlic into small chunks.

IMG_1464.jpg
IMG_1468.jpg

Carrot, onion, garlic, and oats go into the food processor and pulsed until a medium crumble.

Walnuts and arugula next. 

IMG_1481.jpg
IMG_1489.jpg

Pulsed until combined then add in the juice of the lemon a good pinch of salt and pepper, and the drained chicken peas.

IMG_1493.jpg

Pulse until just combined. Some big chunks are good, you just want the mixture to be able to hold together.

IMG_1499.jpg

Dump the mixture into a bowl and place in the fridge for at least and hour and up to a day. 

After the time in the fridge, divide the mixture into 6 equal parts and form each into a patty about an inch think. Take a clean cloth and pat each applies dry on both sides.  

IMG_1525.jpg

Grab a skillet, lightly oil it, and place on a medium heat. Sear each side of each burger until browedthen place on a lightly Ould baking sheet. 

IMG_1529.jpg

Place the burgers into a preheated oven to finished cooking. 40 minutes, flipped after 20.

After the burgers are cooked, it time to assemble. Bread or buns of some kind(I used sourdough rolls) the pickled radish and onion mixture, some mustard( I used honey mustard) and more fresh arugula.

Do it up, do it right. Serve with some fries or chips and eat while knowing that spring is here, even if as you are eating, it is snowing. Damn snow. 

At least we have arugula. 

-C


Arugula Walnut ChickPea Burgers with Quick Pickled Radishes and Onions 

makes 6 burgers 

  • 1 can or 2 cups  cooked chick peas drained
  • 2 large handfuls arugula  (about 2 packed cups)
  • 1 large sweet onion
  • 2 small carrot
  • 1 cup old fashion oats
  • 1/3 cups walnuts
  • 2-3 cloves garlic
  • A lemon
  • salt and pepper
  • 2 tablespoon red wine vinegar
  • handful of radishes (5-7 of them)
  • salt and pepper
  • olive oil

To assemble burgers

  • Burger buns or baguettes
  • Maple or honey mustard
  •  fresh arugula 

Start by cutting half of the onion as thinly as you can. Do the same with the radishes and place the onions and radishes in a bowl with a sprinkle of salt and drizzle the vinegar all over Toss around and set the bowl aside.

Grab the food processor and dump the oats in. Roughly chop the other half of onion, the carrots, and the garlicand toss those into the processor too. Pulse until a medium crumble. Add in the arugula, the juice of the lemon, the walnuts, the chickpeas, and a good pinch each of salt and pepper. Pulse again until just combined and the mixture has come together. Taste and make sure the salt and pepper are good for you then dump the mixture into bowl and set in fridge for at least a half hour or as long as a day.

Preheat oven to 400.

When ready for burgers, take mixture out of the fridge.  Place a lightly oiled skillet on the stove on medium heat. 

Divide the mixture into 6 equal balls and pat into inch think patties. Take a clean cloth and pat eat patties dry.  Place each burger on hot skillet and cook each side for 4-6 minutes or until each side is nicely browed. Transfer burgers onto a lightly greased baking sheet then place them all into the oven to finish cooking for  40 minutes, flipping them after 20 minutes.

Once burgers are cooked, remove from the oven. They will be slightly fragile, but will firm up if you let them set  for 5-10 minutes.

Assemble the burgers. Grab a bun or bread of some kind (if you want), top with a good fork or two full of the pickled radish onion mixture, drizzle with some mustard and top with more fresh arugula.

Get on to eating it. 

If you don't eat all the burger at one time, the freeze really well. I almost prefer them after they have been frozen. 

In Vegetables, Vegan, Spring, pulses, Nuts, Gluten Free, entree, dinner, Dairy Free, beans Tags Arugula Walnut Chickpea Burgers With Quick Pickled Radishes And Onions, Vegan, Vegan Burgers, Veggies Burgers, Pulses, Beans, Burgers, Vegan Food, food, Pickled onion and radishes, spring, Walnuts, Nuts, Protien
Comment
← Newer Posts Older Posts →
 

https://thelovelycrazy.squarespace.com/config#/|/about/

Me. Food Maker.Food eater. Woo HOO!

STEM+NODE  SMALL BATCH AND ONE OF A KIND POTTERY

stem+node ceramics


____________________

Subscribe

GET NEW POSTS IN YO EMAIL

You are AWESOME!!!


@thelovelycrazy 2014-2021