• stem+node ceramics
  • HOME
  • Food Recipes
  • About
  • Contact
Menu

The Lovely Crazy

Street Address
City, State, Zip
Phone Number

Your Custom Text Here

The Lovely Crazy

  • stem+node ceramics
  • HOME
  • Food Recipes
  • About
  • Contact

Shaved Asparagus,Radish, and Cashew Pea Cream Pizza

April 26, 2016 Colleen Stem
IMG_2778.jpg
IMG_2669.jpg

When the mr got home from work last night, her got himself a super great dinner suprice

Pizza, on a Monday. Woo Hoo! (I am so awesome, my sister even texted to congratulate him on his unexpected pizza dinner)

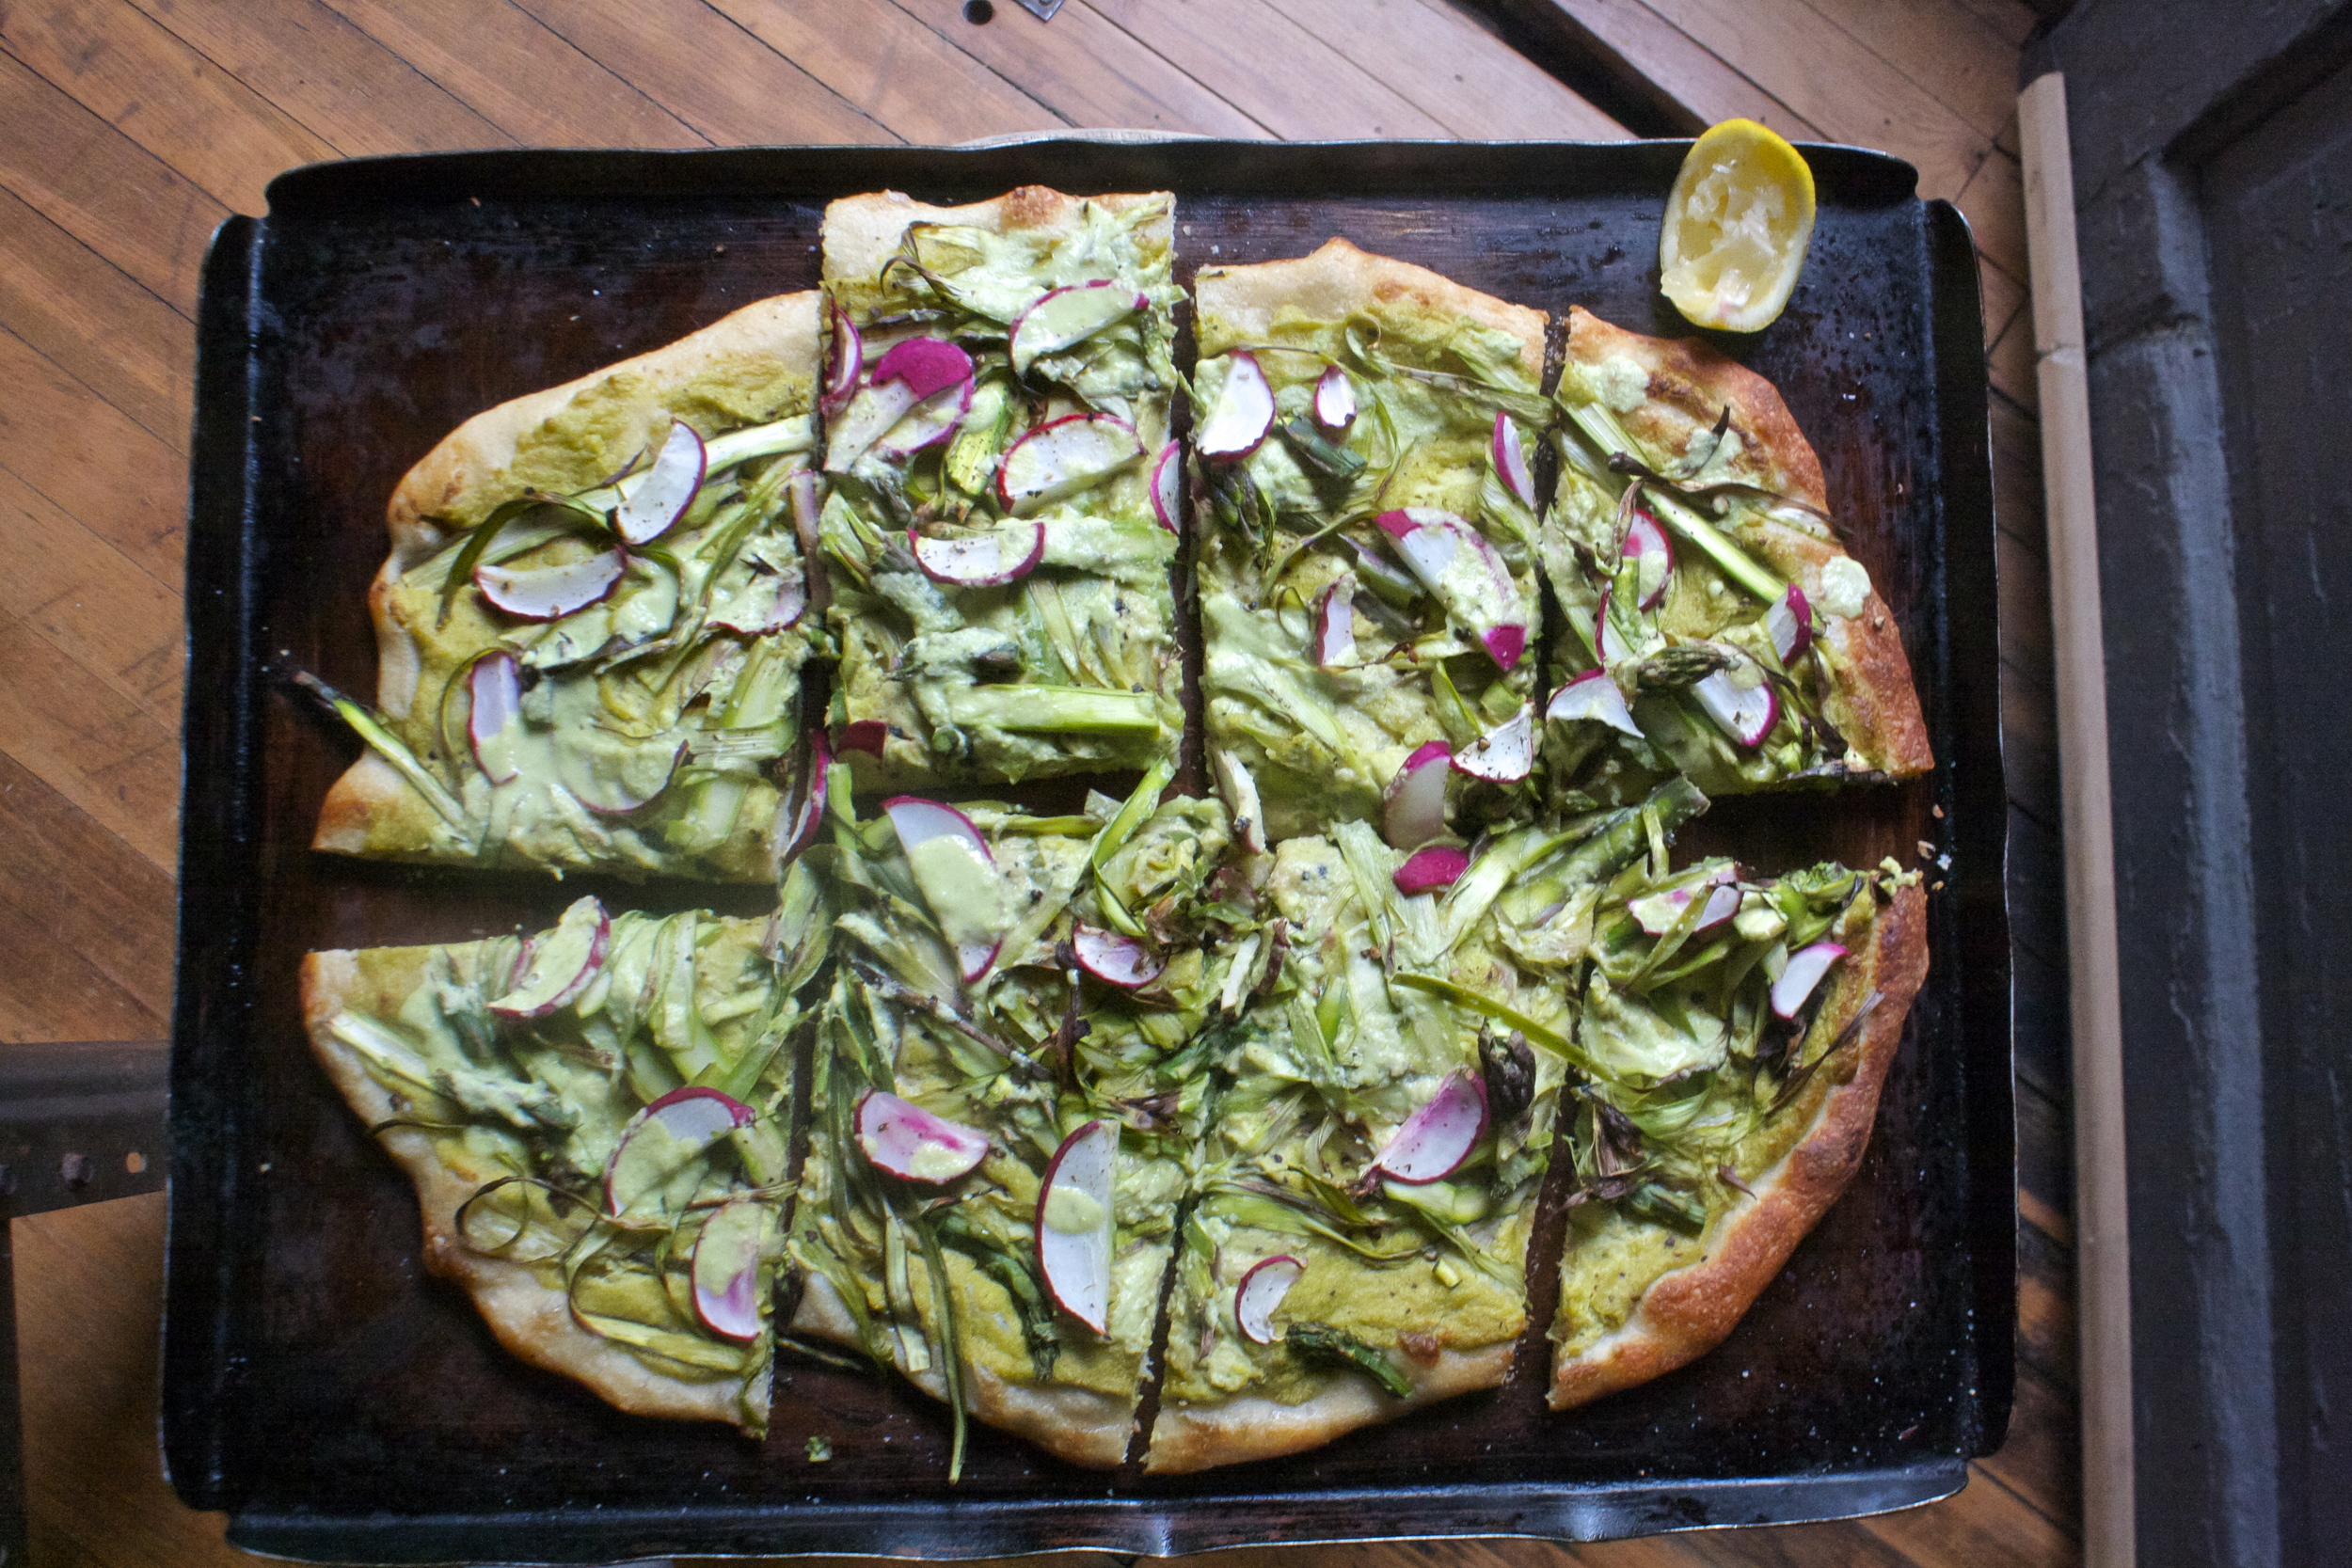
But here is the thing. I think pizza is a completely acceptable dinner any night of the week just as long as it is not covered in a shit tone of greasy cheese or any other kinda heavy and not so good stuff.  This is a not one of those types of pizzas. This pizza is light, the crust rolled slightly thin, covered in a creamy sweet pea and cashew cream, (which is really pretty) and topped off with a tons of shaved asparagus and sliced radishes.It's a celebration of spring time veggies and tastes so f*ing good. Sweet and creamy from the peas cashew cream, a nice crispy freshness from the asparagus, and a nice little spicy kick from the radishes. All the flavors that make me happy. It's oh so good. .

And really, It's almost like eating a big salad with a piece of bread. Not a bad dinner right? So do yourself a favor and make that salad and bread into this kick ass pizza.

You can, you should, you, must.

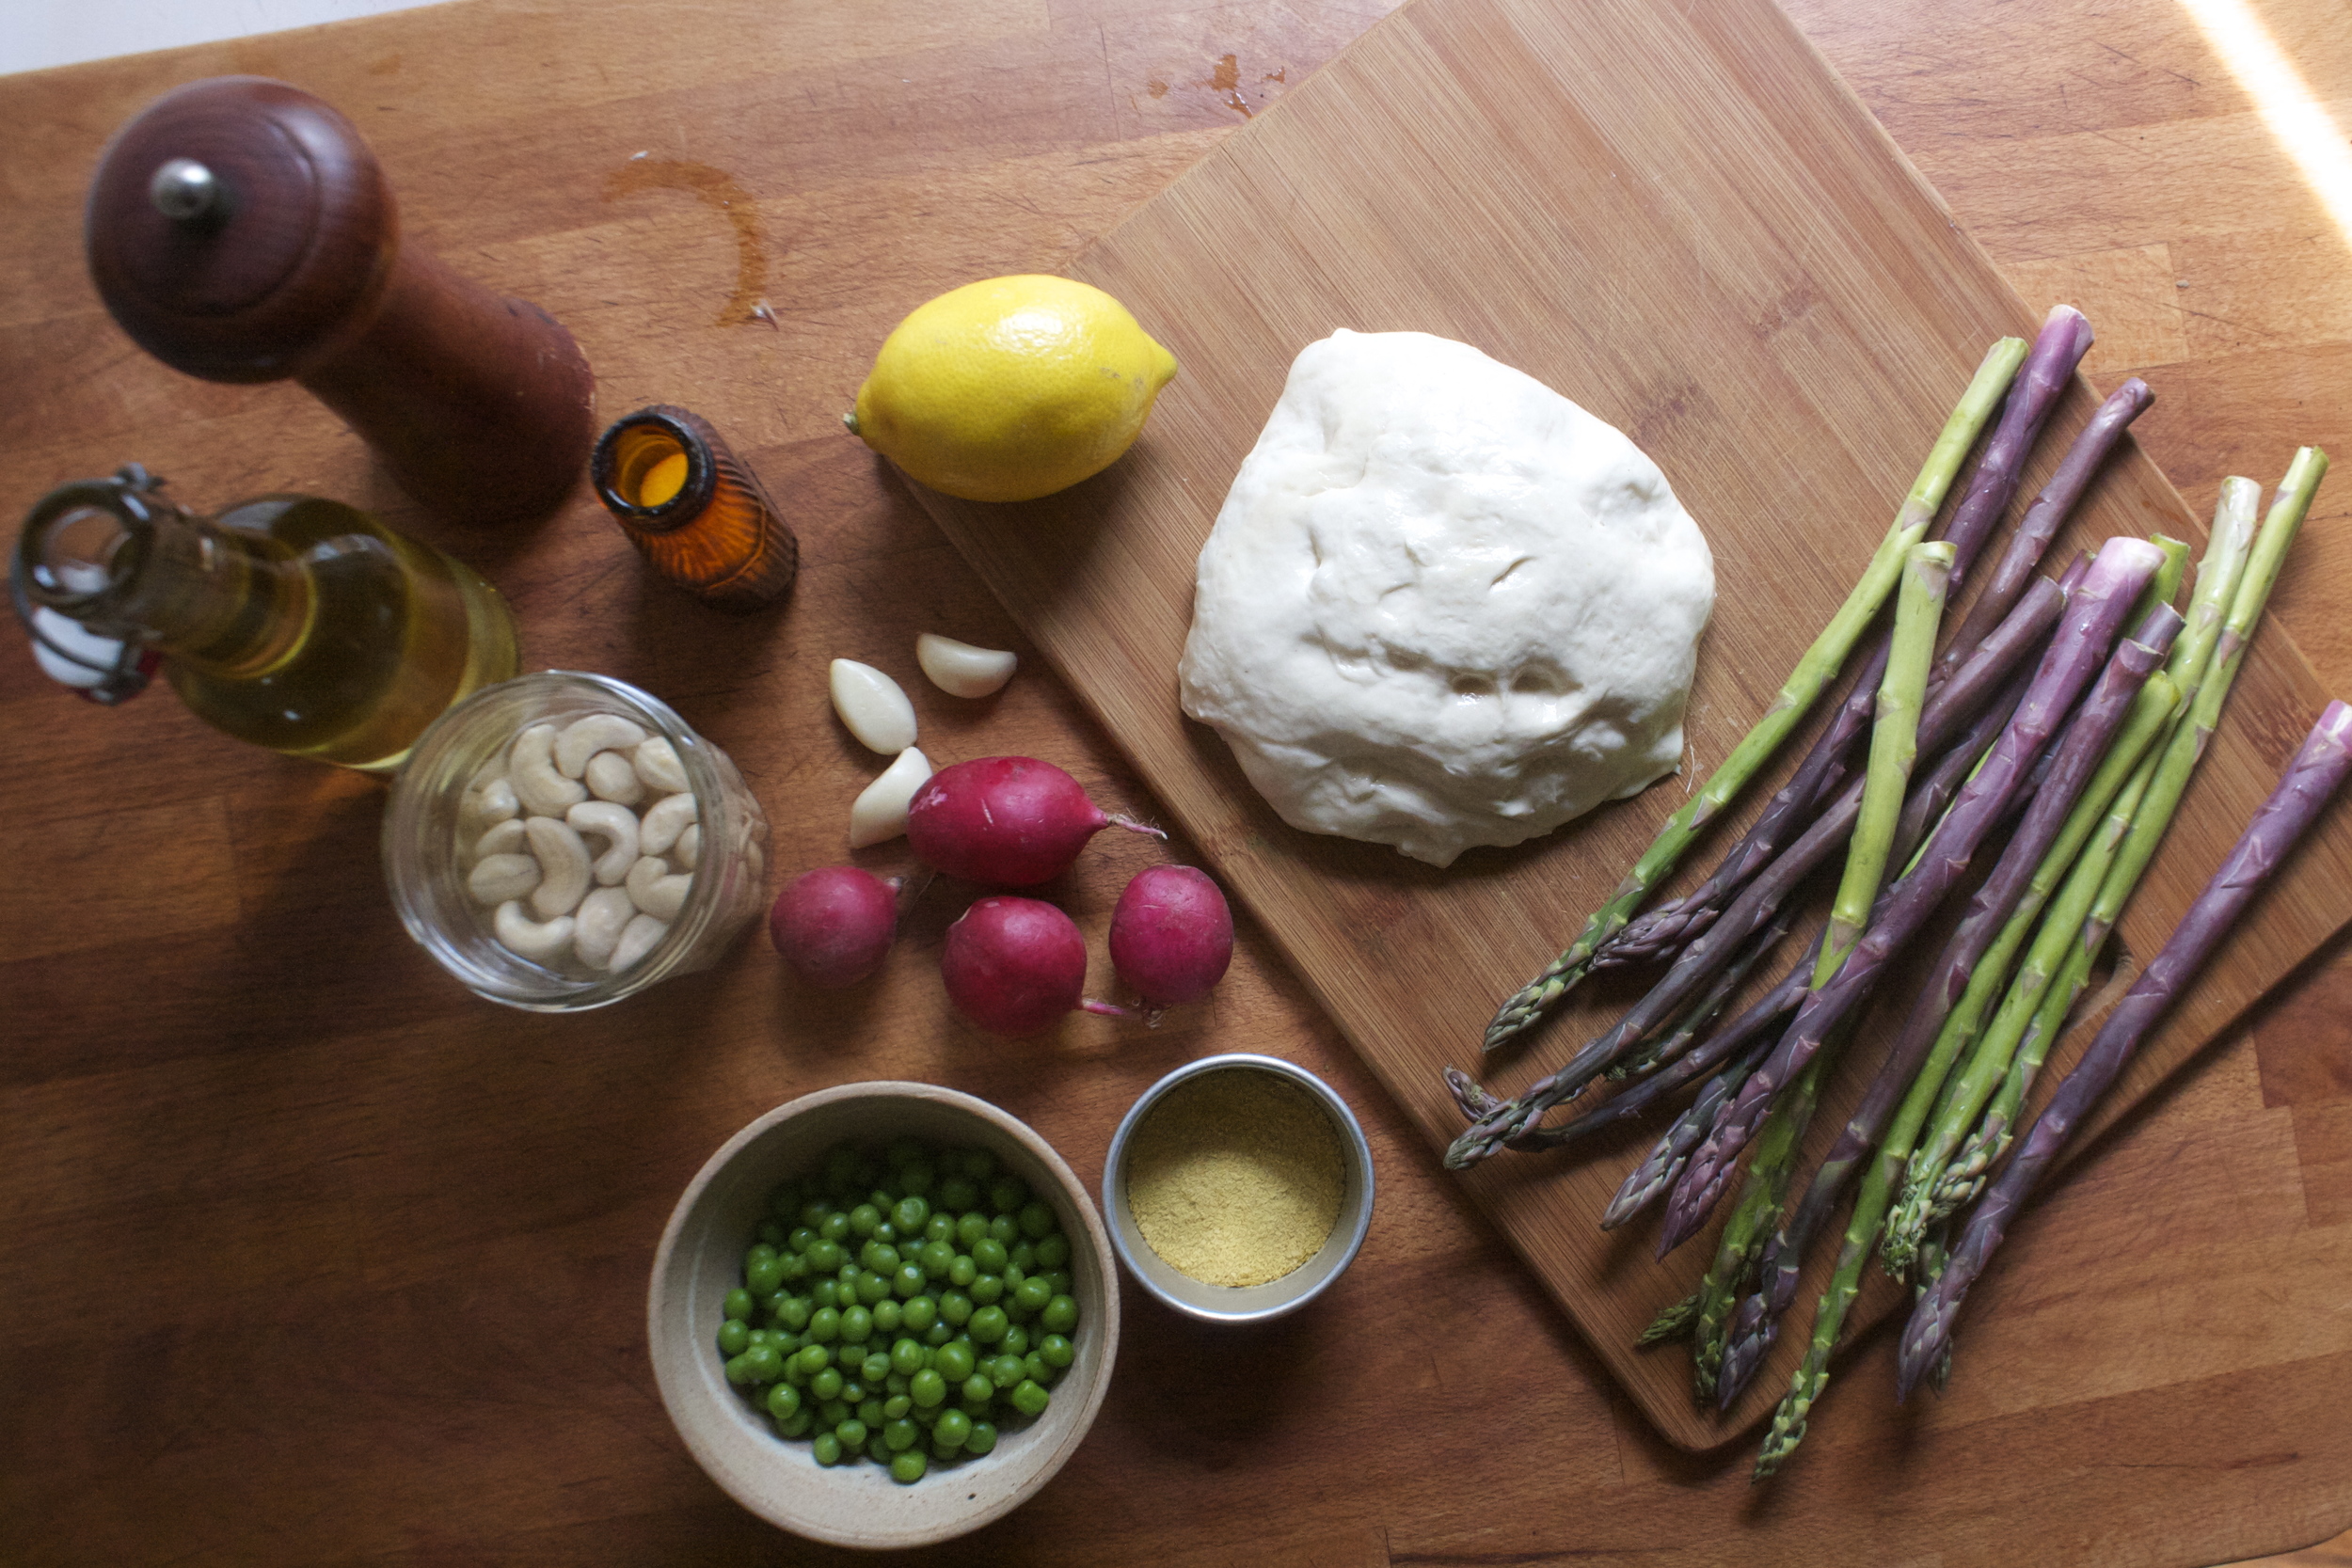
The stuff. Peas (fresh or thawed out frozen.. my were frozen) some cashews soaking in water, a bunch of asparagus (I had purple but you can just use green) ans a few radishes. Also need a lemon, some nutritional yeast, a few coves of garlic, salt and pepper, and a little olive oil. Oh, and a pizza dough.

IMG_2683.jpg
IMG_2691.jpg

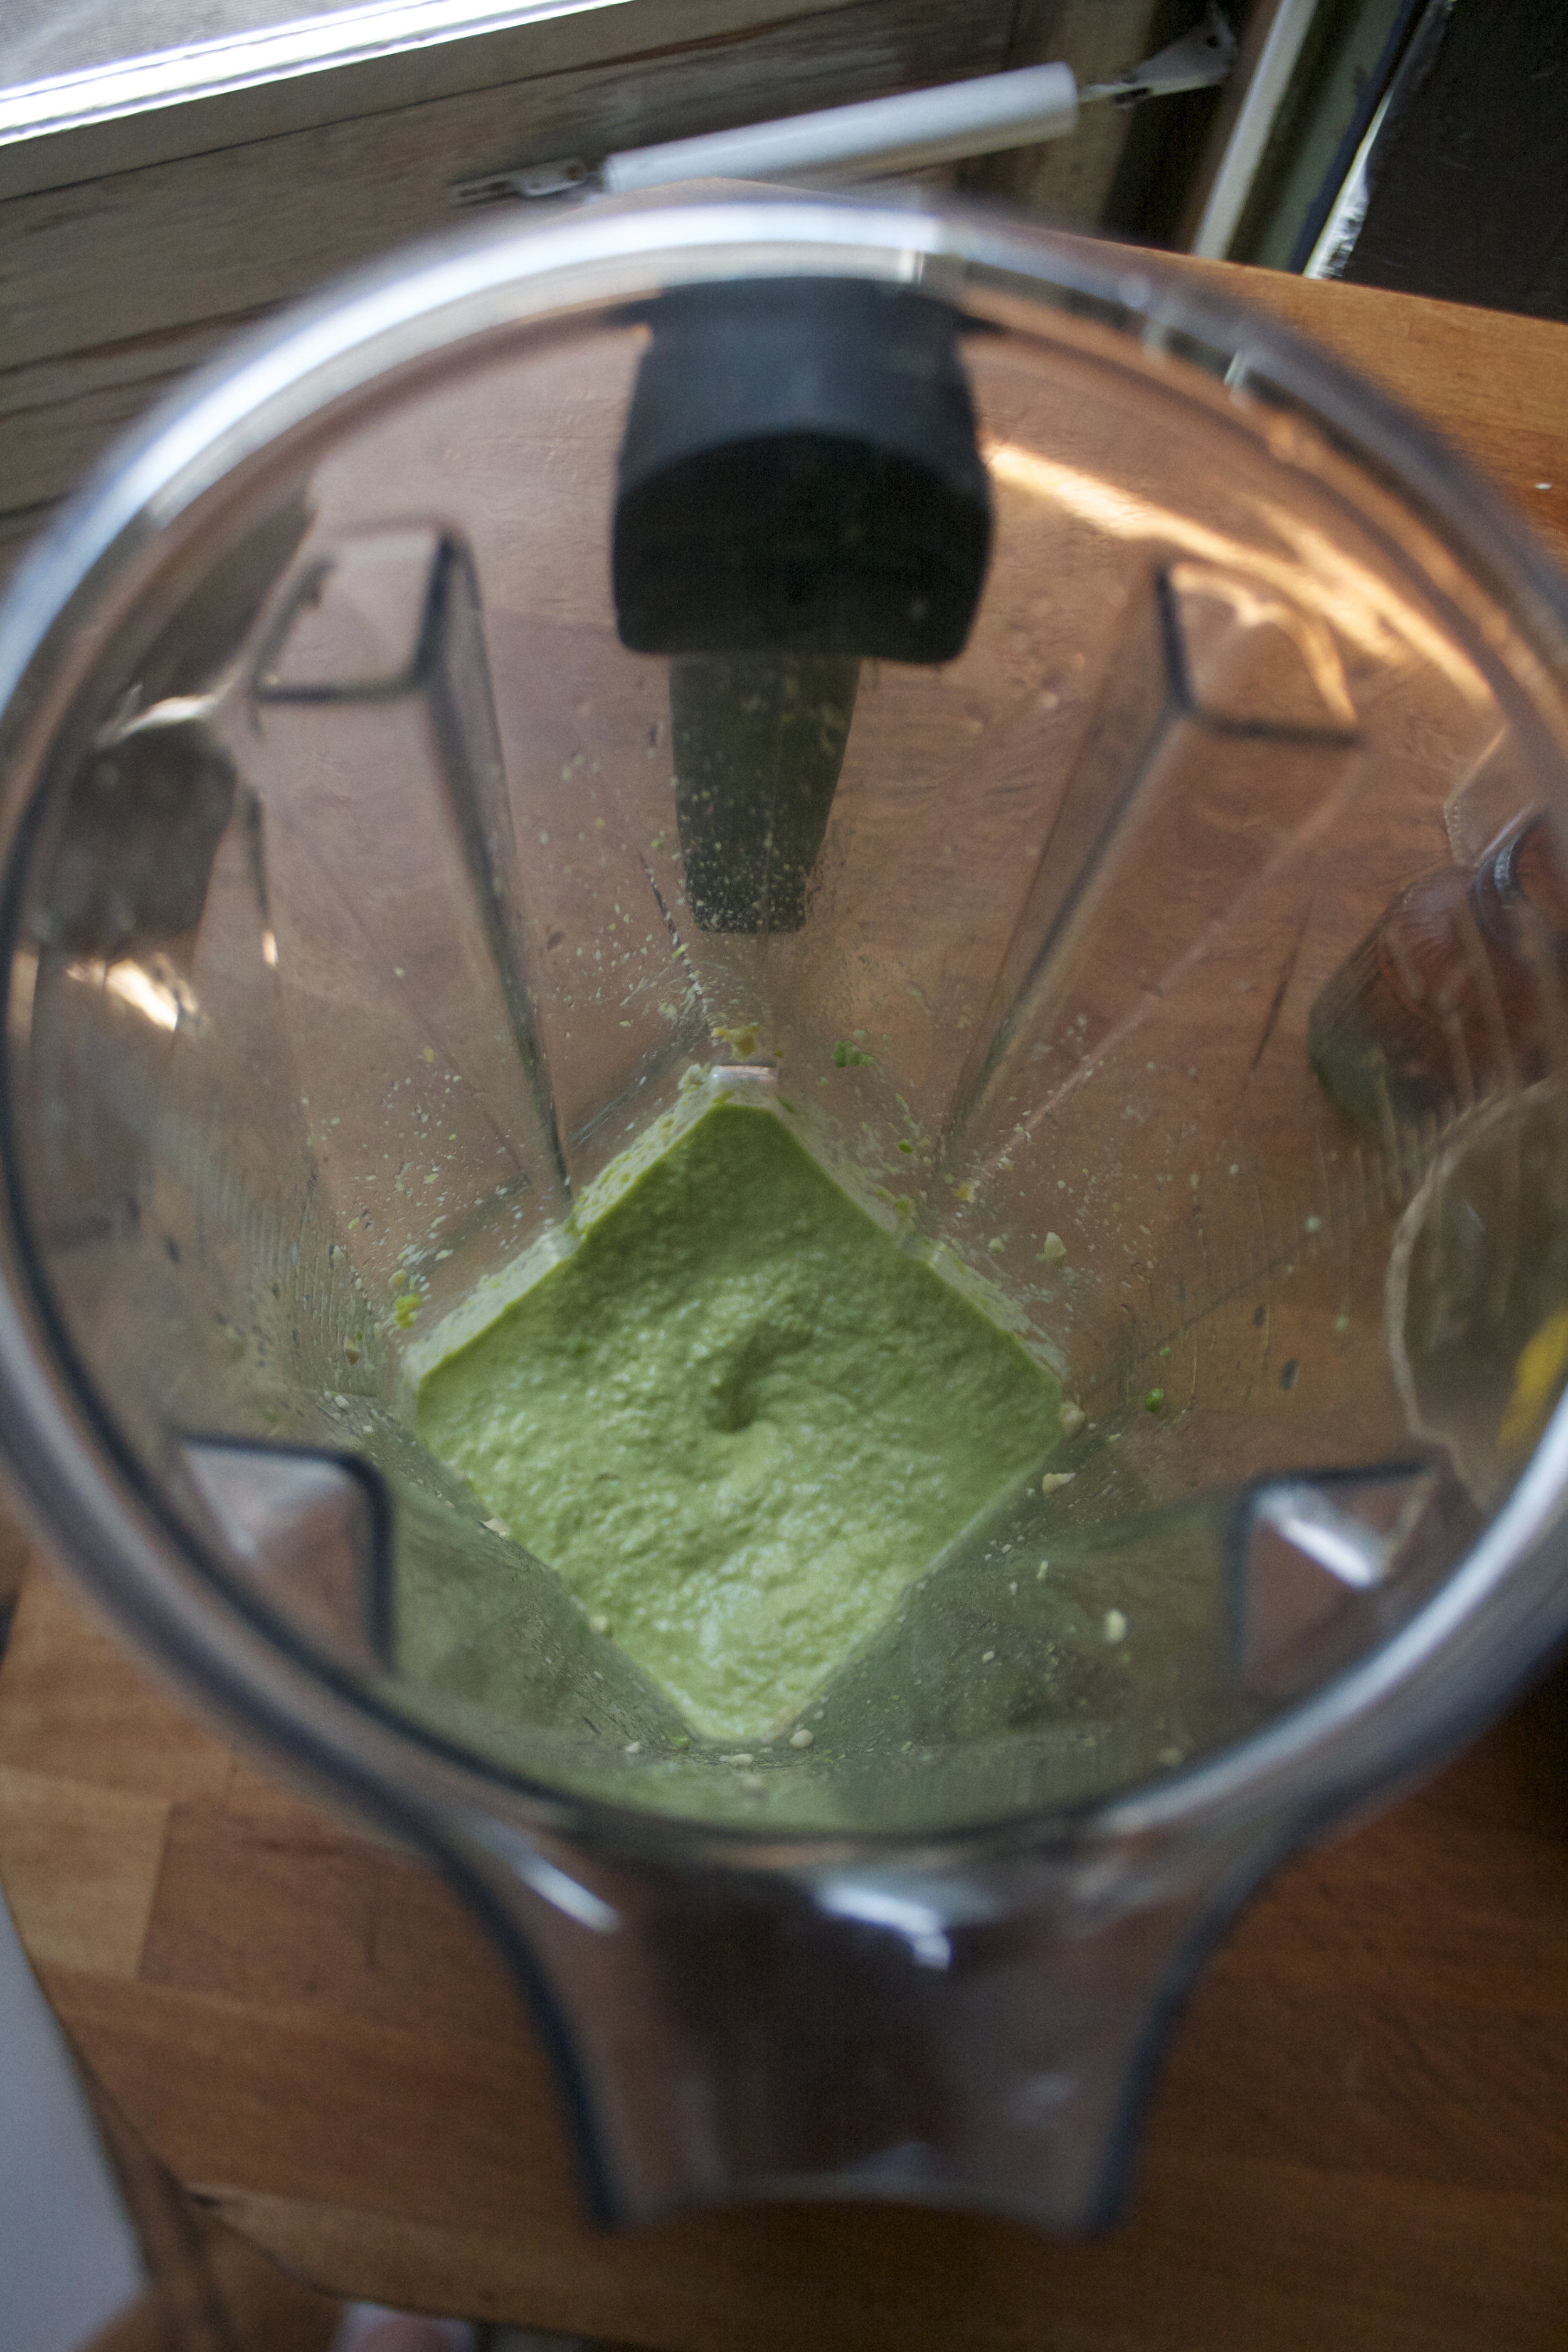
To get the cashew pea cream going, strain the water from the cashews and dump them into a blender along with the peas, garlic, nutritional yeast, juice of half of the lemon, and a pinch of salt. Turn blender on and slowly add in a bit of water, just enough to get the stuff to start blending. Keep on blending until nice and smooth.

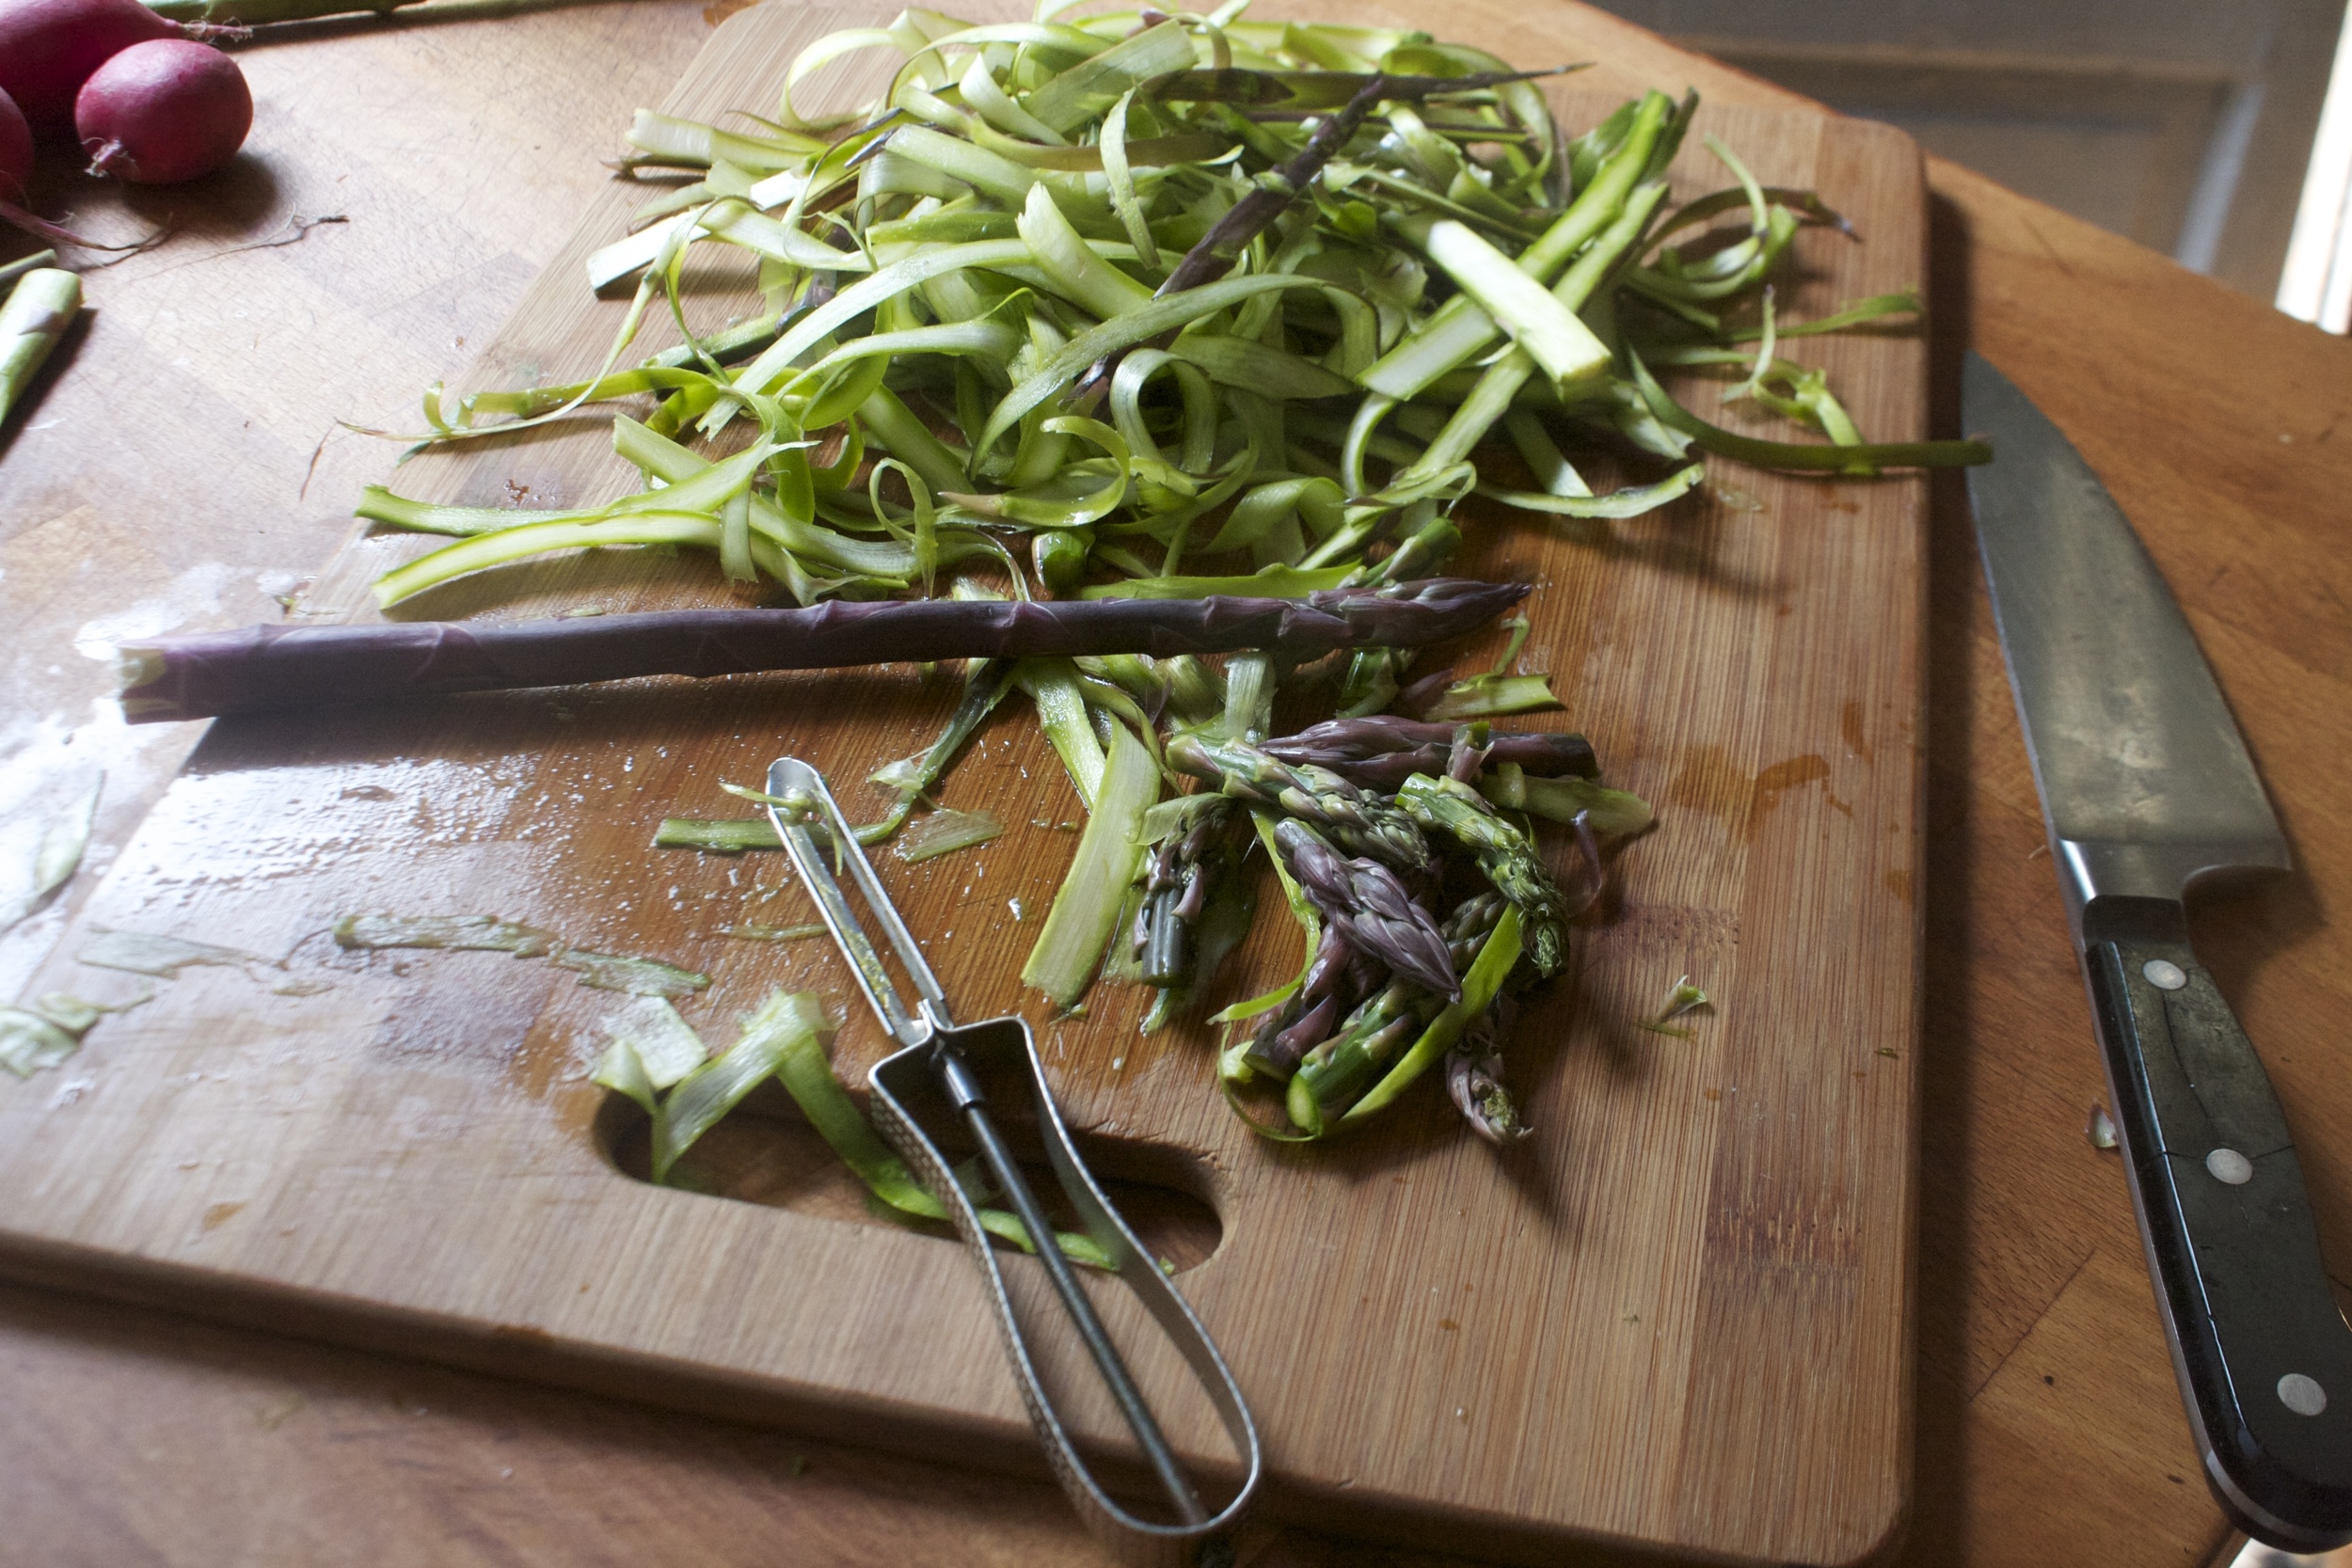
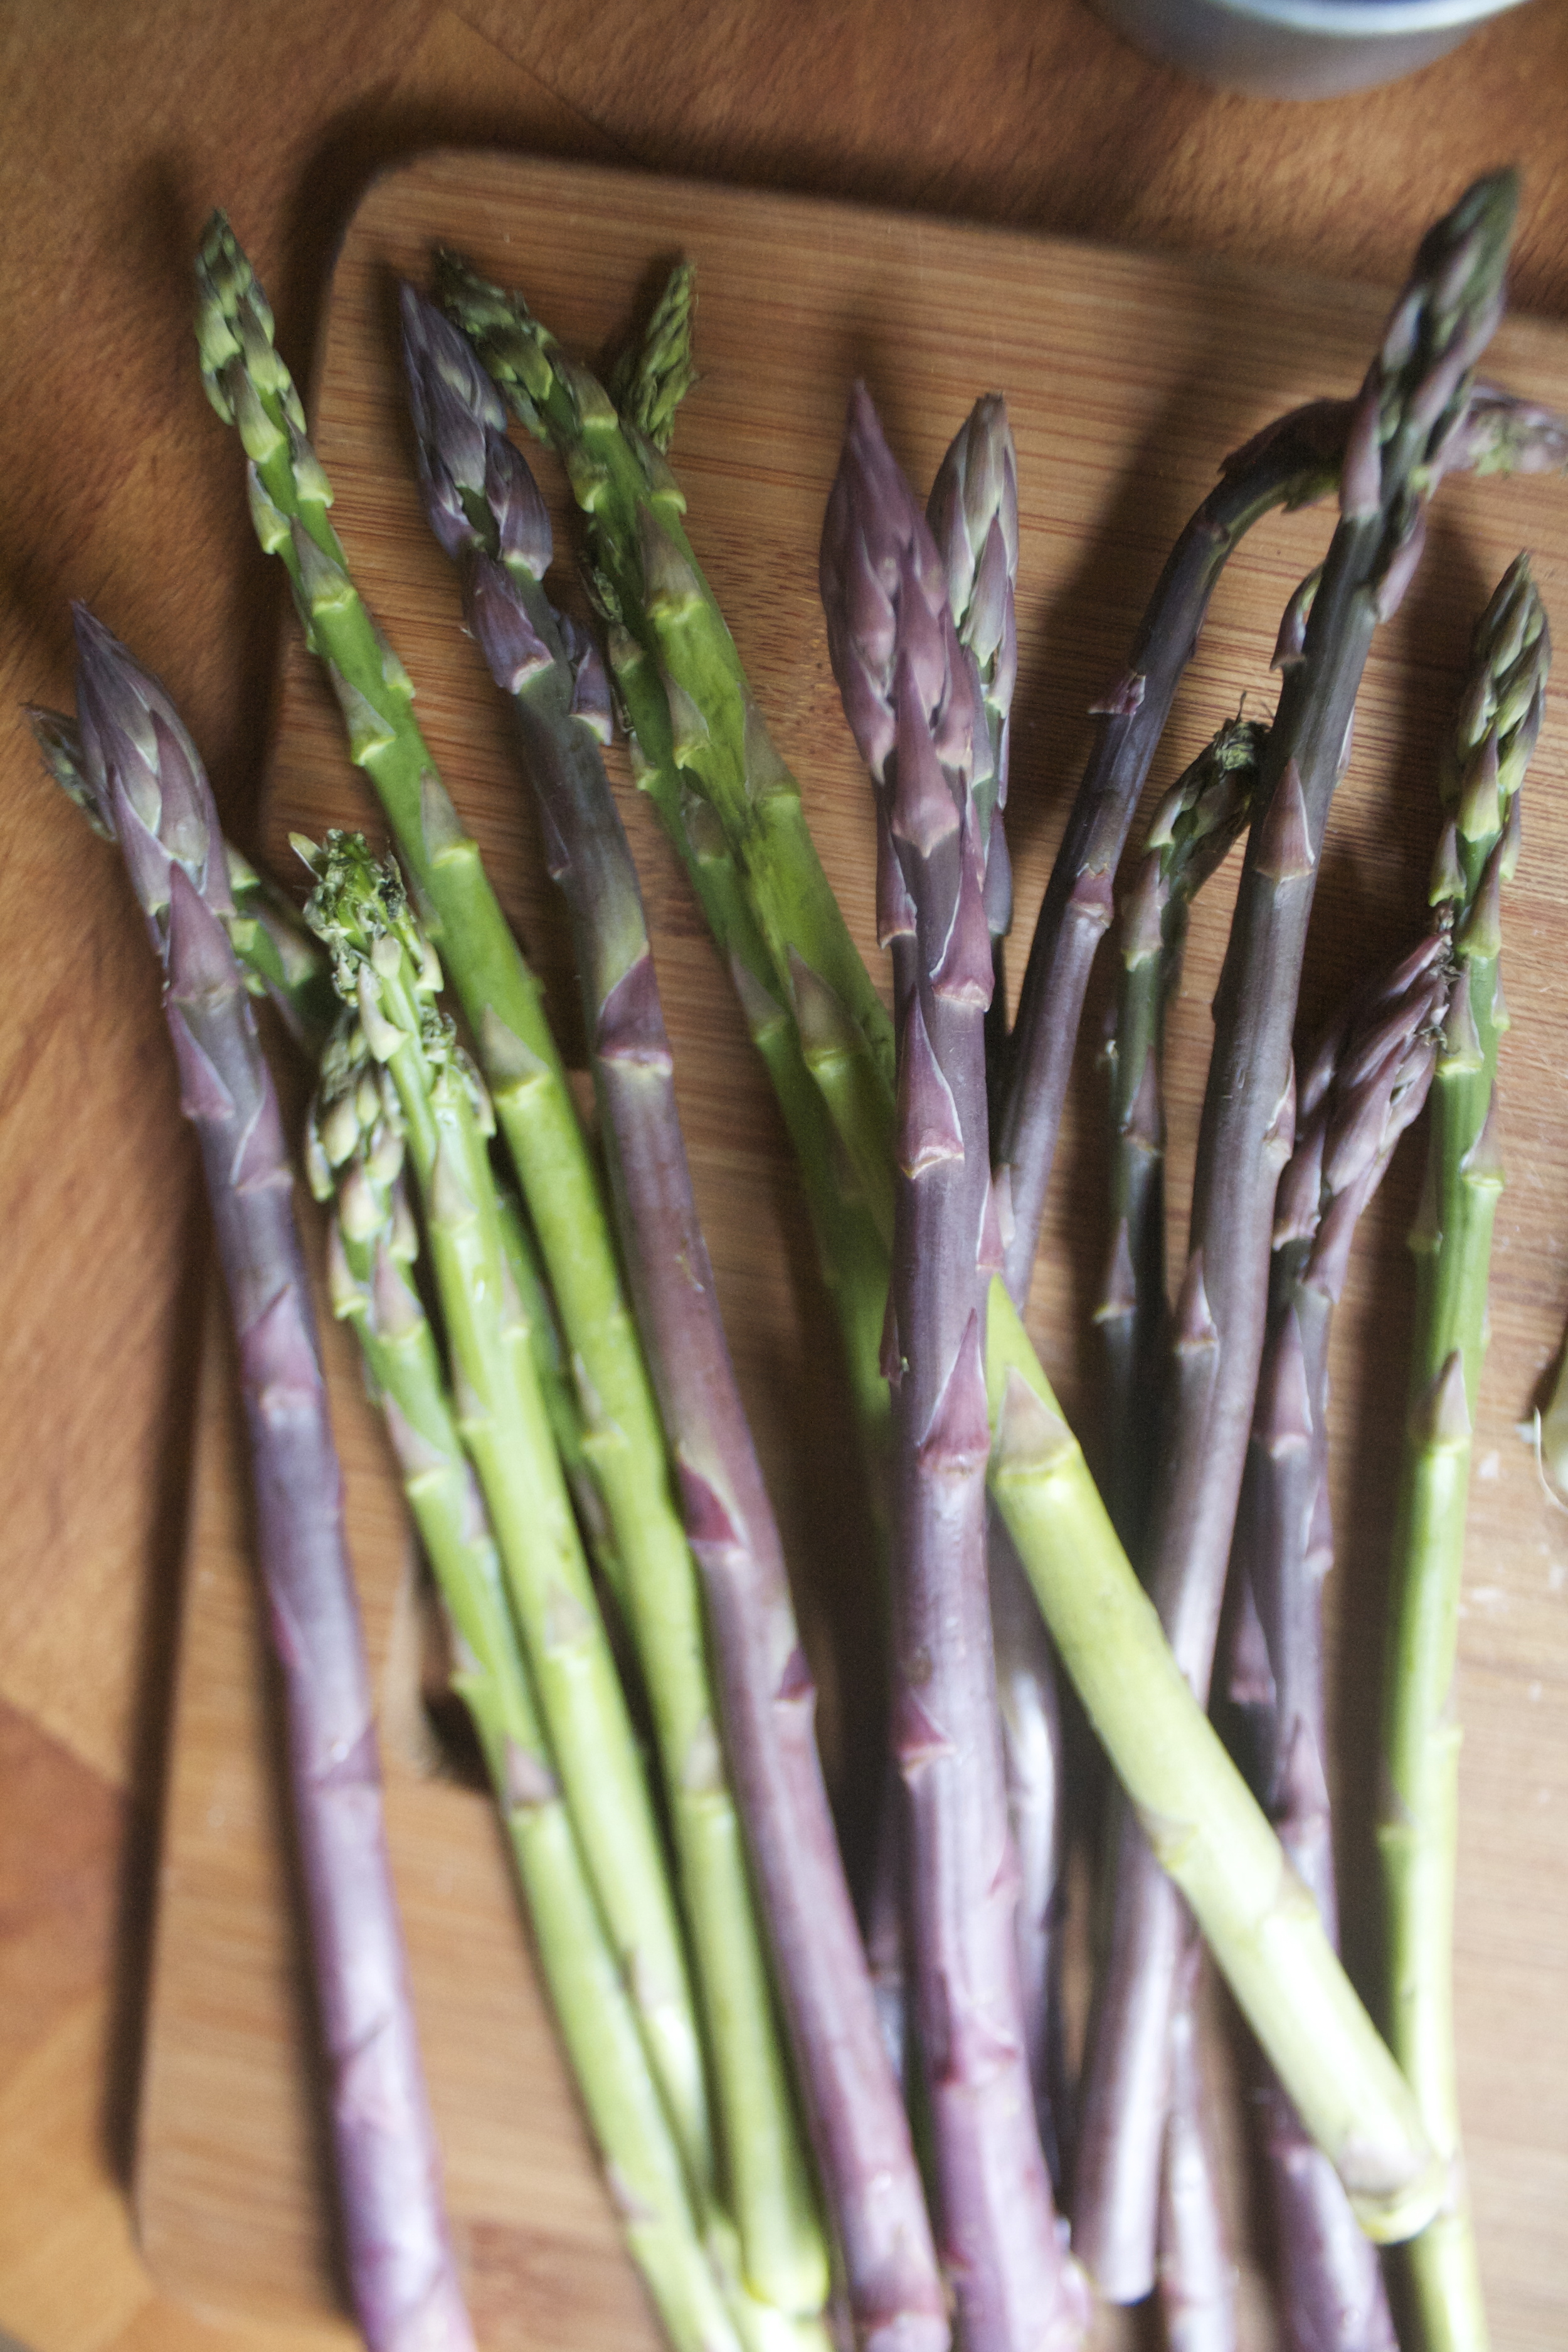
And now shave the asparagus down. I found the easiest way to do this is to chop op the crown part then place the stock on the counter and peel away from you. Not all peels are going to be uniform and perfect, which is good for a textured pizza. Any pieces that break off or shave off weird, keep them too, it;s all going on the pizza. If you asparagus is not super fresh, they might have woody ends.  When done shaving just toss those into a bag and save for a soup later.

And now that the asparagus is done, thinly slice the radishes up.

IMG_2728.jpg
IMG_2731.jpg

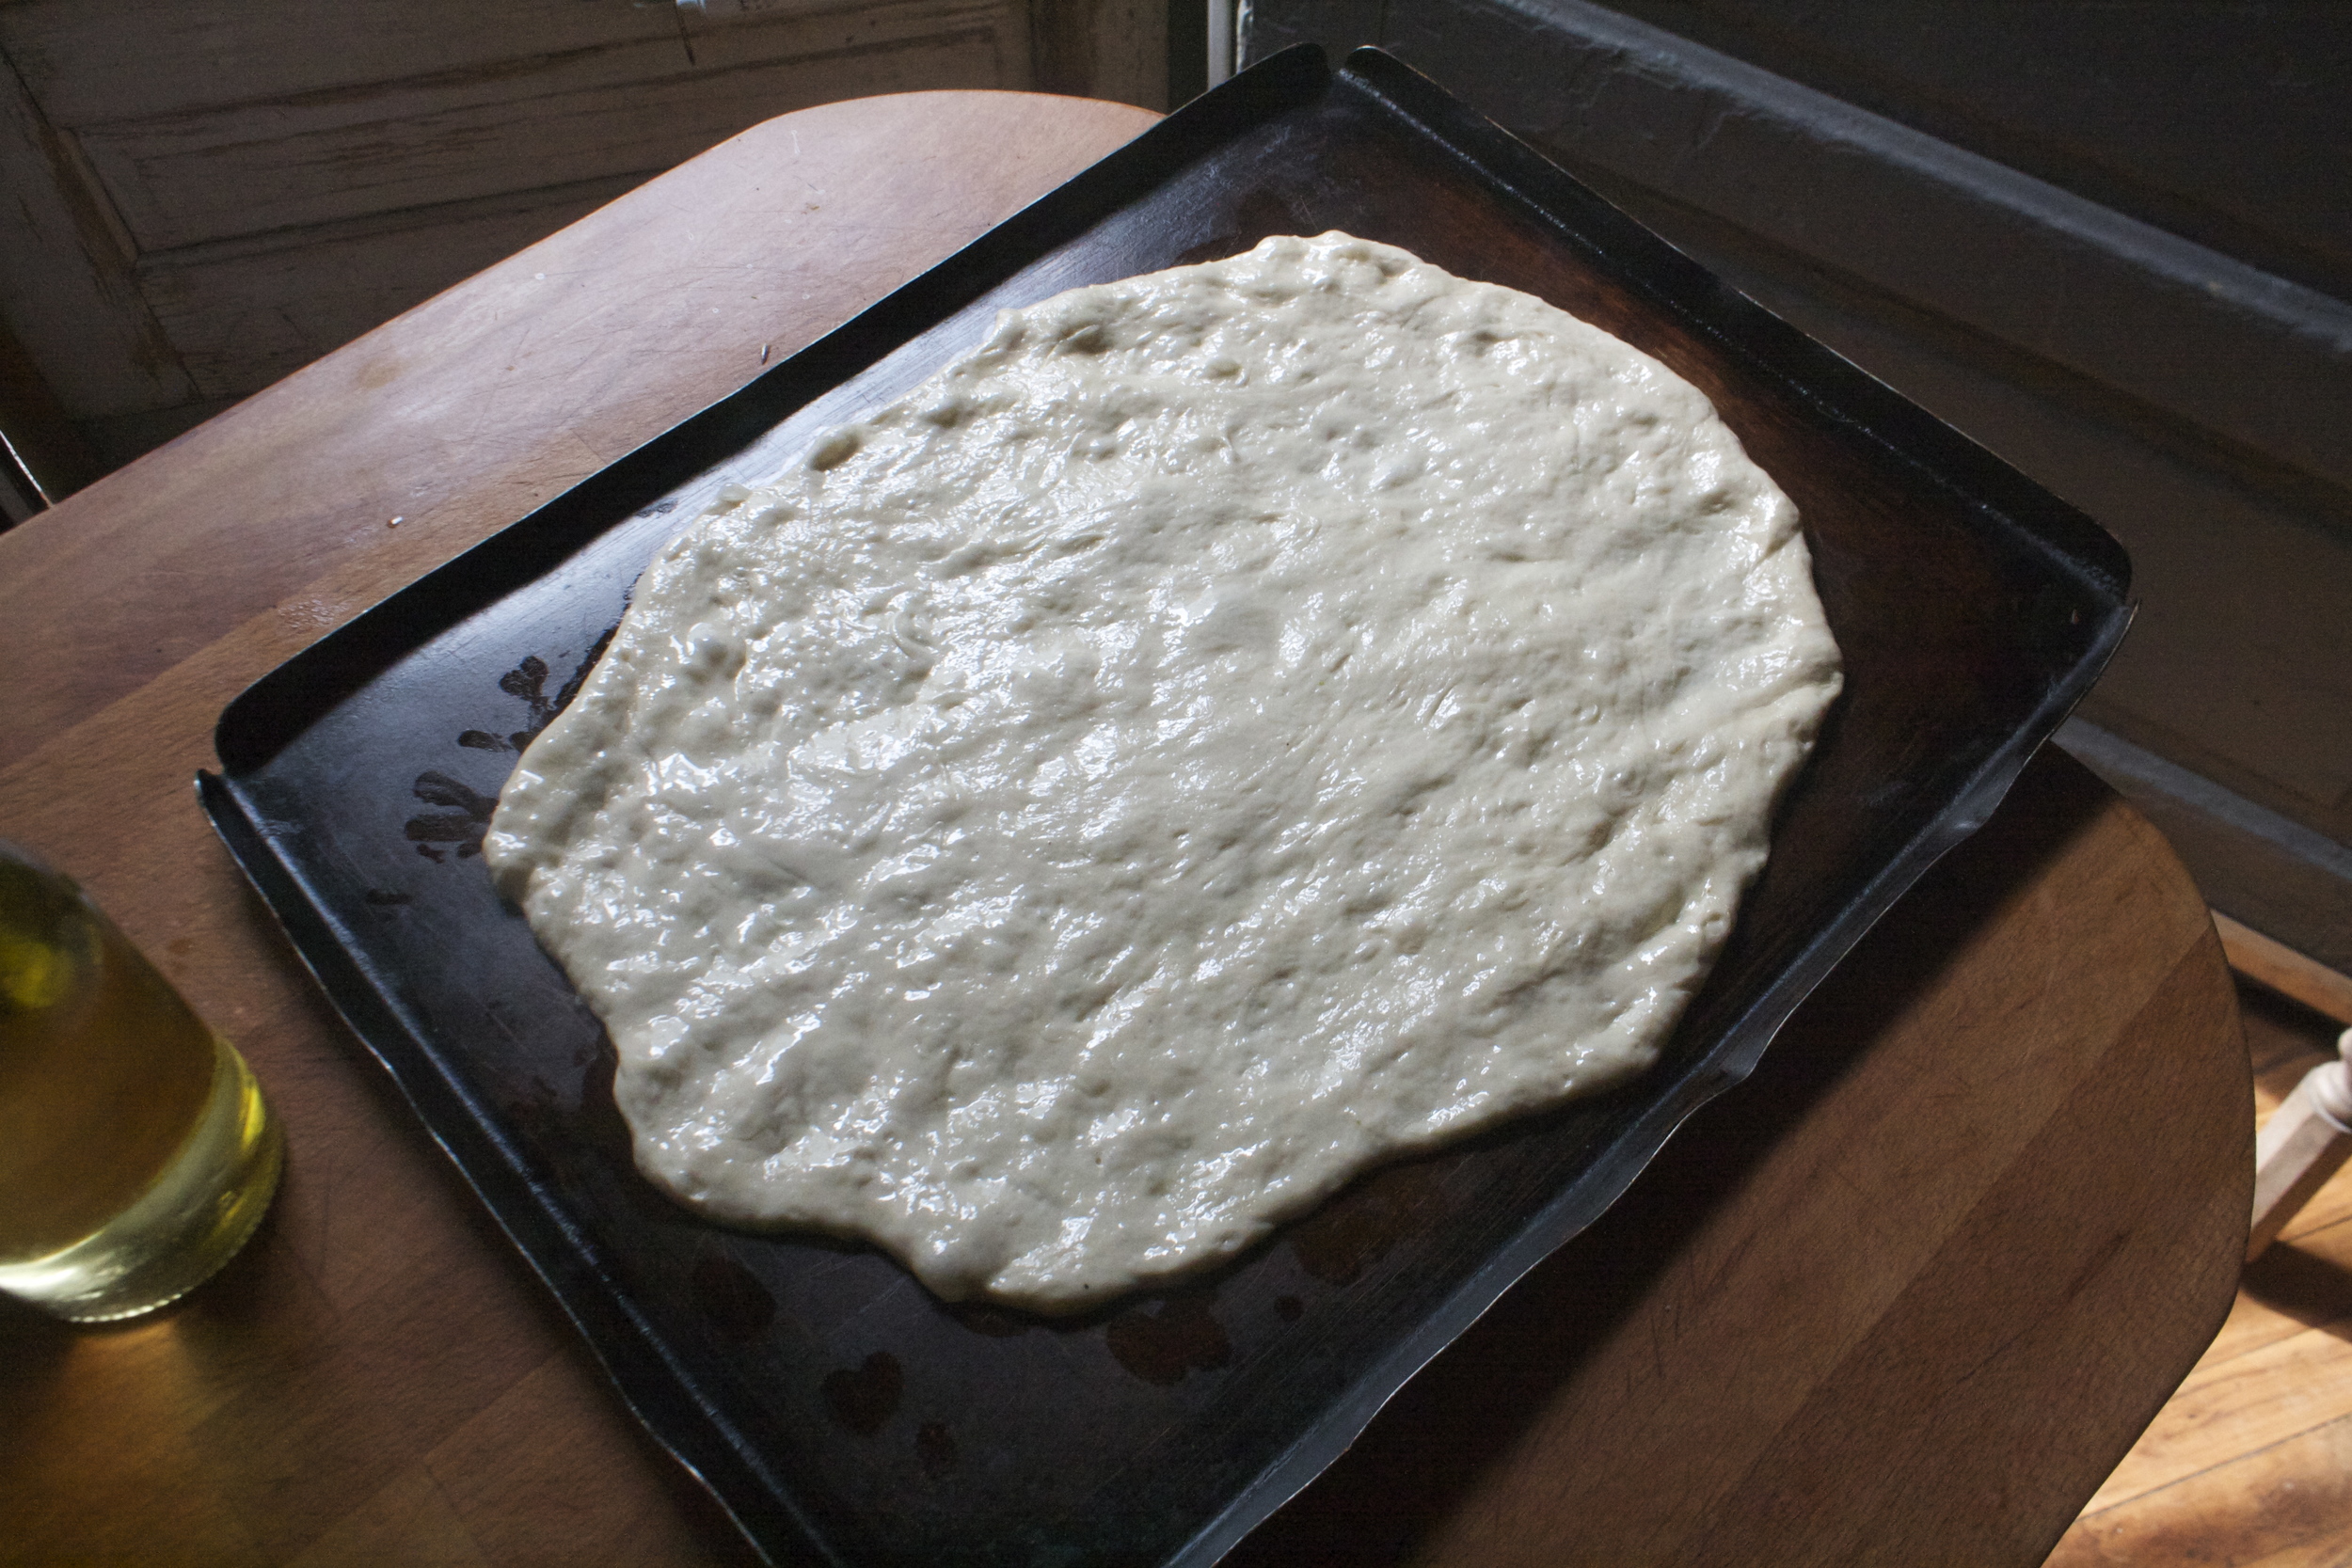
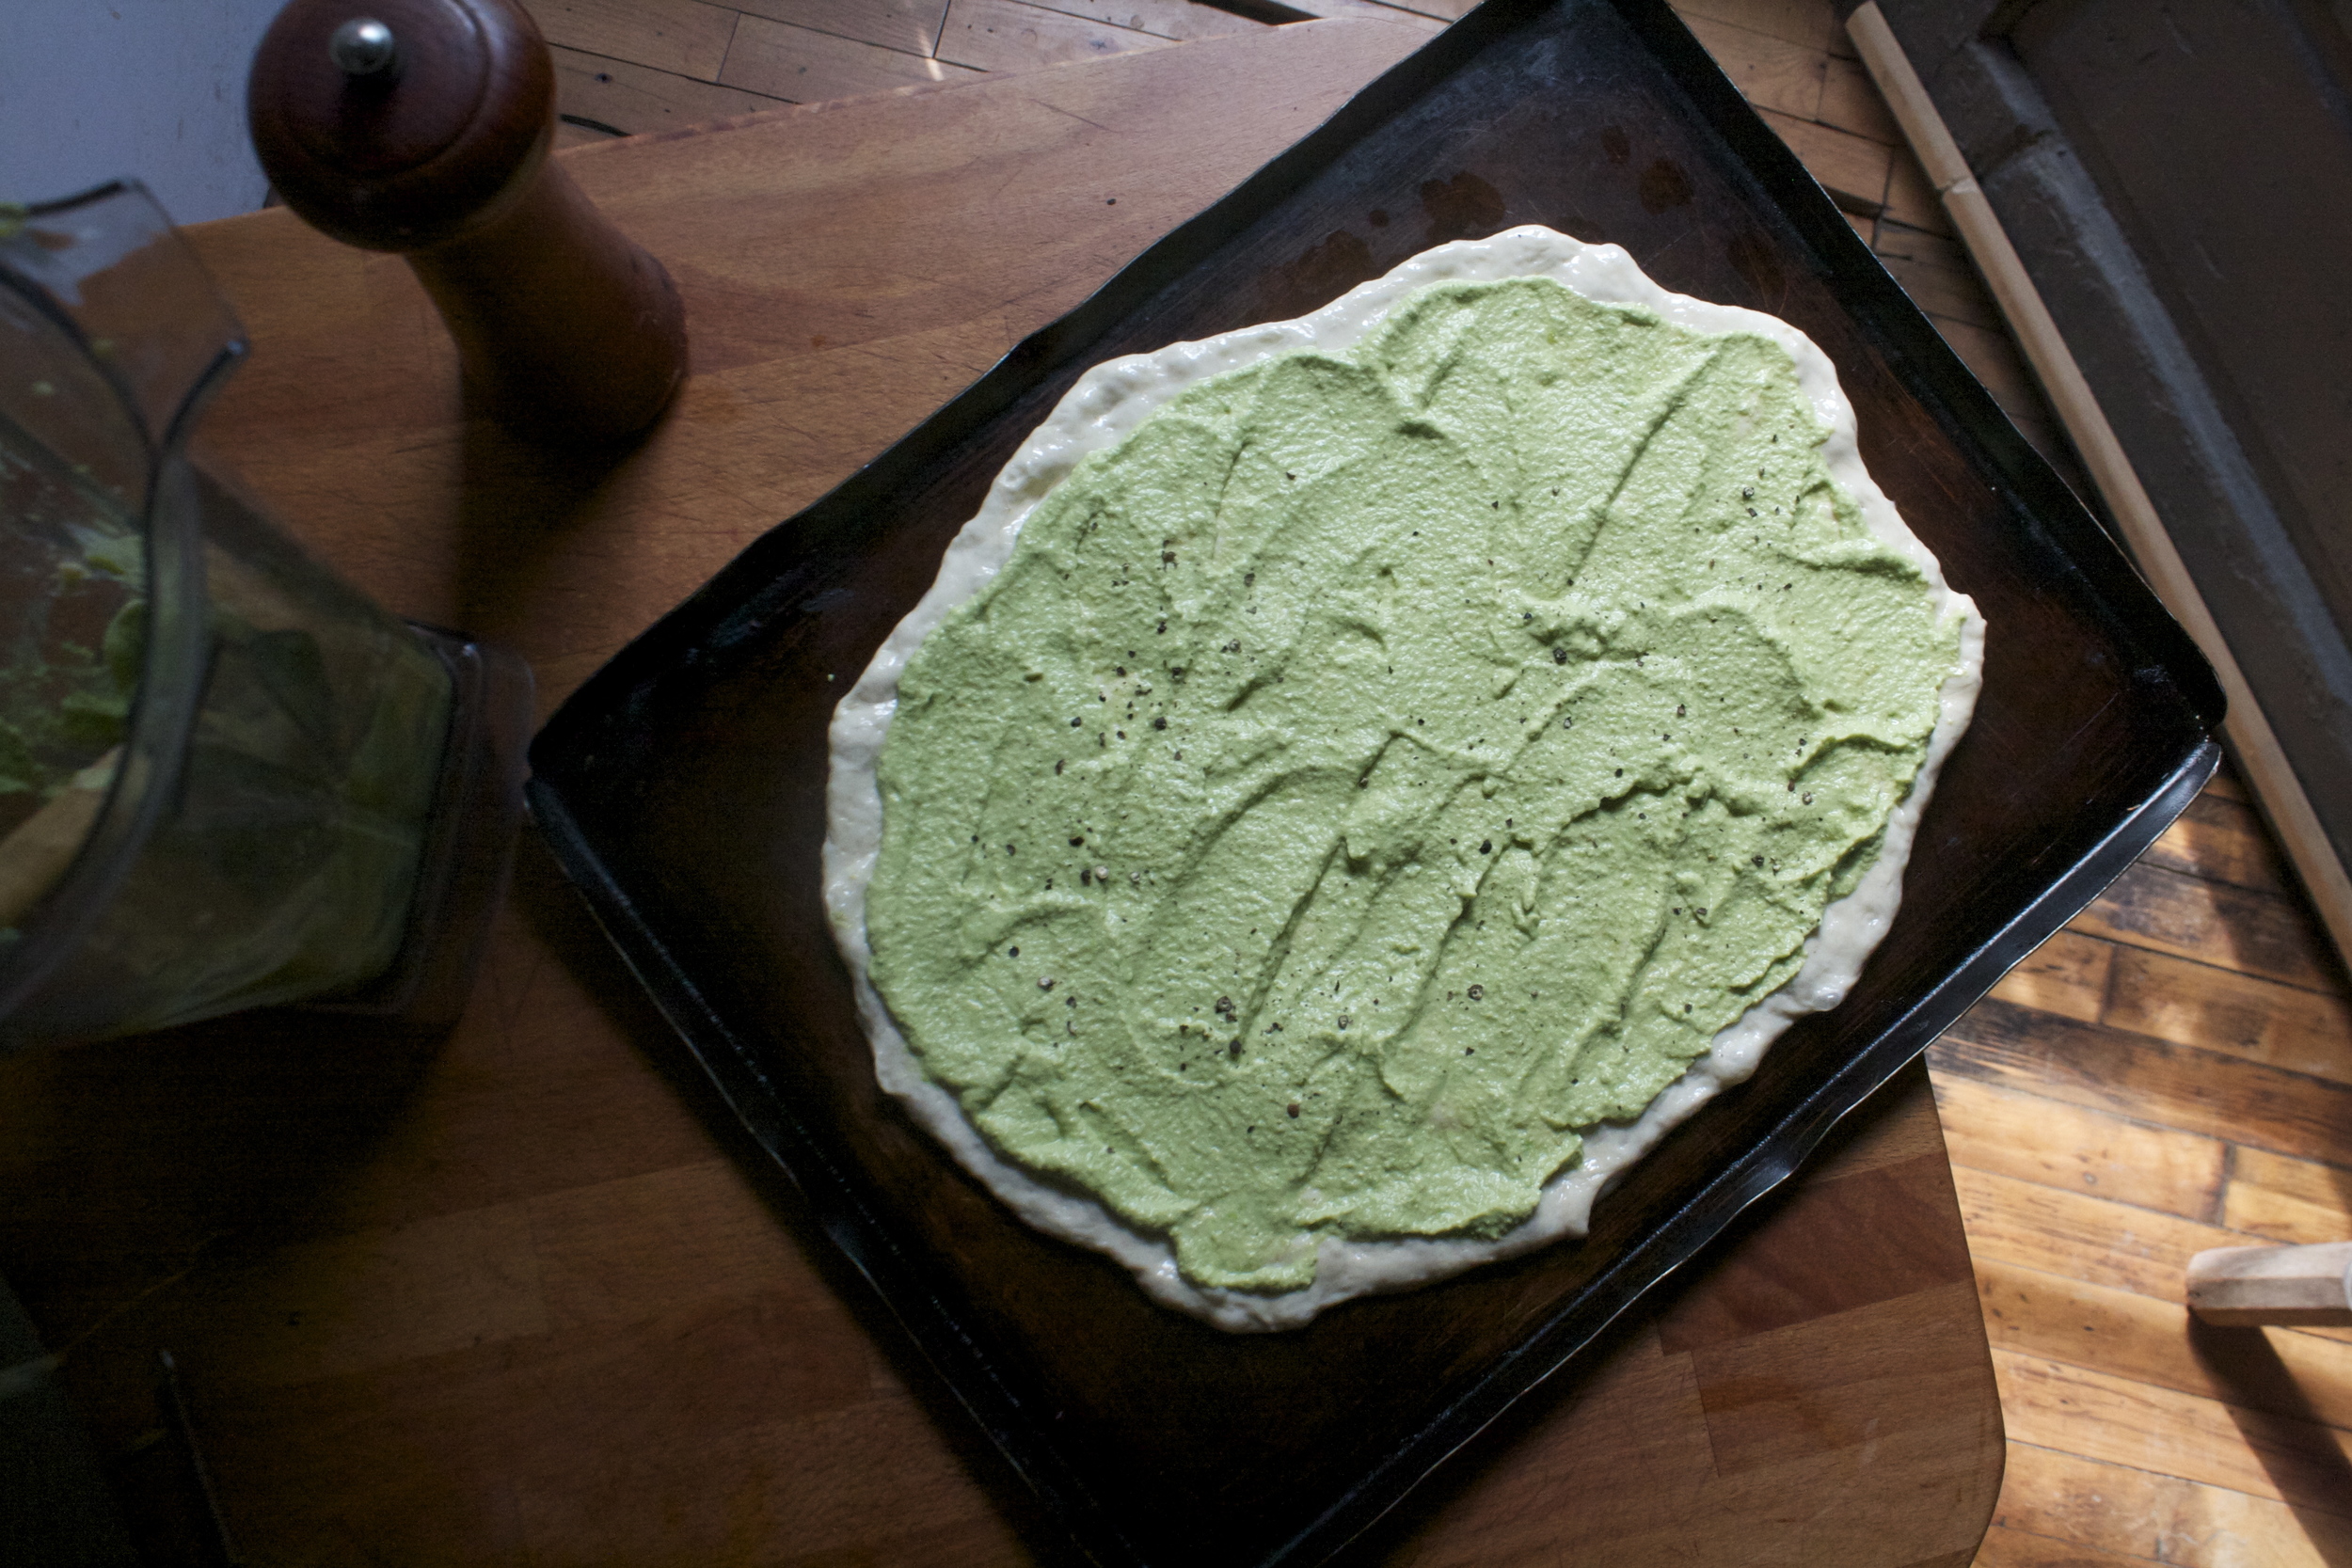
Get that pizza dough onto a baking devise (use a baking sheet, pizza stone, or whatever you usually make pizza on. I used a lightly oiled baking sheet)  and smear lots of that cashew pea cream all over it.

Pile on the shaved asparagus and all the ends and tips that we cut off or broke off.

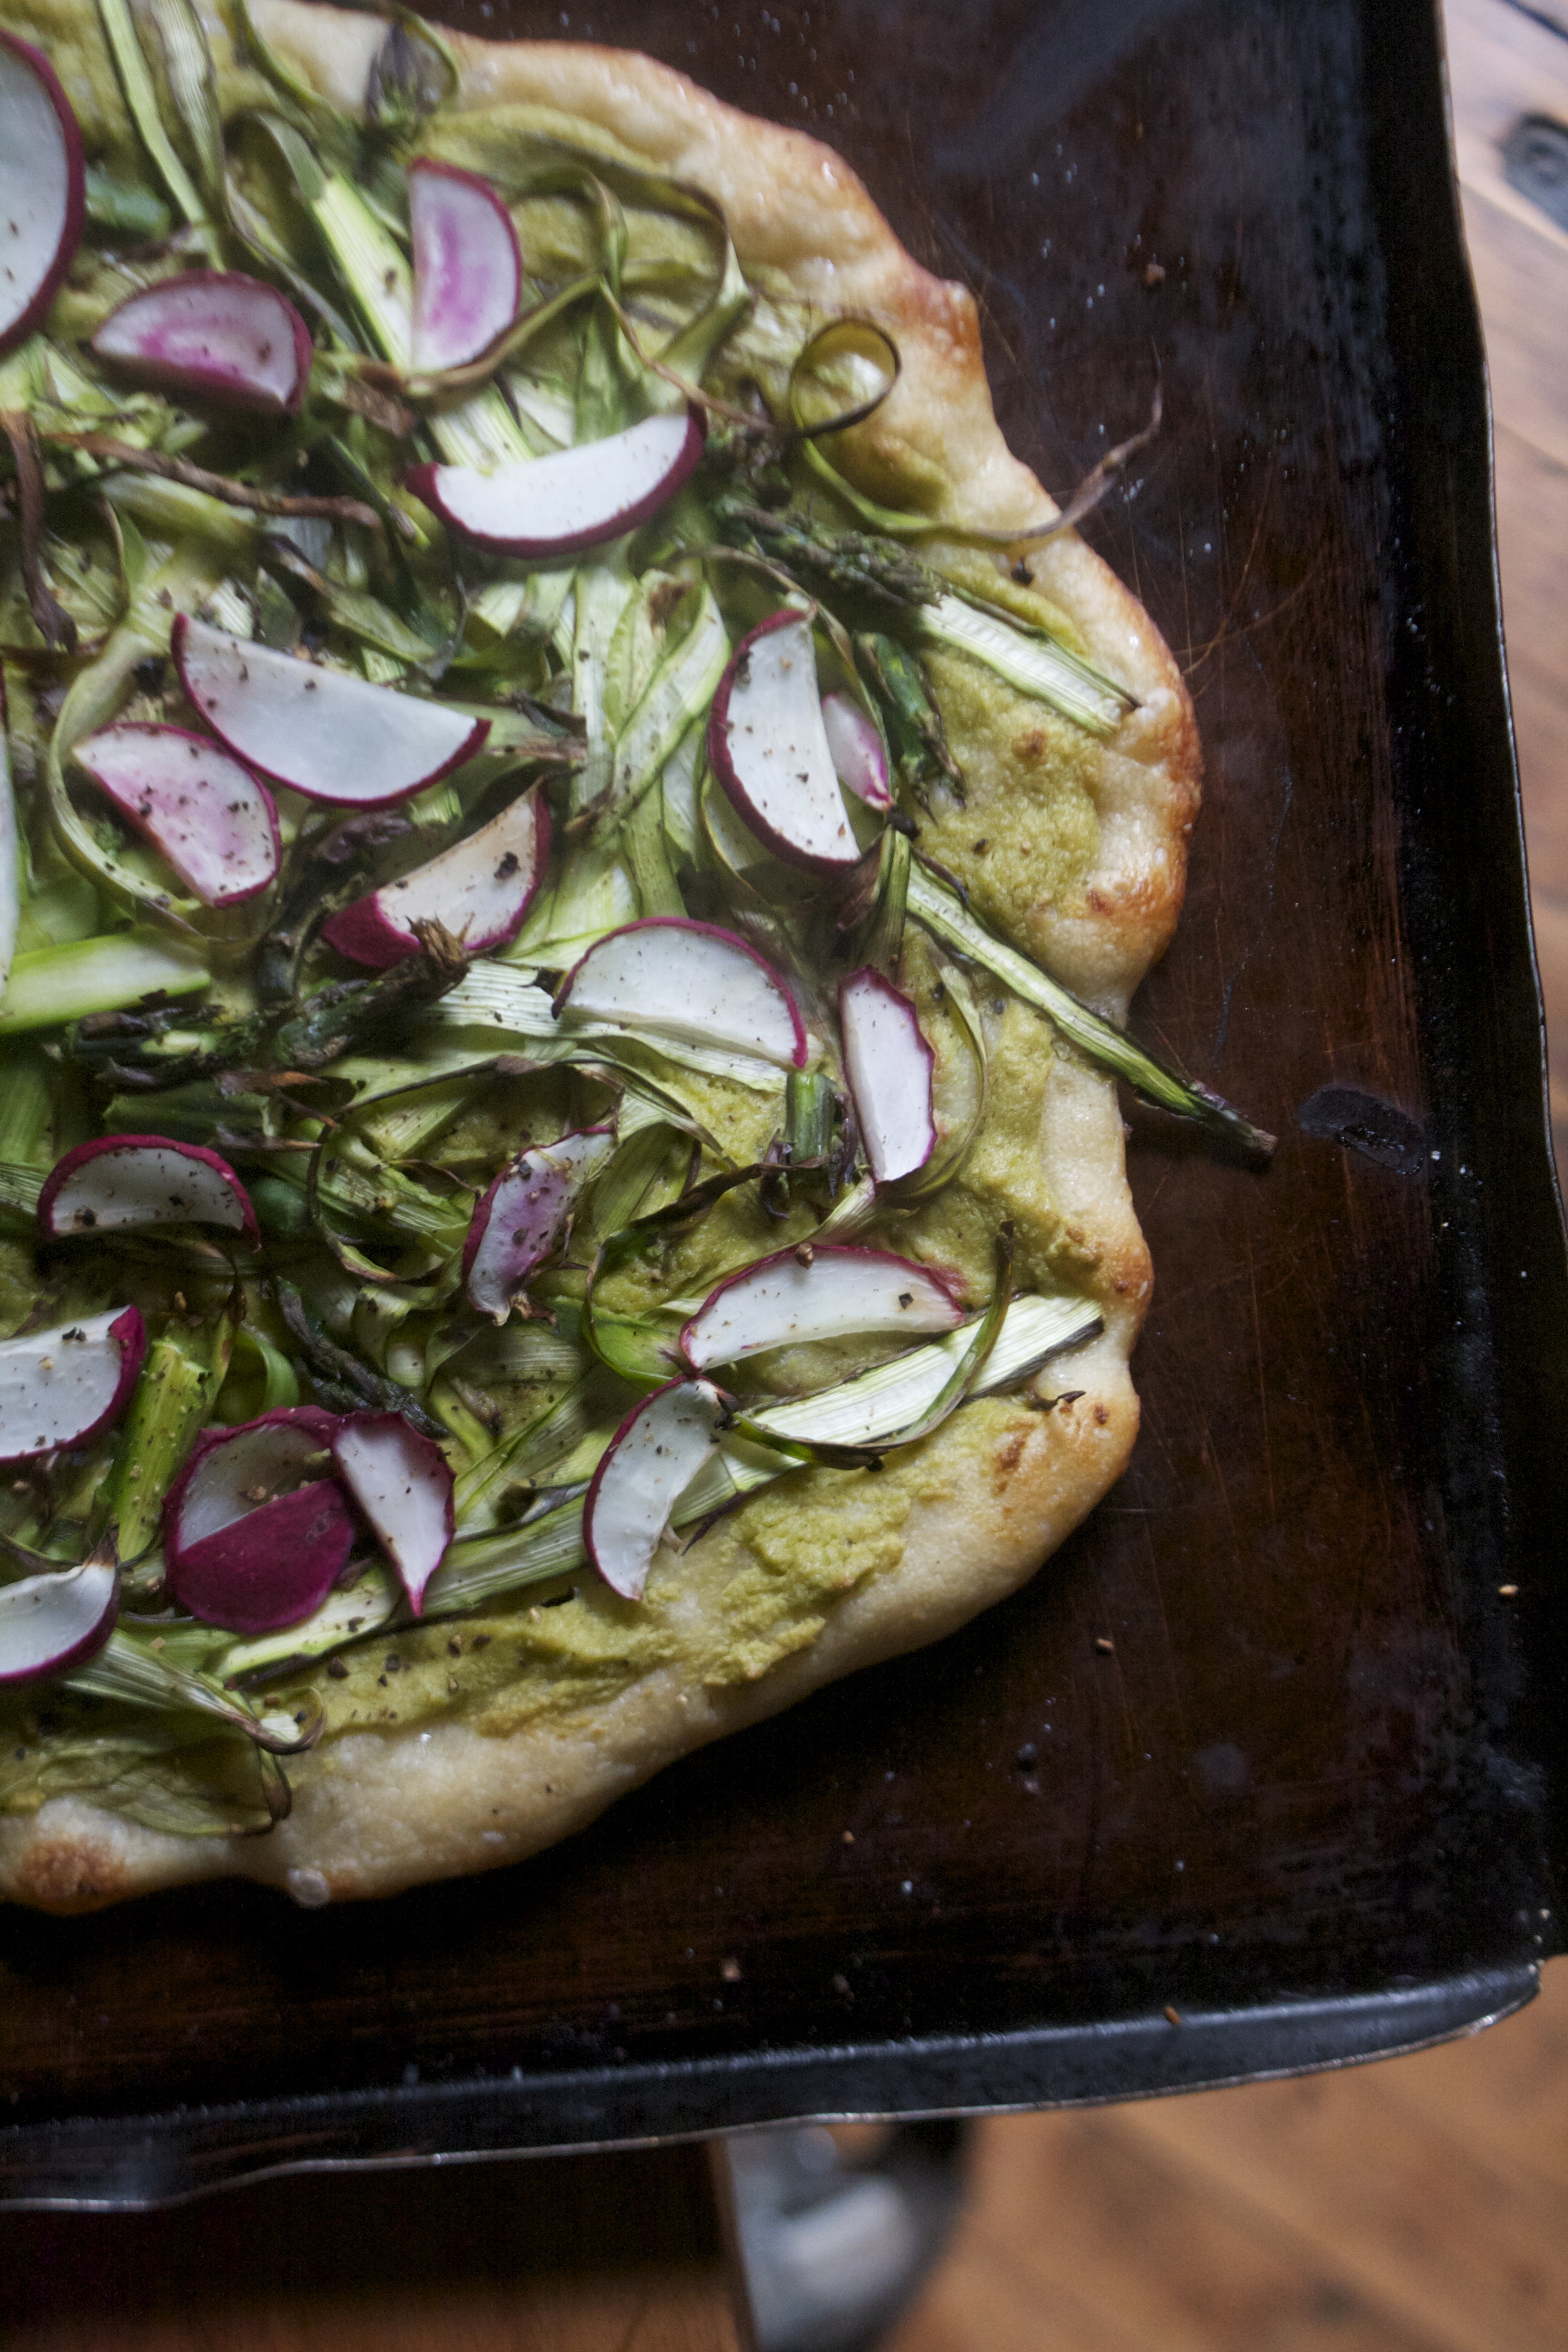
Top with the radishes and a good pinch of salt and lots of fresh cracked pepper.

Into the oven it needs to go.

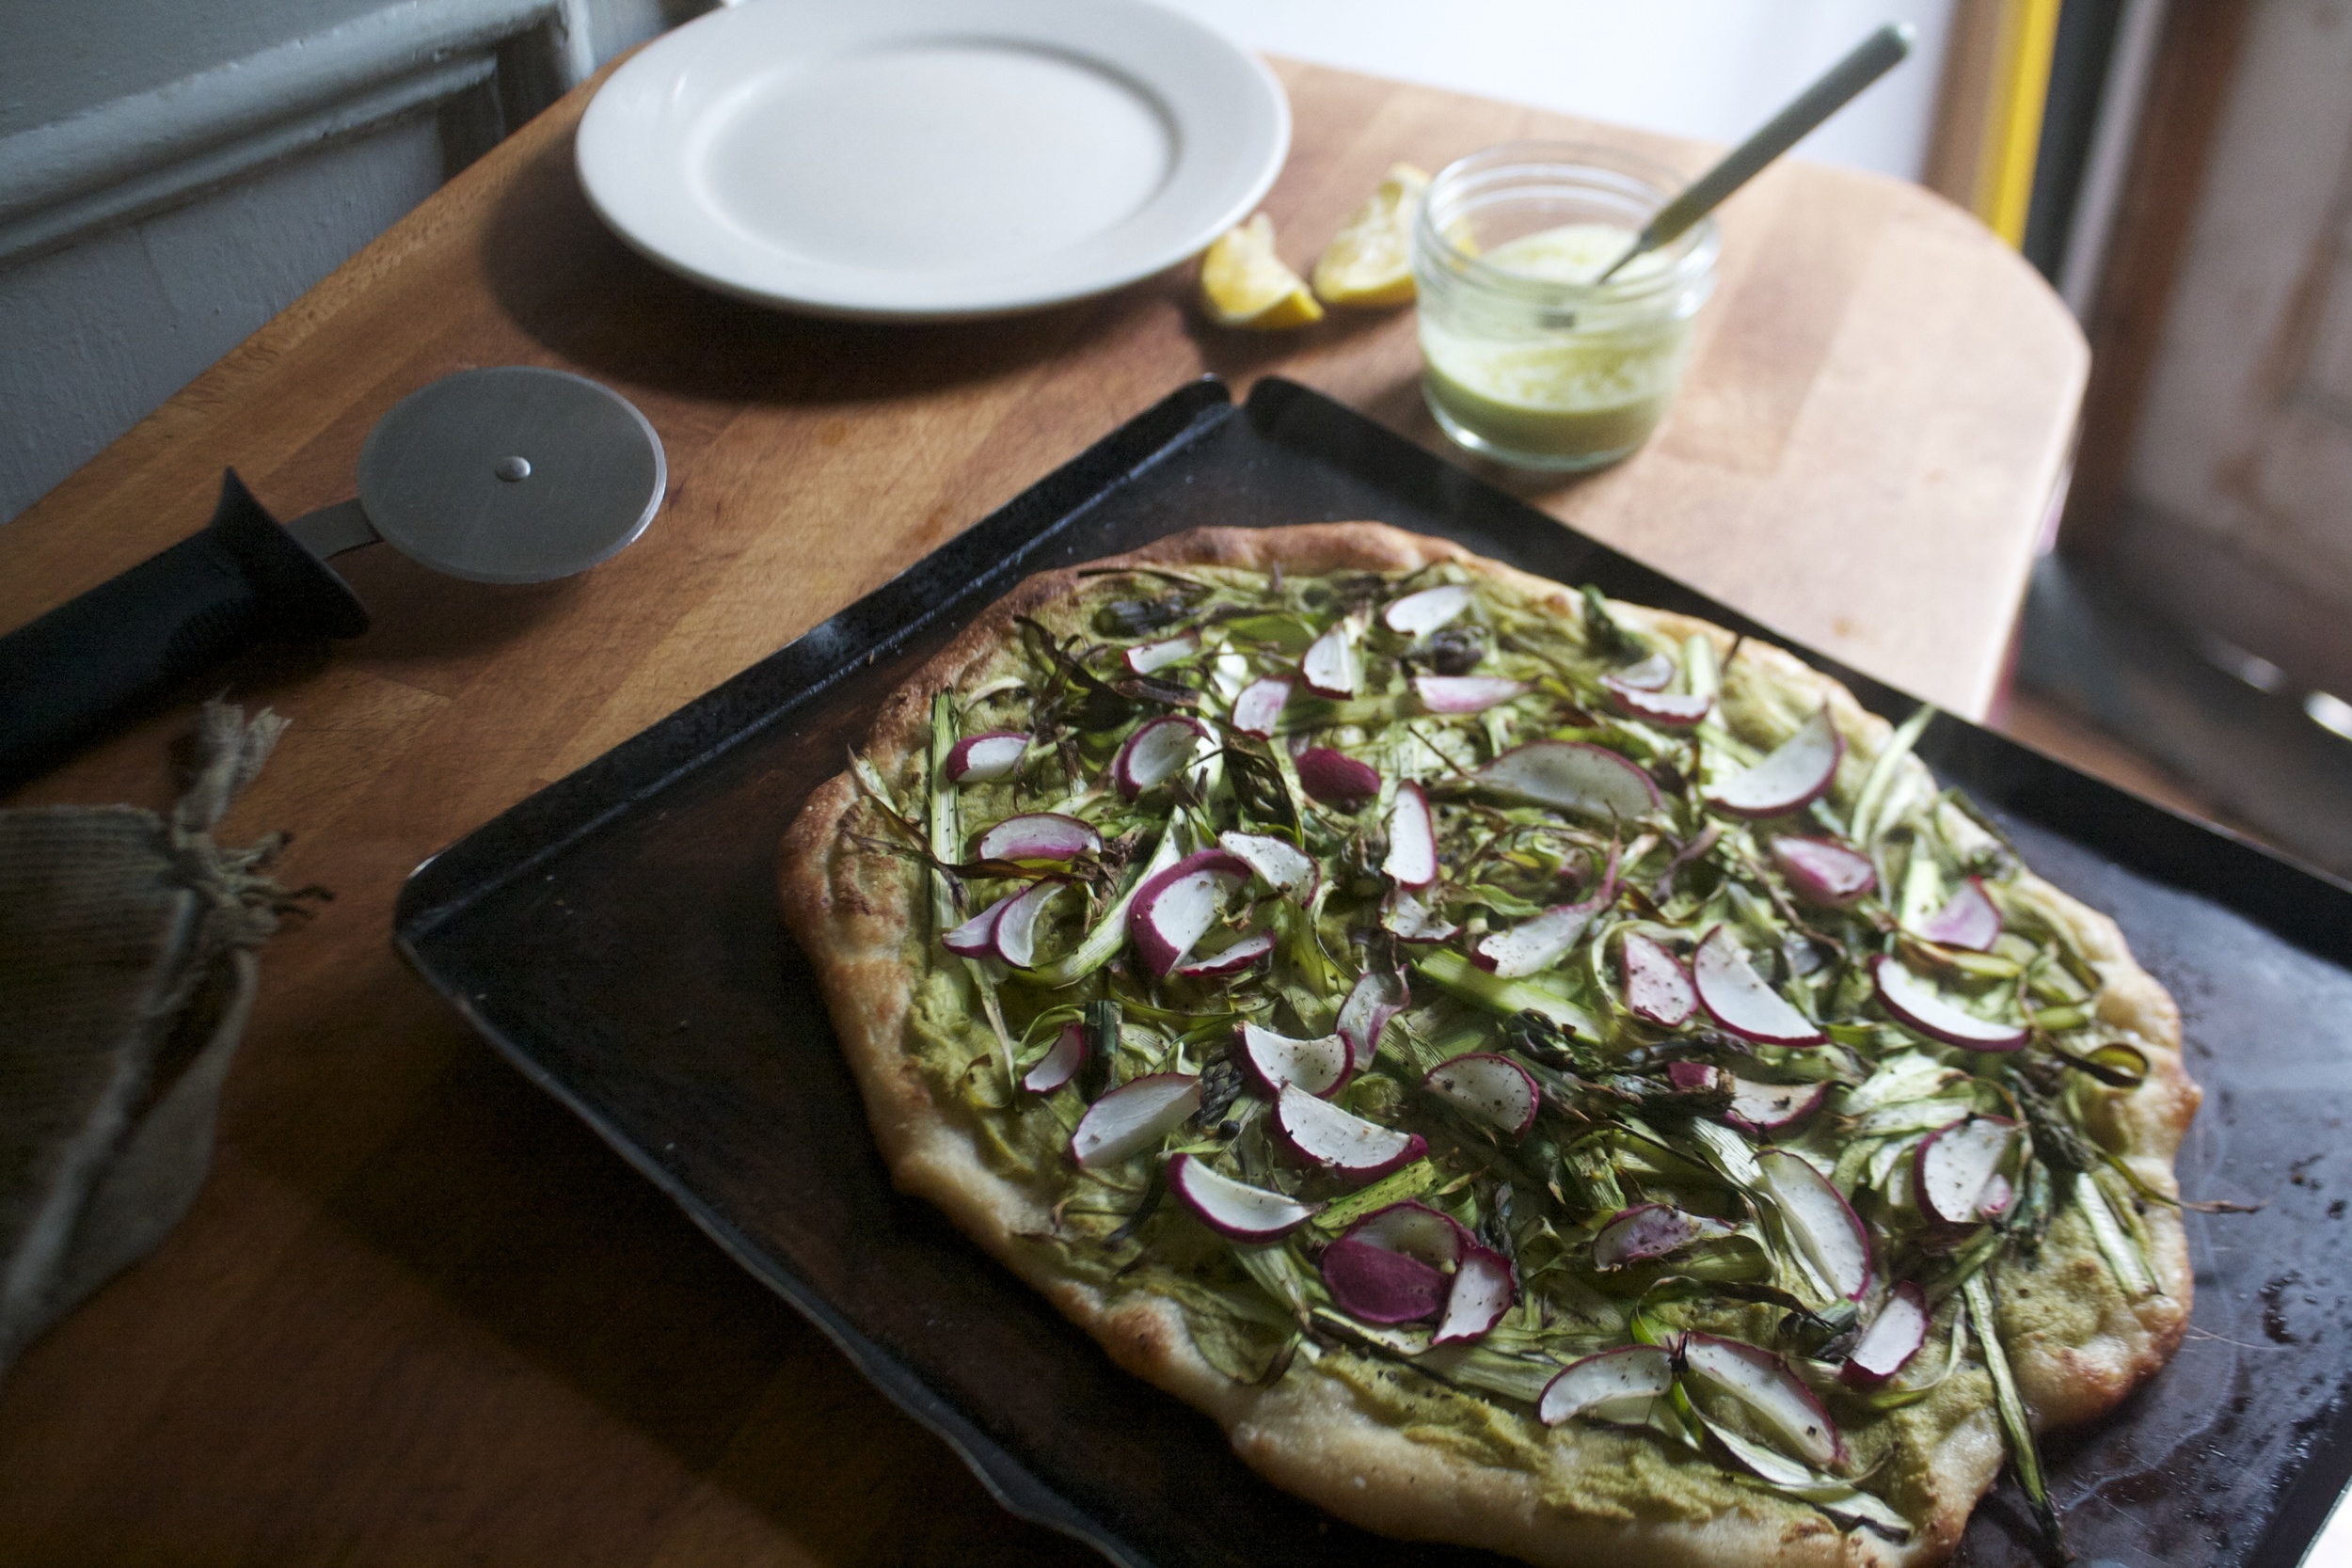
Pulled from the oven, looking all pretty and springy and smelling so amazing.

Drizzled with a little of the left over cashew pea cream and a few squeezes of fresh lemon.

Your good to go!

Pizza on a weekday, it's what you need in your life.

-C


Shaved Asparagus, Radish, and Cashew Pea cream Pizza


  • 1 12oz pizza dough (use this recipe, your own, or store bought)
  • 10-15 or so stalks of asparagus (about 1/2 a pound)
  • 3-4 big radishes
  • 1/2 cup peas
  • 1/2 cup cashews (soaked for about 1/2 an hour)
  • 2-3 cloves garlic
  • 3 tablespoons nutritional yeast
  • 1/8-1/4 cup water
  • A lemon
  • olive oil
  • Salt and pepper

Preheat oven to 450

First off, prepare your pizza dough or remove it from the fridge to come to room temperature.

Strain the water from the cashews and add them to a blender with the peas, the juice of half a lemon, 1/8 cup of water, the nutritionalyeast, and a sprinkle of salt. Blend until smooth. If you need to, add in another splash or two of water to thin it out.

Grab your asparagus stalks ans chop off the top crown parts. Take the remaining stalks and peel them. Do this by holding the stalk flat on the counter and while holding to the end, peel the stalk away from you.  I(f your asparagus is not super fresh ans had woody ends, use those to hold on to and when done shaving, just toss them into a bag and save for a soup later)  Shave each piece until you cant shave any more. Some pieces are going to be super thin, some kinda thick... that's totally cool, it add dimension to the pizza.

  And now, as thinly as you can, slice the radishes.

To assemble pizza- Roll out dough kinda thin and place on a lightly oiled baking sheet.(you can bake your dough any way or on any thing that you usually do)  Smear a good amount of the cashew pea cream on dough. You will probably have a little left over which you can either water down a little as a drizzle for the done pizza or just save for a sandwich or a veggie dip for later.  Topthe smeared dough with all the shaved asparagus and chopped off crowns then layer on the radishes .Sprinkle with salt and pepper and stick into the oven. Bake for 15ish minutes or until your crust golden brown and done to your liking.

When you remove the pizza from the oven, feel free to drizzle the remaining cashew pea cream all over and definitelytop with a squeeze of more of fresh lemon.

Cut into pieces (square, triangles or what have you) and serve to your open mouth!

Happy Spring Eating!


In Vegetables, Vegan, Savory, sauce, recipes, entree, dinner, Dairy Free, bread, pizza Tags Shaved Asparagus - Radish and Cashew Pea Pesto Pizza, pizza, vegan, spring, peas, asparagus, cashew cheese, clean eating, plant based, dinner
Comment

White Bean Banana Bread

March 1, 2016 Colleen Stem
IMG_9905.jpg
IMG_9933.jpg

The other night at a dinner with my family, I was explaining to my dad ans sisters about a cookie that I have been making for myself that is coconut flour, sweet potato and lentils (I'll share that recipe at some point) and all those ass faces were making fun of me. They couldn't understand how I could make anything taste like a cookie with lentils. And not going to lie, I was slightly offended , not for myself but on the lentils behalf. Lentils can do and be anything!

Fast forward to the next nights dinner (we had a lot a family dinners). I was in charge of a dessert.  I had recently took a trip to the store where the bananas where on sale for .30 a pound... So I bough a few (like 20) and had quite a few ripe naners that were in need of being consumed. Banana bread is it. And because I was going to prove my point to the fam that they are all asses and have no idea about anything, I made the bread with beans in it. (the lentils are for me)

Long store short.. The bread was excepted into the mouths of the people with smiles ans yums. No one had any idea that there was anything different about it, only that is was so fantastic and that it was gone within the hour. I did tell everyone after the first few bites that I made it with beans and a lot less sugar then most but no one cared. The kids were actually excited that it had beans in it because it meant that they could have seconds. My dad asked for the recipe, and the rest of the people.. well they didn't care, just ate it and yeah.

See, beans in bread is a great idea.. So what do you think of my lentil cookies now? HA

To the bread. Go banana bean, GO!

The stuff. We got some flour in a bowl with baking powder, baking soda, and a pinch of salt. Then we have a few ripe bananas, a cup of beans (in bean water), a bit of oil, brown sugar, some cinnamon, and a nip of vanilla.

There should be apple cider vinegar in there.... so pretend it is.

IMG_9865.jpg
IMG_9868.jpg

Start off by blending 1 of the bananas up with the beans (use you blending method of choice)  until pretty smooth (some chunks are fine, just not super bean chunks)

Then add in the second banana and mash it in, but leave it chunky (I just used the blender part to mash it up... why dirty a fork?)

Not into chunky, then blend it as well, the chunky/ smooth factor is up to you.

The rest of the wet stuff goes into the bowl (don't forget the vinegar) and gets all mixed together with the naner beans.

Then the wet goes into the dry.

And mixed up until just incorporated.

Dump the mixtureinto a well greased bread pan. Grab that third banana and cut it length wise into thirds and press the pieces into the top of the mixture. This step is optional and also open to interpretation. The designs a banana can make.............

And into the oven it goes!

Baked to a golden perfection, remove from he oven and set to cool.

And after completely cooled (f you can wait that long) grab a knife, cut yourself a hunk, and go about your day knowing you made the right choice by eating sweet ass banana bread that happens to have a good does of beans in it.

One could almost consider this a health food! (almost)

-Have yourself a fine day

-C


White Bean Banana Bread

Makes one loaf

  • 2 cups white whole wet or regular all purpose flour
  • 1/2 cup brown sugar
  • 1/4 cup oil (like canola)
  • 2 ripe bananas (plus optional 1 for topping)
  • 1 cup white beans in the bean juice
  • 2 teaspoons baking powder
  • 1 teaspoon baking soda
  • 1 teaspoon apple cider vinegar
  • 1 teaspoon vanilla
  • 1 teaspoon salt
  • 1 tablespoon cinnamon

Preheat the oven to 375

In a large bowl, combine the flour with the baking soda and powder, the a salt, and the cinnamon. In either the blender or a separate bowl using a hand blender, blend on of the bananas with the beans and bean water until pretty smooth. Once blended, mash in the remaining banana (can puree until smooth if you are not into chunks of banana) Now mix in the oil, vinegar, vanilla and the sugar. Mix until combined then mix into the dry until just combined.

Pour batter into a well greased bread pan and if you want, slice the extra banana into thirds and gently press into the top of the batter. And now stick it into the oven. Bake until golden brown and all pretty like and a tester stick in the middle comes out clean. (about 50 minutes)

Remove from oven and let cool in pan for a few minutes then flip out and let cool completely on a wire rack. When cooled, slice it on up into desired thickness and eat away, whether it be naked (you or the bread) or smothered with peanut butter, jam, butter or whatever.

Cooled bread is fine on the counter covered for a day but should be stored in a air tight bag in the fridge if longer then that..

In Vegetables, Vegan, Sweets, snack, recipes, pulses, desserts, Dairy Free, brunch, breakfast, bread, beans Tags White Bean Banana Bread, Sweet bread, banana bread, bean bread, pulses, vegan, plant based, clean eating, less sugar, protein
3 Comments

Persimmon Maple cornbread

January 14, 2016 Colleen Stem
IMG_7412.jpg
IMG_7433.jpg

This time next week the mr and I will be on our jolly (the word jolly is way underused) journey through the hill of the Irish countryside.  I am getting a bit nervous. First off, we have yet to book a single b and b (we are air bnb-ing it the whole time.) We still haven't reserved a car, have just starting looking at baggage requirements and have no clue how we are getting home from the airport. But we did print out the plane tickets last night, so that's something!!  I make it sound like we have been slacking, but it really isn't our fault (most of it). We have most of the stuff we need to book ready to pay for, but our credit card we ordered for this trip was lost in the mail and we can't book anything without it. Aagh!  But hopefully the new one will be in the mailbox today and we can get on our way to planning the best trip ever

With the trip getting so close, my mind is doing this weird thing where it doesn't want to research things anymore. It is sick of looking up attractions or prices of this, or how to translate that. I have done all the research that I can handle and am mentally tired. I just want to chill on the internet stuff and spend the rest of this week cleaning the house and baking things until we leave. You know, smash in as much domestic things as I can.

So clean I do and bake things I am. The other day I bought 4 beautiful vanilla persimmons (yeah persimmons!)  and instead of hoarding them all to my face, I baked a little persimmon cornbread concoction for the mr(he doesn't get excited about fresh persimmon like I do) This way he gets in on some of the persimmon action and I don't feel as guilty about buying 4 persimmons.

Dense, moist on the inside, crispy on the outside. A nice sweet maple glazed layer of soft persimmon nicely layered on top to take it to the next level .This bread, it's and all sorts of good. It hugs the boarder of a bread and cake. but still makes a great side to a big bowl of squash soup, black bean chili, or whatever.  The mr, he ate a piece for a snack after I made it, then a chunk with his dinner, a little slice for late night snacking and then a piece for breakfast. I might just make him a lunch situation with the rest of it for him today. And then it will be gone.. whoa.  I guess that means it perfect for anytime and it's just that good.

I am that good. But we can talk about me later, for now, the cornbread.

The stuff. A persimmon, some white whole wheat flour, yellow cornmeal, baking soda and powder and salt. Maple syrup, melted earth balance, and some soy milk are going in too.

Start by preheating the oven and then thinly slicing the persimmon into the prettiest little rounds

And now whisk together all the dry stuff in a big bowl then dump in all the wet stuff.

IMG_7346.jpg

Mix it all together until full just incorporated. (don't over mix.)

Grease a 9 inch pan (can use a 9 inch square) and coat the grease with cornmeal.

IMG_7358.jpg
IMG_7359.jpg

Spread the mixture in the pan then layer the top with the sliced persimmon.

Lovely right.

Now stick it into the oven.

After about 25 minutes, the cake is just about done. Remove it from the oven and quickly brush the top with maple syrup then stick it back into the oven to finish baking.

And when the bread is completely baked, the persimmons nice and soft and glimmering,  remove from the oven and sit on a rack to let cool.

And when you can't wait any longer..... cut yourself a big piece

Along with a cup of coffee.....

Nothing to worry about here.

Have a great day.. Wish me luck!

-C


Persimmon Maple Cornbread

make a 9 inch round bread cake

  • 1 cup white wheat flour
  • 1 cup yellow or white corn meal
  • 1/3 cup melted earth balance
  • 1/4 cup maple syrup plus about 2 tablespoons more for brushing the top of bread
  • 1 1/2 cups soy milk
  • 2 teaspoons baking soda
  • 1 teaspoon baking powder
  • 2 tablespoon apple cider vinegar
  • pinch of salt
  • 1 large ripe but firm vanilla or fuyu persimmon (If you have smaller ones, you might need 2)

Preheat oven to 375

First off, slice the persimmon into really thin slices.

Next, combine the flour, the cornmeal, baking soda powder, ans the salt into a large bowl and whisk together. Add in the maple syrup, the soy milk, the melted earth balance and the apple cider vinegar. Mix together until just combined.  Dumb the batter into to a greased and cornflour coated 9 inch cake pan and layer persimmon slices on top, starting with the outer edge and layering inward (or whatever way you want to)

Place bread into oven and bake for about 25 minutes or until the cornbread has risen and is starting to brown, but could use a few more minutes. Take cake out and brush the persimmons with maple syrup. Place back into over to bake for another 8-10 minutes or until the cornbread is completely cooked.(tester comes out clean)

Remove from oven and let cool in pan on a wire rack

Slice, serve, and eat.


In bread, breakfast, brunch, Dairy Free, desserts, photography, recipes, snack, Vegan Tags Persimmon Maple Cornbread, cornbread, persimmon, vegan cornbread, vegan, persimmon bread, corn bread, dessert, corn cake, plant based, refined suger free, fruit
Comment

Honey Orange Ricotta Biscuits

December 29, 2015 Colleen Stem
IMG_6430.jpg
IMG_6472.jpg

I bought a tub of ricotta cheese about a month ago to make the mr his birthday lasagna, and for some reason, I can't seem to get rid of it. I have been adding spoonfuls of the stuff into his food every now and then, but I still have not managed to go through it. I am starting to think that I bought a magic container that will never empty. And if that is that case, is there a never ending tub of hummus I can buy?

Yesterday I cleaned out the fridge.  The cleaning that involves defrosting, washing the shelves, removing the stuck on crap that has so steadily hung on for the past few months and using any food that needs to be used up. To be honest, there isn't much in the fridge at the moment(which is why I am cleaning the it) but there is the freaking tub of ricotta, ans I want it gone, it is taking up to much space. (for real,. my fridge is tiny) And because we all know that I am the worlds greatest girlfriend lady person in all the land, I decided to, once ans for all, get rid of the ricotta and make the mr some biscuits.

Off topic here but... It's SNOWING!! And not just a tiny bit, we are going to have a couple of inches of white stuff. I am so excited! I must get my winter boots out (I have to find them first)

But the biscuits. These biscuits are super freaking easy. Just a few simple ingredients and 15 minutes and you got yourself home made goodness to make your people(or yourself) happy. They would make a great breakfast thing, made for a brunch situation, or even made with the help of the littles that may or may not be hove from school and eaten as a afternoon snack.  As for me, I am just thrilled to have the space back in the fridge and an empty container that may or may not be magical.

The stuff. A bowl of self rising flour, ricotta cheese, a little bit of honey, and an orange.

Dump the ricotta, a few couple tablespoons of honey, and the zest of the orange into the flour.

IMG_6398.jpg
IMG_6401.jpg

And say hi to my new amazing bowl! (Hi bowl, you are so pretty!)

Juice the zested orange and add in 1/2 a cup of the juice.

Now mix everything together until just incorporated.

Scoop dough onto a baking sheet in 12 similar sized balls. Brush the tops with any remaining orange juice you have (if you don't have any, use water) and stick those puppies into the oven (not actual puppies please)

After a quick 9-10 minutes, the biscuit cooking is complete! Golden brown and smelling all biscuit like.

Bust one open, maybe a smear of honey or jam...

And so the things you do with biscuits.. Eat them. I served the first one up tothe mr with a little drizzle of honey (cause I am sweet like that)

Keep on people!

-C


Honey Orange Ricotta Biscuits

makes 12respectable sized biscuits

  • 1 1/2 cups self rising flour
  • 1 navel orange (1/2 cup juice and 2 teaspoon zest)
  • 2 tablespoon honey
  • 1 cup ricotta cheese

In a large bowl, mix together the flour, honey and ricotta. Zest in the rind of the oragne (about 2 teaspoons) then juice the orange and hopefully get at least 1/2 a cup of juice. Add in the 1/ 2 cup of juice and mix until everything is just combined. Scoop out dough into 12 similar sized blobs and place onto a baking sheet. Brush tops of biscuits with any remainingorange juice or water if you don;t have it

Place in oven and bake for 9-11 minutes or until the tops are golden brown and the insides are completely baked.

Remove from baking sheet and let cool for a few minutes.

Bust one open and either eat as is or slather with honey, butter, jam, or all three.

Any left overs can be stored in airtight container for 2-3 days. Can be frozen.


In breakfast, bread, desserts, recipes, snack, Sweets, 5 ingerdients or less, brunch Tags Honey Orage Ricotta Biscuits, Biscuits, ricotta, bread, 4 ingredients, easy, fast, simple, breakfast, brunch
Comment

Chocolate Bread

December 22, 2015 Colleen Stem
IMG_6086.jpg
IMG_6049.jpg

It was the perfect Sunday. Cold, snow covered, cozy and quite. Everything a Sunday should be. (now its warm ,rainy and chaotic. Poop) The perfect day spent reading, drawing, drinking way to much coffee and putzing around. And baking a loaf of bread.. chocolate bread. If everyday was like this.........

Chocolate bread? Well yeah, it is the holiday season after all and I figured that it would make something that would last all week and can is multi -purpose.(breakfast or dinner) I could have made more cookies, but I am airing on the side of not feeding the mr sugar bombs for breakfast these days. But this chocolate bread. He can eat it whenever he wants. It's basically just a loaf of bread (I made it with whole wheat for extra goodness) with a tuch of sweetness ans a lot of chocolate flavor. It makes agreat breakfast toast, a hearty snack, or would be great for some type of french toast situation. Or maybeyou want to make some chocolate bread pudding, or woy are going to be making chili and want something to serve it with. (I was thinking a black bean chili would pair really nicely). There are no rules here. The mr, he has been eating it with peanut butter banana or mashed avocado. Its nothing to complicated, just chocolaty bread.

So of you are around this week, maybe spending some time at home, I think you should make bread.  It's really easy, not much in terms of mess and who doesn't love the smell of baking bread? And bonus.. IF you have any friends or family visiting, or if you are visiting them, why not impress them with a freshly baked loaf of bread, You will be the coolest.

The stuff. White whole wheat flour, cocoa powder, salt, soy milk, coffee, yeast and turbinado sugar.

The sugar and yeast get whisked together with the soy milk and coffee and left for a few minutes to make sure its active (or if you know your yeast is good, then just get on with it.)

Flour, cocoa powder, and the salt get a good whisk together as well. 

Then dumped into the yeast mixture.

Mix until the dough starts to come together, then dump it onto a lightly floured surface and start. Gather together with your hands ans start to knead.

Keep kneading (about 5 minutes or so) until the dough is a cohesive texture, slightly glossy,  ball of goodness.

IMG_6022.jpg
IMG_6023.jpg

Place the dough back into the bowl and drizzle and rub down with a oil (use a neutral flavor) Place a damp towel over the top and stick in a warm place to rise and double in size, which should take between an hour,, hour and a half, (depending on how warm you place is)

Once it has doubled, push down dough, shape into a loaf shape, and place in a greased load pan. Rub a little more oil on the top, cover with plastic this time (a towel will absorb the moisture from the dough), and place back into the place to rise again.

And once the dough starts to crest the pan and has double again,(another 30 minutes) it's tie to bake. Stick the dough into a preheated oven and bake away.  Optional step but yoi should do it. Stick a pan with about an inch of water on the bottom of the oven when you stick the dough in. It makes the crust a little crustier and pretty. and keep the bread a but more moist.

And once the bread is done (45-50 minutes, with a internal temp of 190) remove from the oven and let cool(for at least 15 minutes.. (you can do it!)

Sliced to your preferred thickness, eaten as is or slathered with some peanut butter. Save some for the morning for french toast or strawberry jam toast.
The possibilities are endless.

Enjoy you day.

-C


Chocolate Bread

Makes one loaf

  • 3 cups white whole wheat bread flour (plus a little more if needed)
  • 1/2 cup natural cocoa powder
  • 1 cup soy milk
  • 2/3 cup warm coffee
  • 1/3 cup turbinado sugar (can use cane sugar)
  • 2 1/4 teaspoon yeast
  • 1 teaspoon salt

Note. If you want to make 2 loaves (why not right) just double everything except the yeast. Still only use the 2 1/4 teaspoons.

In a large bowl, whisk together the soy, sugar, and the yeast, then add in the coffee last. (just to make sure the coffee isn't to hot that it kills the yeast) In a separate bowl, whisk together the flour, cocoa powder and salt. Once you are sure the yeast is active, dump the dry into the wet and mix with together until the dough starts to form. If the dough seems to wet, add in another tablespoon or two of flour. Dump onto a slightly floured counter and knead until a cohesive texture that is somewhat smooth a glossy. Place dough back into bowl, drizzle and rub with oil, then place a damp towel over the bowl ans stick it in a warm place. Let the dough rise until it has doubled in size, which should take about 1- 1 1/2 (depending ho warm the spot) Once doubles, dump onto counter and push down. Shape into a loaf and place into a greased loaf pan. Rub a little more oil on top and cover with plastic. Let the dough rise for about another 30 minutes or until the dough is cresting the brim of the pan. 

Preheat the oven to 400

When dough is done it's second rise, place a pan with about an inch of water into the oven on he lowest rack. Place dough in oven on the middle rack. Turn heat down to 375 and bake between 45-50 minutes or until the dough is golden brown and sounds hollow when tapped on. (also can check for temperature of 190 with a instant read thermometer)

When done, remove from pan ans let cool completely (or at least 20 minutes) before cutting.

When cooled, cut into slices and do what you will (straight up or covered in peanut butter.....)

Store uneaten bread in a air tight bag for about 3 days or just cut it all up and stick slices in the freezer and grab pieces as you need them. Either toast or lest thaw to room temp.


In Vegan, Sweets, recipes, desserts, Dairy Free, breakfast, bread Tags Chocolate, chocolate bread, yeasted bread, vegan, breakfast bread, snack bread, easy bread, chocolate bread loaf, vegan bread
Comment
← Newer Posts
 

https://thelovelycrazy.squarespace.com/config#/|/about/

Me. Food Maker.Food eater. Woo HOO!

STEM+NODE  SMALL BATCH AND ONE OF A KIND POTTERY

stem+node ceramics


____________________

Subscribe

GET NEW POSTS IN YO EMAIL

You are AWESOME!!!


@thelovelycrazy 2014-2021