• stem+node ceramics
  • HOME
  • Food Recipes
  • About
  • Contact
Menu

The Lovely Crazy

Street Address
City, State, Zip
Phone Number

Your Custom Text Here

The Lovely Crazy

  • stem+node ceramics
  • HOME
  • Food Recipes
  • About
  • Contact

Maple glazed sweet potato cookies

December 11, 2021 Colleen Stem
IMG_8161.jpg
IMG_8244.jpg

If you are not making cookies right now then what are you even doing?

But seriously, I think that December is basically a month long cookie baking marathon and we all should be participating by baking up a least one batch of cookies. If not for yourself (although you really should be doing it for yourself) then for others. What better way to say something nice without saying anything at all then with homemade cookies? Cookie sharing is a language all on it’s own.

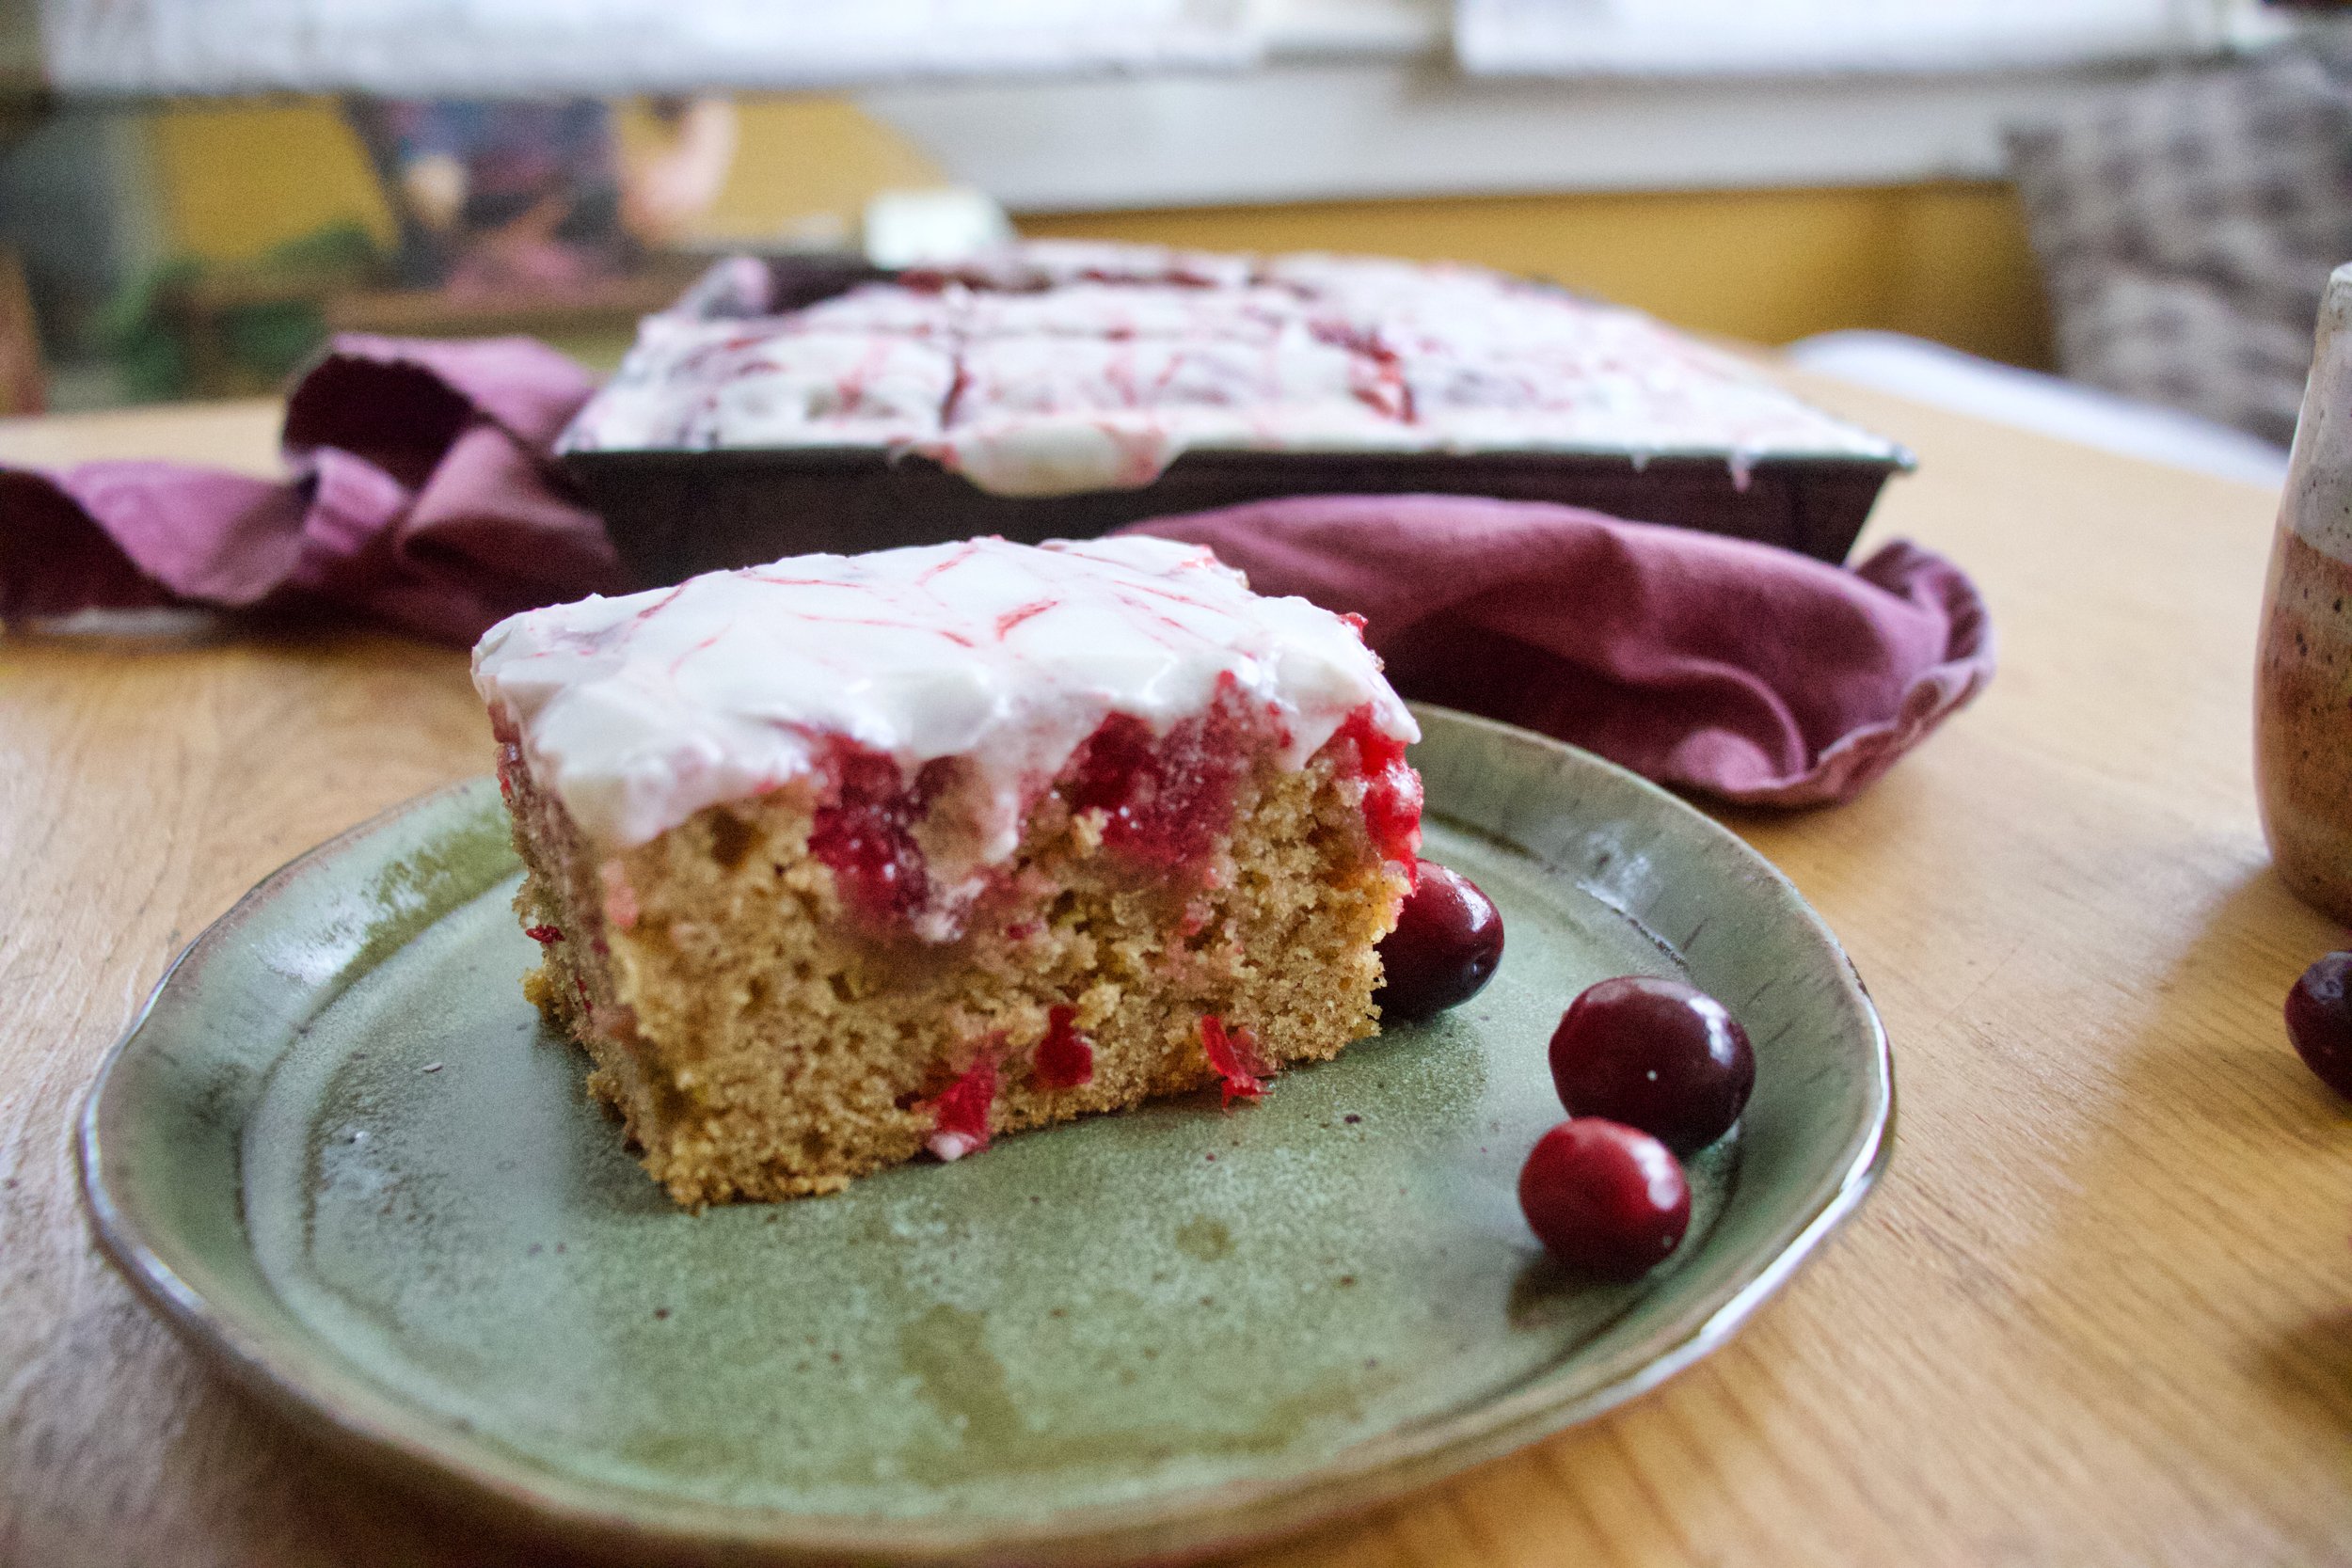
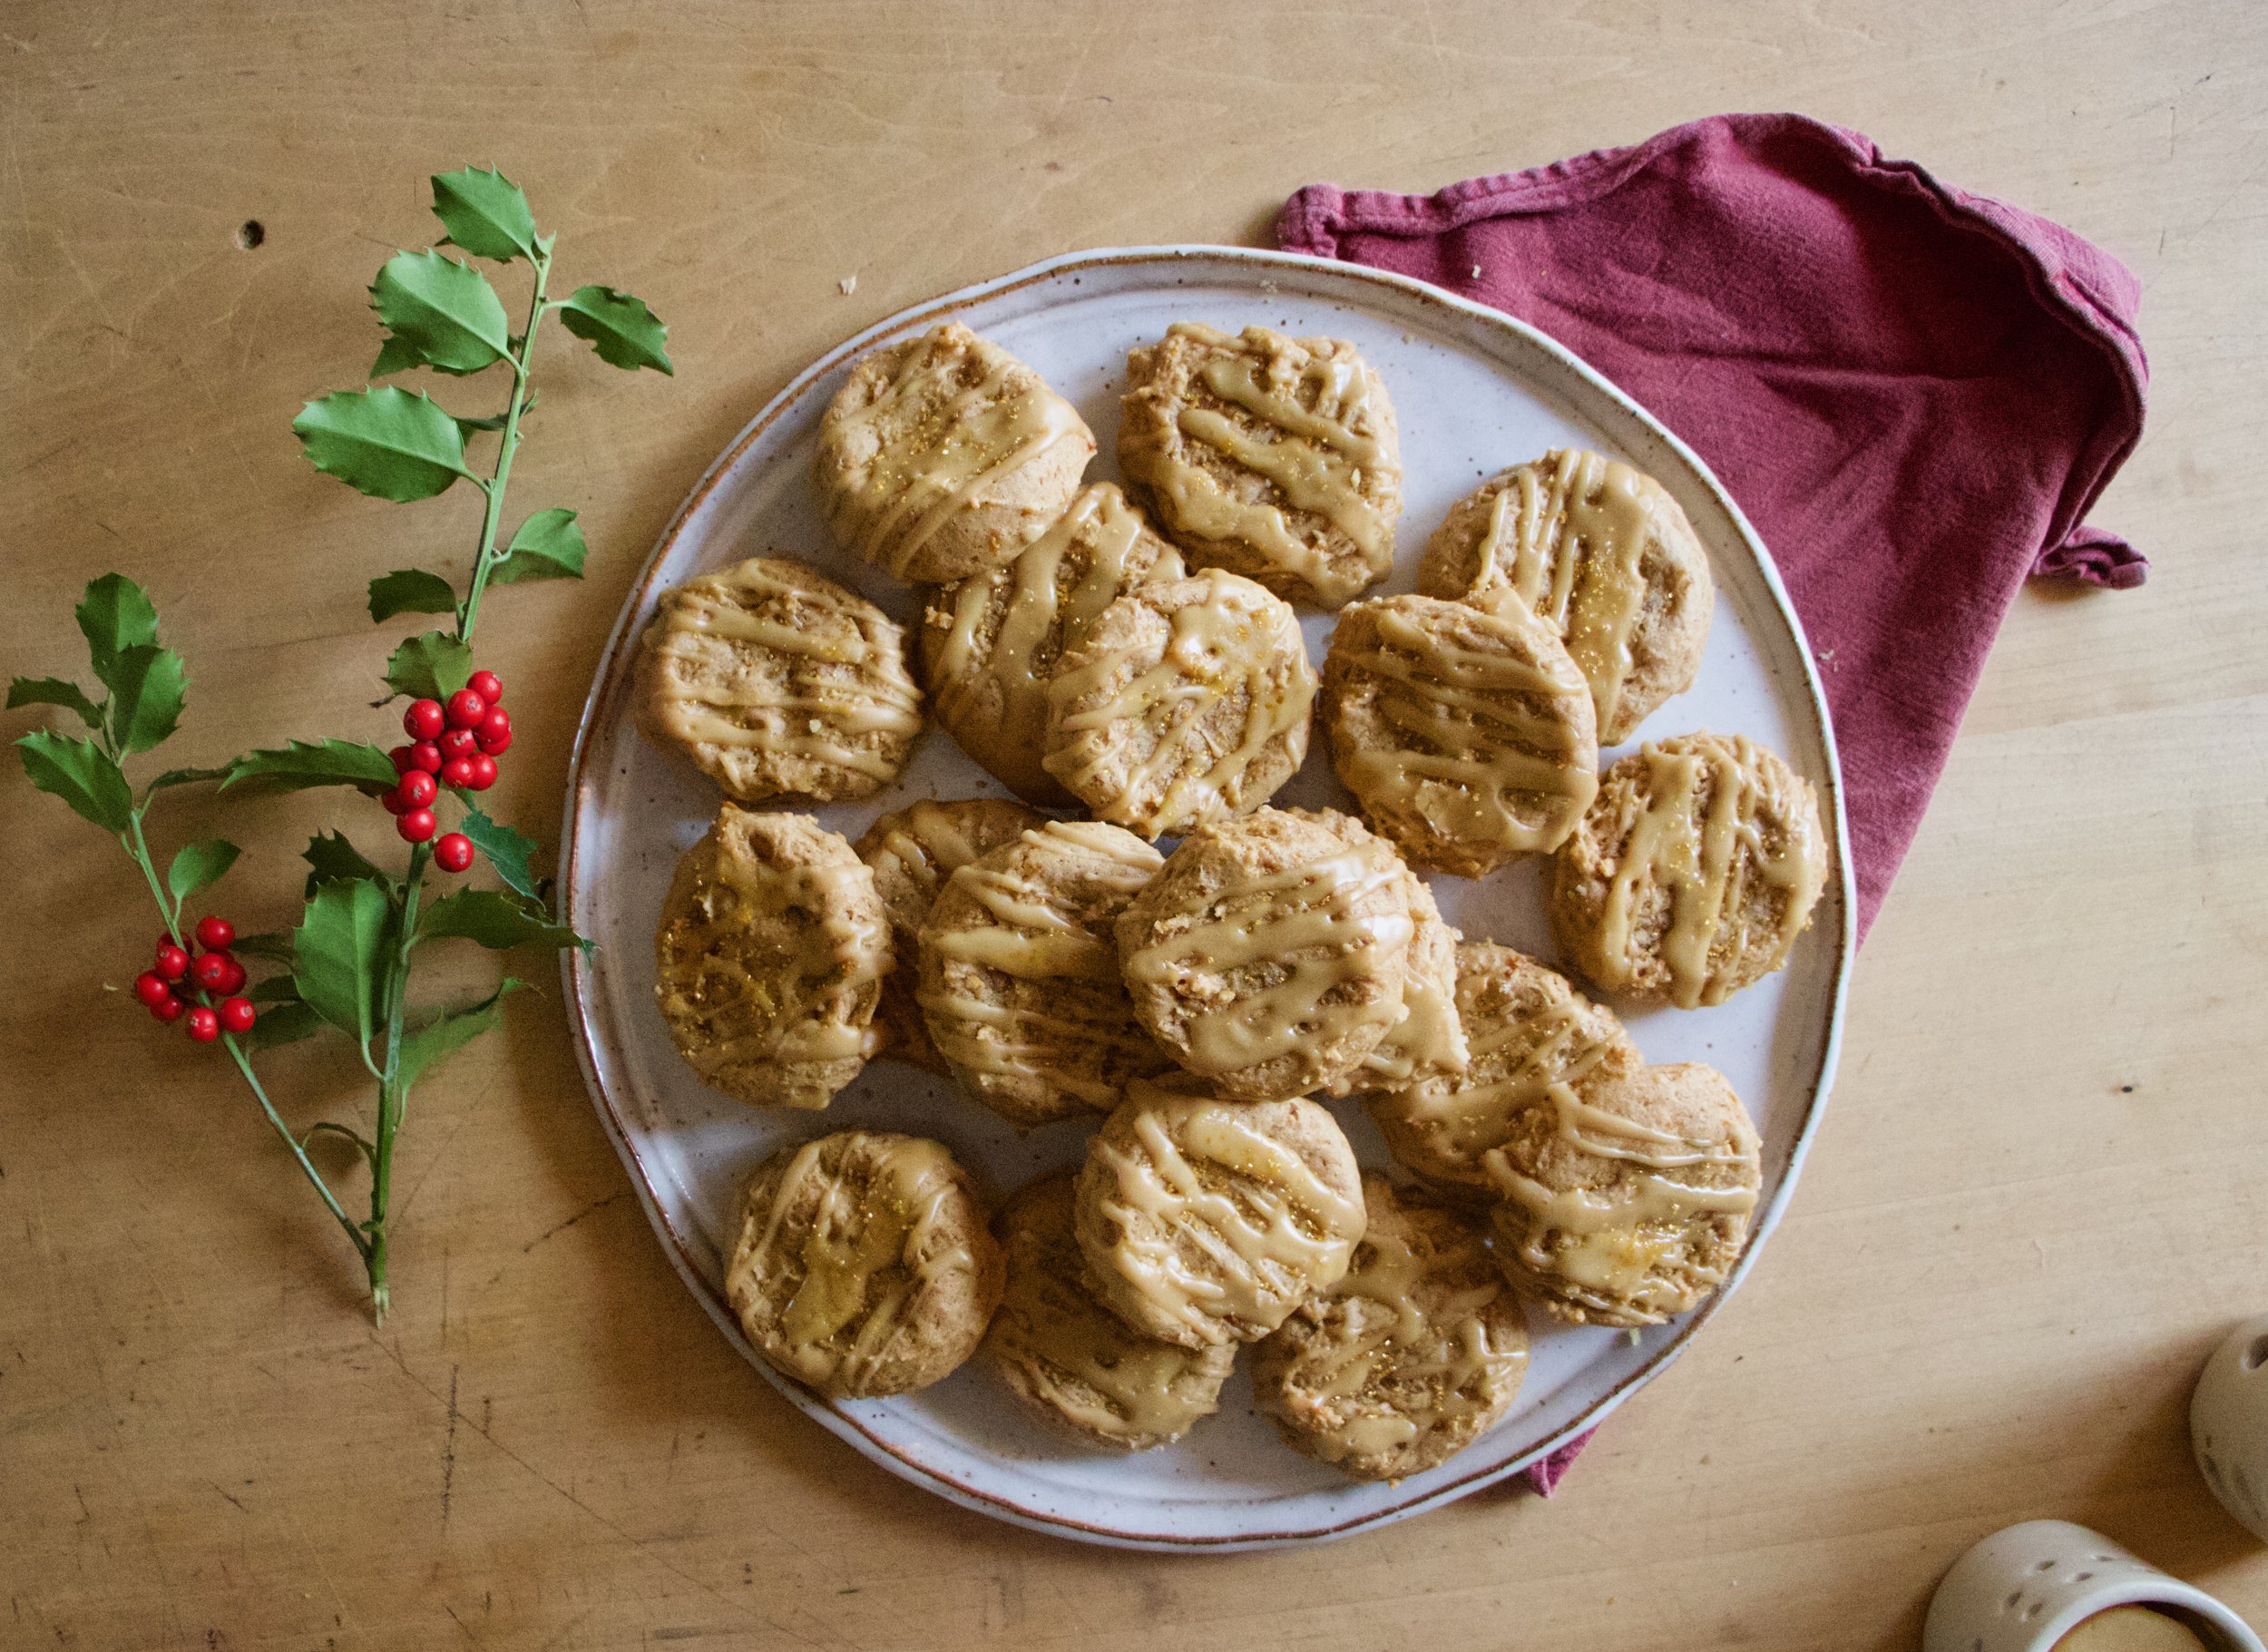
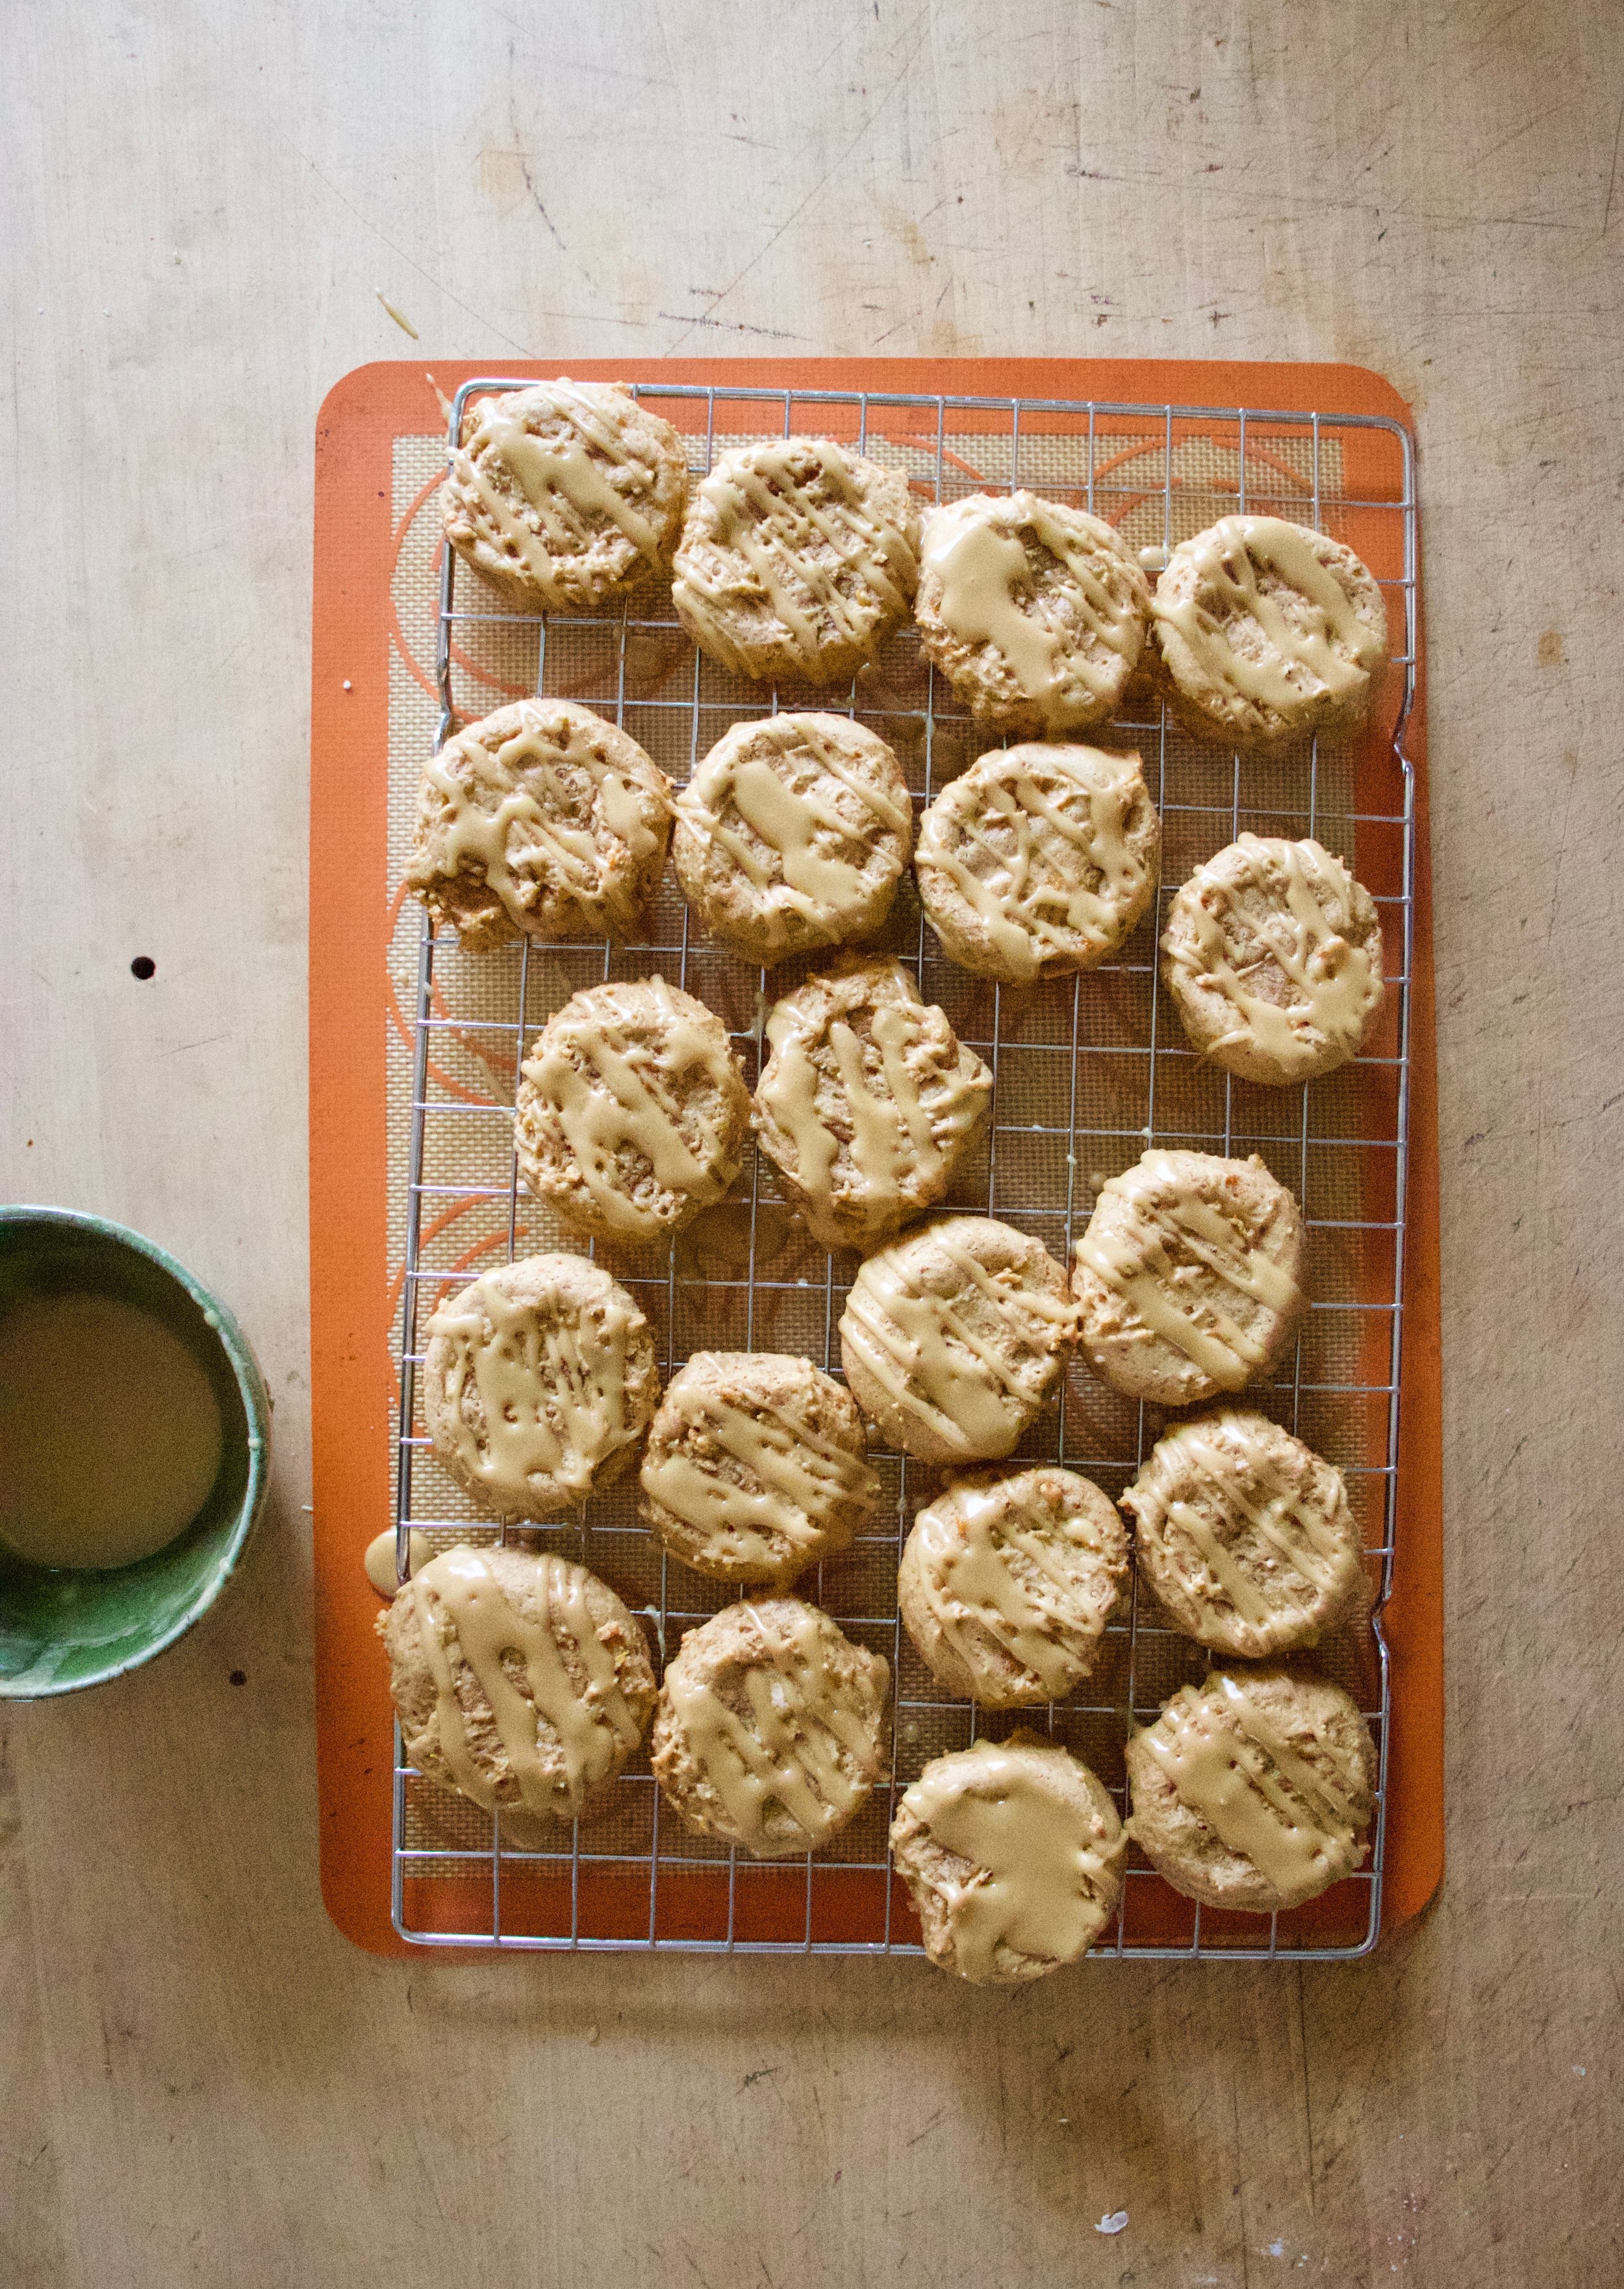
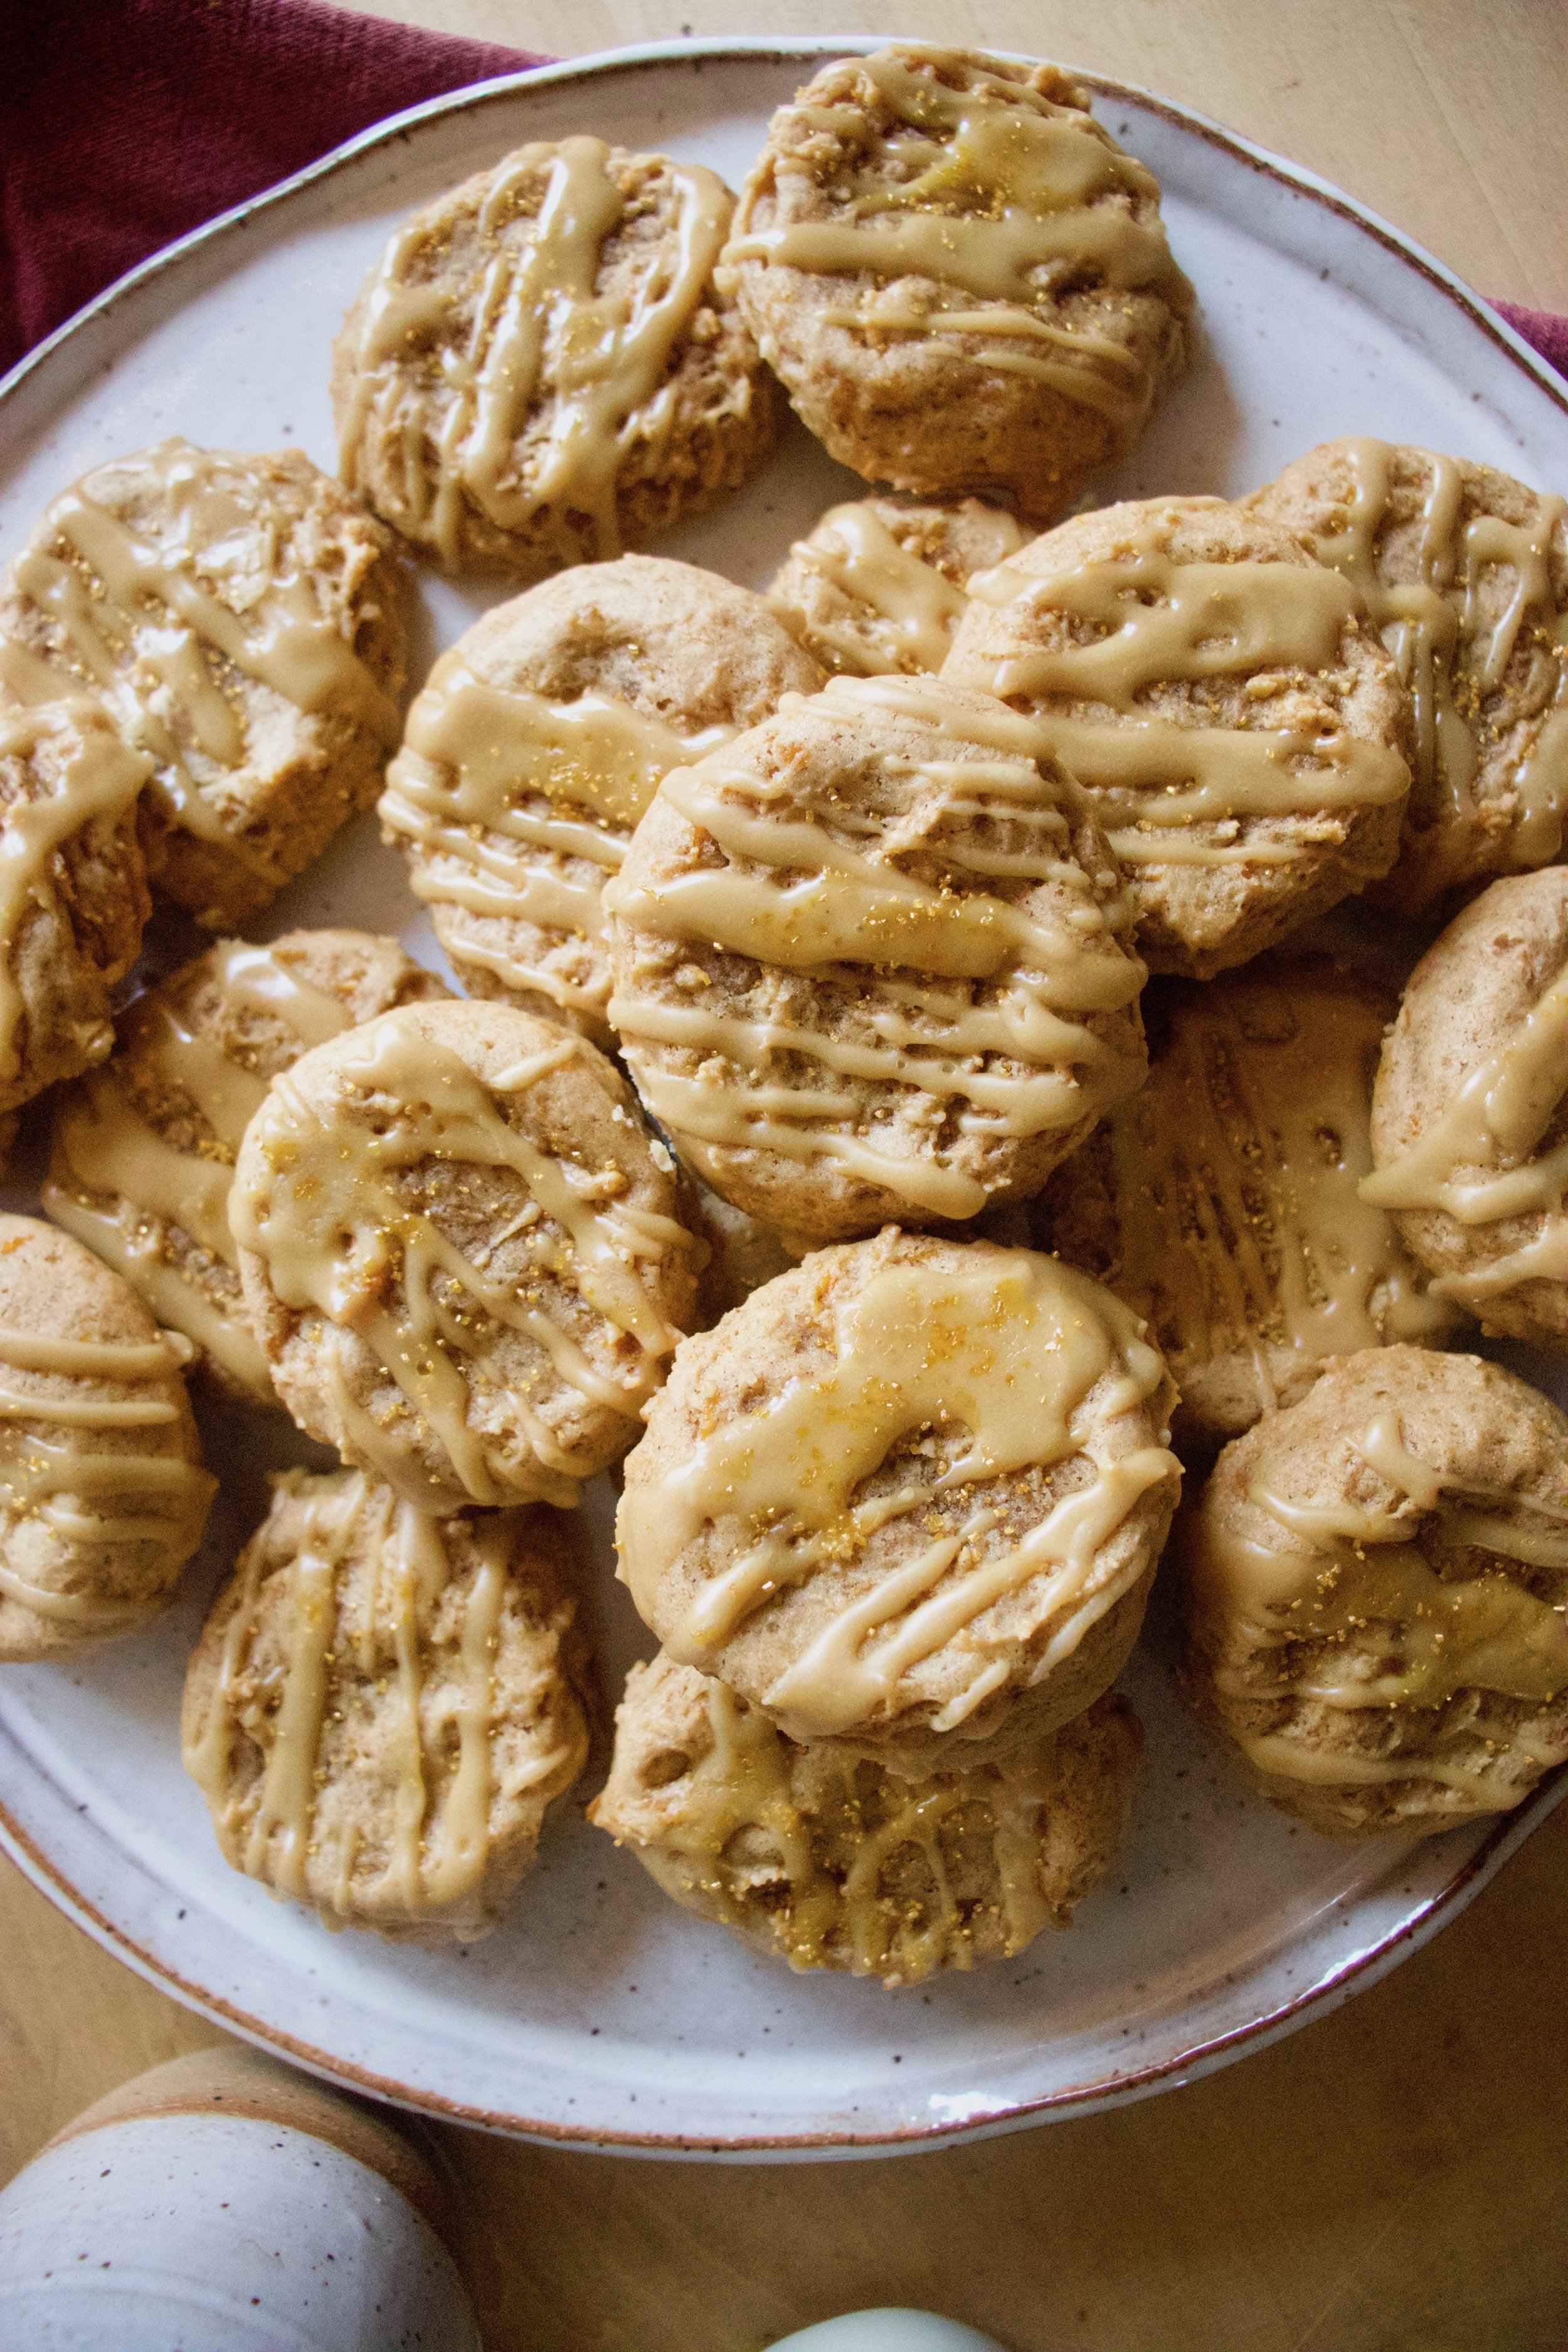
These here cookies are of the sweet potato kind, almost like pumpkin cookie, just a little less cakey and a little more sweet potatoy and are drizzled all over with a nice thick maple glaze that really just ties the hole cookie experience together. They are pretty simple to make, no extra steps or difficult anything. Just a spoon a scoop and the want and or need for a delicious cookie situation.

This cookie is going back into my baking marathon rotation next week when I go all out and bake like 6 batches of cookies .They were a hit and even requested so, you know, got to make the people happy. More like I have a couple extra sweet potatoes. HA!

Now to the cookies!

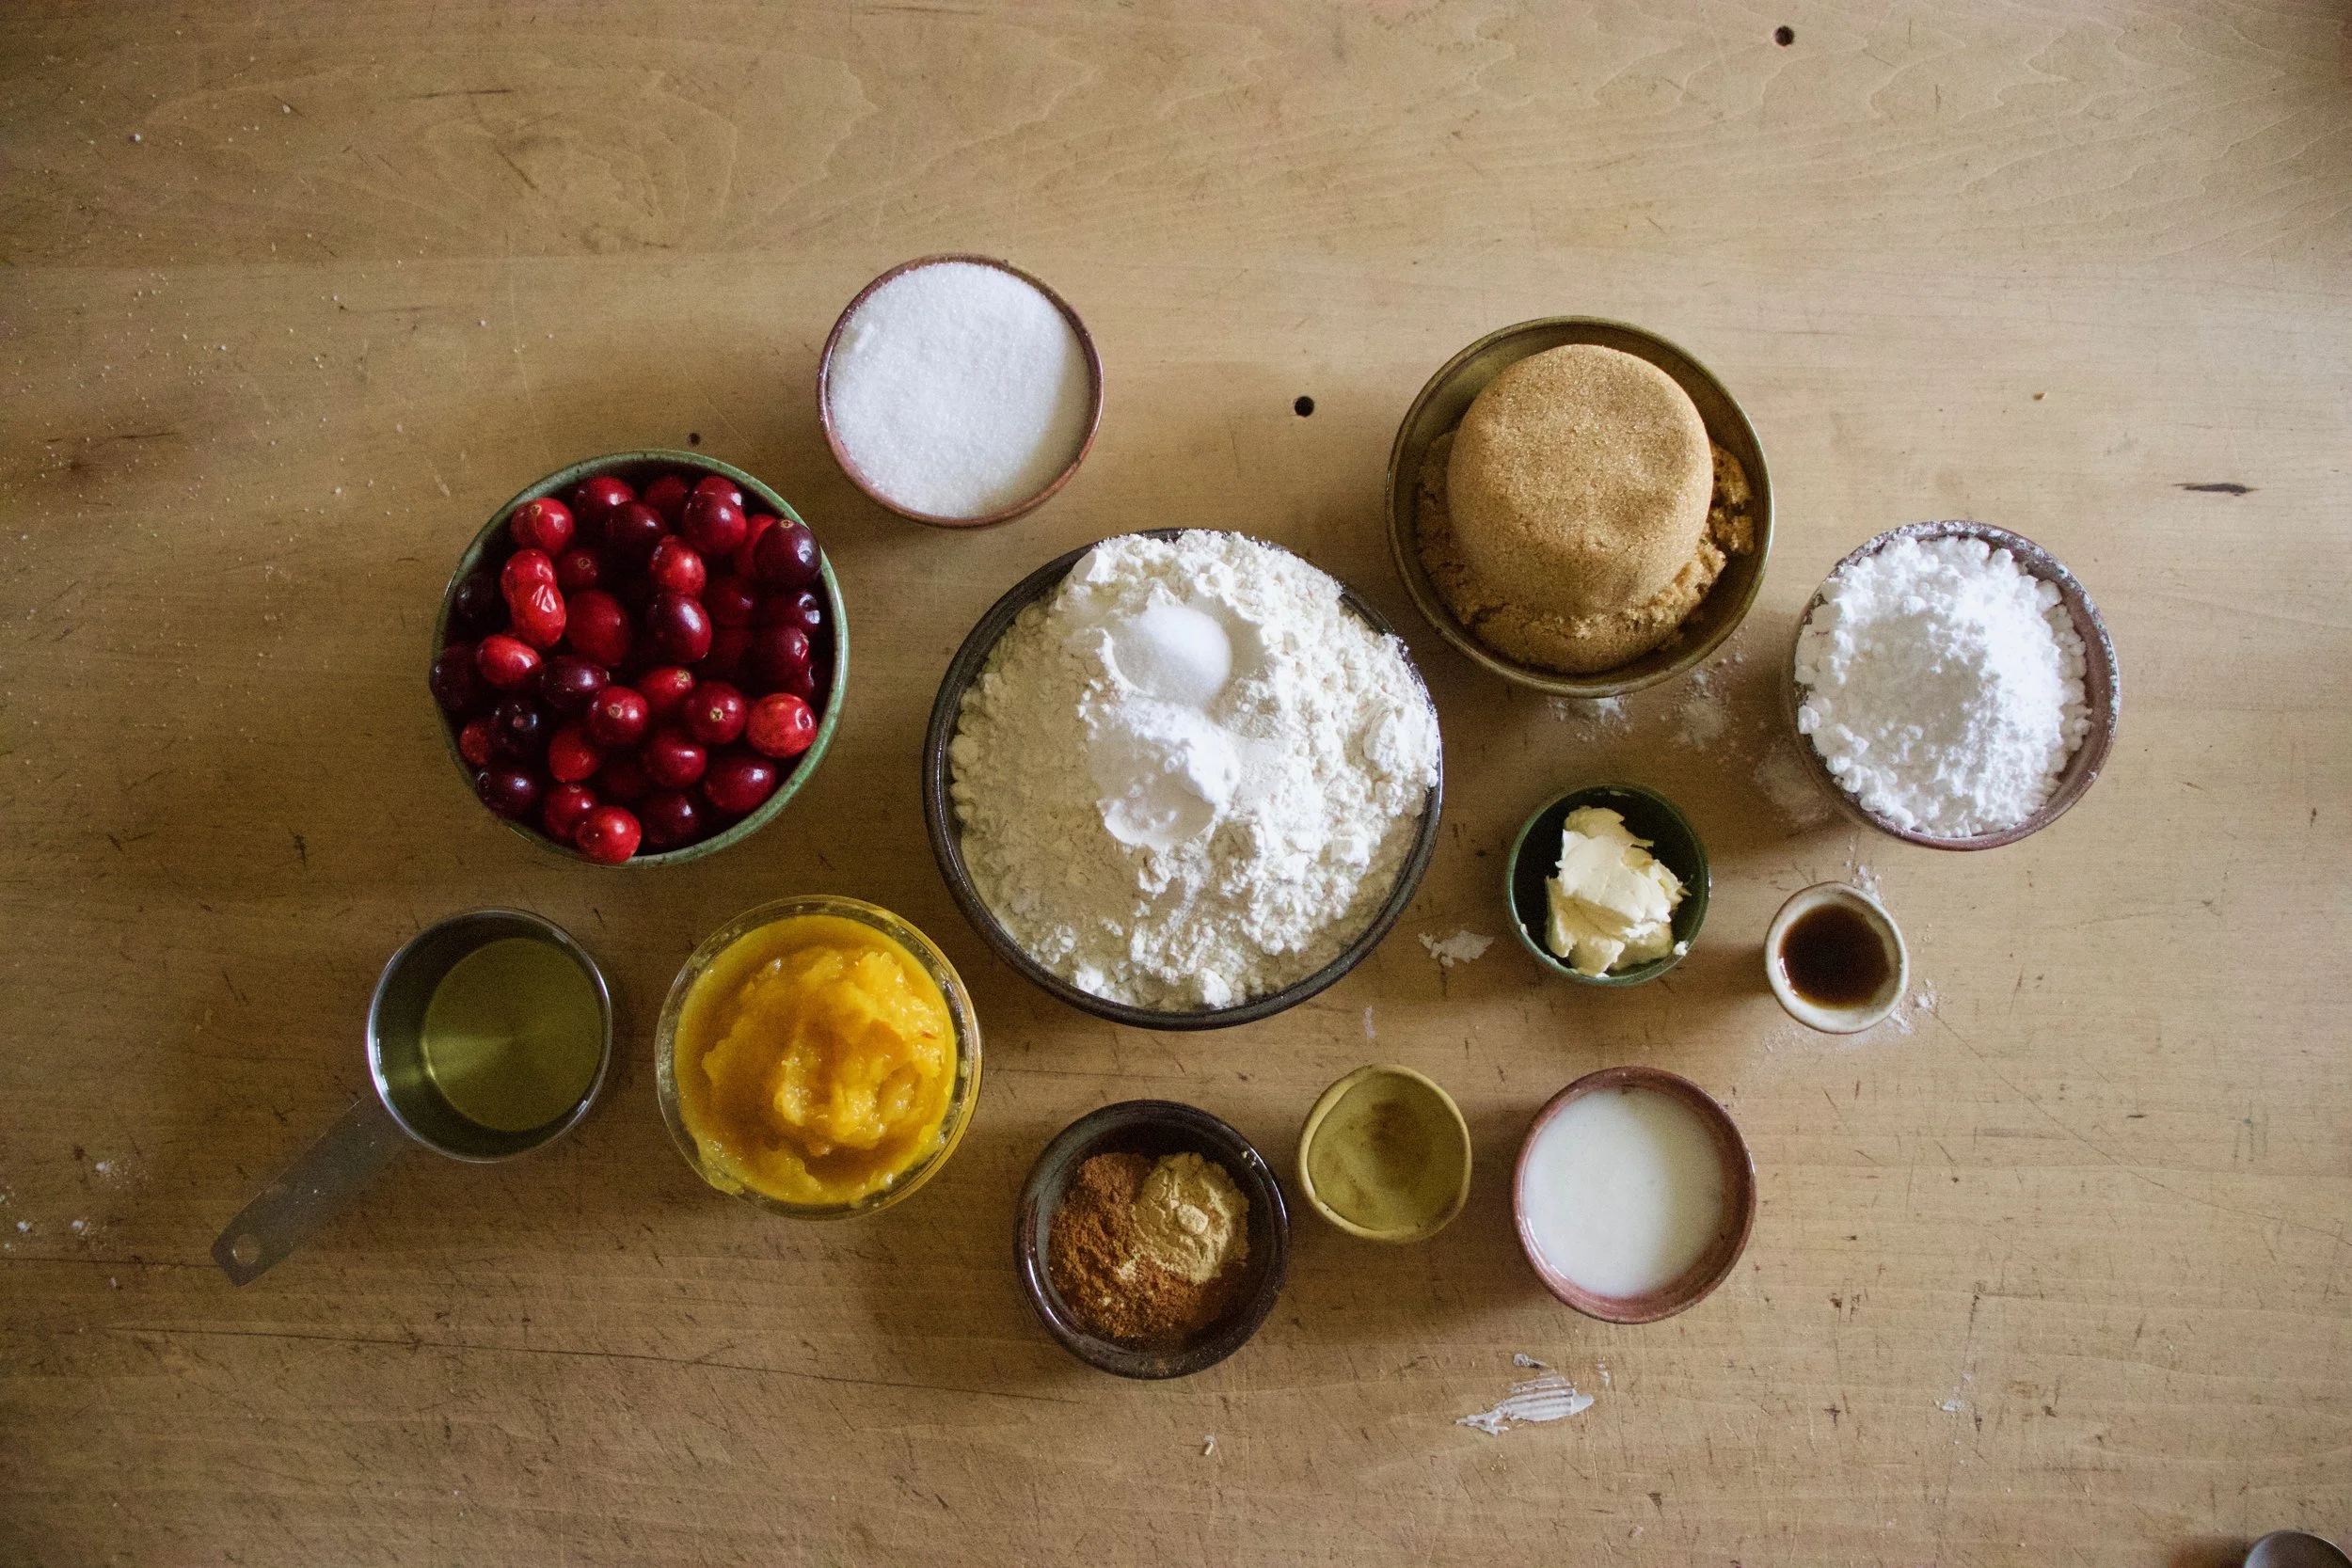
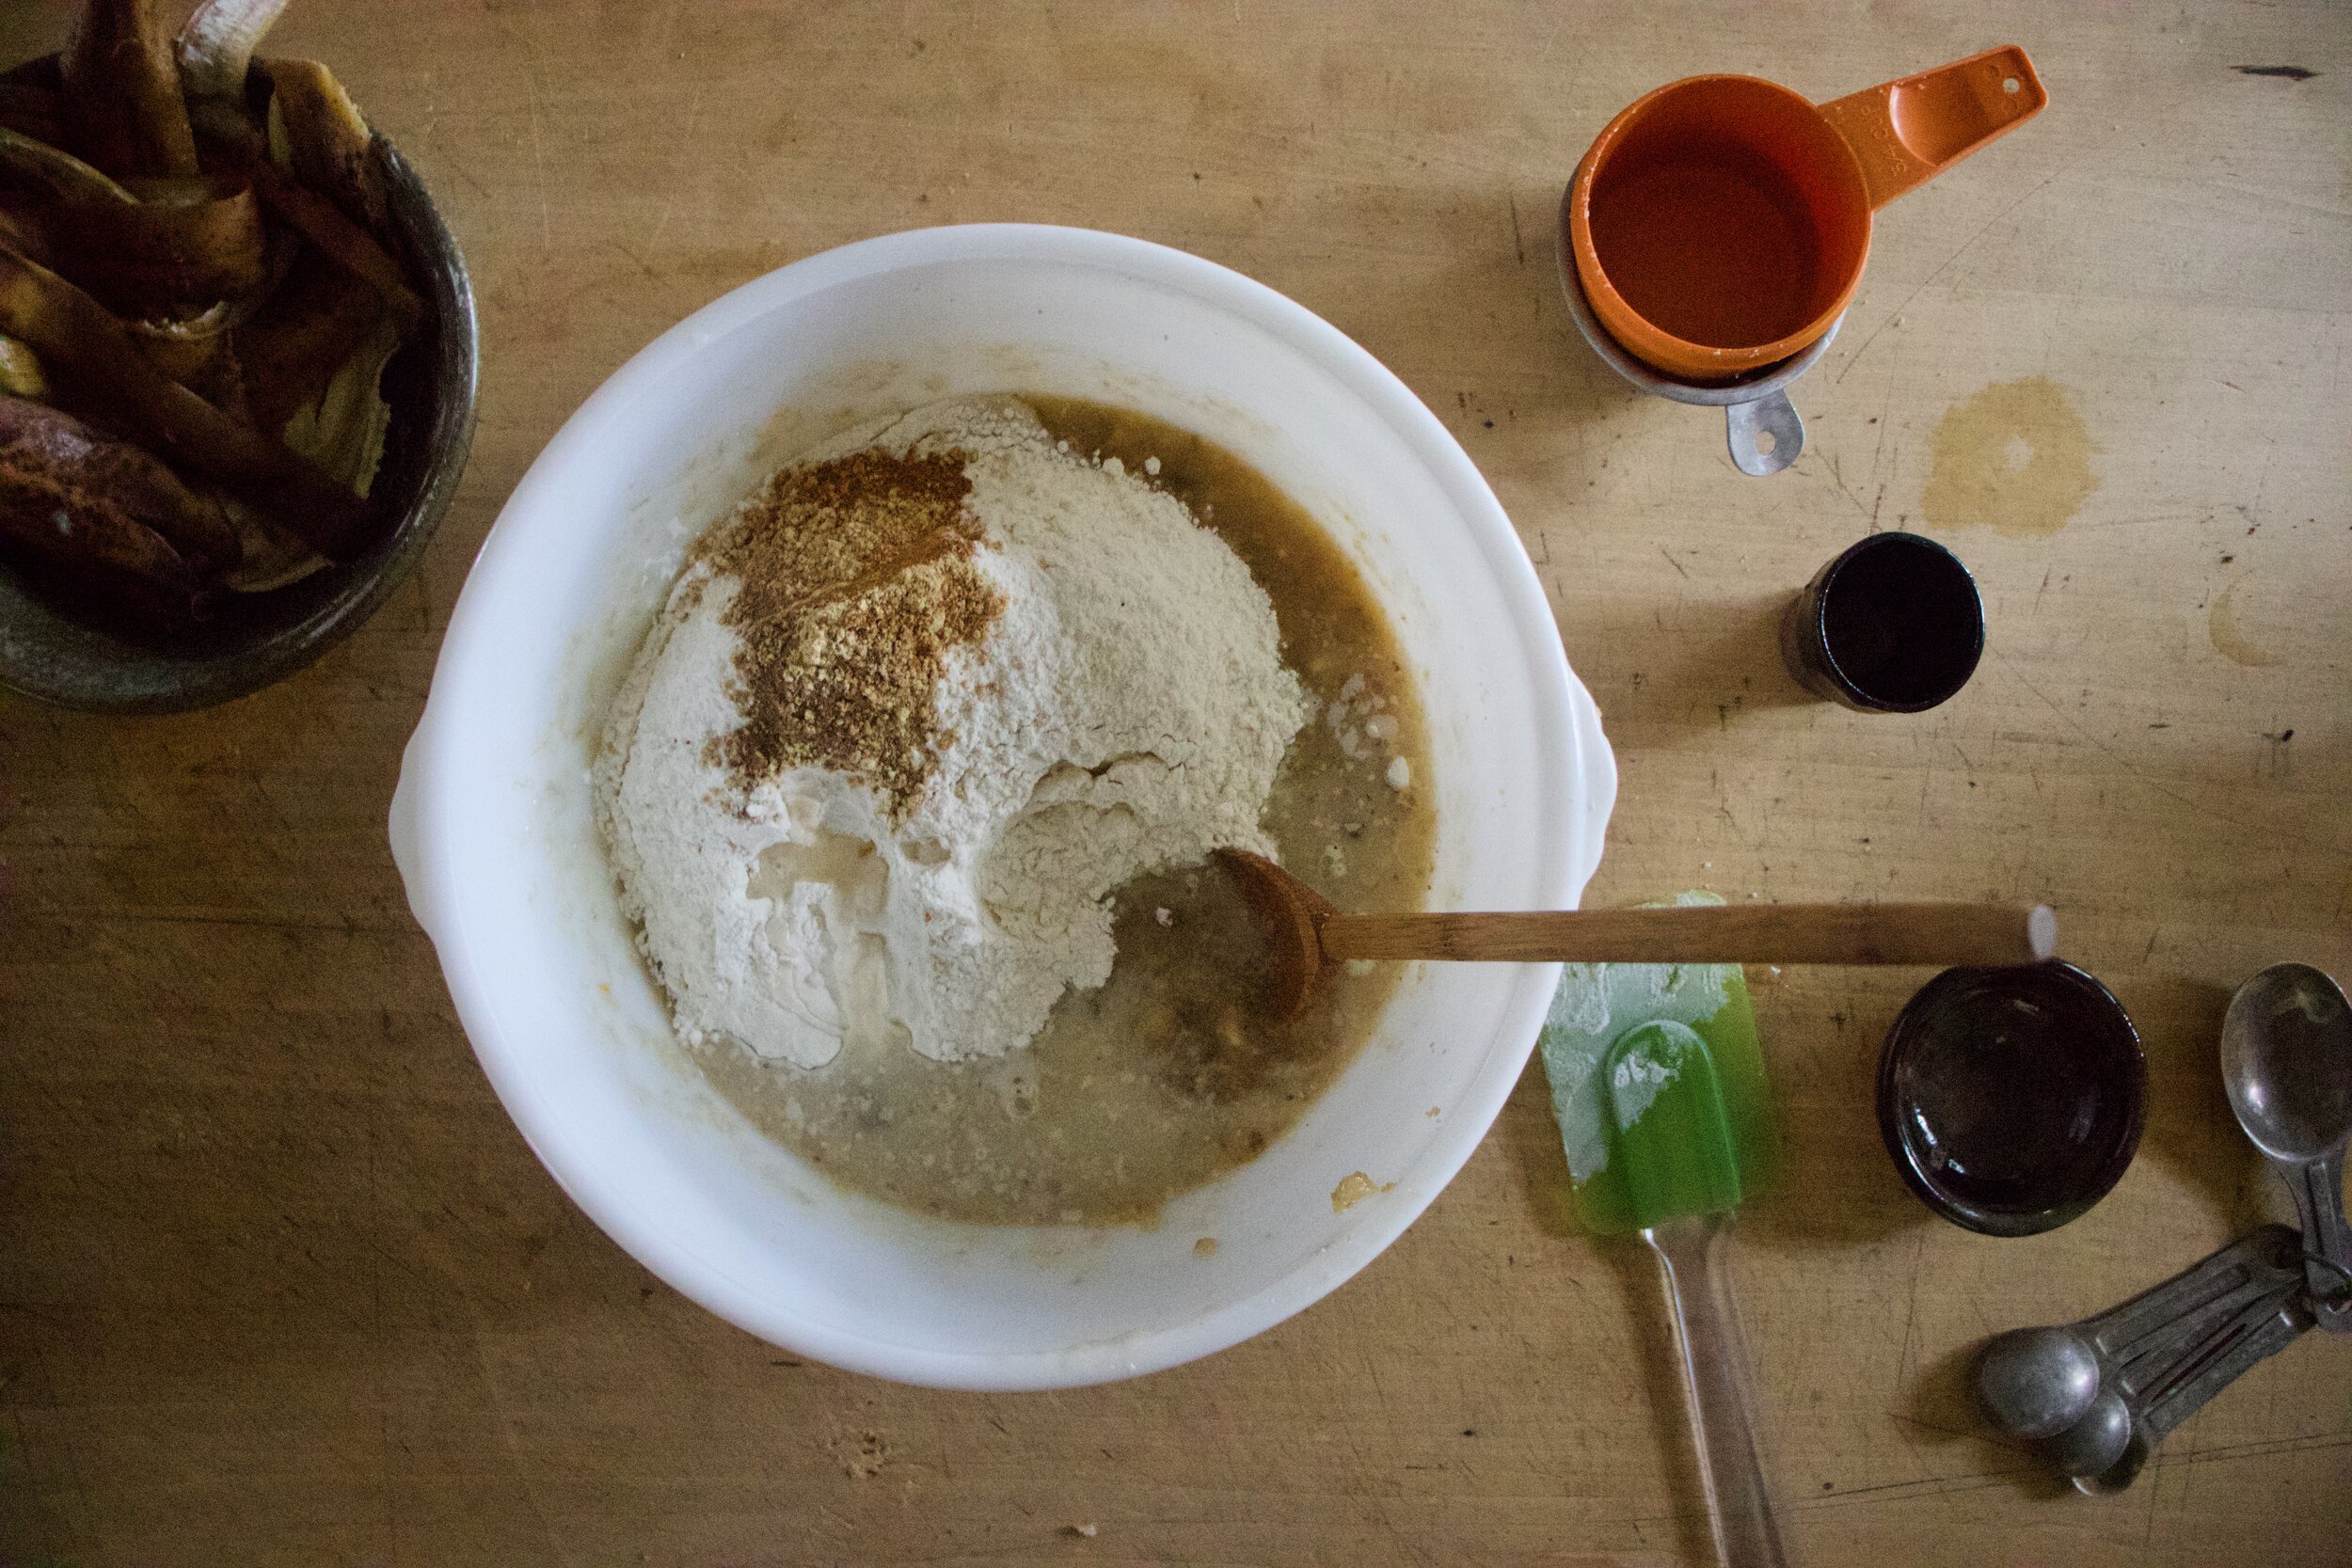
The stuff. Mashed sweet potato, flour, baking powder and soda, salt, cinnamon, brown sugar, coconut oil, vanilla, plant milk, powdered sugar, and last but not least, maple syrup.

IMG_8085.jpg
IMG_8101 2.jpg
IMG_8109.jpg
IMG_8114.jpg

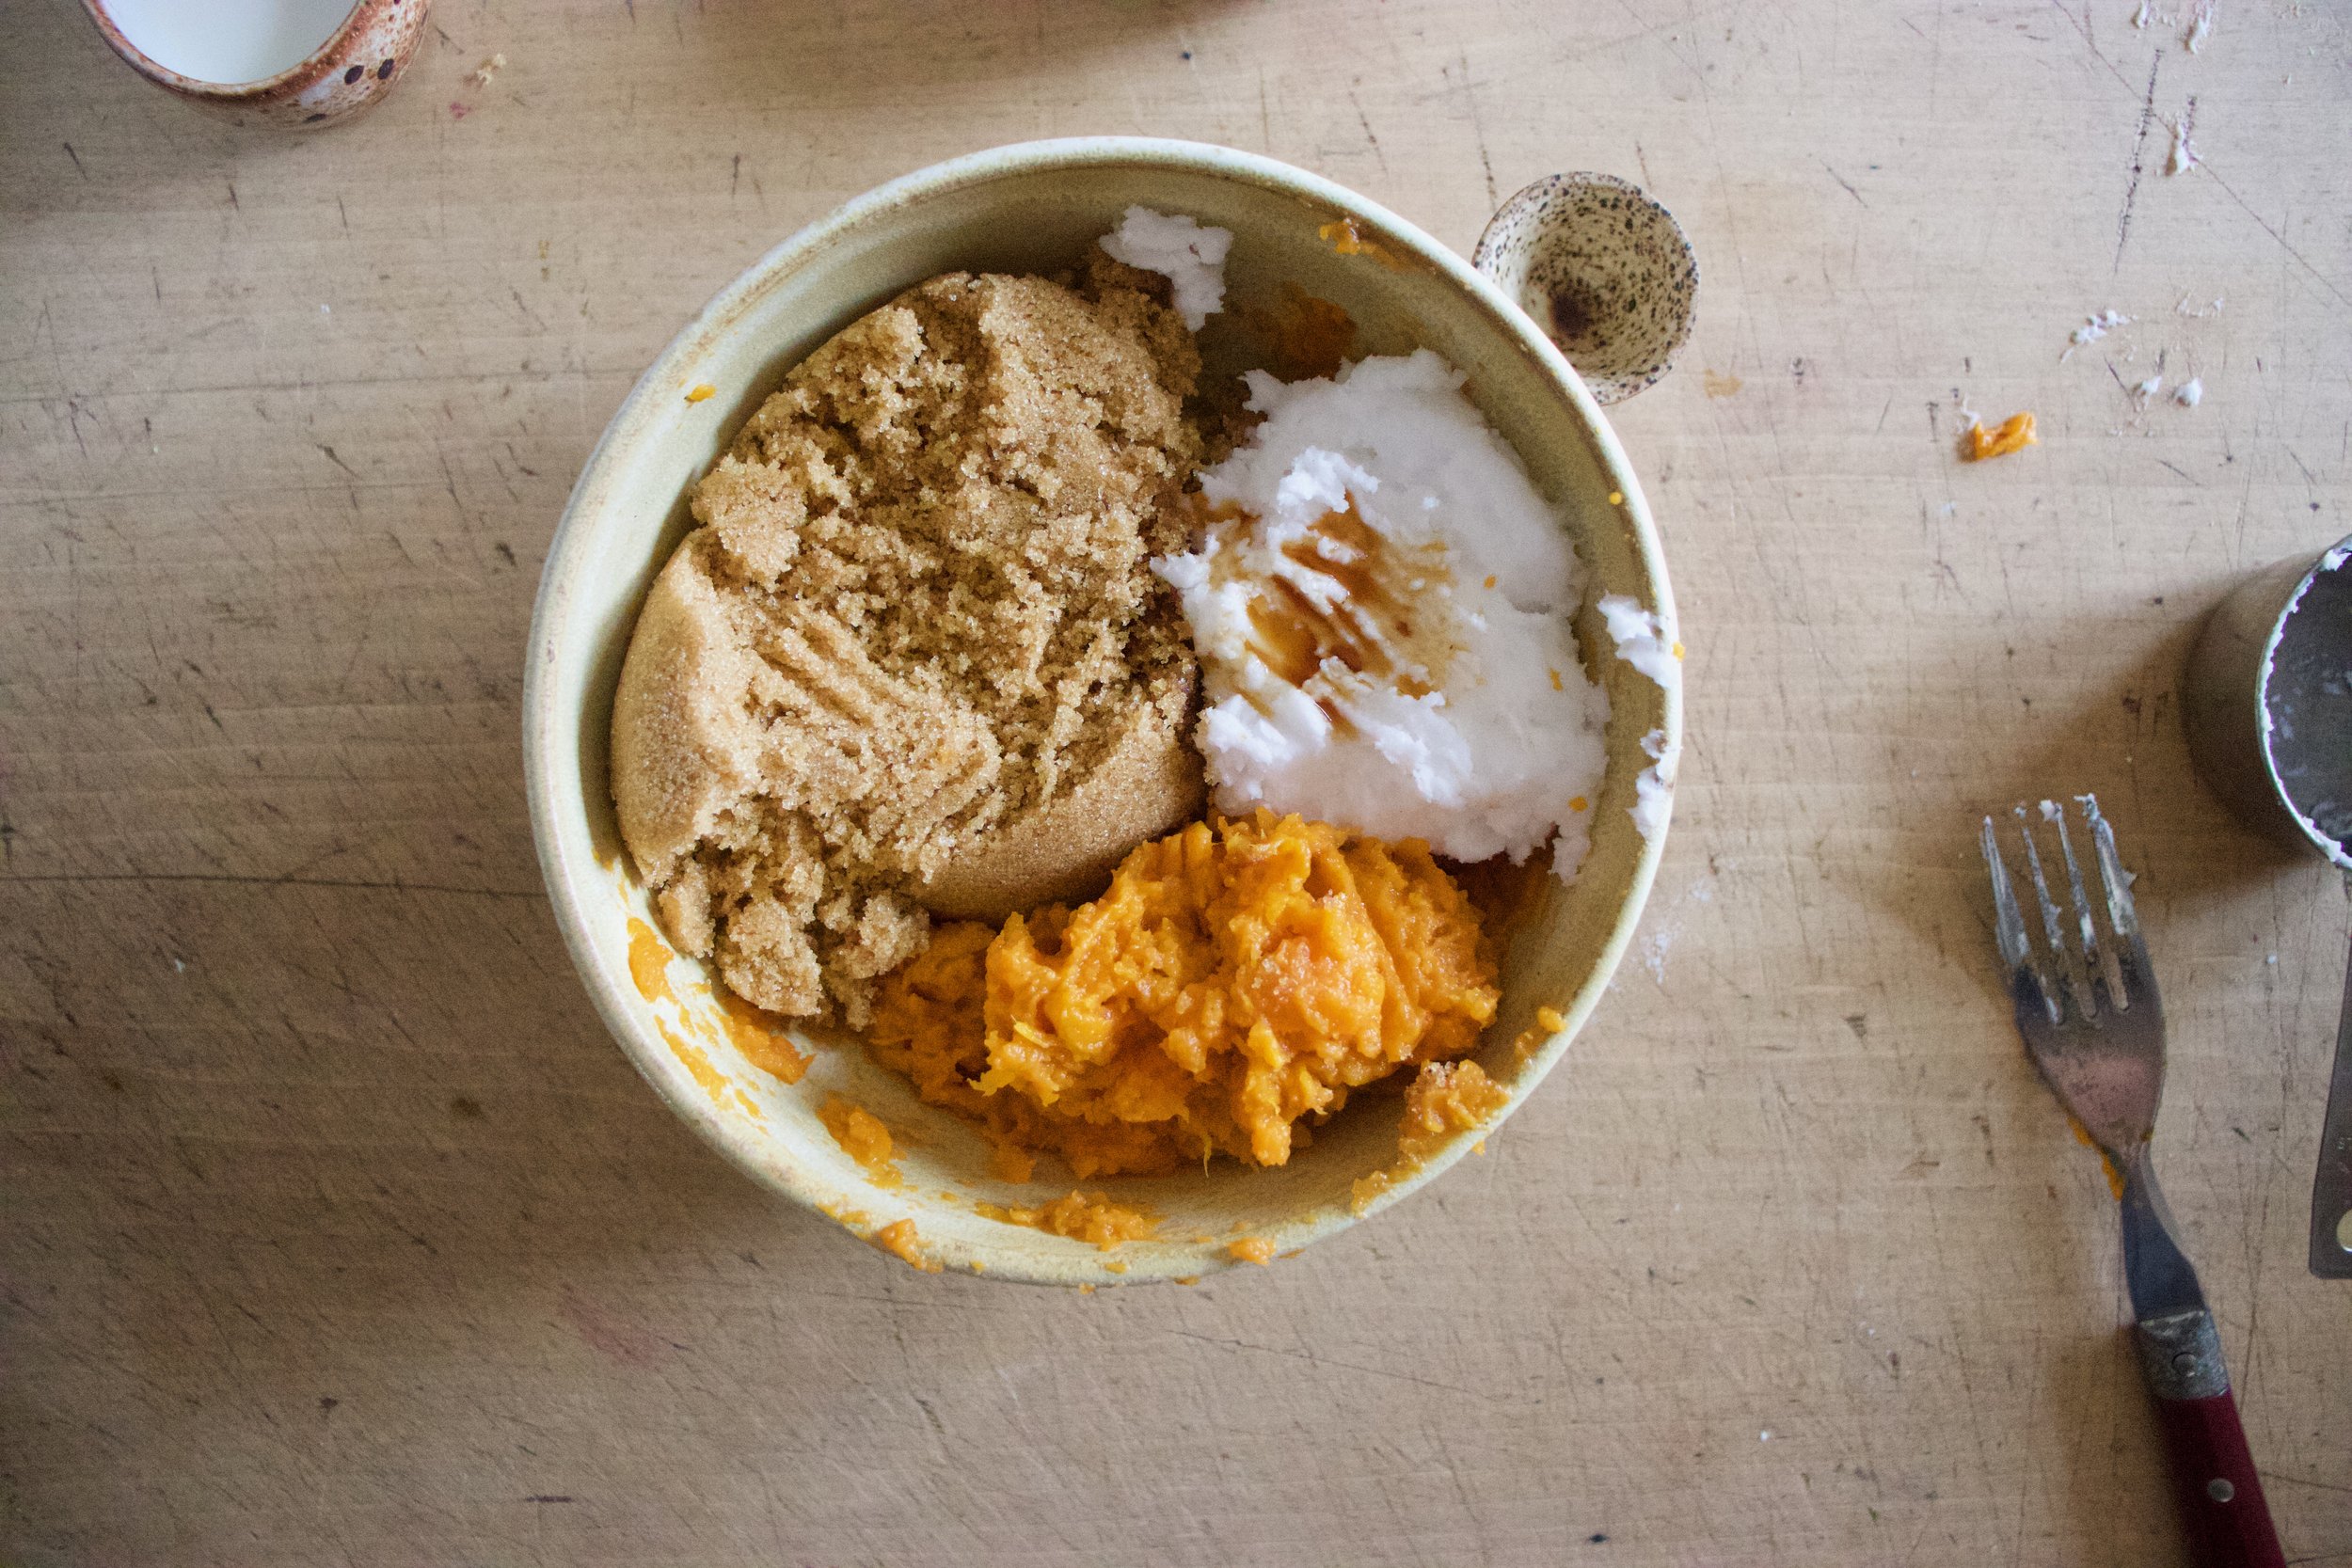
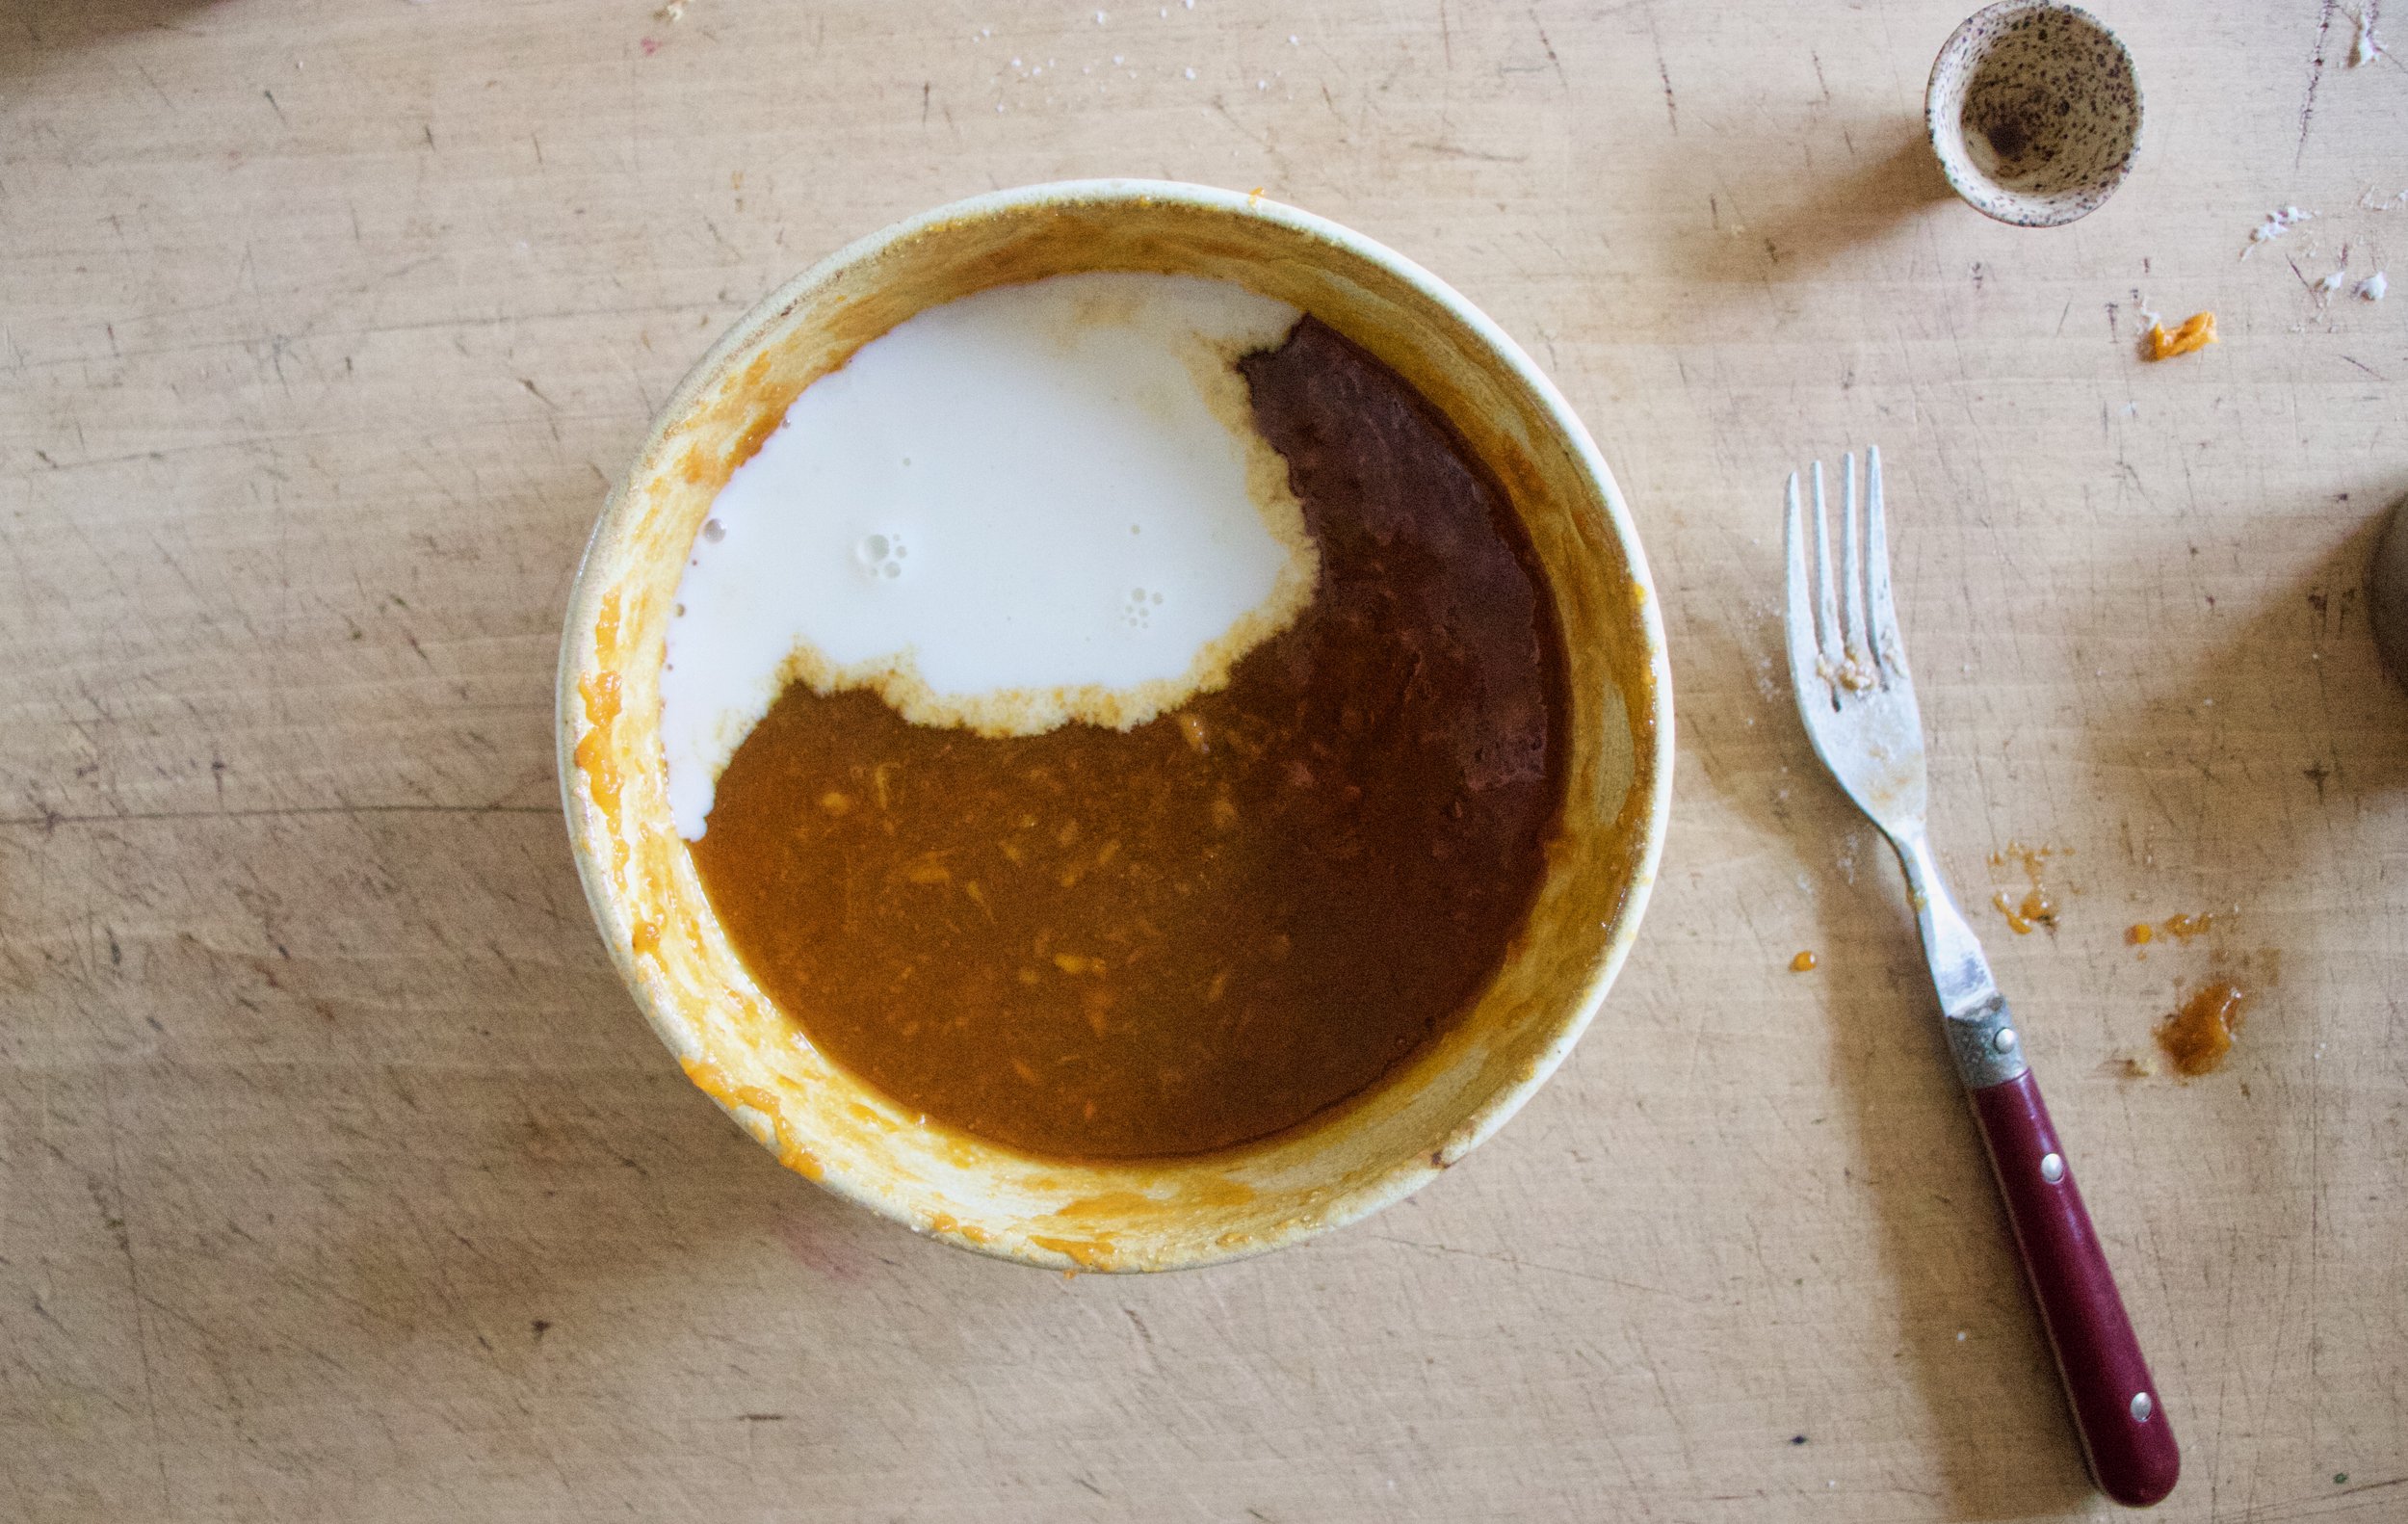
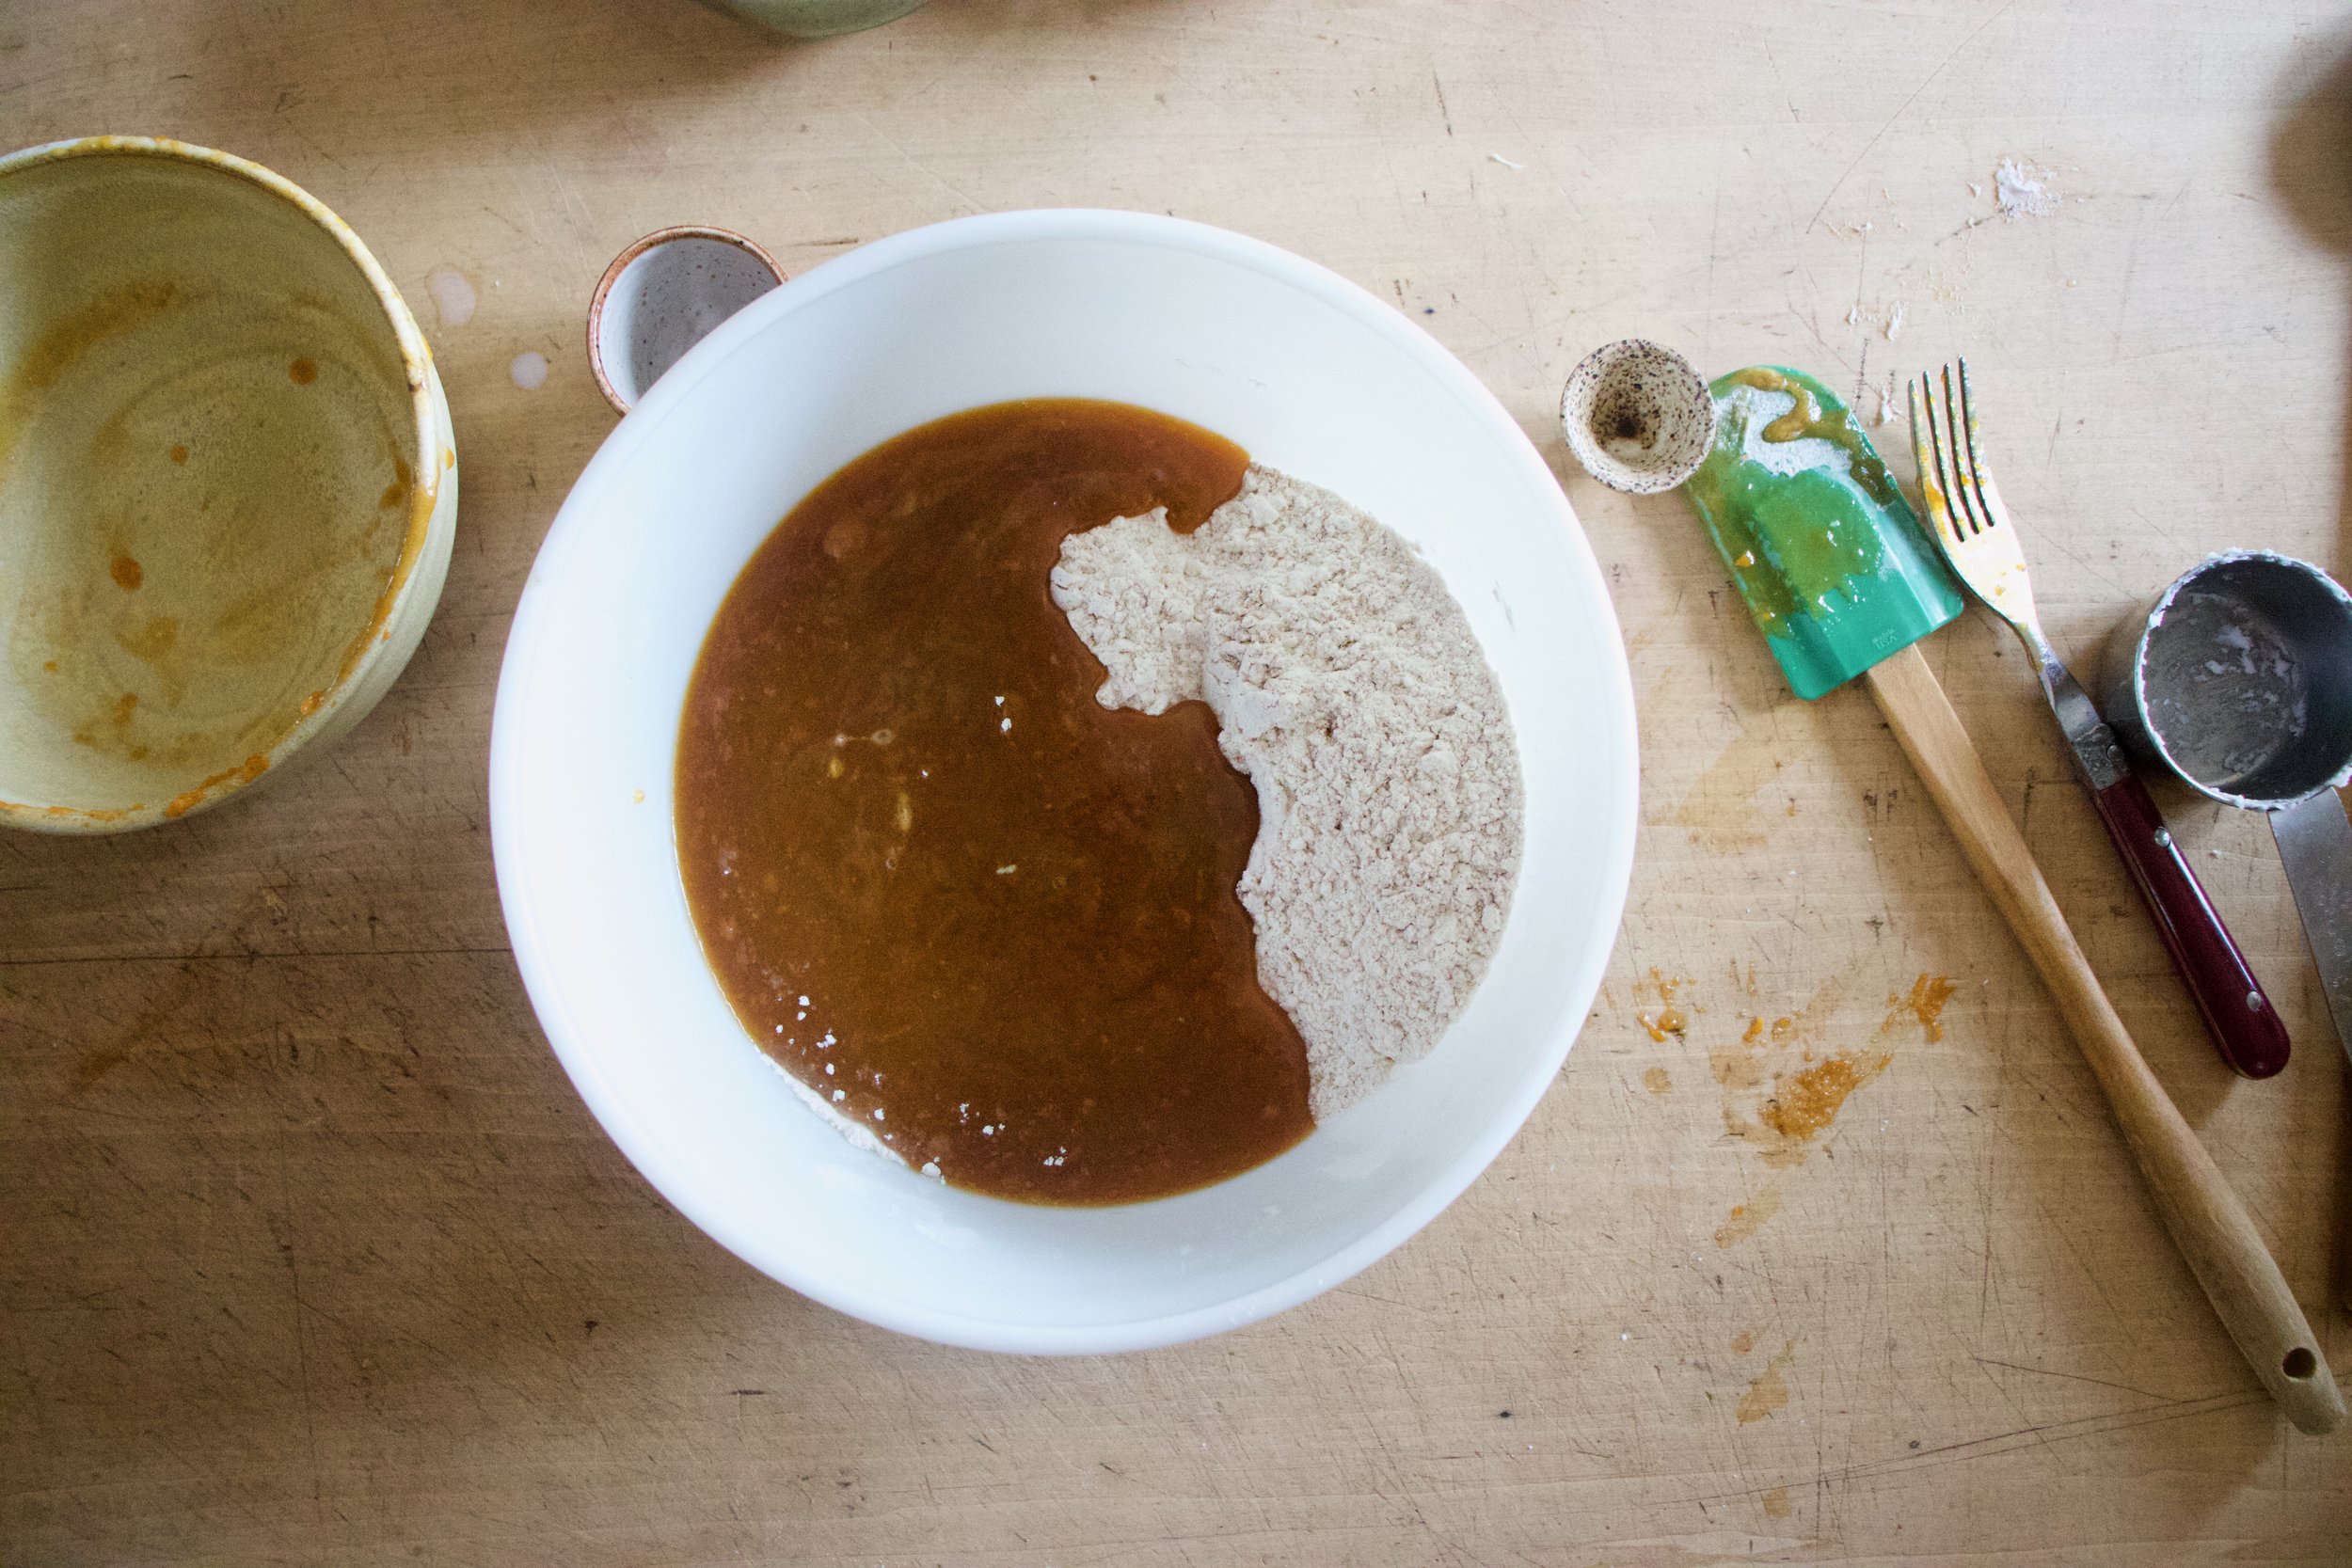
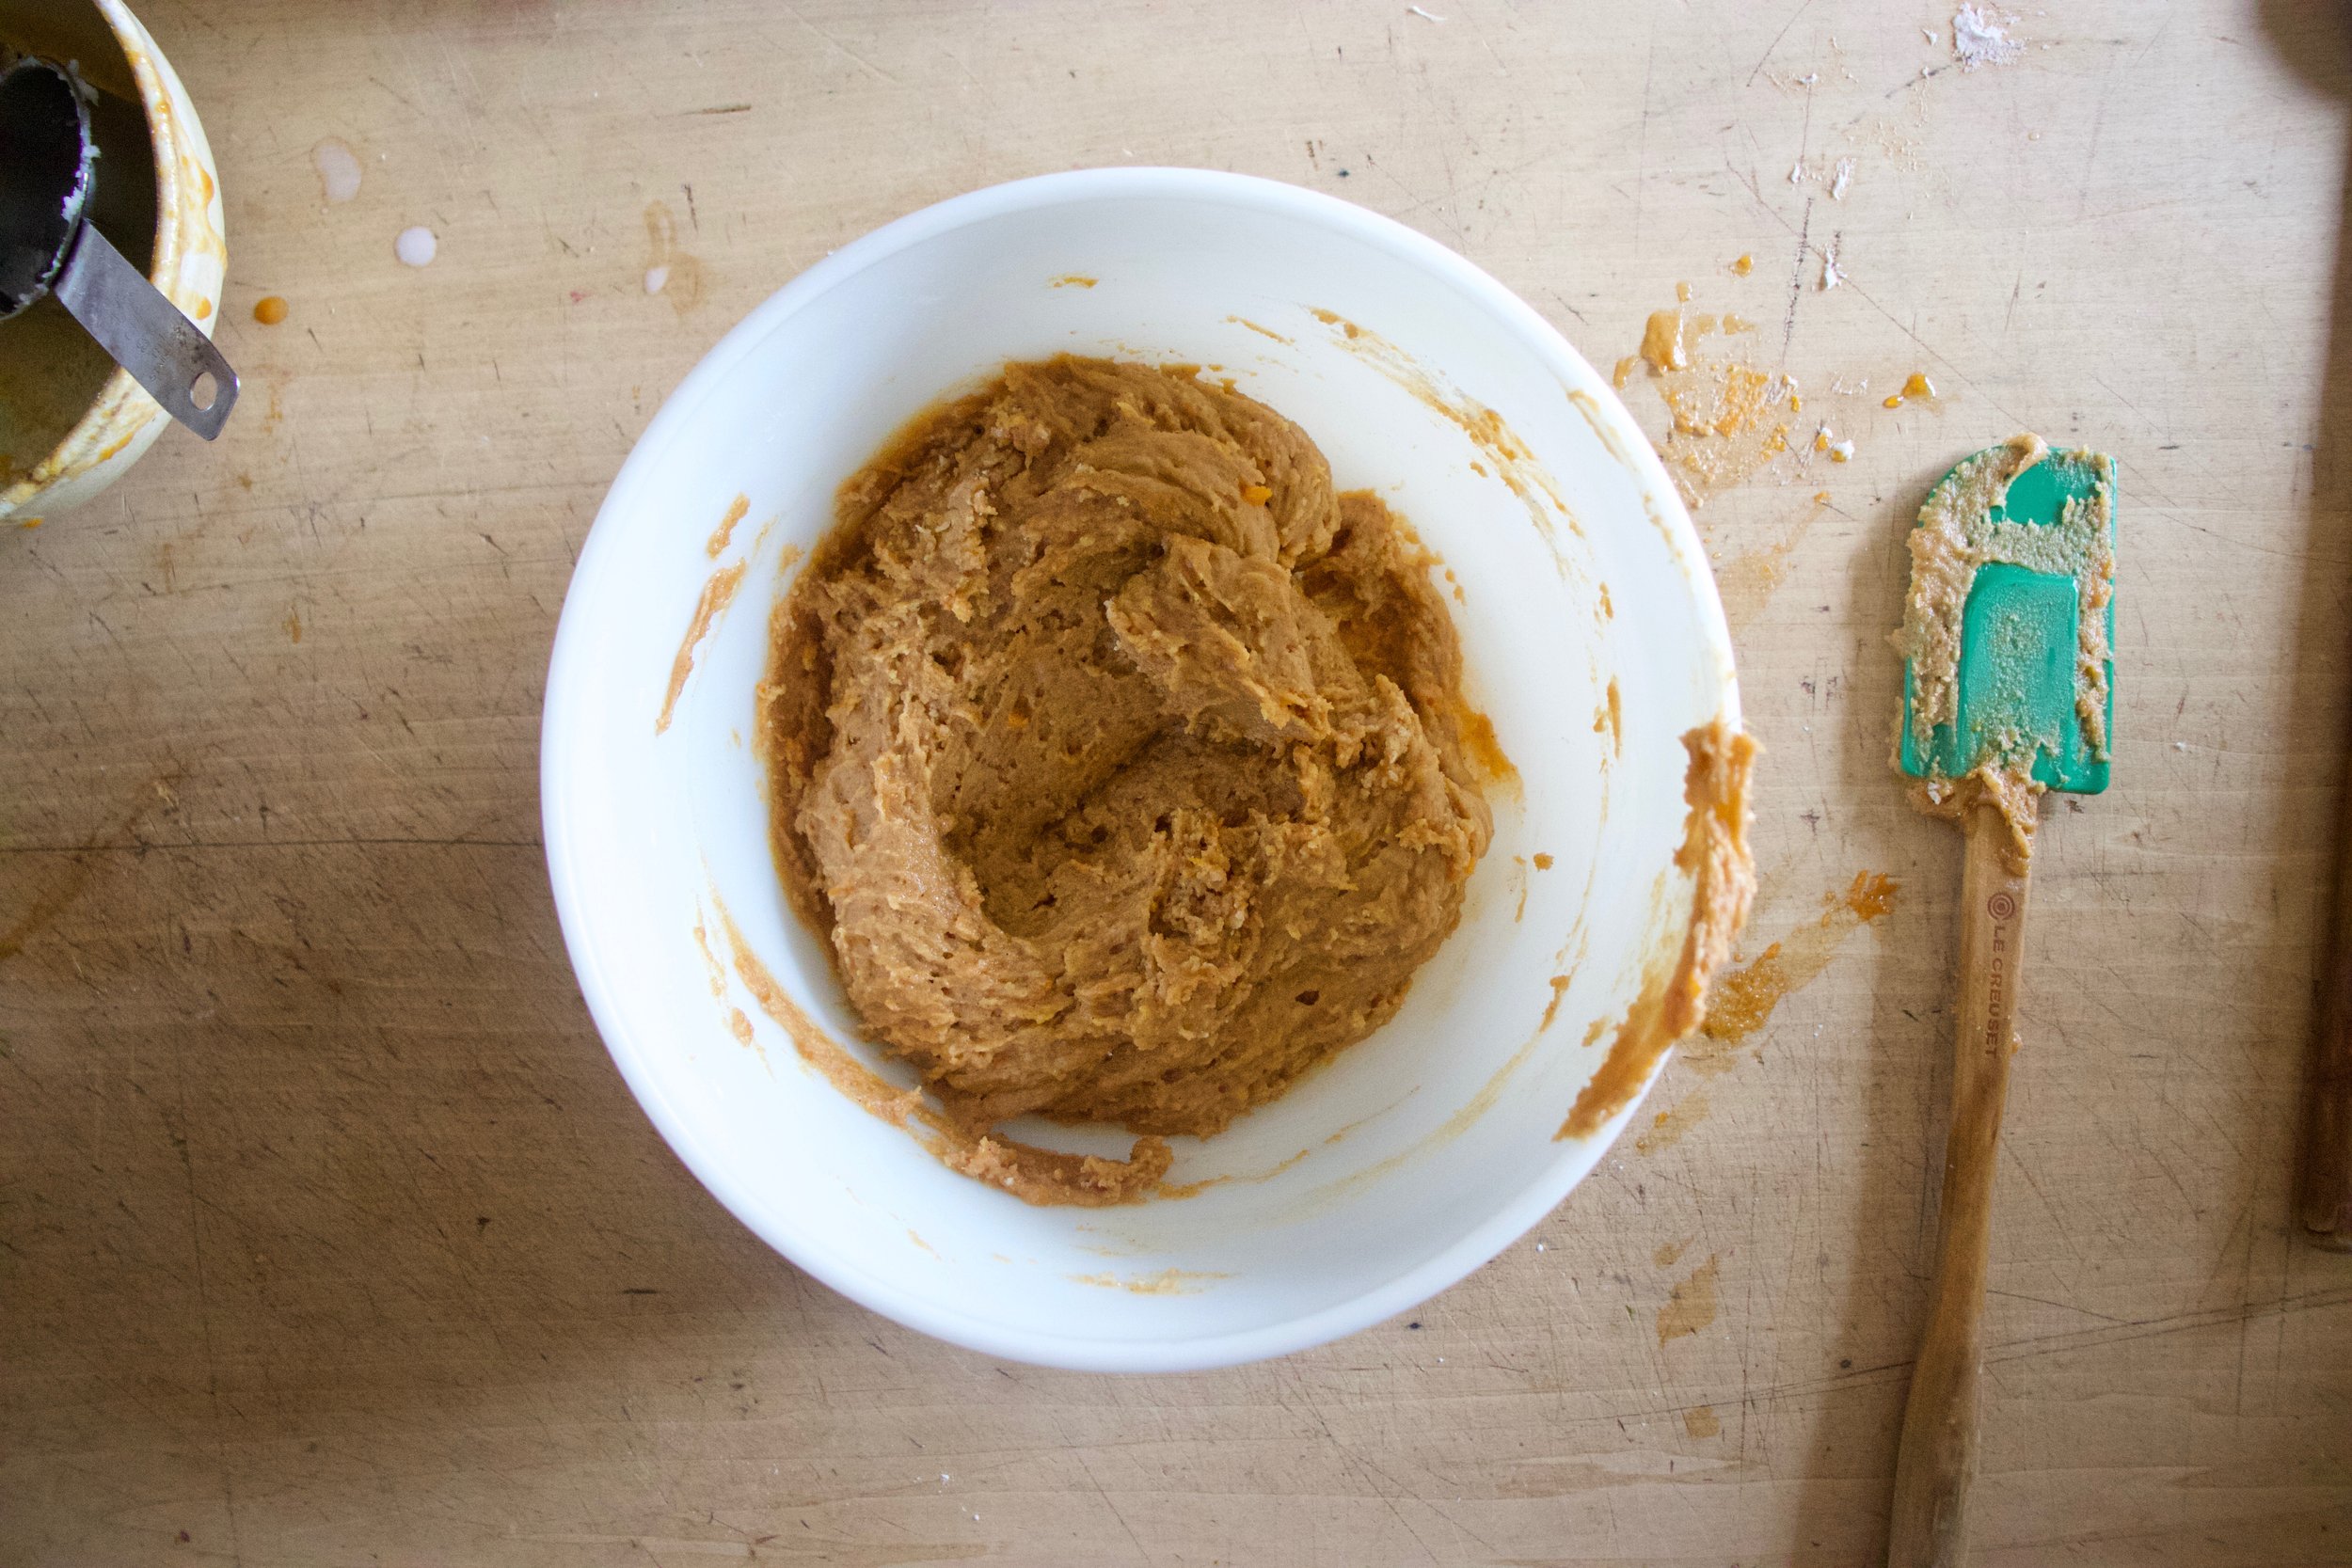
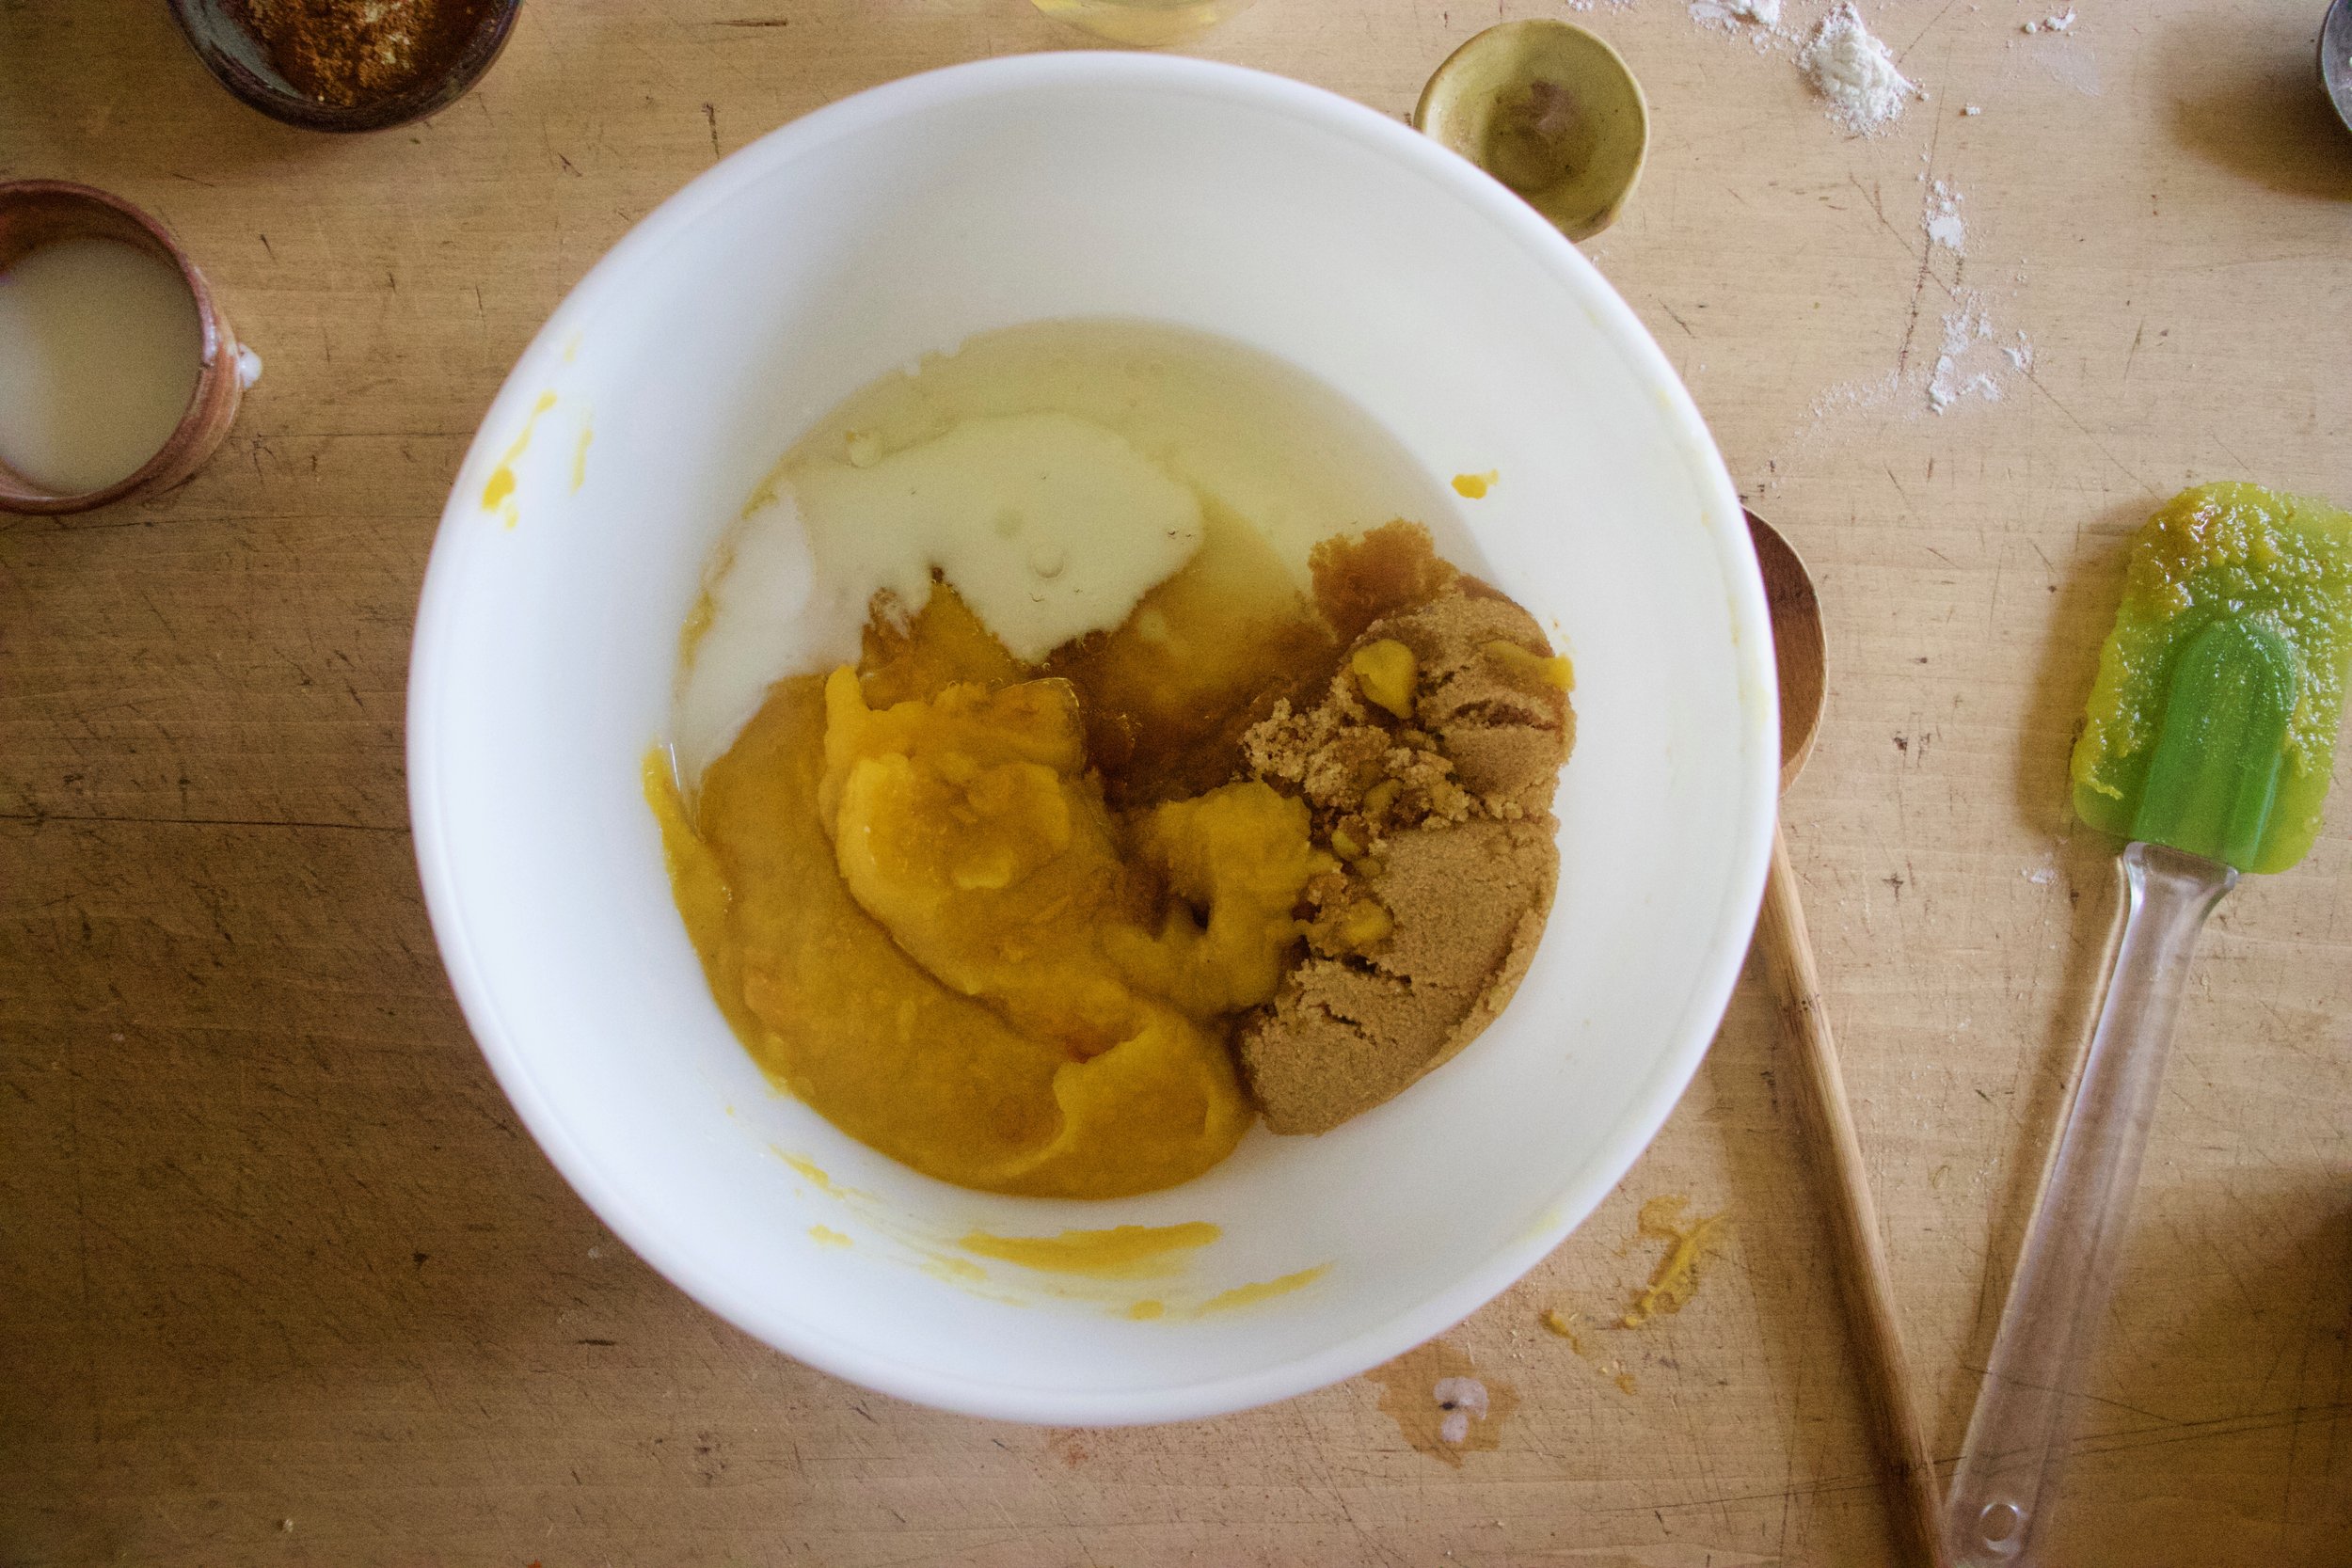
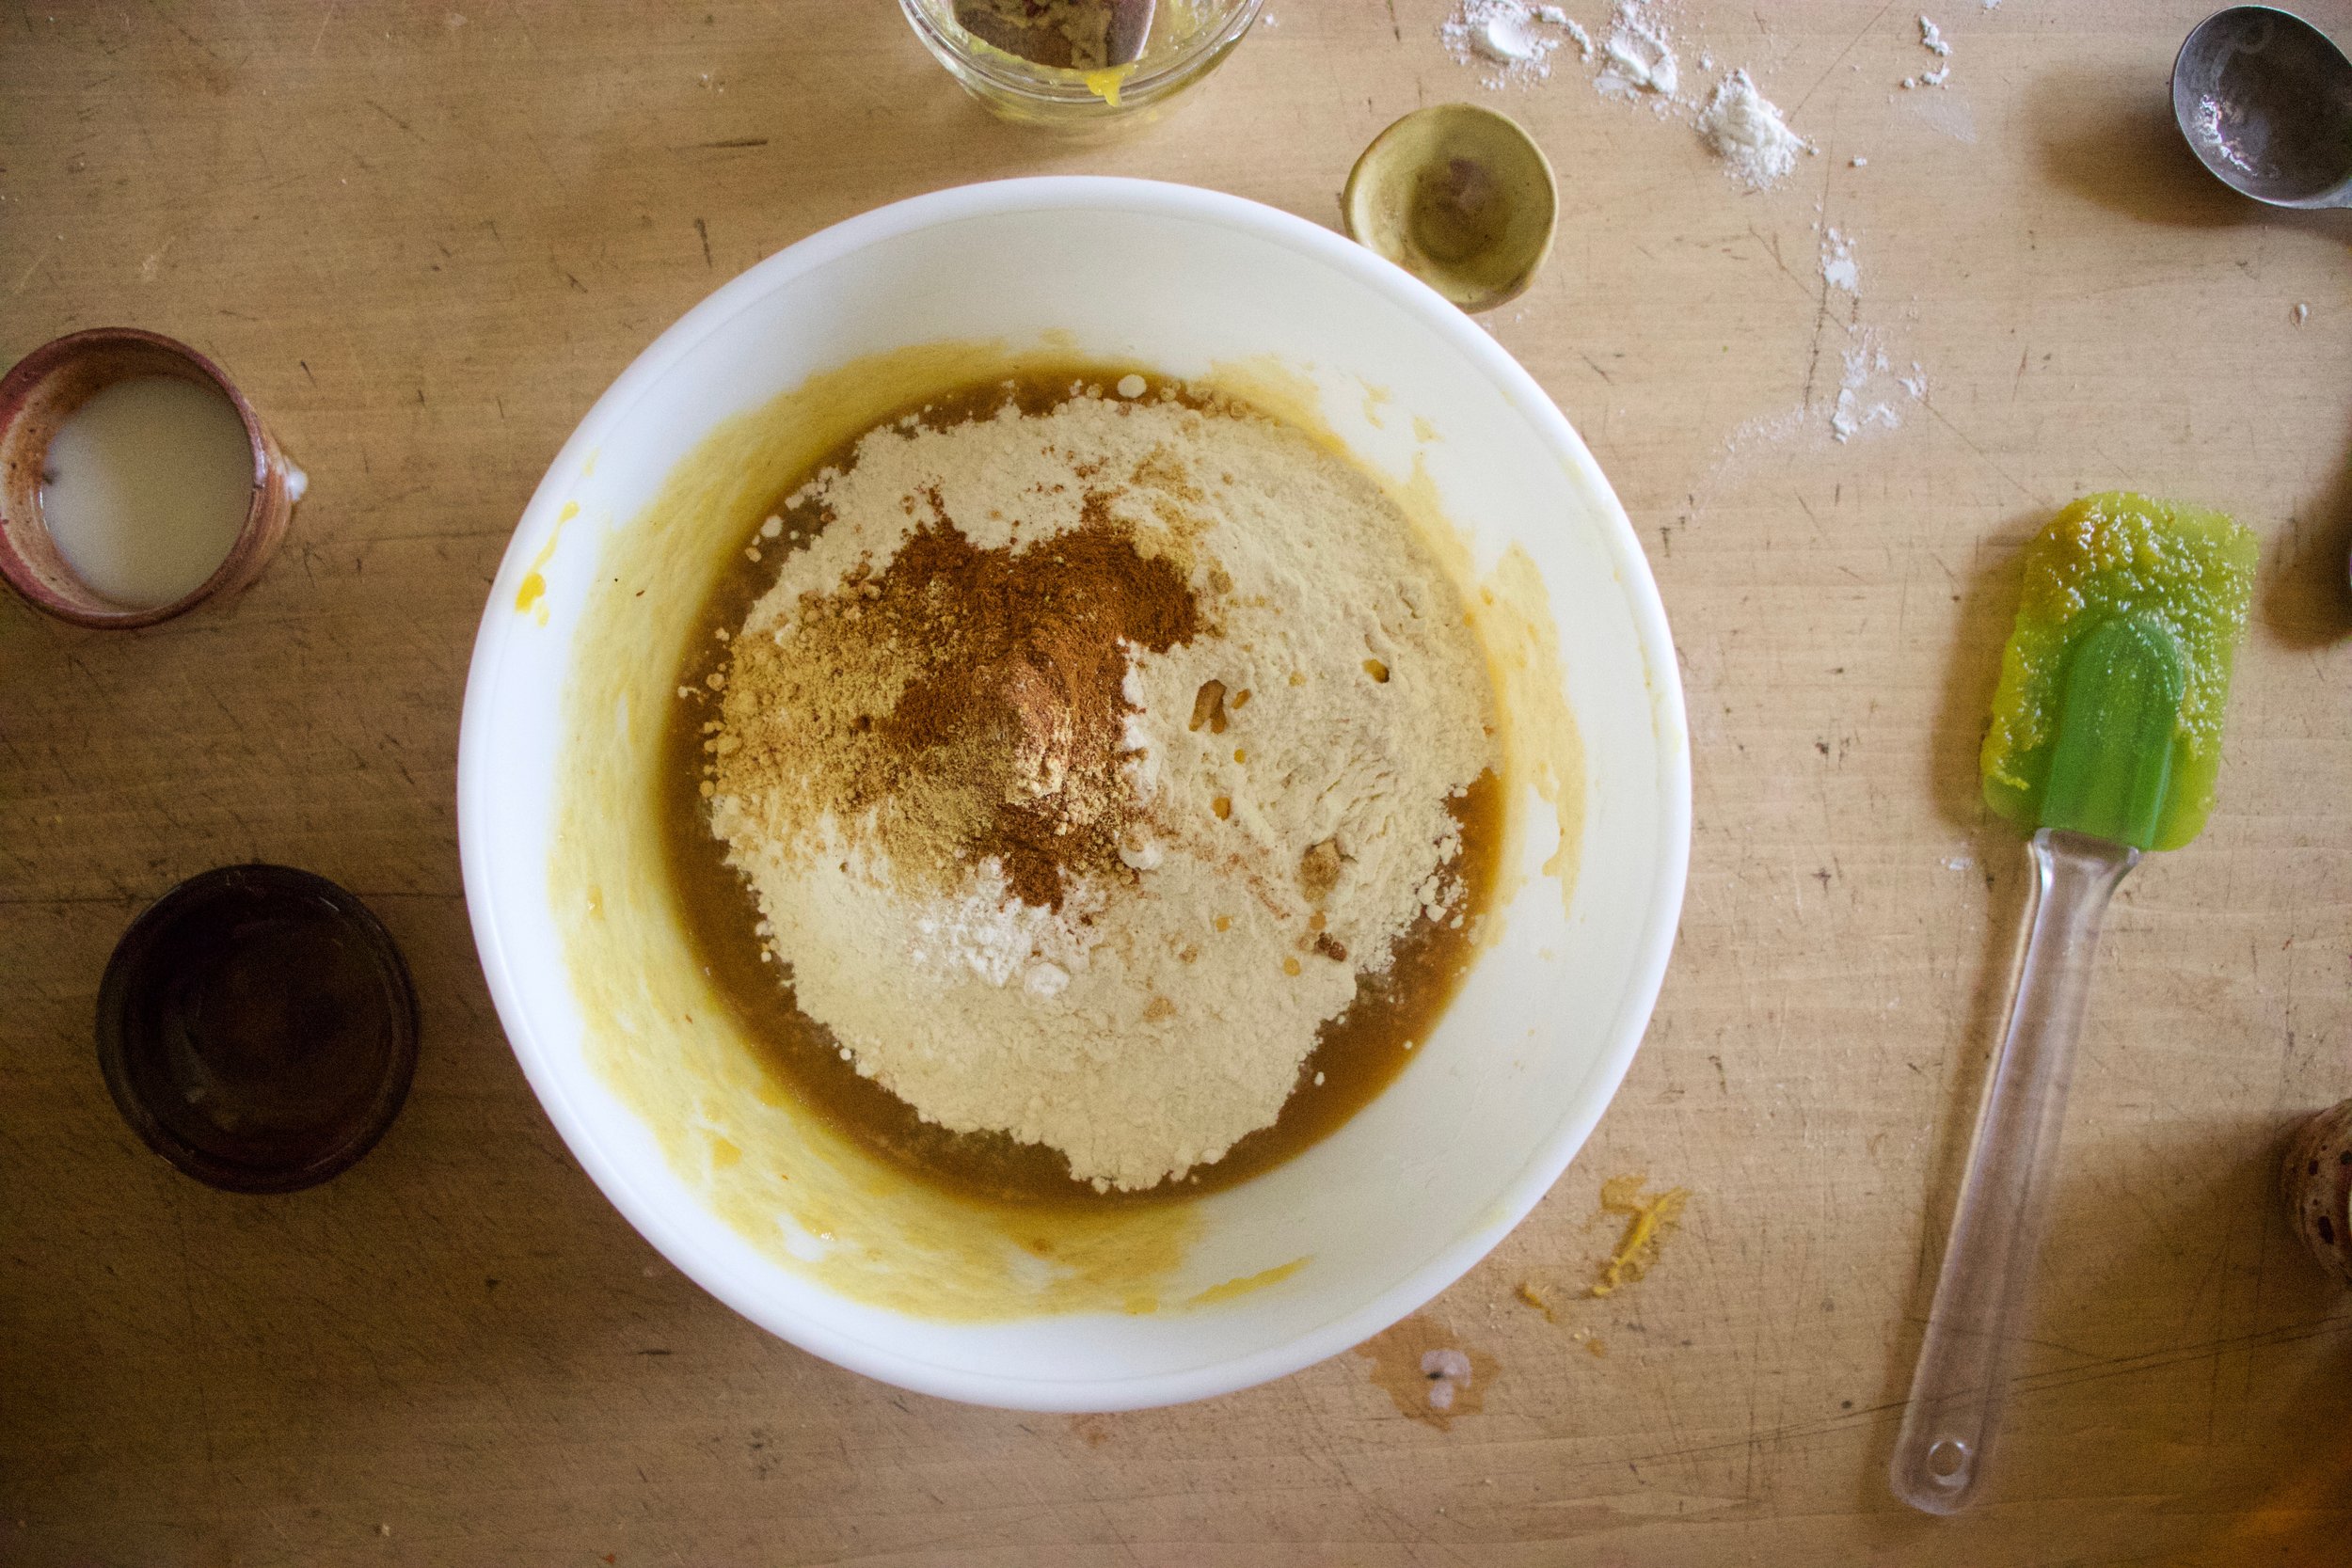
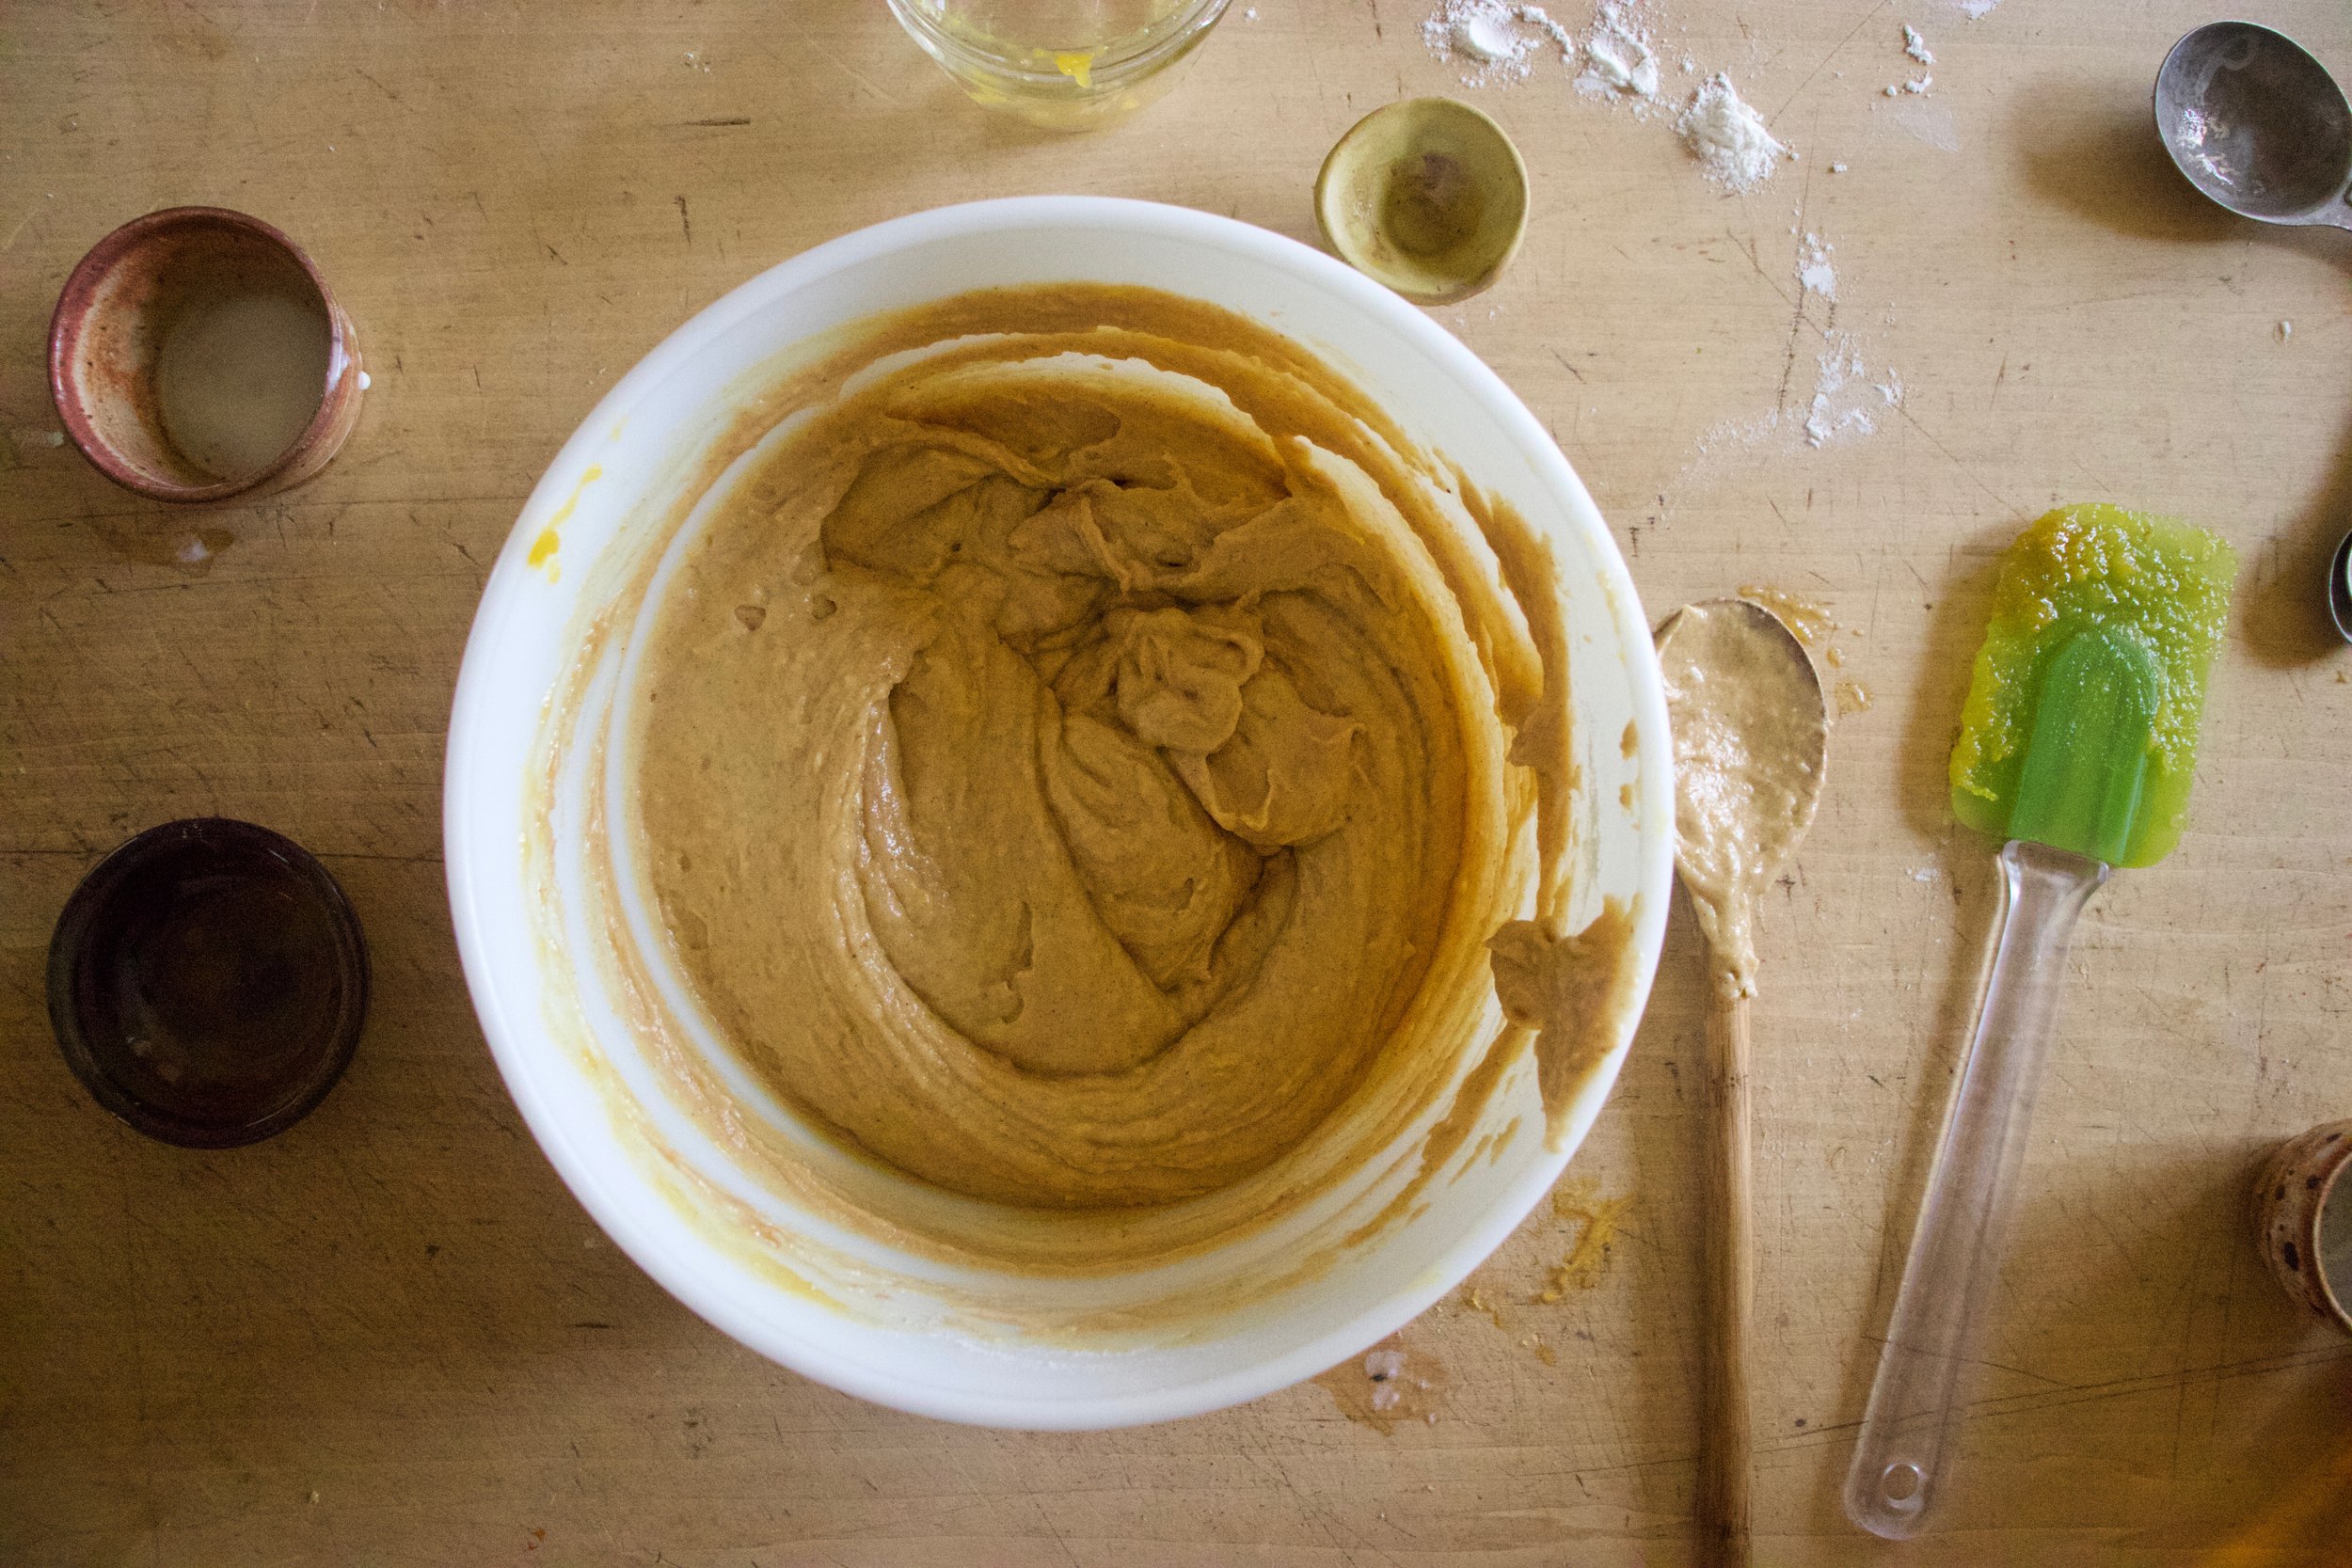
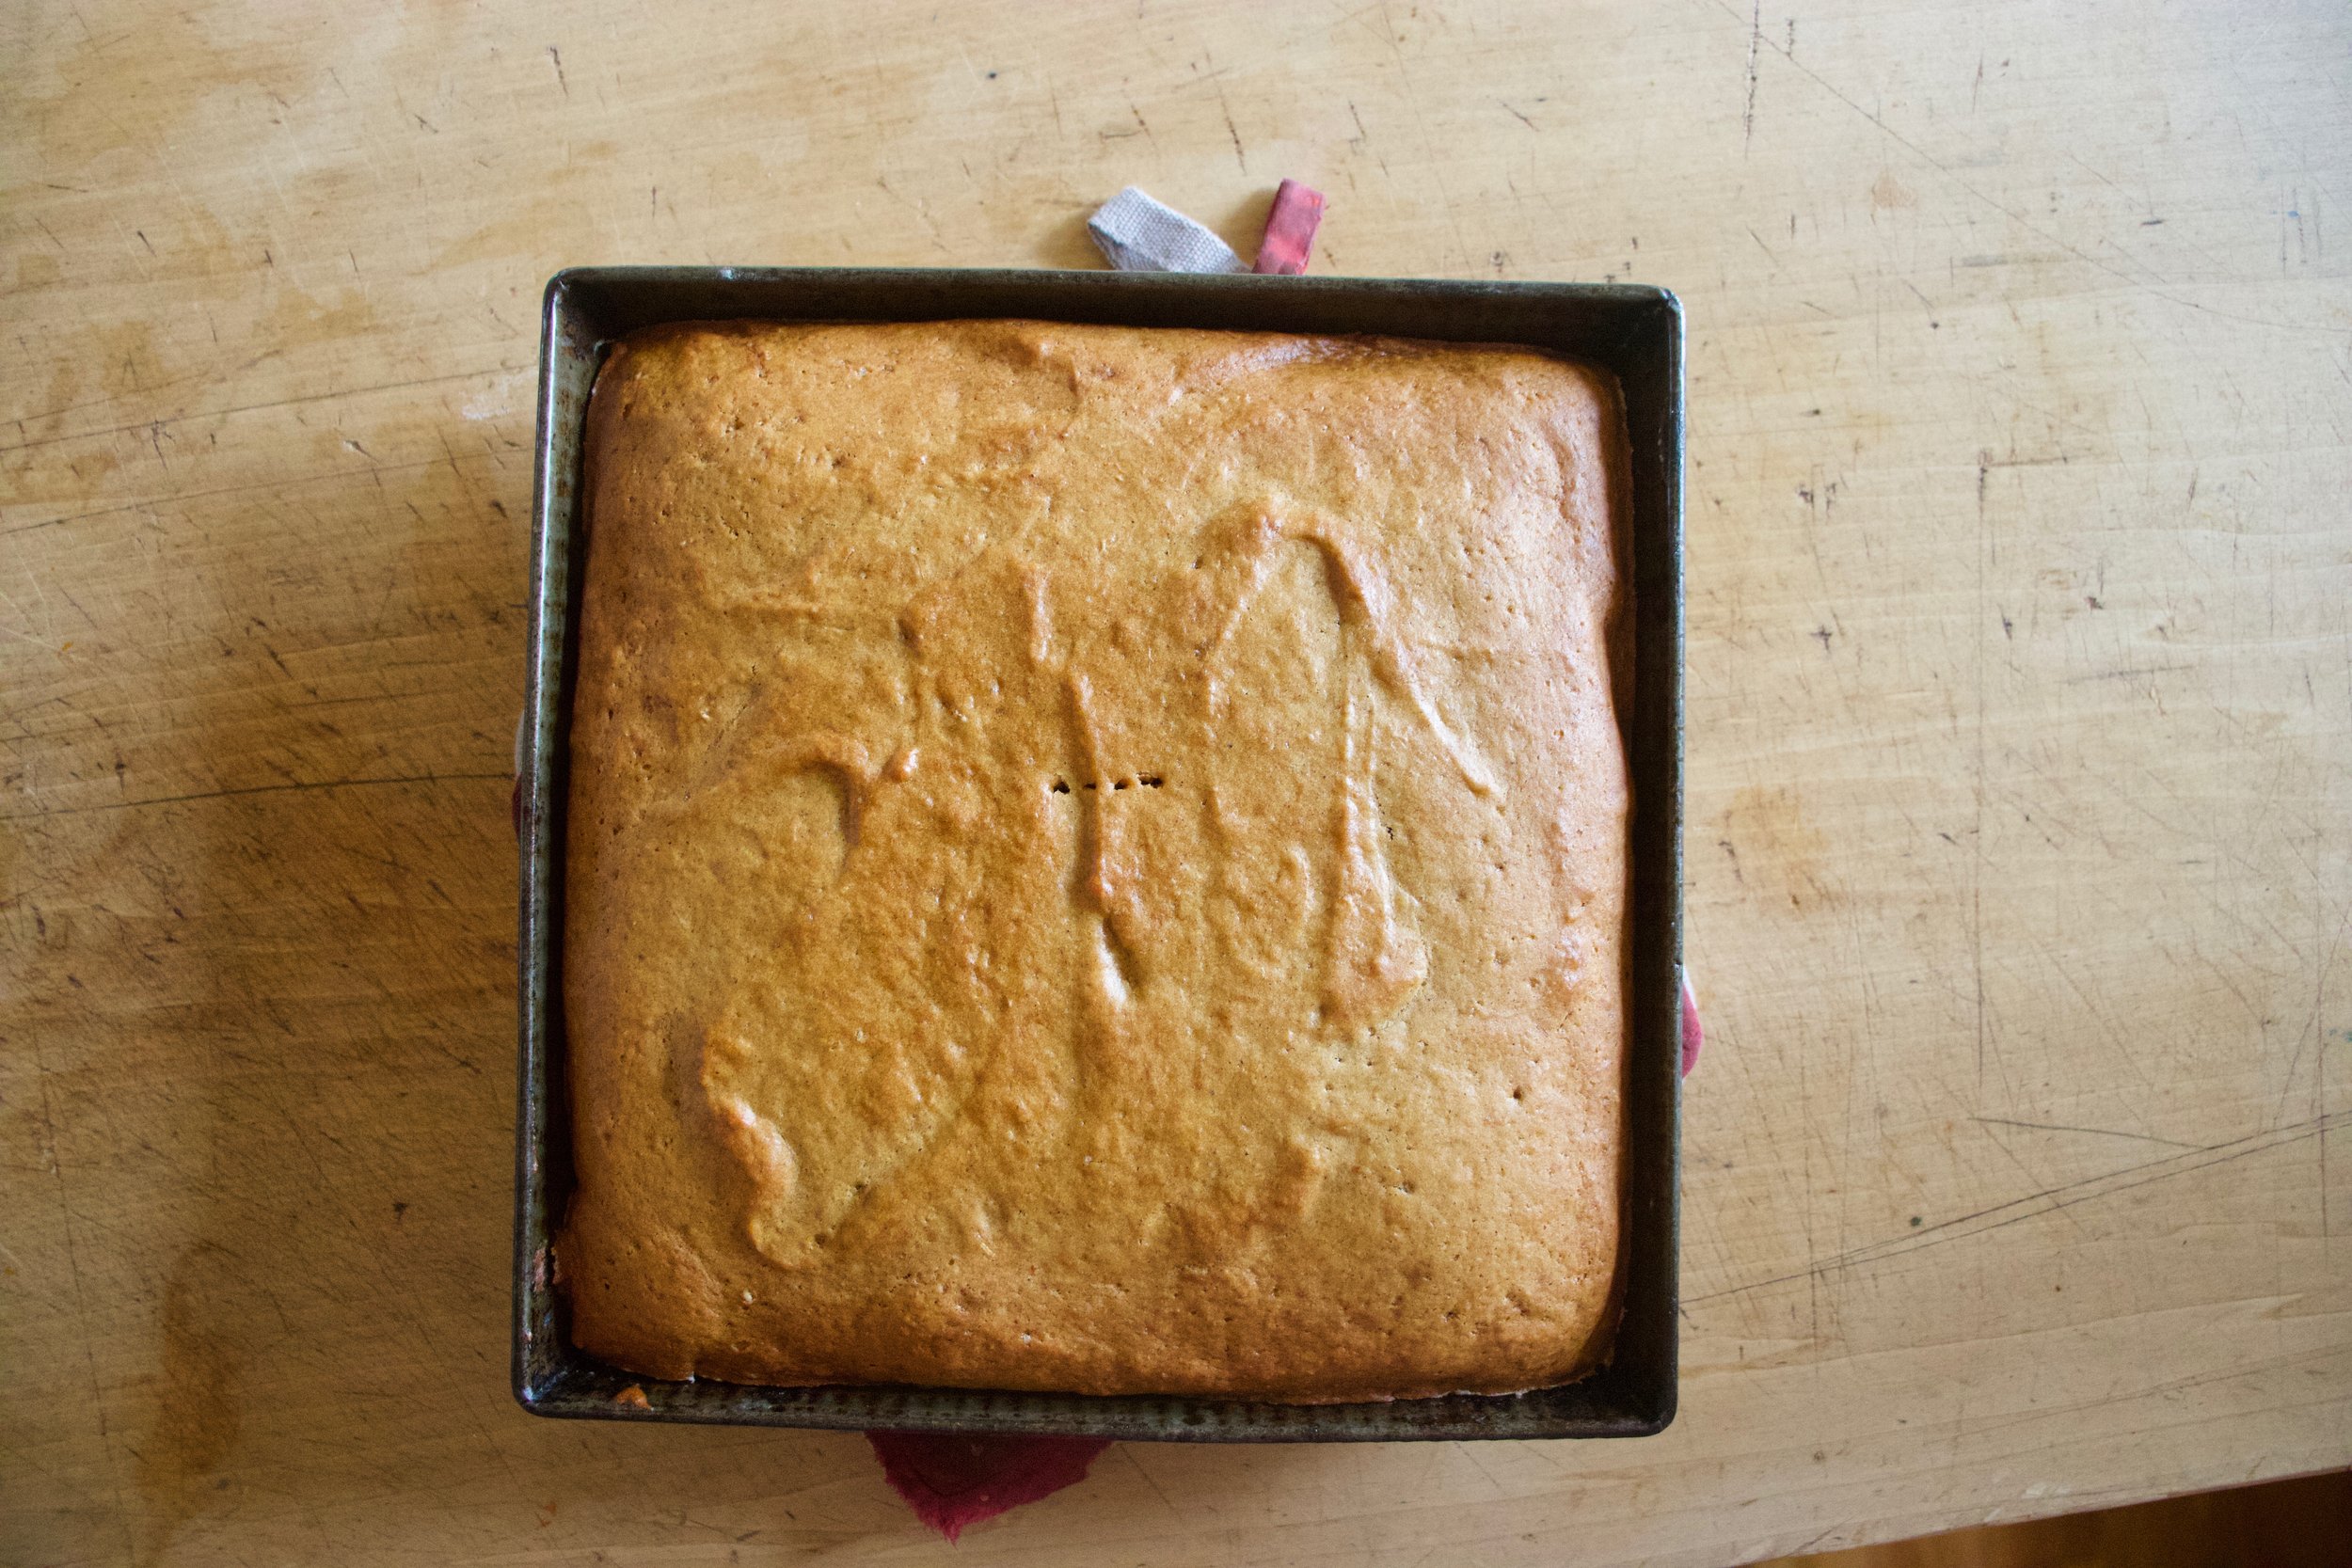
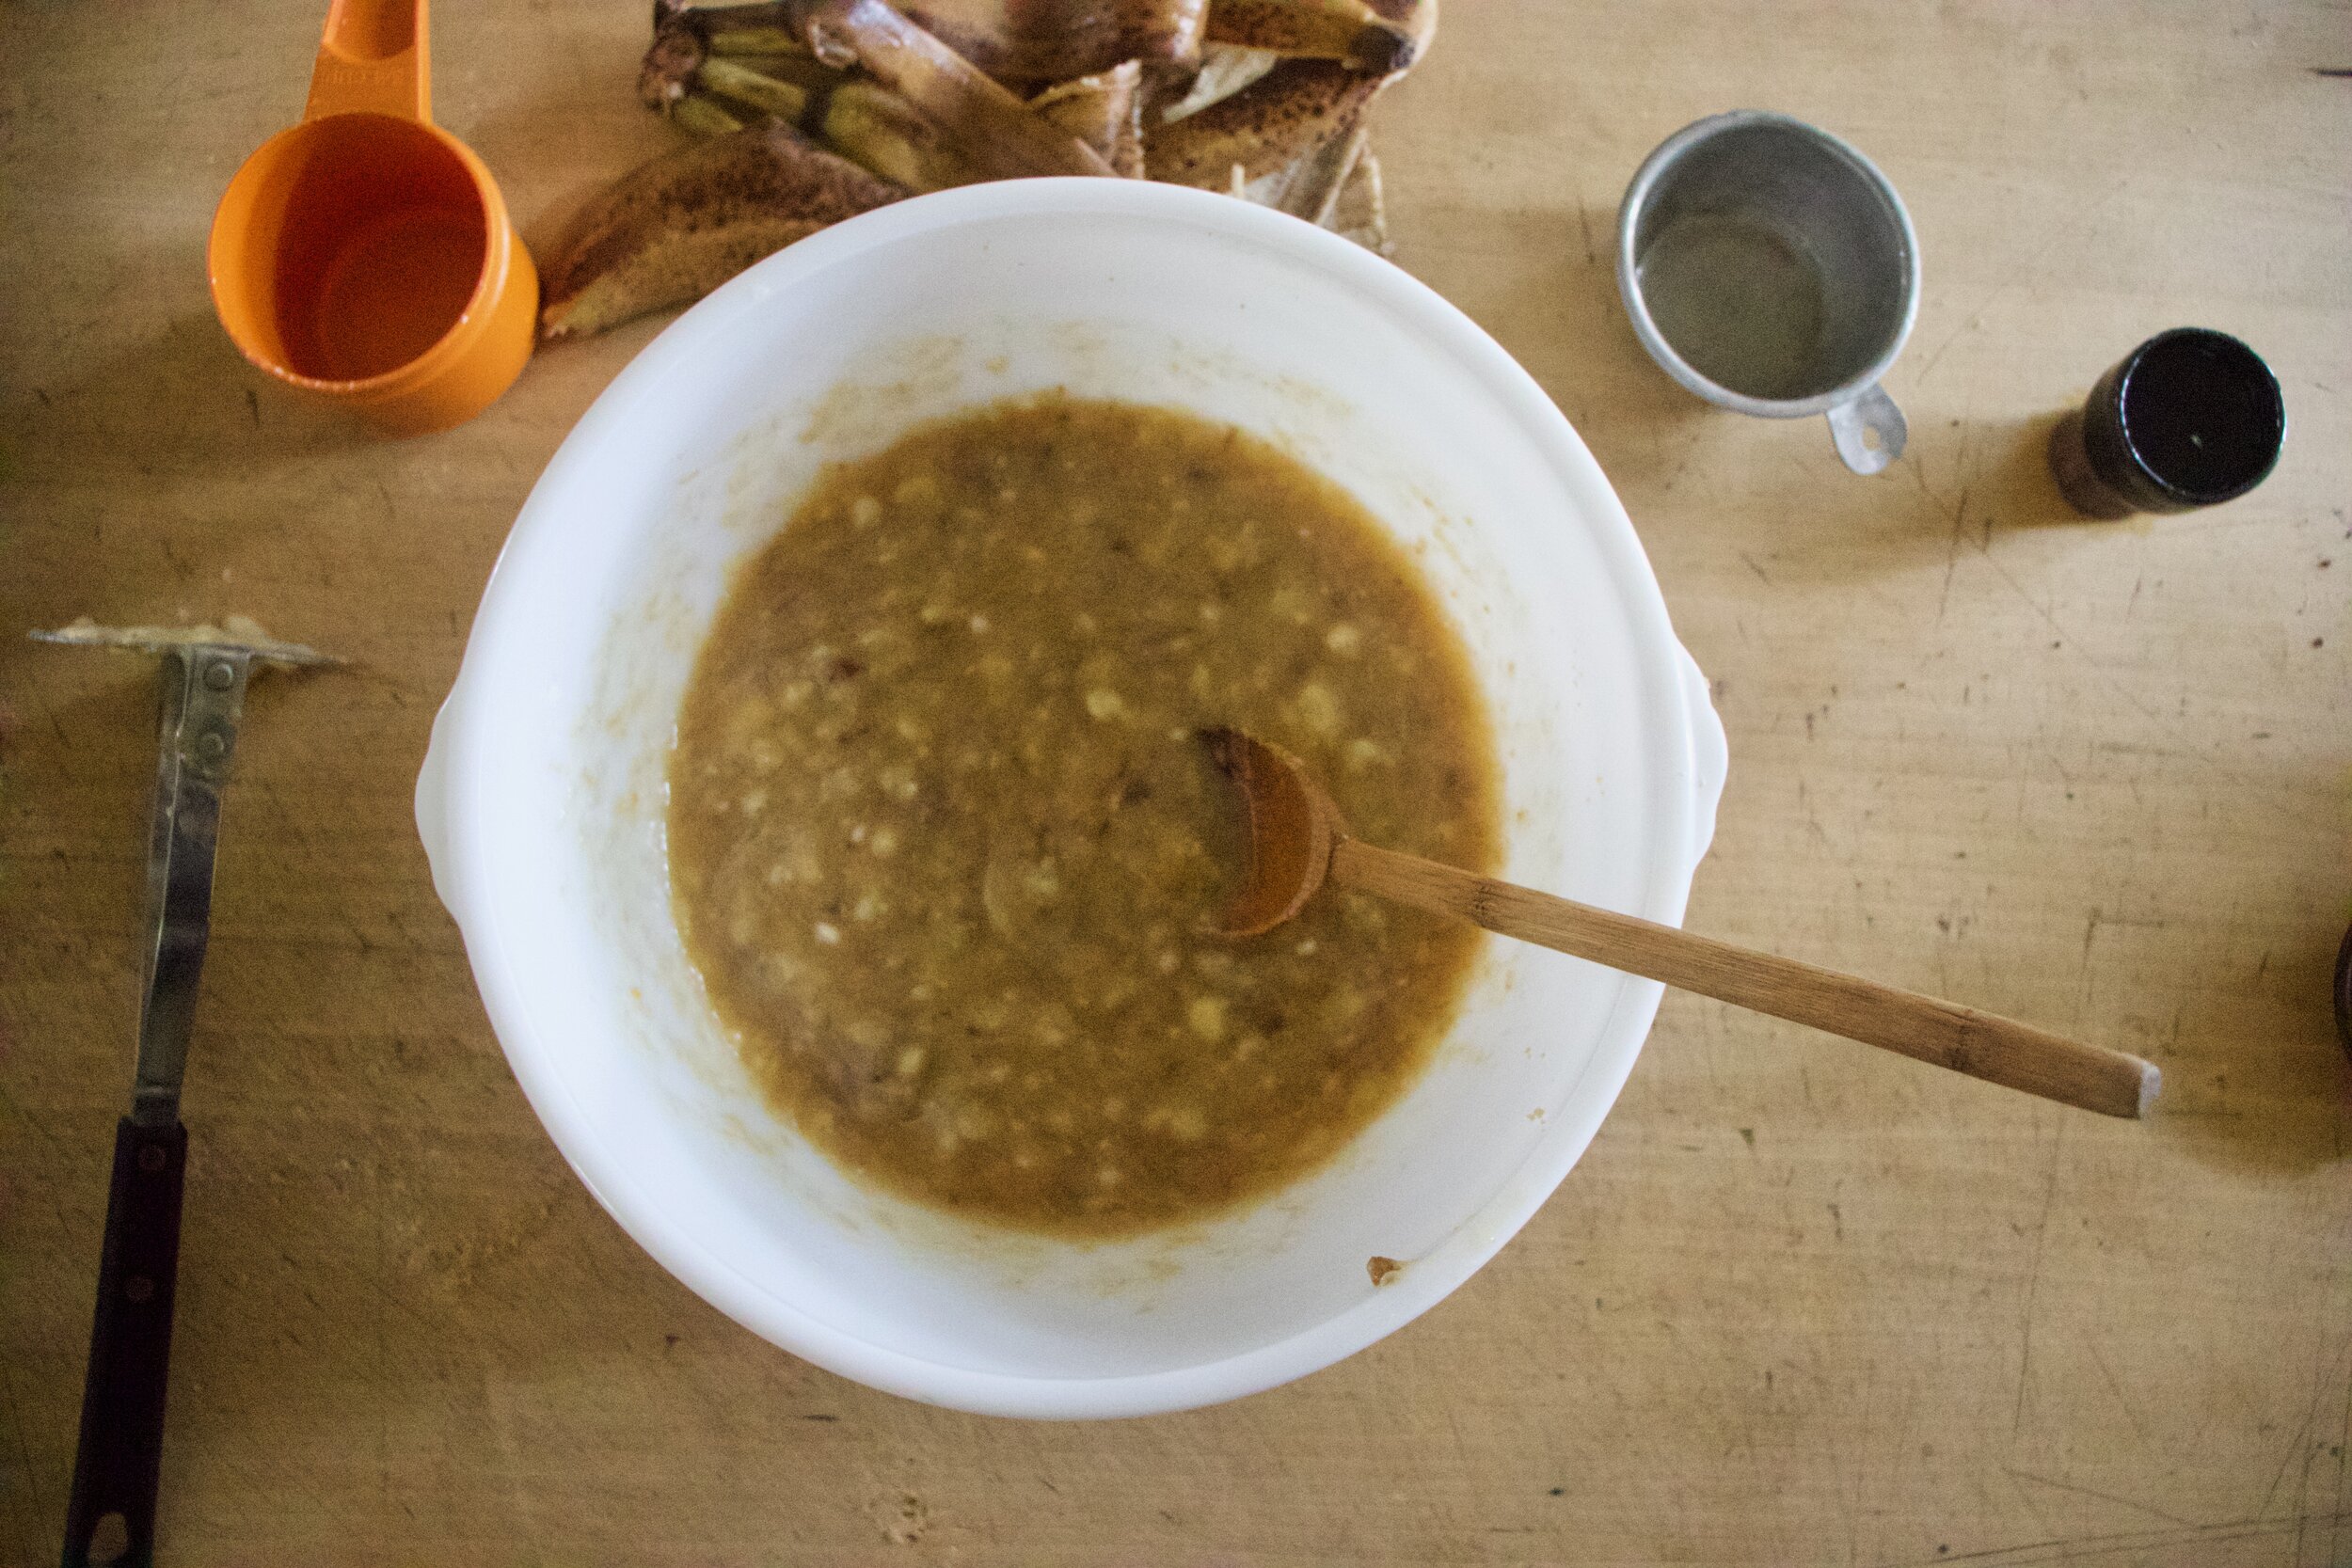
Start by mixing the dry ingredients together into a big bowl, Then mix the sweet potato, oil, sugar, vanilla, and oh the milk in a separate bowl. Once mixed and completely combined, dump the wet into the dry and gently mix until a combined and dough has formed.

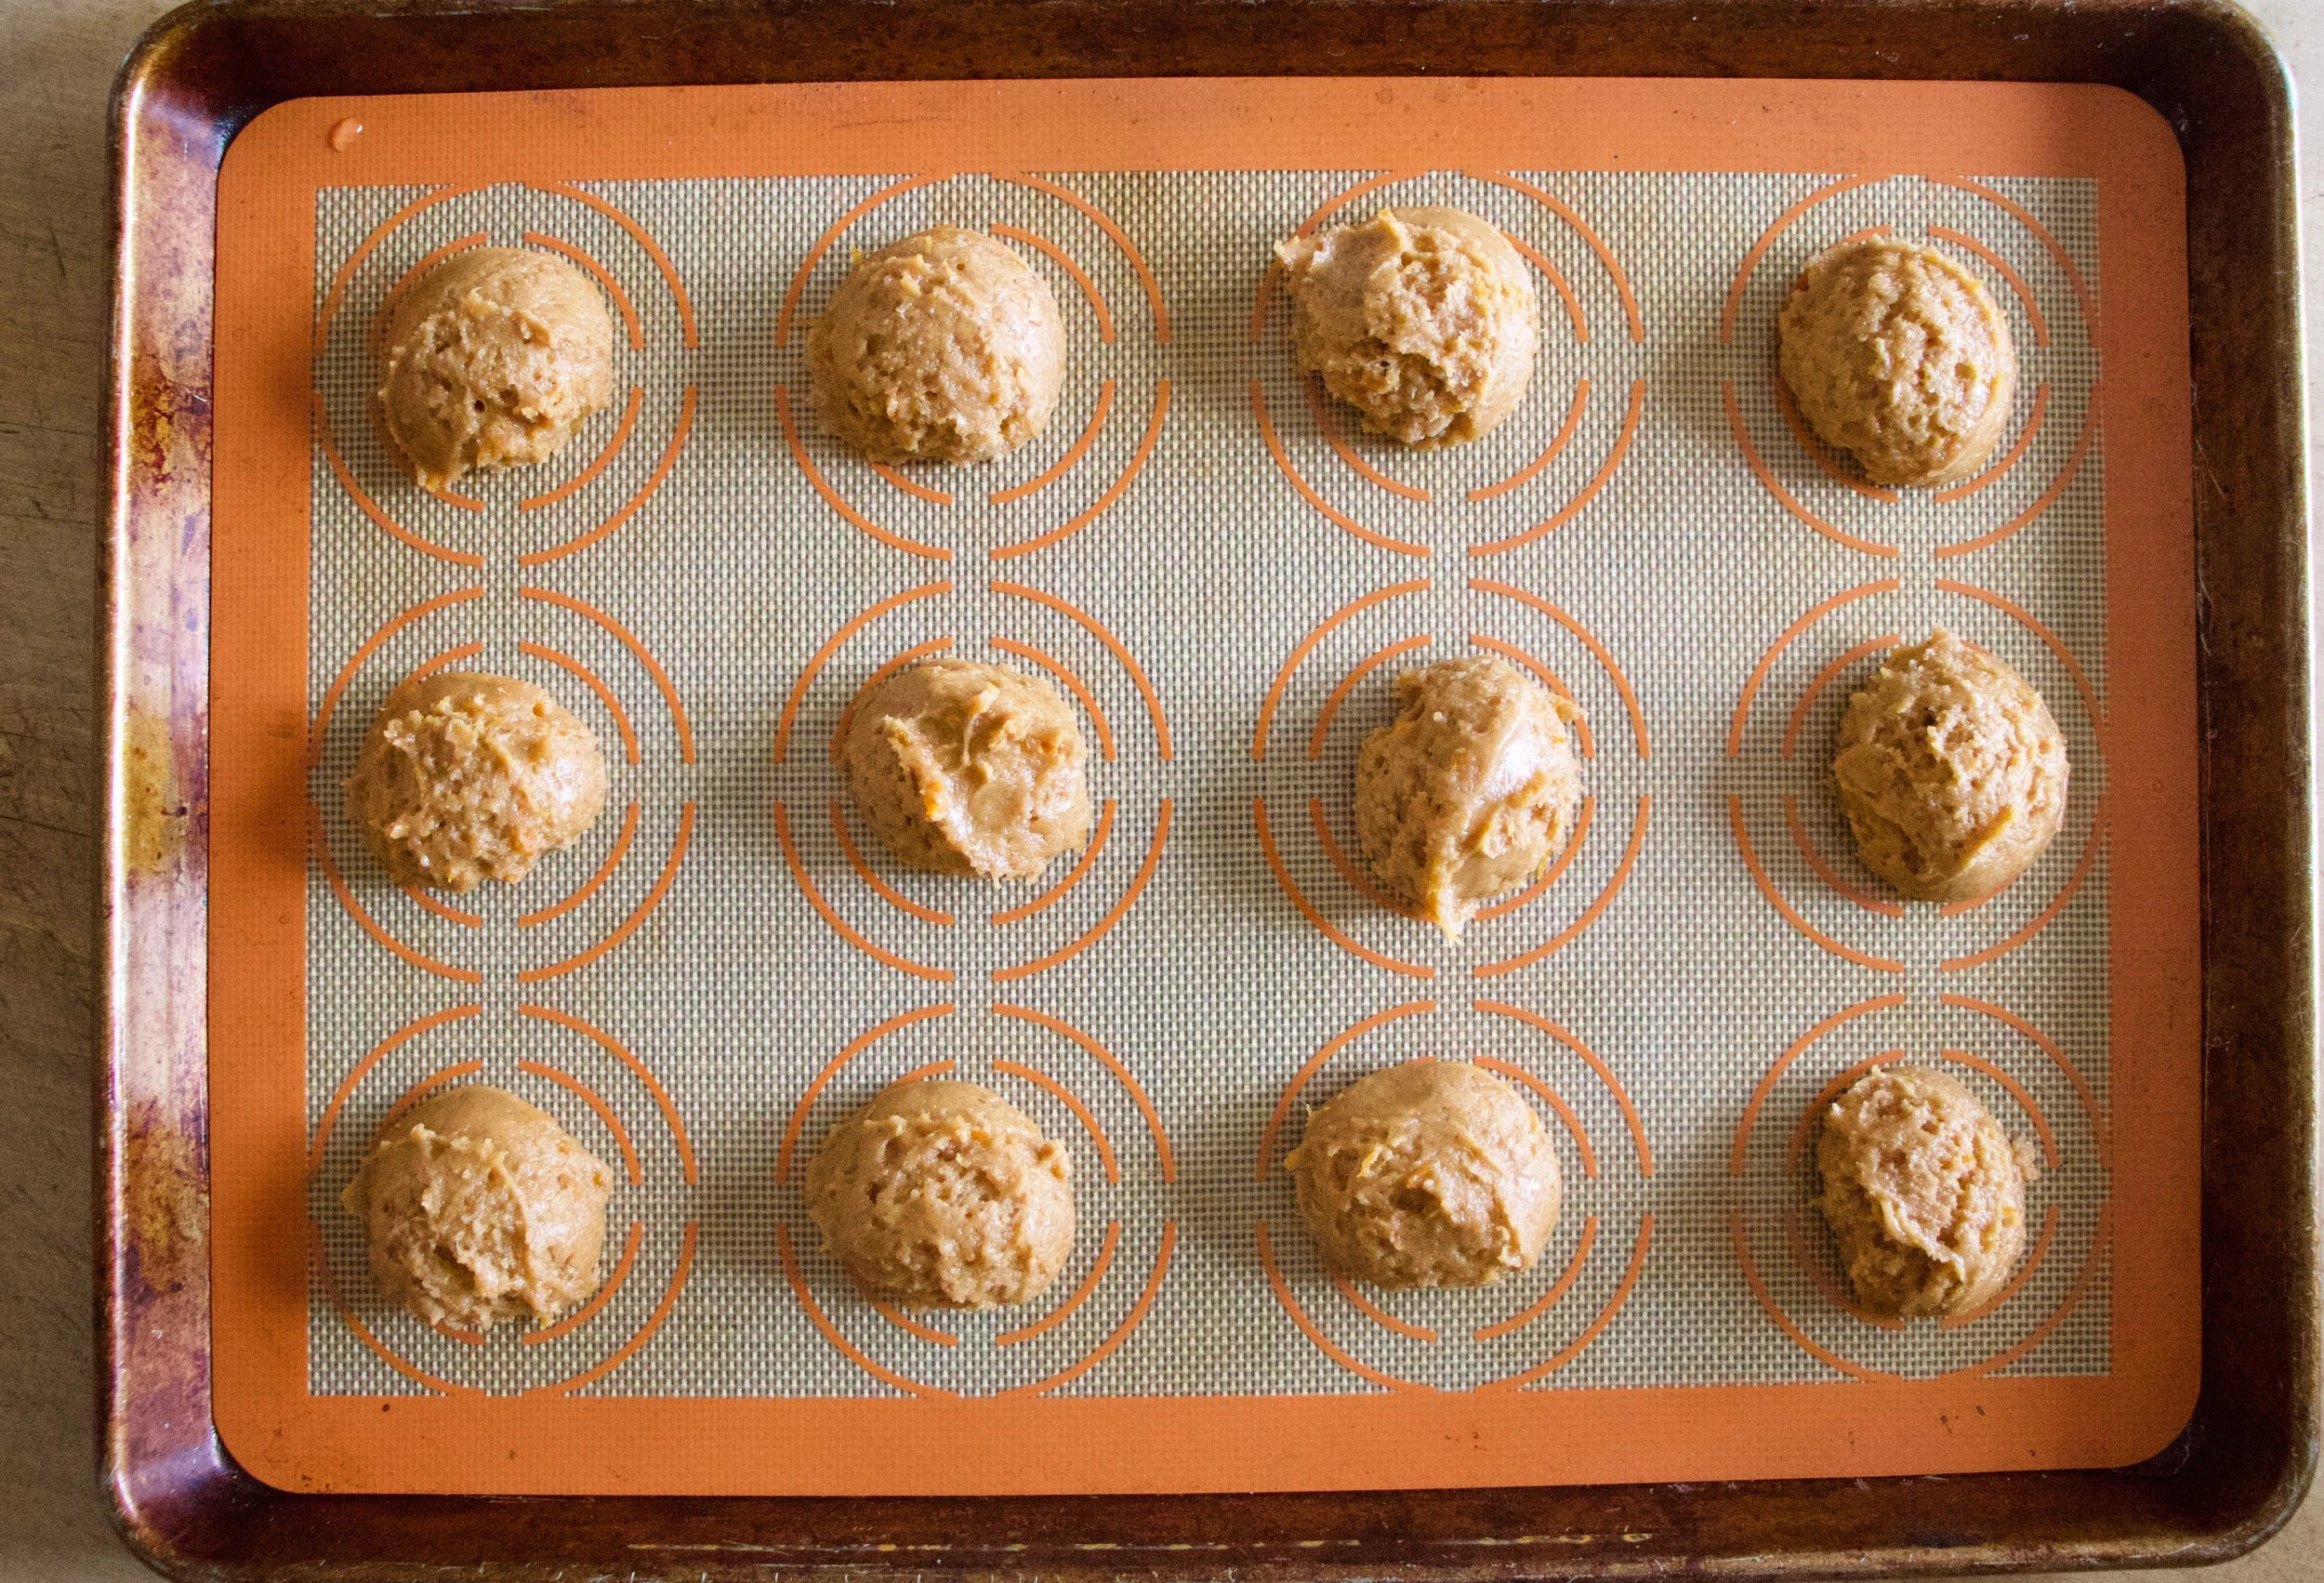
Now scoop equal sizes amounts of dough onto a cookie sheet the pop them into a preheated oven.

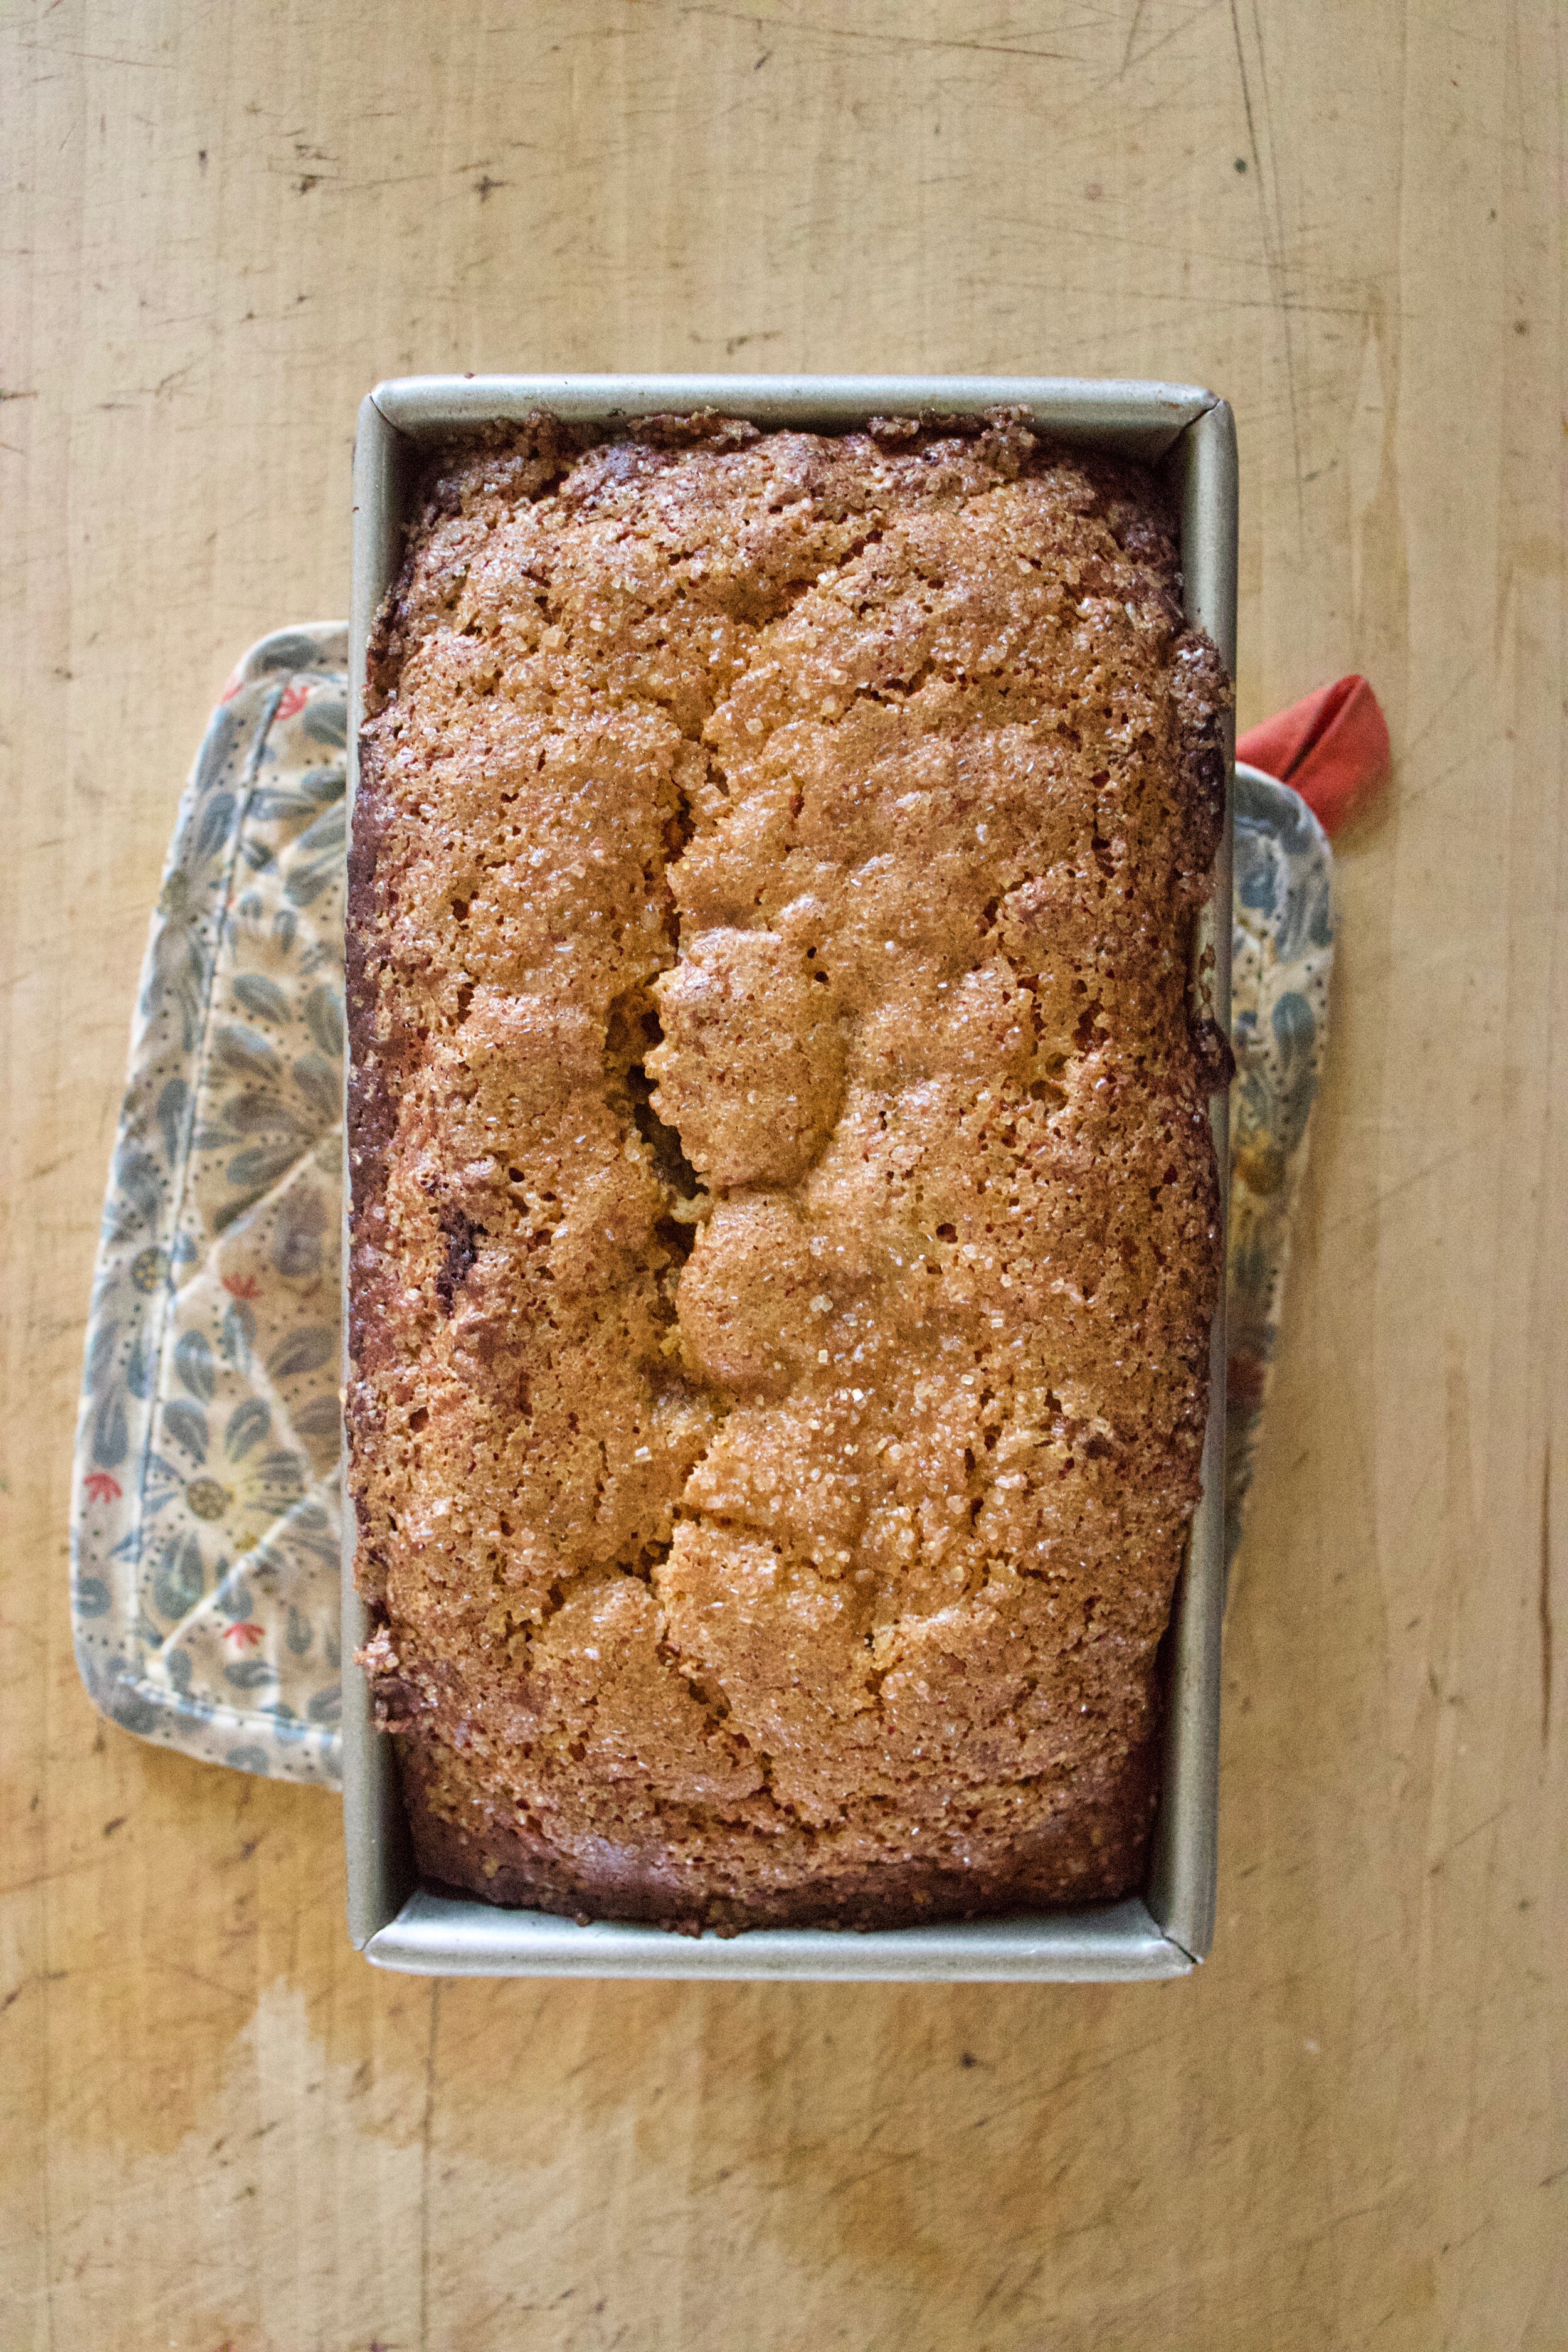
Some minutes later they are done. Nic ans golden brown and slightly domed. A little trick I do is once they come out of the oven I right away take two fingers and just slightly push he dome down a bit. It makes the cookies a little less pillowy and more chewy.

And then place them on a wire rack to cool.

IMG_8138.jpg
IMG_8142.jpg

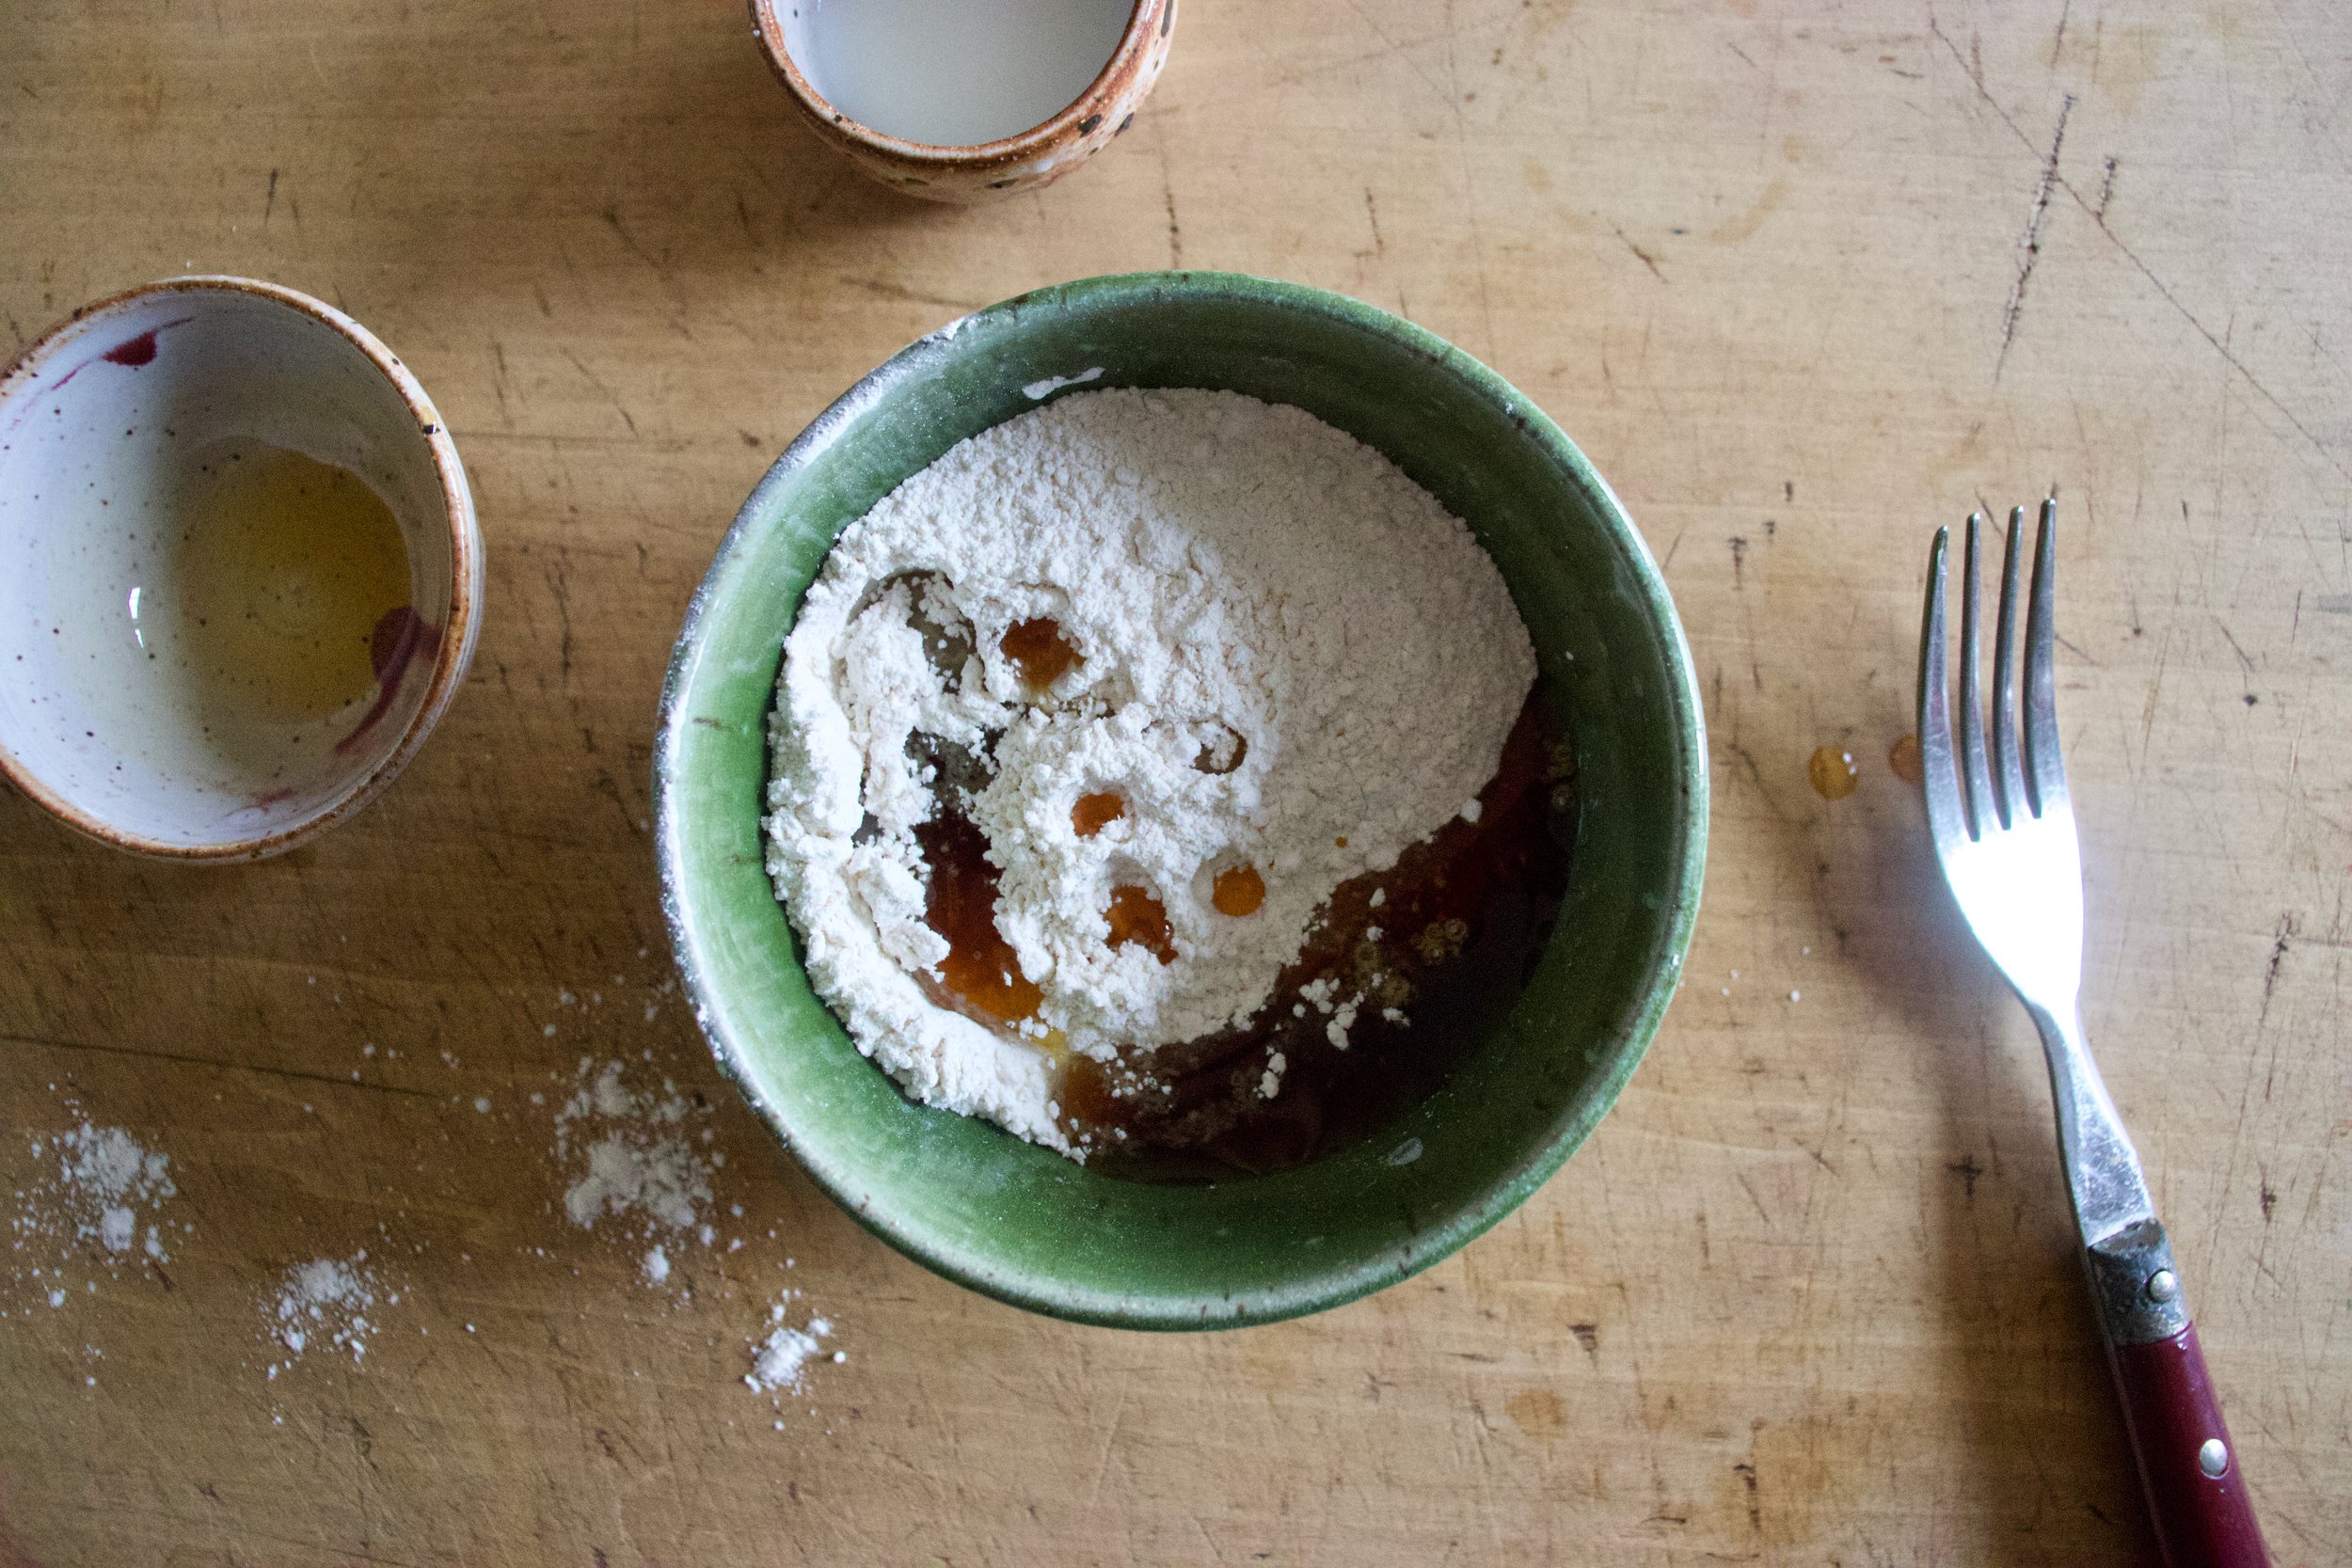
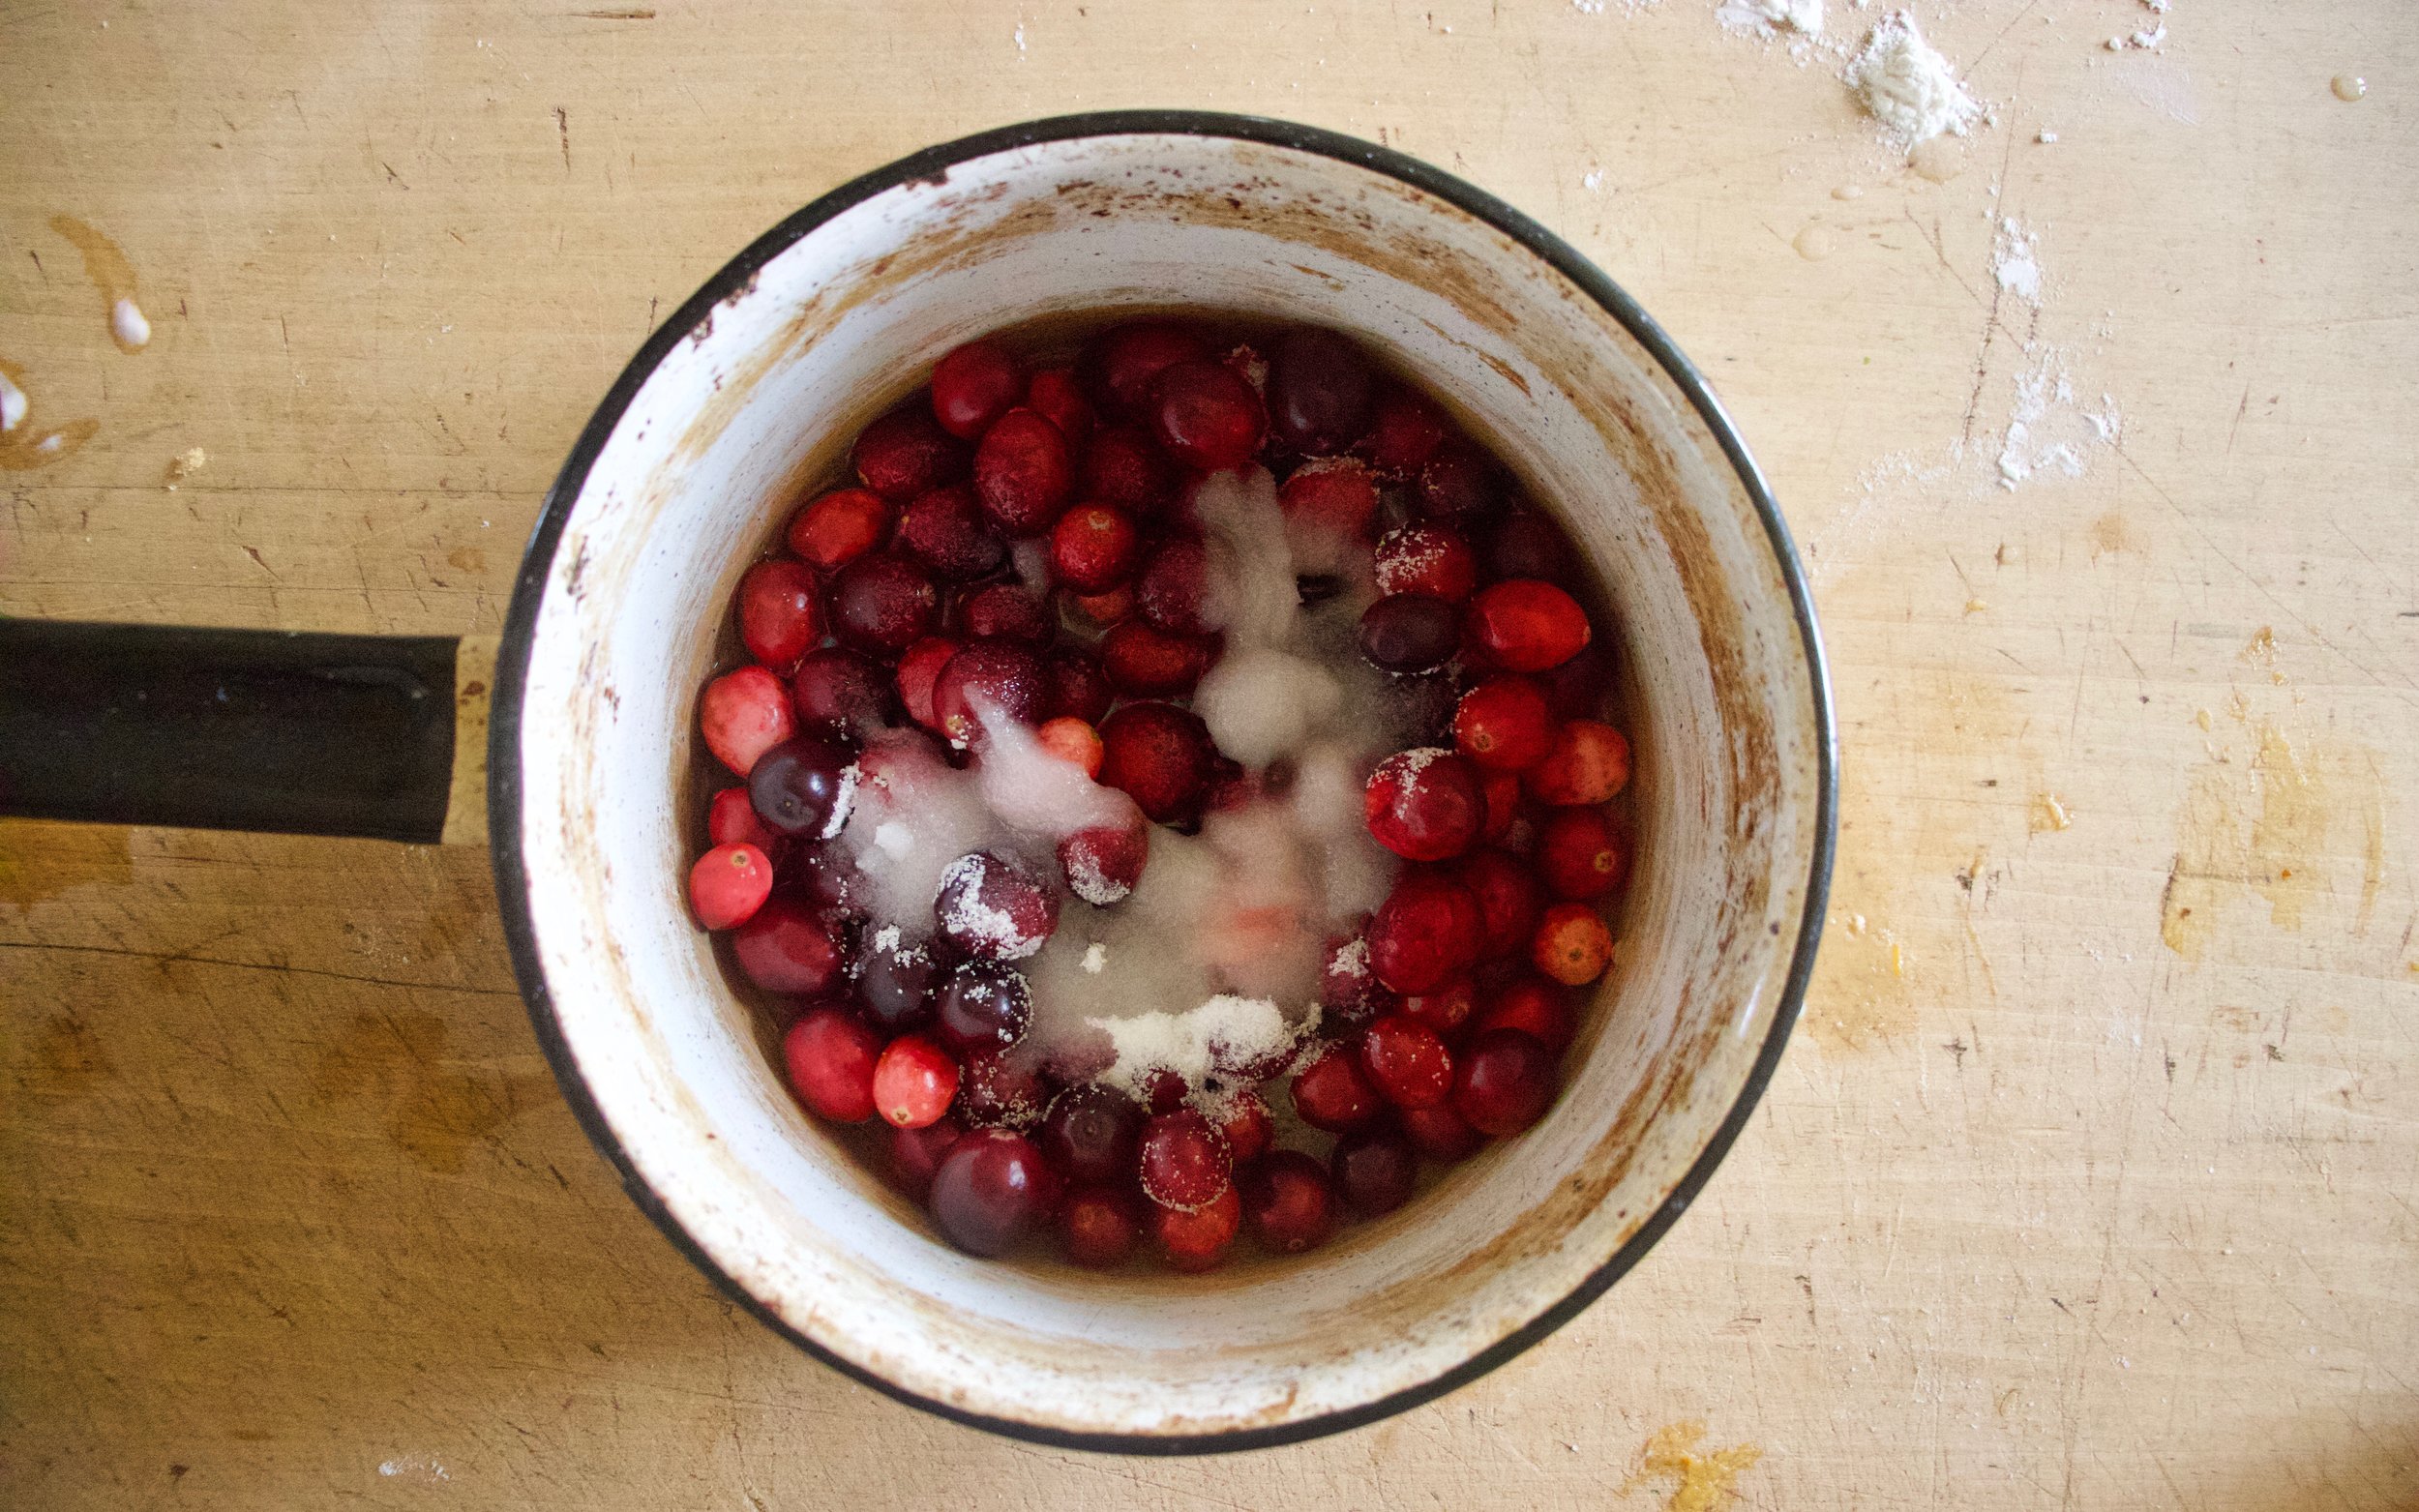
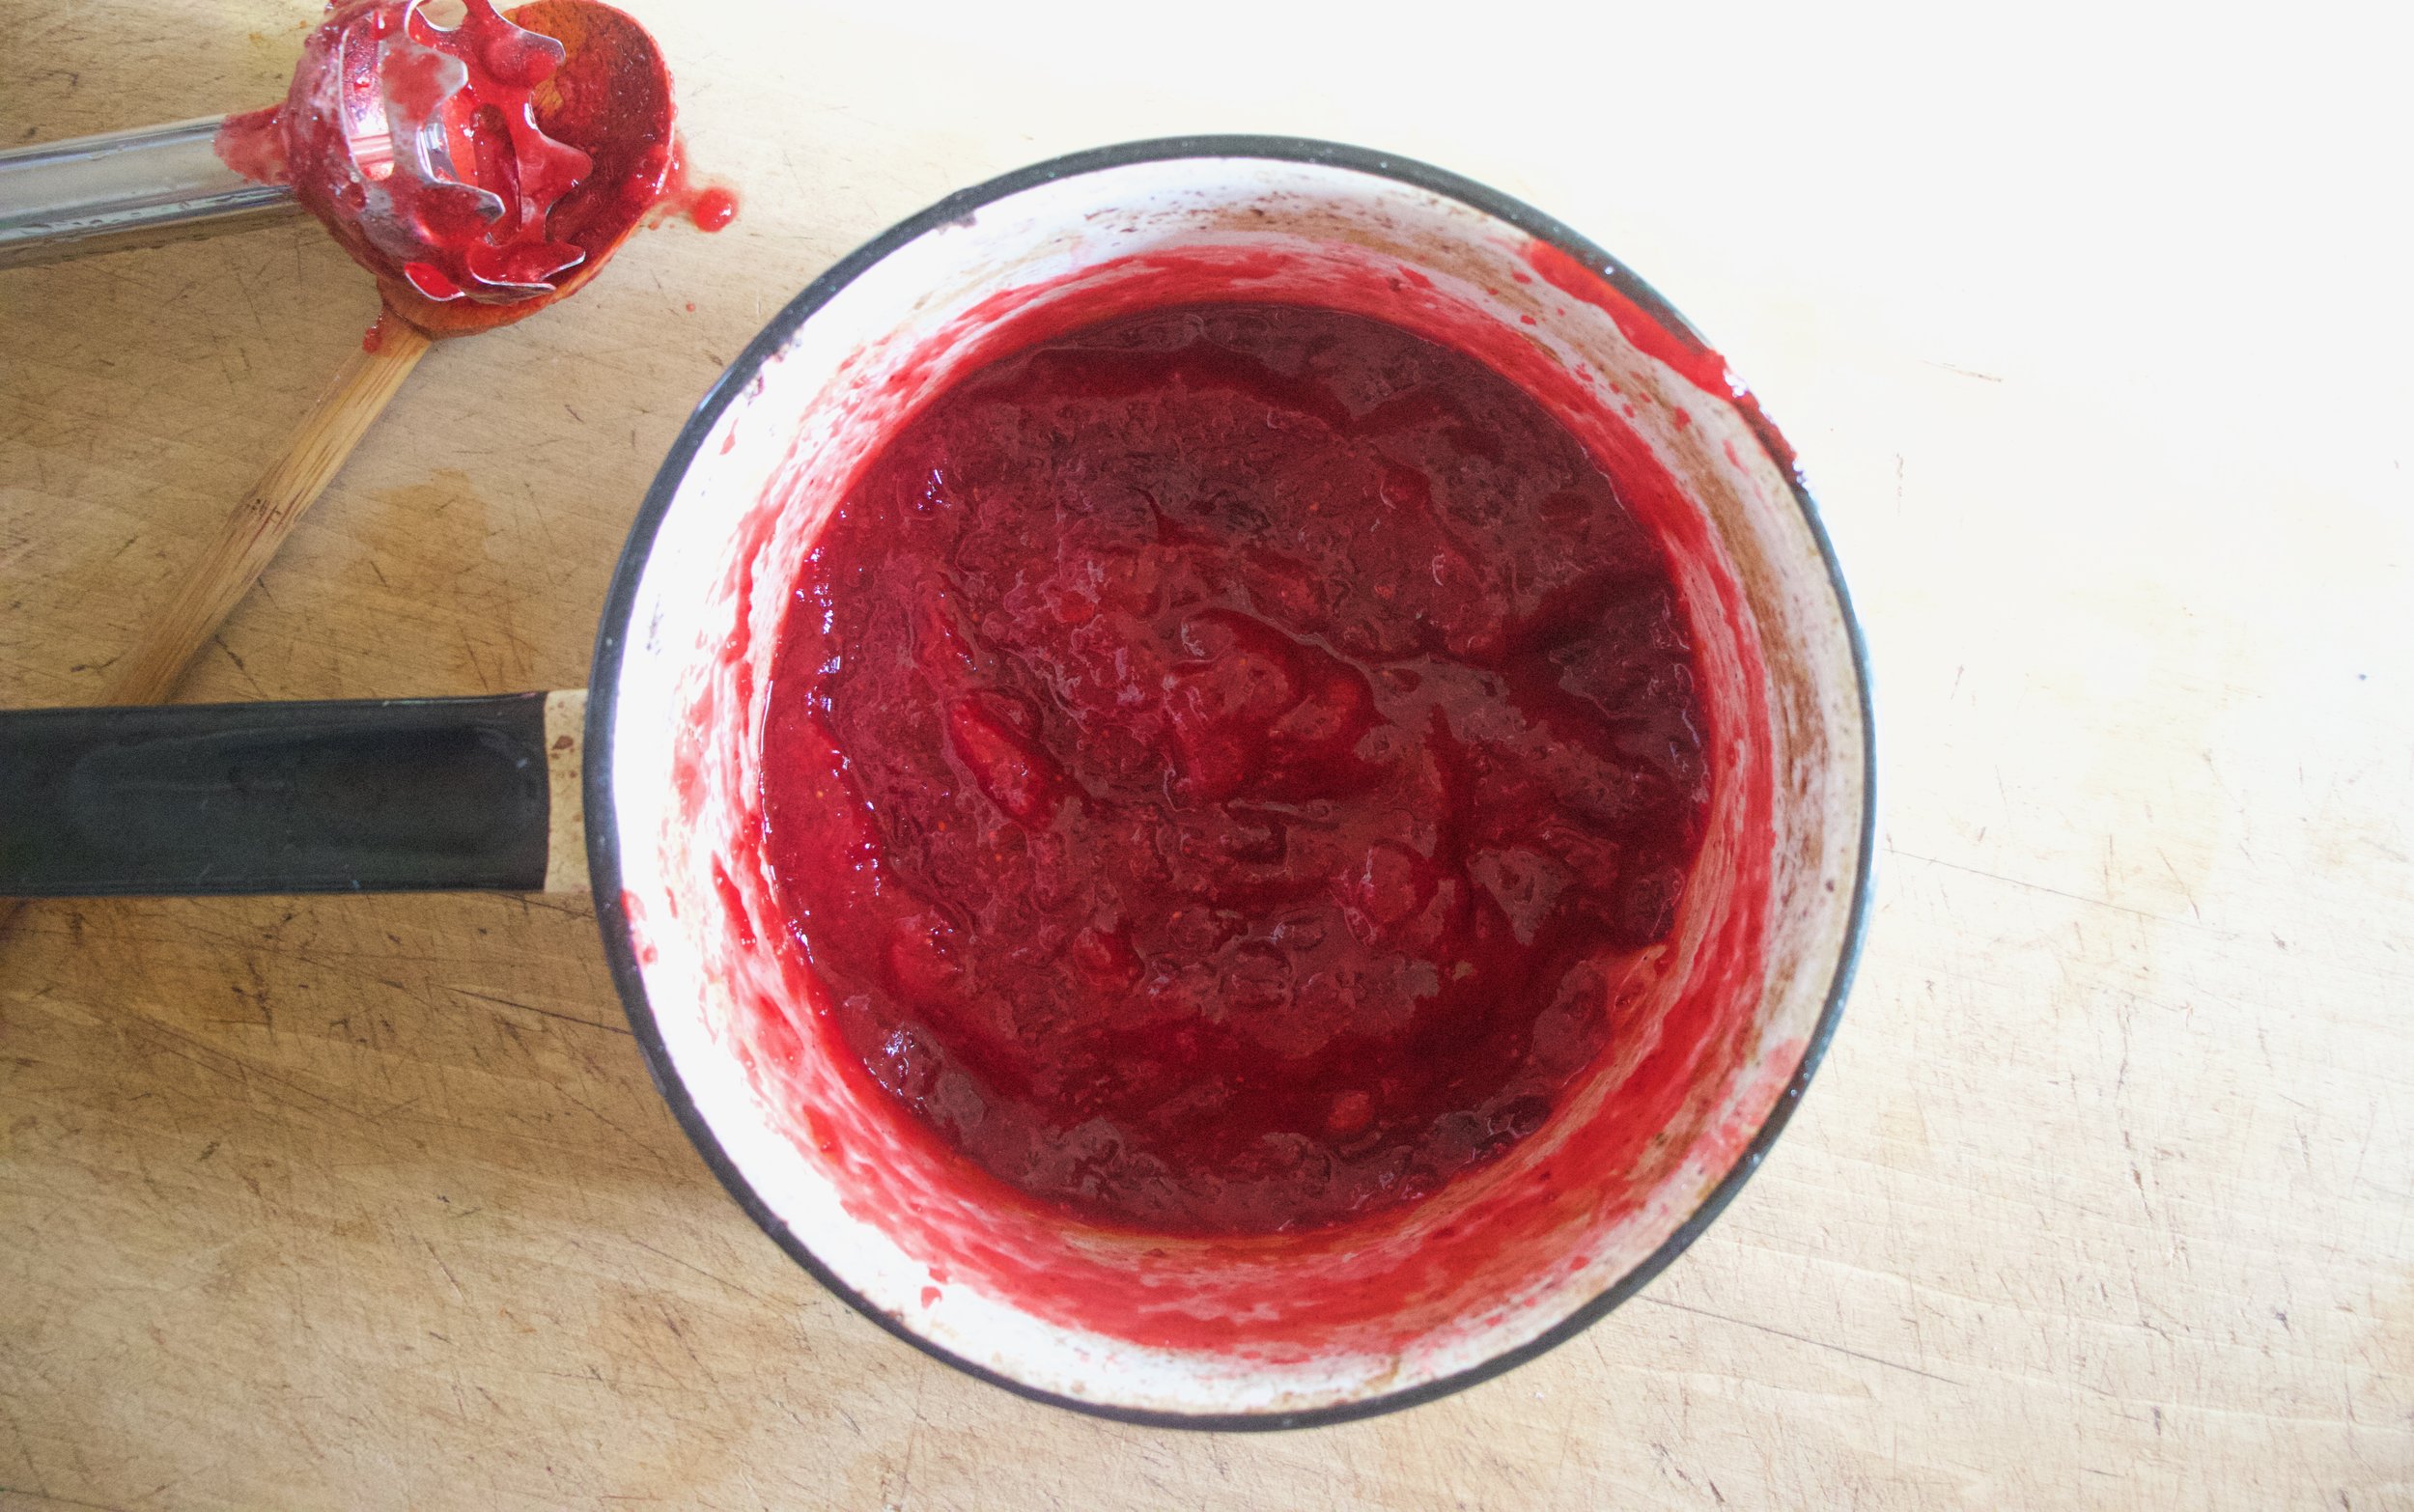
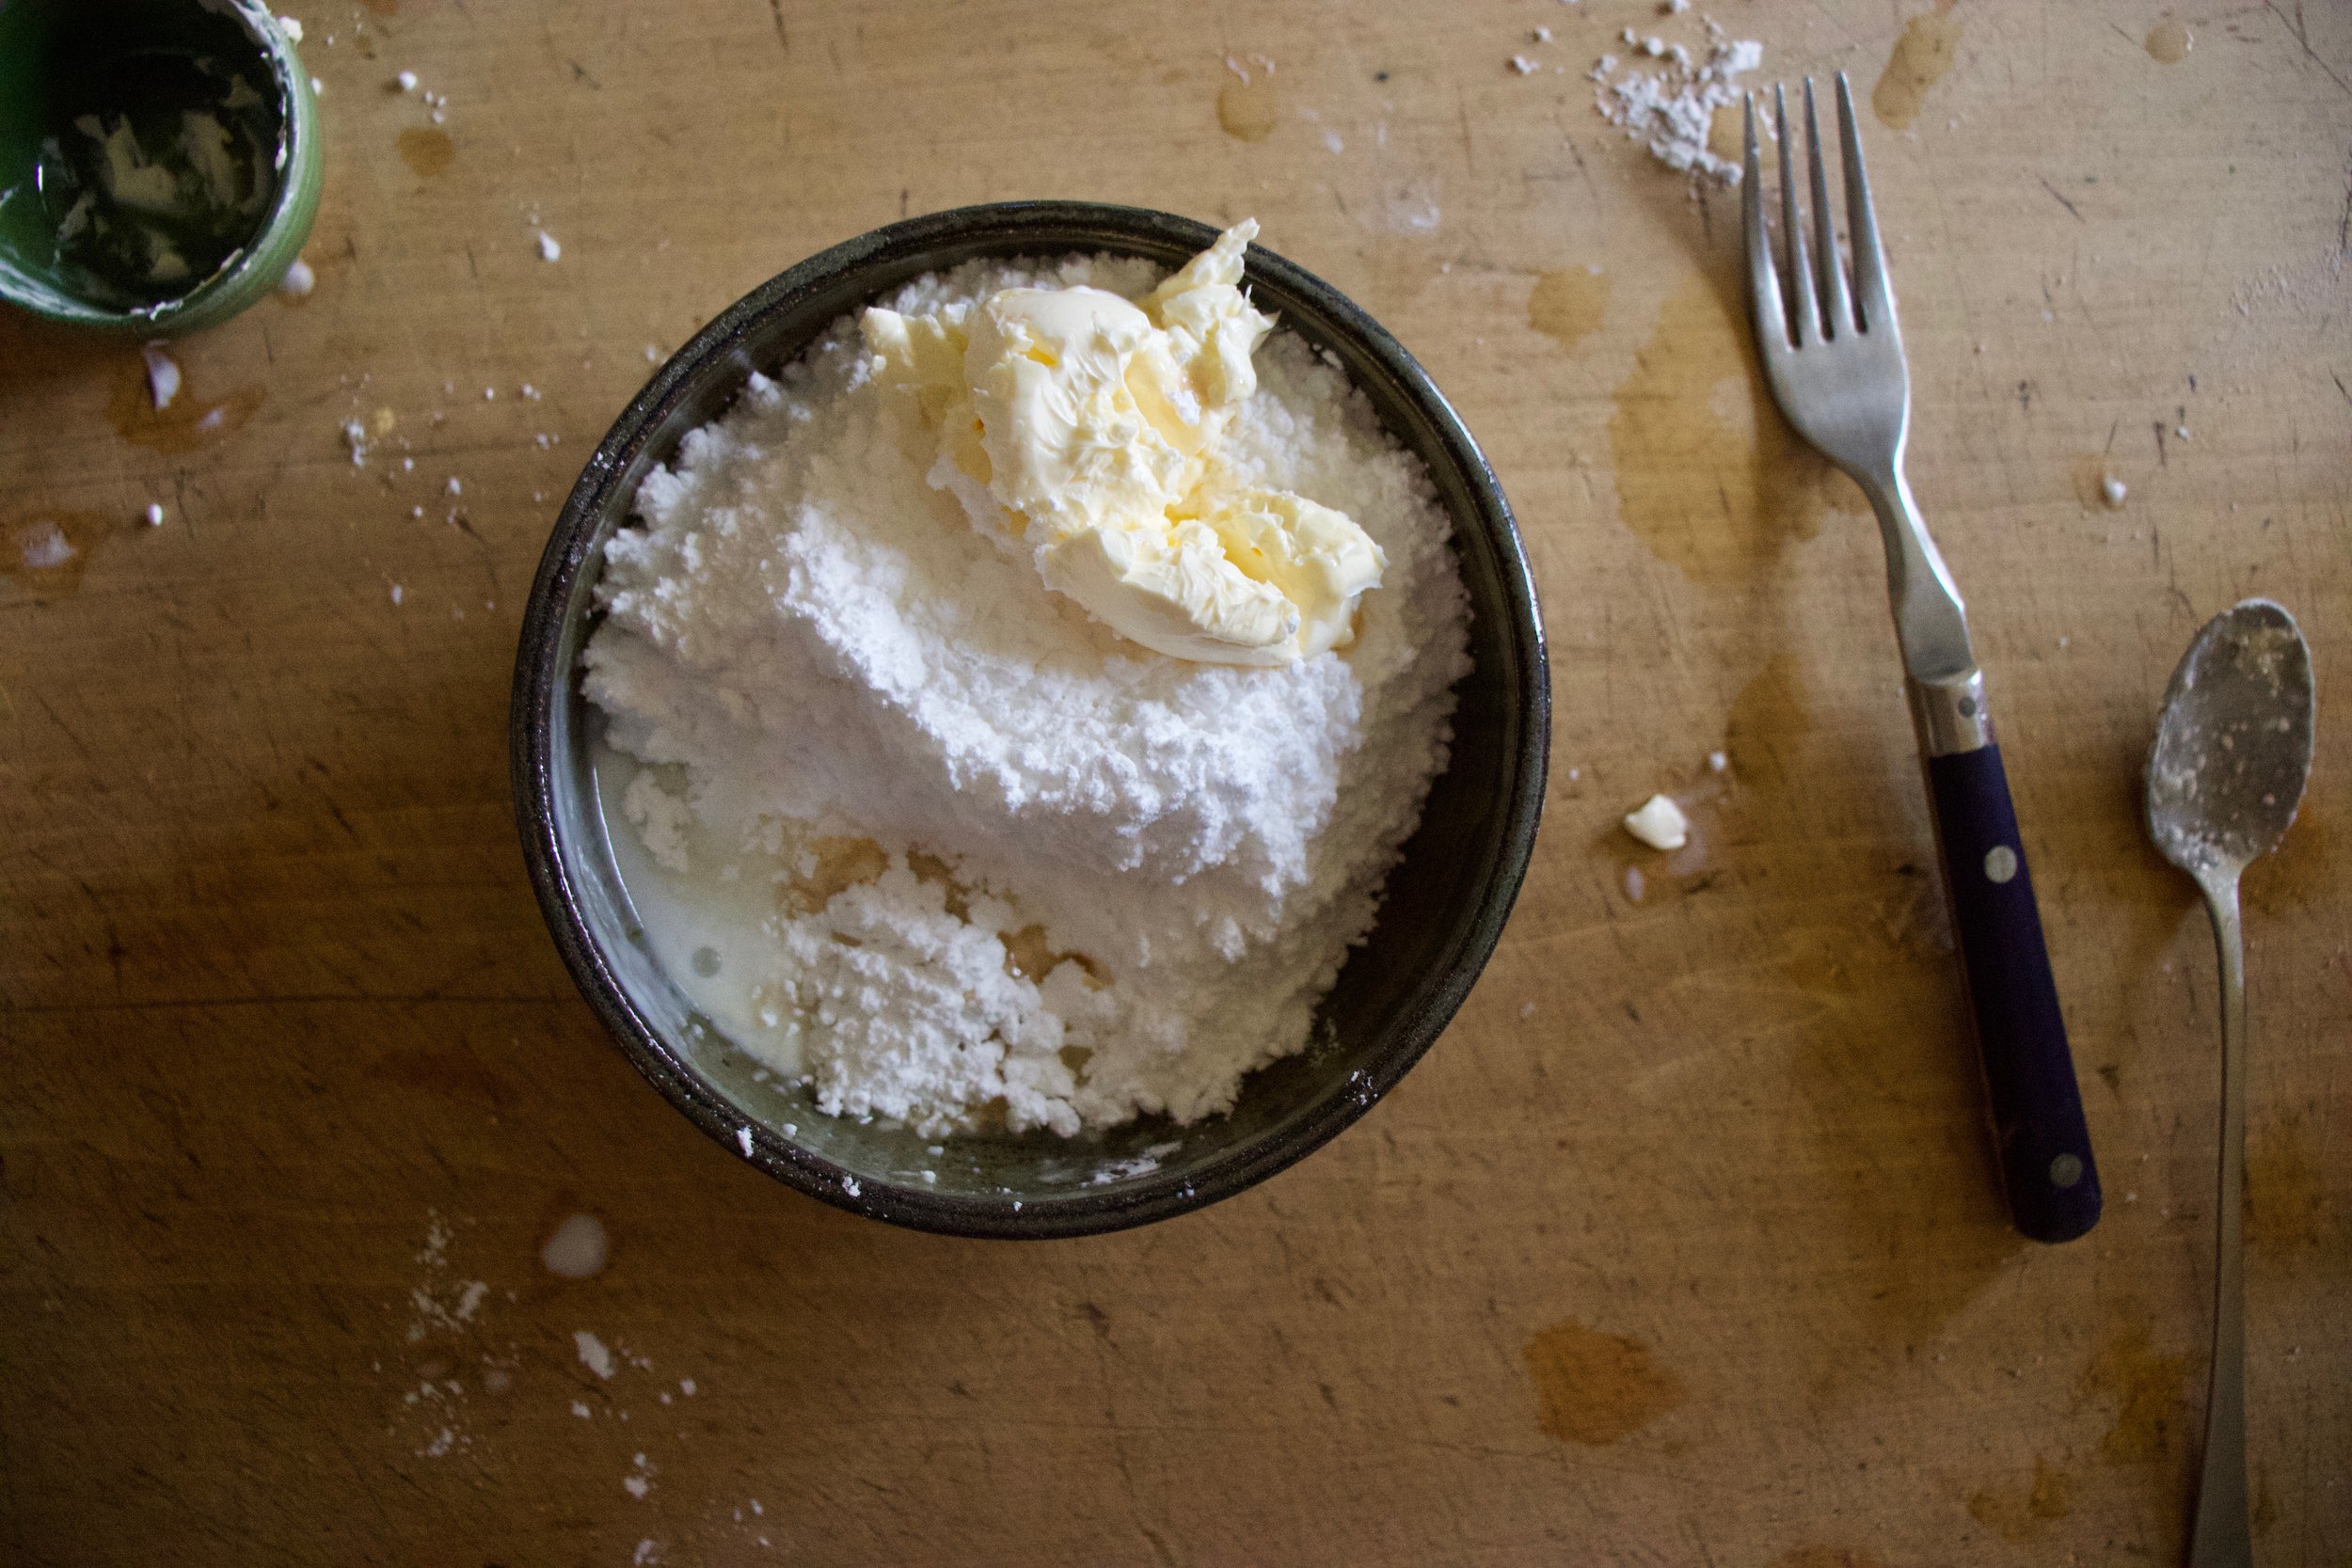
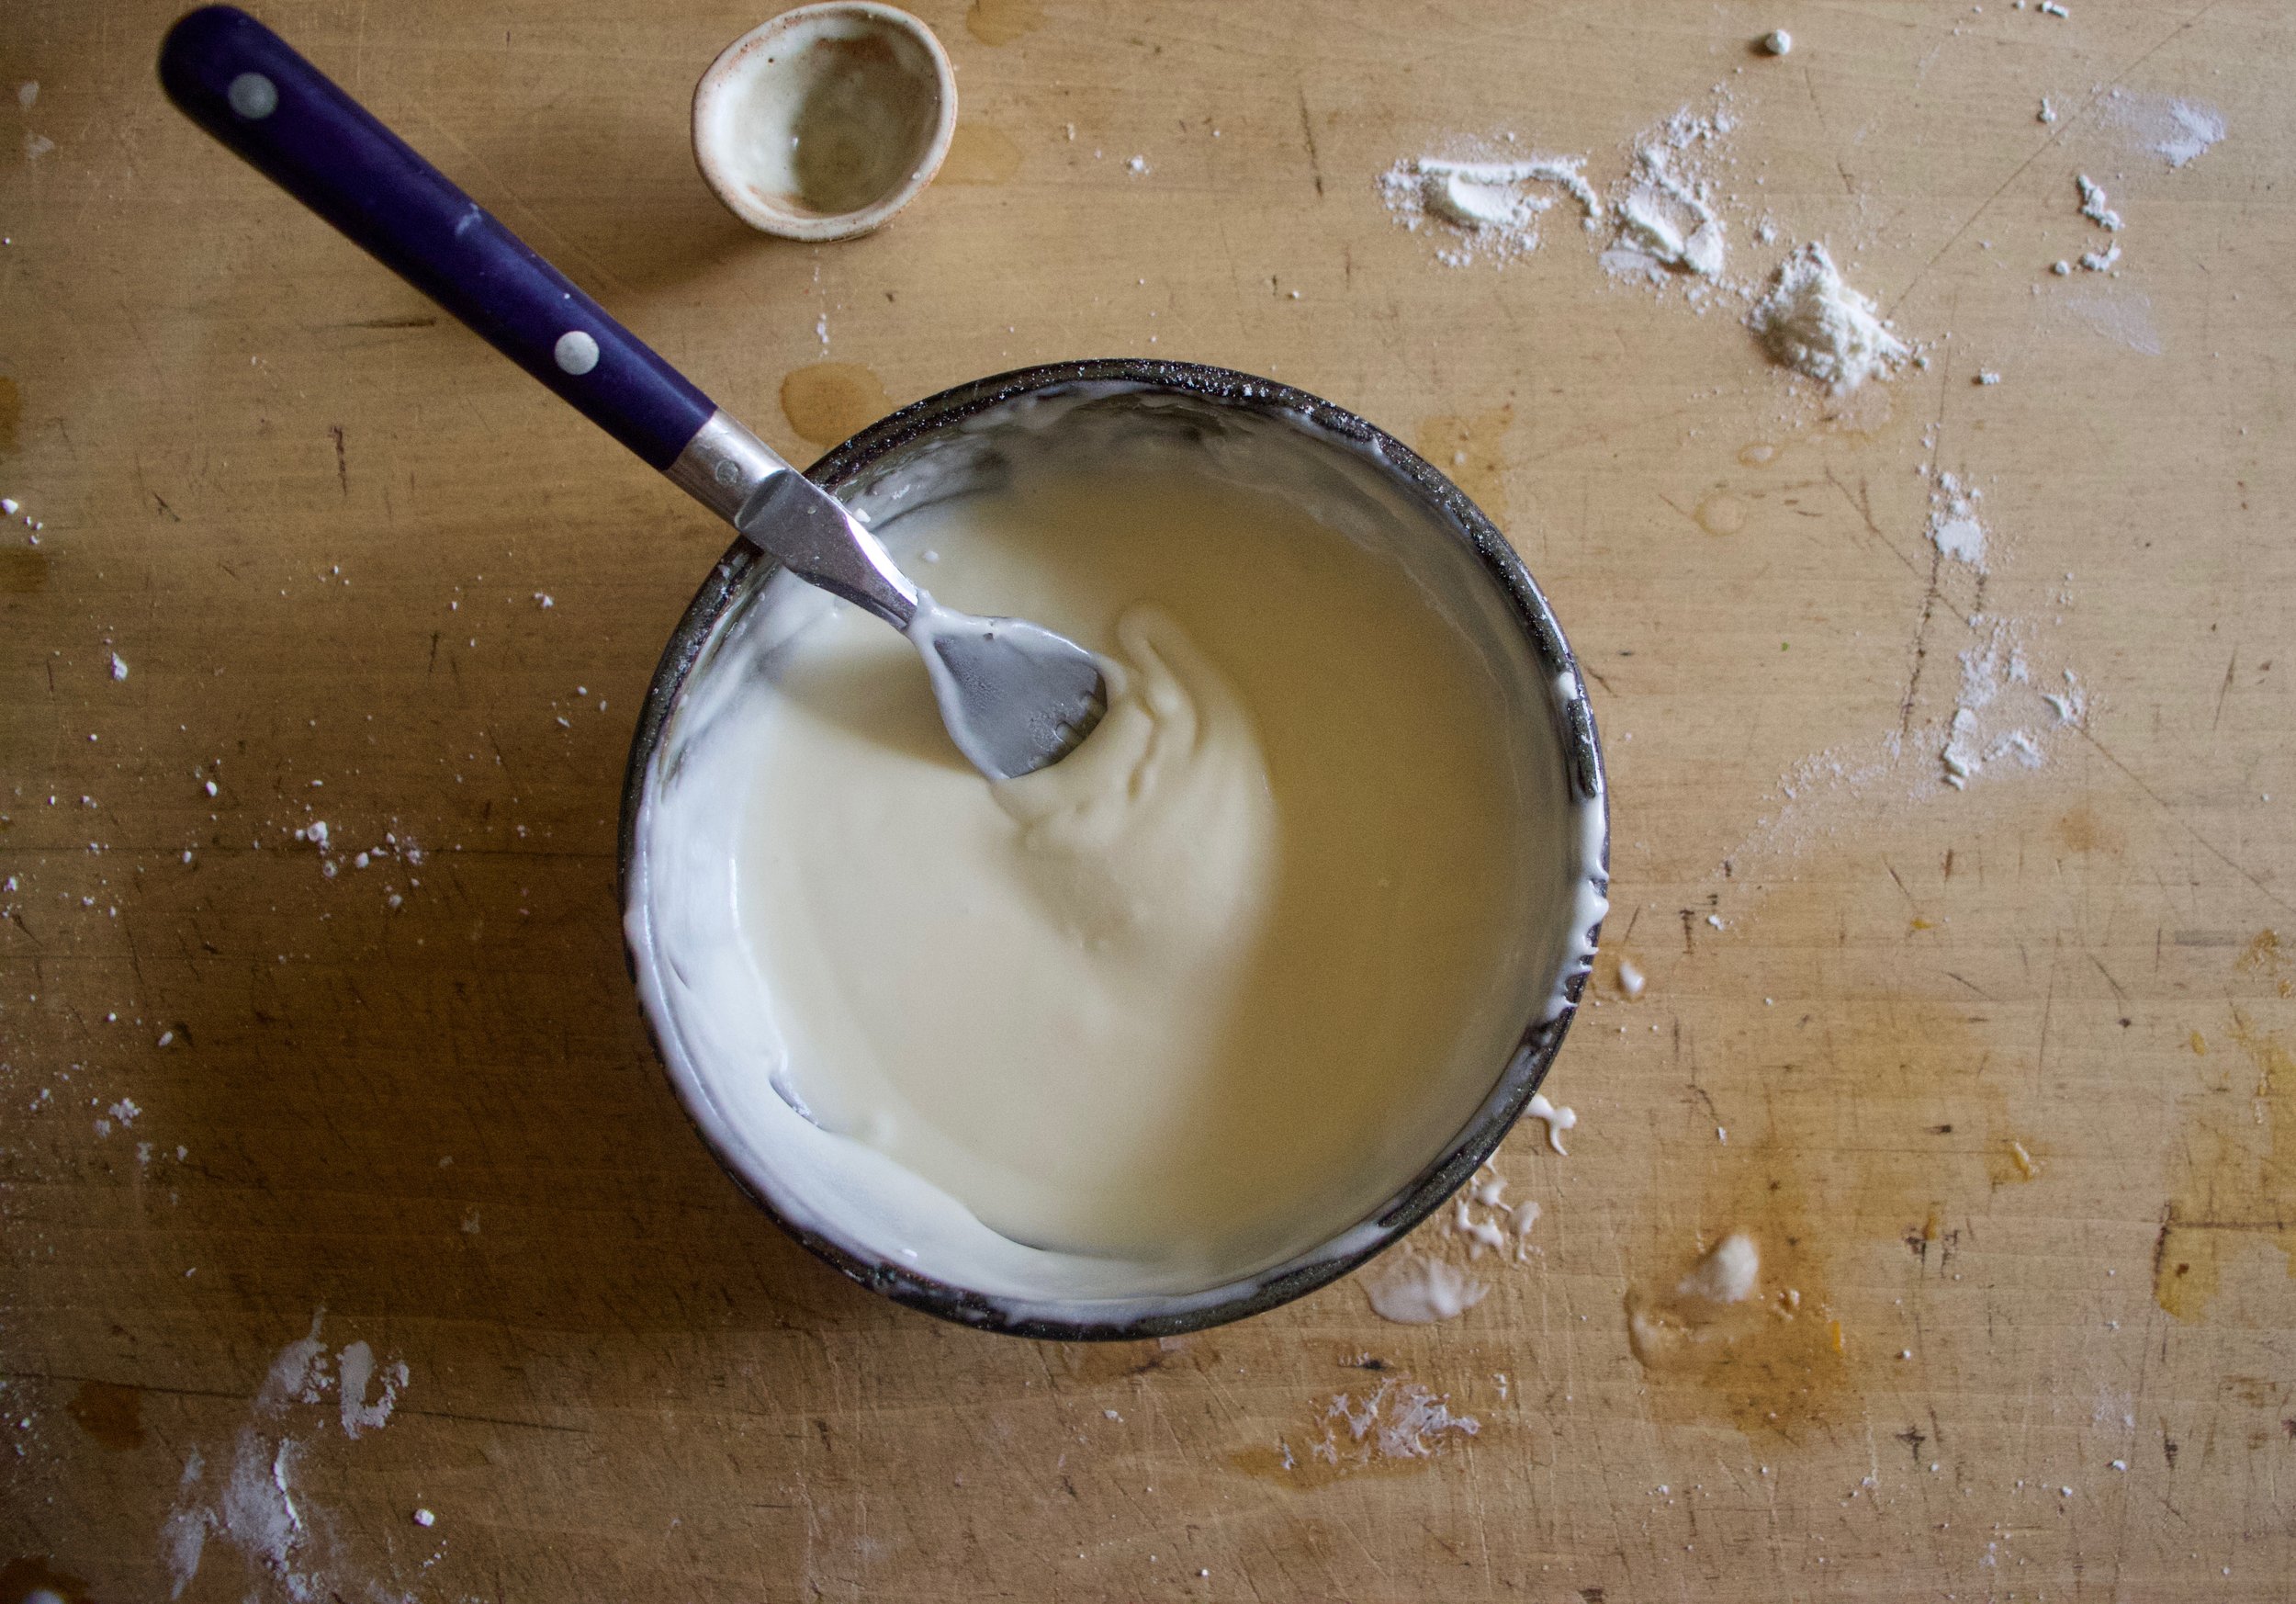
In the meantime make the maple glaze. Mix maple and powdered sugar together until completely combined and is thick put still pourable.

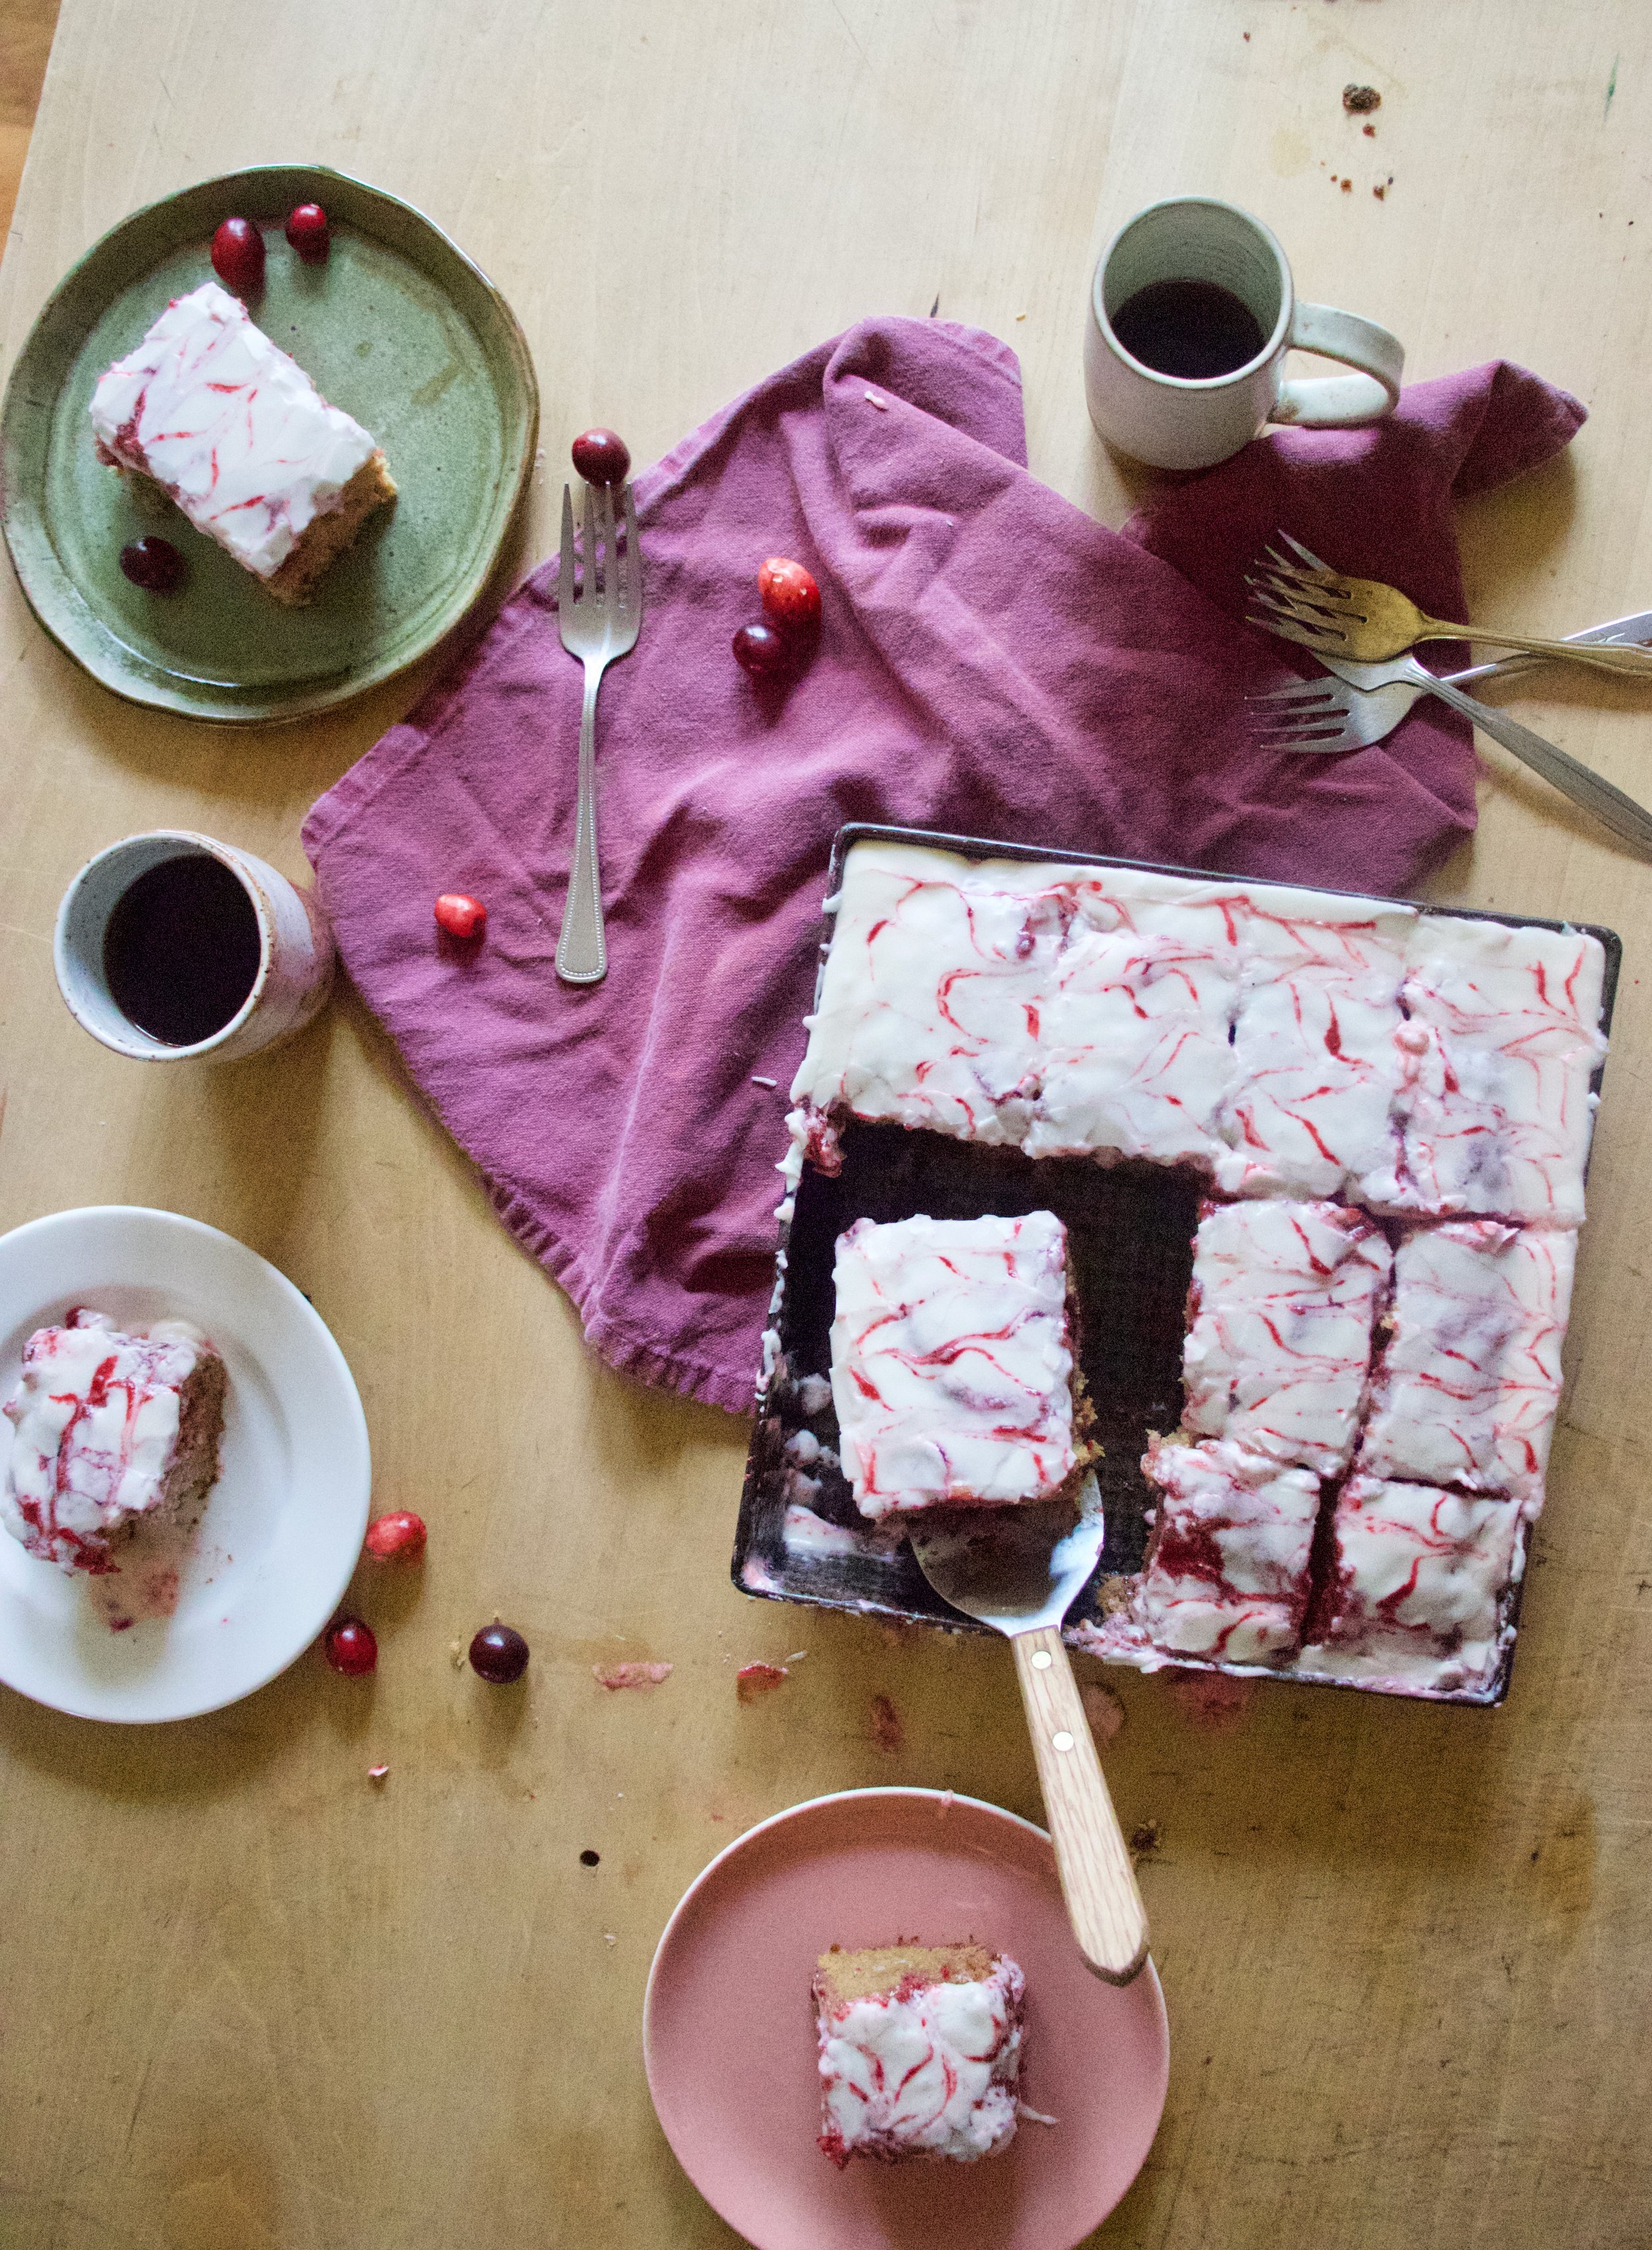
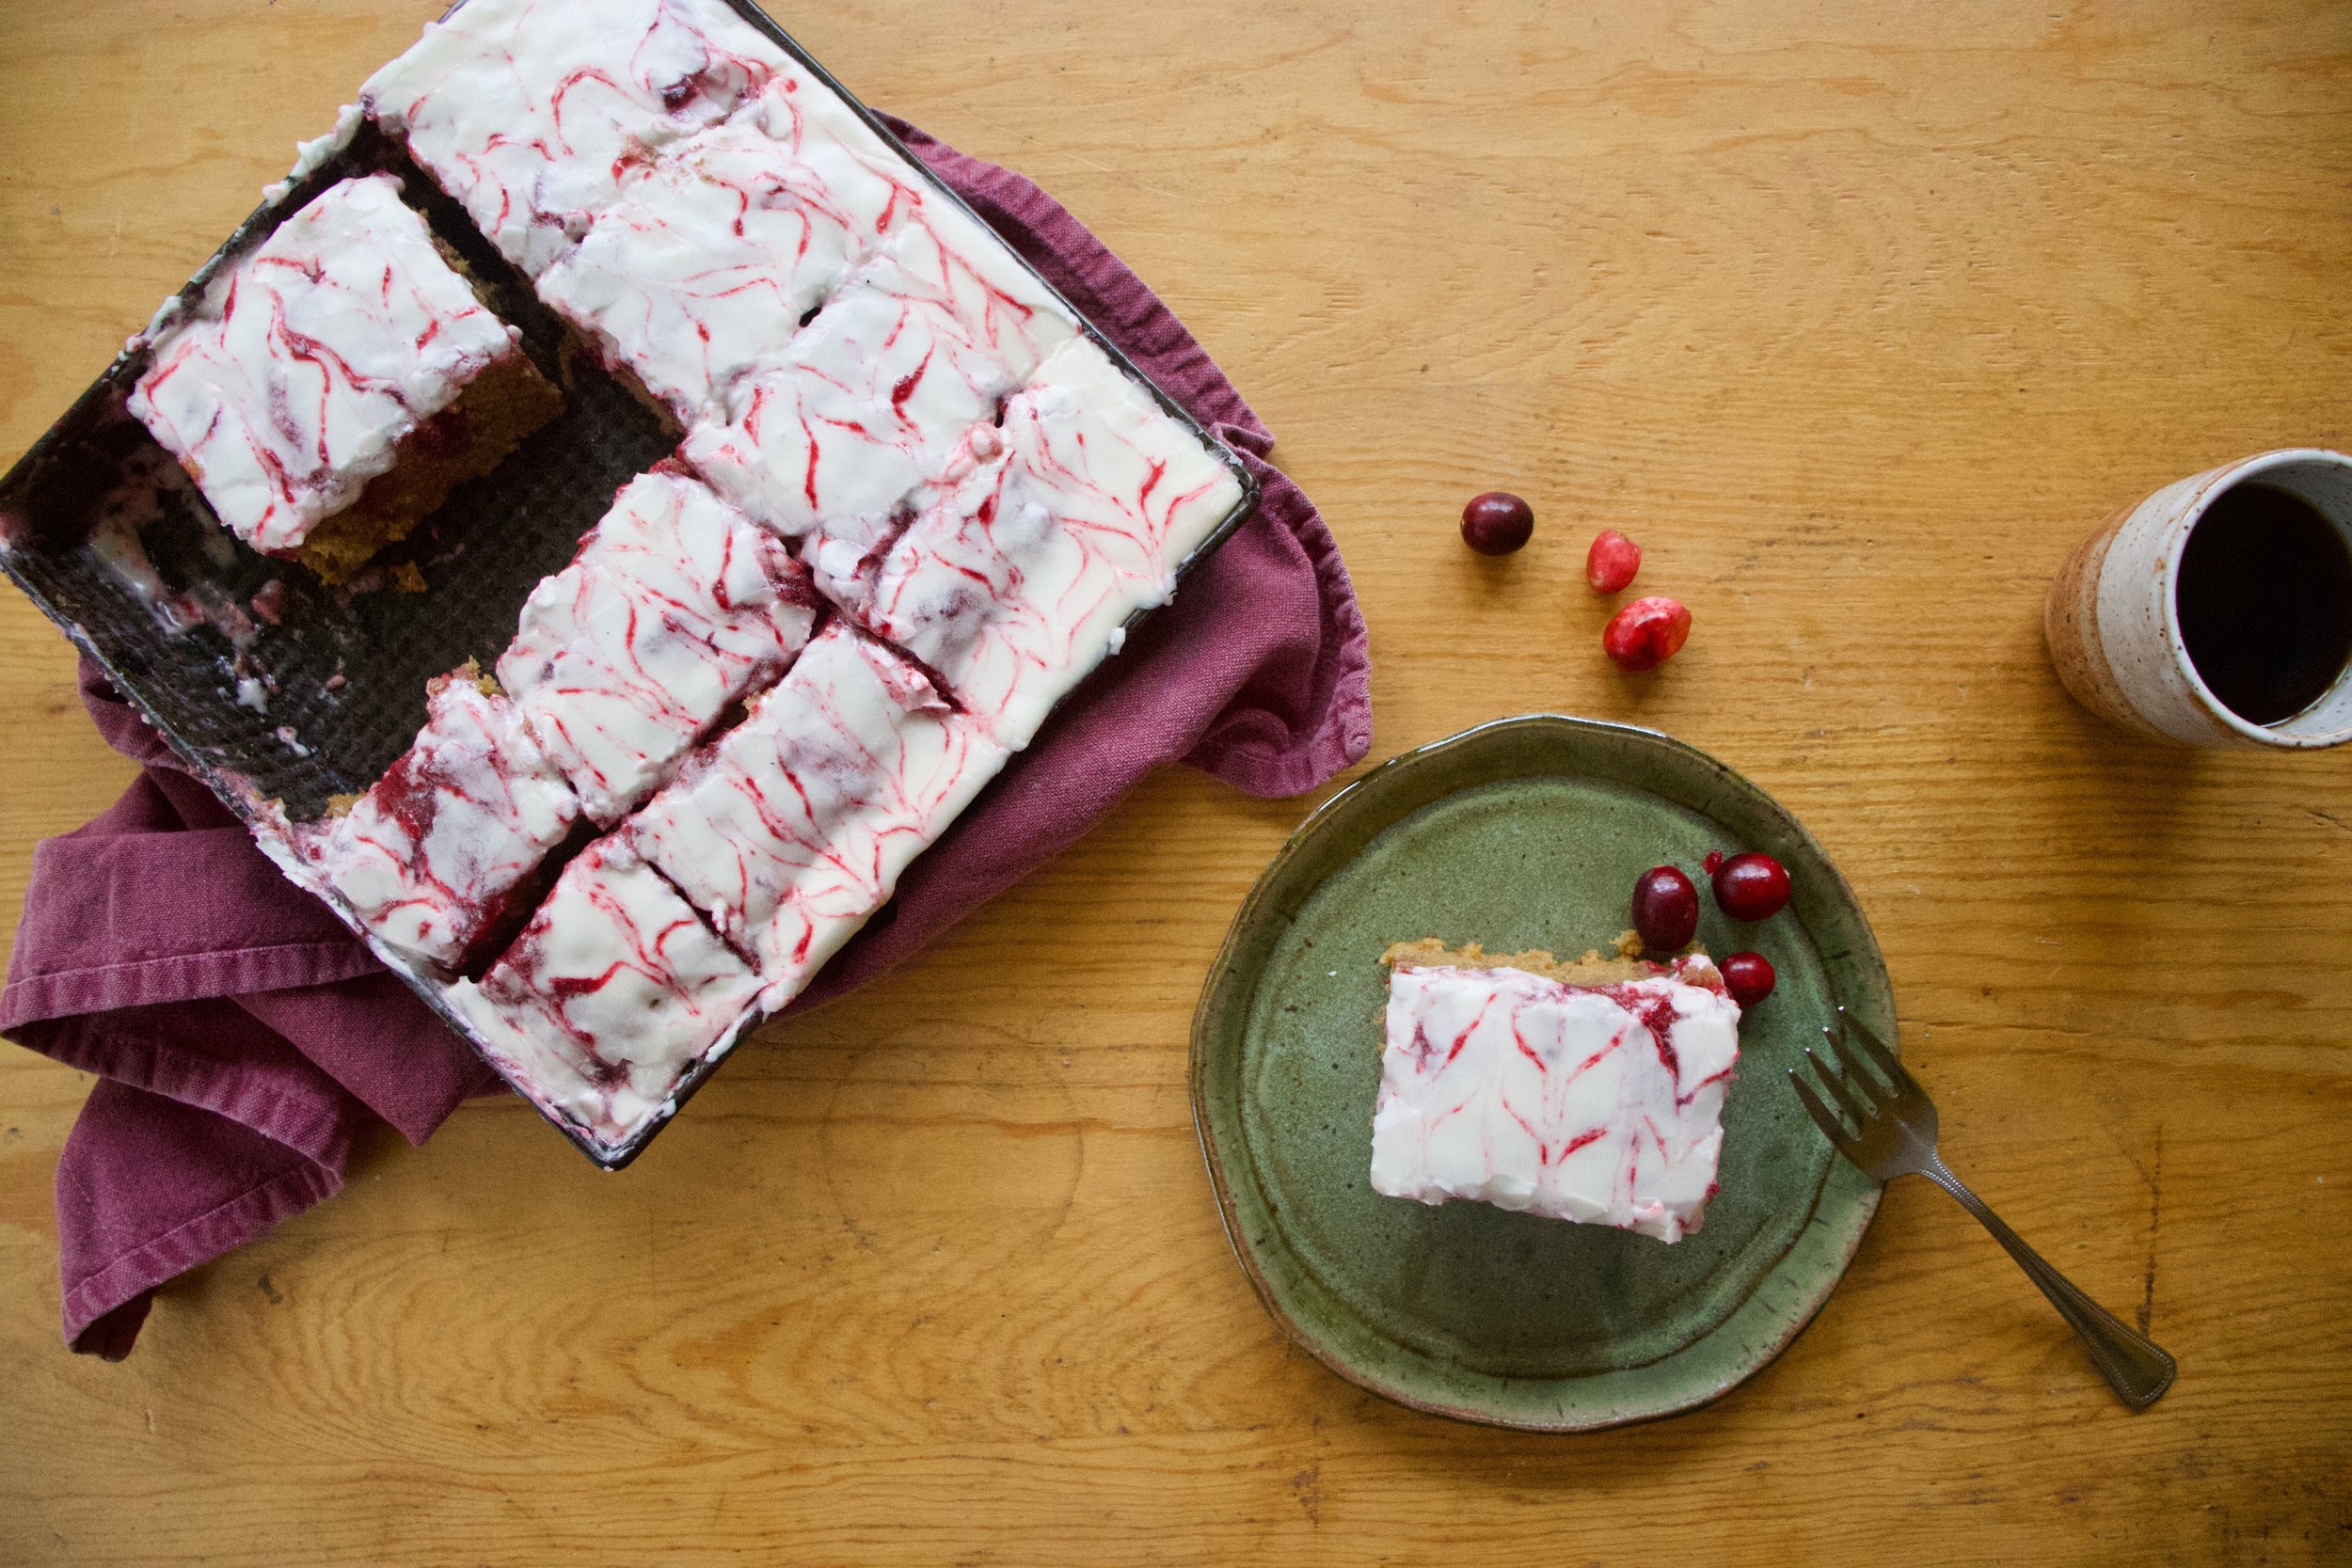
Once cookies have cooled, drizzle on the maple glaze. And if you are feeling like it, add a little sprinkle situation. I added gold sparkly granulated sugar. It was a good idea.

As for the rest, you know what to do. Eat. share, eat some more. Do you.

-C


Maple glazed sweet potato cookies

maskes about 20

  • 2 cup all purpose flour

  • 1/2 reason baking soda

  • 1 teaspoon baking powder

  • 1/2 teaspoon salt

  • 3/4 cup sweet potato mash

  • 3/4 cup brown sugar

  • 2 teaspoons cinnamon

  • 1 teaspoon vanilla

  • 1/3 cup melted but cooled coconut oil

  • 2 tablespoons maple syrup (real shit please )

  • 3/4 cup powdered sugar

  • 1-2 teaspoons plant milk

Preheat oven to 350

In a large bowl whisk together the flour, baking soda and powder, salt, and cinnamon. In a separate bowl mix together the sweet potato mash, brown sugar, and coconut oil. Once completely combined add in the vanilla and milk and mix.

Pour wet ingredients into the dry and mix until combined and a dough forms. Scoop equal sized ball of dough and place on a baking sheet. The cookies will expand but not a lot. When the sheet is full, place into preheated oven and bake cookies for 10-12 minutes or unit they have puffed and turned a nice golden brown. Remove cookies from oven and very gently give each cookie a little smoosh, just to get rid of the dome. Transfer cookies to a wire rack to cool.

While cookies are cooling make glaze. Mix powdered sugar maple, and 1 teaspoon milk together until completely combined and glaze forms into a thick yet pourable consistency. If it is too thick add in a splash more of milk.

Once cookies are cooled, drizzle on maple glaze. And if you want, add a sprinkle situation before the glaze sets and hardens .

Eat.

Cookies will be good for about a week in an airtight container at room temperature. They also freeze amazingly.

In cookies, Vegan Tags sweet potato cookies, cookies, vegan, maple glazed, plant based, simple, easy, holiday, food, cookie, snack, desert, dairy free, egg free
Comment

Pumpkin Cranberry Poke cake

November 20, 2021 Colleen Stem
IMG_8068.jpg
IMG_8029.jpg

Instead of making a pumpkin pie for Thanksgiving I decided to leave the pies to someone else and went the cake route mostly because I have been wanting to make a poke cake for a while and this was as good a time as any.

When I told the mr I made a poke cake he had no idea what I was talking about, do you? A poke cake is exactly what it sounds like, a cake that had been poked. This cake that got poked was a simple but delicious pumpkin cake. Then all those poked holes got filled with cranberry sauce. and then frosted with a simple vanilla glaze situation.

A chunk of it was gobbled up within hours, the mr saying every time he ate a piece how good it was. I was trying to save at least half or it for family Thanksgiving but that didn’t happen. I ended up feeding it to a few more people. And they confirmed to me what I already knew…. It is delicious.

And now it is family Thanksgiving and I only have likes few pieces of the cake left…Good thing I have a brownie mix stashed somewhere in the pantry. Oops.

Now to the poke cake!

The stuff. Pumpkin puree, fresh cranberries, cinnamon, ginger, and nutmeg. Some brown sugar and white sugar. Flour, baking soda, salt. A neutral oil, apple cider vinegar, plant milk. And powdered sugar, vanilla, and a little vegan butter.

IMG_7900.jpg
IMG_7903.jpg
IMG_7908.jpg

Start with making cake. Mix brown sugar, pumpkin puree, apple cider vinegar, plant milk, and oil in a big bowl. Once mixed add in the flour, spices, baking soda and salt and mix until just incorporated.

Scoop batter into a well greased pan and pop into a preheated oven.

IMG_7922 2.jpg
IMG_7932 2.jpg
IMG_7949 3.jpg

While cake is baking make the cranberry sauce. Cranberries go into pot with white sugar and some water. Bring the mixture to a boil then simmer for a few minutes until all the cranberries pop when stabbed. Remove from heat, let cool a minute, and then either with a hand held blender or regular blender, puree until semi smooth.

A gorgeous baked cake. Now let it cool a bit in the pan.

After cooling for a few minutes grab a wood spoon or something that has a dime size handle and well, poke a bunch of hole into the top of the cake. Go deep but not all the way through.

And now grab the craberry sauce and pour all over making sure the sauce goes into the holes.

IMG_7934.jpg
IMG_7943.jpg

And now for the frosting glaze situation. Just mix the powdered sugar, vanilla, plant butter, and a little plant milk together unit completely smooth. It should be the consistency of a really thick glaze.

Then pour/smooth the glaze on gently. And if you are feeling fancy, make a design with a little extra cranberry sauce.

Finished cake looking like a class act.

And then you eat it.

Have fun poking!

-C


Pumpkin Cranberry Poke cake

makes a 10x10 cake

For cake

  • 2 cups all purpose flour

  • 1 teaspoon baking soda

  • 1/2 teaspoon salt

  • 2 teaspoons cinnamon

  • 1 teaspoon ground ginger

  • 1/2 teaspoon nutmeg

  • 1/2 cup of neutral flavored oil

  • 3/4 cup packed light brown sugar

  • 1 cup pumpkin puree

  • 1/4 cup plant milk

  • 1 tablespoon apple cider vinegar

    For Cranberry sauce

  • 2 cups fresh or frozen cranberries

  • 1/2 cup white sugar

  • 1/2 cup water

    For Glaze

  • 2 cups powdered sugar

  • 1 teaspoon vanilla

  • 2 tablespoons butter

  • 1 tablespoons milk

Preheat oven to 375.

In a large bowl mix the brown sugar, pumpkin puree, apple cider vinegar, oil, and plant milk together unit completely combined. Next add in the flour, all spices, salt, and baking soda until just completely incorporated. Grease a 10x10 baking pan and scoop batter in. Level off and pop into the oven. Bake for about 35 minutes, until golden brown, but start checking for doneness at around 30 minutes.

While cake is baking make the cranberry sauce. Cranberries, sugar and water go into a pot. Place on stove and bring to a boil and once its boiling turn heat down and cook for another 3-5 minutes or until all the cranberries are soft and pop when stabbed. Remove from heat and let cool for a few minutes. Then with either a hand blended or regular blended, bend until semi smooth. Some chunks are good.

Once cake comes out of oven and has had a chance to cool down a little, grab a wooden spoon or something with a similar sized handle and poke a bunch of holes all over the top of cake. Go down deep but not all the way to the bottom. Now grab cranberry sauce and pour it all over the top of cake making sure it fills in all the holes. Smooth out the extra on top. Set aside and let cool and set.

To make glaze just mix the powdered sugar, plant butter and milk, and vanilla together unit smooth.It should be the consistency of almost frosting but still thin enough to pour. If it is to thick add a tiny more milk. o thin, more sugar. Once the cake is cooled and the cranberry sauce has had a little time to set up on the cake, pour glaze all over cake. And if you are feeling fancy and have a little cranberry sauce left in the pot you can make a little pattern in the glaze.

And then that is it. You eat it.

Cake is fine in airtight container out at room temperature for a couple of days but after that should be stored in the fridge for up to a week but really, who makes a cake and doesn’t eat it all right away?

In cake, Vegan Tags Pumpkin Cranberry Poke cake, poke cake, vegan, cake, pumpkin, cranberry, plant based, dessert, thanksgiving
Comment

Roasted Celeriac and Squash with Apples and Onions

November 13, 2021 Colleen Stem

One of my most favorite root veggie has arrived in the farm share…Celeriac, also know as celery root and nothing has made me happier (with like food stuff)!. I know a lot of people do not know the deliciousness of the root and that makes me a little sad for them, but hopefully this simple little recipe inspires you to go get some and try it. Yeah sure it looks a little crazy, a little gnarly, but what do looks got to do with t? Celeriac taste like the best celery/apple/potato all mixed together but only better. And when it is roasted it gets nice a soft and just so freaking tasty. When I pick up my share, I make sure to get enough celeriac to eat a whole bulb a day.

So now that we all know how amazing celeriac is, we can roast it with some other amazing stuff. Squash, apples, and onions. All tossed together. All roasted til tender. All super delicious on their own but maybe even better together. A easy little dish that is perfect to make for a quiet evening at home, a mid day snack, breakfast, or to place on the table at any holiday meal. It is that versatile and really, you don’t need to have a specific reason to make it, just do. You won’t be sorry.

Now to all the roasted things!

The stuff. A large celeriac bulb, a small kobocha squash, a couple apples, a couple onions, apple cider vinegar, and salt and pepper.

IMG_7804.jpg
IMG_7805.jpg
IMG_7810.jpg
IMG_7823 2.jpg

First thing is to cut everything up. Cube the squash, celeriac, and apple to about the same size and the onion just cut into rings.

Toss all the cut up stuff onto a lightly oiled sheet pan, toss with a tablespoon or so vinegar and sprinkle a pinch of salt and pepper and place in the oven. Roast for about 1/2 hour, but flipping and drizzling another tablespoon or so of vinegar all over about 20 minutes in.

Roasted and done. Taste and season with more salt and pepper if needed.

Now scoop it all into big bowl and serve it or just eat it all to your very own face like I did. No shade in that.

-C


Roasted Celeriac and Squash with Apples and Onions

  • 1 large bulb (softball sized) of celeriac

  • a small winter squash (can use any variety. I used kabocha)

  • 2 medium apples (I used Macs)

  • 2 onions. Red, yellow, or one of each

  • salt and pepper

  • A couple tablespoons of apple cider vinegar

Preheat oven to 425

Grab squash and cut in half. Remove seeds then cut into cubes about 1/2 and inch thick. Grab celeriac and peel it if you want (I do not peel it) then cut into cubes the same size ad the squash. Now the apples. Cut in half, remove seeds, and cube. And lastly grab onions and slice into 1/2 thick rings.

Toss together all the cut up stuff and place onto a lightly oiled baking sheet and sprinkle with a couple tablespoons of vinegar and a pinch of salt and pepper. Stick the pan into the hot oven and roast for around 20 minutes, removing to give everything a flip and drizzle on another tablespoon of vinegar, then place back in oven for about another 10 minutes or so or until everything is lightly browned and fork tender.

Remove form oven and transfer into a big bowl. Serve right away or at room temperature or heck, it taste freaking awesome cold too.

Tags celeriac, celery root, vegan, vegetable, thanksgiving, fall, side, side dish, snack, healthy, plant based, dairy free, gluten free, squash, winter, apple, onion, easy, simple, fast, food52, bon appetite
Comment

Fall Spiced Banana Bread

October 2, 2021 Colleen Stem
IMG_7522.jpg
IMG_7546.jpg

I am not going to call a spice mixture pumpkin spice when there is no freaking pumpkin involved in the spice at all. If there is in fact some pumpkin in the whatever you are eating and or drinking, well then sure. But people need to stop referring to things as pumpkin spice if the pumpkin is not there. It is very misleading and it drives me nuts.

Sorry (not sorry) if you disagree, but friend, you know I am right.

With that said, I offer you a warm fall spiced (because there is no pumpkin here) banana bread. It is your basic, fantastic, banana-y bread with a good kick of warm fall spices to make it just a tad more fantastic. A loaf to celebrate the cool and cozy season to come. And a great way to use up all the bananas that we (me) might have forgotten were in the fridge.

And really, who doesn't want to turn on the oven now that it is a bit chilly these days, no? Banana bread will keep you warm while baking and make your house smell amazing. Win win win!! (Third win is because you get to eat banana bread.)

Now to the spiced banana bread!

IMG_7417.jpg

The stuff. Really ripe bananas, flour, baking powder and soda, salt, brown sugar, oil, apple cider vinegar, an spices. Cinnamon, clove, nutmeg, ginger, allspice, and a touch or black pepper.

IMG_7421.jpg
IMG_7429.jpg
IMG_7434.jpg
IMG_7445.jpg
IMG_7460.jpg
IMG_7467.jpg

Banana bread basics. Mash bananas in a big bowl until a small chunky goop. Add in sugar, oil and vinegar and mix until combined. Whisk together the dry ingredients in a small separate bowl then add to the wet. Gently fold the dry into the wet until the mixture is completely incorporated but then stop, do not over-mix.

IMG_7475.jpg
IMG_7486.jpg

Pour batter into a well greased loaf pan and sprinkle the tip with sugar then pop that bad boy into the oven to bake. After about an hour, once it loos all nice and dark brown and a tester comes out clean, remove pan from oven. Let cool a minutes then pop the bread from pan and place on a wire rack to cool for a little bit.

Once cooled (or cooled enough), slice it up and eat it. Make sure the slices are nice and thick, then pour yourself a hot drink (I recommend coffee or strong black tea) and go sit someplace warm and cosy and enjoy yourself a nice fall moment.

-C


Fall Spiced Banana Bread

makes 1 loaf

  • 2 cups all purpose flour

  • 1 teaspoon baking soda

  • 1 teaspoon baking powder

  • 1/2 teaspoon salt

  • 1/2 teaspoon nutmeg*

  • 1/4 teaspoon clove*

  • 1 teaspoon ground ginger*

  • 1 1/2 teaspoon cinnamon*

  • 1/8 teaspoon ground black pepper *

  • 1/4 teaspoon allspice*

  • 4 very ripe bananas (about 2 cup mashed banana)

  • 3/4 cup packed brown sugar

  • 1/2 cup neutral oil

  • 2 tablespoons apple cider vinegar

  • 1 tablespoon raw or brown sugar (to sprinkle on top. Optional)

*Note. If you already have a spice blend like pumpkin spice, you can just use a tablespoon of that.

Preheat oven to 375.

Grab a big bowl and throw in unpeeled bananas. With a fork or potato masher, mash bananas up until kinda smooth (some chunks are good). Add in brown sugar, oil, and vinegar and mix together. Add flour, baking powder and soda, salt, and all the spices into a separate bowl and whisk together. Then gently fold the dry mixture into the wet until completely combined but do not over mix.

Pour batter into a well greased loaf pan then sprinkle the top with raw or brown sugar (optional). Place pan in oven and bake for 55- 60 minutes or until the top is a deep golden brown and when a test poke comes out clean.

Remove pan form oven and carefully remove bread from loaf pan. Place on a wire rack to cool for at least 15-20 minutes before cutting into it, but when you do, cut thick slices and eat warm or cold or whatever.

Store bread at room tepature in a airtight container for 3-4 days or in fridge for a week. Individual pieces can be wrapped and frozen as well, but you probably will just eat it all before that needs to happen.

In bread, sweet breads and muffins, Vegan Tags Fall Spiced Banana Bread, plant based, spices, pumpkin spice, vegan, dairy free, banana, sweet bread, quick bread, fall, dessert, snack, breakfast, fruit
Comment

Camp Soup

September 25, 2021 Colleen Stem
IMG_6254.jpg

We camp a lot. Every weekend from early summer to late fall or as long as the weather is tolerable. But once the light goes and the cold damp rainy days come (a little snow is fine) we pack it in for. the season.

The most common question I get asked about when talking about our camping life is what I eat. And the answer is always and will always be soup.

I make soup every single time I go camping. And yes, even in the hot ass summer. Why? Well because soup is versatile, hearty, easy, delicious, adaptable, great on a cold night. It is just all around amazing and not just for camping but for all food consuming meals. That is fact.

So maybe you are going to do a little camping in the next few weeks and are in need of a little inspiration or direction when it comes to camp soup. I made a little list of tips for you.

Tips for making a camp soup.

  • First off, assemble a kitchen that fits your soup needs. A stove and a pot. Have a good sharp knife, a cutting board, and a container to collect any compost (don’t just toss any food into the trees…animals ya know ) plus, you know, a spoon. Also, don;t bring your favorite pot of best knife. You would probably be pretty pissed if you dung it or ruined it. Camping can get rough!

  • When at the camp site, set up a nice little zone to prepare you food. Trying to cut up veggies on the ground is a pain in the ass.

  • If you are making soup for just yourself or you and another person, eat out of the pot(s) that you make your soup in. The mr and I each have out own pots which is nice because I can customize our soups (I always add way more spice and usually more veggies to mine) and we don’t have to bring bowls. The less dishes the better!

  • Don’t bother with stock or brother, just use water.

  • Red lentils are the best. You don’t have to soak them, they cook really fast, and they get creamy and bothy and taste just delicious. Green lentils are also good, and if you have the time, split peas (they need more cooking time). Avoid dried beans because they take way too long. If you want beans, bring precooked or canned beans.

  • Most veggies are good without refrigeration for a few days if not cut up so you really have a good pick of what you want to use. Bring veggies that are on the small side so you use it all up.

  • Whole tomatoes are great to cut up and add, just pack them (or any easily bruised veggie) in a plastic container so they don’t get squashed.

  • For multiple day camp trips, bring sturdier roots like onions, turnips, and beets. Also cabbage and carrots last for days without refrigeration.

  • Greens are great but don’t bring tender greens like lettuce or spinach. Instead go for greens like chard or kale.

  • Winter squash or sweet potatoes are very much encouraged. Sugar pumpkins or delicata cut up really easy and cook super fast, You don’t have to remove the skin (just the seeds) and you can always find small ones.

  • Bring a preblended spice mix. I always just bring a curry mixture I make at home so it is all the spices in one jar. Having a bunch of jars of different spices may seem nice but keeping things simple (and having less stuff) is usually better. Oh and add salt to taste last.

  • When the soup is cooking, don’t walk away for more then a minute of two. You want to watch to make sure the soup doesn't boil over and also watch out for critters. We have encountered a few wily chipmunks in our days. They will come up and steal your food if you are not careful.

  • Have left over soup? Pour it into a jar and save it or breakfast or lunch the next day. No joke, we do it all the time. (The mr does, I never have left overs. I eat it ALL)

Here are some pictures of my soups from the past few weeks.

IMG_5311.jpg
IMG_5728.jpg
IMG_5544.jpg
IMG_5310.jpg
IMG_6693.jpg
IMG_6246 2.jpg

And lastly, remember that making soup at a campsite is suppose to be fun and is pretty much guaranteed to taste amazing, especially if you have spent the day running around in the woods or being really active. There is nothing better then eating a big ol’ pot of hot soup after climbing up and down a mountain!

-C

Tags soup, vegan, camping, food, outdoor cooking, vegetables, tips, stew, plant based, home made, healthy
Comment
← Newer Posts Older Posts →
 

https://thelovelycrazy.squarespace.com/config#/|/about/

Me. Food Maker.Food eater. Woo HOO!

STEM+NODE  SMALL BATCH AND ONE OF A KIND POTTERY

stem+node ceramics


____________________

Subscribe

GET NEW POSTS IN YO EMAIL

You are AWESOME!!!


@thelovelycrazy 2014-2021