• stem+node ceramics
  • HOME
  • Food Recipes
  • About
  • Contact
Menu

The Lovely Crazy

Street Address
City, State, Zip
Phone Number

Your Custom Text Here

The Lovely Crazy

  • stem+node ceramics
  • HOME
  • Food Recipes
  • About
  • Contact

White Bean Zucchini Salad Sandwich

July 6, 2019 Colleen Stem
IMG_9925.jpg
IMG_9985.jpg

Summertime is in full swing. Hot ass days, garden fresh veggies, zucchinis as big as whales, and did I mention that hot ass heat? If you have been around here before, you know how well I handle the heat. (NOT WELL AT ALL!)

I think we are all hot these days. But really, lets just focus on the good things, like fresh summa veggies!

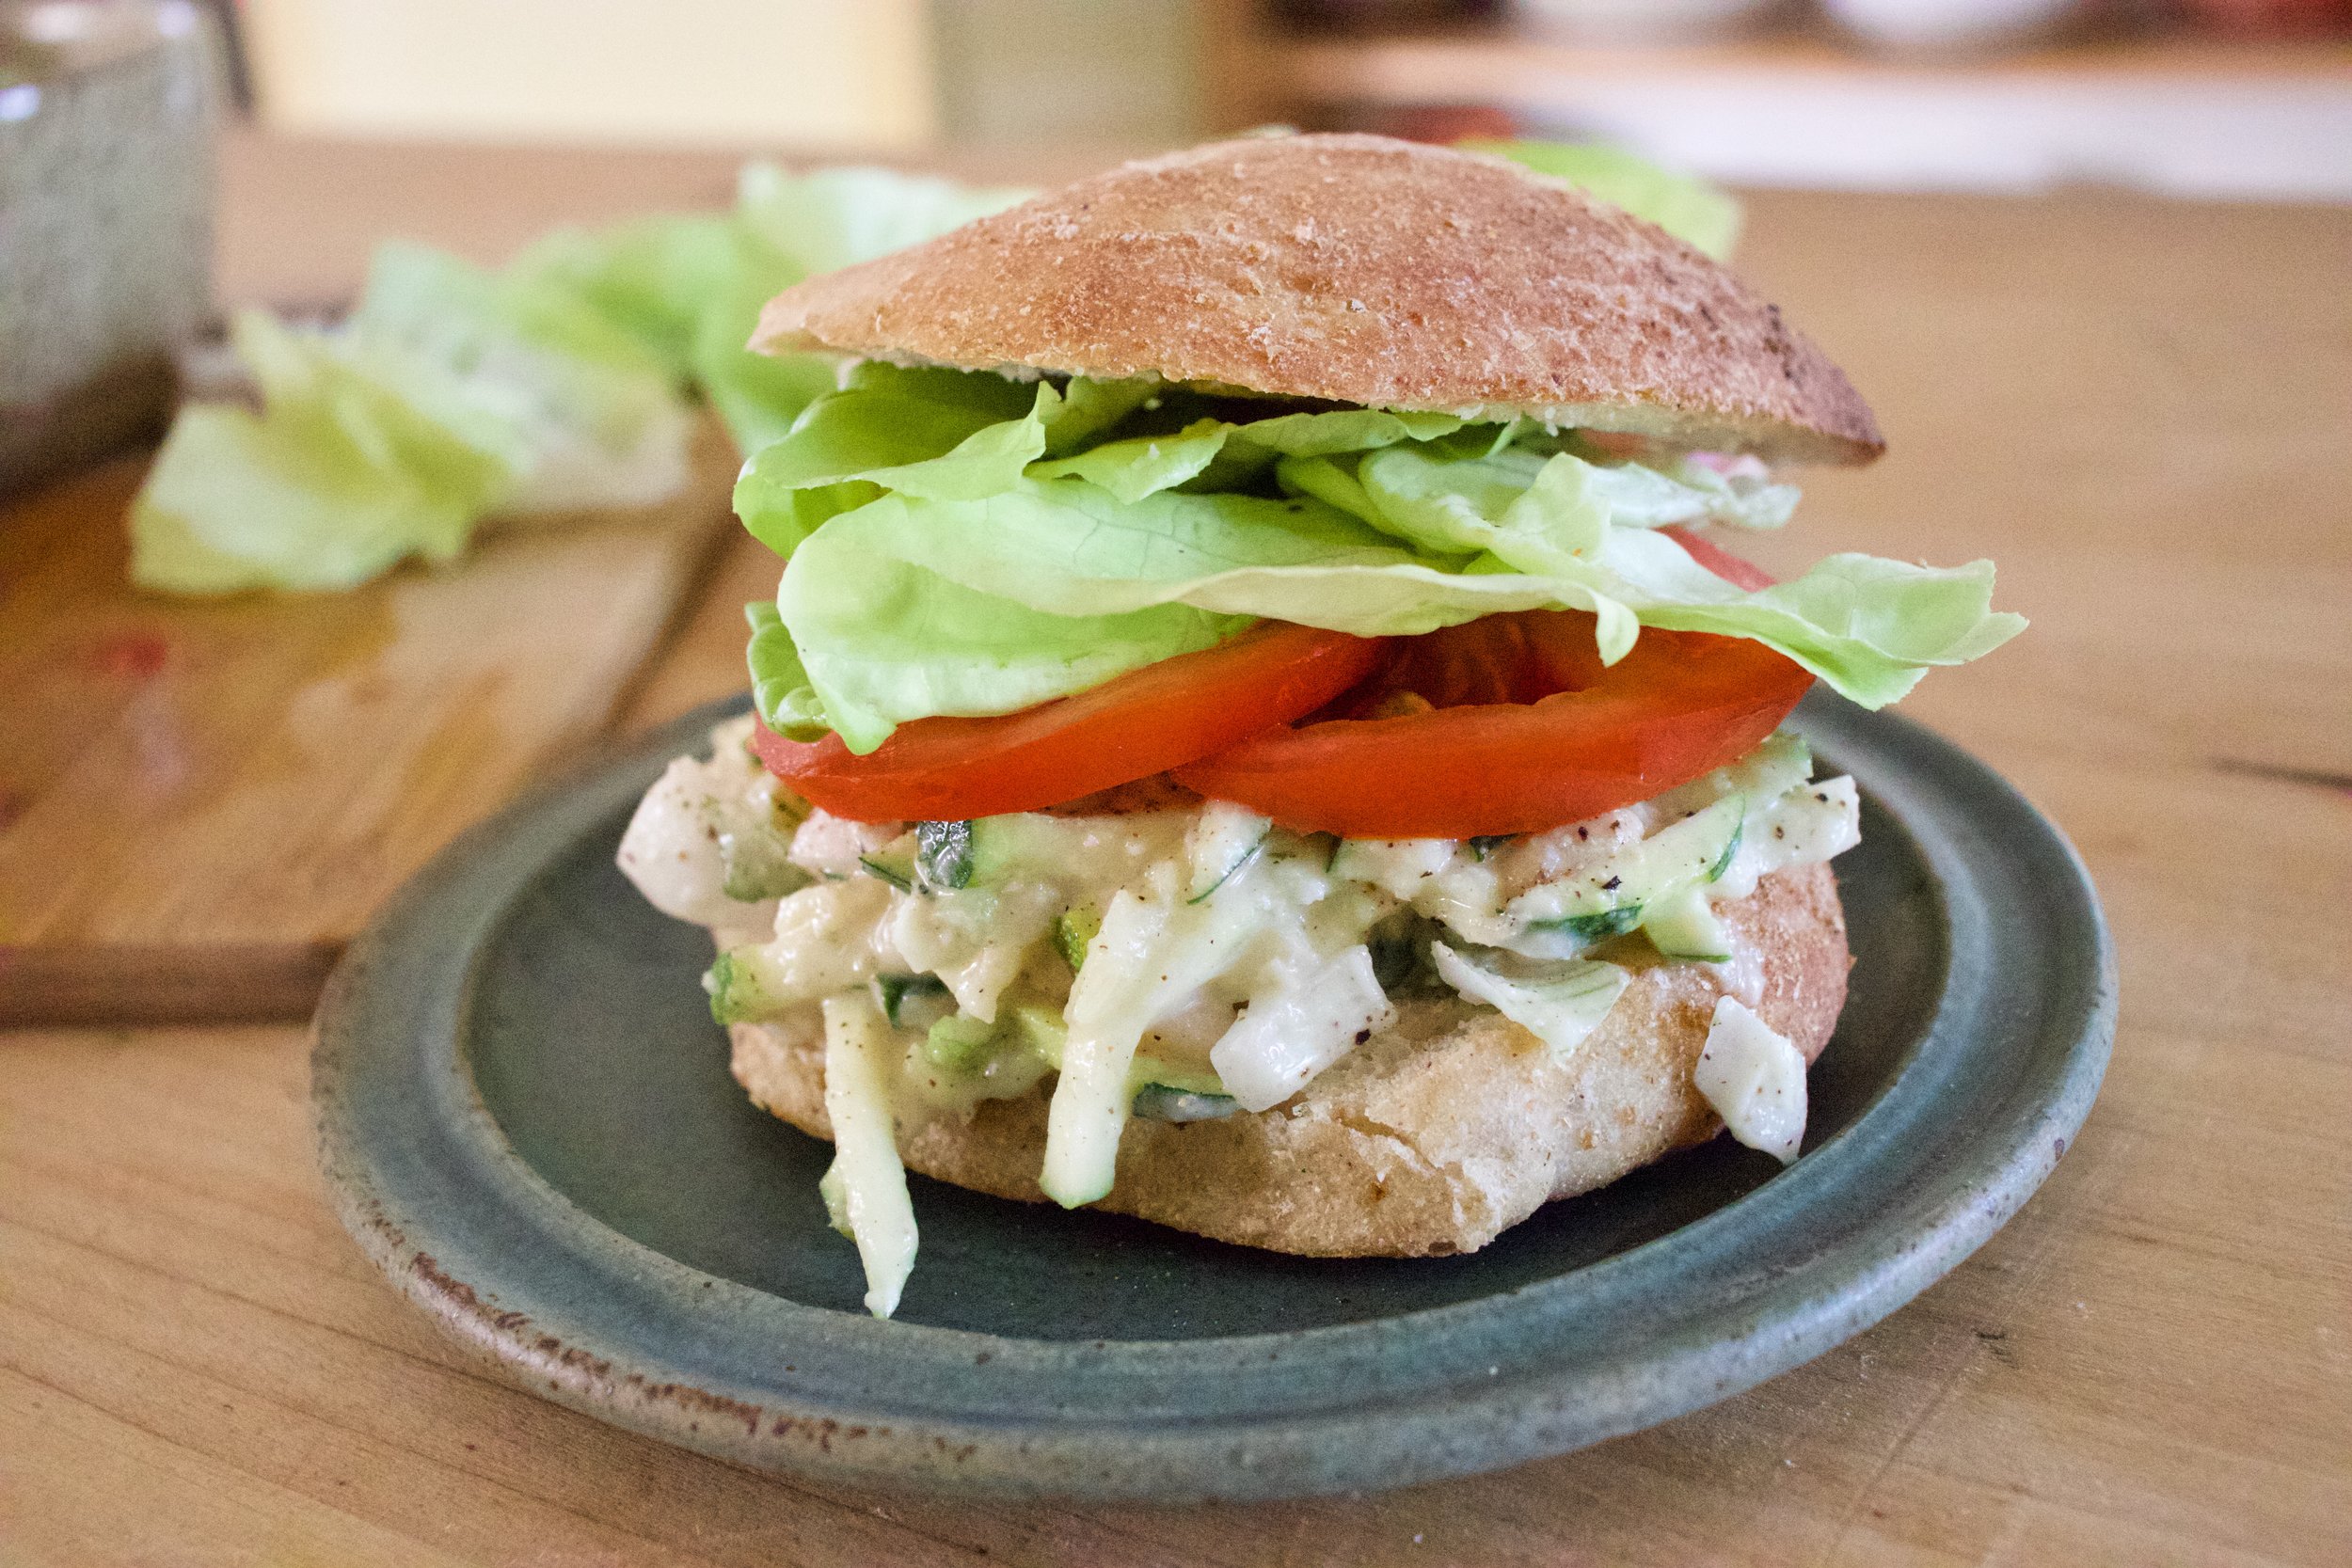
This sandwich is all about summertime and not having to turn on a single flame or heat source and takes all of 5 minutes to make. Zucchini because it is everywhere, beans for more substance and they are delicious, all mixed up in a creamy bean and tahini sauce. Super fast, fresh and oh so delicious. I made a big batch for sandwiches but also I was just eating it with a fork. It’s a tasty one that will be on the summer rotation for sure for the next few months, or until the zucchini runs out and I dare to turn the oven on again. (Ok, I am being a whine ass. It’s not THAT bad and I did turn the oven on, early morning, to bake bread. So yeah.) But for real. This is a great, super fast, throw together, fresh, light but filling, sandwich situation for any and all of your summertime eating needs. What more do we need? The mr said all he needed with the sandwich were chips. Chips and a nice cold drink.

Done sir. Done.

Now to the sandwich!

The stuff. White beans, a zucchini, and a fresh spring onion. Also some tahini, a lemon, a few cloves of garlic, a little vinegar and water, and salt and pepper. And to serve as a sandwich you need bread. lettuce, and tomato. Well you only need the bread, but you get what I am saying.

IMG_9853.jpg
IMG_9857.jpg

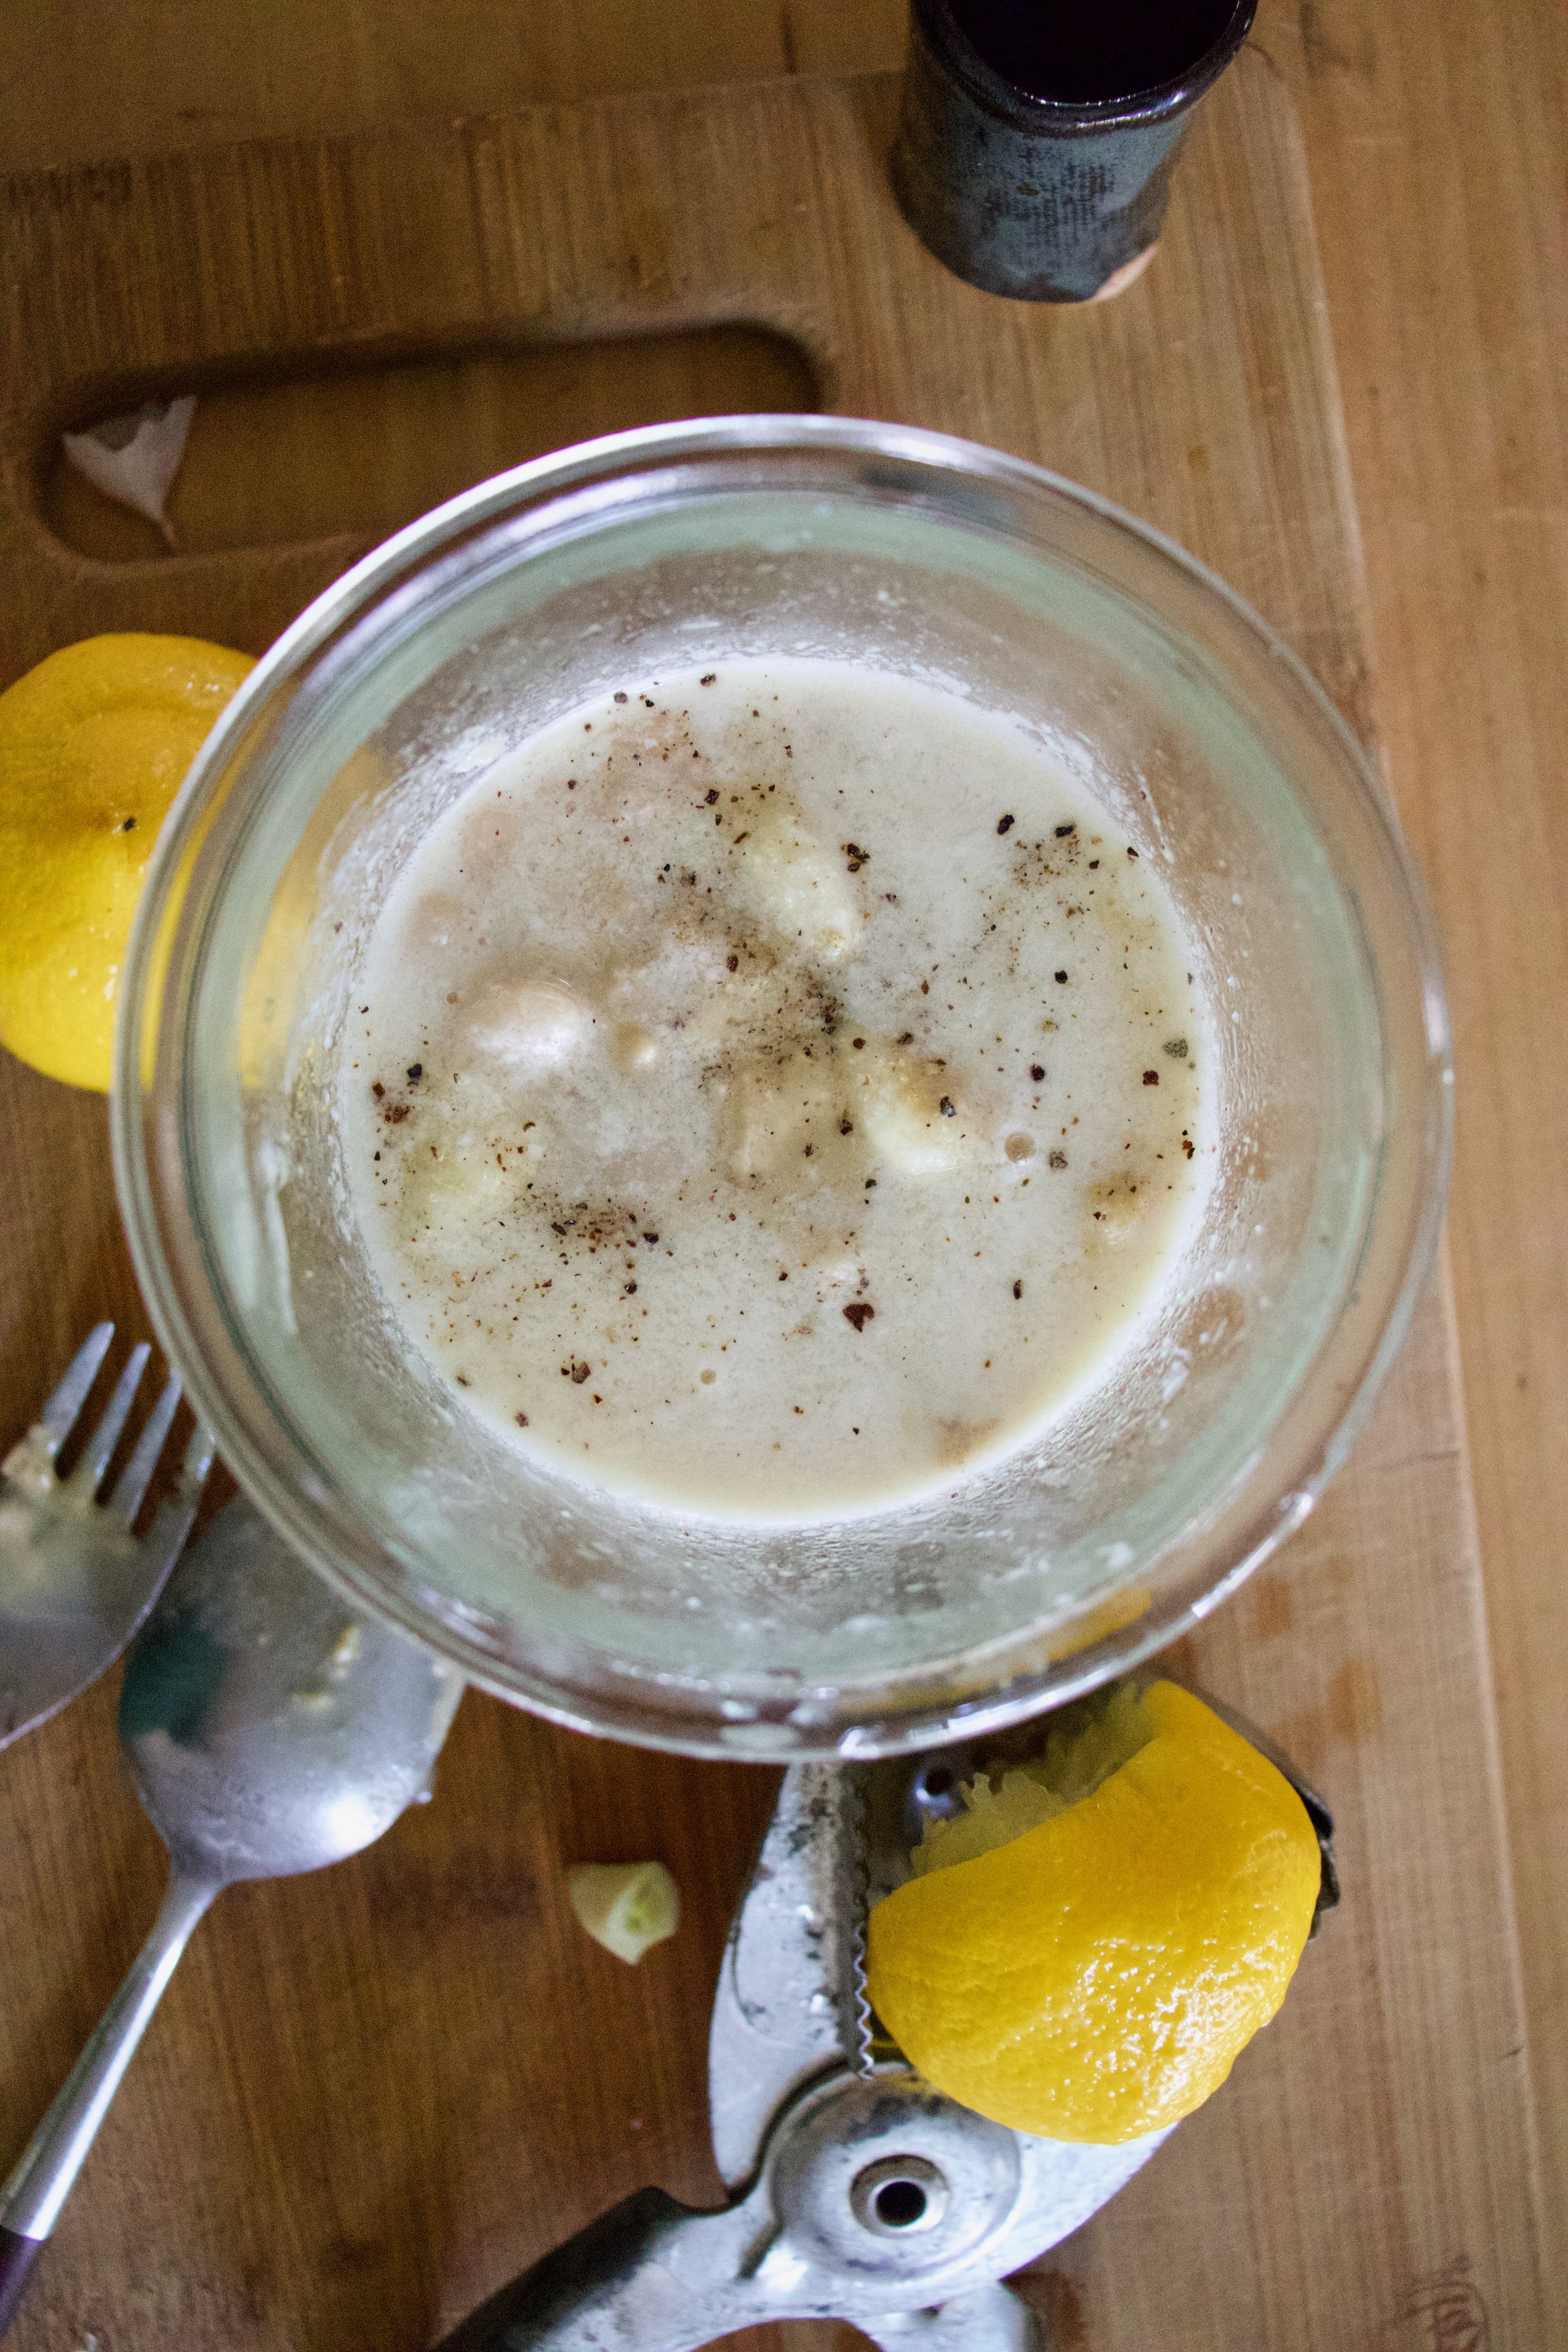
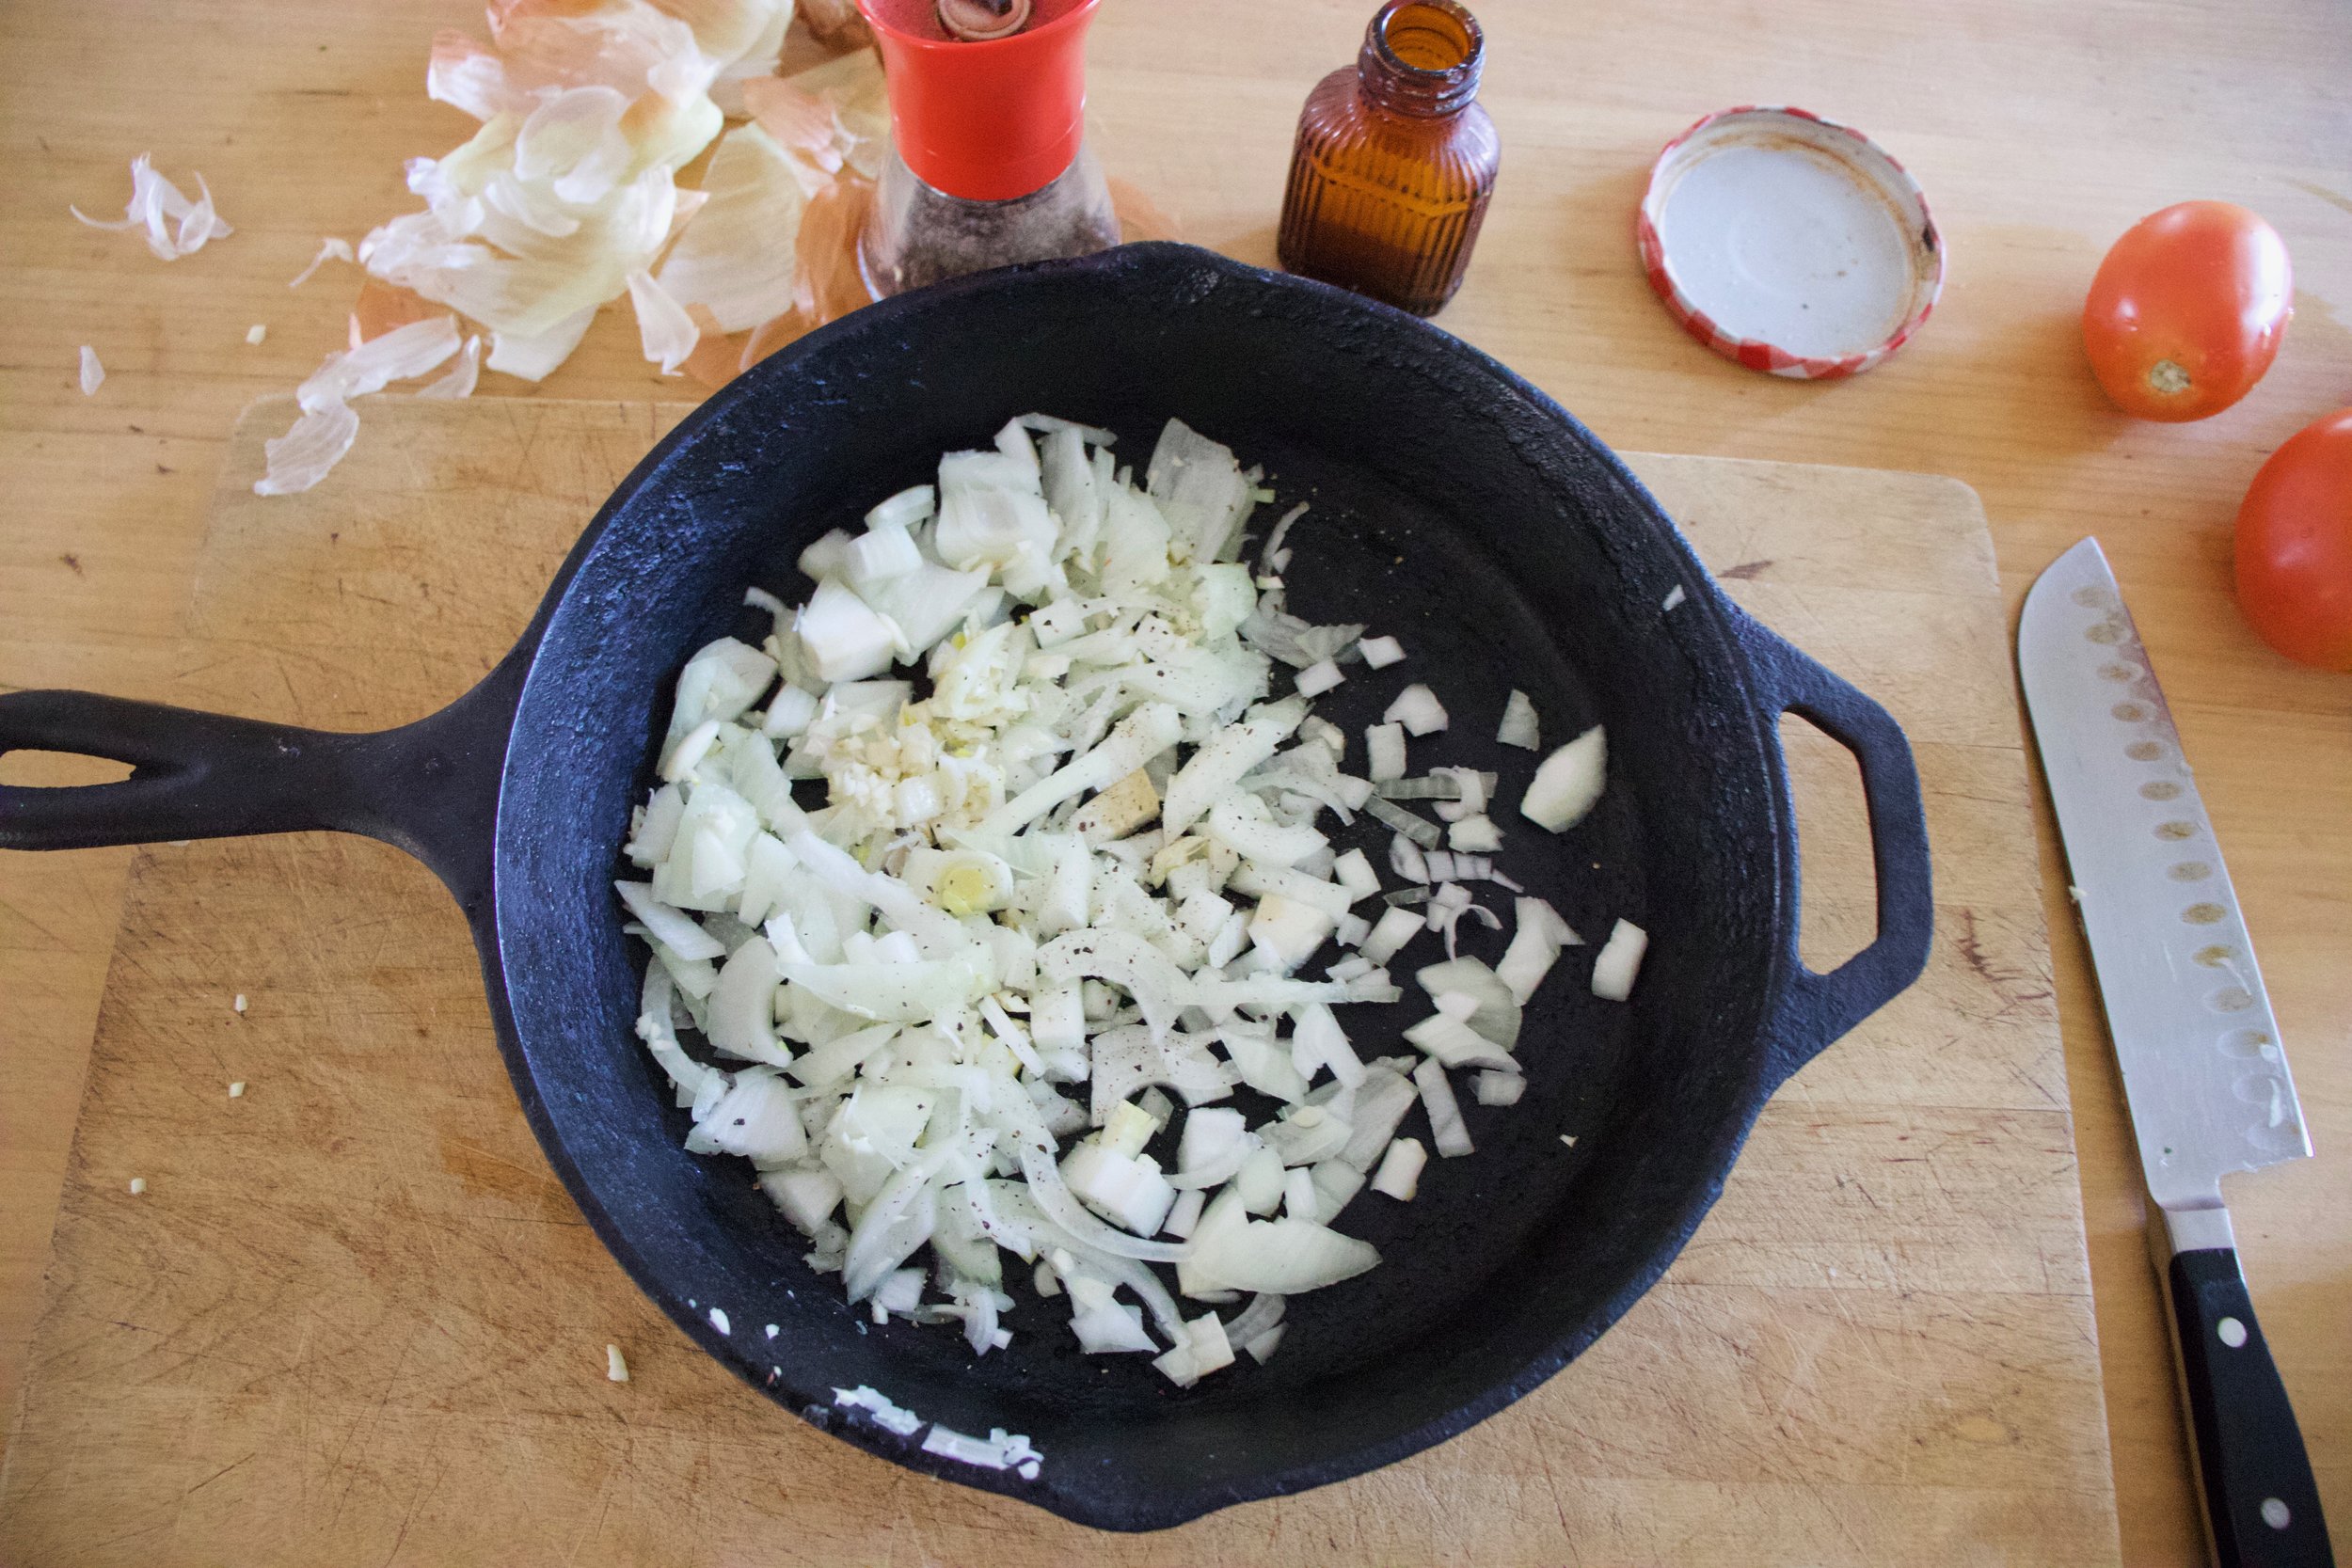
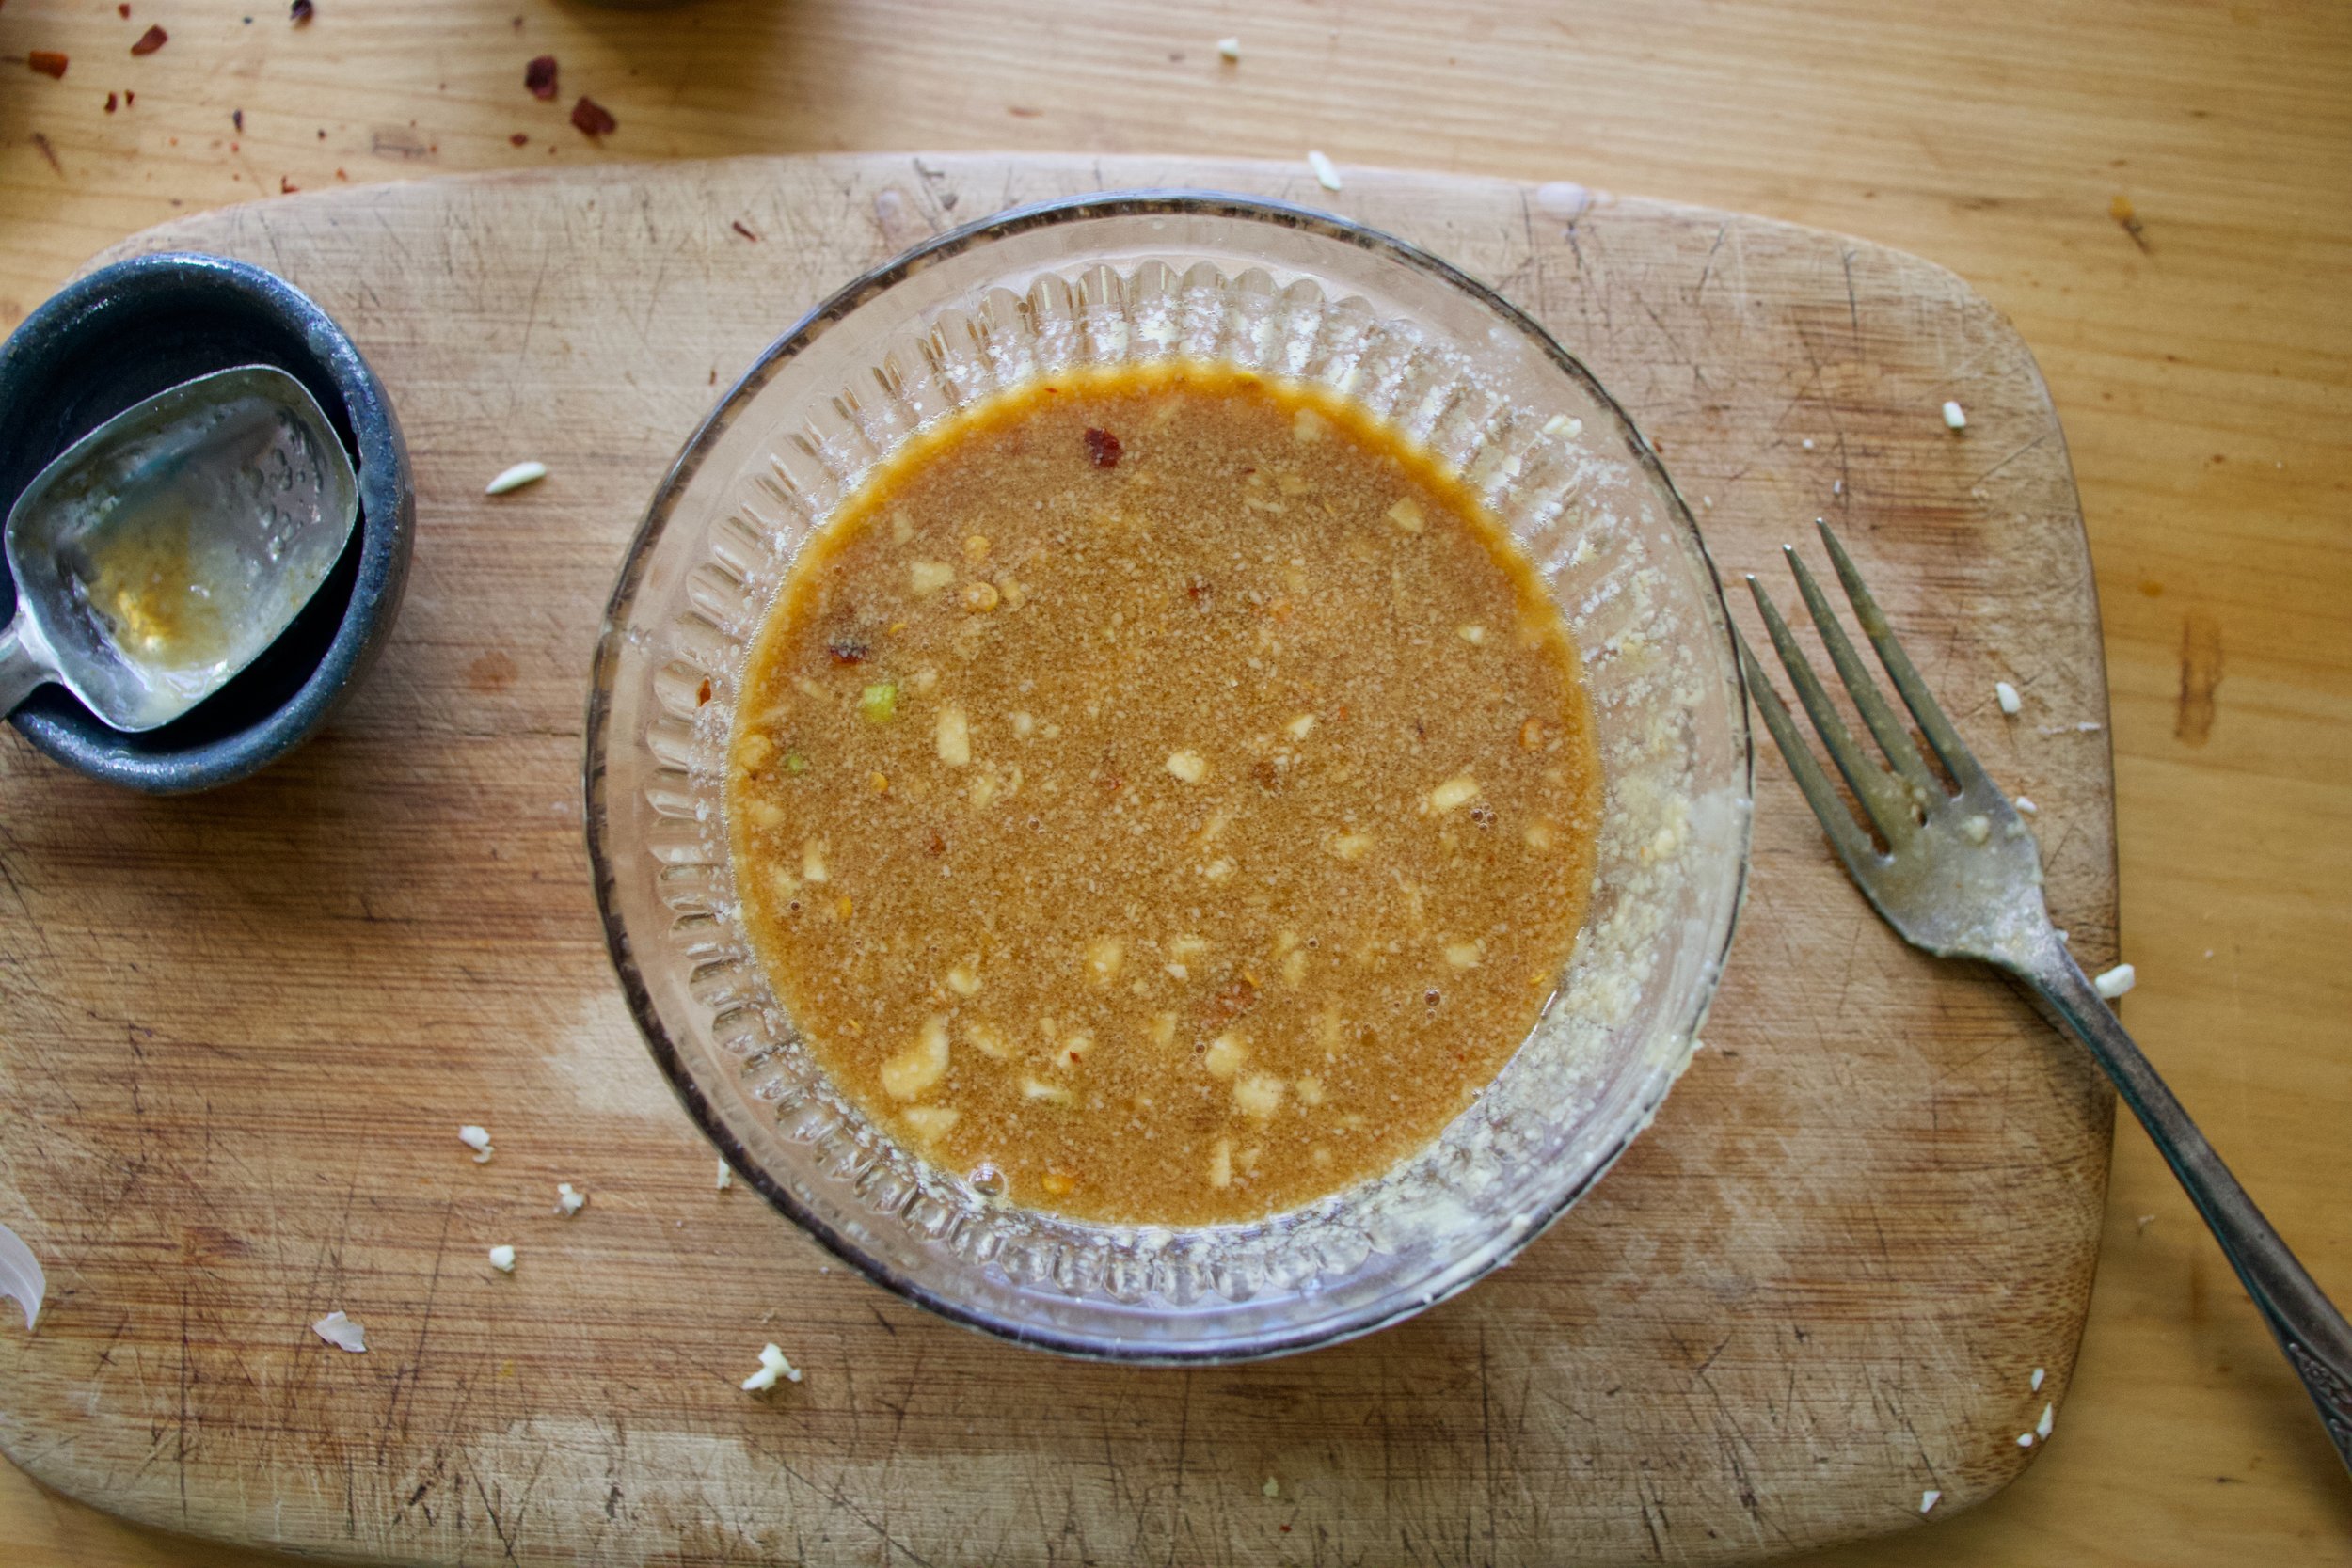
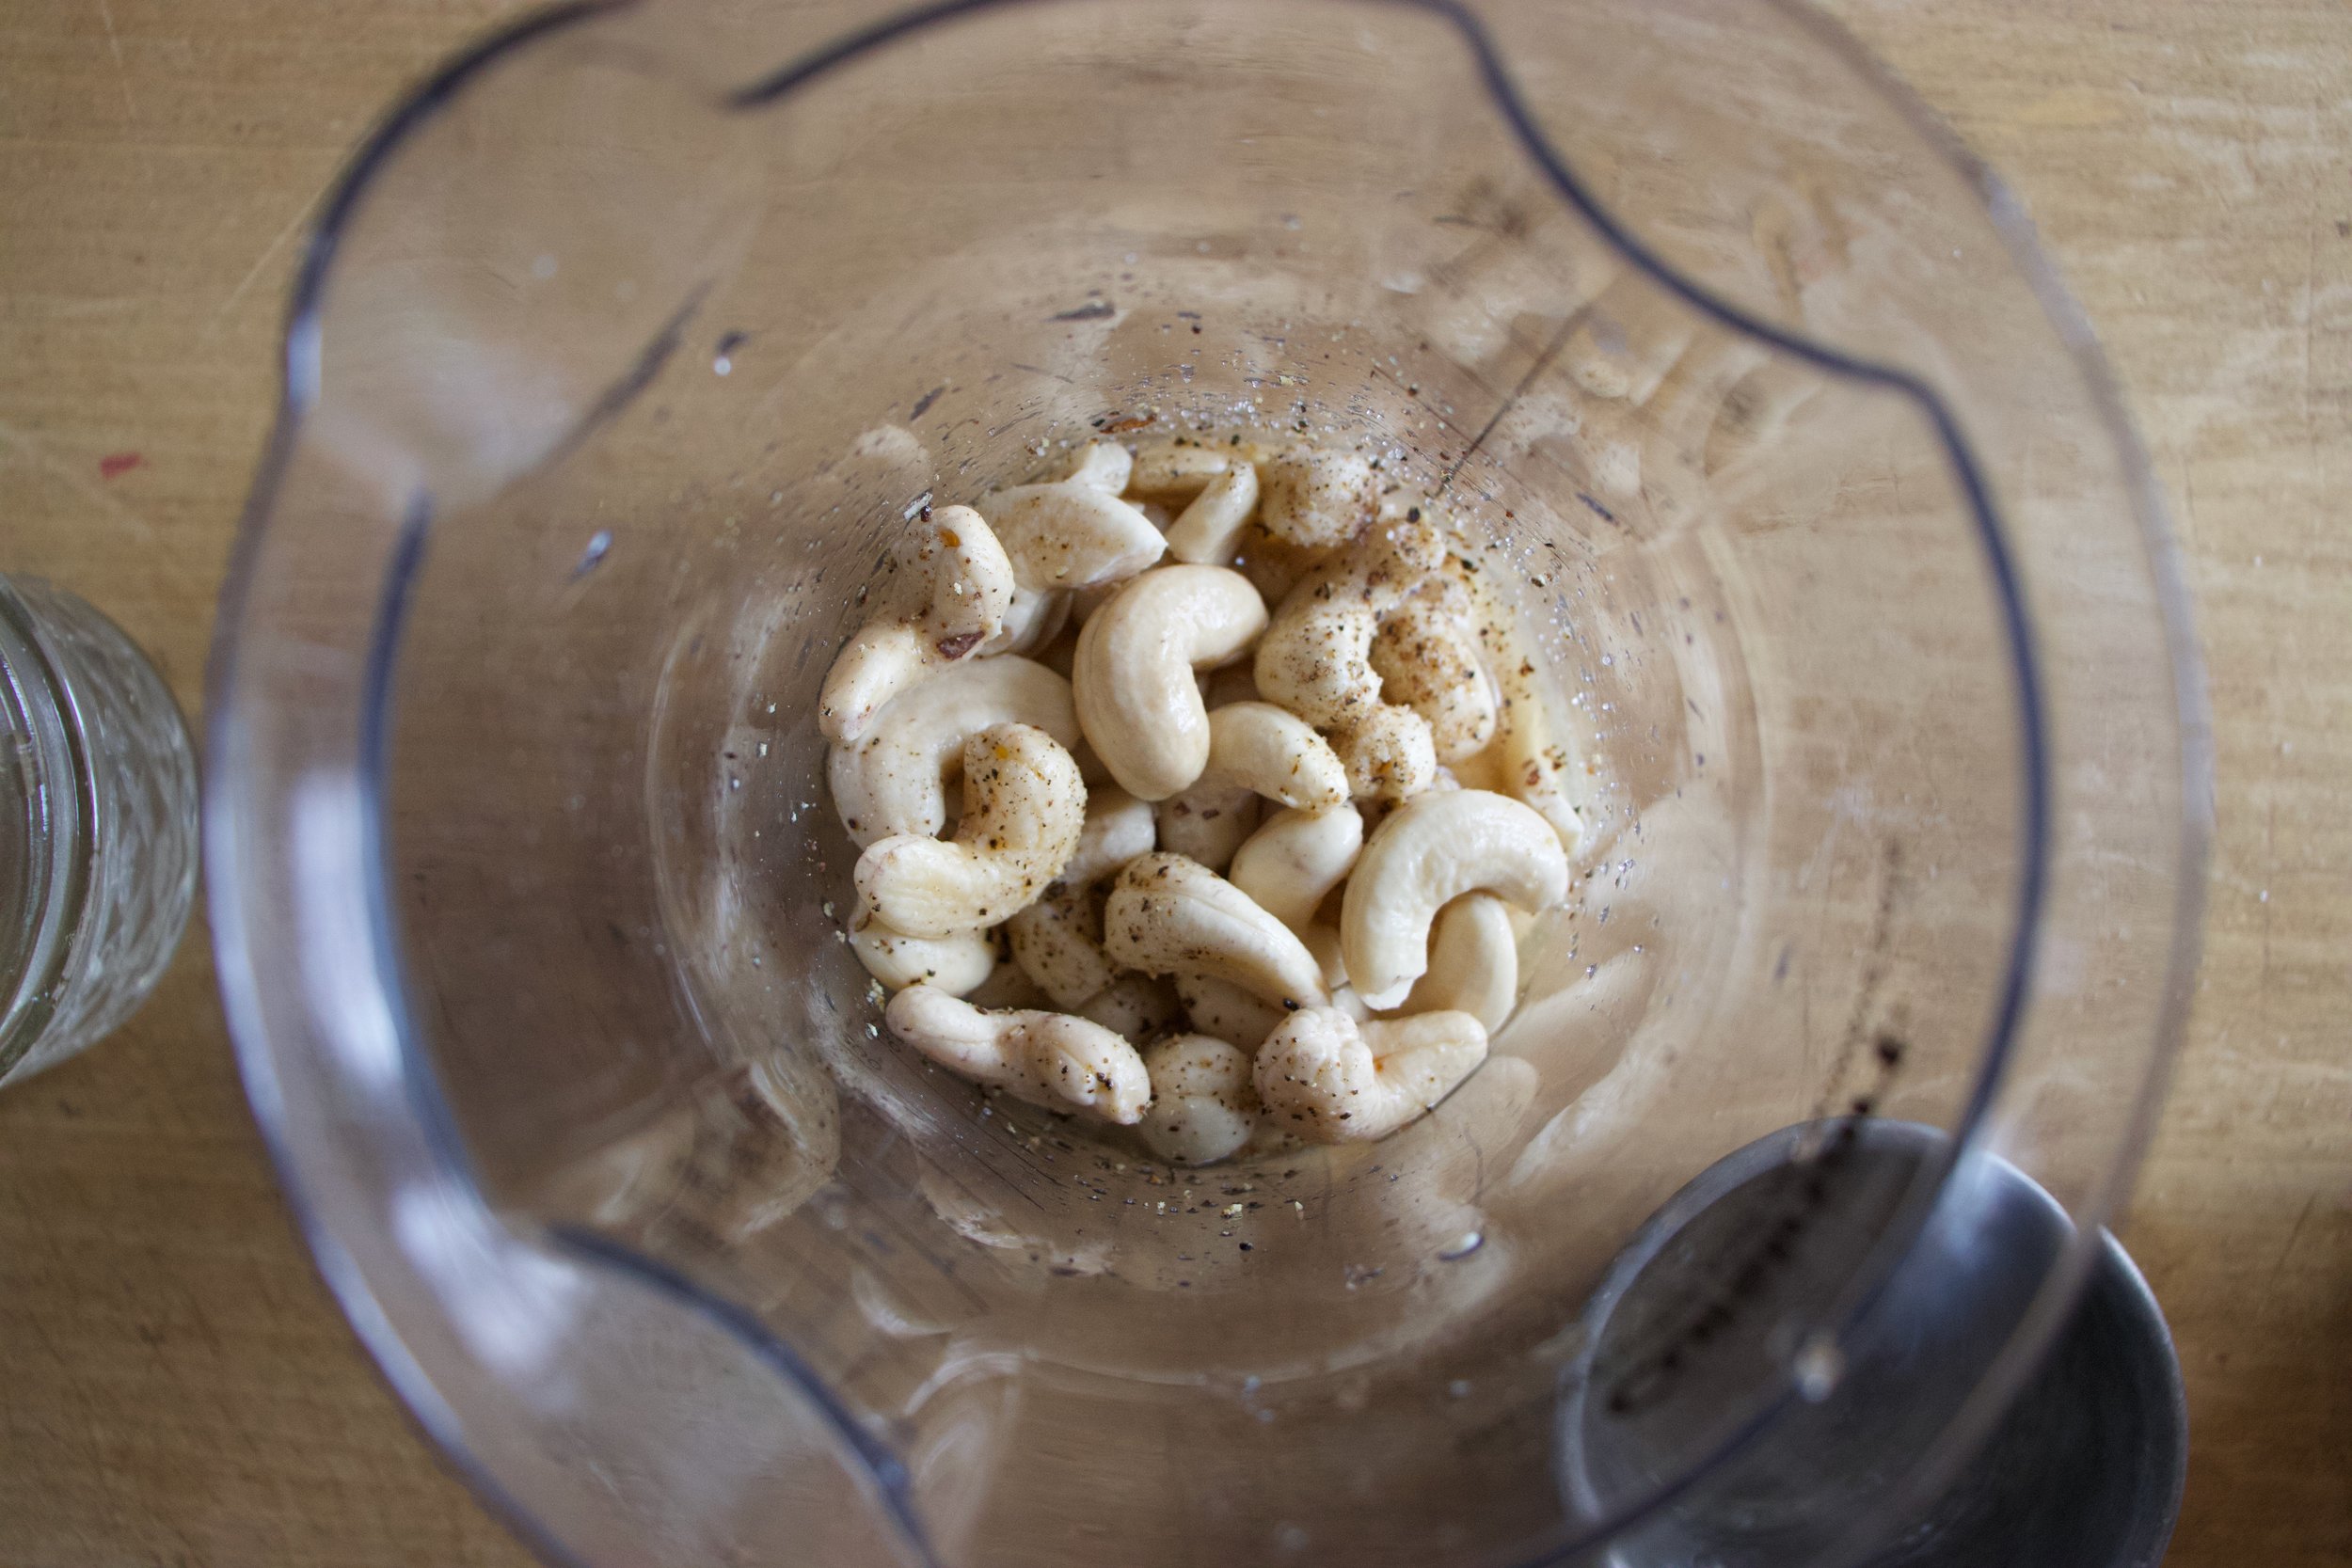
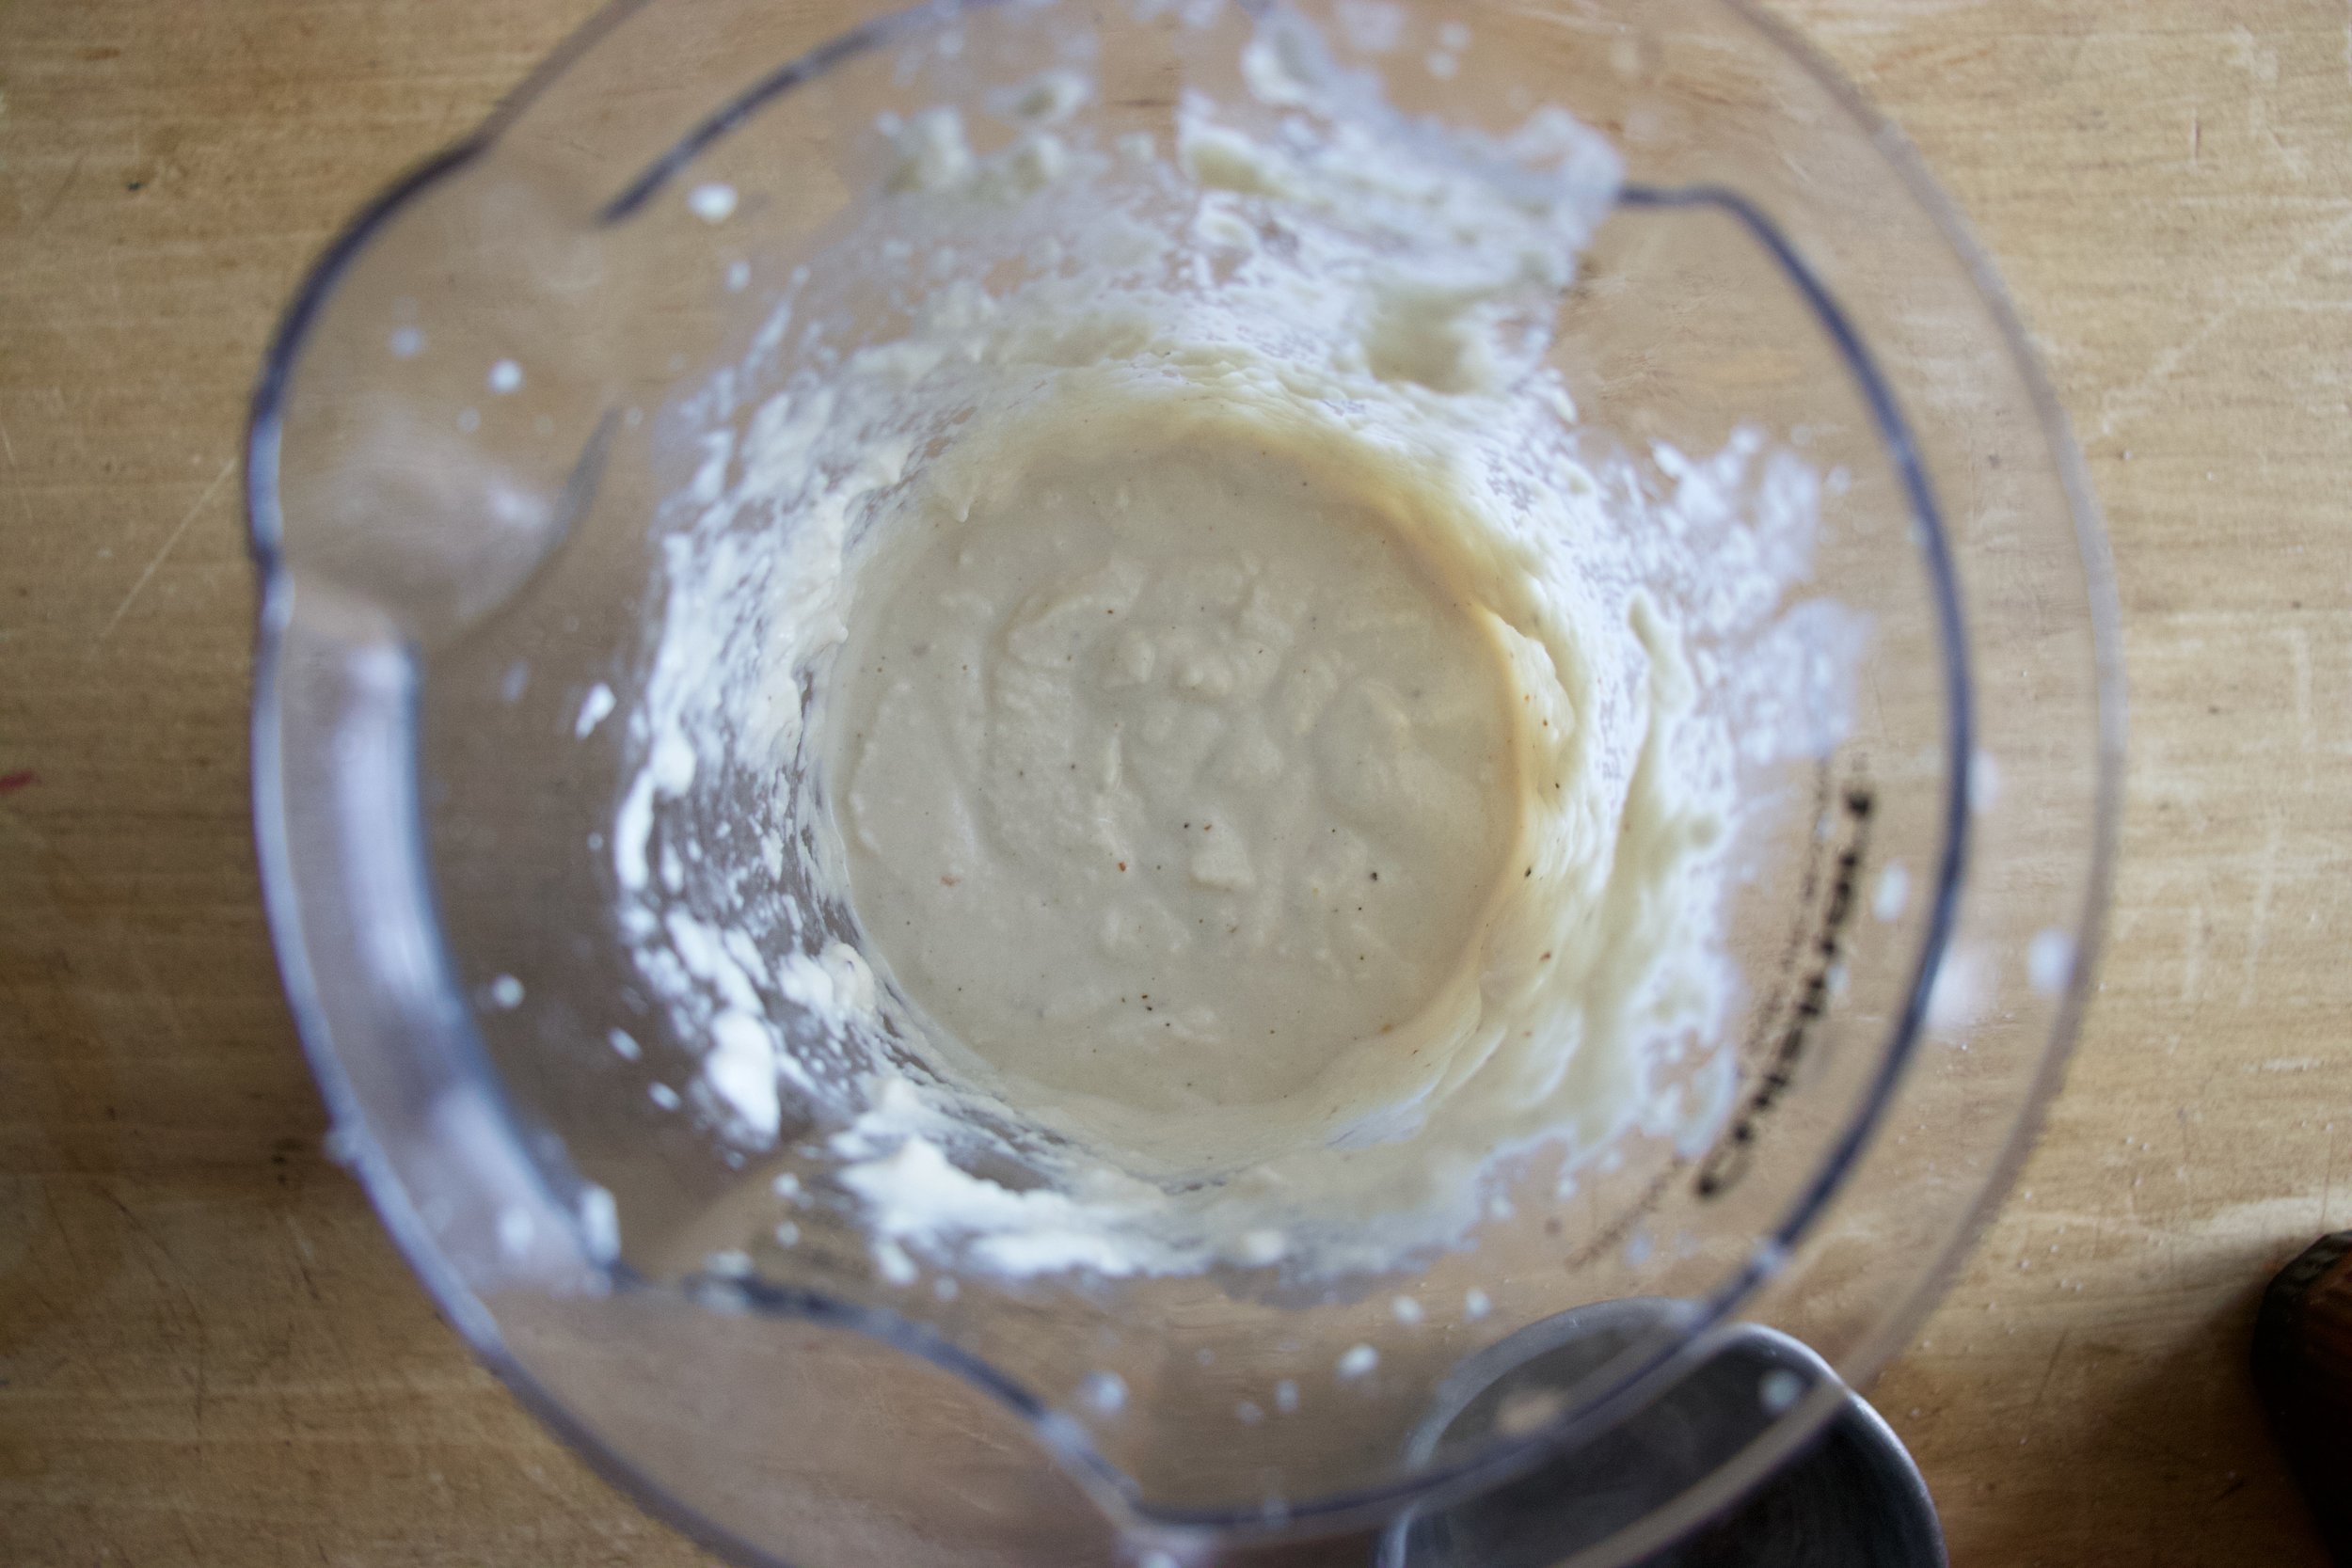
Fist off. Half the white beans go into blender or jar with the tahini, the juice of the lemon, garlic, vinegar and a splash of water. Blended unit nice and creamy smooth. And yes, it is basically hummus but whatever.

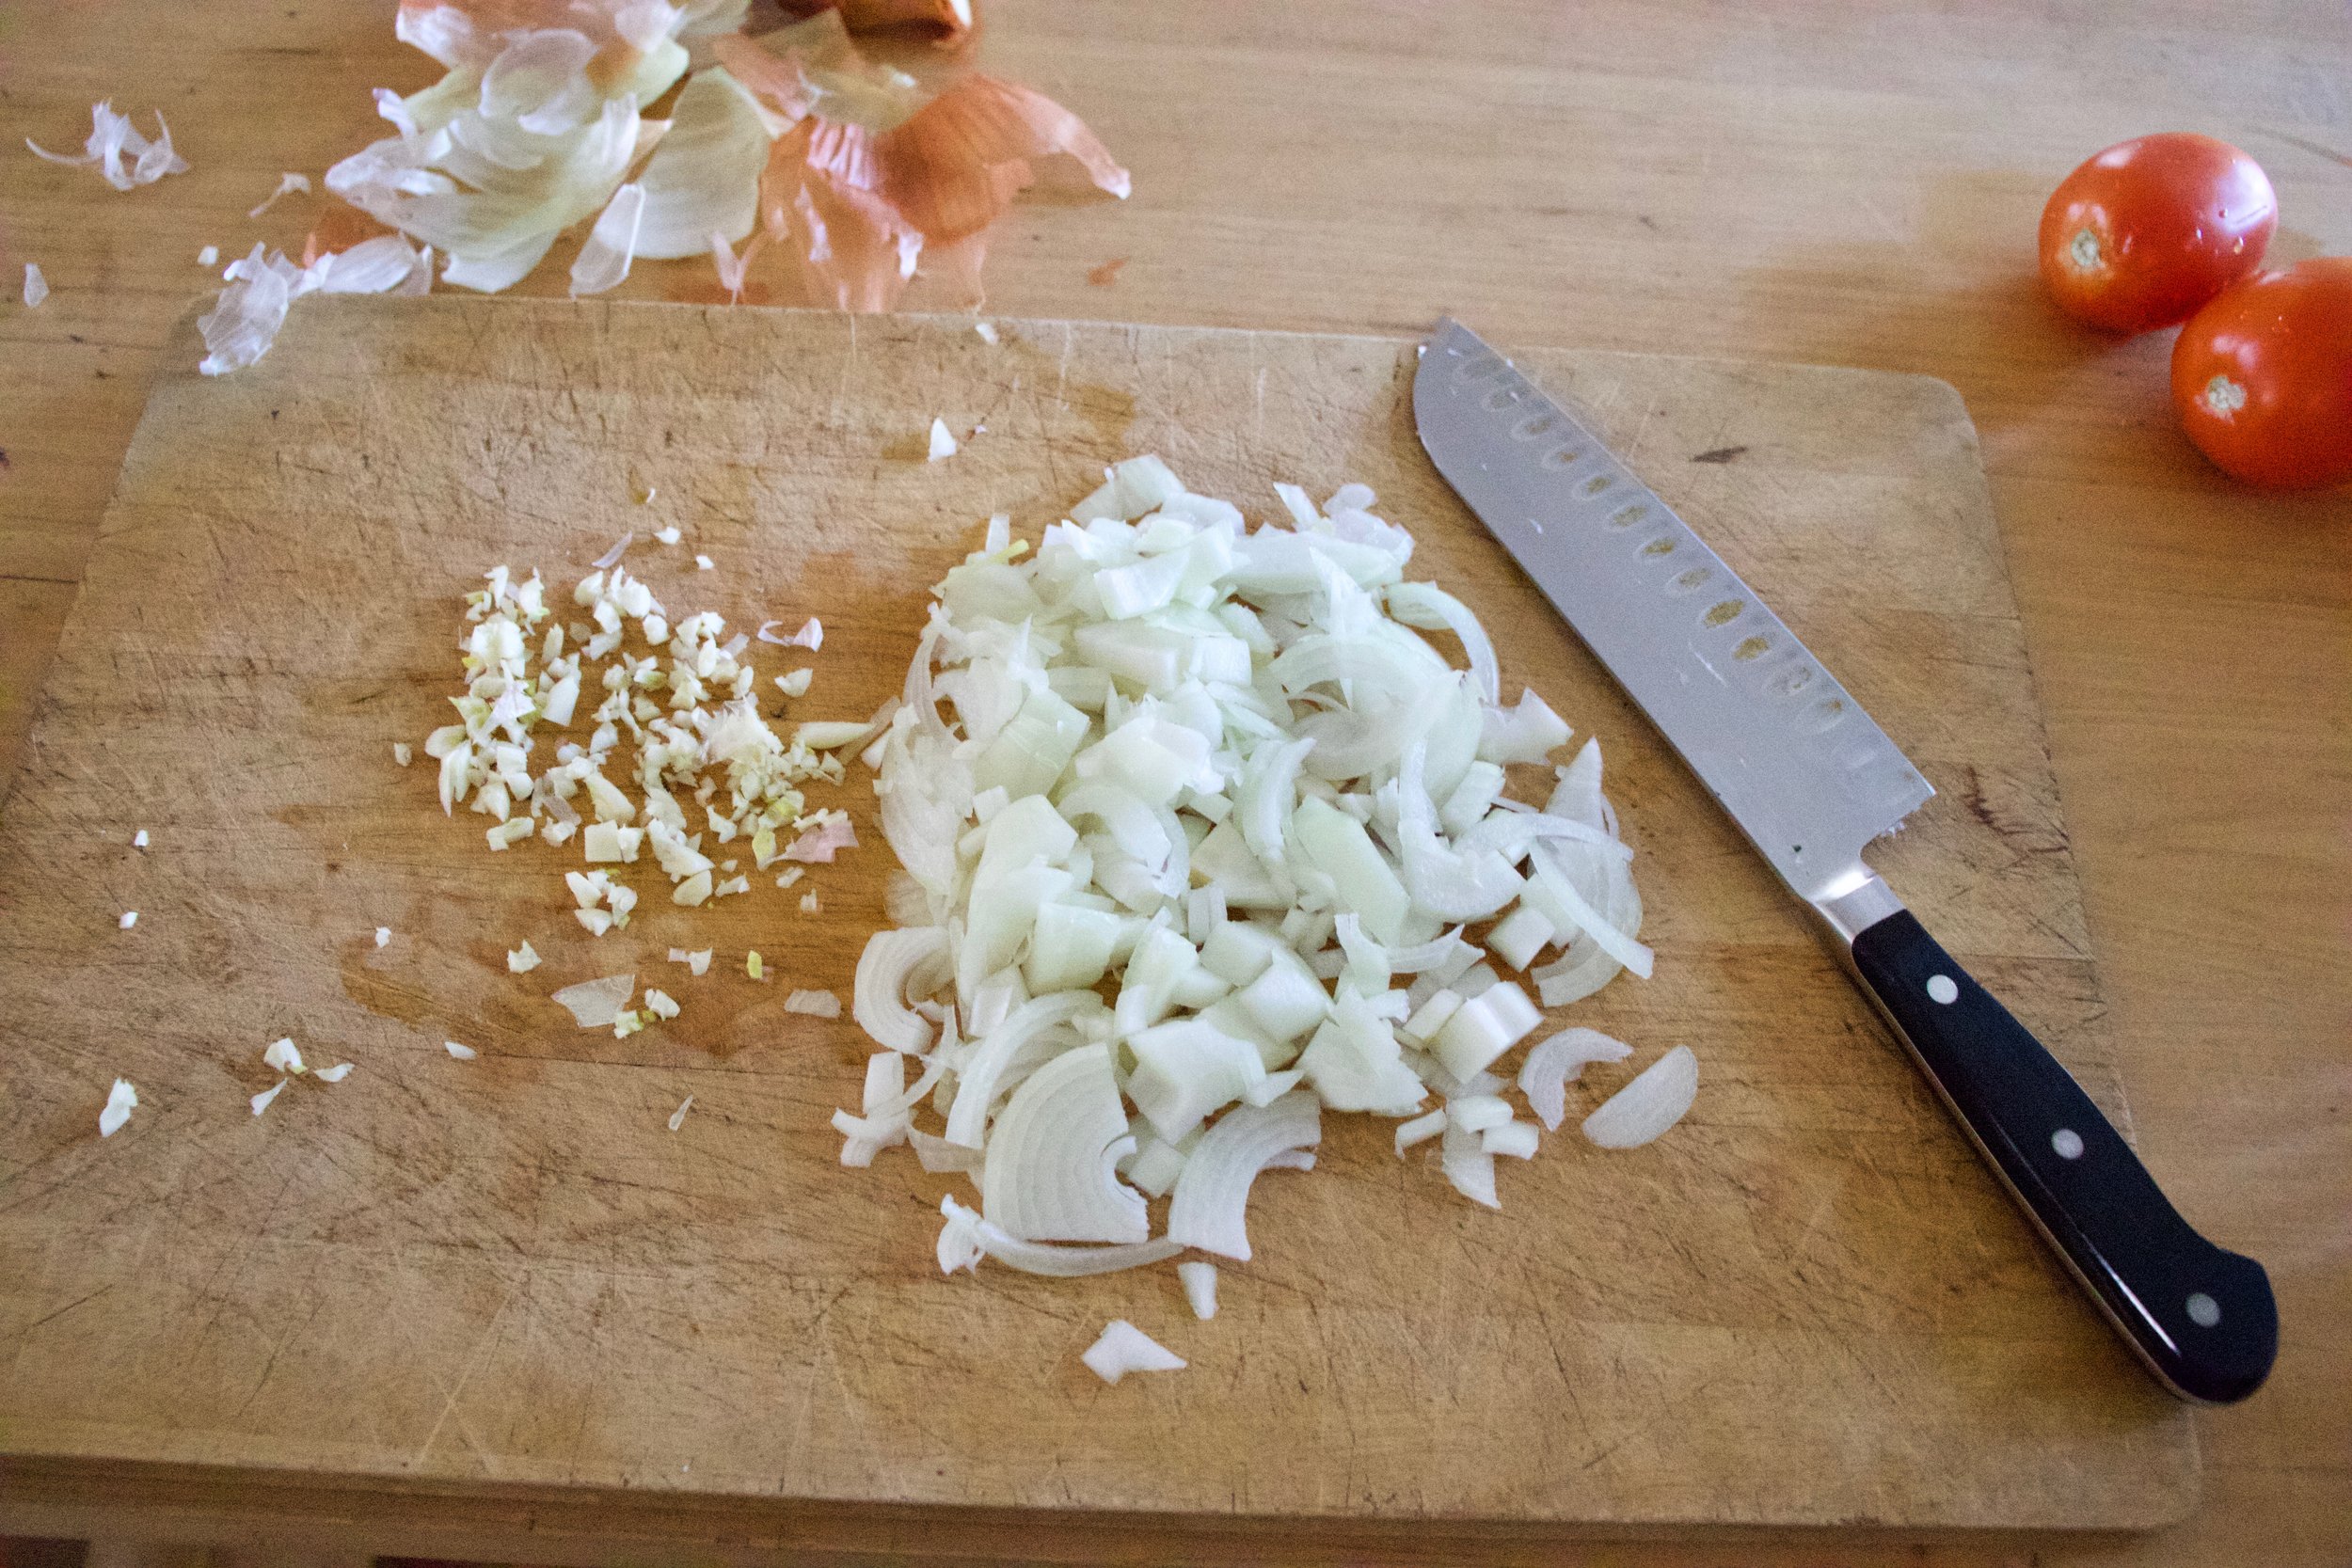
Julienne the zucchini and chop up the onion.

Note. You don’t have a mandolin or done’t want to julienne with a knife, well just chop the zucchini into small little chunks.

IMG_9894 2.jpg
IMG_9895 2.jpg
IMG_9901 3.jpg

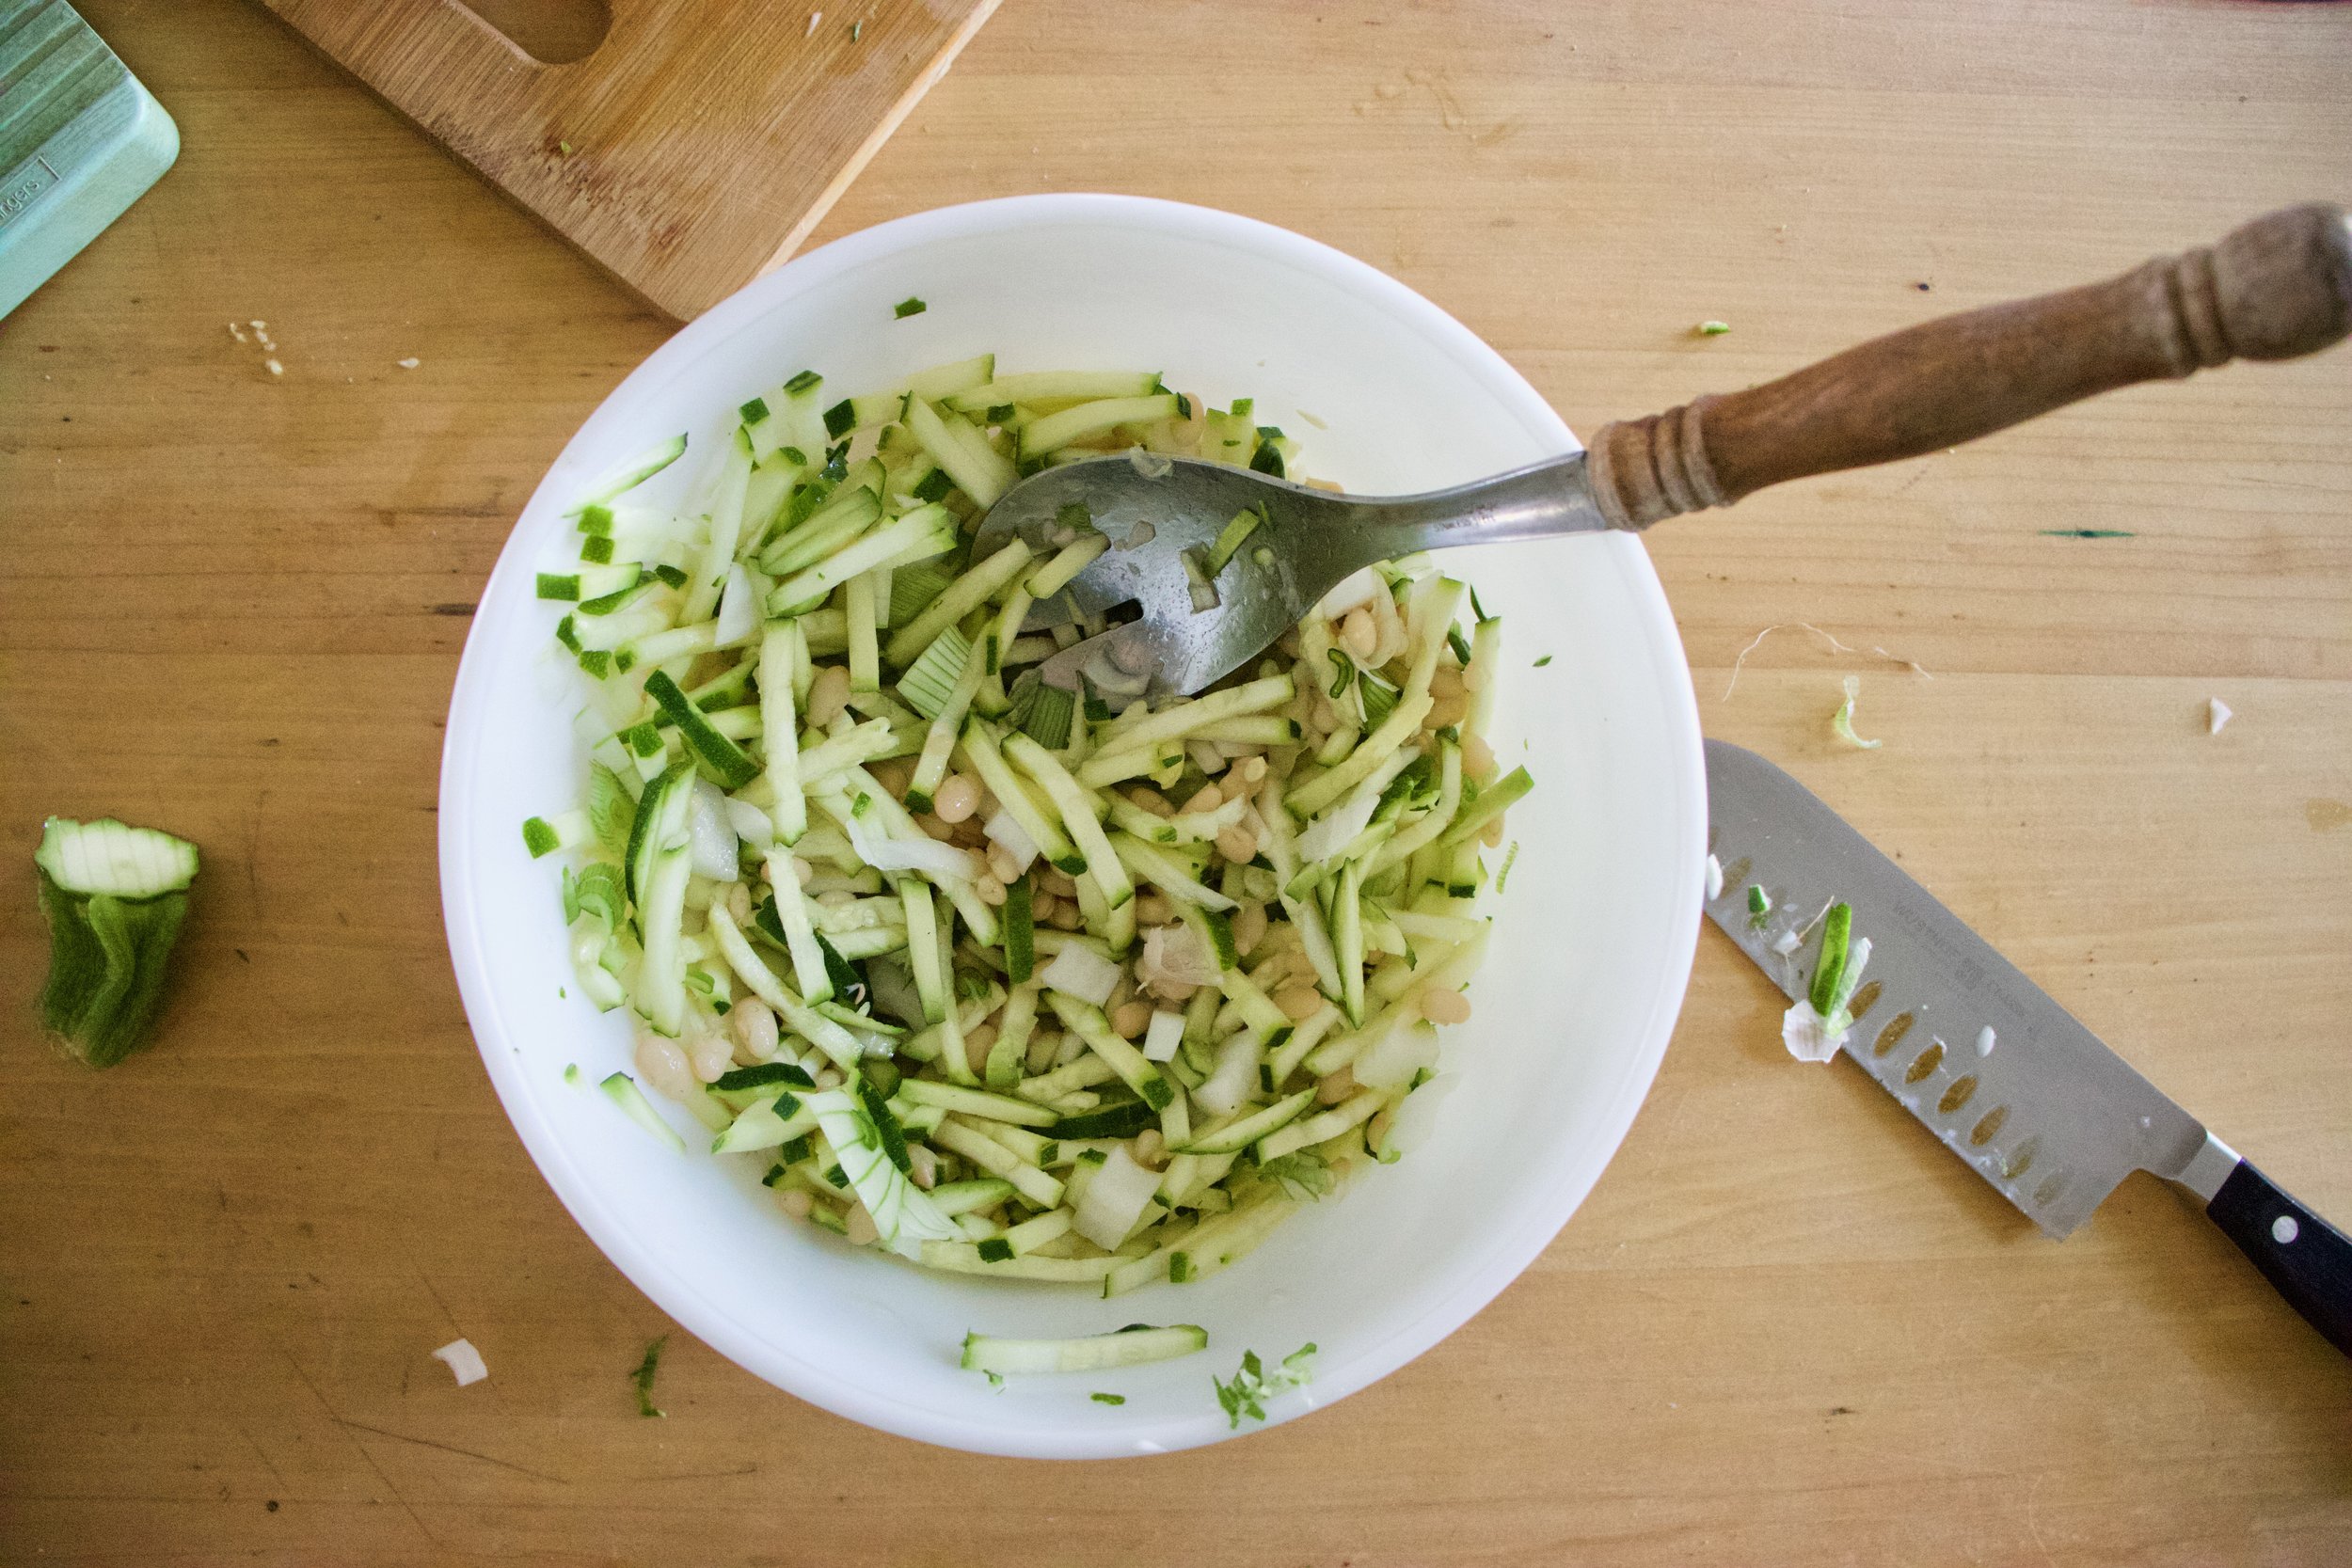
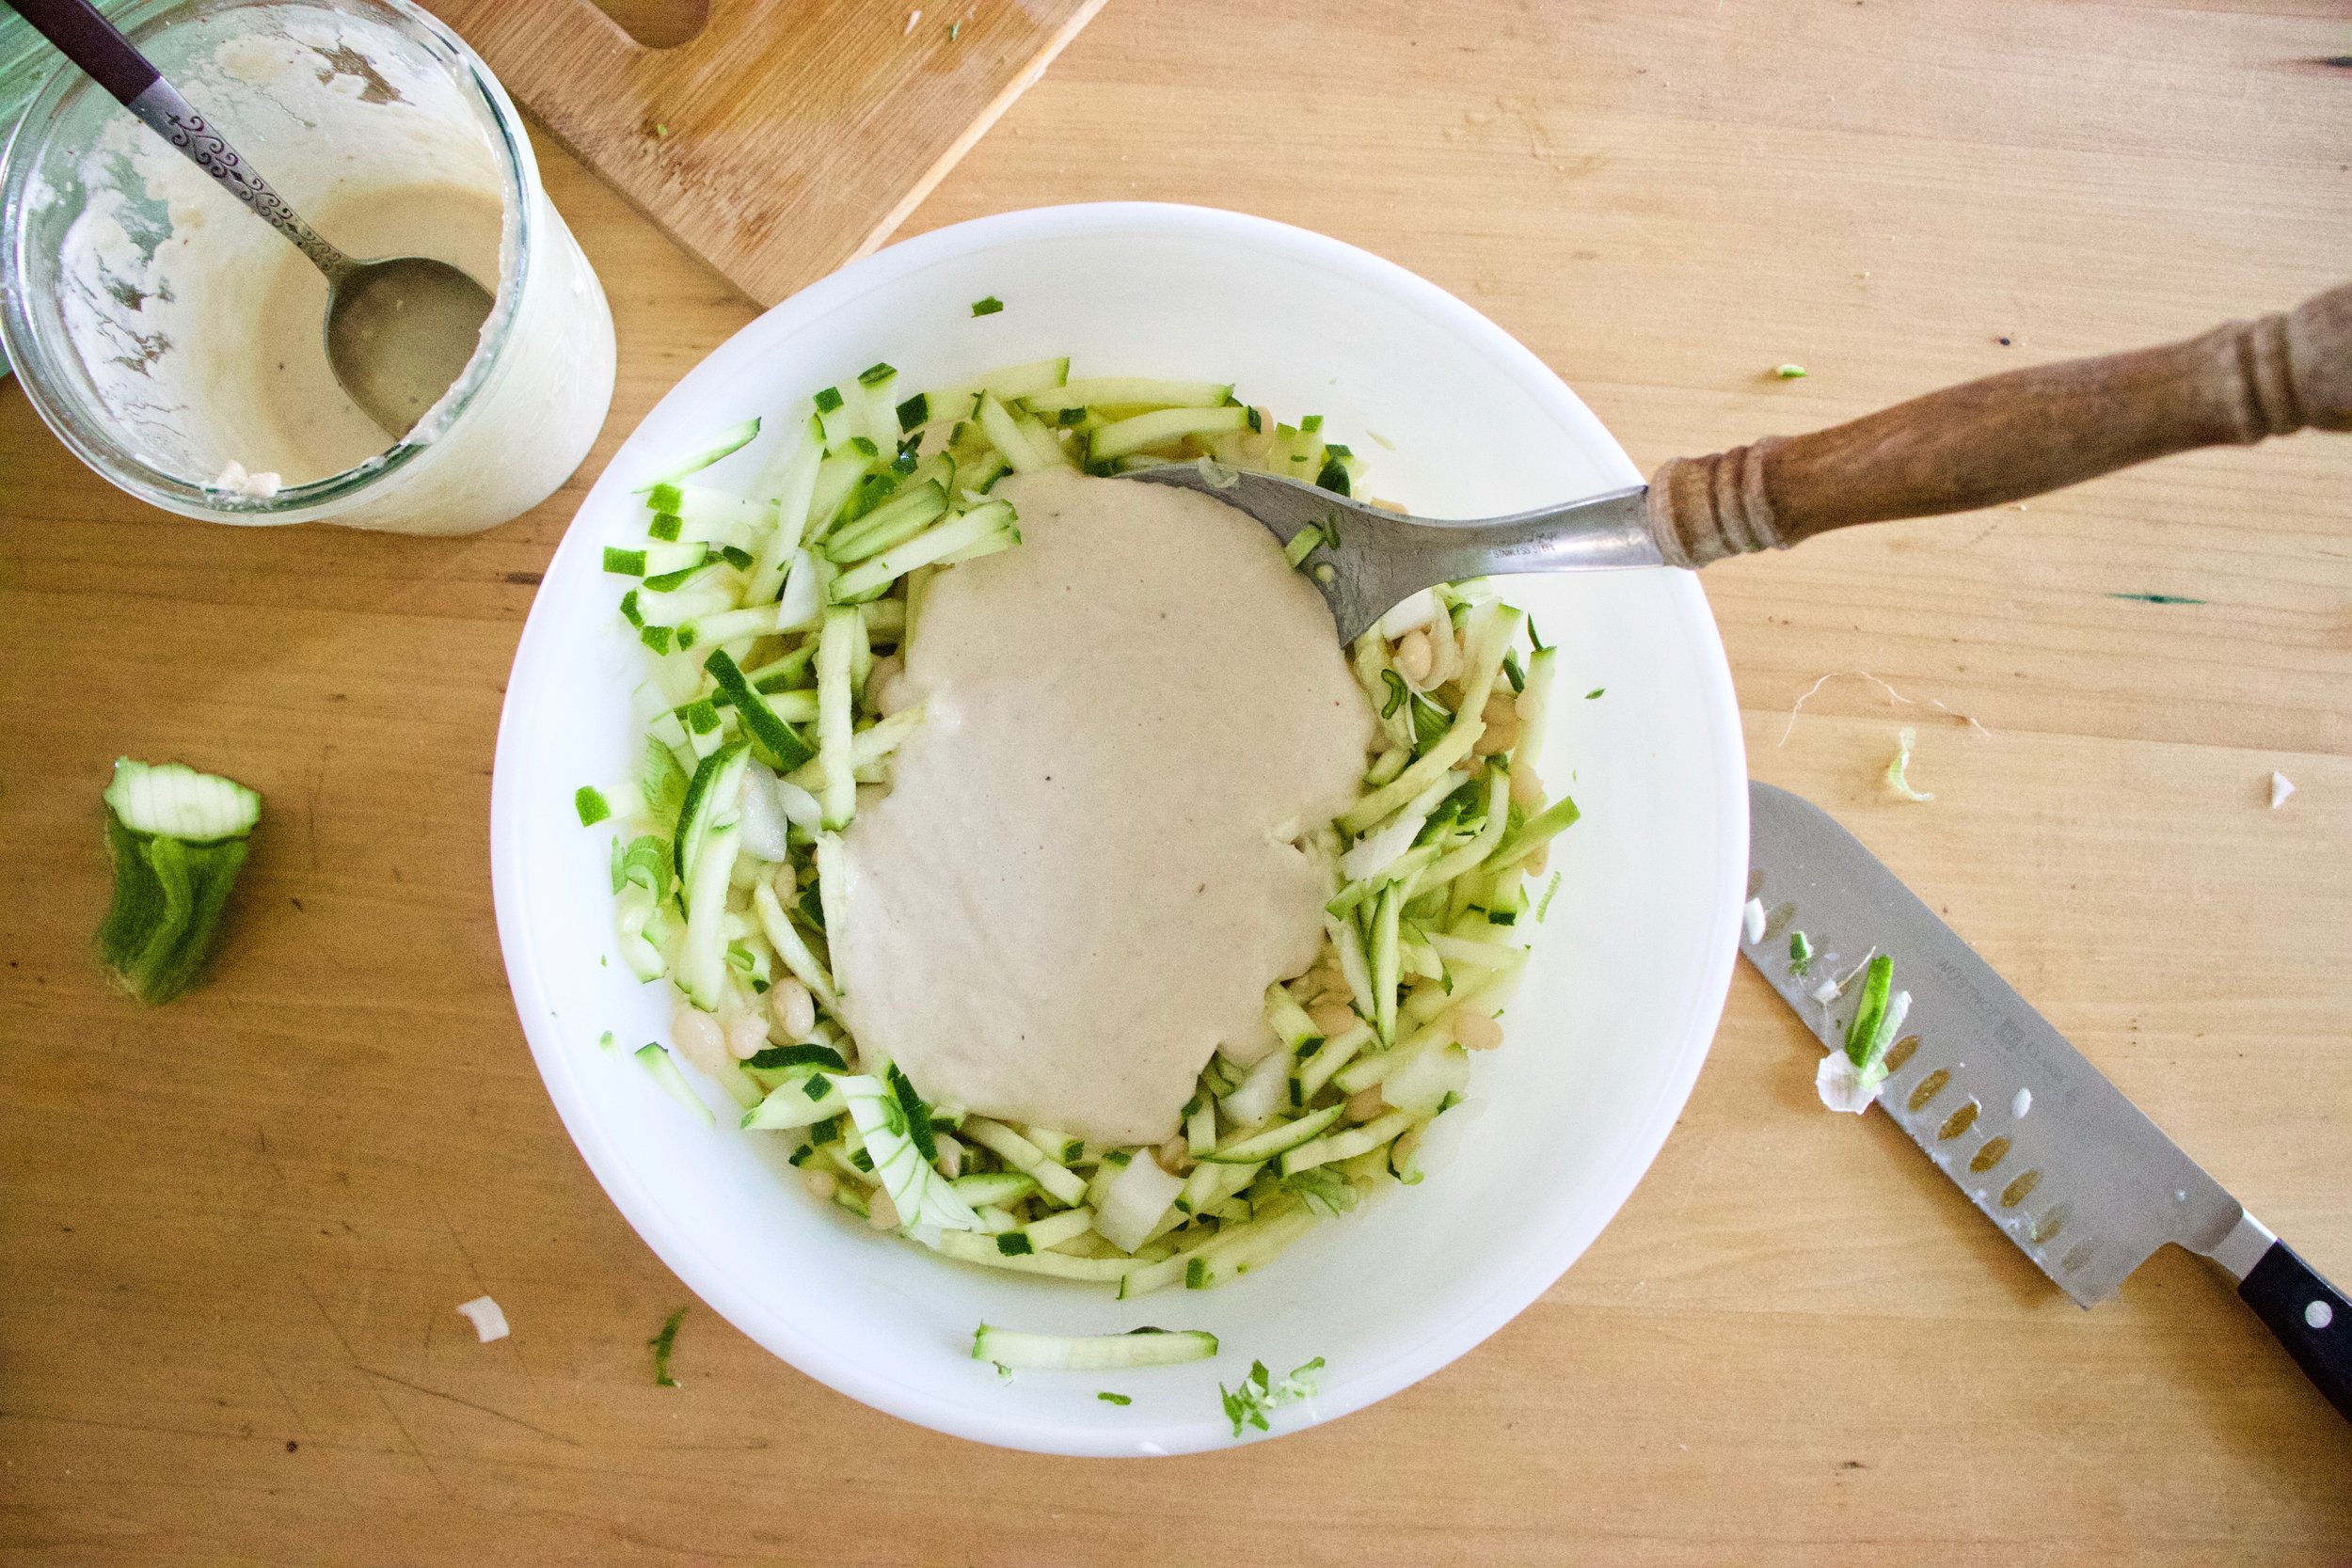
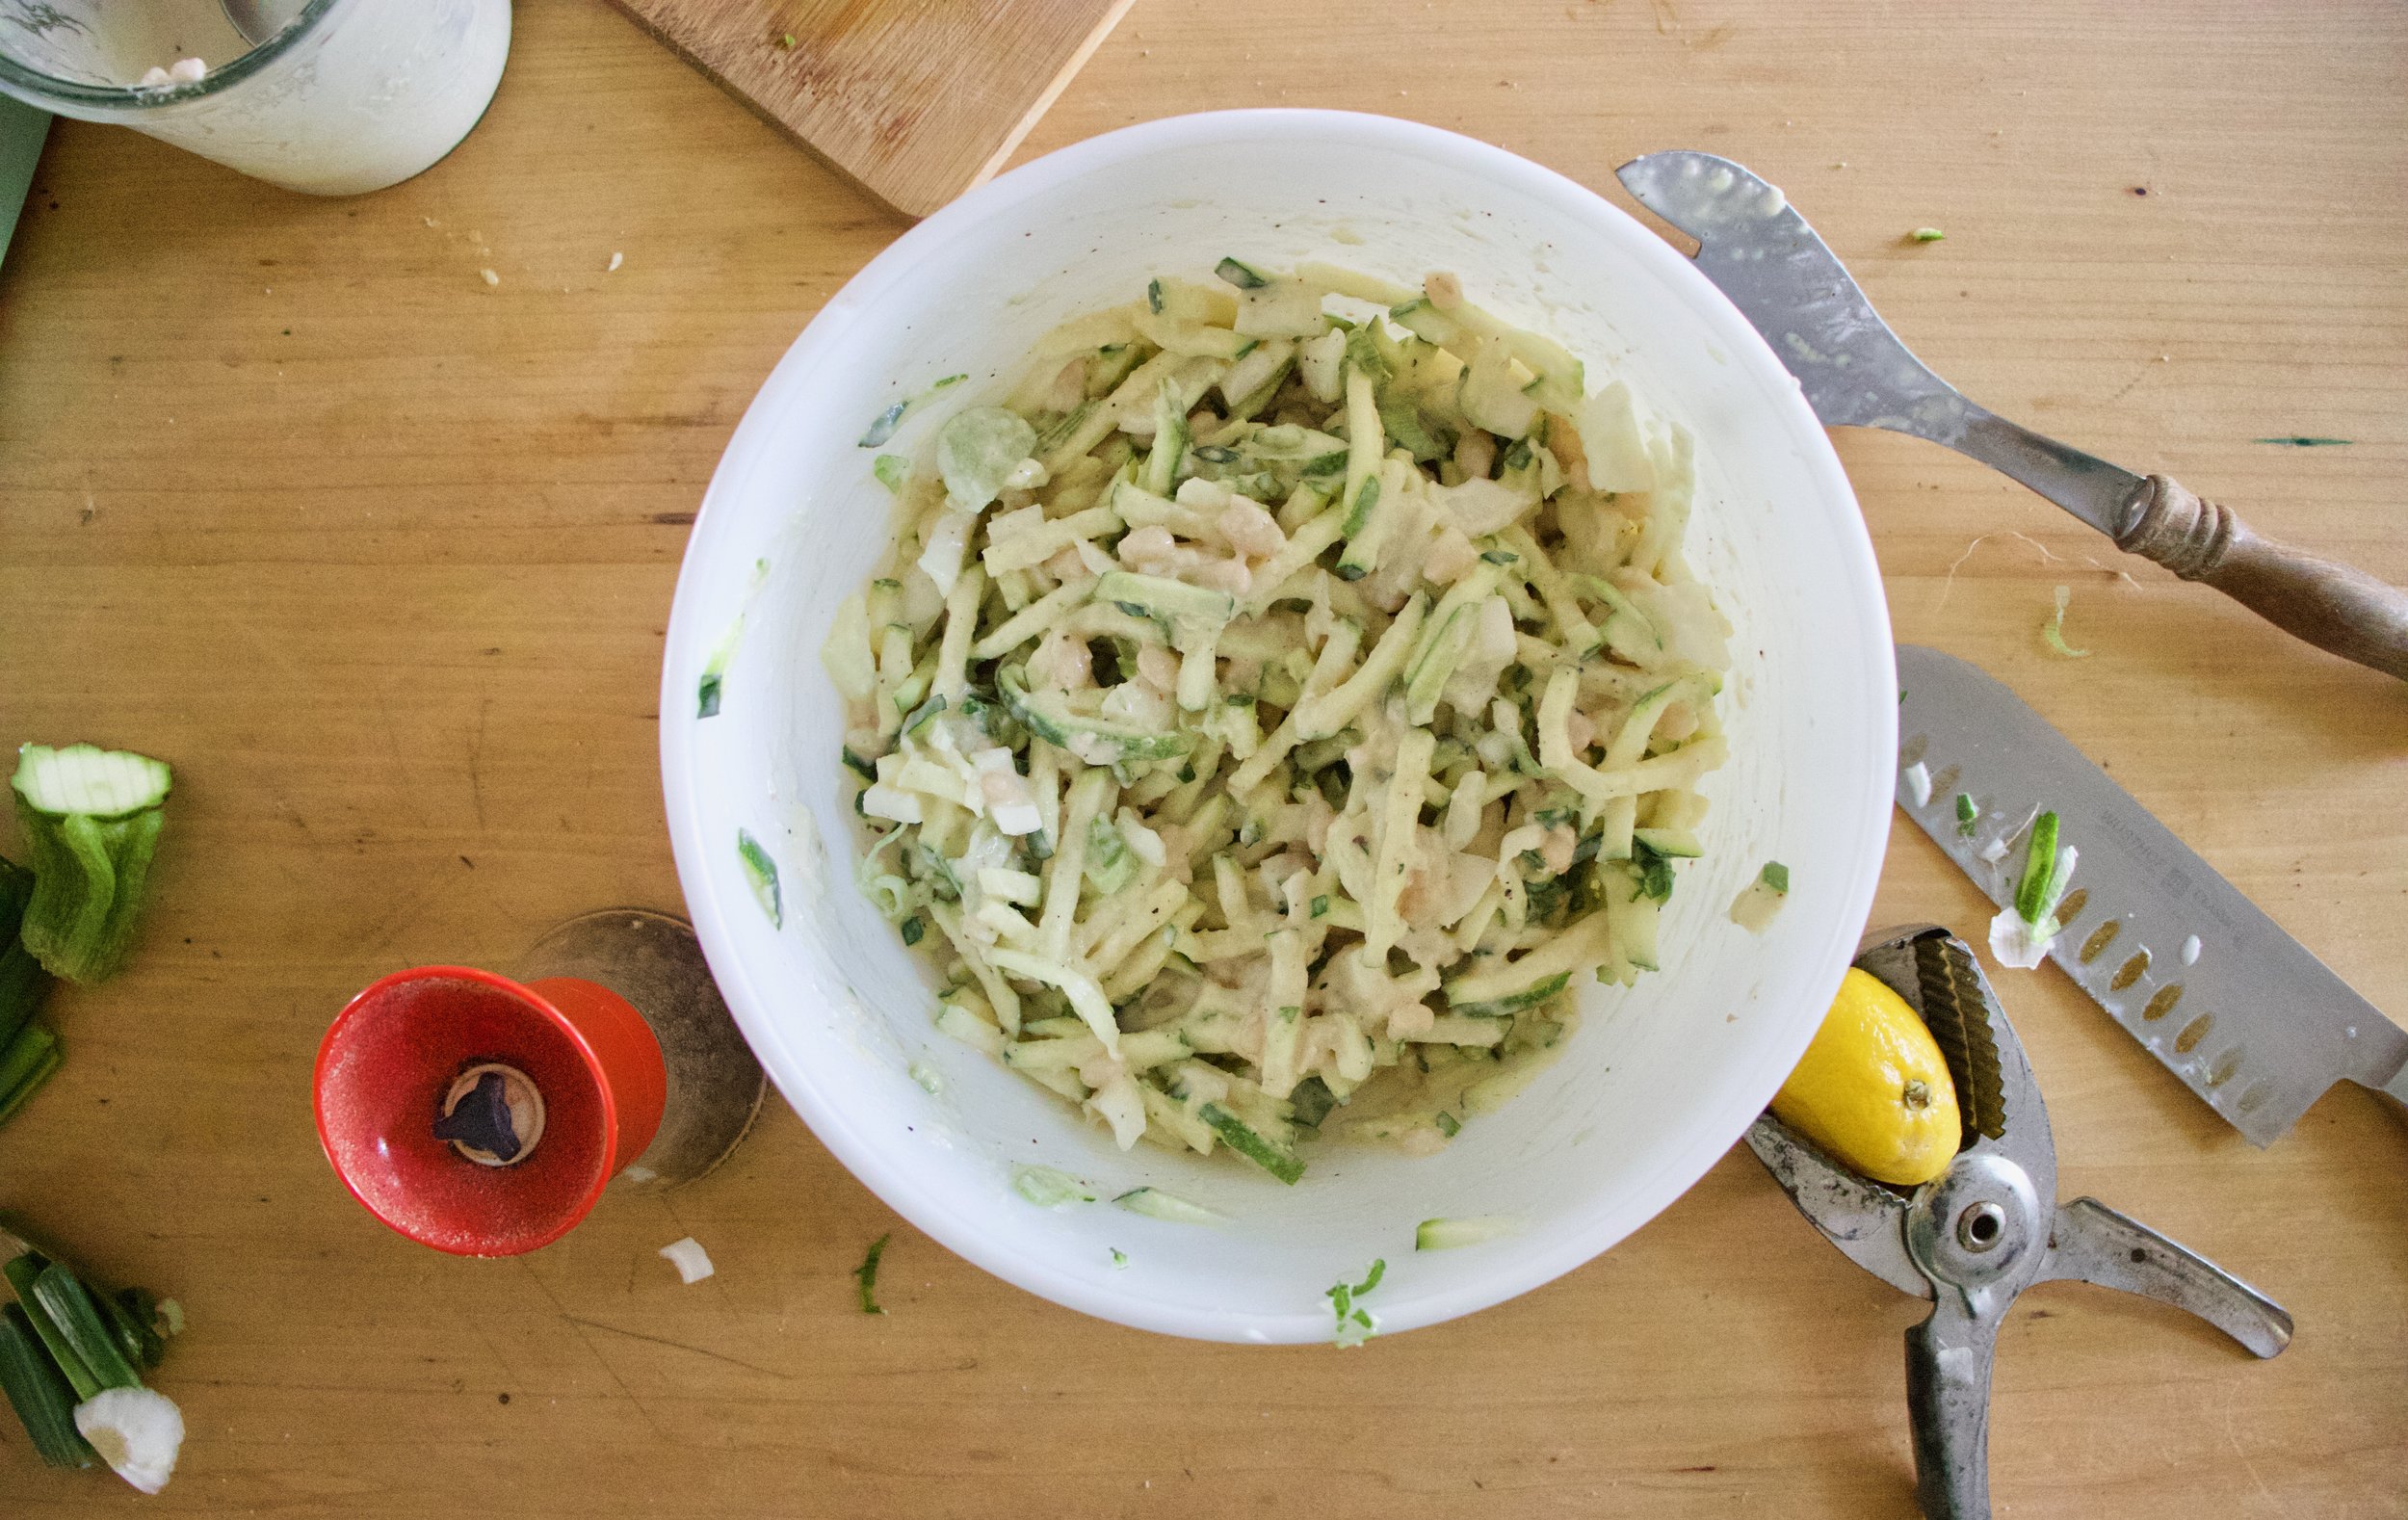
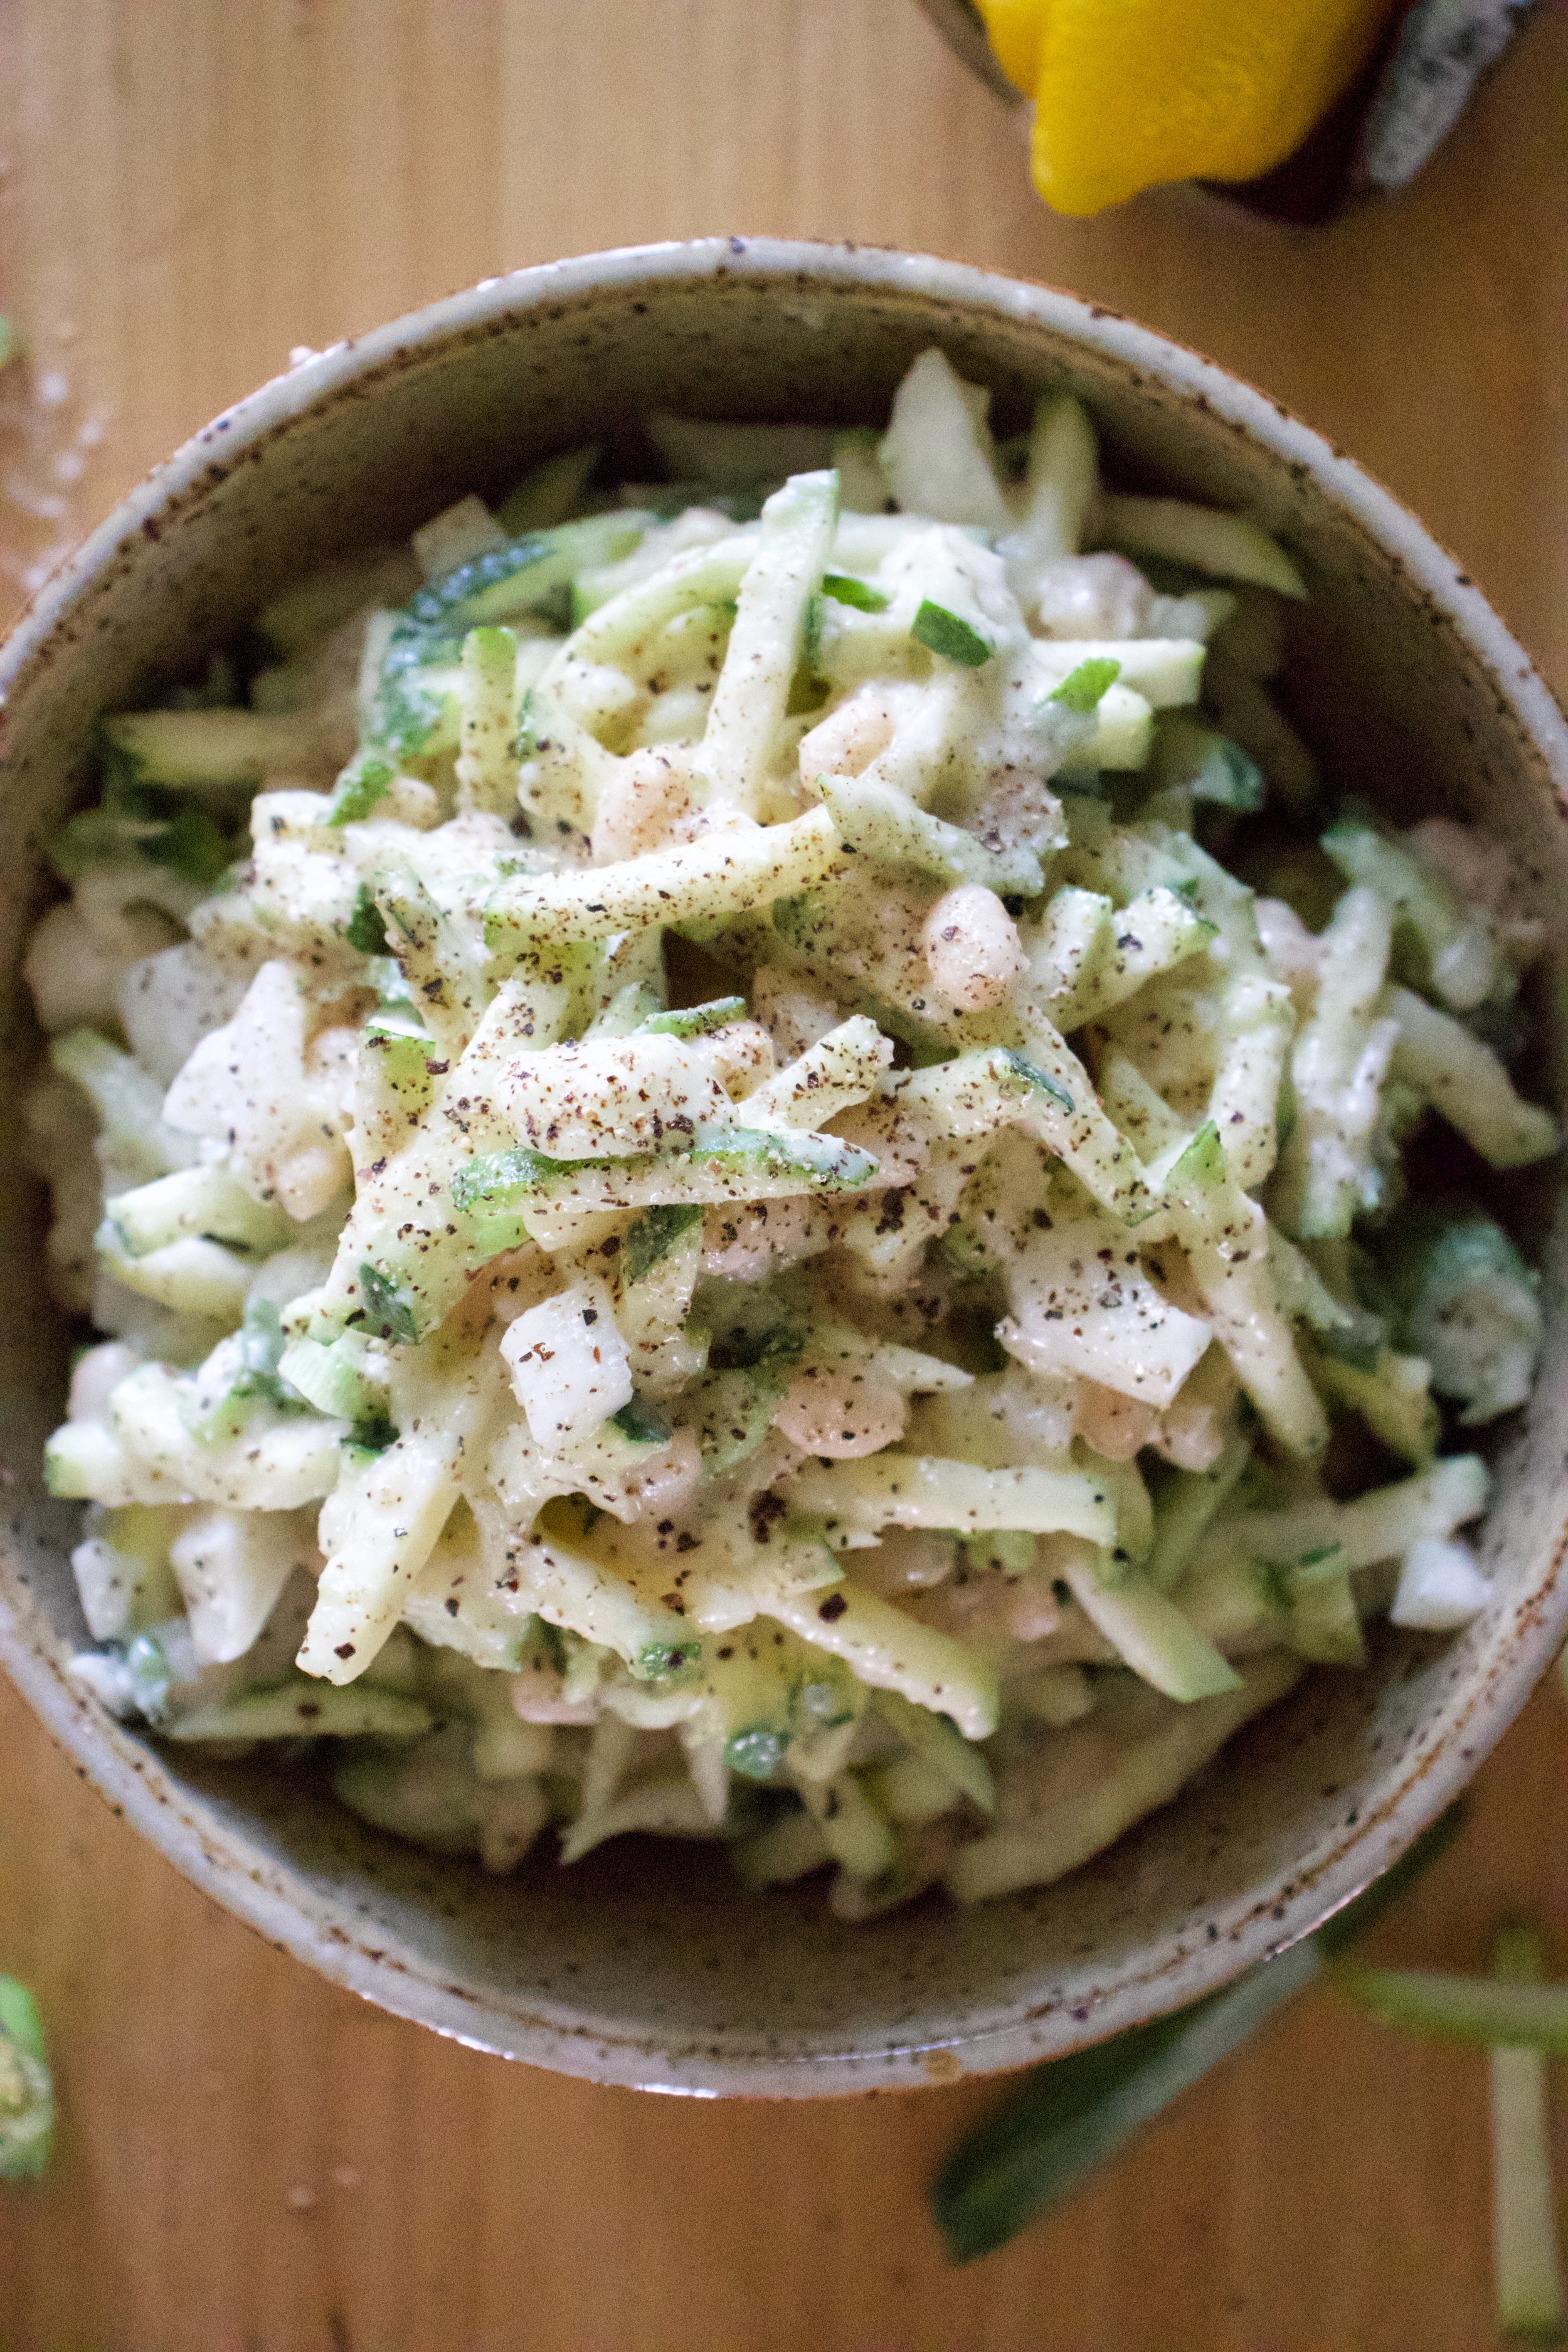
Bean, onion, and zucchini in a bowl. Add in the bean tahini mixture and mix. And ta da, all done. All of 5 minutes and no heat. Good for us.

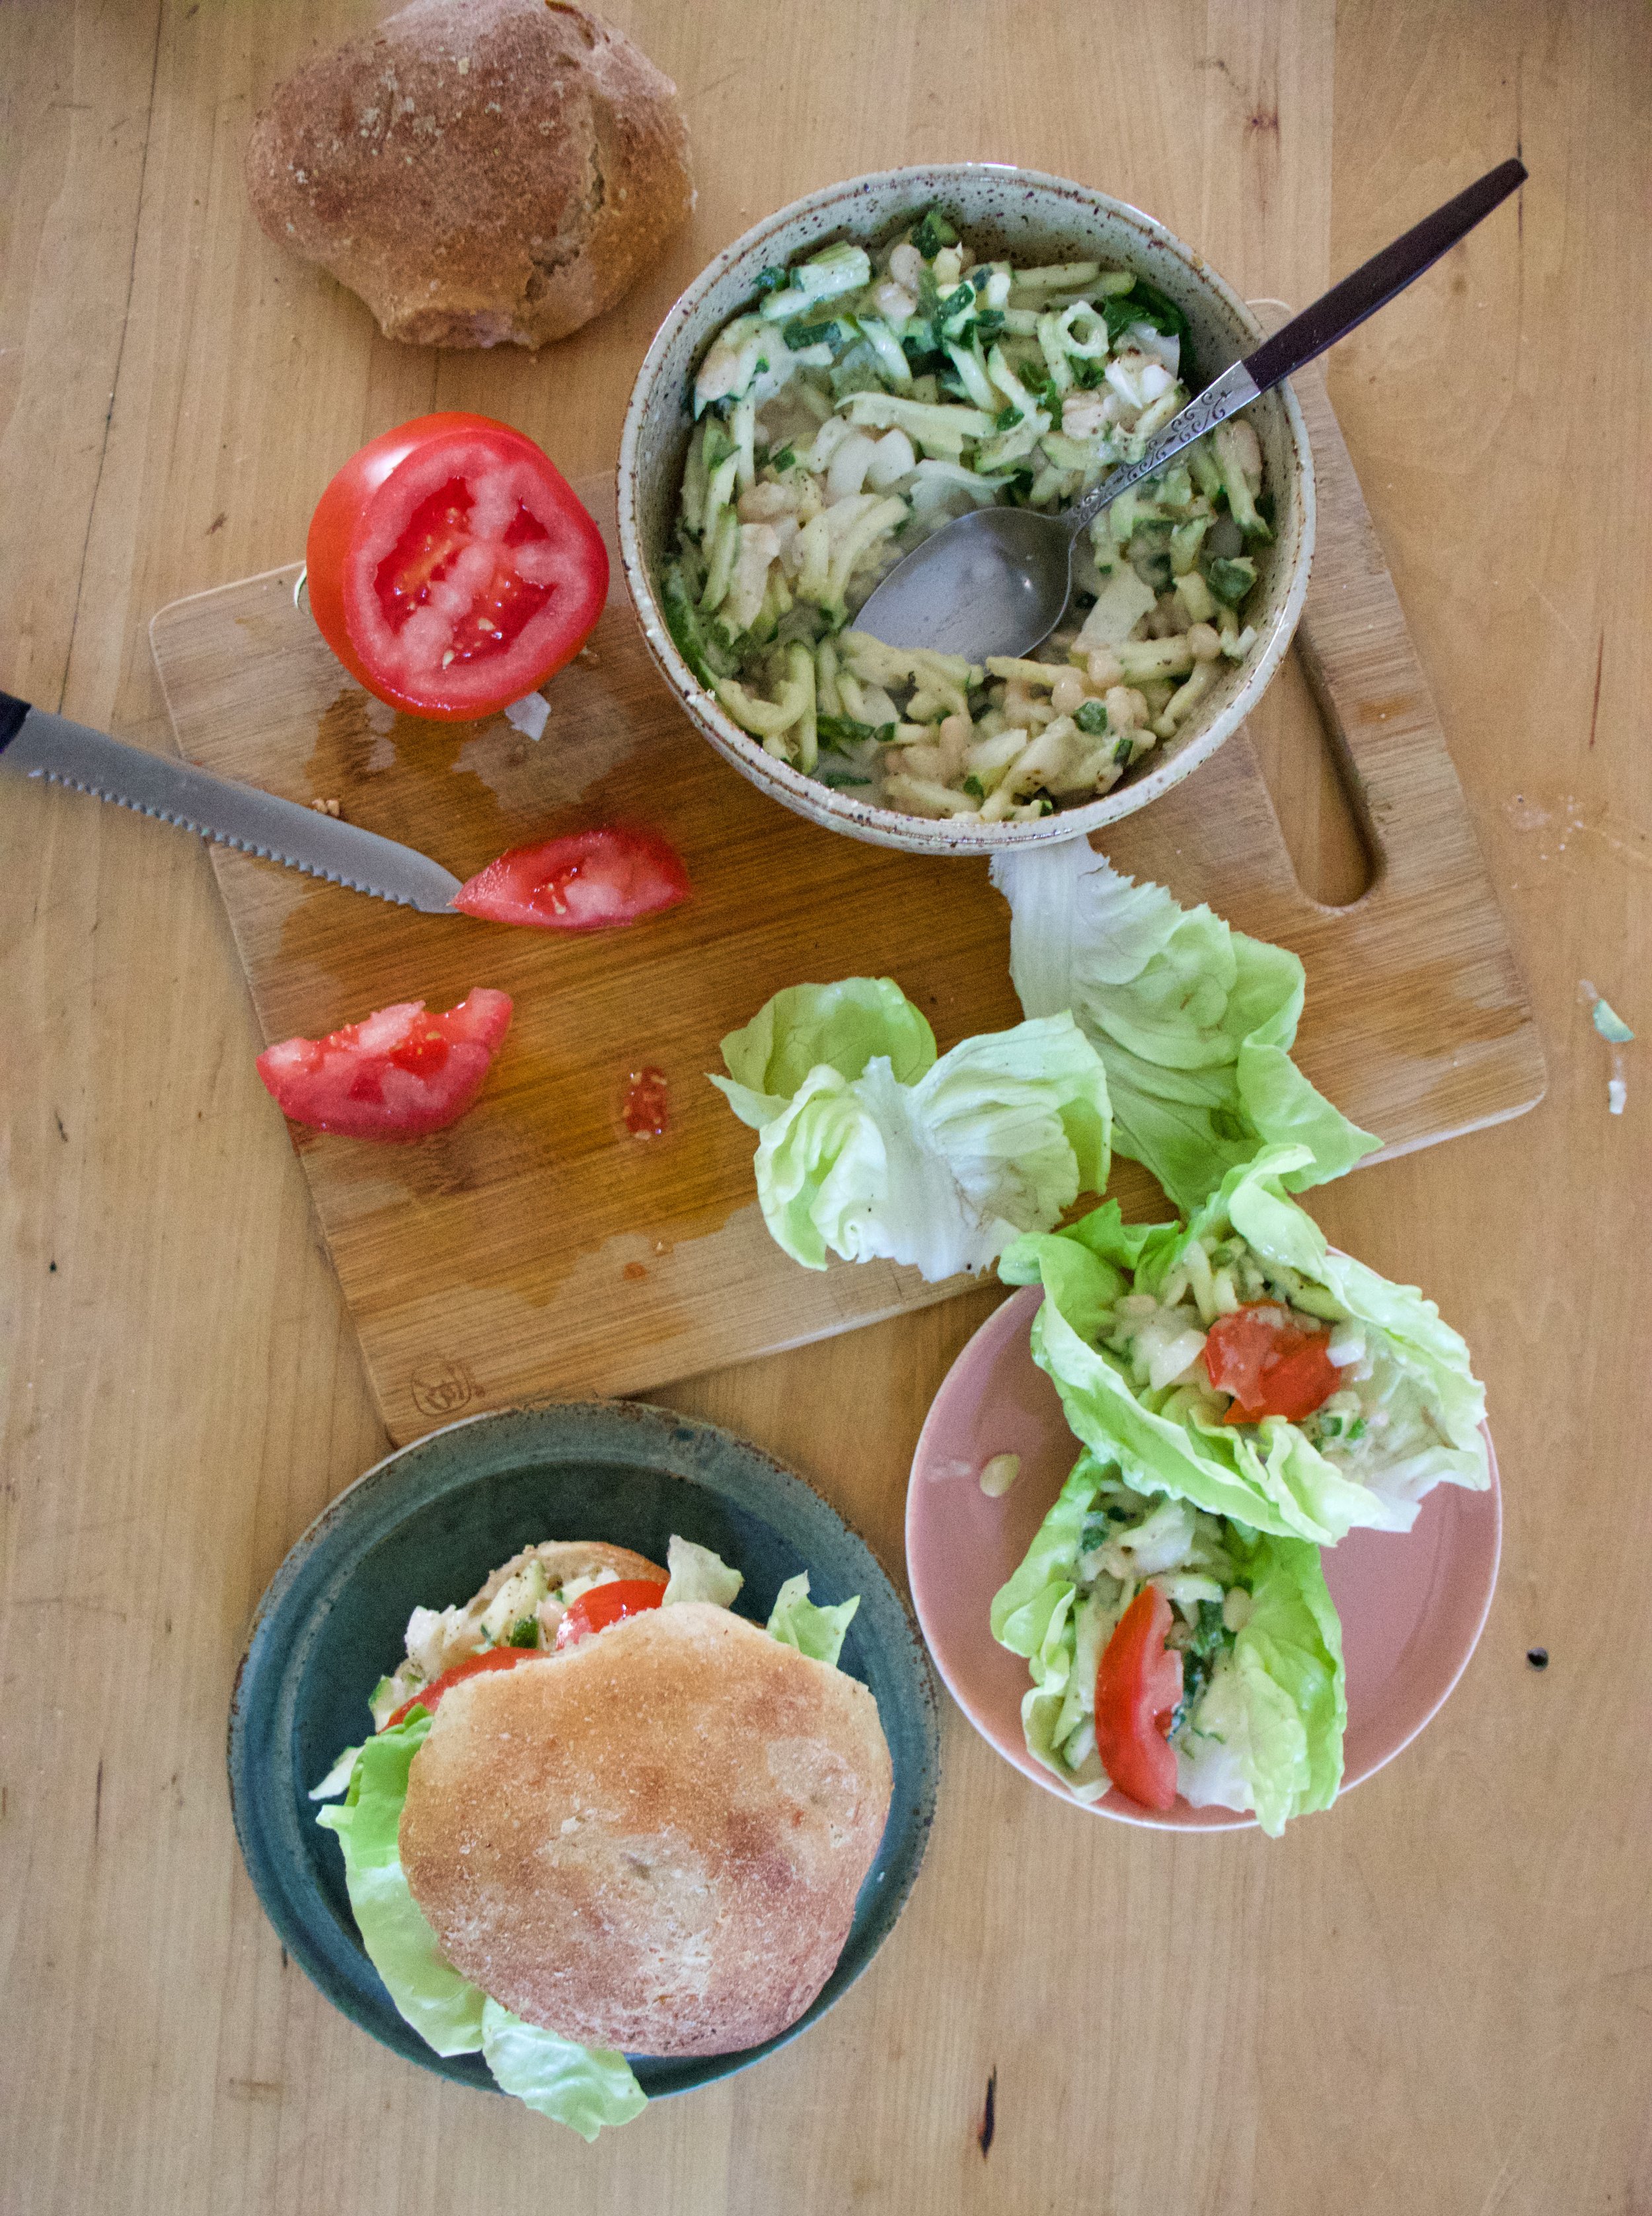
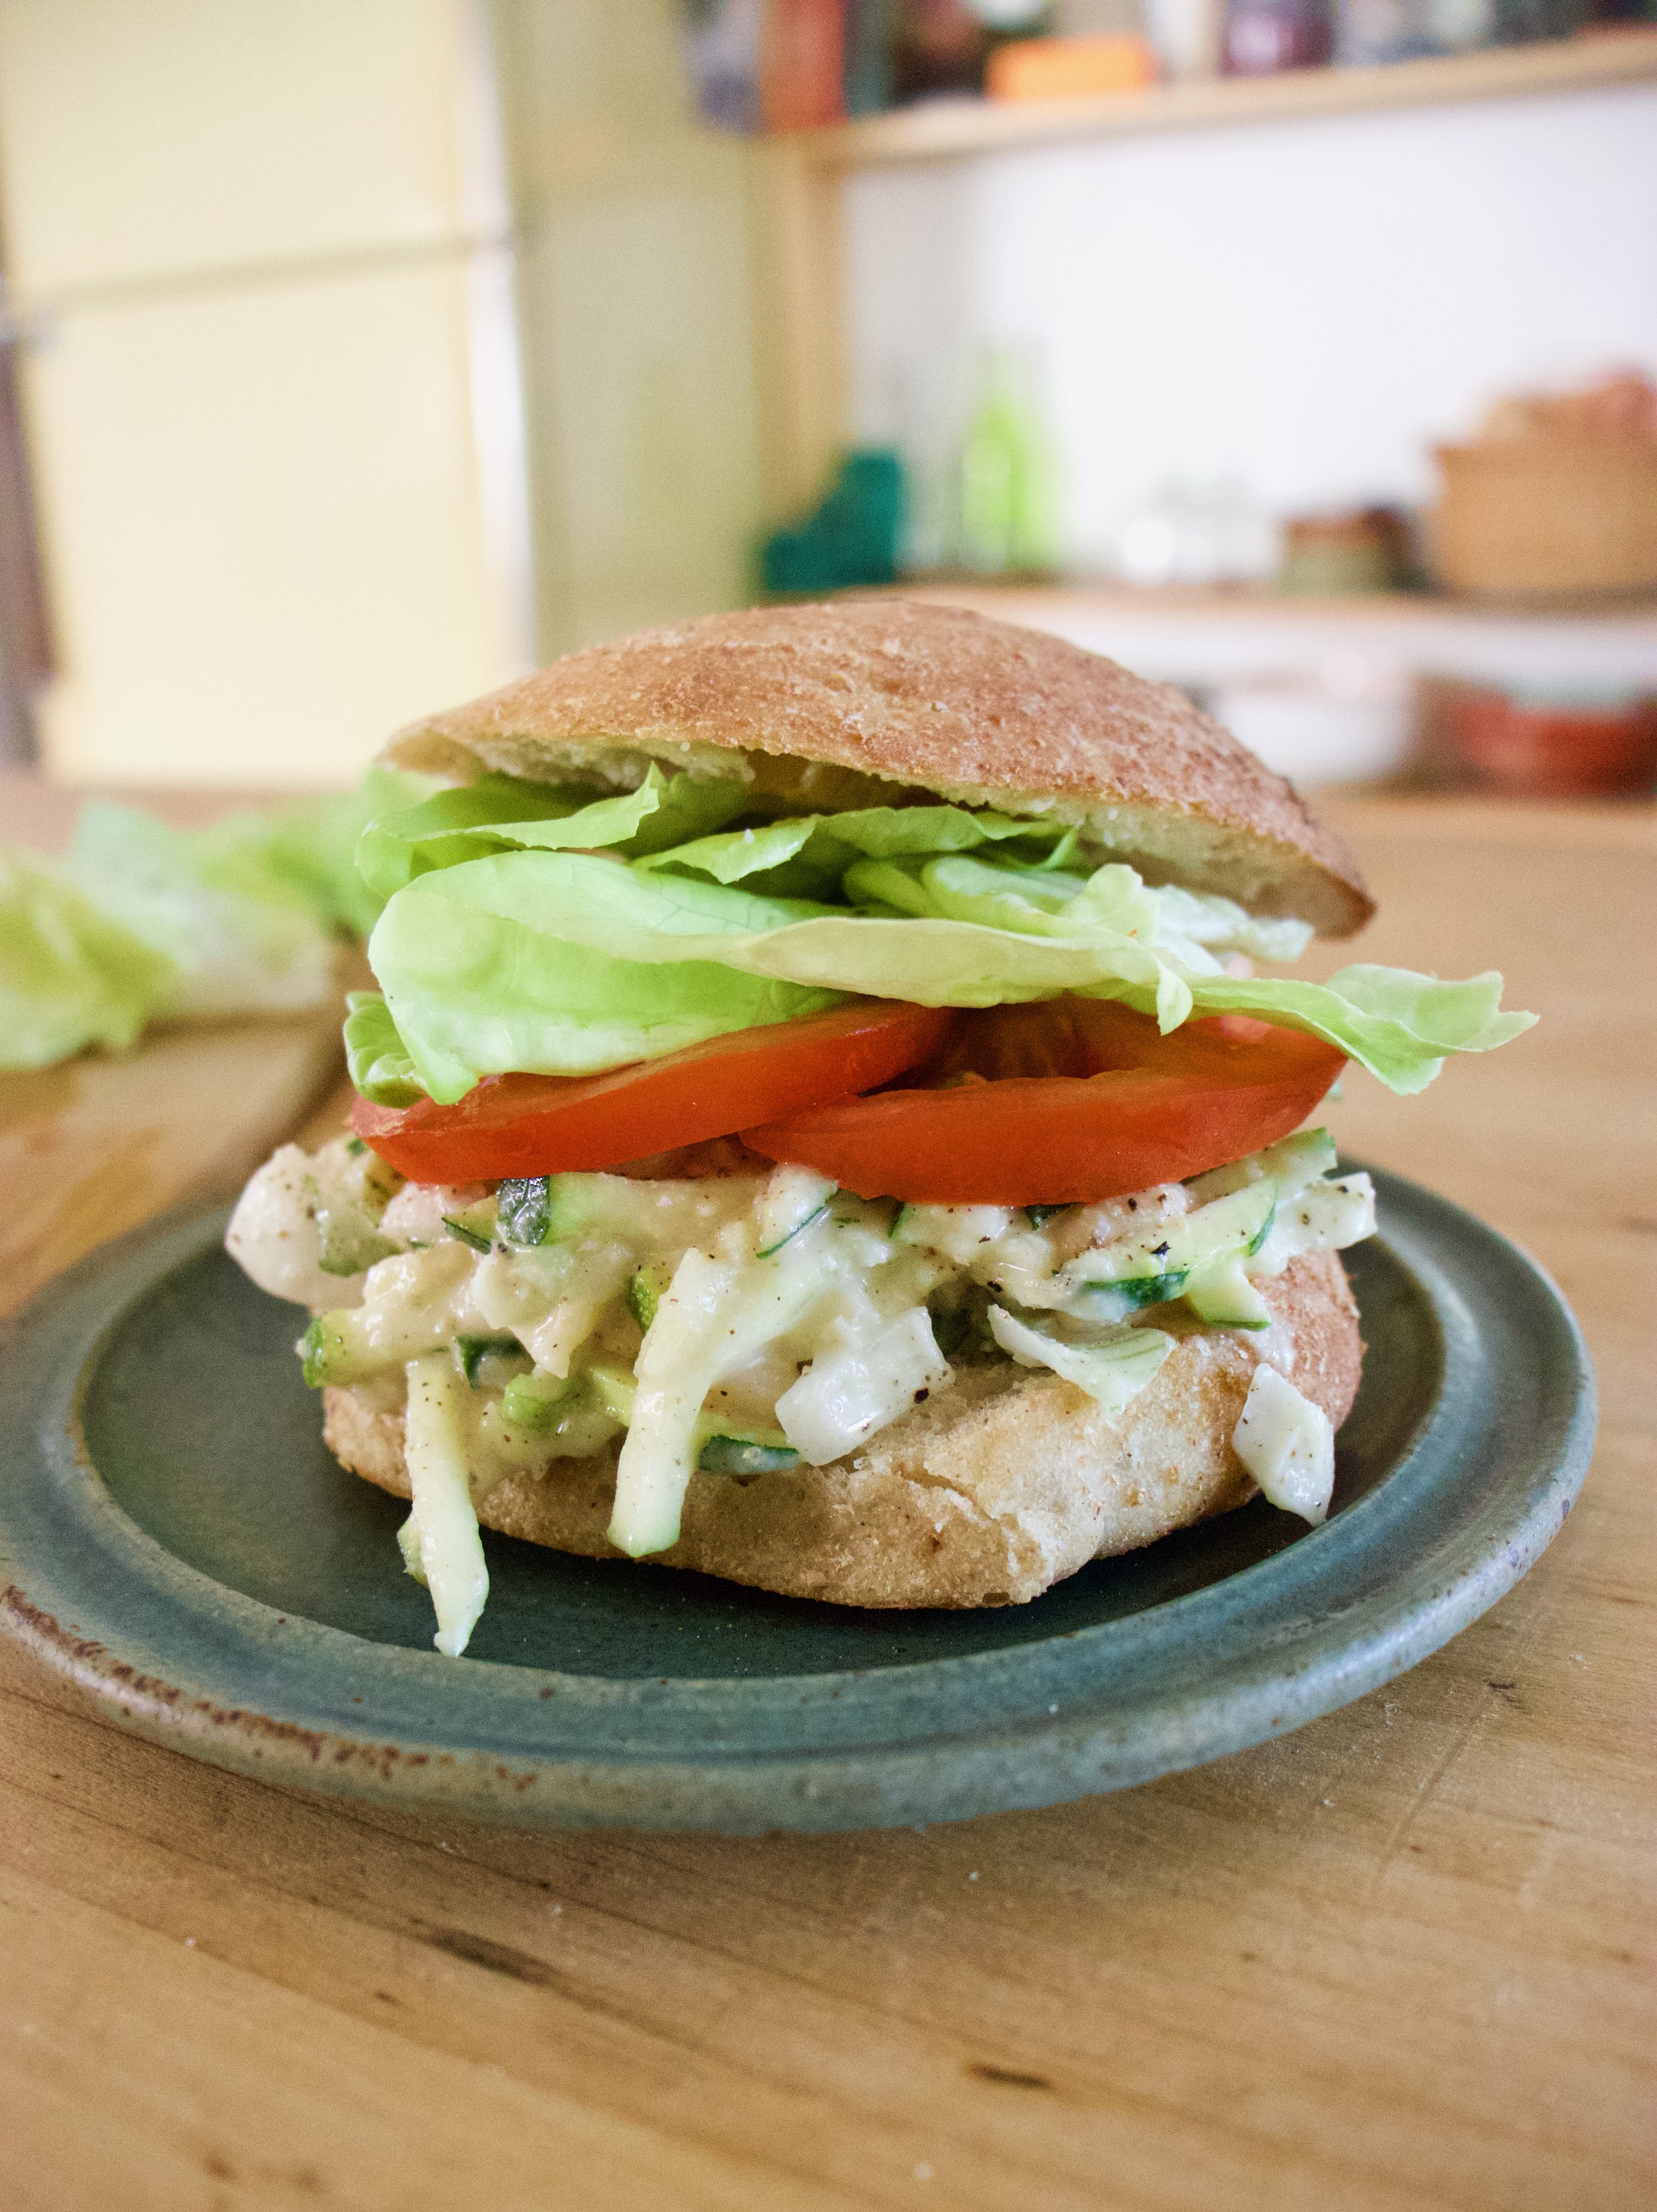
Now here is the thing. This salad is ready to eat now. You can continue onto the sandwich path or just eat it like it is with a fork. What I really liked to do is scoop spoonfuls into lettuce cups with a slice of tomato and a squirt or mustard. So yes sandwich, but also whatever else you want it to be.

IMG_9933.jpg

But as a sandwich…. Bread. And lettuce and tomato and heck, whatever else you want to throw on there. (Again, mustard is A+)

IMG_9994.jpg

Now stop. Sandwich time.

Stay cool!

-C


White Bean Zucchini Salad Sandwich 

makes 3-4 sandwiches

  • 1 medium sized zucchini

  • 2 1/2 cups cooked and strained white beans (a can will do)

  • 1 spring onion (or a small white or red onion)

  • 3 tablespoons tahini

  • 2-3 cloves minced garlic

  • 1 lemon

  • 1 tablespoon white or red wine vinegar

  • 2-3 tablespoons warm water

  • salt and pepper

  • And to serve as a sandwich

  • bread or wrap of your choice

  • tomato slices

  • lettuce

  • anything else you want

Place half of the beans, tahini, garlic, juice of the lemon, and the vinegar into a jar and use a immersion blender or a regular blender and blend until creamy smooth. Add in a tablespoon at a time of water until the consistency is just slightly thinner then hummus.

Grab zucchini and using a mandolin or a knife and julienne it. (You can also just cut into small little cubes.) Dice the onion up into small pieces and toss with zucchini, onion, and the other half of beans into a big bowl. Dump the bean tahini mixture all over and veggies bean mixture and toss around. Add salt and pepper to taste.

To make it a sandwich… Place a scoop onto a bread situation, add some lettuce and tomato and whatever else you want, and eat it.

In beans, dinner, pulses, quick and easy, Raw, salad, summer, Vegan, Vegetables, sandwiches Tags White Bean Zucchini Salad Sandwich, Sandwich, vegan, vegan sandwich, gluten free, vegetables, beans, pulses, plant based, easy dinner, summertime, no cook meal, cold food, salad, zucchini, easy, fast, picnic
Comment

Gnocchi with Chunky Tomato and Onion

June 15, 2019 Colleen Stem
IMG_9417.jpg
IMG_9375.jpg

Farm share started last week (HOORAY!!!!) but always, at the beginning when things are still getting on growing, we are only getting a few things. Lot of greens which I will never get enough of, and lots of potatoes. Also, I made the mistake of buying a very large bag of potatoes last week right before farm share and now I am basically swimming in potatoes. And so the story goes….

So what do you do with a shit ton of potatoes? Yeah, I thought potato cannon to but then I realized that I would have to use my potatoes and sure I have a lot, but I am not wasting them on that. So gnocchi they became. Gnocchi. Basically a boiled french fry or a mashed potato meat ball. Or maybe more like a ravioli. Whatever they are, they are loved by potato loving people and are fun to make. I mean, when do you ever get to use the ricer? ( Don’t worry, you can make gnocchi without a ricer.)

To the gnocchi.

The stuff. Potatoes, flour, an onion, some tomatoes, a few cloves of garlic, salt, pepper, and olive oil.

Note. Make sure to use russet potatoes because they make the lightest, fluffiest gnocchi. You could probably use Yukon gold, but any hard wax potato just won’t do.

First step is to make baked potatoes. Place potatoes in oven, directly on rack, and bake for 30-45 minutes until nice and soft and tender. Just like you would when you eat it as a baked potato. Once cooked cut them in half and let them cool off for a few minutes.

Once potatoes are cool enough to handle, scoop all the flesh out of skins. Keep skins for soup or a snack for later.

And the fun part. Flour the counter then rice the potatoes. You can also do this with a food mill or even grate the potato with a box grater. Once all riced, cover with flour and start to fold and mix the potato into the flour gently until the dough starts to come together. If the dough seems really sticky and wet, add in a tablespoon or two of flour, to dry and crumbly, add in a tablespoon or two of water. The goal is a nice fluffy dough that hold it shape but is not overly dense.

Gnocchi dough.

Cut off a potion of the dough, roll it into a rope about an inch thick, then cut into inch long pieces.

IMG_9354.jpg

To cook gnocchi. Bring a big pot of water to a boil and carefully drop in a handful of gnocchi into the water. They are gonna sink, but after a minute or two they start to float. Once floating, remove them from the pot with a slotted spoon and place them on a lightly oiled baking sheet. Repeat until all the gnocchi are cooked.

Cooked and ready… Ready for what? For anything you want but these are going into a tomato and onion situation.

IMG_9377.jpg
IMG_9378.jpg
IMG_9379.jpg
IMG_9389.jpg

Mince garlic and dice tomatoes and place into skillet with a good pinch of salt and a splash of olive oil. Place on stove and cook until slightly tender. Dice up tomatoes into small chunks and add to skillet along with a cup of water (if you have gnocchi water, use that) Turn heat up and cook until mixture start to bubble, then turn heat down to low and cook until the tomatoes are mushy.

IMG_9406.jpg

Looks good right?

And then drop in gnocchi. Keep on heat until the gnocchi are warmed completely all the way through.

Sprinkle of salt, lots of pepper, and something green if you want to be fancy.

And then you eat them.

-C


Gnocchi with Chunky Tomato and Onion

Makes 3-4 servings

  • 2.5 pounds russet potatoes

  • 2/3 cup of all purpose flour

  • 1 large onion

  • 3-4 tomatoes

  • few cloves garlic

  • salt and pepper

  • olive oil

  • water

Place potatoes directly into oven on one of the oven racks and bake on 450 degrees until soft and tender. Should take about 1/2 hour to 45 minutes, depending on size of potatoes.

Once cooked, remove from oven carefully, cut in half, carefully, and let cool for a about 10 minutes, just so you can handle the potatoes without burning yourself. In the mean time, get a large pot, fill it with water, and set it on the stove to boil.

When the potatoes are not to hot to touch, grab them and with a spoon, scoop out all the potato flesh from the skin (keep skin for a snack or for soup). Lightly flour the counter and start ricing the potatoes directly onto the counter. (You can also use a food mill or a box grater if you don’t have ricer). Once all potato is rices, cover with floor and gently fold potato over into flour, over and over, even using a knife, to kind of cut the potato into the flour, until it all mostly comes together. Be careful to not overwork the dough or else it will become dense make the gnocchi chewy. If the dough seems is sticky, add in a few more tablespoons of flour, to dry and seems crumbly, add a few tablespoons warm water.

Once you have the dough, make sure the water on the stove is still there and has not evaporated and is at a gentle boil. Cut dough in thirds then roll out a portion into a rope about an inch thick. Cut the rope into inch long pieces. Repeat with the rest of dough.

When all the gnocchi are made, grab a rimed baking sheet, coat with oil, and place close by the boil water.

Now to cook them. Drop a handful of gnocchi into water carefully. They will sink. Watch and after about a minute or two, they will start to float. Once floating, take a slotted spoon and take them out of water. Place them on the greased baking sheet. Repeat until all the gnocchi are cooked. (when done cooking, save a cup of the cooking water)

After the gnocchi is cooked, you can do whatever you want with it, like eat it right away with salt and pepper or whatever, but to make the quick tomatoes onion situation, dice up the onion and mince the garlic. Place into a skillet with a drizzle of olive oil and a pinch of salt and place on stove and start to cook. Dice up the tomatoes and once the onion is tender, add in the dice tomatoes and about a cup of the gnocchi cooking water. Turn the heat up until the water is bubbling then reduce to low and cook until the tomatoes are mushy and tender. Once cooked, add in the gnocchi, toss them around, and cook until the gnocchi are fully warmed through.

And then eat it. Maybe a little more salt if needed, definitely lots of pepper, and whatever else you want.

In Vegan, Vegetables, Dairy Free, dinner, entree, Potato, Pasta, sauce Tags Gnocchi with Chunky Tomato and Onion, Potato, Gnocchi, Homemade, pasta, tomatoes, vegan, dairy free, plant based, dinner, king Arthur flour, farm share
Comment

Cajun Lentil and Rice Bake

April 13, 2019 Colleen Stem
IMG_7466.jpg
IMG_7419.jpg
IMG_7428.jpg

It is spring yes? I know it is officially spring but around here it has been more or less still winter which is to be expected but is, at this point, no longer welcomed. I, as well as everyone else I talk to, are over it. Enough snow. enough of the hats and jackets. Just enough.

But the bright side of the chilly, cold weather is that we can and still want to turn the oven on and cook things. And because I turned the heat off a little prematurely, I am cold so I really want the oven on.

One skillet, a little chop action, a stir, some good time in the oven and there you go, food for your belly. Not a ton of dishes to do, steps to fallow, thoughts to think (other then eating thoughts). A good old, hearty, simple to toss together, spicy, delicious skillet of goodness. Prepare it fast, pop into warm oven, sit in kitchen drawing up plans for the spring veggie garden, and then eat yourself warm. What more can we ask for?

We can ask for spring weather because seriously. But other then that.

To the goodness of cajun lentils and rice!

IMG_7328.jpg

The stuff. Lentils, brown rice, cajun seasoning, some crushed tomatoes, an onion, a carrot, a few cloves garlic, some cauliflower, water, oil, and salt and pepper.

First off, mince garlic and chop up the cauliflower, carrot, and onion into small pieces.

IMG_7343.jpg
IMG_7347.jpg

Toss it all into a good sized oven safe skillet with a splash of oil. Mix in the cajun seasoning too and stick o nth stove on medium heat for a few minutes.

IMG_7366 2.jpg

Cook until fragrant and slightly tender. Taste it, it is good.

IMG_7375.jpg
IMG_7382.jpg

Dump in the lentils and rice. Then dump I the tomatoes and the water. Give it all a mix.

Before oven…

IMG_7392.jpg

And after. All done. Now dinner.

IMG_7428.jpg

Grab some green thing to chop and toss on for some color.

Now grab some bowls, a few forks, and get to eating.

-C


Cajun Lentil and Rice Bake

Serves 4-6

  • 3/4 cup uncooked brown or white rice

  • 3/4 cup dried green lentils

  • 2 cups crushed tomatoes (preferably not salted)

  • 2 1/4 cups water

  • 3 tablespoons cajun seasoning (see note)

  • 1 large carrot

  • 1/4 head of cauliflower (about 2 cups chopped)

  • 1 large yellow onion

  • 2-3 cloves garlic

  • 1 tablespoon olive oil

  • salt and pepper

Note. Store bought cajun seasoning usually contains salt and pepper so when seasoning, be aware of the amount of salt (if any) you choose to use.

Preheat oven to 350

Start by chopping the carrot, onion, and cauliflower into small pieces. Mince the garlic and toss it all into the skillet with the olive oil. Stir in the cajun seasoning and sprinkle in salt and pepper if it needs it. Place skillet on medium high heat and cook veggies until fragrant and slightly tender which should take about 5 minutes then remove from heat. Dump in the lentils, rice, water and tomatoes. Stir until mixed then either place a lid or foil over the top. Place into preheated oven for about an hour, removing the lid or foil after 40ish minutes and giving it a stir when you do. The bake is done when the rice and lentils are fully cooked, but if you are into a crispy top and crunchy sides, by all means, cook a little longer.

Remove from oven when fully cooked and you are happy with crispness. Let cool for a few minutes, toss on some chopped green something or another if you want, and serve it up.

Left overs store great in the fridge for a few day and freeze well too.

In casserole, Dairy Free, dinner, entree, Gluten Free, pulses, Vegan, Vegetables Tags Cajun Lentil And Rice Bake, Rice, brown rice, lentils, pulses, vegan, vegetarian, veggies, skillet dinner, casserole, 1 pan dinner, easy, plant based, gluten free, dairy free, healthy, hearty, dinner, spicy
9 Comments

Sesame Noodles

March 30, 2019 Colleen Stem
IMG_7054.jpg
IMG_6911.jpg

It is getting oh so much nicer out yeah? Springing and such, well kind of. Still a wee bit chillier then it should be around here but still, it is spring and I am taking it.

And with the spring, I feel the itch, the itch to spend all of my free time outside. Out doing things that are not inside because I spent the last 7 long months inside way too much. I needed to be outside as much as possible and as it gets even nicer and warmer and garden temperature-able, I am basically going to be living outside.

Bring in sesame noodles. Super fast, super easy, super duper in every way. Make a big old batch and eat now, eat later, eat hot or eat cold. Everyone loves them, they love you, etc. etc… A perfect meal to have in rotation when you know that you are not going to have or want to spend much time cooking in the kitchen because you will be outside playing in the dirt and soaking up the sun. And think about all the picnics and BBQ’s to come. These suckers are fantastic to have at any outdoor eating event. They are even peanut free so you can safely bring them to potlucks and such and don’t have to worry about accidentally kill a peanut allergy person. And you can make them gluten free as well if you sub in your favorite gluten free pasta. These noodles, I am telling you. They are a winner in every way.

So with out further ado, the noodles!

IMG_6790.jpg

The stuff. Spaghetti noodles, tahini, a few cloves of garlic, some toasted sesame oil, soy sauce, red wine vinegar, honey (used whatever sweetener you like), red pepper flakes, tasted sesame seeds some cabbage, half a red onion and a carrot.

IMG_6854.jpg

Get pasta cooking. Boil water, drop noodles in, you know the drill. Cook as long as the the noodles need cooking, just make sure to not over cook them cause soggy noodles are nasty.

Chop, shred and julienne the cabage, onion and carrot. Nice and thin.

Mince the heck out of the garlic. Or use a garlic press if you want.

IMG_6843.jpg
IMG_6848.jpg

Now make the sauce. Add the minced garlic, along with the soy, sesame oil, vinegar, sweetener, and chili flakes to the bowl with the tahini. Mix, mix, mix until it is all incorporated and not lumpy. And that is that.

Noodles should be done by now so strain them out.

IMG_6864.jpg

Add the prepared veggies to a big bowl.

IMG_6876.jpg

Add in the cooked noodles

IMG_6899.jpg

Cover with sauce and toss all around until all the noodles are coated and delicious. Sprinkle with sesame seeds and a pinch or so more of pepper flakes.

And then it is time. Eating time.

Happy spring!

-C


Sesame Noodles

serves 3-6

  • 3/4 lb (3/4 of a package) of your favorite spaghetti noodles (or linguine or similar noodle)

  • 2 tablespoons toasted sesame oil

  • 1/4 cup soy (low sodium if you have it and gluten free tamari if needed)

  • 3 tablespoons red wine vinegar

  • 3 tablespoons tahini

  • 2-4 teaspoons red chili flakes

  • 1-2 teaspoons sweetener of choice (maple, honey, or brown sugar)

  • 4-5 cloves garlic

  • 1-2 tablespoons toasted sesame seeds

  • about a 1/4 head of cabbage

  • a carrot

  • small red onion

Bring a pot of water to a boiling cook the noodles as directed on package. You want them al dente, cooked all the way, but barely. No soggy noodles. (unless you like them soggy)

In the mean time, shred the cabbage, julienne the carrot (or shred it) and slice the onion so very thinly. Place into a large bowl. Now mince garlic and place into a bowl along with the soy, sweetener, vinegar, tahini, sesame oil and a teaspoon or two (more for spicier) of chili flakes and whisk until completely incorporated. Taste and adjust if needed. Add more tahini for more body, more sweetener if needed or more hot pepper flakes for more spice.

Once noodles are cooked, drain and place into large bowl along with the shredded and julienned veggies. Pour in the sauce and toss it all around until all the noodles are covered. Sprinkle in the toasted sesame seeds and a small pinch more of the red pepper flakes.

Eat. Eat warm, room temp, or cold. They are delicious any way.

Any left overs just stick in fridge. Can be reheated or not. Also, you can make the sauce and the noodles a few day ahead of time of when you want to have the dish Just mix the sauce with the noodles when you are about to serve them… So simple!

In BBQ, dinner, Gluten Free, Pasta, quick and easy, sauce, side dish, Spring, Vegan, Vegetables Tags sesame noodles, gluten free, vegan, plant based, easy, cold noodles, dinner, lunch, picnic, potluck, nut free, spring, simple, side dish, dairy free
Comment

Potato Chickpea and Onion Pierogi

March 9, 2019 Colleen Stem
IMG_6424 4.jpg
IMG_6316.jpg

Barb has been bugging me for a few months to make her pierogi and I keep telling her I will. But for some reason I just kept forgetting and ever time she came over for dinner I would just end up making her lentils . I make lentils for people when I care about them because lentils are perfect and I always figure she could use the nutrients. But finally, FINALLY, I remembered and figured it was about time. Time for Barb to get her pierogi. I got the ingredients, made up a plan, and went about making them thinking she was coming over for dinner. But guess what. She didn't come over. After all that, she decided it was better for her to go to her classes and then go to her shift at work, that it was not a good idea to skip out on all that just because I decided to finally make her pierogi. Well whatever I guess.

And full disclouse, I don’t think I made actual plans with her for the particular day that I made these pieorgi. I might have just assumed she was coming over…. So maybe my bad. Good thing these things can be made ahead and cooked whenever. So I saved her half for whenever she does come over (today I think). I did make them for her after all.

Anyway. Pierogi. Pretty much a stuffed ravioli I filled these with the potato, chickpea, and onion mixture, tossed a little dill in for the hell of it, and there they were. The mr got the first half, covered in cashew cream. But I bet these would be equally fantastic with marinara sauce. Or ketchup? I could see that if you are into that sort of thing. Ha.

Also have to note. I keep wanting to write pierogies but I think that is wrong. Pierogi is the plural for pierog.. I think.

To the pierogi.

IMG_6188.jpg

The stuff. Flour, oil, salt and pepper. Cooked chickpeas, a couple russet potatoes, a big onion, some dried dill (optional), warm water, soaked cashews, and a little red wine vinegar.

IMG_6200.jpg
IMG_6201.jpg
IMG_6204.jpg
IMG_6205 2.jpg

First make the dough. Flout, salt, water, and oil get mixed together until la shaggy dough is formed. Dump onto a floured surface ans give ut a good knead for a minute until lit comes together into a nice ball. Place dough back into the bowl (clean it out), cover it with a towel, and set aside to let the dough have little rest.

IMG_6216.jpg

Meanwhile get the potatoes boiling. You are more then welcome to peel your potatoes but I don’t. Chop the potatoes into small pieces, dump into a pot of cold water and cook them (boil until fork tender)

And cook the onions too. Chop the onion into small little bits and place in a skillet with a couple slashes of olive oil. Medium heat and a good stir until they are nice and golden brown.

Cooked onions and cooked ans drained potatoes.

IMG_6246.jpg

Now to make the filling. Add the potatoes, onions, chickpeas, and ill to a bowl. Sprinkle in salt ans pepper

IMG_6248.jpg

Mash it all together, small chunks are ok, but not big.

Taste and season with more salt and or pepper if needed. And stop eating all the filling, you need it.

IMG_6258.jpg

Wen the filling is made, grab the dough, rolling pin, and a large biscuit cutter or a cup.

Roll out dough, then cut out circles.

IMG_6272.jpg
IMG_6277.jpg

And to make a pierogi, grab a dough disk, add a mound of filling, then fold in half and pinch closed. Simple. IF the dough doesn’t want to seal, run a wet finger around the edge of the dough. That will do the trick.

Pierogi production.

All made, and not perfect by any means but perfect to me. Once you have made them, they need a little rest before cooking. Just a half hour or so. Enough time to clean up the mess that you just made and ge ta pot of water boiling on the stove. This is also a good time to prepare some to save for freezing. Any that you do not plan on eating in the next few days, place on a lightly floured baking sheet and stick in freezer. Once frozen, remove from sheet and place in an airtight container or freezer bag and stash away for another day. They can also go I the fridge for 3-4 days without being frozen, just make sure that you give each one a good dusting of flour so they don’t stick to each other.

IMG_6309.jpg
IMG_6311.jpg

Oh, and before you finish cooking the pierogi, make a the cashew cream. Place soaked cashews into blender with the vinegar and a splash of hot water. Blend into creamy and smooth. Season with salt and pepper and that is that.

Now to cook those pierogies. Bring a pot of water to a rolling boil. Once boiling, drop (gently) the pierogies one by one into water. A few at a time as to not over crowed, boil until they start to float to the top, which should take 4-5 minutes. Once cooked, scoop them out and place them on a plate or pan while you boil more (if you are indeed cooking more)

IMG_6333.jpg

After the pieogies had a boil, they then need a little crispness (you can skip this step if you don’t want them crispy). Use the frying pan you cooked the onions in and add a splash more oil. Heat on medium and when pan is hot, add in the boiled (not sopping wet) pierogies. Cook each side for 3-5 minutes or until nice and and browned then flip and cook the other side.

And then all is left is eating. layered on a bed of cabbage carrot slaw and dolloped with a good dollop of the cashew cream. Done and done and ready to for the face.

I don’t know. Maybe Barb should have skipped school and work for dinner.. Just saying

-C


Potato Chickpea and Onion Pierogies

makes about 25

  • For the dough

  • 2 3/4 cups all purpose flour plus more for dusting

  • 1 cup warm water

  • 1 teaspoon salt

  • 3 tablespoons olive oil

  • For the Filling

  • 1 large sweet or vidilla onion

  • 2 medium sized russet potatoes

  • 1 cup cooked chick peas

  • 2-3 teaspoons olive oil

  • 1 teaspoon dill (optional)

  • salt and pepper

  • For the Cashew Cream (Optional for serving)

  • 1/2 cup soaked cashews (soaked for at least 1/2 hour)

  • 2 tablespoons red wine vinegar

  • 3 tablespoons hot water

  • salt and pepper

First off, make the dough. Mix the flour with salt then add in oil and water. Mix together until a shaggy dough forms then dump out onto a lightly flour surface and knead a few times to form a uniform ball. Place dough back into (cleaned) bowl and cover. Set aside to rest.

Once dough is made, chop onion into small little pieces and place in a large skillet with 2-3 teaspoons of oil. Stick on medium heat and cook until tender and browned. Also cook the potatoes. Chop the potatoes into small pieces (peel if you want but you don’t need to) and place into a pot of cold water. Bring potatoes to a boil and cook until they are fork tender, almost falling apart.

Once potatoes are cooked, strain from water and place in a big bowl. Add in the cooked onion and the chickpeas. Sprinkle in dill if you are using and season with salt and pepper. Grab a potato masher or a fork and mash the mixture together. It can be a little chunky, but you don’t want really big chunks. Taste and season if it needs it.

Filling is done so now grab the rested dough. Place dough on a lightly floured surface, cut in half, place one half back in bowl and roll the other out about 1/8 inch thin. Take a large biscuit cutter or a large cup and cut out circles. Gather remaining dough and re roll out. Do this until you can’t. Repeat with second half of dough.

Once the circles are cut out, place about a tablespoon of filling into the center of each. Fold the dough in half and pinch closed. If the dough has dried out to much, brush a little water on the edge of circle to help it seal. Place the pierogi on a floured surface (so they don’t stick) And don’t worry if you have a little extra filling.. Just eat it.

When all the pierogi are made, let them rest for about 1/2 an hour. There are a good amount of pierogi here so if you want, stick some in a container and in the fridge to have in the next few days. Just make sure to flour them so they don’t stick together. Or if you prefer, place however many you to want to save on a lightly floured baking sheet and stick in the freezer until frozen. Once frozen, place into a freezer safe bag or container. They will keep for a few months.

Also, before you finish cooking, make the cashew cream (if you want it) Just add soaked cashews to a blender with vinegar and the water. Blend until smooth and creamy then season with salt and pepper to taste. If the mixture seems to thick, just add a splash more water until it is a desired thickness.

To cook the pierogi, bring a large pot of water to a boil. Place pierogi, one at a time, into pot. 5-7 at a time as to not crowd them, and cook until they start to float. Remove the cooked ones with a slotted spoon and stick on a plate. Boil as many as you are going to eat. Grab a skillet and add a few teaspoons of olive oil. Heat to a medium heat and place the pirogies into pan. Cook each side for 4-5 minutes or until browned and crispy. Flip and cook the other side.

Remove form pan, place on a plate, dollop with cashew cream (if desired) and eat.

In appetizers, beans, Dairy Free, dinner, entree, Pasta, pulses, Vegan Tags Potato Chickpea and Onion and Pierogi, Pierogi, dill, cashew cream, vegan, vegan pierogi, plant based, home made pierogi, from scratch, easy, make ahead, ravioli, dinner, pulses, beans, potatoes
Comment
← Newer Posts Older Posts →
 

https://thelovelycrazy.squarespace.com/config#/|/about/

Me. Food Maker.Food eater. Woo HOO!

STEM+NODE  SMALL BATCH AND ONE OF A KIND POTTERY

stem+node ceramics


____________________

Subscribe

GET NEW POSTS IN YO EMAIL

You are AWESOME!!!


@thelovelycrazy 2014-2021