• stem+node ceramics
  • HOME
  • Food Recipes
  • About
  • Contact
Menu

The Lovely Crazy

Street Address
City, State, Zip
Phone Number

Your Custom Text Here

The Lovely Crazy

  • stem+node ceramics
  • HOME
  • Food Recipes
  • About
  • Contact

Zucchini Dill Empanadas

June 19, 2021 Colleen Stem
IMG_6054.jpg
IMG_5986.jpg
IMG_6004.jpg

YAY for the first zucchinis of the season! Zucchini is one of the main reasons I tolerate summer. Sure I complain a lot about being hot all time and the sun being just too freaking bright but the zucchini helps make it all worth dealing with.

Empanadas. Little hard pies. A perfect little vessel to stuff some zucchini into. Add some dill and it makes it all the better. I mean who wouldn't a zucchini and dill stuffed pastry on a warm summer afternoon (or whatever time you feel like eating). They are super easy to make, light and crispy, and are little pies of zucchini. What is not to like? Plus they require no utensils to eat them . Think about it, Make batch, throw them into a picnic basket and head to a nice little grassy patch under a tree. Doesn't that sound just so nice? That does sound nice. Why didn't I do that? Oh because I was busy being pissy because I made a perfect batch and while letting them cool off in the oven for a few minutes I accidentally turned on the broiler and burnt a few. But whatever, the mr actually really liked them burnt so no harm no foul, But next time I make them it will definitely be for a picnic.

Now to the zucchini dill empanadas!

IMG_5851.jpg

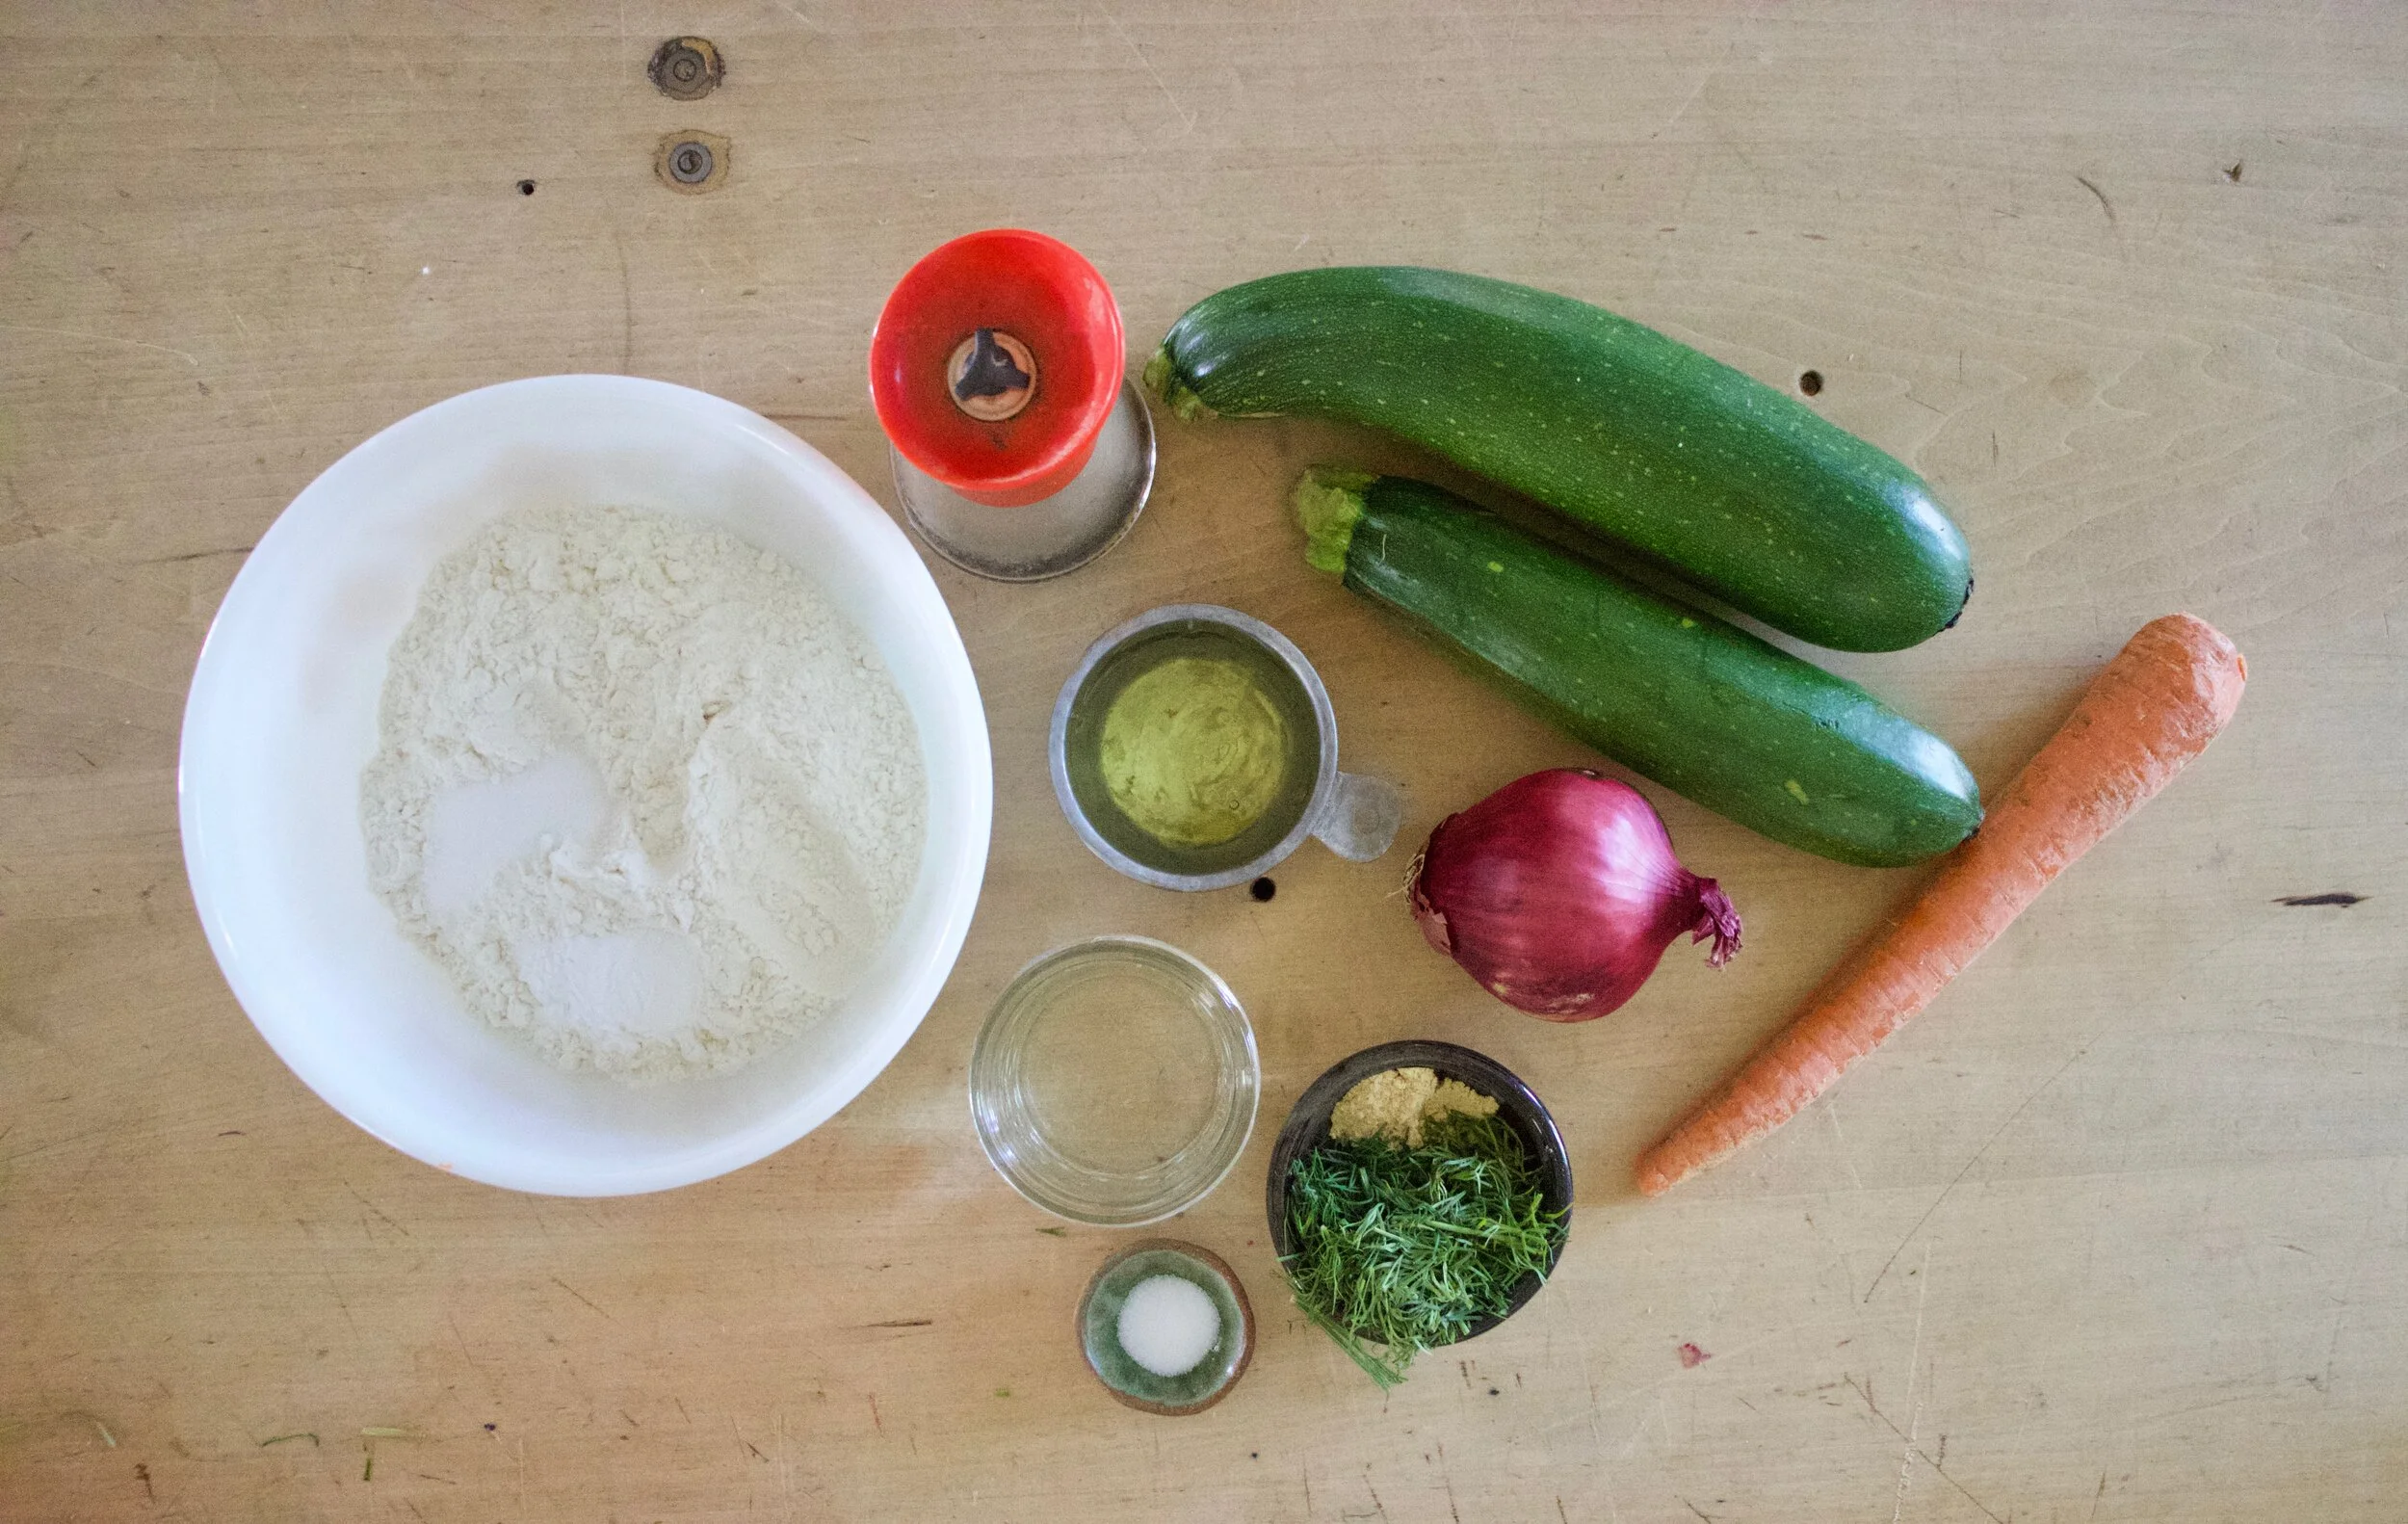
The stuff. Zucchinis, a carrot and a onion, some dill and ground ginger, salt and pepper, water, oil, flour, and baking powder.

IMG_5862.jpg

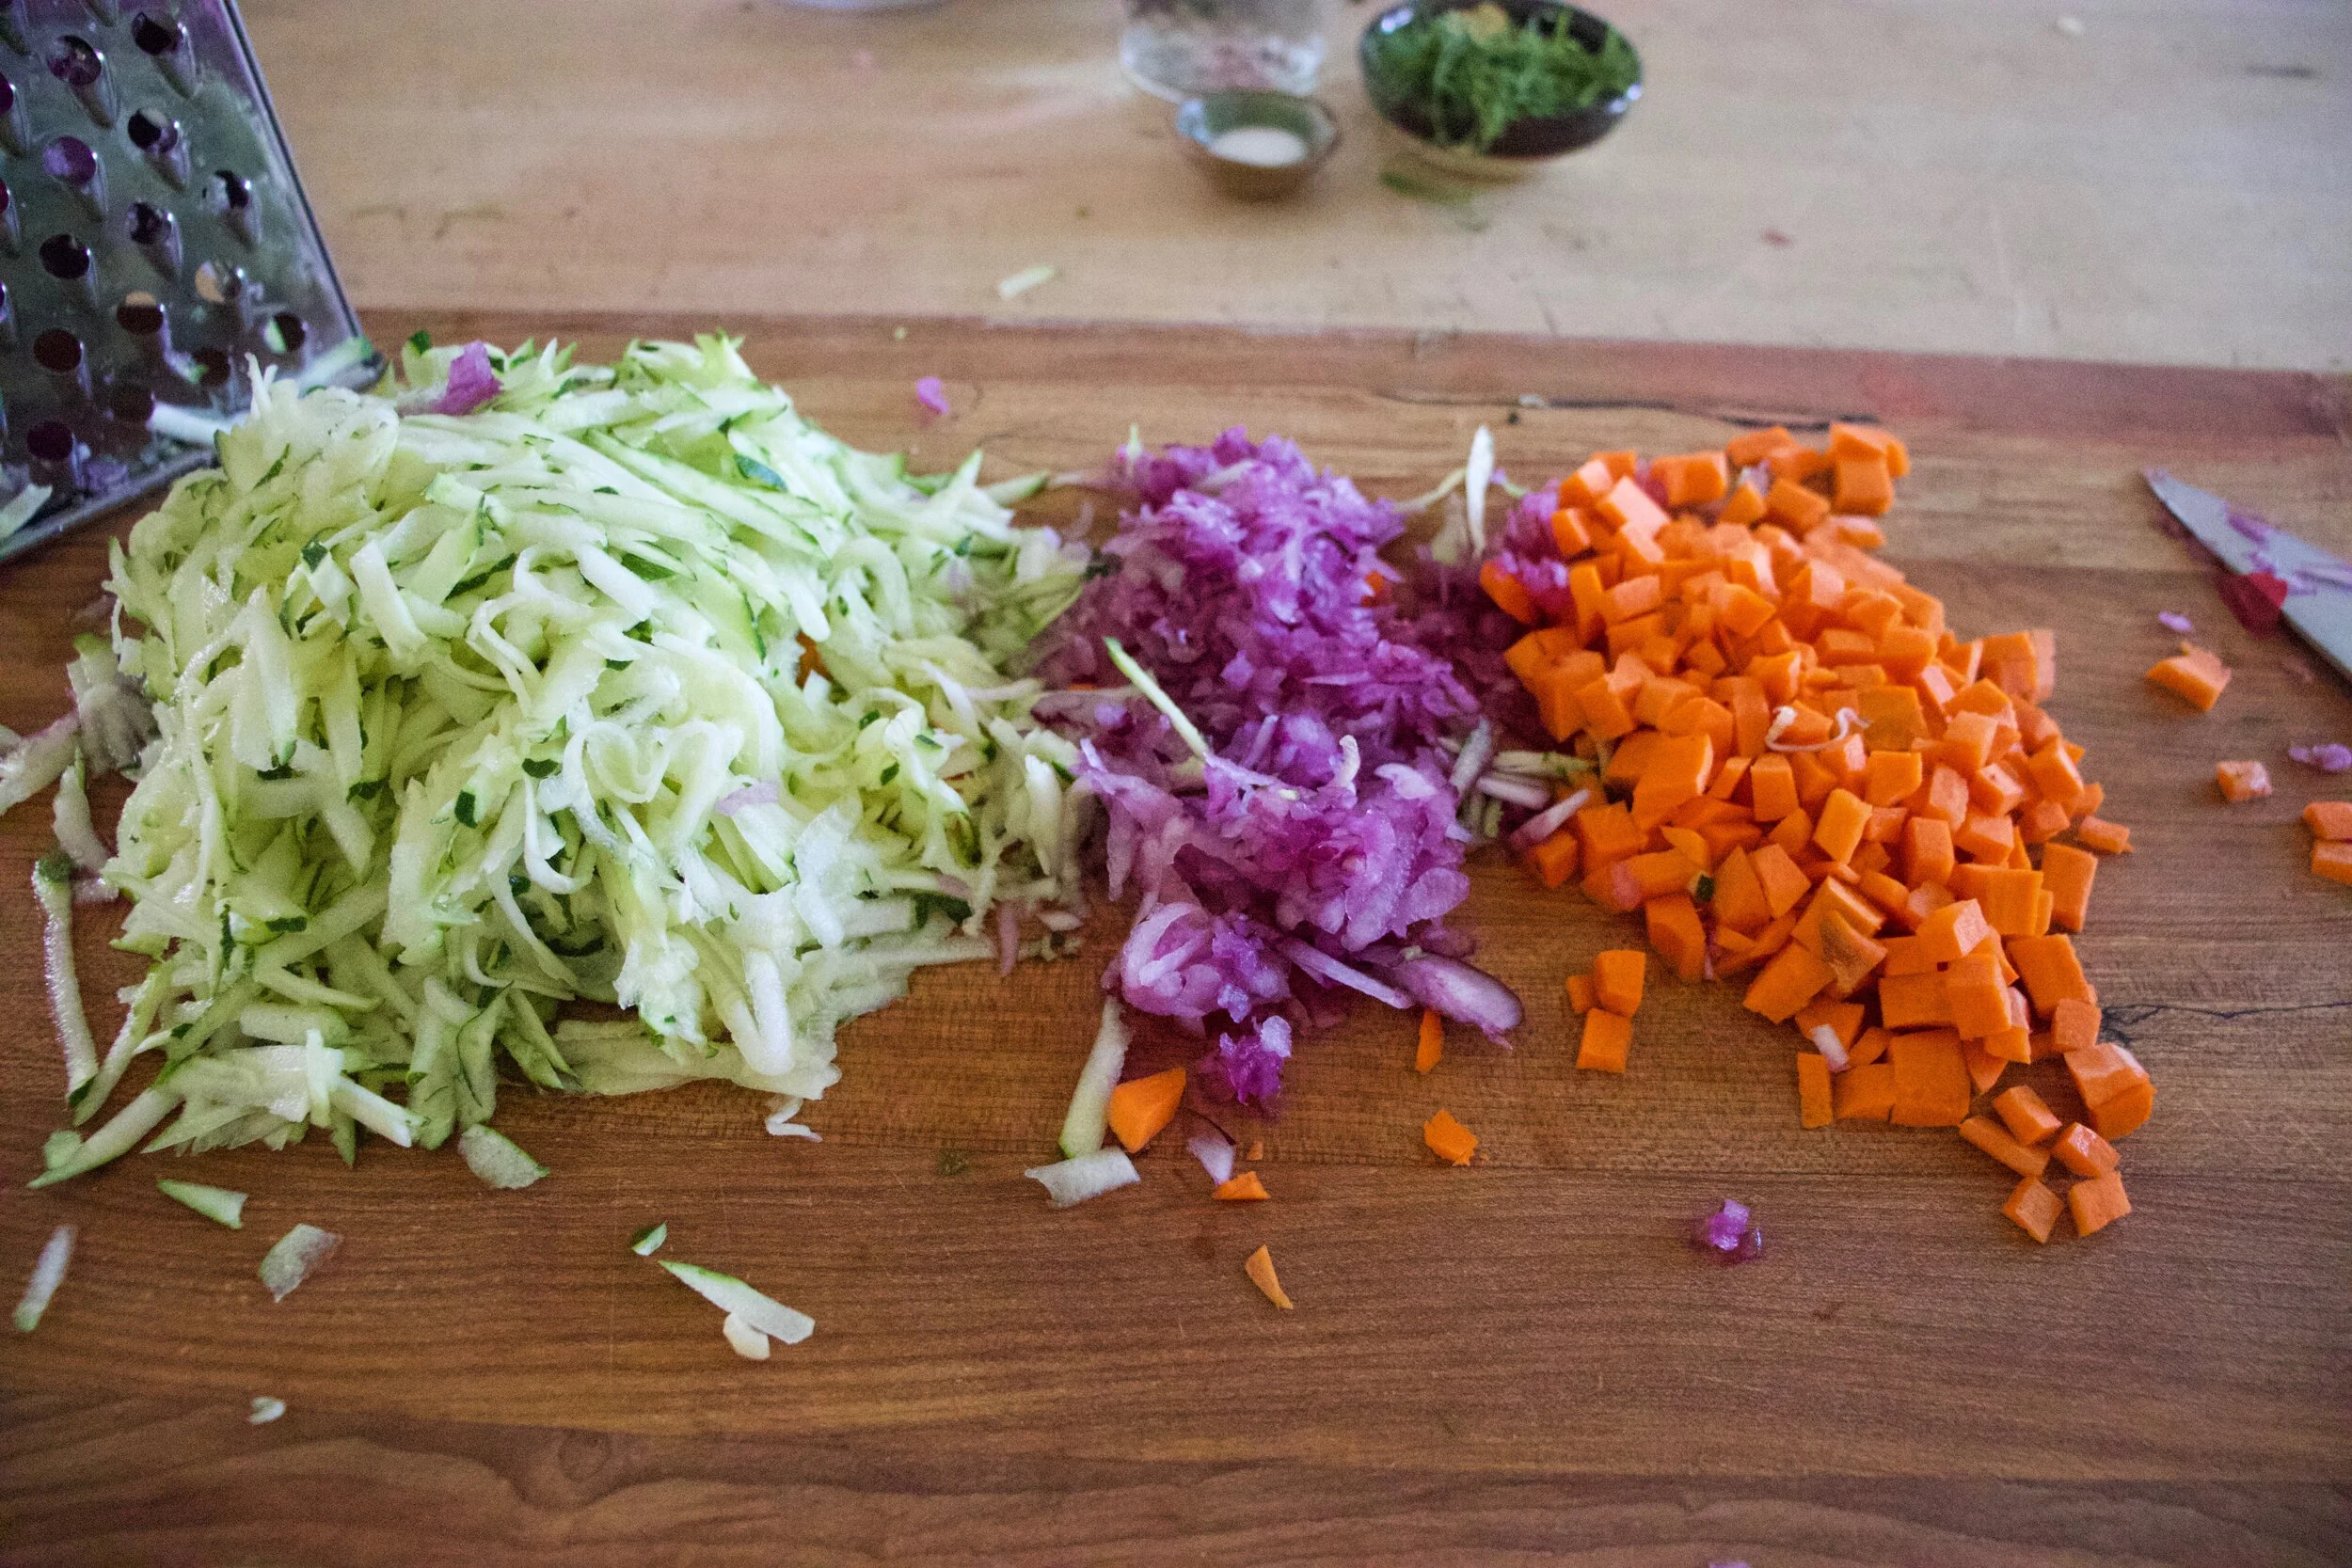
Start with making the filling. Chop the carrots into little cubes then grate up the onion and zucchinis.

IMG_5869.jpg

Gather the zucchini and onion into a tea towel (or cheese cloth) and squeeze out he excess liquid. ( I squeezed it into the dough mixture)

IMG_5892.jpg
IMG_5901.jpg

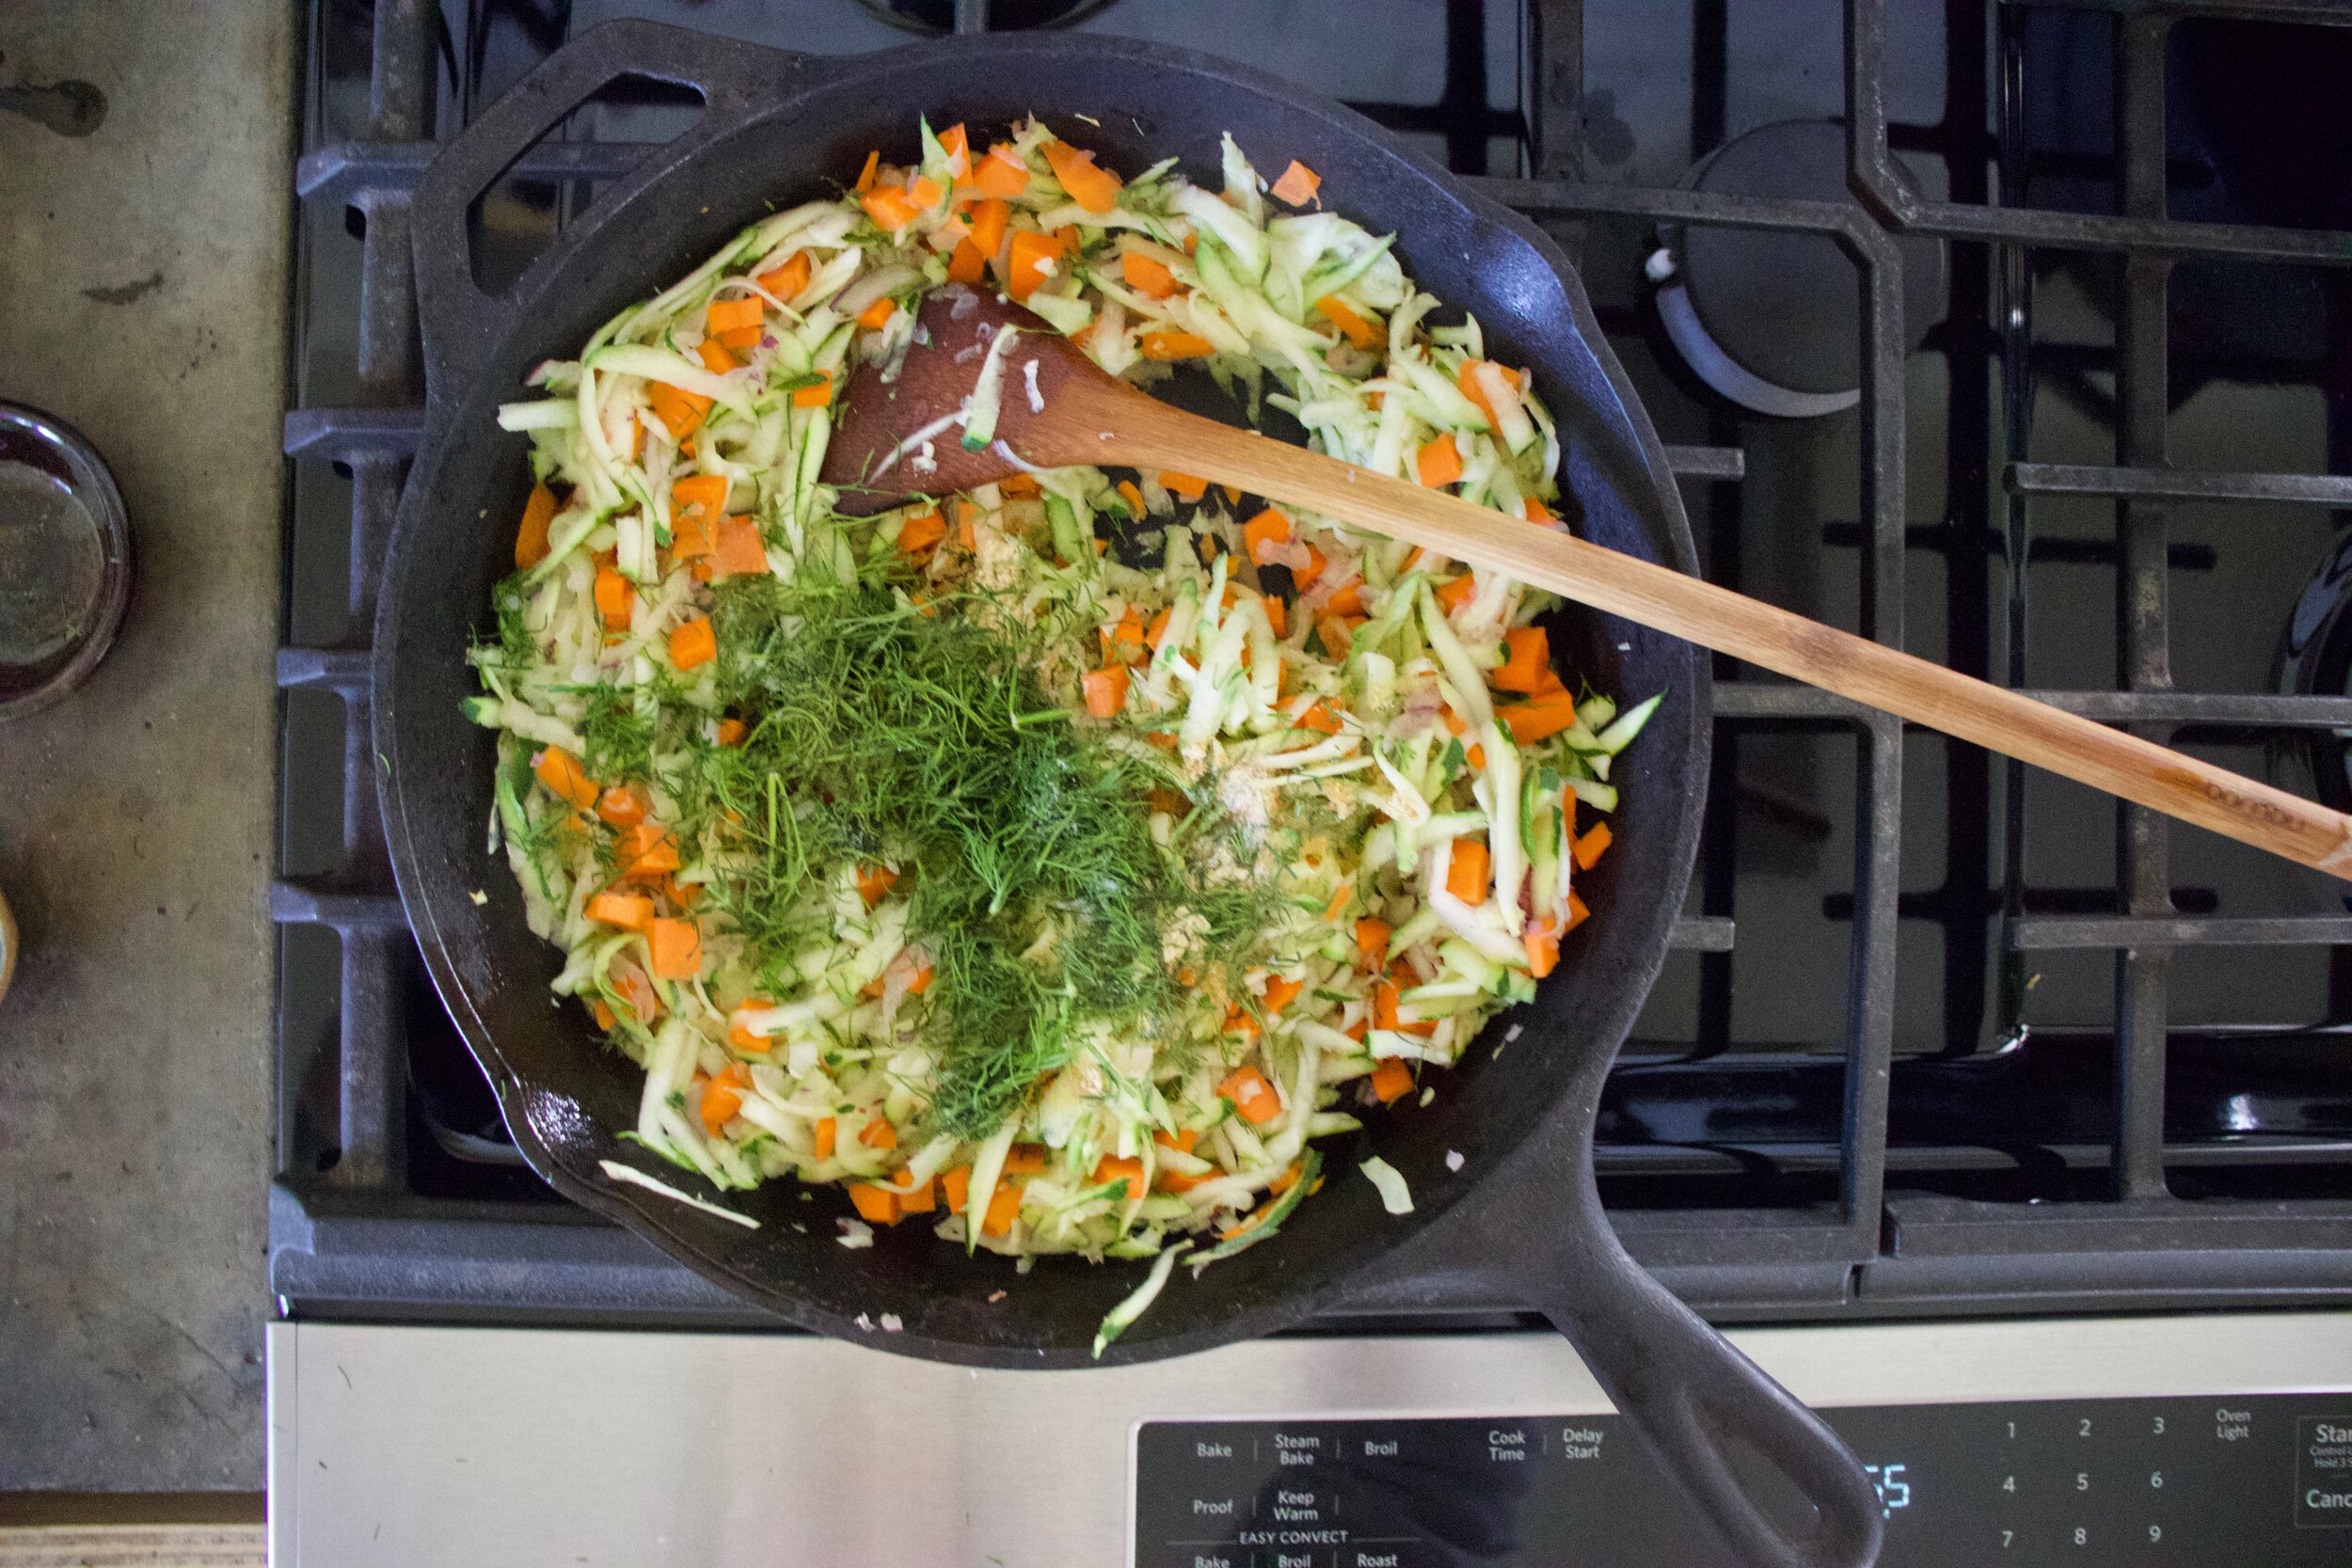
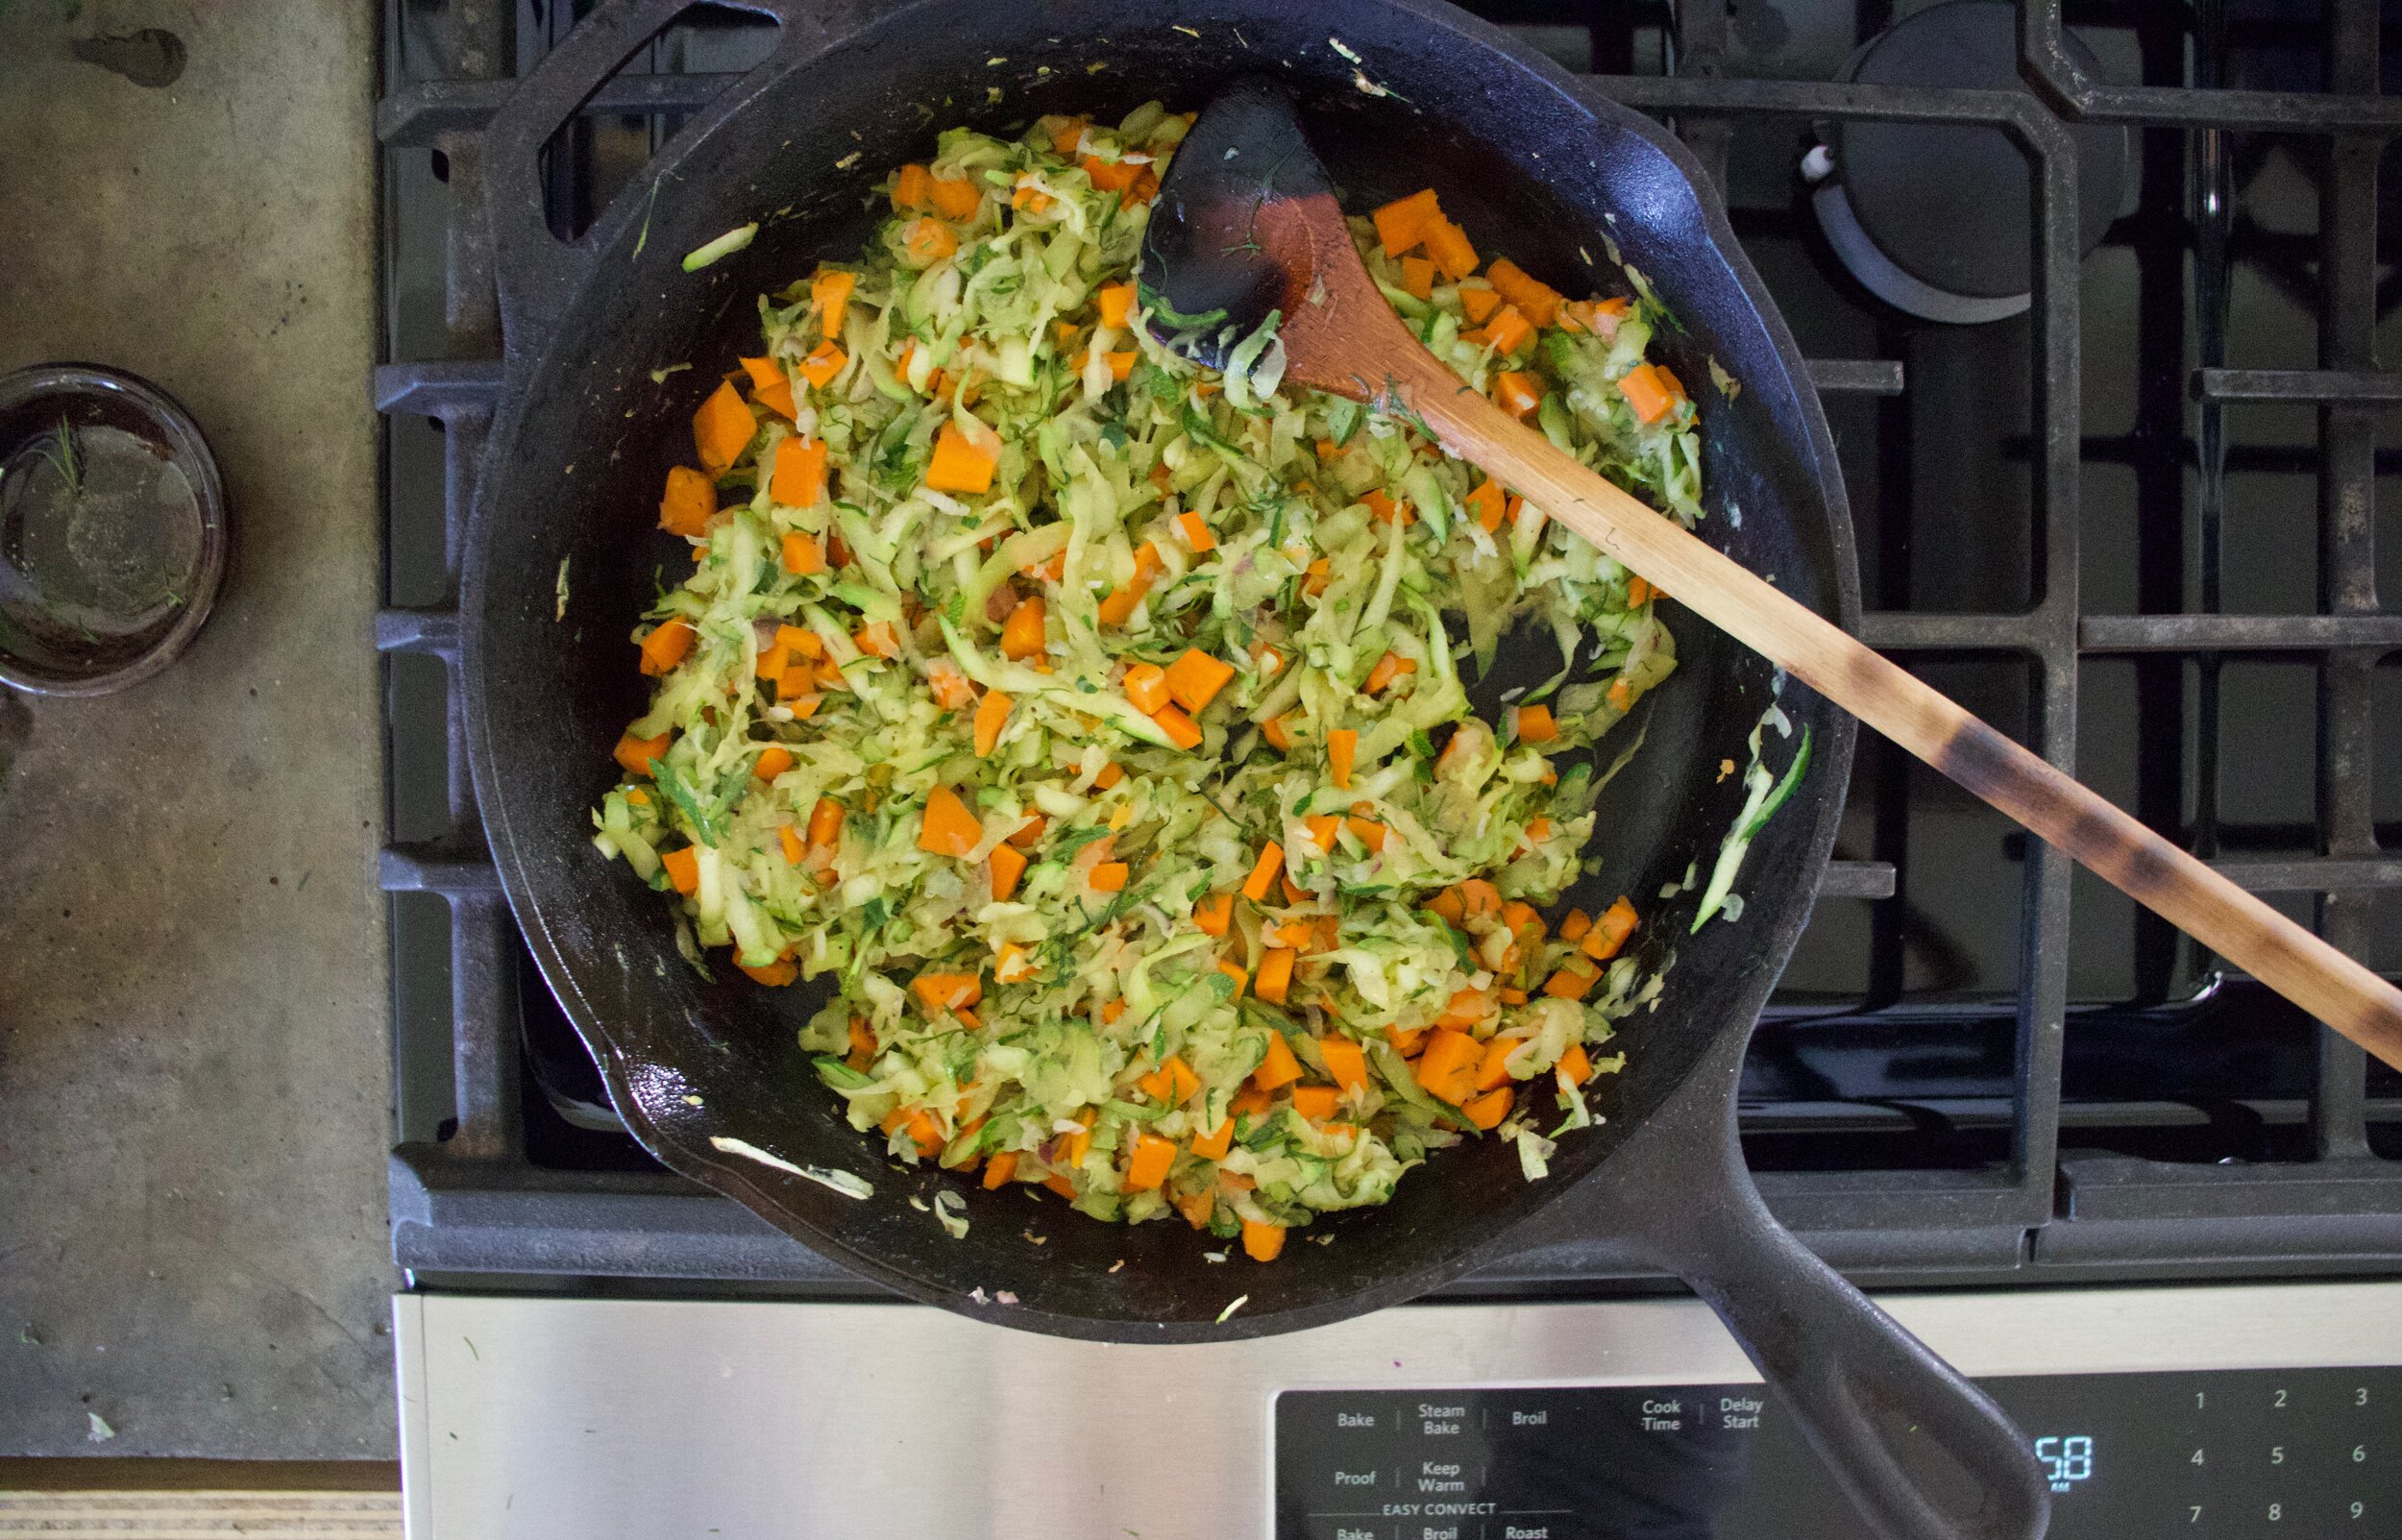
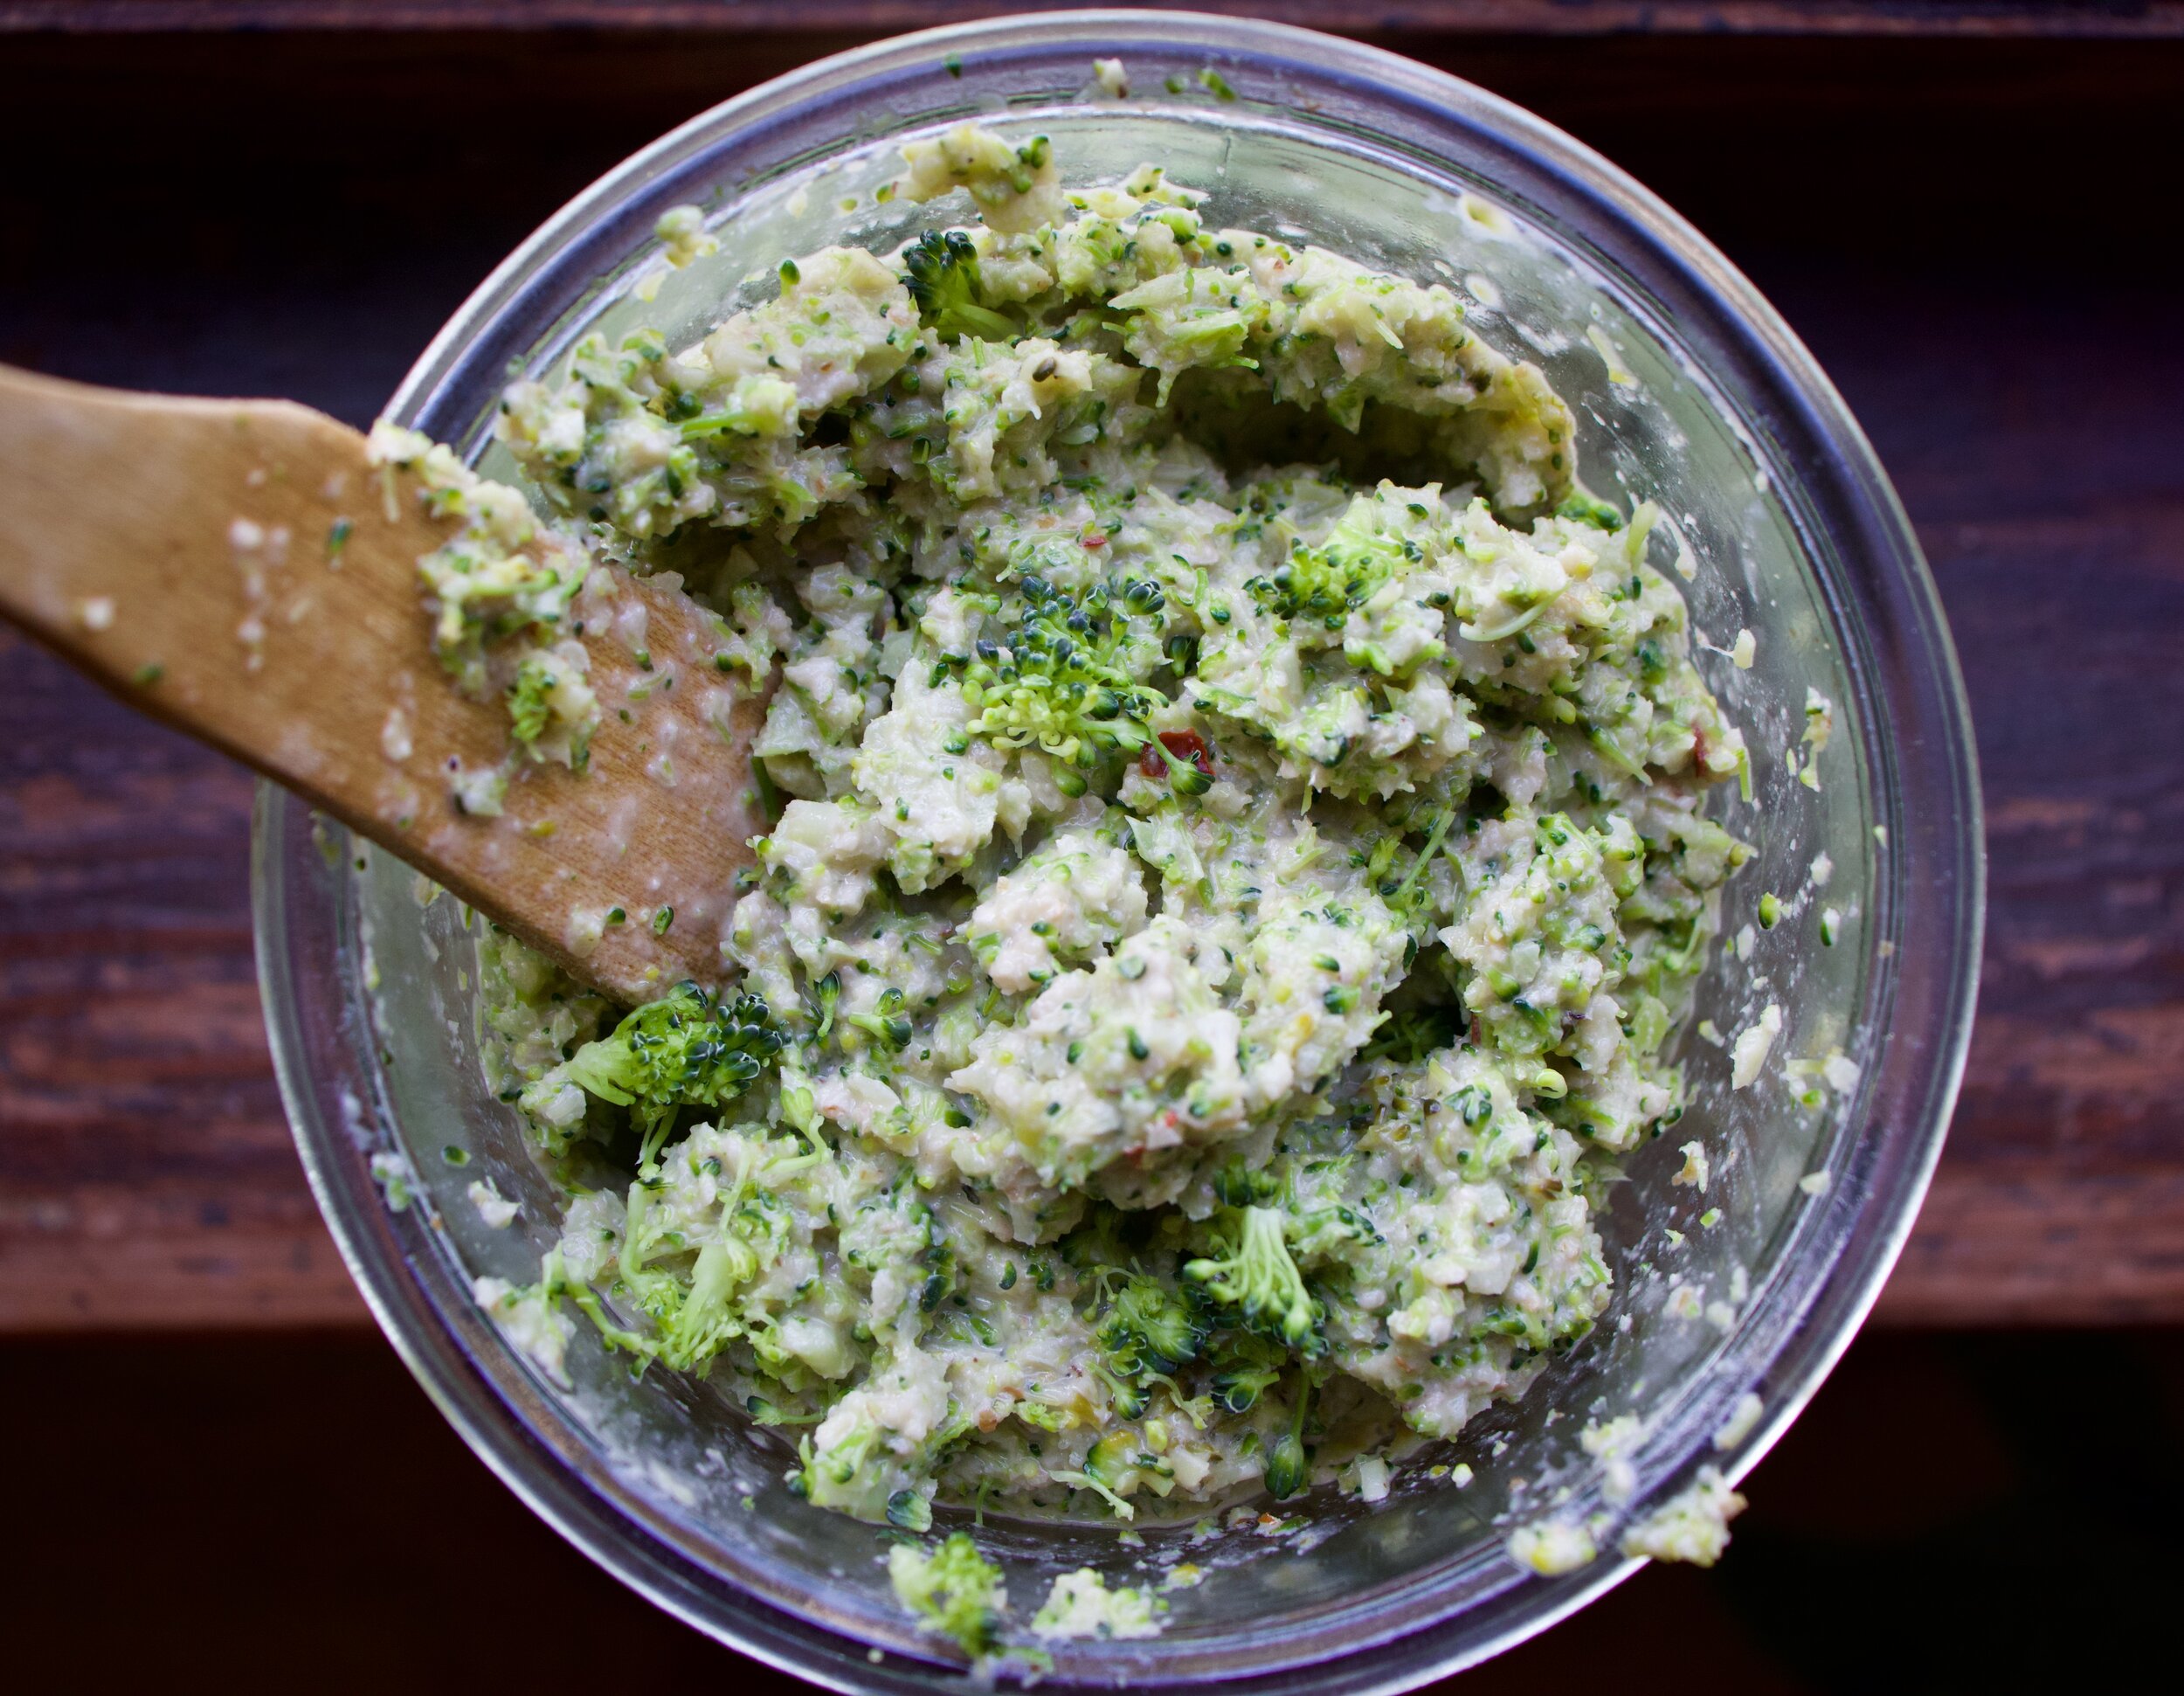
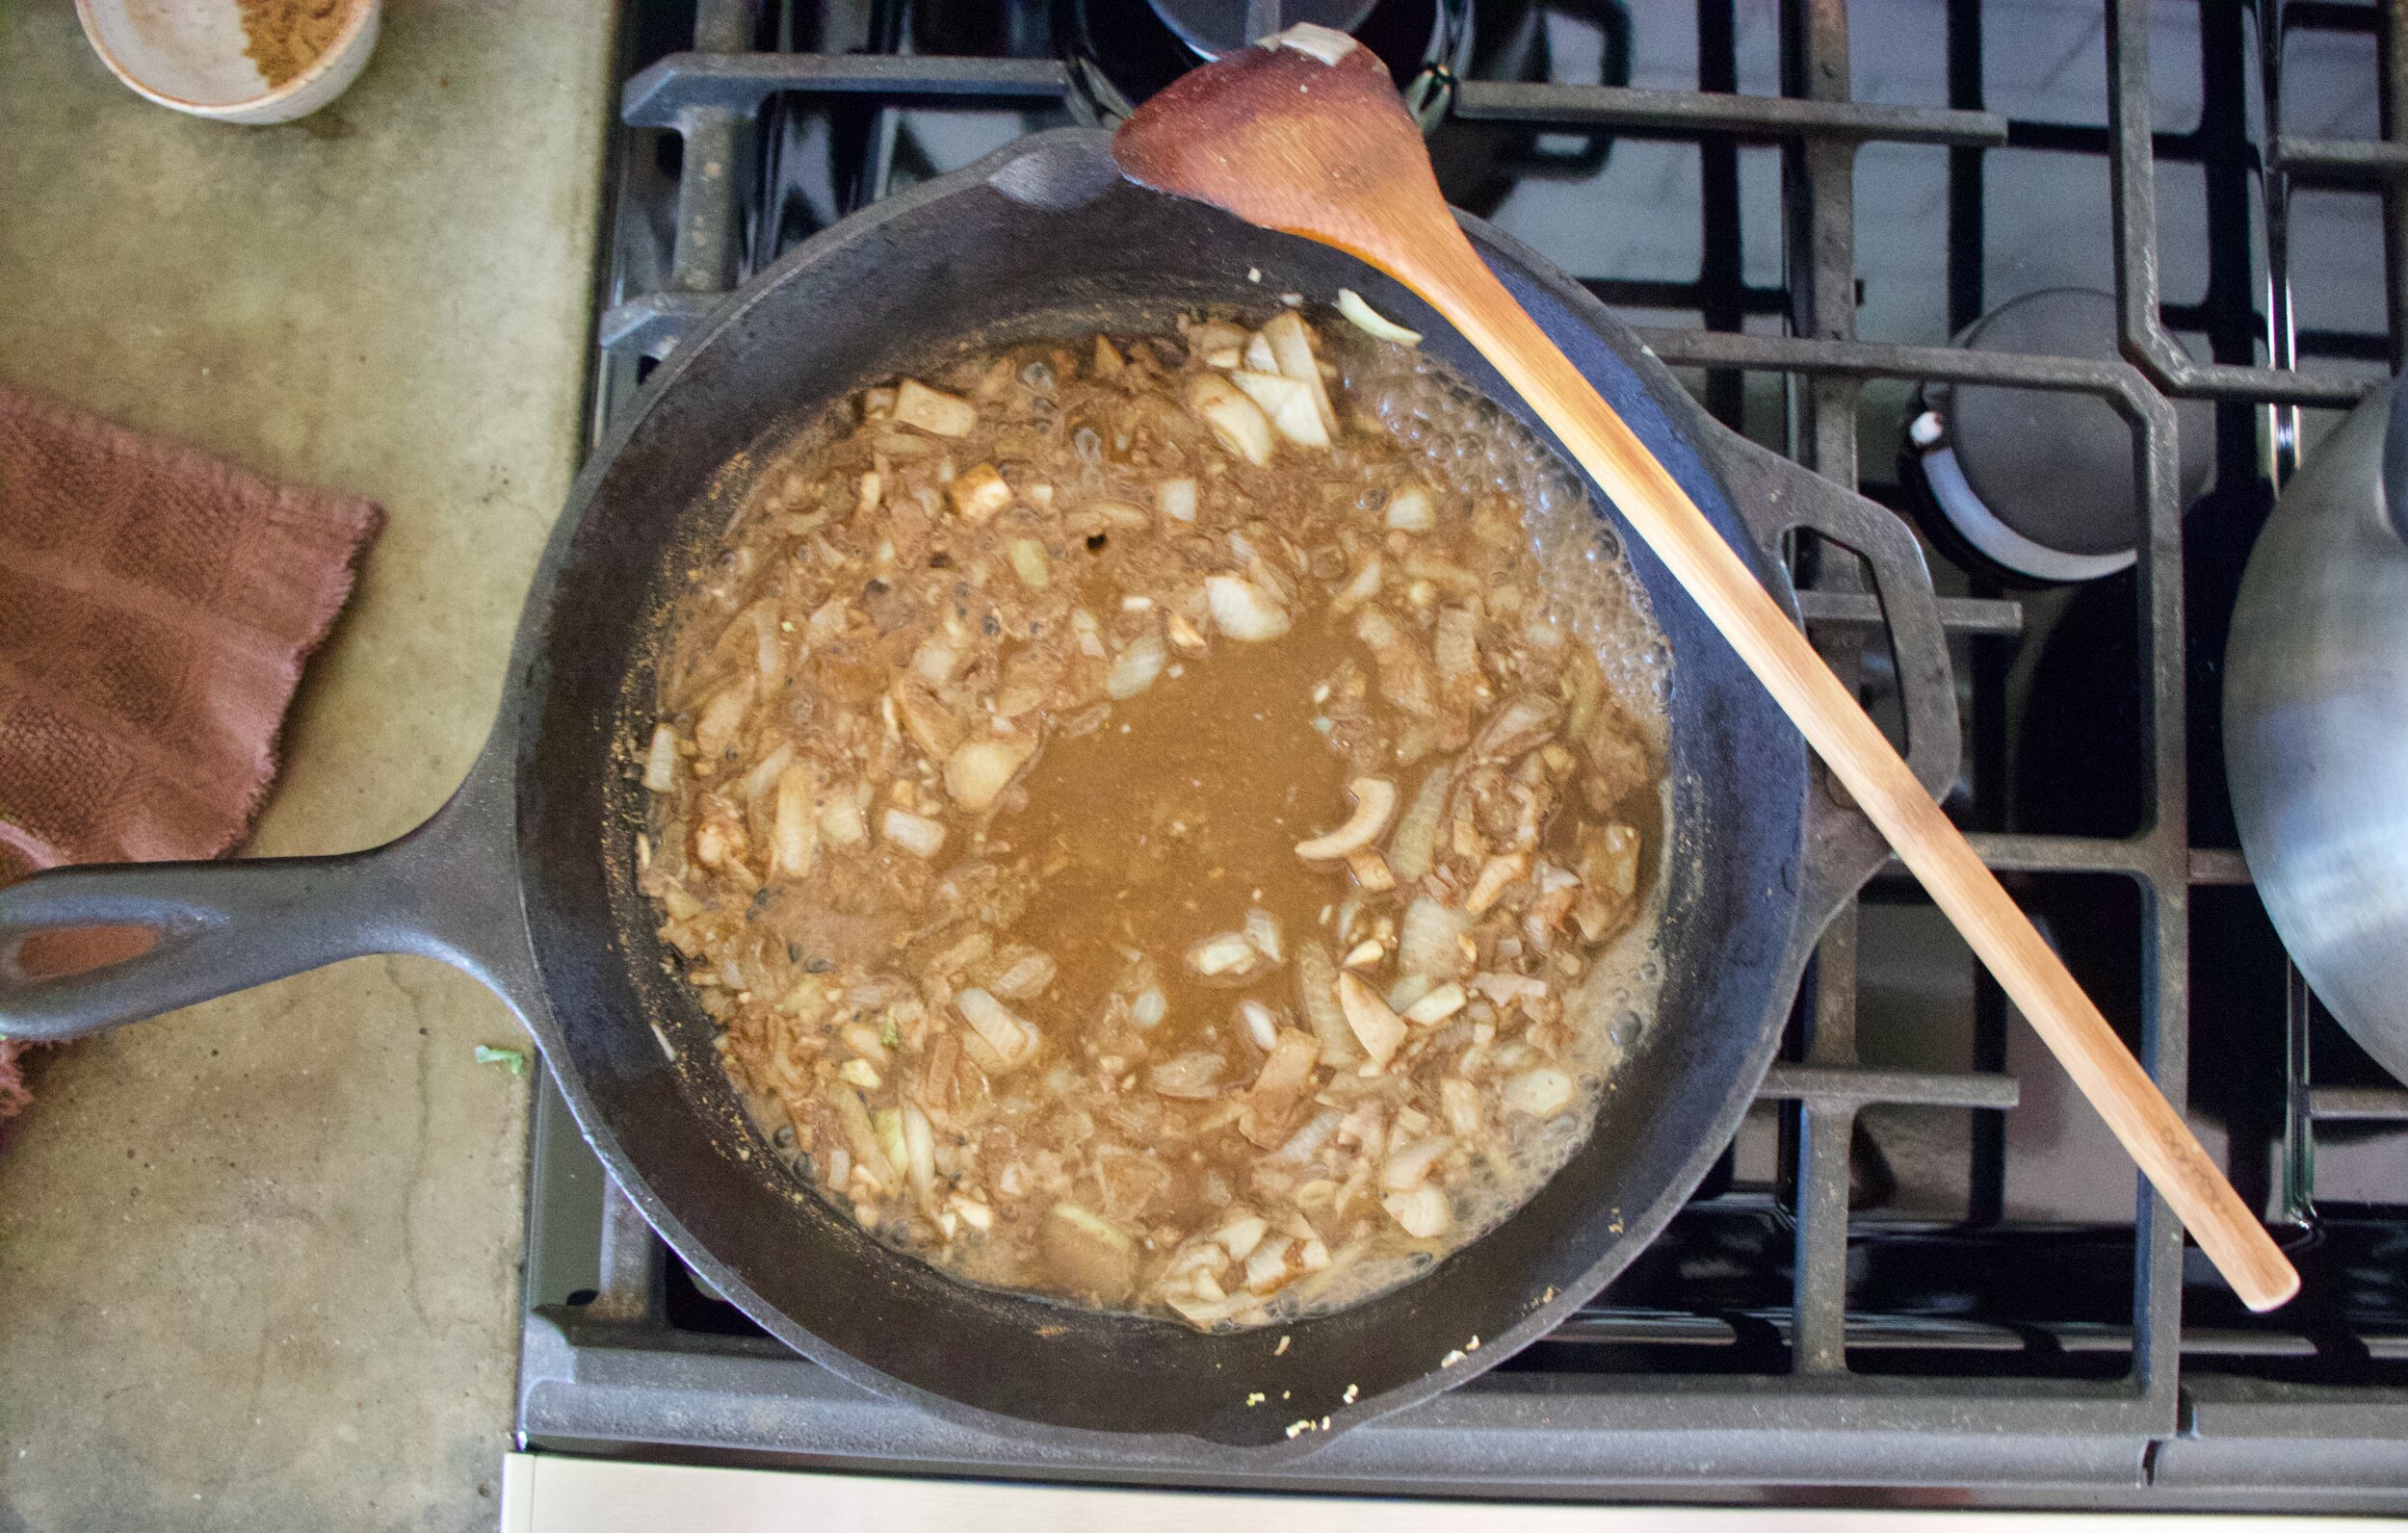
dump the zucchini and onion into a heated and lightly oiled skillet. Add in the carrots, the ginger and dill, and a good pinch of salt and pepper. mix around a cook until the zucchini has gone cooked down and the carrots are slightly tender. Remove from heat.

IMG_5905.jpg
IMG_5907.jpg

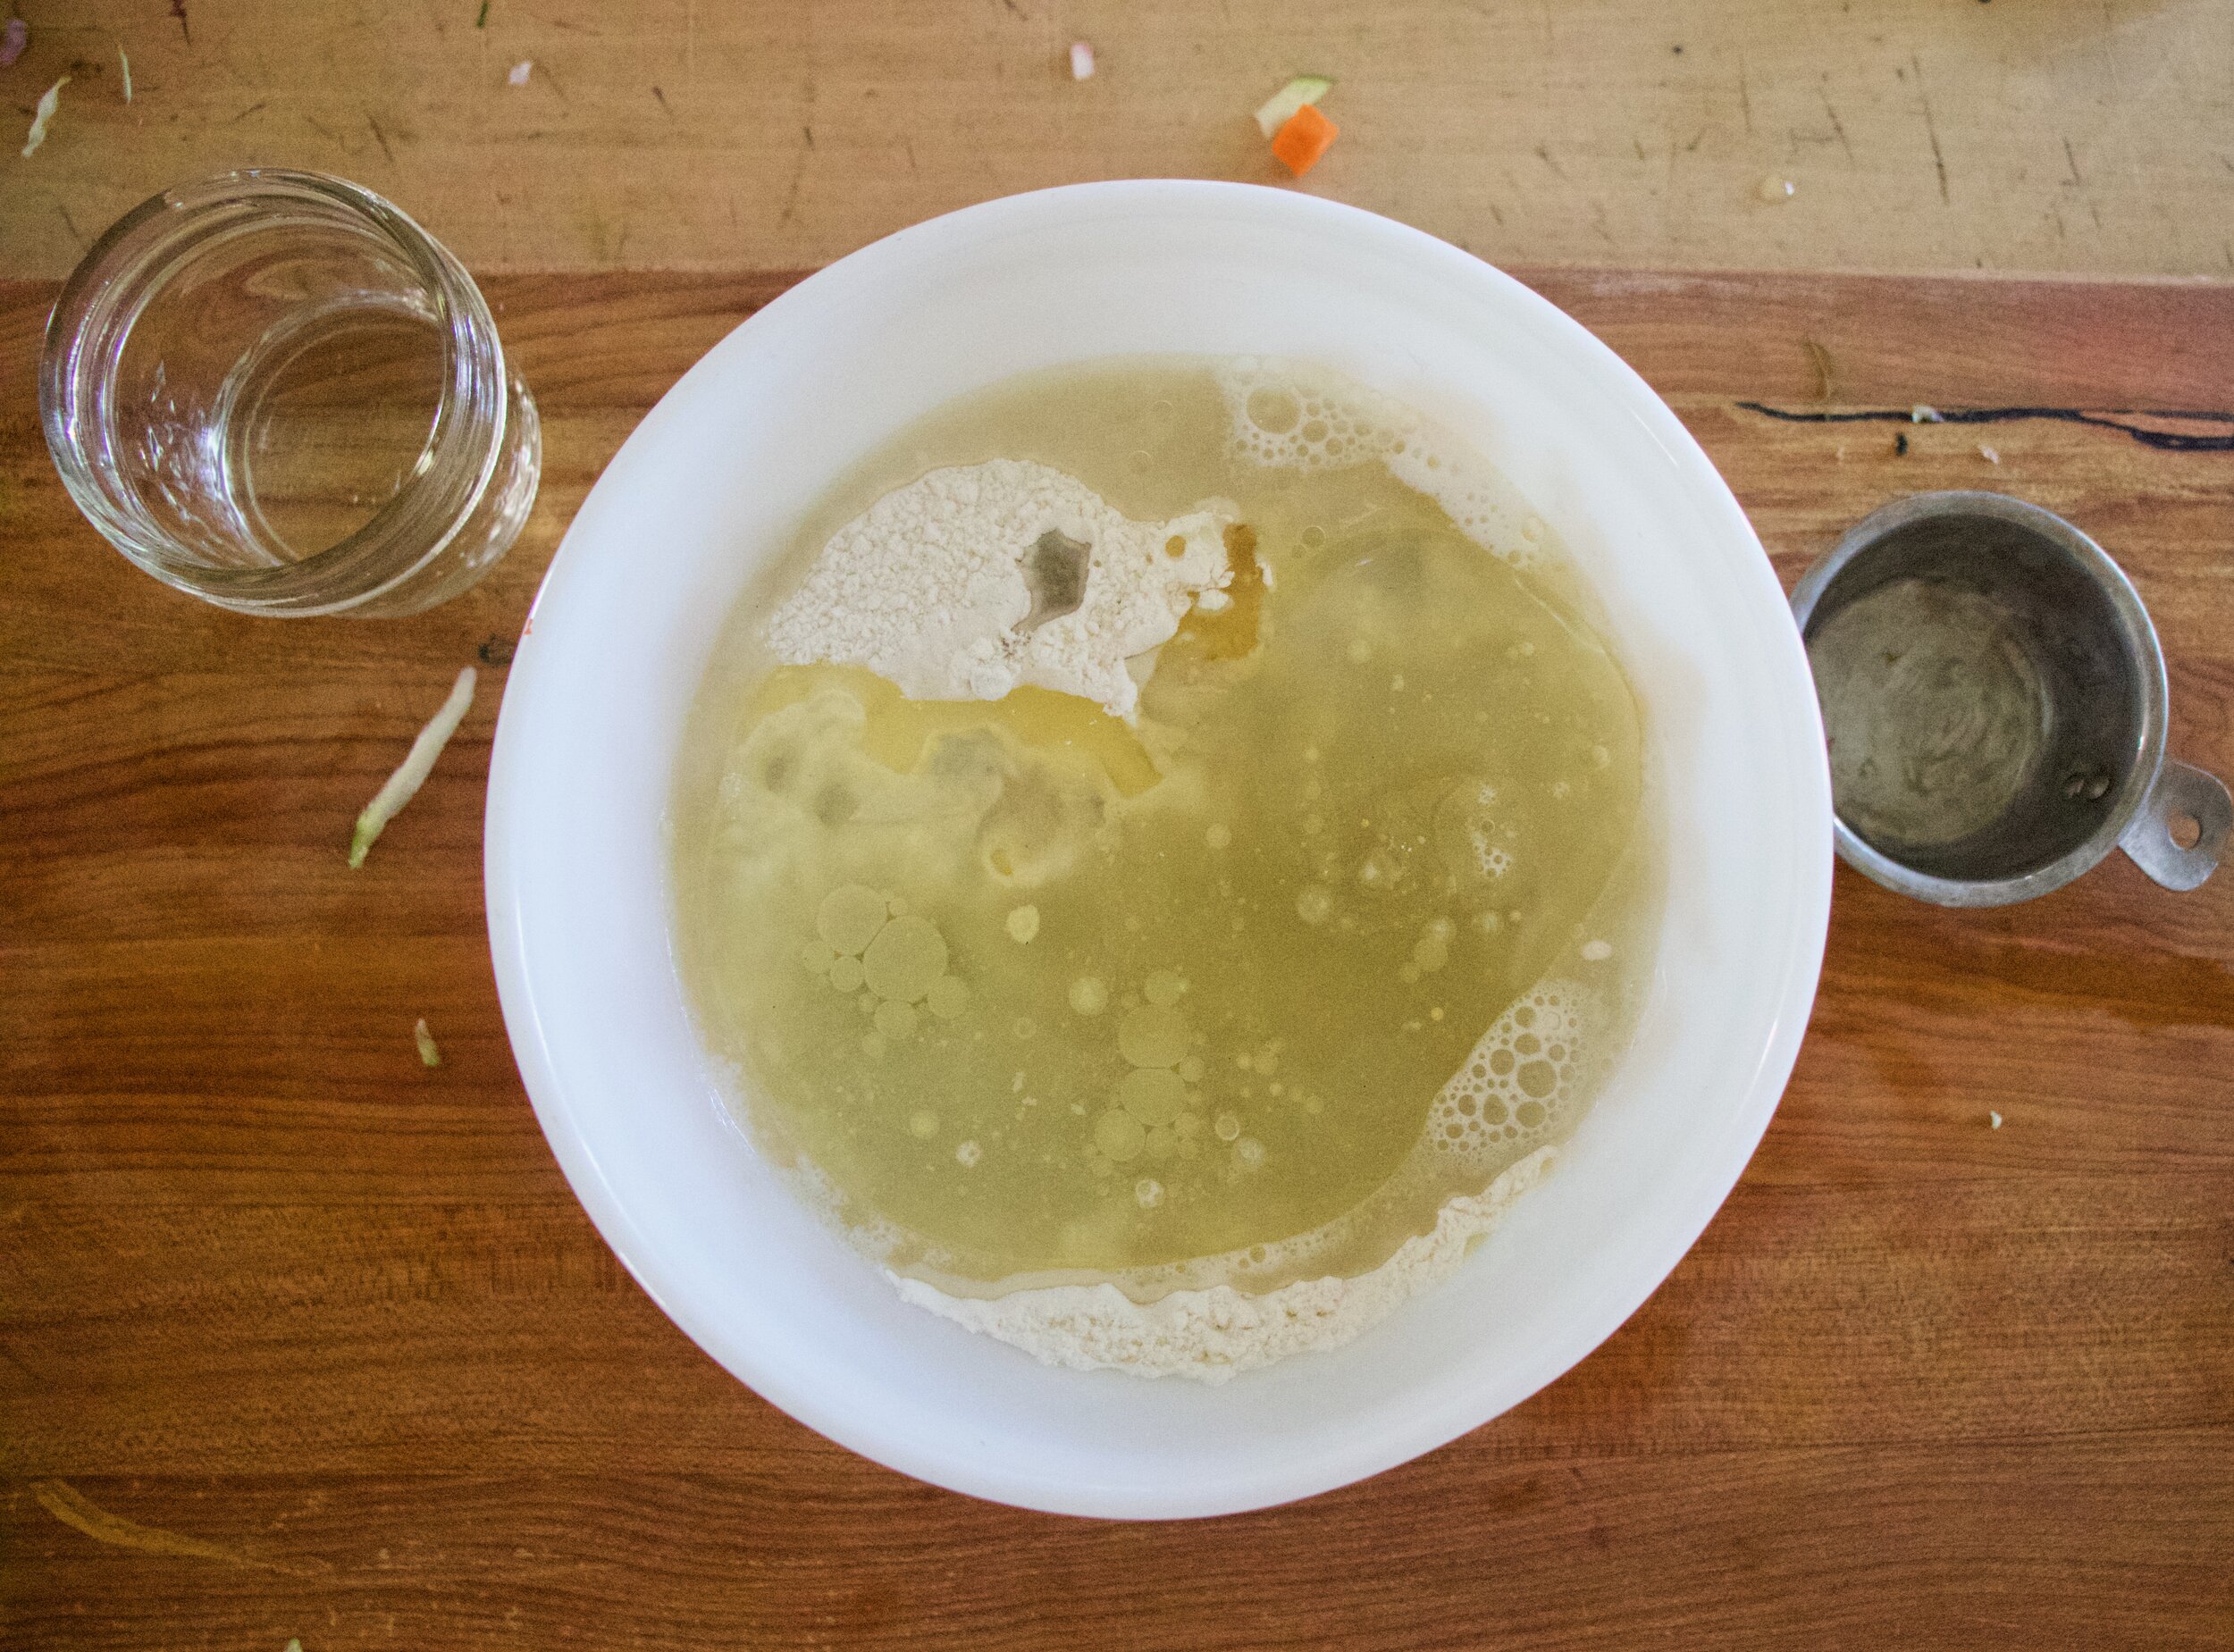
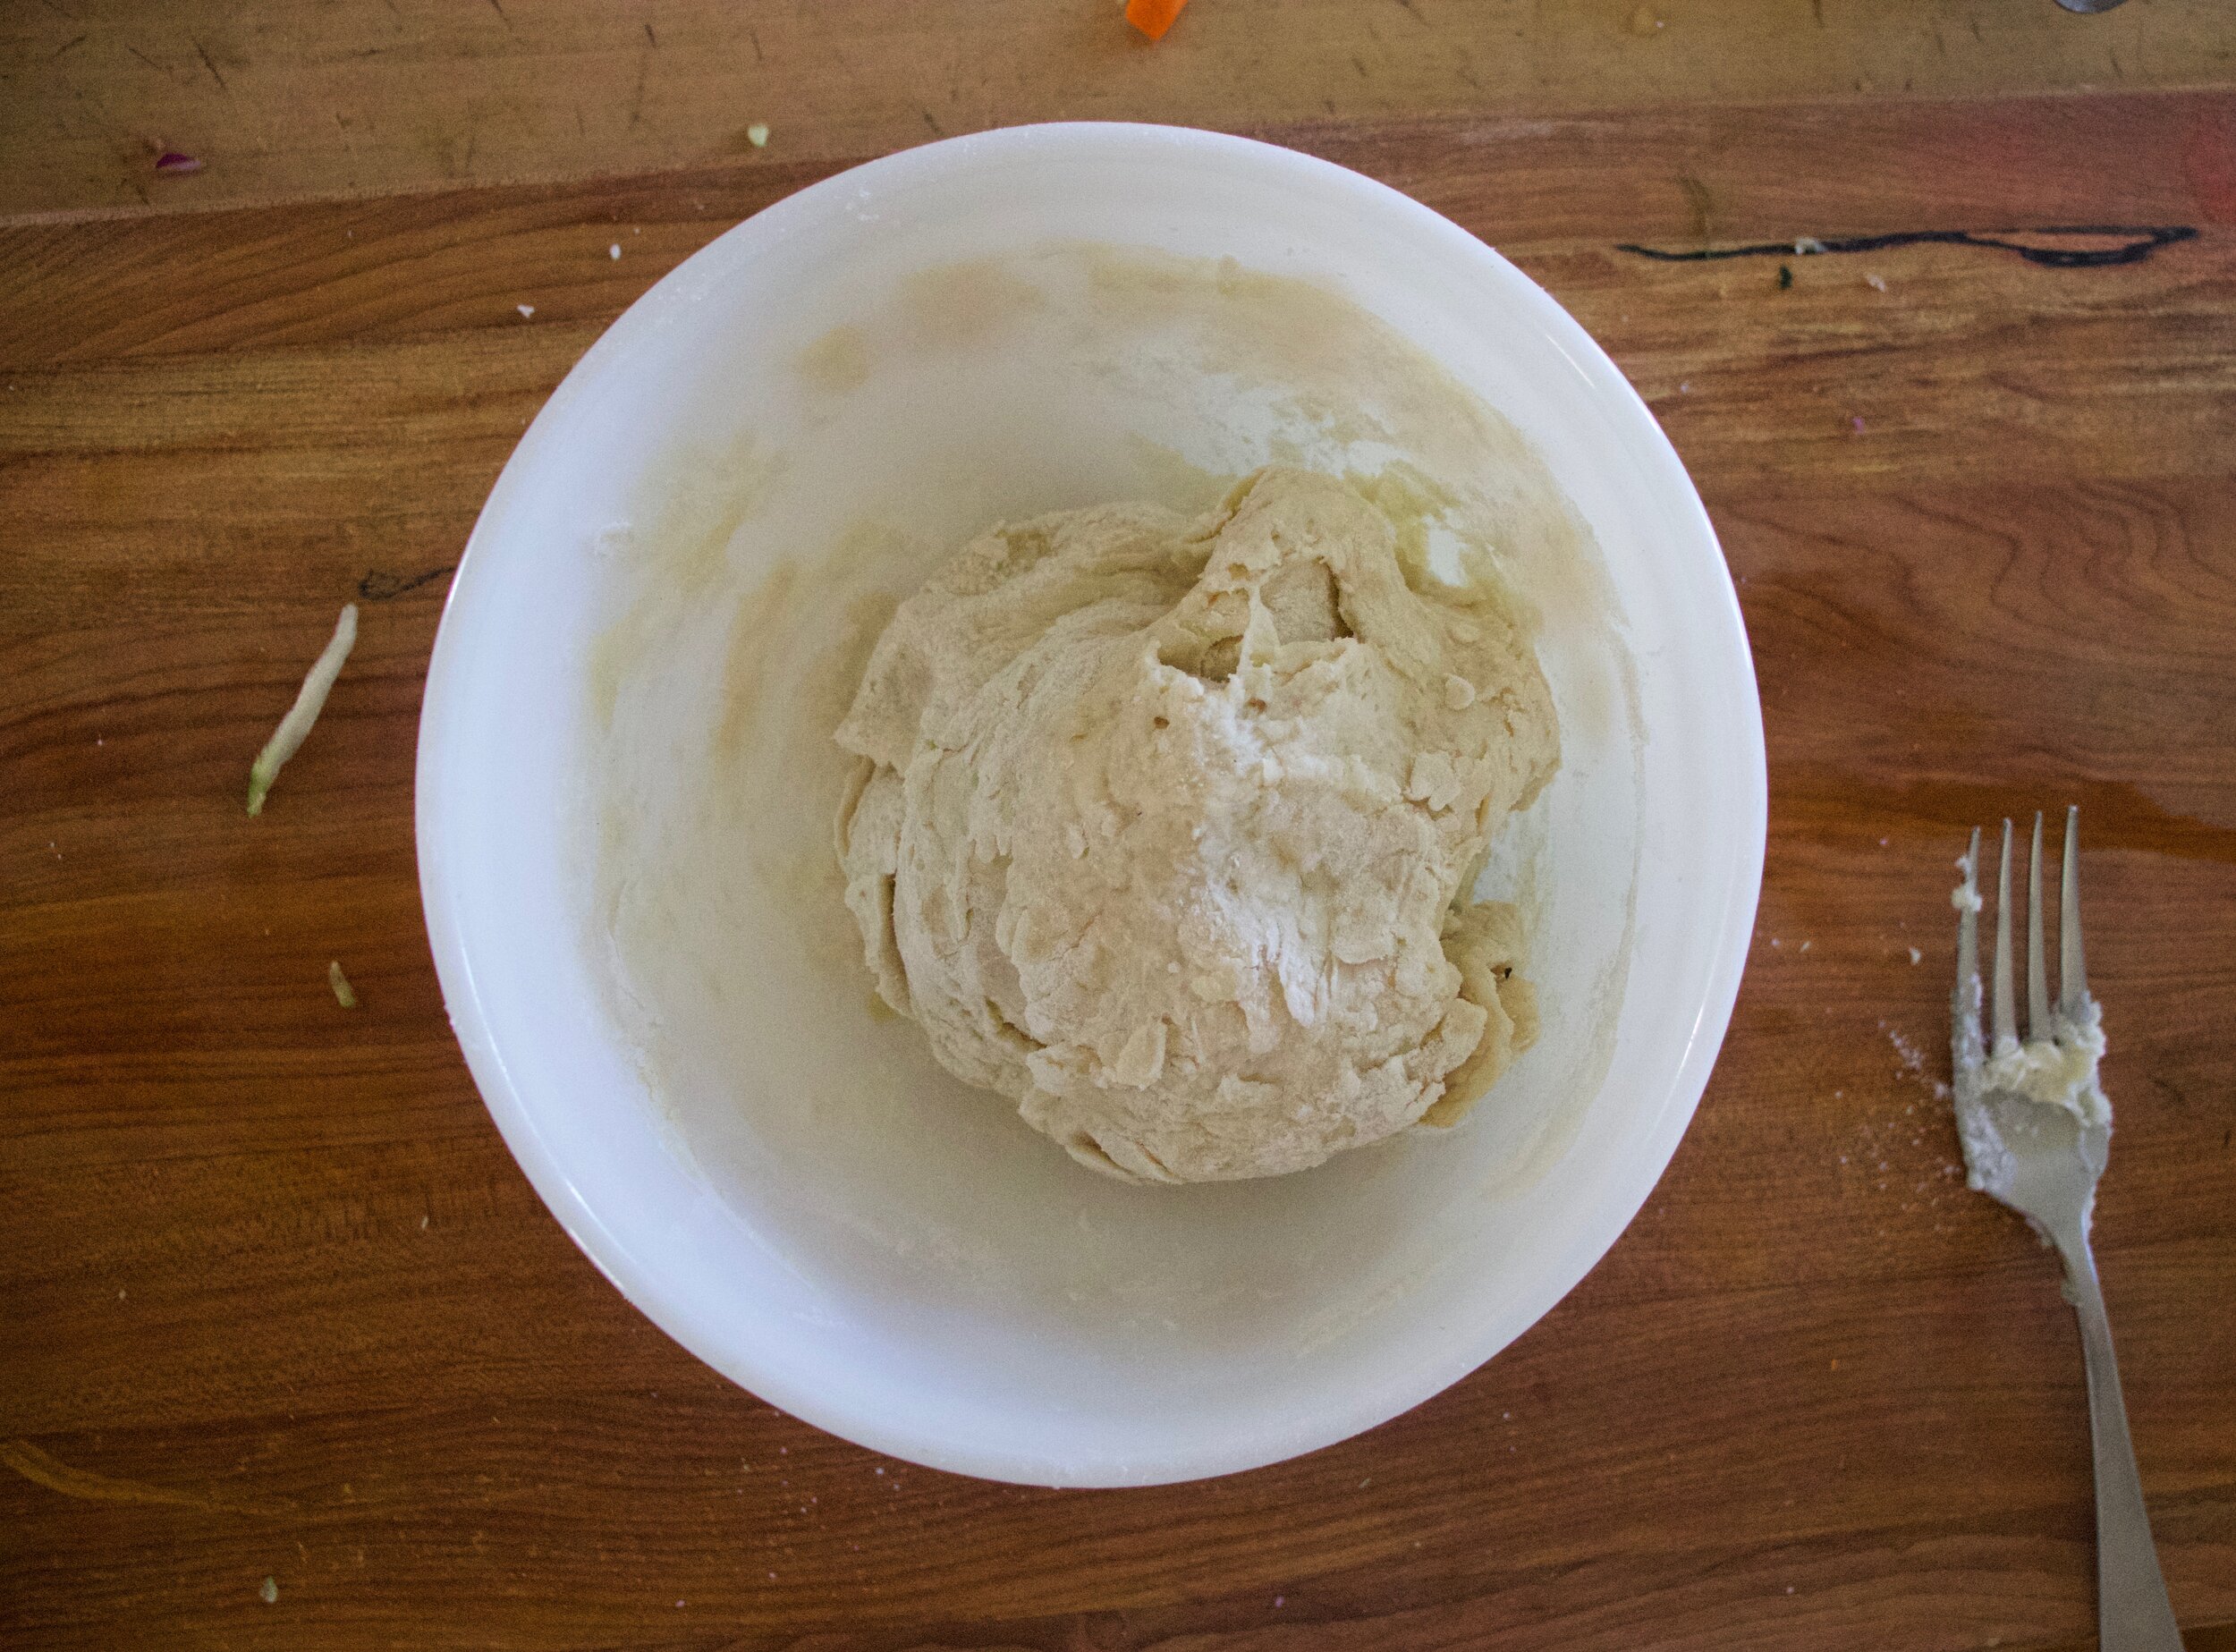
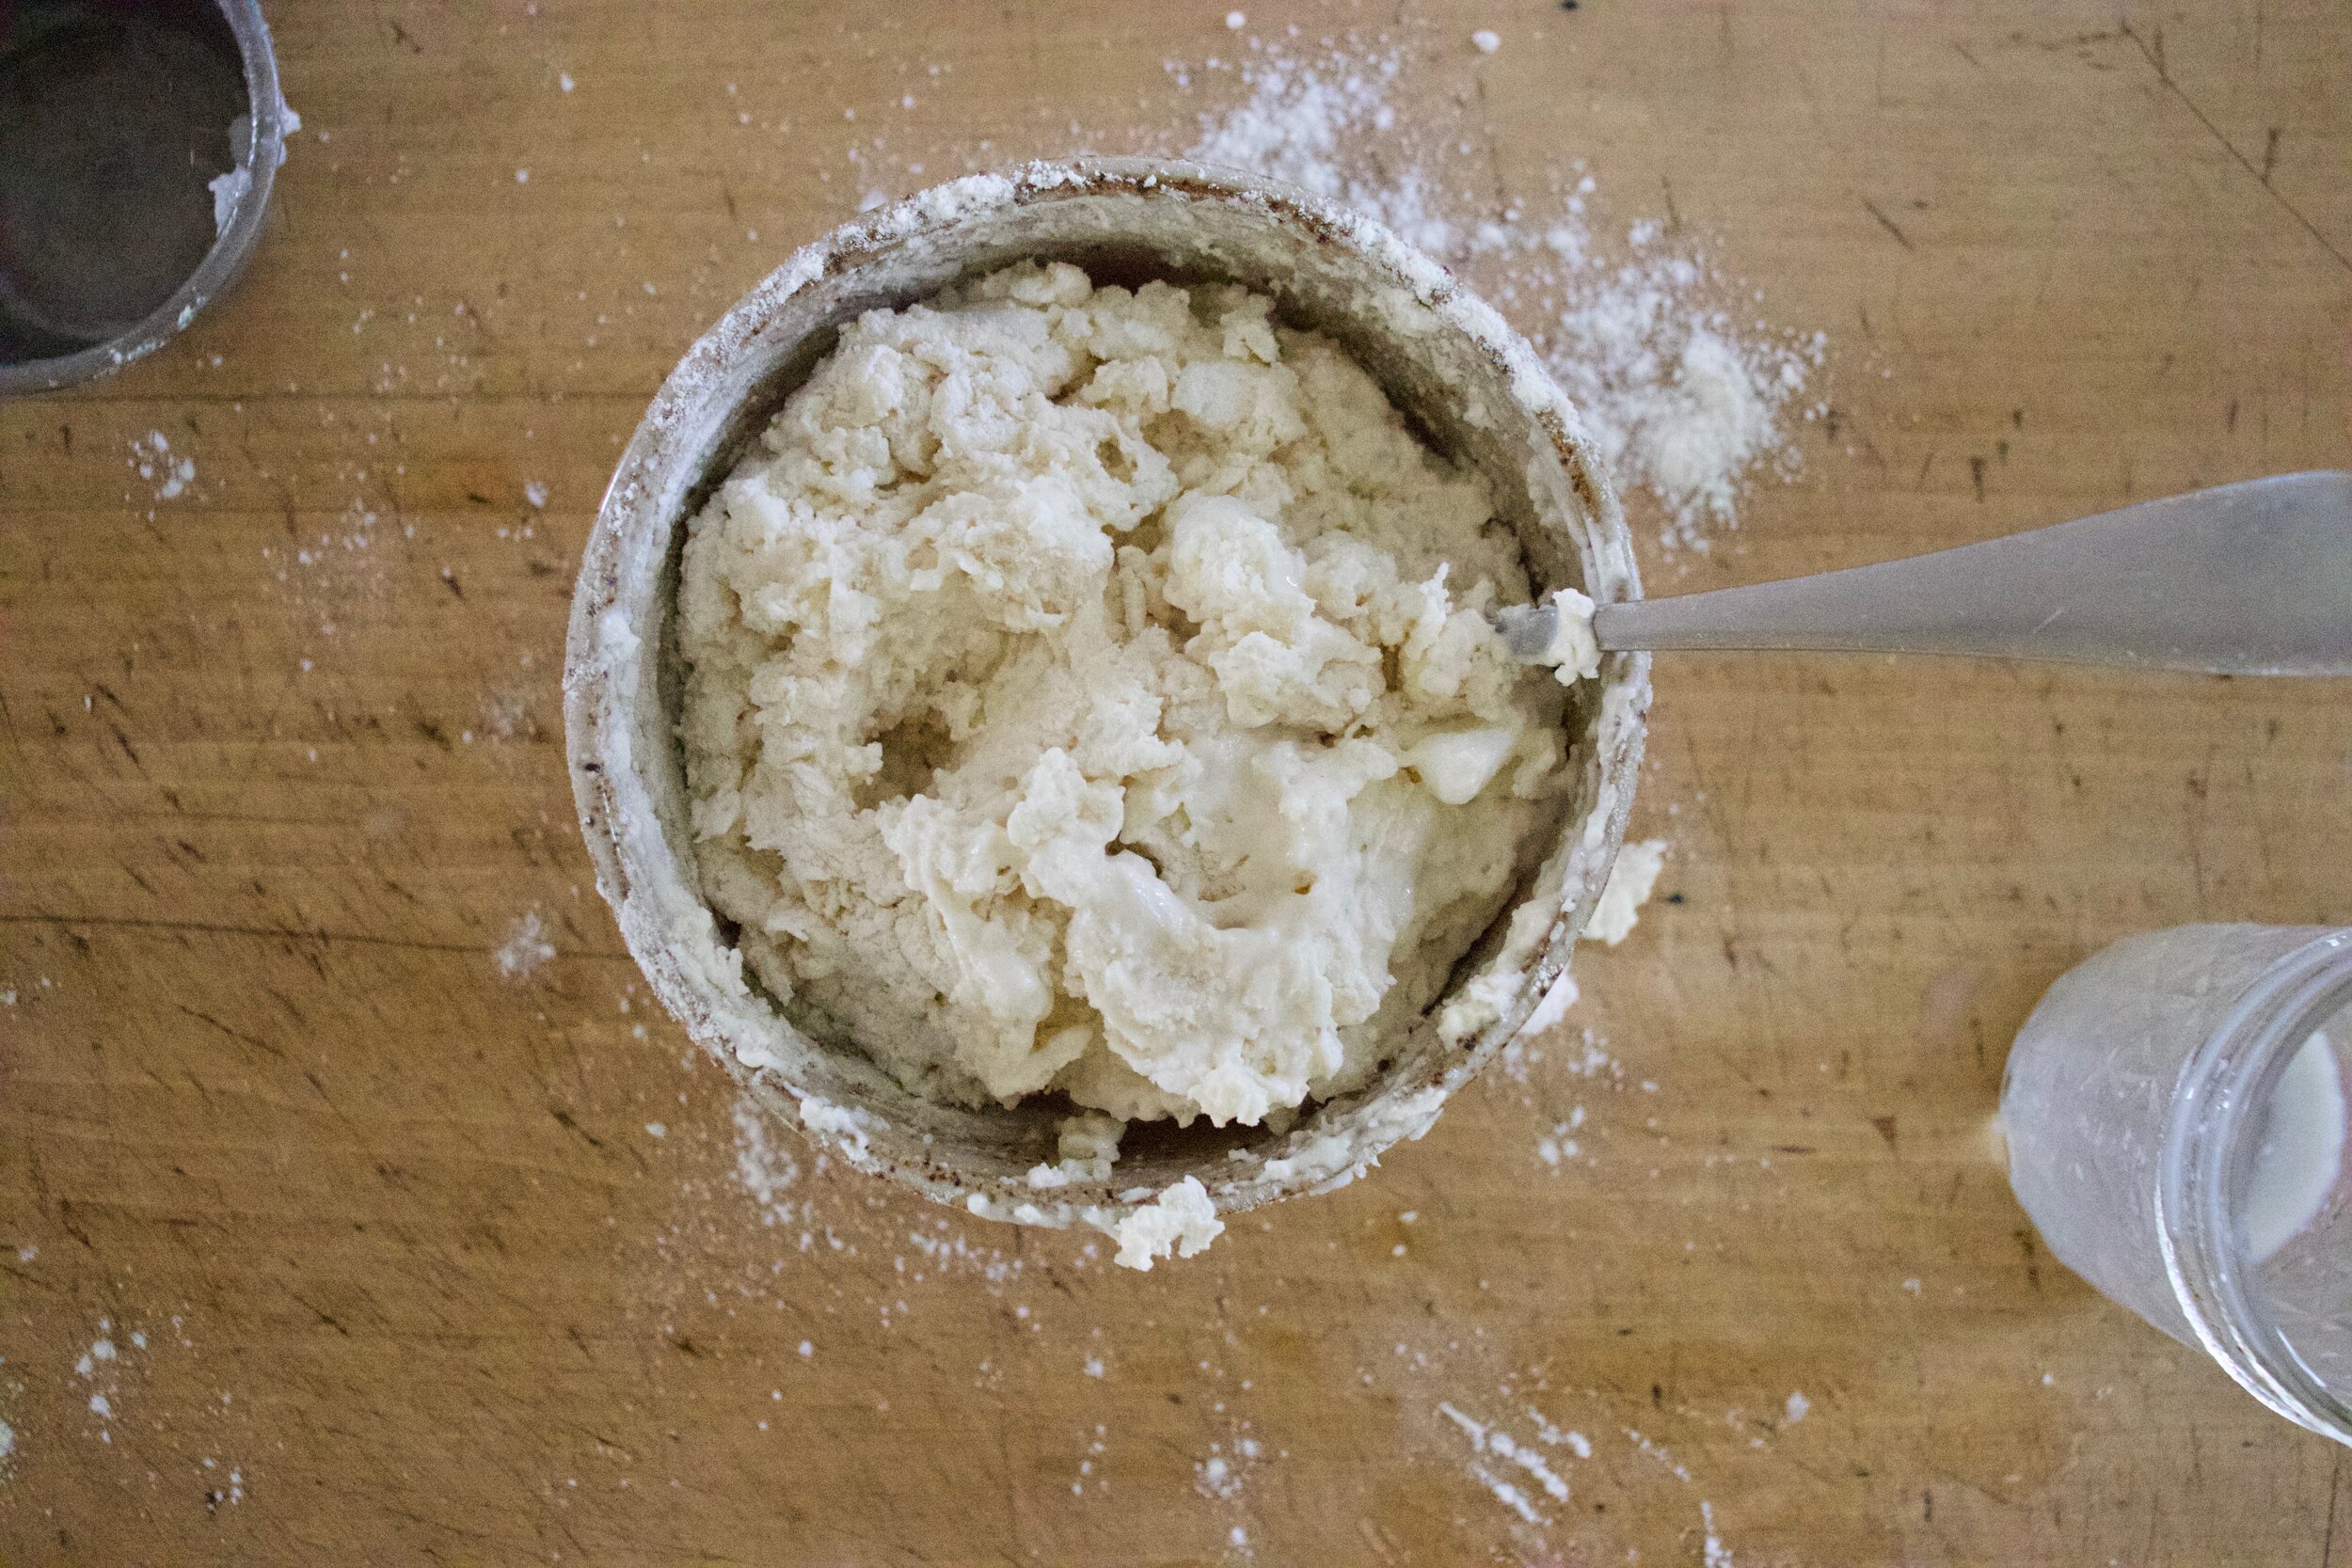
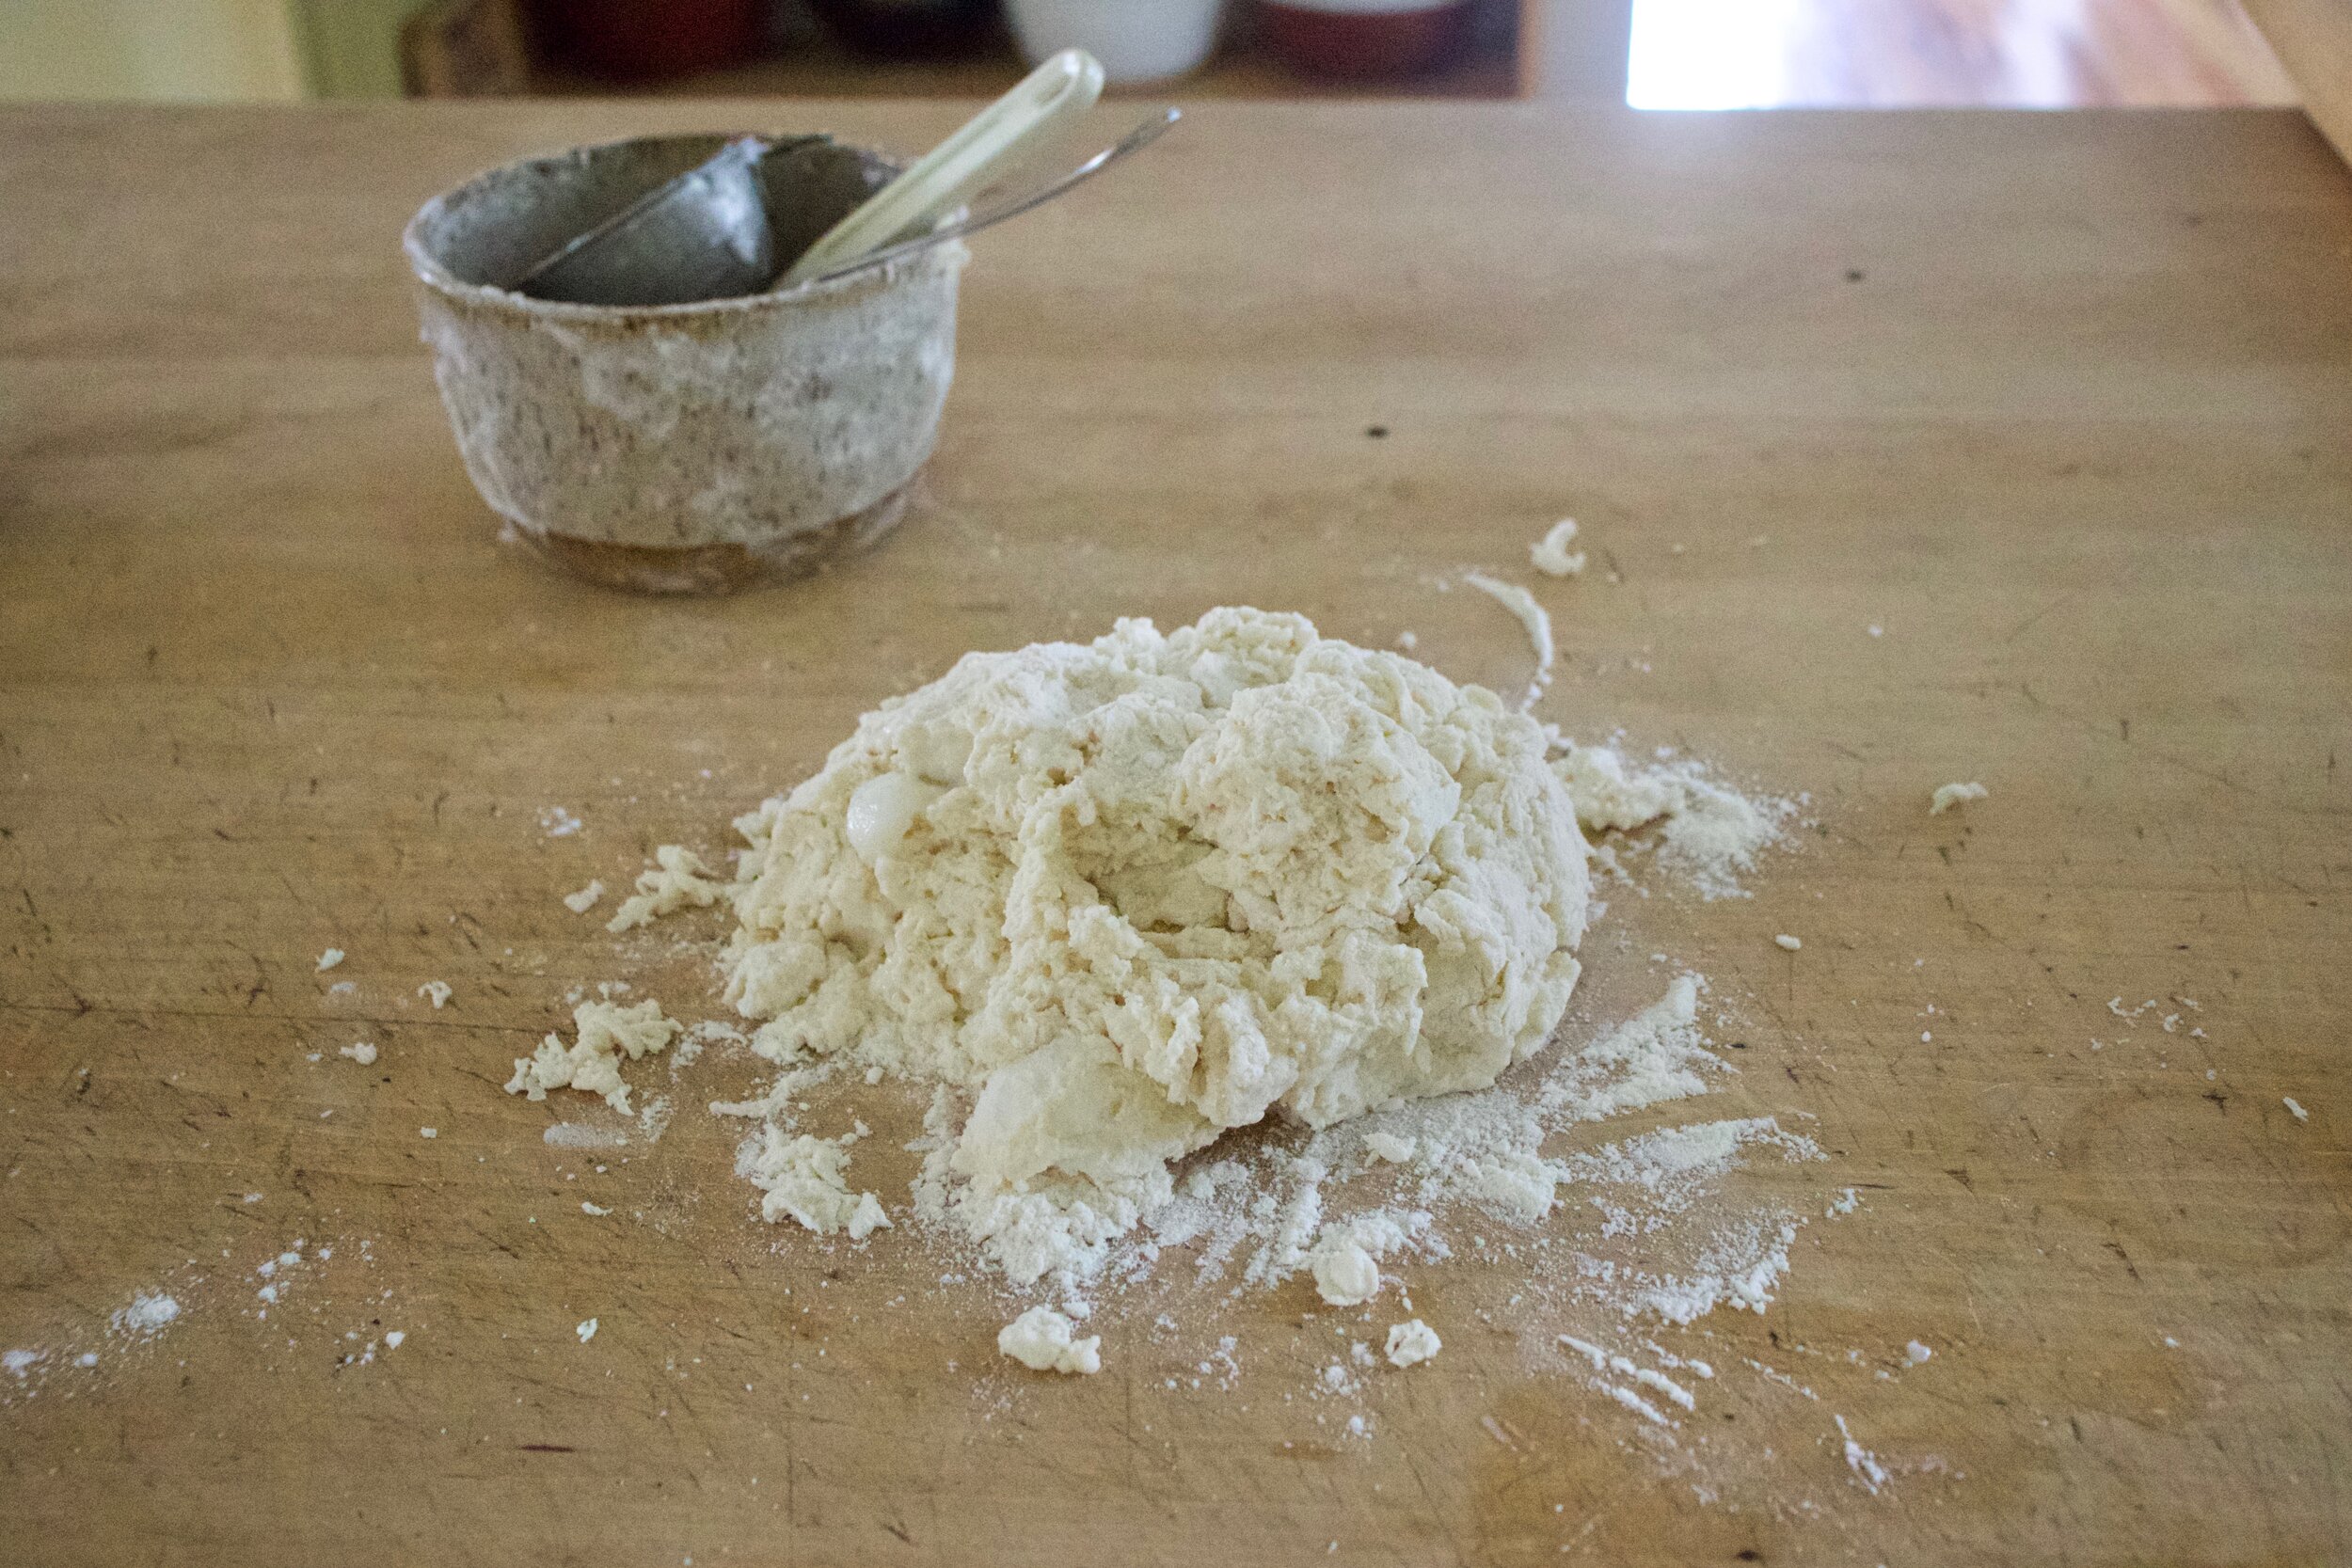
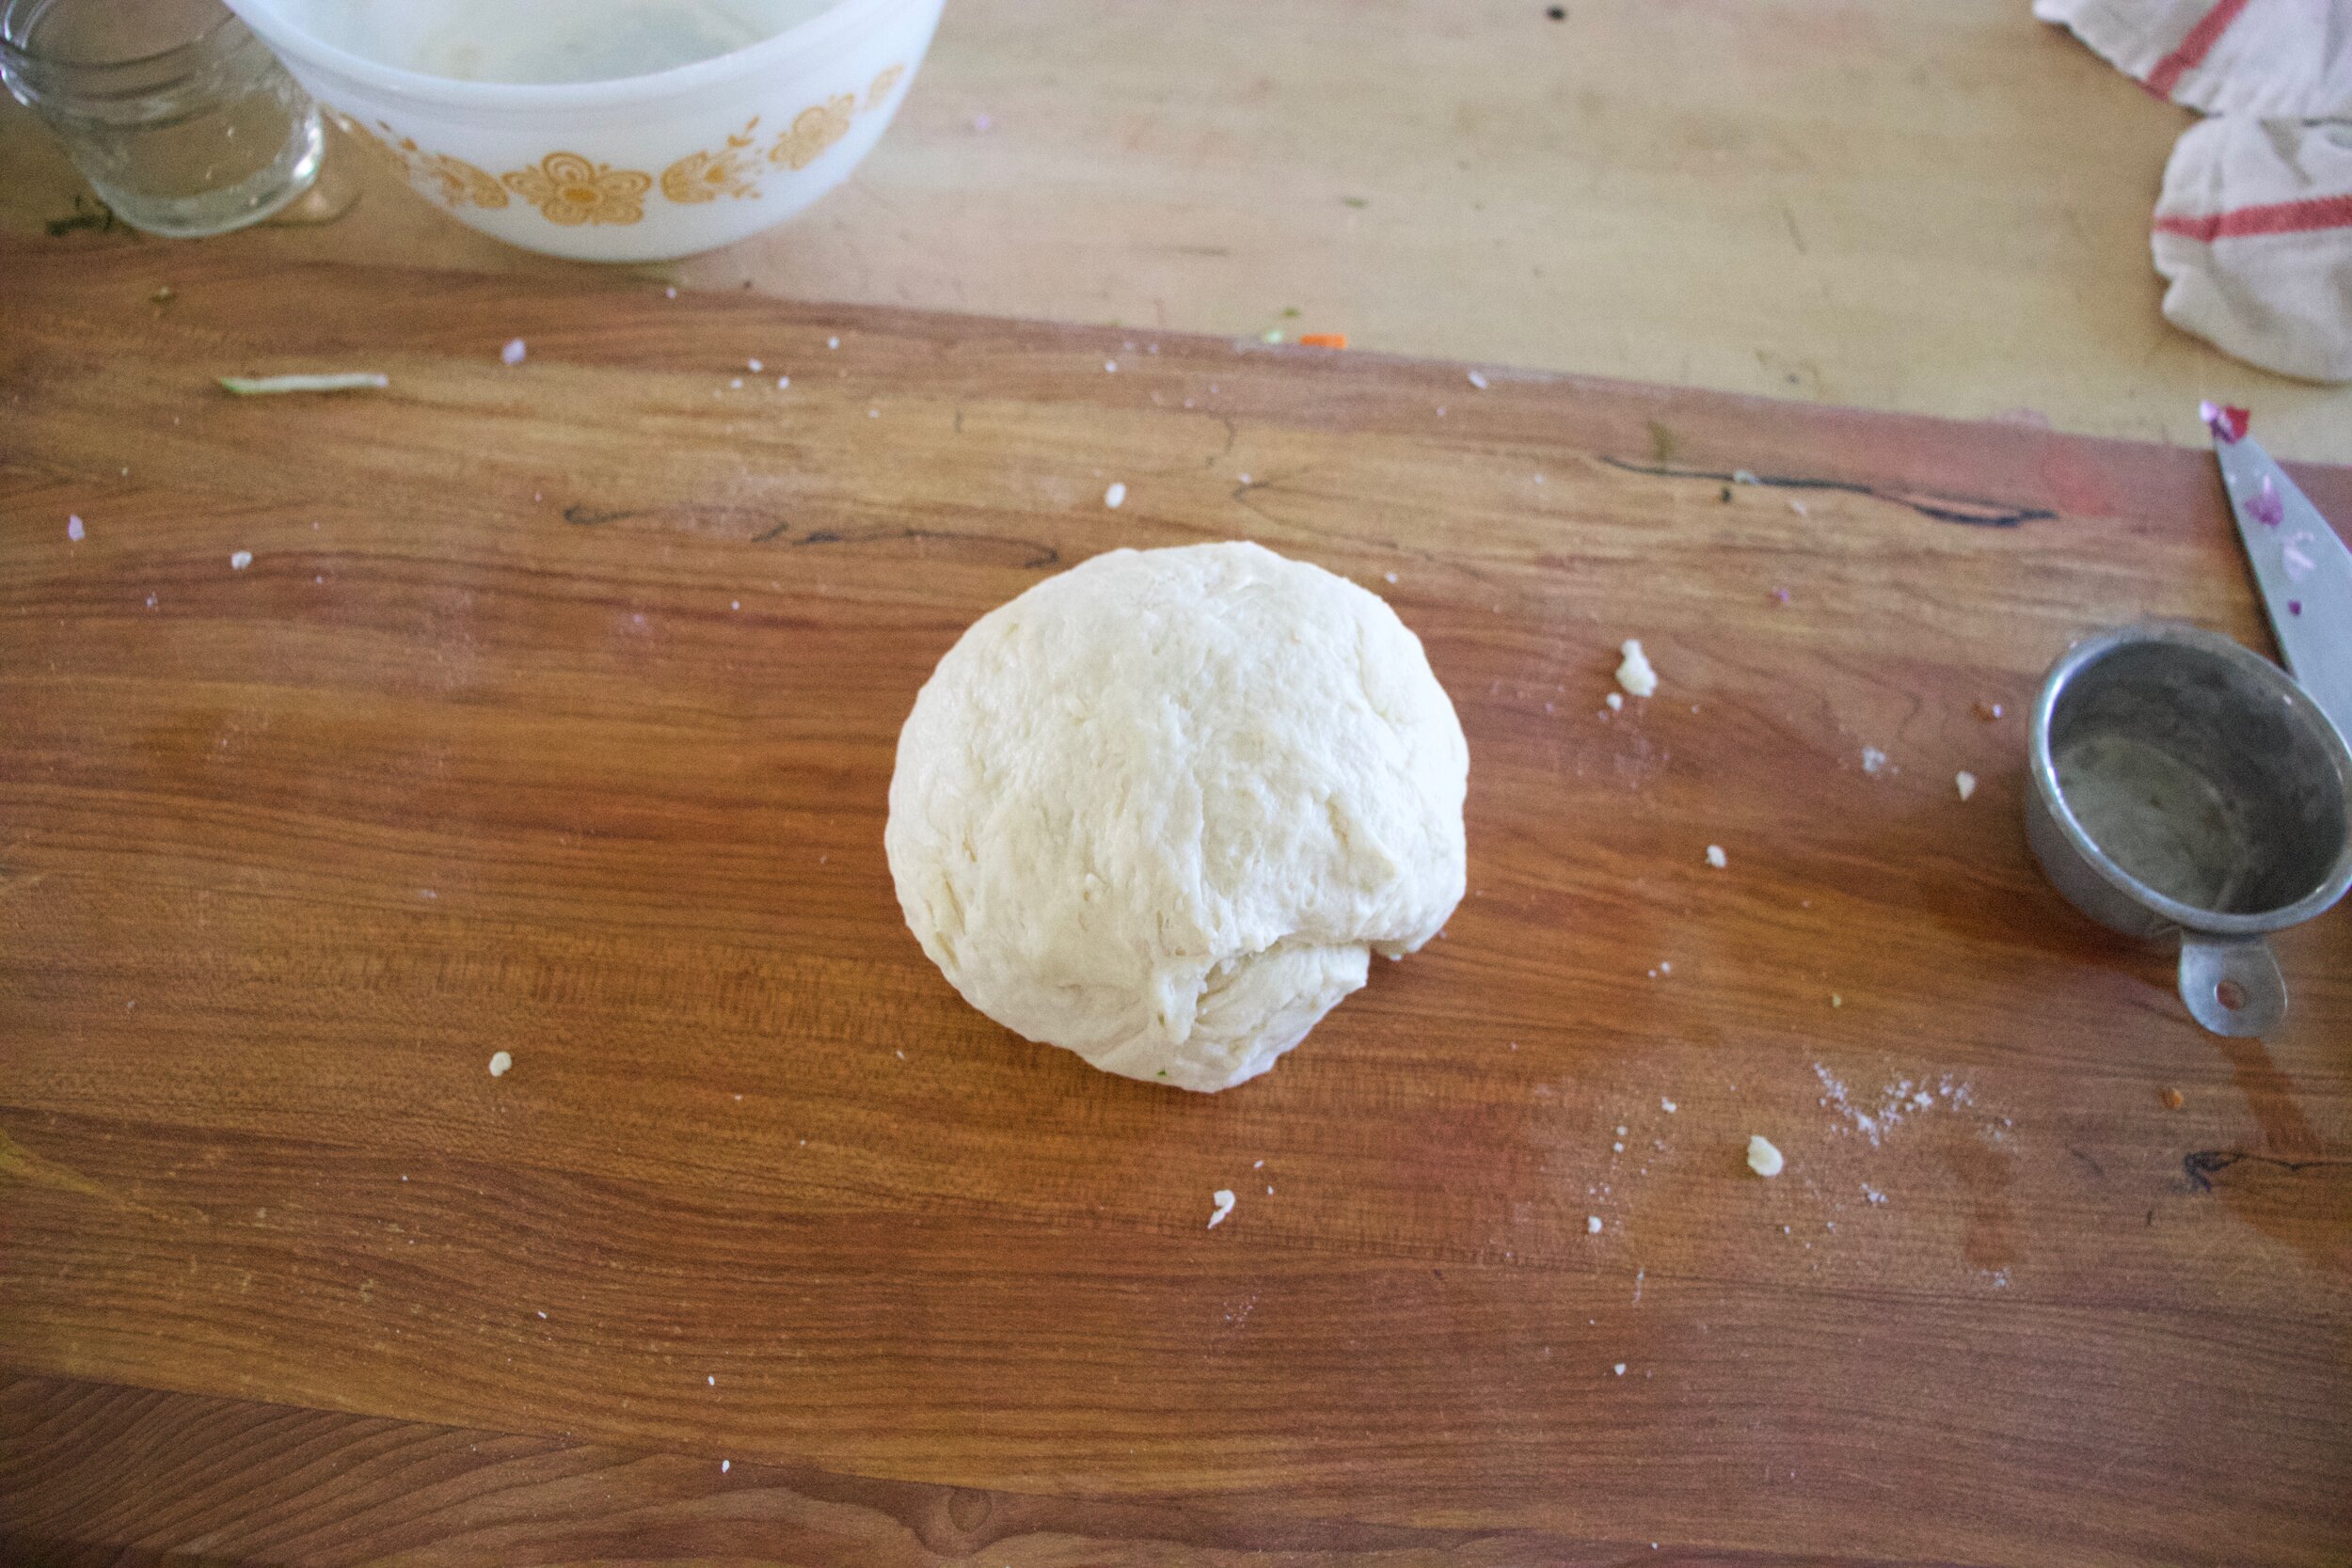
Now make the dough. Ad the wet the dry and mix around unit a shaggy dough form then knead it for about a minute and place in a clean bowl covered with a towel to rest for 15 or so minutes.

IMG_5910.jpg
IMG_5919.jpg

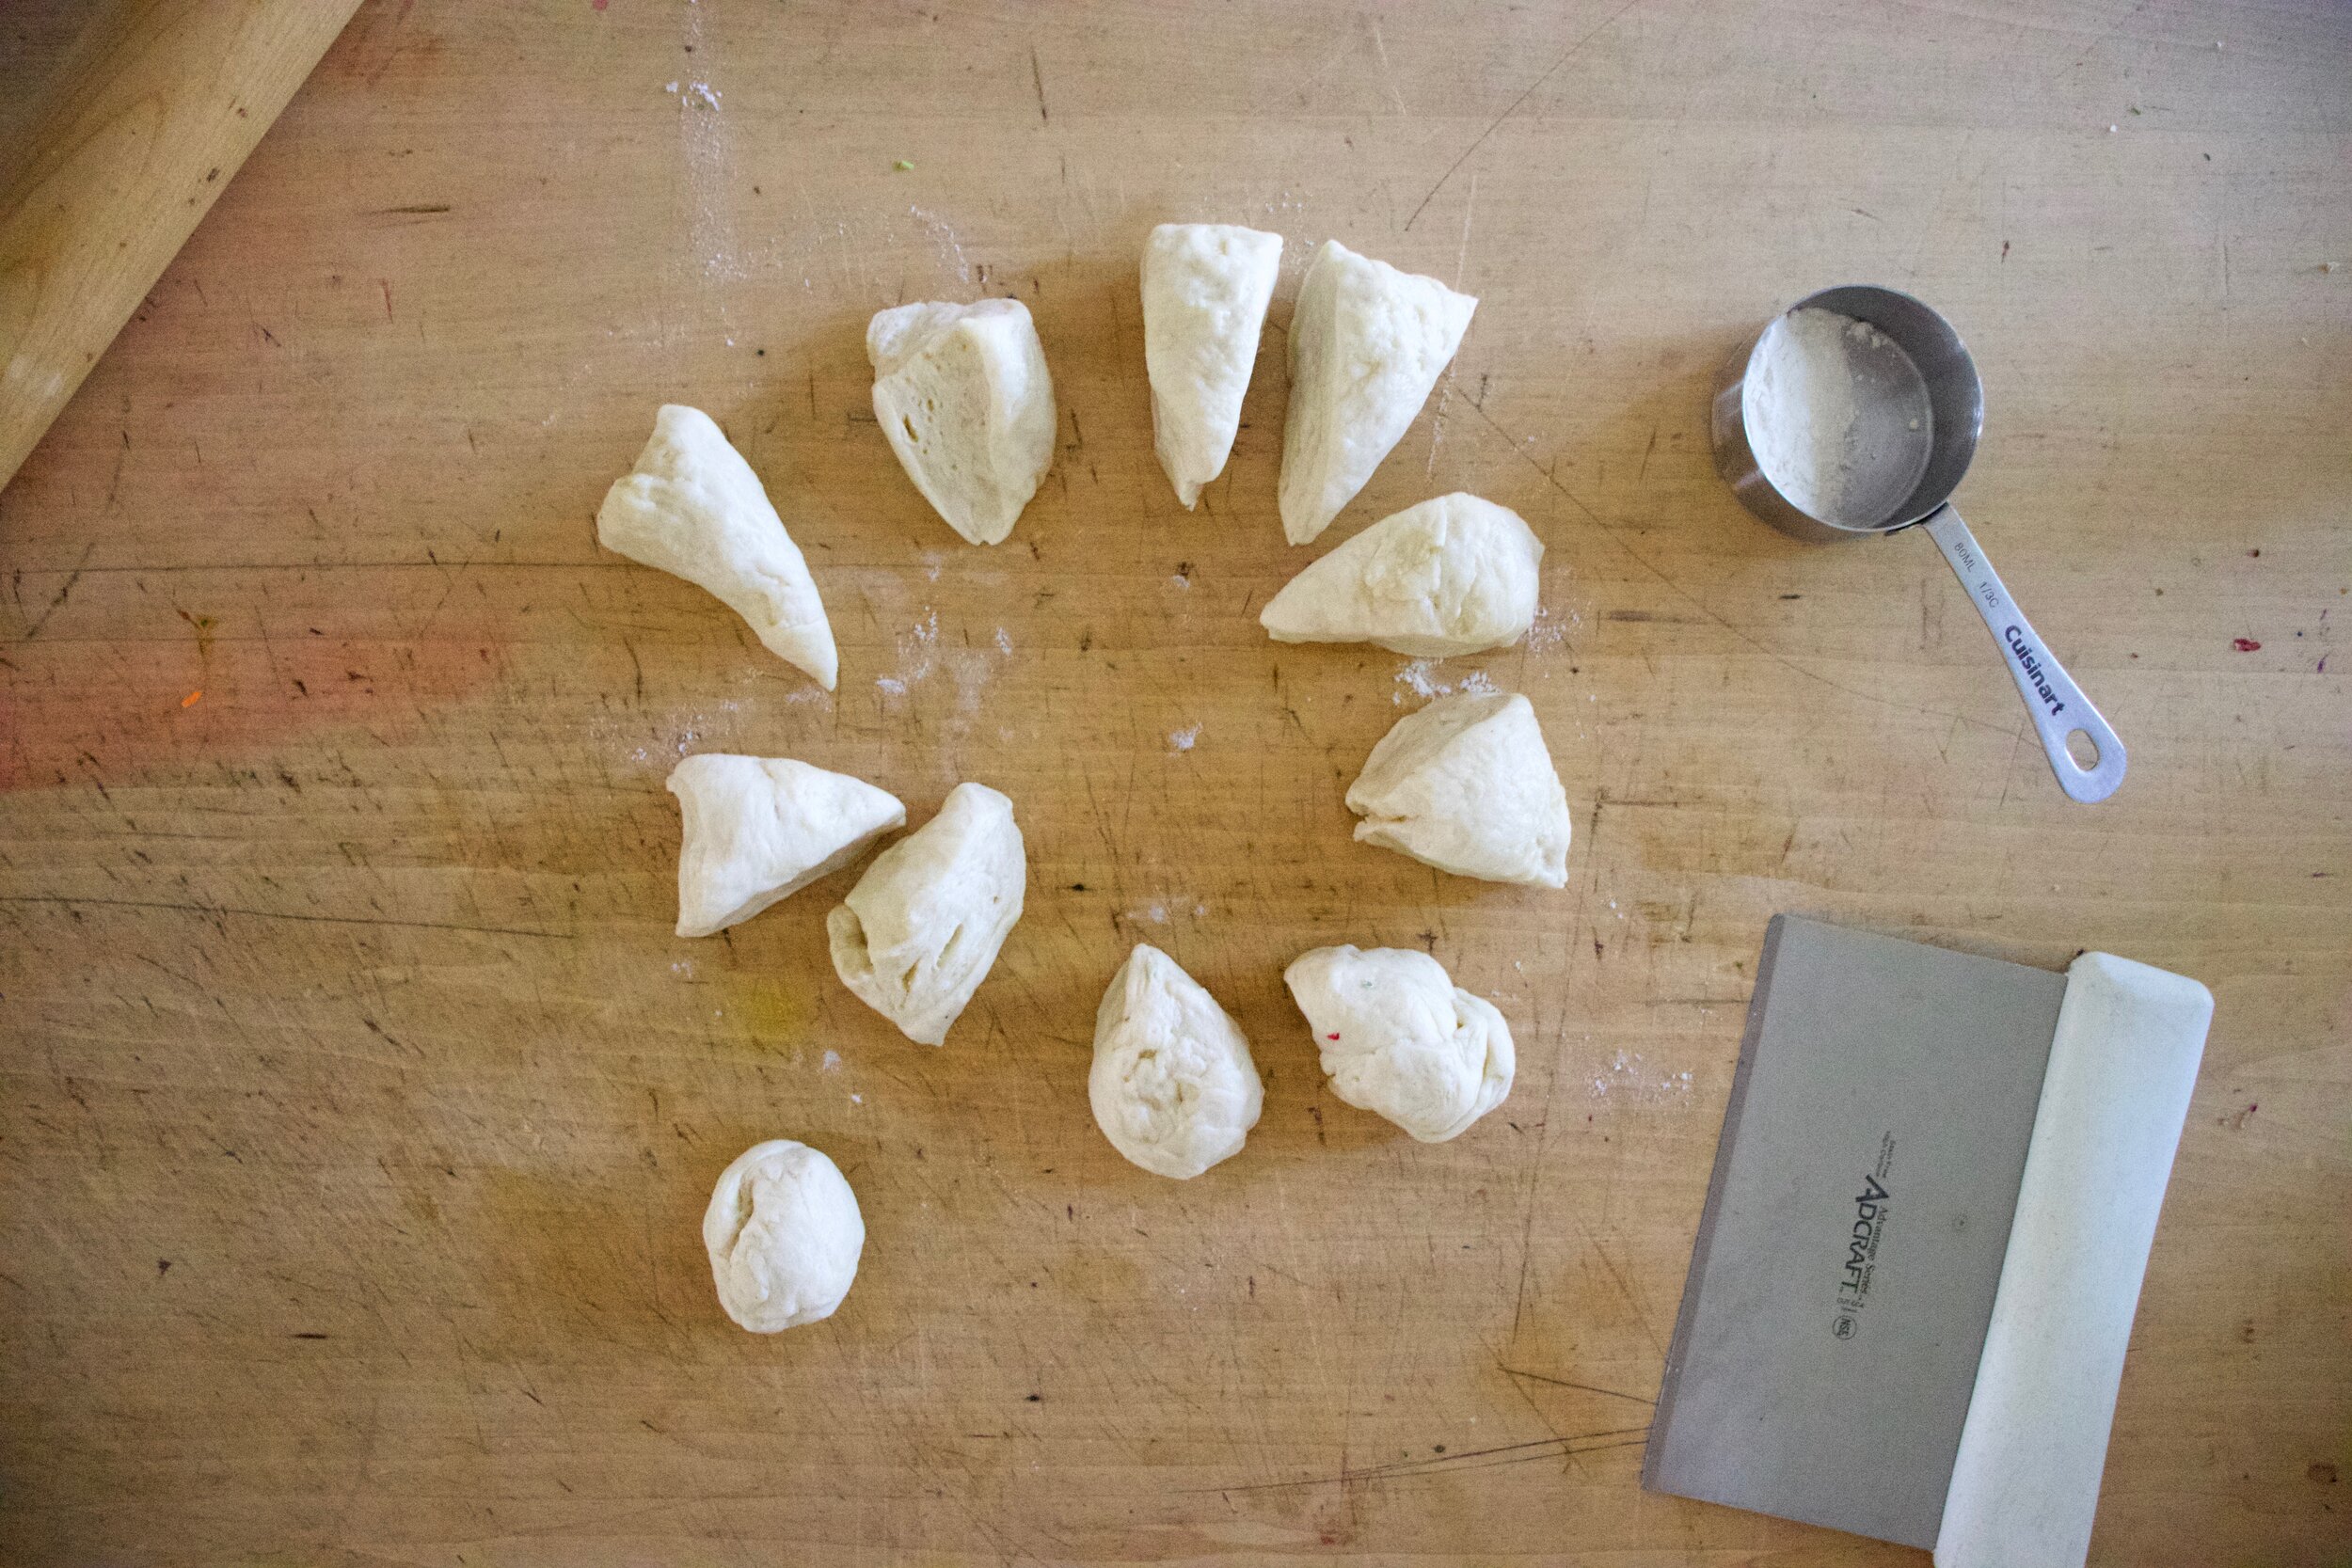
After the dough has rested, dump into counter, pat into a disk and cut into 12 equal pieces.

IMG_5924.jpg

Then roll each piece into a ball. Take a ball and on a lightly floured surface, roll out into a disk.

IMG_5930.jpg
IMG_5931.jpg
IMG_5939.jpg

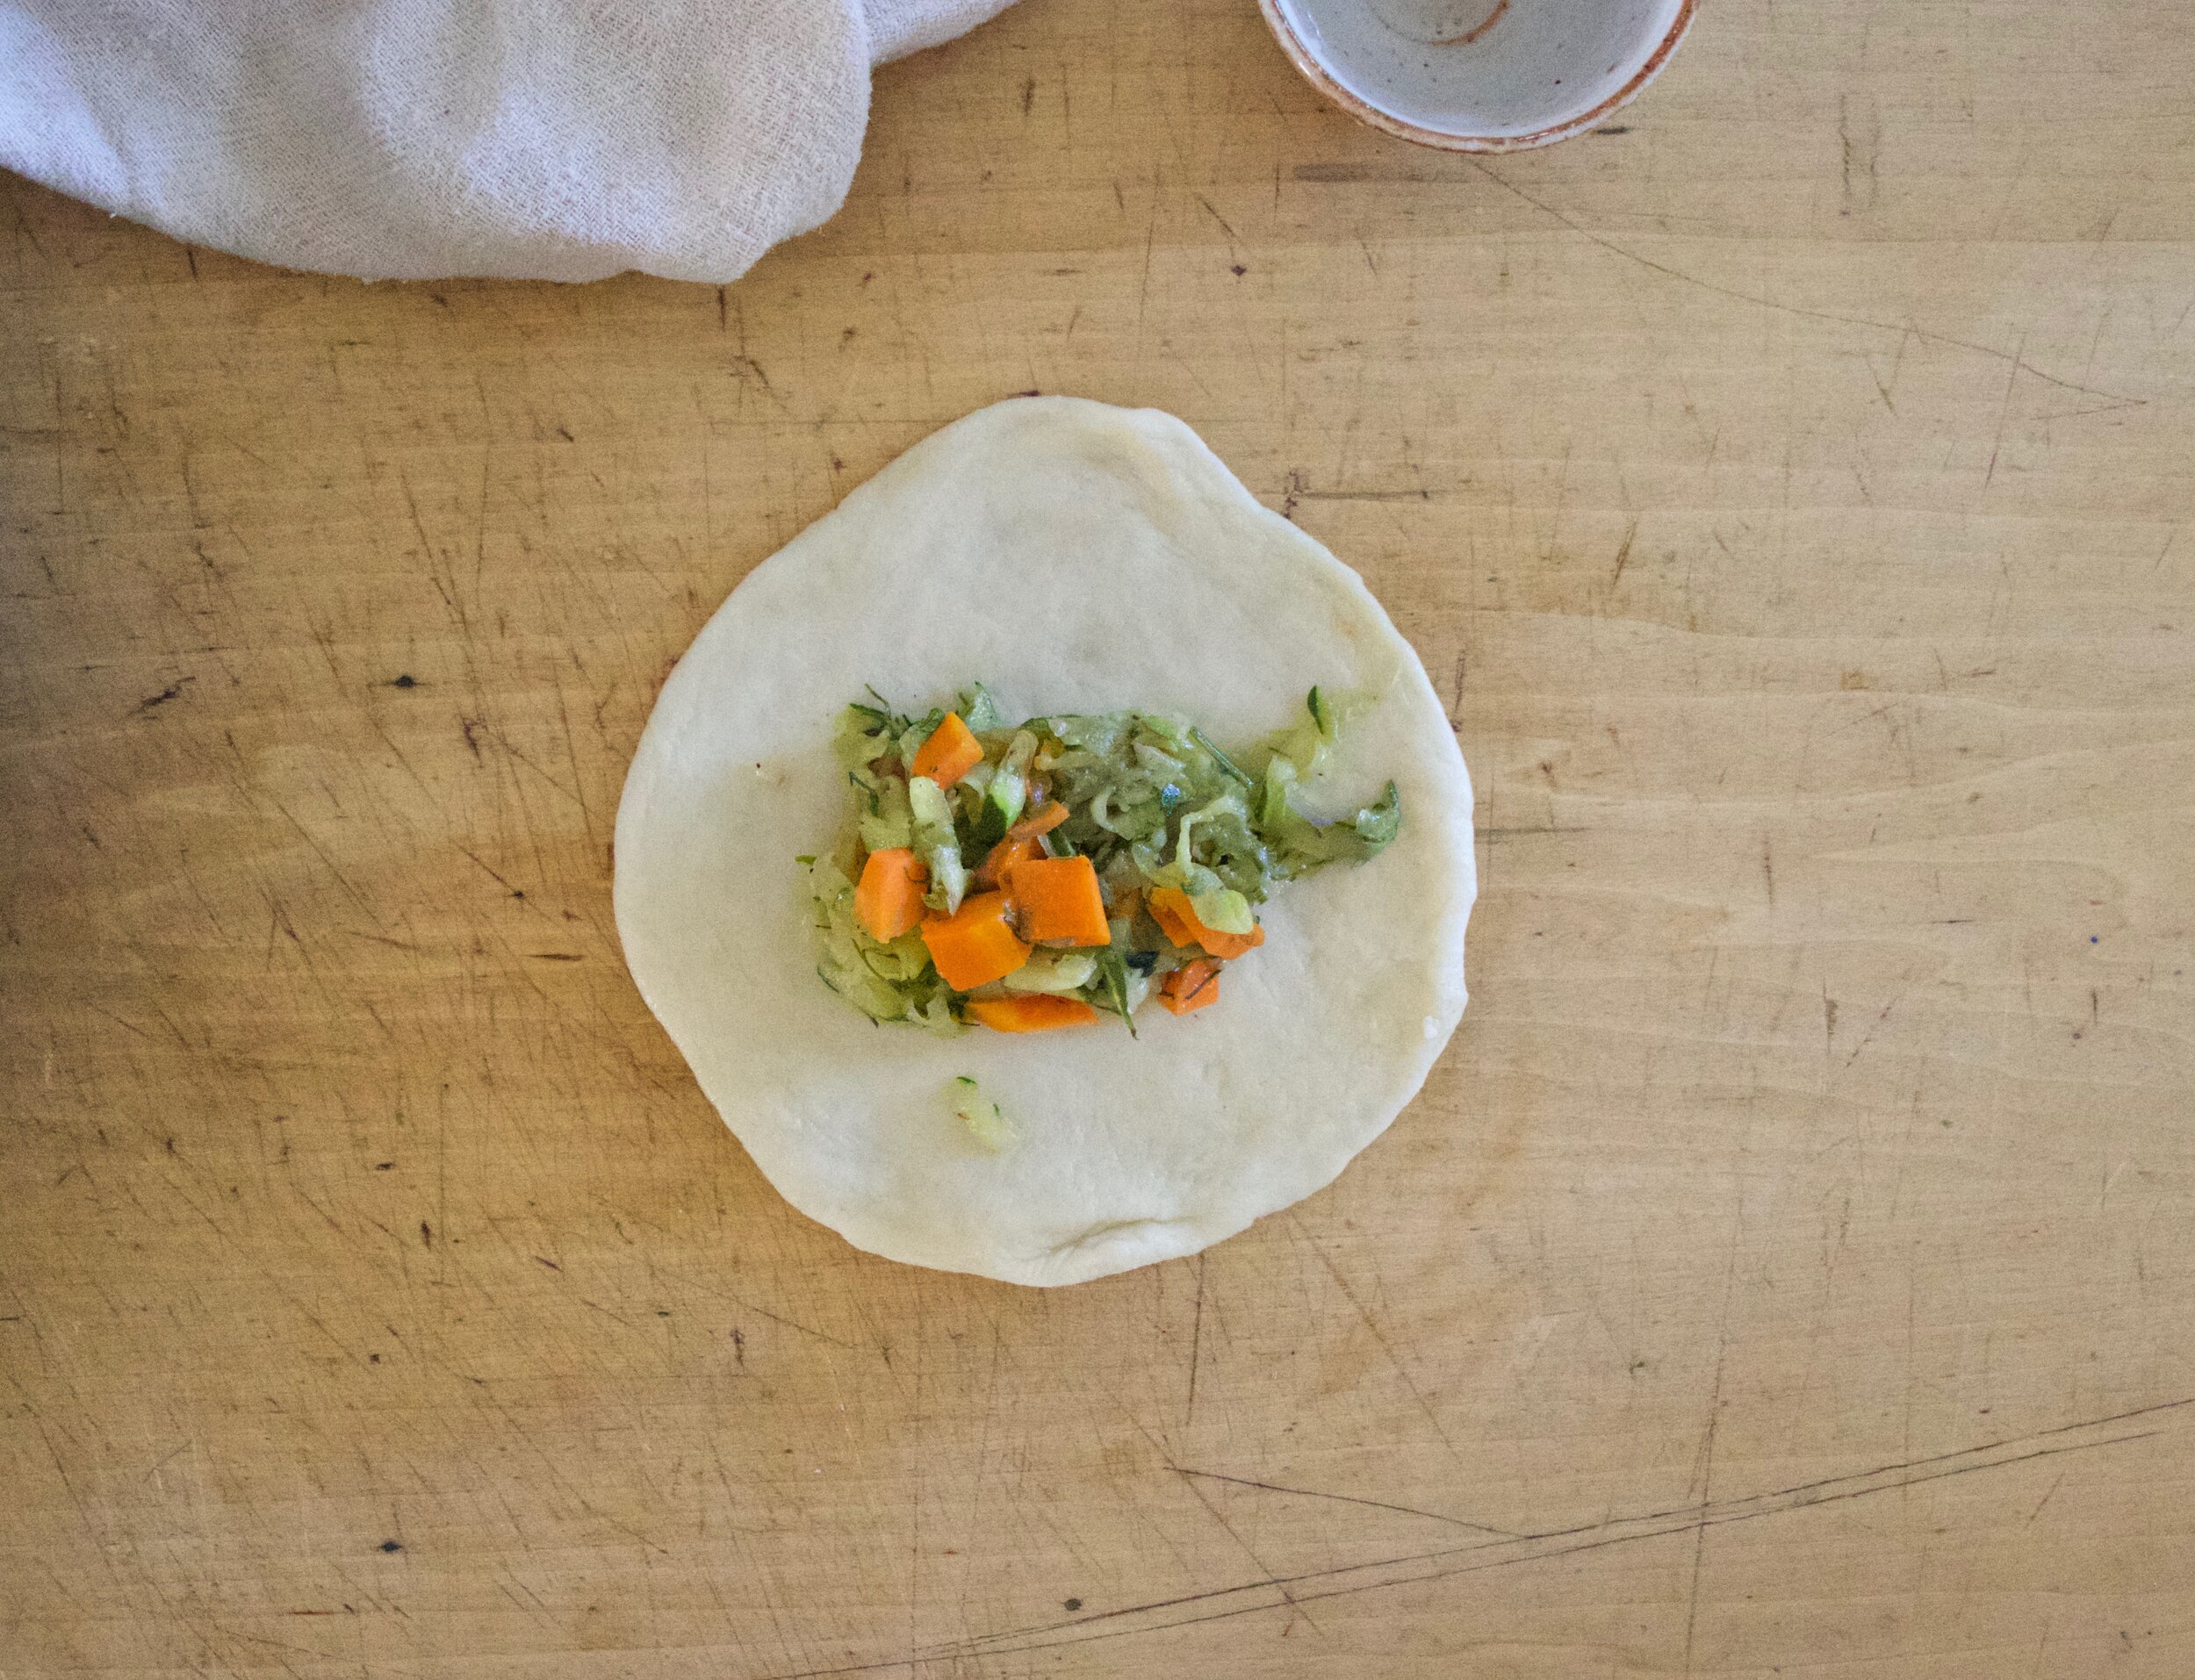
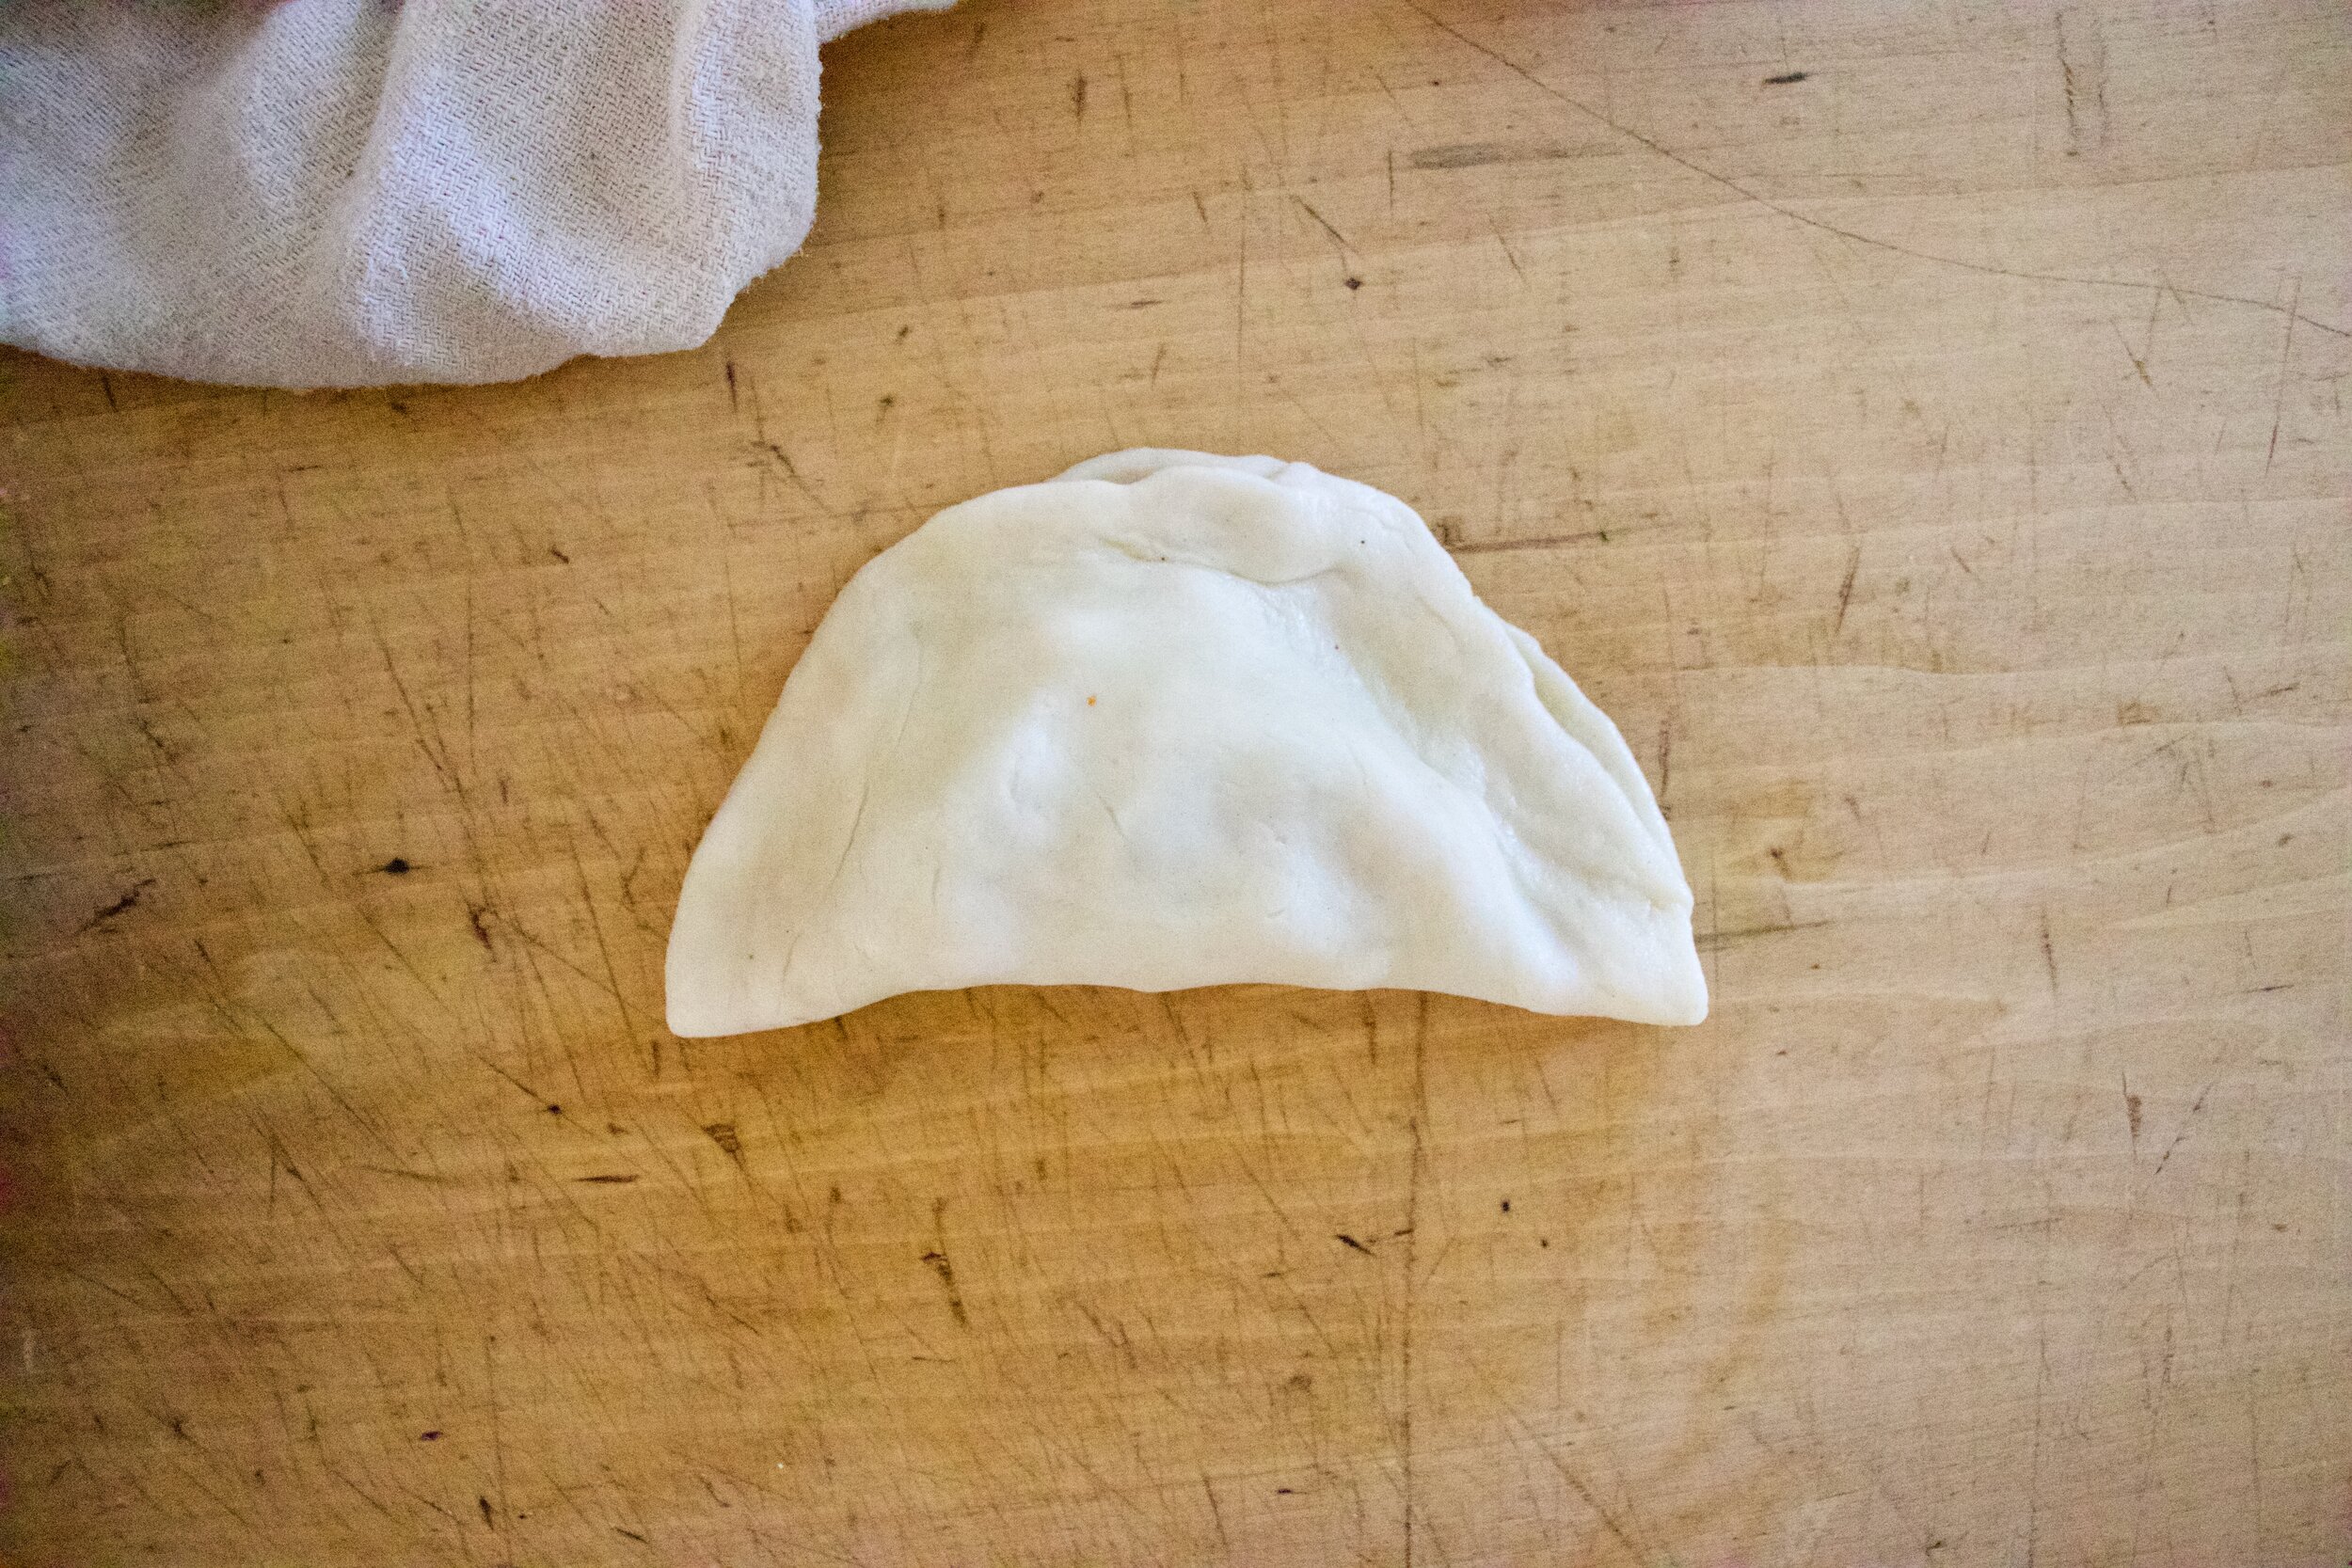
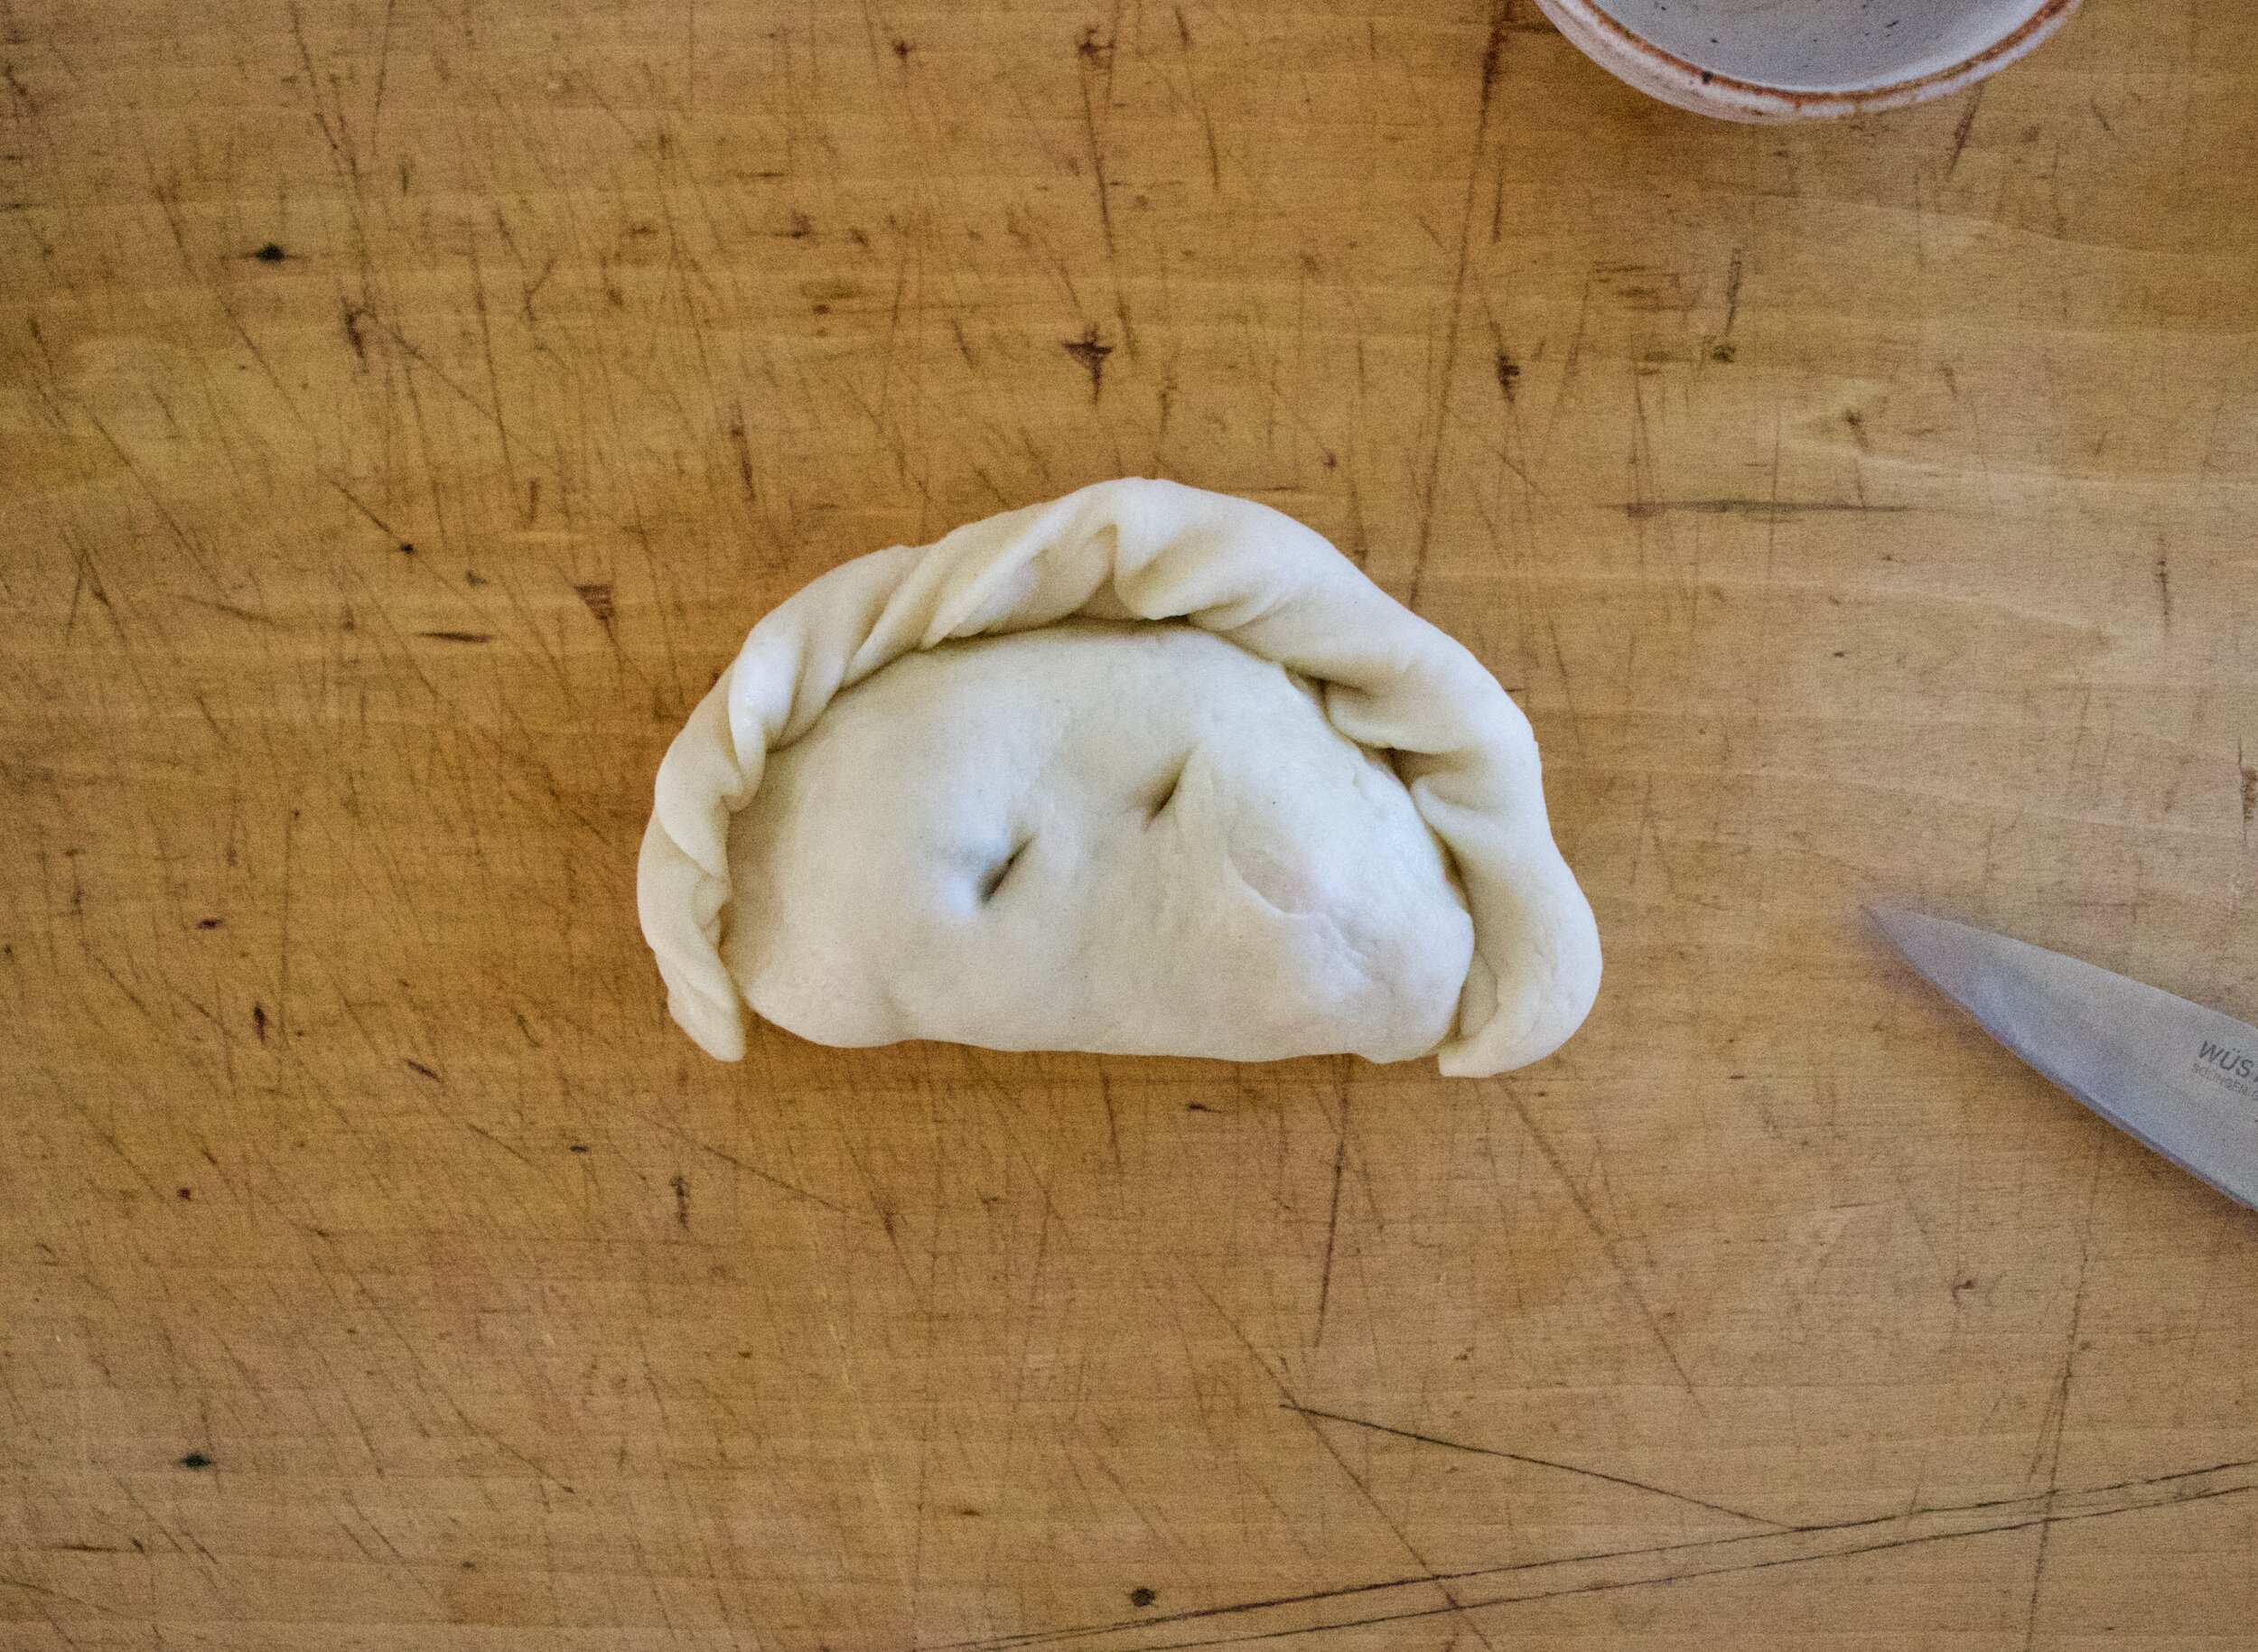
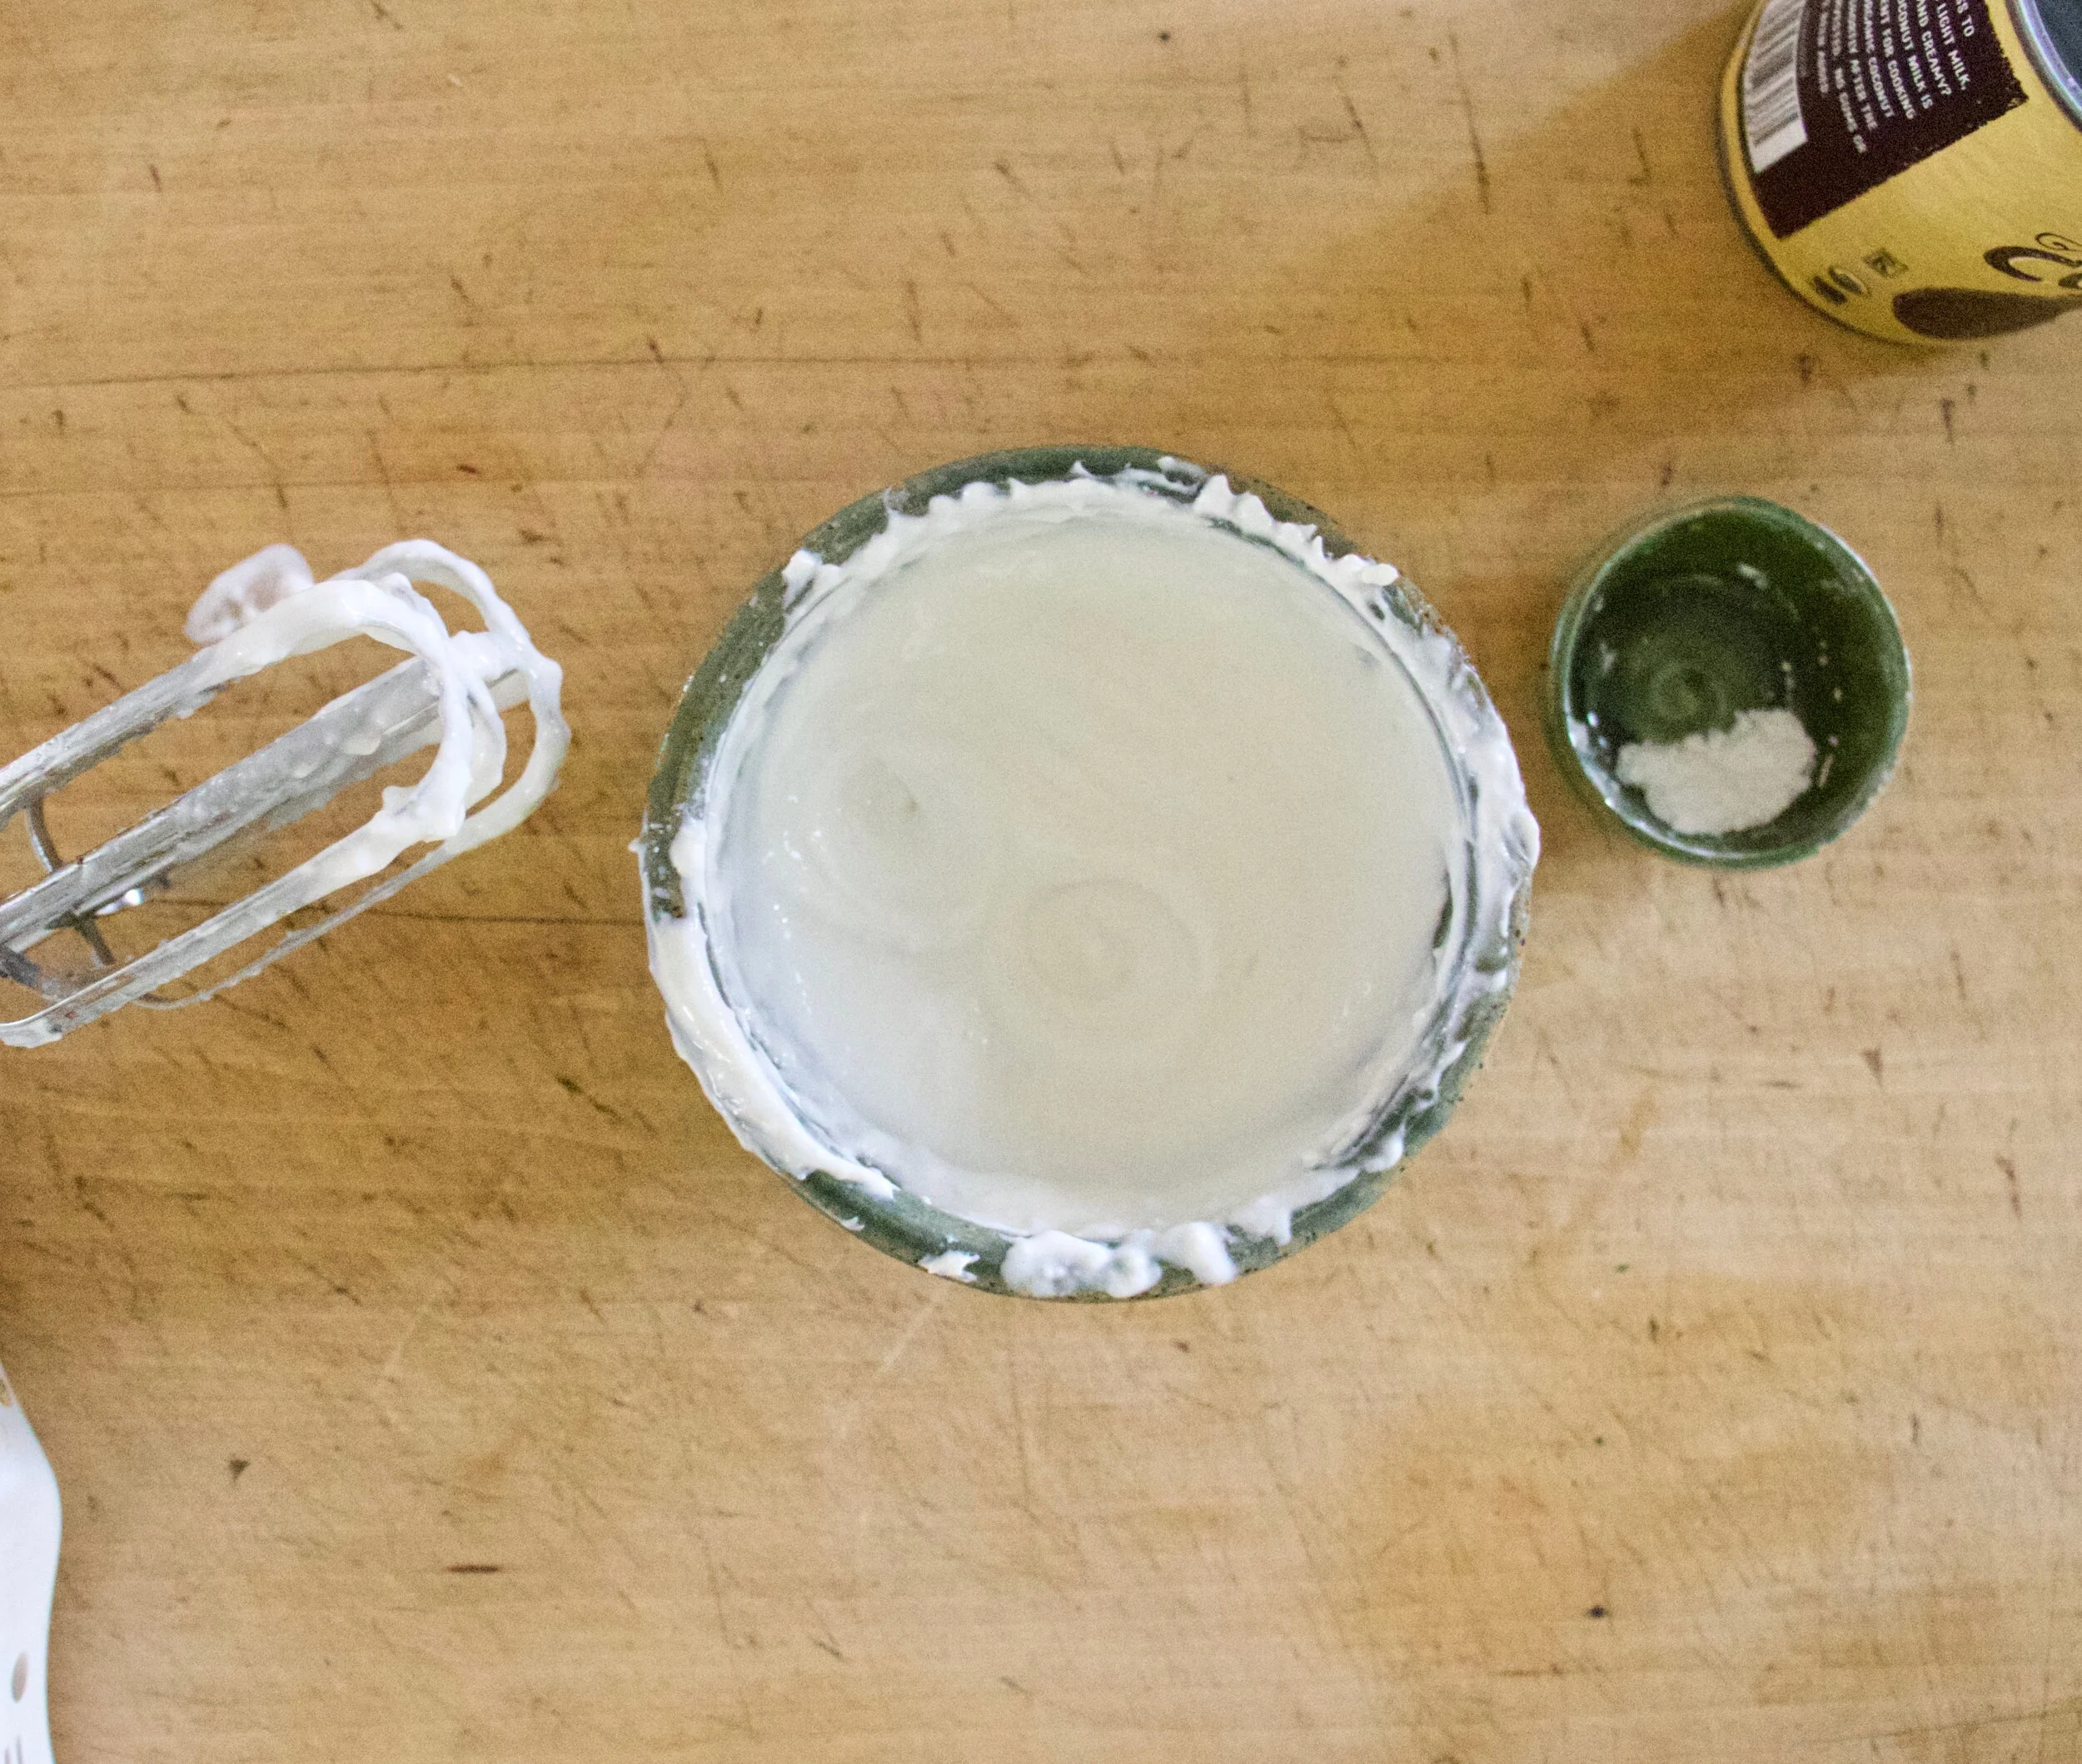
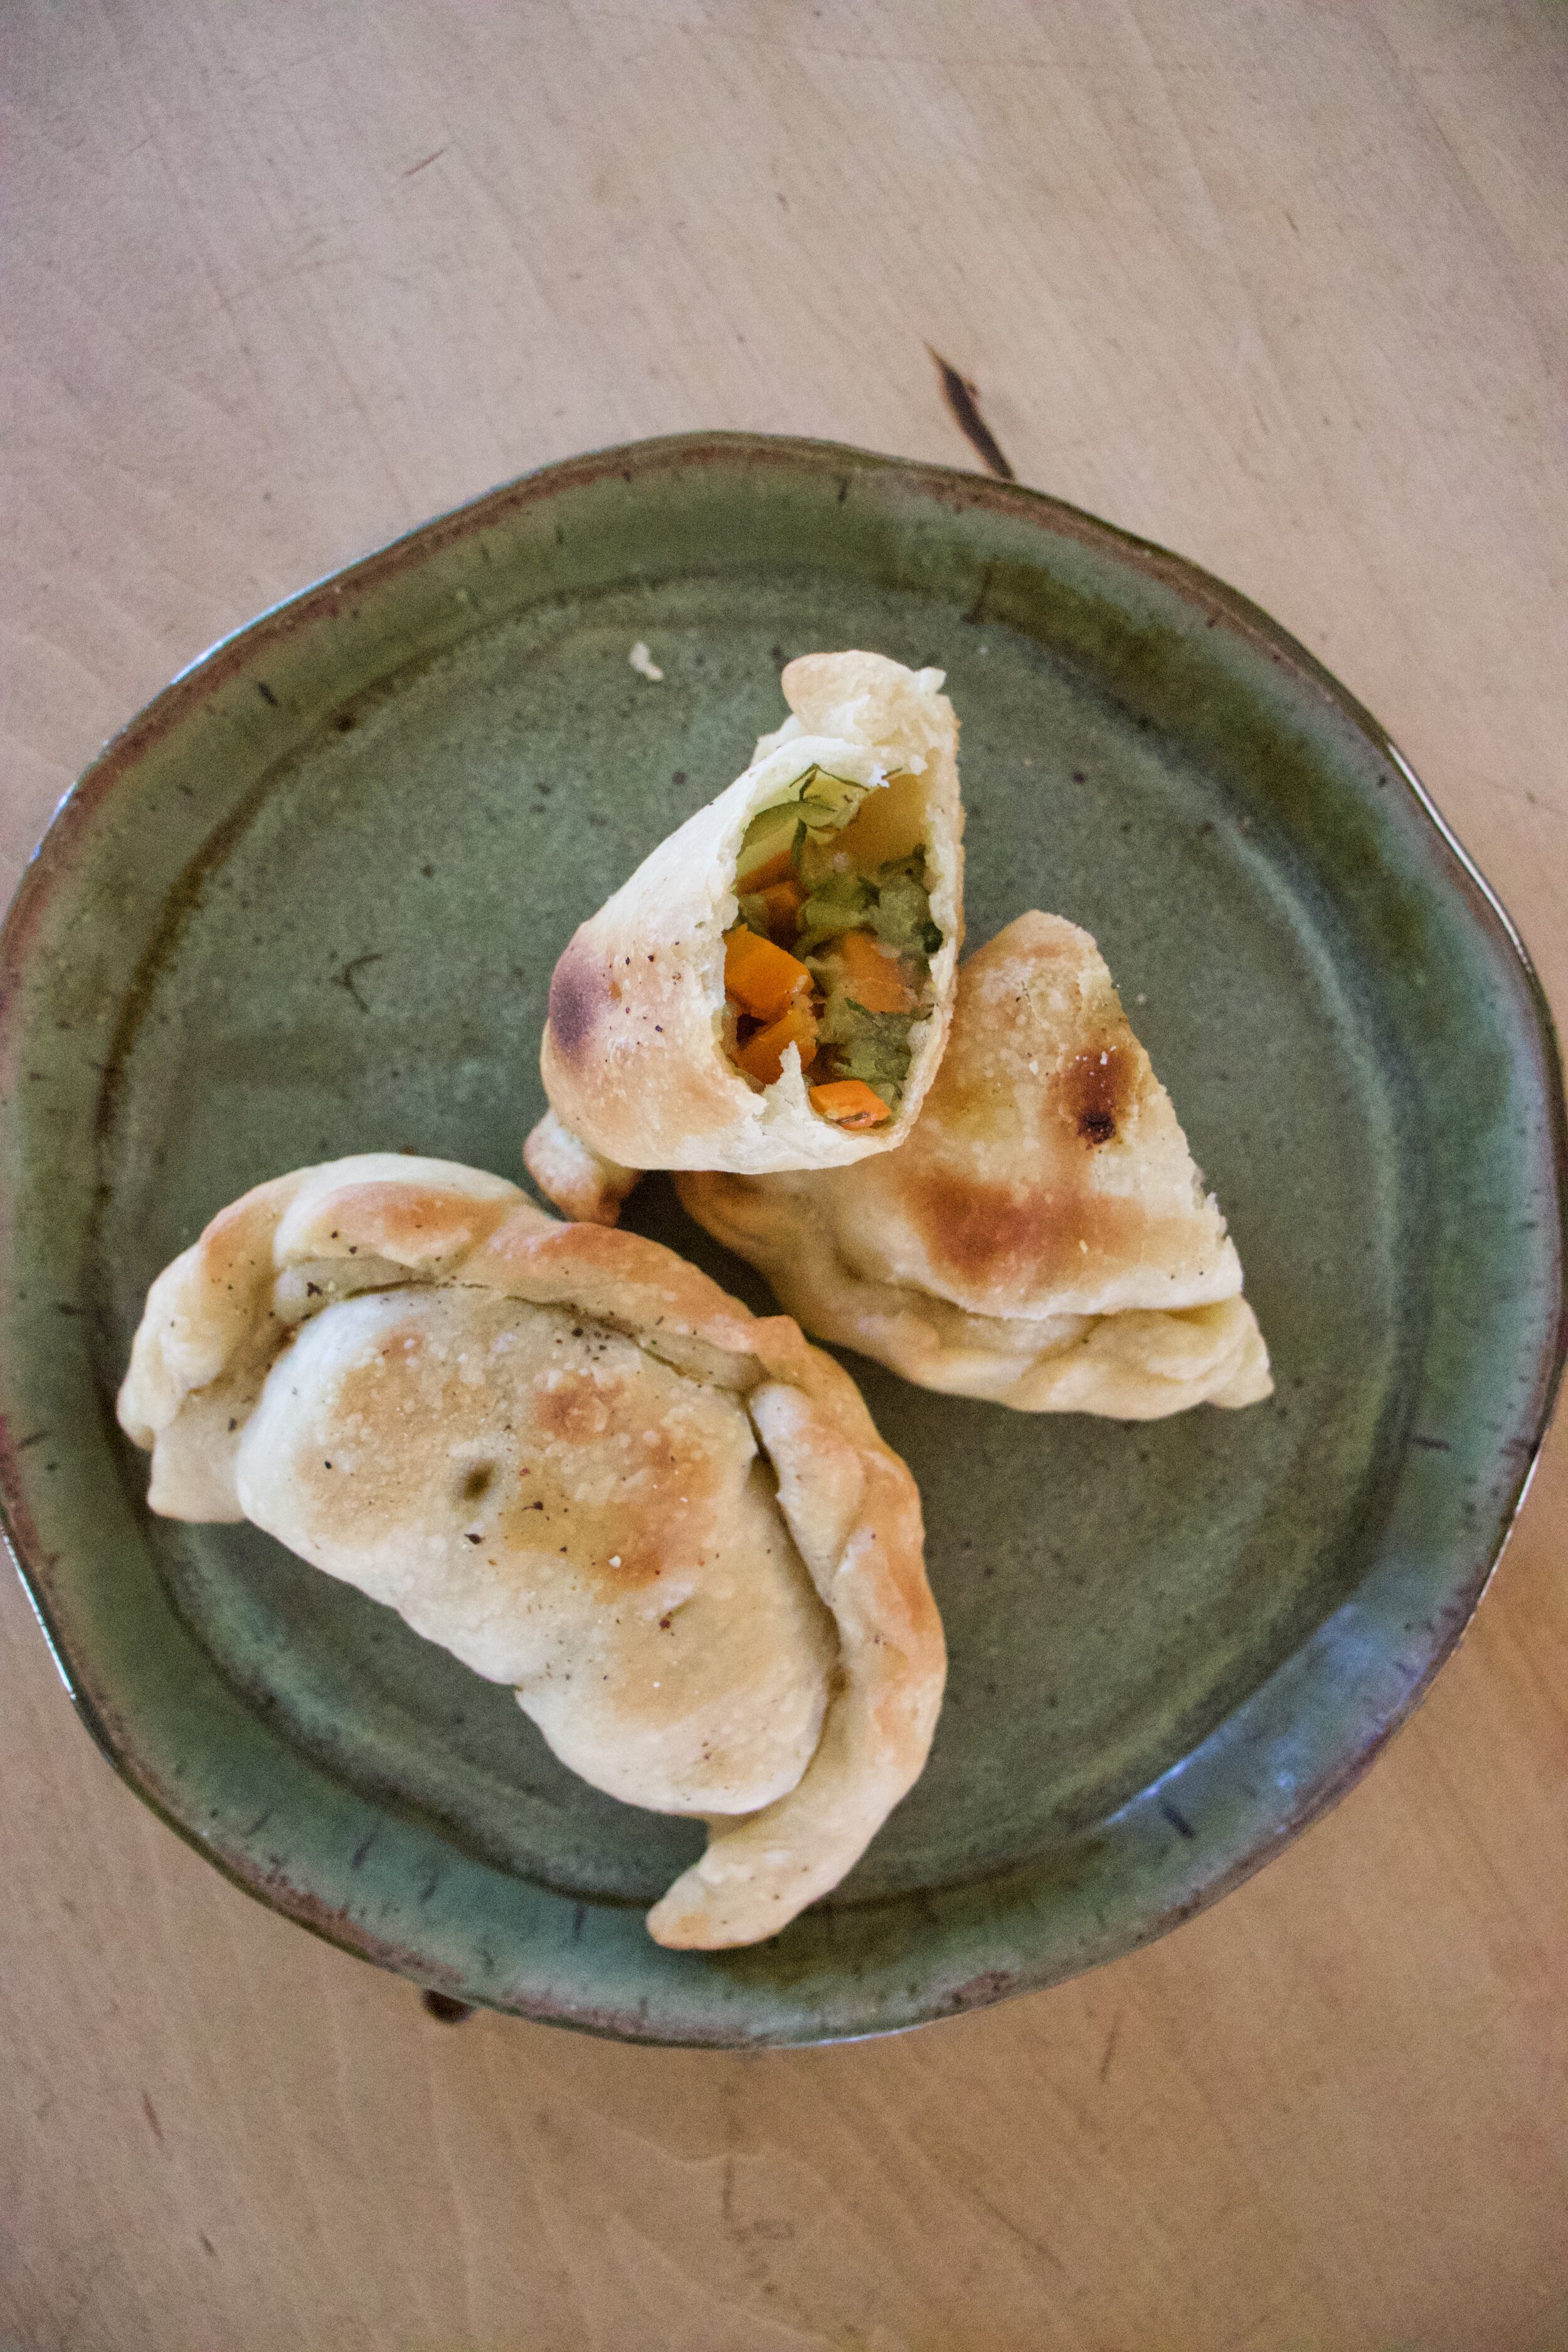
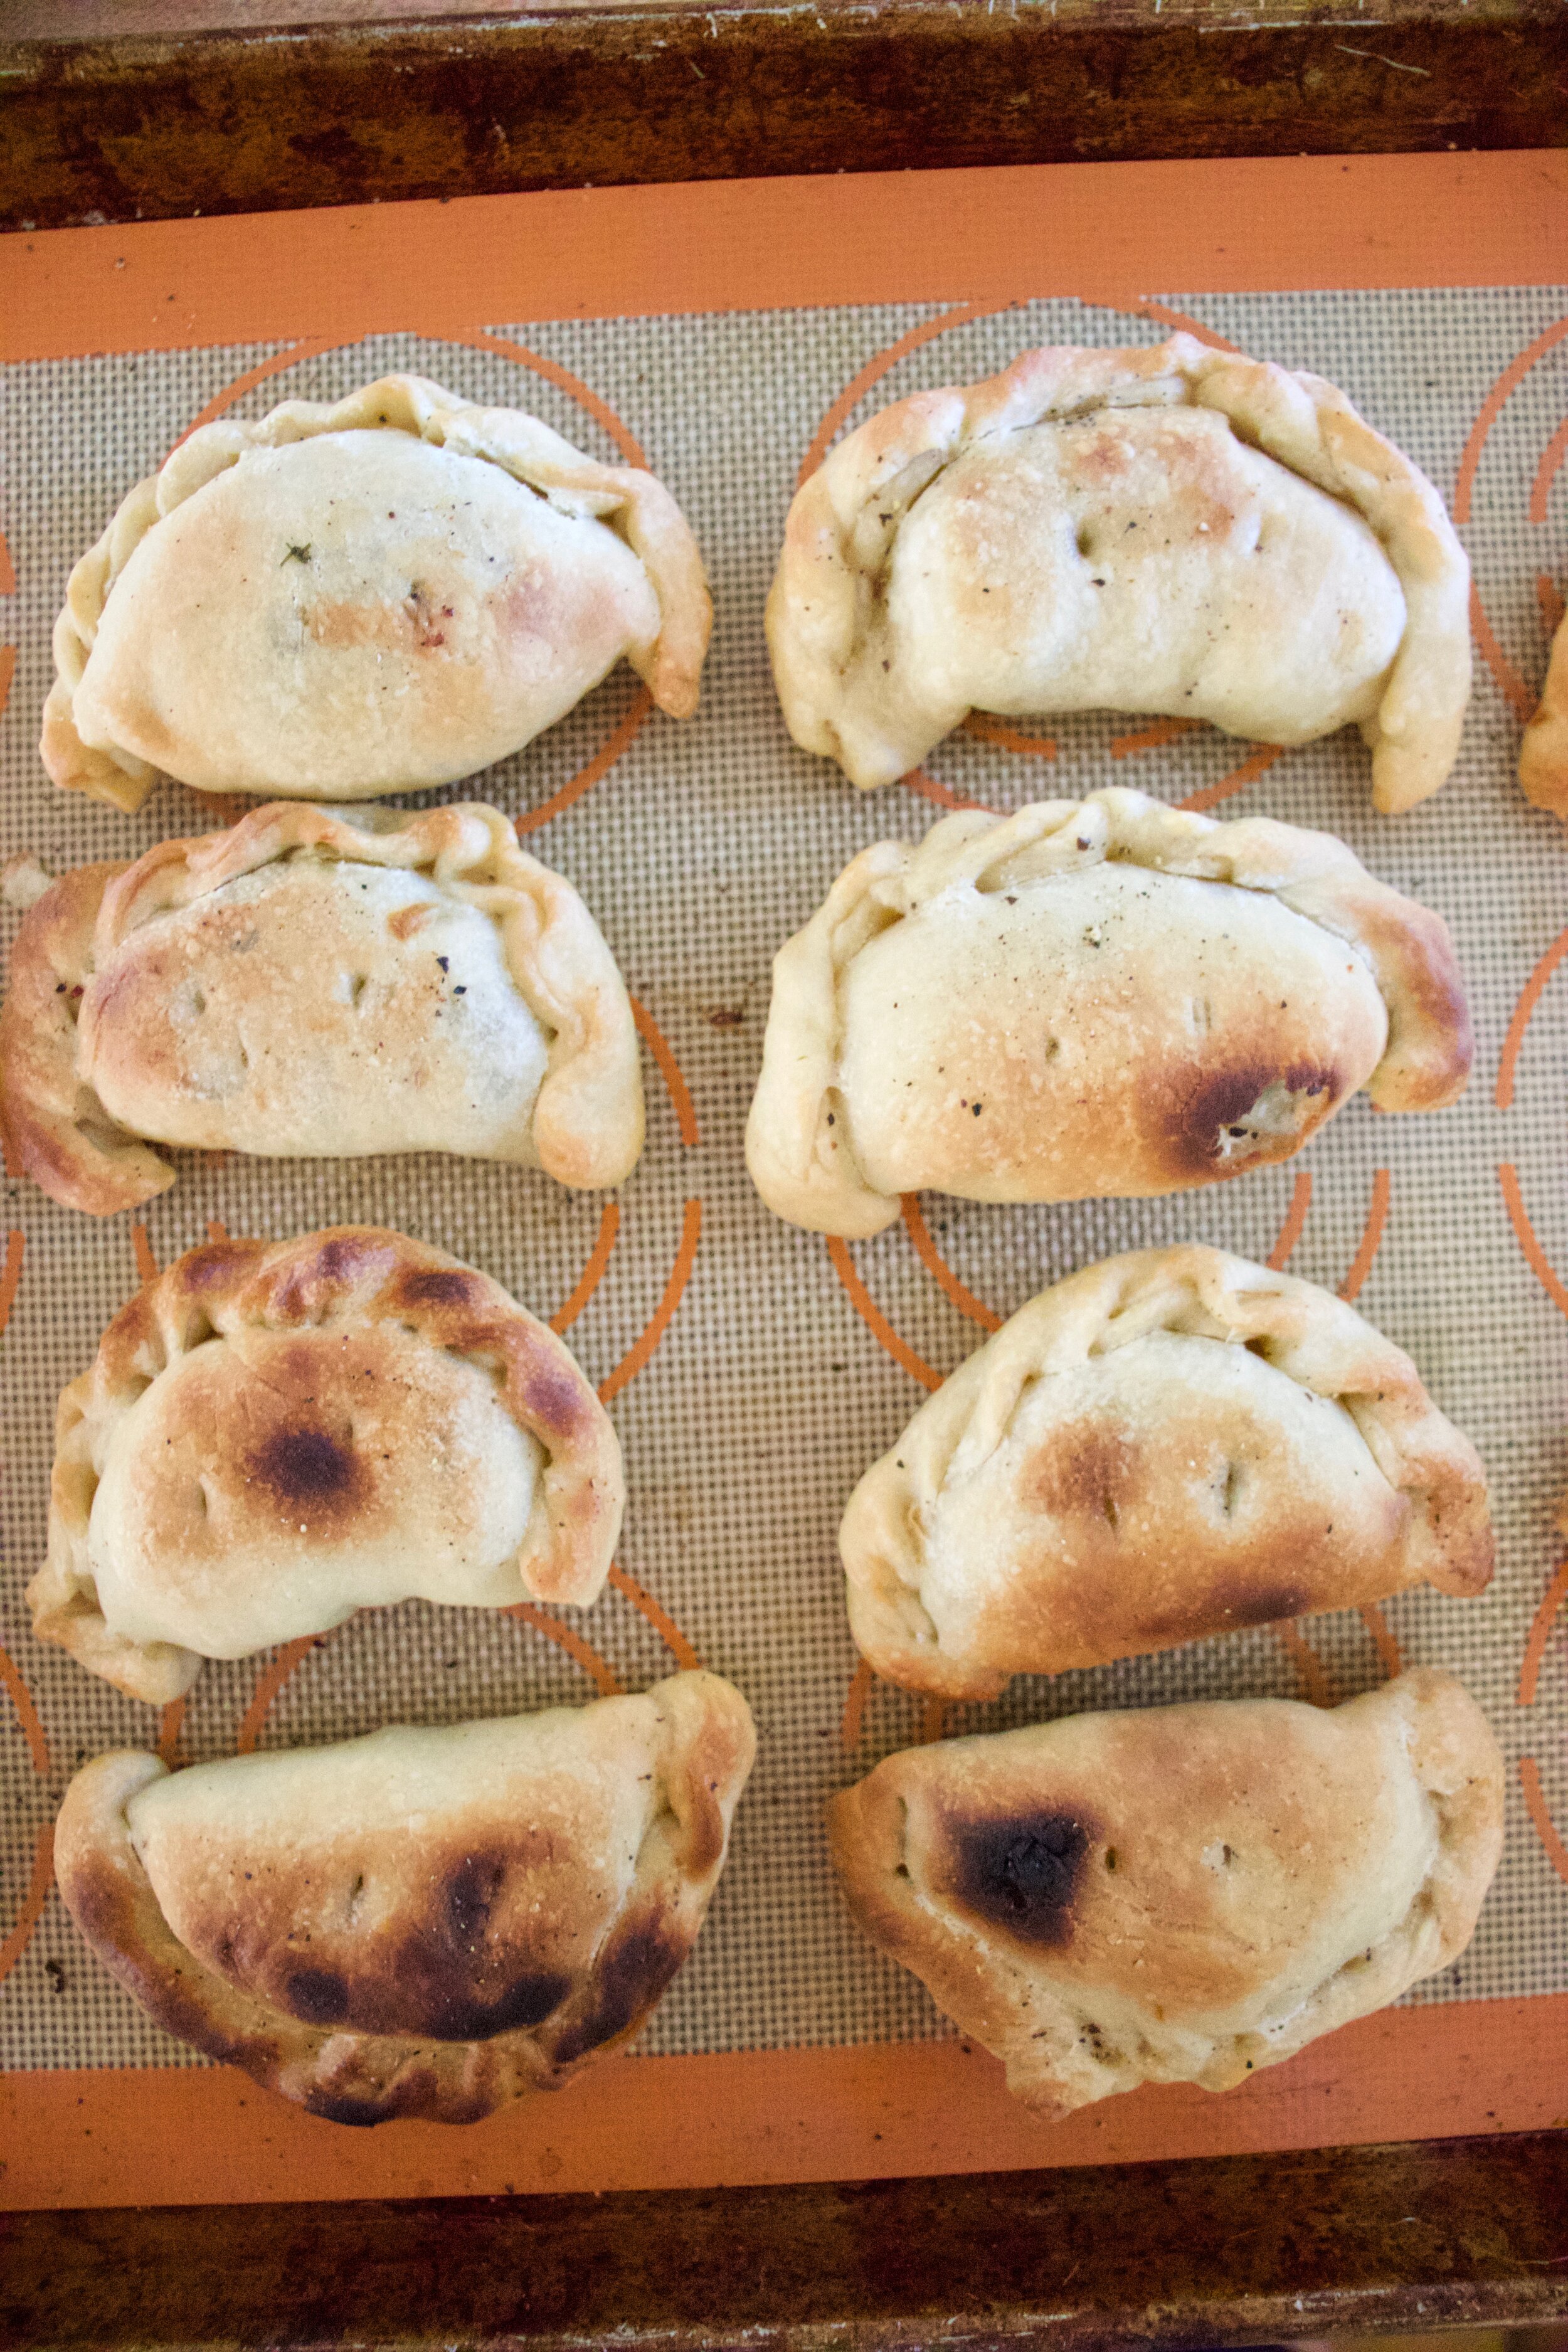
Then add the filling, A couple heading tablespoons of cooled filling go Into the middle. Have a little bowl or water and dip a finger into the bowl and run wet finger around the edge od dough. Fold the filed disk in half and lightly press the dough together. Now you can either try to twist the edges or just crimp them with a fork. Take a knife and cut a little steam vent into he top the place onto a baking sheet. Repeat until all empanadas are made.

IMG_5942.jpg

Brush tops with a little oiled sprinkle with pepper. Pop into the oven to bake.

IMG_5964.jpg

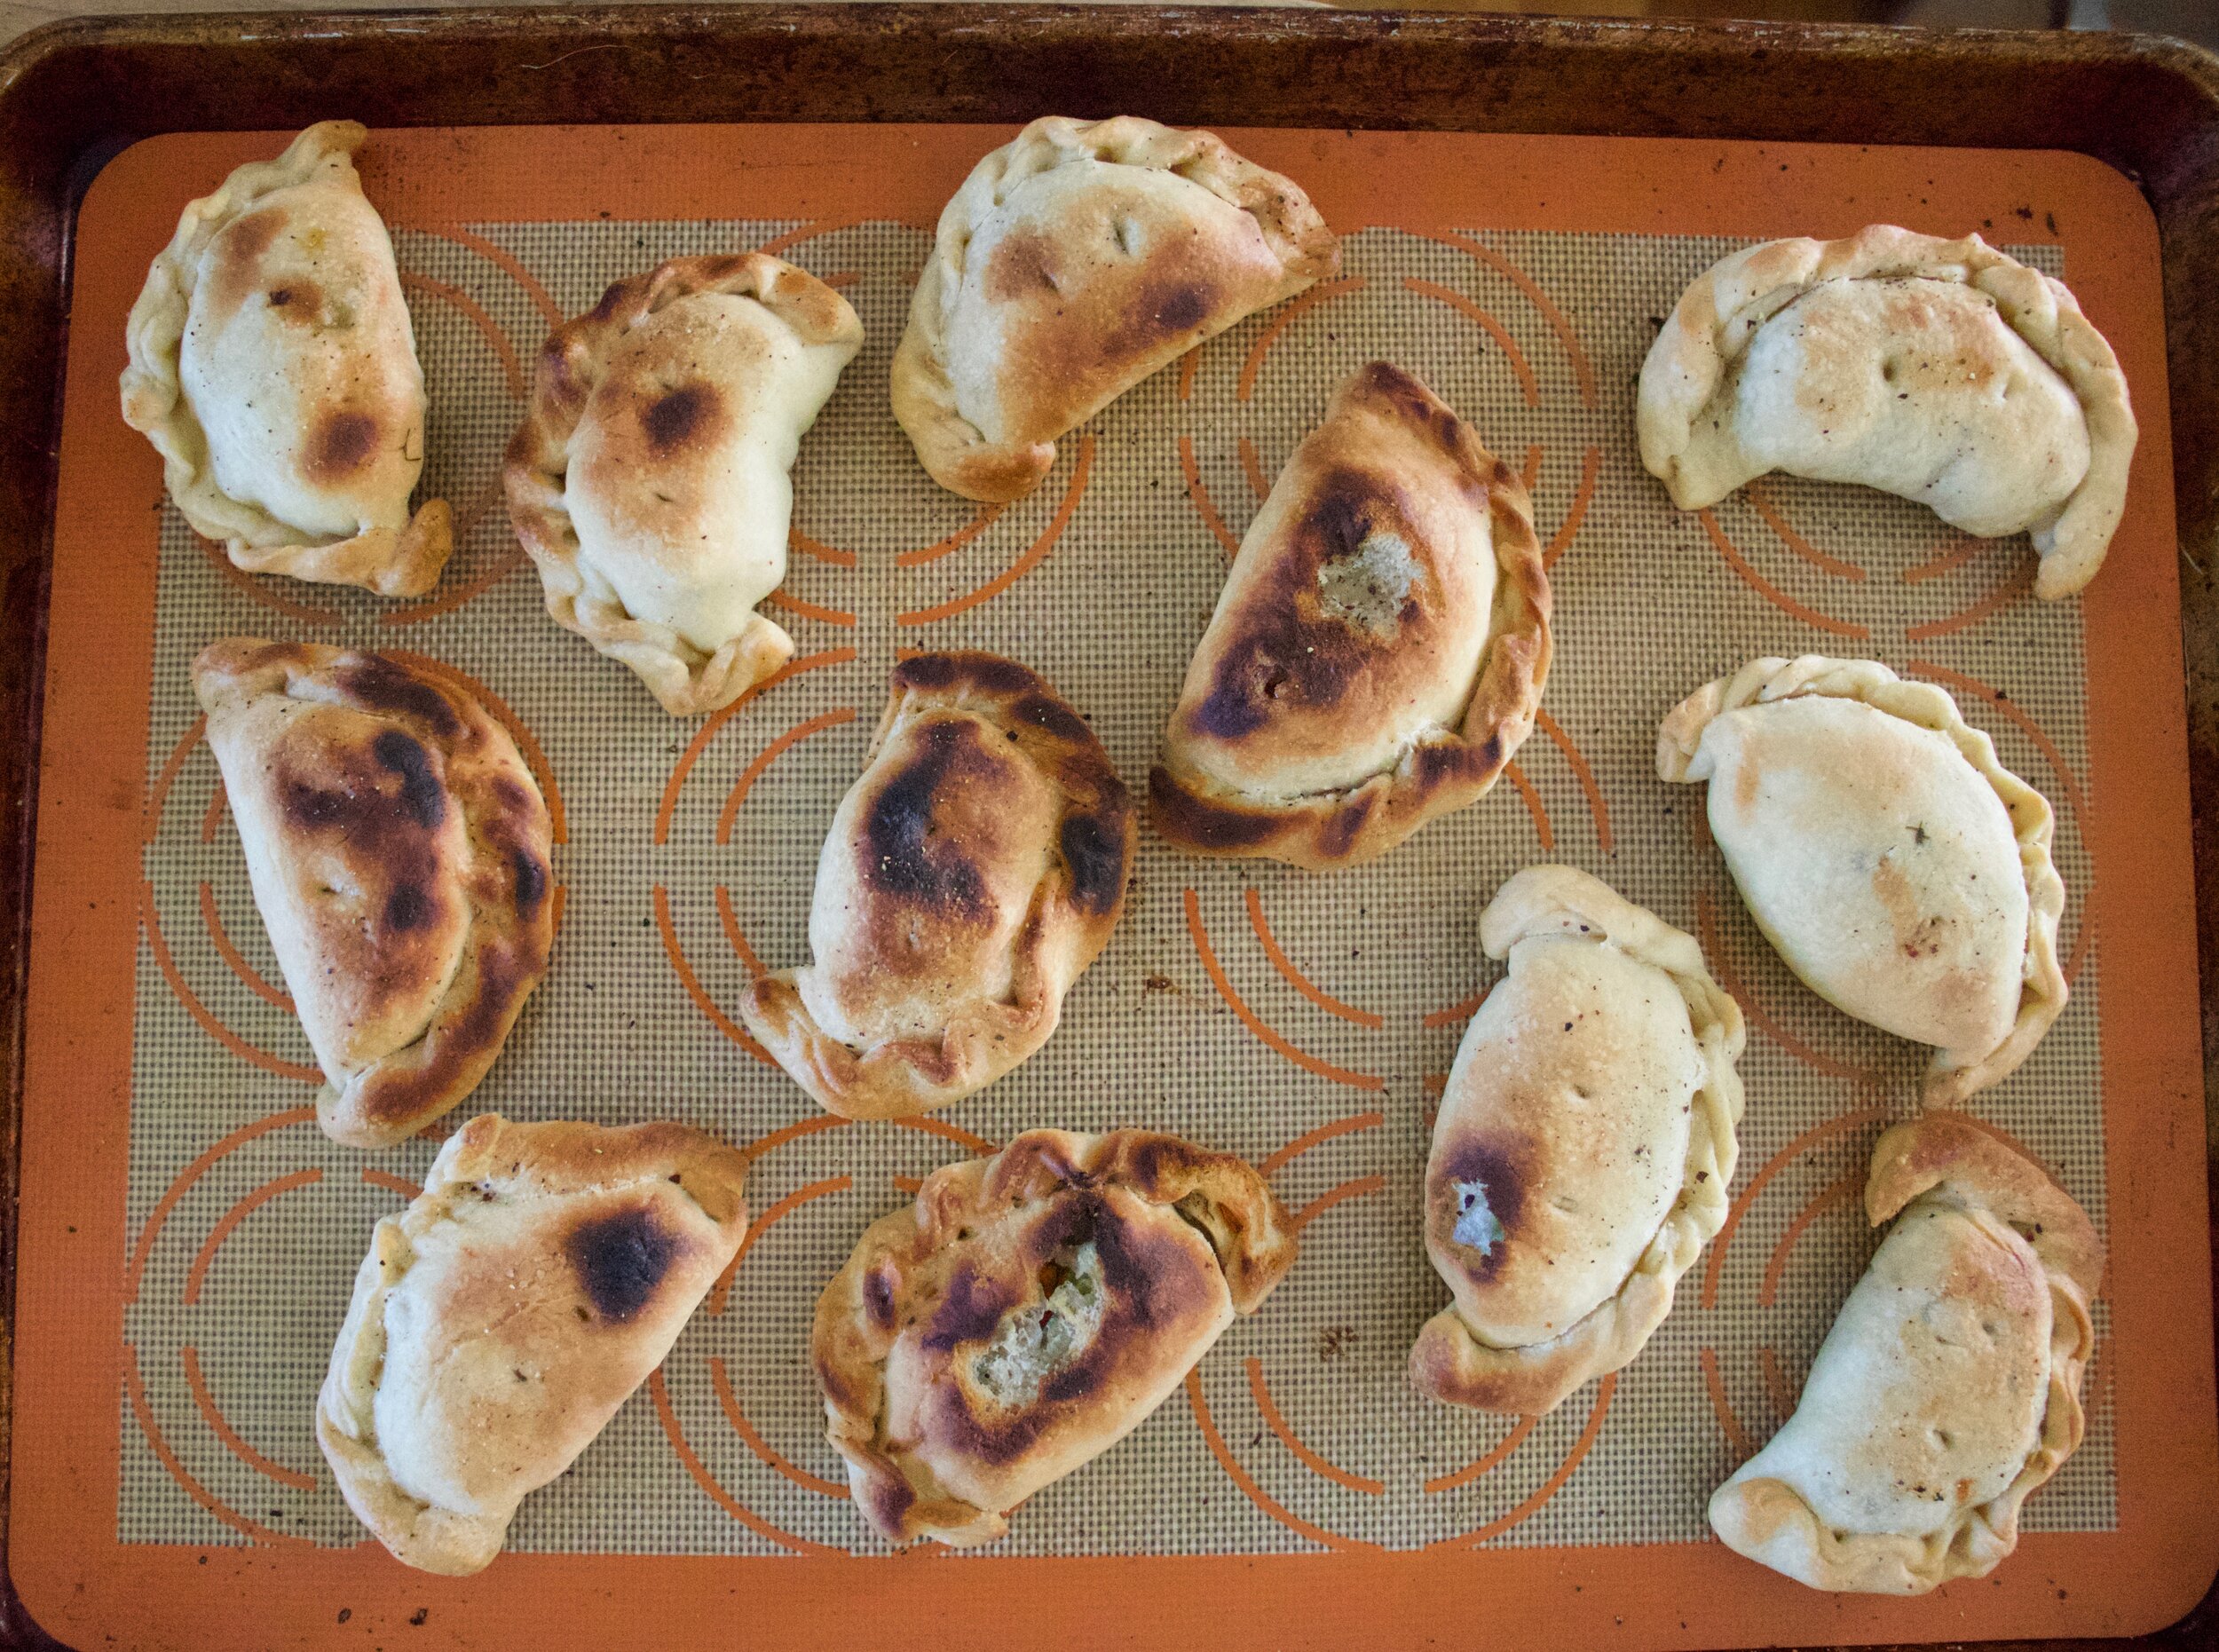
Pro tip. Don’t accidentally turn on the broiler right before you pull them out (especially if they were perfect. But in all honesty the mr liked the burnt ones so whatever.) Once they are nice and golden brown, pop them out of the oven.

IMG_6023.jpg

Now toss them onto a plate and start feeding your face. No utensils required. Dipping sauce is up to you.

-C


Zucchini Dill Empanadas

makes 12

For dough

  • 2 1/4 cups all-purpose flour

  • 1/2 teaspoon salt

  • 1/2 teaspoon baking powder

  • 1/3 cup vegetable oil

  • 1/2 cup cold water

Filling

  • 2 small zucchinis (3 packed cups grated)

  • a small onion

  • a carrot

  • 2 tablespoons fresh or 1 tablespoon dried dill

  • 1/2 teaspoon ground ginger (optional)

  • salt and pepper

  • vegetable oil

Start with making the filling. Chop the carrot into small little cubes then shred the zucchini and onion on a box grater. Gather the zucchini and onion and place in a clean tea towel of cheese cloth and ring to excess liquid. Place the carrot and the zucchini and onions into a preheated and lightly oiled skillet. Add in the dill, ginger, and a pinch of salt and pepper. Cook down for 7-9 minutes or until zucchini has lost a lot of liquid and the carrot pieces are fork tender. Remove from heat and let cool.

Make dough. Place the dry ingredients into a bowl and mix around. Add in the water and oil and mix until it comes together into a shaggy dough. Dump out onto counter and knead for about a minutes them place dough back into the bowl ( wipe it out) and cover with a towel. Let dough rest for 15 or so minutes.

Preheat oven to 375.

Once dough has rested, plop onto counter, pat into a disk shape, then cut into 12 equal pieces and roll each piece into a ball. Lightly flour the counter and start to roll each ball out into a round disk about 4-5 inches wide. You can one at a time and fill it or roll them all out and fill all at the same time.

To fill, take about 2 heaping teaspoons of the cooled filling and place in the center of the rolled out disk. dip your finger into water and and run it around the edge of the dough then fold in half and lightly press the edge together. Then either twist the edge or crimp the edge with a fork. Take a knife and cut a small slit into the top then place on a baking sheet. Once all the empanadas are on the sheet, lightly brush the tops with oil and sprinkle with black pepper. Pop into the oven and bake for 20 -25 minutes or unit the empanadas are a nice golden brown.

Remove from oven. Eat while hot.

Place any left overs in a container in the fridge for 5-7 days. Reheat in oven or toaster oven.

In Savory, summer, Vegan, Vegetables, pie Tags Zucchini Dill Empanadas, vegan, plant based, empanada, dill, summer, zucchini, easy, home made dough, fresh, dairy free, vegetable, hand pie
2 Comments

Chocolate Covered Peanut Butter Date Balls

June 12, 2021 Colleen Stem
IMG_5841.jpg

This is me here trying to be nice and make a sweet little treat for the mr. And to prove to him (without him knowing) that he really does like dates because really, every one does they just might not know it.

Why do I care if he likes dates or not? Well I don’t think I really care but the past few weeks I have been making batches of trail mix with all sorts of goodies (dried fruits and nuts ) and have been chopping up dates and throwing them in as well. He’s been picking around the dates because he thinks they are gross. And that is just not true. He just doesn’t understand. So I made him understand. And understand he did when I made a batch and he ate them al within a day. Don’t like dates my ass.

These little chocolate covered peanut butter balls are freaking awesome. I would describe them as tasting like a soft, chewy, more nutty peanut butter cup and who doesn't want that? Plus they take little to no hands on time, require no oven, and all you need are just a a few ingredients. Win win win!

Are these little sweet peanut butter date balls made of love? Of course. Are they vindictive? Maybe a little but I don’t really care because they are awesome and everyone loves them. Even if they say they hate dates.

Now to the peanut butter date balls!

IMG_5696.jpg

The stuff. Pitted delget dates, oats, peanut butter, chocolate chips, a little coconut oil, and flaky salt.

IMG_5698.jpg

Soak the dates in hot water for a few minutes to make sure they are really soft.

IMG_5707.jpg
IMG_5724 2.jpg

Then you place dates, peanut butter, and oats into a food processor and blend unit la smooth stick dough forms.

IMG_5726.jpg

Scoop and roll dough into balls and place into freezer for 1/2 hour or so to firm up.

IMG_5738.jpg
IMG_5744 2.jpg

And melt the chocolate with the coconut oil until smooth.

IMG_5751.jpg

Once chocolate is melted, remove balls from freezer and start dipping them into chocolate. After a few are covered, sprinkle the tops with a few flakes of salt before he chocolate hardens.

IMG_5827.jpg

And that is it. Place balls in a airtight container and keep in freezer. Eat whenever. And you will eat them fast because, BECAUSE! dates are delicious.

-C


Chocolate Covered Peanut Butter Date Balls

makes 12-16 balls

  • 20 pitted delget dates ( You can use medjool but they are twice as expensive and sweeter., and bigger so only use 12 or so)

  • 1/2 cup old fashion oats

  • 1/3 cup peanut butter

  • 1/3 cup chocolate chips

  • 1 teaspoon coconut oil

  • flaky sea salt

Start by soaking dates in hot water for 5-10 minutes until they soften a bit. Drain water and place the dates, oats, and peanut butter into a food processor. Pulse then blend until a everything is all blended smooth and a sticky dough forms. You are going to have to stop a few times to scrap the sides down. Once dough forms, take a spoon or scooper and scoop out the dough into 12 equal sized balls. With take each ball and roll around to make smooth and place on a plate or a baking sheet. Once all balls are scooped and rolled, place in freezer for 1/2 hour to firm up.

Right before taking the balls out, add coconut oil to chocolate chips and melt either in microwave (15 second intervals until melted) or on stove. Grab frozen balls (they don’t get hard, just firm), and start dipping them into the chocolate. After doing 2-3 three, sprinkle the tops with a couple flakes of sea salt.

Once all balls are covered( eat one) place in the freezer in air tight container until you want to eat them.

They should be good for a least a month in the freezer but I wouldn't know for sure seeing as these were gone the day after I made them. Both times.

In Vegan, snack, Raw, quick and easy, fruit, Dairy Free, Gluten Free, cookies, candy Tags Chocolate Covered Peanut Butter Date Balls, dates, vegan, gluten free, simple, no bake, frezzer, freezer, balls, oats, plant based, snack, energy, raw
1 Comment

Peach Shortcake

June 5, 2021 Colleen Stem
IMG_5668.jpg
IMG_5680.jpg
IMG_5687.jpg

My fruit bowl went from the odd apple and lots of oranges to an overflow of peaches cause its summertime fruit time!

I might have gone a little overboard with the first purchase of peaches and bought like 12 lbs. (Yeah I did). But I knew I wanted to make these shortcakes for the mr and Barb so I figured there is a couple pounds right there that are not going into my mouth so It was like I bought 10 lbs and I can eat 10 lbs of peaches in a week no problem. Facts!

It was weird, I don’t usually plan to far in advances on what I am going to bake but for some reason I had it in my head that I needed to make shortcakes with peaches. Everyone is always making strawberry shortcakes but then stops it there and I don’t know, it just seems like the world needs to expand their fruit and shortcake minds and mix it up. Yes strawberries are fantastic but so is all the other fruit out there. Especially peaches. Peaches are a good fruit to start mixing it up with.

See, I got you. Now to the peach shortcake!

IMG_5560.jpg

The stuff. Flour baking powder, salt, sugar, coconut oil, plant milk, a can of coconut milk, powder sugar, and ripe peaches.

IMG_5597.jpg

Start by cutting up peaches. Remove pits and dice small. You can peel them but why?

IMG_5604.jpg

Place diced peaches into a bowl and toss with a little sugar. Set aside.

IMG_5565.jpg
IMG_5567.jpg
IMG_5573.jpg

Make the biscuits. Toss all the dry together then cut in the very cold coconut oil. You want to have grainy, small little chunks of oil. Next add in the very cold milk and gently fold in with a fork until is is absorbed be gentle to not over mix..

IMG_5581.jpg

Dump the shaggy dough onto a lighhy scoured counter and gather together.

IMG_5590.jpg

roll dough out into a shape that is about 1 1/2 inches thick (I went with rectangle) and cut into 6-8 equal sized pieces.

IMG_5596.jpg

Place cut biscuits on a lined baking sheet, brush tops with a little milk, and sprinkle the tops with a bit of sugar.

Pop into the oven to bake. 20-25 minute unlit golden brown.

IMG_5622.jpg

Pretty bakes biscuits.

IMG_5632.jpg

And last buy not least, the coconut whipped cream. Take the can of coconut milk from fridge and scoop our the thick cream part. Place into a cold bowl and beat until thick and creamy. Beat in a teaspoon or so of powered sugar if you want a little sweetness.

IMG_5676.jpg

And then you add it all together. Cut a biscuit in half. scoop on some juicy sweet peaches, then top with a plop of coconut cream.

Summertime in the mouth.


Peach Shortcake

make 6-8 shortcakes

  • 2 cups flour

  • 1/2 cup very cold coconut oil

  • 1 teaspoon salt

  • 1 tablespoon baking powder

  • 1 tablespoon sugar

  • 1 cup very cold plant based milk

  • 5-6 fresh ripe peaches

  • 1-2 tablespoon sugar for peaches (greater amount for sweeter peaches)

  • 1 can full fat coconut milk chilled for 24 hours

  • 1 teaspoon powdered sugar whipped coconut cream (optional)

Start buy cutting up peaches. Remove pits,(peel them if you must) ,and dice into small pieces. Place into a bowl and toss with a tablespoon or so of sugar. Set aside.

Preheat oven to 400

Now for the biscuits. Place flour, baking powder, 1 tablespoon sugar, and salt into a bowl. Mix until incorporated. Add in the very cold coconut oil and cut in with a fork or pastry cutter until the mixture is crumbly but the oil is NOT completely in mixed in. You want the little chunks of oil. Next dump in the very cold milk. Gently mix with a fork unil all the liquid is absorbed and a shaggy dough has formed. Dump dough onto a lightly floured surface and gather together. Pat flat with hands into a rectangle that is about 1 1/2 inches thick ten cut into 6-8 equal sized pieces. Place onto a line baking sheet, brush tops with a little milk and sprinkle with a bit of sugar. Pop into hot oven and bake for 20-25 minutes or until a nice golden brown on top and bottom. Remove form oven and let cool on a wire rack.

For coconut cream. Remove canned coconut milk from fridge, open it and scoop to the top layer of thick coconut cream. Place into a cold bowl and whip with a beater or by hand until thick. If you want to add a little sugar, beat in a teaspoon or so of powdered sugar.

To assemble. Grab a biscuit, cut in half and place on plate or in bowl. Scoop on some peaches and then add a plop of whipped coconut cream. Grab a eating utensil (spoon or fork, you do you) and eat.

In brunch, desserts, fruit, Sweets, biscuits and such Tags Peach Shortcake, coconut cream, vegan, summer, stone fruit, biscuits, dessert, make ahead, plant based, dairy free, peaches
Comment

Broccoli Pesto

May 22, 2021 Colleen Stem
IMG_5549 2.jpg

I have been eating a shit ton of broccoli the past couple of weeks and I am not even close to made about it. How could I be when broccoli is probably my favorite ( at least in the top 3) vegetable. It is broccoli season and eating broccoli is what we are doing.

Now Pesto. You probably think of basil when hear the word but in this pesto there is no basil, just the broccoli. Blanched just enough so it is not raw, blend up with walnuts (because I just don’t like pine nuts enough to spend $25 a pound and walnuts are far better), along with lemon juice, nutritional yeast for that cheesey flavor, and a little olive oil. Well friends, it is just about the pest freaking pesto I have ever had. Even the mr was super into it.

So if you like broccoli you will love love love this pesto and so you should definitely make it and then eat it. I used half of it for the mr’s pasta dinner, and them well, I ate the other half, dipping carrots and pieces of broccoli into it HA.

Now to the pesto.

IMG_5432.jpg

The stuff. Broccoli, toasted walnuts, national yeast, a couple cloves garlic,, juice of a lemon, olive oil, red pepper flakes, and salt and pepper.

IMG_5436.jpg

Cut or break apart broccoli into small florets.

IMG_5441.jpg

Bring a pot of water to a boil and dump in the broccoli. Cook for about a minutes.

IMG_5445.jpg

Transfer the broccoli wit ha slotted spoon to a big bowl if ice water to shock from cooking anymore and to stay ice and green.

IMG_5451.jpg
IMG_5456.jpg

While the water is still boiling, toss the garlic into it for a minute then remove. This just removes some of the rawness of the garlic. You can skip it if you want. Once it cools off a little, remove skin and chop into small chunks.

IMG_5462.jpg
IMG_5464 2.jpg
IMG_5468.jpg
IMG_5479.jpg

Now make it all into pesto. Grab food processor and add in the garlic and walnuts. Pulse until crumbly. Add I the broccoli (stained from water), the juice of the lemon, the national yeast, a spinch of salt and pepper, and the red pepper flakes. Press start. While it’s going, stream in a couple tablespoons of olive oil. Stop the processor , scrap down sides, then pulse of start it up again until you a good pesto consistency.

IMG_5493 2.jpg

And that is it. The best broccoli pesto.

-C


Broccoli Pesto

Makes about 2 cups. Good for pound of pasta

  • 2 1/2 cups broccoli florets (like 3 crowns)

  • 1/2 cup toasted walnuts

  • 1/4 cup nutritional yeast

  • 2 cloves garlic

  • juice if a lemon

  • 2=4 tablespoons olive oil

  • salt and pepper

  • teaspoon red pepper flakes (optional)

Start placing a large pot of water in the stove and bring it to a boil. Also get a large bowl of cooled water and place it in the freezer.

While water is boiling, break apart the broccoli florets into small pieces. Once water is boiling, place the broccoli into water and let cook for about 1 minute. Grab bowl of water from freezer. After the minute transfer the broccoli to the bowl of ice water with a slotted spoon. Toss the around. And while the water is still boiling, toss the whole cloves of garlic in for about a minute. This helps mellow out the rawness. Remove with slotted spoon.

Grab food processor. Add in the walnuts and the garlic (skin removed and cut into small chunks) and pulse until crumbly. Stain broccoli from water then add to processor along with the juice of the lemon, the nutritional yeast, a pinch of salt and pepper, and the red pepper flakes. Pulse for a minute, scrap down the sides, turn to on and stream in a few tablespoons of olive oil. Stop if needed to scrap down side. Keep processing until pesto is lightly crumby, but smooth consistency. Taste for salt. Add more if needed.

Scoop from processor into a jar with a lid

Eat however you eat pesto. Lasts for about a week in fridge.

In Vegetables, Vegan, sauce, pesto Tags Broccoli Pesto, pesto, broccoli, vegan, plant based, nutritional yeast, spring, easy, walnuts, grain free, dairy free, dinner, spread, condiment
Comment

Moroccan chickpeas and Carrots

May 15, 2021 Colleen Stem
IMG_5410.jpg
IMG_5415.jpg
IMG_5388.jpg

It’s the time of year again, the few weeks time between winter veggies and spring veggies. Farm share is over, asparagus season is pretty much over. The greens, beans, and peas are still growing and the chest freezer is empty. I am living off greens and the few roots that I stashed in the fridge. Yeah I know I can just go buy veggies at the grocery store (the mr informed me…) but nothing is very good there right now either. Poor me right!

But what I do have and always have is carrots and I always have chickpeas. I also always have all the spices and I am never going to run out of raisins because well, Megan keeps giving me boxes and boxes of them.( I went from 5 lbs to like now having 10 lbs) so right here I got stuff to feed myself.

Moroccan chickpeas and carrots. The flavors are very similar to a Indian which I love so much. Cumin, ginger, cinnamon, coriander, and many more. A smokey sweetness that is oh so good. Add that to a big pile of cooked up chickpeas and carrots, sprinkled with raisins, and finished off with fresh parsley. I mean, doesn't that just sound splendid? (It does because it is.) This dish makes not having much in the way of fresh food tolerable. I made a big batch and ate it all day long because you can’t got wrong with carrots and chickpeas. No, no you can’t.

To the Moroccan chickpeas and carrots.

IMG_5285.jpg

The stuff. Carrots, chickpeas, spice blend (cumin, ginger, coriander, cayenne pepper, cinnamon, clove), a small onion, raisins, garlic, fresh parley, and salt and pepper.

IMG_5289.jpg

Start with mincing garlic and chopping th onion up into small pieces.

IMG_5292.jpg

Toss it into a oven safe skillet, add about 1/2 cup water and set on medium heat to start to cook.

IMG_5300.jpg

in the meantime, cut up carrots. Rounds about 1/2 inch thick.

IMG_5305.jpg
IMG_5309.jpg

once all the water evaporates from the onions, add in the spices and stir around. Let cook for a minute then add in about a 1/2 cup more of water.

IMG_5323.jpg

Now add in the carrots, the chickpeas (with liquid) and the raisins. Bring the liquid to a boil then transfer the skillet to the oven. Cook for about 25 minutes.

IMG_5340.jpg

While the stuff is in oven, rough chop up parsley.

IMG_5365.jpg

And once the carrots are tender, remove form oven, let cool for a few minutes, then mix in all the fresh parsley and season to taste with. salt and pepper

IMG_5405.jpg

Grab a bow and a fork and do it…Eat.

-C


Moroccan chickpeas and Carrots

  • 1 lb of carrots

  • 1 can chickpeas with liquid

  • 1/3 cup raisins

  • 1/2 teaspoon each of cinnamon, cayenne pepper, and ground coriander

  • 1 teaspoon each cumin and ground ginger

  • 1/8 teaspoon ground clove or allspice

  • 2 cloves garlic

  • 1 small onioin

  • I bunch parsley

  • water

  • salt and pepper

Preheat oven to 400 degrees.

Mince up garlic and chop up onion into small pieces. Place into a oven safe skillet and stick skillet on stove on medium heat. Add about 1/2 cup of water to the skillet and start to cook down the onions.

Clean carrots and cut them into 1/2 inch rounds. (Peel if you want but I don’t so..)

Once water have evaporated from skillet add in all the spices along with a pinch of salt. Let cook for a minute then add in about 1 cup of water. Also add in the cut up carrots, the chickpeas and liquid (or 2 cups cooked chickpeas and 1/2 more cup water), and the raisins. Mix around and bring the liquid to a boil. Once boiling, transfer skillet to the oven. Bake for 25-30 minutes or until carrots are tender.

Remove from oven and let cool for a few minutes. Rough chop the parsley then toss it in. Season to taste with salt and pepper. Eat.

In Vegan, side dish, pulses, beans Tags Moroccan Chickpeas And Carrots, vegan, dinner, spices, carrots, beans, chickpeas, raisins, food, grain free, plant based, healthy, oil free
2 Comments
← Newer Posts Older Posts →
 

https://thelovelycrazy.squarespace.com/config#/|/about/

Me. Food Maker.Food eater. Woo HOO!

STEM+NODE  SMALL BATCH AND ONE OF A KIND POTTERY

stem+node ceramics


____________________

Subscribe

GET NEW POSTS IN YO EMAIL

You are AWESOME!!!


@thelovelycrazy 2014-2021